If kitting, refer to the final pattern for yardage amounts, it is recommended that a sample is made to confirm accuracy.
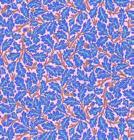
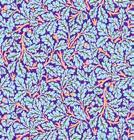
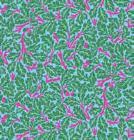
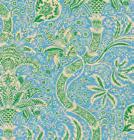
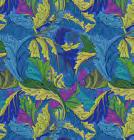
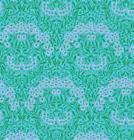
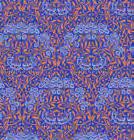
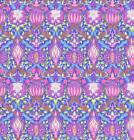
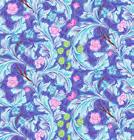
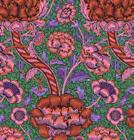
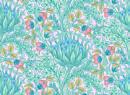
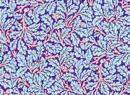
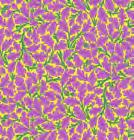
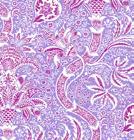
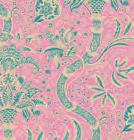
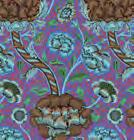
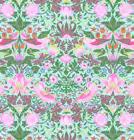
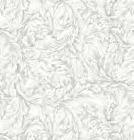
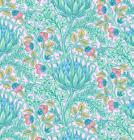
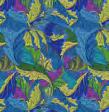
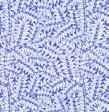
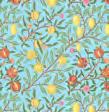
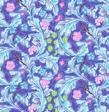
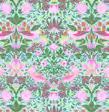
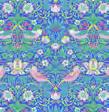
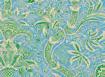
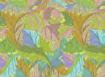
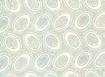
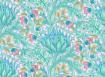
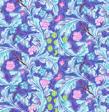
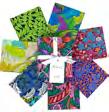
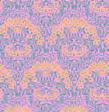
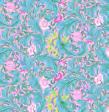
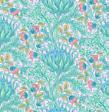
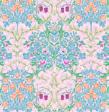
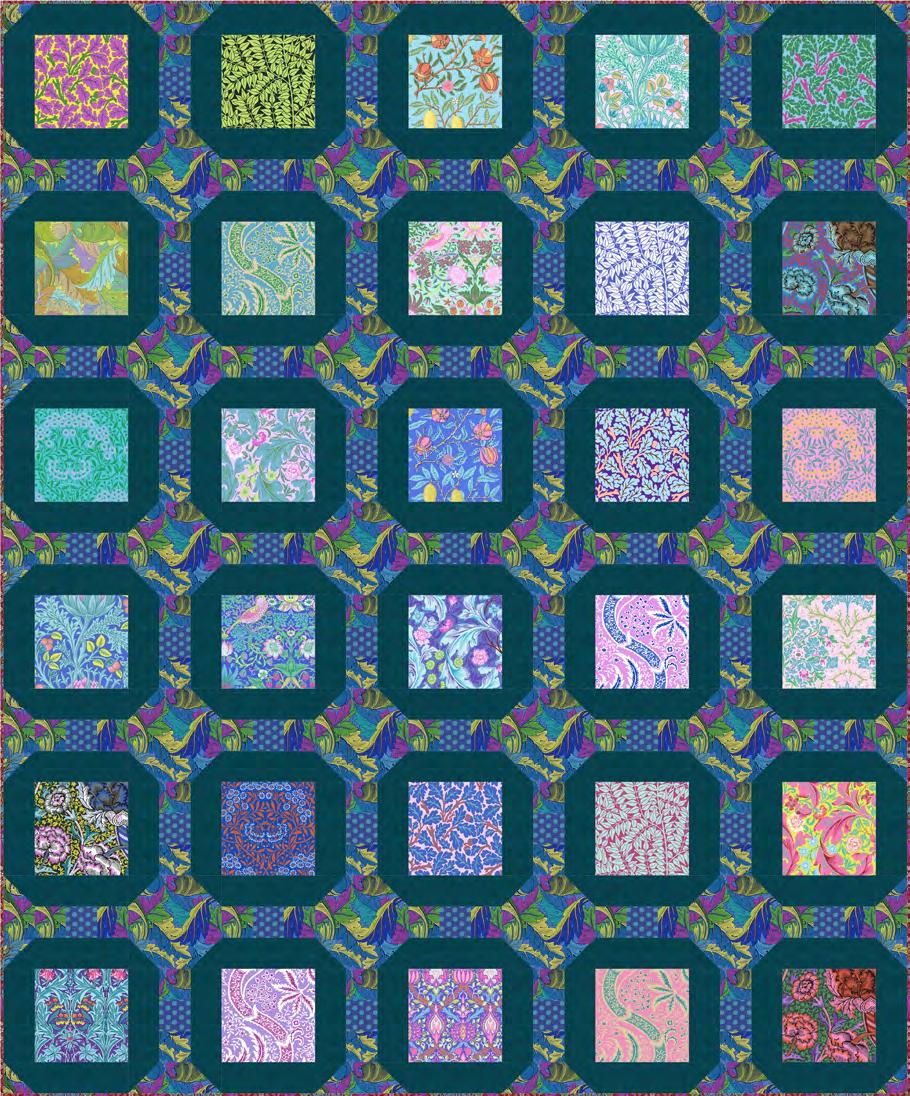
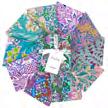
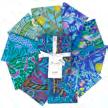
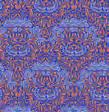
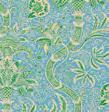
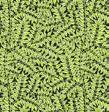
Fabric Swatches
Featuring Kaffe Fassett x William Morris Collection
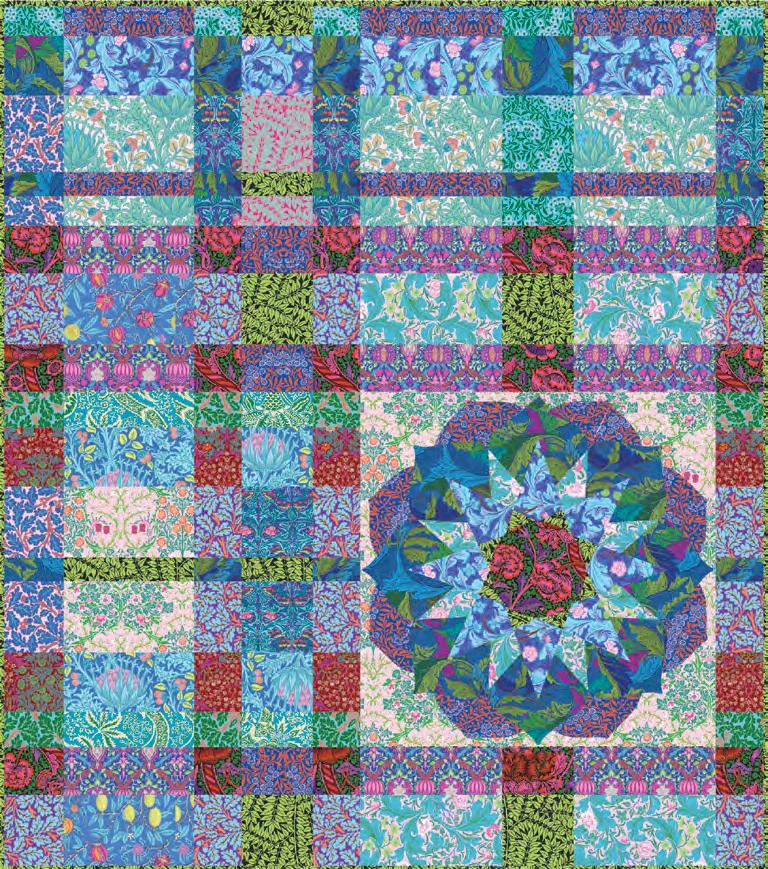
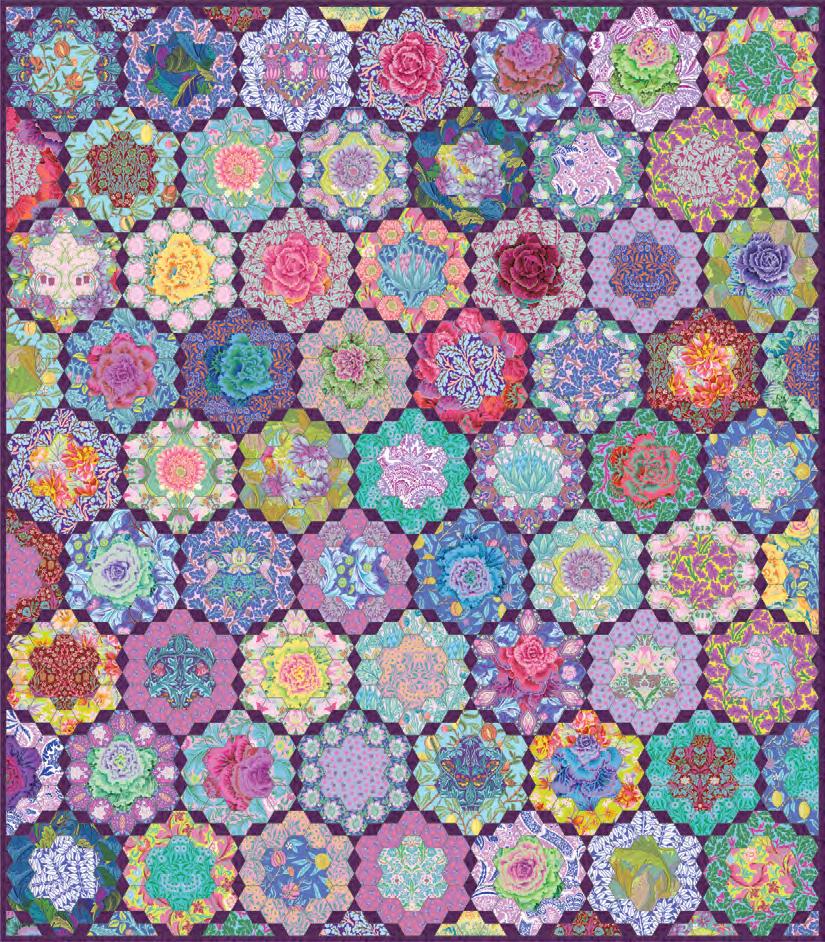
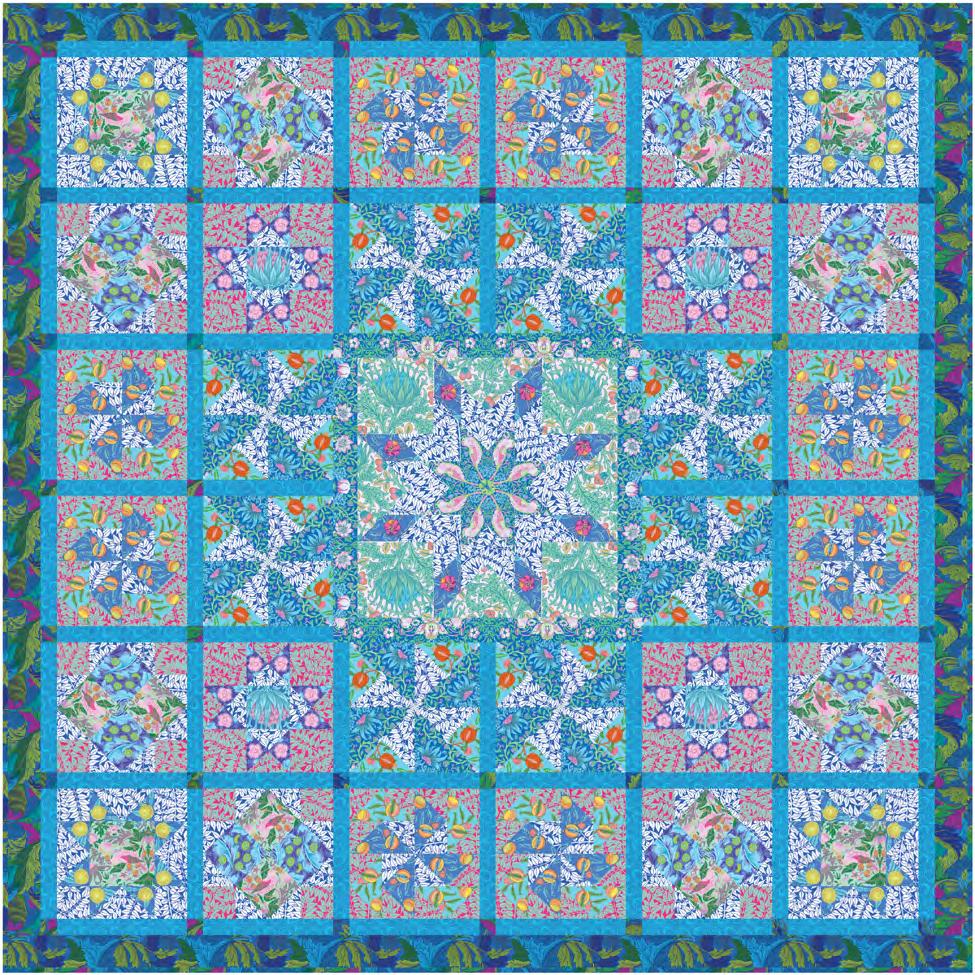
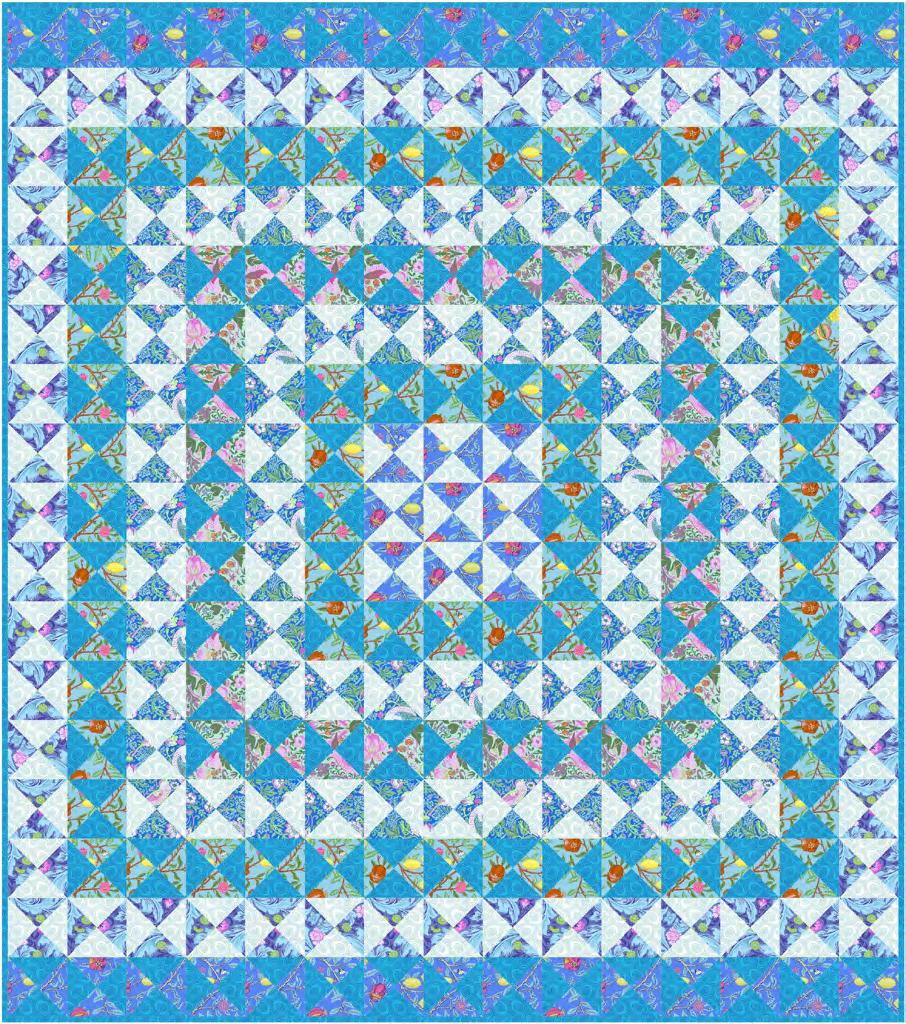
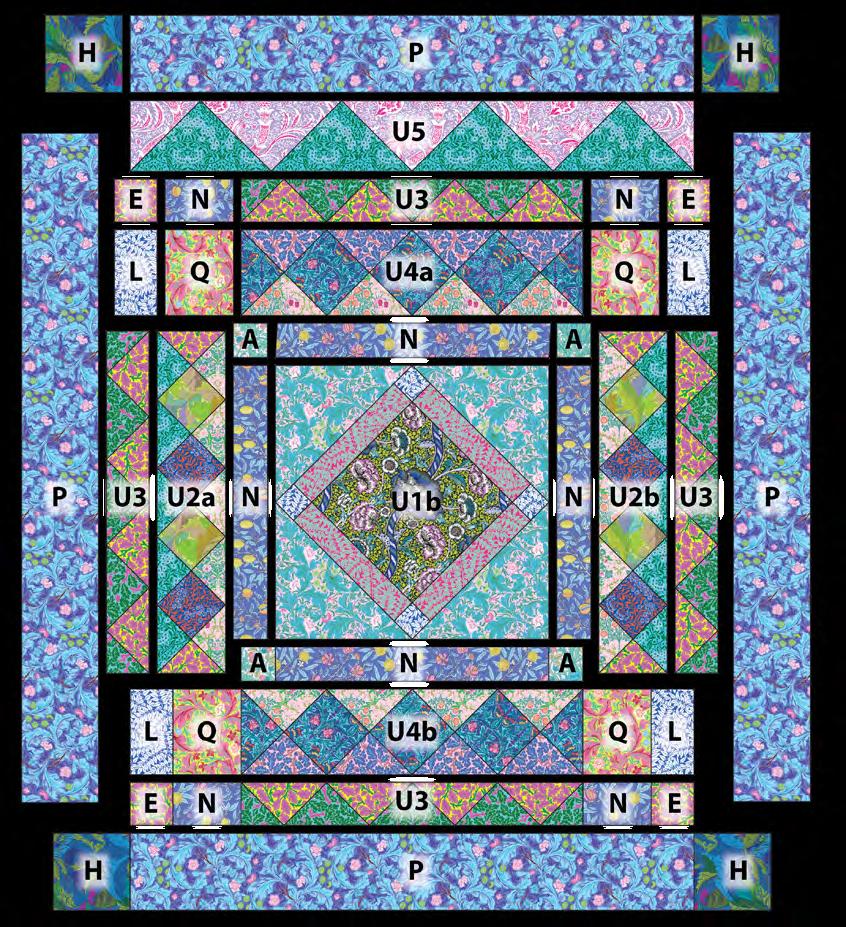
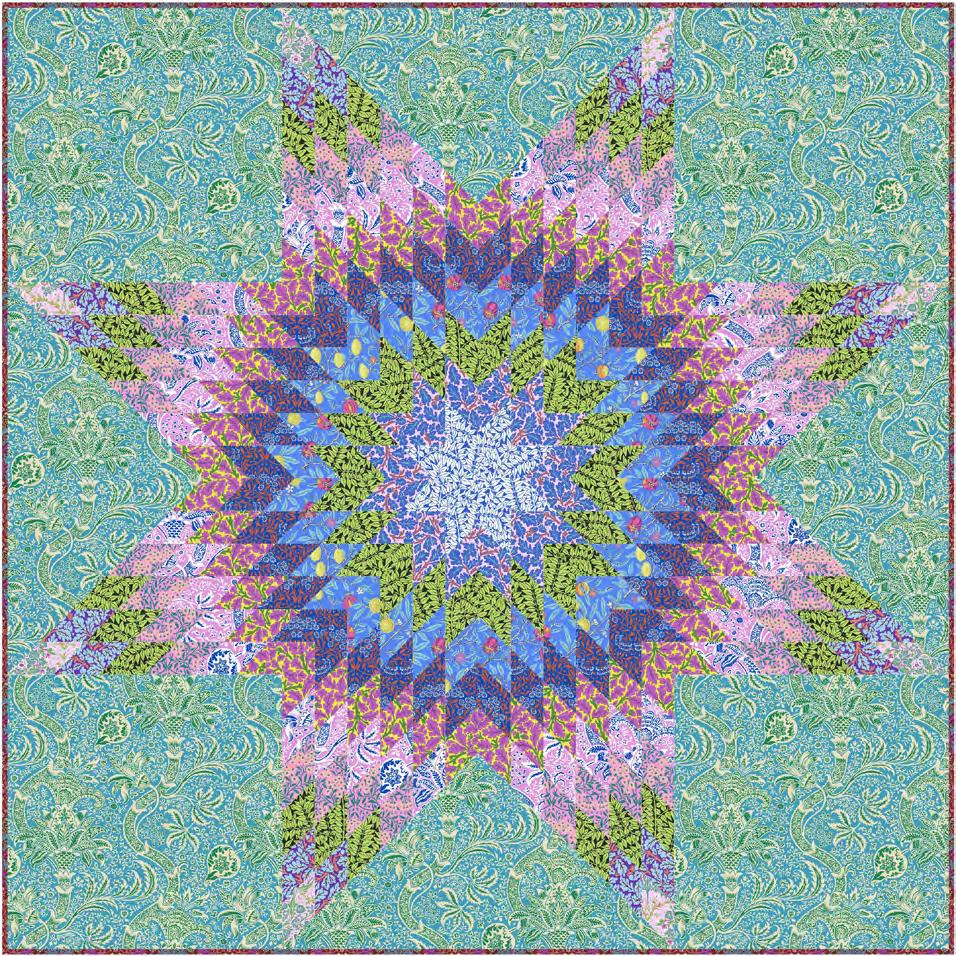
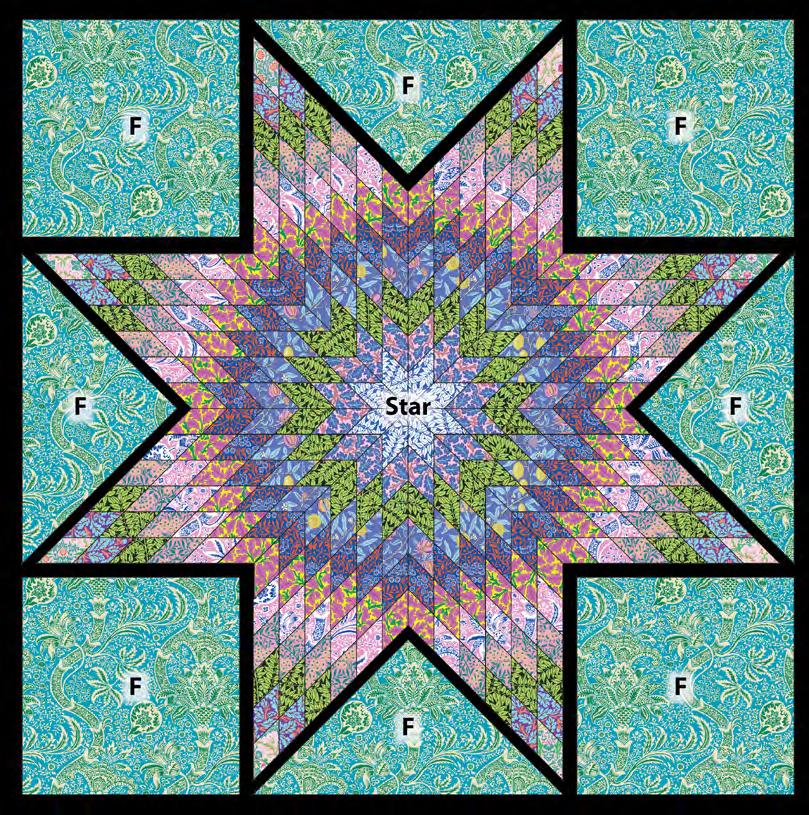
Star Sampler Quilt
Finished Size: 891⁄2" x 891⁄2" (2.27m x 2.27m)
Finished Block Sizes: 24" x 24" (60.96cm x 60.96cm), 12" x 12" (30.48cm x 30.48cm)
Project designed by Liza Prior Lucy
Tech edited by Alison M. Schmidt
Technique: Pieced, Fussy Cut and Y-seams | Skill Level: Intermediate
Fabric Requirements
DESIGN
Star Sampler Quilt
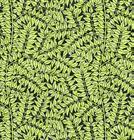
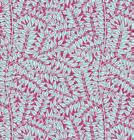
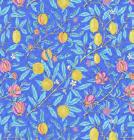
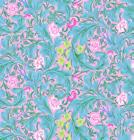
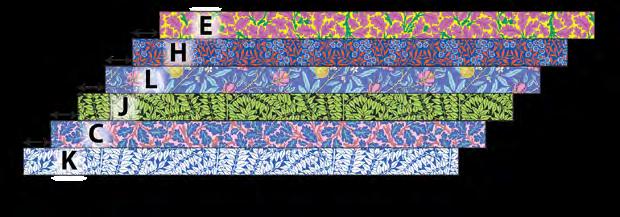
(A) Artichoke Blue PWKW001.BLUE
(B) Artichoke Lavender
(C) Acanthus Cobalt PWKW006.COBALT*
(D) Branches Blue
(E) Branches Magenta
(F) Fruit Cobalt
(G) Fruit
(H) Leicester Cobalt
(I) Strawberry Thief
(J) Strawberry Thief
(K) Aboriginal Dots Turquoise
yards (1.52m) * includes binding
Backing (Purchased Separately) 44" (1.12m) wide
(7.43m) OR 108" (2.74m) wide
Backing 44"
If kitting, it is recommended that a sample is made to confirm accuracy.
Additional Requirements
• 100% cotton thread
• 98” x 98” (2.49m x 2.49m) batting
Optional supplies
• Spray starch or starch alternative
• Invisi-Grip, grip tape, or sandpaper dots (for back of templates)
• Template plastic and permanent marker
General Instructions
Star Sampler Quilt
• Most fabrics are used in more than one month, so keep all remaining partially-cut fabrics together until the quilt top is complete.
• Use a 1⁄4" seam allowance throughout. Sew all pieces with right sides together and raw edges even using matching thread. Press after each seam in your preferred direction.
Preparation
If you like, you can make all the template patterns at once or make them as needed each month.
1. Print all the template patterns (pages 22-35) at 100% and measure to confirm accuracy of printout.
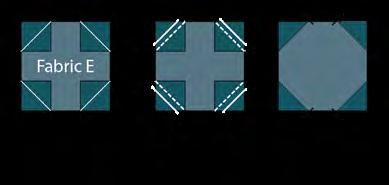
2. Trace template patterns onto template plastic or another sturdy material and cut out on the outer line to make cutting templates. If desired, mark a hole at the quarter inch seam allowance at the corners of diamonds to aid in piecing accuracy. Transfer the template numbers (Square 1, etc.) and fussy cutting guidelines.
Fussy Cutting Notes:
• Press fabrics with starch or starch alternative and let dry before cutting to stabilize edges to be cut on the bias. Handle bias-cut pieces carefully so as not to distort.
• Depending on the cut of yardage, the start and end points of motifs may differ from the cutting diagrams shown, so test placement of all pieces needed before beginning to cut.
• Cut right side up from a single layer of fabric.
• Avoid cutting too far beyond templates, as later pieces may be placed close to previous cuts.
• If templates slip on the fabric, try adding Invisi-grip, grip tape or sandpaper dots to the bottom side. Alternately, place fabric on a sandpaper board, then trace the shapes onto the fabric with a non-permanent fabric marking tool. Cut carefully with scissors, or transfer to a cutting mat and use a ruler and rotary cutter to cut along the marked lines.
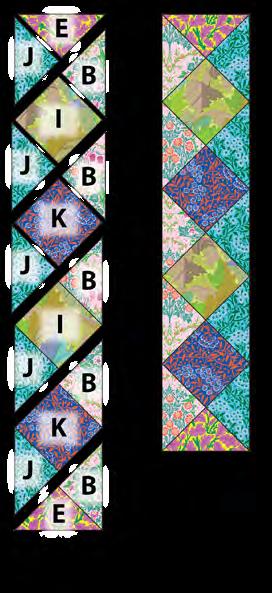
MONTH 1 – BLAZING STAR BLOCK
Cutting
Fabric A Square Template 5: Cut 4
WOF = Width of Fabric
Fabric B, cut: (See diagram below)
4 Square Template 1, fussy cut featuring a blue artichoke
4 Triangle Template 1
Sampler Quilt
Fabric D, cut: (2) 3” x WOF; subcut 16 diamonds from strips using Diamond Template 1
Fabric B Cutting Template
Fabric B Square Template 1: Cut 4
Triangle Template 1: Cut 4
Place triangles as desired, no need to fussy cut.
Fabric F, fussy cut: (See diagram below)
8 Diamond Template 1
Star Sampler Quilt
e x Morris BOM - Fabric Cutting Page 2
Fabric F Cutting Template
Fabric F Diamond Template 1: Cut 8 [Month 1]
Triangle Template 2: Cut 16 [Month 2]
Triangle Template 3: Cut 16 [Month 2]
Triangle Template 4: Cut 32 [Month 3]
Continue cutting required number of shapes.
NOTE: not all pieces shown will be fussy cut this month.
NOTE: not all pieces shown will be fussy cut this month.
Note: Cut borders after cutting all of Triangle 7
Instructions
NOTE: Refer to figures to correctly orient fussy-cut pieces as shown.
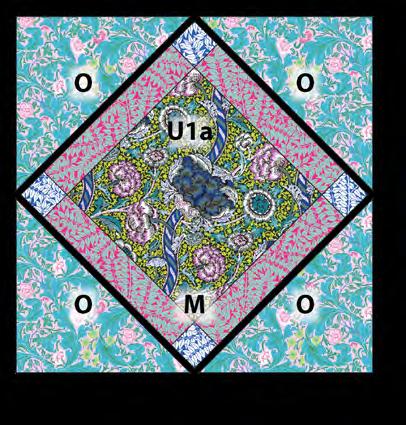
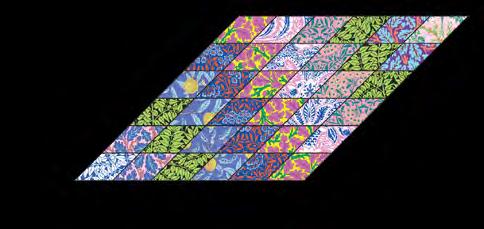
1. Arrange 2 Fabric D diamonds, 1 Fabric F diamond (Diamond Template 1), and 1 Fabric J diamond (Diamond Template 2) in 2 rows as shown. Sew into rows. Stitch rows together. Make a total of 4 Unit 1a. Fig. 1
Fig. 1 Ka e x Morris BOM - Diagram Page 1 MONTH 1 - Blazing Star Block Fig. 1
e x Morris BOM - Diagram Page 1 MONTH 1 - Blazing Star Block
2. In the same manner, make 4 Unit 1b with diamonds indicated. Fig. 2 Fig. 2
3
e x Morris BOM - Diagram Page 1 MONTH 1 - Blazing Star Block Fig. 1
3. Arrange 2 Unit 1a as shown. Stitch together. Press seam open. Make a total of 2 Unit 2a. Fig. 3
3
3
3
5
5
1 Unit 1a Make 4
Template 2
4. In the same manner, make 2 Unit 2b with 2 Unit 1b. Fig. 4
Fig. 4
Template 3
Unit 1b Make 4
Unit 2a Make 2
Fig. 3 Unit 2a Make 2 U1a U1a
Fig. 4 Unit 2b Make 2 U1b U1b
Fig. 4 Unit 2b Make 2 U1b U1b
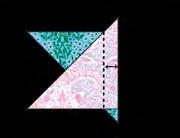
5. Arrange 2 each Units 2a and 2b in q star shape as shown. Sew together into Unit 3. Fig. 5
Fig. 5
Fig. 5 U2a U2b U2b U2a Unit 3 Make 1
Fig. 5
U2b
U2a Unit 3 Make 1
the piece being added (in this case a triangle) to the piece it’s being added to (diamonds). The fabric is then removed from under the sewing machine, the pieces are folded so the second side of the triangle aligns to the adjacent side of the other diamond. The second seam is sewn, then the piece is pressed at.
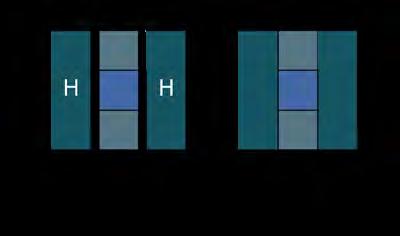
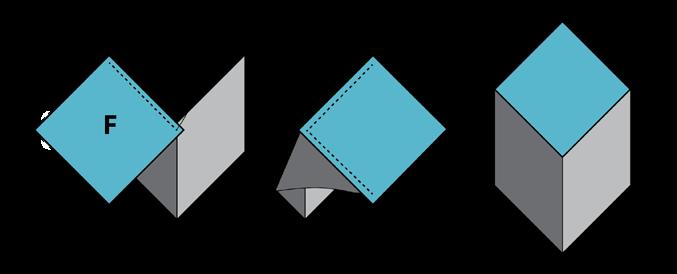
6. Referring to Set-In Seam directions, stitch 4 Fabric B (Triangle Template 1) triangles between star points as shown to complete Unit 4. Fig. 6
6
6
6
Square Template 1
Template 1
Unit 4 Make 1
Template 1
Unit 4 Make 1
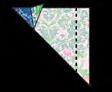
7. Referring to Set-In Seam directions , stitch 4 Fabric B (Square Template 1) squares between remaining star points as shown to complete the Blazing Star block (241⁄2" square unfinished). Fig. 7
7
Template 1
7
Blazing Star Block - Make 1
Star Block - Make 1
Fig.
Fig.
Fig. 7
Fig.
Fig.
Fig.
MONTH 2 – CORNERSTONES BLOCK
Cutting
WOF = Width of Fabric
Fabric D, cut:
(1) 71⁄4" x WOF; subcut (4) 71⁄4" squares, each cut in half diagonally twice for a total of 16 triangles
(2) 31⁄2" x WOF; subcut (16) 31⁄2" squares
Star Sampler Quilt
Fabric F, fussy cut:
16 Triangle Template 2
16 Triangle Template 3
Refer to the Month 1 Fabric F cutting diagram on page 5.
NOTE: Refer to figures to correctly orient fussy-cut pieces as shown.
MONTH 2 - Cornerstones Block
Fig. 1
Fig. 1
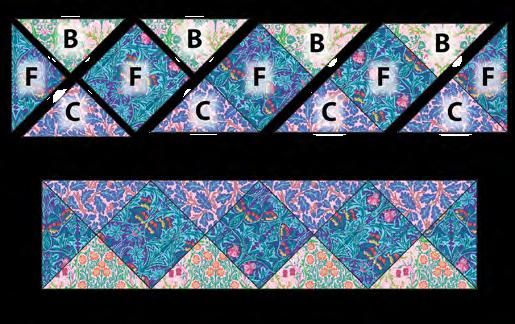
1. Stitch a Fabric F triangle (1 each Triangle Templates 2 and 3) to each short edge of a Fabric D triangle as shown. Make a total of 8 Unit 1a (31⁄2" x 61⁄2" unfinished). Fig. 1
Triangle Template 2
Triangle Template 2
Triangle Template 2
Triangle Template 3
Triangle Template 3
Triangle Template 3
Fig. 1
Fig. 1
Triangle Template 3
Unit 1a Make 8
Unit 1a Make 8
Unit 1a Make 8
2. In the same manner, make 4 each Units 1b and 1c with triangles indicated. Fig. 2
Fig. 2
Triangle Template 3
Fig. 2
Fig. 2 Triangle Template 3 Triangle Template 3
Triangle Template 2
Triangle Template 2
Triangle Template 2 Triangle Template 2
Unit 1b Make 4
Unit 1b Make 4
Fig. 2
Triangle Template 3
Unit 1b Make 4
Triangle Template 3
Fig. 3
Triangle Template 2
Unit 1c Make 4
Unit 1c Make 4
3. Arrange 2 Unit 1a, 1 Unit 1b, 1 Unit 1c, and 1 Fabric I (Square Template 2) square in 3 rows as shown. Sew into rows. Stitch rows together. Make a total of 4 Cornerstones blocks (121⁄2" square unfinished). Fig. 3
Square Template 2
Square Template 2
Square Template 2
Triangle Template 2
Fig. 3
Unit 1c Make 4
Fig. 3
Fig. 3
Cornerstones Block Make 4
Cornerstones Block Make 4
Cornerstones Block Make 4
MONTH 3 – DUTCHMAN’S PUZZLE BLOCK
Cutting
WOF = Width of Fabric
Fabric D, cut:
(2) 37⁄8" x WOF; subcut (16) 37⁄8" squares, each cut in half diagonally once for a total of 32 triangles
Fabric E, cut:
(5) 37⁄8" x WOF; subcut (48) 37⁄8" squares, each cut in half diagonally once for a total of 96 triangles
Star Sampler Quilt
Fabric F, fussy cut:
32 Triangle Template 4
Refer to the Month 1 Fabric F cutting diagram on page 5.
Fabric G, fussy cut: (See diagram below)
32 Triangle Template 4
Fabric G cutting diagram Ka e x Morris BOM - Fabric Cutting Page 3
NOTE: Refer to figures to correctly orient fussy-cut pieces as shown.
EE
Fig. 1 Ka e x Morris BOM - Diagram Page 4
Fig. 1 G
Fig. 1 G EE
Triangle Template 4
Fig. 1 G EE
1. Stitch a Fabric E triangle to each short edge of a Fabric G triangle (Triangle Template 4) as shown. Make a total of 32 Unit 1a (31⁄2" x 61⁄2" unfinished). Fig. 1
Fig. 1 G
Triangle Template 4
Triangle Template 4
Triangle Template 4
Unit 1a
Make 32
Unit 1a
Unit 1a
Fig. 2
Unit 1a Make 32
Make 32
Make 32
2. In the same manner, make 32 Unit 1b with E, F, and D triangles indicated. Fig. 2
Triangle Template 4 F D F
Fig. 2
Fig. 2
Fig. 2
Triangle Template 4 F D F
Triangle Template 4
Unit 1b Make 32 Fig. 2
Unit 1b Make 32
Unit 1b Make 32
Unit 1b Make 32
Fig. 3
Fig. 3 U1b U1a
Fig. 3 U1b U1a
Unit 2 Make 32
Triangle Template 4 F D F Unit 2 Make 32
Unit 2 Make 32
3. Stitch a Unit 1a above a Unit 1b as shown. Make a total of 32 Unit 2 (61⁄2" square unfinished). Fig. 3
Fig. 4
Fig. 4
Fig. 4
Fig. 4
Fig. 4
Unit 2 Make 32 Fig. 3 U1b U1a Dutchman’s Puzzle Block Make 8
Fig. 3 U1b U1a Dutchman’s Puzzle Block Make 8
4. Arrange 4 Unit 2 in 2 rows as shown. Stitch into rows. Sew rows together. Make a total of 8 Dutchman’s Puzzle blocks (121⁄2" square unfinished). Fig. 4
Dutchman’s Puzzle Block Make 8
Dutchman’s Puzzle Block Make 8
MONTH 4 – SQUARE-ON-POINT BLOCK
Cutting
WOF = Width of Fabric
Fabric D, cut:
(4) 37⁄8" x WOF; subcut (32) 37⁄8" squares, each cut in half diagonally once for a total of 64 triangles
Fabric H cutting diagram Ka e x Morris BOM - Fabric Cutting Page 4 x16 x32
Continue cutting required number of shapes.
NOTE: not all pieces shown will be fussy cut this month.
Ka e x Morris BOM - Diagram Page 5
Instructions
Ka e x Morris BOM - Diagram Page 5
Ka e x Morris BOM - Diagram Page 5
NOTE: Refer to figures to correctly orient fussy-cut pieces as shown.
MONTH 4 - Square-on-Point Block
MONTH 4 - Square-on-Point Block
MONTH 4 - Square-on-Point Block
1. Stitch Fabric D triangles to 2 adjoining edges of a Fabric E square as shown. Make a total of 32 Unit 1 (67⁄8" x 67⁄8" x 93⁄4" unfinished). Fig. 1
Fig. 1
Fig. 1 Unit
Fig. 1
Fig. 1
D E
Unit 1
Make 32
Unit 1
Make 32
2. Arrange 2 Fabric H squares (Square Template 3) and 2 Fabric I squares (Square Template 4), noting orientation, in 2 rows as shown. Stitch into rows. Sew rows together. Make a total of 8 Unit 2 (9" square unfinished). Fig. 2
Fig. 2
Fig. 2
Fig. 2
Fig. 2
Bird upside down facing left.
upside down facing left.
Unit 2
Make 8
Unit 2
Make 8
3. Sew a Unit 1 to each of the 4 edges of a Unit 2 as shown, matching seam intersections. Make a total of 8 Square-on-Point blocks (121⁄2" square unfinished). Fig. 3
Fig. 3
Fig. 3
Fig. 3
Fig. 3
MONTH 5 – OHIO STAR BLOCK
Cutting
WOF = Width of Fabric
Fabric A, fussy cut: (See diagram below)
4 Square Template 5
Fabric D, cut:
(1) 51⁄4" x WOF; subcut
(4) 51⁄4" squares, each cut in half diagonally twice for a total of 16 triangles
Fabric E, cut:
Star Sampler Quilt
(1) 51⁄4" x WOF; subcut (4) 51⁄4" squares, each cut in half diagonally twice for a total of 16 triangles
(2) 41⁄2" x WOF; subcut (16) 41⁄2" squares
Fabric H, fussy cut:
e x Morris BOM - Fabric Cutting Page 1
32 Triangle Template 5
Refer to the Month 4 Fabric H cutting diagram on page 14.
Fabric A Square Template 5: Cut 4
Fabric B Square Template 1: Cut 4
Triangle Template 1: Cut 4
Fabric A cutting diagram x4 x4
Instructions
NOTE: Refer to figures to correctly orient fussy-cut pieces as shown.
1. Arrange 2 Fabric H triangles (Triangle Template 5) and 1 each Fabrics D and E 51⁄4" triangles as shown. Stitch triangles together. Make a total of 16 Unit 1 (41⁄2" square unfinished). Fig. 1
Fig. 1
2. Arrange 4 Unit 1, 4 Fabric E 41⁄2" squares, and 1 Fabric A square (Square Template 5) in 3 rows as shown. Stitch into rows. Sew rows together. Make a total of 4 Ohio Star blocks (121⁄2" square unfinished). Fig. 2 Fig. 2
MONTH 6 – TURNSTILE BLOCK
Cutting
WOF = Width of Fabric
Fabric D, cut:
Star Sampler Quilt
Ka e x Morris BOM - Diagram Page 7
(2) 71⁄4" x WOF; subcut (8) 71⁄4" squares, each cut in half diagonally twice for a total of 32 triangles
Fabric G, fussy cut:
Fabric J, fussy cut:
32 Triangle Template 7
MONTH 6 - Turnstile Block
Refer to the Month 1 Fabric J cutting diagram on page 6.
Ka e x Morris BOM - Diagram Page 7
32 Triangle Template 6
Refer to the Month 3 Fabric G cutting diagram on page 12.
MONTH 6 - Turnstile Block
Instructions
NOTE: Refer to figures to correctly orient fussy-cut pieces as shown.
1. Sew 1 each Fabric D 71⁄4" and Fabric G (Triangle Template 6) triangles together along short edges as shown. Add a Fabric J (Triangle Template 7) triangle along long edges. Make a total of 32 Unit 1 (6 1⁄2" square unfinished). Fig. 1
Template 6
Fig. 1
Fig. 1
Template 6
Template 7
Template 7
2. Arrange 4 Unit 1 in 2 rows as shown. Stitch into rows. Sew rows together. Make a total of 8 Turnstile blocks (121⁄2" square unfinished). Fig. 2
Fig. 2
MONTH 7 – QUILT TOP ASSEMBLY AND FINISHING
Cutting
WOF = Width of Fabric
Fabric C, cut:
(9*) 31⁄2" x WOF for outer border
(10) 21⁄2" x WOF for binding (3) 2" x WOF; subcut (49) 2" x 2" cornerstones
*If you plan to join your border strips with diagonal seams, cut 1 additional 31⁄2" x WOF strip.
Fabric J, fussy cut:
(2) 23⁄4" x 29" side inner borders
(2) 23⁄4" x 241⁄2" top/bottom inner borders
Refer to the Month 1 Fabric J cutting diagram on page 5.
Fabric K, cut:
(28) 2" x WOF; subcut
(84) 2" x 121⁄2" sashing strips
Instructions
NOTE: Refer to Quilt Layout diagram (page 21) during the following steps and to correctly orient blocks. The goal is to make a quilt with no distinct wrong direction - there should be right-reading motifs from each side of the assembled quilt top. Press seams towards the Fabric K sashing strips. Measure the Quilt Center width and height before cutting and adding outer borders and adjust cut lengths if necessary to match your measurements.
3. Stitch Fabric J 23⁄4" x 241⁄2" borders to the right and left sides of the Blazing Star block. Add Fabric J 23⁄4" x 29" borders to the top and bottom of the Blazing Star block. Fig. 1
Fig. 1
Star Sampler Quilt
4. Arrange 6 Fabric K sashing strips and 7 Fabric C cornerstones in a row. Sew together to make a long sashing row. Make a total of 4.
5. Arrange 2 each Fabric K sashing strips and Fabric C cornerstones in a row. Sew together to make a short sashing row. Make a total of 6.
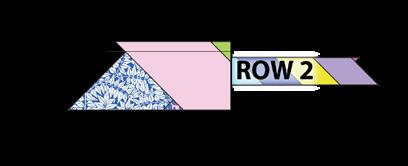
6. Arrange 7 Fabric K sashing strips and 2 each Cornerstones, Square-on-Point, and Dutchman’s Puzzle blocks in a row, making sure the birds in the Cornerstones blocks are right-reading. Sew together into Row 1. Make 2 of Row 1.
7. Arrange 7 Fabric K sashing strips and 2 each Square-on-Point, Ohio Star, and Turnstile blocks in a row, making sure the artichokes in the Ohio Star blocks are right-reading. Sew together into Row 2. Make 2 of Row 2.
8. Arrange a Dutchman’s Puzzle block and a Turnstile block with 2 Fabric K sashing strips. Sew together into Row 3. Make a total of 4 Row 3.
9. Sew a long sashing row to the top of each Row 1 and Row 2, then sew each Row 1 to the top (sashing row edge) of a Row 2.
10. Arrange all 4 of Row 3, noting orientation, and all 6 short sashing rows as shown in the diagram. Sew the block and sashing rows together, then sew to opposite sides of the unit from step 1.
11. Noting orientation, sew the Row 1⁄2 sections to the section from step 8 to complete the quilt center.
12. Sew together all the Fabric C strips end to end and cut into 2 top/bottom borders 89" long and 2 side borders 83" long. Sew the side borders to the right and left sides of quilt, press towards the borders, then add the top/bottom borders to complete the quilt top.
Finishing
1. Sew together the 21⁄2" Fabric C binding strips end to end using diagonal seams. Press seams open. Press the binding strip in half wrong sides together.
2. Layer backing (wrong side up), batting, and quilt top (right side up). Baste the layers together and quilt as desired. Trim excess batting and backing even with the top after quilting is completed.
3. Leaving an 8" tail of binding, sew the binding to the top of the quilt through all layers matching all raw edges. Miter corners. Stop approximately 12" from where you started. Lay both loose ends of binding flat along quilt edge. Where the loose ends meet, fold them back on themselves and press to form a crease. Using this crease as your stitching line, sew the two open ends of the binding right sides together. Trim seam to 1⁄4" and press open. Finish sewing binding to quilt.
4. Turn the binding to the back of quilt and hand-stitch in place.
MONTH
7 - Quilt Assembly
Quilt Layout Diagram
Quilt Layout
Square Template 1
7 1/2” x 7 1/2”
Blazing Star Block Fussy cut 4 block corners from Fabric B.
This square should measure 1" x 1" (2.54cm x 2.54cm) when printed.
*** Measure templates before cutting to confirm printing at 100%***
If kitting, refer to the final pattern for yardage amounts, it is recommended that a sample is made to confirm accuracy.
Broken Lace and Old Dishes Quilt
Featuring Kaffe Fassett X William Morris Collection
‘Quilter’s lace’ is the name given to fabric full of holes after fussy cutting. This quilt is designed to use up the ‘lace’ fabric left over from fussy cutting the Kaffe x Morris Star Sampler BOM, plus 2 additional fabrics. If you are making this project on its own, refer to the yardage amounts listed in the Fabric Requirements.
Collection: Kaffe Fassett X William Morris Collection
Technique: Pieced
Skill Level: Advanced Beginner
Finished Sizes:
Finished Size: 75" x 85" (190.5cm x 215.9cm)
Finished Block Size: 5" x 5" (12.7cm x 12.7cm)
All possible care has been taken to ensure the accuracy of this pattern. We are not responsible for printing errors or the manner in which individual work varies. Please read the instructions carefully before starting this project. If kitting, it is recommended a sample is made to confirm accuracy.
Broken Lace and Old Dishes Quilt
Project designed by Liza Prior Lucy | Tech edited by Alison M. Schmidt
Fabric Requirements
DESIGN
(A) Fruit Cobalt
(B) Fruit Duckegg
(C) Leicester Cobalt
(D) Strawberry Thief Blue
(E) Strawberry Thief Aqua
(F) Aboriginal Dots* Turquoise
(G) Aboriginal Dots* Water
* includes binding
PWKW010.COBALT 3⁄4 yard (0.69m)
PWKW010.DUCKEGG 11⁄4 yards (1.14m)
PWKW011.COBALT 11⁄8 yards (1.03m)
PWKW013.BLUE 11⁄4 yards (1.14m)
PWKW013.AQUA 2⁄3 yard (0.61m)
PWGP071.TURQU* 23⁄4 yards (2.51m)
PWGP071.WATER 21⁄4 yards (2.06m)
There is plenty of leftover ‘lace’ fabric to make the quilt,ifyoumadetheStarSamplerQuilt. Amounts above are if you did not make the Star Sampler BOM and need to buy yardage to make the project. Fabrics F & G are additional yardageneededifyoudidordidnotalready maketheStar Sampler quilt.
Backing (Purchased Separately)
44" (1.12m) wide Fruit Cobalt
PWKM010.COBALT 73⁄4 yards (7.09m) OR 108" (2.74m) wide Leicester Cobalt
Additional Recommendations
• 100% cotton thread in colors to match
• 83" x 93" (2.24m x 2.69m) batting
Optional supplies
• Template plastic
• Spray starch or starch alternative
QBKW002.COBALT 27⁄8 yards (2.63m)
Preparation
Broken Lace and Old Dishes Quilt
1. Print the square and triangle template patterns (pages 7-8) at 100% and measure to confirm accuracy of printout. Note: You will not need the triangle if not using ‘lace’ fabric.
2. Trace template patterns onto template plastic or another sturdy material and cut out on the outer line to make cutting templates.
Cutting
WOF = Width of Fabric
NOTE: Fabric letter designations differ from the Star Sampler quilt.
If unable to cut enough squares of any leftover fabric, use the Triangle Template to cut 4 triangles in place of each square not cut. Fig. 1
Fig. 1
Continue cutting required number of squares/triangles.
Follow the alternate cutting instructions in italics if using yardage.
Fabric A, cut: (20)61⁄4" squares from ‘lace’ fabric OR
if using yardage, cut: (4)61⁄4" x WOF; subcut (20)61⁄4" squares
Fabric B, cut: (32)61⁄4" squares from ‘lace’ fabric OR
if using yardage, cut: (6)61⁄4" x WOF; subcut (32)61⁄4" squares
Fabric C, cut: (28)61⁄4" squares from ‘lace’ fabric OR
if using yardage, cut: (5)61⁄4" x WOF; subcut (28)61⁄4" squares
Fabric D, cut: (32)61⁄4" squares from ‘lace’ fabric OR if using yardage, cut: (6)61⁄4" x WOF; subcut (32)61⁄4" squares
Fabric E, cut: (16)61⁄4" squares from ‘lace’ fabric OR if using yardage, cut: (3)61⁄4" x WOF; subcut (16)61⁄4" squares
Fabric F, cut: (11)61⁄4" x WOF; subcut (63)61⁄4" squares (9)21⁄2" x WOF for binding
Fabric G, cut: (11)61⁄4" x WOF; subcut (63)61⁄4" squares
Broken Lace and Old Dishes Quilt
Instructions
Note: Use a 1⁄4" seam allowance throughout. Sew all pieces with right sides together and raw edges even using matching thread.
Block Construction
1. Draw a diagonal line across the wrong side of all Fabric F and G 61⁄4" squares. Draw a line 1⁄4" on each side of the first line. Note: If you had to cut some triangles from Fabrics A-E, you will not use all the F and G squares until after you’ve made as many blocks as possible using the A-E squares. Fig. 2
2
2. Arrange a marked Fabric F square right sides together with a Fabric B square, aligning all edges. Stitch along the 2 outside lines. Cut apart on the middle line. Press both half-square triangle units open. Do NOT trim. Repeat 32 times for a total of 64 Unit 1. Fig. 3 Fig. 3
3. In the same manner, make a total of 32 Unit 2, 30 Unit 3, 10 Unit 4, 64 Unit 5, and 56 Unit 6 using the fabric combinations shown. Fig. 4
4
4. Draw a diagonal line across the wrong side of 32 Unit 1, 16 Unit 2, 15 Unit 3, 5 Unit 4, 32 Unit 5, and 28 Unit 6. Draw a line 1⁄4" on each side of the first line on each unit. Fig. 5
Fig. 5
5. Arrange a marked Unit 1 right sides together on an unmarked Unit 1, with prints alternating. Stitch along the 2 outside lines. Cut apart on the middle line. Press both quarter-square triangle units open. Repeat 32 times for a total of 64 Block 1 (5 1⁄2" square unfinished). NOTE: If you had to cut triangles from Fabric B instead of all squares, refer to steps 7 and 8 to make the remaining amount of Block 1 needed. Fig. 6
Repeat 32 times for 64
32 times for 64
Fig. 6
Fig.
Fig.
Broken Lace and Old Dishes Quilt
6. In the same manner, make a total of 32 Block 2, 30 Block 3, 10 Block 4, 64 Block 5, and 56 Block 6. NOTE: If you had to cut triangles from Fabrics A and D-E instead of all the squares, refer to steps 7 and 8 to make the remaining amount of Block 1 needed. Fig. 7 Fig. 7
Quilt Top Assembly
9. Noting Quilt Layout diagram ( page 6 ), arrange all blocks into 17 horizontal rows of 15 blocks each. NOTE: There will be 1 extra Block 4.
10. Sew the blocks into rows, backstitching at top of top row and bottom of bottom row. Press the seams in each row all in the same direction, alternating direction from row to row.
11. Sew rows together, nesting the seams, and backstitching at beginning and end of seams, to complete the quilt top. (751⁄2" x 851⁄2" including seam allowances).
7. To make blocks using triangles cut from the ‘lace’ fabric, first cut all remaining Fabric F and G squares in half diagonally twice. Fig. 8
8
8. Arrange 2 Fabric F triangles and 2 Fabric B triangles as shown (or the fabric combination you have in triangles). Stitch together in pairs, then sew together to make a Block 1. Repeat to make the remaining blocks not made in Step 6. Fig. 9 Fig. 9
9
Finishing
12. Sew together the 21⁄2" Fabric F binding strips end-to-end using diagonal seams. Press seams open. Press the binding strip in half wrong sides together.
13. Layer backing (wrong side up), batting, and quilt top (right side up). Baste the layers together and quilt as desired. Trim excess batting and backing even with the top after quilting is completed.
14. Leaving an 8" tail of binding, sew the binding to the top of the quilt through all layers matching all raw edges. Miter corners. Stop approximately 12" from where you started. Lay both loose ends of binding flat along quilt edge. Where the loose ends meet, fold them back on themselves and press to form a crease. Using this crease as your stitching line, sew the two open ends of the binding right sides together. Trim seam to 1⁄4" and press open. Finish sewing binding to quilt.
15. 15. Turn the binding to the back of quilt and hand-stitch in place.
Broken Lace and Old Dishes Quilt
Quilt Layout
Broken Lace and Old Dishes Quilt
Broken Lace and Old Dishes Quilt
Square Template 6 1/4” x 6 1/4”
This square should measure 1" x 1" (2.54cm x 2.54cm) when printed.
*** Measure templates before cutting to confirm printing at 100%***
Broken Lace and Old Dishes Quilt
This square should measure 1" x 1" (2.54cm x 2.54cm) when printed.
*** Measure templates before cutting to confirm printing at 100%***
Broken Lace and Old Dishes
Triangle Template 3 1/8” x 6 1/4”
Quilt
Cottage Garden Quilt
Featuring Kaffe Fassett x Morris & Co. Collection
Collection: Kaffe Fassett x Morris & Co. Collection
Technique: Pieced
Skill Level: Advanced Beginner
Finished Size: 84" x 96 1⁄4" (2.13m x 2.44m)
All possible care has been taken to ensure the accuracy of this pattern. We are not responsible for printing errors or the manner in which individual work varies. Please read the instructions carefully before starting this project. If kitting, it is recommended a sample is made to confirm accuracy.
Project designed by Kaffe Fassett | Tech edited by Alison M. Schmidt
Fabric Requirements
DESIGN
(A) Artichoke Lavender
(B) Blackthorn Pink
(C) Oak Blue
(D) Oak Turquoise
(E) Oak Violet
(F) Bluebell Purple
(G) Indian Lavender
(H) Acanthus Cobalt
(I) Acanthus Jade
(J) Michaelmas Daisy Aqua
(K) Granada Purple
(L) Branches Blue
(M) Branches Magenta
(N) Fruit Cobalt
(O) Leicester Aqua
(P) Leicester Cobalt
(Q) Leicester Fuchsia
(R) Wandle Contrast
Cottage Garden Quilt
PWKW001.LAVENDER 1⁄4 yard (0.23m)
PWKW002.PINK 3⁄4 yard (0.69m)
PWKW003.BLUE 1⁄2 yard (0.46m)
PWKW003.TURQUOISE 5⁄8 yard (0.57m)
PWKW003.VIOLET 3⁄4 yard (0.69m)
PWKW004.PURPLE 2⁄3 yard (0.61m)
PWKW005.LAVENDER 5⁄8 yard (0.57m)
PWKW006.COBALT 3⁄8 yard (0.34m)
PWKW006.JADE 1⁄4 yard (0.23m)
PWKW007.AQUA* 15⁄8 yards (1.49m)
PWKW008.PURPLE 1⁄4 yard (0.23m)
PWKW009.BLUE 3⁄8 yard (0.34m)
PWKW009.MAGENTA 1⁄4 yard (0.23m)
PWKW010.COBALT 7⁄8 yard (0.80m)
PWKW011.AQUA 5⁄8 yard (0.57m)
PWKW011.COBALT** 21⁄4 yards (2.06m)
PWKW011.FUCHSIA 1⁄2 yard (0.46m)
PWKW012.CONTRAST 7⁄8 yard (0.80m) * includes binding
Backing (Purchased Separately) 44" (1.12m) wide
Indian Pink
PWKW005.PINK 8 yards (7.32m) OR 108" (2.74m) wide
Leicester Cobalt
QBKW002.COBALT 25⁄8 yards (2.40m)
Backing 108" Backing 44"
Additional Recommendations
• 100% cotton thread in colors to match
• 92" x 104" (2.34m x 2.64m) batting
(A) (B) (C) (D)
Cutting
WOF = Width of Fabric
Fabric A, cut:
(1) 41⁄2" x WOF; subcut
(4) 41⁄2" squares
Fabric B, cut:
(1) 111⁄4" x WOF; subcut
(2) 111⁄4" squares, then cut each square in half diagonally twice
(1) 91⁄4" x WOF; subcut
(3) 91⁄4" squares, then cut each square in half diagonally twice (not all triangles will be used)
Fabric C, cut:
(1) 111⁄4" x WOF; subcut
(2) 111⁄4" squares, then cut each square in half diagonally twice
Fabric D, cut:
(1) 111⁄4" x WOF; subcut
(3) 111⁄4" squares, then cut each square in half diagonally twice
(1) 57⁄8" x WOF; subcut
(4) 57⁄8" squares, then cut each square in half diagonally once
Fabric E, cut:
(2) 111⁄4" x WOF; subcut
(4) 111⁄4" squares, then cut each square in half diagonally twice
(1) 91⁄4" square, then cut in half diagonally twice
(4) 51⁄2" squares
Fabric F, cut:
(1) 111⁄4" x WOF; subcut
(1) 111⁄4" square, then cut in half diagonally twice
(1) 71⁄2" square
(1) 71⁄2" x WOF; subcut
(5) 71⁄2" squares
Fabric G, cut:
(1) 173⁄4" x WOF; subcut
(1) 17 34" square, then cut in half diagonally twice (only 3 triangles will be used)
(1) 91⁄8" square, then cut in half diagonally once
Fabric H, cut:
(1) 91⁄2" x WOF; subcut (4) 91⁄2" squares
Fabric I and K, cut from each:
(1) 61⁄8" x WOF; subcut (4) 61⁄8" squares
Fabric J, cut:
(1) 173⁄4" x WOF; subcut
(1) 173⁄4" square, then cut in half diagonally twice
(1) 91⁄4" x WOF; subcut (3) 91⁄4" squares, then cut each square in half diagonally twice (not all triangles will be used)
(10) 21⁄2" x WOF (binding)
Cottage Garden Quilt
Fabric L, cut:
(1) 51⁄2" x WOF; subcut (4) 51⁄2" x 101⁄2" pieces (1) 31⁄2"* x WOF; subcut (4) 31⁄2" squares
*Wait to cut this strip until after you have subcut all (4) 5 1⁄2" x 10 1⁄2" pieces. If the last one is short due to shrinkage from pre-washing, cut the last 51⁄2" high piece from remaining yardage, then cut the 3 1⁄2" pieces from the same strip.
Fabric M, cut:
(2) 31⁄2" x WOF; subcut (4) 31⁄2" x 171⁄8" strips
Fabric N, cut:
(1) 51⁄2" x WOF; subcut
(4) 51⁄2" x 81⁄2" pieces
(4) 41⁄2" x WOF; subcut
(4) 41⁄2" x 321⁄2" strips
Fabric O, cut:
(1) 167⁄8" x WOF; subcut
(2) 167⁄8" squares, then cut one square in half diagonally once, and cut the second square in half diagonally once in the opposite direction
Fabric P, cut:
(8*) 91⁄2" x WOF for outer borders
*If you prefer to join border strips with diagonal seams, cut 2 additional WOF strips. This will require additional yardage.
Fabric Q, cut:
(1) 101⁄2" x WOF; subcut
(4) 81⁄2" x 101⁄2" pieces
Fabric R, fussy cut:
(1) 17 1 ⁄ 8 " square, centered on a flower of your choice (either dark center with light outer petals, or the opposite)
Instructions
Note: Use a 1⁄4" seam allowance throughout. Sew all pieces with right sides together and raw edges even using matching thread. Press after each seam, either as directed or towards the darker fabric. Where possible, press so seam allowances will nest.
Medallion Center Construction
1. Arrange the Fabric R 171⁄8" fussy-cut square, (4) Fabric L 31⁄2" squares, and (4) Fabric M 31⁄2" x 171⁄8" strips in 3 rows as shown. Note that Figure 1 shows both options for the fussy-cut center, but only 1 should be made. Stitch into rows, pressing away from Fabric M. Sew rows together to complete Unit 1a (231⁄8" square unfinished). Fig. 1
Fig. 1
Cottage Garden Quilt
2. Sew Fabric O 167⁄8" triangles to all 4 edges of Unit 1a, keeping the directional prints right-reading, to complete Unit 1b (321⁄2" square unfinished). Again, your fussy-cut motif may differ from the one shown. Fig. 2
Fig. 2
Border Construction
• Sewing triangles together side-by-side can be tricky. When possible, align right angles and stitch from the right angle down to the points. Fig. 3a
• When sewing triangles that don’t have right angles that align, offset the triangles so the seam starts and stops 1⁄4" from the edge of the fabrics. Fig. 3b
Fig. 3a
Fig. 3b
3. Arrange 2 each Fabric I and K 61⁄8" squares, and Fabric B, E and J 91⁄4" triangles in (6) diagonal rows as shown. Stitch into diagonal rows, pressing away from the center squares. Sew rows together, matching seam intersections and nesting seam allowances, to complete Unit 2a (81⁄2" x 401⁄2" unfinished). In the same manner, make 1 Unit 2b, which is a mirror image of Unit 2a. Fig. 4
4
Cottage Garden Quilt
4. Arrange (2) Fabric D 57⁄8" triangles, (3) Fabric D 111⁄4" triangles, and (4) Fabric E 111⁄4" triangles in a row. Stitch triangles together. Make a total of 4 Unit 3 (51⁄2" x 401⁄2" unfinished). Fig. 5
Fig. 5
5. Arrange (3) Fabric F 71⁄2" squares, and Fabric B, C and F 111⁄4" triangles in (5) diagonal rows as shown. Stitch into diagonal rows. Sew rows together, matching seam allowances to complete Unit 4a (101⁄2" x 401⁄2" unfinished). In the same manner, make 1 Unit 4b, which is a mirror image of Unit 4a. Fig. 6
Fig. 6
Fig.
6. Arrange (2) Fabric G 91⁄8" triangles, (3) Fabric G 173⁄4" triangles, and (4) Fabric J 173⁄4" triangles in a row. Stitch triangles together to complete Unit 5 (83⁄4" x 661⁄2" unfinished). Fig. 7
Fig. 7
Quilt Top Assembly
7. Noting Quilt Layout diagram (page 7), arrange Unit 1b, (4) Fabric A 41⁄2" squares, and (4) Fabric N 41⁄2" x 321⁄2" strips in 3 rows. Stitch into rows, pressing towards Fabric N. Sew rows together to complete quilt center (401⁄2" square unfinished).
8. Arrange the quilt center, 1 each of Units 2a, 2b, 4a, and 4b, and (4) each Unit 3, Fabric E 51⁄2" squares, Fabric N 51⁄2" x 81⁄2" pieces, Fabric L 51⁄2" x 81⁄2" pieces, and Fabric Q 81⁄2" x 101⁄2" pieces in 5 rows as shown. Stitch into rows. Sew rows together.
9. Sew Unit 5 to the top of the completed section from the previous step.
10. Sew together all the Fabric P border strips end to end with straight seams. Cut into (2) 91⁄2" x 783⁄4" and (2) 91⁄2" x 661⁄2" borders (or the measured width and height of the completed section from the previous step).
11. Stitch the longer Fabric P borders to the right and left sides of quilt. Press towards Fabric P. Sew a Fabric H 91⁄2" square to each end of both remaining Fabric P borders, then sew to top and bottom of the quilt to complete the quilt top.
Cottage Garden Quilt
Finishing
12. Sew together all the 21⁄2" Fabric J binding strips end-to-end using diagonal seams. Press the seams open. Press the binding strip in half wrong sides together.
13. Layer the backing (wrong side up), batting, and quilt top (right side up). Baste the layers together and quilt or tie as desired. Trim excess batting and backing even with the quilt top after quilting is completed.
14. Leaving an 8" tail of binding, sew binding to top of quilt through all layers matching all raw edges. Miter corners. Stop approximately 12" from where you started. Lay both loose ends of binding flat along quilt edge. Where these two loose ends meet, fold them back on themselves and press to form a crease. Using this crease as your stitching line, sew the two open ends of the binding together right sides together. Trim seam to 1⁄4" and press open. Finish sewing binding to quilt.
15. Turn the binding to the back of the quilt and hand stitch in place.
Cottage Garden Quilt
Quilt Layout
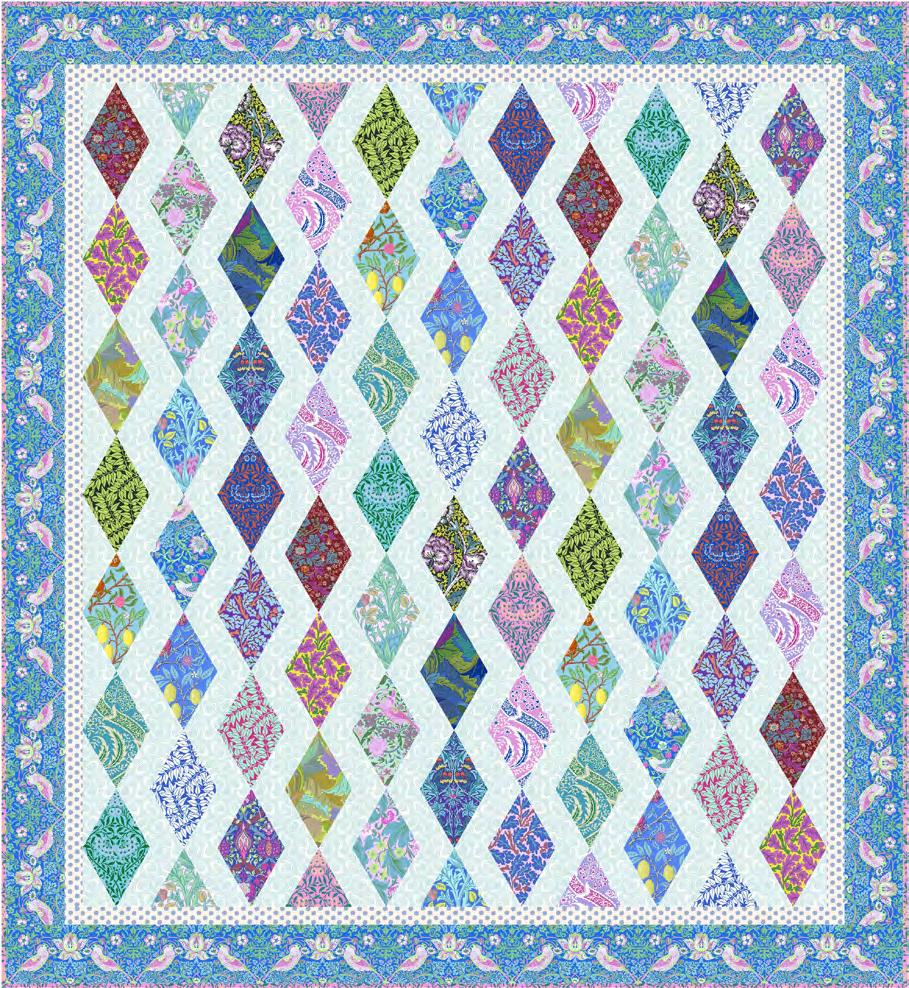
Diamonds Quilt
Featuring Kaffe Fassett x Morris & Co. Collection
Collection: Kaffe Fassett x Morris & Co. Collection
Technique: Pieced
Skill Level: Advanced Beginner
Finished Size:
761⁄4" x 83" (193.68cm x 210.82cm)
Finished Sizes:
Finshed Block Size:
53⁄4" x 10" (14.61cm x 25.40cm)
53⁄4" x 5", (14.61cm x 12.70cm)
All possible care has been taken to ensure the accuracy of this pattern. We are not responsible for printing errors or the manner in which individual work varies. Please read the instructions carefully before starting this project. If kitting, it is recommended a sample is made to confirm accuracy.
Project designed by Stacey Day | Tech edited by
Alison M. Schmidt
Diamonds Quilt
Fabric Requirements
DESIGN
(A) 10 Piece FQ PACK BLUSH Blush
(A) 10 Piece FQ PACK BLUES Blues
(A) 7 Piece FQ PACK BOLD Bold
(B) Oak Blue
(C) Oak Purple
(D) Oak Violet
(E) Branches Blue
(F) Leicester Fuchsia
(G) Strawberry Thief Blue
(H) Aboriginal Dot Water
FB4FQKW.BLUSH 1 FQB
FB4FQKW.BLUES 1 FQB
FB4FQKW.BOLD 1 FQB
PWKW003.BLUE FQ (45.72cm x 53.34cm)
PWKW003.PURPLE FQ (45.72cm x 53.34cm)
PWKW003.VIOLET FQ (45.72cm x 53.34cm)
PWKW009.BLUE FQ (45.72cm x 53.34cm)
PWKW011.FUCHSIA FQ (45.72cm x 53.34cm)
PWKW013.BLUE 27⁄8 yards (1.83m)
PWGP071.WATER 27⁄8 yards (1.83m) (I) Spot Sky
(J) Michaelmas Daisy Pink
* includes binding
Backing (Purchased Separately)
44" (1.12m) wide
Leicester Aqua
GP70.SKYXX 1⁄2 yard (0.46m)
PWKW007.PINK* 3⁄4 yard (0.91m)
PWKW011.AQUA 43⁄4 yards (4.34m) OR 108" (2.74m) wide
Artichoke Lavender
Additional Recommendations
• 100% cotton thread in colors to match
• 85" x 91" (2.16m x 2.31m) batting
QBKW001.LAVENDER 21⁄2 yards (2.29m)
Preparation
1. Print the Diamond and Triangle template patterns (pages 6-7) at 100% and measure to confirm accuracy of printout.
2. Trace template patterns onto template plastic or another sturdy material and cut out on the outer line to make cutting templates. If desired, mark a hole at the quarter inch seam allowance at the corners to aid in piecing accuracy. Transfer the piece names, arrows, and grainline markings.
3. Open up the 3 fat quarter bundles (Fabric A) and remove 1 fabric of your choice (if you want to make the quilt as shown, remove Blackthorn in Pink (PWKW002.PINK), as shown in the swatch below.
PWKW002.PINK
4. Combine the 26 fat quarters from the bundles with the 5 additional fat quarters (Fabrics B-F), for a total of 31 different fabrics. Arrange them in an order that is pleasing to you. If you want to make the quilt as shown, arrange them following the columns, starting from top left, working down and then across as shown in the quilt image on page 1. Number the fabrics from 1-31 (see the quilt layout diagram on page 5 to see the numbered diamonds). It may help to make a numbered swatch sheet for all the fat quarters used before beginning to cut or take a photo of the fabrics in your preferred order.
Cut as listed by fabric number in the cutting instructions that follow. If you want to feature any favorite fabrics, or skip any fabrics, just adjust the cut quantities below in Cutting. In this quilt, Fabric 16 (Strawberry Thief in Blue) is used once more, and Fabric 9 (Indian in Aqua) is skipped once.
Diamonds Quilt
Fat Quarter Cutting
Note: If you decide not to arrange your fat quarters by number first, you will need to cut a total of 72 diamonds and 5 and 5 reversed triangles from Fabrics A-F, in your preferred quantities.
From Fabrics 1, 3, 4, 6, 7, and 10-16, cut from each:
3 diamonds using template
From Fabrics 2, 5, and 8, cut from each:
2 diamonds using template
2* triangles using template
From Fabrics 9, 17, 18, 20, 21, and 23-31, cut from each:
2 diamonds using template
From Fabrics 19 and 22, cut from each:
1 diamond using template
2* triangles using template
*Cut 1 with motif towards top of triangle, and one with motif towards base of triangle if fabric has a directional print that you would like to keep right-reading.
Yardage Cutting
WOF = Width of Fabric
From Fabric G, fussy cut: (8) 51⁄2" x WOF, centered on the pink bird motifs, for outer border
From Fabric H: (26) 31⁄2" x WOF; cut (154) 31⁄2" x 61⁄8"
From Fabric I: (7) 2" x WOF for inner border
From Fabric J: (9) 21⁄2" x WOF for binding
Instructions
All seam allowances are 1⁄4" and pieces are sewn right sides together. Press seam allowances open unless otherwise stated.
1. Cut (77) Fabric H 31⁄2" x 61⁄8" rectangles , placed right side up, on the diagonal from lower left to upper right as shown into (154) A triangles. Cut (77) Fabric H 31⁄2" x 61⁄8" rectangles, right side up, on the opposite diagonal into (154) B triangles.
1 A triangles B triangles
2. Arrange 2 each A and B triangles as shown around (1) diamond. Sew triangles in pairs to opposite sides to make a Diamond block. Trim, 1⁄4" from points, to 61⁄4" x 101⁄2". Make 72 Diamond Blocks total.
Diamonds Quilt
3. Arrange 1 each A and B triangles as shown around (1) triangle cut from the template. Sew together to make a Triangle Block. If you cut directional prints to keep them right-reading, follow the arrows for print placement. Trim to 61⁄4" x 51⁄2". Make (5) sets of 2 matching Triangle Blocks (10 total).
Make 10 (5 sets of 2, noting orientation of any directional motifs)
Quilt Top Assembly
Note: Follow the Quilt Layout diagram (page 5) while assembling the quilt. Measure the Quilt Center width and height before cutting and adding borders and adjust border measurements if necessary to match your measurements. Border strips are sewn with straight seams. Press borders away from the quilt center.
4. Arrange the Diamond Blocks and Triangle Blocks into 11 columns, starting and ending every even column with Triangle Blocks. Make sure all directional prints are oriented right-reading, as shown by the arrows in columns 1 and 2. *To make the quilt as shown, in the last column, Note: that Fabric 9 is skipped - the repeat pattern of fabrics deliberately goes from Fabric 8 to 10.
Fig.
Fig. 2
Fig. 3
5. Sew the Blocks together as shown into columns. Sew the columns together to make the quilt center.
6. Sew the Fabric I WOF strips together end to end with straight seams. Cut (2) 2" x 701⁄2" side borders and (2) 2" x 663⁄4" top/bottom borders. Sew the Fabric I side borders to the sides of the quilt, matching ends and centers. Then sew the Fabric I top/bottom borders to the top and bottom.
7. Repeat step 6 to make 2 side borders 731⁄2" long and 2 top/bottom borders 763⁄4" long from the fussy-cut Fabric G WOF strips, making sure all the birds are oriented in the same direction. Sew the Fabric G side borders to the sides of the quilt, matching ends and centers, and orienting the tops of the bird motifs away from the quilt center as shown. Then sew the Fabric G top/bottom borders to the top and bottom, with the bird motifs right reading in both borders, to complete the quilt top.
Finishing
8. Sew together the 21⁄ 2" Fabric J binding strips end-to-end using diagonal seams. Press seams open. Press the binding strip in half wrong sides together.
9. Layer backing (wrong side up), batting, and quilt top (right side up). Baste the layers together and quilt as desired. Trim excess batting and backing even with the top after quilting is completed.
10. Leaving an 8" tail of binding, sew the binding to the top of the quilt through all layers matching all raw edges. Miter corners. Stop approximately 12" from where you started. Lay both loose ends of binding flat along quilt edge. Where the loose ends meet, fold them back on themselves and press to form a crease. Using this crease as your stitching line, sew the two open ends of the binding right sides together. Trim seam to 1⁄4" and press open. Finish sewing binding to quilt.
11. Turn the binding to the back of quilt and hand-stitch in place.
Diamonds Quilt
Quilt Layout
*To make the quilt as shown, in the last column, note that Fabric 9 is skipped - the repeat pattern of fabrics deliberately goes from Fabric 8 to 10.
This square should measure 1" x 1" (2.54cm x 2.54cm) when printed.
*** Measure templates before cutting to confirm printing at 100%***
Diamonds Quilt
Diamond Template
This square should measure 1" x 1" (2.54cm x 2.54cm) when printed.
*** Measure templates before cutting to confirm printing at 100%***
Diamonds Quilt
Triangle Template
Garden Delights Quilt
Featuring Kaffe Fassett x Morris & Co. Collection
Collection: Kaffe Fassett x Morris & Co. Collection
Technique: Pieced
Skill Level: Advanced Beginner
Finished Size:
Finished Sizes:
721⁄2" x 87 1⁄2" (184.15cm x 224.79cm)
Finished Block Size:
7 1⁄2" x 7 1⁄2" (19.05cm x 19.05cm)
All possible care has been taken to ensure the accuracy of this pattern. We are not responsible for printing errors or the manner in which individual work varies. Please read the instructions carefully before starting this project. If kitting, it is recommended a sample is made to confirm accuracy.
Project designed by Stacey Day | Tech edited by
Alison M. Schmidt
Garden Delights Quilt
Fabric Requirements
DESIGN COLOR ITEM ID
(A) 10 Piece FQ PACK BLUSH Blush
(A) 10 Piece FQ PACK BLUES Blues
(A) 7 Piece FQ PACK BOLD Bold
(B) Oak Blue
(C) Oak Purple
(D) Oak Violet
(E) Acanthus Cobalt
(F) Branches Blue
(G) Leicester Fuchsia
(H) Shot Cotton Peacock
(I) Spot Sapphire
(J) Blackthorn Brown
* includes binding
Backing (Purchased Separately)
44" (1.12m) wide
Michaelmas Daisy Cobalt
FB4FQKW.BLUSH 1 FQB
FB4FQKW.BLUES 1 FQB
FB4FQKW.BOLD 1 FQB
PWKW003.BLUE FQ
PWKW003.PURPLE FQ
PWKW003.VIOLET FQ
PWKW006.COBALT 2 yards (1.83m)
PWKW009.BLUE FQ
PWKW011.FUCHSIA FQ
SCGP123.PEACOCK 3 yards (2.74m)
GP70.SAPPH 1⁄2 yard (0.46m)
PWKW002.BROWN* 3⁄4 yard (0.69m)
PWKW007.COBALT 51/2 yards (5.03m) OR 108" (2.74m) wide
Leicester Cobalt
Additional Recommendations
• 100% cotton thread in colors to match
• 81" x 96" (2.06m x 2.44m) batting
QBKW002.COBALT 21⁄2 yards (2.29m)
Cutting
WOF = Width of Fabric
From Fabric A:
First open up all 3 fat quarter bundles, remove the fat quarters that match Fabrics E (sashing) and J (binding), then cut (1) 8" x 8" square from each remaining fat quarter, fussy cut around motif if desired, for a total of 25 squares.
From Fabrics B–D, F, and G, cut from each: (1) 8" x 8" square, combine with Fabric A squares for a total of 30 squares
From Fabric E:
(8) 3" x WOF for stripsets
(4) 8" x WOF; subcut
(20) 8" x 8"
(4) 3" x WOF; subcut
(18) 3" x 8"
(4) 3" x 3"
From Fabric H:
(34) 3" x WOF; subcut
(120) 3" x 8" (120) 3" x 3"
From Fabric I:
(4) 3" x WOF for stripsets
From Fabric J:
(9) 21⁄2" x WOF for binding
Garden Delights Quilt
Instructions
Note: Use a 1⁄4" seam allowance throughout. Sew all pieces with right sides together. Press, following the arrows, after each seam.
1. Sew Fabric E 3" x WOF strips to both long sides of each Fabric I 3" x WOF strip to make (4) strip sets, measuring 8" high including seam allowances. From the strip sets cut a total of (49) 3"-wide segments (A Units). Fig. 1
1
2. Sew Fabric H 3" x 8" strips to both long sides of each A Unit to complete Block A. Make 49. Fig. 2
Fig. 2
Fig.
3. Draw a diagonal line across the wrong side of each Fabric H 3" x 3" square. Pin a marked Fabric H square in each corner of a Fabric E 8" x 8" square, with the marked lines oriented as shown. Stitch on the line, trim the seam allowance to 1⁄4", and press out towards Fabric H to complete Block B. Make 20. Fig. 3
Fig. 3
4. Pin a marked Fabric H 3" x 3" square to each end of a Fabric E 3" x 8" strip, with the marked lines oriented as shown. Stitch on the line, trim the seam allowance to 1⁄4", and press out towards Fabric H to make a C Unit. Make 18. Fig. 4
Fig. 4
5. Pin a marked Fabric H 3" x 3" square to a Fabric E 3" x 3" square. Stitch on the line, trim the seam allowance to 1⁄4", and press out towards Fabric H to make an HST Unit. Make 4. Fig. 5
Fig. 5
Garden Delights Quilt
Quilt Top Assembly
6. Arrange (5) Block A (rotated so the Fabric H sides are oriented horizontally), (4) Block B, and (2) C Units, oriented vertically, together in a row as shown. Sew together, pinning to match seam intersections, to complete a sashing row. Make 5. Fig. 6
Fig. 6
7. Arrange (5) Fabric H 3" x 8" strips, (4) C Units, and (2) HST Units together in a row as shown, noting orientation. Sew together to complete a top/bottom border. Make 2. Fig. 7
Fig. 7
8. Referring to the Quilt layout diagram (page 5) and the quilt image (page 1) for fabric placement if desired, arrange (5) 8" x 8" squares, (4) of Block A (oriented the opposite of the sashing rows), and (2) Fabric H 3" x 8" strips together in a row. Sew squares, blocks, and units together into rows. Make (6) rows.
9. Sew the block rows together in order with sashing rows between each, pinning at seam intersections to match.
10. Sew on the top and bottom borders, noting orientation, to complete the quilt top.
Finishing
11. Sew together all the 21⁄2" Fabric J binding strips end-to-end using diagonal seams. Press the seams open. Press the binding strip in half wrong sides together.
12. Layer the backing (wrong side up), batting, and quilt top (right side up). Baste the layers together and quilt or tie as desired. Trim excess batting and backing even with the quilt top after quilting is completed.
13. Leaving an 8" tail of binding, sew binding to top of quilt through all layers matching all raw edges. Miter corners. Stop approximately 12" from where you started. Lay both loose ends of binding flat along quilt edge. Where these two loose ends meet, fold them back on themselves and press to form a crease. Using this crease as your stitching line, sew the two open ends of the binding together right sides together. Trim seam to 1⁄4" and press open. Finish sewing binding to quilt.
14. Turn the binding to the back of the quilt and hand stitch in place.
Garden Delights Quilt
Quilt Layout
Twinkle Quilt
Featuring Kaffe Fassett x Morris & Co. Collection
Collection: Kaffe Fassett x Morris & Co. Collection
Technique: Pieced
Skill Level: Intermediate
Finished Size: 72 1⁄2" x 72 1⁄2" (184.15cm x 184.15cm)
All possible care has been taken to ensure the accuracy of this pattern. We are not responsible for printing errors or the manner in which individual work varies. Please read the instructions carefully before starting this project. If kitting, it is recommended a sample is made to confirm accuracy.
Project designed by Kaffe Fassett | Tech edited by Alison M. Schmidt
Fabric Requirements
DESIGN COLOR ITEM ID
(A) Blackthorn Brown
(B) Blackthorn Pink
(C) Oak Blue
(D) Oak Purple
(E) Oak Violet
(F) Indian Aqua
(G) Indian Pink
(H) Michaelmas Daisy Cobalt
(I) Michaelmas Daisy Pink
(J) Branches Black
(K) Branches Blue
(L) Fruit Cobalt
* includes binding
Backing (Purchased Separately)
44" (1.12m) wide
Blackthorn Pink
PWKW002.BROWN* 2⁄3 yard (0.61m)
PWKW002.PINK 1⁄8 yard (0.11m)
PWKW003.BLUE 1⁄4 yard (0.23m)
PWKW003.PURPLE 1⁄4 yard (0.23m)
PWKW003.VIOLET 5⁄8 yard (0.57m)
PWKW005.AQUA 35⁄8 yards (3.31m)
PWKW005.PINK 5⁄8 yard (0.57m)
PWKW007.COBALT 5⁄8 yard (0.57m)
PWKW007.PINK 1⁄2 yard (0.46m)
PWKW009.BLACK 5⁄8 yard (0.57m)
PWKW009.BLUE 1⁄8 yard (0.11m)
PWKW010.COBALT 1⁄2 yard (0.46m)
Twinkle Quilt
PWKW002.PINK 45⁄8 yards (4.23m) OR 108" (2.74m) wide
Artichoke Lavender
Additional Recommendations
• 100% cotton thread in colors to match
• 81" x 81" (2.06m x 2.06m) batting
• Long rotary cutting ruler with 45° mark
• Spray starch or starch alternative
QBKW001.LAVENDER 23⁄8 yards (2.17m)
Cutting
WOF = Width of Fabric
Tip: Press all fabrics for strip sets (Fabrics B-E and G-L) in advance with spray starch and let dry before cutting. This will help stabilize edges to be cut on the bias so as to avoid stretching or distortion of the star points.
Fabric A, cut:
(8) 21⁄2" x WOF for binding
Fabrics B and K, cut from each: (1) 3" x WOF
Fabrics C and D, cut from each: (2) 3" x WOF
Fabrics E and J, cut from each: (6) 3" x WOF
Fabric F, cut:
(1) 32" x WOF; subcut
(1) 32" square, then cut in half diagonally twice (4) 22" x WOF; subcut (4) 22" squares
Fabrics G and H, cut from each fabric: (5) 3" x WOF
Fabrics I and L, cut from each: (4) 3" x WOF
Twinkle Quilt
Instructions
Note: Use a 1⁄4" seam allowance throughout. Sew all pieces with right sides together and raw edges even using matching thread. Press as directed or if you prefer, press open to reduce bulk.
Strip Set Construction
1. Stitch (6) 3" x WOF strips together in the order shown, offsetting the left-hand edge by 21⁄2" with each new strip added. Press seams down towards Fabric K. Fig. 1
1
2. Using a long rotary cutting ruler, align the 45° line with the bottom of the strip set, or a seam line. Make sure to place the ruler so that there are no gaps between the strips. Trim the left-hand edge of the strip set, removing all seam allowances. Fig. 2
Fig. 2
Fig.
3. Align the 45° line with the bottom of the strip set, or a seam line, and with the ruler covering 3" of the left-hand edge of the strip set, cut a 3"-wide strip for ROW 1. Cut a total of (8) ROW 1. Handle carefully to avoid stretching or distorting the bias edges. Fig. 3
Fig. 3
4. In the same manner, make a strip set for each of Rows 2-6 using the fabric shown. Press seams of odd numbered rows down and seams of even numbered rows up. Cut (8) each Rows 2-6. Fig. 4
Fig. 4
Twinkle Quilt
5. Arrange 1 each Rows 1-6 as shown to make a star point. Note: When sewing rows together, the ends of the rows will need to be offset so the seam starts and stops 1⁄4" from the edge of the fabrics, as shown in Figure 5. Pin seams as needed to get them to match at 1⁄4" from the edge of the fabrics, and at the seam intersections. Stitch rows together to make a Star Point. Remember that 2 sides of the outer edges are on the bias, so handle gently to avoid stretching or distorting. Make 8.
Fig. 5 Fig. 6
5
6
Fig.
Fig.
6. With the Fabric K diamond in the center, sew the Star Points into sets of (2), again pinning to match seam intersections. Sew into sets of (4), then sew those together to complete the Star. Press all seams in the same direction. Fig. 7
Fig. 7
Quilt Top Assembly
Y-Seam Method
Twinkle Quilt
Y-seams will be needed to sew Fabric F background squares and triangles to the star points. As shown in diagram, arrange an F square right sides together on a star point as shown. Stitch, from the inside edge, starting 1⁄4" from the edge of the square. The square may extend past the star point. Pivot fabrics so the next side of the square is aligned with the next star point. In the same manner, stitch to star point making sure only the two layers are stitched in the seams. Fig. 8
7. Noting Quilt Layout diagram (page 6) and referring to the Y-Seam method above, sew 4 Fabric F squares to the corners of the star. Note: Fabric F squares and triangles are cut slightly larger than needed and will be trimmed. Press seams toward the Fabric F background squares.
8. Add Fabric F triangles to the sides of the star. Press seams toward the Fabric F background triangles.
9. Trim the quilt top to square up by trimming 1⁄4" away from the outer star points (approximately 73" x 73").
Fig. 8
Finishing
10. Sew together all the 21⁄2" Fabric A binding strips end-toend using diagonal seams. Press the seams open. Press the binding strip in half wrong sides together.
11. Layer the backing (wrong side up), batting, and quilt top (right side up). Baste the layers together and quilt or tie as desired. Trim excess batting and backing even with the quilt top after quilting is completed.
12. Leaving an 8" tail of binding, sew binding to top of quilt through all layers matching all raw edges. Miter corners. Stop approximately 12" from where you started. Lay both loose ends of binding flat along quilt edge. Where these two loose ends meet, fold them back on themselves and press to form a crease. Using this crease as your stitching line, sew the two open ends of the binding together right sides together. Trim seam to 1⁄4" and press open. Finish sewing binding to quilt.
13. Turn the binding to the back of the quilt and hand stitch in place.