
Featuring collections from FreeSpirit Fabrics that are currently in shops or are coming soon!


Featuring collections from FreeSpirit Fabrics that are currently in shops or are coming soon!


Featuring Bloomology by Monika Forsberg for Conservatory Craft
Collection: Bloomology by Monika Forsberg for Conservatory Craft
Technique: Pieced
Skill Level: Advanced Beginner
Finished Sizes:
Finished Size: 70" x 70" (1.78m x 1.78m)
Finished Block Size: 12" x 12" (30.48cm x 30.48cm)
All possible care has been taken to ensure the accuracy of this pattern. We are not responsible for printing errors or the manner in which individual work varies. Please read the instructions carefully before starting this project. If kitting, it is recommended a sample is made to confirm accuracy.
Project designed by Anna Maria | Tech edited by Alison M. Schmidt
DESIGN COLOR ITEM ID YARDAGE
(A) Breeze Guava PWMF033.GUAVA 13⁄4 yards (1.60m)
(B) Spangled Groovy PWMF034.GROOVY* 17⁄8 yards (1.71m)
(C) Hydrangeas Magenta PWMF038.MAGENTA 1 yard (0.91m)
(D) Hydrangeas Jade PWMF038.JADE 3⁄4 yard (0.69m)
(E) Mosaic Primary PWMF032.PRIMARY 3⁄4 yard (0.69m)
(F) Dizzy Grass PWMF036.GRASS 3⁄4 yard (0.69m)
(G) Dizzy Plum PWMF036.PLUM 3⁄4 yard (0.69m)
(H) Headdress Navy PWMF035.NAVY 3⁄4 yard (0.69m)
(I) Mosaic Secondary PWMF032.SECONDARY 3⁄4 yard (0.69m)
(J) Spangled Blue PWMF034.BLUE 5⁄8 yard (0.57m)
(K) In Town Sky PWAH158.SKY 3⁄8 yard (0.34m)
(L) Breeze Neapolitan PWMF033.NEAPOLITAN 1⁄2 yard (0.46m)
(M) Headdress Tangerine PWMF035.TANGERINE 1⁄2 yard (0.46m)
(N) Cathedral Golden PWAH202.GOLDEN 3⁄8 yard (0.34m)
(O) Lace Mango PWAH132.MANGO 1⁄4 yard (0.23m)
(P) Cameo Maple PWMF037.MAPLE 3⁄8 yard (0.34m)
(Q) Cameo Maize PWMF037.MAIZE 3⁄8 yard (0.34m)
(R) Lace Sweet PWAH132.SWEET 3⁄8 yard (0.34m)
* includes binding
Backing (Purchased Separately)
44" (1.12m) wide
Hydrangeas Jade PWMF038.JADE 41⁄2 yards (4.11m)
OR 108" (2.74m) wide
Delphinium Jewel QBAH004.JEWEL 21⁄4 yards (2.06m)


• 100% cotton thread in colors to match
• 78” x 78” (1.98m x 1.98m) batting
• Spray starch/starch alternative (optional)
Cutting
WOF = Width of Fabric
Note: Label cut pieces with fabric letter identifier for easier construction.
Fabric A, fussy cut:
(8) 4" x WOF for outer borders, centered on the intertwining leaf stem motifs
Fabric B, cut:
(2) 61⁄2" x WOF; subcut
(16) 31⁄2" x 61⁄2" rectangles
(1) 37⁄8" x WOF; subcut
(8) 37⁄8" squares
(8) 21⁄2" x WOF for binding
(7) 2" x WOF for inner borders
Fabric C, fussy cut:
(12) 61⁄2" squares, centered on a flower motif
Fabric D, fussy cut:
(1) 9" on-point square, centered on a flower motif
(4) 61⁄2" squares, centered on a flower motif
Fabric E, cut:
(1) 67⁄8" x WOF; subcut
(2) 67⁄8" squares
(3) 31⁄2" x WOF; subcut (32) 31⁄2" squares
Fabrics F and G, cut from each:
(2) 37⁄8" x WOF; subcut
(16) 37⁄8" squares
(3) 31⁄2" x WOF; subcut
(32) 31⁄2" squares
Fabric H, cut:
(3) 61⁄2" x WOF; subcut (32) 31⁄2" x 61⁄2" rectangles
Fabric I, cut:
(6) 31⁄2" x WOF; subcut (64) 31⁄2" squares
Fabric J, cut:
(2) 61⁄2" x WOF; subcut
(16) 31⁄2" x 61⁄2" rectangles
(1) 37⁄8" x WOF; subcut (8) 37⁄8"squares
Fabric K, cut:
(3) 37⁄8" x WOF; subcut (22) 37⁄8" squares
Fabric L and M, cut from each:
(2) 61⁄2" x WOF; subcut (16) 31⁄2" x 61⁄2" rectangles
Fabric N, cut:
(3) 31⁄2" x WOF; subcut (32) 31⁄2" squares
Fabric O, cut:
(1) 37⁄8" x WOF; subcut
(10) 37⁄8" squares
Fabric P and Q, fussy cut from each:
(4) 61⁄2" squares, centered on a right-reading column of floral motifs
Fabric R, cut:
(2) 37⁄8" x WOF; subcut
(16) 37⁄8" squares
Instructions
Note: All seam allowances are 1⁄4" (.64cm) unless otherwise noted. Sew pieces right sides together. Press seam allowances open unless otherwise indicated.
1. Place each Fabric E 67⁄8" square so the motifs are right-reading, as shown by the arrows in the Fabric E cutting diagram. Cut each square in half once diagonally, from corner to corner, in opposite direction as shown to yield (4) triangles.
2. Draw a diagonal line from corner to corner on the wrong side of (16) 37⁄8" Fabric K squares. Place a marked square right sides together with a 37⁄8" Fabric R square. Sew 1⁄4" away from each side of the marked line (Fig. 2). Cut along the marked line to make (2) K/R HST (half-square triangle) units. Press. Make a total of (32) K/R HST units.
Fig. 2
Fig. 2
K R K R
Fabric E cutting diagram
Fabric E Cutting Diagram E
Arrange (1) 9" Fabric D on-point square and (4) Fabric E triangles as shown, so the prints are right-reading, following the arrows (Fig. 1). Center and sew the long edge of one triangle to one side of the on-point square. Center and sew the long edge of another triangle to the opposite side of the square. Press. Repeat with the remaining two triangles to complete the Center Block. If needed, trim to square up to 121⁄2" x 121⁄2".
K/R
HST Unit Make 32.
3. Repeat step 2, using the fabric combinations indicated below to make HST units in the indicated quantities (Fig. 3). Fig. 3
4. Draw a diagonal line from corner to corner on the wrong side of (64) 31⁄2" Fabric I squares. Noting the orientation of the marked line, place one marked square right sides together on one end of a 31⁄2" x 61⁄2" Fabric H rectangle. Sew on the marked line. Trim the excess corner fabric, leaving a 1⁄4" seam allowance. Press the triangle corner open. Repeat to sew a second triangle to the opposite end of the rectangle (Fig. 4a). If you would like to follow the directional print orientation shown in the finished quilt for Fabrics H and M, first arrange the rectangles as shown by the arrows (Fig. 4b), then place the marked squares and sew 1 of each orientation per set of 4. Make a total of (32) H/I Flying Geese units.
Fig. 4a
Fig. 4a
H/I Flying Geese Unit Make 32.
Fig. 4b
Directional print center fabric Make 1 of each orientation per set of 4.
5. Repeat step 4, using the fabric combinations indicated below to make Flying Geese units in the indicated quantities (Fig. 5).
Fig. 5
Fig. 5
M/N Flying Geese Unit Make 16.
L/F Flying Geese Unit Make 16.
J/E Flying Geese Unit Make 16.
B/G Flying Geese Unit Make 16.
6. Arrange (4) K/R HST units, (4) M/N Flying Geese units, and (1) fussycut Fabric Q square in (3) rows of (3) elements each, as shown, making sure the fussy-cut square is right-reading (Fig. 6). Sew the elements in each row together along adjacent edges. Press. Matching seam lines, sew the rows together along adjacent edges. Press. Make (4) identical blocks.
7. Repeat step 6, using the fabric combinations indicated below to make blocks in the indicated quantities (Fig. 7). Note the varied placement of the single J/O HST unit in the final 4 blocks.
Note: Follow the Quilt Layout diagram (page 7) while assembling the quilt. Press seam allowances towards the Sashing Strips. Measure the Quilt Center width and height before cutting and adding borders and adjust border measurements if necessary to match your measurements.
8. Referring to the Quilt Layout diagram (page 7) for block placement and orientation, arrange the blocks into (5) rows of (5) blocks each. Sew the blocks into rows, pressing seam allowances in each row in the same direction, and alternating direction from row to row. Sew the rows together, nesting seam allowances, to complete the quilt center. Press.
9. Sew the 2" x WOF Fabric B strips together end to end. Press. Cut 2 inner side borders, 2" x 601⁄2", and 2 inner top/bottom borders, 2" x 631⁄2". Sew the side borders to the left and right sides of the quilt center. Press the seam allowances toward the borders. Sew one top/ bottom border to the upper edge and the other to the lower edge of the quilt center. Press the seam allowances toward the borders.
10. Sew the fussy-cut 4" x WOF Fabric A strips together end to end. Press. Cut 2 outer side borders, 4" x 631⁄2", and 2 outer top/bottom borders, 4" x 701⁄2". Sew the side borders to the left and right sides of the quilt center. Press the seam allowances toward the outer borders. Sew one outer top/bottom border to the upper edge and the other to the lower edge of the quilt top. Press the seam allowances toward the outer borders.
11. Sew together the (8) 21⁄2" x WOF Fabric B binding strips end to end using diagonal seams. Press the seams open. Press the binding strip in half wrong sides together.
12. Layer the backing (wrong side up), batting, and quilt top (right side up). Baste the layers together and quilt as desired. Trim excess batting and backing even with the quilt top after quilting is completed.
13. Leaving an 8" tail of binding, sew binding to top of quilt through all layers matching all raw edges. Miter corners. Stop approximately 12" from where you started. Lay both loose ends of binding flat along quilt edge. Where these two loose ends meet, fold them back on themselves and press to form a crease. Using this crease as your stitching line, sew the two open ends of the binding together right sides together. Trim seam to 1⁄4" and press open. Finish sewing binding to quilt.

Featuring Garden by Martha Negley
Bringing a lovely garden into your home to enjoy is easier than you think. The prints in this stunning collection of vibrant florals and vegetables are appropriately framed by a twig stripe and can be enjoyed year-round.
Collection: Garden by Martha Negley
Technique: Template Pieced
Skill Level: Intermediate
Finished Project Size:
Finished Sizes:
56” x 69” (1.42m x 1.75m)
Finished Diamond Size: 7” x 10” (17.78cm x 25.40cm)
All possible care has been taken to ensure the accuracy of this pattern. We are not responsible for printing errors or the manner in which individual work varies. Please read the instructions carefully before starting this project. If kitting, it is recommended a sample is made to confirm accuracy.
Project designed by Susan Guzman-recolored by FreeSpirit Fabrics | Tech edited by Alison M. Schmidt
Fabric Requirements
DESIGN COLOR ITEM ID YARDAGE
(A) Zinnia Toss PINK PWMN034.PINK 5⁄8 yard (0.57m)
(B) Sweet Pea TEAL PWMN031.TEAL 3⁄4 yard (0.69m)
(C) Giant Zinnia PINK PWMN029.PINK 3⁄4 yard (0.69m)
(D) Garden Veggies GOLD PWMN028.GOLD 3⁄4 yard (0.69m)
(E) Garden Veggies AQUA PWMN028.AQUA 3⁄4 yard (0.69m)
(F) Veggie Dot GOLD PWMN033.GOLD 3⁄4 yard (0.69m)
(G) Twig Stripe NATURAL PWMN032.NATURAL* 3 yards (2.74m)
(H) Veggie Dot BLUE PWMN033.BLUE 5⁄8 yard (0.57m)
* includes binding
Backing (Purchased Separately)
44” (1.12m) wide
Giant Zinnia PINK PWMN029.PINK 43⁄8 yards (4.00m)
OR 108” (2.74m) wide 2 yards (1.83m)
Additional Recommendations
• 100% cotton thread in colors to match
• Template plastic
• Sharp pencil, pen, or thin-line marker
• Awl or thick needle
• Spray starch or starch alternative
• 64” x 77” (1.62m x 1.95m) batting



Trace template pieces onto template plastic and trim. Label each template piece with match points, grain line markings, and template piece numbers. Use an awl or thick needle to pierce the plastic template pieces through the center of each match point to allow for marking match points onto the wrong side of each fabric piece. Align match points when sewing the fabric shapes together.
Cutting
WOF = Width of Fabric
LOF = Length of Fabric
r = reverse template before tracing it onto the fabric (refer to quilt image (page 1) for orientation). You have enough fabric to cut all pieces for this quilt. Trace all templates onto fabric before cutting.
Tips:
• Press fabrics with spray starch or starch alternative and let dry before marking and cutting. Cut pieces will have bias edges so handle carefully to avoid stretching or distorting.
• If you follow the LOF grainline on the template for Piece 7, it will have the twig stripe oriention shown in the quilt image on page 1, but it will also have bias on all 4 sides. If you prefer a more stable piece, cut straightof-grain fabric strips the width of the template piece (measured across 2 parallel sides), then use the template to cut pieces from the strips so 2 sides are on the straight of grain.
Fabric A, cut:
(8) Piece 5
Fabric B, cut: (11) Piece 5
Fabric C, cut: (10) Piece 5
Fabric D, cut: (13) Piece 5
Fabric E, cut:
(11) Piece 5
Fabric F, cut:
(11) Piece 5
From Fabric G, cut, referring to the cutting diagrams at right:
(1) piece 70" by WOF, and from this piece, subcut:
(4) 21⁄2" x LOF strips for binding
From remaining WOF, cut:
(34) WOF strips the shorter dimension of Template 2/2r (approx. 15⁄8" high), then sub-cut
(84) each Piece 2 and 2r
(12) Piece 1
(14) Piece 3
(71) Piece 7
From remaining yardage, cut
(5) each Piece 4 and 4r
(6) each Piece 6 and 6r
(2) each Piece 8 and 8r
Fabric H, cut:
(8) Piece 5
Fabric G
1a


Instructions
Notes:
• All seam allowances are 1⁄4" (0.64cm). Sew fabrics with right sides together.
• Refer to the Quilt Layout diagram (page 5) for the following steps. Align match points when sewing the fabric pieces together.
1. Referring to the upper left corner of the Quilt Layout, arrange and sew together each of the 13 diagonal sashing rows using Fabric G Pieces 1, 2, 3, and 7. Press seam allowances towards the Piece 2’s. Set the rows aside in the order you made them.
2. In the same manner, arrange and sew together each of the 12 diagonal largediamond rows using Piece 5’s ( Fabrics A - F, H and I ), Pieces 2r, 4, 4r, 6, and 6r (all Fabric G ), as shown or with your own preferred arrangement of large diamond fabrics. Press seam allowances towards the Piece 2r’s.
3. Aligning match points, pin and sew sashing row 1 to large-diamond row 1; press toward sashing row. Continue pinning and sewing alternating sashing and large-diamond rows together; press toward sashing rows. Sew all the pairs together. Sew Fabric G, Piece 8’s and 8r’s, to the corners of the quilt top and press toward sashing strips to finish.
4. Layer the backing, batting, and quilt top together to make a quilt sandwich; baste the layers together and quilt as desired. Trim the batting and backing even with the quilt top.
5. Make Fabric G binding. Fold the binding in half, matching wrong sides, and press the length.
6. Sew the binding to the quilt top and miter the corners. Turn the binding to the back of the quilt and hand-stitch in place to finish your quilt.

Bountiful Garden Piece 8/8r
Large Quarter-Diamond
Piece 7
Piece 1
Piece 2/2r Bountiful GardenSashing
Piece 3
to right side of LOF LOF
This square should measure 1" x 1" (2.54cm x 2.54cm) when printed.
large horizontal half-diamond LOF
Large Horizontal Half-Diamond
Bountiful Garden Piece 6/6r
This square should measure 1" x 1" (2.54cm x 2.54cm)
printed.
bottom of large vertical half-diamond
Piece 4/4rattach to
Large Vertical Half-Diamond
Bountiful Garden Piece 4/4r
This square should measure 1" x 1" (2.54cm x 2.54cm)
bottom of large diamond
Piece 5attach to
Large Diamond
Bountiful Garden Piece 5
straight of grain
diamond
right side of large
Piece 5attach to

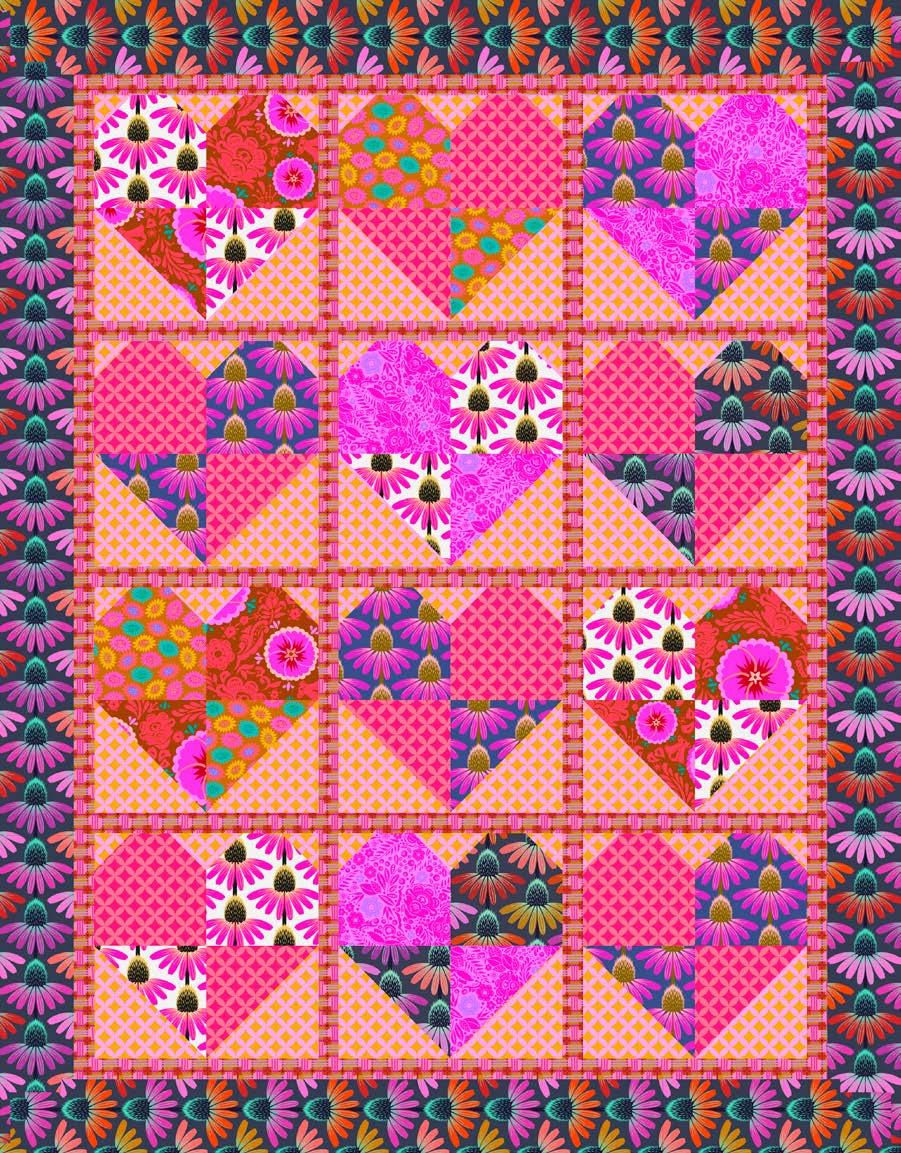
Featuring Love Always, AM by Anna Maria
Collection: Love Always, AM by Anna Maria
Technique: Pieced
Skill Level: Advanced Beginner
Finished Sizes:
Finished Size of Quilt: 443⁄4" x 57 1 ⁄4" (1.14m x 1.45m)
Finished Size of Block: 111⁄2" (29.21cm) square
All possible care has been taken to assure the accuracy of this pattern. We are not responsible for printing errors or the manner in which individual work varies. Please read the instructions carefully before starting this project. If kitting, it is recommended a sample is made to confirm accuracy.
Project designed by FreeSpirit Fabrics | Tech edited by Alison M. Schmidt
Fabric Requirements
DESIGN COLOR ITEM ID YARDAGE
(A) Echinacea Glow Algae PWAH149.ALGAE 1⁄2 yard (0.46m)
(B) In Town Fresh PWAH158.FRESH 1⁄4 yard (0.23m)
(C) Picky Blue PWAH159.BLUE 1⁄4 yard (0.23m)
(D) Lace Cobalt PWAH132.COBALT 1⁄2 yard (0.46m)
(E) Echinacea Grape PWAH075.GRAPE 1⁄2 yard (0.46m)
(F) Cathedral Jade PWAH202.JADE 1⁄4 yard (0.23m)
(G) Echinacea Glow Amethyst PWAH149.AMETHYST* 21⁄8 yards (1.94m)
(H) In Town Sky PWAH158.SKY 1 yard (0.91m)
(I) Cathedral Ocean PWAH202.OCEAN 5⁄8 yard (0.57m)
* includes binding
Backing (Purchased Separately)
44" (1.12m) wide
Cathedral Multi Blue PWAH203.BLUE 31⁄8 yards (2.86m)
OR 108" (2.74m) wide 2 yards (1.83m)
Additional Recommendations
• 100% cotton thread in colors to match
• 53" x 65" (1.35m x 1.65m) batting





Cutting
WOF = Width of Fabric
Fabrics A and E, cut from each:
(2) 61⁄4" x WOF; sub-cut (8) 61⁄4" squares
Fabrics B and F, cut from each:
(1) 61⁄4" x WOF; sub-cut (6) 61⁄4" squares
Fabric C, cut:
(1) 61⁄4 x WOF; sub-cut (4) 61⁄4" squares
Fabric D, cut:
(2) 61⁄4" x WOF; sub-cut (12) 61⁄4" squares
Fabric G, cut:
(1) 61⁄4" x WOF; sub-cut (4) 61⁄4" squares
(6) 21⁄2" x WOF for binding
From remaining fabric, fussy cut 4 strips 35⁄8" x length of fabric for Border 2, each centered on a line of flower heads.
Fabric H, cut:
(4) 61⁄4" x WOF; sub-cut (24) 61⁄4" squares
(3) 23⁄8" x WOF; sub-cut (48) 23⁄8" squares
Fabric I, cut:
(11) 11⁄2" x WOF; sub-cut
(3) 11⁄2" x 37" for row sashing
(8) 11⁄2" x 12" rectangles for block sashing Reserve remainder for Border 1
Note: All seam allowances are 1⁄4" (.64cm) unless otherwise noted. Sew pieces right sides together. Press seam allowances open unless otherwise indicated.
1. Draw a diagonal line from corner to corner on the wrong side of each 2 3⁄ 8" Fabric H square.
2. Place one marked square right sides together in the upper right corner of a 61⁄4" Fabric A square, aligning two outer edges, as shown, and keeping directional prints oriented rightreading if desired. Sew along the marked line. Trim the excess corner fabric, leaving a 1⁄4" seam allowance (Fig. 1). Press the seam allowance toward the Fabric H square.
3. Repeat step 2 to add a second Fabric H square to the upper left corner of the Fabric A square (Fig. 2). Trim the excess corner fabric, leaving a 1⁄4" seam allowance and press the seam allowance toward the Fabric A square. Make a total of (4) of Unit 1 using Fabric A.
4. Repeat steps 2 and 3 to make additional units in the fabrics and quantities shown below (Fig. 3). Note that Fabrics E and G are directional. Refer to the quilt image to orient the fabric before sewing.
Fig. 3
Fig. 3
5. Draw a diagonal line from corner to corner on the wrong side of each 6 1⁄4" Fabric H square.
6. Place one marked 61⁄4" Fabric H square right sides together with a 61⁄4" Fabric A square, aligning the outer edges, and keeping directional prints oriented right-reading if desired. Sew along the marked line. Trim the excess fabric below the seam, leaving a 1⁄4" seam allowance (Fig. 4) to make a Unit 2. Press. Make a total of (4) of Unit 2 using Fabric A.
7. Repeat step 6 to make additional units in the fabrics and quantities shown below (Fig. 5).
Fig. 5
8. Referring to the quilt image for fabric placement, arrange (2) each of units 1 and 2 in two rows as shown. Sew the units in each row together along adjacent edges. Press the seams in each row in opposite directions. Sew the rows together to make a block. Press. Make a total of (12) blocks.
9. Referring to the Quilt Layout (page 6) for fabric placement, arrange the blocks and 11⁄2" x 12" Fabric I block sashing rectangles in (4) rows of (3) blocks and (2) sashing rectangles each. Sew the blocks and rectangles together along adjacent edges. Press the seam allowances toward the sashing rectangles.
10. Place a 1 1⁄ 2" x 37" Fabric I row sashing between each row of blocks. Sew the block rows and row sashings together along adjacent edges. Press the seam allowances toward the sashing rows.
11. Sew the reserved Fabric I Border 1 strips together end to end. Press. Cut (2) 11⁄2" x 491⁄2" Border 1 side borders, and (2) 11⁄2" x 39" Border 1 top/bottom borders. Sew one side border to each side of the quilt center. Press the seam allowances toward the borders. Sew one top/bottom border to the top, and the other to the bottom of the quilt center. Press the seam allowances toward the borders.
12. Meaure the quilt top vertically through the center. Trim 2 of the 35⁄8" x LOF Fabric G strips to fit (511⁄2" long). Sew one side border to each side of the quilt center. Press the seam allowances toward the outer borders. Repeat to measure horizontally, trim, and sew one top/bottom border to the top, and the other to the bottom of the quilt center to complete the quilt top. Press the seam allowances toward the outer borders.
13. Sew together the (6) 21⁄2" x WOF (6.35cm x WOF) Fabric G binding strips end to end using diagonal seams. Press the seams open. Press the binding strip in half wrong sides together.
14. Layer the backing (wrong side up), batting, and quilt top (right side up). Baste the layers together and quilt as desired. Trim excess batting and backing even with the quilt top after quilting is completed.
15. Leaving an 8" (20.32cm) tail of binding, sew binding to top of quilt through all layers matching all raw edges. Miter corners. Stop approximately 12" (30.48cm) from where you started. Lay both loose ends of binding flat along quilt edge. Where these two loose ends meet, fold them back on themselves and press to form a crease. Using this crease as your stitching line, sew the two open ends of the binding together right sides together. Trim seam to ¼" (.64cm) and press open. Finish sewing binding to quilt.
16. Turn the binding to the back of the quilt and hand stitch in place.
Featuring Love Always, AM by Anna Maria
Collection: Love Always, AM by Anna Maria
Technique: Pieced
Skill Level: Advanced Beginner
Finished Sizes:
Finished Size of Quilt: 443⁄4" x 57 1 ⁄4" (1.14m x 1.45m)
Finished Size of Block: 111⁄2" (29.21cm) square
All possible care has been taken to assure the accuracy of this pattern. We are not responsible for printing errors or the manner in which individual work varies. Please read the instructions carefully before starting this project. If kitting, it is recommended a sample is made to confirm accuracy.
Project designed by FreeSpirit Fabrics | Tech edited by Alison M. Schmidt
Fabric Requirements
DESIGN COLOR ITEM ID YARDAGE
(A) Echinacea TRUE PWAH075.TRUE 1⁄2 yard (0.46m)
(B) Fortune TOFFEE PWAH087.TOFFEE 1⁄4 yard (0.23m)
(C) Picky GOLD PWAH159.GOLD 1⁄4 yard (0.23m)
(D) Cathedral CORAL PWAH202.CORAL 1⁄2 yard (0.46m)
(E) Echinacea HAUTE PWAH075.HAUTE 1⁄2 yard (0.46m)
(F) Lace SWEET PWAH132.SWEET 1⁄4 yard (0.23m)
(G) Echinacea Glow GLOW PWAH149.GLOW* 21⁄8 yards (1.94m)
(H) Cathedral GOLDEN PWAH202.GOLDEN 1 yard (0.91m)
(I) In Town SWEET PWAH158.SWEET 5⁄8 yard (0.57m)
* includes binding
Backing (Purchased Separately)
44" (1.12m) wide
Cathedral Multi PINK PWAH203.PINK 31⁄8 yards (2.86m)
OR 108" (2.74m) wide 2 yards (1.83m)
Additional Recommendations
• 100% cotton thread in colors to match
• 53" x 65" (1.35m x 1.65m) batting





Cutting
WOF = Width of Fabric
Fabrics A and E, cut from each:
(2) 61⁄4" x WOF; sub-cut (8) 61⁄4" squares
Fabrics B and F, cut from each:
(1) 61⁄4" x WOF; sub-cut (6) 61⁄4" squares
Fabric C, cut:
(1) 61⁄4 x WOF; sub-cut (4) 61⁄4" squares
Fabric D, cut:
(2) 61⁄4" x WOF; sub-cut (12) 61⁄4" squares
Fabric G, cut:
(1) 61⁄4" x WOF; sub-cut (4) 61⁄4" squares
(6) 21⁄2" x WOF for binding
From remaining fabric, fussy cut 4 strips 35⁄8" x length of fabric for Border 2, each centered on a line of flower heads.
Fabric H, cut:
(4) 61⁄4" x WOF; sub-cut (24) 61⁄4" squares
(3) 23⁄8" x WOF; sub-cut (48) 23⁄8" squares
Fabric I, cut:
(11) 11⁄2" x WOF; sub-cut
(3) 11⁄2" x 37" for row sashing
(8) 11⁄2" x 12" rectangles for block sashing Reserve remainder for Border 1
Note: All seam allowances are 1⁄4" (.64cm) unless otherwise noted. Sew pieces right sides together. Press seam allowances open unless otherwise indicated.
1. Draw a diagonal line from corner to corner on the wrong side of each 2 3⁄ 8" Fabric H square.
2. Place one marked square right sides together in the upper right corner of a 61⁄4" Fabric A square, aligning two outer edges, as shown, and keeping directional prints oriented rightreading if desired. Sew along the marked line. Trim the excess corner fabric, leaving a 1⁄4" seam allowance (Fig. 1). Press the seam allowance toward the Fabric H square.
3. Repeat step 2 to add a second Fabric H square to the upper left corner of the Fabric A square (Fig. 2). Trim the excess corner fabric, leaving a 1⁄4" seam allowance and press the seam allowance toward the Fabric A square. Make a total of (4) of Unit 1 using Fabric A.
Unit 1/Fabric A
4. Repeat steps 2 and 3 to make additional units in the fabrics and quantities shown below (Fig. 3). Note that Fabrics E and G are directional. Refer to the quilt image to orient the fabric before sewing.
Fig. 3
Fig. 3
C
D
5. Draw a diagonal line from corner to corner on the wrong side of each 6 1⁄4" Fabric H square.
6. Place one marked 61⁄4" Fabric H square right sides together with a 61⁄4" Fabric A square, aligning the outer edges, and keeping directional prints oriented right-reading if desired. Sew along the marked line. Trim the excess fabric below the seam, leaving a 1⁄4" seam allowance (Fig. 4) to make a Unit 2. Press. Make a total of (4) of Unit 2 using Fabric A.
Fig. 4
7. Repeat step 6 to make additional units in the fabrics and quantities shown below (Fig. 5).
Fig. 5
Fig. 5
B
2/Fabric B Make 3.
8. Referring to the quilt image for fabric placement, arrange (2) each of units 1 and 2 in two rows as shown. Sew the units in each row together along adjacent edges. Press the seams in each row in opposite directions. Sew the rows together to make a block. Press. Make a total of (12) blocks.
9. Referring to the Quilt Layout (page 6) for fabric placement, arrange the blocks and 11⁄2" x 12" Fabric I block sashing rectangles in (4) rows of (3) blocks and (2) sashing rectangles each. Sew the blocks and rectangles together along adjacent edges. Press the seam allowances toward the sashing rectangles.
10. Place a 1 1⁄ 2" x 37" Fabric I row sashing between each row of blocks. Sew the block rows and row sashings together along adjacent edges. Press the seam allowances toward the sashing rows.
11. Sew the reserved Fabric I Border 1 strips together end to end. Press. Cut (2) 11⁄2" x 491⁄2" Border 1 side borders, and (2) 11⁄2" x 39" Border 1 top/bottom borders. Sew one side border to each side of the quilt center. Press the seam allowances toward the borders. Sew one top/bottom border to the top, and the other to the bottom of the quilt center. Press the seam allowances toward the borders.
12. Meaure the quilt top vertically through the center. Trim 2 of the 35⁄8" x LOF Fabric G strips to fit (511⁄2" long). Sew one side border to each side of the quilt center. Press the seam allowances toward the outer borders. Repeat to measure horizontally, trim, and sew one top/bottom border to the top, and the other to the bottom of the quilt center to complete the quilt top. Press the seam allowances toward the outer borders.
13. Sew together the (6) 21⁄2" x WOF (6.35cm x WOF) Fabric G binding strips end to end using diagonal seams. Press the seams open. Press the binding strip in half wrong sides together.
14. Layer the backing (wrong side up), batting, and quilt top (right side up). Baste the layers together and quilt as desired. Trim excess batting and backing even with the quilt top after quilting is completed.
15. Leaving an 8" (20.32cm) tail of binding, sew binding to top of quilt through all layers matching all raw edges. Miter corners. Stop approximately 12" (30.48cm) from where you started. Lay both loose ends of binding flat along quilt edge. Where these two loose ends meet, fold them back on themselves and press to form a crease. Using this crease as your stitching line, sew the two open ends of the binding together right sides together. Trim seam to ¼" (.64cm) and press open. Finish sewing binding to quilt.
16. Turn the binding to the back of the quilt and hand stitch in place.

Featuring Southwold Blue by Sanderson
Collection: Southwold Blue by Sanderson
Technique: Pieced
Skill Level: Advanced Beginner
Finished Sizes:
Finished Size: 60" x 80" (1.52m x 2.03m)
Finished Block Size: 20" x 20" (50.80cm x 50.80cm)
All possible care has been taken to ensure the accuracy of this pattern. We are not responsible for printing errors or the manner in which individual work varies. Please read the instructions carefully before starting this project. If kitting, it is recommended a sample is made to confirm accuracy.
Project designed by Linda and Carl Sullivan | Tech edited by Alison M. Schmidt
Fabric Requirements
DESIGN COLOR ITEM ID YARDAGE
(A) Rose & Peony Medium BLUE PWSA017.BLUE 3⁄4 yard (0.69m)
(B) Porcelain Garden NAVY PWSA057.NAVY* 2 yards (1.83m)
(C) Pillemont Toile WHITE PWSA056.WHITE 1⁄3 yard (0.30m)
(D) Hollyhocks WHITE PWSA022.WHITE 11 4 yards (1.14m)
(E) Chelsea WHITE PWSA002.WHITE 3⁄4 yard (0.69m)
(F) Small Summer Tree SAGE PWSA058.SAGE 2 yards (1.83m)
(G) Pear & Pomegranate WHITE PWSA055.WHITE 1⁄3 yard (0.30m)
(H) Tournier NAVY PWSA059.NAVY 11 4 yards (1.14m)
* includes binding
Backing (Purchased Separately)
44" (1.12m) wide
Rose & Peony Medium BLUE PWSA017.BLUE 5 yards (4.57m) OR 108" (2.74m) wide
Pure Willow Boughs LINEN QBWM008.LINEN 21 4 yards, (2.06m)
Additional Recommendations
• 100% cotton thread in colors to match
• 68" x 88" (1.73m x 2.24m) batting

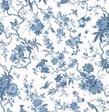


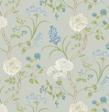
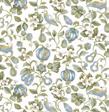


Backing 44"

Backing 108"
Cutting
WOF = Width of Fabric
Fabric A and E, cut from each:
(2) 101⁄2" x WOF; sub-cut (6) 101⁄2" squares
Fabric B:
(2) 6" x WOF; sub-cut (12) 6" squares
(7) 51⁄2" x WOF; sub-cut (48) 51⁄2" squares
(9) 21⁄2" x WOF strips for binding
Fabric C and G, cut from each:
(2) 6" x WOF; sub-cut (12) 6" squares
Fabric D and H, cut from each:
(6)* 51⁄2" x WOF; sub-cut (24) 51⁄2" x 101⁄2"
*You may need to cut additional WOF strips if you are not able to cut 4 rectangles from each strip. There has been enough fabric allowed for this in the fabric requirements.
Fabric F, cut:
(2) 6" x WOF; sub-cut (12) 6" squares
(7) 51⁄2" x WOF; sub-cut (48) 51⁄2" squares
Sewing
Note: All seam allowances are 1 4" (.64cm) and pieces are sewn right sides together. Press after each seam following the arrows or as directed.
Separate the cut fabric pieces into each of the 2 block variations:
Block 1: Blue (Fabrics A, B, C, and D)
Block 2: Green (Fabrics E, F, G and H)
Instructions
1. Mark a diagonal line from corner to corner on the wrong side of all the 6" Fabric B squares (Fig. 1).
Fig. 1
Fig. 1 B
Wrong Side
2. Place a marked Fabric B square on top of a Fabric C square, right sides together. Stitch 1 4" on both sides of the drawn diagonal line (Fig. 2).
Fig. 2 C B
3. Cut apart on the drawn line ( Fig. 3). Press the seams toward the darker fabric to complete 2 B/C HST units.
Fig. 3
Fig. 3 B C B
4. Trim the HST unit to 51⁄2" square, keeping the diagonal seam centered in the corners (Fig. 4).
Fig. 4 B
5. Repeat steps 2-4 to make a total of 24 B/C HST units (Fig. 5).
Fig. 5
Make 24 B/C HST units
6. Mark a diagonal line on the wrong side of all the 51 2" Fabric B squares (Fig. 6).
Fig. 6
Fig. 6 B
Wrong Side
7. Place a marked Fabric B square on top of a Fabric D rectangle as shown, matching the top and side edges. Stitch on the drawn line (Fig. 7). Trim away the excess fabric leaving 1⁄4" seam allowance. Flip open the triangle corner and press towards Fabric B.
Fig. 7
Fig. 7 D
B Wrong Side
8. Repeat step 7 on the opposite side of the rectangle with a second Fabric B square (Fig. 8).
9. Repeat Steps 7 and 8 to make a total of 24 B/D Flying Geese units (Fig. 9).
Fig. 9
Fig. 9 B D
Make 24 B/D Flying Geese units
10. Noting the orientation, follow Figure 1 0 to lay out a Fabric A square with 4 each B/C HST units and B/D Flying Geese units. Sew together in rows, then sew the rows together in order to complete the block. Make a total of 6 of Block 1.
Fig. 10
Fig. 10
Make 6 Block 1 20”
11. Repeat Steps 1-10 using the fabrics indicated in Figure 11 to make a total of 6 of Block 2.
Fig. 11
Fig. 11 F G
Make 24 F/G HST units F H F
Make 24 F/H Flying Geese units
Make 6 Block 2 20”
12. Lay out Blocks 1 and 2 in 4 rows of 3 blocks each as shown in the Quilt Layout diagram.
13. Stitch together the blocks the blocks in each row, matching adjacent seams and pressing seams in alternate directions for adjacent rows.
14. Stitch the rows together in order, matching adjacent seams. Press all seams down.
15. Sew together the 2 1⁄ 2" x WOF Fabric B binding strips end to end using diagonal seams. Press the seams open. Press the binding strip in half wrong sides together.
16. Layer the backing (wrong side up), batting, and quilt top (right side up). Baste the layers together and quilt as desired. Trim excess batting and backing even with the top after quilting is completed.
17. Leaving an 8" (20.32cm) tail of binding, sew binding to top of quilt through all layers matching all raw edges. Miter corners. Stop approximately 12" (30.48cm) from where you started. Lay both loose ends of binding flat along quilt edge. Where these two loose ends meet, fold them back on themselves and press to form a crease. Using this crease as your stitching line, sew the two open ends of the binding together right sides together. Trim seam to 1⁄4" (.64cm) and press open. Finish sewing binding to quilt.
18. Turn the binding to the back of quilt and hand-stitch in place.
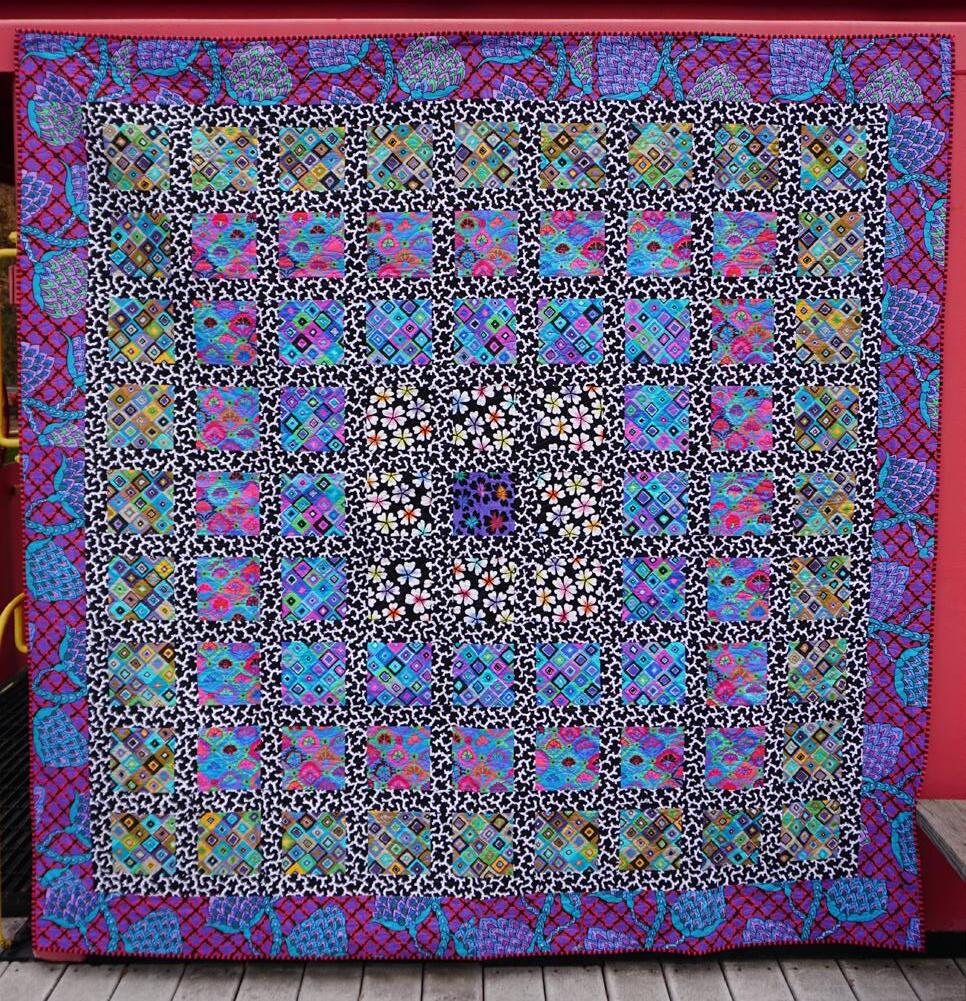
Featuring February 2024 by Kaffe Fassett Collective
Collection: February 2024 by Kaffe Fassett Collective
Technique: Pieced
Skill Level: Advanced Beginner
Finished Size: 86" x 86" (2.18m x 2.18m)
All possible care has been taken to ensure the accuracy of this pattern. We are not responsible for printing errors or the manner in which individual work varies. Please read the instructions carefully before starting this project. If kitting, it is recommended a sample is made to confirm accuracy.
Project designed by Alison M. Schmidt | Tech edited by Alison M. Schmidt
Fabric Requirements
DESIGN COLOR ITEM ID YARDAGE
(A) Paisley Flower Blue PWGP200.BLUE** 12⁄3 yards (1.52m)
(B) Petals Black PWGP201.BLACK 1⁄2 yard (0.46m)
(C) Petals Purple PWGP201.PURPLE 1⁄4 yard (0.23m)
(D) Step Flower Blue PWGP202.BLUE 7⁄8 yard (0.80m)
(E) Square Dance Blue PWGP203.BLUE 2⁄3 yard (0.6m)0
(F) Square Dance Neutral PWGP203.NEUTRAL 11⁄3 yards (1.22m)
(G) Coral Contrast PWPJ004.CONTRAST 25 8 yards (2.40m)
(H) Comb Stripe Rust PWBM084.RUST* 3⁄4 yard (0.69m)
* includes binding
** If fussy-cutting Fabric A for border, increase to 21/4 yards.
Backing (Purchased Separately)
44" (1.12m) wide
Garden Party Contrast PWPJ020.CONTRAST 81⁄8 yards (7.43m)
OR 108" (2.74m) wide
Lotus Leaf Purple QBGP007.PURPLE 23⁄4 yards (2.51m)
Additional Recommendations
• 100% cotton thread in colors to match
• 94" x 94" (2.39m x 2.39m) batting









Cutting
WOF = Width of Fabric
Fabric A, cut: (9)* 61⁄2" x WOF for border
*Cut at least 2 additional WOF strips for a fussycut border (a more advanced option is covered in step 4).
Fabric B, cut: (2)61⁄2" x WOF; subcut (8)61 2" squares
Fabric C, cut: (1)61⁄2" square
Fabric D, cut: (4)61⁄2" x WOF; subcut (24)61⁄2" squares
Fabric E, cut: (3)61⁄2" x WOF; subcut (16)61⁄2" squares
Fabric F, cut: (6)61⁄2" x WOF; subcut (32)61⁄2" squares
Fabric G, cut: (6)61⁄2" x WOF; subcut (90)21⁄2" x 61⁄2" vertical sashing strips (19)21 2" x WOF for horizontal sashing strips
Fabric H, cut: (10)21 2" x WOF for binding
Instructions
Note: Use a 1⁄4" seam allowance throughout. Sew all pieces with right sides together and raw edges even using matching thread. Press after each seam.
Note: Follow the Quilt Layout diagram (page 4) while assembling the quilt. Press seam allowances towards the Sashing Strips. Measure the Quilt Center width and height before cutting and adding borders and adjust border measurements if necessary to match your measurements.
1. Noting the Quilt Layout diagram (page 4), arrange all the 61⁄2" squares and Fabric G 21⁄2" x 61⁄2" vertical sashing strips in 9 rows as shown. Sew the squares and vertical sashing strips into rows, pressing towards Fabric G.
2. Sew together all the Fabric G WOF strips end to end with straight seams. Press open. Cut into (10) 21⁄2" x 741⁄2" horizontal sashing strips.
3. Arrange the rows alternating with the Fabric G horizontal sashing strips as shown and sew together to complete the quilt center. Press towards Fabric G. Quilt center measures 741 2" x 741⁄2" (unfinished).
4. Sew together all the Fabric A WOF strips end to end with straight seams*, making sure to orient all the paisley blooms in the same direction. Press open. Cut 2 top/bottom borders into 861⁄2" long and 2 side borders 741⁄2" long.
*Alternate intermediate-level fussy-cut border method:
Trim 6 WOF strips down so that each short end of the trimmed strip has only the background showing, not any of the large paisley flower blooms. Ideally, just trim away the selvage on the side with the text, and on the opposite side of the yardage, trim off the outermost partial set of blossoms on a vine. Sew 2 sets of 2 trimmed strips together, then add an untrimmed strip to one end of each, noting orientation of the flowers. You may be able to use 1 strip for both with careful cutting. Trim the joined strips to 741 2" to complete the side borders. Repeat the process using 3 trimmed strips each for the top/ bottom 861⁄2" borders.
5. Noting the orientation of the blooms as shown in the finished quilt, sew the Fabric A side borders to right and left sides of quilt center, matching ends and centers, and press towards Fabric A. Repeat to add Fabric A top/bottom borders to the top and bottom of quilt, to complete the quilt top. Quilt top measures 861⁄2" x 861⁄2" (unfinished).
6. Sew together the 2 1⁄ 2" Fabric H binding strips end-to-end using diagonal seams. Press seams open. Press the binding strip in half wrong sides together.
7. Layer backing (wrong side up), batting, and quilt top (right side up). Baste the layers together and quilt as desired. Trim excess batting and backing even with the top after quilting is completed.
8. Leaving an 8" tail of binding, sew the binding to the top of the quilt through all layers matching all raw edges. Miter corners. Stop approximately 12" from where you started. Lay both loose ends of binding flat along quilt edge. Where the loose ends meet, fold them back on themselves and press to form a crease. Using this crease as your stitching line, sew the two open ends of the binding right sides together. Trim seam to 1⁄4" and press open. Finish sewing binding to quilt.
9. Turn the binding to the back of quilt and hand-stitch in place.


Featuring Florescence by Sam Wilde
Collection: Florescence by Sam Wilde
Technique: Pieced
Skill Level: Advanced Beginner
Finished Size: 61 3 1⁄4" x 61 3 1⁄4" (1.56m x 1.56m)
All possible care has been taken to ensure the accuracy of this pattern. We are not responsible for printing errors or the manner in which individual work varies. Please read the instructions carefully before starting this project. If kitting, it is recommended a sample is made to confirm accuracy.
Project designed by Stacey Day | Tech edited by Alison M. Schmidt
Fabric Requirements
DESIGN COLOR ITEM ID YARDAGE
(A) Chrono Corsage Dahlia PWVE016.DAHLIA 3 yards (2.74m)
(B) Hydrangea Hedgerow Small Marigold PWVE019.MARIGOLD 3⁄4 yard (0.69m)
(C) Fragrant Fen Sage PWVE020.SAGE 1⁄2 yard (0.46m)
(D) Vanilla Vineyard Periwinkle PWVE022.PERIWINKLE 1 yard (0.91m)
(E) Tilted Tiles Sunflower PWVE023.SUNFLOWER 3⁄8 yard (0.34m)
(F) Petal Pasture Fuchsia PWVE024.FUCHSIA* 2⁄3 yard (0.6m)1
* includes binding
Backing (Purchased Separately)
44" (1.12m) wide
Marvelous Menagerie Cornflower PWVE017.CORNFLOWER 4 yards (3.66m)
OR 108" (2.74m) wide 2 yards (1.83m)
Additional Recommendations
• 100% cotton thread in colors to match
• 70" x 70" (1.78m x 1.78m) batting
Optional but helpful:
• Spray starch/starch alternative
• 61⁄2" square rotary cutting ruler





Cutting
WOF = Width of Fabric
From Fabric A, fussy cut:
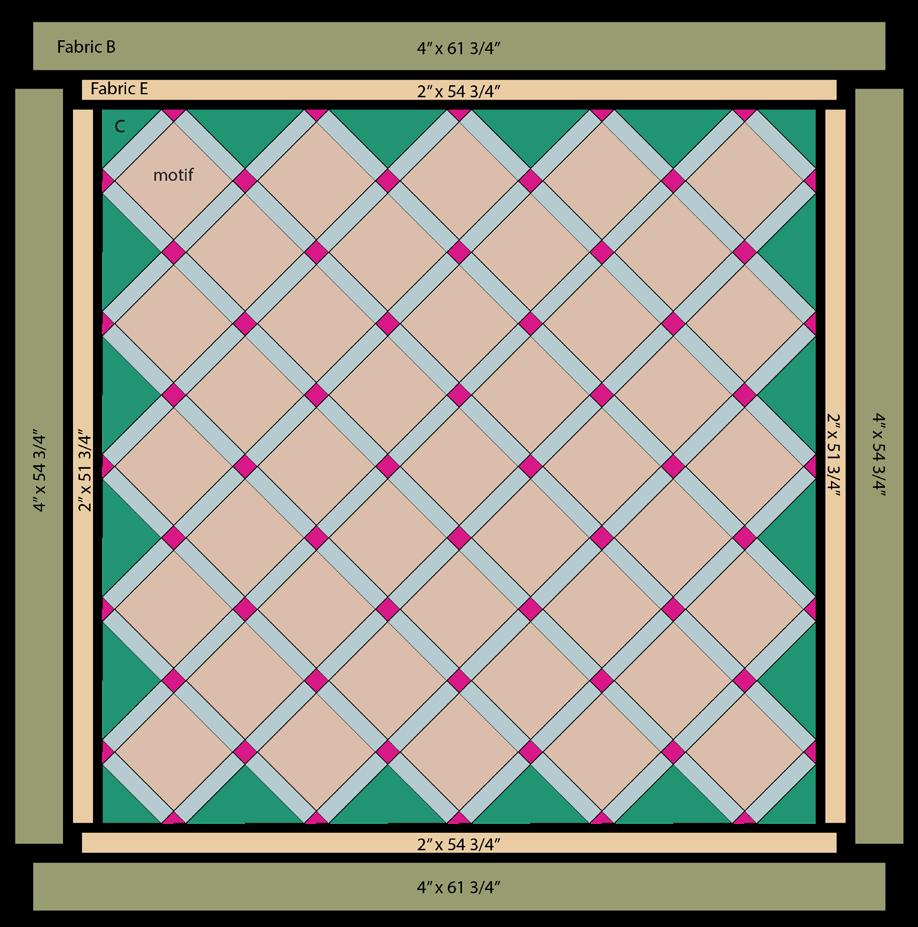
(41) 61⁄2" x 61⁄2" on-point squares, centered on different floral motifs
From Fabric B, cut:
(6) 4" x WOF for outer border
From Fabric C, cut:
(1) 93⁄4" x WOF; cut
(4) 93⁄4" x 93⁄4", cut in half diagonally twice to yield 16 side setting
triangles
(1) 51⁄8" x WOF; cut
(2) 51⁄8" x 51⁄8", cut in half diagonally once to yield 4 corner setting
triangles
Instructions
From Fabric D, cut:
(5) 61⁄2" x WOF; cut
(100) 13⁄4" x 61⁄2" sashing strips
From Fabric E, cut:
(6) 2" x WOF for inner border
From Fabric F, cut:
(3) 13⁄4" x WOF; cut
(60) 13⁄4" x 13⁄4" cornerstones
(7) 21⁄2" x WOF for binding
Note: All seam allowances are 1⁄4" and pieces are sewn right sides together. Press after each seam in the direction listed.
1. Using the Fabric F 13⁄4" x 13⁄4" cornerstones and the Fabric D 13⁄4" x 61⁄2" sashing strips, make 2 each of Sashing Rows 1-5. Press towards Fabric D. Fig.
2. Using a design wall or the floor, lay out the Fabric A 61⁄2" x 61⁄2" squares and remaining Fabric D sashing strips in block rows as shown in Figure 2. Rearrange as needed until you are happy with the distribution of the different floral motifs and take a photograph if you won’t be immediately continuing on to step 3.
3. Stack the Fabric A squares and Fabric D sashing strips in each block row together in order from bottom left to top right to prepare for sewing. Make sure the motif is facing the same direction for all the rows. Maintain the directional orientation for each of the following steps.
4. Sew the blocks and sashing strips together one at a time in order to maintain your chosen block order, to make 9 diagonal rows. Press towards the sashes. Sew a Fabric C 93⁄4" triangle to opposite ends of Rows 1-4 and 6-9, and a Fabric C 51⁄8" triangle to opposite ends of Row 5. Fig. 2, page 4.
Note: Follow the Quilt Layout diagram (page 6) while assembling the quilt. Press seam allowances towards the Sashing Strips. Measure the Quilt Center width and height before cutting and adding borders and adjust border measurements if necessary to match your measurements.
5. Sew the diagonal rows together in order with the corresponding Sashing Row between each. Press towards the sashing rows. Sew the remaining Fabric C 51⁄8" triangles to the top left and bottom right to complete the top.
6. Square up the quilt top, trimming the cornerstones even with the Fabric C triangle edges, to measure 513⁄4" square.
7. Sew the Fabric E 2" x WOF strips together end to end. Cut (2) 2" x 513⁄4 " side inner borders and (2) 2" x 543⁄4" top/bottom inner borders. Sew to the sides, matching ends and center. Press towards the borders, and then add the top/bottom borders to the quilt center in the same manner.
8. Repeat step 6 to make and add the Fabric B outer border strips (sides: 4" x 543⁄4", top/bottom: 4" x 611⁄4") to complete the quilt top.
9. Sew together the 21⁄2" Fabric F binding strips end-to-end using diagonal seams. Press seams open. Press the binding strip in half wrong sides together.
10. Layer backing (wrong side up), batting, and quilt top (right side up). Baste the layers together and quilt as desired. Trim excess batting and backing even with the top after quilting is completed.
11. Leaving an 8" tail of binding, sew the binding to the top of the quilt through all layers matching all raw edges. Miter corners. Stop approximately 12" from where you started. Lay both loose ends of binding flat along quilt edge. Where the loose ends meet, fold them back on themselves and press to form a crease. Using this crease as your stitching line, sew the two open ends of the binding right sides together. Trim seam to 1⁄4" and press open. Finish sewing binding to quilt.
12. Turn the binding to the back of quilt and hand-stitch in place.

Featuring True Colors by Tula Pink
Finished Size: 58" x 100" (1.47m x 2.54m)
Project designed by Rachel Rossi - Rachel Rossi Designs
Purchase pattern at rachelrossi.design
Technique: Pieced and Applique | Skill Level: Intermediate
freespiritfabrics.com
(A) Tiny Dots
Candy PWTP185.CANDY F8
(B) Tiny Dots Thistle PWTP185.THISTLE F8
(C) Tiny Dots Flare PWTP185.FLARE F8
(D) Tiny Dots Watermelon PWTP185.WATERMELON F8
(E) Tiny Dots
Meadow PWTP185.MEADOW F8
(F) Tiny Dots Lilypad PWTP185.LILYPAD F8
(G) Tiny Dots Peacock PWTP185.PEACOCK F8
(H) Tiny Dots Sky PWTP185.SKY F8
(I) Tiny Stripes Mystic PWTP186.MYSTIC F8
(J) Tiny Stripes Sunrise PWTP186.SUNRISE F8
(K) Tiny Stripes Wildfire PWTP186.WILDFIRE F8
(L) Tiny Stripes Moonglow PWTP186.MOONGLOW F8
(M) Tiny Stripes Fern PWTP186.FERN F8
(N) Tiny Stripes
Songbird PWTP186.SONGBIRD F8
(O) Tiny Stripes Clarity PWTP186.CLARITY F8
(P) Hexy Thistle PWTP150.THISTLE F8
(Q) Neon Tent Stripe Cosmic PWTP069.COSMIC F8
(R) Tent Stripe
(S) Tent Stripe
(T) Neon Tent Stripe
Foxglove PWTP069.FOXGL F8
Begonia PWTP069.BEGON F8
Spirit PWTP069.SPIRIT F8
(U) Neon Tent Stripe Aura PWTP069.AURA F8
(V) Wildflower Dahlia PWTP149.DAHLIA F8
(W) Wildflower
Sanpdragon PWTP149.SNAPDRAGON F8
(X) Wildflower Daisy PWTP149.DAISY F8
(Y) Wildflower Spring PWTP149.SPRING F8
(Z) Wildflower Anemone PWTP149.ANEMONE F8
(AA) Wildflower Delphinium PWTP149.DELPHINIUM F8
(AB) Wildflower Hydrangea PWTP149.HYDRANGEA F8
(AC) Pom Pom Poppy PWTP118.POPPY F8
(AD) Pom Pom Marigold PWTP118.MARIG F8
(AE) Neon Pom Pom Karma PWTP118.KARMA F8
(AF) Neon Pom Pom Aura PWTP118.AURA F8
(AG) Hexy Firefish PWTP150.FIREFISH F8
(AH) Mineral Opal PWTP148.OPAL F8
(AI) Tiny Dots Opal PWTP185.OPAL F8
Fabric requirements continued on next page...
If kitting, refer to the final pattern for yardage amounts, it is recommended that a sample is made to confirm accuracy.
freespiritfabrics.com
DESIGN
(AJ) Tiny Stripes
(AK) Fairy Dust
(AL) Fairy Dust
(AM) Hexy Rainbow
(AN) Fairy Dust
(AO) Fairy Flakes
(AP) Designer Essential Solid * includes binding
Backing (Purchased Separately)
44" (1.12m) wide
Deer John
OR
108" (2.74m) wide
Honesty PWTP186.HONESTY F8
Daydream PWTP133.DAYDREAM 1⁄8 yard (0.11m)
Lavender PWTP133.LAVENDER 2⁄3 yard (0.60m)
Ink PWTP151.INK* 11⁄4 yards (1.14m)
White PWTP133.WHITE 21⁄4 yards (2.06m)
Ink PWTP157.INK 3 yards (2.74m
Crush CSFSESS.CRUSH 1⁄8 yard (0.11 m)
Rainbow Hexy XL INK QBTP012.INK 2 yards (1.83m)
Fabric swatches on next page...
If kitting, refer to the final pattern for yardage amounts, it is recommended that a sample is made to confirm accuracy.



















Finished Size: 79" x 79" (2.01m x 2.01m)
Project designed by Carolyn Murfitt - Free Bird Quilting Designs, Re-Colored by FreeSpirit Fabrics
Purchase pattern at freebirdquiltingdesigns.com.au
Technique: Pieced with Paper Templates | Skill Level: Intermediate
freespiritfabrics.com
Featuring In the Pink by Este MacLeod(A) Cosmo
2 yards (1.83m)
(B) Anemones MULTI PWES014.MULTI 11⁄4 yards (1.14m)
(C) Coucal
13⁄4 yards (1.60m)
(D) Peche MULTI PWES016.MULTI 7⁄8 yard (0.80m)
(E) Stella Blue BLUE PWES017.BLUE 7⁄8 yard (0.80m)
(F) Piazze MULTI PWES018.MULTI 11⁄4 yards (1.14m)
(G) Leaf Tumble PINK PWES019.PINK 11⁄4 yards (1.14m)
(H) Dolche PINK PWES020.PINK 11⁄2 yards (1.37m)
(I) Sabah GREEN PWES021.GREEN 7⁄8 yard (0.80m)
(J) Petals GREEN PWES022.GREEN 5⁄8 yard (0.57m)
(K) Silhouette GREEN PWES023.GREEN 5⁄8 yard (0.57m)
(L) Fizzy PINK PWES024.PINK 3⁄8 yard (0.34m)
(M) Designer Essential Solid GLACIER CSFSESS.GLACI* 43⁄4 yards (4.34m)
* includes binding
Backing (Purchased Separately)
44" (1.12m) wide
MULTI
6 yards (5.49m) OR 108" (2.74m) wide 21⁄2 yards (2.29m)







If kitting, refer to the final pattern for yardage amounts, it is recommended that a sample is made to confirm accuracy.
freespiritfabrics.com
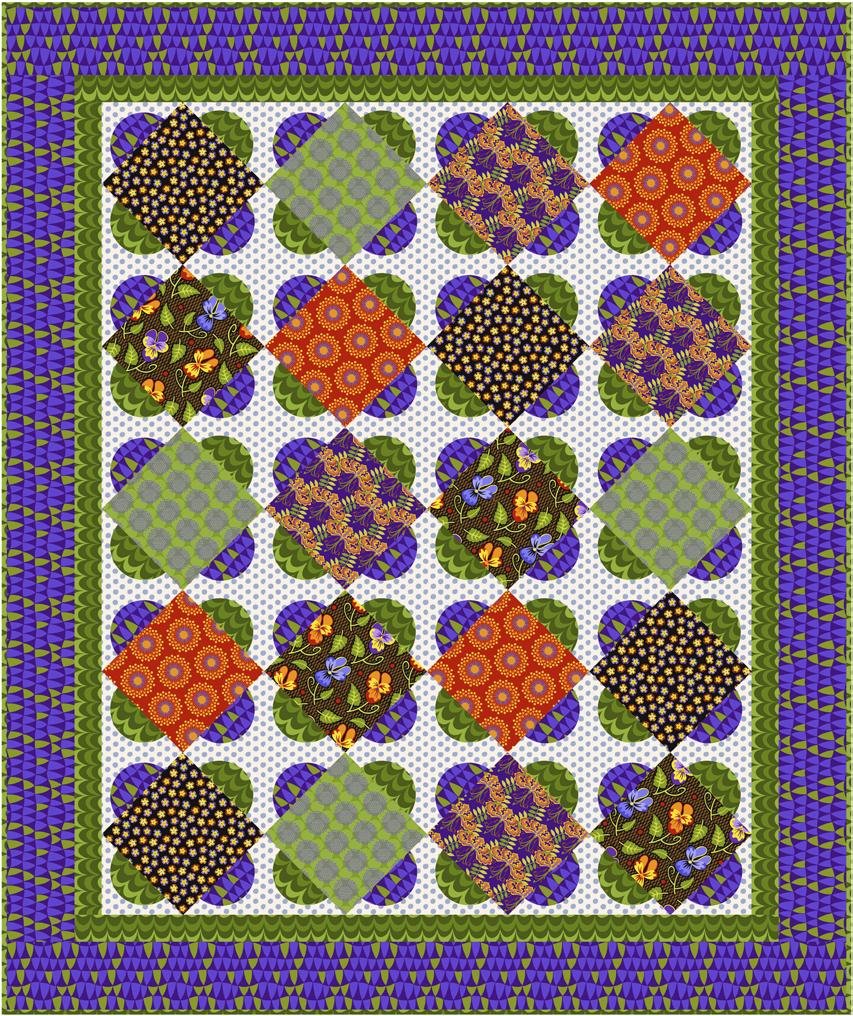
Featuring Gloriosa Garden by Jane Sassaman
Finished Size: 62" x 74" (1.57m x 1.88m)
Project designed by Swirly Girls Design
Purchase pattern at swirlygirlsdesign.com
Technique: Pieced and Applique | Skill Level: Advanced Beginner
freespiritfabrics.com
(A) Double Dots GREEN PWJS151.GREEN 1⁄3 yard (0.30m)
(B) Flower Pop RED PWJS152.RED 1⁄3 yard (0.30m)
(C) Gloriosa Lily PURPLE PWJS153.PURPLE 1⁄3 yard (0.30m)
(D) Johnny Jump Ups BROWN PWJS154.BROWN 1⁄3 yard (0.30m)
(E) Primrose BLACK PWJS157.BLACK 1⁄3 yard (0.30m)
(F) Soft Triangle PURPLE PWJS158.PURPLE 15⁄8 yards (1.49m)
(G) Swag GREEN PWJS159.GREEN* 15⁄8 yards (1.49m)
(H) Spot SKY GP70.SKYXX 13⁄4 yards (1.60m)
* includes binding
Backing (Purchased Separately)
44" (1.12m) wide
Power Flower BROWN PWJS156.BROWN 41⁄4 yards (3.89m) OR 108" (2.74m) wide
Millefiore PASTEL QBGP006.PASTEL 21⁄4 yards (2.06m)


If kitting, refer to the final pattern for yardage amounts, it is recommended that a sample is made to confirm accuracy.
freespiritfabrics.com

Featuring Reflections by Brandon Mably
Finished Size: 60" x 70" (1.52m x 1.78m)
Project designed by Charisma Horton - Charisma’s Corner
Purchase pattern at charismascorner.com
Technique: Pieced | Skill Level: Advanced Beginner
freespiritfabrics.com
DESIGN COLOR
(A) Deco Dark
(B) Reflections Lime
ITEM ID YARDAGE
PWGP199.DARK FQ (45.72cm x 53.34cm)
PWBM087.LIME FQ (45.72cm x 53.34cm)
(C) Reflections Lavender PWBM087.LAVENDER FQ (45.72cm x 53.34cm)
(D) Reflections Moss
(E) Reflections Brown
(F) Reflections Yellow
(G) Reflections Black
(H) Reflections Teal
(I) Reflections Fuchsia
(J) Reflections Green
(K) Reflections Dark
(L) Reflections Putty
PWBM087.MOSS FQ (45.72cm x 53.34cm)
PWBM087.BROWN FQ (45.72cm x 53.34cm)
PWBM087.YELLOW FQ (45.72cm x 53.34cm)
PWBM087.BLACK FQ (45.72cm x 53.34cm)
PWBM087.TEAL* 1 yard (0.91m)
PWBM087.FUCHSIA FQ (45.72cm x 53.34cm)
PWBM087.GREEN FQ (45.72cm x 53.34cm)
PWBM087.DARK FQ (45.72cm x 53.34cm)
PWBM087.PUTTY FQ (45.72cm x 53.34cm)
(M) Reflections Neutral PWBM087.NEUTRAL FQ (45.72cm x 53.34cm)
(N) Reflections Orange
PWBM087.ORANGE FQ (45.72cm x 53.34cm)
(O) Reflections Purple PWBM087.PURPLE FQ (45.72cm x 53.34cm)
(P) Reflections Pastel
PWBM087.PASTEL 21⁄4 yards (2.06m)
(Q) Reflections Red PWBM087.RED FQ (45.72cm x 53.34cm)
(R) Reflections Sky
PWBM087.SKY FQ (45.72cm x 53.34cm)
(S) Reflections Contrast PWBM087.CONTRAST FQ (45.72cm x 53.34cm)
* includes binding
Backing (Purchased Separately)
44" (1.12m) wide
Enchanted Green
PWGP172.GREEN
41⁄4 yards (3.89m) OR
108" (2.74m) wide
Pebble Mosaic Prune


QBBM004.PRUNE 2 yards (1.83m)








freespiritfabrics.com

Featuring Bird Garden by Mia Charro
Finished Size: 461⁄2" x 231⁄2" (1.18m x .60m)
Project designed by Kari Nichols - Quilting Renditions
Purchase pattern at quiltingrenditions.com
Technique: Pieced | Skill Level: Advanced Beginner
(A) Beautiful Birds
(B) Gathering Nest MULTI ROSE
(C) Laida
PWMC061.XMULTI 7⁄8 yard (0.80m)
PWMC064.XROSE 1⁄4 yard (0.23m)
PWMC067.XCHARCOAL 1⁄2 yard (0.46m)
(D) Designer Essential Solid CHARCOAL Raven CSFSESS.RAVEN* 7⁄8 yard (0.80m)
*includes binding
Backing (Purchased Separately)
44" (1.12m) wide
Lovely Robins PINK PWMC060.XPINK 11⁄2 yards (1.37m)


Backing 44"
If kitting, refer to the final pattern for yardage amounts, it is recommended that a sample is made to confirm accuracy.
freespiritfabrics.com

Featuring Classics and Stash by Kaffe Fassett Collective
A 12-Month Block of the Month pattern
Finished Size: 100" x 100" (2.54m x 2.54m)
Project designed by Linda McGibbon - Lakeview Quilting
Purchase pattern at lakeviewquilting2.com
Technique: Pieced | Skill Level: Advanced Beginner
freespiritfabrics.com
(A) Japanese Chrysanthemum Purple PWPJ041.PURPL 21⁄4 yards (2.06m)
(B) Japanese Chrysanthemum Red PJ41.REDXX 1⁄8 yard (0.11m)
(C) Feathers Green PWPJ055.GREEN 1⁄8 yard (0.11m)
(D) Cactus Flower Black PWPJ096.BLACK 1⁄4 yard (0.23m)
(E) Cactus Flower Blue PWPJ096.BLUE 13⁄8 yards (1.26m)
(F) Cactus Flower Green PWPJ096.GREEN 1⁄2 yard (0.46m)
(G) Cactus Flower Red PWPJ096.RED 11⁄8 yards (1.03m)
(H) Millefiore Green GP92.GREE 2 yards (1.83m)
(I) Roman Glass Emerald PWGP001.EMERA 5⁄8 yard (0.57m)
(J) Button Mosaic Green PWGP182.GREEN 1⁄4 yard (0.23m)
(K) Button Mosaic Blue PWGP182.BLUE 1⁄2 yard (0.46m)
(L) Reflections Fuchsia PWBM087.FUCHSIA 1⁄4 yard (0.23m)
(M) Reflections Green PWBM087.GREEN 5⁄8 yard (0.57m)
(N) Reflections Orange PWBM087.ORANGE 1⁄4 yard (0.23m)
(O) Aboriginal Dot Red GP71.REDD 1⁄8 yard (0.11m)
(P) Aboriginal Dot Plum GP71.PLUMX 3⁄4 yard (0.69m)
(Q) Jumble Blue PWBM053.BLUEX 5⁄8 yard (0.57m)
(R) Jumble Ruby PWBM053.RUBY 1⁄8 yard (0.11m)
(S) Spot Duck Egg GP70.DUCKE 31⁄2 yards (3.20m)
(T) Spot Apple GP70.APPLE 5⁄8 yard (0.57m)
(U) Spot Eggplant PWGP070.EGGPL 1⁄2 yard (0.46m)
(V) Shot Cotton – Wide Stripe Heather SSGP001.HEATHER 3⁄8 yard (0.34m)
(W) Shot Cotton – Wide Stripe Aloe SSGP001.ALOE 1 yard (0.91m)
(X) Shot Cotton – Wide Stripe Blueberry SSGP001.BLUEBERRY 1⁄2 yard (0.46m)
(Y) Shot Cotton – Wide Stripe Moss SSGP001.MOSS* 7⁄8 yard (0.80m)
* includes binding
Backing (Purchased Separately)
44" (1.12m) wide
Cloisonne Blue PWGP046.BLUE 81⁄2 yards (7.77m)
OR 108" (2.74m) wide
Millefiore Blue QBGP006.BLUE 3 yards (2.74m)
Fabric Swatches on next page...
If kitting, refer to the final pattern for yardage amounts, it is recommended that a sample is made to confirm accuracy.
freespiritfabrics.com











Featuring Parterre by Sarah Campbell
Finished Size: 80" x 80" (2.03m x 2.03m)
Project designed by Victoria Findlay Wolfe, Re-Colored by FreeSpirit Fabrics
Purchase pattern at vfwquilts.com
Technique: Pieced with Paper Templates | Skill Level: Advanced Beginner
freespiritfabrics.com
(A) Midnight Blossom DARK PWSH027.DARK 1 yard (0.91m)
(B) Poppy Field MULTI PWSH028.MULTI 3⁄4 yard (0.69m)
(C) Woodland Blooms BLUE PWSH029.BLUE 21⁄2 yards (2.29m)
(D) Flowerbed GREEN PWSH030.GREEN 3⁄4 yard (0.69m)
(E) Bestfriend MULTI PWSH031.MULTI 1⁄2 yard (0.46m)
(F) Cheerfulness BLUE PWSH032.BLUE 1⁄2 yard (0.46m)
(G) Brilliant MULTI PWSH033.MULTI 11⁄2 yards (1.37m)
(H) Scarlet Blossom CORAL PWSH034.CORAL 15⁄8 yards (1.49m)
(I) Rosa HOT PWSH035.HOT* 3⁄4 yard (0.69m)
(J) Lola BRIGHT PWSH037.BRIGHT 11⁄2 yards (1.37m)
(K) Bountiful CORAL PWSH038.CORAL 3⁄4 yard (0.69m)
*includes binding
Backing (Purchased Separately) 44" (1.12m) wide Cheerfulness BLUE PWSH032.BLUE 5 yards (4.57m) OR
(2.29m)


If kitting, refer to the final pattern for yardage amounts, it is recommended that a sample is made to confirm accuracy.

Featuring Monochrome, Abandoned 2 and Alchemy by Tim Holtz
Finished Size: 90" x 90" (2.29m x 2.29m)
Project designed by Linda McGibbon - Lakeview Quilting
Purchase pattern at lakeviewquilting2.com
Technique: Pieced using Deb Tucker Studio 180-Diamond Reacts Tool, Deb Tucker Studio 180-Corner Beam Tool, and the Creative Grids - Square 8" Trim Tool
Skill Level: Advanced Beginner
freespiritfabrics.com
(A) Expedition Parchment PWTH016.PARCHMENT 55⁄8 yards (5.14m)
(B) Hotel Burgundy Vineyard PWTH145.VINEYARD 15⁄8 yards (1.49m)
(C) Piano Sorte Patina PWTH138.PATINA* 2 yards (1.83m)
(D) Rue Le Peltier Patina PWTH142.PATINA 21⁄2 yards (2.29m)
(E) Scraped Layers Sienna PWTH144.SIENNA 11⁄2 yards (1.37m)
(F) Alchemy Intrigue PWTH177.INTRIGUE 1⁄4 yard (0.23m)
* includes binding
Backing (Purchased Separately)
44" (1.12m) wide
Muted Medallions Indigo PWTH141.INDIGO 8 yards (7.32m)
OR 108" (2.74m) wide
Expedition Multi QBTH007.MULTI 23⁄4 yards (2.51m)




If kitting, refer to the final pattern for yardage amounts, it is recommended that a sample is made to confirm accuracy.
freespiritfabrics.com
- Coming April 2024 -

Featuring Mythical by Stacy Peterson
Designed by Linda & Carl Sullivan - Colourwerx
Finished Size: 48” x 60” (1.23m x 1.52m)
Total Quilt Top Yardage: 7 yds (6.40m)
Technique: Pieced, Curved Piecing with Templates Pattern available at colourwerx.com

Featuring ROAR! and Solids by Tula Pink
Designed by Stacey Day
Finished Quilt Size: 96” x 96” (2.43m x 2.43m)
Total Quilt Top Yardage: 21 3/8 total yards (19.54m)
Technique: Foundation Paper Pieced

Featuring Paper Trees by Sue Penn
Designed by Sue Penn
Finished Size: 66" x 75" (1.68m x 1.90m)
Total Quilt Top Yardage: 5 5/8 yds (5.14m) + 1 Panel
Technique: Pieced
Pattern available at freespiritfabrics.com - April 2024

Featuring Emery Walker by The Original Morris & Co.
Designed by Lucy A. Fazely
Finished Size: 74” x 84” (1.88m x 2.13m)
Total Quilt Top Yardage: 13 yds (11.89m)
Technique: Pieced
Pattern available at freespiritfabrics.com - April 2024

Featuring Cottage Garden by Snow Leopard Designs / Philip Jacobs
Designed by Antonie Alexander - The Red Boot Quilt Co.
Finished Size: 78 1/2” x 78 1/2” (1.99m x 1.99m)
Total Quilt Top Yardage: 10 1/2 yds (9.60m)
Technique: Pieced
Pattern available at theredbootquiltcompany.com

Butterfly Fields Block by Block Quilt Along Kit
Featuring Field Cloth by Sew Kind of Wonderful
Designed by Sew Kind of Wonderful
Finished Size: 60” x 75” (1.52m x 1.91m)
Quilt Along Total Yardage: 13 3/4 yards (12.57m)
Skill Level: Advanced Beginner
Technique: Easy Curved Piecing
Quilt Along: June 2024 - August 2024
Click here to find a retailer >>

Featuring Good Gracious by Anna Maria
Designed by Anna Maria
Finished Size: 72” x 72” (1.83m x 1.83m)
Total Quilt Top Yardage: 14 yds (12.80m)
Technique: Pieced
Pattern available at annamariahorner.com

I Am Worthy of Grace Quilt
Featuring Grace by Valori Wells
Finished Size: 56" x 70" (1.42m x 1.78m)
Techniques: Pieced, Applique and Foundation Paper Pieced with Templates and Rulers
Skill Level: Advanced Beginner
Pattern available at freespiritfabrics.com

Featuring Haunted by Brenda Walton
Designed by Stacey Day
Finished Size: 76” x 76” (1.93m x 1.93m)
Total Quilt Top Yardage: 8 yds (7.32m)
Technique: Pieced
Pattern available at freespiritfabrics.com - May 2024

Featuring Ghostly Greetings by Cori Dantini
Designed by Lisa Alley - Bear Hug Quiltworks
Finished Size: 70” x 70” (1.78m x 1.78m)
Total Quilt Top Yardage: 8 1/8 yds (7.43m); Plus 1 Panel
Technique: Pieced
Pattern available at bearhugquiltworks.com

Featuring Mystic Moonlight by Rachel Hauer
Designed by Stacey Day
Finished Size: 64” x 64” (1.63m x 1.63m)
Total Quilt Top Yardage: 8 1/4 yds (7.54m)
Technique: Pieced
Pattern available at freespiritfabrics.com - May 2024
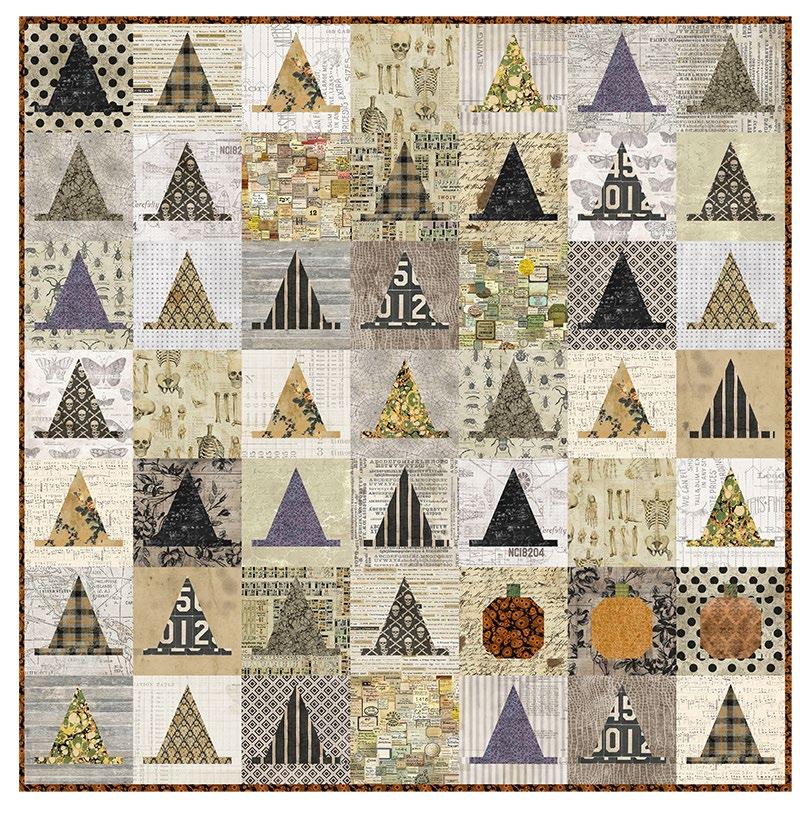
Designed by Melissa Mortenson - Polka Dot Chair
Re-Colored by FreeSpirit Fabrics
Finished Size: 53” x 53” (1.35m x 1.35m)
Total Quilt Top Yardage: 9 5/8 yds (8.80m)
Technique: Pieced
Pattern available at polkadotchair.com