Training Manual



PASSWORDS NEED:
1. At least eight (8) characters in length
2. To contain characters from three (3) of the following categories:
At least one (1) English uppercase character (A through Z)

At least one (1) English lowercase character (a through z)
At least one (1) base 10 digits (0 through 9)
At least one (1) special character ( ! $ * #)
1. Contain the user’s account name or parts of a user’s full name that exceed two consecutive characters
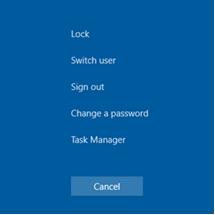
1. Press CTRL + ALT + DELETE on your keyboard
2. Select Change Password
NOTE: The system requires a password change every 90 days. A best practice is to change it on a Monday, so it is not forgotten over the weekend!


For
machines ONLY,
Windows - Download Workspace app for Windows
Current Release - Citrix

MacOS - Download Workspace app for Mac - Citrix Log Into Network
Access Citrix:
1. Go to https:\\goldbergsegalla.cloud.com
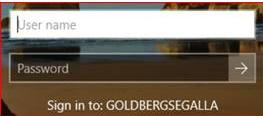
2. This will redirect you to a Microsoft Sign In page
3. Login using your email address and password
4. Complete login with the Duo Push. The Duo app will ask you to deny or approve login on your phone
1. The Citrix Workspace box will appear
2. Click on Use web browser – DO NOT CLICK ON DETECT WORKSPACE OR YOU WILL GET AN ERROR
In order to use both screens, once you complete the login:
1. Click on the Citrix icon at the top of your screen on your Citrix Desktop
2. This will expand out your options
3. Click the multiple monitors icon (center)

3. Click on General Apps Desktop
4. Enter your Username and Password
This will make a new window pop up that you can drag to your second monitor and maximize. You can now drag applications and documents between the two screens.
You need to change your password every 90 days. Two weeks prior to the deadline you will receive popup notifications. DO NOT wait until the day your password expires to change it.
1. Click on Citrix Icon at the top of your screen
2. Click on the Three Dots
3. Click Ctrl+Alt+Del
4. Select Change Password
5. Type your old password
6. Type a new password
7. Confirm your new password
Note: Your new password is used to connect to network via Citrix only. Until you connect your laptop to the network at a GS office, your laptop password will not sync with the new password.
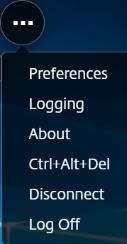
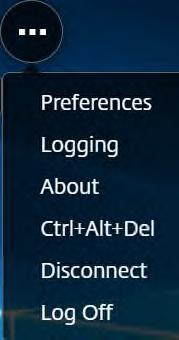
1. Click on Citrix Icon at the top of your screen
2. Click on the Three Dots
3. Select Log Off
4. Now you will be back to the first Citrix Workspace screen

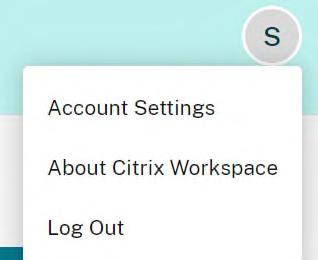
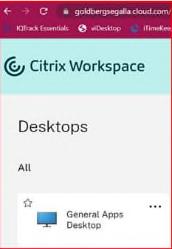
5. Click on your initial at the top right and click Log Out
This gives you the look and feel of working from a desktop in the office.
Citrix will automatically log you out after a short period of time of inactivity
TEAMS is the program we use for video and web conferencing.
1. Open the meeting from your calendar
2. Right click and copy the link that says click here to join meeting
3. Click outside of your Citrix session
4. Open your browser
5. Paste the hyperlink you copied
6. Click Join
Or
1. Open your TEAMS app outside of Citrix
2. Open the meeting from your TEAMS calendar
3. Click Join or click on the link to join meeting
Whenever a document is opened in iManage, it is considered checked out. Use Open Read Only when reviewing but not editing a document.
1. Locate a document in iManage
2. Right-click and select Open Read Only
Your document will open in Read Only view and will remain “checked in” to iManage.
If you are collaborating with others and making edits to a document, use save and sync to immediately save your edits to iManage.


1. Edit the document
2. iManage | File Save and Sync
This button would be a great addition to your Quick Access Toolbar.
Use Citrix Workspace
Do not stream unnecessary audio or video
Save your work often
Use the Save & Sync button

- When you click the traditional Save button ( ) in Word, changes are saved in a local file on your c: drive. Once you close the document, those changes are pushed to iManage.
- iManage’s Save and Sync button ( ) is bi-directional. Changes are pushed to both iManage and your c: drive.

If you need to leave your computer for more than a few minutes:
- Save your work
- Close all applications
- Logout of Citrix
IMPORTANT: You cannot use the link while in Citrix. You must copy the link and paste into a fresh browser window.
In order to use both screens, once you complete the login:
While in Citrix, click on the Citrix Workspace Icon at the top center of your screen
This will expand out your options at the top of your screen
Click the multiple monitors icon (center)

This will make a new window pop up that you can drag to your second monitor and maximize. You can now drag applications and documents between the two screens.
Maximize your screen to avoid opening icons from your local desktop
Maximize your Citrix desktop screen to avoid opening apps from your local desktop. If you see two sets of taskbar icons, you need to maximize. Click on the Citrix Workspace at the top center of your screen and click on the four arrows to maximize your screen

Open Outlook outside of Citrix if you have a GS laptop to schedule TEAMS meetings
Or, open TEAMS app outside of Citrix
Please remember to be vigilant with both electronic and paper files along with your GS and Home computers


- Click on Citrix Icon at the top of your screen
- Click on the Three Dots
- Select Log Off
- Now you will be back to the first Citrix Workspace screen

- Click on your initial at the top right and click Log Out
- Click on Window icon at the bottom left of taskbar
- Click on the Power icon and click Restart
You need to change your password every 90 days. Two weeks prior to the deadline you will receive pop-up notifications. DO NOT wait until the day your password expires to change it.
- Click on Citrix Icon at the top of your screen
- Click on the Three Dots
- Click Ctrl+Alt+Del
- Select Change Password
- Type your old password
- Type a new password
- Confirm your new password
Note: Your new password is used to connect to network via Citrix only. Until you connect your laptop to the network at a GS office, your laptop password will not sync with the new password.
Outlook (if you are using a GS laptop)
Work10 – used to review documents – no edits
iTimekeep

1. Click on the GS University icon or LMS icon on your desktop
2. Click Employee Login in the training section
Login does not require a password
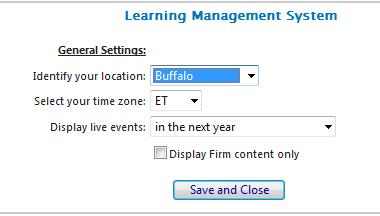
Your first login will require you to setup preferences including
Your office location
Time Zone
Live Events (keep default)
Navigating the Homepage: My Curriculum
1. Learning Plans (for required training)
2. View My Training History
My Recent and Upcoming Training
1. Courses you’ve recently viewed
2. Courses that are assigned to you
Courses I’ve Trained
1. Courses the user has been assigned as speaker to
From time to time Learning Plans may be offered or assigned to you.
A learning plan is a sequence of tutorials, quizzes and classes to obtain an objective, i.e., proficiency level 1 for Excel.
It will show up when training is assigned to you, e.g.: required training.

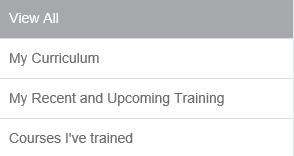
Learning plans are displayed on your Home Page in the My Curriculum section
1. Name of Learning Plan
2. Number of Required/Optional courses
3. Status (In Progress Complete Not Started)
Click View on right for more detailed information on classes
In the My Curriculum section of your Home Page is a link View My Training History which displays a listing of training you have Completed, Attended, is In Progress or Registered (upcoming)
Your training is located on the Home Page
1. Lists all your recently completed training. upcoming events and courses you have started
2. You can launch training courses and view upcoming registered events from here.
1. In the Search field type one or more keywords
2. Click the Search button
3. A list of matching courses will appear in the Advanced Search window

Or…
1. Click the Search button without entering anything in the search field

2. The entire catalog for GSU will appear

If at first you don’t succeed, you can perform an advanced search by selecting any/all of the fields above the search results window
You can also request a class from this area.
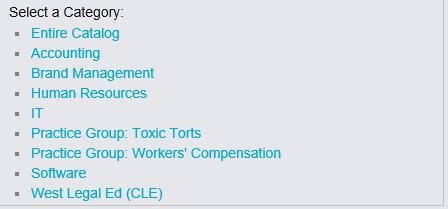
On the left side of the Advanced Search screen is a Category tree
Results will appear in the Search window on the right
1. Click on a month on the homepage (near the search button)

2. Locate the class
3. Click Register
4. Click Register on the next page to confirm.
1. GSU has a series of topic specific tutorials and quizzes.

2. Launch to view the tutorial. You can view it more than once
3. Take the corresponding quiz.
4. Your grade will appear immediately and you can review the questions/answers.
Once you locate a course, you can begin by clicking Open Resource.
The next screen will have a Launch button to begin the video, tutorial or quiz.
NOTE: Reference Guides and Handouts can be accessed on the Launch screen.
When Live Classroom Events or Webinars are scheduled, you will receive an email announcement from GS University. In some instances, class size may be limited so you will be required to register

Email reminders may be sent a day or two prior to the event.
Once you Register for an Event, an email invitation will be sent to you
You must accept the invitation in order to:
Add the event to your Outlook calendar
If you cannot attend, please decline the invite and go back into GSU and unregister for the event.
Certain Learning Plans and classes will generate a Certificate of Completion. These will be emailed directly to you from GSU.
As we are revising most of the training materials, our goal is to train using the most simple and effective methods. A Quick Reference Guide (QRG) is a quick page or two on a training topic that breaks down information into simple steps helping to guide users. We also provide Tip Sheets that are a ‘how to’ guides for performing specific actions or hidden tricks that are not covered in the quick reference guides.

This paragraph is an overview of the quick reference guide topic. Generally, it discusses the topic’s uses and gives a brief introduction of the information to follow.
These headings introduce a new topic and will break down each section of instructions on the QRG. For example, the new section, Creating a Workspace, will look like this:
1. If you see the following pattern: HYPERSTYLES | STYLES HyperParagraph
The first word [HYPERSTYLES] is the tab name
The second word [STYLES] is the group within the tab
The red word following the arrow is the Command button


2. Words in blue indicate a choice from a dropdown list, for example:


PAGE LAYOUT | PAGE SETUP Orientation
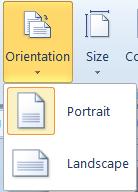
Select Portrait
3. Each section of the Quick Reference Guide or Tip Sheet will also provide step by step instructions in a numbered list along with a graphic for further clarification.
1. Press SendAll
All incoming calls will be sent directly to your
1. Press Directory (Auxiliary key)
2. Type first few letters of person’s last name

If the person’s name has an apostrophe, use the asterisk ( * ) in place of the apostrophe
3. Names will appear at the top of the screen
4. For employees with a common name (i.e. Smith), select Next (Auxiliary key) to move to the next person with that last name
5. Press Make Call to call the person
Menu (options and settings such as ringtones) Contacts – can be programmed for speed
dialing
Call Log - displays last 25 calls
Speaker – changes call from handset to speaker
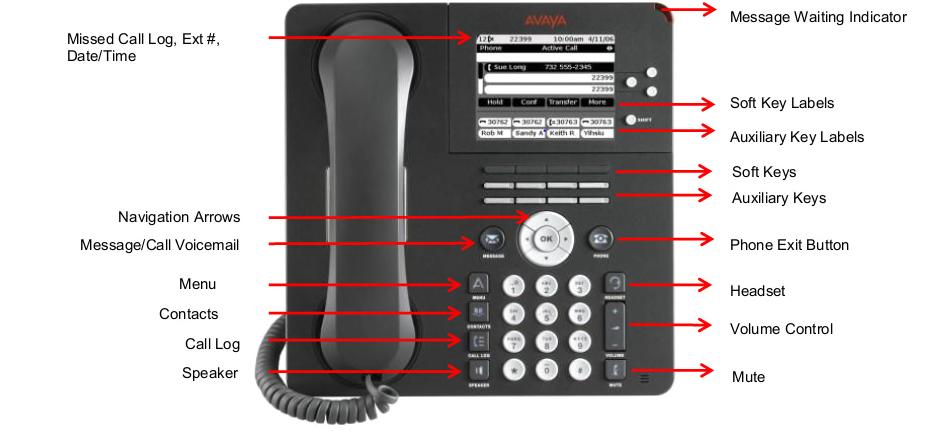
Mute – mutes speaker or handset
Message (to access Voicemail system)
Phone – brings you to the home screen
Note: You must already be active on a call to use this feature.
1. While active on a call, press the Conf softkey button
2. The other party will be placed on hold
3. Dial the 2nd party
4. Once the 2nd party answers, press the Join softkey to join all parties together

5. To add more parties to your call: press the Conf softkey button and repeat steps 3 and 4
6. You may conference up to six parties (including yourself) on a call
7. To drop the last party from a conference call, press the Drop softkey button
8. The last party that was added to the conference call has been dropped
1. Press the Shift Auxiliary Button
2. Press EC500 Auxiliary button the auxiliary button will illuminate red, indicating that EC500 is active
1. Press the EC500 Auxiliary button – the auxiliary button will no longer be illuminated, indicating that EC500 is inactive
1. While you are active on a call, Press the Extend Call Auxiliary button

2. Your cell phone will ring
3. When you answer your cell, it will be conferenced on with your desk phone
4. Hang up your desk phone and continue your call
1. While you are active on a call, press the Call Appearance button on your desk phone
2. You will be on both your cell and desk phone
3. Hang up on your cell phone and continue your call at your desk


1. Call a Goldberg Segalla desk phone from your cell phone with EC500 enabled the desk phone called will display as YOUR GS desk phone extension. It will NOT display as your cell phone
2. Another GS caller in EC500 calls from a cell phone to a GS desk phone forwarded to own cell the cell phone of the user contacted will show as a GS number as well
1. Dial x1999 or press the Message button on your phone
2. Enter your password and # (initially, it is 2468#)
3. Create a new password
4. When prompted, dial your new password (4 15 digits) and then press #
You cannot have repeating digits, any variation of your phone ext., or ascending/descending sequences (i.e. 1234, 4321) for your new password
After creating your password, you will be prompted to
1. Record your first and last name at the tone and press # when finished recording
2. Press * to re record
3. Press # to accept
To change your name at a later date (i.e. marriage)
1. Press the Message button on your phone
2. Enter your password and press #
3. Option 4
4. Option 3
5. Option 3
6. Record your name
7. Press # to save, * to re record
1. Press 2 (after recording your name)
2. Press 2 to record
3. Begin your greeting at the tone
4. Press # to save, * to re record
Hello, you have reached the desk of ________ at Goldberg Segalla. I am unable to take your call at this time. Please leave your name, number and a brief message, and I will return your call as soon as possible. Thank you.
Hello, you have reached the office of ________ at Goldberg Segalla. I’m presently out of the office or away from my desk. If you leave your name and telephone number, I will return your call as soon as possible.
You have reached the voicemail of ________ at Goldberg Segalla. Sorry I am not available to receive your call, but if you leave your name, telephone
number and a brief message I’ll return your call as soon as possible. Thank you.
At Desk:
1. Dial x1999 or press the Message button on your phone
2. Enter your password followed by # 3. Press 1 to listen to messages
1. Dial 716.249.5244
2. Enter your extension number # 3. Enter your password followed by # 4. Press 1 to listen to messages

1. Voice message will appear from gsvoicemail@goldbergsegalla.com
2. The voicemail message will attempt to translate the message into text and it will appear in the Outlook email as well as a .wav file to listen to the message. There will also be a list of options to:
Mark as read
Contacts (not applicable)
Update (not applicable)
Delete this deletes the message from your Phone, not your Inbox.
Delete All deletes messages from the Phone but still remains in Outlook Inbox.
NOTE: A best practice is to delete emails from your phone regularly to ensure your mailbox does not get full. Use the DELETE ALL button in the email to manage your voicemail inbox.
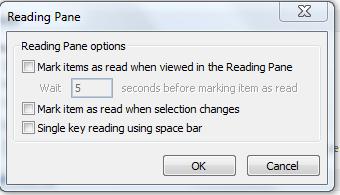
If you wish to turn off the Outlook Reading Pane feature that automatically marks your mail as read, from Outlook:
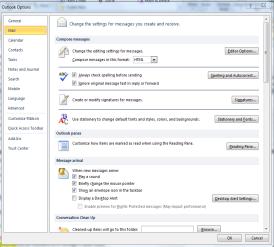
1. FILE | OPTIONS Mail 2. Reading Pane 3. Uncheck all checkboxes

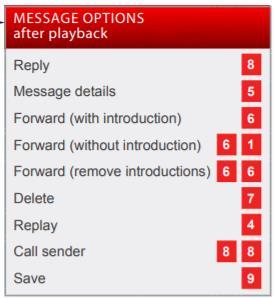
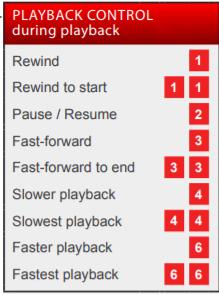
While listening to your messages, these playback control shortcuts will allow you to listen to your messages more effectively

Microsoft Teams is a chat based collaboration platform complete with document sharing, online meetings, and other useful features for business communications.
At your desk TEAMS icon will appear on your desktop.
Citrix open a new tab in Chrome outside of Citrix and proceed to Teams.Microsoft.com. Use your network credentials to login.
Mobile Device use the TEAMS app. This will be pushed to your device via our MDM system.

From TEAMS
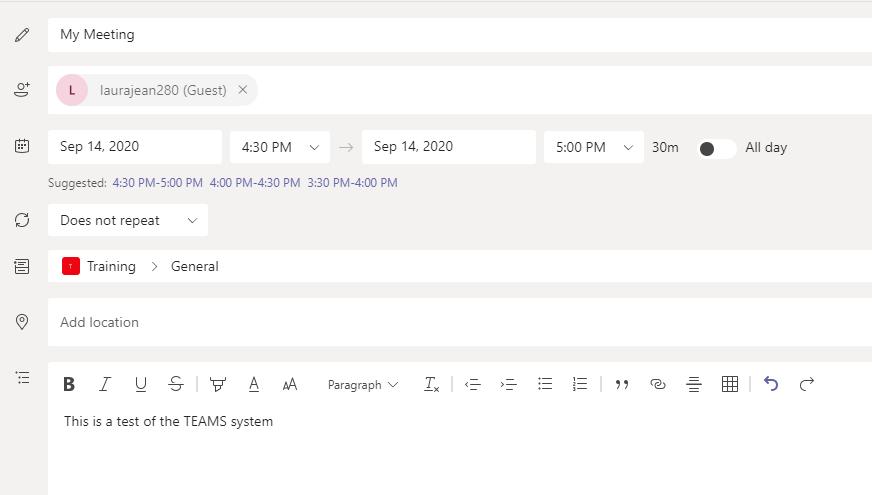
1. Select Calendar
2. + New Meeting (top right)
3. Complete Invitation Details
Invitees
Date/Times
Subject
Recurring schedule (optional)
Meeting Agenda (body of invite)
4. Click Send (top right)
1. Open Calendar
2. HOME | TEAMS MEETING New Teams Meeting
3. The body of the message will auto populate the Join Details with link
4. Add Participants
5. Click Send
Note: Scheduling Assistant is available for internal contacts
On behalf of your attorney
Note: This can only be accomplished if you are in the office or on a GS laptop if working remotely.
1. Access your Attorney’s Outlook calendar
2. HOME | TEAMS MEETING New Teams Meeting
3. The body of the message will auto populate the Join Details with link
4. Add Participants
5. Click Send
From your mobile device (Audio Only)
Use this if you wish to join via Audio only or if you do not have a microphone on your pc.
1. Open the Outlook event to:
Dial the Conference Phone number
Enter the Meeting ID + #
Press * if you are the Meeting Organizer
Enter Organizer PIN + #
Participants will have the option for their device to dial and enter the MeetingID#.
From your PC or Laptop
Using your pc or laptop allows you to join via:
Telephone (if your pc does not have a mic)
Using your microphone
Using your camera (optional)
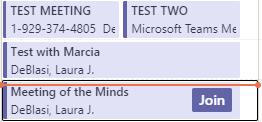
1. Click Join (or right click and select Join)
Note: Join displays 5 minutes prior to the meeting. To start meeting earlier, open Event and click Join Conference
2. Select Audio and Video join options
Click Join now via Outlook Calendar
1. Open Calendar Event
2. Click on Join Microsoft Teams Meeting link

3. Set Microphone, Speaker and Video preferences
4. Click Join Now
If you enable this feature in your meeting, participants will wait in the Lobby until you start the meeting. They cannot communicate with each other:

To enable:
1. Open meeting from your calendar
2. Click on Meeting Options
3. Choose who, if anyone can bypass the lobby
4. Save
When you start the meeting:
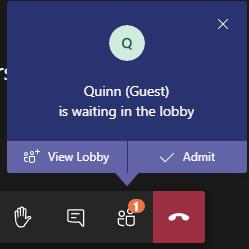
1. A pop up will appear stating who is in the lobby
2. Click on View Lobby if you are expecting multiple participants.
3. Once you enter the Lobby, you can Admit (
) or Decline (
) each participant
1. Access these options for your meeting by clicking on the ellipsis at the top:
Device settings to change your audio devices, audio, mic and camera
Meeting notes these are available for review post-meeting by all attendees
Meeting details will display dial in info and conference ID#
Gallery you choose how many people appear on the screen
Focus is to focus your screen on any shared content
Apply background effect to select a background picture for all attendees to see
Turn on live captions to see the conversation typed out. As people speak, the words will appear at the bottom of your screen
Start recording
Dial Pad
Turn off incoming video
1. To the right of the ellipsis:
2. To the left of the

People show participants
Chat show conversation currently disabled outside of a meeting
Reactions such as raise your hand, applause, etc. organizer will view on their screen
Rooms to set up breakout rooms
To view a list of shortcut keys:
1. Click Control + E
2. When the Search bar displays, type /keys

This tip relates to the process of adding additional participants during a TEAMS meeting.
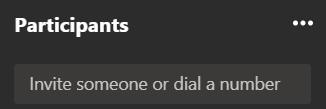
1. Click Participants button at the top right of your screen
2. When the panel opens to the right, click in the field Invite someone or dial a number

3. For Internal participants:

• Begin typing their last name
• Click on their Name when it appears
4. For External participants
• Type their email address OR….

• Dial their phone number (including area code for both local and long distance)


This tip walks you through the process of switching to phone audio during a TEAMS meeting. The TEAMS meeting must include audio options.
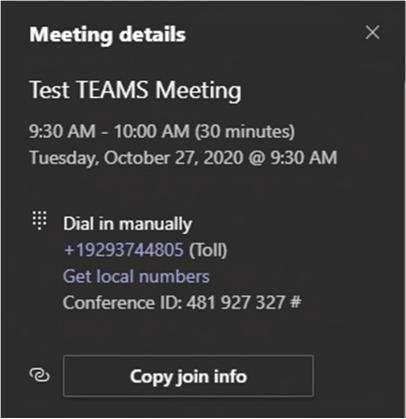

1. Enter the Teams meeting
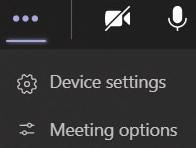
2. Click on More Options (the ellipsis at the top right of the screen)
3. Select Meeting Options
4. Dial in and use Conference ID

TEAMS is an online collaborative audio/video conferencing system commonly used to host online meetings or presentations.
1. You will receive a TEAMS meeting invitation through Outlook
2. Accept the meeting and it will automatically be added to your Calendar
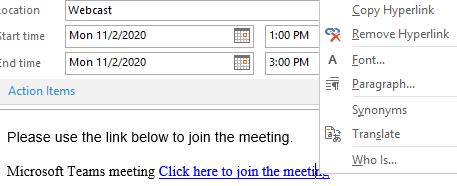
3. Prior to logging on to the meeting:
Locate the meeting in your Calendar and open the invitation
Right click on the TEAMS link and choose Copy Hyperlink
Note: If you do not have a microphone or speakers on your pc, write down the call information

From your Citrix desktop
1. Click on the down arrow at the top of your screen

2. Select Home
3. You will be directed to the Apps Home Page
4. Click on the (+) next to Citrix Receiver to open a fresh browser window outside of Citrix
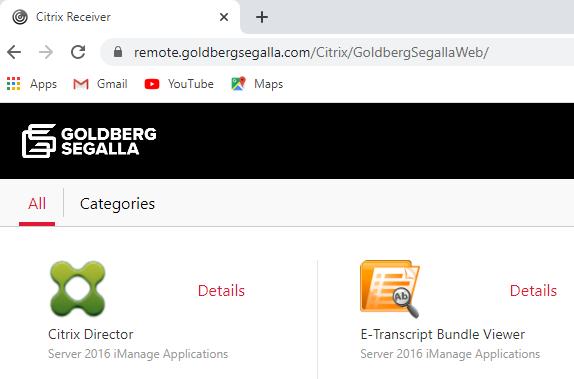
5. Paste the link in the browser
6. A TEAMS window will appear as your meeting begins to load
7. Click on the video camera or mic to mute yourself and click Join
8. When your meeting is over, click on the Leave icon at the top right of the screen
NOTE: If this is your first time using TEAMS, log on about five or ten minutes before your scheduled meeting.
Upon request to ITSupport, the Teams Application will be pushed to your mobile device through our MDM system.
If you do not see the icon, you can download TEAMS from the app store.

Sign in using your GS email address and network password.
Any appointments created on your TEAMS mobile app will sync with your Outlook calendar

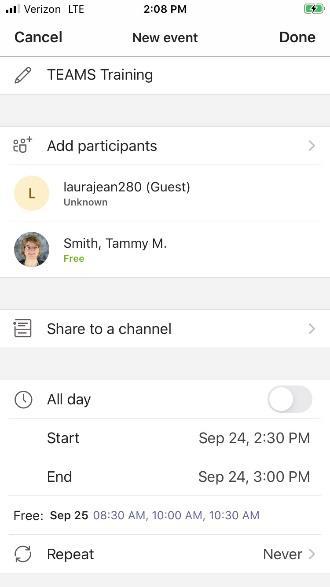
Appointment
1. Open Teams
2. Tap Calendar at bottom of screen
3. Click ( ) at top of screen
4. Complete the appointment details
5. Click Save
1. Tap Calendar at bottom of screen
2. Click ( ) at top of screen
3. Add Participants (internal or external)
4. Complete the appointment details
5. Tap Done to send/save the Meeting
1. Tap Calendar at bottom of screen
2. Tap meeting on list
3. Tap Join on the corresponding meeting
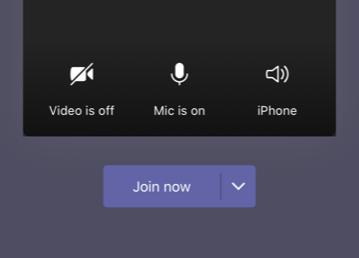
4. Select to use Mic or Phone for Audio (bottom of screen)
5. Tap Join Now (
) dropdown
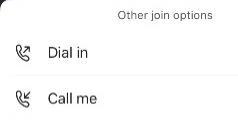
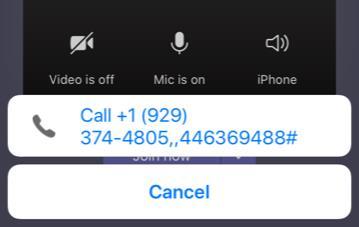
Dial In TEAMS will call the conference number AND enter the ConferenceID#. The organizer will be prompted to enter their PIN.
1. Tap on Reminder that appears on your screen
2. Tap Call
1. Tap Calendar at bottom of screen
2. Tap meeting on list
3. Tap Join on the corresponding meeting
4. Select to use Mic or Phone for Audio and turn on Video (bottom of screen)
5. Tap Join Now

If this option has been applied to your meeting (see TEAMS Meeting QRG)
1. A pop up will appear stating guests are in the Lobby
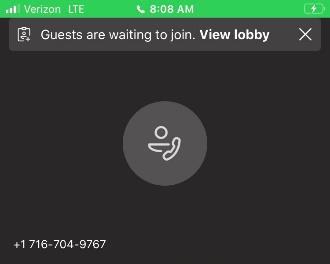
2. Click on View Lobby
3. Once you enter the Lobby, you can Admit (
or Decline (
) each participant
After joining the meeting:
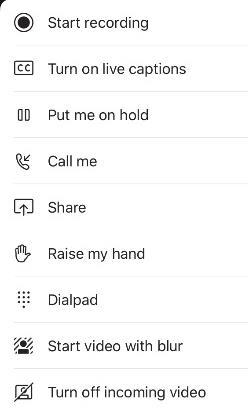
1. Tap the Ellipsis at the bottom of your screen

2. Options include:
Record the meeting
Turn on captions to see what is being said
Place your call on hold
Share your screen
Raise your hand
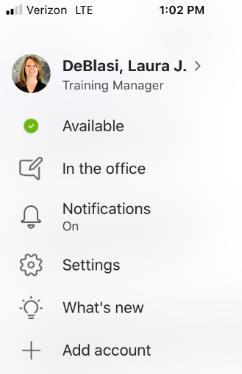
1. Tap the ( ) icon at top of the screen
2. Tap Set Status Message
3. Type a short description of your status, i.e.,
In Court until 1:00
In the Office today
In Roosevelt Conference Room
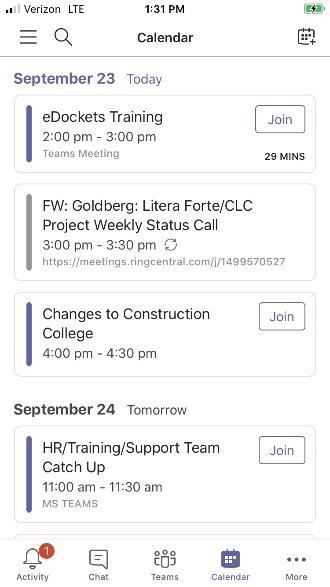
1. Tap Calendar icon at the bottom of your screen
2. List of upcoming Appointments and Meetings will appear.
Remember: TEAMS syncs with Outlook so all calendar items will appear.
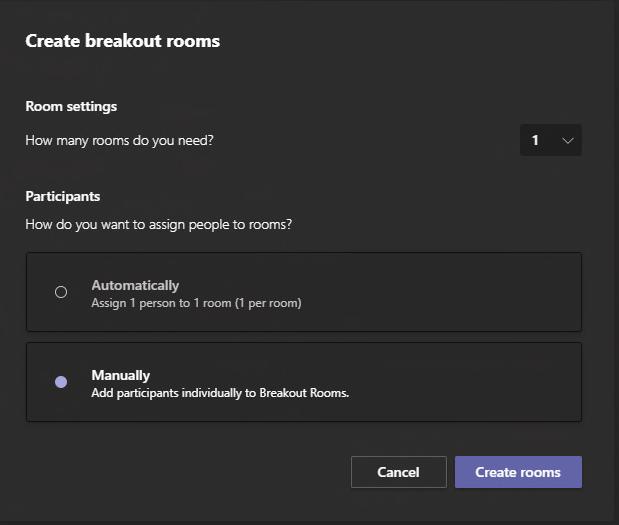
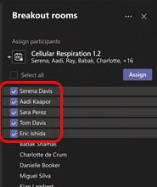
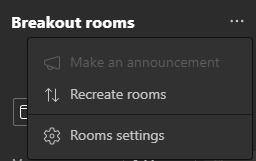
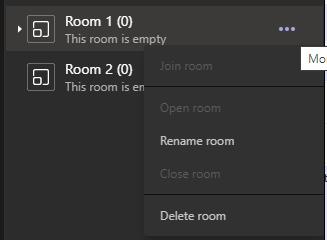
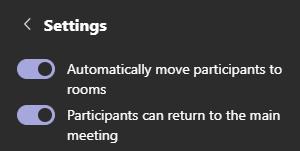
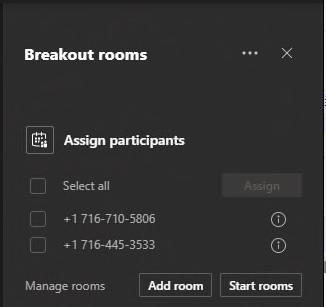
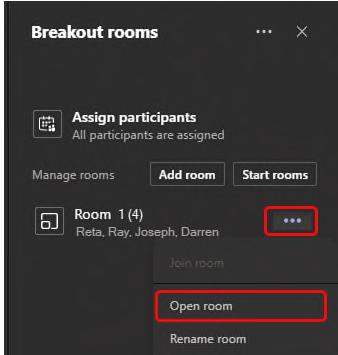

To join a room to check on its progress:
1. Click ellipsis (…) next to room
2. Click Join Room
To leave the room:
1. Click Return
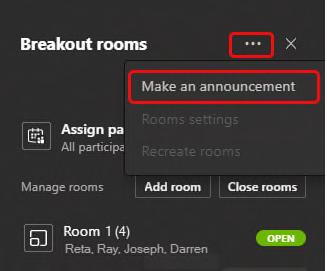
Once the breakout rooms have started, you can send announcements to give time updates or share prompts:
1. Click ellipsis (…) next to room
2. Choose Make An Announcement
3. Type announcement

4. Click Send
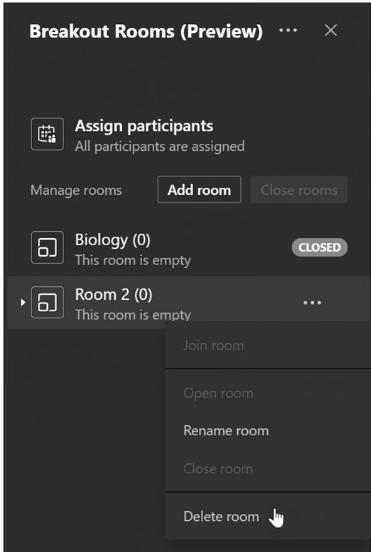
To delete a breakout room:
1. Click ellipsis (…) next to room

2. Click Delete room.
To close all rooms at once:
1. Manage Rooms
Each breakout room has its own chat room, the same as a regular meeting ( )
1. Participants will only be added to a breakout room chat when you start the room. They will be removed as soon as the room is closed.

2. You will have access to all breakout room chats.
3. Participants can still see the chat history and any files shared after the breakout room is closed.
To add an additional breakout room:
1. Select Add room
2. Name the room
3. Add participants to the room using the instructions above
Close rooms
To close rooms individually:
1. Click ellipsis ( ) next to room
2. Close room
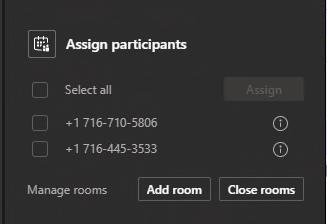
To close rooms all at once:
1. Select Close rooms
You'll know rooms have successfully closed when their status changes to Closed
Select Resume when everyone is back from their breakout rooms and you're ready to meet as a larger group again.

This tip outlines the process to add a GS background in TEAMS.
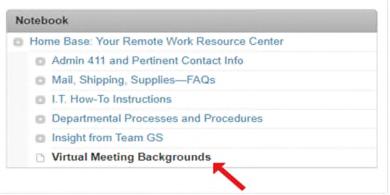
FROM THE GS INTRANET:

1. Click on Remote Work Resources
IN THE NOTEBOOK SECTION:
1. Select Virtual Meeting Backgrounds

Note: You need to be in an active call to setup a virtual background. After the initial setup, it will remain as your default background for subsequent calls.
THE FOLLOWING INSTRUCTIONS WILL BE FOUND AT THE LEFT OF YOUR SCREEN
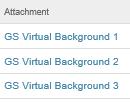
1. Download desired image to your computer's desktop – links to the background choices will be found below the instructions on the intranet

2. When you are in a Microsoft Teams call, click the three dots on the meeting settings bar
3. Select Show Background Effects
4. Select Add New right below the heading “Background Settings”
5. Locate the image file saved in Step 1
6. Either preview or select apply to enable your background
When the background is enabled, it may appear backward on your screen, but will present the correct way to your audience.
Create document and then save using one of the following options:
ILE
SAVE OR…….
on QUICK ACCESS TOOLBAR From Nuance
SAVE or
on QUICK ACCESS TOOLBAR
This feature allows you to publish changes directly to iManage while continuing to work on a document. Other users can view the changes via the viewer or by opening a copy
IMANAGE
Save as PDF
ILE
Save and Sync ( )

From the Document Results Grid:
1. Right click on the Document
2. Select Properties

Only the following fields that should be edited:
IMANAGE
FILE
Save as PDF (
The following options are available:
Convert all or select pages to convert
Relate PDF to the Word document in DM
Save as a new version
Create bookmarks from headings
Save as PDF/A
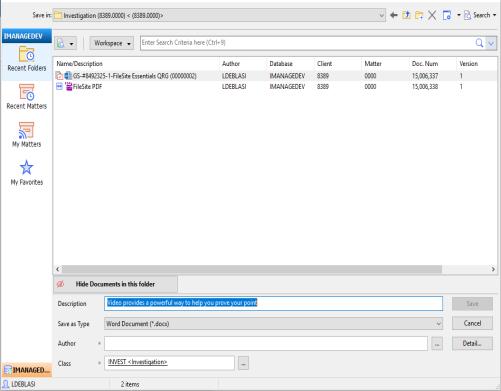
After using one of the save methods listed above, you will be prompted to Profile the document:
1. Navigate to Matter Workspace Folder using options on the left panel:
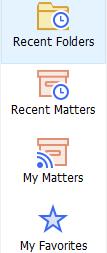
Recent Folders
Recent Matters
Matters
2. EXPAND folders in Matter Workspace
3. Select folder to house the document (make sure the folder shows at top next to Save In)
4. Complete:
Description (name of document)
Author
Click Save
Document Name
Author
Security (if necessary)
Comments
Do Not change client, matter or categories the documents will not move to the respective folder.
2. If you are working in a document and need to change the properties
ANAGE
ROPERTIES
Properties
Change Author or Document name
Save
The Document Results Grid is a list of both folder contents or documents/emails from a search
1. Click once on any column heading to sort in ascending order (
)
2. Click column heading 2nd time to sort in descending order (
)
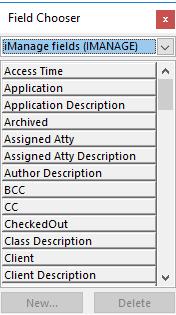
1. Right click on any Heading
2. Select Field Chooser
3. Change Field list to iManage Fields
Locate field you want to add
Drag field(s) onto Heading bar
To Quickly Remove Columns (FileSite)
1. Click on Column heading
2. Drag upward
3. Drop when large black X appears
1. Select the email(s) or document(s) in the original folder


2. Drag it to the new folder location
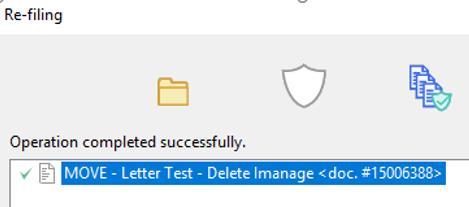
3. Click Yes to Reprofile dialog
A Re filing screen will appear showing the document was successfully moved, click Close
1. Right click on the document
2. Select Move
3. Navigate to and select the target folder
4. Click Select
1. Navigate to Matter Workspace
2. Right click on the folder to import the document
3. Add Document
4. Select the document from your desktop or local drive
5. Open
6. Complete the Profile
7. Click Save
1. Drag and Drop OR…….
2. Select Folder
3. FILE | IMPORT Import
4. Follow steps 4 7 above
From the Document Results Grid
1. Right click on the document
2. Select SAVE AS
3. Change the File Name (optional)
4. Under Destination Path select Browse
5. Select the location for export
6. Click OK
1. Right click on the document
2. Select Export
3. Follow Steps 3-6 above
From an open document
1. IMANAGE | FILE Save as new version

Save As Options displays
2. Select New Version
3. Click OK
4. Comments can be added on the Profile screen
5. Click Save
From FileSite
1. Right click on document that will receive a new version
2. Click Add Version
3. Select the document from your desktop or local drive
4. Open
5. Add a Comment (optional) such as "Changes by Client 4/2/2018)"
6. Click Save
From DeskSite
1. Select document
2. FILE | IMPORT Import As New Version
3. Navigate to locally saved document
4. Open
Best Practice: Do not make any profile changes

From An Email Attachment
1. Select email
2. HOME | EMM TOOLBAR Save Attachments

3. Select Attachment
4. Click New Version
5. Navigate to original document
6. Select
7. Add Comment (optional)
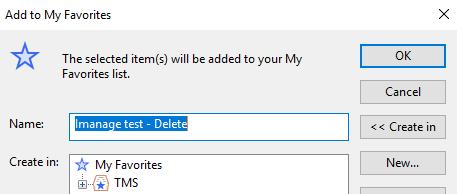
Items you need to access quickly can be added to your favorites:
1. Right click on a document or folder
2. Select Add to My Favorites
3. Click OK
Note: A small blue arrow will appear on documents you added to your Favorites. The document number will not show in the reading pane
1. Right click on My Matters
Checked Out Docs Open documents
Recent Docs Last 40 documents that you created or edited
Recent Matters Last 10 matters which you have saved or edited documents
Recent Searches Lists all searches from current Outlook session
My Favorites Quick links to documents, folders and searches for easy retrieval
My Matters Your filing cabinet you add and remove matters and can manage the "My Matters" of others
2. Subscribe
3. Select username from list
4. Click Add
5. Click OK
Note: You will only see names of those who gave you delegate access.
1. HOME |IMANAGE
Search Workspaces
2. Click Clear to clear the fields from your last search
3. Complete any fields to narrow search
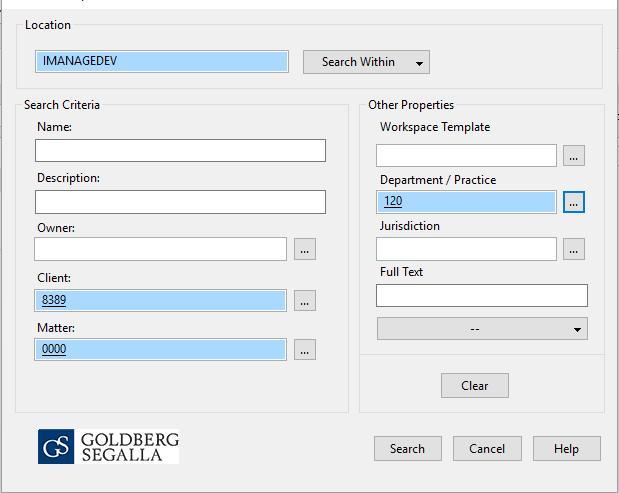
4. Use Ellipses ( ) next to any field to search that field
5. Click Search
6. From Search results
Right click on Matter
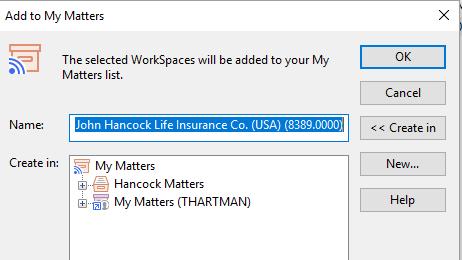
Add to My Matters
Rename (optional)
OK
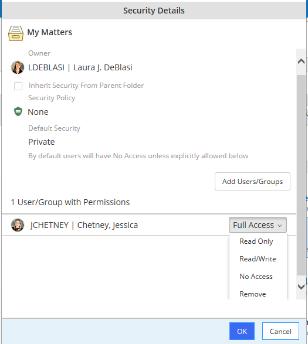
To share your matters:
1. Right click on My Matters
2. Properties
3. Modify Security
Add User
Search for User using their LOGIN NAME
Select Confirm
Select access rights
4. OK
1. Right click on a Matter
2. Rename
3. Type new name this name will only display in your My Matters. It is not changed in the database.

Tip: Use an underscore at the beginning of the name to float the workspace to the top of the list.
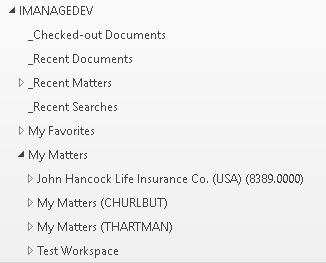
1. Right click on Matter Name
2. Delete
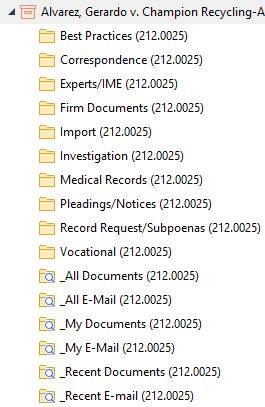
1. Each Matter is listed alphabetically by Matter Name
2. Use arrows () to expand folders
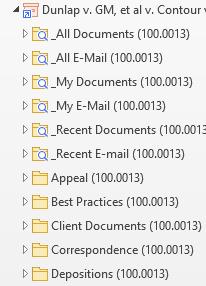
The first six folders are searches specific to the matter:
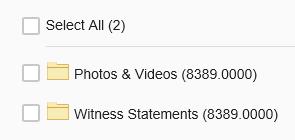
All Documents
All email
My Documents
My E-Mail
Docs
First Level Folders
1. Core folders specific to matter type
2. Structure determined at file opening
3. You cannot add adhoc core folders
Second Level (optional) folders
Optional subset of folders related to each core folder.
To add 2nd level folders:
1. Right click on a Core Folder
2. NEW
FOLDER
3. Select folder(s) from list
You are limited to folders in list
Adhoc folders
1. Right click on a level two folder
2. New
Folder
3. Type a name for the folder Categories
Use Categories to organize your matters by:
Client
Type
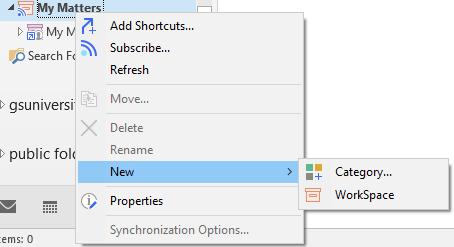
1. Right Click on My Matters
2. NEW CATEGORY
3. Name it

4. OK
Drag and Drop from Matter Worklist OR….
Select the Category when you add the matter to your My Matters
The Document Results Grid lists either folder contents or a list of documents/emails from a search.
1. Click once on any column heading to sort in ascending order (
)
2. Click column heading 2nd time to sort in descending order (
)
1. Right click on any heading
2. Choose Field Chooser
3. From the Field Chooser
Locate the field you want to add
Drag and drop it onto the headings bar
To quickly remove a column
Click on the column heading
Drag it upward
Drop when large black X appears
From Outlook:
1. HOME | IMANAGE EMAIL MANAGEMENT
Search Documents
2. Click Clear as your last search sticks
3. Complete fields in the profile to narrow your search results:
Description (Document Name)

1. HOME | IMANAGE EMAIL MANAGEMENT Search Documents
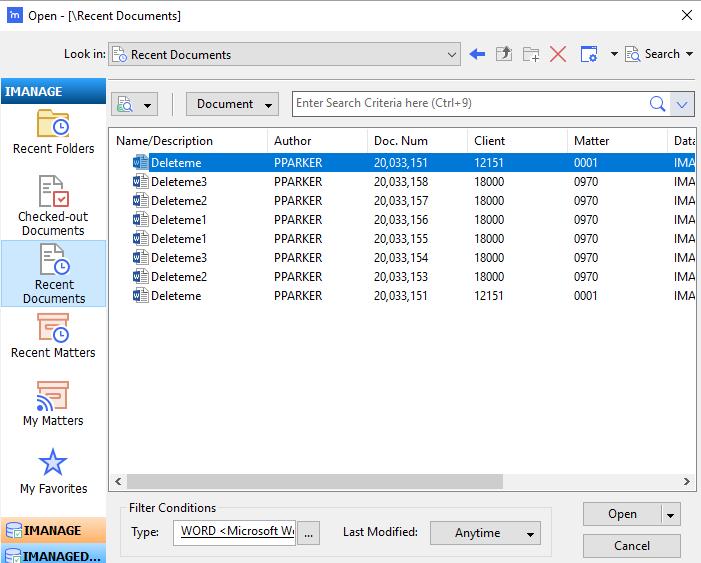
2. Click Clear ONCE to remove prior search fields
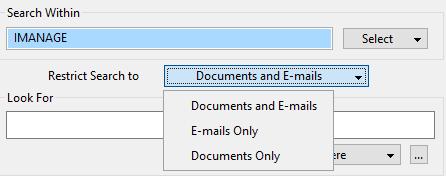
3. Click Restrict Search to (
)
Documents and Emails (default)
Emails Only
Documents Only
4. Complete search fields as needed
Doc # - you won't need to complete any other fields if you know this number.
Author (can use ellipses to search)
Created by (Typist)
Client # (can use ellipses to search)

Matter# (can use ellipses to search)
Class/Subclass (folder categories)
Date Created or Modified
Office (Office that opened the matter)
4. Click OK
5. Click OK
Note: The more you can limit the search by completing fields, the easier it will be to locate your document.
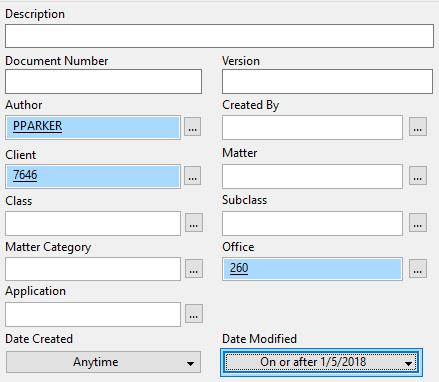
Using the Date Modified field can substantially limit your results.
When searching from an application, your results will only display documents of that type. For example, Word returns only Word docs and Excel displays Workbooks To search for a document:
IMANAGE
Open ( ) OR….
( ) on your Quick Access Toolbar
You can search for a document several ways:
1. Navigate using the left panel by:
Recent Folders
Checked Out Documents
Recent Documents
Recent Matters
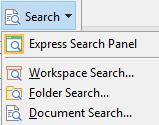
1. Click ON SEARCH (
) | DOCUMENT SEARCH
2. Profile Search dialog box appears
3. Complete Profile Search
To complete a full text search,
1. HOME | IMANAGE EMAIL MANAGEMENT Search Documents
2. Click in LOOK FOR field and type text with quotes (") around the phrase
To limit your search to a single matter or folder within a matter:
1. Right click on Matter Name or Folder
2. Click Search documents
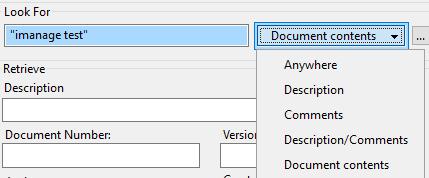
3. A pop up will appear notifying you that your search is limited to a container

3. Click Anywhere (
) to right of LOOK FOR to further restrict search.
4. Complete any other profile fields to narrow the search results (Author, Client #, etc.)
5. Click OK
Deeper Dive Search
Click Ellipse next to Anywhere field
You can now narrow search by:
1. Words that must be in document
2. Words which may be in document Words that are NOT in document

4. Click Clear ONCE to remove prior search fields
5. Complete Search fields
6. Click OK
Note: Check the box to turn off the pop-up, however, this can be a useful feature to notify you that your search is limited, prompting you to change your search container.
To save a search that you will use often:
1. Create a Search Folder in your 18000.#### non billable matter workspace by:
Right-click on any Level 1 or Level 2 folder
New
Search Folder
Name the folder
Save
2. Complete a Profile search, as described above
3. Click Save Search on the Profile screen
4. Navigate to your Search folder
5. Click Select
6. Name the Search
7. Click OK
1. Navigate to your Search Folder
2. When you click on the saved search folder, you will see the results of that search


1. Create new Message
2. MESSAGE | IMANAGE
If you wish to DELETE the email from your Inbox, click ( ) prior to File.
Results:
Insert iManage Attachment
3. Navigate to and select document
4. Click on Insert Copy or change to Insert Link

Directly From FileSite
1. Navigate to document
2. Right click on document
3. Select either Send Document or Send Link
You have the option to attach as:
1. Copy inserts copy of the document in the message
2. Link attaches a hyperlink to the document this can only be used internally.
The EMM toolbar appears below the Outlook ribbon and includes features to quickly file email.
File by Drag and Drop
Save by:
1. Select email(s)
2. Drag to folder in client/matter workspace in left navigation pane.
Results: You are prompted to complete the profile. Email is no longer in the Inbox
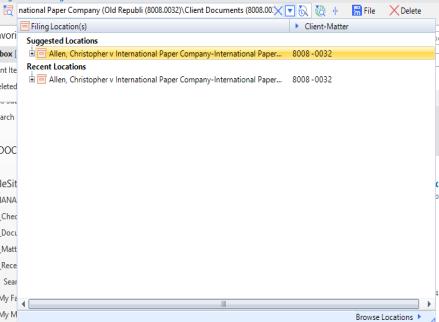
File using EMM Toolbar
1. Select email(s)
2. Select a Filing Location (
):
Suggested location (based on prior filing)
Recent location
Browse to other location in iManage
3. Click File
Profile dialog will appear and you will be prompted to complete Document Name and Author
If you chose to keep email in your Inbox, a icon will appear ( ) indicating it has been filed.
EMM Toolbar Actions
Save emails by:
1. Select email(s) or folder from Inbox
2. Actions (
)
3. Select Action from list
Results:
Move does not keep a copy in your Inbox
Copy leaves a copy in your Inbox and icon ( ) indicating it has been filed appears.
Move Folder creates adhoc folder in the selected workspace matter and moves all emails. You will be prompted to profile each email. Folder no longer exists in Outlook
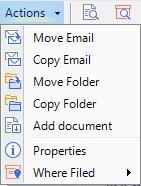
Copy Folder creates adhoc folder in the selected workspace matter and moves all emails. You will be prompted to profile each email. Folder remains in Outlook
Properties displays profile screen of email if it was filed.
Where Filed displays filepath of email that has been filed in iManage
Add document used to import document(s) from desktop, local drives or flash drives.
If you do not want to type
name and author when filing email:
1. Select message with attachment
2. Attachments (
)
3. Select Attachment name
4. Select New Document
5. Locate and select matter workspace folder
6. Complete Profile
7. Save
1. Select message with attachment
2. Attachments ()
3. Select Attachment
4. Select New Version
5. Locate and select original document
6. Add Comment about the version (optional)
7. Save
1. Drag and drop into iManage folder in navigation pane.
2. Complete the Profile
3. Save
To send and file an email at the same time:
1. Create message
2. Go to EMM Toolbar
3. Select a Filing Location ():
Suggested location (based on prior filing)
Recent location
Browse to other location in iManage
1. Let an internal receiver know the email has been filed.
2. When an internal receiver replies to the message, the iManage folder will display as a Suggested Location on the EMM Toolbar

This feature allows you to file emails into an Inbox subfolder where they automatically move to a folder in FileSite
1. Right click on Inbox
2. NEW FOLDER
3. Name the folder

4. Yes to Link to an iManage Folder
BROWSE ( ) to iManage Folder & Select
Choose whether or not to Leave a copy in folder after filing
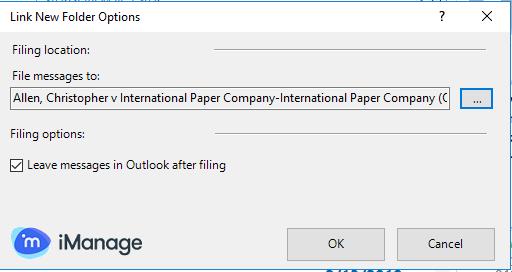
OK
1. Select Email(s)
2. Drag to folder in Matter Workspace
1. HOME | MOVE Move ()
2. Select folder from list or browse to a folder
1. Copy of email moves to designated iManage folder

2. Original email either remains in folder or is deleted
Locate Email in saved in Linked Folder
1. If you set up folder to keep a copy of the email, a copy will remain in folder for one year. OR….
2. If you elected not to keep a copy, you can:
Right click on linked folder
Select Go To iManage Folder
You will be relocated to the folder
When you use the Send and File feature, the email's subject is tagged with the folder ID, i.e., [GSLAWIMANAGE.FID549]
From your Start Menu:
1. Click on Search Windows
2. Type DeskSite
3. Click on DeskSite
To Pin DeskSite:
4. Add Users/Groups
5. Search a user/group
6. Select the Type of Access using the drop down
7. Click Confirm
8. Click OK
1. Right click on DeskSite from the applications or search list
2. Select Pin to Start
My Favorites
Quick links to documents, folders and searches for easy retrieval

Checked Out Docs Open documents
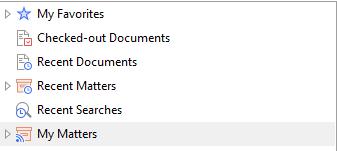
Recent Docs Last 40 documents that you created or edited
Recent Matters Last 10 matters which you have saved or edited documents
Recent Searches Lists all searches from current Outlook session
My Matters Your filing cabinet you add and remove matters and can manage the "My Matters" of others
1. Right click on My Matters
2. Subscribe
3. Select username from list
4. Click Add
5. OK
Note: You will only see names of those who gave you delegate access.
1. SEARCH | SEARCH WORKSPACES

2. Click Clear to clear the fields from your last search
3. Complete fields in the Workspace Search to narrow your results
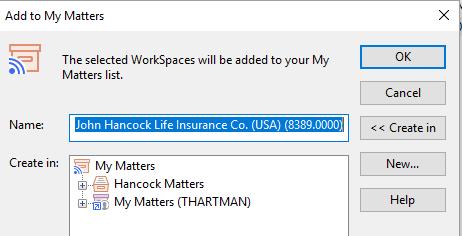
4. Use the Ellipses next to any field to search in that field
5. Click Search
6. From Search Results:
Right click on Matter
Select Add to My Matters
Rename (Optional)
To share your matters:
1. Right click on My Matters
2. Properties
3. Modify Security
7. Click OK

1. Right click on a Matter
2. Rename
3. Type the new name this name will only display in your My Matters. It is not changed in the database

Note: Use an underscore at the beginning of the name to float the workspace to the top of the list.
1. Right click on Matter Name
2. Delete
3. Yes
1. Each Matter is listed alphabetically by Matter Name
2. Use arrows to expand folders
1. Core folders specific to matter type
2. Structure determined at file opening
3. You cannot create adhoc core folders
Optional subset of folders related to each core folder
To add 2nd level folders:
1. Right click on a Core Folder
2. NEW FOLDER
The last six folders are searches specific to the matter:

Docs
Use Categories to organize your matters by:
Client
Attorney
Case Type
More…
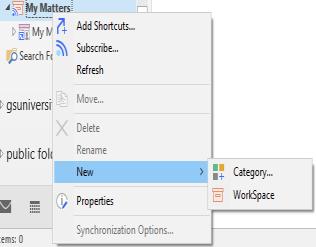
1. Right click on My Matters
2. NEW CATEGORY
3. Name it
4. OK
Drag and Drop from Matter Worklist
OR…
Select the Category when you add the matter to your My Matters
The Document Results Grid lists either folder contents or a list of documents/emails from a search.
1. Click once on any column heading to sort in ascending order (
)
2. Click column heading 2nd time to sort in descending order (
)
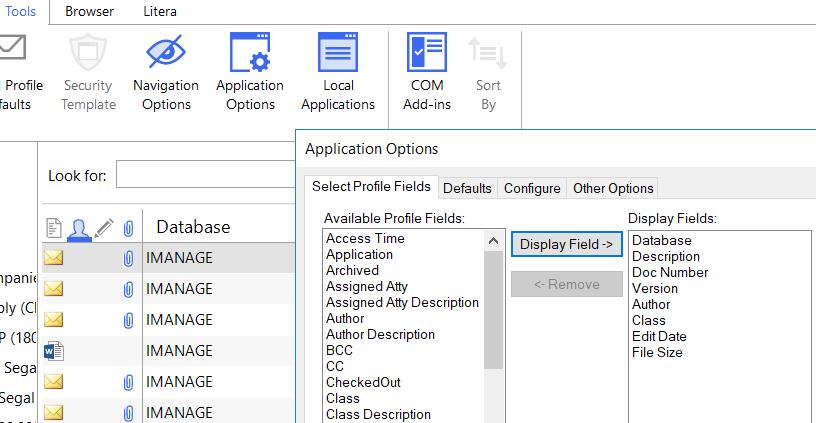
1. Click Tools
2. Click Application Options
3. Click Select Profile Fields
4. Chose the Profile Field you would like to add
5. Click Display Field to add to the Display Fields box
6. Click OK
From Desksite:
1. HOME | SEARCH
Search Documents
2. Click Clear as the most recent search will always stick
3. Complete fields in the profile to narrow your search results:
Description (Document Name)
1. HOME | SEARCH
Search Documents
2. Click Clear ONCE to remove prior search fields
3. Click Restrict Search to (
)
Documents and Emails (default)
Emails Only
Documents Only
Doc # you won't need to complete any other fields if you know this number.
Author (can use ellipses to search)
Created by (Typist)
Client # (can use ellipses to search)

Matter# (can use ellipses to search)
Class/Subclass (folder categories)
Date Created or Modified
Office (Office that opened the case)
4. Click OK
Note: The more you can limit the search by completing fields, the easier it will be to locate your document.


Using the Date Modified field can substantially limit your results.
4. Complete search fields as needed
5. Click OK

When searching from an application, your results will only display documents of that type. For example, Word returns only Word docs and Excel displays
Workbooks To search for a document:
IMANAGE
Open ( ) OR….
( ) on your Quick Access Toolbar
You can search for a document several ways:
1. Navigate using the left panel by:
Recent Folders
Checked Out Documents
Recent Documents
Recent Matters
Search (to find by document number)
1. Click on Search (
) | Document Search
2. Profile Search dialog box appears
3. Complete Profile Search
To complete a full text search,
1. HOME | SEARCH Search Documents
2. Click in Look For field and type text with quotes (") around the phrase

To limit your search to a single matter or folder within a matter:
1. Right click on Matter Name or Folder
2. Click Search documents


3. A pop up will appear notifying you that your search is limited to a container

3. Click Anywhere () to right of Look For to further restrict search.
4. Complete any other profile fields to narrow the search results (Author, Client #, etc.)
5. Click OK
1. Click Ellipse next to Anywhere field
You can now narrow search by:
Words that must be in document
Words which may be in document
Words that are NOT in document
4. Click Clear ONCE to remove prior search fields
5. Complete Search fields
6. Click OK
Note: Check the box to turn off the pop up, however, this can be a useful feature to notify you that your search is limited, prompting you to change your search container.
To save a search that you will use often:
1. Create a Search Folder in your 18000.#### non billable matter workspace by:
Right-click on any Level 1 or Level 2 folder
New
Search Folder
Name the folder
Save
2. Complete a Profile search, as described above
3. Click Save Search on the Profile screen
4. Navigate to your Search folder
5. Click Select
6. Name the Search
7. Click OK
Please use the matrix below to assist you in filing Correspondence into the proper folders or subfolders in iManage.

Best Practices
Billing Compliance Approvals
Communications from Best Practices are placed here. This is Read Only for all users.

Internal Communication

Interim Report
Pre-Trial Report
Any correspondence exchanged with the client that provides client approval for billing compliance. Items include travel, research time, etc. that support our billing.
Any budget including the initial budget and any revised budgets throughout the life of the file.
The initial evaluation report sent to the client.
All status reports and correspondence to the client that is not an initial report, budget or trial related reporting.

All trial related reporting.
All correspondence exchanged internally regarding the file (except for what Best Practices places in the Best Practices folder).
Correspondence exchanged we would not want others to see if the file were reviewed by anyone external to the firm.
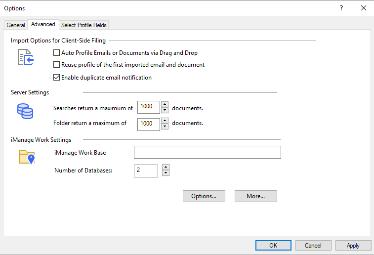
Utilize iManage Work 10 to import local file folders and documents into iManage while maintaining the folder structure and folder names.
1. Using Chrome, go to https://imanage.goldbergsegalla.com

2. Login using your email address and password
1. Click on Matters

2. Type the client.matter # or search by matter name to locate the workspace
3. Double-click on the workspace to open the folders
4. Select a folder
1. Select the document/video/folder(s) from your desktop or email

2. Drag the selected document/video/folder(s) into the matter workspace folder.
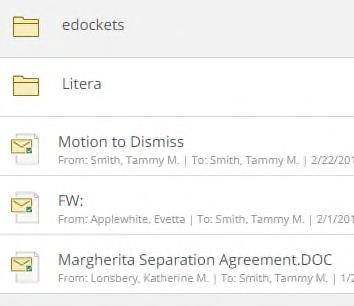
If there multiple folders or subfolders, it will keep the folder structure and folder names as they are imported into iManage.
3. A status bar will appear showing the progress of the import
There is no installation necessary. Work 10 is accessed via the web (see below).
Open your browser to https://imanage.goldbergsegalla.com
A login is not required if you are logged on using your desktop. It will recognize you automatically.
Use Client.Matter#
1. Click in Search bar at top
2. Click Clear Recent Searches from dropdown list
3. Click on Matters
4. Type the Client.Matter number in the Search bar at the top

5. Press Enter Use Keywords
1. Complete Steps 1 3 above
2. In Search field, type part of:
Matter Name
Client Name

Note: You do not have to use wild cards to find your matter.
1. Click on the Matter to expand folders:
2. The first six folders with a magnifying glass ( ) are search folders
3. Click on a folder or a search folder to display documents or emails
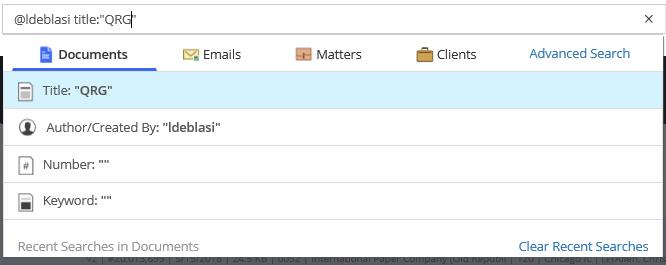
4. Click on the document name to see a document preview
Note: Documents are Read Only at this time. There is no editing available.
1. Click in Search bar at top

2. Click Clear Recent Searches from dropdown list
3. Click on Documents
4. Complete fields in dropdown list to narrow search
5. Press Enter
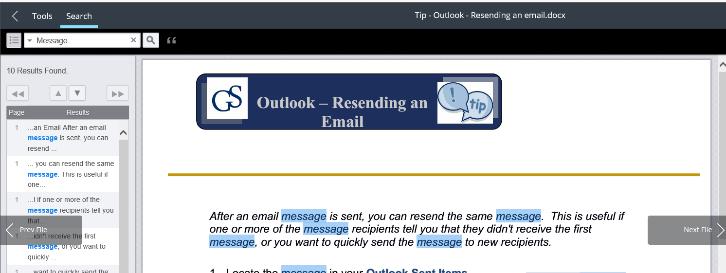
To search within document for keywords
1. Open document in preview mode
2. Tap Search at top of screen
3. Enter keywords in Search box
Navigation panel appears on left allowing you to navigate from instance to instance
Words are highlighted throughout document
To return to the home screen: Click on arrow next to Tools at top of screen
From Document Preview, tap Tools at top left to display the Tools bar. Not all tools are active at this time.
This will display each page of your document as a thumbnail in the left navigation pane
This will create a copy of the link (.nrl) to the document which you can then paste into an email or document for quick access.

This gives you a visual timeline of when document was accessed and modified. Click on….
1. Activities for timeline of document edits
2. Users for listing of document activity by user
3. List displays all document history
4. Versions displays and allows you to view previous versions of the document
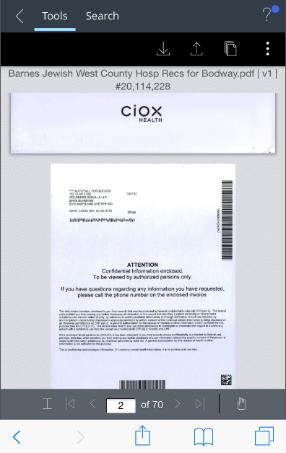
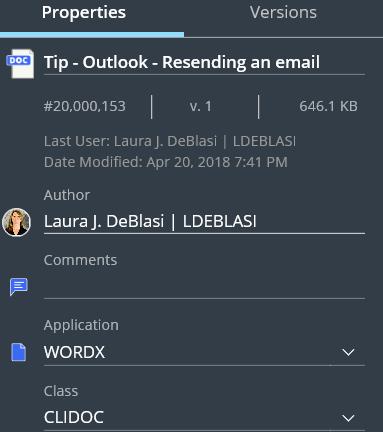
From either a search list view, document list view or document preview, the right navigation panel will display:
Properties document profile fields
Versions previous versions of the document
Tap any version for it to appear in the Preview panel
This mobility feature allows you to view documents sent from Central Mail via a link to iManage's Work 10 website.
1. Open the email on your mobile device
2. Tap the Document Number OR Document Name to open the document
Note: Do not click Tap to Download at the bottom of the message. This will not open up the document
3. Login using your full email address and network password
4. Your document will open in Preview Mode
5. Use the arrows at the bottom to navigate the document
1. Tap Documents or Emails on main toolbar
2. List of Recently Filed appears
To Perform Search
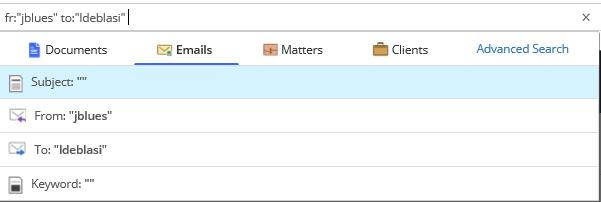
1. Click in Search field and add text OR…..
2. Tap on any field in the dropdown list and type text

Metadact is our new metadata scrubber that automatically cleans attachments emailed to recipients outside the firm.
WHAT IS METADATA?
Metadata is defined information describing the history, tracking or management of an electronic document. For instance, document data includes:
Author information
Last person to modify it
When it was created
Photo metadata includes:
1. Longitude/Latitude where picture was taken
2. Date/Time taken
Number of words
Track Changes
Comments
WHAT METADATA WILL BE REMOVED FROM ATTACHMENTS?
Document Properties
Comments
Tracked Changes all changes will be Accepted and Track Changes turned off
Hidden Text
Text smaller than size 6 font

WHAT METADATA IS NOT REMOVED?
1. Metadata associated with photos will NOT be removed. To remove this metadata, convert the photos into PDF(s).

HOW DO I KEEP TRACK CHANGES OR COMMENTS WHEN I SEND A DOCUMENT?
1. You can place a tag anywhere in the subject line:
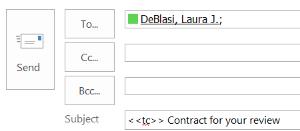
<<c>> - to leave comments

<<tc>> to leave track changes on
2. To convert attachments to PDF
<<pdf>>
NOTE: Tags are removed when the email is processed. Your recipient will not see them.
The following instructions will show you how to encrypt external drives. All external drives are required to have bitlocker encryption enabled in order to save data to it. Devices without encryption can be opened in read-only mode.
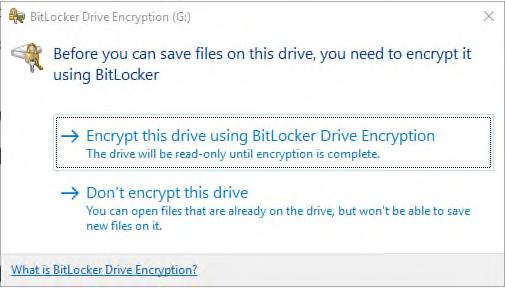
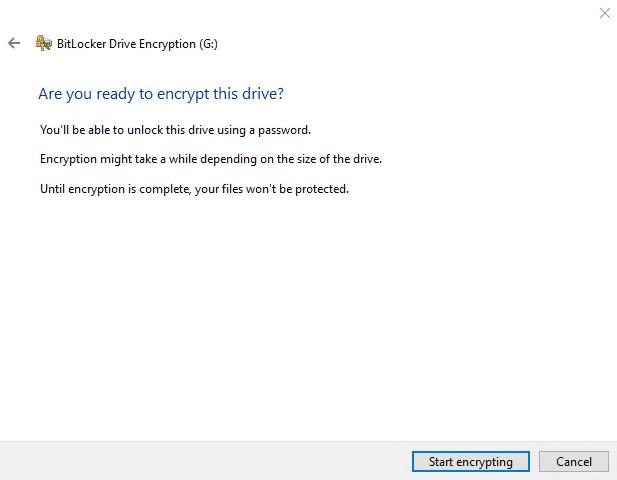
When attaching an external hard drive that has not yet been encrypted by our system, you will be prompted to Encrypt the drive.
Choosing the Don’t encrypt this drive option will allow you to access files within the drive as well as move files to your computer. In order to save to the external drive, you will need to choose to encrypt.
Prepare to Encrypt.

1. Select Encrypt this drive using BitLocker Drive Encryption
2. Enter (and reenter) a password to secure the drive.
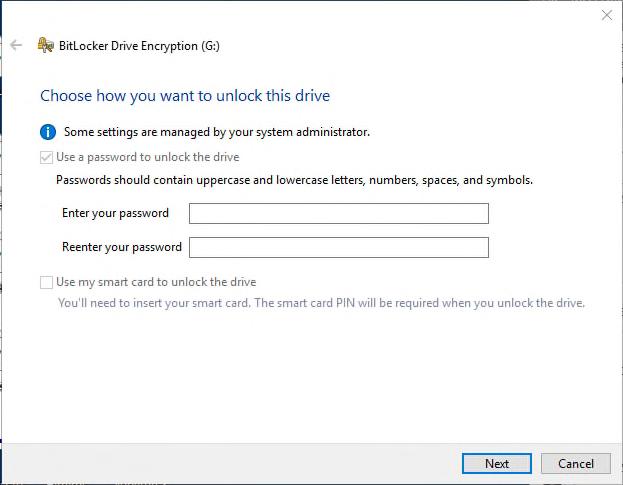
***Only IT can access the drive if the password is lost or forgotten***
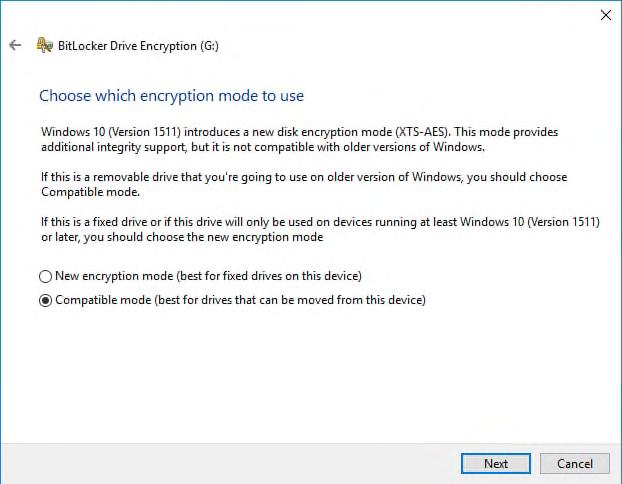
3. After successfully creating a password, leave the default option of Compatible Mode
4. Click Next.


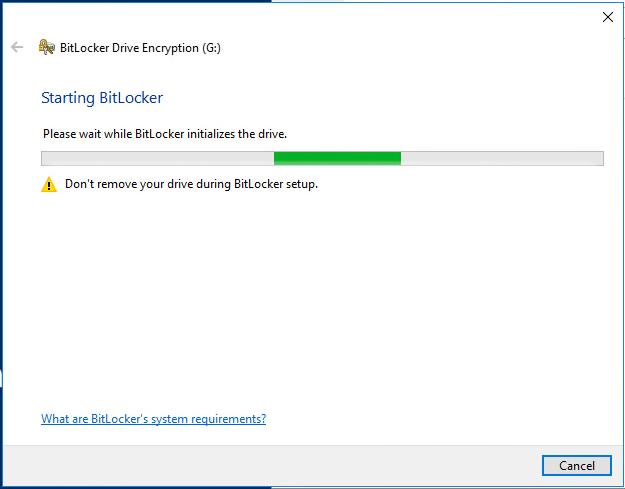
This process can take several minutes.
Once encryption is complete, you can enable auto-unlock which will allow you to use that storage device on your laptop without having to enter the password each time.
1. Open File Explorer
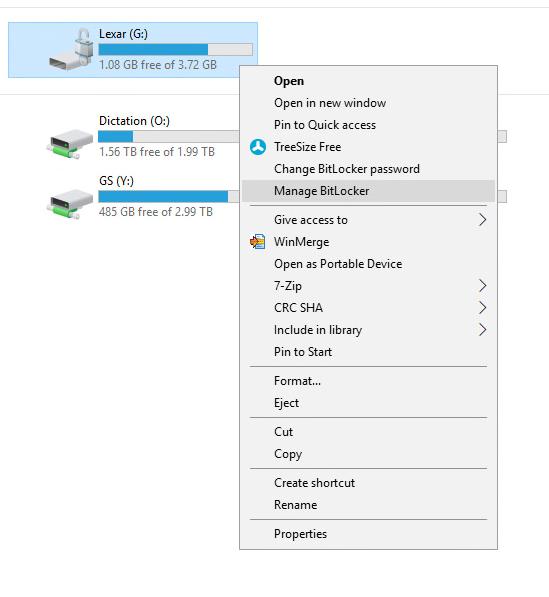
2. If “This PC” isn’t selected on the left panel, click on it.
3. Right click on the drive you just encrypted
4. Select Manage Bitlocker. (In this case it is the G: drive)
When inserting an encrypted drive, you will need to unlock that drive before you are granted access to the files. You may see a pop up message like the one below.
1. If you are able to click on the message in time, you will be prompted for the password
2. Otherwise, open File Explorer
3. Right click on the drive
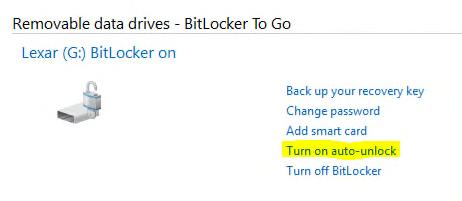
4. Select Unlock Drive

5. Enter the password
6. Click Unlock
**HINT** You can click on More Options and choose to automatically unlock on this PC to prevent having to enter the password every time.

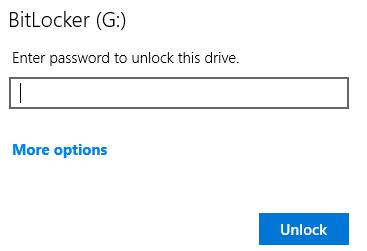
7. If you have forgotten the password, contact IT SUPPORT.
8. You will need to
• Click on More Options
• Select Enter the Recovery Key.
• Support will need the Key ID and will read the recovery key to you.

Attach a COPY of a document
1. Open a new email message
2. MESSAGE | IMANAGE Insert iManage Attachment


3. Locate a document
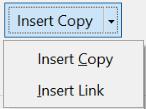
4. Click Insert Copy Or…
1. Open a new email message
2. Locate a document from a folder in FileSite
3. Press Ctrl + drag the document to the body of the email message
4. A copy of the document appears as an attachment
Or…
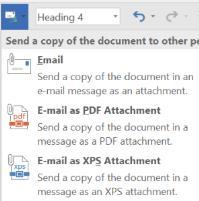
1. Open the document in Word
2. On the Quick Access Toolbar, click on the Send icon
3. From the drop down select:
Email as PDF
Email as XPS
4. A copy of the document appears as an attachment in a new email message
Attach a local document:
1. Open a new Email message
2. MESSAGE | INCLUDE Attach File
3. In the drop down, select Browse this PC
4. Locate the document
5. Click Insert
6. A copy of the document appears as an attachment in a new email message
Attach a LINK to a document
This feature can only be used when emailing internally. External users cannot access our documents.


1. Open a new email message
2. MESSAGE | IMANAGE
Insert iManage Attachment
3. Locate a document
Click on arrow next to Insert Copy
5. Click Insert Link
1. On the taskbar, locate the Outlook icon ( )

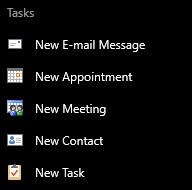

Right click on the icon and select New E-mail Message
1. Select the email message
Home | Respond
Reply
Reply all
Forward
Select a response option
In the Reading Pane, above the sender, select a response option
and select a response option
1. Select an email message
Home | Respond
Complete meeting
Meeting
Add any additional attendees using the TO… field
1. Select an email message
Home | Delete
Delete
1. Hover your cursor on the right side of the email
Click red
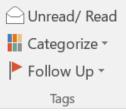
1. Select an email message
2. Home | Tags
Unread/Read
1. Select an email message
To the left of the message click on the blue bar to mark the message as Read
Click to the left of the message to mark the message as Unread
1. Open a new email message
2. Options | Show Fields BCC
BCC appears as a field in your email message and all future messages
To adjust your reading pane:
1. View | Layout Reading Pane
2. In the drop down, select position for the pane on your screen:

Right
Bottom
Off
3. Options uncheck the listed options if you do not want the system to automatically mark messages as read when you click on them but do not open them.
To flag an email for follow-up:
1. Select an email message
2. Home | Tags Follow Up
3. Select a follow up timeframe from list.
Flag will appear on Email
You can filter to see flagged messages
Flagged messages appear in your task list
Overdue flags change text in email to red
1. Click on the arrow next to Inbox to expand the folder list

2. Select an email message
3. Drag the email to any folder
4. The email is now filed in the folder
Or…
1. Select an email message
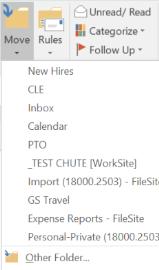
2. Home | Move Move
3. Select a folder from the recents list OR…..
4. Select Other Folder to browse to:
Inbox subfolders
Filesite (iManage) workspace folders
5. Click OK
1. Home | Move
Always move messages to:
Create a rule
Manage rules & alerts
SEARCH EMAILS
Search Current Mailbox:
By default Outlook is set to search your entire Mailbox which includes:

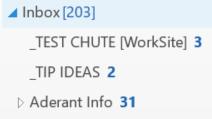
Inbox
Subfolders
Sent Items
Deleted Items
2. Click in the Search Current Mailbox field
3. Type in Keywords for your search
4. Enter
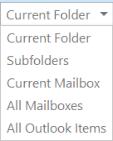
You can easily change what Outlook is searching by:
1. Click on arrow next to Current Mailbox (
2. Restrict to:
Current folder
Subfolders
3. Expand to:

All Outlook Items
All Mailboxes
Rules
2. In the drop down, select one of the following:
When you perform a search, the Search Tools ribbon appears. Use it to refine by:
From
Subject
Has attachments
Flagged
And more!
Do not use the “Search All Mail 1 Year folder. This is NOT searching your Mailbox, it is searching Mimecast
Most attorneys practically live in their email inboxes. It’s where the majority of client communications take place, as well as interactions with other attorneys and staff members, not to mention the steady stream of updates and newsletters from third party companies and vendors. Nothing is worse than opening up your inbox to see hundreds (or thousands) of unread emails. It’s incredibly stressful. Managing email effectively can make a huge difference in not only your productivity, but more importantly, your happiness and sanity.
• Does the message relate to a meaningful objective you're currently working on?
• Does the message contain information you can find elsewhere? If so, delete it.
• Does the message contain information that you will refer to within the next six months? If not, delete it.


• Does the message contain information that is substantive to a matter? You guessed it, delete it
- Conversation Clean-up
- Ignore Conversation Do it
• If it will take less than two minutes…DO IT!
• Does the message relate to a meaningful objective you're currently working on? If not, you can probably delete it. Why keep information that doesn't relate to your main focus? Does the message contain information you can find elsewhere? If so, delete it. Does the message contain information that you will refer to within the next six months? If not, delete it. Does the message contain information that you're required to keep? If not, delete it
• If you can't delete it or do it in two minutes or less, can you forward the email to an appropriate team member who can take care of the task?

• If you can delegate it (forward it to another team member to handle), do so right away. You should be able to compose and send the delegating message in about two minutes. After you have forwarded the message, delete the original message or move it into your email reference system.
• Quick Steps
• Quick Parts Defer it
• If you cannot delete it, do it in less than two minutes, or delegate it, and the action required is something that only you can accomplish – Defer It. Because this is your dedicated email processing time, you need to defer it and deal with it after you are done processing your email. You’ll probably find that about 20 percent of your email messages have to be deferred.
Turn into actionable task by:
• Drag to Tasks
• Drag to Calendar (add reminder)
• Flag it
In a work day, if you really pay attention, a vast majority of the emails you receive are for internal communication purposes.
By using other means to facilitate internal communications in your firm, you will be doing yourself and your employees a favor.
For example, you can make a quick conference call, or utilize LawBase features such as shared notes that allow you to leave notes on a case for your teammates.
The Conversation Clean Up feature in Outlook can help eliminate the number of messages in your mail inbox by moving redundant messages in a conversation to your deleted items folder


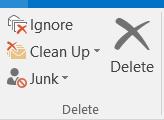
1. Home | Delete Clean Up
2. Select from:
• Clean up conversation – current conversation is reviewed and redundant messages are deleted
• Clean up folder – all conversations in the selected folder are reviewed and redundant messages are deleted
• Clean up folders and subfolders – all conversations in the selected folder and any folder that it contains are reviewed and redundant messages are deleted.
This feature places current and future instances of an email string into deleted items.
1. Home | Delete Ignore
2. Click Ignore Conversation
1. Home | Quick Steps Create New
2. Name the new quick step
3. Choose an Action from the list
4. Complete any additional fields for action, i.e.,
• Folder to file
• Email details
• Category
5. Click Add Action if you wish to add another step
6. Click Finish when complete
The Quick Step now appears in Quick Steps on the Home ribbon.
1. Select a Message
2. Home | Quick Steps Quick Step Name
1. Open a New Message
2. Type a message, phrase, table, or add an image.
3. Select the text or image
4. INSERT | TEXT Quick Parts
5. In the drop down, select Save Selection to Quick Parts Gallery
6. Name it (one simple word or abbreviation)
7. Click OK
1. Type the name of the Quick Part you saved
2. Press F3 button on your keyboard
3. The quick part is now inserted into the body of the message
1. Open a new message
2. Click in the body of the email
3. Message | Include Attach Item
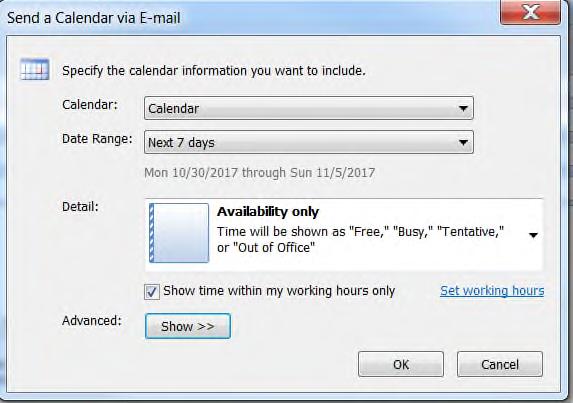
4. Select Calendar from the dropdown list
A dialog box appears with for you to set the following options:
1. Date Range you wish to display
2. Level of Detail – Availability only is a best practice
3. Show working hours only

You can delete, mark messages as unread or flag messages from within the Inbox Message List.
To Delete a Message:
1. Click the “X” next to a message.
To change the Read/Unread Status of a message from within the Message List.
1. Right-click on folder [Chute]
2. Select Go to iManage folder
Create a new message, appointment, meeting, contact or task right from the taskbar while working on other projects
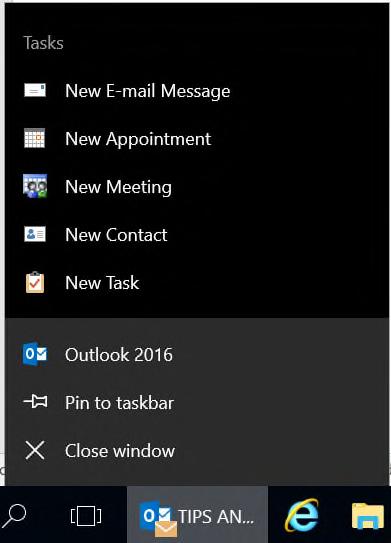
From Word or any other open application:
1. Right click on the Outlook application icon on the taskbar
2. Select a Task
2. Click the blue bar to the left of the message
3. A new window will open to perform the task

1. Create your message
2. Attach document
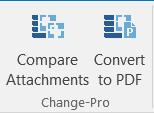
3. Select Litera or ChangePro tab
4. Click Convert to PDF
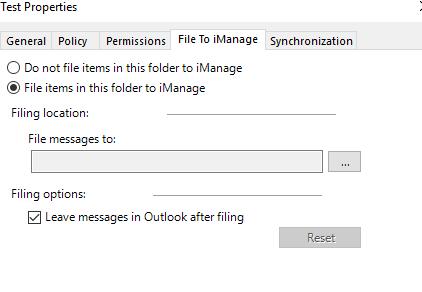
Linked folders allow you to file emails into iManage via your Outlook inbox subfolders. These folders work just like a laundry chute. Any emails dragged into the Outlook folder, move down the "chute" into a designated iManage folder.
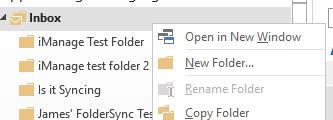
1. Right-click on your Inbox


2. Select New Folder
3. Name the Folder
4. Click Yes to link to an iManage folder
5. Use the ellipses to browse to an iManage folder
6. Check Leave Messages in Outlook after filing if you wish to keep a copy of the email in the folder

Once you complete the task, you will automatically return to the original application.
Metadata is automatically removed from all attachments that leave the firm. If you wish to retain Track Changes or Comments, place one or both of these tags ANYWHERE in the subject line:
1. Track Changes: <<tc>>
2. Comments: <<c>>
1. Select your Inbox or any other Outlook folder
Click in the Search Inbox (Ctrl +E) field
Type Keywords
your Search
Using the Search Tools ribbon to limit your search to:
Specific Sender/Recipient
Email with Attachments
Specific Time Period
Messages you flagged for follow-up
Xmedius is a cloud based desktop faxing system. This faxing system will also improve compliance with HIPAA, GDPR, FERPA, SOX, and other regulations
1. Open a new message in Outlook

2. MESSAGE
NCLUDE
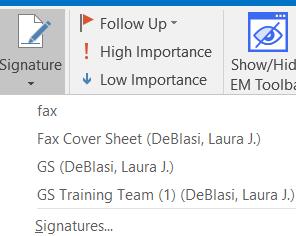
Signature
3. Select Fax Cover Sheet from the list
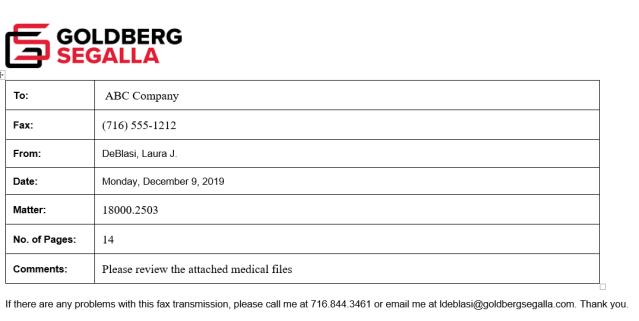
Complete the Fax fields

Address
1. Complete the To, CC
number(s)
BCC
as follows:
Type the fax number on your fax cover sheet with no spaces or dashes@xmedius.com
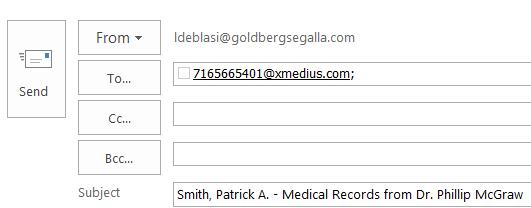
1. Message | iManage Insert iManage Attachment

2. Navigate to and select your document
3. Click Insert Copy
4. Document will appear as an attachment
5. Click Send
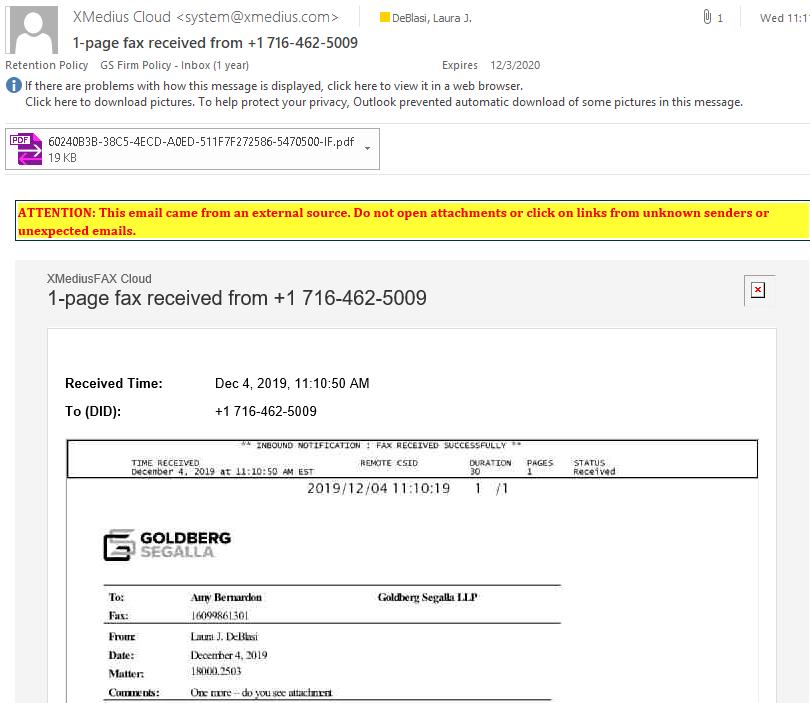
You will receive both success and failure notifications in your Outlook Inbox. Your documents will be attached as a PDF.
The first page of your fax (cover sheet) will appear in the body of the message.
If you only want to save the Confirmation Sheet in iManage, you can remove the attachment before saving by:
1. Select Message
2. Select Attachment (Attachment toolbar appears)
3. Click Remove Attachment
Xmedius is a cloud based desktop faxing system. This faxing system will also improve compliance with HIPAA, GDPR, FERPA, SOX, and other regulations
Create Fax Cover Sheet
From Word:
1. CREATE
REATE
New
2. Expand Letters, Memos, Fax
3. Select Fax Sheet
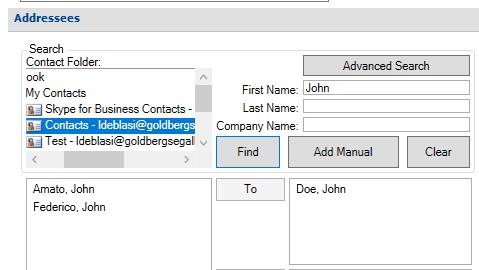
6. Add Contact from:
Your Outlook contacts
Add Manual
Type after cover sheet is created
4. From the Type dropdown list, select Standard Fax or Paperless Fax
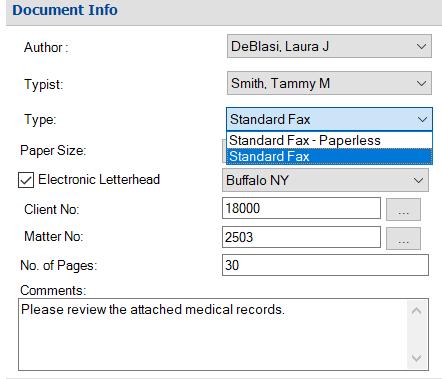

5. Complete:
Client/Matter
Pages
From your Quick Access Toolbar (QAT):
1. Click Send to Mail Recipient ( )
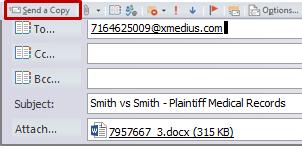
2. Complete the To, CC or BCC fields with the fax number as follows:
Type the fax number on your fax cover sheet with no spaces or dashes@xmedius.com (see sample below)

1. Click Insert Text From File ( )
2. Navigate to and select your document
3. Click OK
4. Document will appear as an attachment
5. Click Send A Copy on the mini Outlook toolbar
You will receive both success and failure notifications in your Outlook Inbox. Your documents will be attached as a PDF.

The first page of your fax (cover sheet) will appear in the body of the message.
If you only want to save the Confirmation Sheet in iManage, remove the attachment before saving by:

1. Select Message
2. Select Attachment (Attachment toolbar appears)
3. Click Remove Attachment



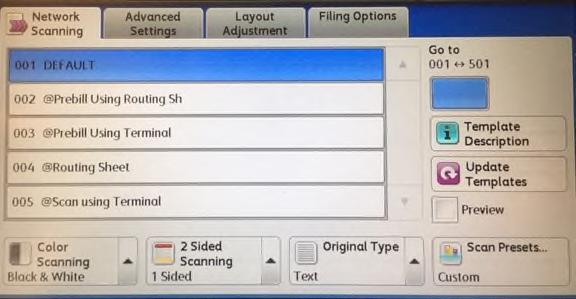

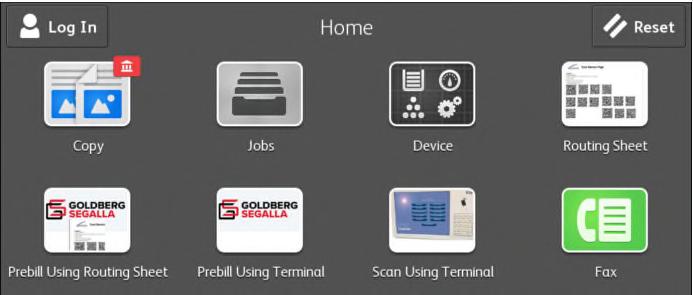
1. From COPIER HOME SCREEN
2. Tap Prebill Using Routing Sheet
3. Insert documents into the document feeder
4. Tap Scan
From Terminal
1. From COPIER HOME SCREEN
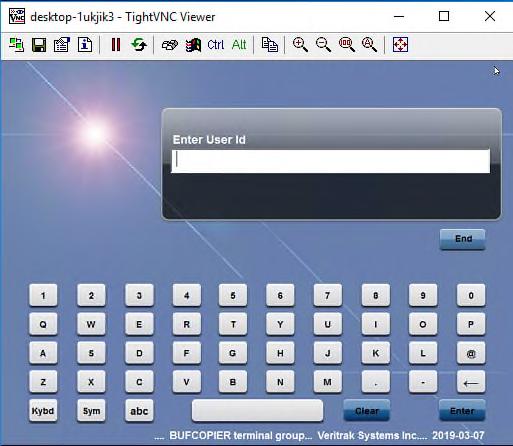
2. Tap Prebill Using Terminal
3. Log into TERMINAL
4. Select Scan to Email or Scan to Folder
5. Insert documents into the document feeder with routing sheet on top.
6. Tap Scan
7. Preview appears on TERMINAL
8. From TERMINAL, Tap Send or End to complete the job
Note: Please do not change any settings as they are configured specifically for the pre-bills.
1. Tap Network Scanning

2. Tap @Prebill Using Routing Sheet

3. Insert documents into the document feeder with the routing sheet on top
4. Press Start on the COPIER
From Terminal
1. From COPIER HOME SCREEN
2. Tap Network Scanning
3. Tap @Prebill Using Terminal

4. Log into TERMINAL
5. Select Scan to Email or Scan to Folder
6. Insert documents into the document feeder with routing sheet on top.
7. Press Start on the COPIER
8. Preview appears on TERMINAL
9. From TERMINAL, Tap Send or End to complete the job
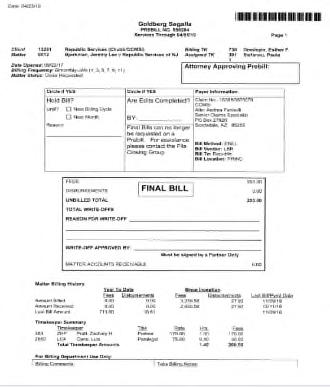
Pre-bills need to be scanned portrait and not landscape. Refer to sample. The arrow displays how the document should be placed into the document feeder.

Routing sheets contain QR Codes (quick response) that instruct the copier to perform a series of actions. For example, scan and email a document to several recipients. These sheets can be re-used as needed.
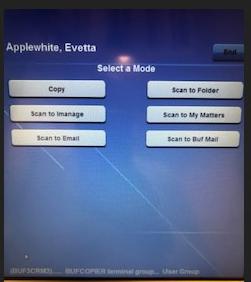
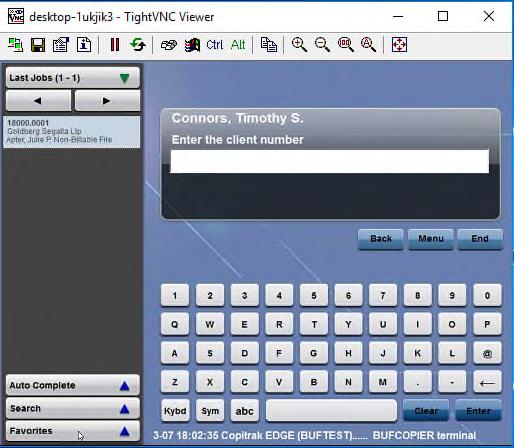
From the Copitrak terminal:
1. Tap any key to wake the terminal
2. Login with your TimekeeperID#
3. Select a Mode (see below)
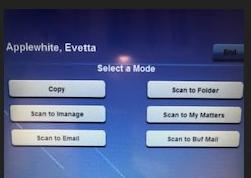

1. Tap Scan to Email
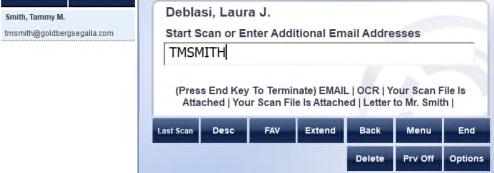
Your email address is applied by default.
2. Enter additional INTERNAL email addresses (optional)
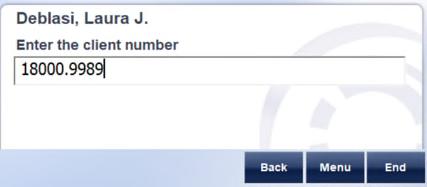
1. Tap Scan to Folder
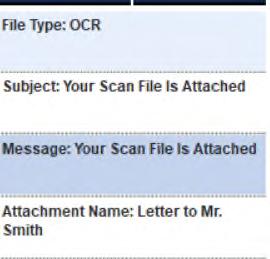
2. Type Description (document name)
3. Tap Options button to change:
• Subject
• Message
• Attachment
4. Tap Print Banner
Routing sheet will print
3. Tap Enter
4. Tap Print Banner

5. Routing sheet will print
Document(s) appear in your scan folder on the X:drive
1. Tap Scan to iManage
2. Search for WORKSPACE or Select from Recents in left navigation pane
3. Expand workspace
4. Select folder or subfolder
5. Name the document (Description)
Change Author (optional)
Tap Print Banner (bottom left)
Routing sheet will print
1. Tap Scan to My Matters
2. Expand My Matters in left navigation pane
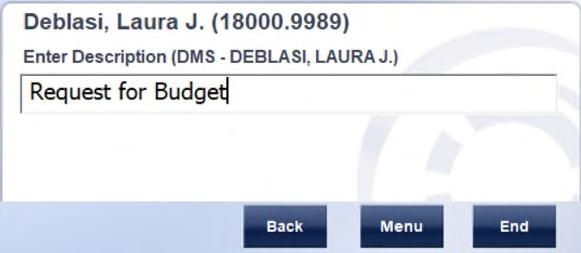
Expand workspace
Select folder or subfolder
Name the document (Description)
Change Author (optional)
Tap Print Banner (bottom left)
Routing sheet will print
1. Proceed to COPIER HOME SCREEN
2. Tap Routing Sheet
3. Insert documents into the document feeder with the routing sheet on top
4. Tap Scan
Note: You can run multiple jobs at once. Simply load all your jobs in the feeder with the corresponding routing sheet on top of each job.
1. Proceed to COPIER HOME SCREEN
2. Tap Network Scanning
3. Tap @Routing Sheet
4. Insert documents into the document feeder with the routing sheet on top
5. Press Start
1. Proceed to COPIER HOME SCREEN
2. Tap Routing Sheet
3. Tap Build a Job

4. Tap On
5. Place your routing sheet on top of the first set of documents you are scanning
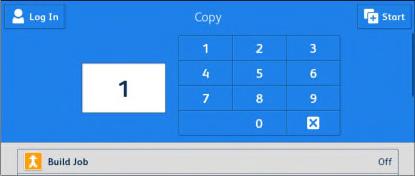

6. Tap Scan to start your job
7. After scanning your first set of documents, add the remaining documents
8. Tap Scan Next Segment
9. Once all documents have been scanned, Tap Submit
10.When all documents are processed, you will receive a Completed notification on your screen.
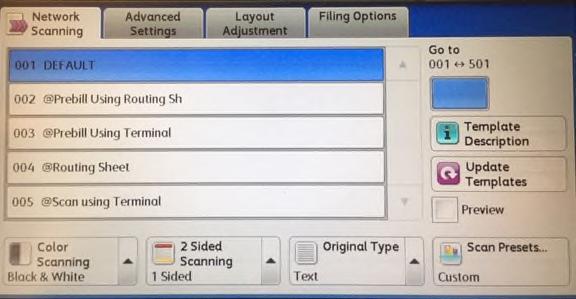
1. Proceed to COPIER HOME SCREEN
2. Tap Network Scanning

3. Tap @Routing Sheet

4. Place documents in Copier feeder
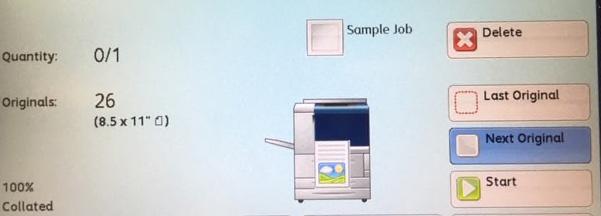
5. Tap Start
6. While the documents are feeding, tap Next Original
7. Place next set of documents in the feeder
8. Tap Start
9. Tap Last Original when you are finished

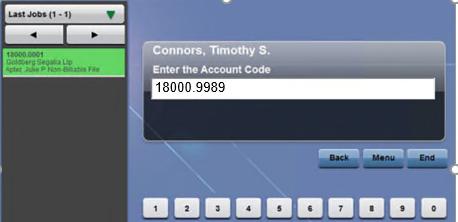
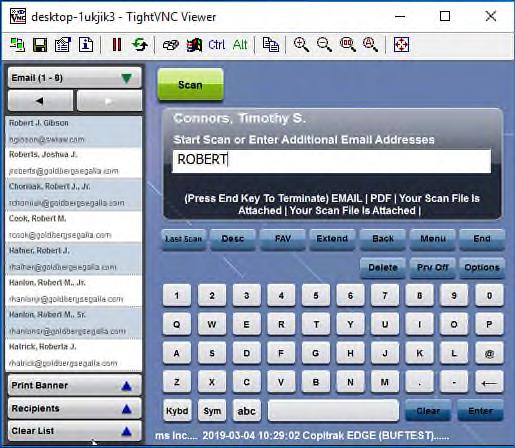
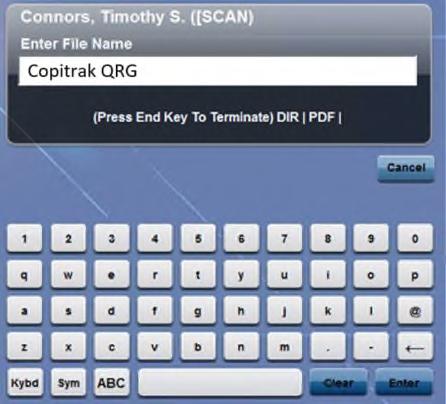


9. Load document(s) in the feeder or place on glass
10. On COPIER screen, tap Scan Using Terminal
11. On COPIER Tap Scan
12. Preview appears on the TERMINAL
13. Tap any Option in left navigation pane of the TERMINAL (See Scan Options section below)
14. Tap SEND or End on the TERMINAL to complete the job or Next Job if you have another document to scan
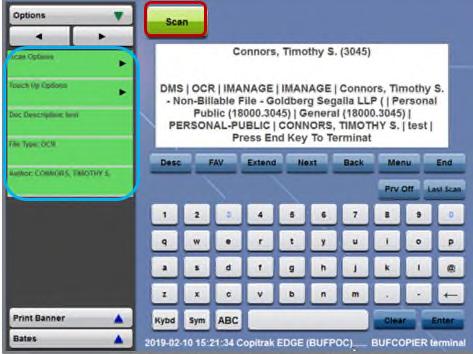
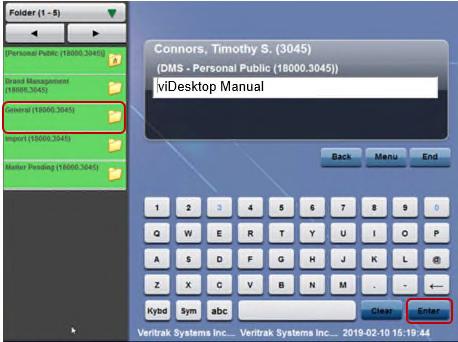
Use this process to easily locate a workspace in your My Matters. From the Home Screen:
1. Tap Scan to My Matters
2. Your Matters appear in the left navigation pane
3. Tap the workspace to expand folders
4. Tap the destination folder
5. Follow Steps 7-15 above to complete the scan
Once the Preview screen appears in any scan, you have the option to replace one or more pages by:
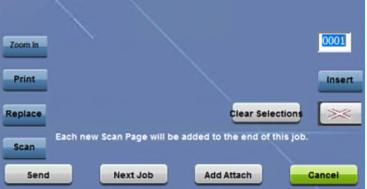
1. Tap the page(s) you want to rescan two times ( checkmark appears on page)

2. Load the new page(s) in the feeder
3. Tap Replace Original pages will be marked with ( )and will not be included with Send
From Scan Preview Screen:
1. Tap twice on page located to the right of where you want pages inserted ( appears)
2. Tap Insert
3. Load Documents
4. Tap Scan

Prior to completing a scan job, you are presented with options in the left navigation pane. Options change based on the scan you are performing.
1. Name Document or Attachment –if you do not type a name, the system assigns one.
2. Author – the systems assumes you are the author. Tap this option to change.
3. Touch up –
4. File Type – HQ PDF, PDF/A,
5. Subject – you can customize email subject line

6. Message – you can add a message to the email.
7. Bates Numbers


1. Follow the Basic Copy Job steps 1-6
2. Tap Copy Output tab
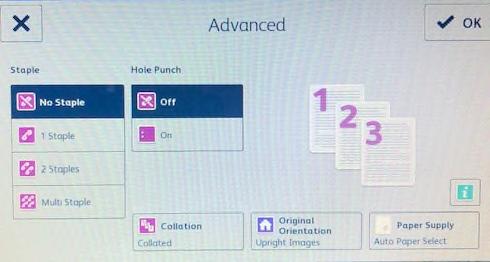
3. Select 2 Holes or 3 Holes along with position on the page.
4. Tap Save
5. Tap Start
1. Follow the Basic Copy Job steps 1-6
2. Tap Output Format tab
3. Tap Annotations
4. Tap Page Numbers
5. Select Position to change where page numbers appear. Default is bottom right

6. Select new position from presets
7. Tap Save
8. Tap Start

1. Follow the Basic Copy Job steps 1-6
2. Tap Job Assembly tab
3. Tap Build Job
4. Tap On
5. Place documents in Copier feeder


6. Tap Start
7. Place next set of documents in the feeder
Tap Start
Tap Last Original when you are finished


6. Tap the destination folder
7. Type Document Name
8. Tap Enter
9. Load document(s) in the feeder or place on glass
10.On COPIER screen, tap Network Scanning
11.On COPIER Tap Scan
12.Preview appears on the TERMINAL
13.Tap any Option in left navigation pane of the TERMINAL (See Scan Options section below)
14.Tap Send or End on the TERMINAL to complete the job or Next Job if you have another document to scan


Use this process to easily save a scan to a workspace in your My Matters. From the TERMINAL Home Screen:
1. Tap Scan to My Matters
2. Your Matters appear in the left navigation pane
3. Tap the workspace to expand folders

4. Tap the destination folder
5. Follow Steps 7-14 above to complete the scan

Prior to completing a scan job, you are presented with options in the left navigation pane. Options change based on the scan you are performing.
1. Name Document or Attachment – if you do not type a name, the system assigns one.
2. Author – the systems assumes you are the author. Tap this option to change.
3. Touch up – adjust darkness/lightness
4. File Type – HQ PDF, PDF/A, Word
5. Subject – you can customize email subject line

6. Message – you can add a message to the email.
7. Bates Numbers (see Tip Sheet)
Once the Preview screen appears in any scan, you have the option to replace one or more pages by:

1. Tap the page(s) you want to rescan two times ( checkmark appears on page)

2. Load the new page(s) in the feeder
3. Tap Replace Original pages will be marked with ( ) and will not be included with Send
From Scan Preview Screen:
1. Tap twice on the page located to the right of where you want pages inserted ( appears)
2. Tap Insert
3. Load Documents
4. Tap Scan
1. Open your Outlook Calendar
2. HOME
1. APPOINTMENT
MANAGE
Insert iManage Attachment

NEW
New Appointment or double click on a day
3. Add a subject and location
4. Select a start and end date and time
5. In the body, include additional meeting information (optional)
6. APPOINTMENT
2. Locate a document
3. Click Insert Copy Or…
1. Located a document in iManage
2. Press the CTRL key and drag the document into the body of the meeting
ATTENDEES
Invite Attendees
7. In the To: field select attendees
Indicate attendees as required, optional, or resource
8. APPOINTMENT
3. The document will show as an attachment
1. HOME
New Appointment
HOW
Indicates when an attendee is available

9. Click Send
Or…
10.Open your calendar in Outlook
11.Single click on a day
12.Begin typing calendar appointment information:
Include a timeframe (i.e. 8:00am 8:30am)
Include a meeting title
1. MEETING
Reminder
2. Select a reminder timeframe
1. MEETING
Show
2. Select a show as option
show attendee
Office
Note: This is useful when utilizing the scheduling assistant feature to see the free/busy time of invitees.
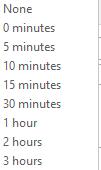
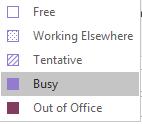
2. Add a subject and location
3. APPOINTMENT
OPTIONS
4. Add a start and end time
Recurrence
5. Select the recurrence pattern daily/weekly/monthly/yearly & include specific day(s) of the week

6. In the range of recurrence section, select a start and end date
7. Click Ok
8. Click save and close
1. Double click on the appointment in your outlook calendar
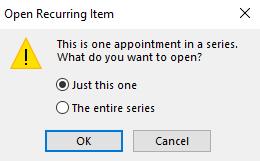


2. Select just this one or the entire series
3. Click Ok
4. Edit the appointment
5. Click save and close
Note: A pop up will ask if you want to change the date of all occurrences, click yes to change the current occurrence. If you want to change all occurrences, select open the series upon editing the appointment.
1. Right click on the appointment you wish to delete
2. Select delete
3. Select delete this occurrence or delete the series
Note: If you delete a recurring appointment, you will need to send a notice to the attendees so it will notify them and delete off of their calendars.
1. Locate a calendar entry
2. Drag the entry to another calendar day
3. A pop up will occur that the time of the meeting has changed. Choose one of the following:
Save changes and send update
Don’t save changes
4. The appointment screen will open to make any changes
5. Click send update
1. MEETING | RESPOND
Response Buttons
2. Select a response: Accept, Decline, or Tentative

3. In the drop down select:
Edit the response before sending
Send the response now
Do not send a response
1. Open the calendar appointment
2. In the start and end time select a new date or time
3. Click Send Update
4. An updated meeting appointment will be sent to the invitees
1. Right click on the calendar appointment and select Cancel Meeting
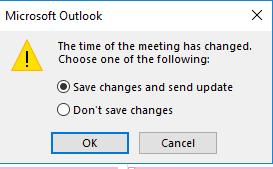
2. Click Send Cancellation


1. MEETING | TAGS
5. Select a color

6. Click Ok
Adding a category to a calendar entry
1. Open the outlook calendar

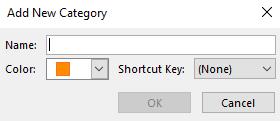
2. Select a calendar entry
3. MEETING | TAGS
4. Select a category
Categorize
Categorize
2. In the drop down, select all categories
3. Click New
4. Name the category
Mimecast is a secure email gateway used for:
1. Spam and virus protection.
2. To send and receive emails in the event of a server outage.

3. Email Archive It saves all incoming and outgoing email for 13 years, even if deleted from within Outlook. It is your safety net.
If Mimecast considers an email is suspect, it will be placed on hold and you will receive an email message.
The message will display sender, subject, and date received. You have the option to:
1. Release this will release the email to your inbox. However, future emails from this source will be placed on hold
2. Block all future messages from this sender will be blocked
3. Permit will release the email to your inbox and permit all future emails from this sender
stop
1. Click Compose
2. Add a recipient in the TO… field.
a) If you are sending an email to a recent contact, begin typing the name and the email will autofill
b) To send a message to someone that is not in your recent contacts, click on the and it will load the global contacts.
3. Type in the subject and the body of the email
4. Add attachments
5. Click Send
Search from Mimecast Website Inbox
1. From the Inbox, begin a quick search using the Search All Mail, 1 year search bar
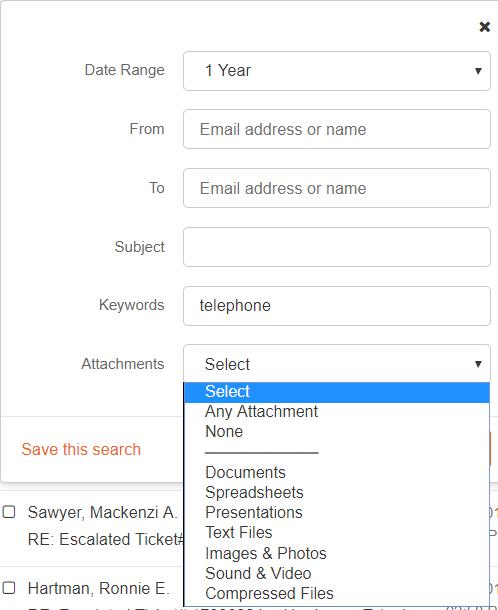
To refine your search, click the Options button:
Next complete any/all search fields:
1. Date Range select from dropdown: today, yesterday, one week, one month, etc. or type in a range of dates
2. From / To Select from the dropdown list or type the name
3. Subject Insert any keywords specific to email’s subject line.
4. Keywords search based on words within the email
5. Attachments Select attachment type from dropdown list
6. Click Search
7. Once your results are found, you can save the search or refine it further.
8. Select any email to display a preview on right of the screen
1. Select an email(s)
2. Use the buttons at top to:
Reply
Forward
Forward as an attachment
Block Sender or Domain


Report Spam or Phishing
1. From your Outlook Inbox, begin a quick search using the Search All Mail, 1 year search bar
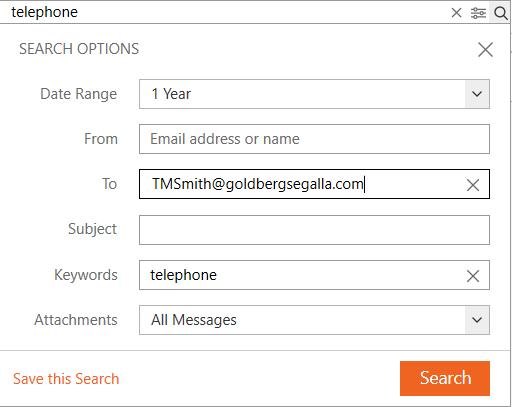
1. Forward Email it will lose its integrity, i.e., Date Sent, Sender, Recipient
2. Export to Outlook if it is older than allowed by our retention policy, it will automatically delete.
The Mimecast search results screen will open
2. To refine your search, click on the Search Options button
3. Add information to search fields to expand or narrow email search results
To Restore the email:
Select an Email
Click on the More Actions button
Select Download
Save to your desktop
File to iManage
OneDrive is a cloud-based service that enables you to collaborate with users to by sharing documents and files regardless of size. These are shared in a secure environment.
1. Open Chrome
2. Proceed to Office.Com
3. Use your network email & network password to sign in.
4. Open OneDrive by clicking on the blue cloud in the apps

Create Folder
1. Click New
2. Select Folder
3. Name it
Upload Files To Your Folder

1. Open folder
2. Click Upload
3. You will be prompted by i Integrate (if you have it installed) to upload from iManage. Otherwise, you will access your local drives.
2. Click Share at the top of the screen
3. Enter email address(es)

4. Add Message
5. Your choices to Share are:
Send to send directly through OneDrive
Copy Link to paste into an email
Click Open
can also:
1. Drag and drop your files from iManage to OneDrive by:
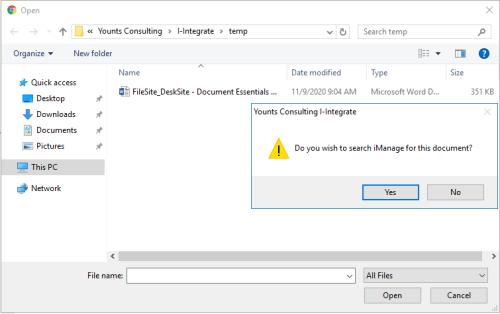
Select the documents (iManage or Local)
down Control + Left Click
Drag to the folder
Outlook option requires you to log into Outlook not recommended
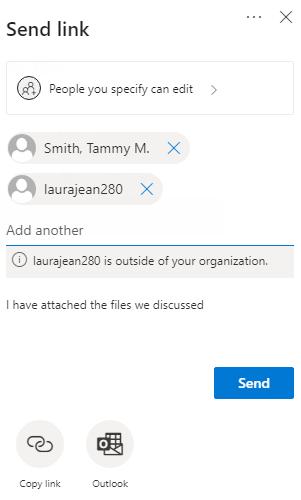
6. To change link options, click on People with existing access can use the link
Please note: The link is only good for one month and you will only get confirmation that the recipient accessed the documents when you send the link through One Drive, not if you copy the link into an Outlook email

1. Select documents or folder to be downloaded
2. Click Download
3. A copy of the documents will be in your local Downloads folder
4. If only one document is chosen, OneDrive will open the document

1. Select the folder you want files to be uploaded to
Click Request files
Below What files are you requesting
enter a description
Click Next
Choose to either:
Copy Link (which you can paste into an email)
Send via email add addresses
Add a message (optional)
Only recipients of the link can access the files you share. If they forward the link, access will be denied to that person.
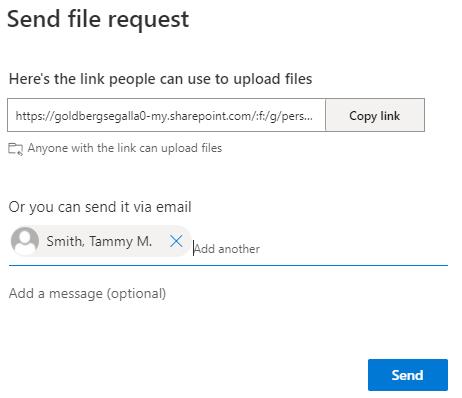

Size limits are as follows:
1. Web based download 300 MB
2. Desktop download 100 GB
1. Email all of the documents (as a PDF) for signature to RecordsRequest@goldbergsegalla.com
2. Be sure to include the following information:
Full Name(s)
Email Address(es)

Where to sign if not obvious
Who should be copied on the notification email
Records is available to print and mail the signed documents, if requested. Include any information needed
1. After the document has been sent for signature, you will receive an email notification. You will receive one email for each document sent.
2. You will receive another email once the document has been signed
3. The email contains a link in the email for you to download the signed document.
4. Download and save into iManage
PLEASE NOTE: Records will not be saving the signed documents. Also, the link is only good for 30 days, so be sure save the signed document and certificate upon receipt

RightSignature is an easy way to send a document for a legally binding signature
1. Send an email to IT Support requesting Winscribe. Include the name of your Assistant in this email.
2. Download Winscribe from the App store. You will need your Apple ID and password
3. Follow the setup instructions sent from ITSupport which will include your Author ID#.
4. Your Author ID# is also the password.
5. Once the application is downloaded, tap the Winscribe icon ( )


6. Winscribe will open in Draft Folder view displaying any existing Saved Drafts.
1. Tap the ( ) icon at the top of your screen
2. Tap Subject to enter a description for the dictation
3. Tap Job Type if you wish to change typist:
Preferred Typist Job (Default) your assigned Assistant
Overflow
KSP KeyStroke Pro external for overnight typing
Record dictation
4. Tap ( to begin recording dictation
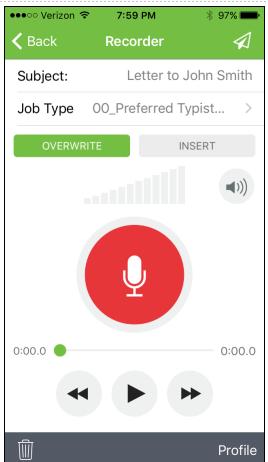

5. When recording Pause ( ) and Playback controls will be available to you
The Recording Timeline displays length of dictation
If you decide to discard the dictation, Tap the ( ) icon at the bottom of the screen
Save Dictation as Draft
If you wish to complete the dictation at another time:
1. Tap Back at the top of your screen
2. Dictation will appear in Drafts Folder
Save and Send a dictation
Tap send icon ( )
Dictation will be sent to chosen Job Type (typist) immediately without further profiling
Additional details will assist the typist to complete and properly save the dictation.
To further profile your dictation before sending: After completing the dictation
Tap ( ) at the bottom of your screen
Tap any additional fields you wish to complete or change:
1. Priority toggle to set to high
2. Claimant # (Workers Comp)
3. File # (Workers Comp)
4. Client-Matter
5. Required by Date
To Send Job to your Assistant
By default, your Assistant is assigned as the Preferred Typist
Tap ( ) at the top of your screen
The dictation job will be moved to the OUTBOX Folder and uploaded to the server.
Once uploaded, the jobs will be moved to the SENT Folder
To Send Job to another Typist
Tap Profile
Tap Typist >
Select from list either:
1. Overflow be sure to include Claimant #, File # and Client Matter Number in the profile when possible
2. KeyStroke Pro used for overnight transcriptions. You must first reach out to Steve Hellmig to see if in house staff is available.
3. When using KeyStroke Pro you must then email Jennifer Majewski to let her know the date of your transcription.
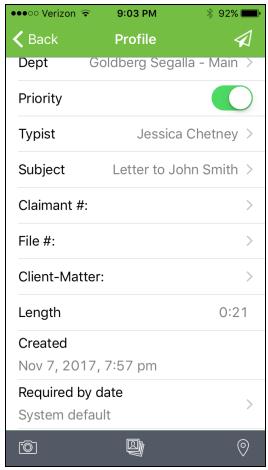
Winscribe allows you to digitally insert dictation within dictation. To perform this action:
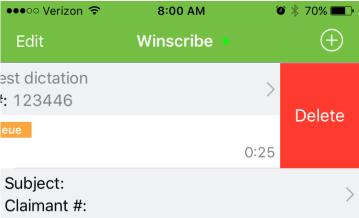
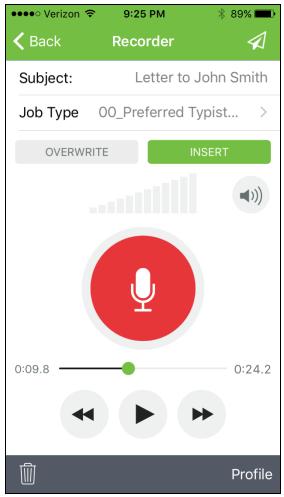
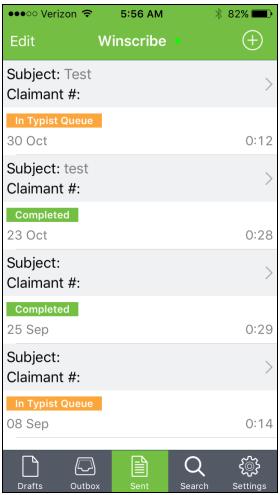
1. Rewind the dictation to the where new dictation needs to be inserted

2. On your screen, tap Insert
3. Tap Record ( )
4. Dictate inserted text
5. Tap Pause ( ) when complete


6. Slide the progress bar to end of dictation
7. Tap on Overwrite
8. Complete dictation
9. Profile and Send
The bottom of the screen allows you to toggle between Drafts, Outbox and Sent folders
DRAFT FOLDER Lists all jobs that have been started and saved but not sent.
OUTBOX FOLDER Lists all jobs that are in the process of being uploaded or queued for upload to the server. Progress of upload (%) will be displayed.
SENT FOLDER Lists all jobs that have been successfully uploaded to the server. It also lists the current status of each job:
In Typist Queue
Completed
To delete a dictation:
1. Tap Drafts or Sent folder
2. Swipe the dictation job from right to left

3. Tap Delete

1. Recording quality is set to High
2. Background Recording is Off
1. Starting to Speak take a breath after you click Record before speaking. It takes a second for record to kick in and the first few words of your sentence can be lost.
2. Speak clearly and evenly.
3. Be aware of your surroundings Is it noisy?
4. Don’t cover microphone when dictating.
5. Keep the phone at a consistent distance from your voice so volume is not erratic.
6. Shuffling papers next to the microphone overtakes your voice.
7. Long dictations take time to upload and WiFi can be inconsistent. Send long dictations in “chunks” of 10 minute intervals.

Winscribe’s Mobile Text Return feature allows authors to review or forward their dictations to themselves by email in order to process their own documents.
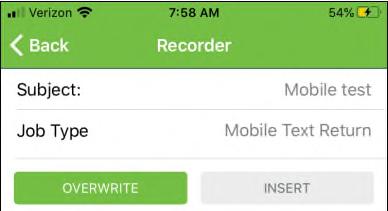
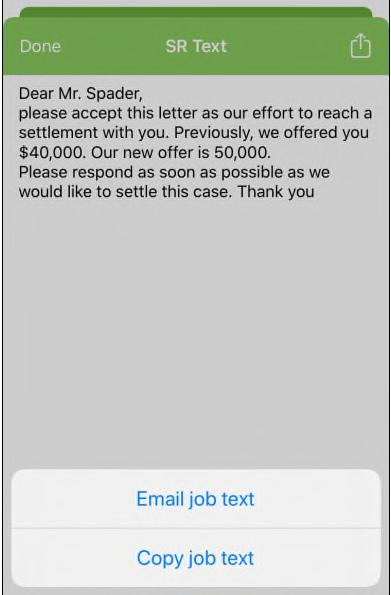
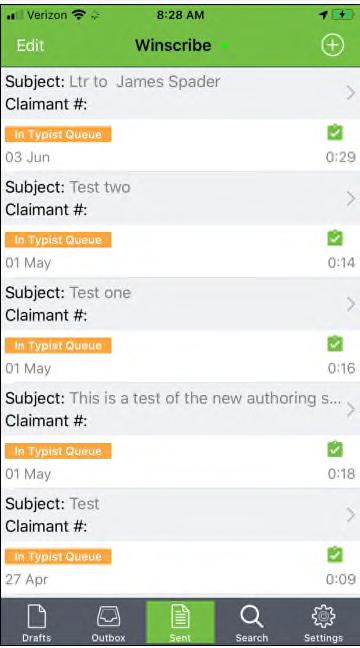
1. Create your dictation
2. Select Job Type: Mobile Text Return
3. Send dictation
4. Your dictation is now being processed for speech recognition
1. Proceed to Sent items on your mobile device
2. Status should be In Typist Queue
3. Tap clipboard on right
4. Text appears in new window
1. Tap Share icon at the top of the screen
2. Choose Email job text
3. Address email and send
COPY/PASTE TEXT
1.
Tap Share icon at the top of the screen
2. Choose Copy job text

3. Text is copied to the device’s clipboard

4. Open app on your mobile device to paste text in such as:
• Messenger
• OTG Time
5. Press finger onto screen
6. Choose Paste
Worker’s Compensation Overflow is here to assist Monday-Friday from 8:00 a.m. to 5:00 p.m.
1. Attorney will create dictation via Olympus device or through Winscribe which will allocate it to the queue. If your attorney uses a digital system, please be sure to attach this to your email

2. Once the attorney has completed his/her dictation and allocated it to you, you will receive an email notification from Winscribe that a job is in your queue.
3. Open Winscribe to obtain the file information from the job
If the file (matter) information is not in the subject, you will need to listen to the first few minutes of the job to ascertain this information.
1. Forward the email notification to WCOverflow@goldbergsegalla.com with the following information in the subject line:
Attorney’s full name/location (abbreviated)
Winscribe Job #
If the job is marked as priority in Winscribe (!), please indicate Rush in the subject line of your email.
Workers' Compensation Overflow will complete the following work:
Hearing Reports along with the PHD
Deposition Summaries;
Summations;
Medical Reviews;
Initial Reports; and
Letters to the Adjuster.
Workers' Compensation Overflow typically processes your work within 24 to 72 hours and 24 hours for Rush Reports
If you have any questions, please feel free to contact WCOverflow@goldbergsegalla.com.
Thank you and Welcome to Team GS.

If you are sending your dictation to Overflow, please follow these instructions. To Send Job to Overflow
1. Tap Profile
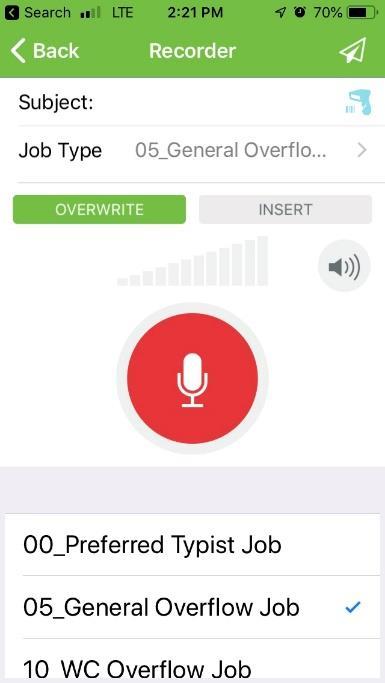
2. Tap Typist >


3. Change Job Type to either:
General Overflow be sure to include Claimant #, File # and Client Matter Number in the profile when possible
WC Overflow


1. Click Start| Programs| Winscribe| Winscribe Client – The Logon dialog box is displayed
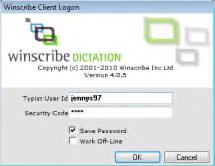
To enable notifications when you receive a job:
1. SETTINGS | SETTINGS Options
2. Select Notification on left
3. Select desktop or email notification
4. Select job notification options
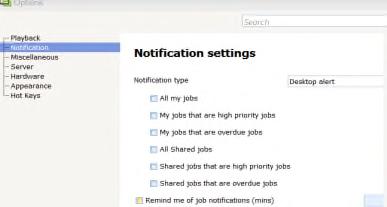
When a job is directly allocated to a typist or group, they will receive two messages notifying them of the new dictation.
2. Enter your UserID and the Security Code provided by your System Manager
3. If you want to work on a job off-line, click the Work Off-line box on the Logon screen

4. Click Save Password to store the logon information so that you do not have to enter it each time you connect
1. Inbox – shows you all jobs available for viewing
a) My Jobs – jobs that have been specifically allocated to you. These jobs are shown in bold until you have opened or downloaded them to the server.
b) Shared Jobs – jobs that have been allocated to typist groups you belong to
c) Completed Items – shows jobs that have been marked complete
d) The Outbox – displays jobs that are waiting to be uploaded to the server
2. Search Folders – provide additional filtering of jobs allocated to you or your typist group

a) My Work in Progress – shows all the jobs that you have downloaded from the server including any you are currently on
b) Priority Jobs – jobs that are marked as high priority
c) Overdue Jobs – jobs from the inbox that have a finish by date that has already passed
NOTE: The number in the parentheses ( ) reports the number of jobs within the folder that have not yet been downloaded. The number in the brackets [ ] reports the total number of jobs.
1. The first email notifies the typist/group that a job has been allocated.
2. The second email notifies the typist/group that a job was sent and is awaiting typing


You can reject a job if you are unable to complete it.
1. HOME | ACTIONS
Reject Or..
2. Right click on the selected job and select Reject
3. Once rejected, the job moves from the My Jobs folder to the server queue and changes status to Waiting for Typing
1. HOME | MISCELLANEOUS
Find OR CTRL+F
2. Type in a word or phrase (results show as you type)
Allocate to Others:
1. The job must be in your My Jobs folder
• Open the job, then close it with the red X on the control bar to get the job into your My Jobs folder
2. Select the job to allocate from your My Jobs folder
3. Right click and choose Allocate
4. The Allocate to Typist window opens
5. Use the search to find a specific typist or typist group
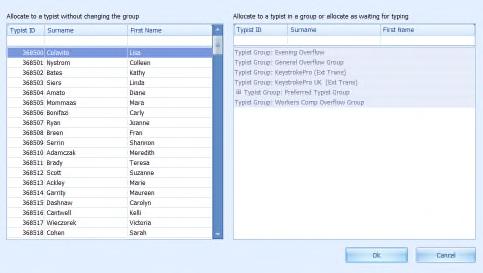
6. Once selected, click Ok
7. If the job has been allocated to a typist, it will now appear in their Typist Queue. If the job has been allocated to a typist group, the job status will change to Waiting for Typing
Before adding a new folder, you must place a filter on the jobs listed in your queue.
To apply a filter
1. Hover your mouse over a column header until a small arrow appears. Click the arrow to select your filter criteria.
2. HOME | FOLDERS
3. Name the folder

4. Click Enter
Add
1. Select a Job
2. HOME | TRANSCRIBE
Start Selected Or…
3. Double click on a job
4. The typist playbar is launched
NOTE: If a Word processor is defined on your Winscribe, it is also opened automatically when a transcription is started.
The Playbar is launched after a job is selected for transcription.

1. Use the buttons to play back the dictation Or..
2. Use the foot pedals to play back a dictation
Once you are finished with a transcription, you can mark the status of the job from the playbar.
3. Click to mark the job as complete. It will now show in your completed folder
4. Click to mark a job incomplete. It will remain in your My Jobs folder
5. Click to mark a job as complete and start the next job
NOTE: If you have the confirm end job commands option enabled, you will be asked to confirm that you wish to mark the job as complete.
Text will appear
1. Open Winscribe


document.
2. Double-click to open
transcription
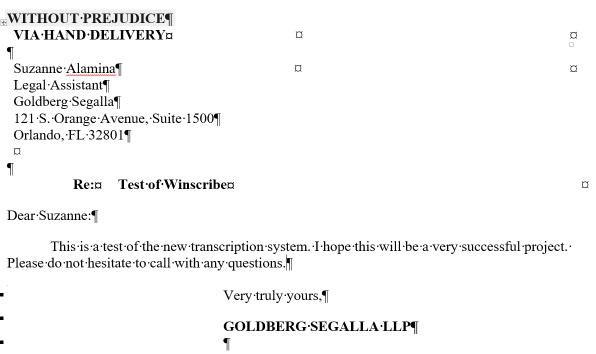
3. Speech Recognition window appears


Change your Font at top to Times New Roman 12
1. Return to
You will only need to do this once. The system
retain
change.
1. Use your pedal to listen to the dictation (optional)
2. Make edits/corrections in the window
After
Confirm


Proceed
Mark Transcription
Job will move
1. To request a FedEx account email Records Buffalo

2. Open Chrome and go to www.fedex.com
3. At the login screen, type your UserID and Password
4. Select Shipping | Create a Shipment
5. You will be in FedEx Ship Manager and the Create a Shipment screen will appear. Complete the form to create the shipping label you will use to apply to your package.
From – This section has already been pre-populated with your profile information. Click Edit to change your name to the name of the attorney who is sending the package.

To – Enter the information for each field or select an entry from the Company or Contact name drop-down menu.
Select the Service Type, Number of packages, Weight and Declared Value (if applicable). The Ship date defaults to the current date, however, it can be edited. Check the box if you want a return label to be printed.

1. Bill Transportation to: Goldberg Segalla (default), Recipient or Third Party
2. Your Reference – Enter the client.matter number (required)
3. More Reference Fields (not needed)
4. Special Services (Optional)
COD, special signature requirements and Hold at FedEx location.

5. Pickup/Drop-off (Optional)
The default is for the scheduled pickup at our office. However, you have the option to drop it off at another FedEx location.
6. Shipment Notifications (Optional) – You can choose to be notified by email throughout the shipment process. In addition, you can choose to have the recipient notified as well.
7. Rates & Transit Times (Optional) – If you expand this option you can see how much the shipment will cost and an estimate time of arrival. This is helpful especially if it is going to a rural area and you need to adjust the service type.
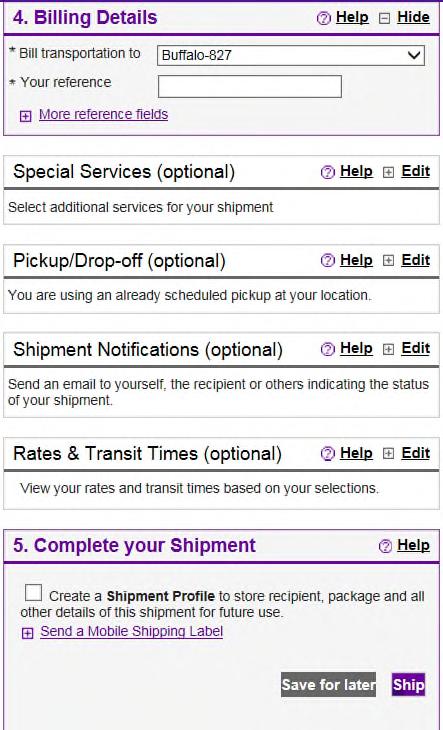
• Save for Later and Ship from Pending OR
• Click Ship to print labels now
• Check the box to save this information as a shipment Profile for future use.
Once you have selected Ship, a shipping label will be generated that includes the tracking number. At this time you will also have an option to cancel the order.
• Print the package label and adhere it to package
• Place the package in the designated pick-up area for your office; or
• Take it to any off-site FedEx drop –off location
You can view your shipment history up to 90 days.
Ship History – list contains:
• Pending Shipments
• Shipments you have processed using FedEx Ship Manager up to 90 days (see drop-down list of days)

• Task Buttons
• At the bottom of this page you can track another shipment if you have the tracking number
Select a shipment from the list and choose a task
1. Copy to my shipment profiles
2. Cancel 3. Download
4. Track
5. View Details
6. Reprint
7. Create return shipment
8. Prepare customs documents
1. Click Create Return Shipment under Package & Shipment details when creating your shipment
2. Once you complete your shipment, a pre-filled form will appear for the Return Shipment
3. Complete fields
4. Click Ship
5. You can now print All Labels plus instructions on how to process the Return Shipment
You will need to enter the following information:
• Package Contents (Documents or Products)
• Document Description
• Shipment Purpose
• Customs Value
• Customs Documentation – This section serves as a guide for additional customs paperwork which may or may not be required.
My Lists | Address Book
Lists your saved Recipients
You can:
• Add new
• Edit
• Delete
• Check the Address (validates)
BEST PRACTICE – build your address list as you send out packages. Save all new recipients.
Use Shipment Profiles when repeatedly shipping the same package to the same recipient within the domestic U.S. and intra-Canada. New Profiles can be created by saving the record within Ship Manager
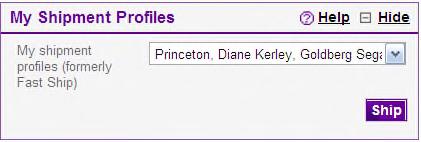
There are several ways to check on your shipment
• Email – If you complete the email options on the Shipment Form, you will be notified via email of your shipment’s status.
• Track by Tracking Number or Track Reference –
Click Tracking on menu bar and enter the Tracking ID in the first box and click Track
• Shipment History (tab) - After your package has been successfully tracked, the Detailed Results page will appear.
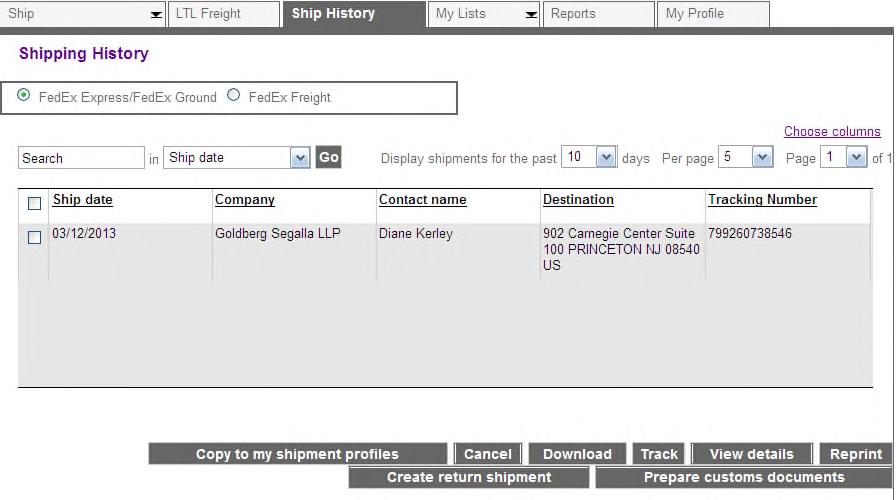
A "business associate" is a person or entity that performs certain functions or activities that involve the use or disclosure of Protected Health Information ("PHI") on behalf of, or provides services to, a covered entity, such a hospital, health plan, provider, etc.
HIPAA business associates must comply with the Health Insurance Portability and Accountability Act of 1996 ("HIPAA") Security and Privacy mandates and are subject to audits. Business associates that do not meet the requirements after a HIPAA compliance audit may be held accountable for data breaches and suffer penalties.
PII (Personally Identifiable Information) and HIPAA Compliance are also part of our Client Guidelines.
PHI only relates to information on patients or health plan members. It does not include information contained in educational and employment records, which include health information maintained by a HIPAA covered entity in its capacity as an employer.
1. Names (Full or last name and initial)
2. All geographical identifiers smaller than a state.
3. Dates (other than year) directly related to an individual
4. Phone Numbers
5. Fax numbers
6. Email addresses
7. Social Security numbers
8. Medical record numbers
9. Health insurance beneficiary numbers
10. Account numbers
11. Certificate/license numbers
12. Vehicle identifiers (including serial numbers and license plate numbers)
13. Device identifiers and serial numbers;
14. Web Uniform Resource Locators (URLs)
15. Internet Protocol (IP) address numbers
16. Biometric identifiers, including finger, retinal and voice prints
17. Full face photographic images and any comparable images
18. Any other unique identifying number, characteristic, or code except the unique code assigned by the investigator to code the data
The Security Rule requires covered entities to maintain reasonable and appropriate administrative, technical, and physical safeguards for protecting ePHI.

Specifically, covered entities must:
1. Ensure the confidentiality, integrity, and availability of all e-PHI they create, receive, maintain or transmit;
2. Identify and protect against reasonably anticipated threats to the security or integrity of the information;
3. Protect against reasonably anticipated, impermissible uses or disclosures; and
4. Ensure compliance by their workforce.
1. Create complex passwords
2. ShareFile
3. Email Encryption
4. Fax
5. Encrypted Flash Drive
6. Transport Layer Security (TLS)
7. Unless needed for court or other business reason, do not remove PHI documents from the office.
1. Do not leave laptop in public area unattended, such as car, conference…..
2. Lock your computer before walking away from it (Windows key + L)
3. Double-check all fax numbers before sending.
4. All PHI documents must be shredded.
1. A user (employee, contractor, or third-party provider) has obtained unauthorized access to personal information maintained in either paper or electronic form.
2. An intruder has broken into database(s) that contain personal information on an individual.
3. Computer equipment such as a workstation, laptop, CD-ROM, or other electronic media containing personal information on an individual has been lost or stolen.
4. A department or unit has not properly disposed of records containing personal information on an individual.
5. A third party service provider has experienced any of the incidents above, affecting the organization’s data containing personal information.

Email to: IT-Incident@goldbergsegalla.com
Please report any breach as soon as possible. This will allow us to get ahead of it. Client guidelines require us to inform them within a specific amount of time (usually within 24-72 hours).
Maintaining client confidentiality is always important. However, any breach concerning medical records takes it to the next level.

If you are traveling to countries outside the United States, Canada, Mexico, or the United Kingdom, be aware that there are access restrictions to data and services, including email, in place. The purpose of these restrictions are to further strengthen the security posture of the firm by preventing malicious traffic from ever reaching our infrastructure.
Below are two items you need to consider before traveling. Please contact IT Support at least two business days before your planned departure so these can be addressed.
1. If you require cellular data and voice on your firm issued phone:
- Travel Pass must be enabled on your phone service.
2. If you require access to Citrix, email, and/or documents:
- VPN must be installed and enabled on the firm issued devices you will be traveling with.
It is important to note that while we try to be flexible and accommodating, it will not be possible to access Citrix, email, or documents on personal devices while overseas. A firm issued laptop/phone or a personal mobile phone enrolled in MaaS (Mobile Device Management) is required.

Applying styles to every document you create is not only essential to prepare a table of contents, bookmarks, references, etc., but is a best practice so all firm documents look consistent and professional.
When preparing a new document, the first thing you should do is set up your Hyperstyles. It is a best practice to start with an existing scheme:
1. HYPERSTYLES | NUMBERING
2. Levels 1-9 will be prepopulated with a basic numbering scheme
The Format Outline Numbering pane will appear on the right side of your screen which will display all of the formatting properties for the current level in your document.
The example below shows that you are in Heading 1.
1. Level (top) Use these buttons to navigate from one level to the next when making changes.

2. Font Use this section to add bold, italics, font size to your paragraphs
3. Paragraph Use this section for paragraph alignment, spacing of your paragraph and keeping text together
4. Multi-Level Numbering Use this section to set your number style, number font, number alignment and tab stops


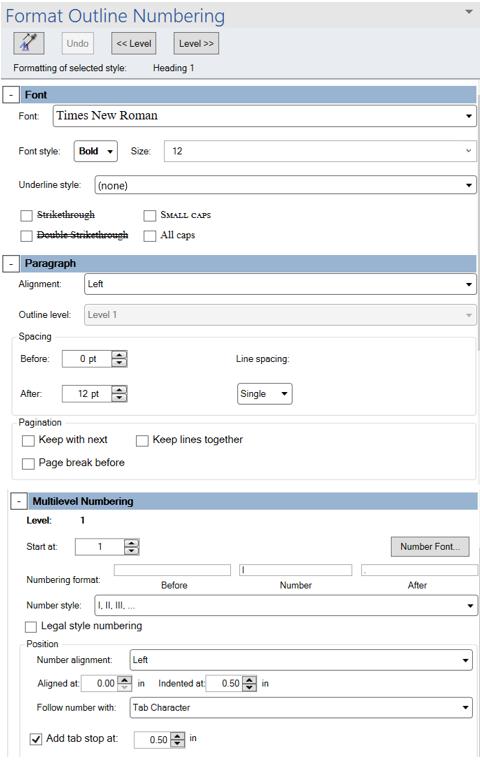
If you modify any heading after you apply styles within the document, the style will automatically update throughout.
To choose a scheme:
1. Click on the down arrow next to Scheme Manager

2. Select Display Schemes
A preview of the selected scheme will display on the right side of the screen.
3. Select a scheme that closely fits your needs. You can modify as needed later
4. Click Apply
NOTE: The reason you should start with an existing scheme is because you must format all 9 levels for the Hyperstyles to work properly.
After selecting a scheme:
1. Place your cursor at the beginning of the paragraph
2. Delete the number and any spaces/tabs up to the first word of the paragraph
3. HYPERSTYLES | NUMBERING
4. Click on applicable level #
You can apply a different level to any paragraph at any time.
1. After applying styles throughout your document:
2. Click in the document so that your cursor is on a styled paragraph
3. Under the Hyperstyles tab:
Click Format Outline Numbering
If you create a scheme you will use often, you can save it to your Personal schemes by:
1. Create an apply scheme to a document
2. Hyperstyles | Numbering & Schemes Scheme Manager ()
3. Select Save Scheme (you may be prompted to save document first)
4. Name your Scheme
5. OK
6. This new scheme will appear under your Personal schemes
If you have a document that you just can’t work with or is not cooperating because of codes, it is better to strip all the codes/formatting and start fresh.
1. CREATE | CREATE Blank Or…
2. CREATE | CREATE Quick Launch (for templates)
Use Super Copy to strip the document of all formatting by:

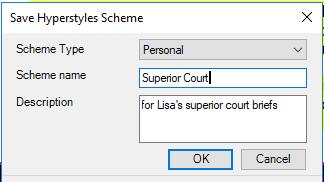
1. Copy the text of the document you want to renovate (CTRL + C)
2. CREATE | CLIPBOARD Super Copy
3. The document will appear without formatting
1. HYPERSTYLES | NUMBERING AND SCHEMES Scheme Manager ()

2. Select Display Schemes
3. Select a Scheme
NOTE: When selecting a scheme, find the scheme closest to what you are looking for. Schemes can also be modified or a personal scheme can be created.
4. Click Apply
1. HYPERSTYLES | DOCUMENT Renovation Tools (
2. Select Convert Manual Numbering
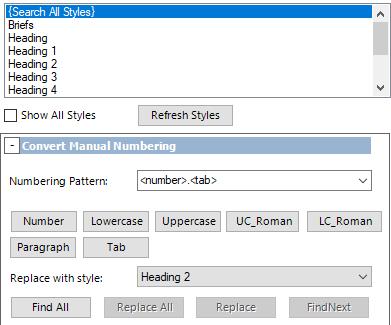
3. Select Search All Styles at the top
4. Convert Manual Numbering:
Numbering pattern: Use buttons to build your pattern (Number, Tab, etc.)
Must be exact and specific. Be sure to include periods and spaces)
)
Select the Heading (
) to replace the old style
Click Find All The manual numbering will be found in the document and highlighted in green
Click Replace All for document wide replacement or
Navigate one by one using FindNext button if the numbering pattern is picking up more than what you want replaced
Note: Instead of going through all of the above steps, you also can use your Litera/Numbers tool
This is a great tool to use if someone manually altered a style and numbers are out of order.
There is a new way to apply Hyperstyle themes throughout a document!
Instead of using the Renovation Tools using pattern matching to replace one level at a time, you can now use Litera Numbers!

1. HYPERSTYLES | NUMBERING & SCHEMES Scheme Manager (


2. Choose a scheme
3. Make changes to the scheme as needed

4. To apply the numbering throughout the document:
Litera |Repair Numbers
)
This will only work with numbered paragraphs, not headings without a number
If you have a scheme you use frequently, instead of recreating it for every document, create your own personal Hyperstyles scheme
1. Hyperstyles |Scheme Manager Display Schemes
2. Select and apply a scheme that is similar to what you would like
3. Hyperstyles | Numbering and Schemes Format Outline Numbering
4. Change the formatting of scheme levels as needed
5. Hyperstyles |Scheme Manager Save Scheme
6. Name the scheme and it will appear under your Personal schemes

If you change your mind after you create the scheme, you can modify the scheme by:

1. Open a blank document

2. Add 9 paragraphs of text (i.e., Level 1, Level 2, etc)
3. Apply your scheme from the Scheme Manager
4. Apply a scheme level to each paragraph
5. Hyperstyles | Numbering and Schemes Format Outline Numbering
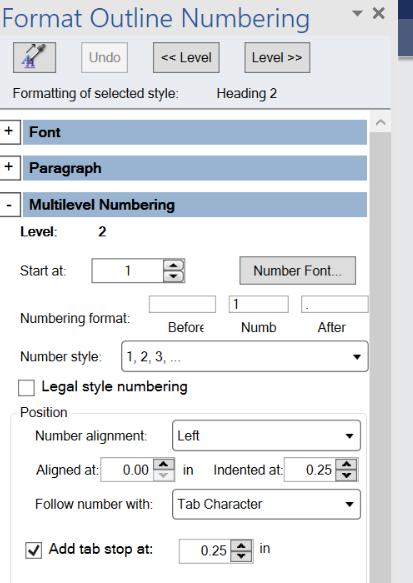
6. Change the formatting of scheme levels as needed
7. Hyperstyles |Scheme Manager Save Scheme
8. Name the scheme the same and it will overwrite the current scheme
If you find a document with a scheme that fits your needs, you don't have to recreate it, steal it!
1. Open the document

2. Hyperstyles |Scheme Manager Save Scheme
3. Name the scheme


Now that your document has been Hyperstyled, here are the steps to create your Table of Contents.
IF ALL OF YOUR HEADINGS HAVE A NUMBER OR LETTER

1. LITERA | REPAIR Table of Contents
2. Choose how many levels should show in the TOC and where you want the TOC placed:
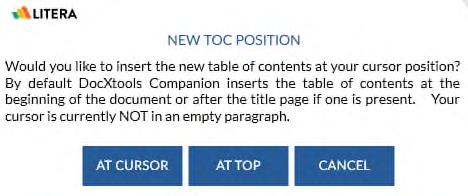
• At Cursor
• Beginning of Document
3. The TOC will be placed in your designated position
FOR HEADINGS WITHOUT A NUMBER OR LETTER, I.E. “CONCLUSION”
1. HYPERSTYLES | SECTIONS/TOC Rebuild TOC (
2. Hover over Table of Contents
3. Choose Customize Table of Contents
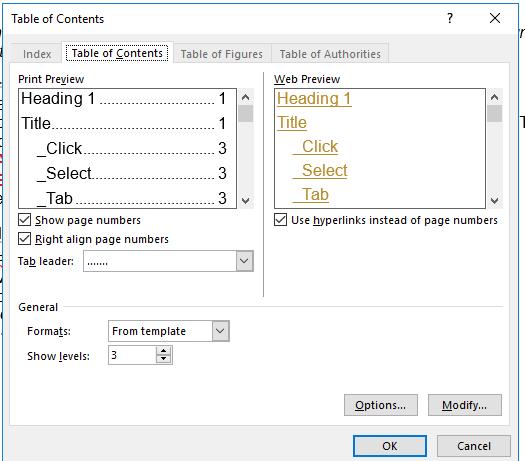

4. Enter the number of levels
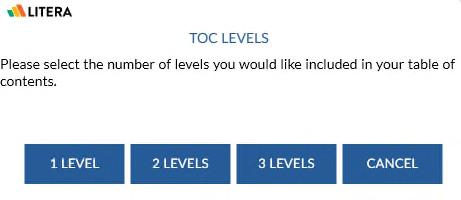
5. Click OK
)
Best Authority allows you to quickly create a Table of Authorities. Make sure the citations are formatted properly and let Best Authority do the rest.
In Word, on the BEST AUTHORITY tab, you will begin with the Startup
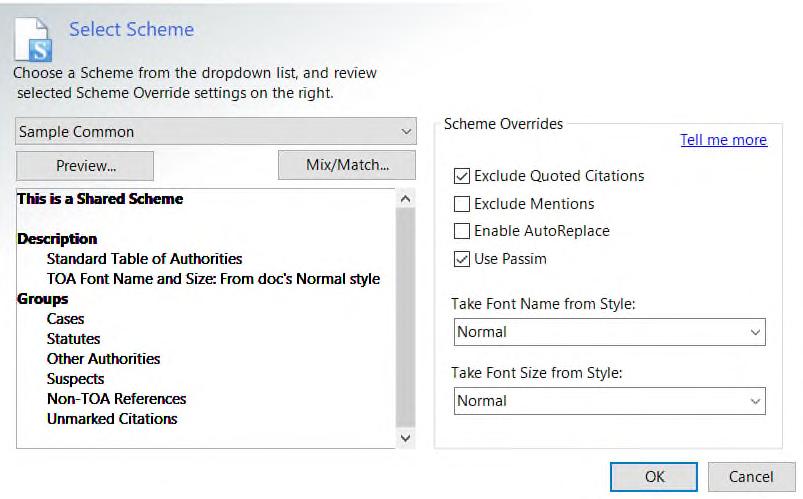
1. Select a Scheme
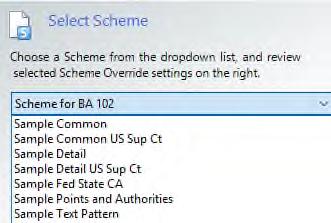
• Generally, Sample Common is used. Other options include:
2. Make changes to the scheme, such as:
• Passim
• Font Options
• Exclusions
3. Click OK
4. Set the Scan Range for the TOA (at Prompt)
• Place your cursor at the beginning of the first paragraph in the document
• click Set
• Place your cursor at the end of the last paragraph in the document (do not include certifications, signature lines, etc.)
• Click Set
5. Set TOA Location
• Place cursor where you would like the TOA to appear
Note: Be sure to have a section break before and after the TOC
Next you will scan the document to start building the TOA.
1. State: If this is a federal matter, you can use choose None for the State Abbreviations. 2. Otherwise, select a State from the list.
This step will scan the document and then you can review the document to confirm everything is marked appropriately for the TOA

1. If something was not marked that should have been:
• Highlight the citation
• BEST AUTHORITY | EDIT TABLE OF AUTHORITIES Mark
2. If something was marked you do not want included in the TOA:
• Highlight the citation
• BEST AUTHORITY | EDIT TABLE OF AUTHORITIES Unmark Citation or Suppress

3. If you need to change how the TOA is displayed:
• BEST AUTHORITY | EDIT TABLE OF AUTHORITIES Edit 1 Authority

4. At any point, you can preview the TOA by:
• BEST AUTHORITY | VIEW Preview TOA
Note: If the citation is incorrect in the document, change it in the document. If you make manual changes in the TOA and you re-run the TOA, your changes will be lost.
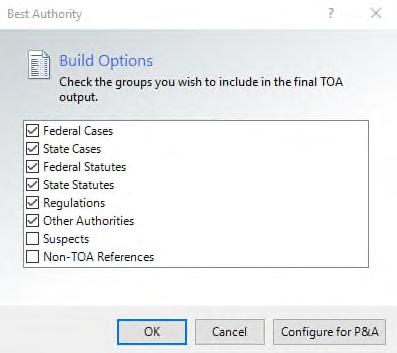
5. When complete, click Close Review from the ribbon
After completing the review and you are satisfied everything is marked properly, complete the Build Process by:
1. BEST AUTHORITY | TOA CREATION STEPS Build
2. Check each group you want included in the final TOA.
3. Click OK
Using the review tools in Best Authority helps you correct your document in order to run an accuratte TOA.
In the Best Authority tab under Review, there is a legend which explains what each highlighted citation means:
• Yellow = Long Citation
• Blue = Short Citation
• Grey = Unmarked/Suppressed – these will NOT be included in the TOA
• Red = Suspects – these require your attention
• Purple = References – references to a record or transcript and will NOT be included in the TOA
• Green = Selected (Citations)
The review pane lists all TOA information that BA has discovered, including:
• Groups – black bold
• Authorities – black italicized
• Citations - blue
The 3 buttons at the top of the review pane control how many levels will display in the tree
• Collapse All – displays the Groups in the tree which are determined by the scheme selected at startup.
• Tree to Authority: Displays all Groups’ Authorities. This is the text that will appear in the final TOA
• Detail View: Expands all Groups, Authorities and Citations
• As you click on the citations in the tree, you will move to that citation in the document. The citation will be bordered.
• If you click on an “Id”, it will highlight the “Id” along with the corresponding citation.
• If you hover over a Group, Authority or Citation in the Review Tree, relevant information will display.
• If you see passim in the TOA instead of a page #, it indicates there are five or more citations in the document.
1. At any point in the review, you can click on Preview TOA on the ribbon to view the TOA without leaving the Review Mode.


1. BA ribbon
2. From the Edit menu in the review pane
• Click on Citation
• Click on Edit
3. Right-click on Citation in the Review Tree
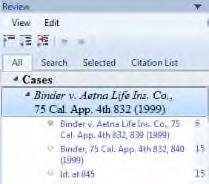
1. Navigate the document using the Review pane to move from citation to citation
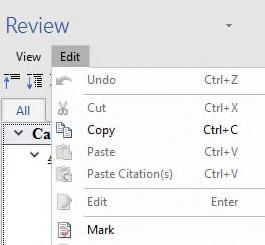
2. Next, go to the Review Tree to make sure all of the Authorities are arranged the way you want to see them in the TOA
3. Items to proof and edit are:
• Text that doesn’t belong in the TOA
• Too much or not enough information in a citation
• Suspects, this may be a part of a citation that BA needs your help to decide if you need to make corrections or not and if they should be added to the TOA
1. Mark Citation – Used for a suspect or for a citation that was not discovered
• Select Authority (Citation) text
• Click Mark Citation
• Mark Long to create a new Authority (Citation)
• Mark Short to add to an existing Authority (Citation)
2. Unmark Citation - If the marked citation should not be included in the TOA:

• Select Citation
• Click Unmark Citation
• The suspect will now be grey and it will not be included on the TOA.
• It is then added to the Unmarked Citations Group in the Review Tree
3. Edit Authority – Allows you to:
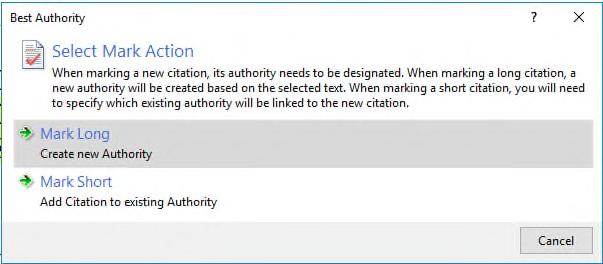
• Edit the text of the Authority or Suspect
• Assign Suspect to an Authority
• Assign Citation to a TOA group such as Cases, Statutes, Other Authorities
4. Supress – Citation will not appear on TOA, but is not moved to Unmarked Citation group
Once you make a change, you will see a pencil icon next to the Authority in the Review Tree.
If a Suspect that is broken in the document, fix it in the document, not in the TOA. For example, this citation was split because Co., was not italicized. After you italicize it in the document, it will appear in the next scan.
If two suspects are broken by a phrase, to display as one citation: you can either:
• Fix it in the document OR…
• Select it and choose Mark, Edit the Text and assign to a TOA Group
• Choose long citation and then edit the citation on the next screen deleting clearly a “triable issue”.
Note: Citations in a block paragraph are considered quoted citations and will not be included in the TOA unless the scheme you chose permits quoted citations.
These citations will have a “Q” next to them in the Review Tree
2. Once the review is complete, close the review and rescan the document
3. If you click on Search | Search by New Change, it will bring up the new citations that were added since the previous scan
When you are ready to generate the final form:
1. Click on Build
2. Confirm the boxes checked are TOA Groups you want included
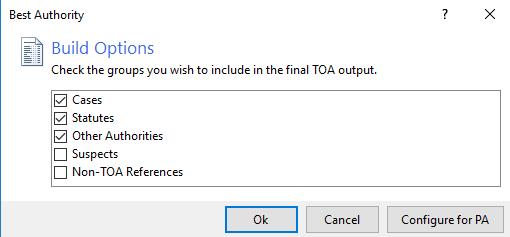
3. Click OK
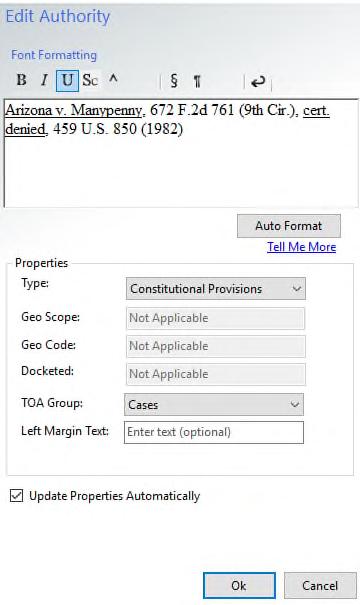
1. CREATE | CREATE
New
2.Select All Templates on the left
3.Expand Letter, Memo, Fax (+) on tree
4.Select Letters
Select an Author and Typist at the bottom of the dialogue box
Click OK
NOTE: Always click SHOWALLwhen available on data entry screens.
Document Information:
1. Type: Select Paperless letterhead or US (Buffalo Office Only)
2. Author – will populate from the previous screen
3. Typist – will populate from the previous screen
Include with document
1. Office – select another office from list to change the address and phone numbers on the letterhead
2.
Option to include Author’s fax, direct line, email or title from letterhead – these should always be checked
3.Update Date Automatically should never be checked
4. Closing – select from list
5.
6.
Add Goldberg Segalla LLP below closing (optional)
Add eSignature which is the /s/ signature (optional)

7. Re Line - can be multi-line

1.Select Contact list on the left (single click to use search; double click to display list)
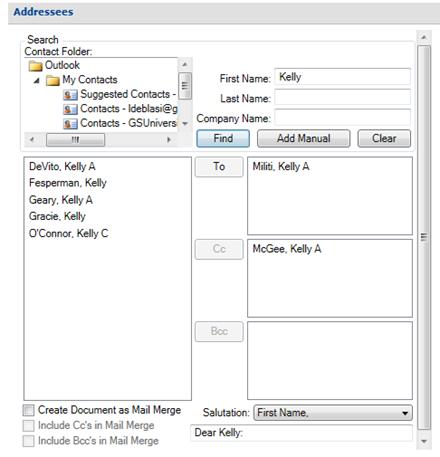
2.To search:
Type first/last name or company name in fields
Click Find
3.Add contact(s) by clicking on the name and To, Cc, Bcc
4.Add Manual address by:
Click Add Manual
Complete address fields
Click To button
You have the option to add this contact to your Outlook Address Book
NOTE: Use search method for LARGE contact lists as they take extra time to load
1.Choose a different Salutation from list (default is Dear First Name)
2.Create a custom Salutation
3.Create document as a Mail Merge – each addressee will receive an individual letter
Notations (optional):
Choose from list or select OTHER to create your own.
Method
Finish
Letter appears with cursor in the body
Encore saves data to use for future documents
1.Open any template in Create
2.Complete all or part of the corresponding dialog box
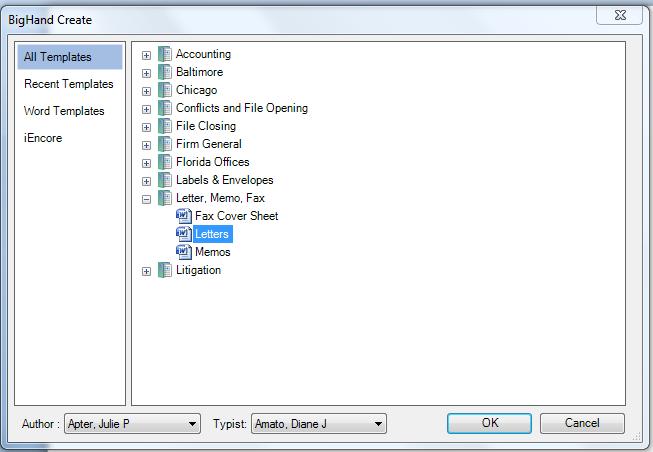
3.Click Save Encore at the bottom of your screen
4.A prefilled dialogue will appear
5.Make any additions or changes to fields
6. Finish
4.Name the entry 5.Finish
1. CREATE | CREATE
New
2.Expand Letter, Memo, Fax (+) on tree
3.Select Memo
Select Author and Typist at the bottom of the dialogue box


Click OK
Complete Document Info:
1. Type: Client or Interoffice
2. Addresses – add manually or search
3.Click Finish
Memo will open ready for typing
The After the Fact feature is used to make changes after you’ve created your letter, memo or fax.
1. CREATE | AFTER THE FACT
2.Click on corresponding icon to change:

Author
Typist
Addresses (change recipient or add more)
Office – to change address/phone/fax info
All changes will immediately appear in your document.
Note: Be aware that when you change an author or typist, you must change the office location
1. CREATE | CREATE
New
2.Select Encore in navigation pane
3.Select a Saved Encore entry which will bring up all of your Encore entries (i.e., Letters, Pleadings, etc.)
1. CREATE | CREATE
2.Select a template
Or…
New
3.Click Retrieve Encore on the bottom of the template dialog
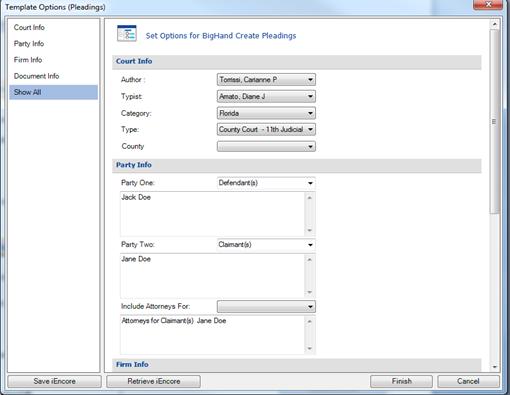
4.Select an Entry
5.Make any additions or changes to field
6. Finish
Use the Finish and Clean button to remove content controlled text into regular text
1.Create a document or letter using Create
2. CREATE | AFTER THE FACT
Finish and Clean
3.All content controlled fields now appear as regular text
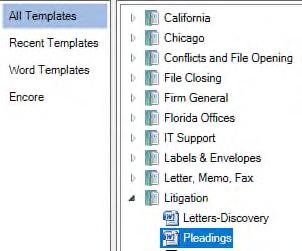
Create Toolbar:
1. CREATE | CREATE
New
2. Select All Templates on left
Litigation (+) on tree
4. Select Pleadings | OK
NOTE: When completing the template, click Show All on the left sidebar to show all sections that need to be completed
1. Complete the Court Information using the dropdown arrows
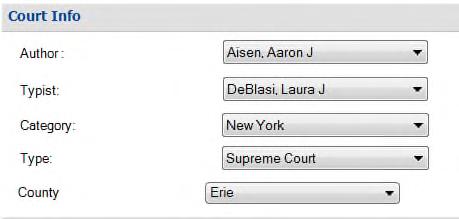

Author and Typist
Court, and County
2. Complete the Party Information using the dropdown
4. Complete the Document Information:
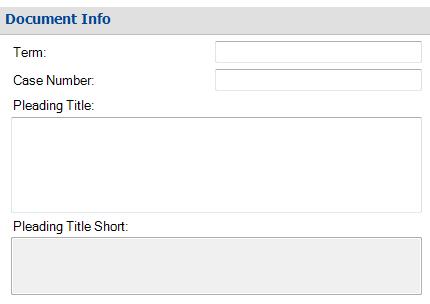
• Term (where applicable)
• Case Number
• Pleading Title

1. Click Save Encore at the bottom of the dialogue box
2. Enter the name, description, client and matter number
3. Save as new
4. Click Finish
5. The template information will upload into a pleading document and your cursor will be in the body of the text where you can begin typing.

1. CREATE | CREATE New
2. Select Encore on left
3. Select your Saved document

4. Pleading appears pre-populated in the dialogue box
Use CREATE | AFTER THE FACT to make any changes to your document such as selecting a different office, adding attorneys or adding sections.

NOTE: When changing an attorney, be sure to also change offices, if necessary. Create will look up addresses and take note of any updates.
3.
Use either SuperCopy or SuperPaste in lieu of cloning documents. Here are three reasons NOT to clone documents:
1. Addition of offices, changes to addresses, author titles
2. Metadata / Document Corruption
3. New Document may be created in Word 2003 format
Use SuperCopy when you copy from an existing Word document to paste into an Create template such as a letter or pleading. Follow this procedure:
1. Open existing document
2. Select text to be cloned (body of the letter only)
3. Press SuperCopy button located on the Create tab
4. Create will open
5. Choose template, author and typist
6. Click OK to get to next screen
7. Complete dialog box
8. Finish
Use SuperPaste when copying text from other software such as PDF’s or the Internet. Follow this procedure:

1. Open PDF or Internet site

• If PDF, best practice is to be sure it is “searchable”

2. Select text/area to be cloned
3. Press SuperPaste button on the Create tab
4. Create will open
5. Choose template, author and typist
6. Click OK to get to next screen
7. Complete dialog box
8. Finish
When saving or forwarding a receipt, it is a Best Practice to give it an easily identifiable file name or subject line.
Submit from GS Email Account via Phone
1. Take a photo of your receipt
2. Send the photo to Expenses@goldbergsegalla.com
3. It will appear on the MX Repository tab in the Attachment Manager (see below)
You must send receipts using your GS email account.
Submit via email from your laptop or pc
Receipts cannot be combined onto scanned pages. Each receipt must be attached to a corresponding line item in the Expense Workflow
Acceptable formats for receipts are:
TIFF
Receipts received by external email
For example, if you receive hotel folios via email, forward the email to Expenses@goldbergsegalla.com
It will appear on the MX Repository tab in the Attachment Manager (see below)
Hotel Folio Submit your full hotel folio for reimbursement as one line item. AP will split out any meals, Wi-Fi, parking, etc. Each traveler will continue to be responsible for all incidentals which should not be included in the total.

1. Open Nth from your desktop

2. WORKFLOW | WORKFLOW TYPES
Expenses
Each Workflow should consist of all expenses associated with one single trip.
3. Complete the following fields at the top of the screen:
Initiator will default to your name as you are completing and submitting the report
Requestor who is getting reimbursed. Legal Assistants will see themselves and the names of their Attorney Assignments If you need anyone added to your Requestors, contact IT Support. Attorneys and Administrators names will automatically display
Description purpose of your travel
Payment Delivery direct deposit will coincide with payday
Check Print Location Always Buffalo: this will become your default
4. Add your line items and receipts
1. On the Actions tab, Click Attachment Manager
2. MX Repository (receipts that were emailed to Expenses@goldbergsegalla.com from your GS Mail Account)
Select User from dropdown list
Select Receipt from list
3. File System

Navigate to Desktop or My Documents
Select document
Click Paperclip icon to attach file to the expense item

4. File Merge use this feature to combine documents into a single attachment (i.e., add authorization)
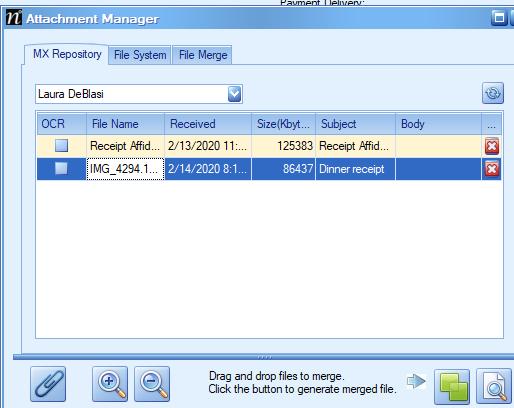
Information Tab Client Expenses
1. Expense Details:
Date of Charge date on receipt/date of travel
Amount of Expense
Currency Always USD: must convert foreign $ to USD prior to submission.
Type: Client
Payable to/Vendor # will populate with requester’s name
If traveler’s name does not populate, search using the description field or select “New Vendor” and AP will setup.
Expense Description details of expense, i.e., parking, tolls, dinner with John Smith
2. Cost Code
Choose from either dropdown list
3. Client/Matter #

You can enter the Client.Matter number in the Matter# field to populate all c/m fields
1. Select Line Item
2. Click Paperclip
1. Add all line items with receipts
2. ACTIONS | FILE Save
3. ACTIONS | FILE Submit
When you submit your Expense Workflow, if your Supervisor is required to approve your expenses, it will be routed first to your Level 1 Approver. Once Approved, it is forwarded to Accounts Payable for further review and payment.
If your Approver or Accounts Payable declines your Expense Workflow, you will receive an email:
Information Tab Firm Expenses (includes Marketing)
1. Date of Charge date on receipt
2. Amount of Expense
3. Currency Always USD: must convert foreign $ to USD prior to submission.
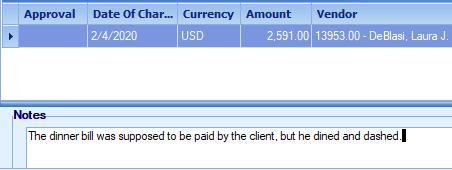
4. Type: Firm
5. Payable to/Vendor # will populate with requester’s name
6. Expense Description details of expense
7. GL# view commonly used GL list for reference. AP will edit as necessary.
8. Expense Approval this will automatically populate, when required, and send your report to the proper Approver.

1. Attach Receipt
2. Complete Information tab
3. Click small Save ( ) to the right of Client
Add/Edit/Delete Line Item
To add the next Expense line item from your trip:
1. Click New ( )
You will be prompted to copy from previous to prefill with data
2. To Edit a line item: Select item and Click Edit To Delete a line item: Select Item and Click Delete
1. Stating the Reason for the declination
2. Who declined the report/line item

3. The Report will then appear in your Workflow Dashboard
4. Click the Workflow Details button ( ) to update the declined line item(s) Sort & Filter
1. Sort: Click ▼▲ on any heading
2. Filter: Click ( ) on right side of any heading Notes
Below the Line Item listing is a Notes field where you can communicate with your Approver or Accounts Payable

For traveling, you can now use google maps to calculate your mileage automatically
1. Click on Workflow
2. Click on Expenses
3. In the Cost Code Field, select Mile or In Description, select Auto Mileage
4. Answer YES to Mileage Expense prompt
5. In the Expense Detail section, Click on the Google Maps icon ( )
6. In Start Field, type in the starting address
7. In the End Field, type in your destination
8. Click on Return Trip (optional)
9. Click on the compass to display the route ( )
10.Click on the Save/Download icon to save the distance to your expense sheet ( ( )

11.The Expense Description, Mileage Distance and Amount will autopopulate.
You will be able to change the Expense Description by clicking and typing in the field
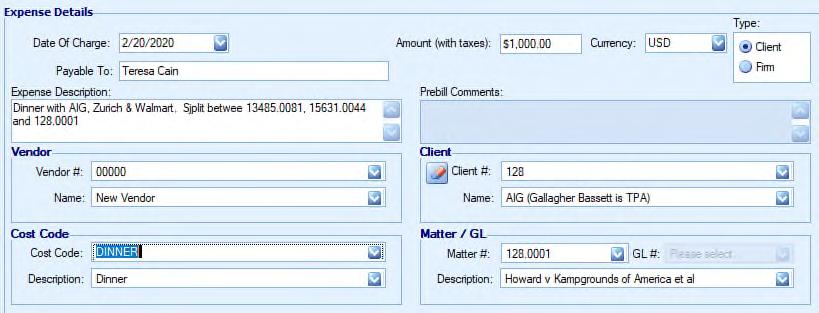
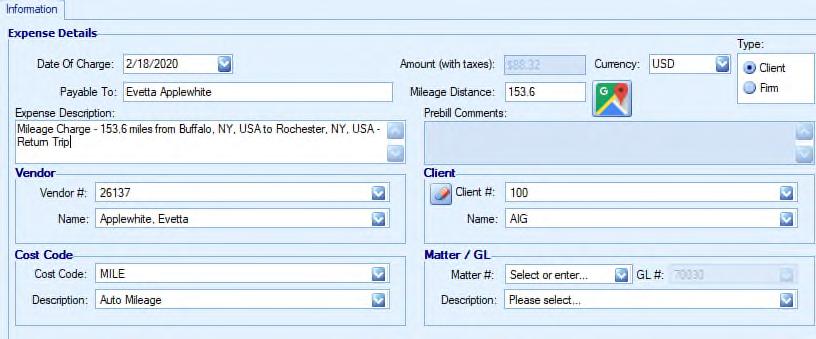

Used when sharing workload or temporarily assisting
1. Open any Workflow that has NOT been submitted to Finance

2. Select Actions tab
3. Click Reassign/Retract
4. Click Reassign radio button
5. Choose a user to assign the workflow
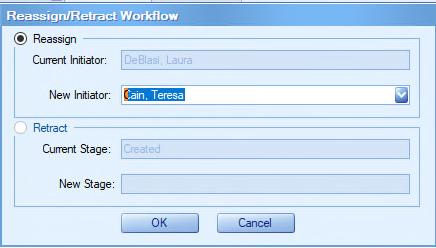
6. Click OK
If you are traveling on behalf of a client, you must complete the Client and Matter/GL Section of the expense report
Mileage – EP’s
EPs are not reimbursed for mileage, but we will bill the client appropriately. For mileage to be billed to the client:
1. Send an email to AP with the Google map, file# and reason for travel.
1. Enter as a single expense using one of the file numbers that is splitting the expense in the Client/Matter fields
2. Put all the split file numbers in the expense description field
(ex. Tolls – split with 123.0045 and 456.5234)
7. Workflow will appear on their dashboard
Retract a Workflow
Used to make corrections to a Workflow after it has been submitted to Finance.
Can only be retracted if Finance has not begun processing
1. Open Workflow
2. Select Actions tab
3. Click Reassign/Retract
4. Click Retract radio button
5. Click OK
Workflow will then appear with Create status on your dashboard
At the top of each workflow is a Running Total field which displays the total Expenses as you add line items.


70040
70050
Administrative Meals – Travel (any firm related meal expenses incurred while traveling)
Administrative Meals (any firm related meal expenses incurred NO Travel)
76250 IT Meals (IT department only – any meal expenses)
76260 IT Travel (IT department only – any travel expenses, i.e. mileage, parking, tolls, taxi)
70350 Business Development – Meals (Attorney expenses – meal expenses incurred while traveling for client meetings, file reviews, all business development related events)
Each line item has a history tab displaying changes made over the lifetime of the entry. To display:
1. Open any Workflow
2. Select a
3. Click
tab
AIR Airfare
AUTO
LDTRV
LUNCH
MILE
60630 Office Move/Expansion
(any meals/travel related to an office move or expansion)
70030 Administrative Travel (any firm related travel expenses for an office visit, i.e. mileage, parking, tolls, taxi, rental car)
70360 Business Development – Travel (Attorney expenses – all travel expenses incurred during client meetings, file reviews, all business development related events, i.e. mileage, parking, tolls, taxi, rental car)
80610 Attorney Seminars & Training – Travel (Attorney expenses – all travel expenses incurred during conferences, seminars, trainings, i.e. mileage, parking, tolls, taxi, rental car)
80620 Attorney Seminars & Training – Meals (Attorney expenses – meal expenses incurred during conferences, seminars, trainings)
81030 Orientation Travel (all travel expenses incurred while traveling to Buffalo for orientation, i.e. mileage, parking, tolls, taxi)
81040 Orientation Meals (meal expenses incurred while traveling to Buffalo for orientation)
1. Marketing expenses will continue to follow a twostep approval process – by client relations guidelines and AP guidelines. In the history tab within the module you will see “Submitted to Finance” (AP) – once AP reviews and approves the expenses it will be sent to Client Relations for the second step in the approval process. You will then see “Pending Approval” by Client Relations. This does not mean there is an issue with your expenses, it simply means it is in the second step in the approval process.
2. Client relations reviews expenses using the following guidelines:
Marketing event received pre-approval from the appropriate marketing approval group
Post event report was submitted (within 30 days of marketing event)
Travel guidelines were followed
Expenses were submitted within 30 days of marketing event
Other firm compliance guidelines
As you accumulate receipts on the go, you can forward multiple photos in a single email to Expenses@goldbergsegalla.com
1. Take a photo of each receipt (one receipt per picture)
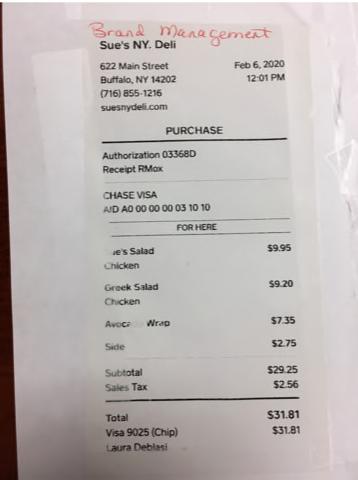
2. Open your Photos app ( )

3. Select your first receipt
4. Tap the Forward icon ( )
5. Select all other receipts to be included
6. Tap on Email icon ( )
7. Address your email to Expenses@goldbergsegalla.com

Note: The email must be sent from your GS email account, not a personal email account
8. Your attachments will appear as separate entries in the MX Repository tab in Nth.

If you are missing a receipt, you can now submit your completed receipt affidavit form directly to the Nth Attachment Manager using the button on the form.
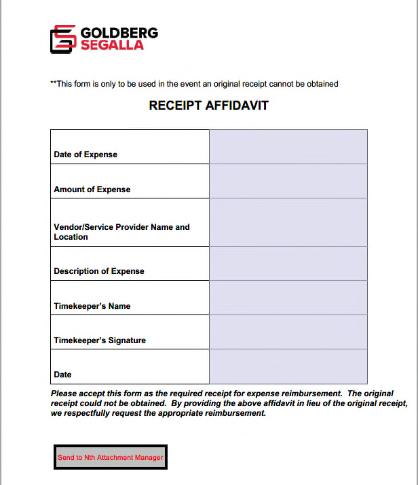
1. Access the Receipt Affidavit form in Create
2. Complete all applicable fields
3. At the bottom of the form, click Send to Nth Attachment Manager
4. A New Message will open addressed to Expenses email address with the affidavit attached.
5. You can change the subject line of the email before sending the document to easily identify it later.

6. Click Send
1. Open Nth from your desktop

2. Click on the Workflow Tab
3. Click on Expenses
4. Under Actions, click on Attachment Manager

5. Under the MX Repository
6. Select the user name
7. Select the Affidavit to be attached
You may also save this document to your desktop and add to the expense from the File System tab.
Nth File Closing is the firm’s electronic system used to process requests for a final bill and closing of a file.
1. Open Nth Degree application

2. Click on Workflow tab
3. Click File Closing button
4. Workflow Screen appears
1. Complete:
Initiator: The individual preparing the file closing workflow.
Requestor: For purposes of File Closing, this is the same as initiator. When preparing workflow for Check Requests and Expenses handled by Accounts Payable, the Requestor should be the attorney or paralegal.
When selecting Client and Matter, you may receive the below message.
Client #
Matter #
This is an indication that the file cannot be closed in Aderant as there may be WIP, Accounts Receivable (money owed), a trust balance or unapplied credit balance.
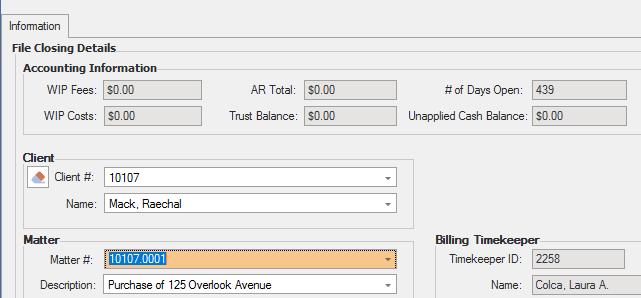

You can choose to:
Override to continue the workflow If you choose to override, the process to begin closing the file will begin. When the file closing workflow is received, the file will be closed in the accounting system. The Billing attorney will receive the final prebill immediately if RUSH was indicated, otherwise they will receive the final pre bill in the next monthly pre bill process.
Cancel If you cancel, the workflow will be deleted and the file closing process will not begin.

If you choose to continue and the matter being closed has AR, Trust or Credit balances, please contact the AR department (accountsreceivable@goldbergsegalla.com) to alert them of the closing and to finalize any balances. If you check the Rush box, you will not have to send an email to Accounts Receivable as that will occur automatically in connection with it being a Rush request.
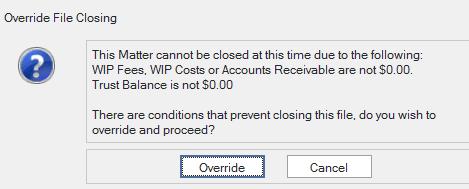
Answer the following File Closing Questions by checking the boxes. You may also indicate this is a RUSH in this section.
1. All time has been entered and released in Expert Time? Ensure that all time has been entered in Expert Time and released without error. If a Time Entry has an error, it will not release and be available to submit on the client’s bill. If you need assistance resolving an error, reach out to Expert Time Assistance.
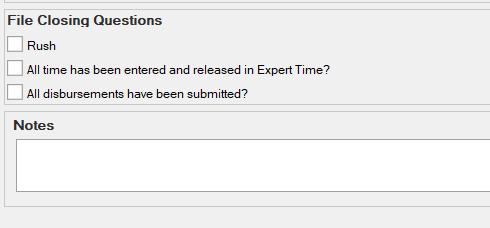
2. All disbursements have been submitted? Confirm all expenses have been submitted to the Accounts Payable or Vendor Invoice Audit Department. Expenses not submitted before the file is closed may not be reimbursed.
3. You will also be able to add Notes for the File Closing Coordinator.
Once the file closing workflow is submitted, the Billing, Responsible, Assigned and working timekeepers on the matter will receive an email indicating the file is closing. Example:
The person submitting the workflow will also receive an email. Example:
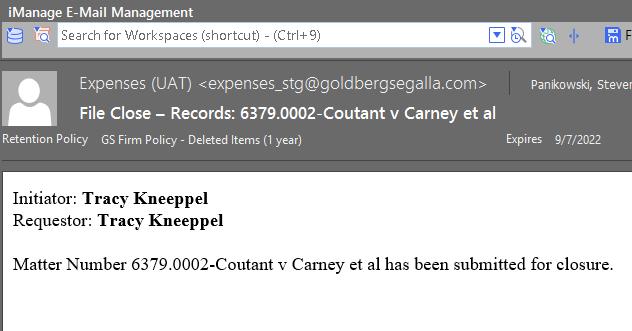
Once you complete the question section:
1. ACTIONS | FILE Save
2. Click OK on Save Confirmation
3. Click Submit to send the workflow for processing

1. File Closing will reach out to you with any questions regarding submission

2. For any technical questions or other concerns, please email File Closing Group FileClosingGroup@goldbergsegalla.com You no longer need to save a copy of the file closing form in iManage. All files you have requested to be closed will be visible within the Nth application.


Check requests are for pre-payment of invoices/fees (i.e. prepayment of medical records, expert retainers, membership dues, filing fees)
Check Requests are processed Monday, Wednesday and Friday; requests received and approved by noon on these days will be mailed out that day as specified when the request is submitted
Ensure client guidelines are reviewed and followed for each request
1. Each request should contain only the necessary documentation pertaining to the request
2. Invoice (pdfs only, iManage docs are not accepted)
• Always review to confirm invoices contain accurate and current information
• A receipt affidavit should be completed and provided if there is not an invoice, or you are waiting for a receipt of payment (i.e. Filing fees)
3. Client Approval email (only if necessary per the client’s guidelines)
4. Prepare then save all documents pertaining to the check request as one pdf file to a desktop folder
NOTE: AP does not require payment letters to vendors or addressed envelopes
• Attach Invoice/Backup Documents:
1. Select Attachment Manager

Select your name from MX Repository drop down to access documents you sent to: expenses@goldbergsegalla.com
- OR -
Select File System to access documents saved to a specific folder


2. Select file from list – once highlighted blue, select paperclip to attach document
If you have multiple documents in include, attach first document ( select paperclip to add), select next document ( select paperclip again to merge to the first doc)
• Invoice #:
If there is not an invoice# listed, use the invoice date as the 6 digit invoice#
o
If you have multiple invoices for the same vendor that have the same date, add an 01 to the next invoice (i.e. use 012422 and 01242201)

If Nth identifies “invoice # and vendor already exist”, this is a duplicate and should be deleted.
Complete
• Requestor: select attorney or paralegal
the
of
• Initiator: The individual submitting the check request workflow (your name will autofill here)
Please email AP with questions about duplicate invoices or status of previously submitted check requests or invoices.
• Date: date of invoice
• Amount: amount of invoice/request
• Currency: select USD
• Payment Reason: reason for request (i.e. medical records for Laura Johnson, expert retainer fee for Dr. Richards)
• Check Routing (IMPORTANT):
Select drop down option to confirm where payment should be sent.
Select Sent Directly to Vendor (Check Request) if you would like AP to mail payment to the vendor directly

All check requests will be mailed directly to the vendor, unless specified otherwise.
• Check Print Location: select Buffalo
• Description: format should be noted as below
Select Return to Initiator (Check Request) if you would like the check returned to you in your office

Enter any special handling instructions for AP in the NOTES section (i.e. specific address to send payment to, check to be returned to someone other than you, request the check to be sent overnight via FedEx, etc.)
• Vendor/Address:
Use “Name” field to search for the individual or organization we are paying
If you do not see the vendor we are making payment to, select NEW VENDOR
Select Address drop down to select the correct address payment should be mailed to
o If you don’t see the address in the list or want the payment mailed to a specific address, please enter in NOTES section
• Type: select Client or Firm
Client= billable expense
Firm= firm/office expense
1. Select Client


2. Enter Client # & Matter #
Only OPEN FILES are available in Nth. If the file number is pending open, select FIRM as the type and GL# 78000. Note “pending file” in the description. Once the file is open, email AP with the worfklow ID and file number to be billed.
• Cost Code: select the type of cost from the list (i.e. Medical Records, Expert, Witness Fees)

FIRM
1. Select Firm
2. Select GL# associated with request (search using the GL “description” field)
3. Leave GL Detail as it populates
1. 70210 – Memberships (Voluntary) – (for attorneys)
2. 80030 – Mandatory Registrations, Licenses, Certifications – (for attorneys)
3. 80040 – Professional Licenses/Dues – Staff
4. 80600 – Conference/Event Registration
5. 70280 - Sponsorships
If an expense should be split between multiple attorneys, multiple offices or multiple files, please specify in the NOTES
Firm expenses may require approval. If necessary AP will submit check requests for approval and the status will show as PENDING APPROVAL until approved.
Once all fields have been completed, select to Update the workflow
Then select Save at the top to save the workflow to the database
Select Submit
Workflow will now be in SUBMITTED TO FINANCE status
IMPORTANT: AP will audit requests and once processed the status will show as EXPORTED
If you need to make edits to your submitted request, while your workflow is in SUBMITTED TO FINANCE status, you can retract it back to a CREATED status to edit the workflow. Ensure you select SUBMIT again once edits have been made.
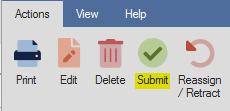
• i.e. Incorrect file, specific check routing instructions, incorrect requestor
If the workflow is in EXPORTED status, the request has been processed; edits cannot be made in Nth at this time. Email AP as soon as possible to make necessary changes.
• If a check request is no longer needed, please email AP as soon as possible.
If more information is required, AP will reach out with questions by email and will include the workflow ID in the subject of the email so you can easily identify which request we are referring to.
IT Support – if you experience application issues or require access to submit requests for a specific attorney not listed in your requestors list, please reach out to IT Support.
Trust Check Requests – form in Word Create
Emergency Check Requests –submit in Nth (choose correct CHECK ROUTING)
The left side of the page contains tools and panel icons including:
Hand Tool ( ) – used to scroll through the document
Select Tool ( ) – select text, objects and images
Bookmark Panel ( ) – create bookmarks to provide easy navigation and/or create a Table of Contents
Pages Panel ( ) – allows you to view & navigate pages in thumbnails view and perform page operation
Stamp Panel () – place stamps in document and create stamps
Attachments () view and work with attached files
Comments Panel () view and work with document comments
Security Panel () create and modify security themes
Clip Art Panel () place clip art in documents and create new clips
The bottom of the screen has navigation and display icons
Arrows to go to first page, last page, next or previous page.
Zoom Controls to increase or decrease display
Nuance integrates with many software programs making it easy to create PDF’s.
Local Document via Nuance
1. HOME | CREATE From File
2. Locate and open document(s)
From Word, Excel, PowerPoint
1. Open document in respective program
2. IMANAGE | FILE Save as PDF
3. The save as PDF dialog box opens-
4. Click Ok
The profile screen opens to rename and save the document in iManage
If you do not need to save the PDF:
CHANGE-PRO | CHANGE-PRO Print to PDF

1. Open webpage
2. Click on Nuance icon in right corner
3. Choose a Create option from list
Sometimes PDF’s are scanned without OCR and are Image Only. Nuance can make the pdf’s searchable by:
HOME | CONVERT Make PDF Searchable
After creating or opening a PDF, you may need to make changes or additions. This is accomplished via
the Home tab:
1. HOME | PAGES Document Assembly
2. Click on Page # at bottom of page
3. Drag page to desired position – red line appears where page will insert.
1. HOME | PAGES Insert
2. Select document(s) from DM or network drive
3. Add more files (optional)
4. Select location for insert
5. Click OK
Creates a new pdf from specific pages
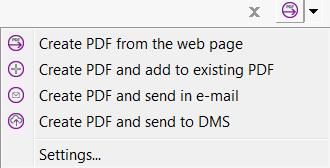
1. Select page(s) from Document Assembly view

2. HOME | PAGES Extract
3. Enter a page range or choose selected pages
4. Choose whether to delete after extraction
Used to conform all pages to portrait or landscape layout
1. HOME | PAGE ROTATE
2. Select Right or Left
3. Advanced allows you to apply to all pages or a page range.

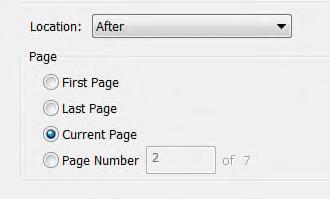
1. HOME | PAGES
Delete
2. Choose to delete selected pages or set a page range for deletion.
3. Click OK
Allows you to select pages and then replace with another pdf document from network or DM.
1. HOME | PAGES
Document Assembly
2. Right click on any page
3. Choose Replace
4. Choose document from:
5. Network
6. DMS (Click on Open From DMS)
7. Verify page ranges for replacement
8. Click OK
HOME
AGES
1. Right click on any page
2. Click New
3. Choose location for Insert
4. Click OK
HOME |CONVERT
select Program
1. DMS – Store/Do Not Store
2. Choose Page Range
3. Click OK
4. Name & choose location
5. Click SAVE
1. HOME | CREATE
Combine Files
2. Create PDF from Multiple Files

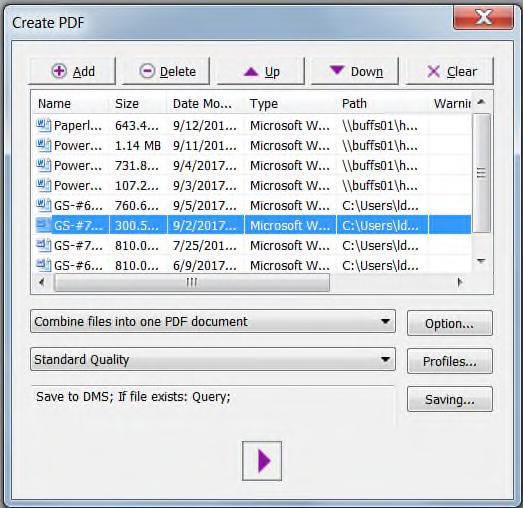
3. Click Add at top of dialog box

4. Select documents from Desktop or Network drive OR….
5. Click Open from DMS to select documents from the DM.

6. Click Add to include more documents if needed.
7. From the Create PDF dialog, you can adjust:
Be patient. Even if it doesn’t appear to be working, depending on the size, it could take a while. When complete, Open Files will appear.
Nuance provides sets of creation parameters for your pdf including these properties:
Compatibility – use this setting to create a PDF/A document for submission to court
Watermark – add to the first page or all pages including Drafts, Do Not Copy, Confidential, etc.
Security – set password to open the pdf or set permissions to modify, print or extract content. Click Advanced to add password and set permissions.
Compression – sets quality of conversion to PDF, these are options when you combine files:

1. Lossless - (level 100)
2. High Quality - (level 75)
3. Medium Quality - (level 50) (default for Standard Quality)
4. Low Quality (level 25)
5. Image Place Holder (level 5)
6. No Image (level 0)
Searchable PDF – used to convert image only files to a searchable format using OCR.

8. Combine options
9. Profile (see below)
10.Saving options
11.Click arrow to start
There are three steps to redacting a document. Access redaction via SECURITY | REDACTION
1. Click Redaction Properties
• Select color (default black, but white should be used for clean-up of a document)
• Select overlay text (optional)

2. Click Mark Redaction
• Click and drag mouse over text to be redacted, a red box appears around text
3. Click Apply Redaction
Search & Redact
You can search for words and phrases or patterns such as SSN’s, DOB or phone numbers to redact.
1. Security | Redaction
1. Choose search type:
• Single word or phrase
• Multiple words or phrases
• Looks like pattern match (SSN, Phone #)
• Custom pattern match
2. Click Search & Redact – list of Search Results appears
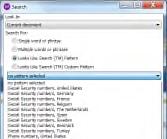
• Check items for redaction or Select All
• Click Mark Selected Results for Redaction
This feature is useful when you need to redact headers/footers, bates labels or lines from scanners on all pages
1. Set redaction properties to White with no text overlay
2. Mark redaction area on the first page
3. Right click on redaction
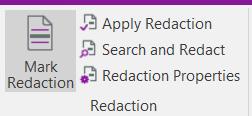
4. Select Apply To All Pages
Apply redaction
1. EDIT
NSERT
Bates Numbering
Add files or Add folders
3. Arrange the order (move up, move down)
Remove unneeded files (optional)
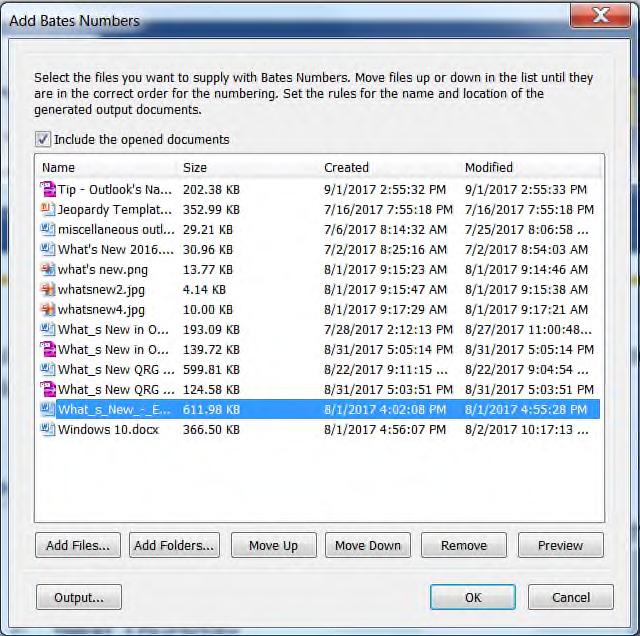
Preview (optional)
Select Output (or use default)
OK
EDIT | INSERT
Bates Numbering
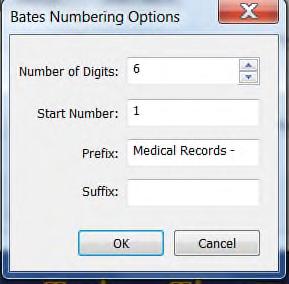
1. Make changes to font (optional):
• Size
Type
Color
2. Click Settings to:
Set Start Number (if this is a continuation from previous job)
Add Prefix or Suffix (i.e., MEDICAL RECORDS)
Click OK
Place cursor in Header or Footer field (left, center, right)
Click Insert Macro (see preview in field)
Click OK
This feature is useful when your pdf is too large for court requirements or as an email attachment.
1. HOME | TOOLS Split
2. Choose an Open pdf or Browse to a saved pdf
3. Select a Split Mode
• File Size
• Page Options (# of pages, blank, etc.)
• Bookmarks
• Extract options
4. Pick a folder to save split documents
5. Click OK
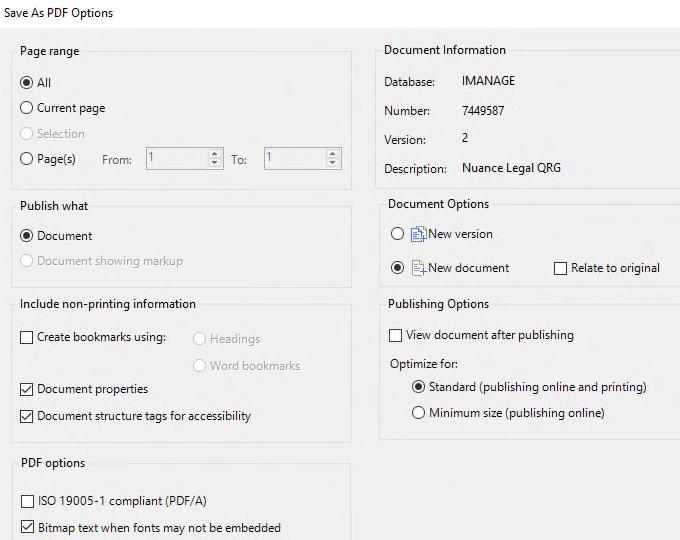

Bookmarks are used to easily navigate a large document and to create a TABLE OF CONTENTS
1. Open Bookmarks Panel from left navigation pane
2. Using selection tool ( ), select text in document to bookmark
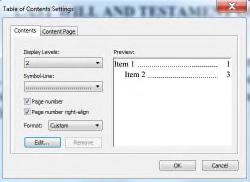


3. Click the (+) on the bookmarks toolbar

4. Rename bookmark (optional) by typing over text.
To change the order of a bookmark:
1. Click on bookmark icon ( ) and drag to desired position in the list.
2. Line with arrow designates new bookmark position
3. Be sure arrow is at left margin.
To change a bookmark to a subheading:
1. Click on bookmark icon ( ) and drag below parent heading
2. Arrow should be indented from the left margin.
Word document must be formatted with Headings, Styles or Bookmarks prior to conversion to a PDF.
1. IMANAGE | SAVE AS PDF

2. Create bookmarks using:
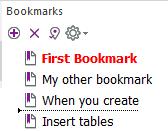
• Headings
3. Click OK
4. Save the PDF
5. When you open the PDF and click on Bookmarks in the left navigation pane, your bookmarks will appear there
Your PDF must contain bookmarks either added manually or through the conversion of a Word document that contained headings, bookmarks or styles.
From the Bookmark panel
1. Click on Gear ( )
2. Select CREATE TABLE OF CONTENTS
3. Set TOC Options
• Display levels
• Dot leader format
• Page Number alignment
4. Click OK
5. TABLE OF CONTENTS will appear as a new page at the top of your document.

Using a digital signature is another way to sign a PDF document.
Add the signature to your desktop or f: drive (pdf, jpg, png, gif)
1. From Nuance select the Security tab
2. Select Handwritten Signature Manage

3. Click on the + at the bottom
4. Change Draw My Signature to Import an image as my signature

5. Browse out to locate
6. Name it
7. OK
Make sure the signature is placed on a white piece of paper, that the picture does not have any shadows on it to ensure it comes in clean and make the signature very large as it will come in much smaller than you think it will
1. Security Handwritten Signature Place
2. Click in the document where you want the signature to appear
3. Adjust the size and placement of the signature by

Click on the signature and drag ( ) 4 arrows or
Align mouse on corner and drag to resize ( ) 2 arrows
Before emailing the signed document, you must flatten the file or print to PDF to ensure the signature is not removed enroute

Advanced Processing | Flatten File Ok
The scan process at the NYWC Board does not allow for flattening. Therefore, you must use one of the following methods:
1. Reprint to a new PDF after adding signature
2. Add signature to your WORD document, then convert to PDF

1. Using a Felt Tip pen, write your signature on a plain sheet of paper
2. Scan and email the document to yourself
3. Open the document in Nuance
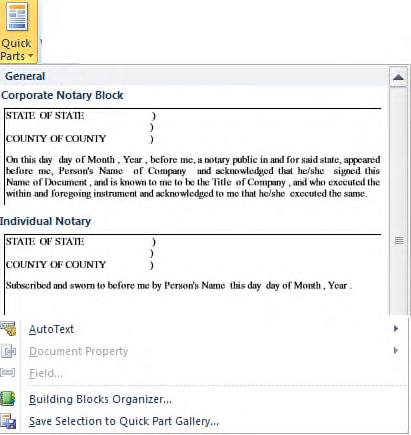

4. Use the snipping tool to select the signature. It will automatically copy onto the Clipboard
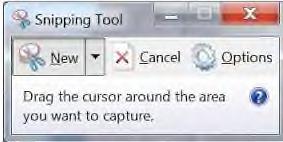
5. Paste the signature onto a Word document
ADJUSTING YOUR SIGNATURE
Using the Picture Tools ribbon, make the following adjustments to your selected signature:
1. Adjust height to approximately .6 inches. The width will automatically adjust.

2. Change Text Wrapping to In Front of Text
3. Click on Color drop down list
4. Select Set Transparent Color
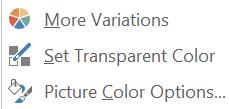
5. Click your cursor anywhere in white section of your signature
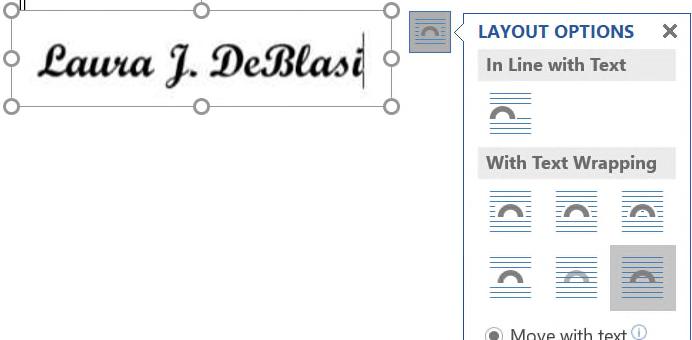
TO ADD YOUR SIGNATURE TO QUICK PARTS:
With your signature selected:
1. INSERT | TEXT Quick Parts ()

2. Choose Save Selection to Quick Part Gallery
3. Name the AutoText (i.e., ljdsig)
4. Click OK
1. Type in name of Quick Part (ljdsig)
2. Press F3
iTimekeep is a cloud-based service that enables you to enter time on your computer or phone (see our iTimekeep for Mobility QRG for phone access).
1. Your initial set up will be done by a link sent from Aderant Support to set up your account
2. Only new iTimeKeep users or existing users with a new device will be required to activate their device. Follow the instructions to set up your account.
3. Once your account is set up, you can log in at www.iTimekeep.com
4. Enter your firm email in the Username field
5. Enter your Password
6. You will stay logged in until there is 24 hours of inactivity, at which time you will be signed out
1. Click Add Time
2. Click the Matter search box
3. Suggested Matters provides a list of client matters used in the last 30 days and the default will be the last client and matter you chose
4. To find another matter on the firm database, click on the previous client it defaulted to and search by client name, client number, matter name or matter number in the search field and click Search on Server
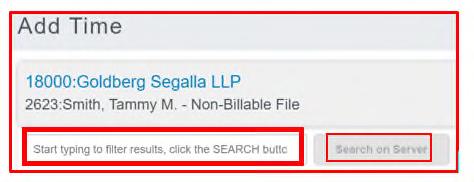
8. Select any Task, Activity or Action codes shown on the timecard from the populated drop downs, these will only populate if the client requires it

9. Add the narrative description using keyboard entry or shortcut codes
10.Click Submit at the bottom of the timecard to submit and close out the timecard or Submit+ to submit it and add a new timecard to start your next entry
11.You will also have the option to Save as Draft, however, you will need to remember to Submit them by the end of the month in order to have them show up on the prebills
12.If you Release your time (which is located under the Hamburger menu), you cannot make any further edits Any time you have not released that is in a Submitted status, the firm will release at the end of the month

Timecards can be opened by simply clicking on the entry in the My Time screen and edited as needed. Entries can be edited until the status changes to Released, at that time no further entries can be changed and must be changed on the prebill.
Timecards can have long narratives and can be repeated to reduce the number of clicks in entering time, any timecard can be duplicated. They can also be deleted, if necessary.
1. Click the three dots to the right of the timecard
2. The Actions menu will appear
3. Click Duplicate, Edit or Delete
You will only be able to search for matters that you are an approved timekeeper on. If you are not finding your matter, email Timekeeper Approvals to get on the approved timekeepers list.
5. When found, click on the matter in the search results to add to the timecard
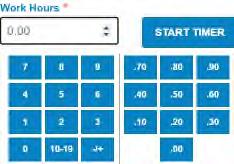
6. The work date will default to today's date, click in the Work Date field to change as needed
7. Click in the Work hours “0.00” field to adjust using the up/down arrows, typing in the amount of hours or using the number pad (the left option is for hours and the right option is for tenths of time)
There are several views you can switch between at the menu at the top of the screen including, My Time, Dashboard, Calendar and Timers.
My Time: This view is used when users want a quick way to view entered time.

Dashboard: This view allows the timekeeper to fix or review timecards and fill in their missing time gaps.
Calendar: This view allows the timekeeper to review timecards submitted by day and week, with the totals broken down for each week and can fill missing time.
Timers: Provides a view for managing timers.
A timecard’s status is on the right side of the My Time screen.
Submission Error - offline timecard or needs correction
Submitted – Submits the time, but you can make changes until it is on the prebill

Draft – saved but not yet submitted (this is used in the case of Temporary Matters or when a timer is still active)
Released – Submitted to time and billing system and Released/Finalized/Posted, no changes can be made at this point

A timer can be started at the top right of the screen
1. Click Start Timer
2. A blank entry will appear in your list of entries and the timer will start ticking
3. Single click on the entry to open it and complete the rest of the entry
4. You also can Resume or End the timer
5. The Nudge option can be used to adjust your timer, for example, if you walked away and wanted to reduce the timer by 10 minutes
6. You will see under the Unreleased column, you can pause and restart your timer if you are using it throughout the day.
Note: All timers will have a status of Draft and will need to be released at the end of each day
7. To submit a timecard with an active timer, open the timecard, end the timer and click Submit
8. OR, click the radio button to the left of the entry if the timecard is complete and choose Submit on the options at the top of the screen
You can also start a timer from an open timecard, by clicking on Start Timer. This option will only populate for time entries for the current work day.

A filter can be used to show all time for a specific client/matter, day, released time, etc. The filter is at the top right above the timecard status. To clear the filter, click on Clear Filter which will appear next to the Filter option when it is active, and the view will go back to your entire list of time entries.
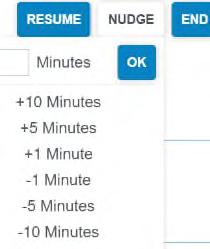

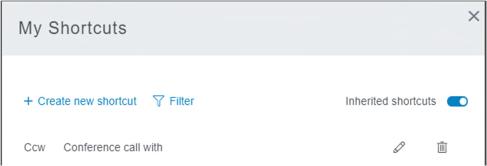
My Shortcuts is where you can create your own customized narrative shortcut codes by entering a couple of letters which will expand to a word, several words or even an entire narrative. The timekeeper’s shortcuts will take precedent over the firm created shortcuts, in case you enter the same shortcut code.
1. Select My Shortcuts from the hamburger menu at the top left side of the screen
2. Select Create New Shortcut
3. Add the desired shortcut code (you can start the shortcut with an = for any common word such as =an which would expand to analyze) and its associated text in the fields labeled Shortcut and Phrase respectively
4. Select Save
5. To use them in your entry, type the equal sign (if you included it in your shortcut) followed by the shortcut and then hit the spacebar, for example, =tcw
The Temporary Matters feature allows you to create custom matters until a file has been opened. They only can be seen within the specific timekeeper's account.
1. From a new timecard, open the Matter Search window
2. Click Create Temporary Matter
3. Give your Temporary Matter a name
4. Click Save
1. Click Temporary Matters from the hamburger menu

2. Click Create
3. Give your Temporary Matter a name
4. Click Save
5. Select the Temporary Matter from the Timecard Matter Search
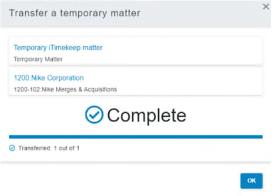
1. Select Temporary Matters from the hamburger menu
2. Select Transfer
3. Choose the Temporary Matter by selecting the top box
4. Select the Temporary Matter from the list
5. Search for the New Active Matter by selecting the lower box under “Replacement Matter” and select the Matter from the search results
6. Click Transfer button at the bottom of the window
7. Once transferred, you will see a confirmation and will be able to submit those draft timecards

3. Click on the action button above the entries for the action you want to perform such as Submit, Duplicate, etc. A dialog message will appear asking you to confirm the task.
4. Once complete, another confirmation message will appear confirming that the number of timecards were successfully Submitted or Released.
Timekeepers can customize the look of their screen and custom defaults under the Settings options
General Settings Tab – this tab is where you can set your daily goals, the default is eight hours
Timecard Multi-Select allows users to perform actions in bulk such as Submit or Duplicate timecards selected individually, by day, or in total.
Change Color Theme Customize color theme by clicking on the colored circle
Change your timecard entry defaults, for example toggle on/off Default to Today or Remember Last Matter
1. You have the ability to choose what hour totals you would like to see on your calendar
2. All categories are set to enable by default. Toggle each category on/off to customize what you would like to see in the calendar view such as totals, released, errors, etc.
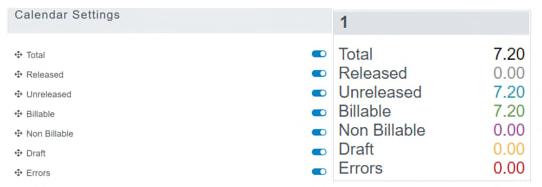
1. Click the circle next to each timecard to select it. Selected timecards will display a check mark inside the circle. You can select timecards one by one, day by day or select all.
2. The buttons that will appear above those entries will tally the total number of eligible timecards that have been selected.
The Temporary Matter will automatically be added to this timecard and can be chosen for other timecards
iTimekeep is a cloud-based service that enables you to enter time on your phone.
1. Download “iTimekeep” from the Apple Store or Google Play Store
2. Enter your firm email in the Username field
3. Enter your Password in the field provided
4. Tap LOGIN
1. Only new iTimeKeep users or existing users with a new device will be required to activate their device
2. In the Device Activation window, tap Send me a Verification Code and watch for an email
3. Enter the emailed 6-digit code in the Verify My Code field on your device
1. Tap the Add Time button (+)
2. Tap the Matter search box
3. Suggested Matters provides a list of client matters used in the last 30 days
4. To find another matter on the firm database, search by client name, client number, matter name or matter number and tap Search
You will only be able to search for matters that you are an approved timekeeper for. If you are not finding your matter, email Timekeeper Approvals to get onto the approved timekeeper list.
5. When found, tap the desired matter in the search results to add to the timecard
6. Tap the Work Date to change as needed – the default is today's date
7. Tap “0.00” to adjust the Work Hours
8. Select any Task/Activity or Action codes shown on the timecard from the populated drop downs, these will only populate if the client requires them
9. Add narrative description using keyboard entry or shortcut codes. You can also use the voice to text option by tapping on the microphone at the bottom
10.Tap Submit, Submit + or Save as Draft (which is a toggle to turn on at the bottom, remember to submit these by the end of the month to show up on prebills)
Timecards can be opened by simply tapping on the entry in the My Time screen and edited as needed.

Timecards can have long narratives and can be repeated to reduce the number of taps in entering time, any timecard can be duplicated. They can also be deleted, if necessary.
1. Swipe left (iOS) or press and hold (Android) on the timecard.
2. The Actions menu will appear
3. Tap Duplicate, Edit or Delete
A timecard’s status is on the right side of the My Time screen.
Submission Error - offline timecard or needs correction
Submitted – Submits the time, but you can make changes until it is on the prebill
Draft – saved but not yet submitted (this is used in the case of Temporary Matters or when a timer is still active)
Released – Submitted to time and billing system and Released/Finalized/Posted

A timer can be started at the top right of the screen
1. Tap Start Timer
2. A blank entry will appear in your list of entries and the timer will start ticking
3. Single click on the entry to open it and complete the rest of the entry
4. You also can Resume or End the timer
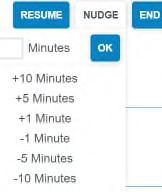
5. The Nudge option can be used to adjust your timer, for example, if you walked away and wanted to reduce the timer by 10 minutes
6. You can pause and restart your timer if you are using it throughout the day right from your list of time entries
A filter can be used to show all time for a specific client/matter, day, released time, etc. The filter is at the top right above the timecard status

My Shortcuts is where you can create your own customized narrative shortcut codes. The timekeeper’s shortcuts will take precedent over the firm created abbreviations, if you enter the same shortcut abbreviation.
1. Select My Shortcuts from the hamburger menu at the top left side of the screen
2. Select the + button
3. Add the desired shortcut code and its associated text in the fields labeled Shortcut and Phrase respectively (you can add an = to your shortcut for common words like =an, which will expand to analyze)
4. Select Save
5. To use them in your entry, type the = followed by the shortcut and then hit the spacebar (i.e. =tcw)
1. Select Temporary Matters from the hamburger menu
2. Select Create
3. Give your Temporary Matter a name
4. Click Save
5. Select this Temporary Matter when needed from the Timecard Matter Search
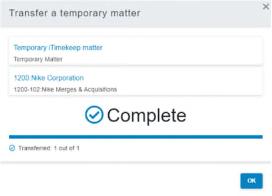
1. Select Temporary Matters from the hamburger menu
2. Select Transfer
3. Choose the Temporary Matter by selecting the top box
4. Select the Temporary Matter from the list
5. Search for the New Active Matter by selecting the lower box under “Replacement Matter” and select the Matter from the search results
6. Click Transfer button at the bottom of the window
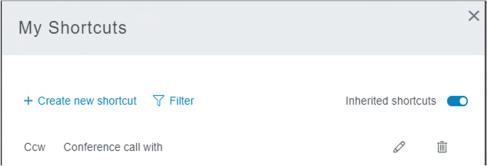
7. Once transferred, you will see a confirmation and will be able to submit those draft timecards

The Temporary Matters feature allows you to create custom matters until a file has been opened. They only can be seen within the specific iTimekeep account.
Here are two different ways to create a Temporary Matter:
1. From a new timecard, open the Matter Search window
2. Select the Create Temporary Matter button
3. Give your Temporary Matter a name
4. Click Save
The Temporary Matter will automatically be added to this timecard.
Timecard Multi-Select allows you to Bulk Submit, Bulk Release Bulk Duplicate or Bulk Delete timecards selected individually, by day, or in total.
1. Tap the circle next to each timecard you wish to select. Selected timecards will display a check mark inside the circle. You can select timecards one by one, day by day, or select all.
2. The action will appear below those entries and will tally the total number of eligible timecards that have been selected
3. Tap the on the action button that you want to perform such as Delete, Duplicate, etc.. A dialog message will appear asking you to confirm. the task.
4. Once complete, another confirmation message will appear confirming that the number of timecards were successfully Submitted or Released.
You can also start a timer from an open new timecard, by clicking on Start Timer
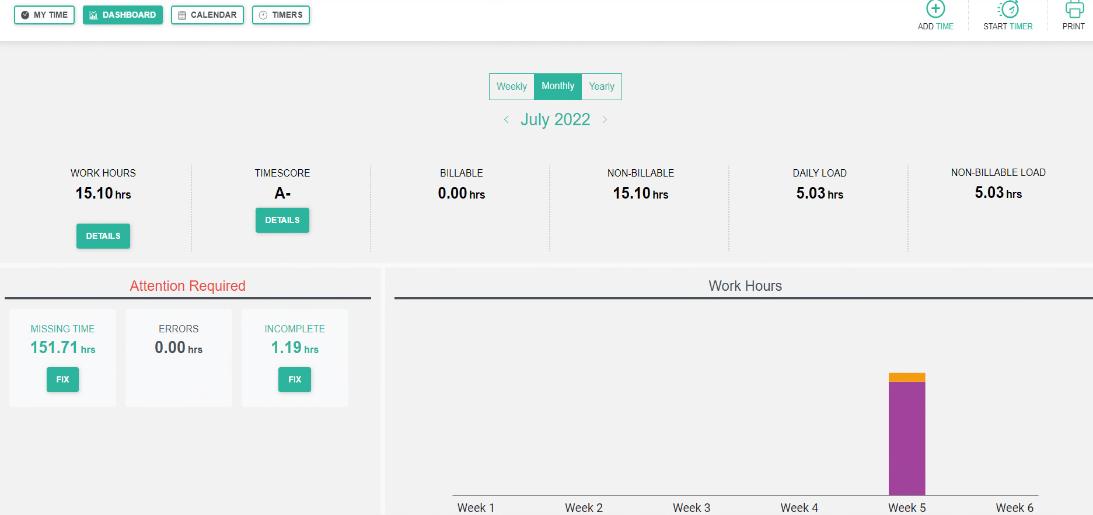
In iTimekeep, the dashboard view allows the timekeeper to fix or review timecards and fill in any missing gaps. This is an ideal view for a user who doesn’t enter their own time but wants to stay on top of performance and identify missing time at a glance.
1. Open up iTimekeep
2. Click on Dashboard
3. You can switch your view to Weekly, Monthly or Yearly and have the ability to toggle forward and backward dependent on the time frame you chose
4. You can also see the details of Work Hours and your Timescore
5. You can also click on the fix buttons for any missing or incomplete time

In iTimekeep, there are a couple of ways to use a timer. Timers are a helpful way to track time, however, remember that you can have multiple timers for the day, but only one can be running at a time.
1. Open the timecard
2. Complete the matter and any other fields necessary (you can always go back to edit the narrative, if needed)
3. Click on Start Timer. This option will only populate for time entries for the current work day.

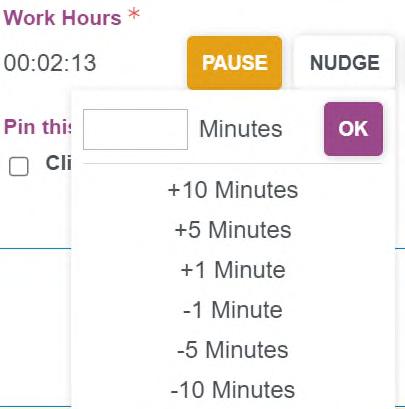
4. Once the timer is started, you can Pause, Nudge or End the timer

5. Nudge is used to add or remove time from the timer. This is useful if you forgot to pause the timer or start the timer and you need to adjust the time
1. Click Start Timer
2. A blank entry will appear in your My Time entries and the timer will start ticking
3. Under the Unreleased column, you can click on the Pause to stop the timer or the Right Arrow to start it again, only one timer can be running at a time
4. Single click on the entry to open it and complete the rest of the entry
5. You also can Resume, Pause, Nudge or End the timer from the open time entry
Note: All timers will have a status of Draft and need to be Submitted at the end of each day
1. To submit a timecard with an active timer, open the timecard, end the timer and click Submit

2. OR, click the radio button to the left of the entry and choose End Timer or End + Submit on the options at the top of the screen


In iTimekeep, you can create Timer Templates to help the contemporaneous timekeeper.
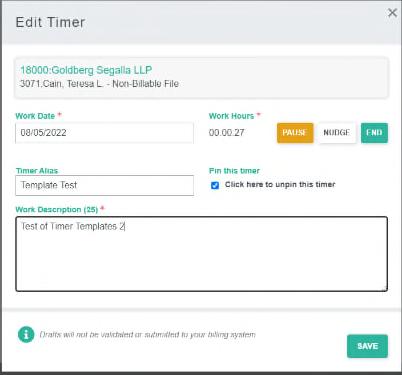
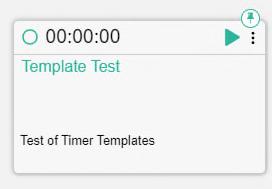
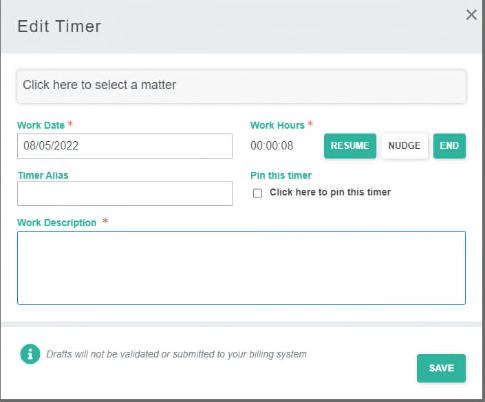
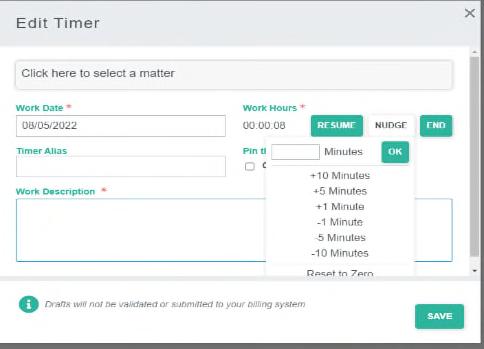
1. Log into iTimekeep
2. Click on Timers
3. Select Grid View
4. Click on Start Timer

5. Click on the Timer to open the time card
6. Click on Nudge and then select reset to Zero

7. You can choose to select a matter, type in a Timer Alias and work description or you can leave them blank

8. Then click on the checkbox for Click here to pin this timer
9. Click on Save to pin your timer to your Timers Dashboard screen for you to use repeatedly
1. Select the Template you need
2. Click on the three dots at the top right
3. Click Duplicate
4. Click on the duplicated timer and click Start
5. Uncheck the Click here to unpin this timer
6. Click Save
7. When you are done with the timer, click on End
8. Your view will change to a regular timecard view
9. You can edit the matter number, Work Date, Work Hours and Work Description, if needed, on the Timecard

10. Click on Submit
11. Switch back to your My Time view to see the completed Timecard
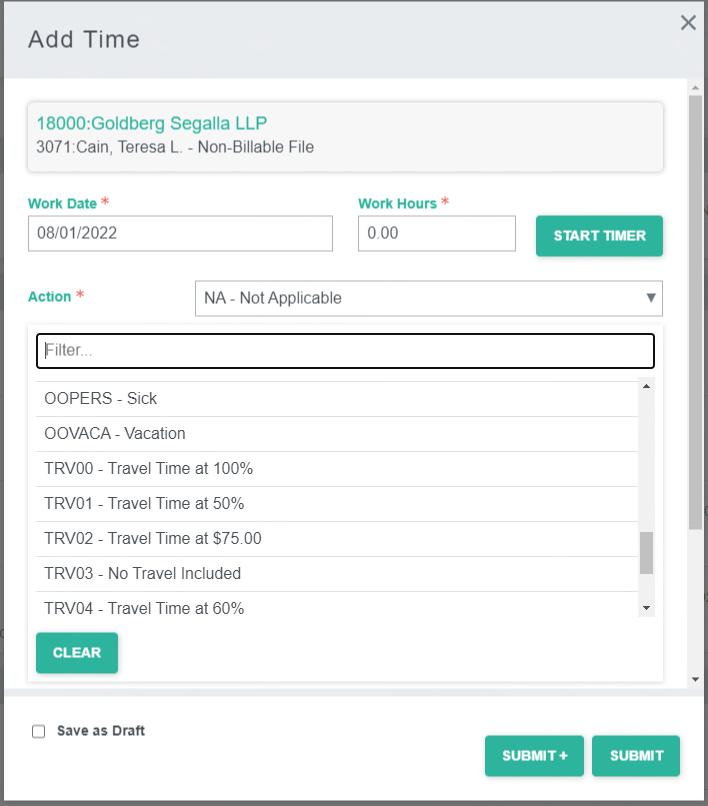
Time off action codes have been added to iTimekeep, they should be entered whenever Sick or Vacation time is used
1. Open up iTimekeep
2. Click on ADD TIME

3. Click in the block to select a matter
4. Select your 18000 account
5. Enter the Date and Hours
6. The time off action codes can be searched in the action codes field as normal
7. OOVACA – for vacation time
8. OOPERS – for sick time
9. Enter a narrative
10. Submit and release time as normal
Filters can be used in iTimekeep to find time entries for particular client/matters, days or even time entry status.
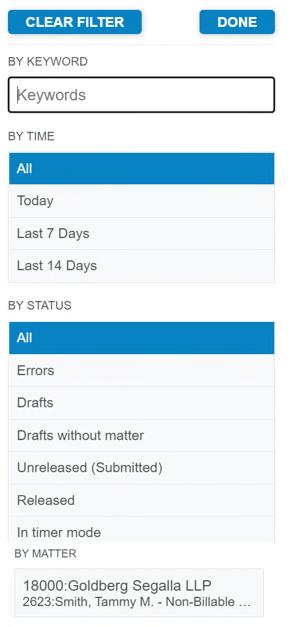

The filter is at the top right above the timecard status.
1. From the My Time view, click on Filter
2. Choose what you would like to filter by:
o Search by keyword(s)
o Search by period (today, last 7 days, last 14 days)
o Search by time entry status

o Search by Matter
3. Click Done
4. Filtered results will appear in the My Time view
Once you have finished reviewing the search results, click Clear Filter which will appear next to the Filter option when it is active, and the view will go back to your entire list of time entries
1. Open up iTimekeep
2. Click on the Hamburger Menu
3. Select My Shortcuts
4. Click on Create new shortcut
5. Enter in the equal sign then the code in the shortcut block (do not enter a space between the = and code)

6. Type in the Phrase for the shortcut

7. Click on Save
1. Open up a Timecard or start a new timecard
2. In the work description type in the = and shortcut code then press the spacebar. It will fill in the description for you.
1. Open up iTimekeep
2. Click on the Hamburger Menu
3. Select My Shortcuts

4. Click on Add New
5. Type in the = sign and the shortcut code in the shortcut block (do not enter a space between the = and code)
6. Type in the description in the description area
7. Click on Save
1. Open up a Timecard or start a new timecard
2. In the work description type in the = and shortcut code then press the spacebar. It will fill in the description for you.


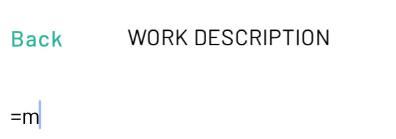
3. Click on the back button to get back to the timecard

Users can set their own personal preference on how their search results are sorted when entering a new timecard.
1. Navigate to the Hamburger Menu

2. Click Settings
3. Click Account Settings

4. Set your preference on how search results are sorted
5. Open a new timecard
6. In the client matter field search by:
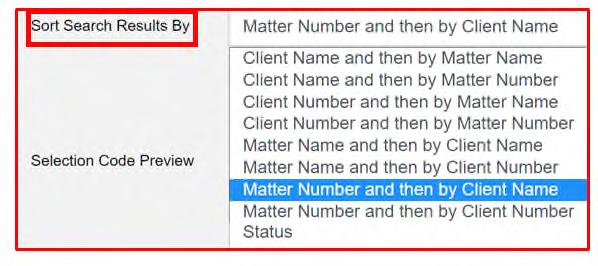
o Client number
o Client name
o Matter number
o Matter name
7. If you cannot locate a matter in iTimekeep:
o Reach out to iTimekeep Assistance to verify the matter is open
o Reach out to Timekeeper Approvals to verify you are an approved timekeeper for the matter, if you are NOT an approved timekeeper, you will not be able to search for the matter
When you are opening a new file, you can create a temporary matter so you can continue to bill for this time as you do the work. Once the file has been opened, you can transfer all of the temporary entries at once to the new file number.
1. Open up iTimekeep
2. Click on the Hamburger Menu
3. Select Temporary Matters
4. Click Create
5. Fill in the name of the temporary matter and click on Save
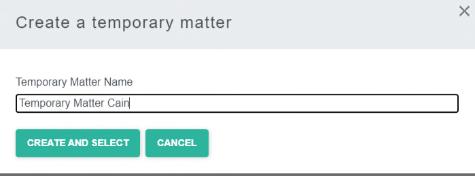


6. You can now create more temporary matters, edit any temporary matters you currently are using, delete any temporary matters or transfer a temporary matter when it becomes a live matter.
7. When you are done, click on the X to close out of the Temporary Matters pop up block
8. The temporary matter you just created can be searched for when you start a new timecard
OR
1. You can also create a temporary matter by clicking on ADD Time

2. Click in the field to select the matter and then click on Create Temporary Matter.
3. Enter the name of the temporary matter and click on Create and Select.

1. Open up iTimekeep App
2. Tap the Hamburger Menu

3. Select Temporary Matters

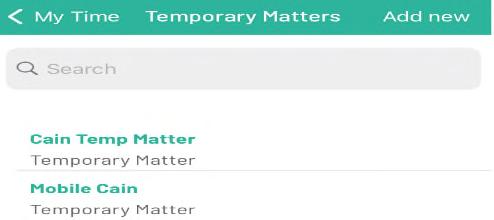
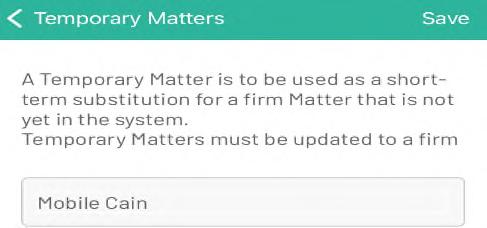
4. Tap Add new
5. Give the Temporary Matter a name and tap Save
6. You can now add more temporary matters or go back to My Time and begin entering time using the Temporary matter
OR
1. You can also create a temporary matter by tapping on ADD Time
2. Tap in the Choose Matter block
3. Scroll down to the bottom and tap Create
4. Enter the name for the temporary matter and tap Save
5. You can now begin entering time on this matter

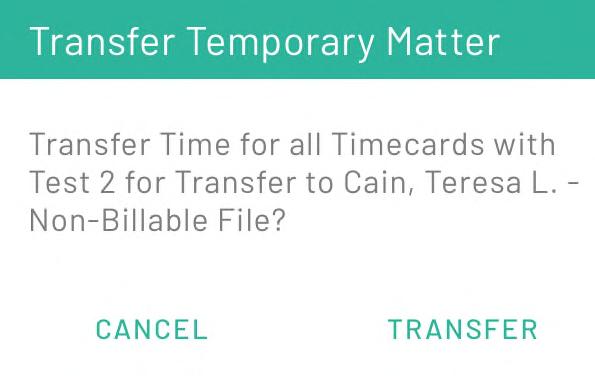
Once your file has been opened, you will need to transfer the temporary matter to the new file number. Here are the instructions on how to do that from both the Desktop and Mobile app.
1. Open iTimekeep
2. Click on the Hamburger Menu

3. Select Temporary Matters
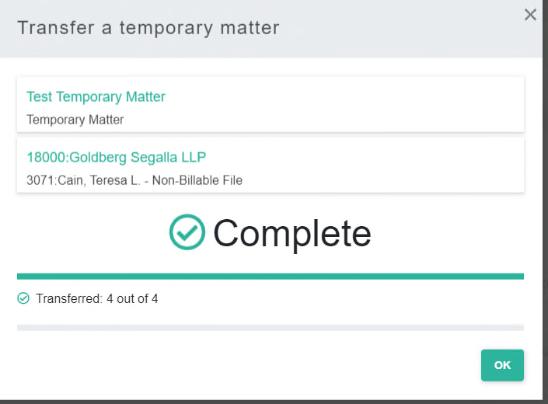
4. Click on Transfer
5. Select the name of the temporary matter in the top block and select the new open matter in the bottom block and click on Transfer
6. When the transfer is done, you will see a confirmation showing Complete
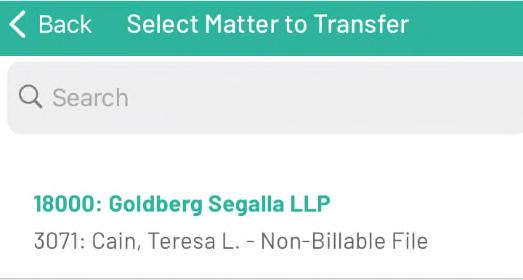
7. Click on OK and close out of the Temporary Matters screen by clicking on the X
1. Open up iTimekeep App
2. Tap on the Hamburger Menu
3. Tap Temporary Matters
4. Select the Temporary Matter you want to transfer
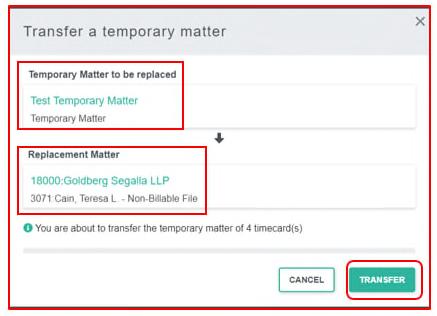


5. At the bottom of the screen tap Transfer Time
6. Select the Matter you want to transfer the time to
7. Tap Transfer
8. When it is done, it will bring you to the Main Time Entry screen
Intelligent Teams allows Timekeepers to “tag” another Timekeeper in their timecards.
1. Enter the timecard as usual
2. To tag a timekeeper, click on the Add Timekeeper icon which is below the Work Description
3. There will be a list of timekeepers that you can choose from to tag. Only timekeepers that have added time to that matter previously will be in the list
4. Check the box next to the timekeepers name and a draft time entry will appear in the tagged timekeeper's list of time to review and submit
5. Or you can mention the timekeeper's name using the @ symbol in the Work Description, for example @Teresa Cain

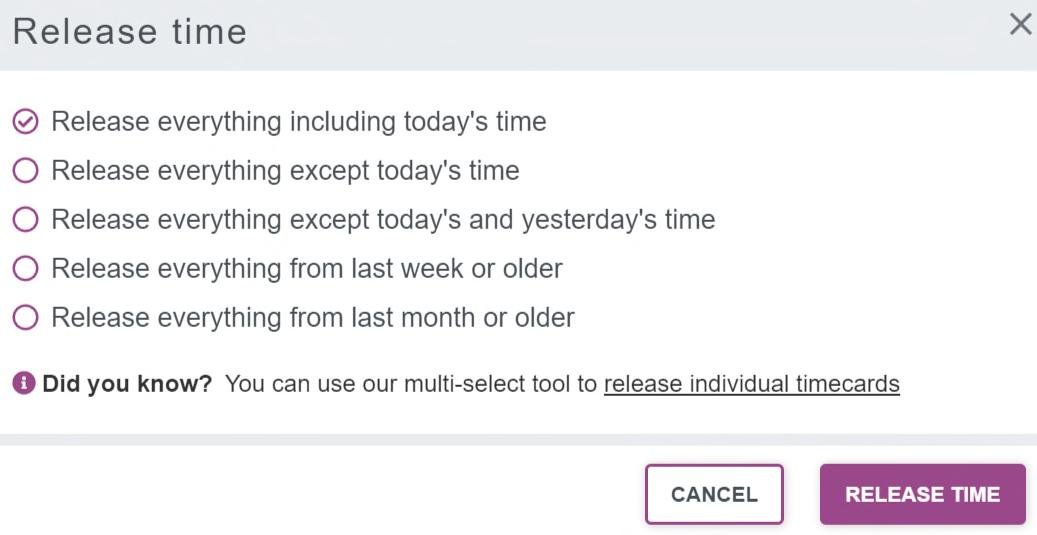
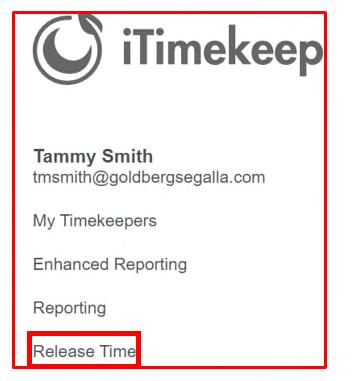
Timecard Multi-Select allows users to Bulk Submit, Bulk Release, Bulk Duplicate or Bulk Delete timecards selected individually, by day or in total in both the Desktop or Mobile version
1. Click or tap the circle(s) next to each timecard you want to select
2. Selected timecards will appear with a checkmark inside the circle
3. You can select timecards one by one, by day or select all
4. The Submit, Release, Delete or Duplicate buttons that appear will tally the total number of eligible timecards that have been selected
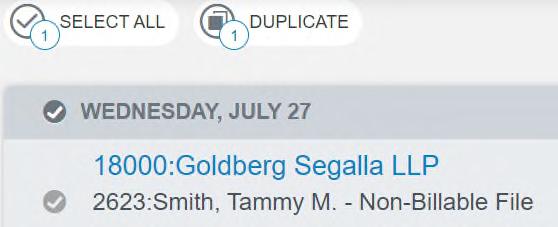
5. Click or tap on the button for the action you want to perform
6. A dialog message will appear asking you to confirm the task
7. Once complete, another confirmation message will appear confirming the number of timecards that were successfully submitted or released
You can also Release all of your time on the Hamburger Menu
1. Click on the Hamburger Menu

2. Click on Release Time
3. Click on the circle next to the option you would like to release
4. Click on Release Time
Expert Time now contains a series of prepopulated templates for Travel & Attendance. Here is how to access and utilize these templates:
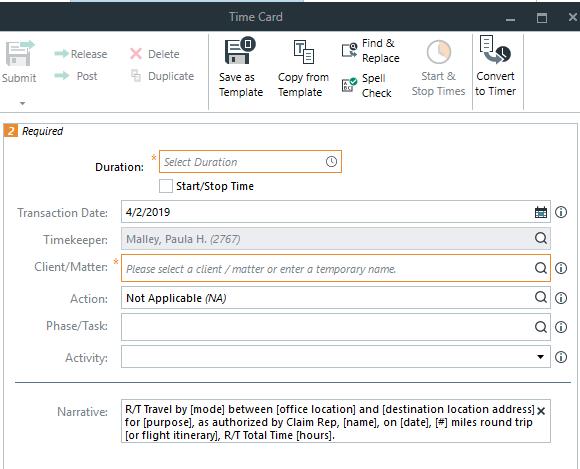
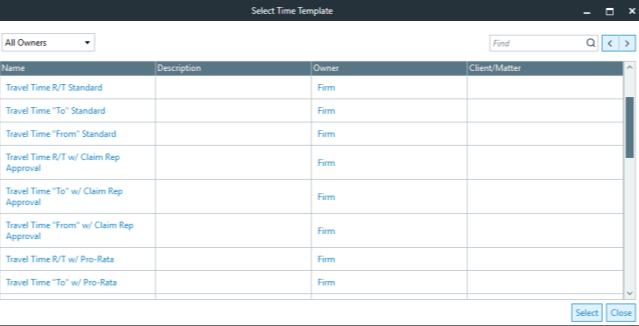
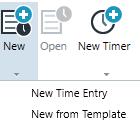


1. Click New (
)
2. Select New from Template
Template list appears
3. Select applicable template from list
4. Click Select
1. Complete required fields:
Duration
Client/Matter

Action (see below)
Phase/Task/Activity (if applicable)
TRV00 100% of hourly rate is billable TRV03 No Travel Time included in Attendance
TRV01 50% of hourly rate is billable TRV04 60% of hourly rate is billable
TRV02 $75 flat fee allowed for travel time
TRV05 75% of hourly rate is billable TRV06 $75 per hour allowed for travel time
2. Complete Narrative by filling in appropriate information for ALL fillable brackets [xxxxx] within the pre-filled narrative. Brackets are placeholders and should not be left in the Narrative.
3. Click Submit

We recognize that it may be a little overwhelming trying to remember the critical information that Clients require to be included in attendance and travel time billing entries. When we fail to provide this information, these entries are reduced typically resulting in large reductions requiring time consumi ng appeals by both professional and administrative staff. And, ofte n times, these entries are reduced simply due to the fact that travel and attendance time is blocked in one billing entry.
In an effort to promote billing compliance, and decrease reductions, we have created Attendance and Travel Time Templates wit hin Exp ert Time which contain all elements of information required by the most stringent Guideline standards. Templates have been created to account for a variety of scen arios. A Quick Reference Chart of the available templates is provided for your convenience followed by a Step by Step Instruction Tutorial.
ATTENDANCE TEMPLATES: You will notice that the Action Code has been included in the Expert Time Template as well as the term “travel time not inclu ded "
Example
Attend Mandatory Settlement Conference at Superior Court of Orange County, 3 5 pm, travel time not included.

Fillable Narrativ e
Attend [event] at [event location],[start/end times], travel time not included.

Attend deposition of Plaintiff, Jane Doe, at opposing counsel’s office, 321 W Monroe St., Bogalusa, LA, 10 am 5 pm, as approved by Claim Rep, John Doe, on 3/31/18, travel time not included.
Attend [event] at [event location],[start/end times], as approved by Claim Rep, [name], on [date], travel time not included.
Attend mediation at Morton’s Mediation, 143 56 th Place, Phoenix, AZ, 14 pm, travel time not included. Total time 3.00 split between 2 claims. (Bill 1.50 each matter.)
Attend [event] at [event location],[start/end times], travel time not included. Total Time [hours] split between [#] claims.
Attend mediation at Morton’s Mediation, 143 56 th Place, Phoenix, AZ, 14 pm, as approved by Claim Rep, John Doe, on 1/10/18, travel time not included. Total time 3.00 split between 2 claims. (Bill 1.50 each matter.)
Attend [event] at [event location],[start/end times], as approved by Claim Rep, [name], on [date], travel time not included. Total Time [hours] split between [#] claims.
Attend mediation at Morton's Mediation, 143 56th Place, Phoenix, AZ, 14 pm, dual timekeeper attendance approved by Claim Rep, Jane Doe, on 1/10/18, travel time not included.
Template
Attendance Standard
Attendance W/ Claim Rep Approval
Attendance W/ ProRata
Attendance W/ ProRata W/ Claim Rep Approval
Attendance Multiple Staff W/ Claim Rep Approval
22641329.v2 Attend [event] at [event location],[start/end times], dual timekeeper attendance approved by Claim Rep, [name], on [date], travel time not included.

Attend mediation at Morton's Mediation, 143 56th Place, Phoenix, AZ, 1 4 pm, dual timeke eper attendance approved by Claim Rep, Jane Doe, on 1/10/18, travel time not included. Total Time 3.00 split between 2 claims. (Bill 1.50 each matter.)
Attend [event] at [event lo cation],[start/end times], dual timekeeper attendance approved by Claim Rep, [name], on [date], travel time not included. Total Time [hours] split between [#] claims.

Attendance Multiple Staff W/ ProRata W/ Claim Rep Approval
Attend deposition of Plaintiff, Jane Doe, via telephonic appearance, 2 3 pm.
Attend [event] via telephonic appearance, [start/end times].
Attend deposition of Plaintiff, Jane Doe, via telephonic appearance, 2 3 pm, as approved by Claim Rep, John Doe, on 3/31/18.
Attend [event] via telephonic appearance, [start/end times], as approved by Claim Rep, [name], on [date].
Attend deposition of Plaintiff, Jane Doe, via telephonic appearance, 2 3 pm, Total Time 1.00 split between 2 claims. (Bill .50 each matter.)
Attend deposition of Plaintiff, Jane Doe, via telephonic appearance, 2 3 pm, as approved by Claim Rep, John Doe, on 3/31/18. Total Time 1.00 split between 2 claims. (Bill .50 each m atter.
Attendance Telephonic Standard
Attendance Telephonic W/ Claim Rep Approval
Attendance Telephone W/ ProRata:
Attend [event] via telephonic appearance, [start/end times], as approved by Claim Rep, [name], on [date]. Total Time [hours] split between [#] claims.
Attendance Telephone W/ ProRata W/ Claim Rep Approval
22641329.v2 Attend [event] via telephonic appearance, [start/end times], Total Time [hours] split between [#] claims.
: When using a Travel Time Template, you are required to select the appropriate Action Code in Expert Time based on the allowab le rate by the Client
TRAVEL TIME TEMPLATES
Example
R/T Travel by car between 123 Sunshine Street, San Francisco, CA and Superior Court of Orange County, 700 W Civic Center Dr., Santa Ana, CA for Mandatory Settlement Conference, 52 miles round trip, R/T Total Time 2.60.
Travel by car from 123 Sunshine Street, San Francisco, CA to Superior Court of Orange County, 700 W Civic Center Dr., Santa Ana, CA for Mandatory Settlement Conference, 26 miles oneway, Total Time 1.30.
Return travel by car from Superior Court of Orange County, 700 W Civic Center Dr., Santa Ana, CA to 123 Sunshine Street, San Francisco, CA following the Mandatory Settlement Conference, 26 miles oneway, Total Time 1.30.
Fillable Narrative
R/T Travel by [mode] between [office location] and [destination location address] for [purpose], [#] miles round trip [or flight itinerary], R/T Total Time [hours].
R/T
Template
Travel Time Standard
Travel by car from 123 Sunshine Street, San Francisco, CA to Superior Court of Orange County, 700 W Civic Center Dr., Santa Ana, CA for Mandatory Settlement Conference, as authorized by Claim Rep, John Doe, on 6/1/18, 26 miles one way, Total Time 1.30.
Travel by [mode] from [office location] to [destination location address] for [purpose], [#] miles one way [or flight itinerary], Total Time [hours].
To
Retur n travel by [mode] from [event location address] to [office location] following the [purpose], [#] miles oneway [or flight itinerary], Total Time [hours].

From
R/T Travel by [mode] between [office location] and [destination location address] for [purpose], as authorized by Claim Rep, [Name], on [date] [#] miles round trip [or flight itinerary], R/T Total Time [hours].
. To
Travel by [mode] from [office location] to [destination location address] for [purpose], as authorized by Claim Rep, [Name], on [date] [#] miles oneway [or flight itinerary], Total Time [hours].
R/T
Travel Time W/ Claim Rep Approval
22641329.v2TRAVEL TIME TEMPLATES R/T Travel by car between 123 Sunshine Street, San Francisco, CA and Superior Court of Orange County, 700 W Civic Center Dr., Santa Ana, CA for Mandatory Settlement Conference, as authorized by Claim Rep, John Doe, on 6/1/18, 52 miles round trip, R/T Total Time 2.60.
Return travel by car from Superior Court of Orange County, 700 W Civic Center Dr., Santa Ana, CA to 123 Sunshine Street, San Francisco, CA following the Mandatory Settlement Conference, as authorized by Claim Rep, Joh n Doe, on 6/1/18, 26 miles one way, Total Time 1.30.
Return travel by [mode] from [event location address] to [office location] following the [purpose], as authorized by Claim Rep, [Name], on [date] [#] miles oneway [or flight itinerary], Total Time [hours].
From
R/T Travel by car between 123 Sunshine Street, San Francisco, CA and Superior Court of Orange County, 700 W Civic Center Dr., Santa Ana, CA for Mandatory Settlement Conference, 52 miles round trip, R/T Total T ime 2.60 split between 2 files (12345, 87291) = 1.30.
R/T Travel by [mode] between [office location] and [destination location address] for [purpose], [#] miles round trip [or flight itinerary], R/T Total Time [hours] split between [#] files [(Claims Numbers)] = [hours]
R/T
Travel by car from 123 Sunshine Street, San Francisco, CA to Superior Court of Orange County, 700 W Civic Center Dr., Santa Ana, CA for Mandatory Settlement Conference, 26 miles one way. Total Time 1.30 split between 2 files (12345, 87291) = .65
Travel by [mode] from [office location] to [destination location address] for [purpose], [#] miles oneway [or flight itinerary], Total Time [hours] split between [#] files [(Claims Numbers)] = [hours]
To
Travel Time W/ ProRata
R/T Travel by car between 123 Sunshine Street, San Francisco, CA and Superior Court of Orange County, 700 W Civic Center Dr., Santa Ana, CA for Mandatory Settlement Conference, as authorized by Claim Rep, John Doe, on 6/1/18, 5 2 miles round trip, R/T

Total Time 2.60 split between 2 files (12345, 87291) = 1.30.
Return travel by [mode] from [event location address] to [office location] following the [purpose], [#] miles one way [or flight itinerary], Total Time [hours] split between [#] files [(Claims Numbers)] = [hours]
From
R/T Travel by [mode] between [office location] and [destination location address] for [purpose], as authorized by Claim Rep, [Name], on [date] [#] miles round trip [or flight itinerary], R/T Total Time [hours] split between [#] files [(Claims Numbers)] = [hours]
R/T
Travel Time W/ ProRata & Claim R ep Approval
22641329.v2 Return travel by car from Superior Cou rt of Orange County, 700 W Civic Center Dr., Santa Ana, CA to 123 Sunshine Street, San Francisco, CA following the Mandatory Settlement Conference, 26 miles oneway. Total Time 1.30 split with 2 files (12345, 87291) = .65
Travel by car from 123 Sunshine Street, San Francisco, CA to Superior Court of Orange County, 700 W Civic Center Dr., Santa Ana, CA for Mandatory Settlement Conference, as au thorized by Claim Rep, John Doe, on 6/1/18, 26 miles one way. Total Time 1.30 split between 2 files (12345, 87291) = .65
Travel by [mode] from [office location] to [destination location address] for [purpose], as authorized by Claim Rep, [Name], on [date] [#] miles oneway [or flight it inerary], Total Time [hours] split between [#] files [(Claims Numbers)] = [hours]

To
Return travel by car from Superior Court of Orange County, 700 W Civic Center Dr., Santa Ana, CA to 123 Sunshine Street, San Francisco, CA following the Mandatory Settlement Conference, as authorized by Claim Rep, John Doe, on 6/1/18, 26 miles one way. Total Time 1.30 split with 2 files (12345, 87291) = .65
22641329.v2 Return travel by [mode] from [event location address] to [office location] following the [purpose], as authorized by Claim Rep, [Name], on [date] [#] miles one way [or flight itinerary], Total Time [hours] split between [#] files [(Claims Numbers)] = [hours]
From
Keyword Requirement: Canal Insurance requires keywords to be included in billing narratives when using a particular phase/task code. The rules in Expert Time will produce an error on time entries where the billing narrative does not contain one of the keywords required by the phase/task code selected. To clear the error, edit the billing narrative to include one of the required keywords or, if the wrong phase/task code was used, select the proper code for the task being performed. See example below.
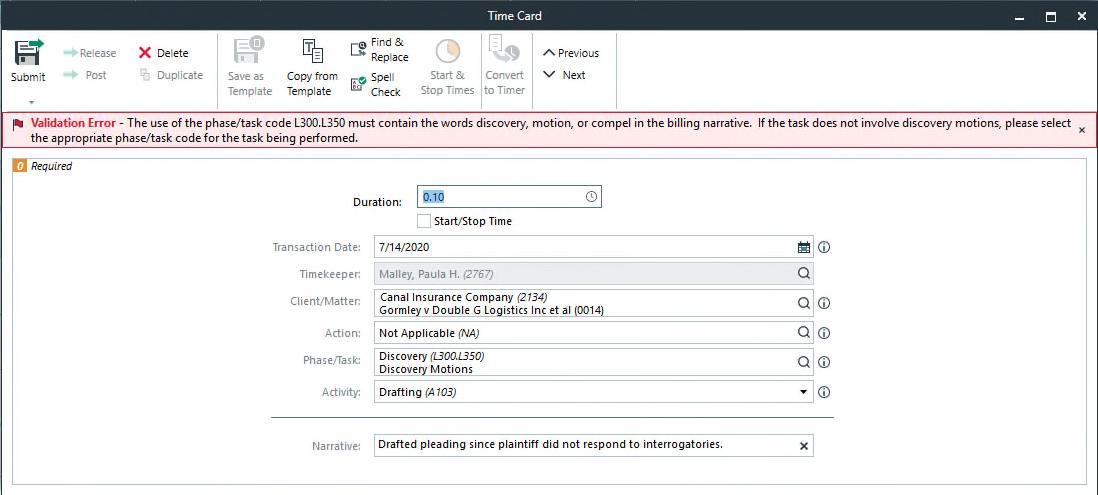
To clear the error, edit the narrative to include the word “motion,” i.e., Drafted Motion to Compel since plaintiff did not respond to interrogatories.
L100.L150 bud, budget L300.L310 request, disc, Rogg, RFA, admission, interrogatories, inspect L100.L160 settlement, mediation, arbitration, mediator L300.L315 RPD, RFP, produc L100.L210 plead, answer, complaint, counter, cross L300.L320 Ontellus, identify, record, notice, subpoena, letter L100.L240 dismiss, judgement, MSJ, MTD, disp L300.L350 discovery, motion, compel
• Task Specific Phase/Task Codes:
o Social Medical/Background Investigation – The Client requires L115 (L100.L115) to be used when conducting social media and background investigation.
o Requests for Production of Documents from Parties – The Client requires L315 (L300.L315) to be used for tasks related to Requests for Production of Documents from parties.
• Budgets: Budget preparation is capped at half an hour (.50). Entries billed in excess will error in Expert Time. To clear the error, reduce the time billed to no more than .50.
• Requires Prior Approval:
Entries not including approval language where required will error in Expert Time. To clear this error, edit the billing narrative to include the name of the Claim Rep that provided approval along with the date that approval was provided, i.e., “Approved by Claim Rep, Jane Doe, on 7/1/2020.”
o Preparation of medical chronologies
o Legal Research greater than 2.00 hours aggregate.
o Motion practice in excess of 2.00 hours aggregate per motion.
(NOTE: Legal research and motion drafting under 2.00 hours will produce a warning to remind you of the Client’s requirement. If research and/or motion practice entries collectively are in excess of 2.00 hours, approval language should be included in the billing narratives for those entries.)
The following tasks have been identified as non-billable and will produce error messages in Expert Time if billed.
o Interoffice Communication/Meetings
o Document/File Management Activities
1. Open Aderant Live from your desktop – if you do not have it, please contact Aderant Support for assistance



2. Expand GS [+]
3. Expand Billing [+]

4. Double-click on Billing
From the Billing – ADERANT Expert screen:



1. Select Utilities Edit Time Narratives
5. Enter the Timecard Number in the Time ID field if you need to make narrative edits to a few entries

6. Enter the Prebill Number (from the top of the Pre-bill) to make edits to multiple entries
7. Select the Entry to be modified
8. Click Modify
9. Edit the Narrative
10. Click OK to save the changes
11. If you receive an error that “No entries exist….”, contact your Billing Assistant for the status of the bill
Litera is a great tool to analyze documents for errors to be addressed before remitting them for execution.
1. Open the document
2. LITERA | LITIGATION COMPANION Analyze
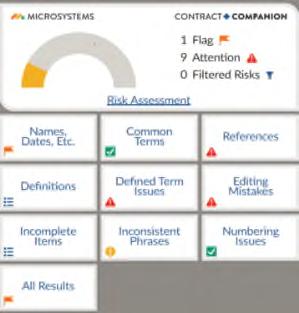
3. Litera will scan the document and you will receive a Risk Assessment
The Risk Analysis is broken down by Category You can review:
1. By Category (References, Numbering, etc.) OR….
2. All Results – displays all issues within the document
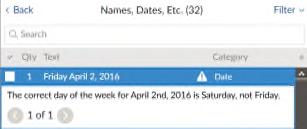
Select a Category to display a list of potential issues with brief description of each. Click on an issue to navigate to where it is located within the document.
Categories
1. Names/Dates
• Inconsistent spelling of names
• Does day of week match the date you cited?
• Does zip code match city/state in address?
1. If there is an issue, correct it in the document and it will be removed from the list
2. If the item is not an issue, mark it as Reviewed and it will move to the end of the list
2. Editing Mistakes – common punctuation and other errors spellcheck may not find.
3. References – cross-references, citations and references to other documents.
4. Definitions – checks for consistency throughout the document when referring to defined terms
5. Numbering – outline numbers out of order or repeated.
6. Incomplete Items – finds placeholders you leave in document to complete later (i.e., or ???)
7. Inconsistent Phrases –ensures consistency throughout the document of terms and definitions
3. If there is an issue you need to review later:
• Check to the left of the issue and then click Flag or Mark to review later
4. After all results have been reviewed, you can:
• Run ANALYZE again to display a shorter list of issues OR

• Click Refresh at the bottom of screen
Litera will review all citations. Errors that will display in the results include:
1. If you have a short citation without a long citation
2. If the citation is not formatted correctly
3. If the citation has missing information
• If the citation is not complete, click ( ) Copy The Citation To The Clipboard
• Click Research The Selected Case ( )
Google Scholar will open and locate the case.
1. Search for the missing information
2. Copy text into the document to clear the error
An additional way to collaborate is by adding Comments to documents.
1. Check () the issues you wish to address
2. Click Comments ( ) at the bottom of the result pane
Corresponding Comments are automatically inserted throughout the document

When the issues have been resolved, remove Comments by:
1. Right click directly on the comment
2. Delete Comment
If the document contains references to a related document, you can mark the relationship. The Risk Assessment will recognize it, rather than marking it as an issue.
Note: You can open up to 15 related documents
1. Open the related documents in Word
2. Click on Related
3. Select the related documents
4. Click OK
If you are collaborating with others or working with someone who does not have the Litera tools, you can run a Report of issues to be addressed.
1. Check () the issues to be addressed
2. Click Report at the bottom of the result pane to produce the report
3. You can print it or email it for review
You can decide which categories display in the Risk Analysis using the Show or Hide feature:

At the bottom of the Risk Assessment panel, click Show or Hide Specific Features
1. All of the categories will show with checkboxes in the lower right corner
2. Categories you want should be checked and categories you don’t want, should be unchecked
3. Click Done
In Settings, you can add information you do not want reviewed, such as a Client Name.
From the Risk Assessment pane:
1. Click Settings
2. Double-click on the category you would like to add information
3. Click on the specific information, such as Name, Company, etc.
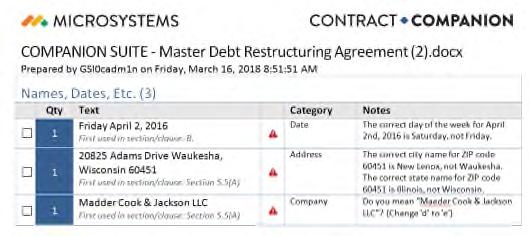

4. Click New
5. Enter the information to be recognized or ignored
6. Choose Recognize or Ignore
The information will automatically be saved with a small green Saved at the bottom of the screen.
To remove the word from the recognized list:
1. Click Settings
2. Delete it

If you have a document in need of a good cleaning, don't forget about our cleanup tool on the Litera tab in Word. This tool is much faster than using the redaction tool in Nuance to clean spots, lines, etc. or manually styling the document in Word.
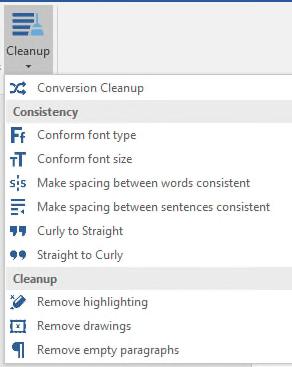
Scanned documents that have been converted into Word are the perfect documents for this tool!
To access this tool:

1. LITERA | CLEANUP Conversion Cleanup.
This will perform a quick cleaning of your document
2. For a more specific cleaning, you can also select:
• Consistency of font type and font size
• Spaces between word and sentences consistent
• Make all of your quotations marks consistent

• Remove highlighting and drawings
• Remove empty paragraphs
With both documents open:

1. LITERA | CHANGE PRO
Compare Open Documents
2. If more than two documents are opened, choose the Original and Modified Document:
• Click the drop down arrow (
) next to the document that needs to be changed
• Select the correct document to be compared
3. To complete the comparison, click Save and Compare
From Open Email:
1. LITERA | CHANGE PRO
Compare Attachments
2. On the dialog box designate the Original and Modified Document
The Change Pro menu will open and list the Original and Modified documents to be compared.
1. To switch the Original and Modified order:
• COMPARE | SELECT
2. Compare ()
Switch
1. Locate the document in an iManage folder or Search
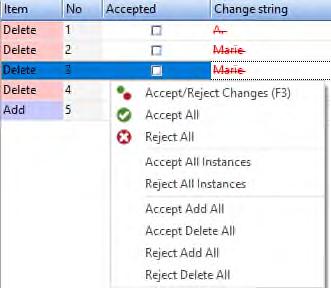
2. Right click on the document
3. Select Compare to previous version
4. Click Select
To compare versions 1 and 3, instead of 2 and 3, change the version number directly in the Original and Modified document number and click

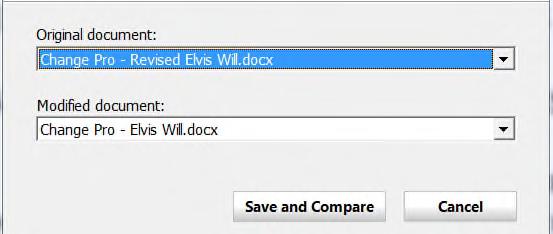
COMPARE ( )
Delete 2
type 1
3. OK
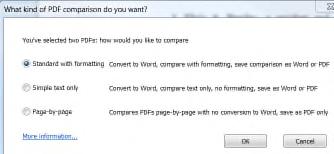
1. Open CHANGE-PRO from the start menu
2. COMPARE | SELECT add the Original and Modified documents by clicking on( ) for local drives or ( ) to browse in iManage
3. Compare ( )
4. Choose a comparison type (standard is default)
5. OK

Once the redline has been completed:
1. Navigation Pane appears on the left
2. Redline results appear in main window with a tab for Redline, Original and Modified. You can toggle between all three.
1. Changes tab
• Click on a revision to navigate within the document
• Right click to Accept or Reject the change
2. Search tab
•
Type a keyword to display all of instances
• Each instance will indicate if it is located in the Redline, Original or Modified document.
• Displays the origins of the compared documents
• Lists all changes between the documents and the results of the comparison
1. Save – locally or to iManage
2. Print options include:
• Entire document
• Redlined pages only
3. Email - the following options and formats are available for the email attachment(s):
Documents to include
• Original
• Modified
• Redline
• With Tracked Changes – sends the redlined document as if it was prepared in Word with track changes
• Redline Pages Only – useful for large documents with only a few changes
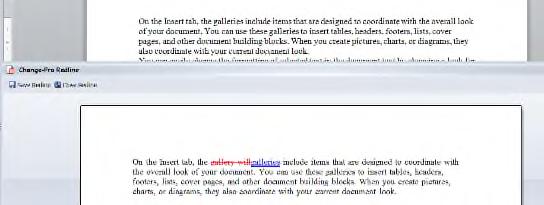
• Zip File of the attachments
• Doc (Word 97-2003) DO NOT USE!
• Docx (Word 2007 and above)
• PDF/A (archive format – required by many courts)
Convert Email Attachment to PDF
From new email message:
1. Attach document(s)
2. LITERA | CHANGE PRO Convert to PDF
3. Select document(s) to be converted
This will convert any document type to a PDF EXCEPT for a linked (.NRL) document
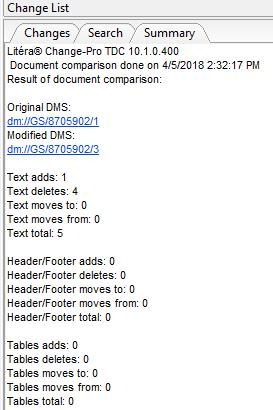
With the documents open:
1. Highlight the first paragraph to compare
2. Click LITERA | CLIPBOARD COMPARE Add to Compare
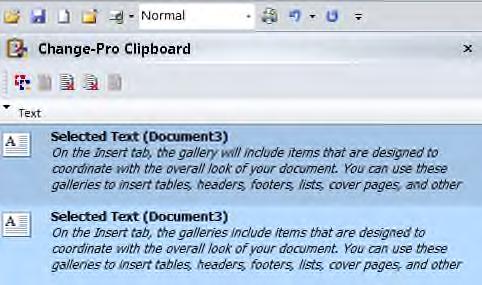
3. Highlight the next paragraph
4. Repeat Step #2
5. From the Change-Pro Clipboard:
• Click on the first paragraph to be compared then
• Control + Click on the next paragraph to be compared. Repeat if more than two paragraphs
6. Click Compare Selected Items icon ( )
A progress bar will appear. The redlined paragraphs will appear on the top of the original document
• Save the redline - this is required in order to print or email the redline
• Close the redline
Page Vault is a tool to capture social media pages, including videos, that is admissible in court including all metadata associated with it.
1. Open Page Vault from your desktop or Chromewww.page vault.com
2. Log in with your Page Vault username and password
3. Click on Launch Portal Viewer to create folders or access videos

4. Click Launch Capture Mode to capture pages
7. Confirm the page displays what you need to capture
8. Click Capture in the top left corner the capture dialog box appears
9. Select the folder to save the capture in
10.To create a new folder, click Create New Folder in the upper right corner of the dialog box.
11.Leave the Capture Name as is
12.If needed, add Notes Notes will be viewable in your Page Vault Portal, but will not appear on the capture itself when downloaded.
13.Click Save Capture to start your capture.
14.As the capture is running, a green progress bar will show at the top.
15.Upon completion, the capture will be in your Portal
1. In the Portal Viewer, navigate to the folder where you would like to create a subfolder

2. For a top level folder, click on My Folders on the top left.
3. In the folder contents area, click on New Folder | Name the Folder Enter or click Save icon
4. To rename a folder or a capture, click on the pen and paper icon next to the name
5. To delete a folder or capture, click on the checkbox next to the folder or capture name and click Delete Selected
Note, once you delete a folder or capture you cannot restore them
To move a folder or capture, in either the left folder navigation or the folder contents area:
1. Click and hold the folder or capture and drag it to the new location
2. Release the mouse to move it into the new folder.
You cannot move a Capture from the details page
You will need to make an account to log into any social media site
1. Log into Page Vault
2. Choose Launch Capture Mode
3. Click on Capture Mode
4. Type in the website in the browser bar
5. Press Enter
6. Log into the social media site
Next you will go back and log into the Launch Portal Viewer
1. Go to the folder the capture was saved it
2. Check the box next to the capture
3. Click on Export Files and send it to yourself
4. You will receive a confirmation email and a second email with a link to download a zip file.
Note: This link is only good for six hours
5. Click Download
6. This folder will be saved locally in your Downloads
To capture a Video:
1. Log into the Launch Portal Viewer
2. Copy the URL of the video needed
3. Go back to the Portal Viewer
4. Click on Batch
5. Click Video
6. Choose the folder to save it to

7. Give it a Job Name
8. Enter the file number in the Case Matter ID
9. Paste the URLs (up to 100) in the Video URL List Click Start Video Batch Capture
1. Tweets shows the tweets and re tweets that the user originated. It does not show replies to their own tweets or to other users’ tweets, or tweets that begin by @ tagging another user.
2. Tweets & Replies shows all the tweets from the user and their own replies to other people’s tweets.
3. Twitter limits the feed to the last 3,000 tweets.
1. Open the Twitter profile and select the tab Tweets or Tweets & Replies
2. When the page is loaded, click Scroll in the Page Vault menu bar to scroll and load all the content to the bottom of the profile
3. When the scroll is complete, click Capture
4. Make selections as you would for a regular webpage capture. The capture will save to the selected folder in your Portal.

1. Click on the tweet you want to capture. It will load in its own page.
2. When the page is loaded, click Scroll in the Page Vault menu bar to scroll and load all the content to the bottom of the profile.
3. Depending on the number of replies, Twitter may stop auto loading replies at which point you will then have to click Show more replies
4. Click Scroll again to continue.
5. Repeat until you have reached the end of the replies.
6. When the scroll is complete, click Capture
7. Make selections as you would for a regular webpage capture. The capture will save to the selected folder in your Portal.
1. Navigate to the Instagram profile page (grid).
2. Click Scroll in the Page Vault menu bar. The Scroll function will keep scrolling to load all posts on the grid.

3. Once scrolling is complete, click Capture in the Page Vault menu bar and proceed to make your capture selections as with a normal capture.
1. Turn off Video Auto Play if you do not, it will significantly slow down the capture and may crash the browser. To turn this off:
Choose Video | Auto Play Videos
In the drop down, choose Off
The video must be publicly viewable which is indicated by the globe. Look for the globe at the bottom of the page by the published date
2. Copy the URL from your browser for each video individually including the http://
3. To find the source URL
Right click on the video
Choose Copy video URL
4. Paste the URL directly into Batch
5. Open Batch
6. Choose Video
7. Complete Folder, Job Name, and Case Matter ID
8. Enter each URL into Batch limit of 100 URLs and 5 job requests that are pending at one time
9. Click Start Batch Capture to submit the job
If there are any unsupported URLs in your list, you will receive an error notice and the job will not submit. Make any changes in the error notice and click "Start Batch Capture" again to submit.
10.The status of your Batch job can be tracked in the Job History section and the captures will appear in the selected folder in your Portal.
1. Navigate to the page you want to capture
2. In the upper left corner, choose Expand
3. In the dialog box, choose Scroll to the bottom and open comments
4. Choose Capture at the top to complete the capture
5. Optional: If you would like the capture to immediately initiate after scrolling and opening, then check the box marked Capture after expanding and save to folder
6. Your folder list will open
7. Click Expand and capture
1. Navigate to the profile you need to capture
2. Scroll down and click open any additional content you want to capture
3. Click Capture button
4. Select the folder to save the capture in or create a new folder. Leave the scroll settings on their default to scroll the full page.
5. Select Save Capture and the capture will automatically save to the selected folder in your Portal
CTRL + O: Opens the Capture dialog box (the same as clicking the Capture button)
CTRL + D: Scrolls to the bottom
This will scroll the main screen, so if you have a Facebook or Instagram overlay, it will scroll the background

CTRL + E: Scroll to the bottom and expand all comments (Facebook only)
CTRL + S: Capture with the last settings used in the capture dialog box
A capture must be made in the current session for CTRL + S to be available. The shortcut works when you do not have the Capture dialog box open. If you click on CTRL + O and then try CTRL + S, it will not capture
CTRL + J: Takes a single screen shot (not scrolling)
CTRL + K: Facebook photo scrolling capture
Only when viewing a single Facebook photo. Be sure to expand and scroll the Facebook photo comments
1. Single-Screen: this option will only take a capture of what is currently showing in the browser.

2. Scrolling (default): this option will scroll the page and capture based on the selection in What to scroll and capture
1. Entire Page: this will scroll and load to the bottom of the page content and then capture everything that was opened. You do not have to scroll to the bottom of the page yourself.
2. From Top to Active Screen: this captures from the top of the page to the location you are currently viewing
3. From Active Screen to End: this captures the content from the location you are currently viewing to the bottom of the page.
If you are on a website that uses infinite scroll, like a news website, using Entire Page or Active Screen to End will scroll indefinitely and may result in the browser crashing due to too much data. Be sure to check that the website is not using infinite scroll before using one of these options

3. Delay between Screenshots - depending on how a website’s code was written, the order of how a page renders as you scroll down could result in a temporary view that is not what the page will look like in another moment once it has finished loading. If you are running into rendering issues on your capture, try increasing the delay between screenshots, it will give the server additional time to correctly render the page before capturing and scrolling down to the next frame.
4. Select Scroll Box to Capture - Sometimes web pages use a separate container to load content, like the comments on a photo on social media, that scroll independently of the scrolling on the page. To scroll these other elements with the Scrolling Capture, you will need to use Select Scroll Box to Capture”.
1. PDF Page Overlap - a portion of the prior captured page shows on the following page. This allows you to confirm that the capture did not skip, cut off or omit a portion of the page’s content. It also allows you to control how much of the prior page, in pixels, shows on the following page. The default setting is 175 pixels.
2. Header on First Page Only – on many websites, the header and/or navigation menu floats at the top of the page as you scroll down. If you would like to only see the header on the first page of the capture and not as you float down, select this option.
To change the scrolling option to a container other than the main page, select the desired container in the Select Scroll Box to Capture area. When your mouse hovers over the container name, you will see it highlighted in the browser behind the dialog box (move the dialog box to cover less of the page if you can’t see it)

To capture Facebook pages by a specific date or to select specific posts, use the Expand tool.
1. Locate the Facebook page you want to capture
2. In the upper left corner, choose Expand
3. In the dialog box, choose Scrape list of posts
• Click on email scrape and your GS email address will appear

• Click Expand
• This process may take a while, depending on the size of the page
• You will receive a notification when it has completed and an email with the Excel report

4. Open the Excel spreadsheet and select the rows that you want to capture and copy them

5. Return to Facebook page and designate the folder to save the captures
6. Choose Capture a list of posts (URLs)

7. Click on the ellipsis to the right and paste the Excel info into the box that pops up
8. Click OK
9. Click on Expand and Capture
10. Once complete, you will find the captures in your designated folder
11. Complete with exporting as usual
CopyTrans allows us to connect to an iPhone, unlocked with the individual’s security passcode, to access their Text Messages in the native iOS platform (sms), even if they leveraged something like “What’s App”.
This was recently used by one of our Attorneys in a libel/slander case with discovery demands for our client’s text messages between her and her fellow codefendants. She had hundreds of texts that would have been impossible to collect by screen captures. This software makes it easy to export faster, and in PDF Format.

It allows us to sync the messages to the software and then search either by Timeframe, or by entering a contact name, which allows you to view a conversation thread with that individual directly, or any Group Text Message in which the individual was included

Once you identify the message(s) you would like to export, you can export them cleanly into any one of multiple formats including PDF, Word, Excel, etc. but PDF looks the best. These can be saved individually by text conversation. The output includes the Timestamp and names of individuals involved in each thread.
Below is a link to the CopyTrans website that reviews what we currently use as a reference and shows a glimpse of what it looks like when using it: https://www.copytrans.net/copytranscontacts/#down

All requests to facilitate a search/export should be sent to: eDiscovery@goldbergsegalla.com


LawBase is a case management system that is 100% customizable to each practice group. LawBase can be used for client reporting purposes, automation of commonly used documents and replacement of spreadsheets maintained by various practice groups.
Open LawBase from your desktop with the icon
Recents - Displays recent matters you have worked on
Quick Note - Allows the user to add a quick note to the matter without having to search for the matter in your Smartfolders list
New Contact – Click to add a new contact in LawBase note AFTER you have thoroughly checked that the contact does not already exist in our database.
Quick Access Toolbar dropdown list to customize your toolbar or move it below your ribbon

LawBase Ribbon
Note: Many icons that appear on the ribbon are also available on the Quick Access Toolbar
1. Exit and Forget Open Windows (preferred method of exiting out of LawBase) or
2. Exit and Remember Open Windows – any windows left open when you close LawBase will appear the next time you open
3. Favorites – displays items you wish to retrieve quickly. To add:
• Locate the contact, matter, etc.
• Right click on the matter
• Select add to favorites
Home Ribbon
Note: Many icons that appear on the ribbon are also available on the Quick Access Toolbar
1. New Navigator – will open a 2nd navigation window
2. Quick Search – allows you to quickly search for a matter without opening your smartfolders.
3. Display Search – provides a list of search results from entire database (contacts, cases, etc.)
4. Calendar – Create a quick calendar entry for a matter. Displays your personal or master calendar
5. Recents – Displays recent matters you have worked on
1. General
• Auto Align Fields - default is blank, as fields will adjust as they are viewed
• Remember Open Windows can be selected as a default however, Best Practices is to Exit and Close Open Windows
• Use Fluent Layout - Provides a different view of cases in a stacked and tab view. Commonly used items will be seen vertically instead of horizontally.
2. Skins - Allows you to change the color schemes or themes
3. Color Mix - allows you to change the background coloring
Windows Ribbon
The Main Navigator resides at the left of your screen and allows you to access the following
Smartfolders
Smartfolders are pre-filtered lists of data used to organize and distribute information. They are customized for you based on your position and assigned work.
1. All Contacts - Displays ALL contacts that have been saved in LawBase for the entire firm
2. Other contact related smartfolders are filtered for Courts, Judges, Experts
3. My Work - Lists the cases you are assigned to work on.
4. All Open Claims and Lawsuits - Displays ALL matters open across the firm
Will Display your open windows in a stacked view Main NavigatorAllows for the user to search for Contacts, Claims and Lawsuits in a vertical view
Click on the GS Team Tab to add internal parties related to this case such as:
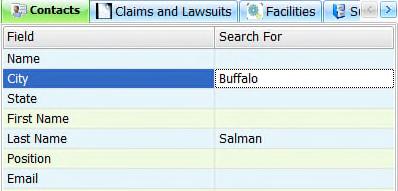
• Paralegal
• Working Attorney
• Primary Working Attorney
Note: Additional tabs will be visible to different Practice Groups. However, the most common tabs will always be Parties and Related Contacts, GS Team Tab, and iMange
Allows the user to run reports, if applicable, for matters
Shortcuts
Provides a list of commonly used apps and links by attorneys and legal assistants

New claims are automatically populated into LawBase when opened via the New File Form. Information is fed from Aderant and fields in the header cannot be edited
NOTIFICATION area displays alerts such as the case has been moved to another matter #.
Parties and Related Contacts tab
Use this tab to add ALL parties associated with the matter such as Adjusters, Claimant/Petitioner/Plaintiff, Judges, Courts, etc.
To add a Party:
1. Unlock ( ) the case (top left) to place in edit mode
2. Click (+)
3. Type part of the name of the party
4. Contact list filters as you type
5. Select the Party from the list
6. Assign a Role
Note: Information from this tab can be used to create an Information Sheet from Lawbase to be saved in iManage
GS Team tab
Is available inside of Lawbase, it allows you access to your matter in iManage from LawBase in a Work10 view. You are able to search and open documents in the matter
Displays a history of ALL notes related to the case. To create a Note:
1. Click on Notes at the bottom of your screen
2. Click (+)
3. Select a note Type
4. Attachment (Optional) – type the iManage DocID number for any related document
5. Type the note
6. Click Email (optional) to send the note. LawBase will prefill your subject line and message body.
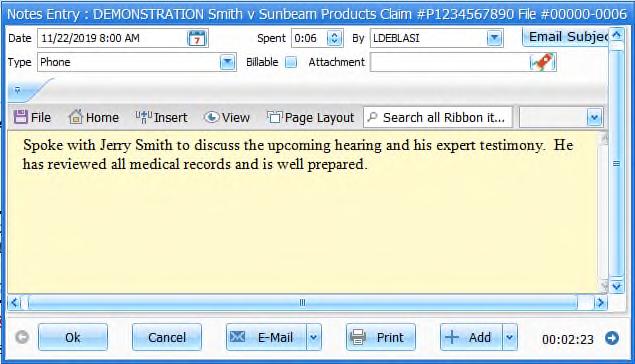
7. Click OK to save
Displays a history of notes created specifically for the active tab. When there is a Tab Note, it will be highlighted in Red Calendar
Displays all calendar entries for the case regardless of who they are assigned to.

Provides a history of the changes made to the case from time it opens to the time it closes including adding/removing parties, notes, emailing, etc.

1. Click on the Column Header in the Results Grid
2. Results will be in Ascending order
3. Click the Column Header a second time to view results in Descending order
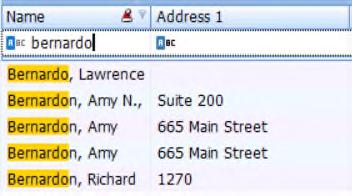
1. Sort the first Column (see instructions above)
2. Shift + Click on 2nd column
3. Continue steps 1 and 2 as needed
From
1. Click in the Auto Filter Field below the Column
2. Type part or all of the filter criteria.
1. Click
Select an Operator from the dropdown list that best fits your field type and
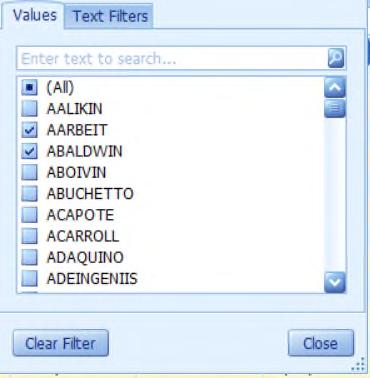
filtering requirements
4. Type the filter criteria in Auto Filter field
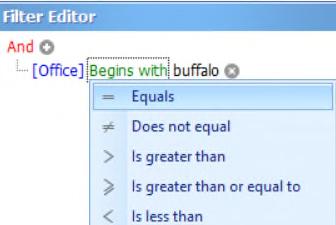
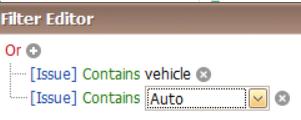
5. Your results will display in the Results Grid
Note: You can filter by multiple fields to further narrow your results
1. Hover on the right side of any heading to display filter icon ( )
2. Click on the icon to display a list of unique values in the column
3. Check one or more values in the list
1. Right click on Column Heading

Select Filter Editor
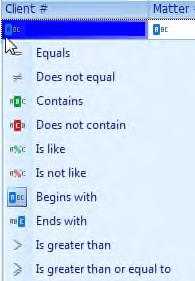
Select an
Type in
1. Click on (+) next
Select
Type
Click
Click on x at bottom of
1. Hover over any Date heading
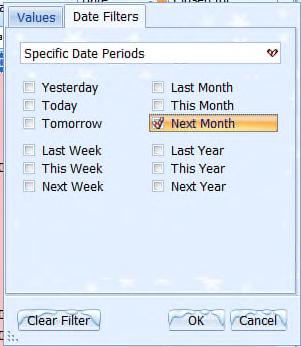
2. Click on the filter icon

3. Select Date Filters tab
4. Select a date or time period
5. Click OK
We have made some changes to the formatting of our Contact Names. This may cause you to have unexpected results in your routine searches. Here are instructions for using various operators when performing a search or filter of data.
From the Results Grid of any Smartfolder:

1. The Default filter is “Begins with” ( )
2. Click in the Auto Filter Field below the Column Header
3. Type part or all of the filter criteria.
The results grid will filter as you type. If the text you type for the name, company, etc. is NOT at the beginning of the cell, it will not display in the Results Grid.
1. Click on the ABC icon on the left side of the Auto Filter Field ( )
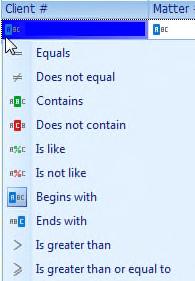
2. A list of Operators displays
3. Select an Operator from the dropdown list that best fits your field type and your filtering requirements.
• Contains – BEST Choice – it will pattern match your criteria through the entire column

• Equals – use this for exact match of text in cell such as NY, FL

4. Type the filter criteria in Auto Filter field under heading
5. Your results will display in the Results Grid

Once you change the Operator, the change will remain set for that column every time you use LawBase

To add new columns to your view or to add back columns you previously deleted:
1. Right click on any column heading to display a POP UP MENU.


The Customization box will appear in the bottom, right corner of your LawBase screen listing all available columns to be displayed.

3. Double click on the column you wish to add anywhere on the heading line.
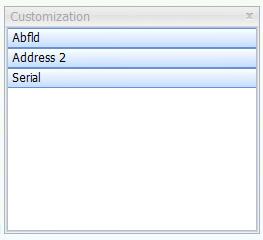


4. The column where appear at the end of the heading line.
5. You can place them in any order that you like by dragging either left or right and letting go.
6. Once completed, click on the X to close the Customization box.
If you need to view and analyze data outside of LawBase, you can export data into Excel. Here are the steps:
1. Open Smartfolder that contains the data
2. Filter data as needed

1. Right click on Smartfolder (remember it must display what you want to export on the screen)
2. Export Results
3. Results to Excel (NO HYPERLINKS)
Hyperlink feature is not currently available
1. You will be prompted to Save
2. For confidentiality and ease in retrieving data later:
• Navigate to where you want the data saved


• Save
Initial location for save is on the network
IT Help Desk Information
Password Requirements
Remote Access
Remote Work Survival Guide
GS University
How to Utilize the QRGs
Telephone QRG
EC500 Telephone
Voicemail
TEAMS – Add A Participant During A Meeting
TEAMS – Switch Audio from PC to Phone
TEAMS – Remote Access
TEAMS Mobility
TEAMS - Breakout Rooms
TEAMS - Add a GS Background
FileSite - DeskSite - Document Essentials
FileSite Workspaces and Folders
FileSite - Document Search
FileSite – Email Management DeskSite Workspaces and Folders
Desksite - Document Search
Best Practices - Roadmap to Filing Correspondence
iManage – Import using Work 10
Work10 for Mobility
Metadact
USB Encryption
Outlook Email
Outlook – Email Management
Outlook Tips & Tricks
Desktop Faxing Via Outlook
Desktop Faxing Via Word
Copitrak - Copy Essentials
Xerox – Prebill Scanning
Copitrak Routing Sheets
Xerox B&C Copiers – Scan From Terminal
Xerox D95 Copiers – Copy Essentials
Xerox D95 Copiers – Scan From Terminal
Outlook Calendar
2 3 4 6 9 11 12 14 15 17 19 19 21 22 23 26 27 29 31 33 35 37 39 39 41 43 44 48 50 52 54 55 57 58 59 60 62 64 67
Mimecast
OneDrive - Secure File Send RightSignature
Winscribe Mobility
Winscribe – Mobile Text Return
Worker's Compensation Overflow Procedures for Legal Assistants Send Dictation to Overflow
Winscribe Typist
Winscribe – Speech to Text FedEx
HIPAA Essentials
OverSeas Travel – Restricted Remote Access Hyperstyles
Hyperstyles – Apply Numbers Using Litera Numbers
Hyperstyles – Create Your Own Scheme
Hyperstyles – Create A Table of Contents
Best Authority
Best Authority – Review Tools
Create – Letters and Memos
Create Pleadings
Create - SuperCopy/SuperPaste
Nth Expenses QRG
Nth Expenses – Advanced Features
Nth – Multiple Receipts in One Email Using your Phone
Nth – Receipt Affidavit
Nth File Closing
Nth - Check Request
Nuance Essentials
Nuance – Legal Features
Nuance – Create Electronic Signature Word – Create Electronic Signature
Expert Time
On The Go Time
Travel and Attendance Templates
Canal Insurance Expert Time Requirements
Aderant Live – Edit Narratives on a Pre-Bill
Litera - Document Proofing Essentials
Litera – Clean Your Document
Change Pro - Redlining Essentials
Page Vault
Page Vault - Advance Capture Options
Page Vault - FaceBook Captures Expand Tool
CopyTrans
69 71 73 74 76 77 78 79 81 82 84 86 87 89 90 91 92 93 95 97 98 99 101 103 104 105 106 109 111 113 114 115 121 128 134 135 136 138 139 141 144 145 146
LawBase Essentials
LawBase – Sort & Filter Folders
LawBase – Filter Using Operators
LawBase – Add Columns to a SmartFolder View
LawBase – Exporting Data
147 150 152 153 154