


Home-baked goodies make the season shine


Soft and delicate, with a slightly sweet, milky flavor, BelGioioso Burrata is made with handcrafted Fresh Mozzarella filled with Stracciatella, a mix of soft mozzarella shreds and sweet cream.
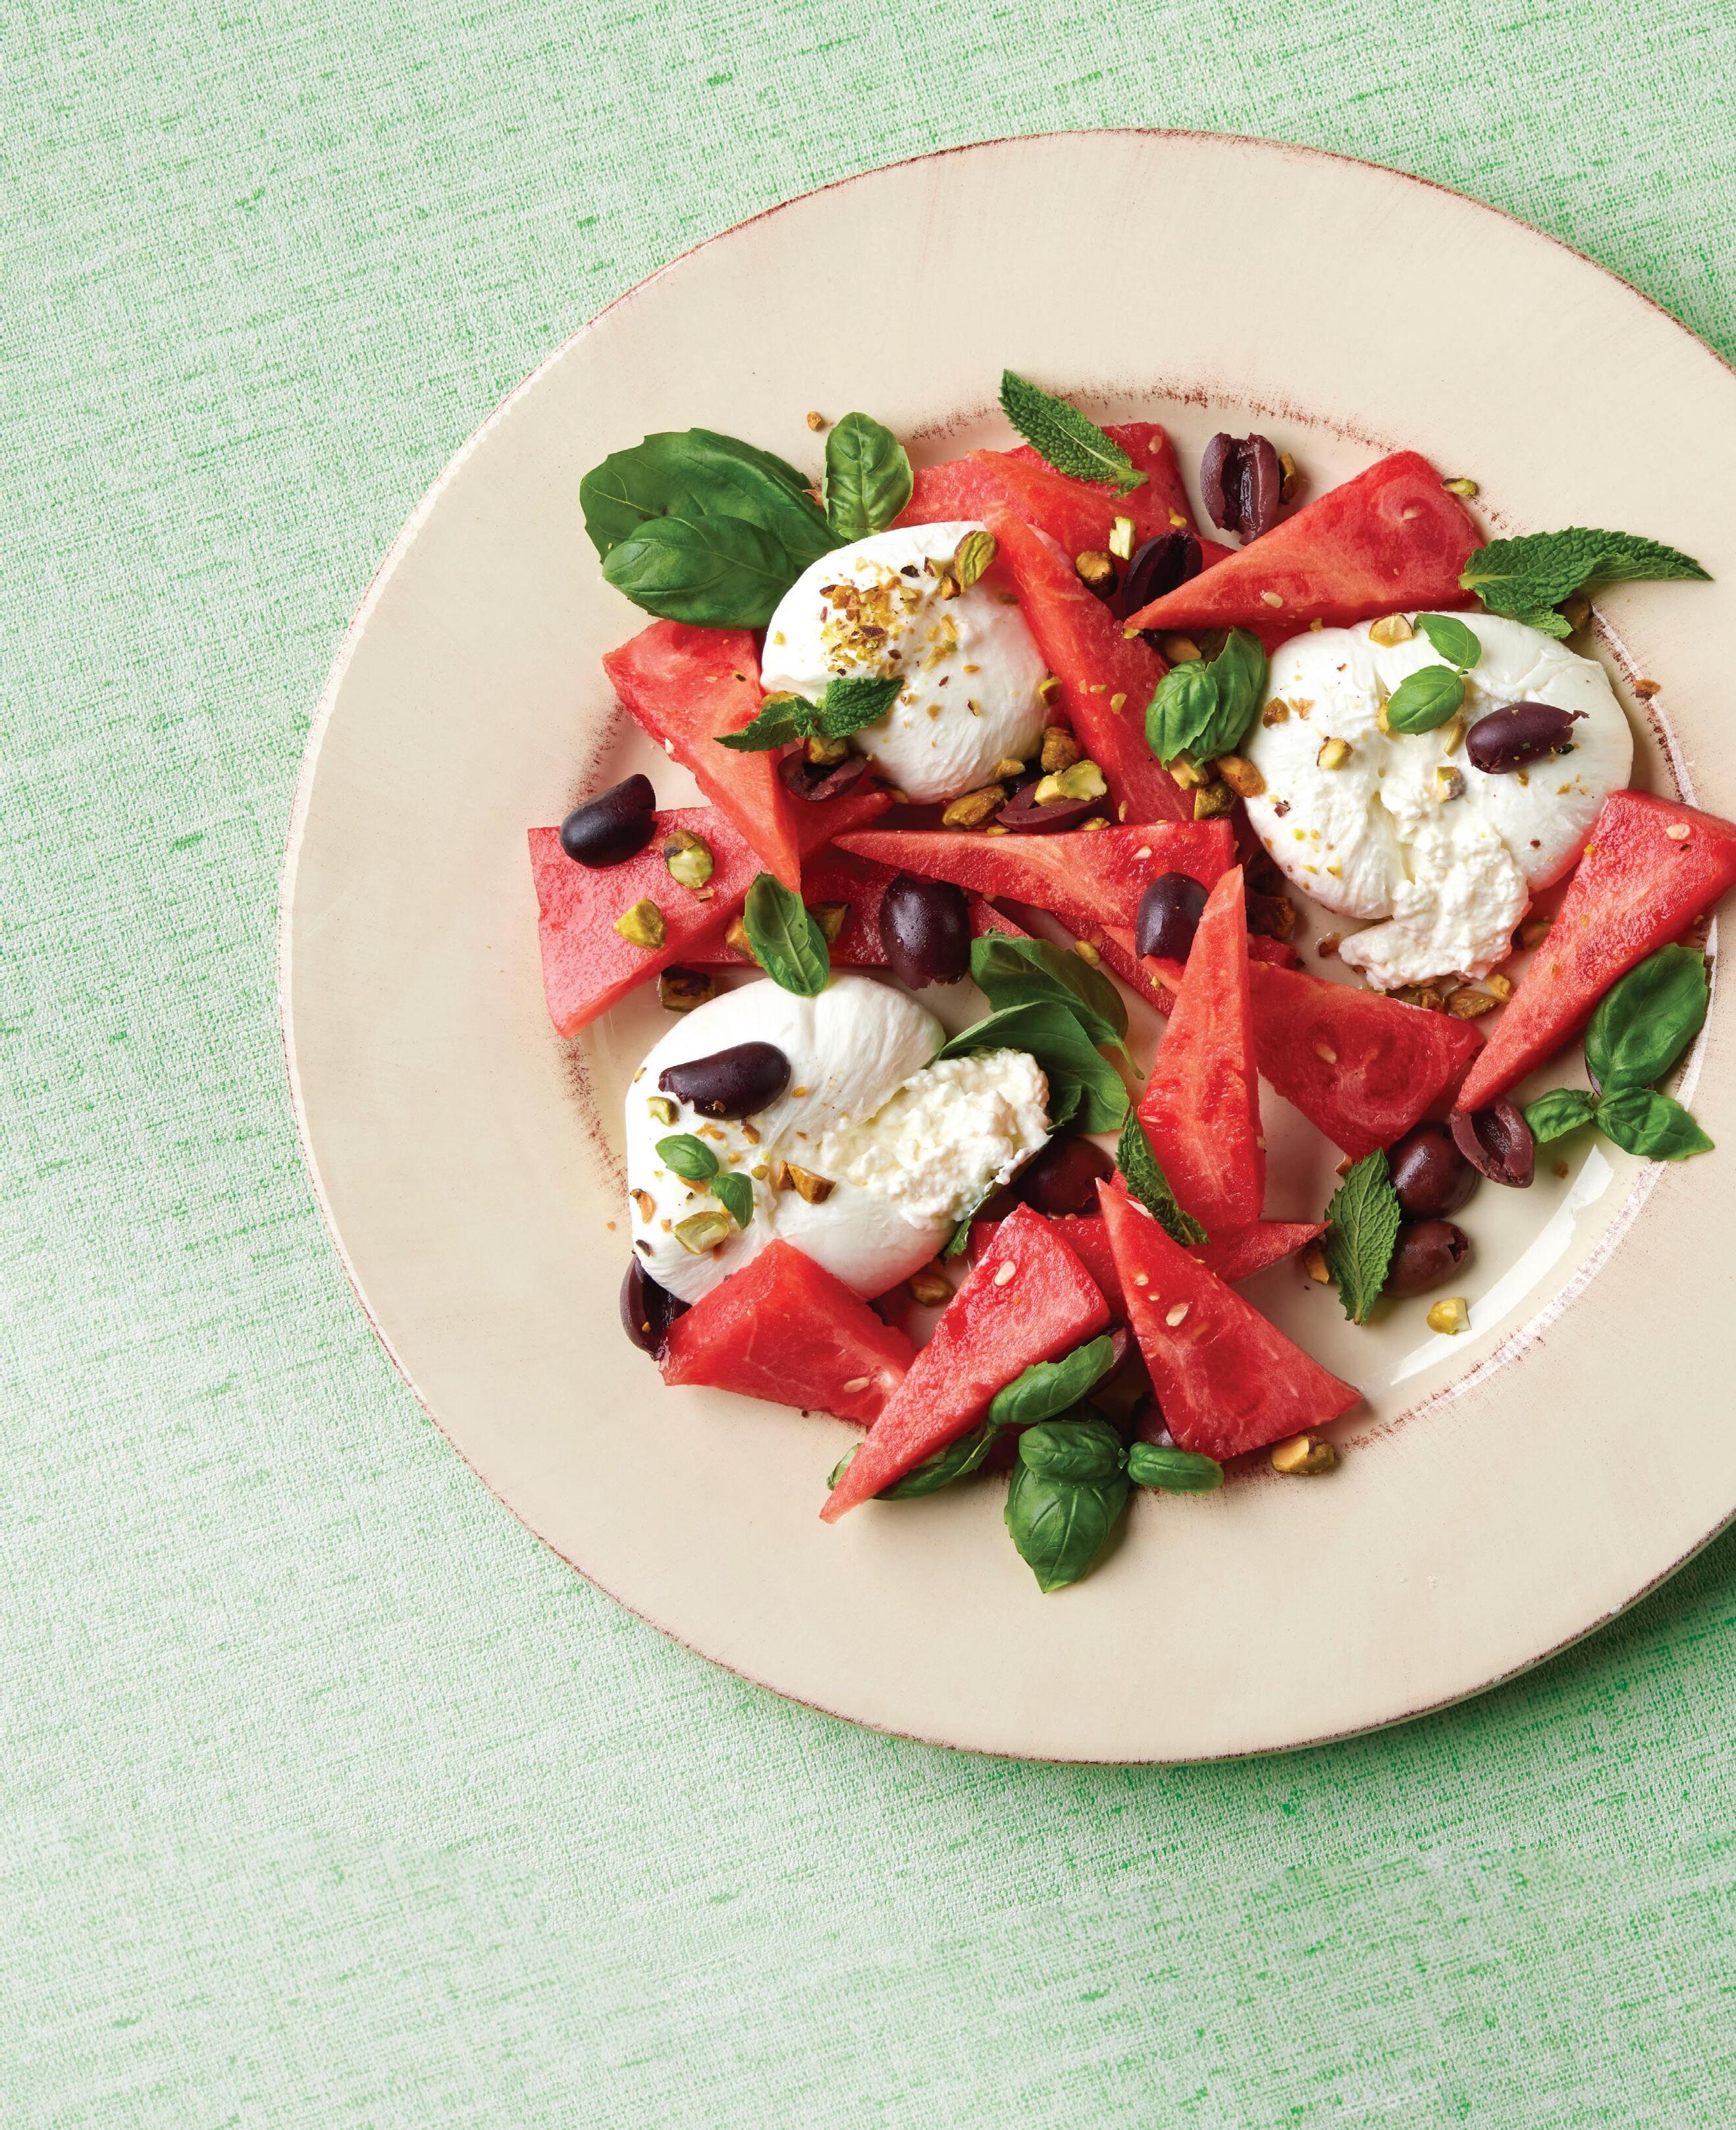
Enhance your meals by creating a new, fresh Burrata salad with seasonal produce. Or enrich your pizza or pasta by topping with a garnish of this fresh, creamy cheese just before serving.


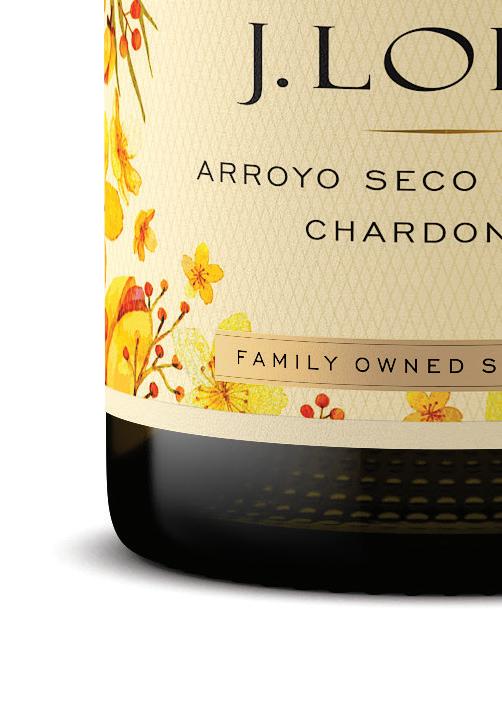


Savor the versatile J. Lohr Estates Riverstone Chardonnay with your favorite dishes. Its crisp, refreshing notes enhance grilled vegetables, creamy pastas, and light fish tacos. Perfect for those who love cooking and eating well, this Chardonnay brings out the best in your culinary creations. Enjoy the perfect pairing today!
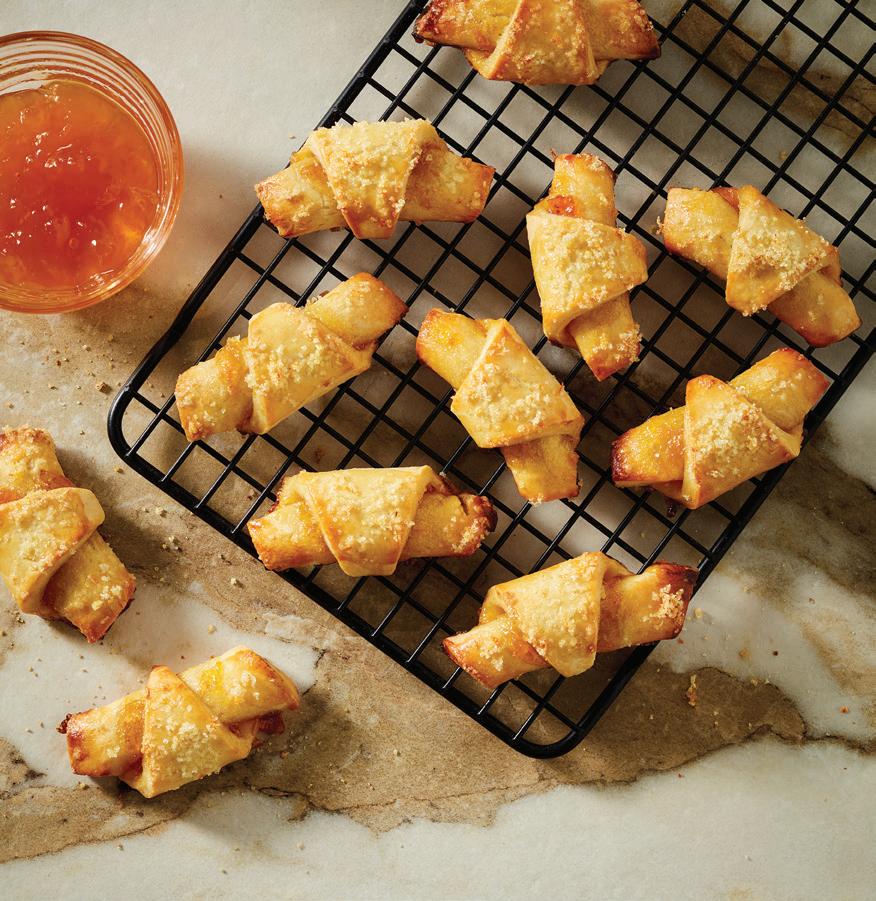
Rugelach delivers three times the avor with a sweet almond crust, tangy cranberry lling, and orange-scented sugar topping (page 49).
“A par without cake is just a meeting.”
–JULIA CHILD
Make any get-together a li le bit sweeter with these homemade baked treats.
BY JUDITH FERTIG

4 Ingredient
Fresh, juiced, dried, or jellied, cranberries contain excellent health bene ts and a distinctive avor pro le. BY JULIA JACOBSON
6 Four of a Kind Crunch into healthy, versatile almonds for snacking, baking, and more.
BY MARY SUBIALKA
17 Tips and Tools
Gadgets to transform your baking experience. BY
JULIA JACOBSON
Create a memorable dinner with an easy, no-fuss roasted turkey, the rich avors of a perfectly cooked beef roast, and more.
BY MARY SUBIALKA
Chef Devan Rajkumar dishes on his debut cookbook “Mad Love,” which is a fusion feast of culture, family, and avor.
BY EMMA ENEBAK
Dr. Uma Naidoo, author of “Calm Your Mind with Food,” discusses brain-healthy foods.
BY MACY HARDER
20 Viva Aperitivo!
Embrace the art of Italian snacks to entertain with mouthwatering, creative appetizers.
RECIPES BY STEF FERRARI


Whether veggiepacked or rich and creamy soup means “comfort” to you, these recipes will t the bill.
RECIPES BY SHELLY WESTERHAUSEN WORCEL
Sweet Sips: Elevate your dessert course with wine.


BY MARY SUBIALKA
THERE ARE MANY WAYS TO RELISH CRANBERRIES. See page 4
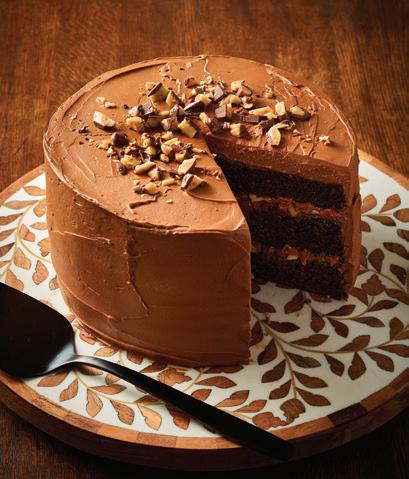
ON THE COVER
Sour Cream Chocolate Cake with Caramel Toffee Filling, page 51
PHOTOGRAPHER
Terry Brennan
FOOD STYLIST
Lara Miklasevics
PUBLISHER
Tammy Galvin
GROUP EDITOR
Alesha Taylor
CONTENT DIRECTOR
Mary Subialka
CONTRIBUTING EDITORS
Emma Enebak
Macy Harder
EDITORIAL INTERN
Julia Jacobson
CREATIVE DIRECTOR
Ted Rossiter
ART DIRECTORS
Olivia Curti, Traci Zellmann
PRODUCTION DIRECTOR
Deidra Anderson
ADVERTISING COORDINATOR
Sydney Kell
SALES & MARKETING SPECIALIST
Tausha Martinson-Bright
VOLUME 20, NUMBER 3
Real Food magazine is published quarterly by Greenspring Media, LLC, 9401 James Ave. S., Suite 152, Bloomington, MN 55431, 612.371.5800, Fax 612.371.5801. All rights reserved. No part of this publication may be reprinted or otherwise reproduced without written permission from the publisher. Real Food is exclusively operated and owned by Greenspring Media, LLC. Printed in the USA. realfoodmag.com
The pages between the covers of this magazine (except for any inserted material) are printed on paper made from wood fiber that was procured from forests that are sustainably managed to remain healthy, productive and biologically diverse.


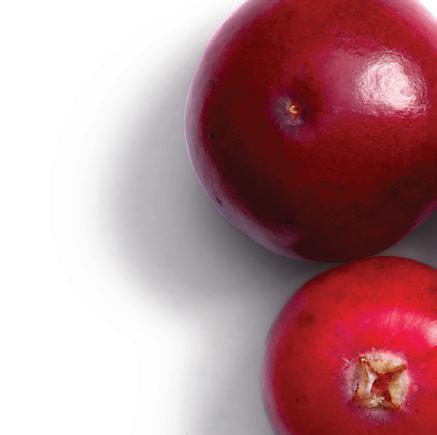


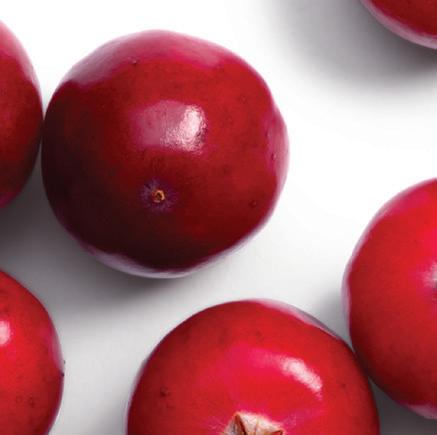
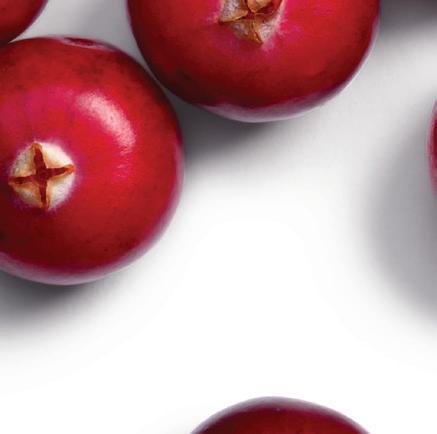
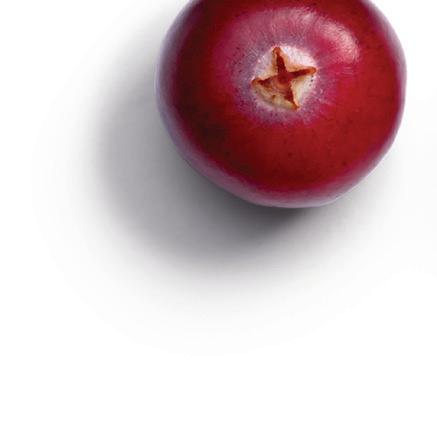
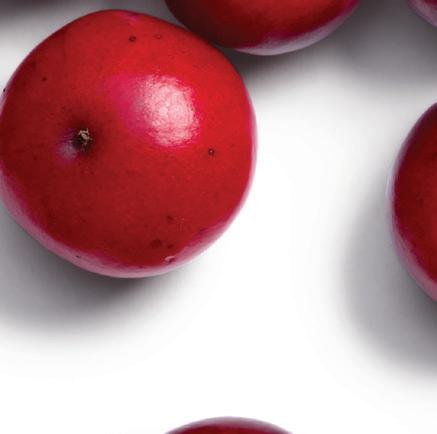
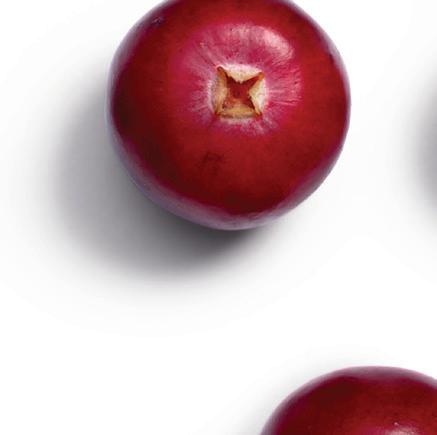
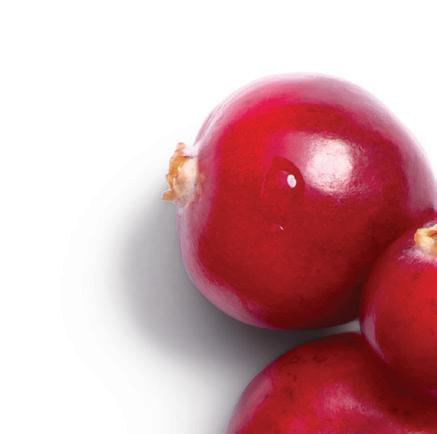

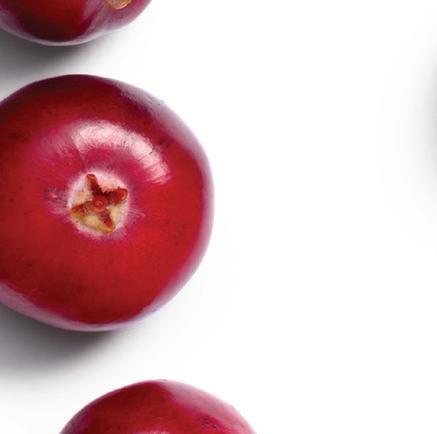
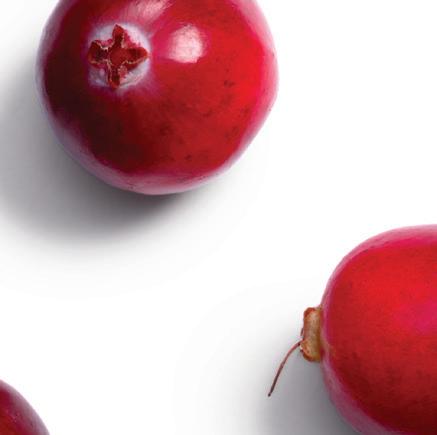
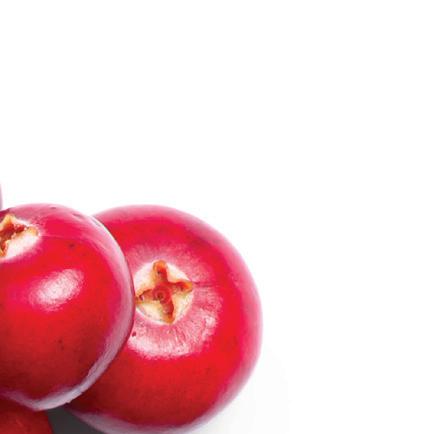
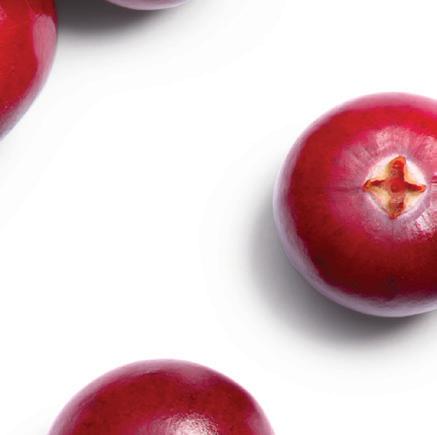
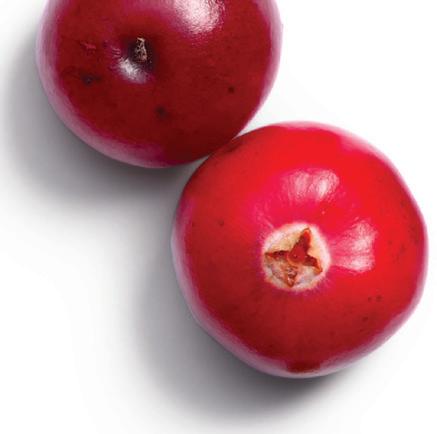
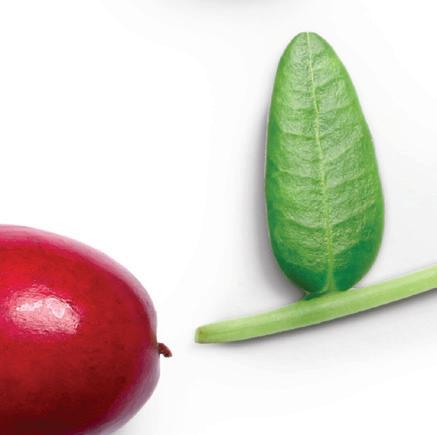


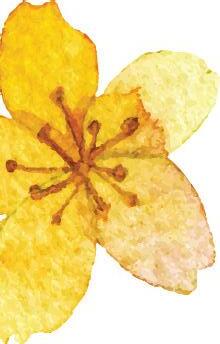
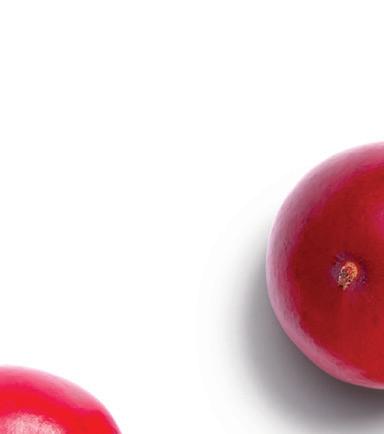
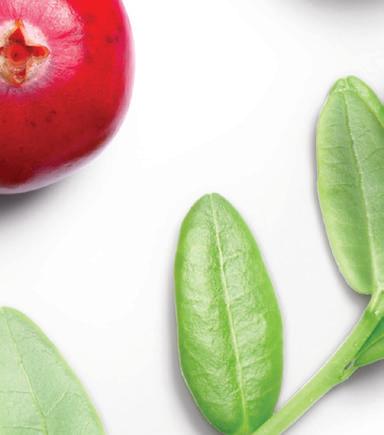
Fresh, juiced, dried, or jellied, this tart berry contains excellent health benefits and a distinctive flavor profile
by julia jacobson
Cranberries have long been associated with the holiday season, often used in salads, as a garnish alongside turkey, or strung around a Christmas tree for decoration. One of America’s native fruits, these tangy red berries have a deep history, notable nutritional value, and versatile culinary capabilities that help explain their seasonal significance.


Long before America became an independent country, Native Americans harvested cranberries and discovered their medicinal powers. They grew them in boglands and marshes, quickly realizing the high amount of moisture needed to protect and grow the fruit. Early European colonists observed their cranberry harvesting process and carried on the practice in their own communities. Pilgrims relied on the berry for its nutritional value, as it boosted energy levels and lasted for months, making it easily transportable for long journeys. Excerpts from early explorers’ writing confirm that Native Americans made the first cranberry sauce, using its sweet and sour flavor as a relish for meat. By the time sugar became readily available in New England throughout the 17th century, cranberries were put in desserts, including pies and tarts. Native Americans also recognized cranberries’ medicinal properties, using the berry to treat wounds, scurvy, poisoning, indigestion, and seasickness. Their multidimensional practicality made cranberries a popular commodity in the New World.


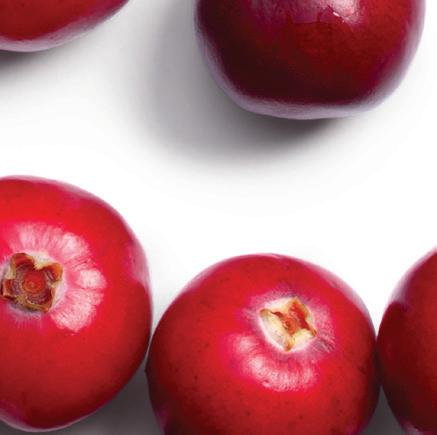
Some vines on Cape Cod are more than 150 years old and are still bearing fruit. Normally, growers do not replant each year since an undamaged cranberry vine will survive indefinitely.
(SOURCE: MASSACHUSETTS CRANBERRIES)
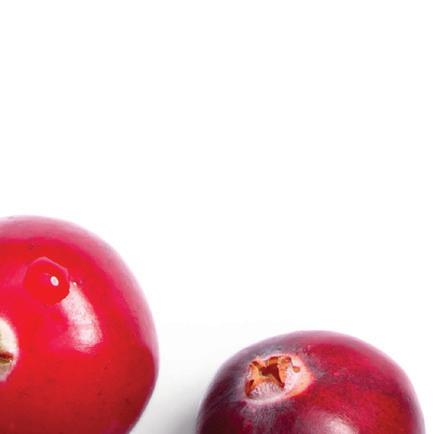
Cranberries are not easy to grow commercially and only grow wild in specific Northeast and Pacific Northwest locations. They grow close to the ground on vines, requiring acidic soil and ample fresh water supply to flourish. Cranberries naturally develop in wetlands, which help to maintain a water table. This environment for growing cranberries is often referred to as a bog, which initially formed from glacial deposits thousands of years ago and offers a “bed” for water to collect and for cranberries to grow. Their commercial production traces back to the early 1800s in Cape Cod, Massachusetts. The number of cranberry growers increased once Captain Henry Hall of Massachusetts established cultivating techniques, and New Jersey, Maine, and Wisconsin became popular production sites because of their suitable environments. Today, most bogs are artificial, and the United States harvests approximately 40,000 acres of cranberries annually.
Beyond their delicious taste, cranberries’ health benefits should not be overlooked. Rich in vitamin C and antioxidants, this red fruit promotes urinary tract health and prevents bacterial infections. Its antioxidants may also help reduce oxidative damage to cells that can lead to cancer, heart disease, and other degenerative diseases. Whether you cherish them for their tart avor or medicinal powers, cranberries are a versatile fruit with many bene ts. While they are o en associated with the sauce served at Thanksgiving, cranberries can be used in countless di erent and delicious ways. Sprinkle dried cranberries atop salads, bake them into cookies and mu ns, make a fresh cranberry chutney to serve with pork or salmon, and try them in the recipe for mu ns at right.
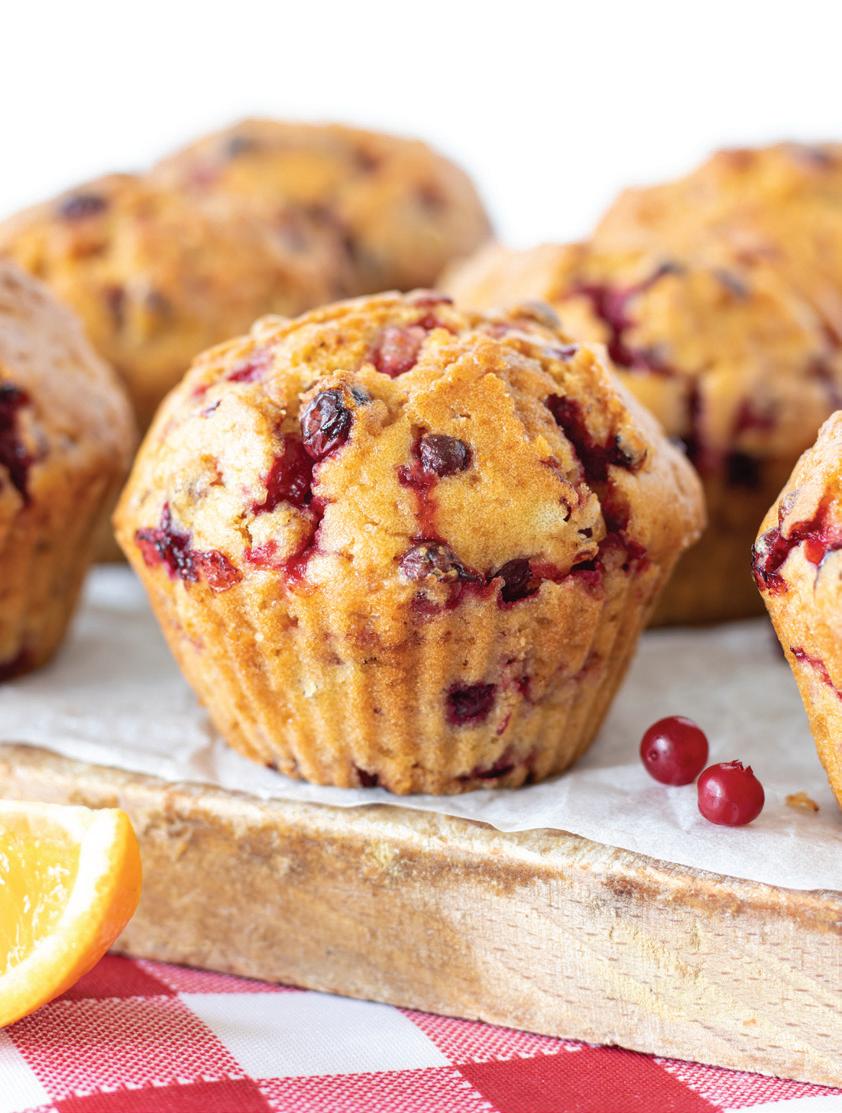
MAKES 12 MUFFINS | RECIPE COURTESY OF CAPE COD CRANBERRY GROWERS’ ASSOCIATION FROM “MAKE IT BETTER WITH CRANBERRIES COOKBOOK”
Fresh cranberries and the bright flavor of orange come together in this easy recipe.
1 orange with peel, quartered and seeds removed
½ cup orange juice
1 large egg
½ cup butter or margarine
1¾ cups all-purpose flour
¾ cup white granulated sugar
1 teaspoon baking soda
1 teaspoon baking powder
1½ cups fresh cranberries
1. Heat the oven to 400°F. Spray a 12-cup mu n pan with nonstick cooking spray.
2. In a blender or food processor, put orange quarters and orange juice. Blend until pureed. Add egg and butter and combine. Pour mixture into a large bowl and set aside.
3. In separate bowl, combine flour, sugar, baking soda, and baking powder. Add all of these dry ingredients to the pureed mixture. Stir to combine. Gently fold in chopped cranberries until incorporated into batter.
4. Fill prepared mu n cups about ¾ full. Bake in preheated oven for 20 minutes, then remove.
by mary subialka
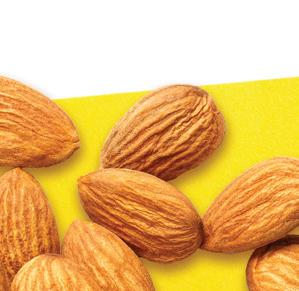
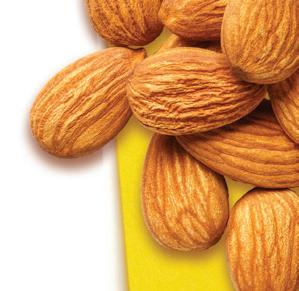
Almonds have been mentioned in everything from Greek mythology to the Bible. And since Spanish Franciscan padres brought the almond tree to California in the 1700s, it has taken root and prospered to become one of the Golden State’s most popular commodities. More than 80% of the world’s almonds are produced in California, and they make their way to over 90 countries, with more than 30% of those almonds consumed in the United States. From whole almonds to almond butter, gluten-free almond flour, almond milk, and almond oil, there is much to love about these nuts.
These versatile nuts are not only delicious, but also good for us. Almonds are heart healthy, gut healthy, and full of vitamins and nutrients. A 1-ounce serving of almonds (which is about 23 nuts) contains protein (6g), dietary fiber (4g), calcium (75mg), and 13 grams of “good” unsaturated fat and only 1 gram of saturated fat—and they’re cholesterol free. Naturally salt-free and low in
staying power
Thanks to their antioxidants, almonds have real staying power if stored properly. Store in resealable plastic bags or airtight containers, avoid exposure to direct sunlight, and avoid exposure to strong smells, as almonds can absorb odors of other materials if exposed for prolonged periods. When kept in cool, dry conditions (less than 40°F and less than 65% relative humidity), whole natural almonds can be stored for about two years with no significant loss in quality.
did you know?
sugar, almonds are also an excellent source of vitamin E, magnesium, potassium, and antioxidants—all at 160 calories per serving.
It’s easy to get a healthy and tasty dose of almonds in many forms. Add slivered almonds to oatmeal or yogurt for breakfast or sprinkle on salads at lunch. Blend almond milk into a fruit smoothie, whisk almond oil into a vinaigre e and drizzle over salad, or whisk almond bu er with sesame oil and soy sauce to use as a dipping sauce for a satay. A handful of almonds makes the perfect post-workout snack or workday afternoon nibble to get you through until dinnertime. When you’re entertaining, set out a bowl of natural, sweet, or savory almonds or bring some to a gettogether. Include them in baked goodies and other desserts. With their subtle, buttery flavor and versatility, they can easily work in both sweet and savory recipes, such as those on the next page, which are courtesy of the Almond Board of California—as well as the following fun facts.
almonds around the globe
■ Newlyweds in ancient Rome were showered with almonds, then considered a fertility charm, similar to today’s custom of giving sugared Jordan almonds at wedding celebrations.

■ Almonds are used for Germany’s marzipan confections and are starting to become more popular in snack foods at open-air fests and Christmas markets.


■ The average healthy, mature California almond tree can produce about 4,000 almonds, about 10 pounds of nuts, in a growing season, according to the USDA.
■ Almond farmers practice a zero-waste approach, ensuring everything an orchard grows is put to use. Almond shells are used as livestock bedding, and hulls are valuable dairy feed, with research underway exploring new potential uses in the areas of recycled plastics, fuel, and regenerative agriculture.
■ Swedes have been known to hide an almond in rice pudding as a symbol of good fortune. Whoever finds it is said to get married in the coming year.

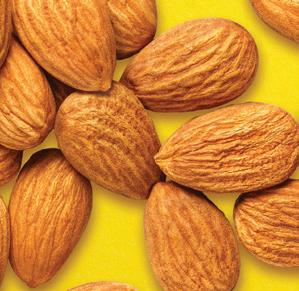

what does a serving look like?


To gauge a serving of almonds, just remember 1-2-3. A 1-ounce serving of almonds is about 23 almond nuts. Think of it visually as a handful or about the size of a ¼ cup measuring cup, a shot glass, or the number that covers the surface of a 3x3-inch sticky note.
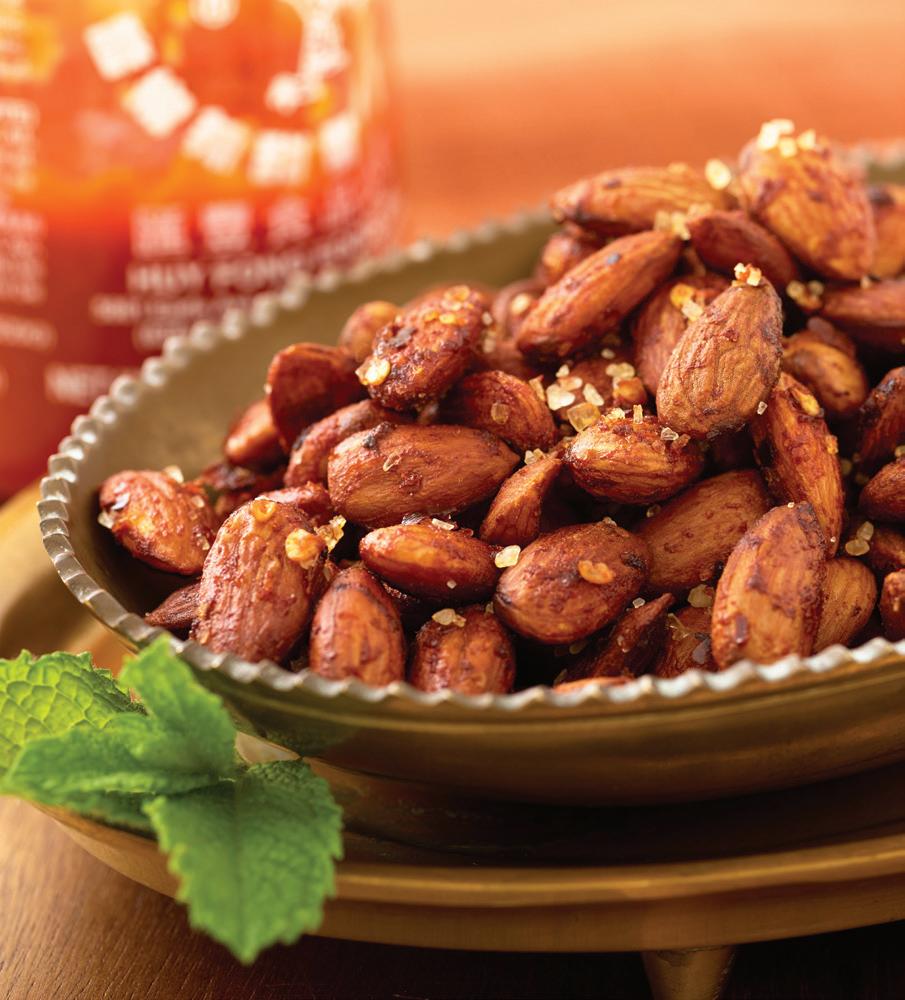
The popular flavor of Sriracha chili sauce comes together with crunchy almonds for a spicy savory snack that’s perfect for a game day get-together, movie night, or the holidays.
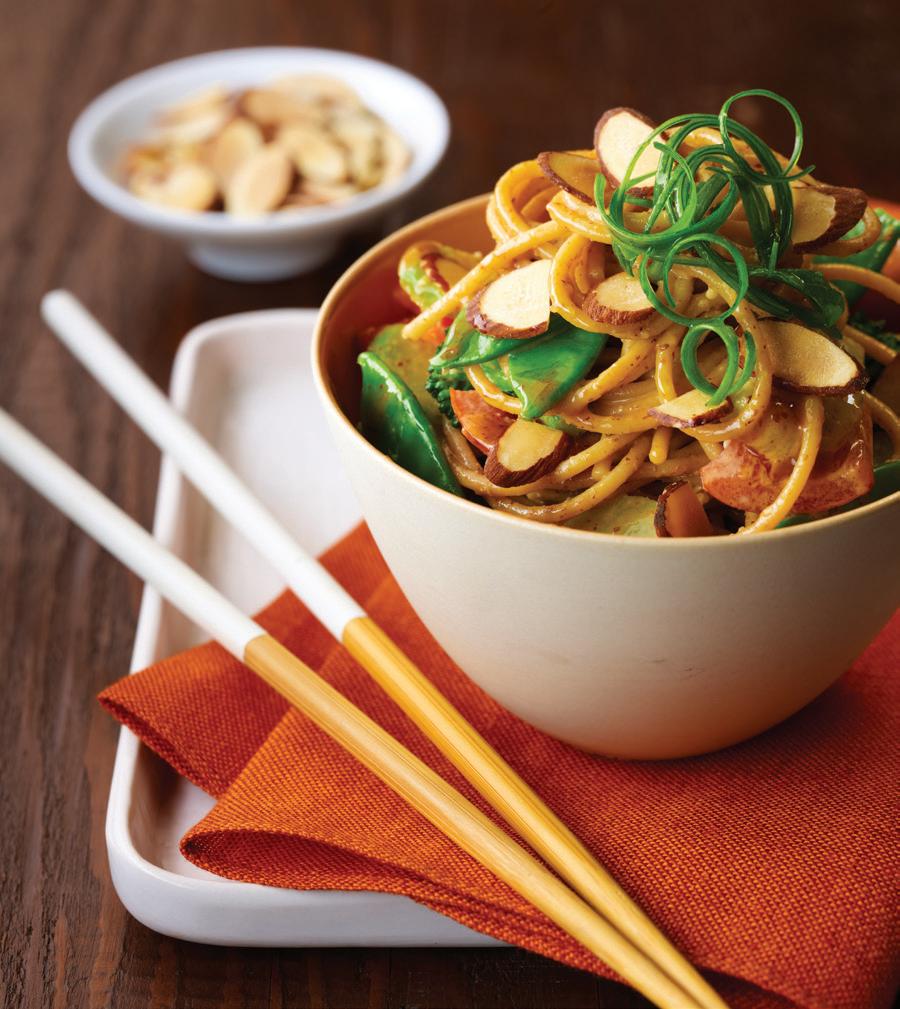
Whole-wheat noodles, crisp snow peas, broccoli, and red bell pepper are accented by garnishes of scallion and crunchy sliced almonds. But the showstopper to this dish is the spicy almond sauce that packs a wallop of heat.
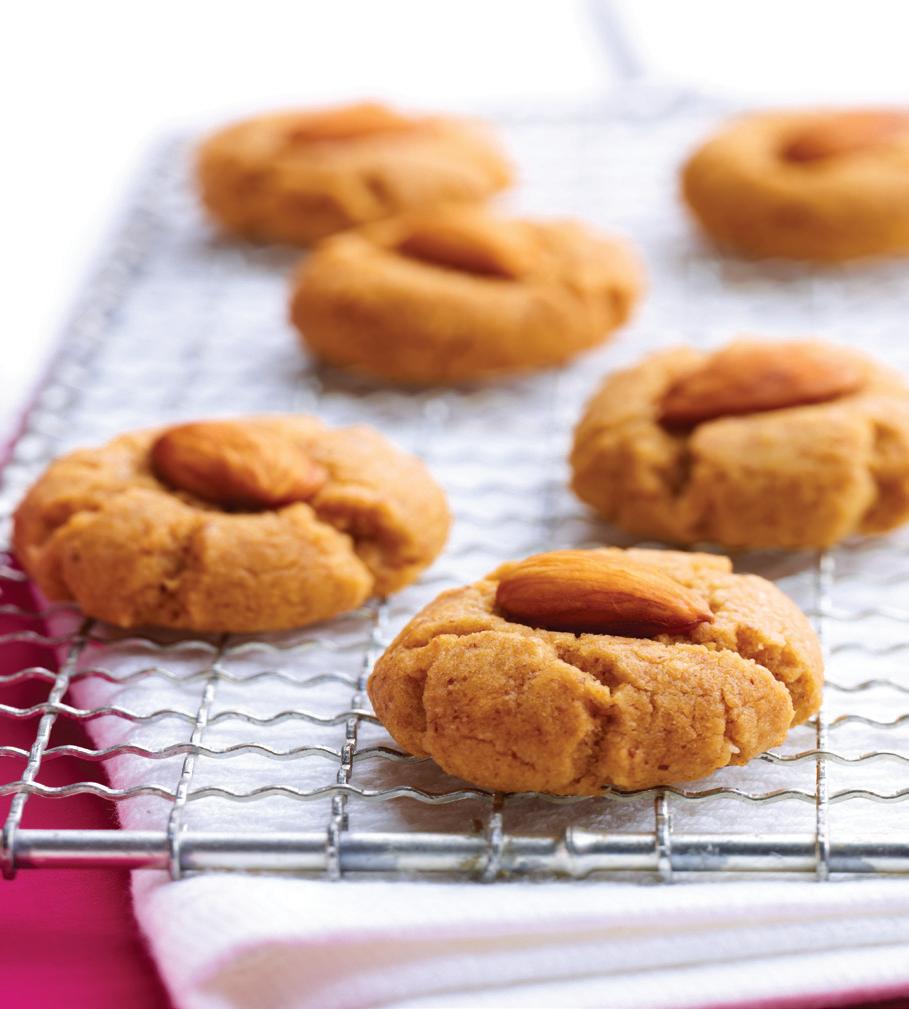
This is a whole-wheat and almond butter version of the Chinese cookie classic. These treats are an ideal partner to a cold glass of milk or a cup of afternoon tea or coffee.
Cut
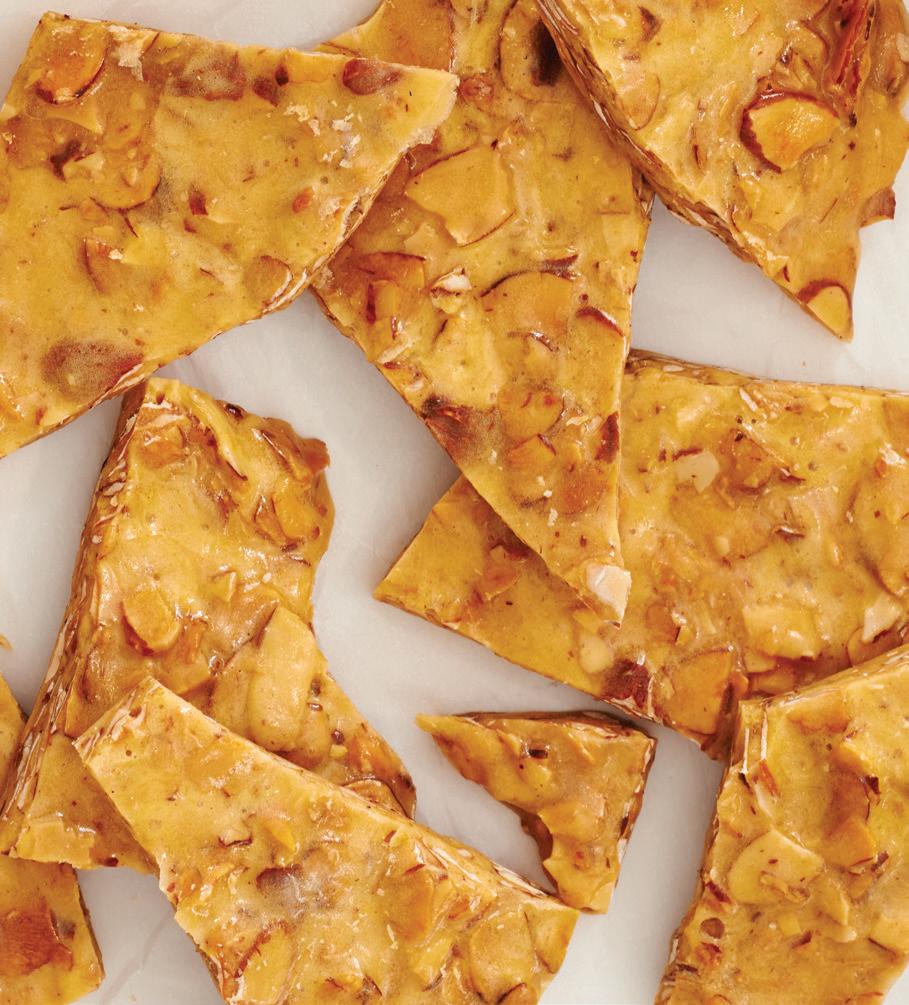
This sweet, crunchy brittle is covered with almonds and perfect as a delicious dessert or holiday party treat. The generously sized recipe also makes plenty to share as homemade gifts.
MAKES 36 | RECIPE COURTESY ALMOND BOARD OF CALIFORNIA
3/4 cup all-purpose flour
1/2 cup whole-wheat pastry flour or regular wholewheat flour
3/4 teaspoon salt
1 teaspoon baking soda
1/4 cup unsalted butter, softened
3/4 cup smooth, unsalted almond butter
1/3 cup packed light brown sugar
1/3 cup granulated sugar
1/2 teaspoon vanilla extract
1 egg
36 raw whole almonds (a heaping 1/4 cup)
1. Heat the oven to 375°F. Spray 2 baking sheets with cooking spray and set aside.
2. In a large bowl whisk together the flours, salt, and baking soda.
3. In another large bowl beat together the butter, almond butter, and sugars until fluffy. Add the vanilla and egg and beat until well combined. Gradually stir in the flour mixture, blending well.
4. Shape the dough into 3/4-inch balls, and place on the prepared baking sheets.
5. Place an almond in center of each cookie and press down lightly. Bake for 10 to 12 minutes, until lightly browned. Cool on a wire rack.
MAKES 8 SERVINGS | RECIPE COURTESY ALMOND BOARD OF CALIFORNIA
2 cups whole natural almonds
3 tablespoons Sriracha sauce
1 tablespoon soy sauce
1 tablespoon olive oil
2 teaspoons chili flakes, plus more for topping 1/2 teaspoon kosher salt
1. Heat oven to 350°F. Line a baking sheet with foil and spray it with nonstick cooking spray.
2. Spread the almonds on the prepared sheet and bake for 5 minutes.
3. Remove from oven (leave oven on) and allow to cool while you mix the marinade.
4. In a bowl, whisk together the Sriracha, soy sauce, oil, and chili flakes. Stir in almonds to coat evenly.
5. Return almonds to the foil-lined baking sheet in a single layer and bake again for 10 minutes, stirring once halfway through.
6. Remove pan from oven and stir, then sprinkle with the salt and extra chili flakes, if desired. Allow to cool completely. Store in an airtight container for up to 1 week.
MAKES 5 POUNDS, ABOUT 40 (2-OUNCE) SERVINGS | RECIPE COURTESY ALMOND BOARD OF CALIFORNIA
1 pound, 12 ounces (about 31/2 cups) granulated sugar
12 ounces (11/2 cups) water
20 ounces (21/2 cups) light corn syrup
1 pound sliced almonds
2 ounces (4 tablespoons) unsalted butter
2 teaspoons kosher salt 1/2 ounce (1 tablespoon) baking soda
1. Line sheet tray(s) with Silpat or parchment and set aside.
2. In a heavy-bottomed saucepan, bring sugar and water to a simmer.
3. Add corn syrup and bring to 290°F (do not stir).
4. Add almonds and cook until 311°F is reached, stirring constantly.
5. Add butter, salt, and baking soda, stirring well.
6. Pour onto prepared sheet tray(s) and let set.
7. Break into desired size.
8. Store airtight at room temperature until ready to use.
MAKES 6 SERVINGS | RECIPE BY ELLIE KRIEGER FOR THE ALMOND BOARD OF CALIFORNIA
1/4 cup sliced almonds
3/4 pound whole-wheat spaghetti
1/2 head broccoli (about 3/4 pound), tops cut into flowerets, stems peeled and sliced thinly
2 cups (about 4 ounces) snow peas, trimmed
1 red bell pepper, cut into 1-inch pieces
1/2 cup unsalted almond butter
1/4 cup reduced sodium soy sauce
3 tablespoons fresh lime juice
2 tablespoons brown sugar
1 tablespoon chili-garlic sauce, such as Sriracha
1 scallion, green part only (about 3 tablespoons)
1. Bring a large pot of water to a boil for the pasta.
2. Toast the almonds in a dry skillet over a medium-high heat, stirring frequently, until they are golden, about 3 minutes. Set aside.
3. Cook the pasta according to package directions. At 3 minutes before the pasta is ready, add the broccoli to the pasta pot. At 1 minute before it is ready add the snow peas and red peppers to the pot.
4. While the pasta is cooking, make the sauce. Place the almond butter, soy sauce, lime juice, brown sugar, chili-garlic sauce, and 3 tablespoons of boiling water (from the pasta pot) into a large bowl and whisk until smooth.
5. Drain the noodles and vegetables, return them to the pasta pot, add the sauce, and toss to coat. Serve garnished with the toasted almonds and scallion greens.
LOCATIONS
BLUE BELL, PA
wine & beer available! 1301 Skippack Pike 215-437-3200
DOYLESTOWN, PA
Simply Fresh By McCa rey’s 200 West State St. 215-348-1000
GLADWYNE, PA
wine & beer available! 1025 Youngs Ford Road 484-229-2777
NEW HOPE, PA
wine & beer available! 300 West Bridge St. 267-741-8001
NEWTOWN, PA
wine & beer available! 2890 South Eagle Road 215-579-1310
YARDLEY, PA 635 Heacock Road 215-493-9616
PRINCETON, NJ
wine, beer & spirits available! 301 North Harrison St. 609-683-1600
WEST WINDSOR, NJ
wine, beer & spirits available! Princeton-Hightstown Road and Southfield Road 609-799-3555
FARM-FRESH FOODS
McCa rey’s brings you the freshest variety of foods—frequently from our own backyard! Look for our locally grown seasonal produce. You’ll love its superior freshness.
CHEF’S KITCHEN
Shopping for dinner at McCa rey’s is like having a personal chef. Find just the right meal for you and your family in our Prepared Foods Department, including our Gourmet To Go family meals.
GOURMET CATERING
McCa rey’s is your best choice for elegant, in-home dining and entertaining. Using only the highest quality, freshest ingredients, our professional catering sta guarantees delicious and elegant food you can serve with absolute confidence.
If you would like to discuss your catering needs or meet with us personally, we are available Monday to Friday 9 a.m. to 5 p.m., Saturday 9 a.m. to noon and by appointment. Please call our Catering Planners at 1-800-717-7174.
mccaffreys.com

Want to throw a party . . . just because?
Whether it’s a Wine and Dine, Bonfire Bash, Friendsgiving, or any other gathering , let McCaffrey’s help you with everything from theme and menu planning to decorations and desserts!
Reading the pages of this issue will be perfect inspiration to generate exceptional themes no matter what the occasion—from small, intimate affairs to large, elegant events. All you must do is send the invites. The most important part is to get your friends and/ or family together! McCaffrey’s will do the rest. Here are some ideas:
■ Wine and Dine: Have the girls over to enjoy full-bodied whites and light-tomedium-bodied reds and pass a tray of these Lecca Lecca Al Parmigiano (page 21). Just Because!
■ Bonfire Bash: Neighbors can BYOC (bring your own chair) while you light the fire and pass around bowls of Pumpkin and White Bean Soup with Brown Butter Sage (page 28). Just Because!
■ Friendsgiving: Gather your gang and serve this Sour Cream Chocolate Cake with Caramel To ee Filling (page 51). Just Because!
This issue is full of ideas—from food to serve at a tailgate party to an ugly sweater contest—and you don’t need to attend the game or knit to have a competitive shindig! Invite everyone over for no reason at all . If you still need help or more recipes, call our catering coordinators at 800-717-7174 or visit mccaffreys.com/recipes. We love helping our valued customers just because!
James J. McCa rey III president James J. McCa rey IV executive vice president

Every department has a great selection to make any day or special occasion delicious
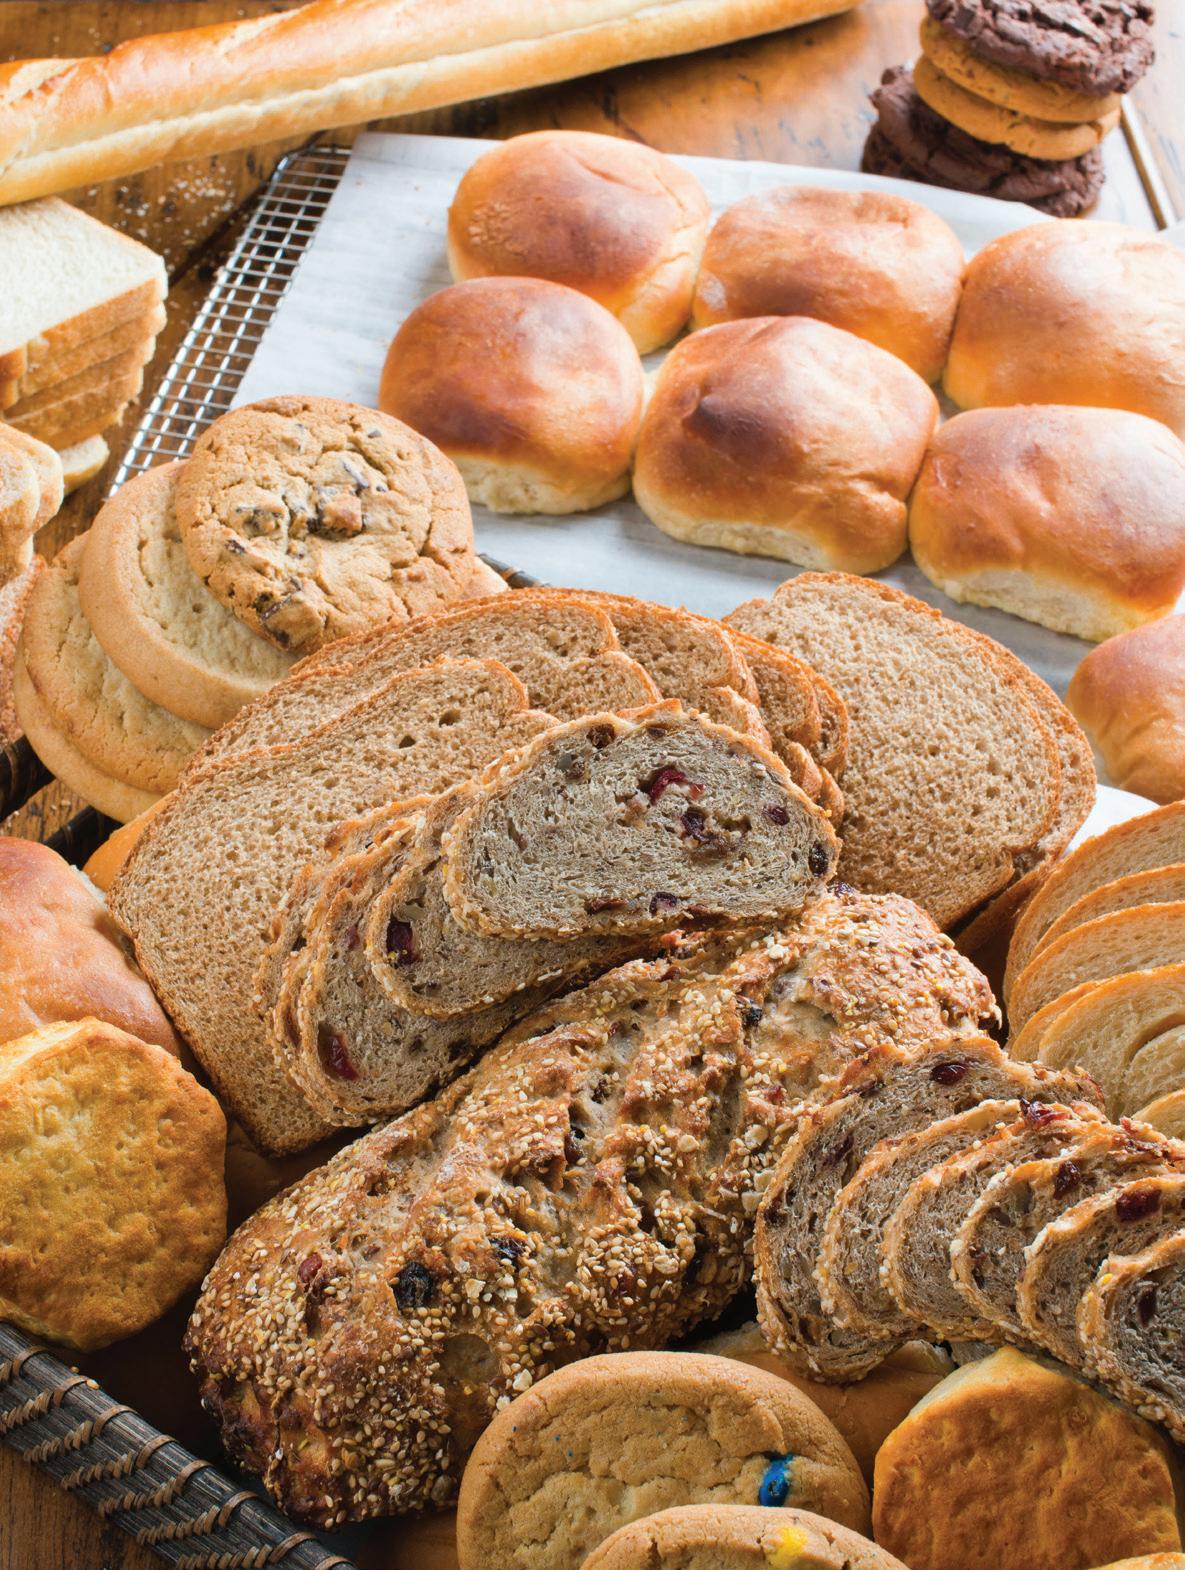
Delicious goodies and breads are waiting for you in the bakery department. Our bakers are hard at work making pastries, fresh breads, rolls, cakes, and desserts every day. Pick up delicious ready-made items when you stop in the store.
In addition to the various treats and baked goods to enjoy now, you can order cakes for special occasions. Our in-house decorators can create anything from the perfect wedding or anniversary cake to your child’s birthday cake or a special holiday dessert. And it’s not just for cake; we can create unique cookies, cupcakes, or specialty desserts to fit your occasion. Stop by our bakery to check out all the possibilities and speak to our decorators to make your special occasion dessert not only delicious but a piece of art. Delicious gluten-free selections are always available, too.
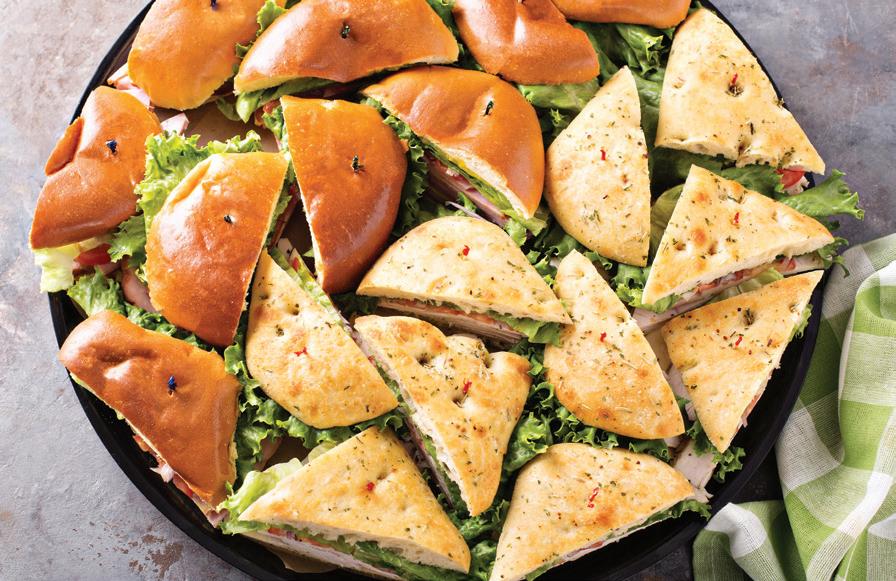
Need something for lunch or dinner tonight? Planning for the weekend? Our prepared food items cover almost every imaginable cuisine. Find fresh, chef-crafted gourmet meals and side dishes from classics to some of today’s most exciting contemporary recipes. Just stop in to see our wide selection or let us know if you’re looking to order larger quantities for a get-together. Planning a party? Make it easy on yourself— our catering department can prepare handmade sandwiches, catering trays, and more for any occasion. You gather the people, and we’ll provide the food.
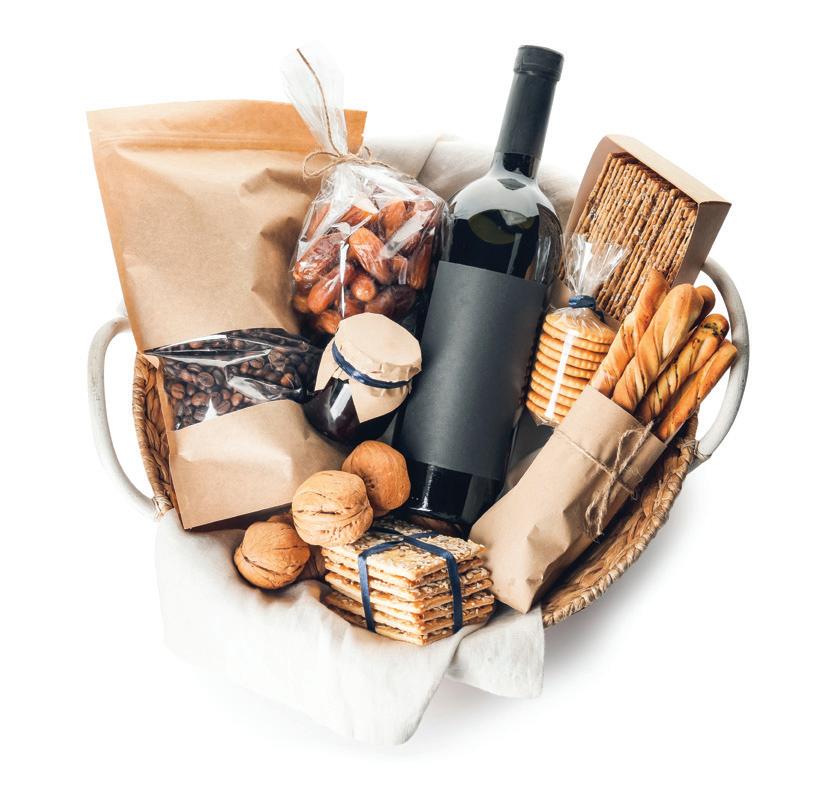
Who wouldn’t enjoy a gift basket filled with delicious foods? It can make the perfect gift for the foodies in your life or for those hard-to-buyfor people on your list. If you can’t decide, a store gift card is a great idea and the recipient can have fun picking out their favorite items or enjoy trying something new.


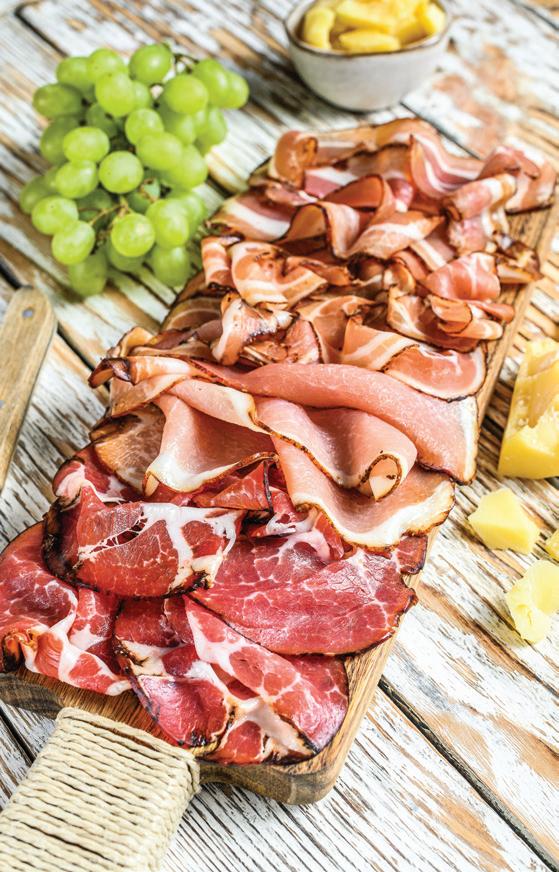
Our deli departments have a great selection of cheese and meats for sandwiches, of course, plus, we stock the elements you need to get creative and make your own charcuterie board. The delicious combination of cheese, meat, and sweet and salty accompaniments of a charcuterie board is perfect for a game-day party, holiday party, or other get-together throughout the season. We can also help you out with a selection of ready-made charcuterie and cheese trays to simply grab and go when you need a little help. How much will you need? If you are serving your charcuterie as an appetizer or snack, plan on 3 to 4 ounces of cheese and 3 ounces of meat per person. If serving these items as more of a main food item, plan on about double the amount of each. For mixed nuts: ½ ounce per person; olives: 2 ounces per person (or 2-3 pieces per person); crackers: 2 ounces per person.

We shop the region’s and nation’s farms for the finest and freshest produce. The farmers pick perfect fruits and vegetables that our produce buyers select from, and they are shipped directly to our stores. And whenever possible, we buy locally grown produce to provide the best that our area’s farmers have to o er.
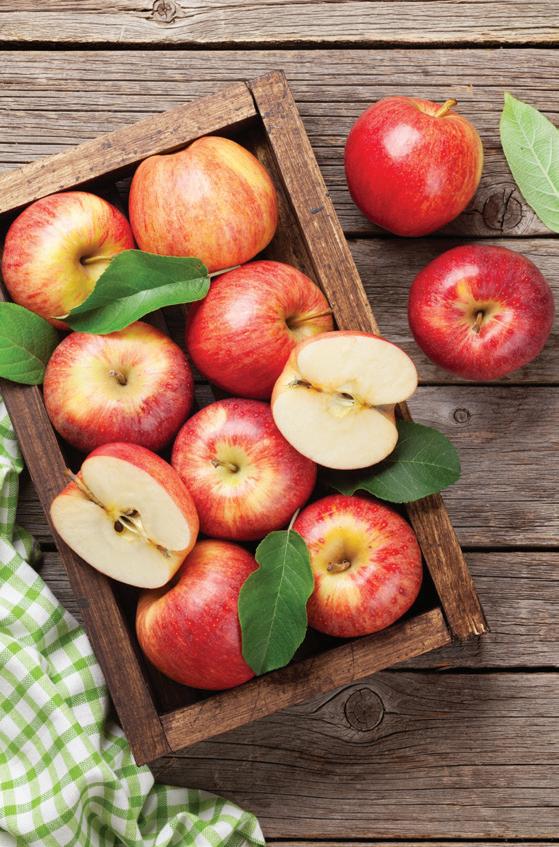
It’s a great time of year to find an abundance of crisp, juicy apples in our stores to enjoy on their own, in sweet baked goodies (try the Harvest Apple Bars with Cinnamon-Cardamom Glaze on page 47), or in savory dishes like the salad recipe at right. It’s also prime time for squash and pumpkins and we have a great variety, whether you’re looking for something to mix up a comforting pot of soup, side dish, or delectable dessert—not to mention the decorative gourds and large jack-o’-lantern pumpkins.


Flowers have a way of brightening the holidays or any day. Stop in the floral department to pick up something to bring festive flair to the dinner table or brighten someone’s day—including your own. Choose from a variety of fresh-cut, grab-and-go bouquets of everyday favorites such as roses, lilies, and orchids, or potted plants. Whether wishing someone well or celebrating a special occasion, whatever you want to express, you can do it with flowers.
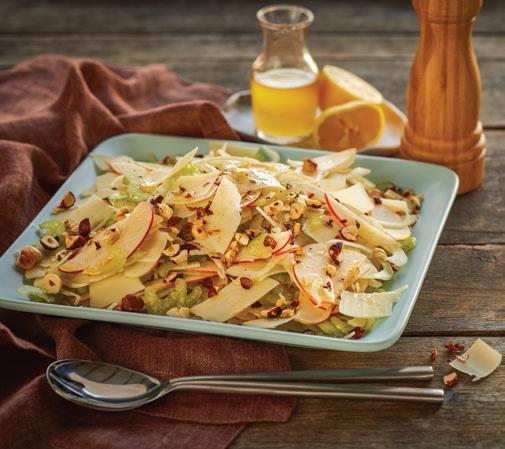
MAKES 6 TO 8 SERVINGS | RECIPE
COURTESY OF WISCONSIN CHEESE
6 celery ribs
4 tart apples, cored and quartered
1 fennel bulb, halved and cored
1⁄4 cup olive oil
Juice of 1 medium lemon
8 ounces Cello Parmesan cheese
1⁄4 cup hazelnuts, toasted and chopped Pepper, to taste
1. Shave or cut the celery, apples, and fennel into thin slices with a mandoline slicer or knife. Transfer salad to a large bowl. Combine olive oil and lemon juice, and drizzle over salad. Toss to coat.
2. Shave Parmesan into thin strips with a vegetable peeler. Add the cheese and hazelnuts to salad and gently toss. Season with pepper to taste.
Make the most of your remains of the day. Turn ham, turkey, and mashed potato leftovers into delicious twists with these ideas.
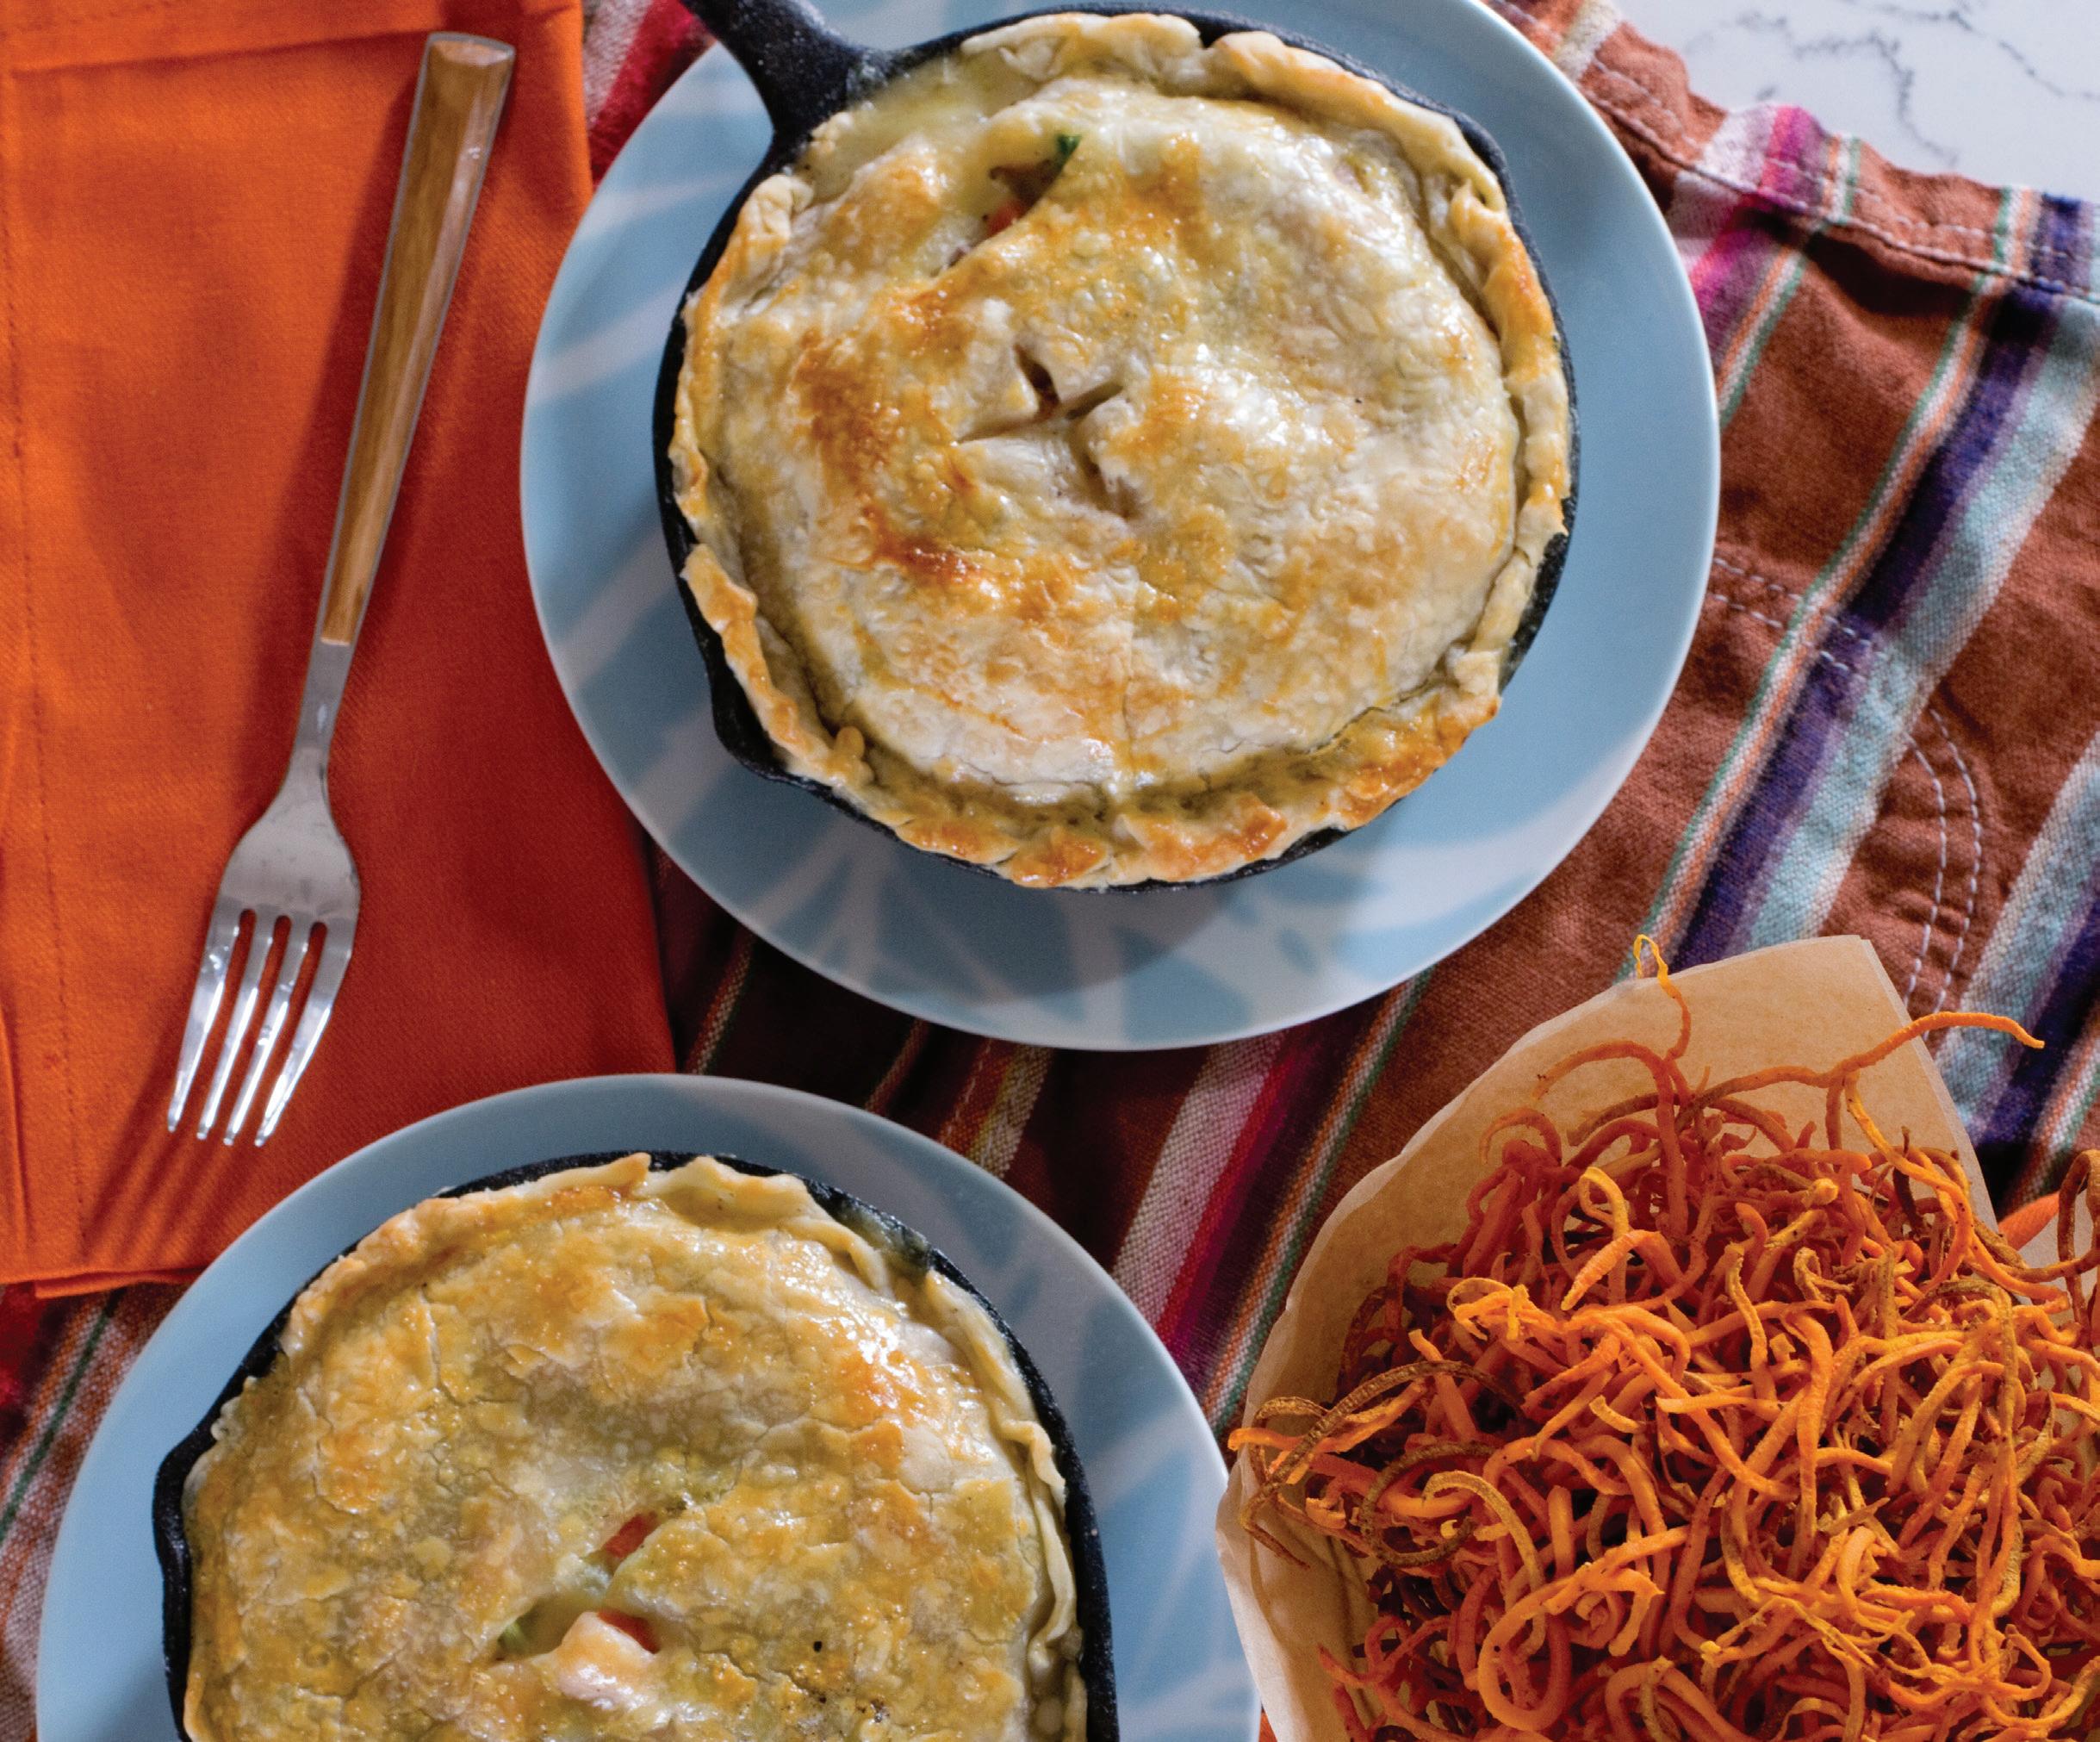
Turkey Pot Pie
MAKES 4 SERVINGS | RECIPE BY BETSY HALEY COURTESY OF IDAHO POTATO COMMISSION
Leftover turkey stars in this take on a comforting classic.
¼ cup butter
2 cloves garlic, minced
⅓ cup chopped onion
4 cups chopped fresh vegetables
⅓ cup all-purpose flour
Salt and pepper, to taste
1¾ cups chicken broth
½ cup milk
3 cups cooked, chopped turkey
Pie crust dough or refrigerated pie crust
1 egg, beaten
1. Heat oven to 425°F.
2. Melt butter in a large skillet over medium high heat. Add garlic and cook until fragrant, 1 to 2 minutes.
3. Add onion and vegetables and cook until they begin to tenderize. Stir in flour, salt, and pepper.
4. Gradually add broth and milk, stirring until smooth and thick. Stir in turkey.
5. Spoon mixture into 6-inch skillets or ramekins. Roll out pie crust and cut circles to fit over the top of each pot pie. Crimp edges to seal and cut a vent in the top of each pie to release steam.
6. Brush the crust with beaten egg and bake for 15 minutes. Cover each pie with foil and continue baking for an additional 15 minutes until golden brown and bubbly.
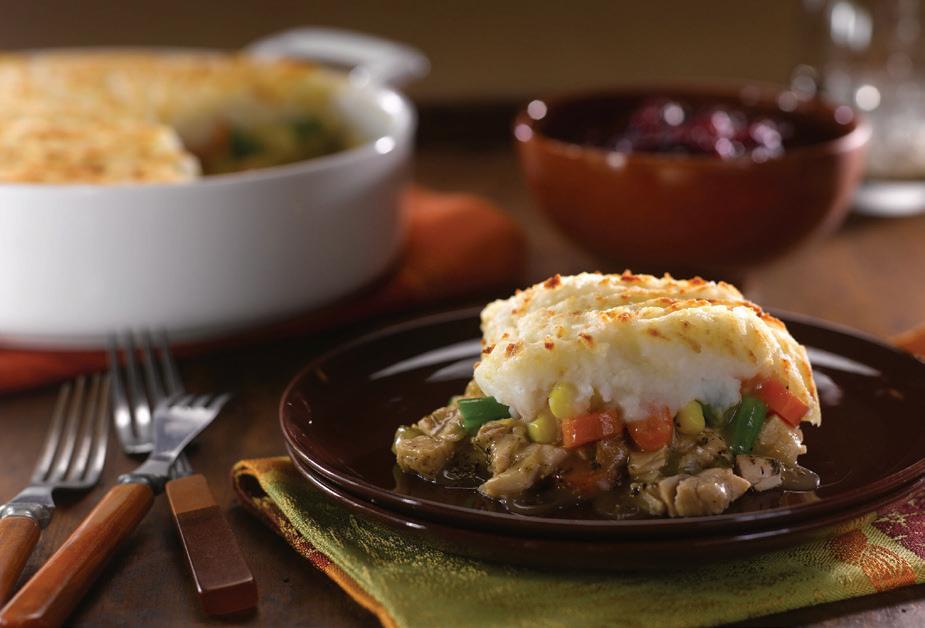
MAKES 4 SERVINGS
RECIPE COURTESY OF IDAHO POTATO COMMISSION
What to do with leftover mashed Idaho potatoes? Prepare a healthy and hearty Turkey Shepherd's Pie!
2 tablespoons vegetable oil
1/4 cup finely chopped celery
1/2 cup finely chopped onion
1/8 teaspoon ground black pepper
1/4 teaspoon poultry
seasoning
3 cups leftover mashed Idaho potatoes
1/4 cup reduced-fat sour cream
21/2 cups finely chopped cooked turkey meat
11/3 cups gravy, homemade or store-bought
2 cups leftover cooked vegetables (or mixture of frozen corn, peas, carrots, green beans, etc., thawed)
1 tablespoon butter, melted Cranberry sauce, homemade or storebought, (optional)
1. Heat the oven to 375° F. Line a baking sheet with foil and set aside.
2. In a large skillet over medium heat, combine the oil, celery, onion, ground black pepper, and poultry seasoning. Cook and stir until the onions begin to soften, about 5 minutes.
3. While the onions are cooking, place the potatoes and sour cream in a mixing bowl. Stir well to combine and set aside. Add the turkey and gravy to the onion mixture in the skillet and stir. When the mixture is heated through, transfer it to a deep-dish pie pan or a 9x9-inch baking dish. Top the turkey mixture with the cooked vegetables.
4. Drop the mashed potatoes by large spoonfuls onto the pie. Using a rubber spatula rinsed with cold water, flatten the potatoes to cover the turkey and vegetables, smoothing to the edge of the pie pan or dish. Brush the top of the potatoes with melted butter. Place the pie pan onto the foil-covered baking sheet and bake 35 to 40 minutes, or until heated through.
5. Cover the pie with foil and let it rest for 5 to 8 minutes before serving. If desired, offer cranberry sauce on the side.
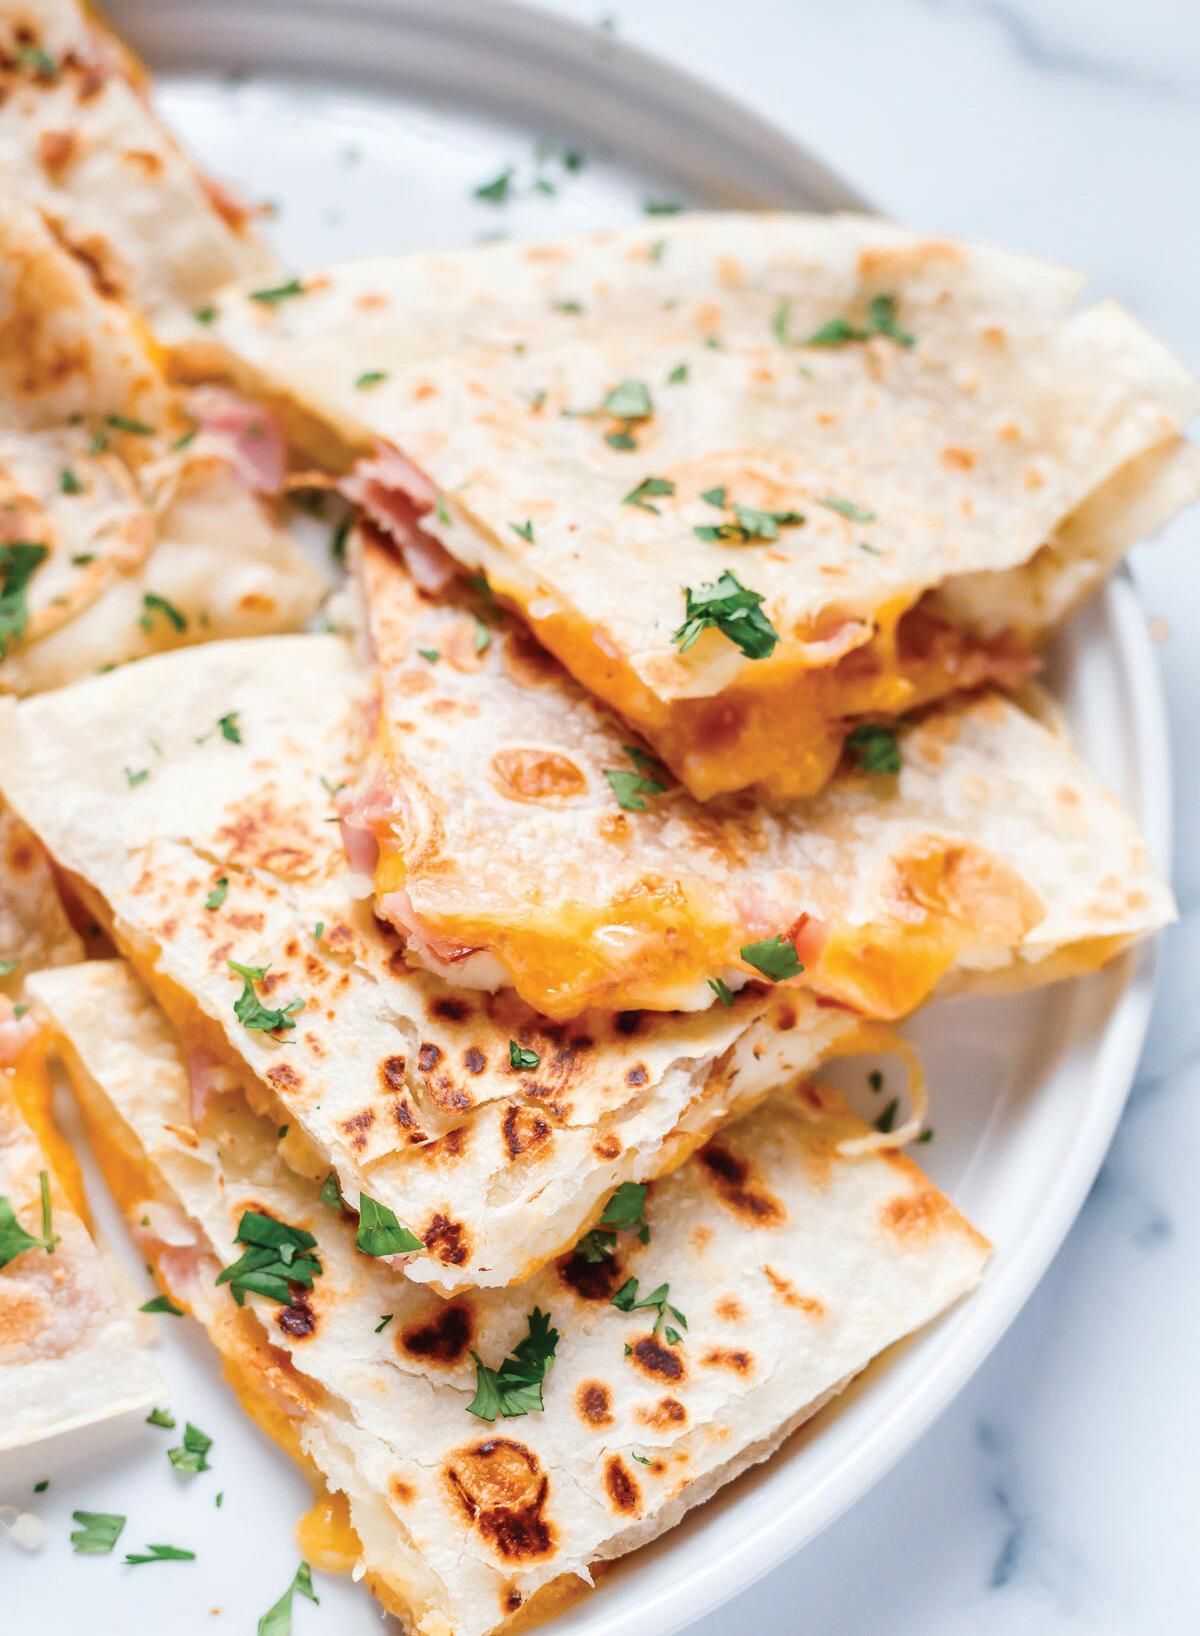
MAKES 4 SERVINGS
RECIPE BY LOVE KEIL COURTESY OF IDAHO POTATO COMMISSION
This is a delicious lunch for kids and adults. They are crispy on the outside and mushy on the inside with all of that gooey cheese and mashed potatoes. Enjoy as they are or serve with mild salsa. –l.k.
4 tortillas
2 cups mashed Idaho potatoes, leftovers or freshly made 1 cup cubed ham
1 cup grated sharp cheddar cheese
1 teaspoon finely chopped parsley Salsa, for serving
1. Top 2 tortillas with 1 cup mashed potatoes on each and spread out evenly.
2. Top each tortilla with ½ cup ham.
3. Divide cheddar cheese over the top of the ham.
4. Cover with the remaining 2 tortillas.
5. Preheat skillet over medium heat. Add quesadillas and cook 2 to 3 minutes. Flip and cook an additional 2 to 3 minutes, or until cheese melts and mashed potatoes are heated through. If using cold mashed potatoes, cook 5 to 7 minutes on low heat. Flip and continue to cook an additional 5 minutes, or until cheese melts and mashed potatoes are heated through. You may have to do them in two batches depending on the size of your skillet.
6. Place quesadillas on a cutting board and cut into quarters.
7. Garnish with a sprinkle of parsley. Serve warm with salsa.
Score points with tasty snacks or heartier fare at your game day gettogethers. Whether your team wins or loses—or your favorite games are played at home atop a table— you’ll always enjoy the food.
MAKES 6 SERVINGS
RECIPE COURTESY OF BEEF, IT’S WHAT’S FOR DINNER
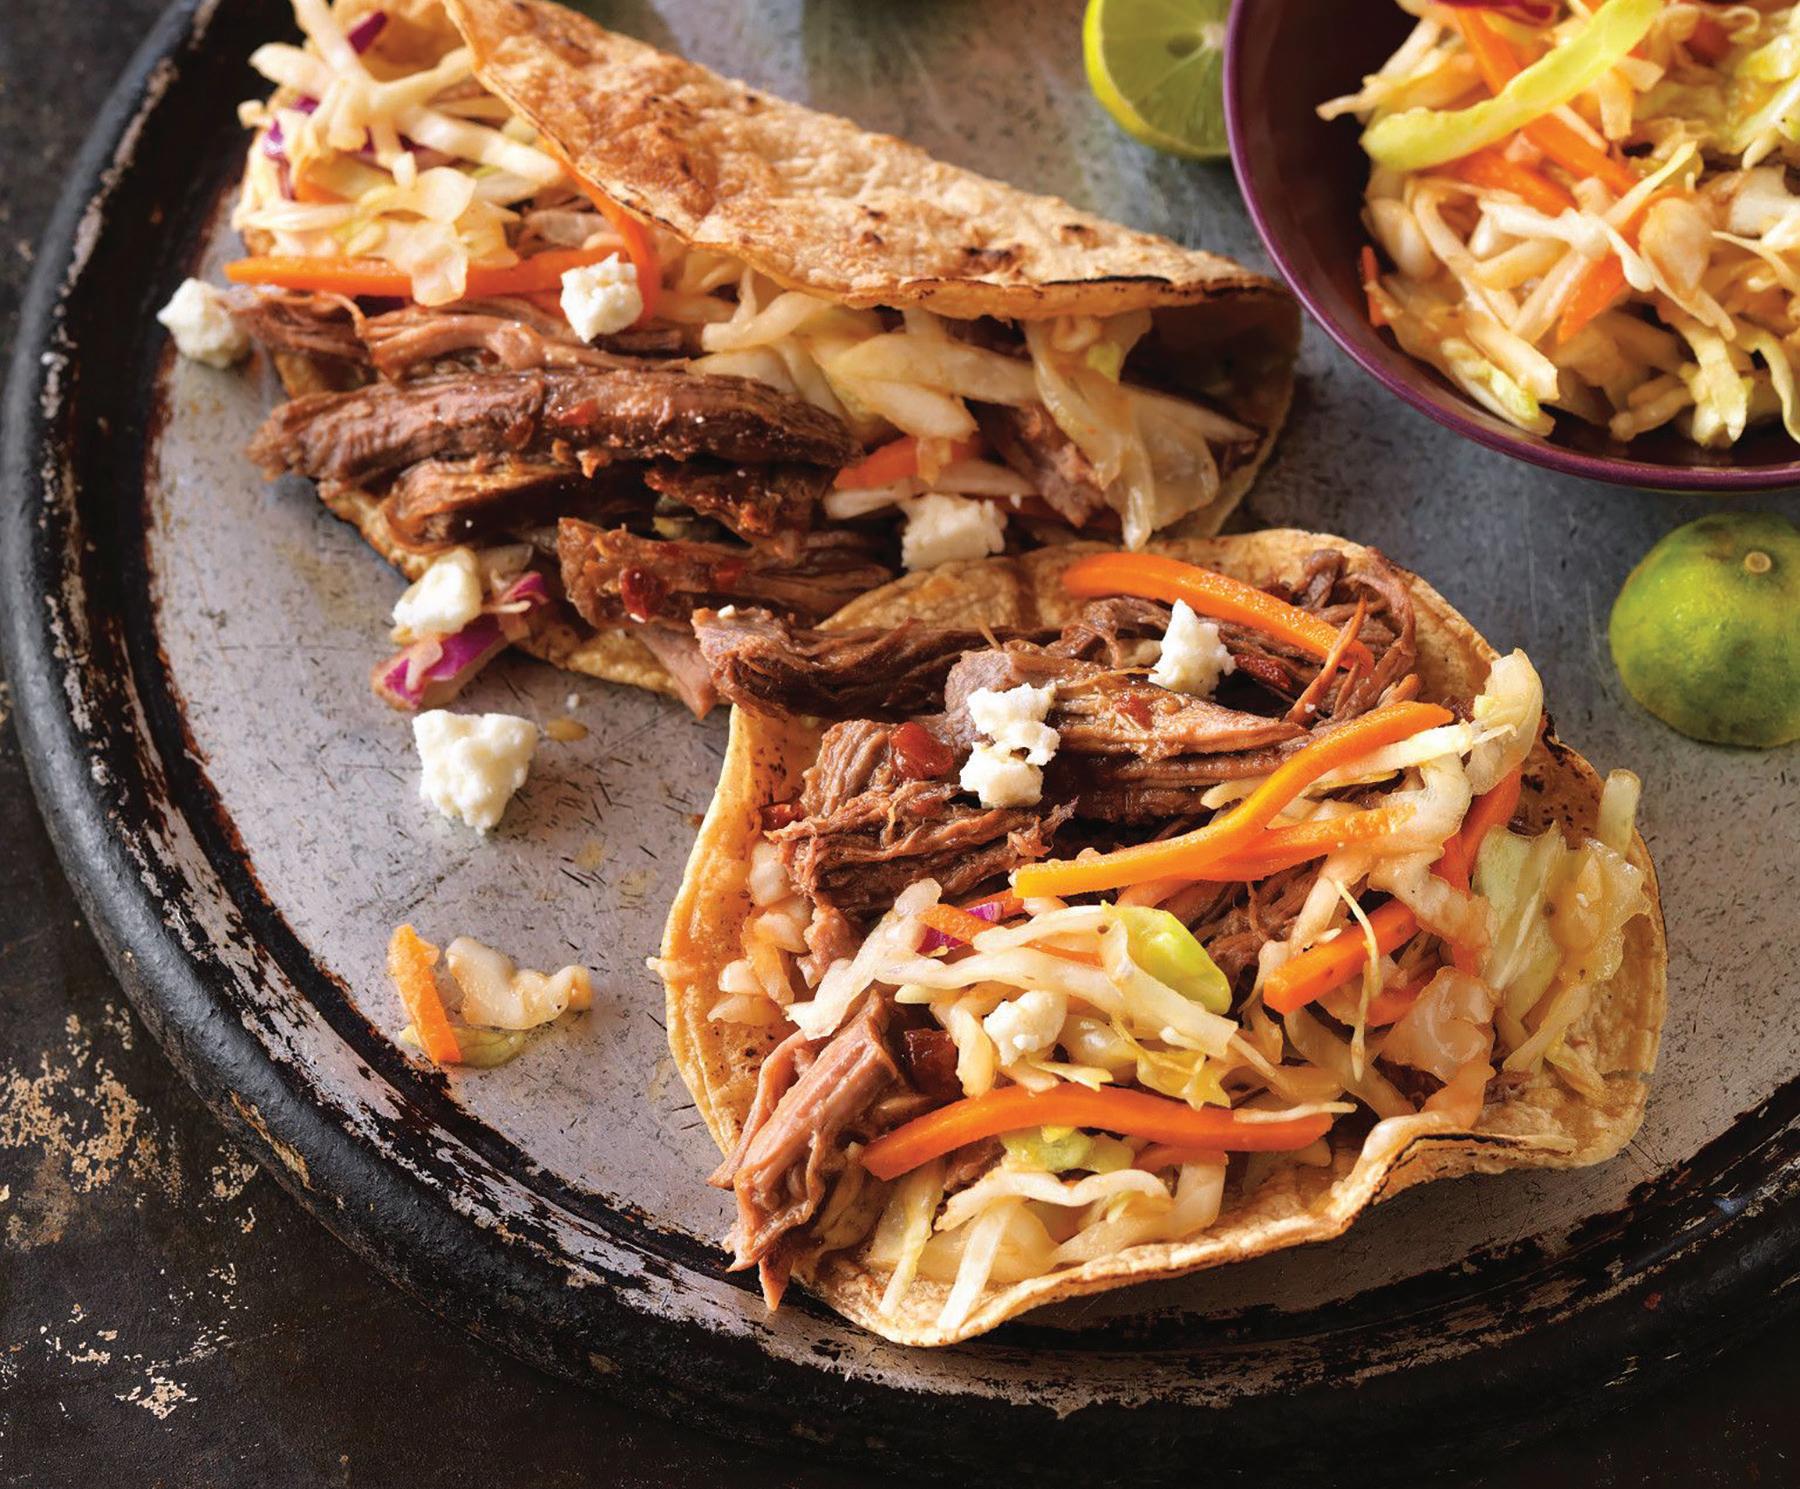
This recipe is a winner for game day or taco Tuesday anytime. Beer and chipotle peppers add delicious flavors to this lean beef roast.
1 (2-pound) boneless beef shoulder roast
2 teaspoons olive oil
Salt and pepper, to taste
1 (12-ounce) bottle beer
2 medium chipotle peppers in adobo sauce, minced
2 tablespoons, plus 1 teaspoon adobo sauce from chipotle peppers, divided
12 small (6-inch diameter) corn or flour tortillas, warmed
2 cups coleslaw
Chopped red onion, chopped fresh cilantro, crumbled queso or sour cream, fresh lime juice or lime wedges, for topping (optional)
1. Heat oil in a stockpot over medium heat until hot. Place beef roast in stockpot and brown evenly. Pour off drippings and season with salt and pepper, as desired.
2. Add beer, peppers, and 2 tablespoons adobo sauce to stockpot and bring to a boil. Reduce heat, cover tightly, and simmer 21/4 to 21/2 hours or until roast is fork tender.
3. Meanwhile, combine coleslaw and remaining 1 teaspoon adobo sauce. Refrigerate until ready to use.
4. Remove roast and cool slightly. Skim fat from cooking liquid and bring to a boil. Reduce to medium and cook 10 to 12 minutes or until reduced to 11/2 cups. Meanwhile, trim and discard excess fat from cooked roast. Shred roast with 2 forks. Return beef to reserved liquid and cook over medium heat until heated through.
5. Serve beef in tortillas and top with coleslaw mixture and toppings, as desired.
BEEF, IT’S WHAT’S FOR DINNER (2),
PHOTOS (CLOCKWISE FROM ABOVE LEFT)
MAKES 12 SERVINGS
RECIPE COURTESY OF BEEF, IT’S WHAT’S FOR DINNER
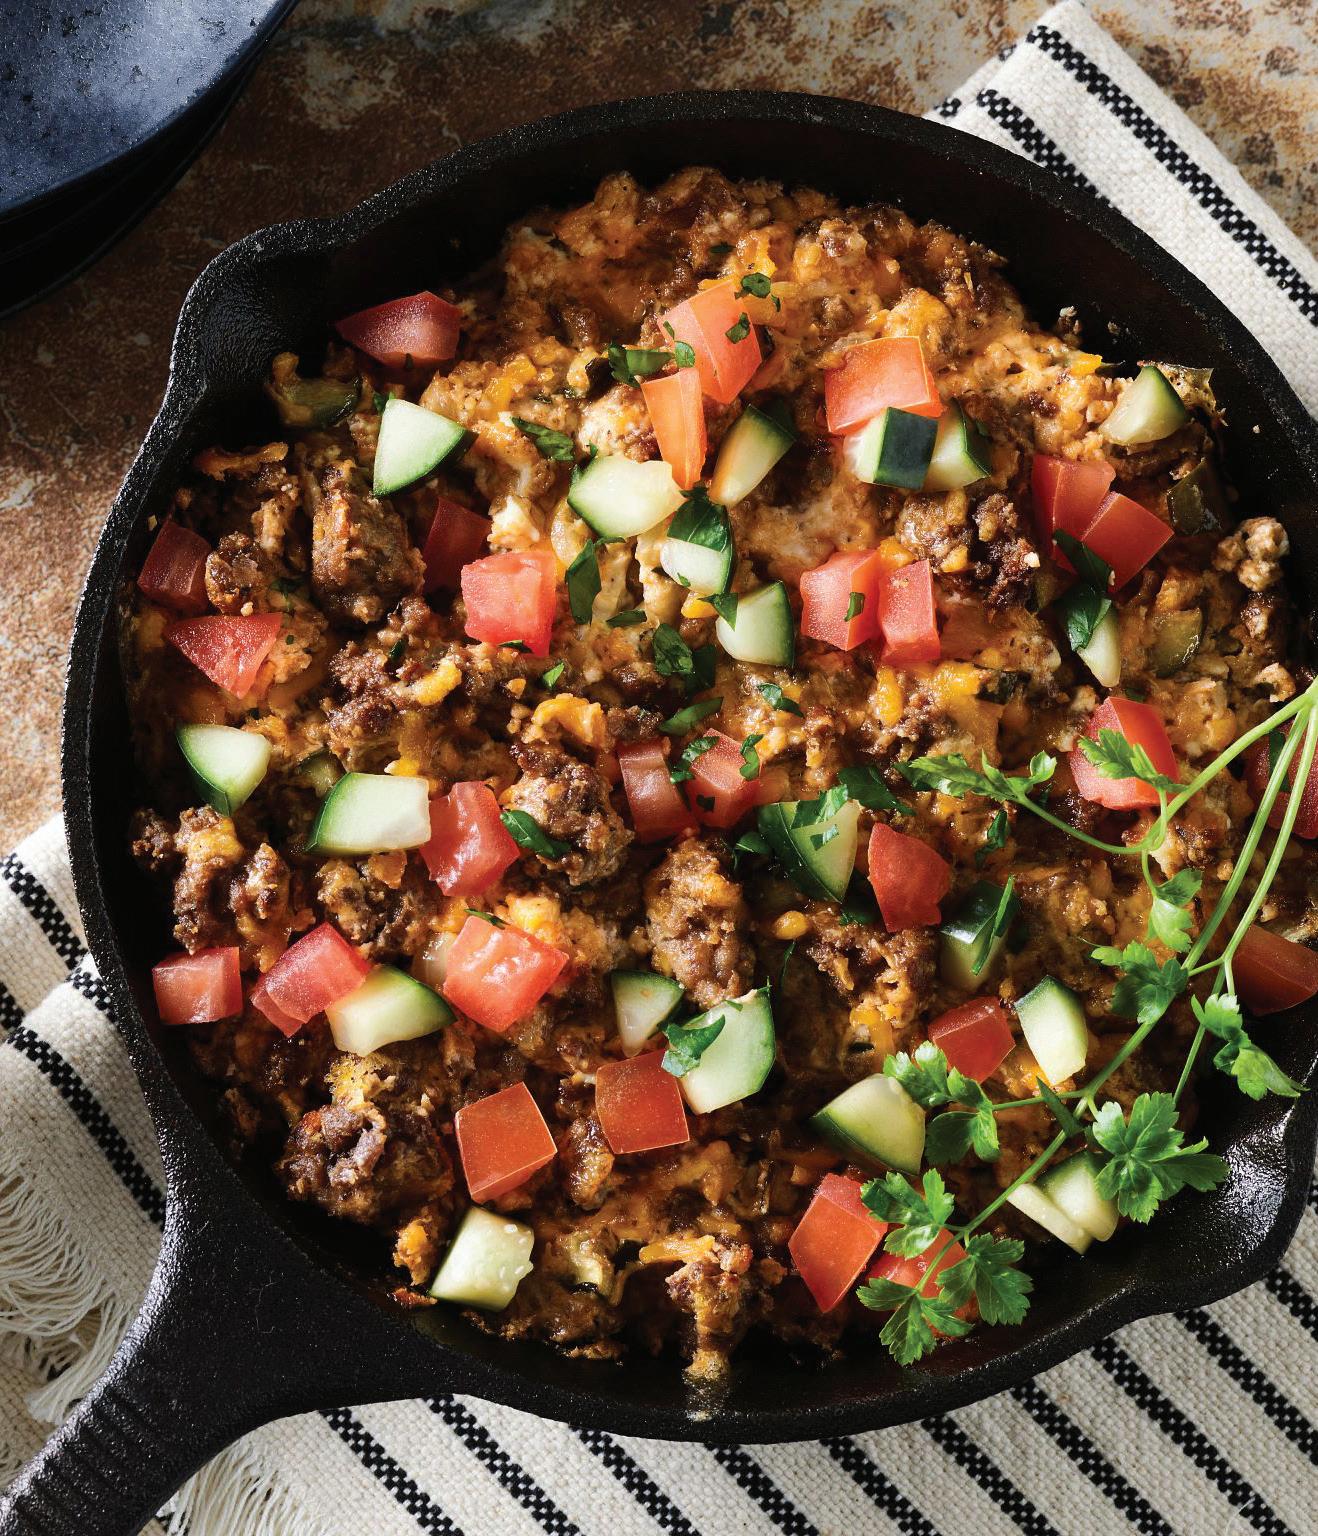
Impress your tailgate friends with this take on a cheesy dip. Serve it with potato chips for that classic burger and fries flavor combo.
1 pound 90% lean ground beef
3/4 cup diced onion
8 ounces cream cheese
11/2 cups shredded cheddar cheese
1 teaspoon granulated garlic
1 tablespoon Worcestershire sauce
2 tablespoons ketchup
1 teaspoon freshly ground black pepper
3/4 cup diced dill pickle, divided
2 tablespoons fresh parsley, chopped 1/4 cup Roma tomatoes, diced
1. Heat a nonstick skillet over medium heat until hot. Add ground beef and cook 8 to 10 minutes, breaking into 3/4-inch crumbles and stirring occasionally. Add in onion and continue to cook for 3 to 4 minutes. Remove from heat and allow to cool.
2. In a standing mixer combine cream cheese, cheddar cheese, ketchup, Worcestershire sauce, garlic, pepper, and 1/2 cup of the diced pickles until well incorporated. Add cooled beef mixture and mix until well incorporated. Remove bowl from mixer and refrigerate for at least 30 minutes or until ready to bake.
3. Spread the dip into an 8-inch cast iron or ovenproof skillet. Bake at 375°F for 25 minutes or until golden brown and edges are bubbling. Remove from oven and top with remaining pickles, parsley, and diced tomatoes. Serve warm with potato chips or crackers.
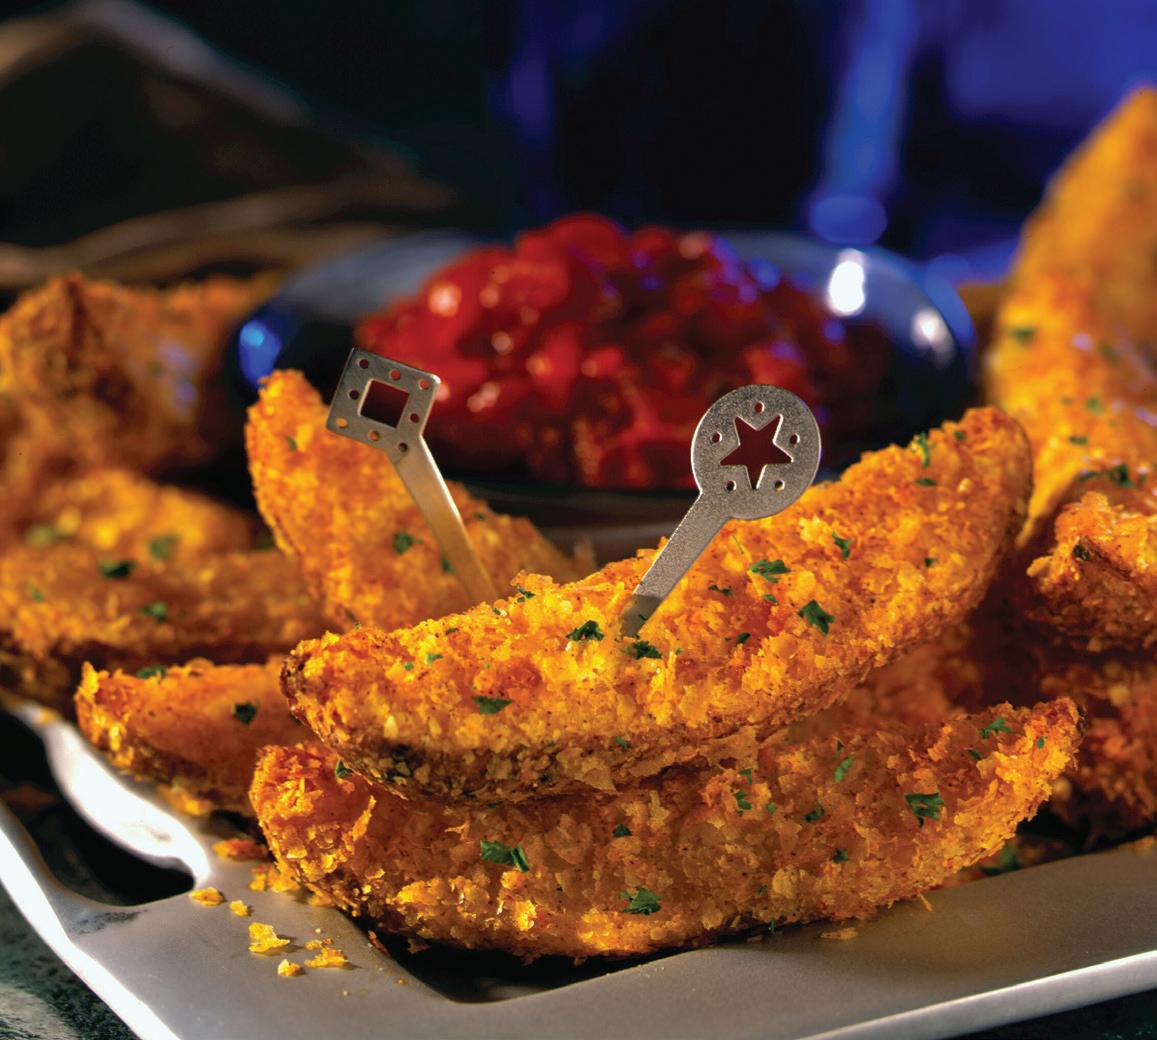
MAKES 4 TO 6 SERVINGS | RECIPE BY MARCEL LANGLIAS, COURTESY OF IDAHO POTATO COMMISSION
These savory potatoes are baked, not fried, and deliver a high dose of flavor without a lot of fat.
4 large Idaho potatoes, peeled, each cut in 6 wedges
1/4 cup olive oil
1/2 cup dry Parmesan cheese
1 cup instant flaked mashed potatoes
1 pinch cayenne pepper
2 teaspoons Old Bay Seasoning Cooking spray
1 teaspoon salt Marinara, Bolognese, or blue cheese sauce, for serving (optional)
1. Blanch potato wedges in salted water. Drain. While hot, toss with 1/4 cup olive oil.
2. In a bowl, mix cheese, flaked potatoes, Old Bay Seasoning, and pepper. Toss with warm potatoes to coat well.
3. Spread potatoes on pan sprayed with coating.
4. Bake at 450°F for 18 to 20 minutes or until cooked through.
5. Season with salt.
6. Serve with Marinara, Bolognese, or blue cheese sauce, if desired.
Sip delicious wines for great partners alongside these featured recipes


Coppola Diamond
Collection Merlot
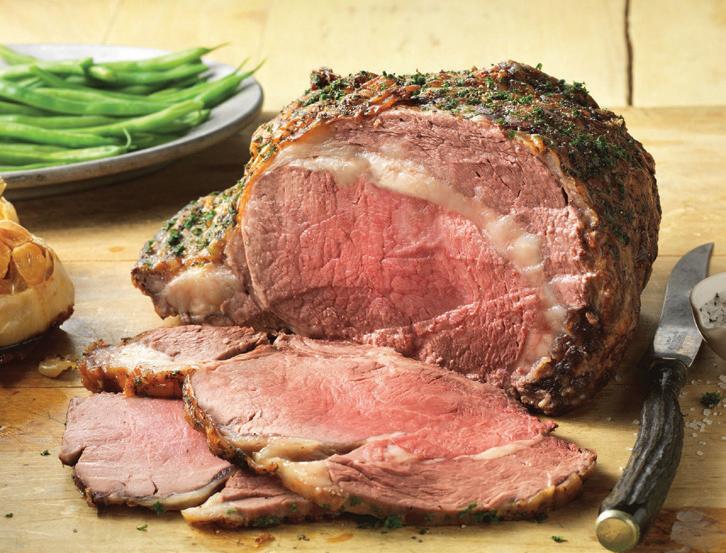
PEPPERED RIB ROAST WITH ROASTED GARLIC SAUCE | PAGE 39
This Merlot derives its complexity and lush concentration by blending fruit from diverse appellations in California. It features well-balanced fruit, lush with flavors of caramel, ripe red fruits, and chocolate. Perfect for all occasions—including those special “just because” ones!
Galen Glen Grüner Veltliner


CRANBERRY, ALMOND, AND ORANGE RUGELACH | PAGE 49
This Pennsylvania Grüner was awarded 92 points by James Suckling, who writes, “Brimming with ripe pear and green apple aromas plus some white pepper. Juicy and mouth-filling for 12% alcohol; the spritz of carbon dioxide lifts the palate beautifully. A long, delicately spicy finish that pulls you back for more.”
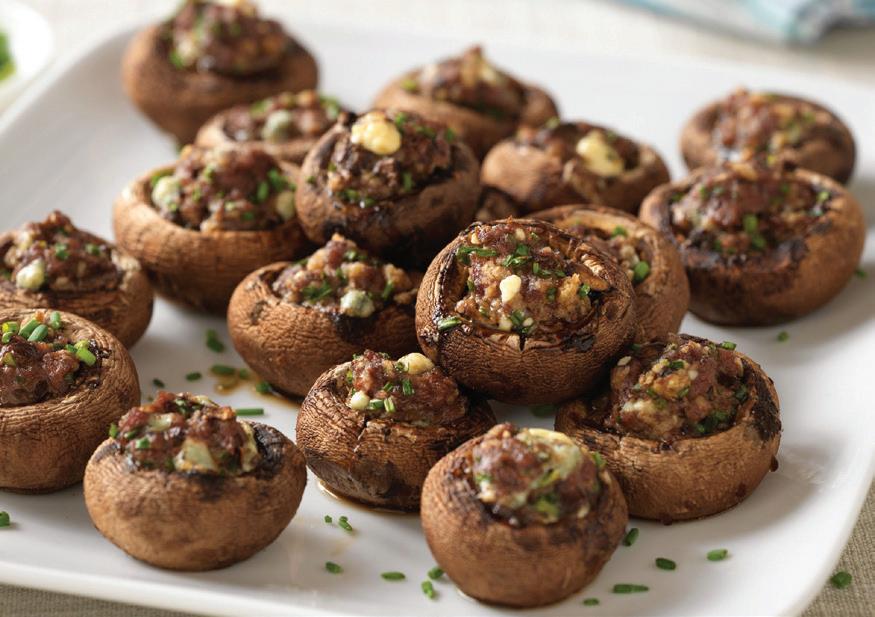
Louis Jadot Bourgogne Pinot Noir
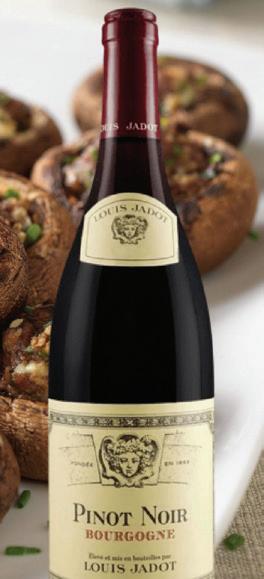

BEEF AND BLUE CHEESE-STUFFED MUSHROOMS | PAGE 41
This French Pinot Noir is exceptionally elegant, with complex aromas of plums, raspberries, and cherries. It features fresh red fruit flavors in the mouth with earthy floral, mushroom, and mineral notes and balance acidity.


Santa Margherita Pinot Grigio
TORTA DI CECI AL SALE MARINO E OLIO
D’OLIVA | PAGE 22
This is full of authentic, flavorful personality highlighted by its straw yellow color, clean intense aroma, and dry golden apple taste. It goes wonderfully with fresh cheeses, seafood, pasta, and rice dishes, as well as white meats, sushi, and sou és.
Some wines may not be available in all locations.
It’s
no secret that the right baking gadgets can change the game when it comes to your kitchen adventures. Explore these must-have innovative tools that will transform your baking experience.
by julia jacobson
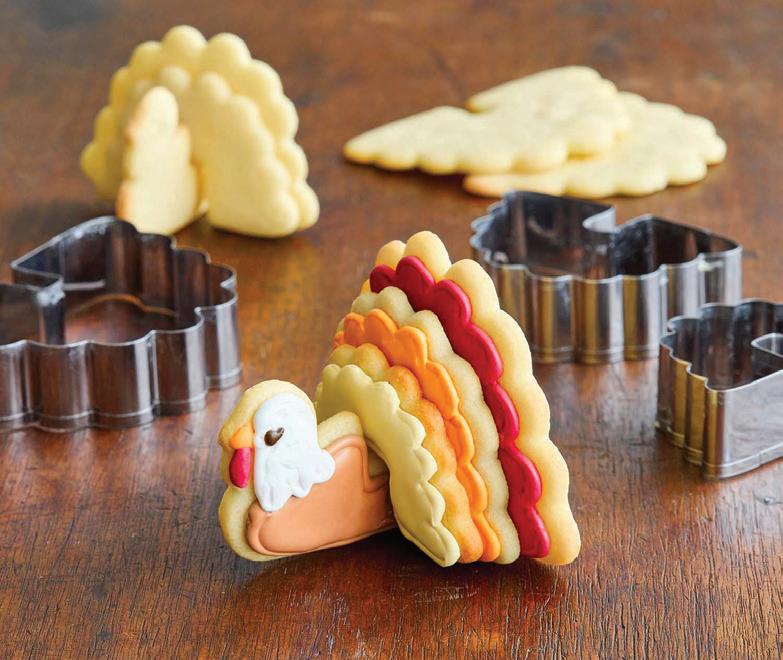
Make a cookie that stands out (literally) with clever 3D cookie cutters. Instead of the typical cookie cutter that makes flat shapes, 3D cookie cutters elevate your treat’s design by creating multidimensional shapes and patterns. With themes for birthdays, holidays (like this example from Sur La Table), and everything in between, 3D cookie cutters o er the perfect addition to your baking tool kit.
With a cookie press decorating kit, you can create beautiful, uniform cookies with ease. Simply scoop your dough into the press and e ortlessly make batches of cookies with intricate designs. With 12 custom design options, this cookie press from OXO, for example, allows you to get creative anytime of year and bake cookies that make you look like a pro.


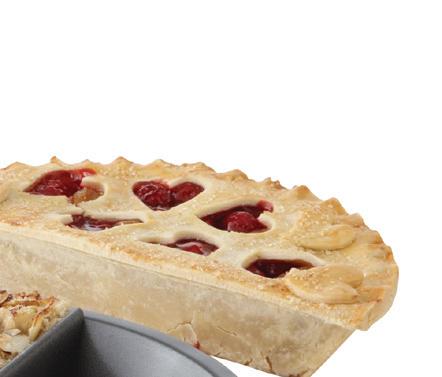


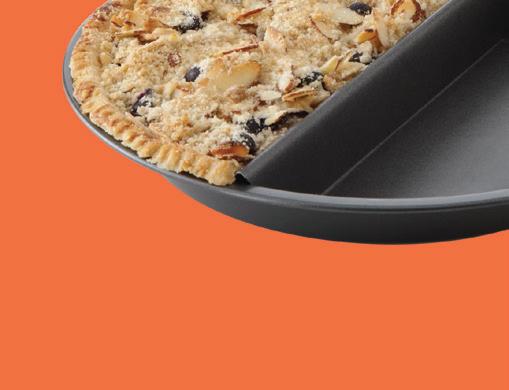
To alleviate your indecisiveness and dishwashing duties, try a split pie/cake pan, such as this example from Wayfair. It is perfectly split down the middle, allowing you to bake two treats simultaneously and experiment with fun flavor combinations.


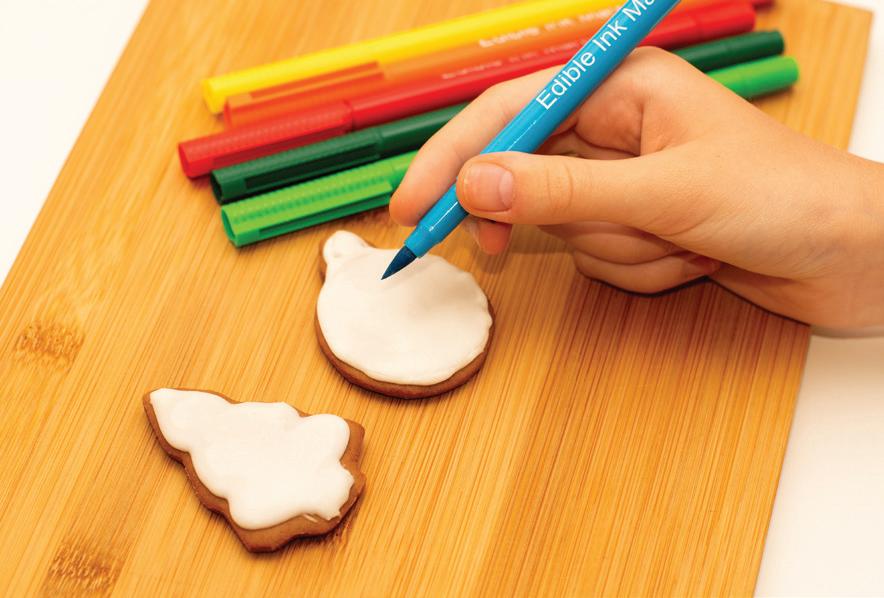
When it comes to frosting baked goods, precision is key. But mastering your icing projects doesn’t need to be a daunting task with the food decorating pen. A decorating pen, with its quickly drying edible paint, adds the perfect finishing touch to your desserts, making you feel like a professional baker in no time.
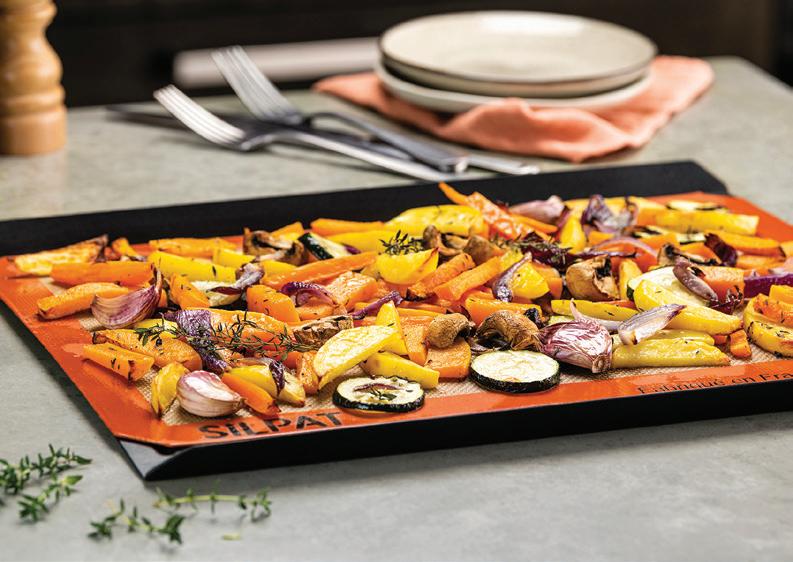
This food-grade silicone baking mat eliminates the need for parchment paper. Reusable and easy to clean, the Silpat baking mat is a staple for any kitchen. From roasted vegetables to warm cookies, it guarantees a nonstick, heat-resistant surface for any recipe requiring an oven.

Dr. Uma Naidoo, author of “Calm Your Mind with Food,” discusses her favorite brain-healthy foods to ease anxiety and improve mental well-being
by macy harder
Did you know that your diet can be directly linked to mental illness? Or that over 90% of the body’s serotonin is produced in the gut? In her book, “Calm Your Mind with Food,” Harvard-trained nutritional psychiatrist, chef, and nutritional biologist Dr. Uma Naidoo details the gut-brain relationship and how food and anxiety are often intertwined.
Naidoo says her interest in the intersection between food, wellness, and science stems from her upbringing. “I come from a large family of allopathic doctors with a sprinkling of Ayurvedic practitioners mixed in, and I learned yoga and meditation from my grandparents,” she explains. “It made sense to me that we need more tools in our toolkit for our mental well-being, and while prescriptions have been life saving for many of my patients, it is not the only route to improving mental fitness.”
We asked Naidoo a few questions surrounding gut science, how to mitigate feelings of anxiety with food, and her favorite snacks to have on hand. (Interview edited for length and clarity.)
Can you briefly explain the connection between the gut microbiome and the brain? Furthermore, how does an imbalanced gut microbiome affect one’s mental health?
U.N.: The premise of nutritional psychiatry rests upon what I affectionately term the “gut-brain romance.” The cells which form the nerves of the human gastrointestinal tract as well as the nervous system—our brain and spinal cord—originate from the exact same cells in the human embryo. They remain closely connected by the vagus nerve, which allows two-way communication, like friends texting each other all the time!
The vagus nerve also acts as a two-way, super-fast highway, constantly sending signals and chemicals back and forth between the brain and the gut. One of these chemicals is serotonin, our natural mood regulator. We produce over 90% of our body’s serotonin, as well as other neurotransmitters which govern mood, in the gut—where our food is digested and broken down into vitamins, minerals, and other nutrients. This enables a natural symbiosis between food and the body’s brain chemistry.
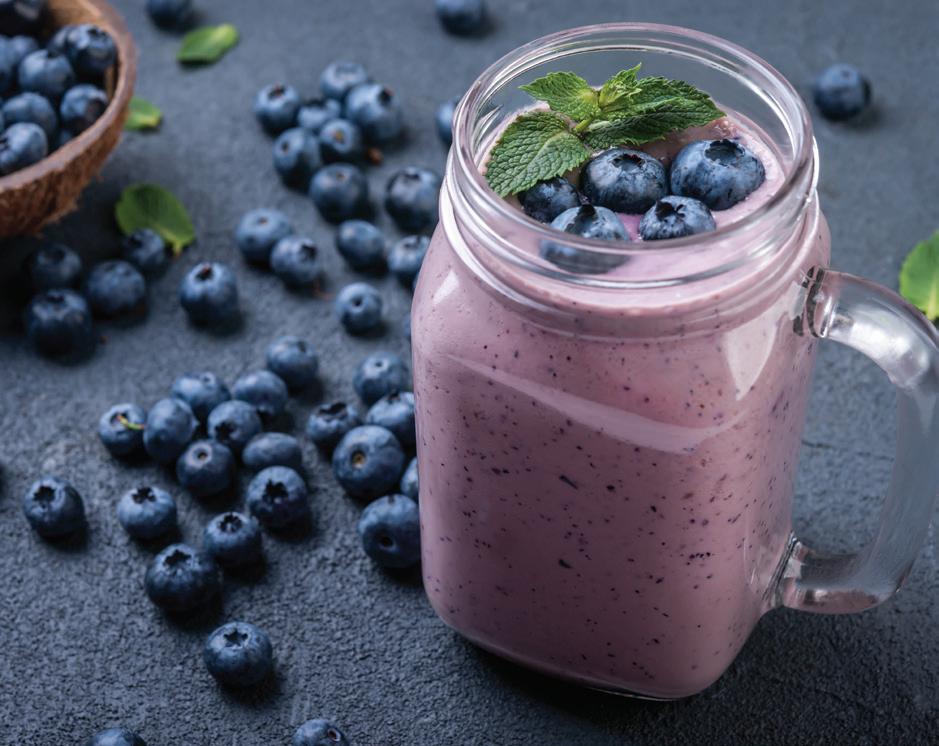
With the combination of folate-rich mixed greens, berries rich in antioxidants and vitamin C, almond butter for a healthy dose of vitamin E, avocado for cognitionboosting omega-3 fatty acids, and a dose of hemp seeds to round out the fiber punch, this smoothie is truly a brain-food all-star. –dr. uma naidoo
1 handful mixed greens (I love spinach and arugula)
½ cup assorted berries, fresh or frozen
1 tablespoon almond butter (can substitute any preferred nut butter or coconut oil)
½ avocado, peeled, pitted, and sliced
1 tablespoon hemp seeds
¾ to 1 cup almond or other plant-based milk
Blend at high speed for 30 seconds to 1 minute. Pour into a tall glass and enjoy!
What are a few other ways in which our diet can directly contribute to anxiety?
U.N.: Processed packaged foods … with lengthy ingredient lists and expiration dates are typically packed with processed additives like sugar, seed oils, preservatives, and dyes—all of which feed the bad microbes in the gut for worsened inflammation, and therefore, stress. These foods are also devoid of brain-boosting vitamins, minerals, and fiber. In addition, foods high in refined sugars not only increase inflammation, but also cause rapid shifts in the energy balance to our bodies and brains. After a “sugar rush,” the inevitable “crash” often leaves us feeling anxious, tired, and on edge.
Sugar consumption and its relation to anxiety comes up frequently in your book. For people who crave sweets, what are healthy substitutions to satisfy a sweet tooth?
U.N.: I’m always amazed by how adaptable our bodies and brains are! As we lessen our processed and refined sugar intake, it’s very common that individuals begin finding the natural sweetness of fruit and veggies satisfying. I encourage those working to reduce their sugar intake to first “add in”—for example, adding a handful of berries to a morning plain Greek yogurt with a sprinkle of cinnamon for sweetness, or half of a green apple to a smoothie. Over time, these changes make a huge difference.
Do you have any favorite recipes to help calm your mind? What prepared meals and snacks do you always have on hand?
U.N.: Trail mix—a handful of roasted, plain cashews, another handful of almonds, and some chunks of 80% cacao dark chocolate makes for a great snack! I also love to have smoothies on hand. There are many recipes in my book, but here is a great, simple one (see above).
things to include:
n Prebiotic fiber in the form of vegetables (asparagus, garlic, onions, leafy greens, artichokes, legumes, mushrooms, apples, and others) —These veggies can help maintain an abundance of healthy bacteria in the gut, which is associated with reduced neuroinflammation and stress.
n Berries —Loaded with fiber, antioxidants, and vitamins, berries support a healthy microbiome and can reduce inflammation.
n Omega-3 fatty acids —Consumption of omega-3 is associated with reduced anxiety, brain fog, and cognitive decline, as well as improved mood.
n Spices (turmeric, black pepper, cinnamon, saffron, rosemary, ginger) —These spices not only boost the flavor and color of our meals, but are also rich in antioxidants, micronutrients, and anti-inflammatory compounds for improved mental fitness.
n Fermented foods (sauerkraut, kimchi, kefir, miso, plain yogurts) —A healthy microbiome is dependent on a healthy presence of good bacteria in the gut, and an effective way to replenish these populations of good bacteria is through eating fermented foods.
things to avoid:
n Ultra-processed foods
n Added and refined sugars
n Artificial sweeteners
n Industrial oils (corn, grapeseed soybean, sunflower, palm)
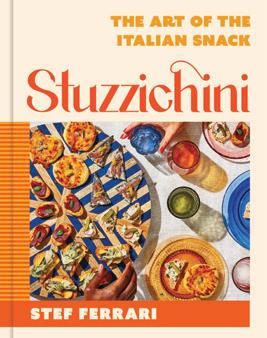
Embrace the art of Italian snacks to entertain with mouthwatering, creative appetizers

In a perfect world, you might be sitting along the Italian coast with a glass of Prosecco in your hand, gazing into a stunning sunset with a collection of handmade snacks at your fingertips, enjoying “aperitivo,” which is like Italian happy hour. While you might not be able to transport to Italy on a whim, you can bring a taste of the country’s appetizers into your kitchen with these curated recipes from “Stuzzichini: The Art of the Italian Snack” by Stef Ferrari. “Stuzzichini” (pronounced stootzi-KEY-nee) are Italian snacks served with drinks before a meal and are symbols of the culture’s deep desire to extend a feeling of “accogliente,” or “welcoming,” to guests, whether they travel from abroad or from across town, notes Ferrari in the intro to her book. From romantic dinner dates or happy hour with a few friends to family gettogethers over the holidays, you can’t go wrong with these appetizers. Savor the assemblage of these Italian flavors and buon appetito!

–julia jacobson

In the spirit of relaxed Italian cooking, the abbreviation “q.b.” appears in some recipes. This is a common “measurement” in Italian recipes and refers to the phrase “quanto basta,” which literally translates to “just enough.” To English speakers it is the similar notion of seasoning “to taste.” q .b.
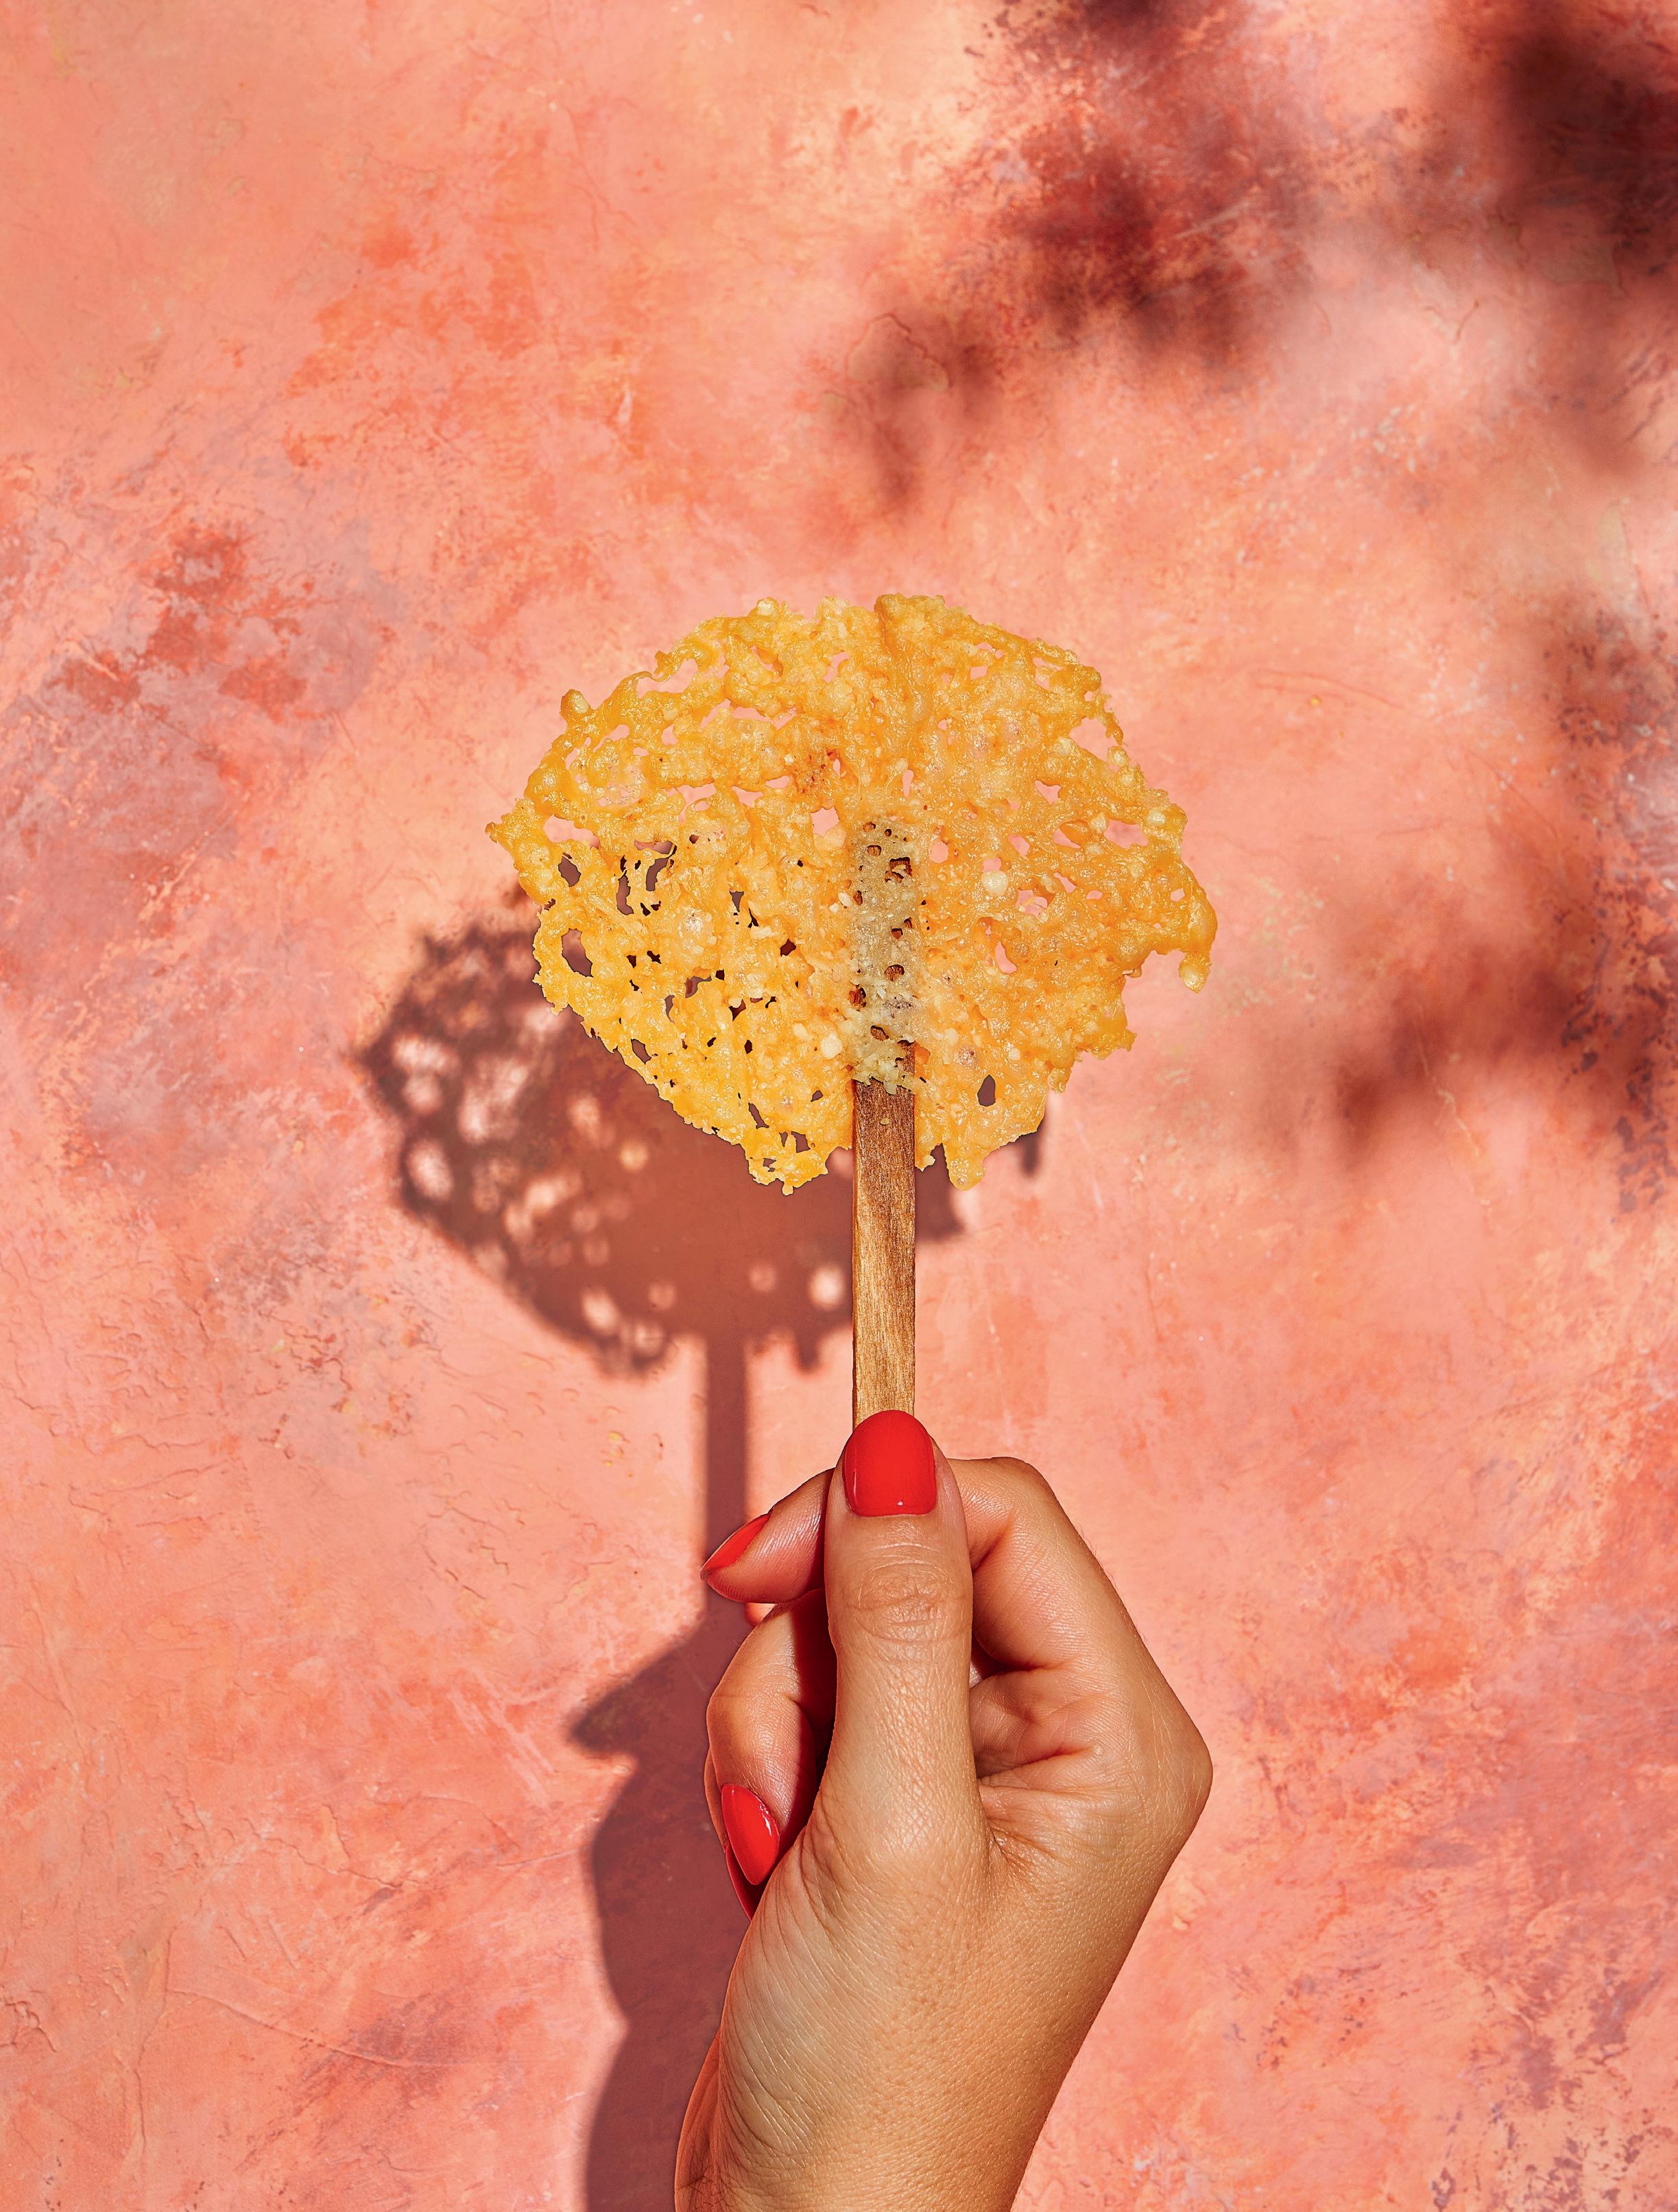
Parmigiano Lollipops MAKES 6 LOLLIPOPS | VEGETARIAN, GLUTEN FREE
At the start of an event to introduce a group of journalists to the culture and culinary treasures of the Collio area of northern Italy, we were greeted with this whimsical bite. To see lollipops—or “lecca lecca” in Italian—on the menu was unexpected, given the professional nature of the gathering, but they made more of an impression than any of the courses that followed. Our hosts were thrilled to hand us something so simple to pair with our cocktails, so evocative of childlike enjoyment yet sophisticated in flavor and representative of Italian cuisine.
This recipe could hardly be simpler—and in fact, I hesitate to call it a “recipe” at all. Yet each time I set these lollipops on a table for guests, I revel in the way people light up with delight and surprise. They are fun and playful, beautiful when bunched up and served in a bouquet and, most importantly, utterly delicious. The one-ingredient base is also endlessly versatile. You can sub Pecorino Romano for the Parmigiano Reggiano, season with a flurry of fresh black pepper, and call it a Cacio e Pepe Pop. Add poppy or sesame seeds, or spices like pepper flakes, cumin, coriander, turmeric, or even za’atar. I love to blend in a bit of freeze-dried fruit powder like strawberry or raspberry for a sweet and savory spin that’s also visually stunning. For a simple fruity addition that is a literal “spin” on spaghetti al limone, dust with freshly grated lemon zest as soon as you remove the tray from the oven. You can even forgo the stick if you prefer straight cheese crisps, which are a great textural addition to anything from salads to egg sandwiches to pizza as a topping. –stef ferrari
About 1 cup grated Parmigiano Reggiano
6 wooden sticks (skewers or pop sticks)
Red pepper flakes, q.b. (optional)
Seeds like poppy or sesame, q.b. (optional)
1. Heat the oven to 425°F and line a sheet pan with Silpat or parchment.
2. Make rounds of grated cheese on the paper, leaving space in between. You can also use a biscuit cutter or similar as a guide if you want more precise rounds, but try to spread as evenly as possible so baking is consistent. Lay a stick in each circle, with one end of the stick reaching to the center. Sprinkle more cheese to cover the stick, then bake for 5 to 6 minutes, until golden brown.
3. Remove from the oven and allow to cool completely; they will still be pliable while warm. Use a thin spatula to carefully lift up the lollipops, then serve in a basket, or stick them into another treat as a garnish. Serve with sprinklings of red pepper or poppy or sesame seeds if you like.
Nutrition (per serving): Calories: 150, Fat: 11g (Sat. 7g), Cholesterol: 0mg, Sodium: 220mg, Carb: 0g, Fiber: 0g, Sugar: 0g, Protein: 13g
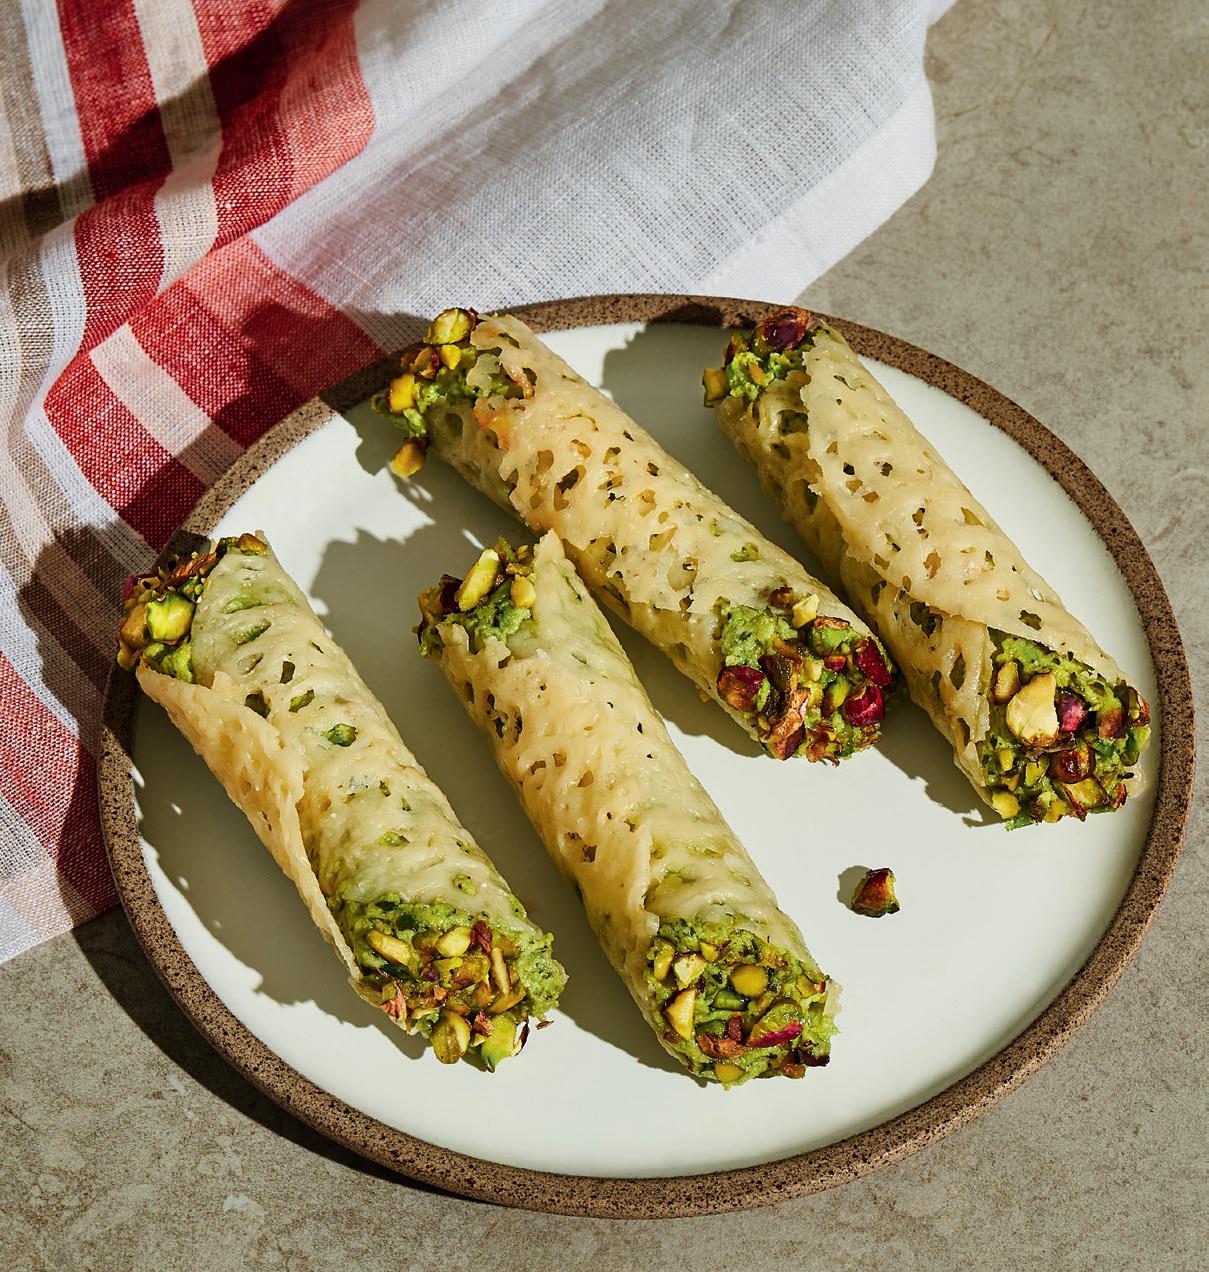
“Cannoli” Salati Con Crema Di Piselli
Salty “Cannoli” with Green Pea Cream MAKES 6 SERVINGS | VEGETARIAN, GLUTEN FREE
The functions of cheese in Italy are endless, but the first time I saw grated Parmigiano Reggiano manipulated into “cannoli” shells in a winery’s tasting room in Sicily, I was filled with pride for Italian ingenuity. In this dish, the salty vessels are filled with a sweet pea–ricotta cream and pressed into crunchy pistachios. It is one of those smack-your-forehead preparations that makes such logical sense, it should be studied as an archetype of balanced flavors and textures. –s.f.
for the cannoli salati
About 1½ cups grated cheese (preferably Grana Padano, Pecorino, or Parmigiano Reggiano; a blend also works)
for the crema di piselli
Extra virgin olive oil, q.b.
2 large cloves garlic, minced
2 cups fresh peas (frozen works, too—no need to thaw)
Kosher salt, q.b.
Fresh-cracked black pepper, q.b.
½ cup whole-milk ricotta
⅔ cup grated cheese (preferably Grana Padano, Pecorino, or Parmigiano Reggiano; a blend also works)
1 teaspoon minced fresh basil leaves
1 teaspoon minced fresh mint leaves
Pistachios, crushed, q.b.
1. Make the Cannoli Salati: Heat the oven to 400°F and line a sheet pan with Silpat or parchment.
2. Place a 5-inch biscuit cutter on the lined sheet, drop about 3½ tablespoons of the grated cheese inside the biscuit cutter and spread evenly within the circle. Repeat five times, allowing some spacing between shells. Bake for 5 to 7 minutes, until golden brown.
3. Let the cheese cool slightly, 1 to 2 minutes, until you can handle the rounds but they’re still pliable. Wrap each around a 5-inch cannoli tube (see Cook’s Note) to form shells. Set aside and allow to cool completely while you make the filling. The unfilled shells will last 2 to 3 days in an airtight container.
4. Make the Crema Di Piselli: In a medium saucepan over medium heat, heat enough oil to cover the bottom of the pan. Add the garlic and cook
until browned (but be careful not to burn!). Add the peas, season with salt and pepper, and cook until the peas are tender but not soft, about 3 minutes. Remove from the heat and allow to cool a bit.
5. In a food processor, combine the peas, ricotta, grated cheese, basil, and mint. Drizzle in about 2 tablespoons olive oil and pulse until well combined and creamy. You can also do this by hand with a sharp knife and a rough chop for a slightly less creamy and more rustic version. Add more cheese to thicken or more oil to thin if needed. Chill in the refrigerator for about 30 minutes.
6. Assemble the Cannoli: Transfer the pea filling to a pastry or storage bag (cutting the tip to create an opening). Pipe the filling into your shells, press the exposed ends into the crushed pistachio, and serve. Once filled, it’s best to serve as soon as possible as the shells will lose some of their crispness, but you can store the filling separately in an airtight container for 3 to 5 days.
Cook’s Note: If you don’t have a cannoli tube, you can use a clean curtain rod or broom handle. (Wrap plastic wrap around the part you plan to use!).
Nutrition (per serving): Calories: 290, Fat: 19g (Sat. 9g), Cholesterol: 10mg, Sodium: 560mg, Carb: 12g, Fiber: 4g, Sugar: 4g, Protein: 18g
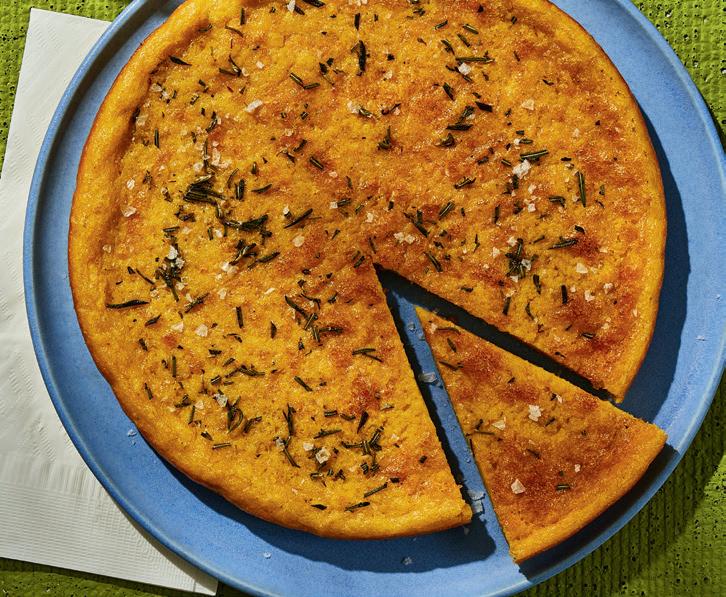
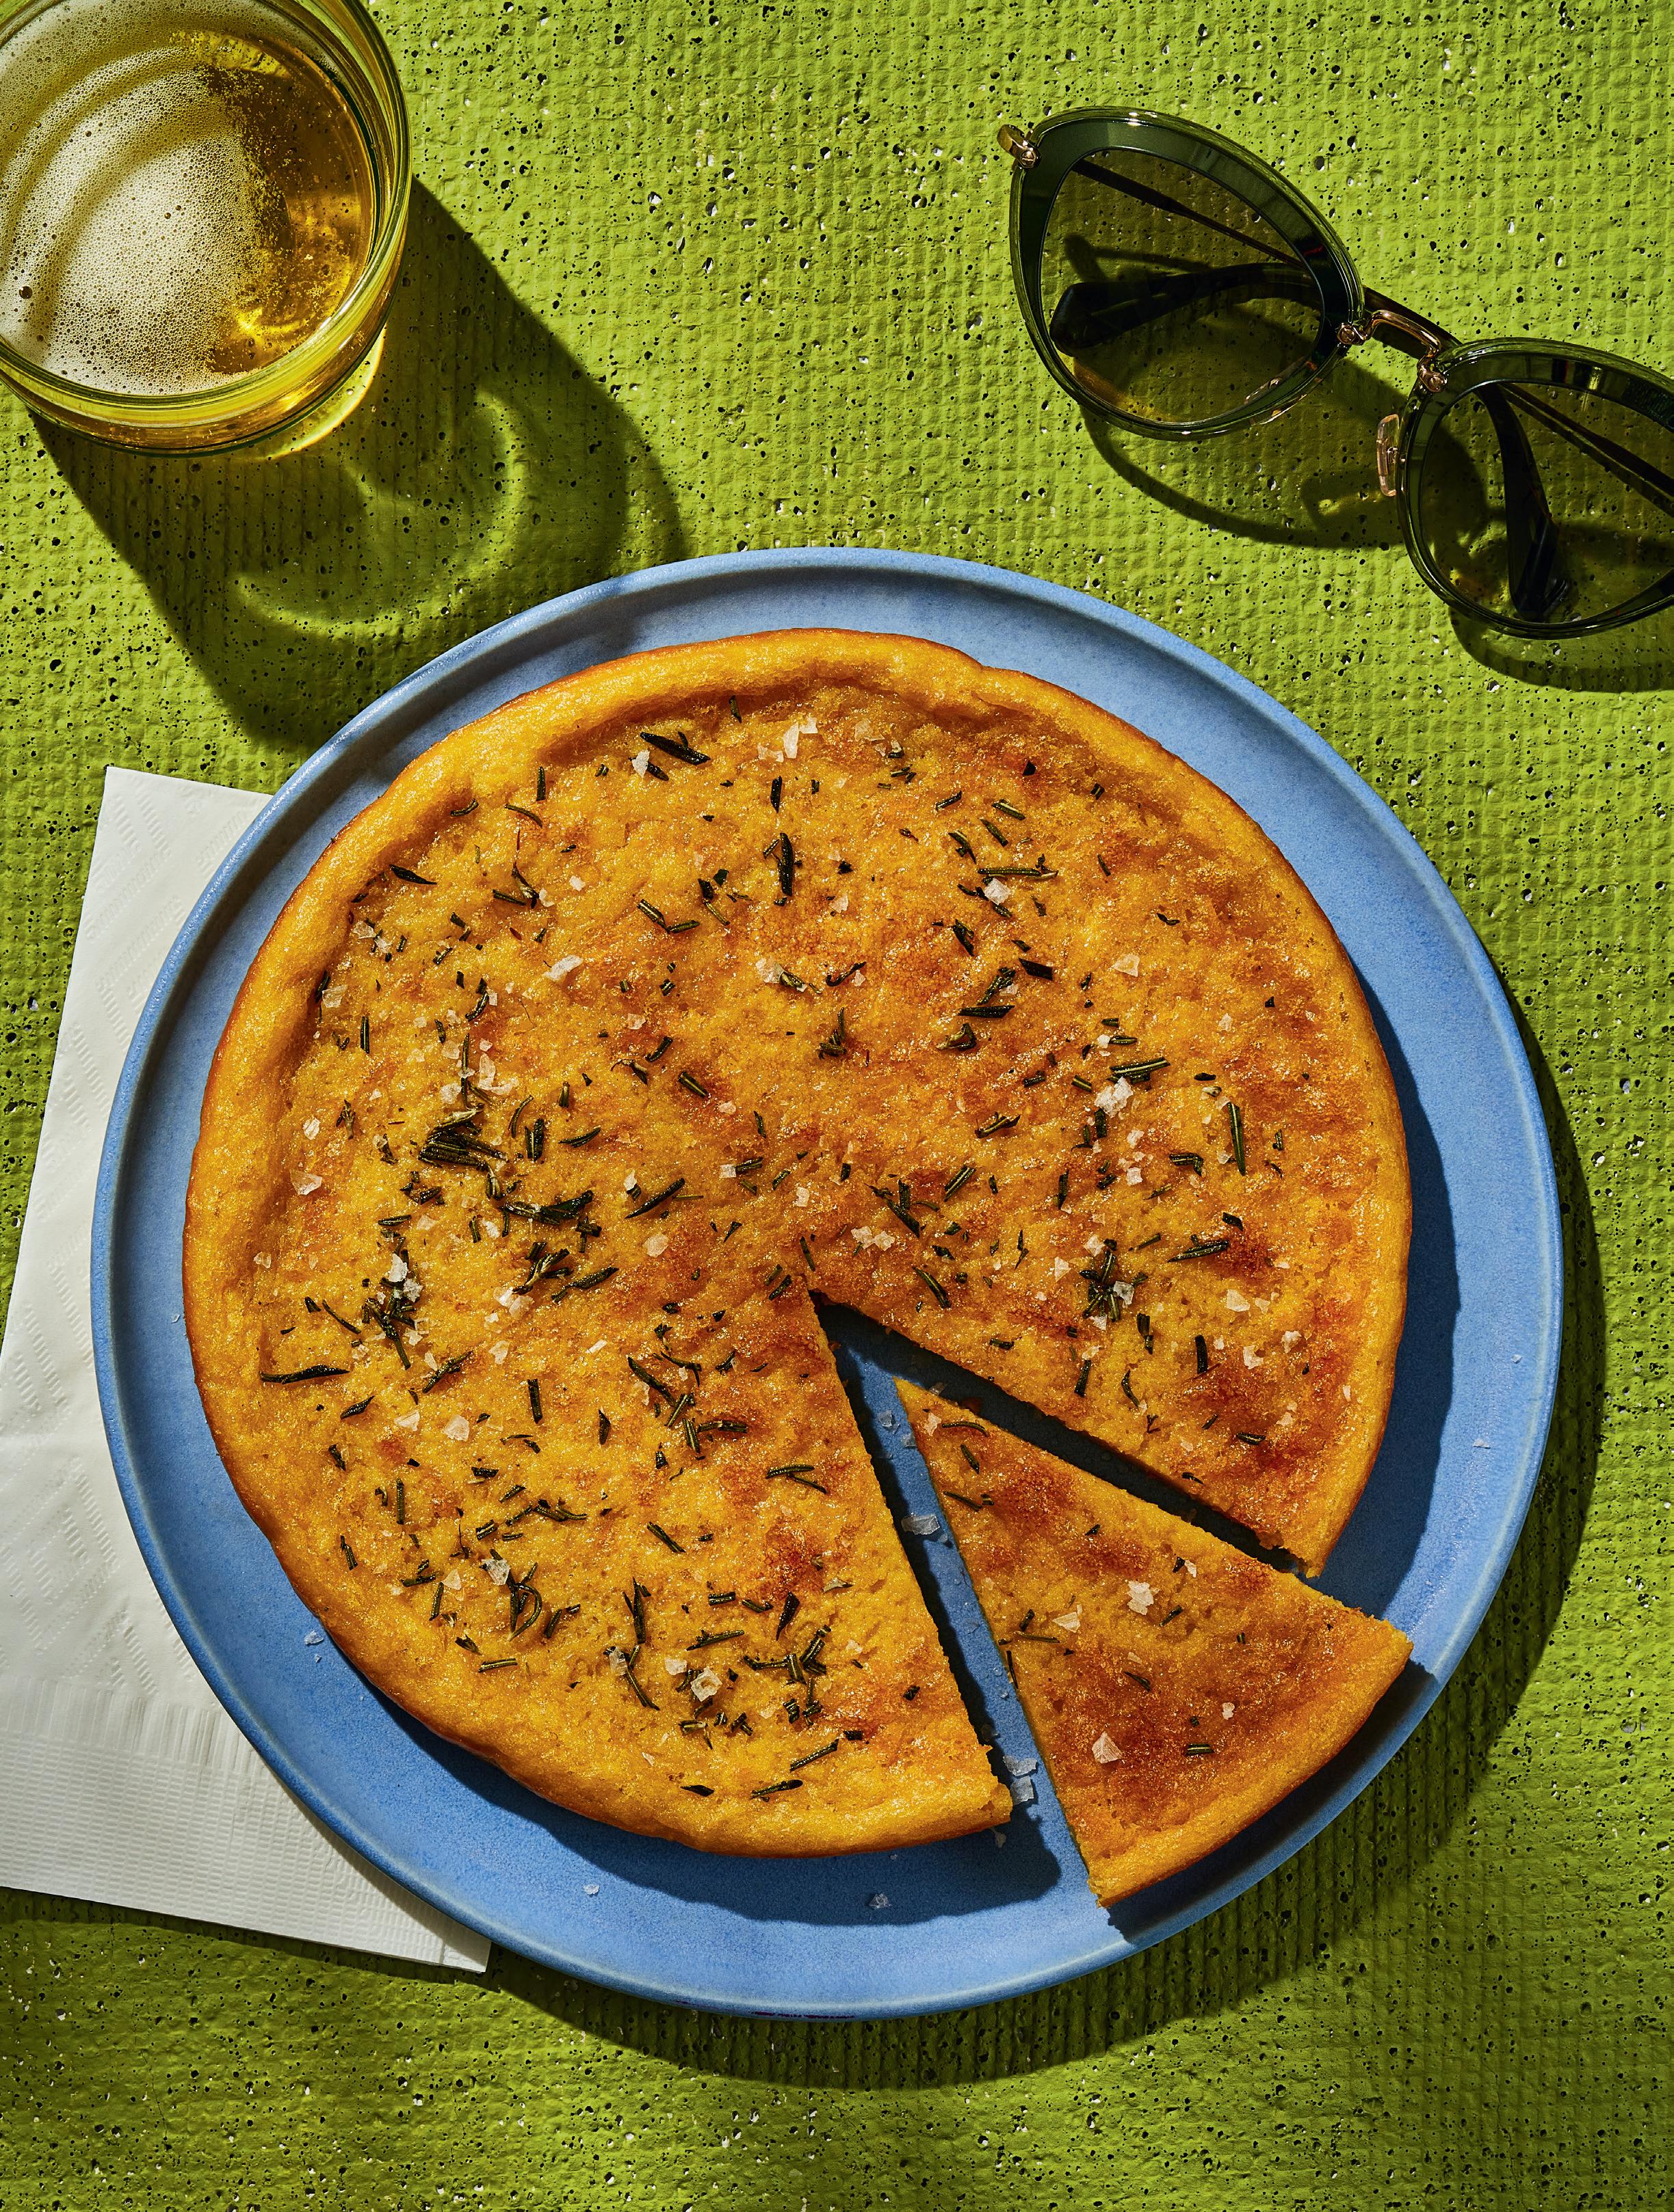
Sea Salt and Olive Oil Chickpea Pancake
MAKES 6 TO 8 SERVINGS | VEGAN, GLUTEN FREE
There are quite a few origin stories for this dish, each one more actionpacked than the last. One stars hungry Roman soldiers frying chickpea flour on hot shields after a battle in an effort to restore their energy. Another from farther north takes a seafaring turn, purporting that during a naval battle in the 13th-century’s Genovese-Pisan War, a battered ship spilled sacks of ceci into salt water, where they were pulverized. Starving and stranded, sailors spread the mash of chickpeas on stones and, after allowing it to dry in the sun, realized they were onto something.
Today, hungry Italians seek out this crisp chickpea pancake in many regions, and refer to it by various names including “farinata,” “cecina,” and “socca.” Tuscans even transform this thin and custardy cornbread-esque cake into something sustaining by pan-frying slices and stuffing them into a focaccia sandwich—especially popular as street food in coastal Livorno.
Regardless of the conflicting, conflict-inspired origins, designations, and preparations, I’m certain no one will be able to fight off the craving for these crisp bites after the first taste. Serve hot as is or with a blizzard of black pepper, along with a cocktail, Prosecco, or crisp beer. –s.f.
1⅔ cups chickpea flour
2 cups water
2 tablespoons extra virgin olive oil
2 teaspoons kosher salt
Chopped fresh rosemary, q.b. Flake sea salt, q.b.
1. Place the chickpea flour in a large bowl and form a well. Gradually add the water, mixing well with a rubber spatula or by hand. Cover and rest at room temperature for 4 to 5 hours, or overnight, stirring occasionally. (You can skim off any foam you see forming during the resting process.)
2. Heat the oven to 450°F and grease a 12-inch pizza pan with oil.
3. Skim the foam from the batter a last time and discard. Whisk in the olive oil and kosher salt, spread the batter on the pan, and sprinkle with rosemary. Bake for 12 to 15 minutes, until the edges are golden brown and the top is crisp. Sprinkle with sea salt and serve hot or at room temperature.
Nutrition (per serving): Calories: 150, Fat: 5g (Sat: .5g), Cholesterol: 0mg, Sodium: 680mg, Carb: 20g, Fiber: 5g, Sugar: <1g, Protein: 5g
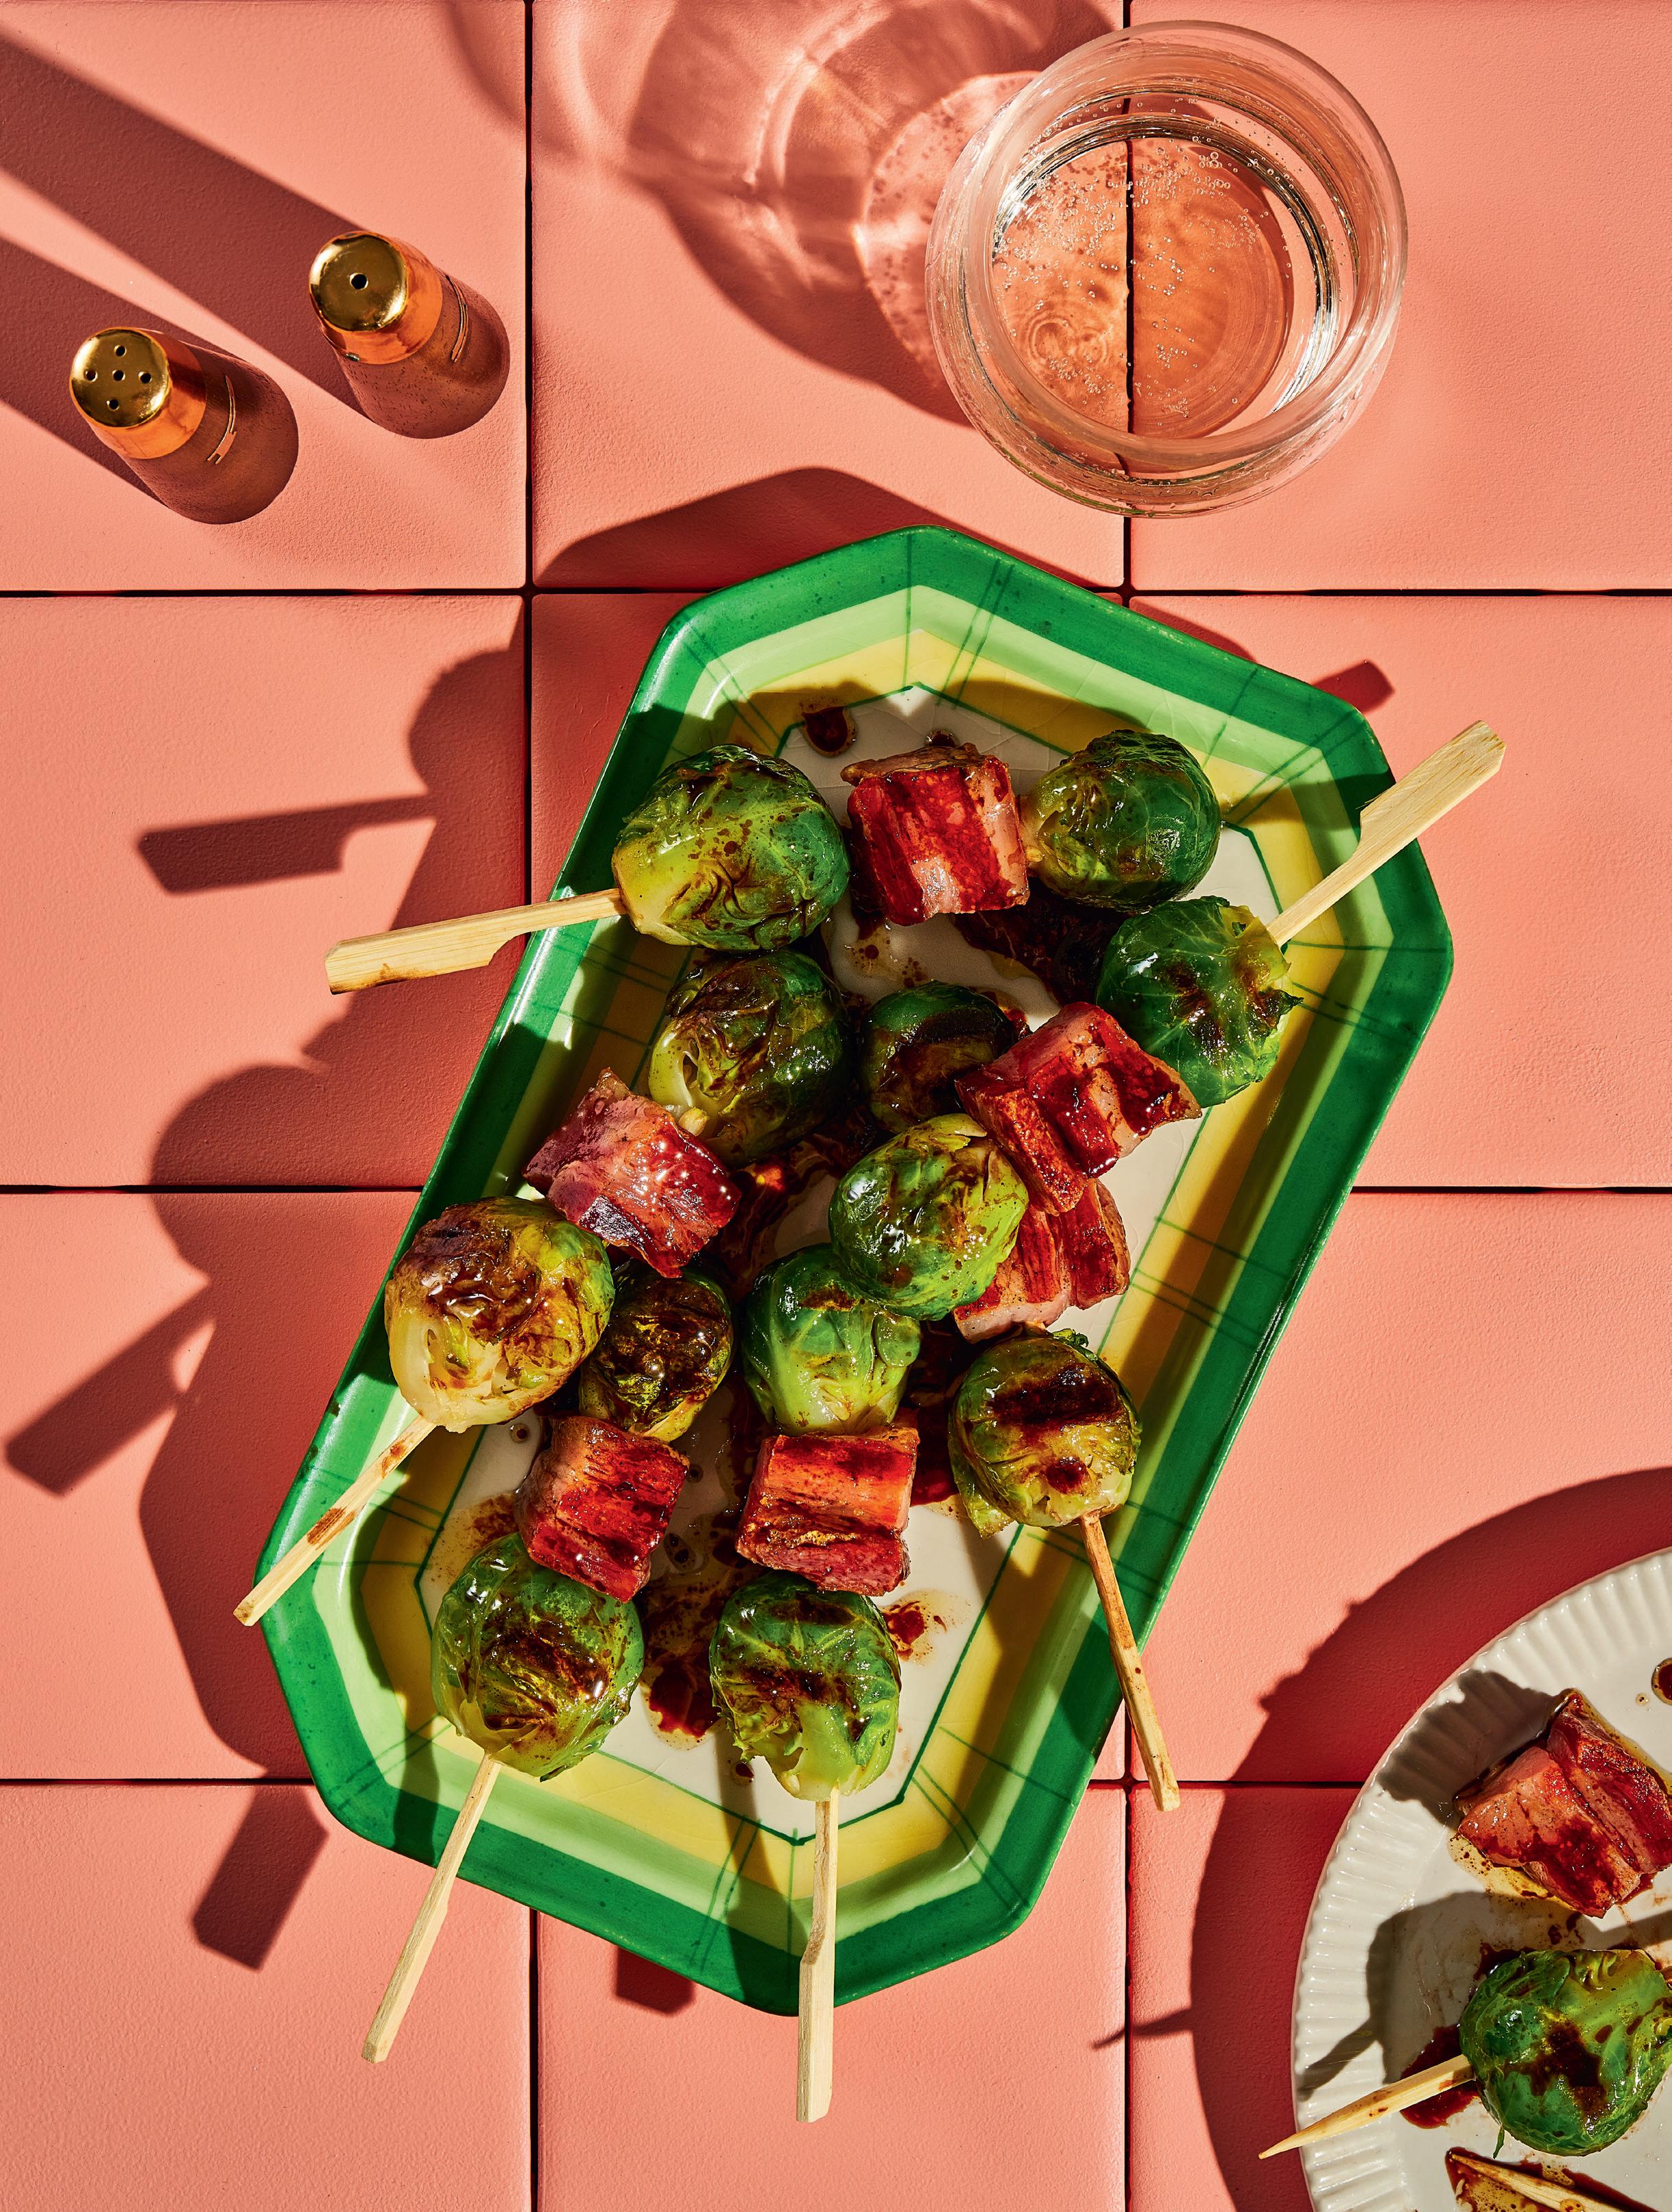
Brussels Sprouts and Pancetta Skewers with Sweet and Spicy Balsamic Glaze
MAKES 6 TO 8 SMALL SKEWERS | GLUTEN FREE
This spiedini was inspired by the combination of Brussels sprouts and bacon I always loved when it showed up on my family’s Thanksgiving table in the States. In this case, pancetta gives it an Italian spin. Balsamic Glaze is one of those condiments that has so much going on and is so satisfying, balanced, and diverse that it’s hard to imagine not finding a spot for it on the table at every meal. Here, the way it marries the mild bitterness of grilled Brussels sprouts with salty pancetta and a kick of red pepper is a masterful manipulation of flavors. –s.f.
ingredients for the skewers
5 to 6 cups Brussels sprouts
1 to 1¼ cups pancetta cubes
Balsamic Glaze
for the balsamic glaze
1 cup balsamic vinegar
1 tablespoon honey
1 teaspoon red pepper flakes
1. First, make the glaze. Balsamic glaze ratios range widely, and are based in part on how long you plan to simmer the vinegar into a reduction, which can require some time and babysitting! A quick recipe is about 1 cup balsamic and 1 tablespoon honey, simmered for about 10 minutes or until thick enough to coat the back of a spoon. For a kick, combine about 1 teaspoon red pepper flakes with the vinegar at the beginning of the simmer, or if you have access to chili-infused honey, you can use that instead.
2. Heat the grill to medium. Wash the sprouts and dry them with a paper towel.
3. Bring a large pot of water to a boil, then simmer the sprouts for about 5 minutes, until tender. Drain and cool, then compose the skewers, alternating sprouts and meat.
4. Grill for about 2 minutes per side, until slightly charred and crispy. Drizzle with the glaze and serve.
Cook’s Note: Pancetta cubes come in a variety of sizes. If yours are on the smaller side (¼-inch pieces or smaller), the meat may burn on the grill while the sprouts are cooking. So you’ll want to saute the meat first on the stovetop until crispy, then set aside. Grill the skewered sprouts alone, then add the pancetta to the skewers to serve.
Nutrition (per serving): Calories: 160, Fat: 7g (Sat: 3.5g), Cholesterol: 15mg, Sodium: 390mg, Carb: 16g, Fiber: 3g, Sugar: 11g, Protein: 5g
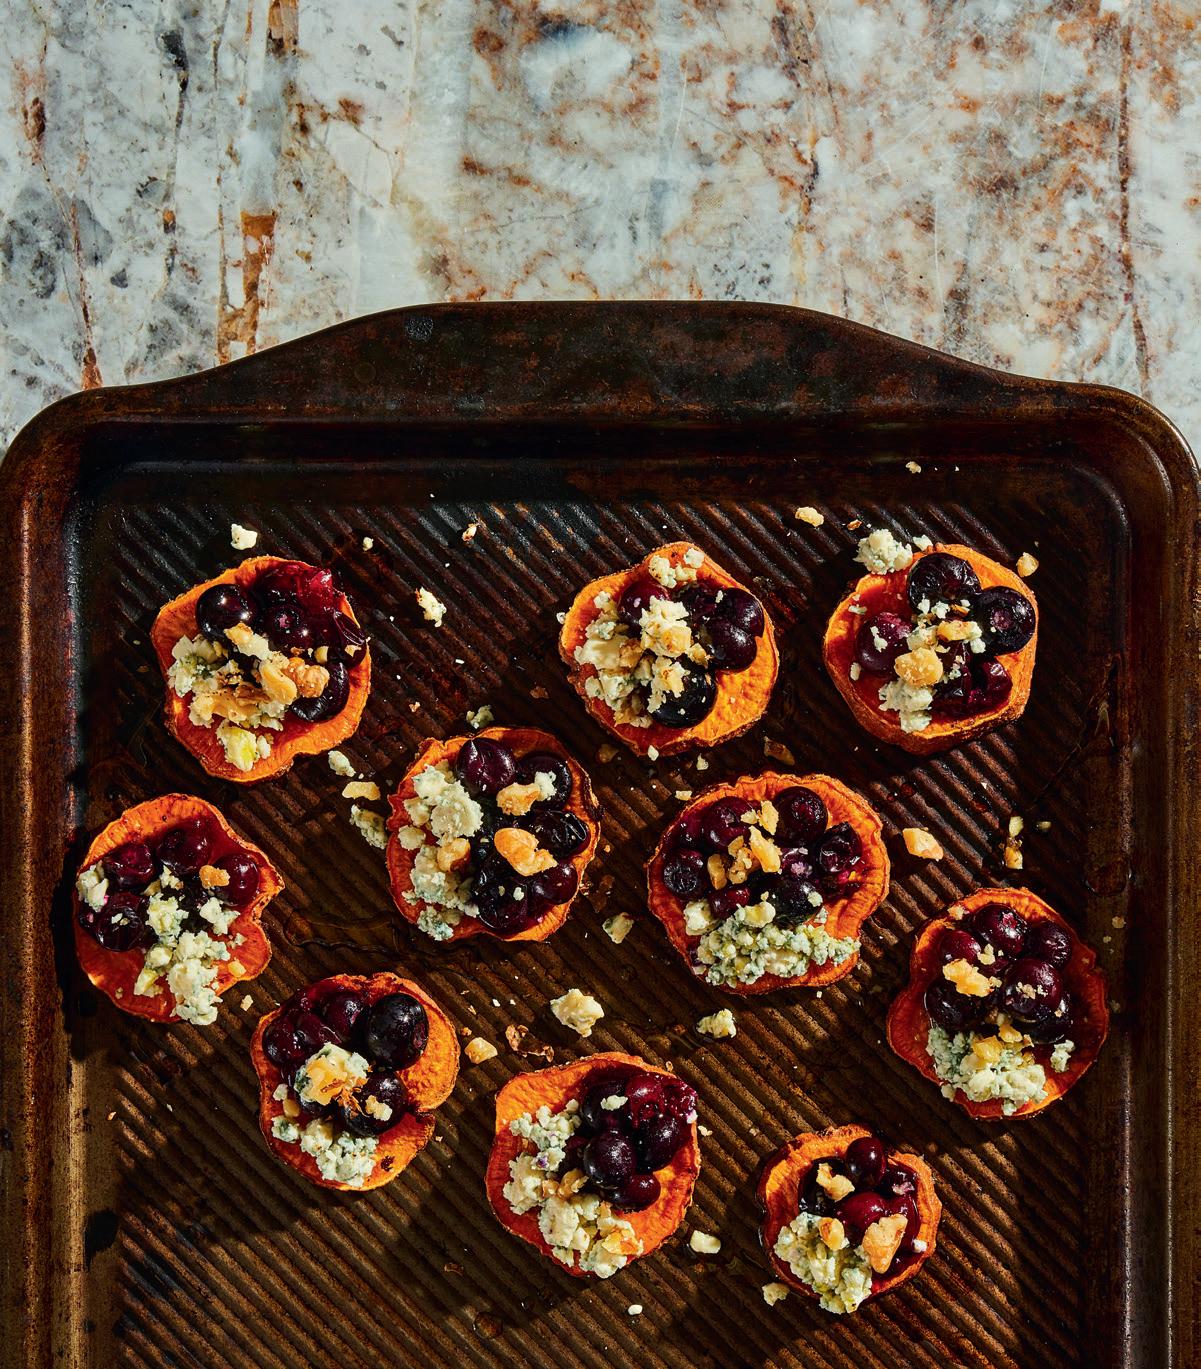
Patate Dolci “Crostini” con Mirtilli Tostati e Gorgonzola
Sweet Potato “Crostini” with Roasted Blueberries and Gorgonzola MAKES 6 TO 8 SERVINGS | VEGETARIAN, GLUTEN FREE
I first had this take on crostini at an intimate cocktail party, and it wasn’t until I took a bite that I realized this was no regular toast (and had to interrupt my conversation to marvel at it: “Did you taste this thing?!”). Perfect for those in your life who require a gluten-free option, or when you’re looking for a little spin on the classic base, these bites utilize sliced sweet potato as a stand-in for baguette slices or other sliced carbohydrate, and here are paired with jammy, tart “mirtilli” (blueberries).
Sweet potatoes and blueberries may not be the most common ingredients that come to mind when considering Italian food, but both are fairly abundant around the country. Sweet potatoes fill pastas and even transform into stuzzichini-friendly fries, and blueberries stand out in gelato cases when churned into sorbetto, or when accompanying savory dishes like duck. Their seasons overlap a bit during the months of September, February, and March, but this dish can utilize frozen blueberries as well.
Both ingredients are a natural match for northern Italy’s prized Gorgonzola dolce, and with the cheese’s striking blue veins this stuzzichino is a perfect cooler weather snack that is deeply delicious and beautiful to behold—and will give you plenty to talk about. –s.f.
for the mirtilli tostati
2 cups blueberries, fresh or frozen
1 tablespoon granulated sugar
6 to 8 fresh sage leaves
for the patate dolci
2 large sweet potatoes
Extra virgin olive oil, q.b.
for the “crostini”
2 cups Gorgonzola dolce
Toasted walnuts, q.b. (optional)
Kosher salt, q.b.
Fresh-cracked black pepper, q.b.
1. Roast the Mirtilli: If using fresh berries: Heat the oven to 400°F and line a sheet pan with Silpat or parchment. Wash the blueberries and drain. Spread on the lined sheet pan and toss with the sugar and sage by hand. Roast for about 10 minutes, until the berries are bursting. Let cool. If using frozen berries: Cook in a medium frying pan over medium heat for about 10 minutes, stirring regularly with a rubber spatula, until the liquid reduces and becomes syrupy. You can test this by spooning a bit of the syrup onto a plate and allowing to cool to room temperature to gauge the consistency and thickness. In either case, allow the blueberries to cool to room temperature and set aside.
2. Roast the Patate Dolci: Heat the oven to 425°F and grease a sheet pan with nonstick spray or oil.
3. Cut the sweet potatoes into ½ -inch-thick rounds and toss with the oil. Arrange the rounds on the pan, leaving a bit of space in between. Roast for 15 minutes, then flip and roast for another 10 minutes, until slightly caramelized at the edges and soft in the center. Let cool slightly.
4. Assemble the “Crostini”: Top the rounds with Gorgonzola, roasted blueberries, and walnuts (if using). Season with salt and pepper to taste and serve warm or at room temperature.
Nutrition (per serving): Calories: 390, Fat: 28g (Sat: 13g), Cholesterol: 0mg, Sodium: 760mg, Carb: 15g, Fiber: 2g, Sugar: 8g, Protein: 19g


Whether veggie-packed or rich and creamy soup means “comfort” to you, these recipes will fit the bill

Srecipes by shelly westerhausen worcel illustration by olivia curti
oup is a perfect food for any season, though as the weather cools, it often pops up more and more as a great idea for a comforting meal. But soup can be very personal. When writing her book “Every Season is Soup Season: 85+ SuperAdaptable Recipes to Batch, Share, Reinvent, and Enjoy” Shelly Westerhausen Worcel asked people what their favorite soup is, and they rarely gave her the same response twice. “I think this is because most people turn to soup for comfort, and comfort means so many different things to different people,” she notes. “Comfort” can mean craving vegetables, carbs, or meat. It might also mean wanting something hearty to fill you up, or light, to enjoy with a salad.
Whether you’re looking for a quick weeknight meal or might want to spend an afternoon in the kitchen on a cold weekend day, these recipes from her book offer a range of meals for whatever “comfort” means to you—from velvety tomato or pumpkin soup to hearty tortilla soup or creamy mushroom lasagna soup. All recipes are vegetarian and offer meat add-in ideas—plus some take it to the next level of versatility with suggestions for using the soup as a base for even more meals. Deliciously feed a crowd with these one-pot wonders or you and your family can enjoy them for several cozy days. –mary subialka


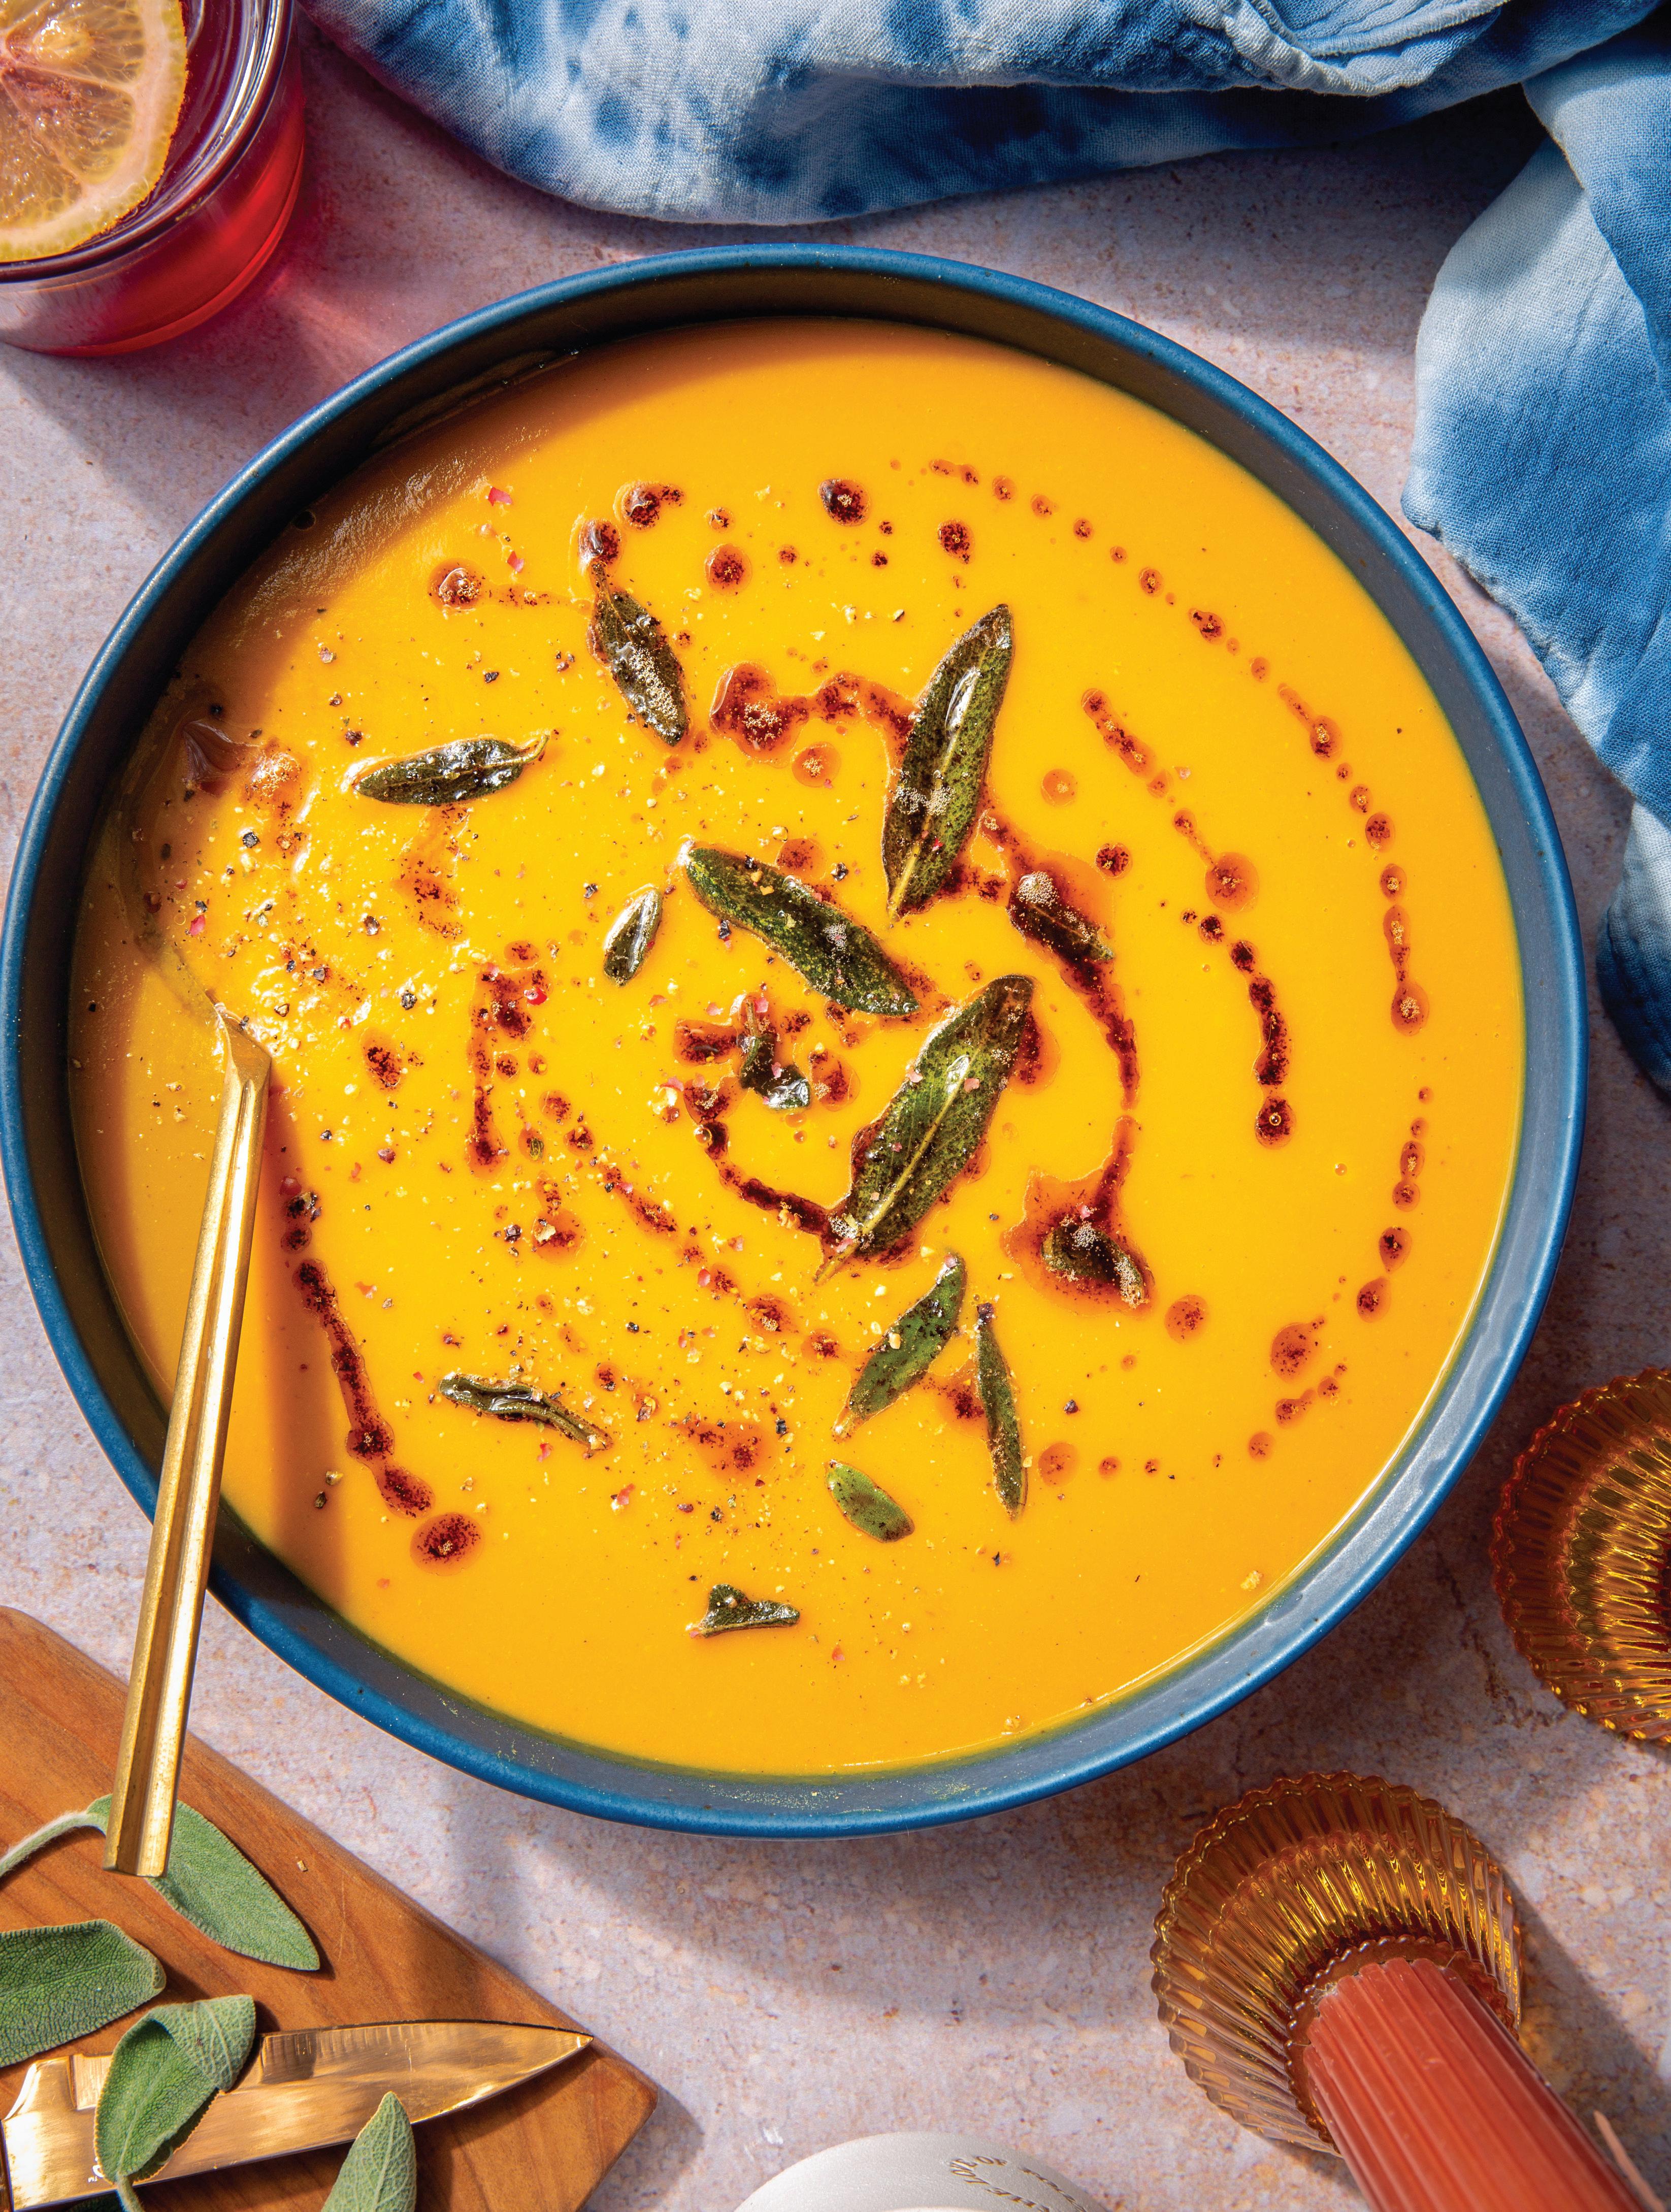
MAKES 4 TO 6 SERVINGS AS A MAIN OR 16 AS A STARTER
Aside from its irresistible fall flavors, there are a couple of things that make this soup so special. First up, it uses canned pumpkin, which cuts down on the prep. Second, the white beans add creaminess and protein without altering the flavor too much. This soup is delicious on a cool fall or winter night served as a meal with some crusty bread or as a soup shooter at your holiday gathering. –s.w.w.
for the soup
2 tablespoons unsalted butter
2 white onions, diced
1 tablespoon fresh rosemary, or 2 teaspoons dried
2 garlic cloves, minced
1 teaspoon curry powder
½ tablespoon salt
½ teaspoon freshly ground black pepper
¼ teaspoon grated nutmeg
Pinch of ground cloves
2 tablespoons maple syrup
1/3 cup apple cider
4 cups Homemade Roasted Vegetable Broth (Cheater
Vegetable Broth; see recipe on page 33) or store-bought low sodium vegetable broth
2 (15.5-ounce ) cans white beans, such as cannellini or great northern, drained and rinsed
2 (15-ounce) cans pumpkin purée
for the brown butter sage
2 tablespoons unsalted butter
12 fresh sage leaves, rinsed and patted dry
Meat Suggestion: Crumble Candied Bacon (see recipe on page 33) over the finished soup instead of—or in addition to—the Brown Butter Sage for an extra boost of sweet and savory.
1. Make the soup: In a large Dutch oven or stockpot over medium heat, melt the butter. Add the onions and cook until very soft and translucent, 10 to 12 minutes. Add the rosemary, garlic, curry powder, salt, pepper, nutmeg, and cloves and saute until fragrant, another 30 seconds. Add the maple syrup and cook until mostly absorbed, 3 to 5 minutes. Add the cider and cook, stirring often, until reduced by half, 2 to 3 minutes.
2. Add the vegetable broth, beans, and pumpkin and bring to a boil over high heat. Lower the heat to medium-low and simmer for 15 minutes to develop the flavor. Remove from the heat and use an immersion blender to blend until smooth. Let cool enough to taste and season with salt and pepper.
3. Meanwhile, make the brown butter sage: In a small skillet over medium heat, melt the butter. Let the butter sizzle, swirling the pan around, until it is golden brown and nutty smelling. Remove from the heat and add the sage leaves (being careful that they are dry, as they may splatter the butter if wet.) Toss the sage in the butter to coat.
4. Divide the soup among serving bowls or small glasses and top each with a spoonful of brown butter and the sage.
Cook’s Notes
n Pressure Cooker: Use the saute function on the pressure cooker to do step 1. Stir in the vegetable broth, beans, and pumpkin. Pressure cook on high for 6 minutes, then do a quick release. Use an immersion blender to blend the soup until smooth, season with salt and pepper, and continue with the recipe at step 3.
n Storing : Store leftovers refrigerated in an airtight container for up to 4 days or freeze for up to 2 months.
Nutrition (per serving soup only; no bacon or sage): Calories: 160, Fat: 4g (Sat. 2.5g), Cholesterol: 10mg, Sodium: 700mg, Carb: 30g, Fiber: 7g, Sugar: 15g, Protein: 3g
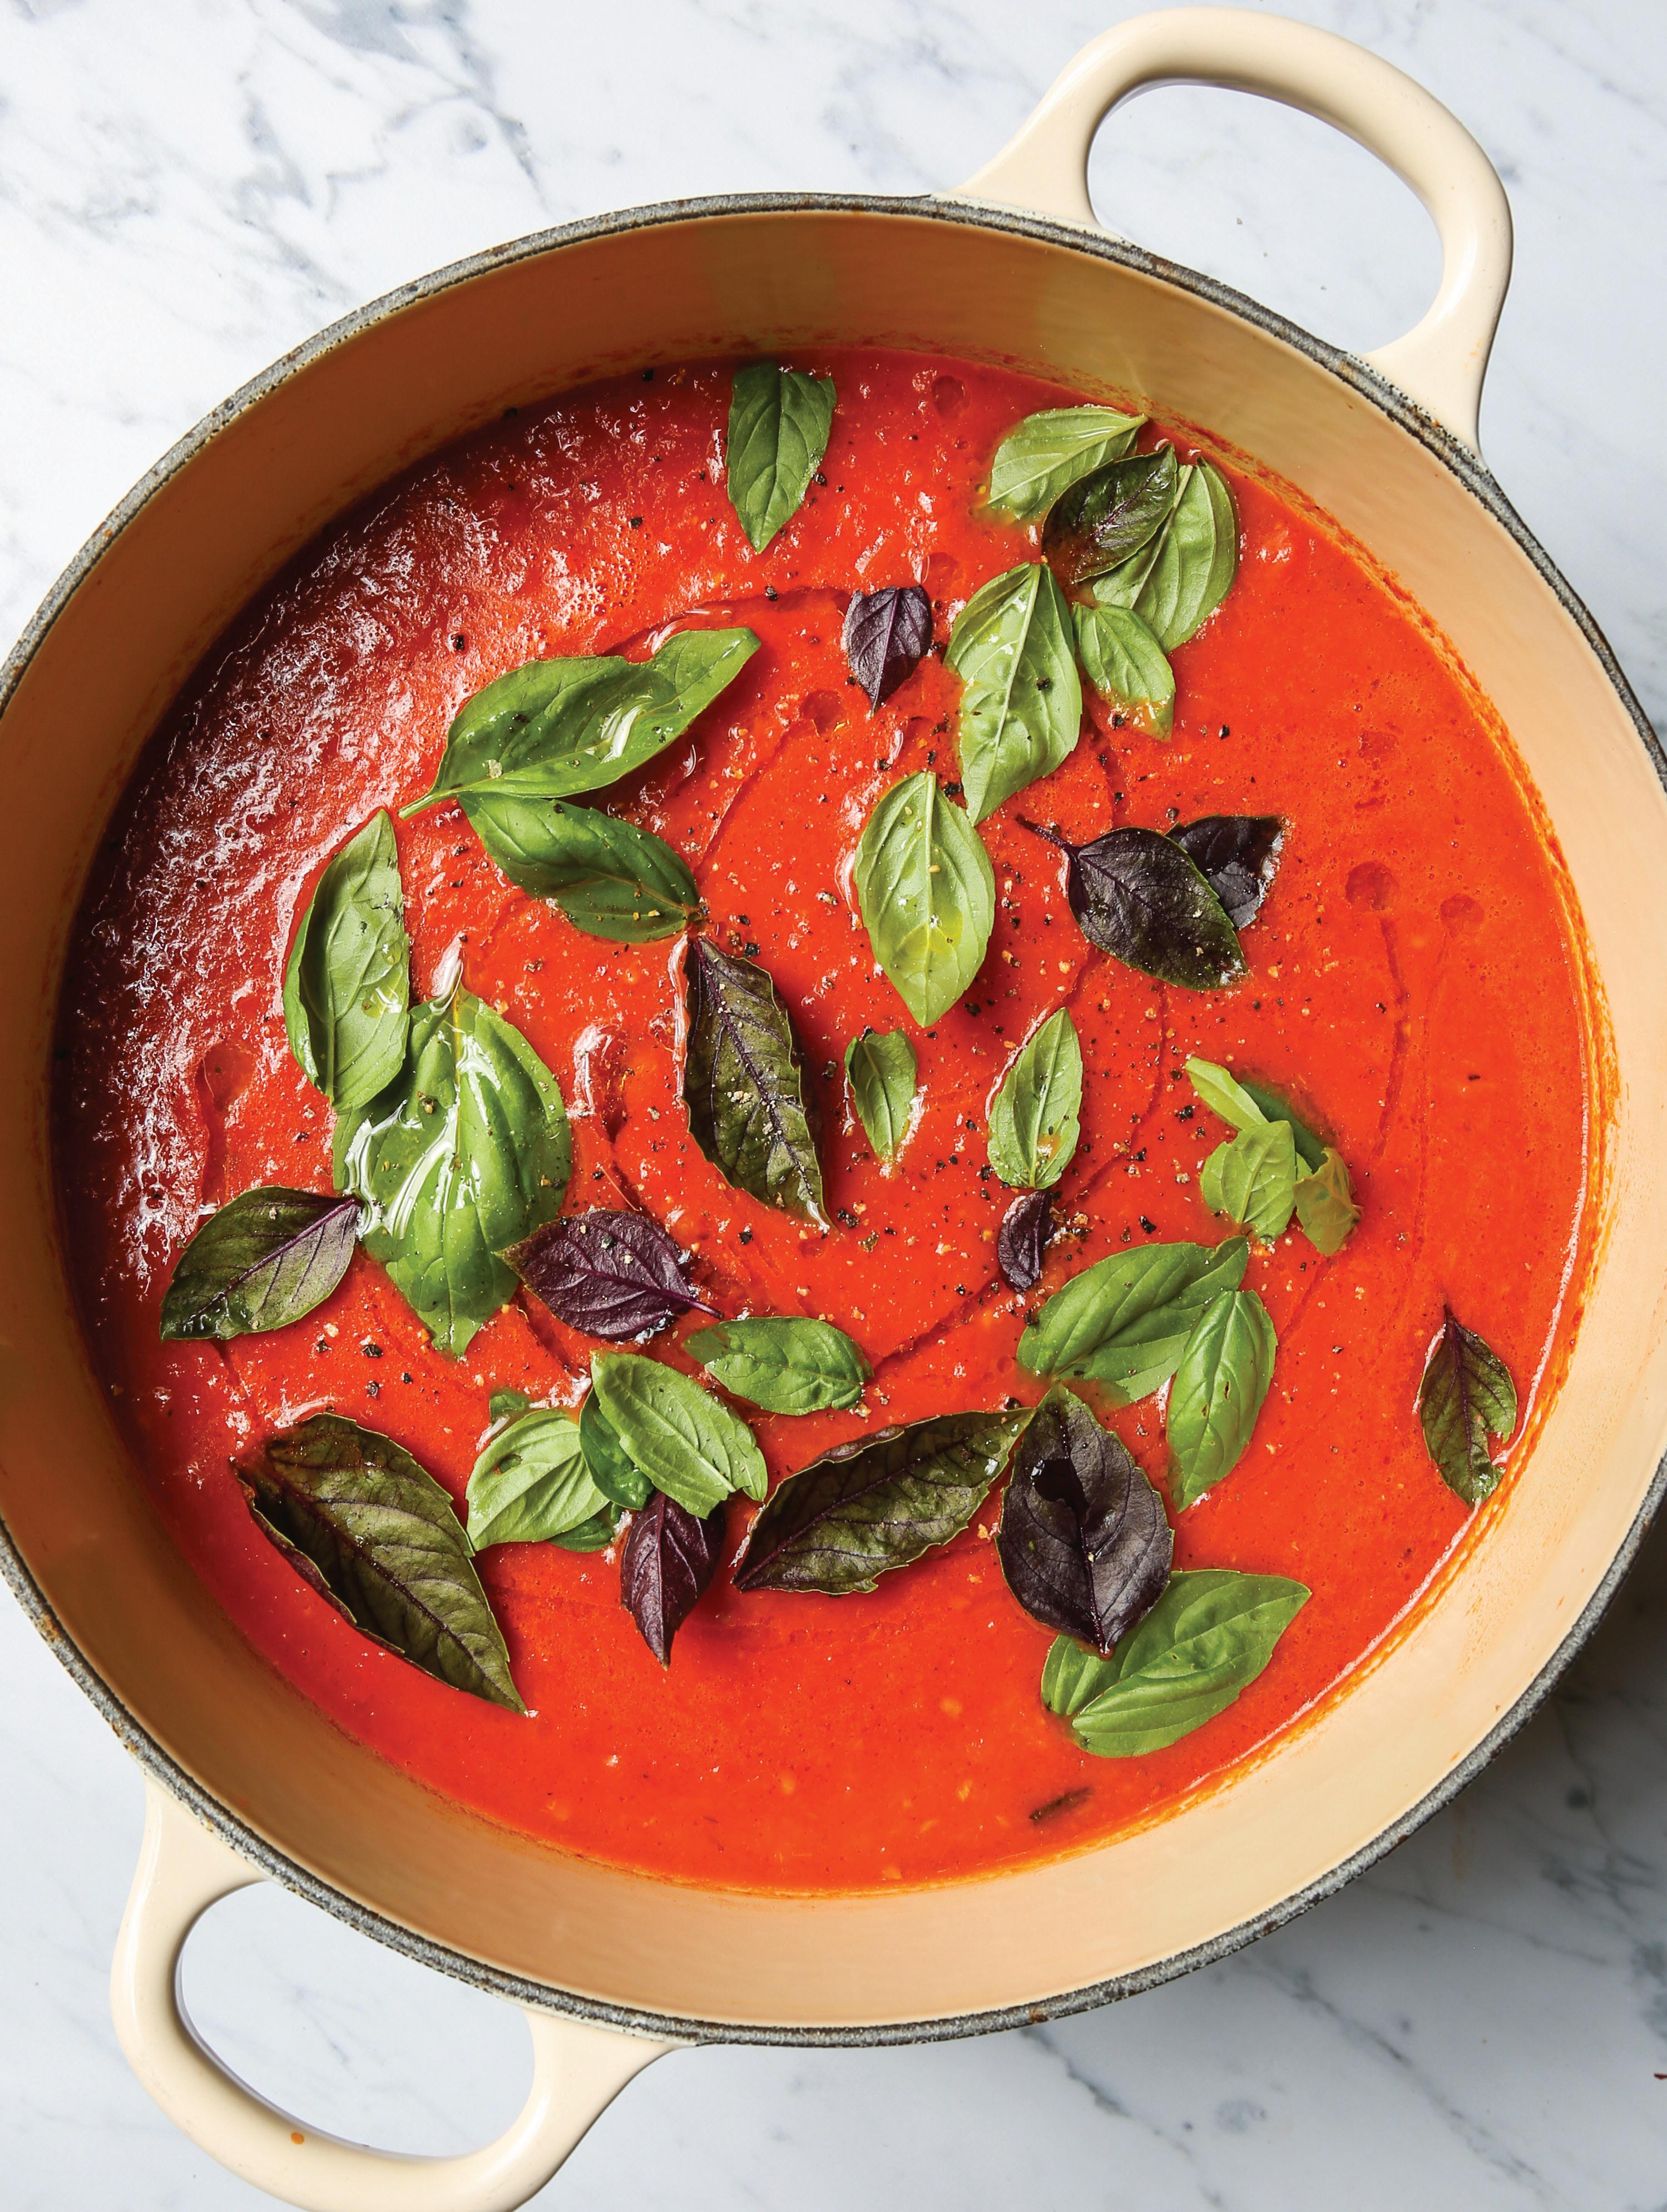
MAKES 6 SERVINGS
I love to make this soup in early fall when the weather has just started to cool off and the last of the tomatoes are still lingering … To make sure the star ingredient really shines through, I use freshly roasted tomatoes, canned tomatoes, and tomato paste. Although this soup is delicious on its own, the Smoked Gouda Grilled Cheese Croutons will take it over the top. Make a batch while the tomatoes are roasting and serve them on top. You may not need a full tablespoon of sugar if your tomatoes are sweet, so start by adding just a little bit, taste, and add more as needed. –s.w.w.
3 pounds plum tomatoes, halved
2 small or 1 medium shallot, quartered
4 garlic cloves, crushed
6 thyme sprigs
¼ cup olive oil
½ teaspoon red pepper flakes
2 teaspoons salt, divided
½ teaspoon freshly ground black pepper
1 (28-ounce) can whole tomatoes
2 cups low sodium vegetable broth
1 tablespoon tomato paste
1 tablespoon unsalted butter
½ teaspoon dried oregano
1 tablespoon red wine vinegar
1 tablespoon sugar (optional)
Smoked Gouda Grilled Cheese Croutons (see recipe on page 33) and chopped fresh basil, for serving (optional)
Meat Suggestion: Candied Bacon can be crumbled over the soup (see recipe on page 33).
1. Heat the oven to 400°F. In a 9x13-inch baking dish, add the fresh tomatoes, shallots, garlic, and thyme and toss with the oil. Spread into an even layer and sprinkle with the red pepper flakes, ½ teaspoon of the salt, and the black pepper. Roast until starting to fall apart, about 45 minutes. Scoop out the thyme sprigs with a fork.
2. Transfer the tomato mixture to a large stockpot and add the canned tomatoes with their juice, vegetable broth, tomato paste, butter, oregano, and ½ teaspoon of the salt. Bring to a boil over high heat. Lower the heat to medium-low and simmer for 10 minutes so the flavors can meld and develop.
3. Remove from the heat and stir in the vinegar and the remaining 1 teaspoon salt. Use an immersion blender to blend to the desired consistency. Taste and add sugar if needed. Season with salt, pepper, and vinegar as needed. Serve warm, topped with the croutons and basil, if desired.
Cook’s Note:
n Slow Cooker: Roast the tomatoes following the instructions in step
1. Transfer to a slow cooker and add the canned tomatoes with their juice, 1½ cups of vegetable broth (instead of 2 cups), tomato paste, butter, oregano, and ½ teaspoon salt. Cook on high for 2 hours. Finish the soup as described in step 3.
n Storing: Store leftovers refrigerated in an airtight container for up to 3 days or freeze for up to 2 months.
Nutrition (per serving soup only; no croutons or bacon):
Calories: 340, Fat: 24g (Sat. 9g), Cholesterol: 35mg, Sodium: 1280mg, Carb: 25g, Fiber: 6g, Sugar: 11g, Protein: 10g

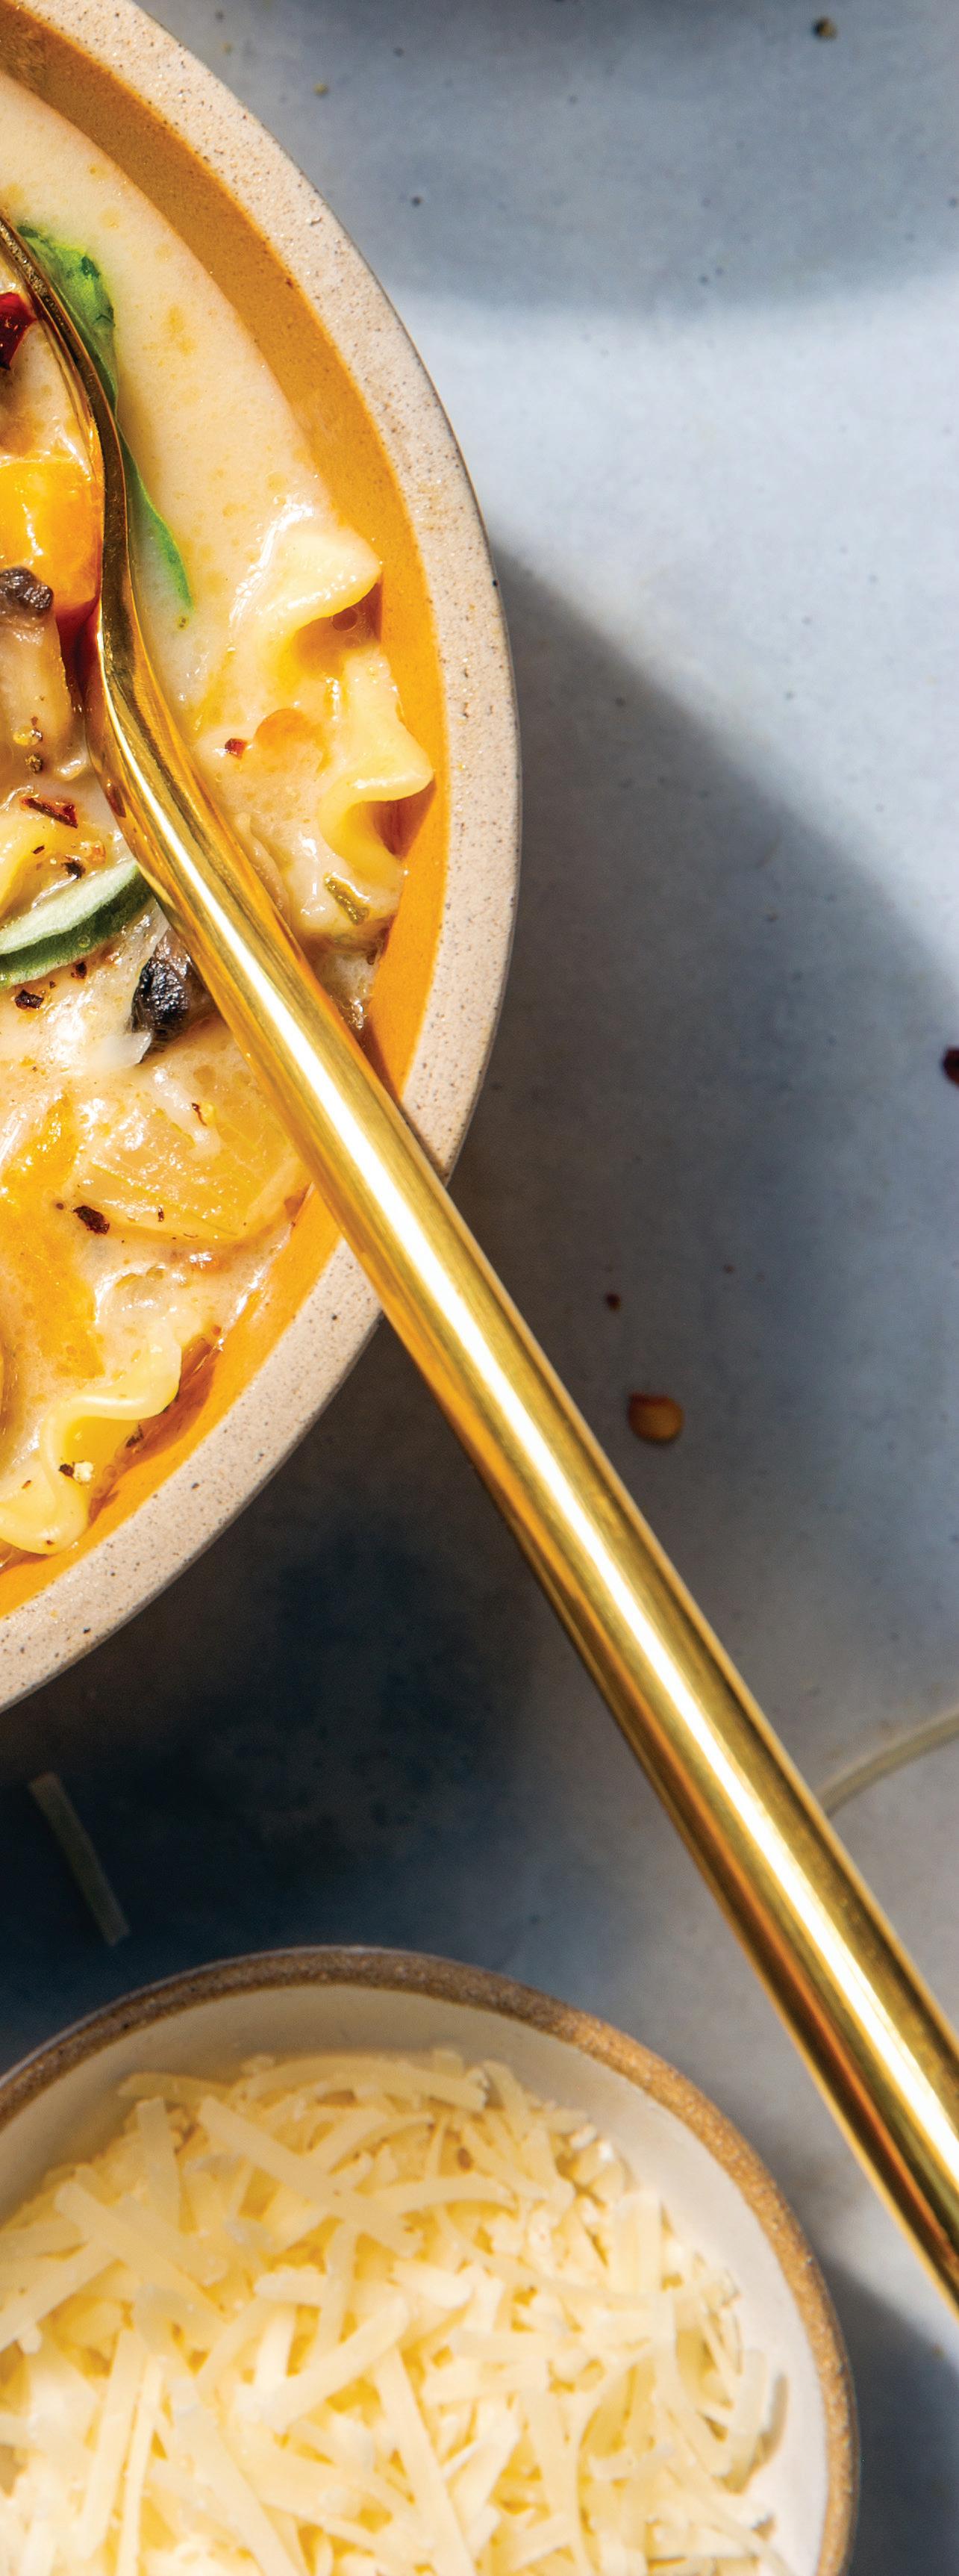
This is a very hearty soup for when you are craving carbs and cheese but also want them served with a few vegetables. If you are feeling extra enthusiastic, brown a few tablespoons of butter and drizzle it over the top of each bowl. When I’m not in the mood to battle with peeling and chopping a butternut squash for this soup, I use sweet potatoes in their place. As with many of the other soup recipes in the book that involve pasta, I cook the lasagna noodles separately so that they don’t get soggy when left over. If you’re planning to eat all this soup at one meal, then you could cook them right into the soup. –s.w.w.
4 tablespoons unsalted butter
1 yellow onion, diced
4 garlic cloves, minced
¼ cup all-purpose flour
4 cups low sodium vegetable broth
1 pound butternut squash, cut into ½ inch cubes (about 3½ cups)
8 ounces white button mushrooms, sliced
1 tablespoon chopped fresh sage
1 teaspoon red pepper flakes
8 lasagna noodles, broken in half
1 cup whole milk
Salt, to taste
Freshly ground black pepper, to taste
4 ounces mozzarella cheese, shredded
½ cup grated Parmesan cheese
Meat Suggestion: Cooked shredded chicken can be added to the soup after removing it from the heat and before stirring in the milk.
1. In a large Dutch oven over medium heat, melt the butter. Add the onion and saute until very soft, 5 to 7 minutes. Add the garlic and saute until fragrant but not yet browning, 30 seconds. Add the flour and whisk for 1 minute, until the flour darkens slightly and smells nutty.
2. Add the vegetable broth, squash, mushrooms, sage, and red pepper flakes and bring to a boil over high heat. Turn down the heat to mediumlow and simmer until the squash is tender and easily pierced with a fork, 15 to 20 minutes.
3. Meanwhile, bring a large pot of salted water to a boil over high heat. Cook the lasagna noodles according to the package directions and drain.
4. Remove the soup from the heat and stir in the milk. Taste and season with salt and pepper as needed. Divide the soup among serving bowls and nestle the lasagna noodles into the soup. Top each bowl with mozzarella and Parmesan and serve right away.
Cook’s Notes
n Pressure Cooker: Using the saute function, follow step 1 through toasting the flour. Add 3 cups vegetable broth (instead of 4 cups), along with the squash, mushrooms, sage, and red pepper flakes. Pressure cook on high for 5 minutes, then quick release. Let cool slightly until the steam has mostly subsided, about 5 minutes. Continue with the recipe from step 3.
n Storing: Store leftover soup and pasta refrigerated in separate airtight containers for up to 3 days. I do not recommend freezing this soup due to the dairy and pasta.
Nutrition (per serving): Calories: 370, Fat: 15g (Sat.9g), Cholesterol: 40mg, Sodium: 360mg, Carb: 45g, Fiber: 4g, Sugar: 7g, Protein: 15g
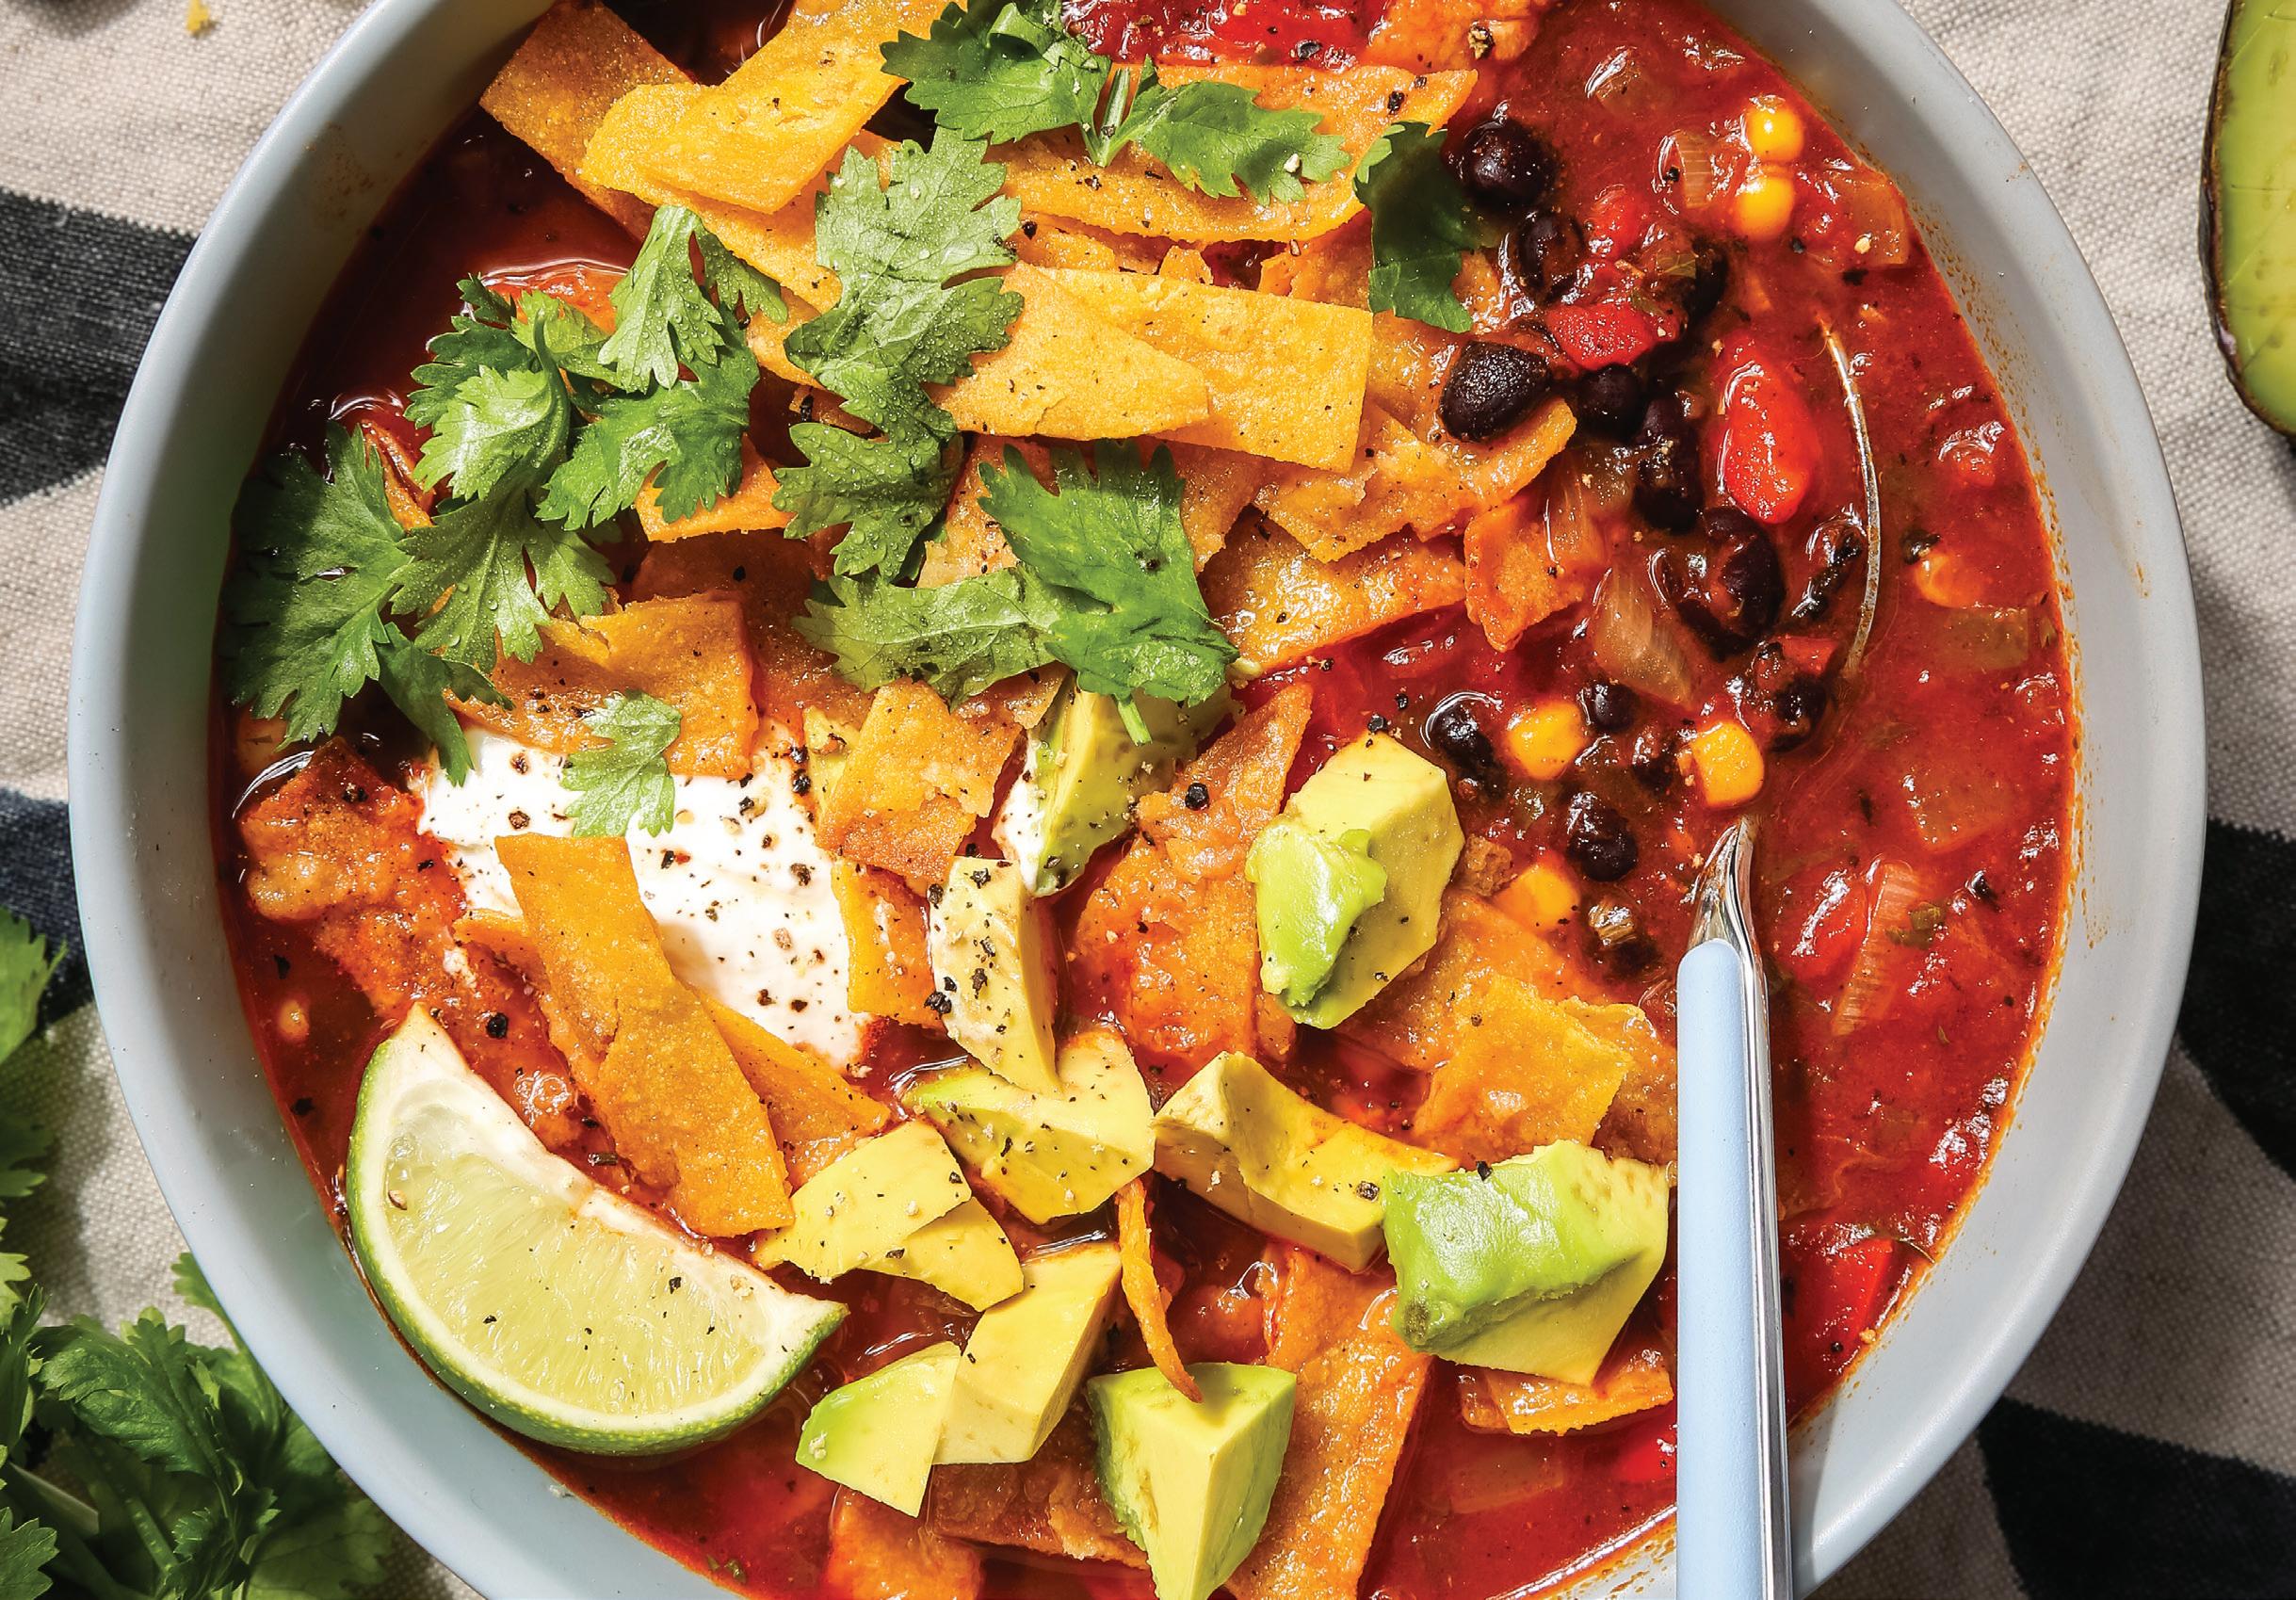
MAKES 4 TO 6 SERVINGS
This simplified Mexican soup is served with crispy tortilla strips. It’s traditionally made with corn tortillas, but you could use flour tortillas if that’s what you have on hand. I also bake the tortilla chips in the oven instead of frying, which I find to be a bit more weeknight-friendly in terms of cleanup. You still need to watch them closely; toss them often toward the end of their baking time so they don’t burn. –s.w.w.
4 tablespoons olive oil, divided
1 red onion, diced
1 red bell pepper, diced
1 jalapeño, minced
4 garlic cloves, minced
1 tablespoon chili powder
1 teaspoon salt, plus more to taste
1 teaspoon ground cumin
1 teaspoon smoked paprika
¼ teaspoon cayenne pepper
4 cups Homemade Roasted Vegetable Broth (Cheater Vegetable Broth; see recipe on page 33) or
store-bought low sodium vegetable broth
2 (15-ounce) cans black beans, drained and rinsed
1 (28-ounce) can crushed fire-roasted tomatoes
1 cup frozen corn
¼ cup chopped fresh cilantro, plus more for serving
1 tablespoon fresh lime juice
5 corn tortillas, cut into 2x½-inch strips
Sliced avocado, sour cream, and lime wedges, for serving
Meat Suggestion: Mix in some cooked shredded chicken at the end to bulk up the protein.
1. Heat the oven to 375°F.
2. In a large stockpot or Dutch oven over medium heat, warm 2 tablespoons of the oil. Add the onion, bell pepper, and jalapeño and saute until softened, 5 to 7 minutes. Add the garlic, chili powder, 1 teaspoon of the salt, the cumin, paprika, and cayenne and sauté until fragrant, 30 seconds.
3. Add the vegetable broth, beans, tomatoes and their juice, and corn and bring to a simmer over high heat. Lower the heat to medium-low and simmer for 30 minutes. Remove from the heat and stir in the cilantro and lime juice. Taste and add salt as needed.
4. Meanwhile, toss the tortilla strips with the remaining 2 tablespoons of oil and spread in an even layer on a baking sheet. Bake until golden, 15 to 17 minutes, tossing halfway through and again toward the end of the cooking.
5. Serve the soup topped with the tortilla strips, avocado, sour cream, lime wedges, and more cilantro.
Cook’s Notes
n Slow Cooker: Follow the directions through sauteing the spices in step 2. Add 3 cups vegetable broth (instead of 4 cups) to the pot to deglaze it and then transfer everything in the pot to a slow cooker. Add the beans, tomatoes and their juice, and corn and cook on high for 4 hours or on low for 8 hours. About 30 minutes before the soup is ready, make the tortilla strips as described in step 4 and continue with the recipe.
n Storing: Store leftovers refrigerated in an airtight container for up to 3 days or freeze for up to 2 months.
Nutrition (per serving): Calories: 390, Fat: 12g (Sat. 1.5g), Cholesterol: 0mg, Sodium: 1140mg, Carb: 56g, Fiber: 13g, Sugar: 13g, Protein: 15g
MAKES 16 LARGE CROUTONS
These croutons may be simple, but they pack a ton of flavor! Make a batch when you whip up your Roasted Tomato Soup. They add texture while also gesturing to the comforting classic menu of grilled cheese and tomato soup. –s.w.w.
4 slices white or sourdough bread
2 tablespoons unsalted butter, at room temperature, divided
4 ounces smoked Gouda cheese, shredded
1 tablespoon Dijon mustard, divided
1 tablespoon olive oil
1. Start by making 2 sandwiches. Spread ½ tablespoon of the butter onto each of the slices of bread. Flip the bread slices over so that the butter is facing down. Divide the cheese between 2 of the bread slices. Spread ½ tablespoon of mustard on each of the 2 remaining slices and place on top of the cheese-covered slices, mustard-side down, so that the cheese and mustard are on the inside of the sandwiches.
2. Heat the oil in a medium skillet over medium heat. Add the sandwiches, lower the heat to medium-low, cover, and cook until golden brown, about 3 minutes on each side. Remove from the heat and transfer to a cutting board. Cut each sandwich into 1-inch squares and serve on top of soup.
Cook’s Note: Smoked Gouda Grilled Cheese Croutons are best enjoyed the same day but can be stored in an airtight container in the fridge for up to 2 days.
Quick Fix
Turn your leftover soup into a comforting pasta meal with the addition of cheese tortellini and spinach. Bring a large stockpot of salted water to a boil. Add 1 (9-ounce) package of tortellini and cook according to the package directions. Meanwhile, warm up 4 cups of leftover Roasted Tomato Soup in a medium saucepan. Drain the tortellini and add it to the soup along with 1 cup fresh baby spinach. Cook, stirring constantly, until the spinach wilts, about 1 minute, top with torn fresh basil, and serve right away.
Nutrition: Calories: 60, Fat: 4.5g (Sat. 2.5g), Cholesterol: 10mg, Sodium: 105mg, Carb: 3g, Fiber: 0g, Sugar: 0g, Protein: 2g
Candied Bacon
SERVES 6 AS A TOPPING
If you are looking to add a pop of flavor, the mix of sweet and savory makes this bacon an ideal topping for most soups. In order to achieve even cooking, you’ll want to place the bacon on a wire rack (I use my cookie cooling rack), which allows air to circulate. I also line the baking sheet with foil for easy clean up and place that under the rack to catch the rendered bacon fat. –s.w.w.
½ cup packed brown sugar
2 tablespoons maple syrup
12 ounces bacon
½ teaspoon freshly ground black pepper
1. Heat the oven to 325°F. Line a baking sheet with foil and place a wire cooling rack on top.
2. In a small bowl, whisk together the sugar, maple syrup, and black pepper. Arrange the bacon in a single layer on the cooling rack.
3. Sprinkle half of the sugar mixture over the top of the bacon, and bake for 15 minutes. Flip the bacon and sprinkle the remaining sugar mixture on the other side of bacon. Bake until turning dark and crispy, 15 to 20 minutes more.
4. Remove from the oven and cool completely (the sugar will harden up as it cools, which helps it stick to the bacon). Enjoy as strips or transfer to a cutting board and chop into small pieces to sprinkle over soup.
Cook’s Note: Storing: Store leftovers in an airtight container in the fridge for up to 2 days and reheat over low heat in a skillet.
Nutrition: Calories: 240, Fat: 13g (Sat.4.5g), Cholesterol: 35mg, Sodium: 640mg, Carb: 17g, Fiber: 0g, Sugar: 16g, Protein: 13g
MAKES ABOUT 4 CUPS
I fully realize that the Homemade Roasted Vegetable Broth recipe takes 2 hours to execute. We don’t always have that much time to spend in the kitchen, so I use this shortcut “cheater” vegetable broth when I need a smaller amount quickly. This recipe utilizes store-bought vegetable broth jazzed up with vegetables, herbs, and spices. Don’t skip adding a tomato or tomato paste; it adds a burst of umami. Because some of the broth will evaporate as it cooks, I like to add back a little water so that it doesn’t get too salty and because many of my recipes call for 4 cups of broth. –s.w.w.
4 cups store-bought low sodium vegetable broth
1 yellow onion, peeled and quartered
2 celery stalks, cut into 2-inch pieces
1 carrot, peeled and cut into 2-inch pieces
1 plum tomato, chopped, or ½ tablespoon tomato paste
4 thyme or parsley sprigs
2 garlic cloves, peeled and lightly smashed
1 teaspoon whole peppercorns
1 bay leaf
½ tablespoon champagne vinegar or rice vinegar
1. Add the vegetable broth, onion, celery, carrot, tomato, herbs, garlic, peppercorns, bay leaf, and ½ cup water to a large stockpot and bring to a boil over high heat. Lower the heat to medium-low and simmer for at least 30 minutes to develop flavor. Remove from the heat and use a fine-mesh strainer over a large bowl to strain out the solids to discard. Stir in the vinegar.
Cook’s Note: Storing: Let the broth cool slightly, then store refrigerated in an airtight container for up to 5 days or freeze for up to 3 months.
Nutrition (per cup): Calories: 45, Fat: 0g (Sat. 0g), Cholesterol: 0mg, Sodium: 150mg, Carb: 9g, Fiber: 3g, Sugar: 4g, Protein: 2g
RECIPES AND PHOTOS FROM “EVERY SEASON IS SOUP SEASON: 85+
SUPER-ADAPTABLE RECIPES TO BATCH, SHARE, REINVENT, AND ENJOY” BY SHELLY WESTERHAUSEN WORCEL © 2023 REPRINTED WITH PERMISSION FROM CHRONICLE BOOKS.


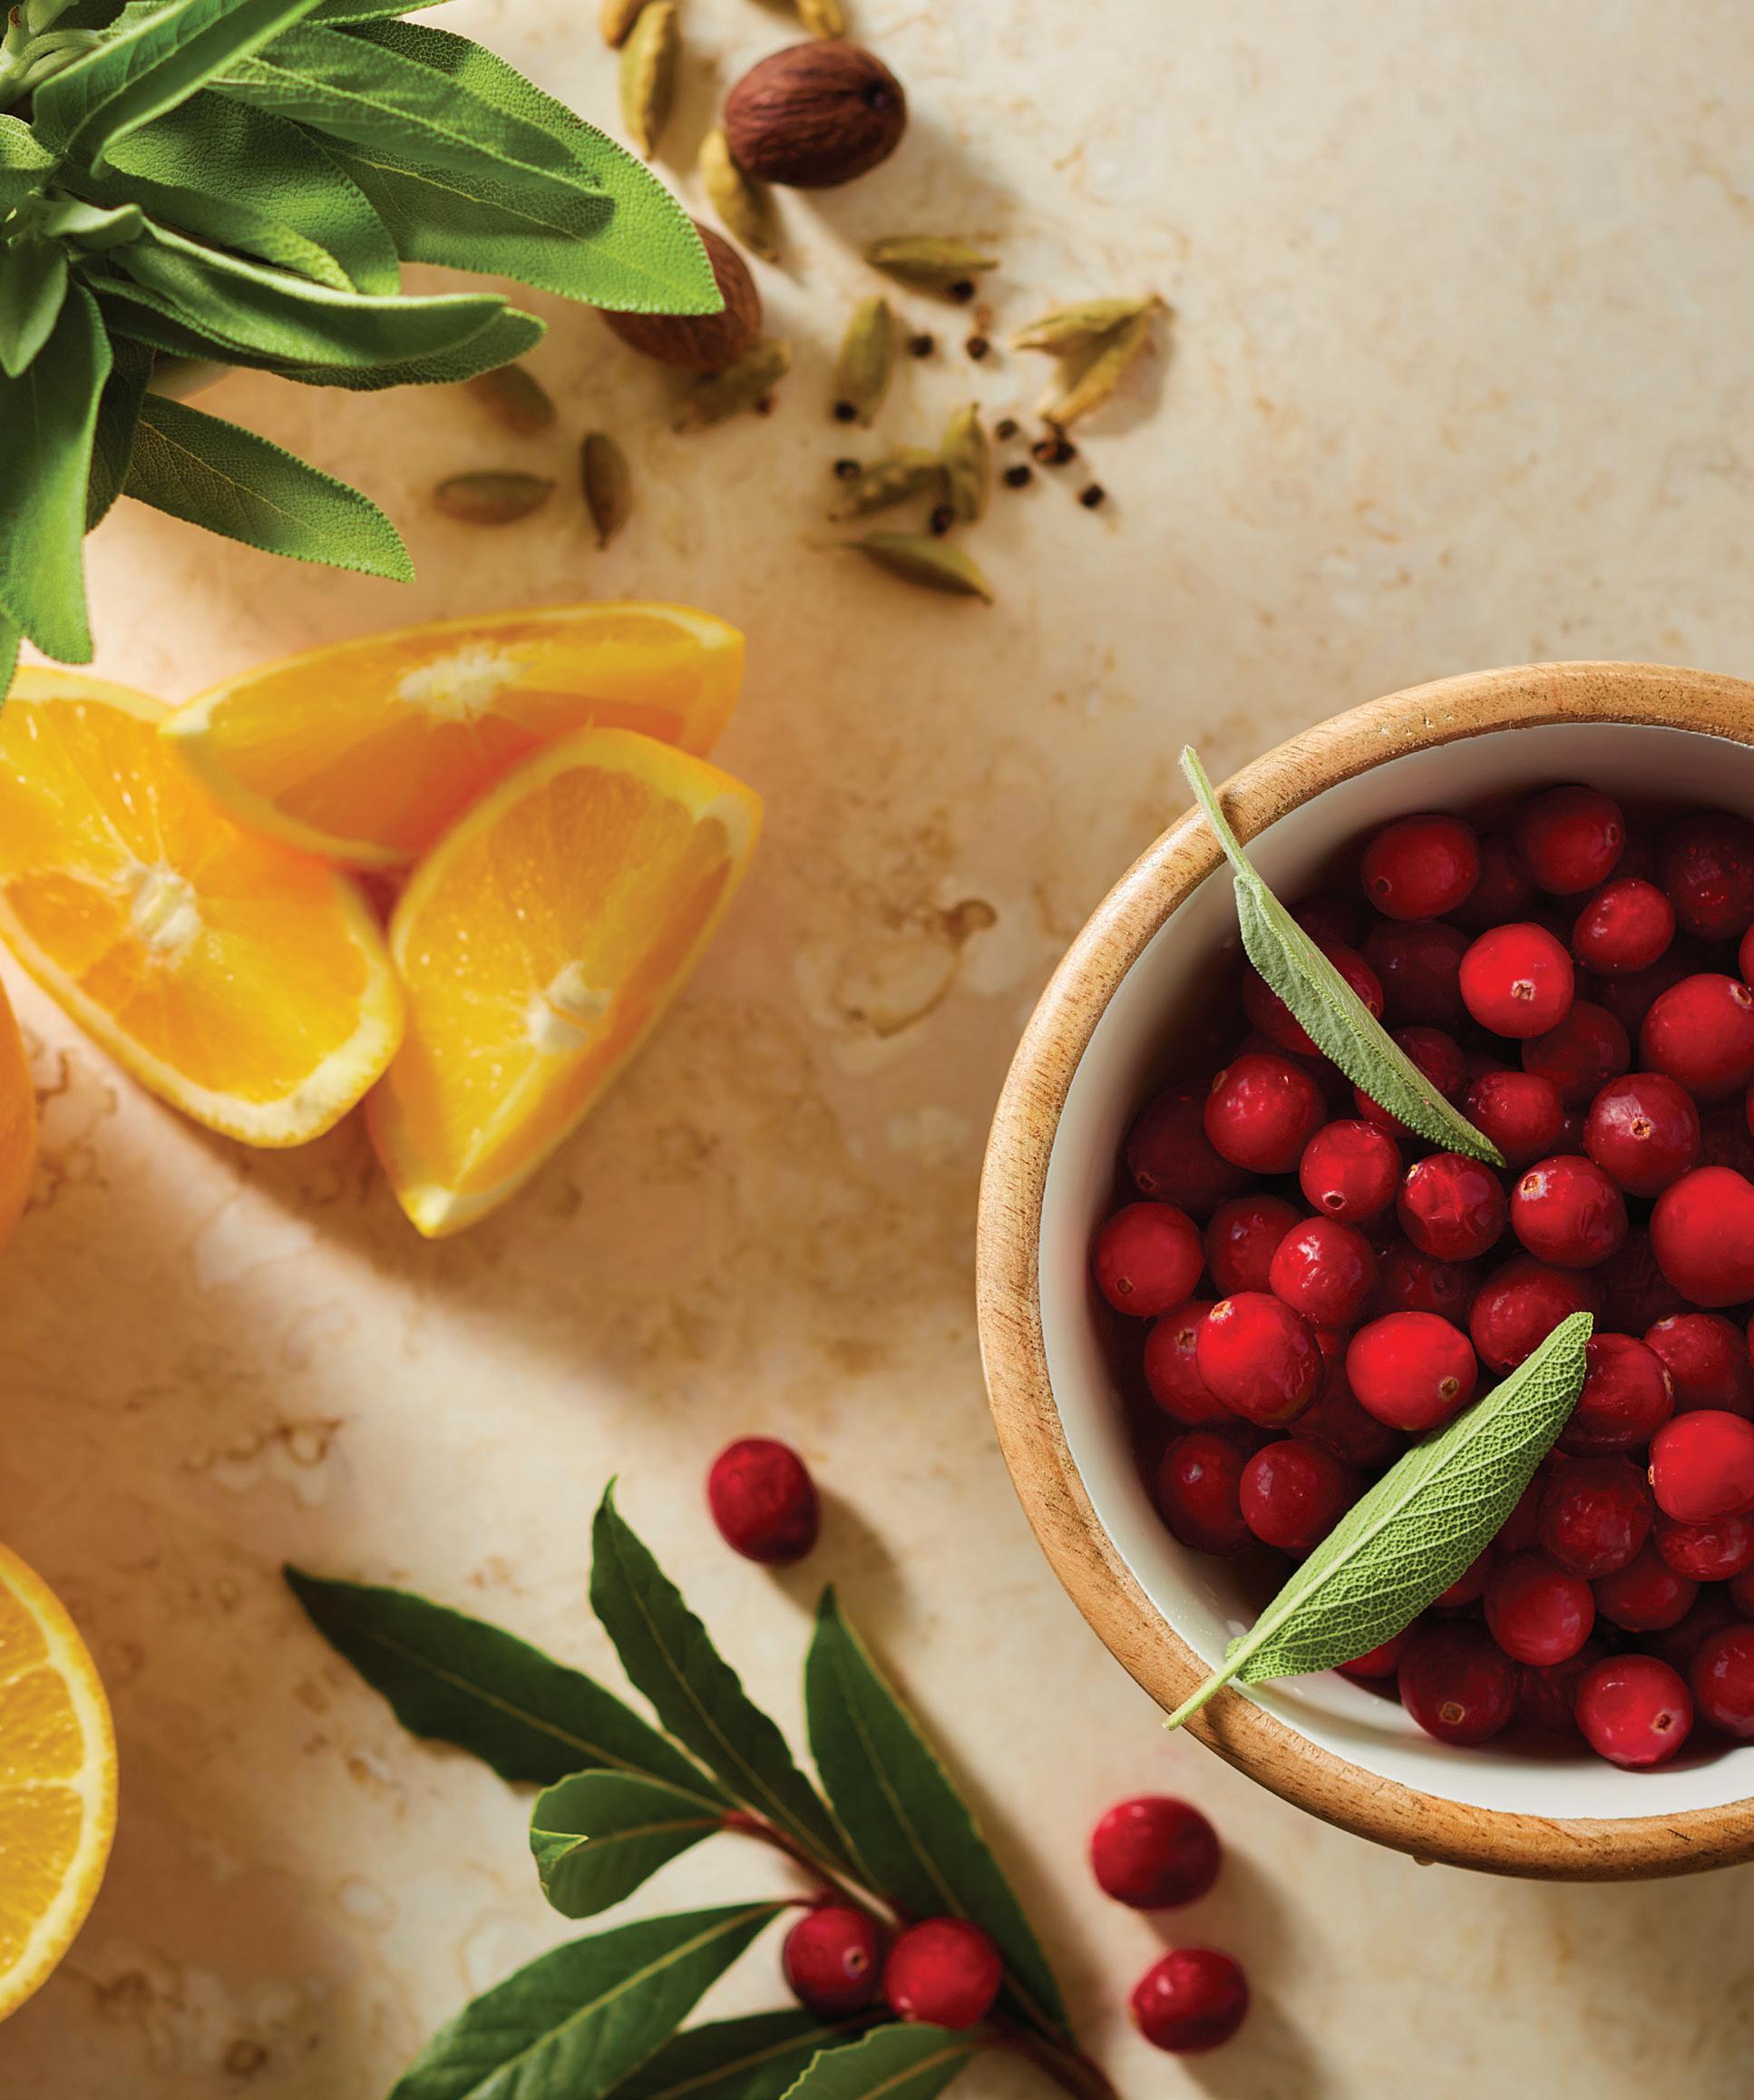
The joy of gathering with friends and family to share in festive meals throughout the holiday season doesn’t need to be served with a side of stress. Whether you’re a fan of roasted turkey or the rich flavors of a perfectly cooked beef roast, we’ll help you create a memorable feast. From mouthwatering recipes to expert tips, you’ll find what you need to craft a holiday dinner that will be the highlight of the season, bringing a side of comfort and joy, along with deliciousness, to your table. –mary subialka
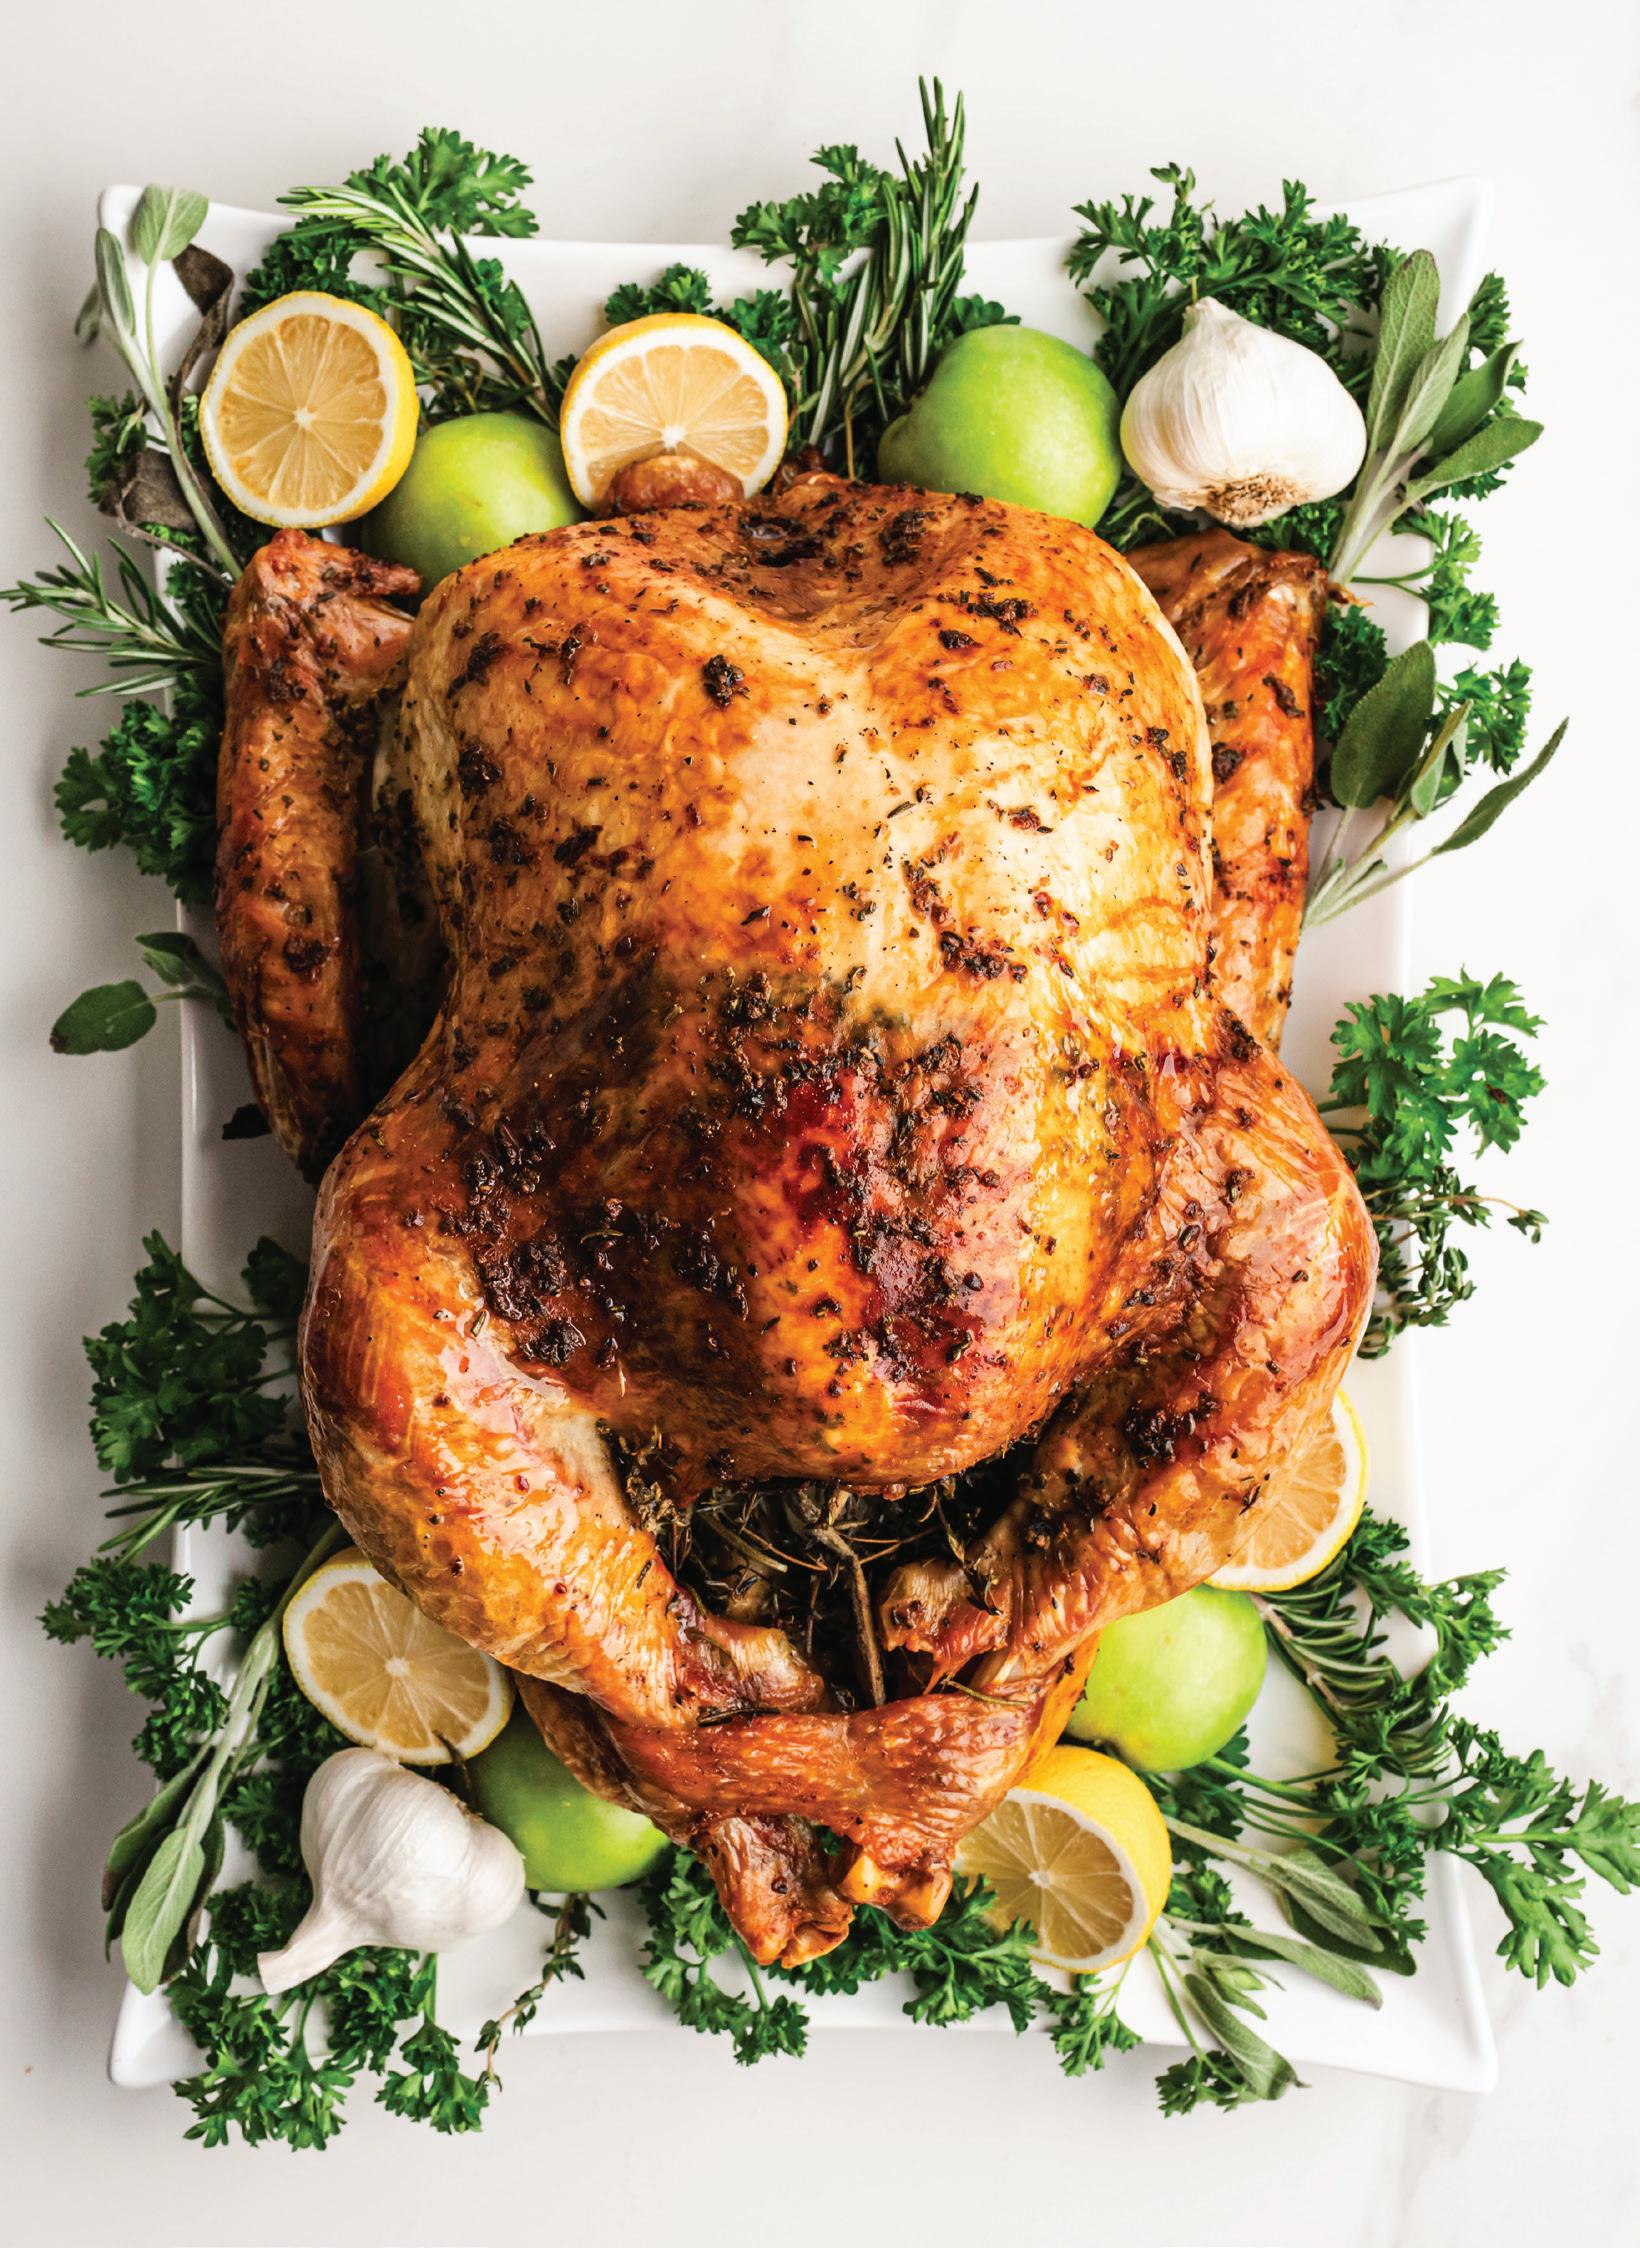
MAKES 8 TO 14 SERVINGS | RECIPE BY LAUREN ALLEN, TASTES BETTER FROM SCRATCH


This recipe packs all of the flavor and juiciness you expect from the perfect turkey, with none of the stress. My hope is to squash any fears or insecurities you might have about cooking a perfect, beautiful turkey. This method is completely fuss-free and easy. There’s no brining or basting the turkey, no cooking it upside down, or anything weird. This recipe is not only the simplest way to cook a turkey, it also yields a gorgeous, super juicy, perfectly cooked bird. –l.a.
for the turkey
1 12-20 pound turkey (see Cook’s Notes)
1 onion, peeled and quartered
1 lemon, quartered
1 apple (your favorite kind), quartered
1 (0.75-ounce) container fresh rosemary (see Cook’s Notes)


1 (0.75-ounce) container fresh thyme (see Cook’s Notes)
1 (0.75-ounce) container fresh sage (see Cook’s Notes)
for the herb butter
1 cup unsalted butter, softened
1 teaspoon salt
1⁄2 teaspoon freshly ground black pepper
6-8 cloves garlic, minced

4. Make the herb butter by combining the butter, minced garlic, salt, pepper, fresh chopped rosemary, thyme, and sage. (You’ll use the remaining fresh herbs for stu ng inside the cavity of the turkey)
5. Remove turkey from packaging and remove the neck and giblets from the inside the cavities of the bird. (Reserve them for gravy, if you want, or discard them). Pat the turkey very dry with paper towels.


6. Season the cavity of the turkey with salt and pepper. Stu it with the quartered lemon, onion, apple, and leftover herbs.
7. Use your fingers to loosen and lift the skin above the breast (on the top of the turkey) and smooth a few tablespoons of the herb butter underneath.
8. Tuck the wings of the turkey underneath the turkey and set the turkey on a roasting rack inside a roasting pan (see Cook’s Notes if using a disposable pan).
9. Microwave the remaining herb butter mixture for 30 seconds (it doesn’t need to be completely melted, just very softened). Use a basting brush to brush the remaining herb butter all over the outside of the turkey, legs, and wings.
10. Roast at 325°F for about 13 to 15 minutes per pound (which is about 31⁄2 hours for a 14-pound turkey), or until internal temperature (inserted on middle of thigh and breast) reaches about 165°F. (You could remove the turkey from the oven once it reaches 160°F, and then tent it with foil, and let it rest on the counter. It will continue cooking under the foil, to reach 165°F.)


11. Check the turkey about halfway through cooking, and once the skin gets golden brown, cover the top of the turkey with foil to protect the breast meat from overcooking. Alternately, you could start cooking the turkey with it tented in foil, then during the last hour or so of cooking you can take the foil o to let the turkey brown.
12. Allow turkey to rest for 20 to 30 minutes before carving. (For tips, see page 37.)
13. Reserve any drippings and juice remaining in your roasting pan to make turkey gravy, if desired.
Cook’s

1 tablespoon fresh chopped rosemary (from package listed for the turkey)
1 tablespoon fresh chopped thyme (from package listed for the turkey)
1⁄2 tablespoon fresh chopped sage (from package listed for the turkey)
1. If the turkey is frozen: Thaw in the fridge, 24 hours for every 5 pounds of turkey. (You can give yourself 1 extra day, just to be safe.)
2. Remove the thawed turkey from the fridge 1 hour before roasting to let it come to room temperature.

3. Adjust your oven rack so the turkey will sit in the center of the oven. Heat oven to 325°F.


■ Calculate about 11⁄2 pounds of turkey per person. So, if you’re feeding eight people, buy at least a 12-pound turkey, for example—that way you’ll have leftovers.
■ To substitute dried herbs, use 1 teaspoon dried herbs in place of 1 tablespoon fresh chopped herbs.
■ If you do not have a big metal roasting pan, no worries. Just use a casserole dish large enough to fit the bird, or buy a disposable foil roasting pan. If using a disposable roasting pan, place fresh chopped vegetables on the bottom of the pan to act as a rack to elevate the turkey. Use 4 or 5 ribs of celery and 4 large carrots, roughly chopped. The veggies will add great flavor for your drippings to use for gravy, however it’s not recommended to eat them or use them in the gravy.

Nutrition (per serving): Calories: 576, Fat: 30g (Sat: 12g), Cholesterol: 264mg, Sodium: 518mg, Carb: 3g, Fiber: 0g, Sugar: 0g, Protein: 70g


TURKEY DO’S AND DON’TS
The real key to roasting a perfect turkey is not to overcook it— that’s what dries out the meat, and you want to carve into a juicy, moist turkey at your holiday table. So, just plan ahead to get the timing right. Here are some do’s and don’ts to help you roast a delicious turkey.
–lauren allen
What size turkey? Buy about 11⁄2 pounds of turkey per person. So, if you’re feeding six people, buy at least a 10-pound turkey, for example—that way you’ll have leftovers.


How to thaw your turkey: Make sure to allow plenty of time for your turkey to thaw. A good rule is to allow one day in the fridge for every 5 pounds of turkey. Give yourself one extra day, just to be safe. Set the turkey on a cookie sheet or pan to catch any liquid the turkey may drip as it defrosts in the fridge.
Don’t wash the turkey. If you wash the turkey in your sink you will contaminate your sink. Remove the turkey from its packaging, dry it o with some paper towels, and then prepare it for the oven. Any bacteria possibly on the turkey will be killed in the hot oven while it bakes.

Don’t baste the turkey. Basting is unnecessary to produce a beautiful golden-brown turkey. It also requires that you constantly open the oven, which causes the oven to lose heat and the turkey to take longer to cook—which could lead to a dry turkey. By smearing an herb butter mixture over the outer and inner skin of the turkey you will ensure the skin will brown beautifully and taste amazing.


Don’t cook stu ng inside the turkey. If you try to put stu ng inside the cavity of the bird, the turkey will be overcooked by the time the stu ng reaches a temperature that’s safe to eat. Instead, cook your stu ng (then called “dressing”) in a casserole dish. You can fill the cavity of the turkey with things that will give it flavor (and add flavor to the drippings/stock), including salt and pepper and any mixture of onion, apple, carrots, celery, or citrus.
Do test the turkey with a thermometer. The only way to really tell if the turkey is cooked (165°F), is by using a thermometer. Test the turkey right from the oven—if it reaches 160°F, take it out and tent it with foil. It will continue to cook inside the foil tent to make up that extra 5 degrees.


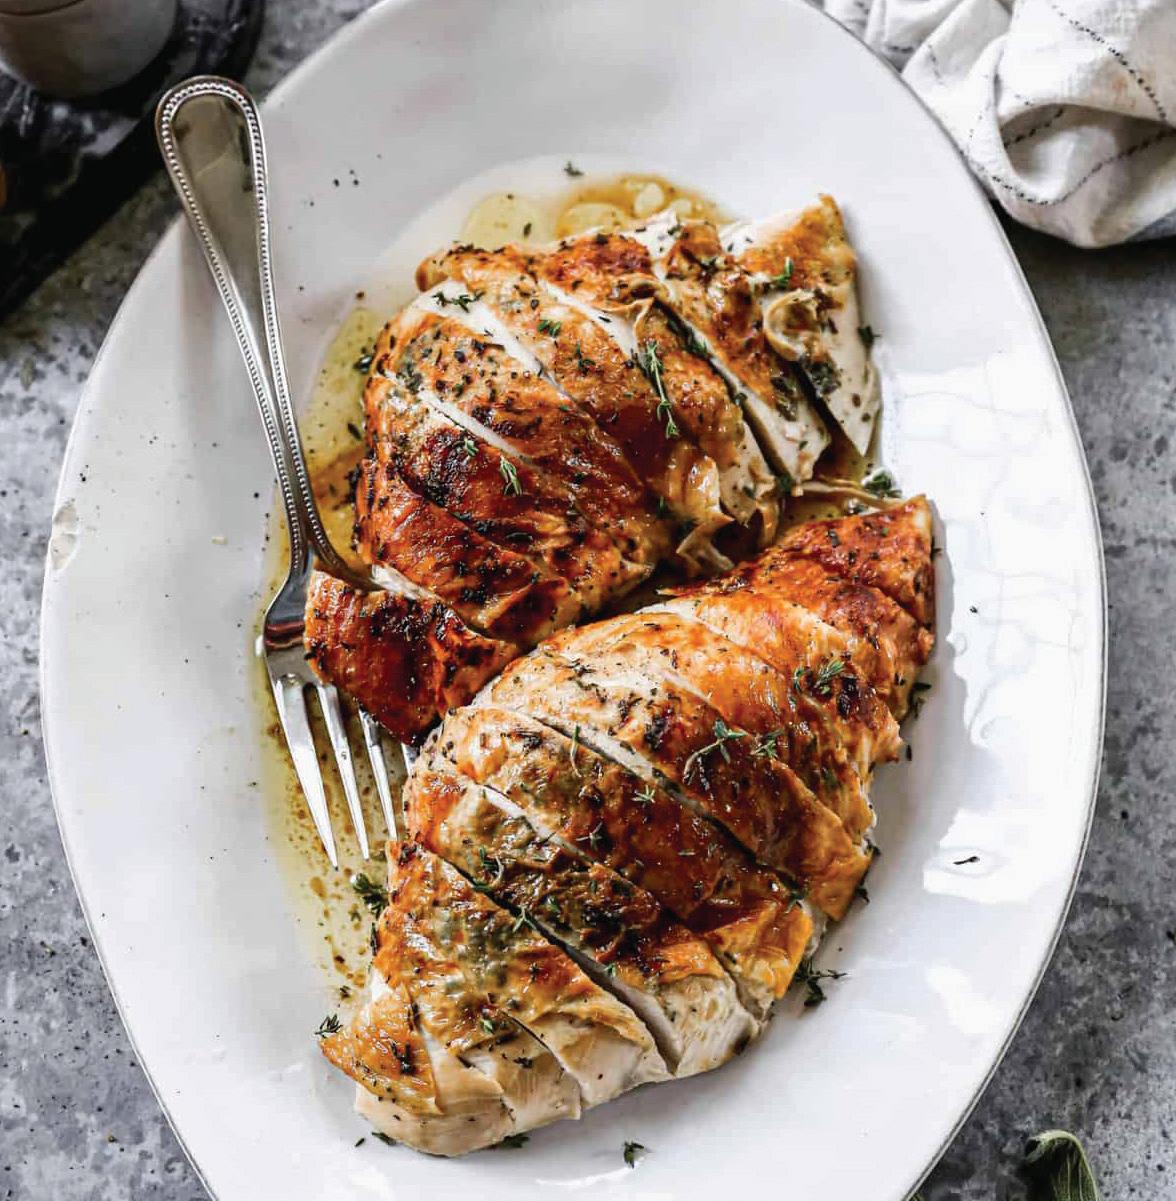


Do let the turkey rest. After removing the turkey from the oven, let it rest for at least 15 minutes, or up to 40 minutes (that gives you some extra time if you need to bake or warm anything else in the oven). If you’re using the drippings for gravy, remove the turkey from its pan to a cutting board and tent it with foil while it rests there. If you’re not using the drippings, then just leave the turkey in the pan and tent with foil.
Do save the turkey drippings. After the turkey is finished cooking there will be juice and browned cooked bits at the bottom of your roasting pan. You can reserve all of it for making turkey gravy. You can also use the leftover neck and giblets you pulled from the turkey when you removed it from the packaging to make giblet gravy.
MAKES 5 SERVINGS
RECIPE BY LAUREN ALLEN, TASTES BETTER FROM SCRATCH


This is perfect for everyone who loves turkey but is entertaining a smaller group. I’ve adapted my hugely popular Easy, No-Fuss Roasted Turkey recipe for a smaller party size, making this recipe simpler than ever. –l.a.
1 whole bone-in (5-8 pounds) or boneless (3-4 pounds) turkey breast (see Cook’s Note) for the herb butter
1⁄2 cup unsalted butter, softened 1⁄2 teaspoon salt


1⁄4 teaspoon freshly ground black pepper
3 cloves garlic , minced
1½ teaspoons chopped fresh thyme
1½ teaspoons chopped fresh rosemary
1⁄2 teaspoon chopped fresh sage
1. Thaw turkey breast, if frozen. A general rule is 24 hours for every 5 pounds of turkey. Remove the thawed turkey breast from the fridge 20 minutes before cooking.
2. Position oven racks so the turkey will sit in the center of the oven. Heat oven to 325°F.
3. Make herb butter by combining butter, garlic, salt, pepper, and fresh herbs in a bowl.
4. Remove turkey from packaging and use paper towels to pat it dry on all sides. Season the outside with some salt and pepper. Loosen the skin and smear a spoonful of herb butter under it, spreading it over both sides of the breast. Spread remaining herb butter all of the outside of the turkey breast. Place in a baking dish or sheet pan.


5. Cook at 325°F for about 14 to 15 minutes per pound (about 45 to 60 minutes for boneless or 11⁄4 to 2 hours for bone-in), until internal temperature (inserted into the thickest part of the breast) reaches 165°F.
6. Remove from oven and cover turkey with a piece of aluminum foil. Allow it to rest for at least 15 minutes before carving.
Cook’s Note: Bone-in turkey breast has both skin-on breast portions of the turkey connected by the backbone and ribs (the leg, thigh, and large cavity portion of the whole turkey have been removed). A half turkey breast (single breast) will also work for this and cook time will be shorter (about 1 to 11⁄2 hours depending on size until internal temperature is 165°F).
Nutrition (per serving): Calories: 439, Fat: 31g (Sat: 15g), Cholesterol: 161mg, Sodium: 338mg, Carb: 1g, Fiber: 0g, Sugar: 0g, Protein: 38g


Here are step-by-step tips for carving your delicious turkey –lauren allen
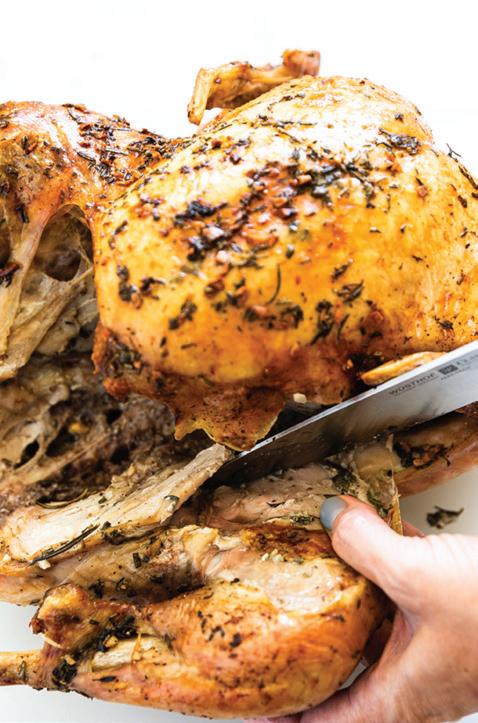
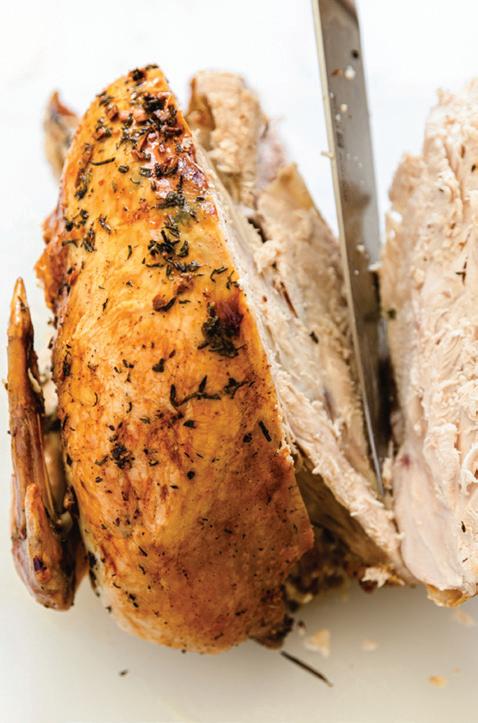

Remove the legs: Start with one leg and use your knife to slice through the skin and meat toward the leg joint while at the same time gently pulling the leg back to separate it from the rest of the turkey. As you gently pull it, listen for the joint to “pop,” meaning that the thigh bone popped through. You don't want to cut right through the joint. Then gently cut away any additional skin and meat around the joint and remove the leg from the body. Set aside the thigh and drumstick and repeat this process with the remaining leg. Separate the drumstick from the thigh by placing it skin side down on your cutting board and cutting right through the natural seam of the joint.

Remove the wishbone: Remove the wishbone next so that it's extra easy to cut away the breast meat. Plus, then you can make a wish! Locate the front neck cavity of the bird (where the head would be) and cut away the skin from the opening of the neck so that you have a window into the neck cavity. The wishbone runs along the neck cavity in an upside down "v." Use your hands to feel for the bone then gently cut along the wishbone and pull it down and out of the bird.


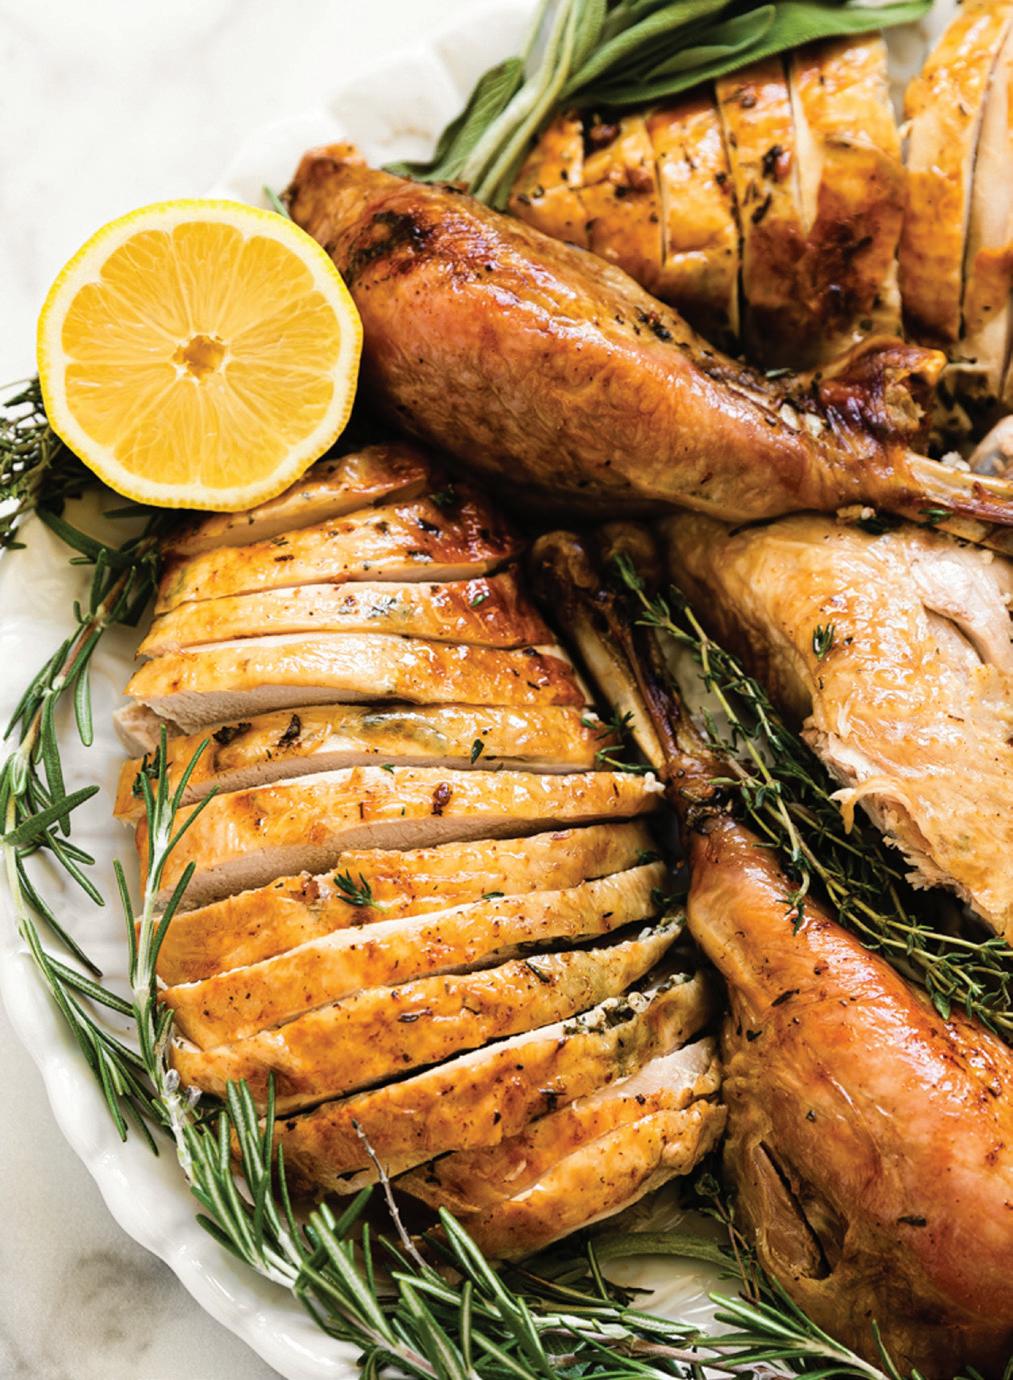
Carve the turkey meat:
Remove the breast meat: First locate the keelbone, also known as the breast bone, that runs all the way down the center of the carcass, separating the two turkey breasts. Take your knife and cut down the center on one side of the keelbone. Slice downward, following the curve of the breast bone and cutting and separating the breast meat from the bone until the entire breast is free. Set breast meat aside and repeat this process with the other turkey breast.
Remove the wings: Gently pull the wings away from the body and use your knife to cut around the skin and meat and cut through the joint. Remove the wing, set it aside, and remove the other joint.
■ Slice against the grain. The most important part of carving the meat is to cut it the correct way. Cutting against the grain means cutting the meat opposite of the direction that the natural muscle fibers run. If you look at each piece of your carved turkey meat, you'll see its all "running" or pointing the same direction. Be sure to cut it opposite of this which will help ensure that the meat is tender and not chewy.
■ Try to preserve the skin. Cut as carefully through the skin as you can (with a sharp knife) so that each slice of turkey has its skin still attached.
■ Keep the turkey warm: Cover it with aluminum while carving to keep it warm.
■ Save the turkey carcass: Use it to make homemade chicken broth or soup.


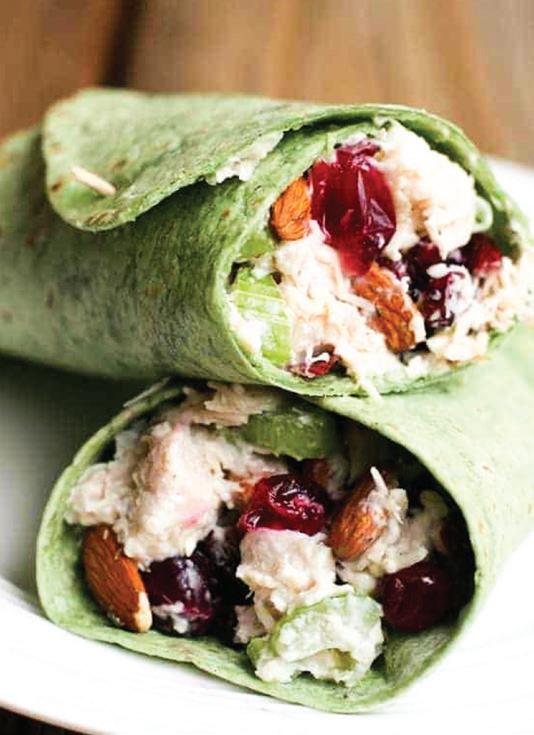

MAKES 4 SERVINGS
RECIPE BY LAUREN ALLEN, TASTES BETTER FROM SCRATCH


This wrap is the perfect way to use your leftover holiday turkey dinner— you get all the amazing flavors of turkey and cranberry together without feeling like you’re eating the exact same thing as the day before. It’s equally delicious with chicken. –l.a.
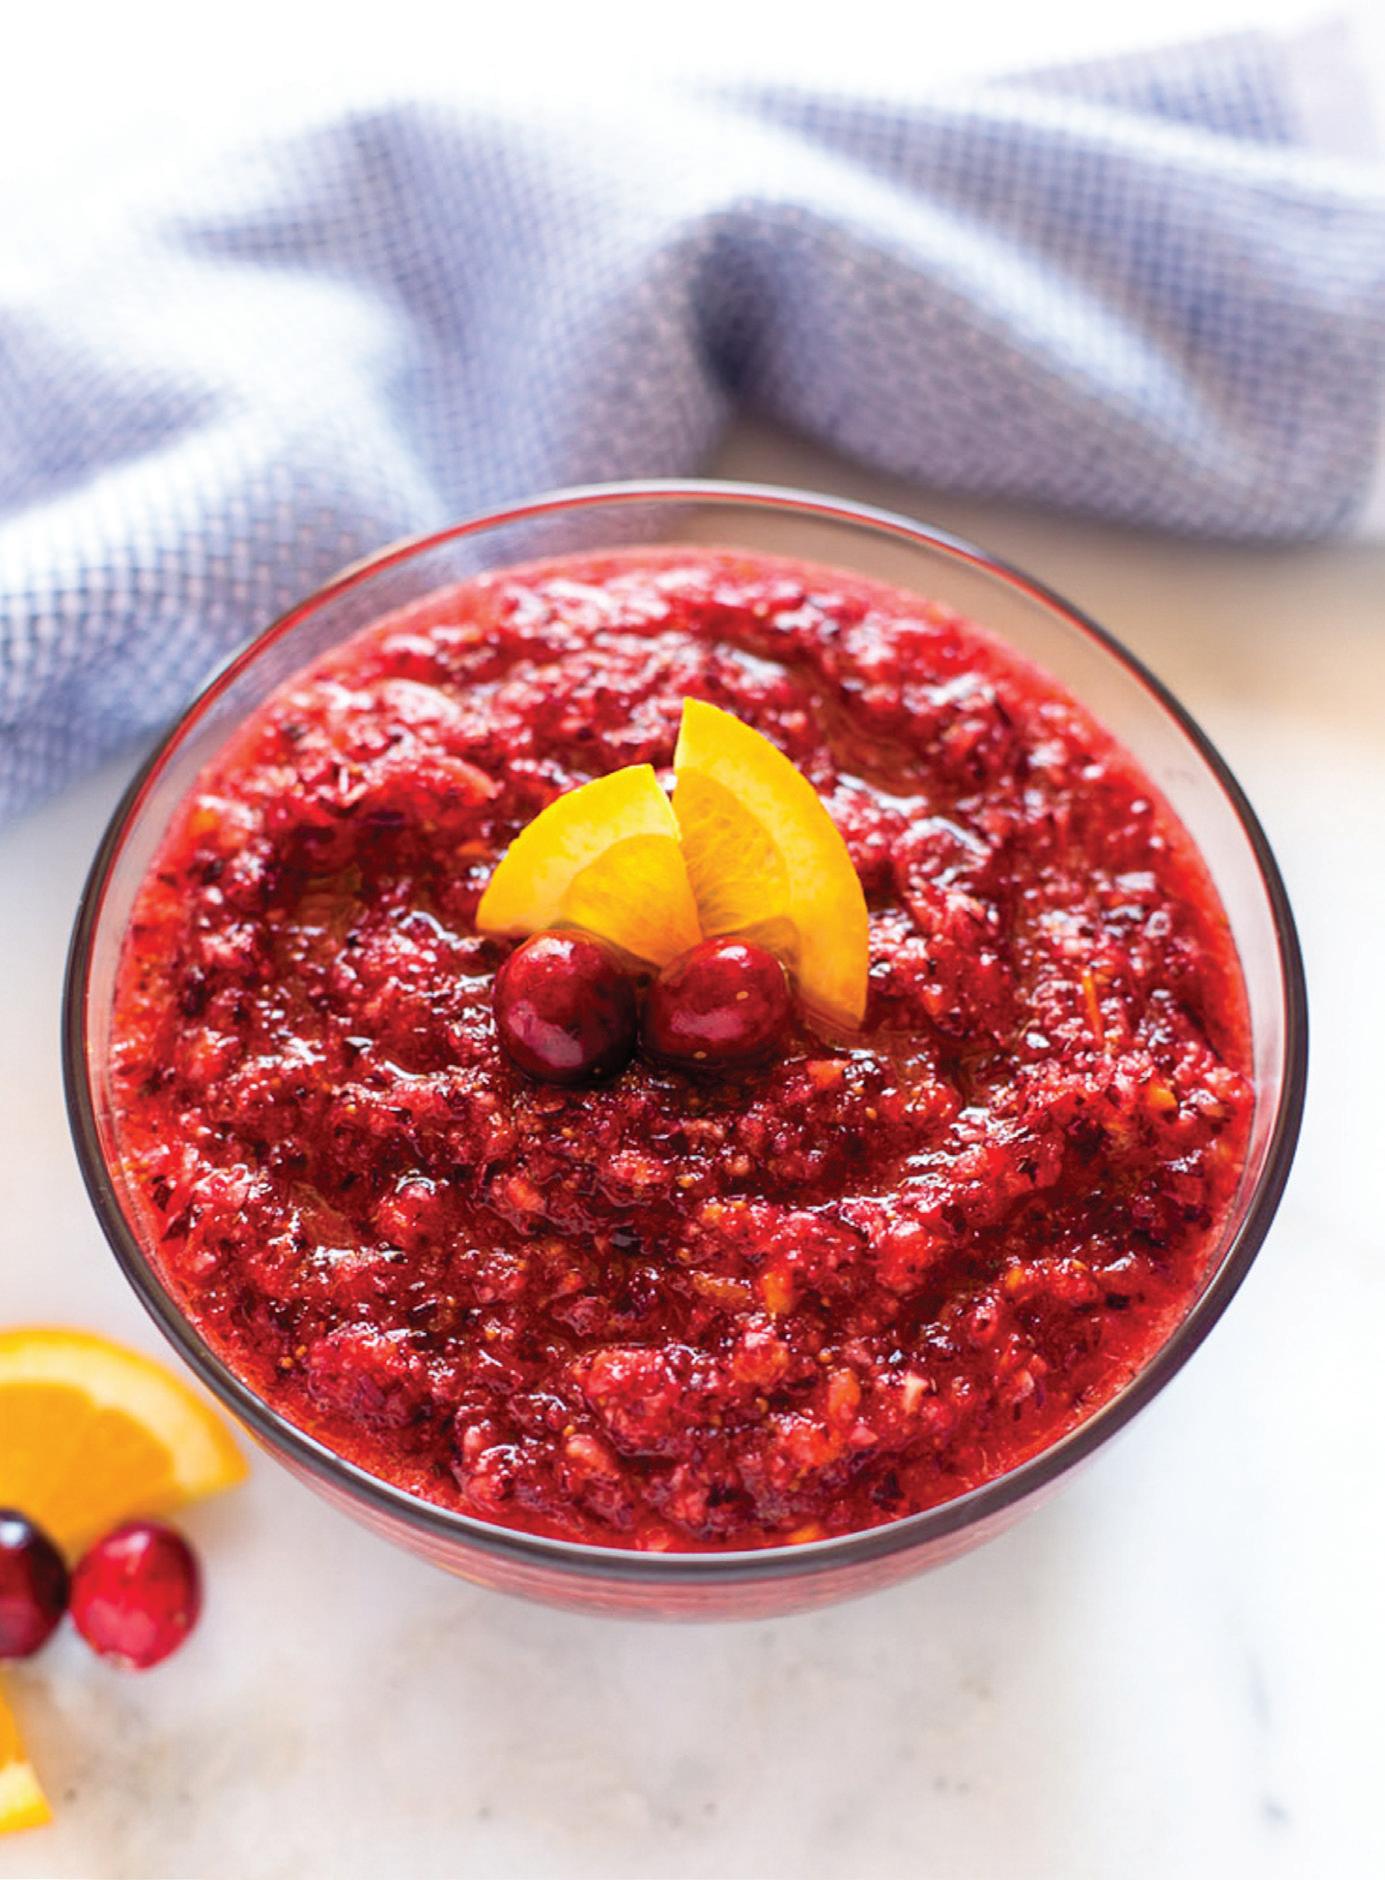


3 cups cooked and shredded turkey (or chicken)
1⁄2 cup whole or sliced almonds
2 ribs celery, chopped
2-3 tablespoons mayonnaise (or Greek yogurt), to taste
1⁄2 cup cranberry sauce (or dried cranberries)


Salt and freshly ground black pepper, to taste
3-4 large tortillas
1. Combine all ingredients together in a bowl. Season with salt and pepper.
2. Spoon filling into tortillas and roll into a wrap.

Nutrition (per serving): Calories: 263, Fat: 13g (Sat: 1g), Cholesterol: 53mg, Sodium: 109mg, Carb: 18g, Fiber: 2g, Sugar: 14g, Protein: 20g

MAKES 3 CUPS, ABOUT 24 SERVINGS | RECIPE BY LAUREN ALLEN, TASTES BETTER FROM SCRATCH

This three-ingredient relish has been a family favorite for generations. It’s sweet and tangy and perfect paired with turkey or served with chicken or pork. This type of cranberry “sauce” is technically a “relish” because the cranberries are not cooked and everything is cold and raw, but this stu is pure gold—it’s good enough to eat with a spoon. –l.a.


12 ounces fresh cranberries 1 orange, with the peel on 1 cup granulated sugar
1. Slice the very edge root ends o the orange, just until you see the flesh. Leave the rest of the skin on the orange and slice it into 8 pieces.
2. Place the fresh cranberries, orange slices, and sugar in your food processor and process until smooth (or until no large chunks remain).
3. Refrigerate until ready to serve (it tastes best after being in the fridge for at least an hour) or for up to 1 week. Serve over turkey, chicken, pork loin, and more.
Cook’s Notes

■ You can make the cranberry relish ahead and stored in the refrigerator for up to 2 weeks.
■ To freeze, store relish in a freezer safe container for 2 to 3 months. To use, remove it from the freezer and thaw it in the refrigerator.


Nutrition (per serving): Calories: 330, Fat: 0g (Sat: 0g), Cholesterol: 0mg, Sodium: 2mg, Carb: 85g,
Fiber: 6g, Sugar: 75g, Protein: 0g


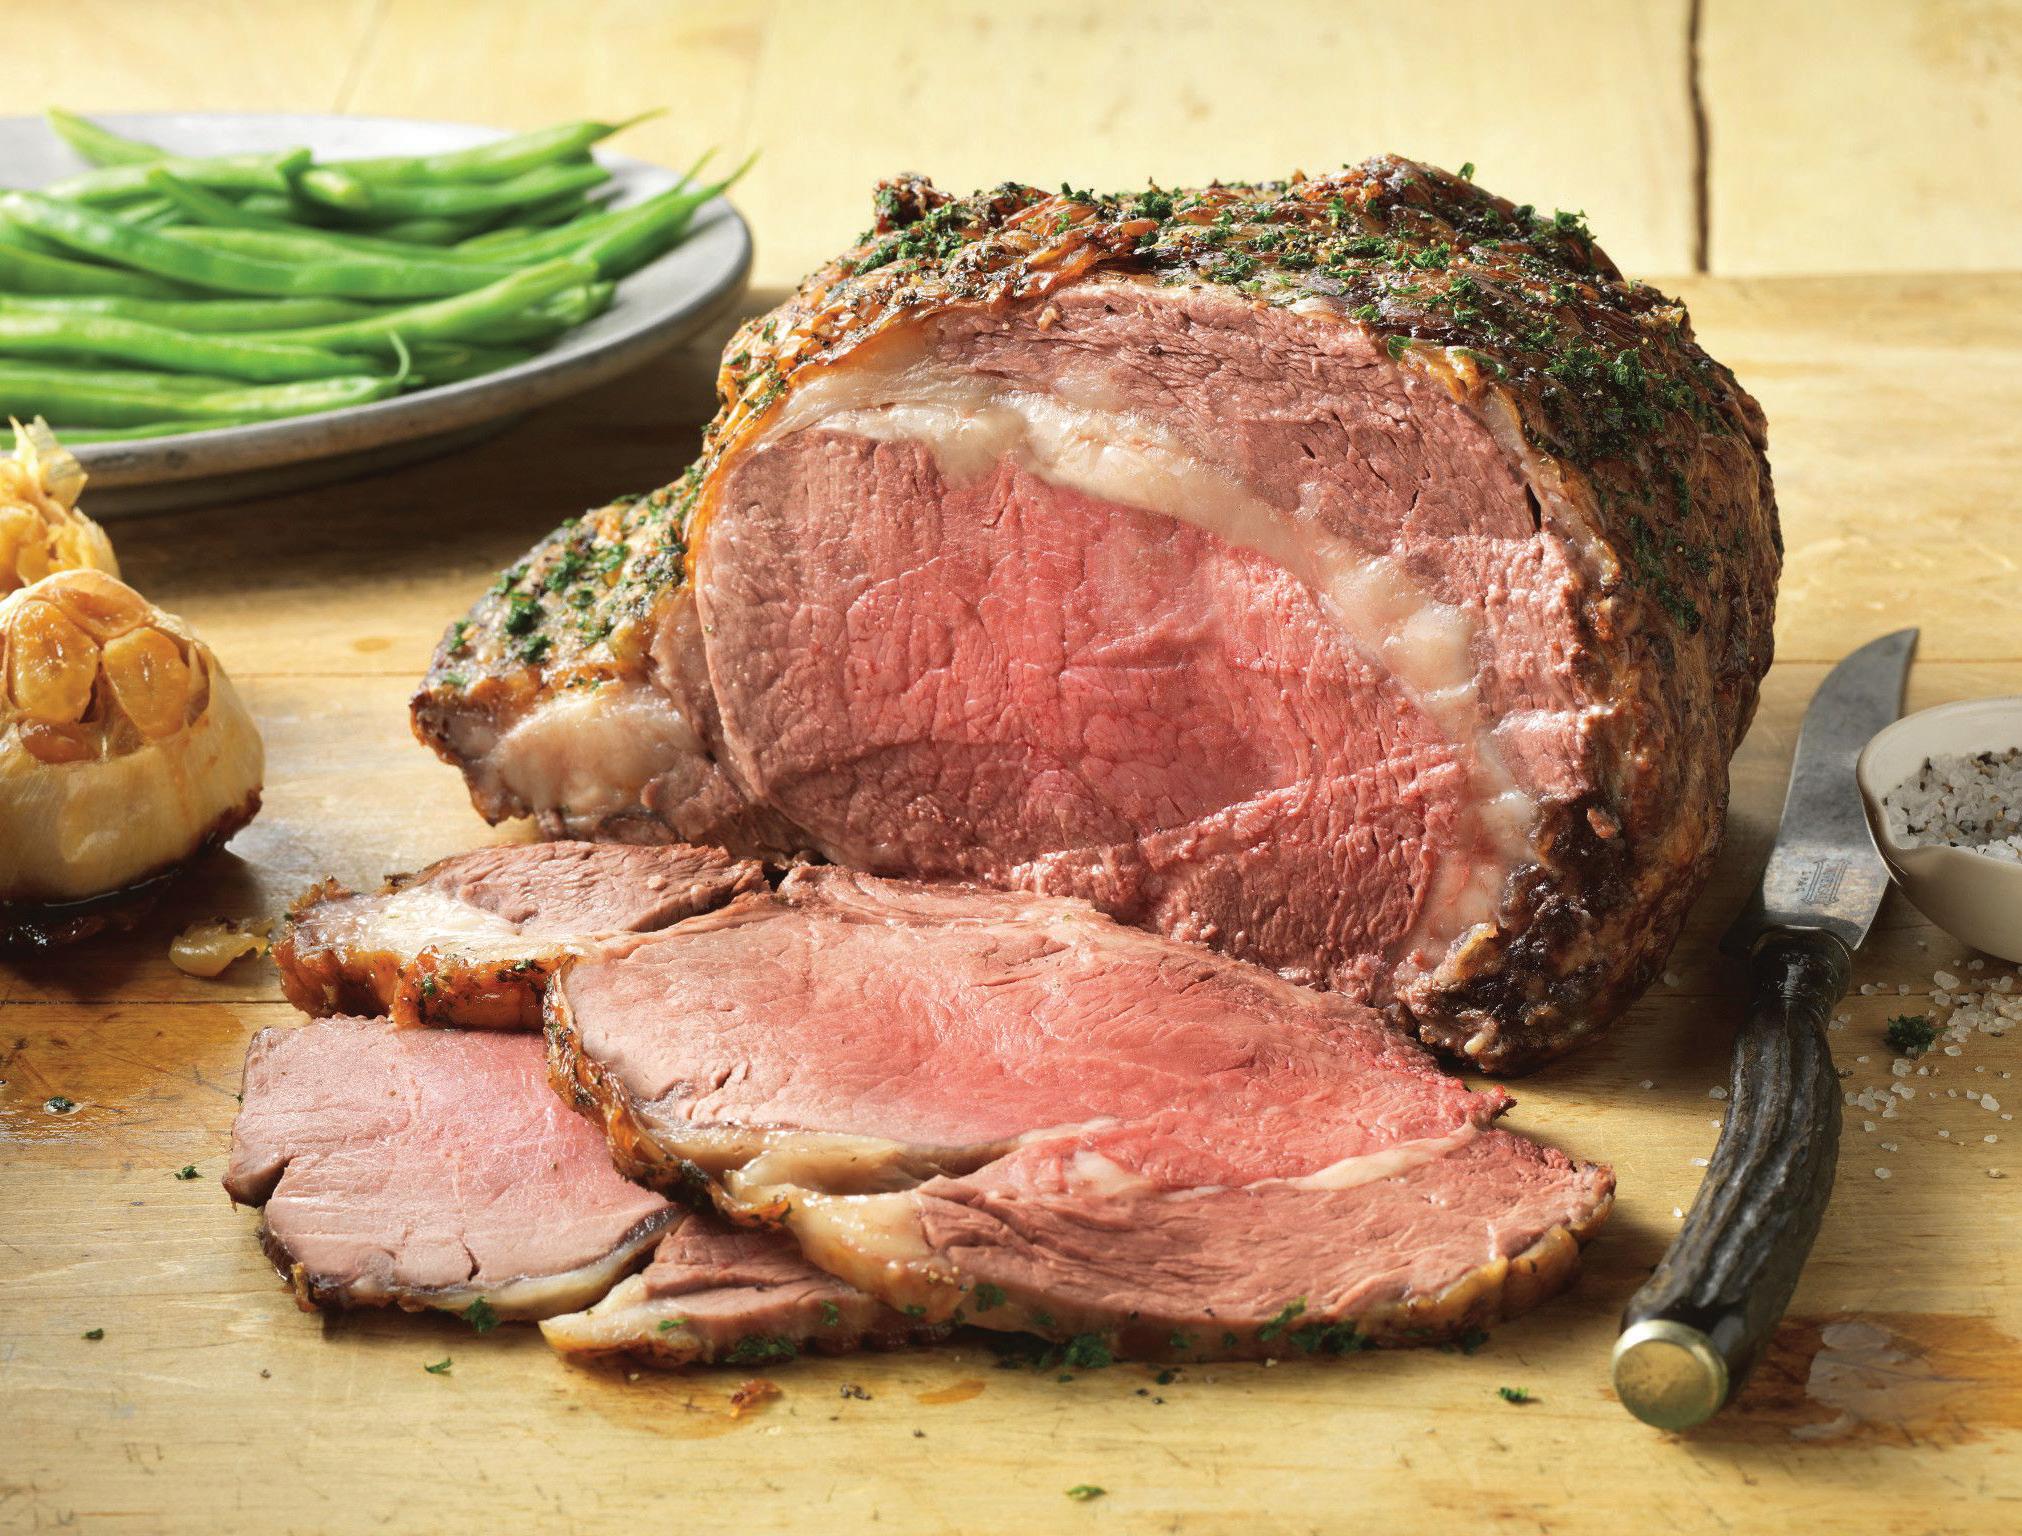
Peppered Rib Roast With Roasted Garlic Sauce
MAKES 8 TO 12 SERVINGS
RECIPE COURTESY BEEF, IT’S WHAT’S FOR DINNER
Show your friends and family that you’re an expert in the kitchen. Peppered Ribeye Roast served with a creamy roasted garlic sauce is nothing but delicious. Also known as boneless prime rib, boneless rib roast, and rib-eye roast, this fine-textured beef with generous marbling is a classic holiday roast.


1 (4- to 6-pound) beef ribeye roast boneless, small end
1 tablespoon chopped fresh parsley, plus more for garnish, if desired
2 teaspoons coarse ground black pepper


aluminum foil; drizzle each with 1 teaspoon oil. Bring two opposite sides of foil over garlic; seal with double fold. Fold in open ends to seal. Place alongside roast in pan. Roast beef in 350°F oven 13⁄4 to 2 hours for medium-rare; 2 to 21⁄4 for medium doneness. Roast garlic 11⁄4 to 11⁄2 hours or until very soft and golden brown; set aside.

2 medium heads garlic
2 teaspoons olive oil
1 cup reduced-sodium beef broth
2 tablespoons dry sherry
1⁄2 cup half-and-half
1⁄4 teaspoon salt
1. Heat oven to 350°F. Combine the 1 tablespoon parsley and pepper in a small bowl. Press evenly onto all surfaces of beef roast.

2. Place roast, fat side up, on rack in shallow roasting pan. Insert ovenproof meat thermometer so tip is centered in thickest part of beef, not resting in fat. Do not add water or cover. Cut about 1⁄4 inch off top of each garlic head, exposing cloves. Remove outer papery skin, leaving head intact. Place in center of 12-inch square heavy-duty


3. Remove roast when meat thermometer registers 135°F for medium-rare; or 145°F for medium. Transfer roast to carving board and tent loosely with aluminum foil. Let stand 15 to 20 minutes. (Temperature will continue to rise about 10°-15°F to reach 145°F for medium-rare or 160°F for medium.)
4. Meanwhile, squeeze garlic cloves from skins into small bowl; mash with back of spoon. Combine garlic, broth and sherry in medium saucepan; bring to boil. Cook 10 to 11 minutes or until reduced by half. Add half-and-half; reduce heat and bring to a gentle boil. Continue cooking 4 to 6 minutes or until sauce is reduced to 1 cup, stirring occasionally. Keep warm.
5. Carve roast into slices; serve with sauce. Garnish with additional parsley, as desired.

Nutrition (per serving, 1⁄12 of recipe): Calories: 196, Fat: 8g (Sat: 3g), Cholesterol: 82mg, Sodium: 159mg, Carb: 2g, Fiber: 0g, Sugar: 0g, Protein: 26g


MAKES 8 SERVINGS | RECIPE COURTESY BEEF, IT’S WHAT’S FOR DINNER

Fresh basil, thyme, and parsley enhance this flavorful beef roast served with fingerling potatoes, new potatoes, and shallots. Tenderloin roast is the most tender beef roast and is well known for being lean and succulent as well as easy to carve.
1 (2-pound) beef tenderloin roast, center cut


12 ounces fingerling potatoes, cut in half lengthwise


HOLIDAY HAM


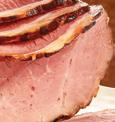
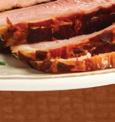
2 tablespoons chopped fresh basil
2 tablespoons chopped fresh thyme
1 tablespoon chopped fresh parsley
1 teaspoon coarsely grind black pepper
3 tablespoons olive oil, divided
12 ounces new potatoes, cut in half
4 large shallots, peeled, cut lengthwise into quarters Coarse salt, as needed
1. Heat oven to 425°F. Combine basil, thyme, parsley, and pepper. Stir in 1 tablespoon oil. Press evenly onto all surfaces of beef roast.
2. Place roast on a roasting rack in shallow roasting pan. Insert ovenproof meat thermometer so tip is centered in thickest part of beef. Do not add water or cover.


3. Toss potatoes and shallots with remaining 2 tablespoons oil on rimmed baking sheet and season with salt and ground black pepper, as desired. Turn vegetables cut side down. Roast beef in preheated oven 35 to 45 minutes for medium-rare to medium doneness. Roast vegetables 55 to 60 minutes or until potatoes are almost tender.

4. Remove roast when meat thermometer registers 135°F for medium-rare or 150°F for medium. Transfer roast to carving board and tent loosely with aluminum foil. Let stand 10 minutes. (Temperature will continue to rise about 10°F to reach 145°F for medium-rare or 160°F for medium.) Meanwhile, stir vegetables and continue roasting 8 to 10 minutes or until potatoes are tender and browned.
5. Carve roast into slices and season with coarse salt, as desired. Serve with roasted vegetables.
Nutrition (per serving): Calories: 250, Fat: 10g (Sat: 3g), Cholesterol: 55mg, Sodium: 45mg, Carb: 21g, Fiber: 2g, Sugar: 0g, Protein: 20g


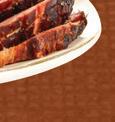
Prefer sweet and savory ham for dinner? Here are tips to prepare it. How much? A guideline is to plan on 8 to 12 ounces per serving for bonein and 7 to 10 ounces for boneless ham as a main course. A 16-pound bone-in ham can feed about 18 to 20 people, and a 5-pound boneless ham about 10 people. For heartier appetites plan for an additional ounce per person.
Heating: Ham is fully cooked but warming it in the oven brings out its flavor. Remove ham from the package and place in a baking pan—place the largest cut surface face down for half or quarter hams. Add ½ cup water to the pan. Cover the ham and pan securely with nonstick foil. Bake at 325°F for about 20 minutes per pound or until warmed through to about 135°F or 140°F. If glazing, remove from oven 15 minutes before done, apply the glaze, and heat the remaining 15 minutes.


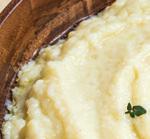
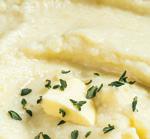


Make mashed potatoes like a pro. The folks at the Idaho Potato Commission have perfected the art of creating flu y mashed potato dishes. Here are their tips so you can, too. Whether you like them made with heavy cream and butter or on the lighter side, this will help make sure your taters aren’t too lumpy, creamy, or over-whipped.

■ To ensure your potatoes cook evenly, cut them into similar sizes (about 1 to 2 inches) and place in a pot of cold water, gradually bringing the water to a boil, then simmer. Salt the water you boil the potatoes in. Optionally, add a bouillon cube to the boiling water. Save the liquid when you drain the potatoes and add some of it while mashing as a calorie-free flavor enhancer.


■ Leave the potatoes in water until ready to use. Just add a little acidity, a tablespoon of white wine vinegar or lemon juice added to a gallon of water.

■ Drain the hot water from the cooked chunks of potatoes and put them back on the stovetop to cook o any extra water. Stir occasionally to keep the bottom of the potatoes from sticking to the pan.

■ Always add warm or room temperature butter (never cold) first then the warm liquid slowly to the cooked mashed potatoes. Cold milk, cream, or butter will make the potatoes gummy. Add more milk and leave out butter for reduced-fat mashed potatoes.

■ Over-mashing will result in gluey and sticky potatoes. Use your food processor for something else—don’t whip the potatoes to mash; they will be overmixed and gummy as it breaks down the starch cells.

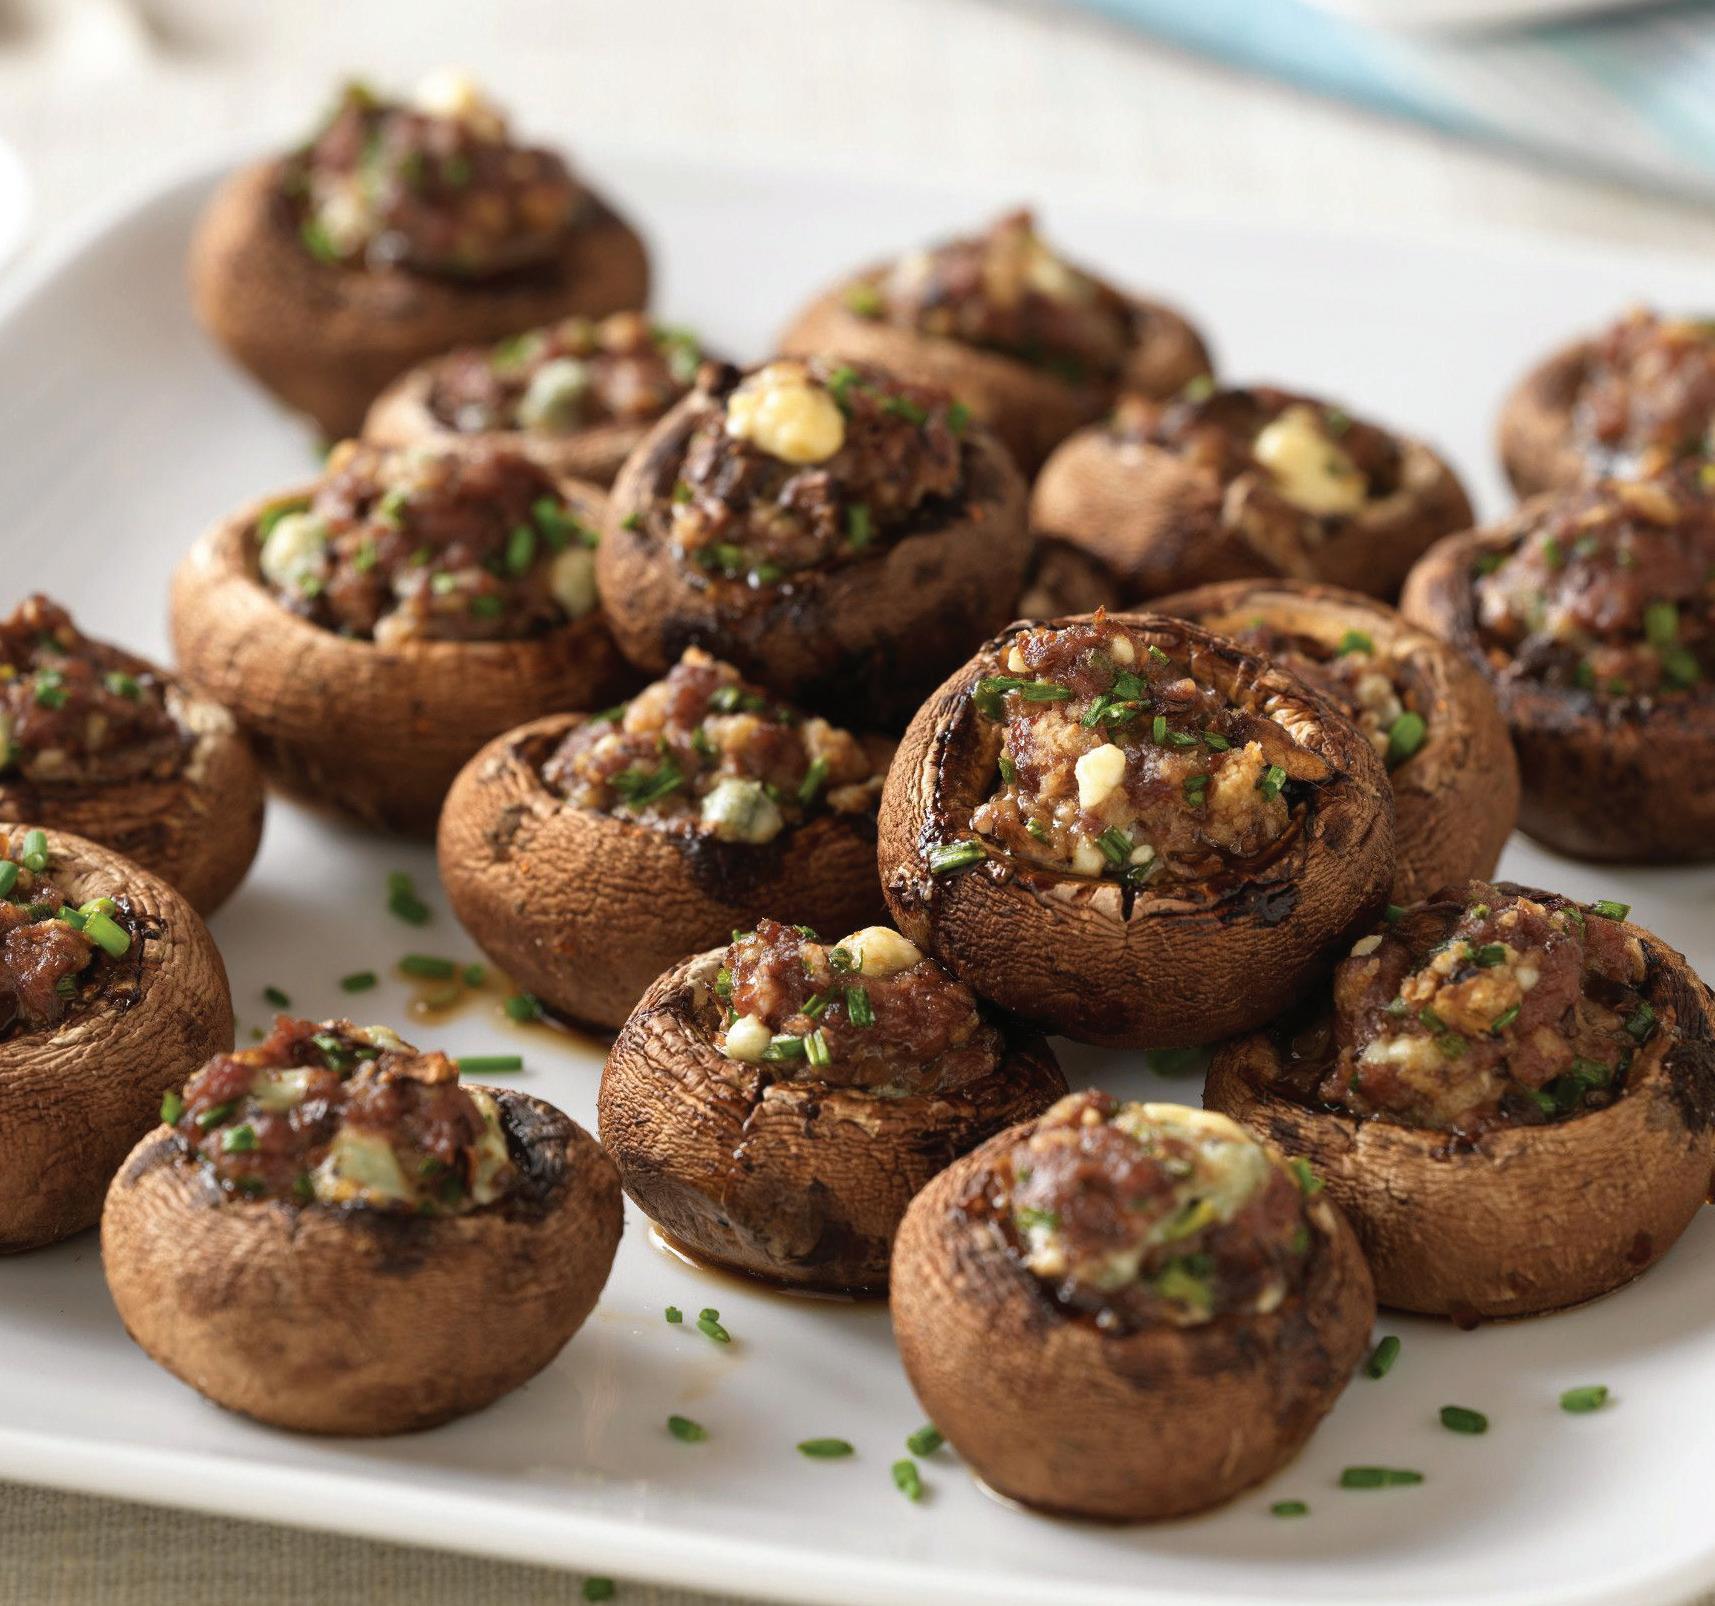
■ For flu er mashed potatoes, add ½ teaspoon of baking power to the mixture while mashing. Allow the potatoes to sit a few minutes before serving.


■ Try mashing your potatoes with buttermilk instead of milk or cream. Buttermilk tastes like sour cream but has less fat and calories.
■ Add fresh herbs, spices, minced vegetables, or grated cheese to boost the flavor and color of your potatoes.
■ Warm the container you are serving your mashed potatoes in before serving. This will help keep your potatoes hot.


To Make 4 to 6 Servings of Traditional Mashed Potatoes: Place 2 pounds Idaho potatoes, peeled and cut into 1-inch chunks (about 5 cups), in a large pot and add enough cold water to cover the potatoes. Bring the water up to a boil, then simmer for 13 to 15 minutes or until very tender. Drain potatoes in a colander. Return cooked potatoes to pot and stir over medium heat, about 1 minute, until excess water has evaporated. With potato masher, mash in ¾ cup hot milk (1%, 2%, or whole), 2 tablespoons butter, ½ teaspoon salt, and ¼ teaspoon pepper. Beat with wooden spoon until potatoes are smooth and creamy. Stir in any optional add-ins, if desired.


MAKE 36 TO 40 | RECIPE COURTESY BEEF, IT’S WHAT’S FOR DINNER
Truly a bite-size wonder. Mushroom caps are stuffed with a rich blend of ground beef, blue cheese, and chives, then baked until golden brown and bubbly.
1⁄2 pound ground beef
36 to 40 small button or cremini mushrooms (11⁄2- to 2-inch diameter)
1⁄4 teaspoon salt
1⁄3 cup crumbled blue cheese
1⁄4 cup soft whole wheat bread crumbs

3 tablespoons minced chives, plus more for garnish, if desired
1⁄2 teaspoon steak seasoning blend
1. Heat oven to 375°F. Remove and reserve stems from mushrooms. Season mushroom caps with salt and set aside. Mince stems to yield 1⁄2 cup and discard remaining stems.
2. Combine ground beef, minced stems, blue cheese, breadcrumbs, 3 tablespoons chives, and steak seasoning. Spoon beef mixture evenly into mushrooms.

3. Place stu ed mushrooms on rack in broiler pan. Bake in 375°F oven 15 to 20 minutes. Sprinkle with additional chives, if desired.
Cook’s Notes
■ To make soft breadcrumbs, place torn bread in food processor or blender container. Cover and pulse on and o , to form fine crumbs. One-half slice makes about 1⁄4 cup crumbs.

■ Cooking times are for fresh or thoroughly thawed ground beef. Ground beef should be cooked to an internal temperature of 160ºF. Color is not a reliable indicator of its doneness.


Nutrition (per mushroom, using 80% lean ground beef): Calories: 20, Fat: 1g (Sat: 1g), Cholesterol: 5mg, Sodium: 49mg, Carb: 1g, Fiber: 0g, Sugar: 0g, Protein: 2g


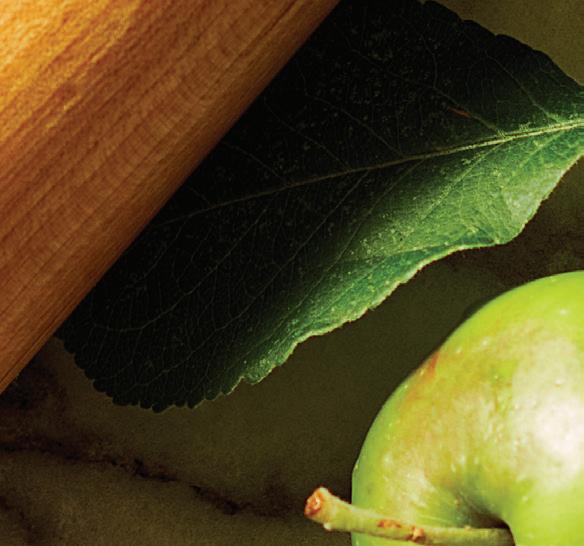


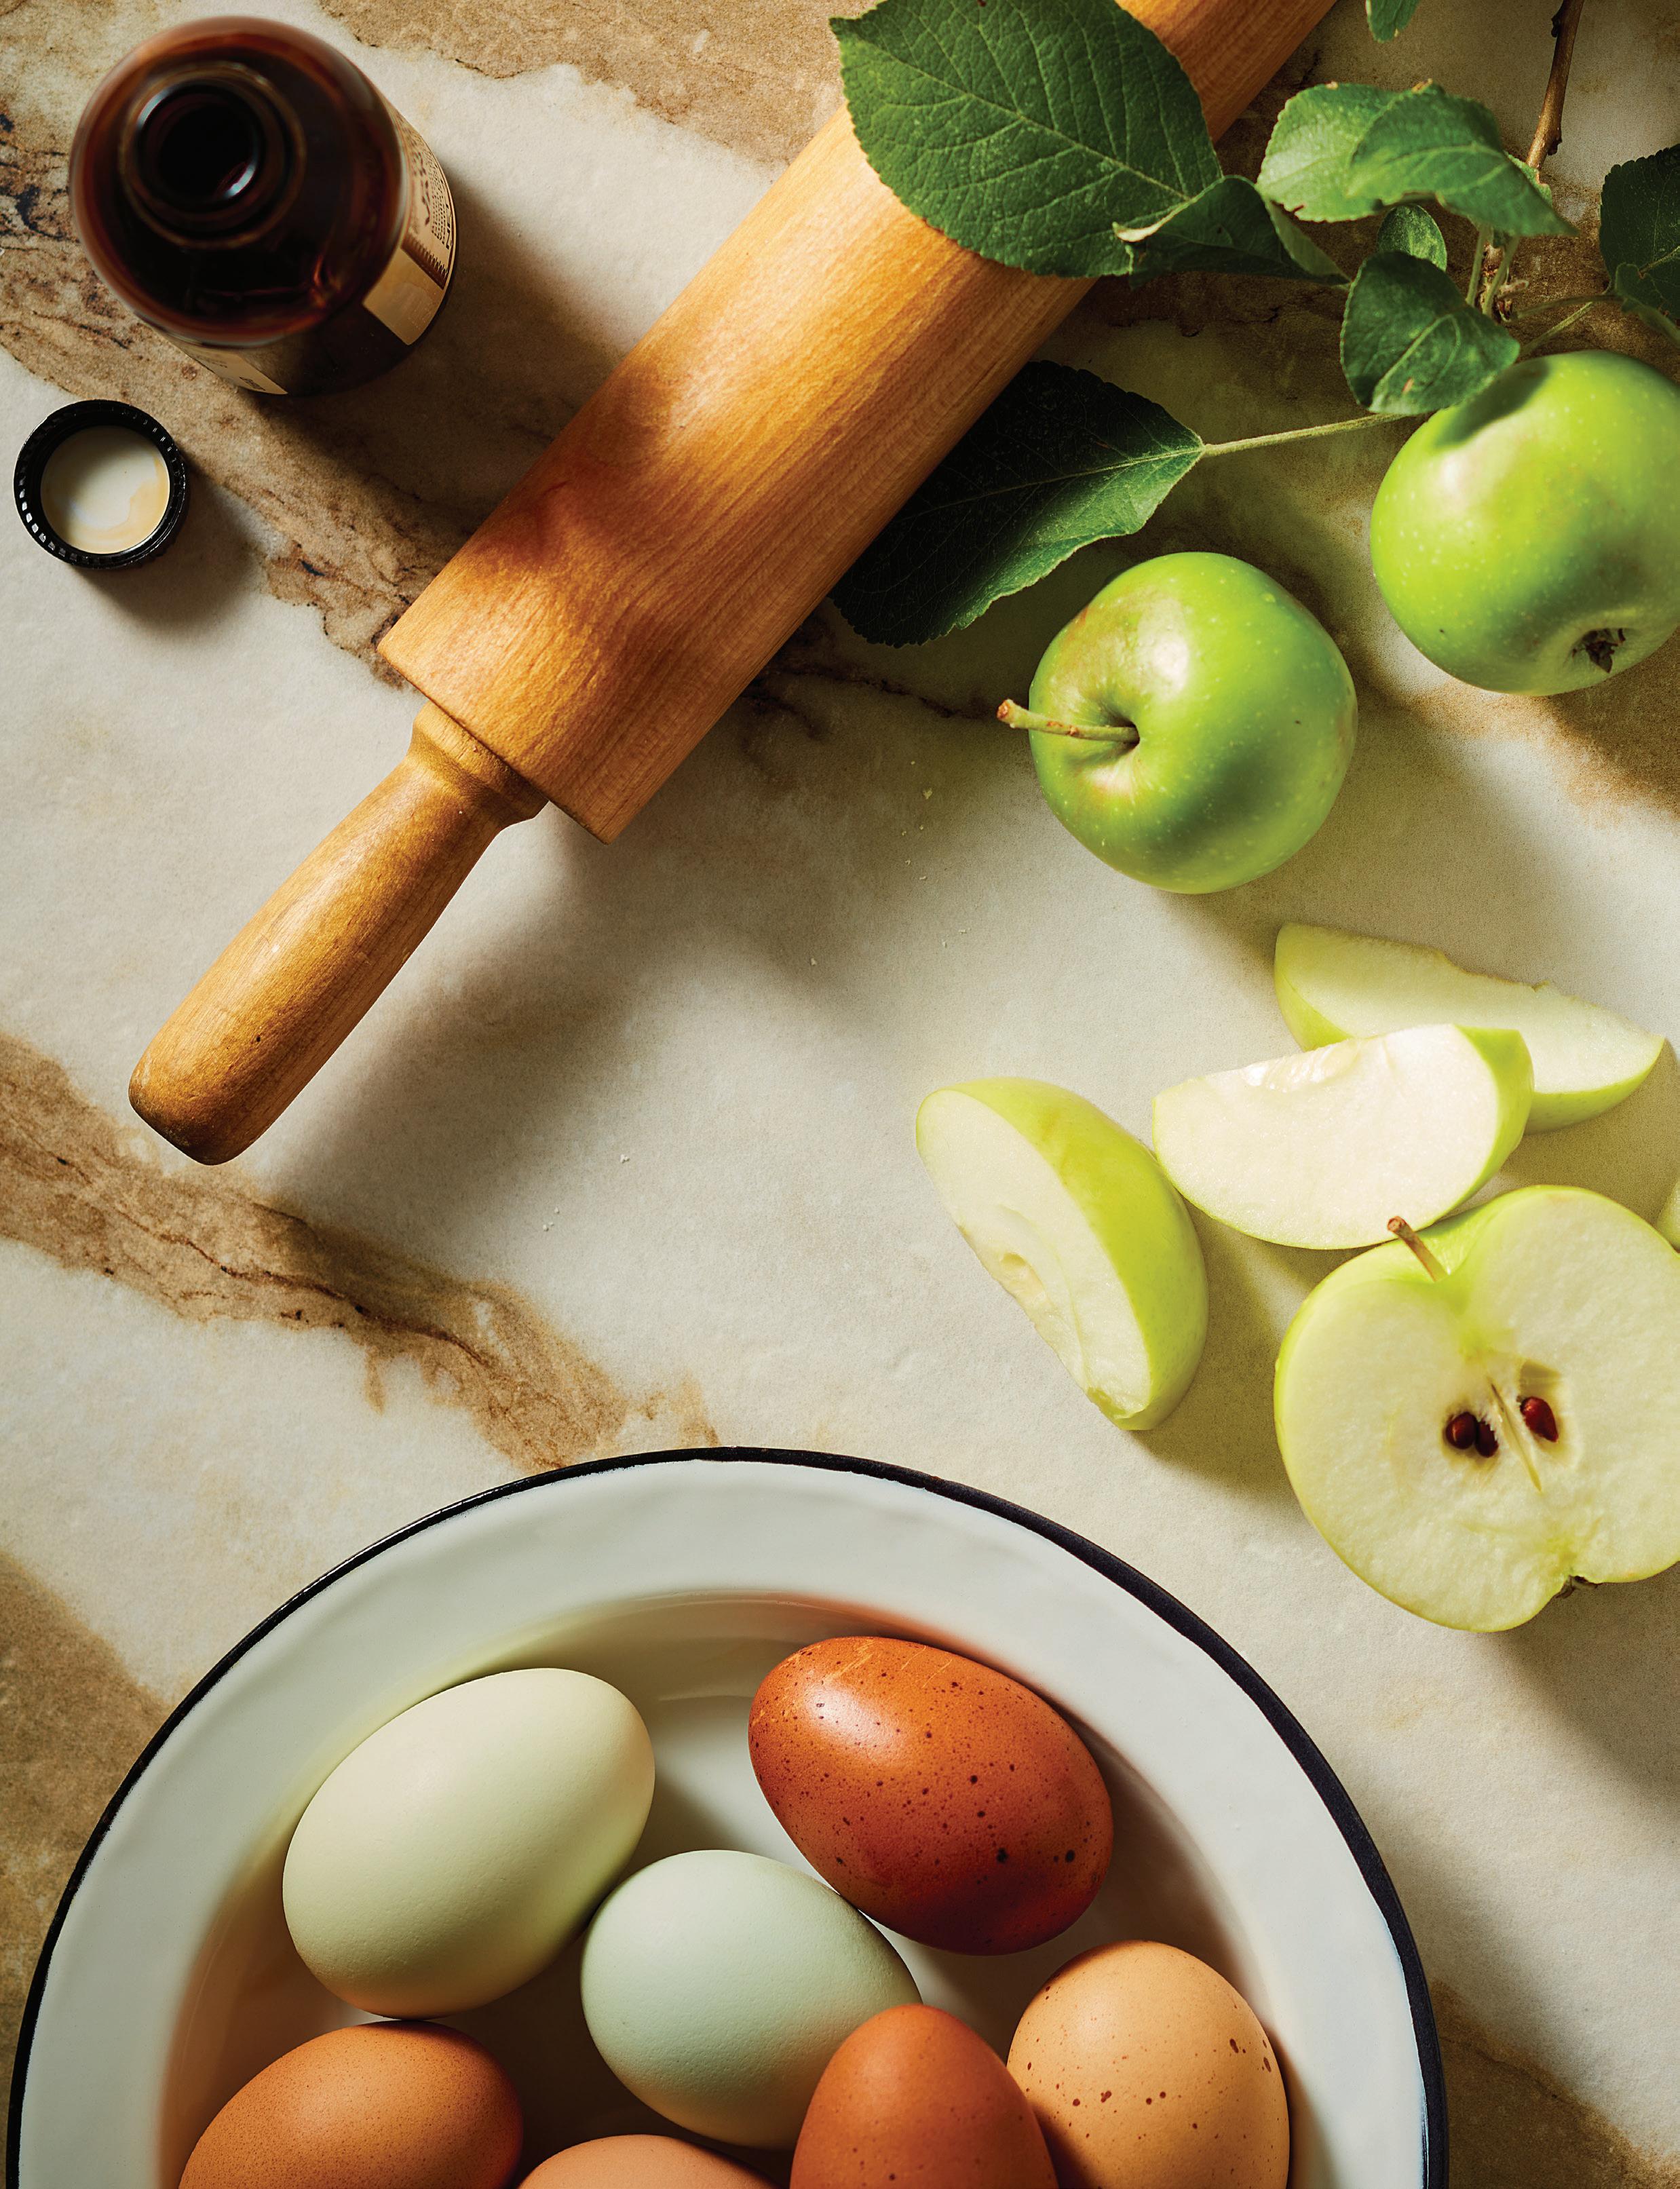


Make life a li le bit sweeter throughout the season with these homemade baked treats


horter days and chilly nights usher in the best time of all—baking season—with a sweet treat for any and every occasion.

For casual get-togethers like tailgating, apple-picking, or meetings, bake a grab-and-go confection that can be cut larger or smaller, depending on the crowd. Harvest Apple Bars with Cinnamon-Cardamom Glaze are also great to bring into work.


When you want a stand-out dessert for a dinner party, birthday, or holiday, there is none more chocolate-y than the three-layer Sour Cream Chocolate Cake with Caramel Toffee Filling and a creamy, fluffy chocolate frosting. Pumpkin pie, usually heavy with spices, is a Thanksgiving classic. If you’d like a more nuanced version—and are averse to rolling out pie crust—you might want to try Pumpkin Pecan Slab Pie with a crumb crust you pat in a sheet pan. Again, cut this pie into smaller or larger pieces, but always dollop on the whipped cream.
For a holiday cookie party, (or yourself as you wrap gifts), Lemon Poppy Seed Pinwheels and Cranberry, Almond, and Orange Rugelach will have everyone asking you for the recipes.


And doing a star turn on a holiday dessert table or buffet, Festive Mini Strawberry Cheesecakes look as good as they taste. Arrange them on a tiered dessert stand garnished with greenery—sprigs of rosemary and fresh mint, or a mix of fresh herbs—or serve individually on heirloom dessert plates. All’s right with the world when you gather your favorite people and make life just that little bit sweeter.


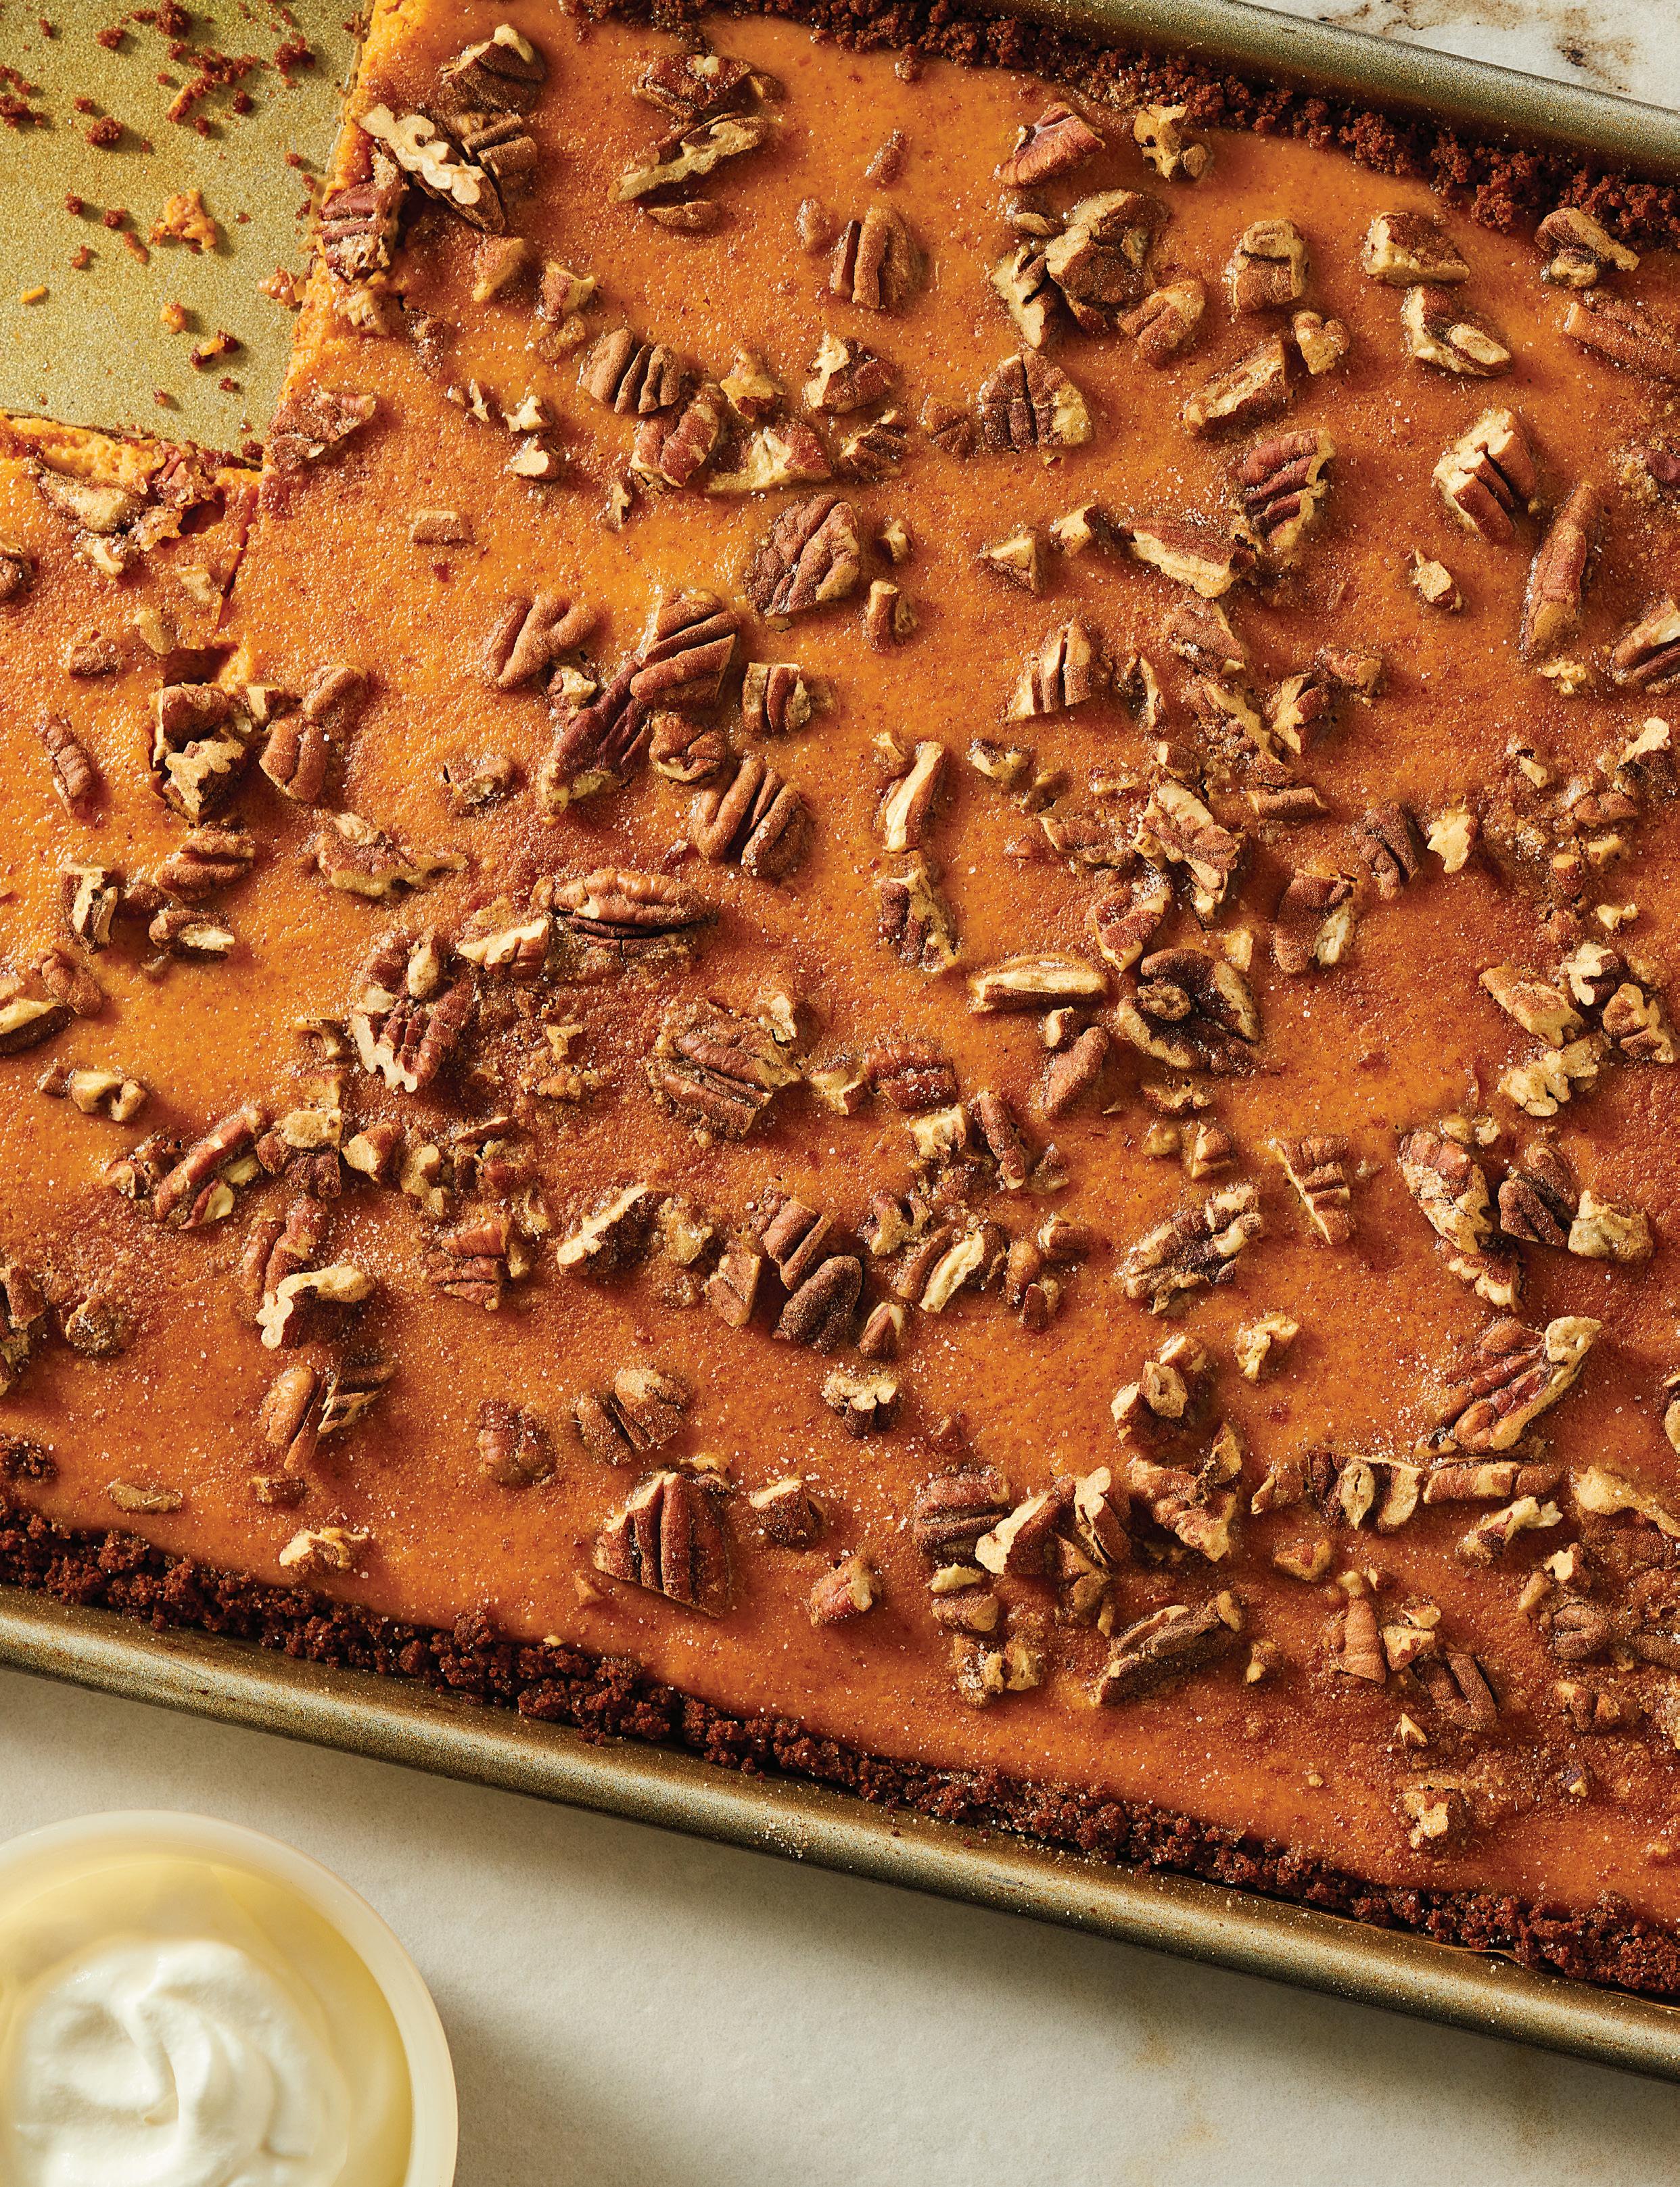
MAKES 1 (12X17-INCH) SLAB PIE, 12 TO 16 SERVINGS
Crunchy, sweet, spicy, and rectangular—can this be pumpkin pie? Yes, it most deliciously can. With a spice cookie crust and a sweetly spiced pecan topping, the thin pumpkin filling adds a creamy, mellow ribbon of flavor. With a slab pie, you can cut large or small pieces, whichever you prefer. This crunchy confection welcomes whipped cream as a final flourish.
for the cookie crust
1 (8.8-ounce) package thin spice cookies, such as Bisco 1⁄2 cup (1 stick) butter, melted
for the pumpkin filling
1 (15-ounce) can pumpkin pie filling
1 (14-ounce) can sweetened condensed milk
1 large egg

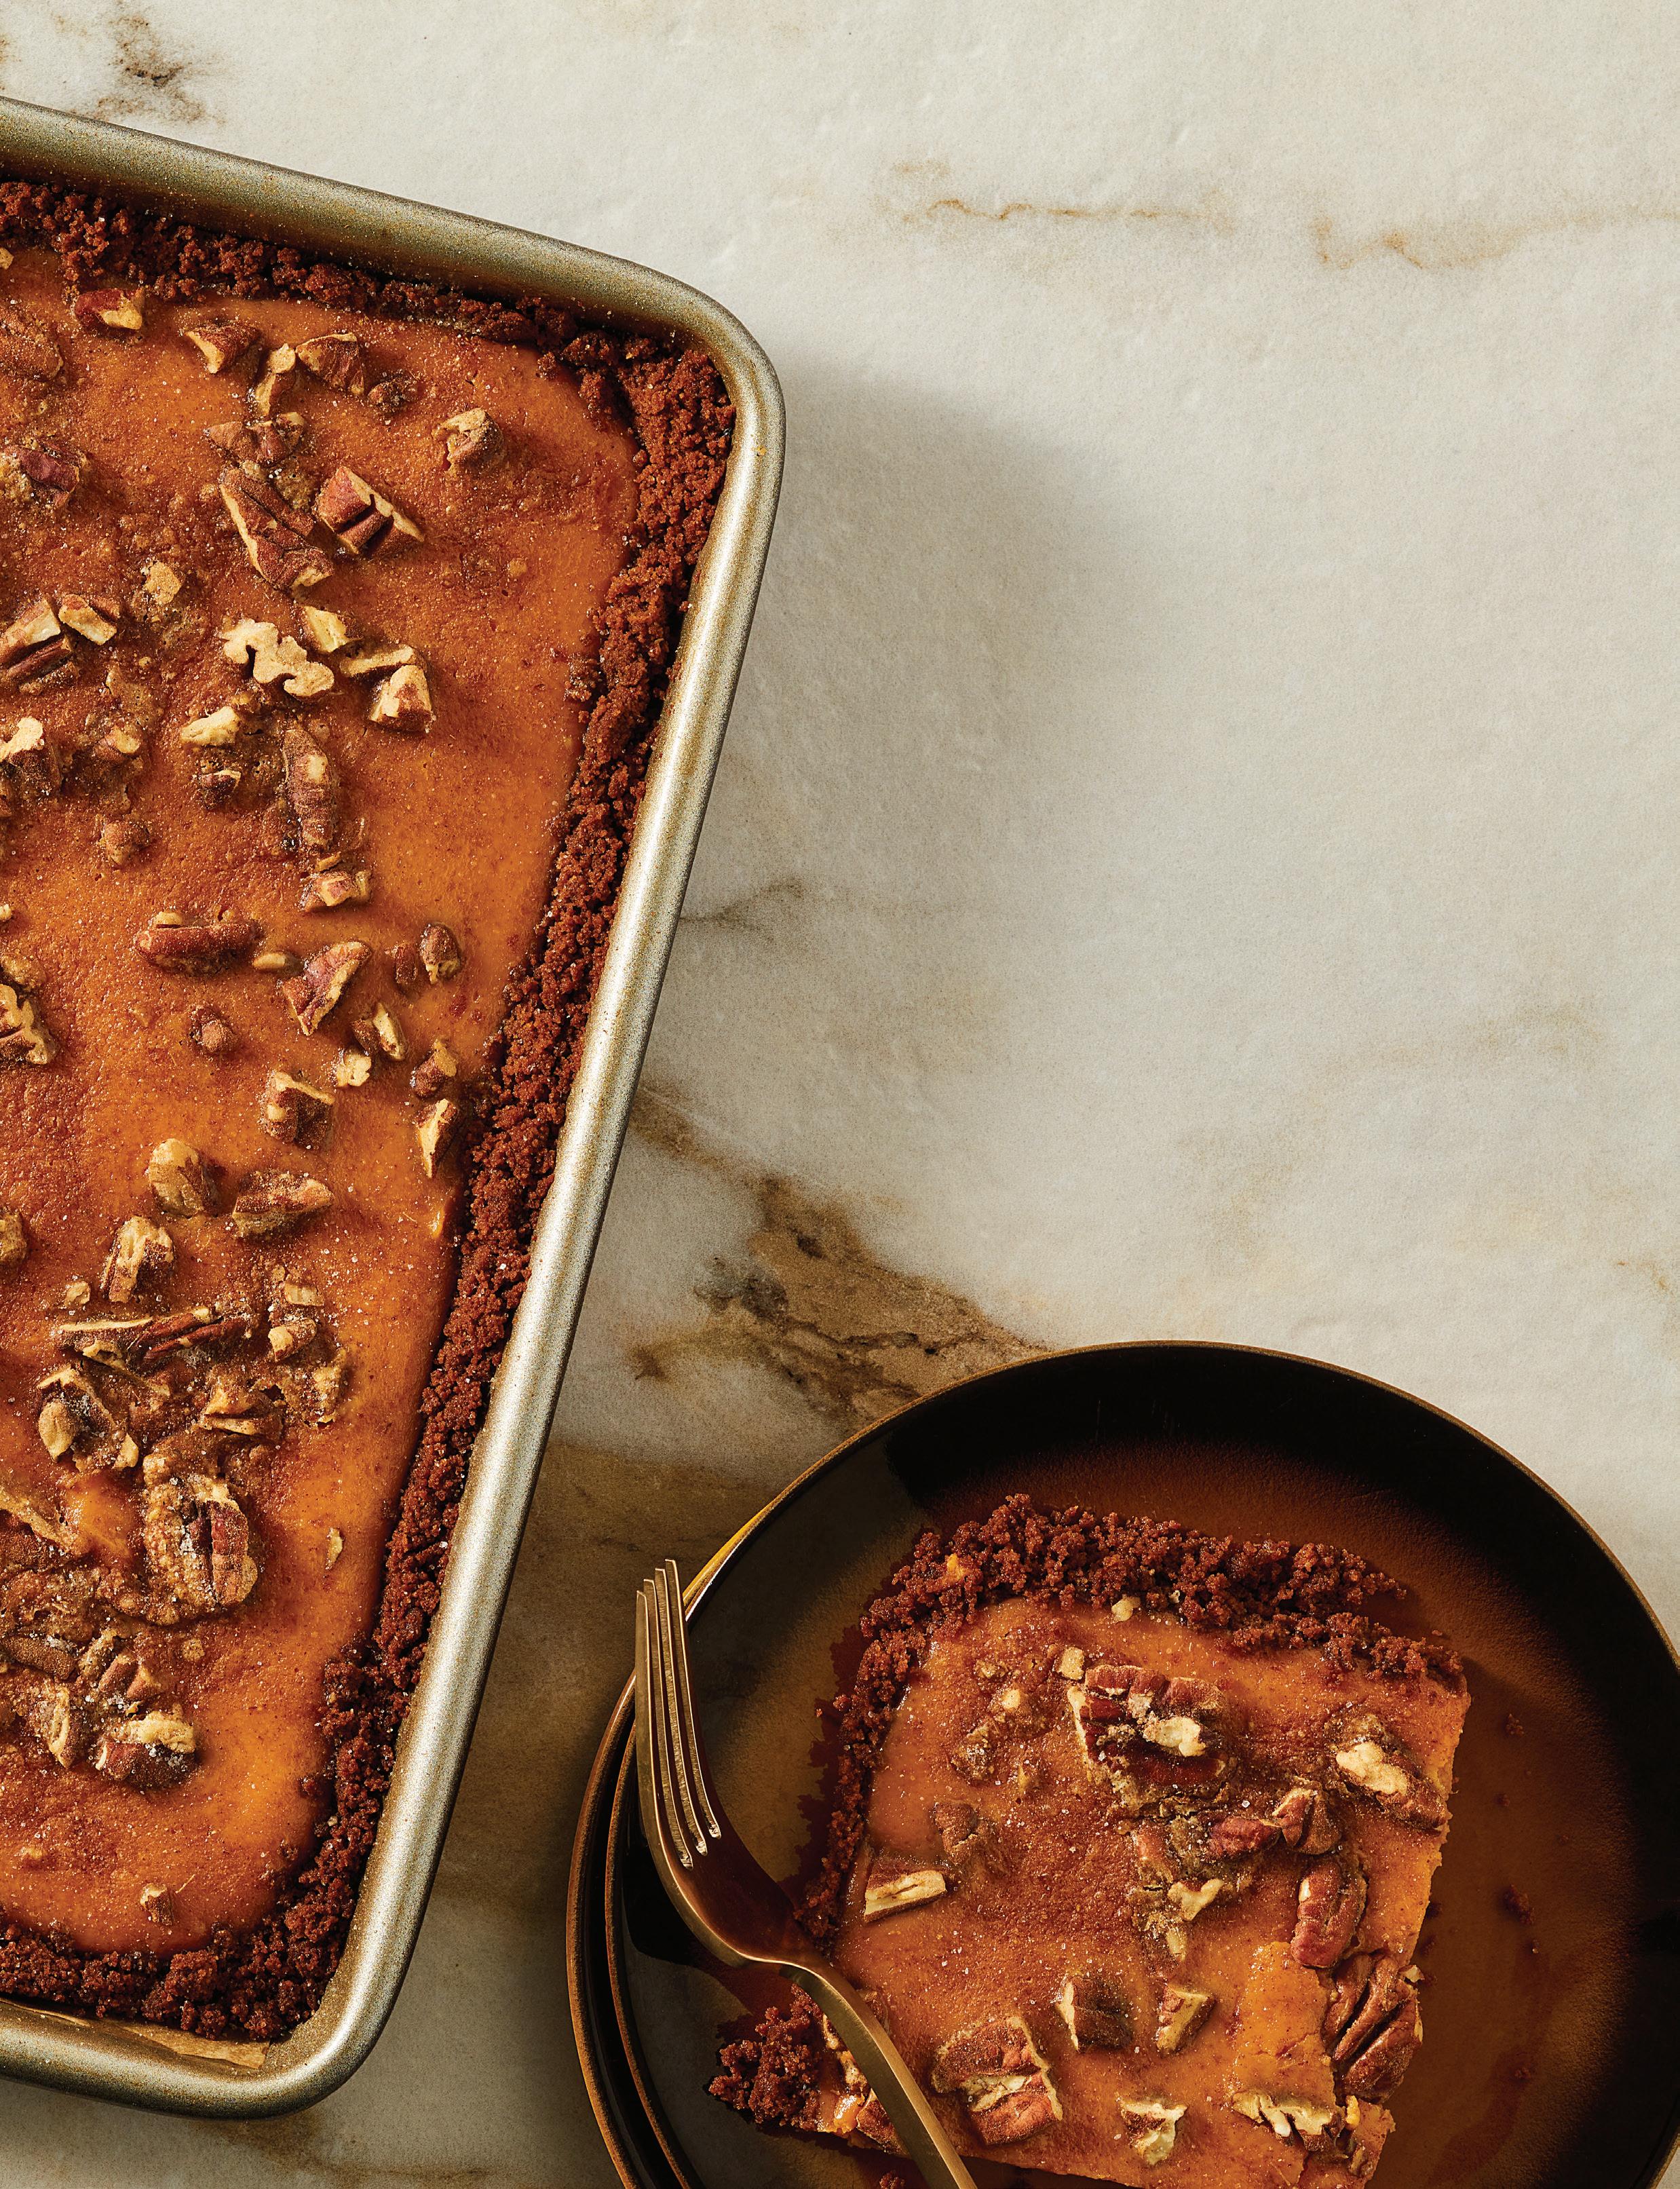
for the pecan topping
1 cup (4 ounces) coarsely chopped pecans ½ teaspoon cinnamon ½ teaspoon ground ginger 2 tablespoons granulated sugar
Whipped cream, for serving (optional)


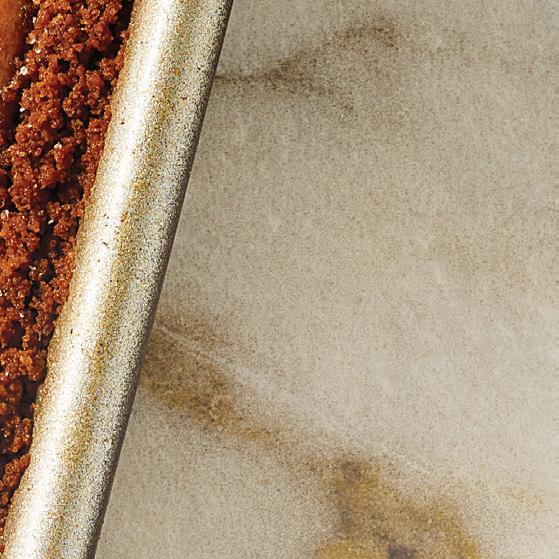
1. Heat the oven to 350°F. In a food processor, pulse the cookies until you have fine crumbs, about 2 cups (see Cook’s Note). Combine with the melted butter and press into the bottom of a 12x17-inch ungreased sheet pan. (There will be gaps in the crust.) Bake for 15 minutes and remove from the oven.


2. For the filling, whisk the pumpkin, sweetened condensed milk, and egg in a medium bowl until smooth. Pour over the cookie crust and smooth with a spatula, leaving a 1-inch perimeter of crust visible.

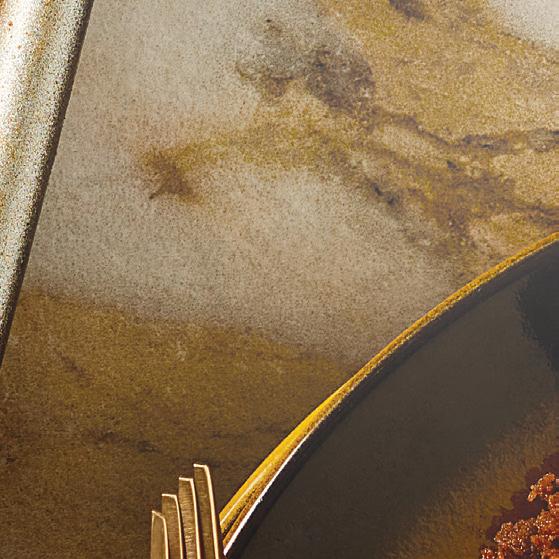
3. For the topping, combine the pecans, spices, and sugar in a small bowl. Sprinkle over the pumpkin filling.
4. Bake for 20 minutes or until the filling is firm to the touch. Let cool and then cut into squares topped with a cloud of whipped cream if desired.


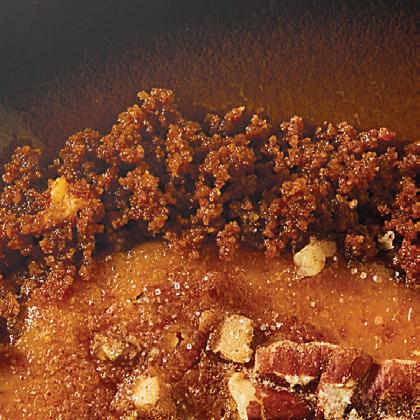
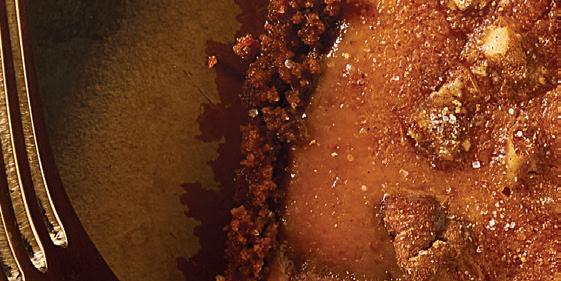

Cook’s Note: If you don’t have a food processor, you can make the cookie crumbs by placing the cookies in a plastic bag, sealing it, and crushing with a rolling pin or other tool.
Nutrition (per serving): Calories: 290, Fat: 16g (Sat. 7g), Cholesterol: 35mg, Sodium: 150mg, Carb: 35g, Fiber: 3g, Sugar: 21g, Protein: 3g

MAKES 32 COOKIES
The sweet citrus-scented dough wraps around a river of crunchy poppy seed filling for a taste and texture that will be a welcome addition to your holiday cookie o erings.
½ cup (1 stick) butter, at room temperature
1 cup granulated sugar
The zest of 1 lemon, about 1 teaspoon
2 large eggs
2¼ cups all-purpose flour, plus more for dusting
½ teaspoon baking soda
¼ teaspoon salt
1½ tablespoons lemon juice
1 (12.5-ounce) can poppy seed cake and pastry filling
1. With an electric mixer in a medium bowl, beat the butter, sugar, and lemon zest together until flu y. Beat in the eggs, then the flour, baking soda, and salt until the mixture resembles coarse crumbs. Sprinkle the crumbs with the lemon juice and beat until the mixture begins to form a ball.
2. Transfer the dough to a floured surface, work into a ball, and then cut in half. Form each half into a disc, cover with plastic wrap, and chill for at least 1 hour and up to 24 hours.
3. When ready to bake, spoon the poppy seed filling into a microwavesafe bowl and warm on the defrost setting for 40 seconds.
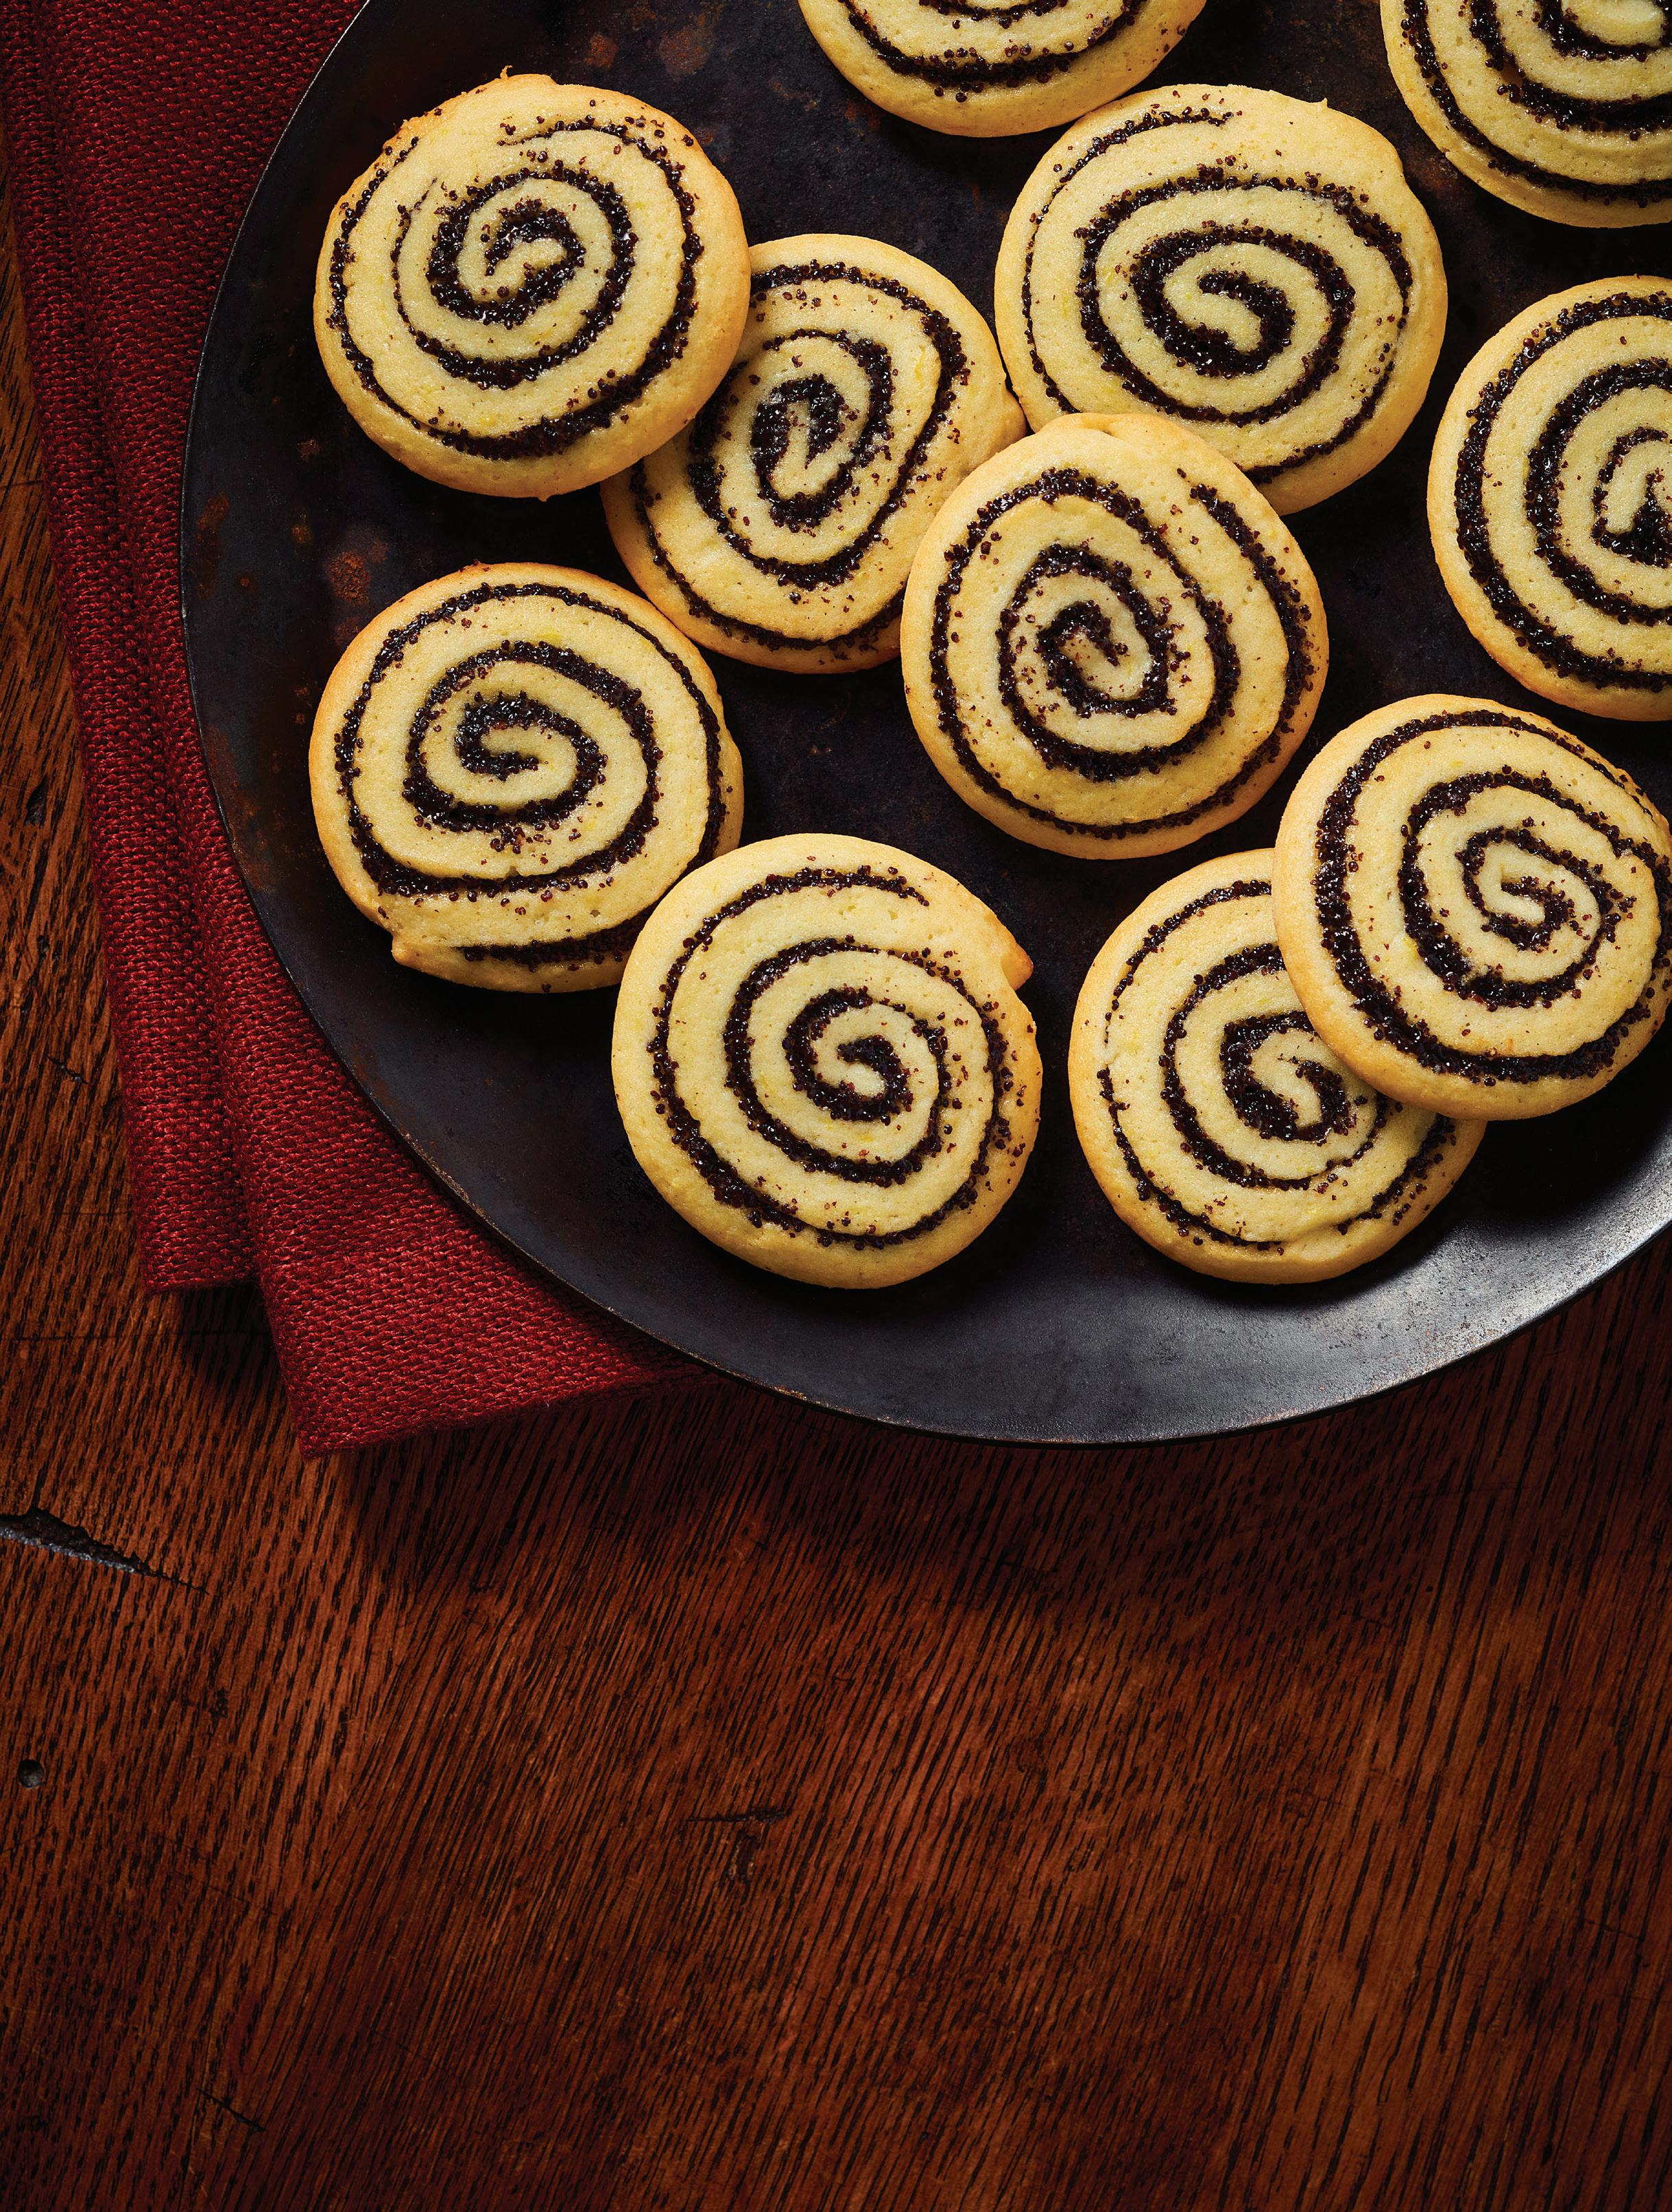


4. On a floured surface, and dusting the dough and rolling pin with flour, roll out each disc into a 12x8-inch rectangle. Trim the edges. Using a table knife, spread dough rectangle with 3 tablespoons of the poppy seed filling, leaving ½ inch perimeter of the dough visible. Starting with a long side, carefully yet firmly roll up the dough to form a cylinder. Pinch the ends closed. Using your hands, shape the cylinder to a length of 12 inches. Repeat with the second dough disc. Cover with plastic wrap and refrigerate for 1 hour.


5. When ready to bake, line 2 large baking sheets with parchment paper. Heat the oven to 400°F.
6. Remove the dough cylinders from the refrigerator. Cut each cylinder into 16 slices and place on a prepared baking sheet about 2 inches apart.


7. Bake one batch at a time, until the bottoms begin to lightly brown, about 10 minutes. Let cool. Store in an airtight container for up to 1 week.
Cook’s Note: Make sure you thoroughly chill the dough so it is easier to work.
Nutrition (per serving): Calories: 120, Fat: 4g (Sat: 2g), Cholesterol: 20mg, Sodium: 70mg, Carb: 19g, Fiber: 0g, Sugar: 6g, Protein: 2g
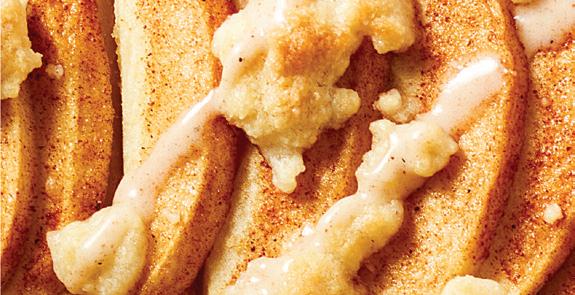
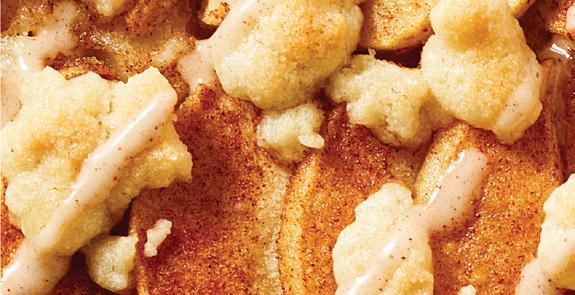
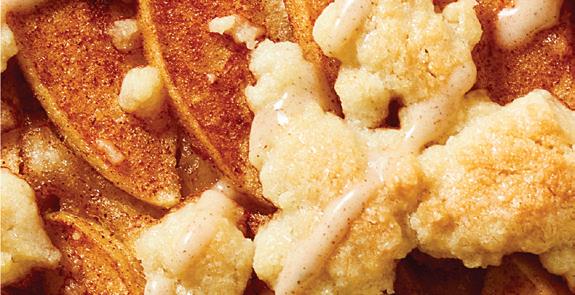
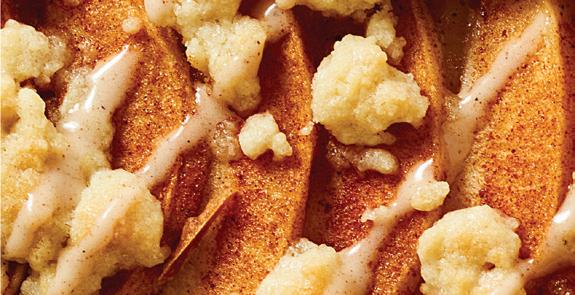
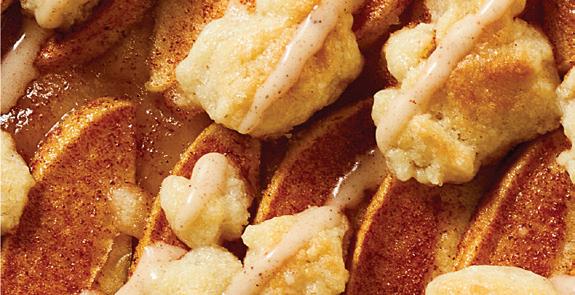
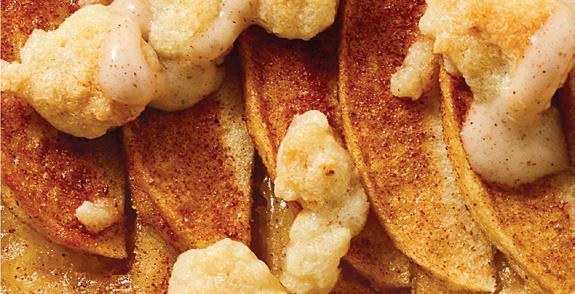


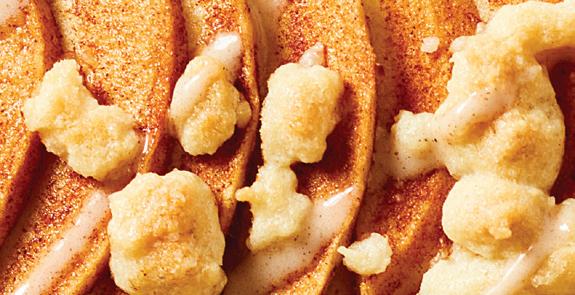
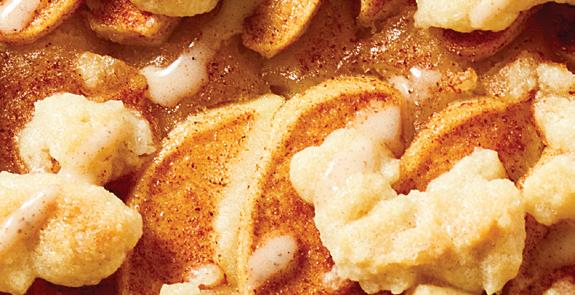
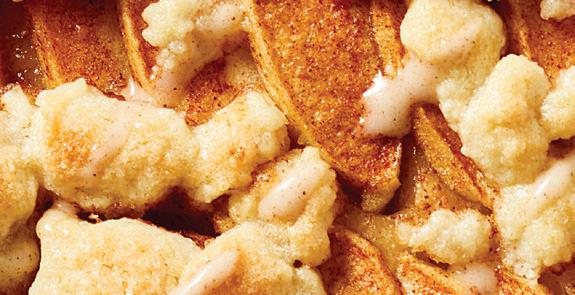
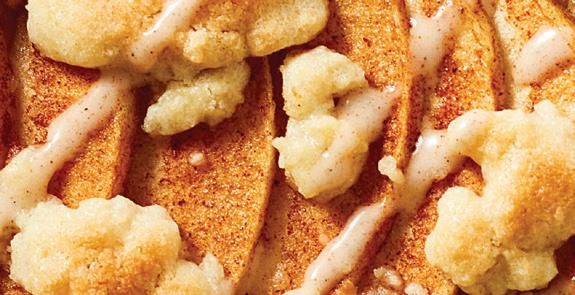
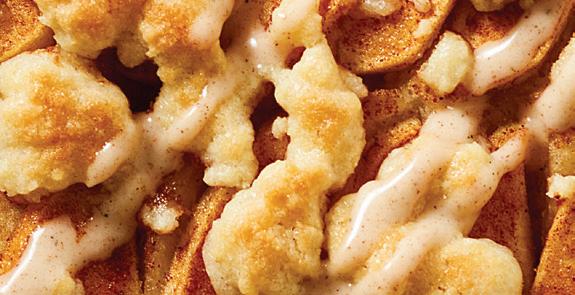
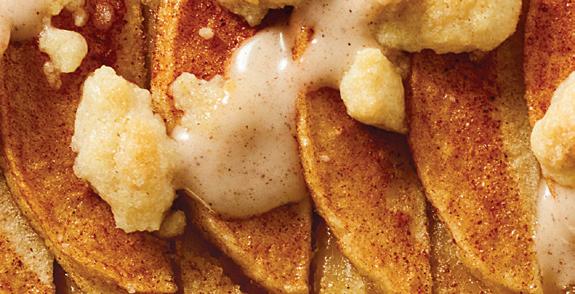
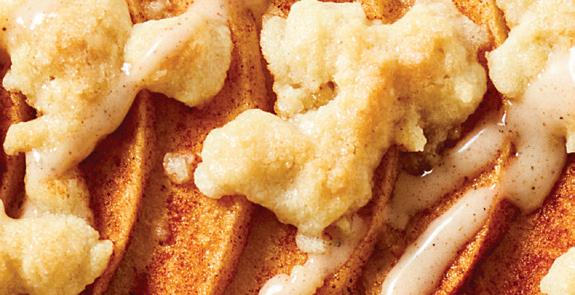
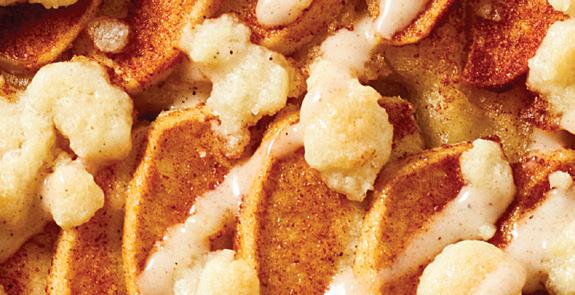
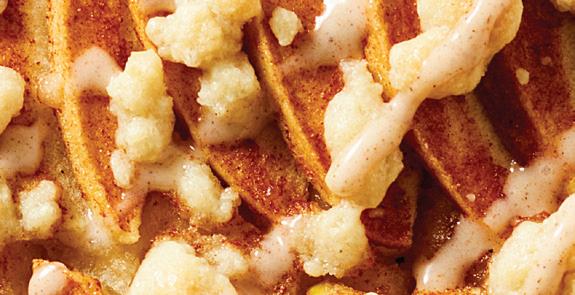
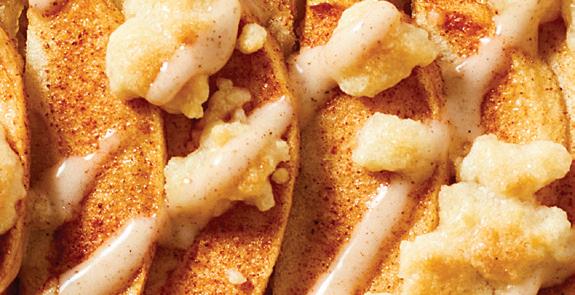
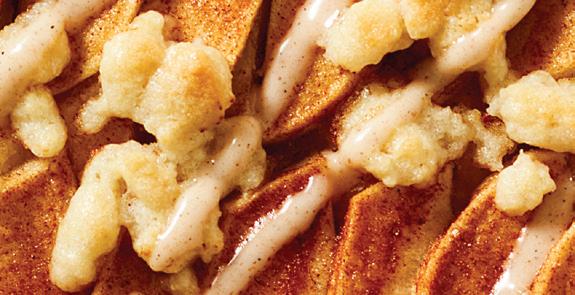


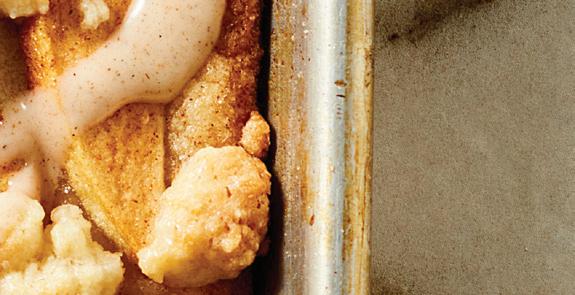
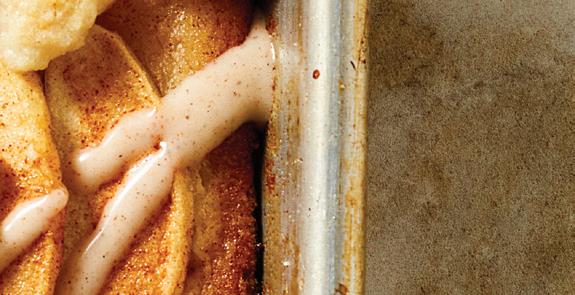
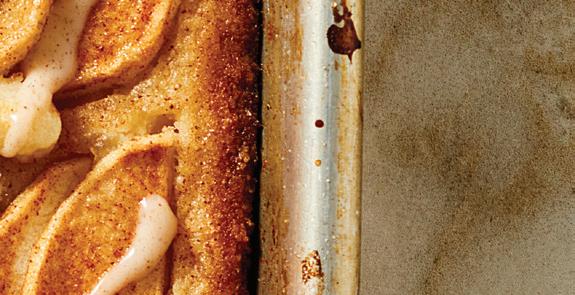
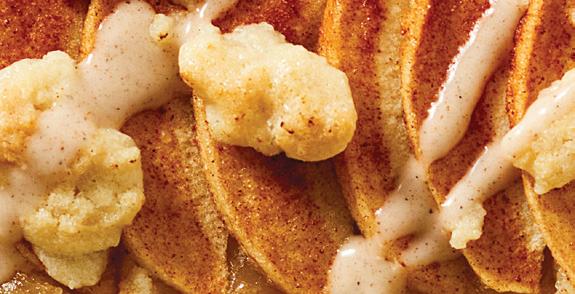


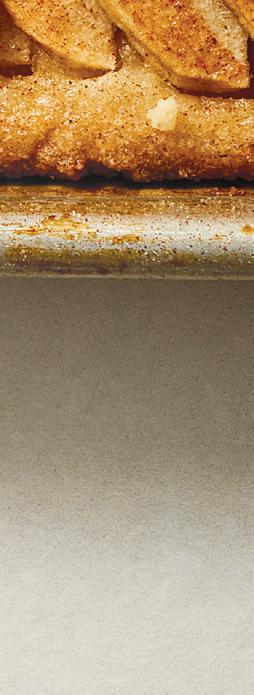

MAKES ABOUT 48 (3X4-INCH) BAR COOKIES

4 cups all-purpose flour
2 cups granulated sugar
½ teaspoon salt
1½ cups (3 sticks) butter at room temperature, cut into small pieces


2 large eggs, beaten


for the filling


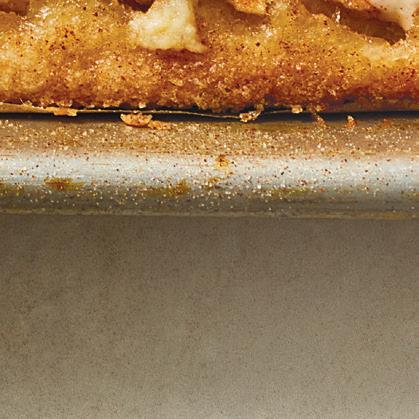

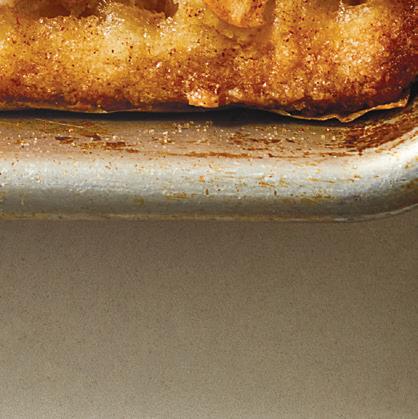


1. Heat the oven to 350° F.


A hint of cardamom in the glaze adds a slightly exotic taste to the familiar apple. Take these to a tailgate party, a potluck dinner, or as a treat for coworkers. You can substitute cinnamon for cardamom, if you wish.


6 to 8 large Granny Smith apples (about 3 pounds), peeled, cored, and thinly sliced
1⁄3 cup granulated sugar

1 teaspoon cinnamon for the glaze
½ teaspoon cinnamon
2. For the crust, sift the flour, sugar, and salt into the bowl of a food processor. Pulse in the butter until the mixture resembles small crumbs. Pulse in the egg until you have a moist, crumbly mixture. Reserve ¾ of the crust mixture.
3. Transfer the remaining mixture to a 12x17-inch baking sheet and press into the bottom with your hands. There will be gaps in the crust.

1 cup sifted powdered sugar
1⁄3 cup heavy cream


½ teaspoon ground cardamom

4. Arrange the apple slices in rows over the crust. Mix the remaining 1⁄3 cup sugar with the cinnamon and sprinkle over the apples.
5. Bake for 40 to 43 minutes or until the crust has lightly browned and the apples are tender. Let cool in the pan on a wire rack.


6. For the glaze, whisk the powdered sugar and spices together, then whisk in enough cream to make a thick, somewhat drippy glaze. Using a whisk or the tines of a fork, ribbon the glaze over the bars. After the glaze sets, store the bars in an airtight container.


Cook’s Note: Pears or plums would also be delicious in this recipe.
Nutrition (per serving): Calories: 160, Fat: 7g (Sat: 4g), Cholesterol: 15mg, Sodium: 15mg, Carb: 24g, Fiber: 1g, Sugar: 15g, Protein: 1g


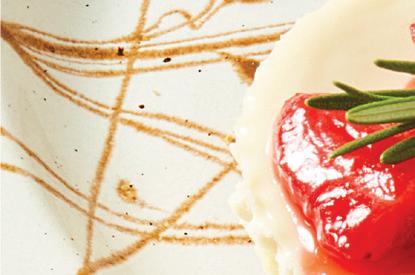


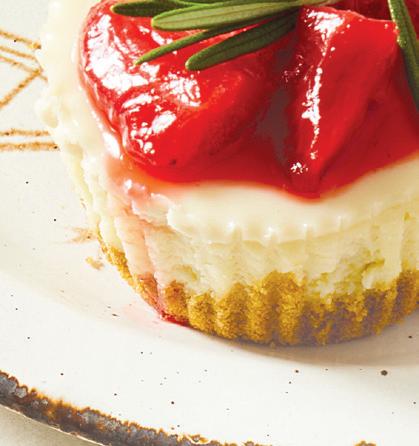
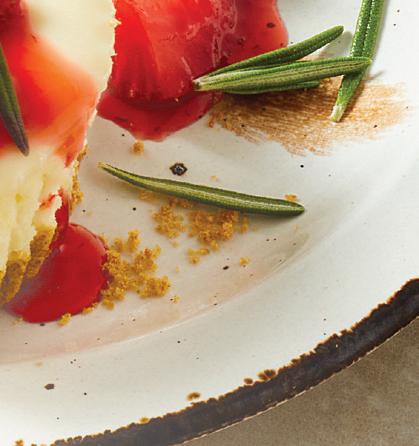
MAKES 12 MINI CHEESECAKES

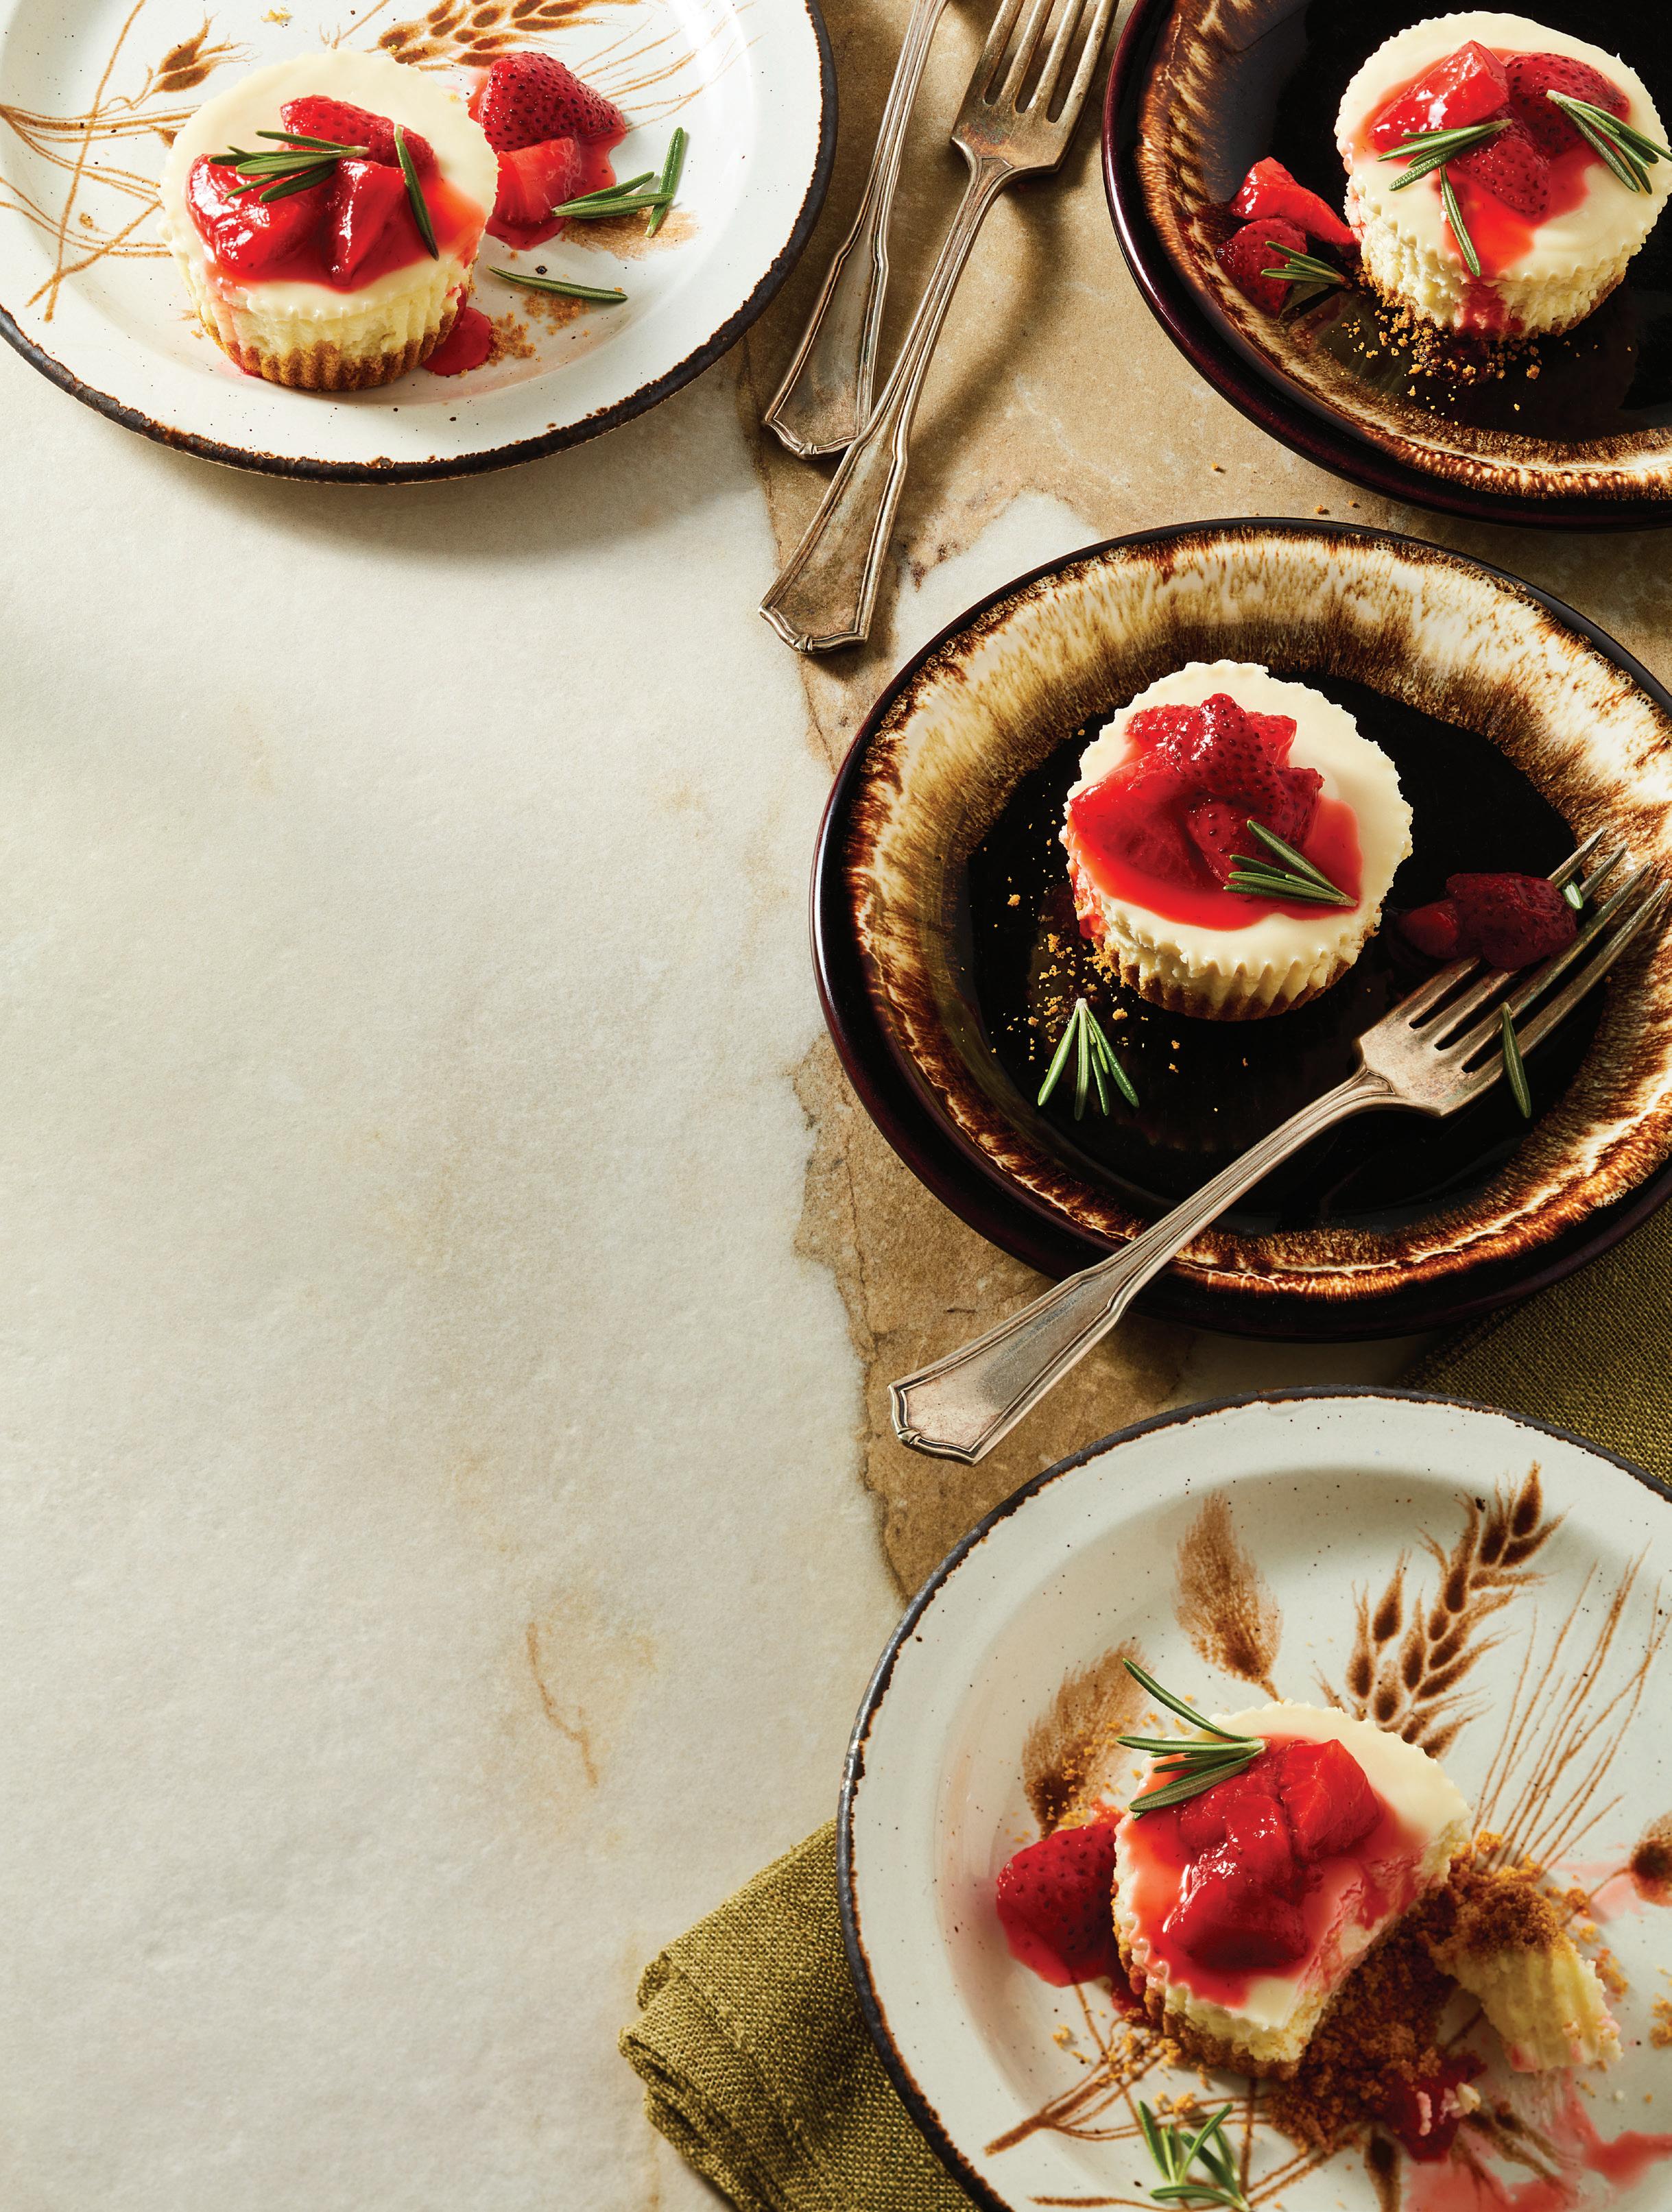
On a tiered dessert stand, these ruby red cheesecakes garnished with fresh mint leaves or sprigs of fresh rosemary say “holiday” without “over-indulgence.” The sour cream topping lends a creamy contrast to the strawberry.
for the crust


1 cup graham cracker or Bisco cookie crumbs (from about 8 graham crackers or 14 Bisco cookies)

for the sour cream topping
1 (8-ounce) container sour cream
3 tablespoons granulated sugar
1 teaspoon vanilla extract
for the cheesecake
1⁄3 cup sour cream


2 (8-ounce) packages cream cheese, at room temperature

½ cup granulated sugar
1 teaspoon vanilla extract
2 large eggs


for the strawberry topping
1 pound fresh strawberries, hulled and sliced
1 tablespoon fresh lemon juice
1⁄3 cup granulated sugar Fresh mint leaves or rosemary sprigs to garnish
1. For the strawberry topping, place the strawberries, lemon juice, and sugar in a medium saucepan over medium-high heat. Cook, stirring occasionally, until the mixture comes to a boil. Reduce the heat and let simmer for 20 minutes or until the berries have cooked down. Let cool for 1 hour. The sauce will thicken and darken as it cools—and will thicken even more in the refrigerator.


2. Heat the oven to 325°F. Line a 12-cup cupcake pan with liners.
3. To make the crumbs, place the cookies in the bowl of a food processor and process or place in a large plastic bag, seal, and crush with a rolling pin. 4. Spoon the crumbs into the bottom of each liner and press with the end of a small glass until firm. Set aside.

5. For the sour cream topping, combine the sour cream, sugar, and vanilla in a separate bowl and set aside.

6. In the bowl of a food processor or in a bowl with an electric mixer, blend the cream cheese, sour cream, sugar, vanilla, and eggs until smooth. Divide the mixture among the cupcake liners, filling to the top.

7. Bake for 15 minutes, remove the pan from the oven, and spoon the sour cream topping on each cheesecake. Return to the oven for 3 to 5 minutes more, or until the filling is firm and doesn’t jiggle when you gently shake the pan. Let cool in the pan on a wire rack, then transfer to the refrigerator to cool and firm up for 1 hour or until ready to serve.


8. To serve, remove the cupcake liners from each cheesecake. Spoon the strawberry topping over each cheesecake and garnish with a mint leaf or rosemary sprig.


Nutrition (per serving): Calories: 310, Fat: 19g (Sat. 10g), Cholesterol: 80mg, Sodium: 190mg, Carb: 30g, Fiber: <1g, Sugar: 23g, Protein: 5g


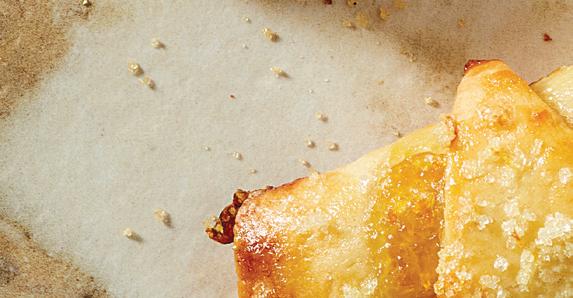
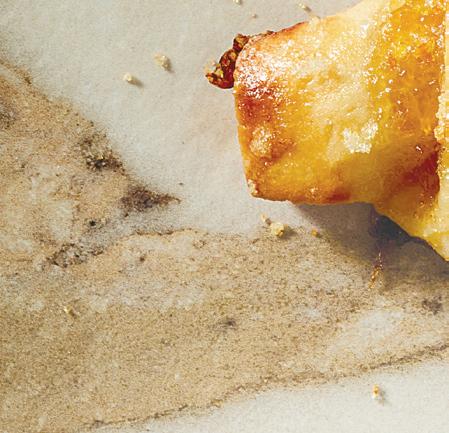
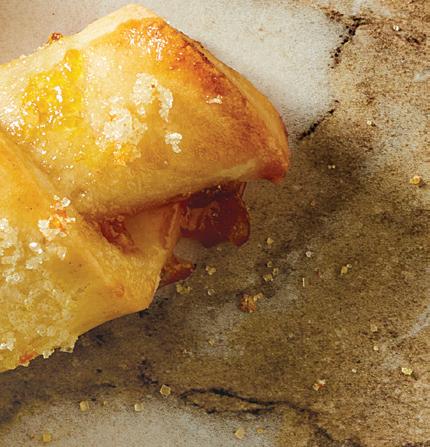
MAKES 60 PASTRIES

Cranberry, Almond, and Orange Rugelach
almond pastry dough
1 (8-ounce) package almond paste
2 cups all-purpose flour
¼ teaspoon salt
1 (8-ounce) package cream cheese


1 cup (2 sticks) cold butter, cut into small pieces for the filling


Rugelach, rolled pastry crescents, deliver three times the flavor with a sweet almond crust, tangy and colorful cranberry filling, and orange-scented sugar topping.

1 (14 ounce) can whole berry cranberry sauce, gently warmed for the topping
½ cup sparkle or raw sugar (sugar with larger granules)

The zest of 2 oranges, about 1 tablespoon

2. Heat the oven to 375°F. Line 2 large baking sheets with parchment paper and set aside.


1 large egg, beaten
1. For the dough, chunk the almond paste into the bowl of a food processor and process until you have a uniform mixture with no large lumps. (Alternately, you could use a mixer.) Add the flour and salt and pulse to combine. Add the cream cheese and butter and pulse until the mixture resembles coarse crumbs. Transfer the mixture to a floured surface and knead into a ball. Divide the ball into 4 equal portions. Wrap with plastic wrap and refrigerate for 30 minutes. (Dough can be made up to 3 days ahead).


3. When ready to bake, spoon the cranberry sauce into a microwavesafe bowl and warm on the defrost setting for 40 seconds.
4. On a floured surface, roll each portion of dough to a 9-inch circle, using an inverted pie or cake pan as a guide. Trim the edges and reserve the trimming to use for the fifth circle of dough. Spread 3 tablespoons of warmed cranberry filling on the dough, using an o set spatula or table knife. Using a pizza wheel or a long, sharp knife, cut the dough circle into 12 equal pie-shaped wedges. Starting from a wide end of each wedge, roll the dough up into a crescent. Place each crescent on a prepared baking sheet, about 1 inch apart. Continue with the rest of the dough and filling.


5. For the topping, combine the orange zest and sugar in a small bowl until well blended. (Can be mixed, covered, and kept at room temperature for up to 3 days before using). Brush the top of each crescent with beaten egg and sprinkle with orange sugar.
6. Bake for 21 to 23 minutes or until the pastries have very lightly browned. Let cool and store in an airtight container at room temperature for up to 3 days. They can be frozen for up to 3 months.


Cook’s Note: Instead of the whole cranberry sauce, you could also substitute good-quality preserves, such as apricot, plum, or blueberry.

Nutrition (per serving): Calories: 90, Fat: 6g (Sat: 3g), Cholesterol: 15mg, Sodium: 25mg, Carb: 9g, Fiber: 0g, Sugar: 3g, Protein: 1g


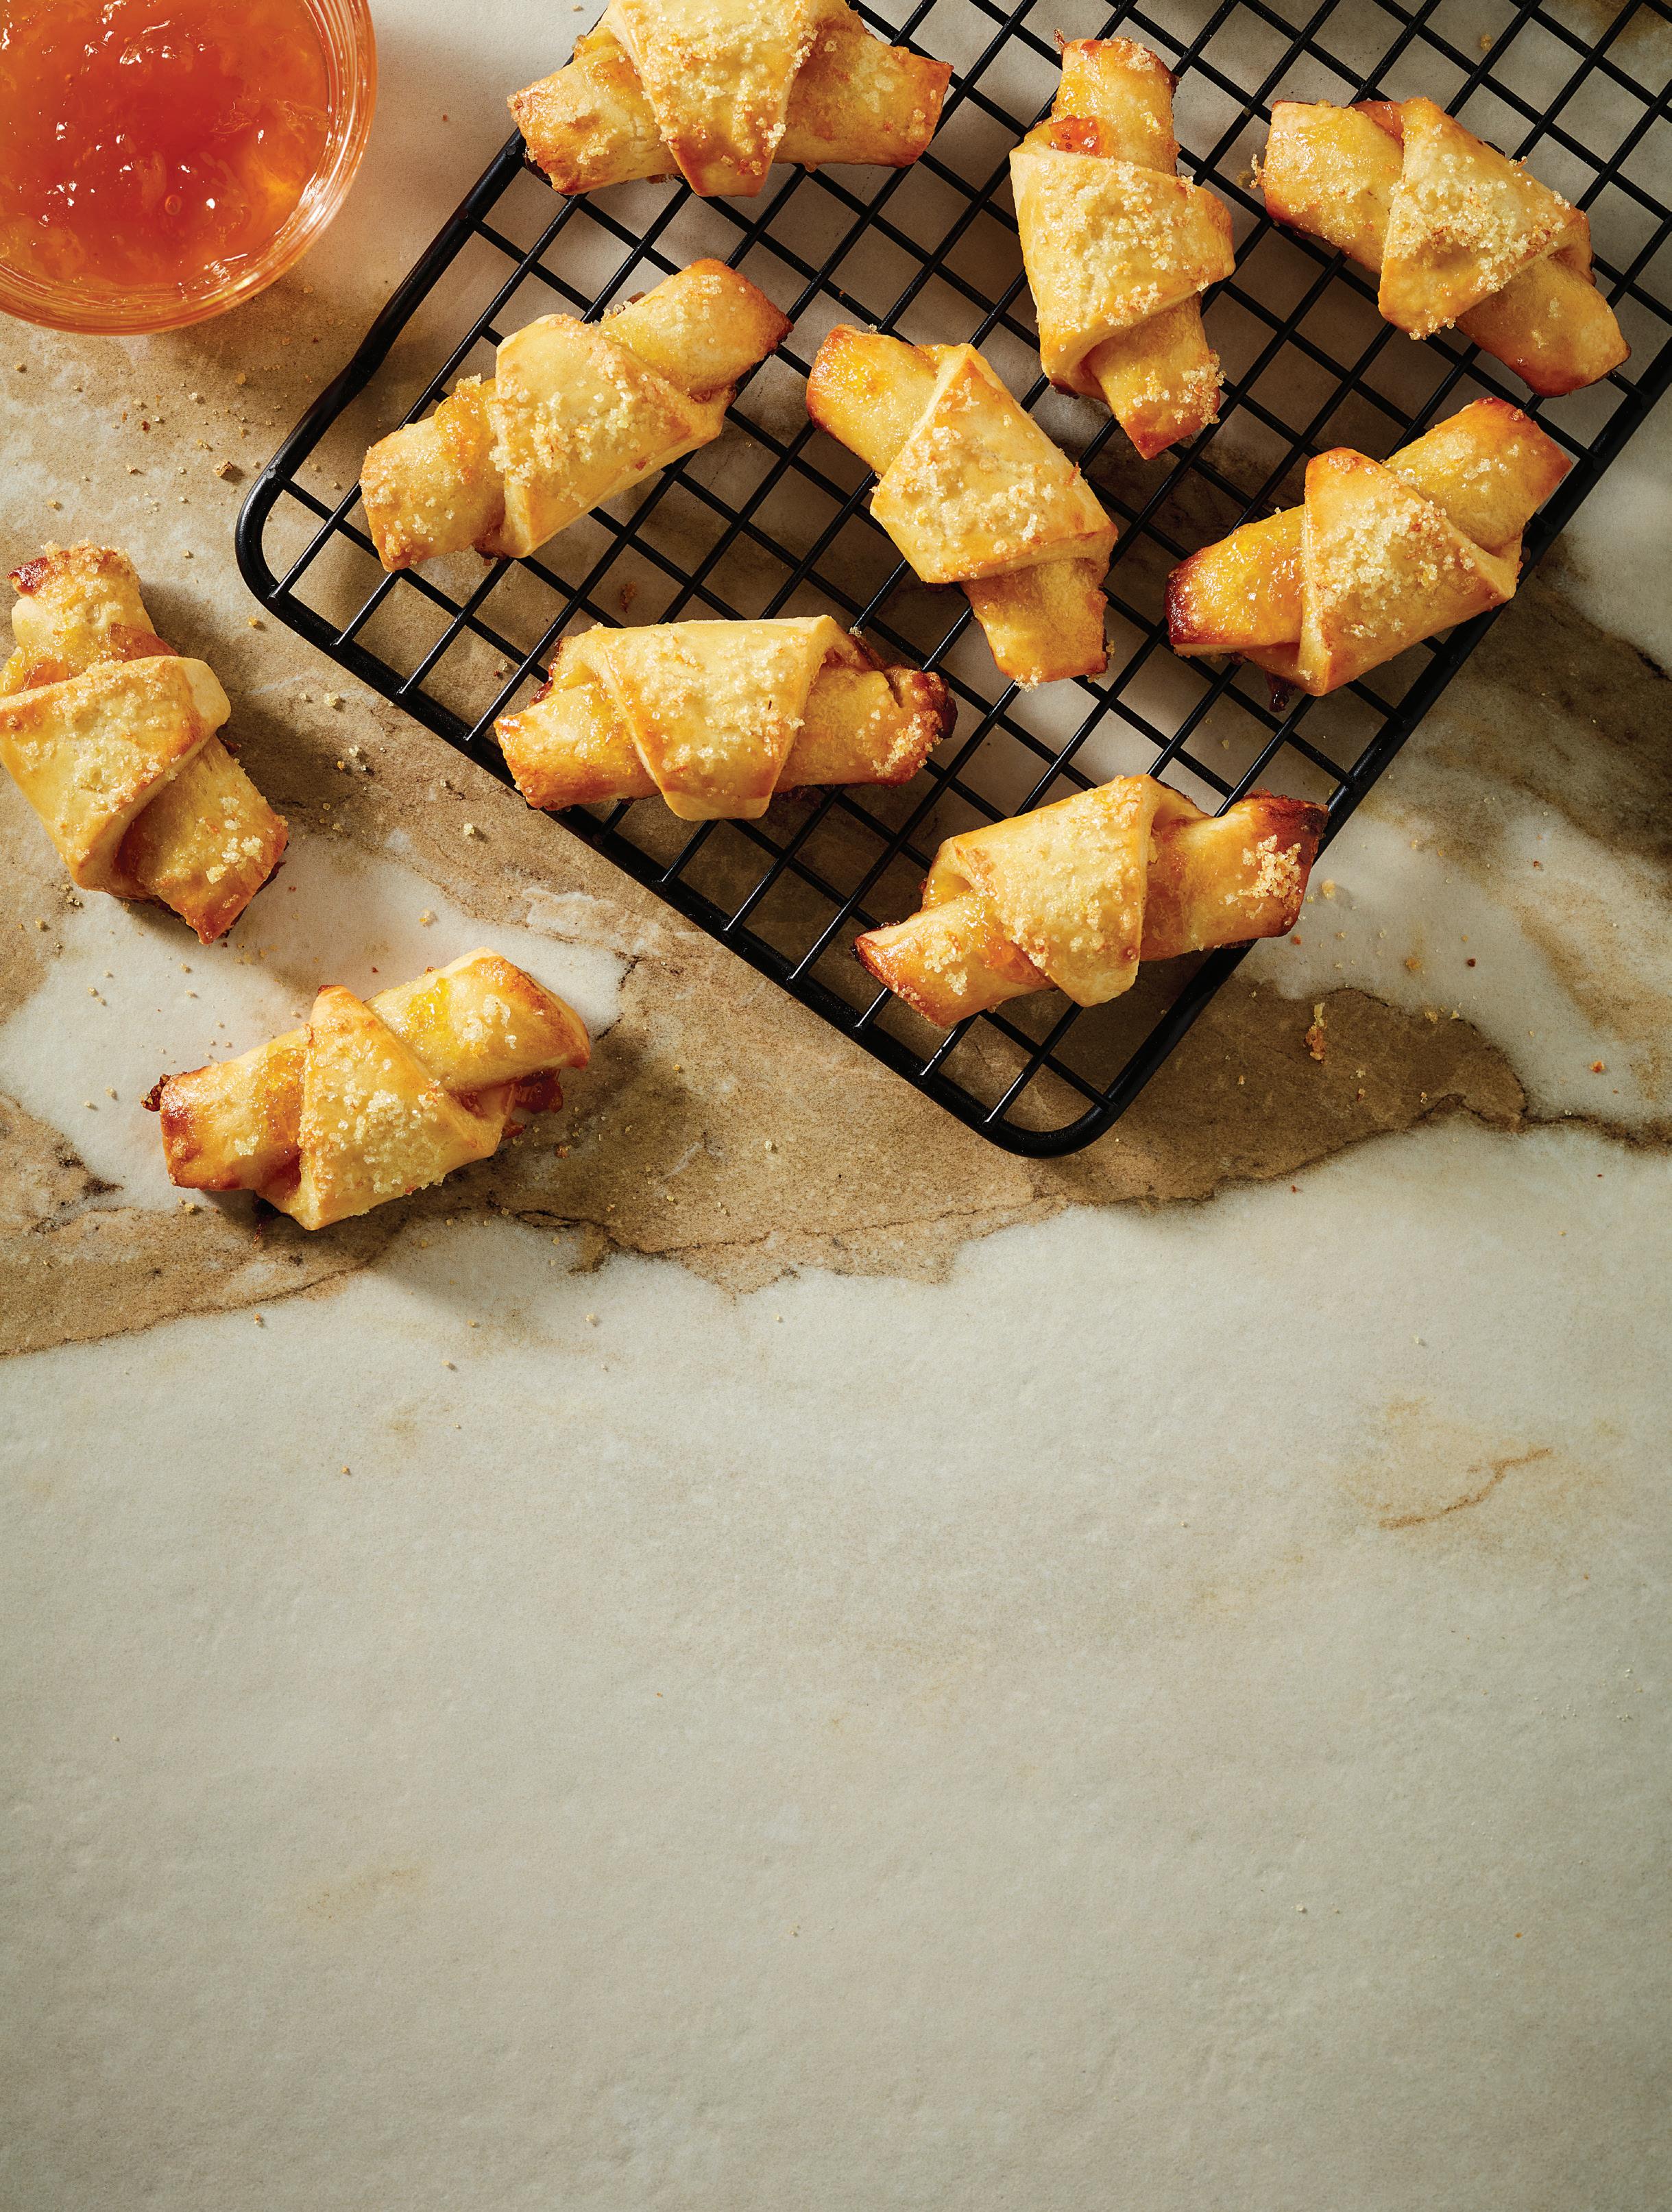

MAKES 1 (8-INCH, 3-LAYER ) CAKE, 16 SERVINGS
This moist and decadent devil’s food cake with a crunchy toffee filling will delight chocolate lovers. Garnish the creamy, fluffy chocolate frosting with more toffee bits around the top of the cake—and give a hint of the delights to come.
for the cake
3 cups all-purpose flour
2¼ teaspoons baking soda
1½ teaspoons cinnamon
3 cups granulated sugar
¾ cup vegetable oil
¾ cup unsweetened cocoa powder
3/4 cup sour cream
2 teaspoons vanilla extract
1½ cups hot water

for the frosting
1½ cups semi-sweet chocolate chips
1½ cups (3 sticks) butter, at room temperature
3 cups powdered sugar
for the filling 1 (13.4 ounce) can/jar dulce de leche
1 cup English toffee bits (from an 8-ounce package), plus more for garnish
1. Heat the oven to 350°F. Grease and flour 3 (8-inch) round cake pans, tapping out the excess flour over the sink, and set aside.
2. Sift together the flour, baking soda, and cinnamon into a medium bowl, and set aside. In the large bowl of an electric mixer with a paddle attachment, beat together on low speed the sugar, oil, and cocoa powder until well blended. Beat in the sour cream and vanilla, then beat in the dry ingredients, 1/3 at a time. Beat in the hot water until you have a somewhat runny batter. Divide the batter evenly among the prepared cake pans.
3. Bake for 25 to 30 minutes or until a cake tester inserted in the center comes out clean. Remove from the oven and cool in the pans for 5 minutes. Run a knife around the perimeter of each pan and carefully invert each cake layer onto a wire rack to finish cooling.
4. To prepare the frosting, place the chocolate chips in the top of a double boiler over simmering water or in a microwave-safe bowl to melt on the defrost setting for 90 seconds. Stir until smooth, microwave again if necessary, and set aside to cool. In a mixing bowl, beat the butter until fluffy. Add 1 cup powdered sugar and beat again on low speed. Add the remaining sugar, 1 cup at a time, and beat for 2 minutes on medium-high speed or until you have a smooth, creamy, fluffy frosting.
5. When the cake layers are completely cool, arrange the bottom layer on a serving plate. Spread the top with half of the dulce de leche and sprinkle with half of the toffee bits. Repeat the second layer and place the third layer on top. Frost the sides, then the top and garnish with toffee bits.
Cook’s Notes
n Dulce de leche, which is caramelized sweetened condensed milk, can be found in the baking or Hispanic foods aisle at the grocery store.
n Choose the most domed cake layer for the top of the cake.
Nutrition (per serving): Calories: 810, Fat: 42g (Sat. 20g), Cholesterol: 60mg, Sodium: 290mg, Carb: 110g, Fiber: 3g, Sugar: 86g, Protein: 6g


“Mad Love,” a fusion feast of culture, family, and flavor
BY EMMA ENEBAK
Along South America’s North Atlantic coast, there is a sundrenched country called Guyana. Colored by dense rainforests and white sandy beaches, the beautiful country has an equally vibrant cultural landscape one that has been woven together by its diverse, multiethnic population. One area this cultural scene shines perhaps the most vibrantly? Food.
Or at least, that is what awardwinning chef Devan Rajkumar would tell you. Born in Toronto into a Guyanese household, Rajkumar was raised on the bold, intense flavors of his ancestry, a complex palate that spans the traditions of both South Asian and Caribbean West Indian cuisine. With the release of his debut cookbook, “Mad Love: Big Flavors Made to Share from South Asia to the West Indies,” Rajkumar is bringing these beloved flavors to the kitchens of home cooks everywhere.
Well-known for his role as a Food Network judge on “Fire Masters,” and as a stalwart chef expert on the Canadian daytime program “Cityline,” Rajkumar has harnessed his classical chef training into a wide-reaching culinary career that spans television, social media, live demonstrations, global popups, and now, a cookbook of his own. He has received awards in a number of competitions for chefs making their marks outside the traditional restaurant industry. Among others, he was winner of the Underground Chef Cartel Battle in 2017, and runner-up in Toronto’s Hottest Chef Competition in 2013.
Garnering inspiration from his multicultural upbringing, his passion for travel, and his classical chef training, Rajkumar uses the pages of “Mad Love” to present food as a vehicle for adventure, self-expression, and deep familial connection. Dedicated to his late brother Jai, Rajkumar dives deep into cherished memories, while also keeping an eye on the future, empowering the next generation of East and West Indians to
honor the culinary traditions of their ancestors while sharing it with all kitchens. We caught up with Rajkumar over Zoom to talk all things “Mad Love,” from sources of inspiration to favorite recipes and his hopes for the book’s impact on chefs everywhere.
(Interview edited for length and clarity.)
You were born in Toronto into a Guyanese household. How did your multicultural upbringing inform your early relationship with food and cooking? Growing up in Toronto was the biggest blessing ever. Because as many people know, and for those who don’t know, it’s a huge melting pot. We have so many different races, so many different ethnicities and cultures. We were surrounded by Vietnamese, by Africans, by Italians, and there were so many examples of cuisine coming from different parts of the world. Another huge, huge influence on my life growing up was my brother, Jai. Jai was very worldly with his palate, there was nothing that he was afraid to try. When I was very young, I’d go with him and all his friends to eat food—Korean food, regional Italian food, Ethiopian, and all these different styles of cuisine.
I saw that your brother is in your cookbook dedication. It seems like he’s been a big part of your journey. As soon as you open the book, boom— there’s my bro, Jai. For a long time, I didn’t discuss him publicly and I didn’t talk about what happened to him. But after loads of internal work, I have been able to process his passing. And now I’m very excited to choose to celebrate him.
You share in your book intro that your mother has also had a great influence on your career. Do you remember a favorite dish that your mom would make when you were growing up?
One of the most heartwarming dishes that my mother makes is a stewed chicken dish. It’s got beautiful spices in it, loads of onion and garlic. And we use whole
chicken so that we have the bone, which has so much more flavor. I’ve never had a stewed chicken like it anywhere else. Plus, she makes this with fresh roti. And both of those recipes are in the cookbook.
Did you always know you wanted to have a career in the culinary space?
Absolutely not. When I was growing up as a kid, I was always obsessed with food. I’d sit on the floor of my grandmother’s apartment, and we would make this wonderful dish called coconut choka. It’s a very popular Guyanese dish. I would follow my mom all over the kitchen. I was always watching food shows on TV. But I never knew I could follow that as a passion. My dad was a very successful businessman, and my parents wanted me to go into law, engineering, medicine, things of that sort. I didn’t put two and two together in my late teens that I could go to school to enter the field of cooking. Also, back then people went to culinary school to become chefs and hopefully own a restaurant, and that wasn’t really my path. So, I bounced around bilingual sales jobs in my early 20s, until I finally summed up the courage to enroll in culinary school at 24 years old. And it was a very eyeopening moment. It was the first time in my life that, the night before school, I was so excited, I couldn’t sleep. Because I was going into school to study mother sauces, and to make stocks, and do butchery, and study internal temperatures of meat. And it’s like, ‘you’re telling me everything I have to learn and study is stuff that I can’t get enough of already?’ It was a very ‘a-ha’ moment for me.
Tell us more about your passion for traveling. Is it closely related to your passion for food and cooking? When I was young, I remember going on trips and meeting individuals who were traveling all the time. It was very foreign to me, I didn’t understand how people could afford a lifestyle like that. Like, how do you get to visit the whole world? How can I find a job that allows me to do that? And in 2016, after I helped open a huge restaurant in Toronto, I felt I needed more experience; I needed to learn more about other cultures and step out of my comfort zone. So, I left for six months. I spent time in Dubai, London, and Peru. In fact, when I got to Peru in the sixth month, I was so broke I was couch surfing. But that experience was intangible for me. It established me
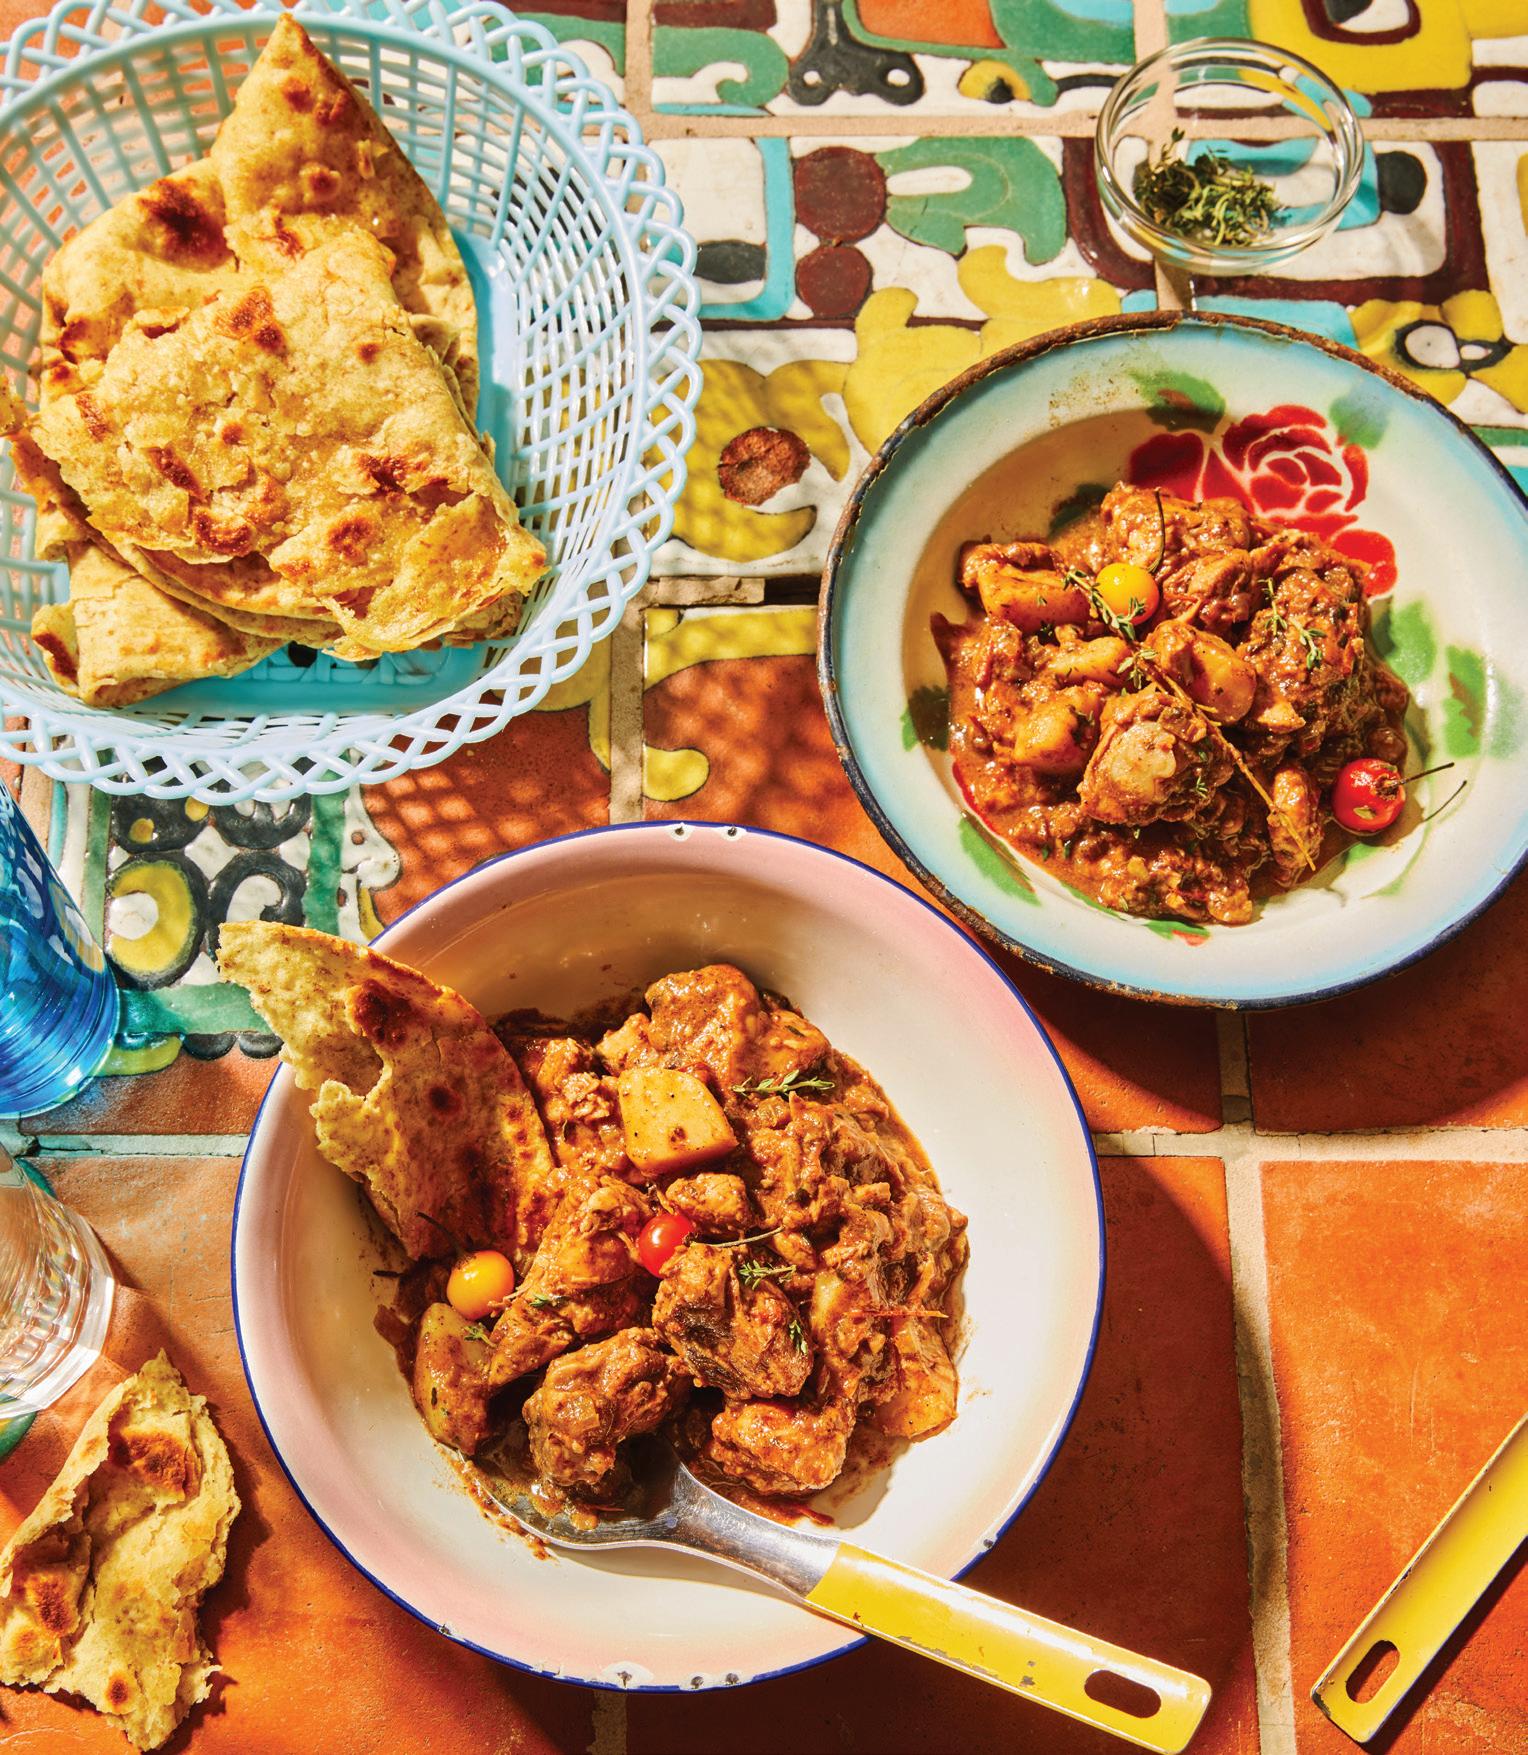
as a cook and as a chef—as someone without boundaries, who could travel and cook and make magic happen abroad. And then, of course, I brought that back to my hometown and to my audience over here. So that 2016 trip, I didn’t know it was going to set me on this trajectory, but it did. Slowly but surely, gigs abroad started coming. And now I am almost exclusively traveling all year.
So how did your relationship with food change when you began traveling the world? Did you begin to see your craft differently?
The biggest thing is, I just want to learn. I’m a very curious, inquisitive dude at the end of the day. If I have a million lifetimes, I still won’t be able to learn everything there is to know about food on a global scale. I know that. So, I travel to learn as much as possible.


Mom’s Chicken Stew MAKES 4 SERVINGS
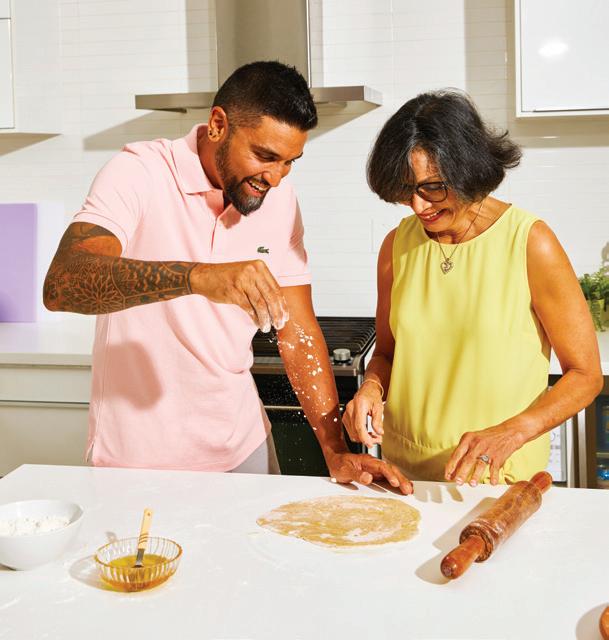
Whenever I return from my travels—whether it’s a week or months on end—Mom makes me stewed chicken and roti. I have scrutinized the recipe, studying her methodology countless times, yet I can never replicate it to the same standard. The only reason this recipe even comes close is because she helped me write it. Thanks, Mom. –DEVAN RAJKUMAR
2 tablespoons grapeseed oil
6 cloves garlic, finely chopped
2 tomatoes, chopped
1 onion, chopped (1 cup)
1 small stalk celery, chopped (1⁄2 cup)
1 Wiri Wiri chili pepper, finely chopped (see Cook’s Note), plus extra whole chili peppers for garnish (optional)
2 pounds bone-in chicken thighs, cut into 2-inch pieces
21⁄2 teaspoons salt
5 basil leaves, torn
1 teaspoon finely chopped ginger
1 teaspoon thyme leaves, plus extra for garnish (optional)
1 teaspoon ground cumin
1 teaspoon ground allspice
1 teaspoon smoked paprika Black pepper, to taste
1. Heat oil in a saucepan over medium heat. Add garlic, tomatoes, onion, celery, and Wiri Wiri chili pepper. Saute for 5 to 6 minutes, or until onion is translucent.
2. Add chicken and the remaining ingredients. Increase heat to medium-high and saute for 10 to 15 minutes, stirring frequently to prevent burning. When the moisture from the chicken dries out, pour in 2 cups warm water, cover and bring to a boil. Reduce heat to medium-low and simmer for 15 to 20 minutes, stirring occasionally.
3. Transfer to a serving platter and garnish with Wiri Wiri chili peppers and thyme (if using). Serve with roti flatbread, if desired [recipe in “Mad Love” cookbook].
Cook’s Note: Wiri Wiri chili peppers can be substituted with half the amount of Scotch bonnet or habanero chili peppers.
What is the greatest lesson you’ve learned through travel?
The best thing I learned is that I don’t know as much about food and cooking as I thought I did. As I travel, I learn so much more about new ingredients, techniques, processes. I learn more about the language behind food, the aromatics, everything. Traveling keeps me very, very humble as a chef. And I need all the humility I can get.
Of all the places you’ve traveled, where had the best food?
India. I mean, I’ve had spectacular food all over the place—places like Peru, Hawaii. I’ve had amazing food throughout the States. I always say the same place, though. And it’s India.
There’s a few different reasons for this. One is that it’s familiar to me, I grew up eating Indian food, and surrounded by that community. So, there’s nostalgia attached to it. There’s also the range of it—India is bloody massive. Every 100 kilometers, the menu will change to a certain extent. There are different local ingredients, different styles of cooking new ingredients, it’s just really fascinating.
How has your focus on East/West Indian flavors helped shape your career?
It’s only in the past four or five years that I’ve really owned this lane, and really made an effort to be an ambassador to West and East Indian cuisine. With my training in and out of culinary school, I was very much a world-inspired chef—I had no boundaries and would cook anything. But things started to change for
me when I really started to nestle into this East and West Indian focus… I nd myself so fortunate because I can dive back and forth. I can be cooking Indian food one day and at the same breath, cook Caribbean food, West Indian food, Guyanese food. So, I find that very, very exciting.
So, your career eventually led you into television in popular media. How did stepping into the public spotlight affect your life and career?
I’d go to culinary school during the day [in 2009] and then I’d start teaching live culinary demonstrations in five different locations [Mongo’s grocery store chain in Toronto] in the evenings. And that really set me off on this path of performing or engaging with audiences. I was heavily inspired by Emeril Lagasse as a kid… and it made me feel like, ‘I want to be like that guy one day.’
I started doing ‘Cityline’ in 2014 and did that for 10 years. I started judging on Food Network. I’ve done demos literally all over the world, even as far as Nepal. But the most exciting part is that I’m able to nurture and nourish a community.
Let’s focus on your cookbook. Can you tell me a little bit about where the title, ‘Mad Love,’ comes from?
In 2020, I came home for a while during the pandemic. I remember one day I came downstairs, and I used a rubber band to wrap my phone to an old tripod and started lming a video. I called this series ‘Chef Dev at home.’ It really built my pro le, and the trajectory of my career changed. I started to do a lot more brand partnerships, and I started to perform very well in that area. Naturally, I talk with a lot of slang, and so I was signing o these videos with, ‘mad love.’ I said ‘mad love’ for a number of di erent reasons. I cook with so much love, and it’s the secret ingredient in my cookbook. If you really want to knock someone’s socks o , if you really want to look a er someone and take care of them, you’ll cook with as much intention and love as possible.
I didn’t think anything of it, but over months, and over the last couple of years, ‘mad love’ really started to stick. When I went to Pakistan last year to help my friends open a restaurant, they branded it as the ‘Mad Love Popup’ with Chef Dev from Canada. I launched a merch line with hoodies, tuques, and aprons that all have ‘Mad Love’ on them. I just got ‘Mad Love’ platters delivered. There’s ‘Mad Love’ badges. So, I really started to build a brand around it. Now, I know the book couldn’t have had any other name.
‘Mad Love’ is your first cookbook. Does it feel different from other ways you’ve shared your craft with the world? This is massive. My audience is going ballistic for this cookbook. And it’s a testament to the relationship and the intimacy of the bond that I’ve created with them over the past few years. This cookbook is something that they want— they want to bring Devan home. They know how much passion I cook with. And they didn’t just want to be a part of the brand, they wanted to be a part of the movement.
This cookbook is also a big legacy piece. Not only for me, but for my mother, my grandmother, who both have recipes in the book, and my entire community. Since releasing the book, I get messages every single day of people telling me they’re so proud that I’m doing this and they’re proud to be Guyanese, and they’re happy their community and culture is being showcased. That’s how this is different from anything I’ve ever done before.
Can you share a little bit about your recipe experimentation process? I don’t recipe test a lot. I recipe tested for my cookbook, but I almost exclusively cook through feel. I lead with what I want to eat. That’s ultimately the inspo—‘what does Devan want to eat?’ That’s how I get recipes like that Bombay tomato chicken parm. Chicken parm is one of my favorite things in the entire world, but I just add so much spice, heat, and flavor into that tomato sauce that really takes it to the next level … stepping out of the comfort zone, doing things that are uncommon, and above all, following my gut.
There’s another recipe that I’d love to tell you about. It’s palak paneer spanakopita. Palak paneer is a famous South Asian dish consisting of paneer and spinach. You eat it with rice, or naan, or roti, anything like that. So, I make it and I reduce it down further than you normally would. I add feta and dill, and then I put it into phyllo. So, it’s a palak paneer spanakopita. I love taking things from different parts of the world and combining them. It makes perfect sense in my head, but it really blows people’s minds.
If you had to choose, what would be your favorite recipe in ‘Mad Love?’ I already mentioned that spanakopita, which is one of my favorites. Besides that, my favorite recipe is probably the smoked goat biryani. It’s also the most
difficult in the cookbook, because while it’s technical, it demands the most amount of ingredients.
What’s the best recipe for a lazy weeknight? A big celebration?
For a weeknight meal, I’d go with mom’s chicken stew … It’s so heartwarming and it’s a one-pot wonder. And for a big celebration? Well, there’s two. There’s Guyanese pepper pot, which would be a little bit challenging for people who have never had it before, only because it demands a couple of pretty special, rare ingredients. Also, the Guyanese chicken chow mien. Guyanese food is so inspired, it’s a melting pot of different cuisines—European, Portuguese, African, Chinese, of course, Indian. The Chinese immigrants brought different foods over, and fried rice and chow mien is at every single Guyanese restaurant on Earth, it seems like. So, the Guyanese chicken chow mein is a really good dish, you can make it in the morning and leave it out all day and just graze on it.
What’s your number one tip for approaching a new recipe, especially for beginner chefs?
Don’t be afraid to make a mistake. I find a lot of people don’t tackle new recipes or step out of their comfort zone because they’re afraid they’re gonna mess up … The more you make a new recipe, the better you’ll get at it. And then, eventually you’ll get to the point where you can put your own unique spin on it.
What do you hope readers take away from this book?
I hope they take away inspiration, and as I mentioned before, to step out of their comfort zones. But I also hope they take away how much passion I have for this. Every year that goes by, the younger generations of East and West Indians become a bit more disconnected to the recipes of our grandparents, so I’m hoping that this connects them back to it. The book is called ‘Mad Love’ for a reason, I just want it to bring love into every kitchen that it enters.

RECIPE FROM “MAD LOVE: BIG FLAVORS MADE TO SHARE, FROM SOUTH ASIA TO THE WEST INDIES” BY DEVAN RAJKUMAR © 2023 REPRINTED WITH PERMISSION FROM FIGURE 1 PUBLISHING.
by mary subialka
You can keep the wine flowing into the dessert course when you select varietals that are a little sweet themselves. Sweets can emphasize a wine’s acidity, and if paired with a selection that is drier than the dessert, the combination can result in a bitter taste. Dessert wines are made in a wide range of styles and are generally thicker, richer, and sweeter than table wines, but there are also some table wines that can make good matches with certain sweets.
Some wines to bring to the dessert table include Sauternes, Muscat, and late-harvest Gewürztraminer, especially with fruit tarts. Fresh fruit and treats made with fruit are natural partners, such as ice wine with apple pie à la mode, or carrot or spice cake can team up well with Riesling or late-harvest Riesling. The hints of orange flavor in Muscat can accent those in a chocolate orange dessert.
For bubbly selections, choose sec (medium sweet), demi-sec (sweet), and doux (very sweet) styles to pair with desserts. Chocolate-covered strawberries and sparkling wine are a classic delight, and these can provide a better match than dry brut styles. Also try sparklers with angel food cake, lemony desserts, and almond-flavored holiday cookies.
Fortified wines are a classic choice. Vintage port and late-bottled vintage port pair well with dark chocolate, dried fruits, and desserts containing nuts. Ruby port is one of the few wines that complements milk chocolate, and it makes a good partner for fresh fruit such as pears, sliced apples, raspberries, plums, and fruity desserts. Try tawny port with custard and creamy desserts such as pumpkin pie, crème brûlée, cheesecake, and tiramisu. Oloroso sherry’s rich nutty raisin-like flavor is a good match with nutty desserts such as pecan pie—or if you break out that fruitcake. Madeira or Muscat can also pair well with the pecan pie or fruitcake. Sherry plays nicely with English trifle, since it’s made with a bit of sherry, and Asti or Moscato d’Asti counterbalance Christmas pudding. Try sipping Zinfandel, which has a li le spice on its own, with full- avored gingerbread and spice cookies. And late-harvest Riesling and ruby port can complement Hanukkah doughnuts lled with jam and dusted with powdered sugar. Any way you slice it, there’s bound to be a delicious match for your dessert.