2 minute read
rendering + compression


Rendering
Rendering refers to the process of publishing your work, which creates self-contained files viewable outside of After Effects.
Advertisement
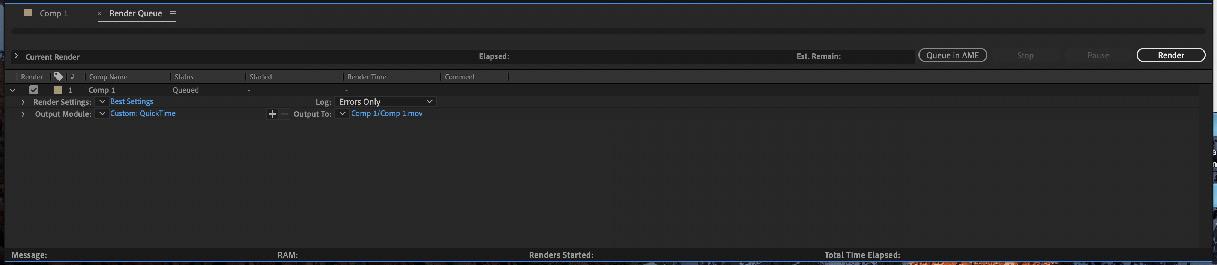
● Add to render queue > Composition > Add to Render Queue
● Render Settings > Best Settings
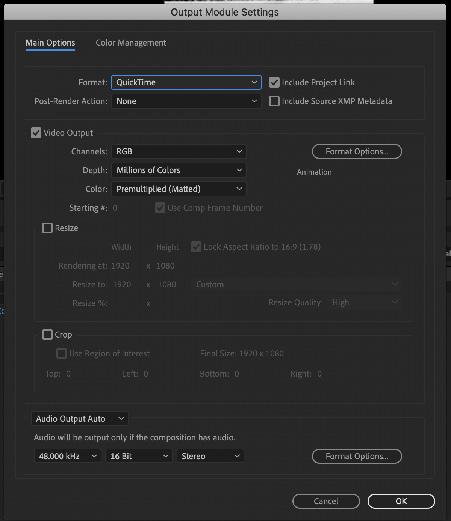
● Output Module > Lossless > click on Lossless, the pop-up window ‘Output Movie Settings’ will appear. > Format: Quicktime (selct file format) > OK
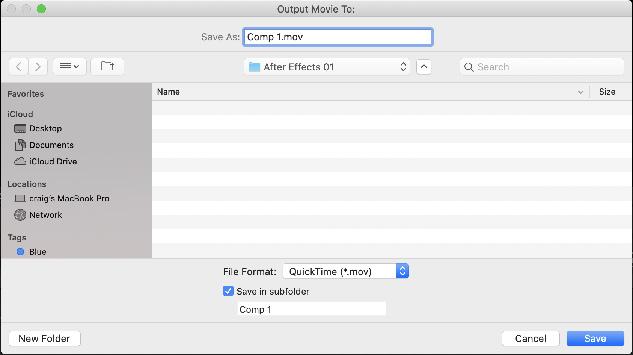
• Output to: > click on the file name, the pop-up ‘Output Movie To’ window will appear > select output location + name > save
• Render Click the Render button in the upper-right corner of the Render Queue panel
render
Compression
After Effects can make very large files, use one of the following to compress your film:
● Handbrake ● Adobe Media Encoder
Handbrake
This works largely the same in both Mac and Windows, the only difference being the template for Handbrake. To convert a single video, follow this process:
● download and install HandBrake > https://handbrake.fr/ ● Launch Handbrake
● If necessary, click the Source button in the top left, to choose what you want to convert. ● Choose a File, if necessary, click the Source button in the top left, to choose what you want to convert. ● Click the appropriate preset in the sidebar to load it. ● Choose your Destination, click Browse next to the destination box to choose where you want to save the file. ● Convert, Click Start to begin conversion. This can take quite a long time depending on the length of the source video.


Adobe Media Encoder
Adobe Media Encoder is a media processing application that allows you to encode(export) audio and video into a variety of formats from applications such as After Effects, Premiere etc.
The interface is divided into four panels: ● media browser - allows you to browse a range of formats on your system ● queue - is the main function area of the program. it lists the encoding jobs ● preset browser – a list of possible output file types or create your own presets to use with premiere pro ● encoding - encoding panel monitors the progress of the current encoding job
To process files: ● Go to media browser and select the file you want to encode ● Drag the source file to the queue window ● Select a preset in the preset browser window or set a custom version and then drag to the queue window ● Click on the output file if you want to change the name or location ● Press the green start queue button in the top right-hand corner and the media encode will start working ● The encoding window shows the progress of the job ● when the job is complete, click on the output file and it will take you directly to the window of where the output file is located.
media browser
preset browser queue

encoding

