ST PAUL’S CATACOMBS

Manual
Young Archaeologist
Mdina and Rabat stand at the centre of Malta and have been inhabited for a very long time. This is the highest point on the island on which they are built, defended by natural cliffs along the west, north and east sides. Besides, the area is also rich in freshwater springs and surrounded by fertile lands.
The city of Melite, Malta’s capital during Roman times, stretched over this promontory. It covered present-day Mdina and Rabat’s historic core. Melite was surrounded by fortification walls along the perimeter of the natural cliffs, and by a wide ditch cutting across the land access to the promontory.

Roman law prohibited burials within the city for health reasons, so all dead persons were buried outside the city walls. The tombs were cut into the surface of the rock with the bodies placed in underground chambers, and were mostly grouped in the stretch of land beyond the ditch as seen in this map.
The Roman City of Melite St Paul’s Catacombs

2


3
St Paul’s Catacombs
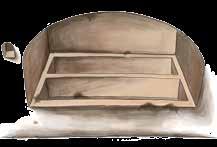
As can be seen at the St Paul’s Catacombs Complex, every stretch of land was used to excavate tombs. There are 59 catacombs, as well as many surface tombs in this site.

These add up to over 1000 tombs and together they hold around 1500 burials.
The main and largest catacomb has an intricate system of interconnected passages which covers an area of more than 2000 square metres.
Entrance
Visitor Centre: Archaeological Museum, Audiovisuals and the feature on
Elsa facial reconstruction
Social Background Information
3 2
1
4
Here is a plan of the 24 catacombs marked in circles, which you can enjoy exploring, and 8 information areas to learn more about the catacombs.

Main Catacomb
Small Catacombs
First Aid
Burial Rituals Information
Catacombs Conservation Information
Catacombs Architecture Information
4 5 6 7 8 9 11 10 Exit Building housing the Museum Shop The Excavation Pit 3D
of Catacombs
Information
Experience
Catacombs Exploration
5
Type of Tombs

Catacombs are places of burial. These cannot be interpreted as an isolated development since they are strongly influenced by the culture of the time. Whereas through human remains found by archaeologists we learn about the dead, by looking at the types of tombs that were constructed, we get information about the dead and the living people who were burying their loved ones.
A visit to St Paul’s Catacombs will reveal several interconnected tombs which vary in size and shape. There are 8 types of tombs which can be found in Maltese catacombs and all of them can be seen at St Paul’s Catacombs.

Varying from simple hollows to more elaborate works, these tombs speak of families with different standards of living, as well as the changing space available in these cities of the dead.
A rectangular hollow dug into the wall mainly used for the burial of infants which is covered and sealed with a stone slab.
A large arched recess dug into the wall, with one or more burial hollows at the base, where the body is laid and then covered with stone slabs.
An arched window entrance dug in the rock leading to a chamber where the body is laid. The opening is then sealed with a stone slab.
Loculus Arcosolium Window tomb 6
Wall Tombs
Free Standing Tombs

Table tomb
A block of bedrock with burial hollows where the body is laid down and then covered with stone slabs.
A table tomb which has corner pilasters that link up to the ceiling forming a canopy covering. The body is laid down in the hollow and covered with stone slabs.
A canopied tomb with a carved out saddle-back lid over the burial hollow. The body was inserted through an opening at the side of the hollow, then sealed with a stone slab.
Other Tombs
A rectangular hollow cut into a bench, which may have originally been used as seating places. The body is laid down in the hollow and covered with stone slabs.


A rectangular hollow cut into the floor, probably dug out when there was no space left for more tombs in the catacomb. The body is laid in the hollow and then covered with stone slabs.
 Baldacchino (canopied) tomb
Saddle-back Baldacchino tomb
Bench tomb
Baldacchino (canopied) tomb
Saddle-back Baldacchino tomb
Bench tomb
7
Floor tomb
What can you find in the Catacombs?
At St Paul’s Catacombs there were two types of burials taking place: inhumation, that is burial of the corpse, and cremation, where the body is burnt during a funeral ceremony with the human ashes collected in urns and then buried.
In fact, at St Paul’s Catacombs, apart from human bones, archaeologists also unearthed urns containing cremated human remains. Amphorae with the remains of infants’ bodies were also discovered.

Even centuries after death, skeletons still carry unique features which tell us about their identities. Some bones, such as teeth, the clavicle (the collar bone) and cranium (skull) indicate the age at death. The size of the pelvic bones reveals the gender of the skeleton since the female one is wider than the male to allow women to give birth. Bones can typically betray signs of ancient diseases, whereas the condition of teeth can provide clues to factors such as diet and malnutrition.
While some burials are found intact (meaning the whole skeleton is found together), others consist of disjointed skeletons, generally indicating that bones were moved from another place, either by humans or animals. The largest bones, such as the skull, the humerus (the bone of the upper arm), the vertebral column (the backbone) and the femur (thigh bone) are the ones which tend to survive the most. Smaller bones, particularly those of the hands and feet, are more difficult to find, especially if the skeleton has been moved from its original burial place.

8
Skeleton Fun Facts!
An adult skeleton has 206 bones while babies are born with over 300 as some bones fuse together as we grow up.
The longest and strongest bone in the human body is the femur.


The smallest bone in the human body is found in the ear.
There are 52 bones in the feet and 54 bones in the hands.
~ ~ ~ ~
Cranium
Humerus Vertebral column
Femur
Ribs
Radius
Ulna
Fibula
Tibia
Pelvis
9
clavicle
Digging a Tomb
A tomb, whether ancient or modern, holds the remains of a person. Therefore, an archaeological dig in a grave needs to be done with utmost care and respect.
Before starting a dig, an archaeologist must first survey the site of the dig. Tombs have to be numbered to be able to identify the findings after the dig.
Since a skeleton is made up of several bones of different sizes, some which are very tiny, it is important to sieve the soil being removed from a tomb in order to look for any human remains such as loose teeth.
Once the skeleton is visible, the soil has to be brushed away gently off the bones to avoid damaging them. Each bone must be completely uncovered before being photographed, picked up, catalogued, put in storage or displayed.

10

11
After the dig...
Once a dig is finished, the post-excavation process begins. Here, all the records taken and all the findings discovered during the excavation need to be linked to uncover the real story behind them.
One of the main roles of the archaeologist is to explain the use of the site changes which took place over time so that we can see what happened first, what happened next, and so on. Such information is revealed through the documentation and finds recorded, while the layers of soil and rubble were being removed from the site. Keeping in mind that as time passes things get covered with dust, the more modern objects are always on top while the oldest are buried deep at the bottom. This is how archaeologists create a chronological framework
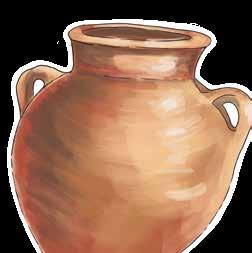
It may not always be possible to date or identify every artefact found. However, there are many ways and means to fit the puzzle together. For example, the size of bones and other characteristics on them will reveal the age of the deceased and possibly any disease which the person had suffered from. The style of the pottery found with them and any decoration on them can be clues when compared to other artefacts which have already been found, identified and dated.
This may also indicate whether the pottery was made locally or if it was imported from some other country. The discovery of coins might also serve as a lucky find to help date and identify the objects unearthed from the same layer of soil.
Radio-carbon dating (also known as carbon-14 dating) is another means to achieve greater certainty in dating organic materials. Carbon-14 is produced by the effects of sunlight in the atmosphere, in the seas and on plant life. It can be found in the air we breathe and in the food we eat.

12
Thus, all living things absorb it while still alive. So when the organism dies and stops taking in carbon-14, a clock starts ticking from the moment of death, which helps archaeologists determine the approximate time the organism died.
Samples taken from bones can also be tested for DNA in order to understand human and population history, origins and evolution. This helps us to learn new facts about the lives of the people who lived before us, such as where they came from and if there were any population movements.
Facial reconstruction is another method used to give life to these persons. At St Paul’s Catacombs, a skeleton of a woman (specialists named her Elsa) aged between 18–24 years, found to date back between the 4th century BC and 2nd century AD, was brought back to life with a facial reconstruction, giving us the opportunity to look at history in the face.

13
The Excavation Pit at St Paul’s Catacombs
A hands-on excavation experience... find your way through the plan in pages 3-4

Archaeology is the study of our past through material remains found in excavating sites and archaeologists are the people who study the remains which they find during their digs.

This helps us learn more about our history, that is, who we are, where we come from, and how we lived. During excavation, archaeologists use tools which you might recognise. Some of them you even use for different purposes. These are…
The trowel is the main tool the archaeologist uses during an excavation.
A magnifying glass helps the archaeologist to get a close-up and personal look at the artefact uncovered.

14
A digital camera is a key tool to record in pictures the discoveries, including how and where each artefact was found.

The brush is important as its soft bristles cleans the artefact from loose dirt without damaging it.

A measuring tape is necessary to lay out geometry (grids) of the excavation pits to keep a good record of the site.
What other tools do you think are useful to archaeologists?

15
The Excavation Pit at St Paul’s Catacombs (...continued)
Excavate like a true archaeologist…
In real life, artefacts should only be removed by archaeologists, as the location of where they are discovered is very important to piece the story of their history! So, archaeologists lay out a grid to help them keep records.
In the opposite page is an illustration of the excavation pit.
The first thing to do is to divide the excavation site in a grid. The grid is usually marked with string. Divide the excavation pit in squares of the same size, as illustrated in the opposite page. Each square in the pit will help you to draw the object in the grid of the pull-out sheet.
Now start digging using the trowel. When you come across an object, use the brush to gently expose it.

Take a photo of all objects as discovered in the pit.
Draw the objects on the grid sheet provided to record the finds. Use the measuring tape to draw an accurate plan of where you found them.
In the pit, you should discover skeleton bones. These are fixed and cannot be removed. Using the skeletal diagram in the pull-out sheet, identify and mark the bones you find.
You will also find other objects such as pottery sherds. These also need to be recorded in the pull-out sheet provided.
.
16
1. 2
3. 4. 5. 6.
All fixed objects found in the excavation pit are to remain at the pit and cannot be taken home.

17
Create your own dig
You can create your own archaeological dig at home!

First, find yourself a place to set up your dig. You can use a sandpit, or an area in your garden, or use a big box. Ideally, you should have different layers such as a layer of play sand, gravel, soil and top soil.
Set the objects you will be burying into different groups and start burying each group in a different layer. Note the various items buried in 3 different layers in the opposite page. Now, you can start to dig.
Get your archaeological kit and dig out carefully with the spade. Once you notice a find, use your trowel to remove the material from around the object more cautiously. As soon as part of the object becomes visible, use the brush to sweep away the material gently, so as not to damage the find. Before removing the find, take a picture of it as part of the documentation. Remove the object and put it in a plastic or paper bag, together with a label marking the pit’s name (eg. PIT 1) and the layer (eg. LEVEL 2). Continue working like this until you remove all the material from the dig.

Now, it is time to do some study in your lab to get a close-up look at the finds you have uncovered. Remove carefully each item one by one and draw them on a paper. Observe each item carefully, its texture, colour and size, and write down your observations. After finishing this work, look at all your finds. What story do they tell you?
 The excavation is to be held in a purposely created pit at home and nowhere else.
18

Young heritage expert manual - 1
Pages 1-2
The Roman City of Melite
Short introduction with an easy map illustrating boundaries of the old capital city of Melite.
Pages 3-4
St Paul’s Catacombs
A plan to find your way around the Catacombs and the hands-on Excavation Pit.
Pages 5-6
Types of Tombs
The different types of tombs found in Maltese Catacombs.
Pages 7-8
What can you find in the Catacombs?
Types of burials and Skeleton Fun Facts.
Pages 9-10
Digging a Tomb
How real-life archaeologists excavate… QR code leads you to an encounter with a real archaeologist!

Pages 11-12
After the Dig...
How archaeologists study the finds and learn the story...QR code on Elsa facial reconstruction.
Marked on plan in pages 3-4
Pages 13-16
The Excavation Pit at St Paul’s Catacombs
An archaeologist’s tools.
Excavate like a true archaeologist...
marked on plan in pages 3-4

On-site hands-on archaeological excavation activity with pull-out sheet.
Pages 17-18
Create your own dig
How to create your own archaeological dig at home!
Produced by © 2023 Heritage Malta Publishing
10 2
