Contents: Artistry
Collections
Physical Activity
Feature Hobby:
Composing


Contents: Artistry
Collections
Physical Activity
Feature Hobby:
Composing


Here at Hobbyism, we believe that you don’t have to be good at a hobby in order for it to be worthwhile. Regardless of whether you’ve been doing a hobby for 30 minutes or 30 years, a hobby should be an activity that means something to you. The point of a hobby can be expressing yourself, learning something new, or just having something to enjoy in your day-to-day life. Every issue of this magazine is divided into four main sections: artistry, collections, physical activity, and a one-time feature hobby. In this issue you’ll see an abundance of tutorials and articles spanning topics from jewelry making, retro game collecting, ballroom dancing, and so much more! Thus, no matter what you’re interested in, there’s something in Hobbyism for everyone to explore. One note we’d like to leave you with before you dive in: even the most talented people in the world were also once brand-new at their craft. If you were to take away one thing from Hobbyism let it be that there’s no shame in being a beginner. In fact, being a beginner is just an opportunity for growth, completely free from any expectations. To us, the word ‘beginner’ describes someone having the bravery to try new things. We hope that Hobbyism inspires you to explore the wide world of hobbies for yourself, and experience the joys of getting to be a beginner again and again.
Lauren is a third-year physics major at Harvey Mudd College. They were inspired to make this magazine due their love of trying new things and experimenting with different hobbies. Lauren wanted to show their love of learning through Hobbyism, which stresses the importance of trying hobbies you’ve never even considered before. In her free time, Lauren enjoys ballroom dancing, rock climbing, and drawing, which are three activities you can read about in this issue of Hobbyism.
Nestor is a senior computer science and mathematics major studying at Harvey Mudd College. He joined the Hobbyism team because he shared their goal of introducing people to new hobbies they may have not considered before. Aside from academics and making this magazine, he enjoys playing the piano, composing music, and playing video games. Two of his interests made it into this inaugural issue.
Sydney is a senior at Harvey Mudd College, graduating with an applied physics degree. She has always loved trying new things and pursuing untraditional paths, all of which she channels into Hobbyism. From hip hop to woodworking, Sydney has explored many art forms and skills through the classes available at the Claremont College Consortium. She hopes to continue pursuing new hobbies in her everyday life after graduation. She greatly enjoys exploring on her walks and rockhounding, two hobbies that can be read in this issue of Hobbyism.
Letter from the Editors pg. 0
Artistry pg. 2 – 3
Jewelry Making pg. 4 – 7
Drawing Tutorial pg. 8 – 13
SFX Makeup pg. 14 – 19
Collections pg. 20 – 21
Rock Collecting pg. 22 – 27
Video Game
Collecting pg. 28 – 33
Physical Activity pg. 34 – 35
Ballroom Dance pg. 36 – 43
Walking pg. 44 – 48
Rock Climbing pg. 49 – 55
Feature: Music Composition pg. 56 – 67
Reader Submissions pg. 68

Jewelry Making pg. 4 - 7

Drawing Tutorial pg. 8 - 13
SFX Makeup pg. 14 - 19
 by: Sydney Cornell
The best part of having a number of friends who enjoy making jewelry is seeing the variety in styles of pieces that they create, and what inspires them. One of my friends uses a laser cutter to create fun shapes from acrylic sheets and use them for earrings. Another friend incorporates a wide variety of unconventional materials into necklaces, such as dice and playing cards. Mita Kongetira, a college student who is currently pursuing a degree in engineering, uses wire and polished stones to create beautiful and intricate earrings and rings. I met Mita when we both joined an acapella group during the pandemic. Initially all of our rehearsals took place online with low attendance and our ‘performance’ was a compilation of voice and video recordings taken separately around the country. I didn’t know that she had an interest in jewelry making until 8 months later, when we finally had our first large, in-person performance and she made every acapella member a music note ring. She has created many incredible pieces since, and is opening up about her experience with jewelry making.

Q: When and why did you start making jewelry?
A: I started making jewelry around July 2019. I love arts and crafts and never grew out of my handmade gift phase from preschool, so over the years, I have picked up different types of crafts like crocheting, sticker-making, candle-making, and more. I wanted to make a gift for my mom’s birthday so I started learning how to make jewelry, but I started to get into it more in college to destress.
Q: How did you learn to make jewelry?
A: I learned to make jewelry by looking at Pinterest photos. I attempted to learn through YouTube, but my pieces would always look really strange compared to the pieces in the tutorials, so it became easier to figure out how it was made by looking at pictures.
Q: What kind of jewelry pieces do you make? What materials do you use?
A: I make earrings, rings, and necklaces, but earrings are more of my forte and I can be a lot more creative with them. The earrings are made of jewelry wire (18 and 24 gauge), stone beads, and chains. I use a pack of jewelry-making pliers and a ring mandrel to actually make the earrings.
Q: How long does a piece tend to take you?
A: A piece can take anywhere from thirty minutes to two hours depending on the complexity.
Q: Are you inspired by anything in making your jewelry?
A: My jewelry designs are usually inspired by the beads I pick out. Stone beads made of materials such as agate and quartz are super pretty and versatile, and no bead looks exactly the same. I will usually spend about 30 minutes in the bead aisle at Michaels craft store jotting ideas down and then proceed to buy way too many beads.
Q: What has been your favorite piece of jewelry made thus far?
A: My favorite pair of earrings are a pair of green and copper earrings. They weren’t super complex to make, but I personally found them to be really beautiful.
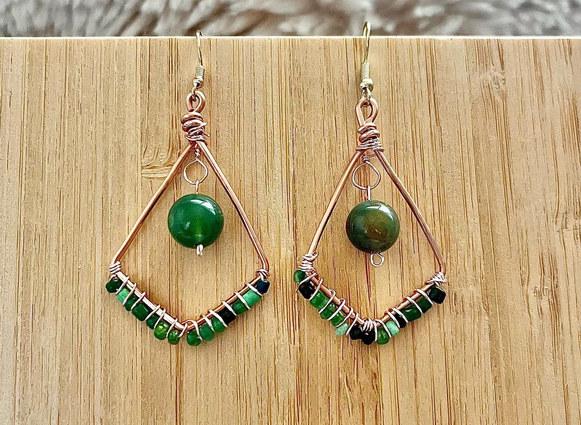

Q: Are there pieces you have made that didn’t turn out as you liked? What did you do with them?
A: I have definitely had a lot of pieces that did not come out how I wanted, but I usually repurpose them into cute keychains or remake them into a different piece of jewelry.
Q: Is jewelry making a hobby for you, or something that you want to or do pursue further, either by a side business or otherwise?
A: Right now, it is more of a hobby, but there was a period where I sold jewelry at the Motley [a student-run cafe at Scripps College]. As much as I love jewelry making, it was a little stressful to do it as a side business because I wanted each piece I sold to be unique, so it was easy to get creatively burnt out. However, it did give me the freedom to make whatever I want because a lot of people, especially at Scripps, love unique pieces so they sold pretty well!
Q: Do you have any advice for those who are trying to start jewelry making?
A: To start jewelry making, I would suggest getting really familiar with the tools you are using by playing around with wire and making different shapes with it. It helps you get a sense of how the wire feels and works and also gives you the best ways to manipulate it to get the results you want in your pieces!
Turquoise is a gemstone that is highly valued for its vibrant color and matrix pattern. It is widely used in jewelry not only for its beauty, but because it also holds a lot of cultural significance for a number of peoples. In the United States, turquoise is best known for its value in some Native American tribes, from giving the wearer of turquoise beads great power in the Creation myth of the Acoma Pueblo, to protecting them from storms in the Navajo tradition. While many tribes still retain similar styles and jewelry practices from the past, turquoise has found significance in new styles of Native American jewelry as well. The stone was an important component
Artists from the Kewa Pueblo (sometimes referred to as the Santa Domingo Pueblo) began to experiment with ‘found’ materials. These found materials ranged from plastic food utensils, to records, to car battery casings. The battery casings were very integral to this jewelry style, as the dark color closely resembled that of jet. These necklaces also incorporated turquoise in the
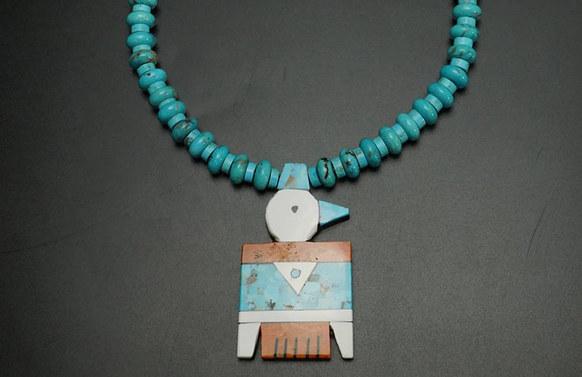

of what became known as thunderbird jewelry.
Thunderbird jewelry arose as a result of the Great Depression. With financial hardship, materials that were considered ‘authentic’ for use in Native American jewelry, such as jet, were difficult to afford.
form of mosaics, using small chips or irregularly shaped pieces of the stone. They often had bird motifs, and the turquoise introduced a splash of color.

The new thunderbird jewelry appealed to tourists and helped the tribe through the Depression. In addition to its practicality, the style also encouraged more creativity and innovation where it had previously been lacking. Prior to the Depression, jewelry from larger trading posts and companies was often made of silver and used large and valuable turquoise stones. Such pieces have a long history in a number of Native American cultures, but can feel ‘uninspired’ with the production line -esque creation and lack of meaning in the symbols stamped into the silver. With thunderbird jewelry, there was room for inspiration, and it was something that could be done from the comfort of one’s home.
Though turquoise is ingrained into the very beginnings of Native American culture, it is very adaptable and relevant. It found new life in Depression-era thunderbird jewelry, and will continue to be a part of future innovations while still being firmly rooted in a longstanding and beautiful tradition.
Jewelry can be made out of a variety of materials. For example, there’s ceramics, wood carving, beading, metalworking, wire-bending, and so much more! If you want to explore jewelry making, there are so many styles and techniques you’ll be able to explore. Below are some synopses of different materials you might want to learn more about:
1) Embroidery thread - Embroidery thread can be used to weave bracelets, rings, and chokers. There are many patterns accessible online that you can follow to make colorful fabric jewelry for yourself and your loved ones! (See the tutorial on page ??? to see an example for yourself). The material in this type of jewelry making is consistent, but the colors used in any piece of jewelry you make is customizable!

Braceletbook.com
2) Beaded Jewelry - This type of jewelry involves threading beads through a string or wire. Beads can come in a variety of shapes, sizes, colors, and materials. For example, beads can be made of wood, plastic, or glass. Beading can be a very affordable kind of jewelry making, as most beads and thread can be found for cheap prices. It’s a great way to get variation in your collection! Note: if you thread beads onto a thin wire, you may need additional tools such as needle-nosed pliers to bend the wire into a desired shape - see wire bending for more details!

3) Metalsmithing - If you want to make metal jewelry completely from scratch, you may be interested in smithing. This type of jewelry making involves forming metals such as brass, gold, and silver. Metalsmithing is likely the most expensive form of jewelry making if you plan to purchase all the materials yourself. However, if you are able to find a studio with the required tools, this hobby may become much more affordable. Some basic tools you may consider investing in are a jewelry saw, pliers, a bench pin, needle files, a torch, and a soldering iron. These tools will allow you to change the shape of the metal you’re working with via both additive and reductive techniques.

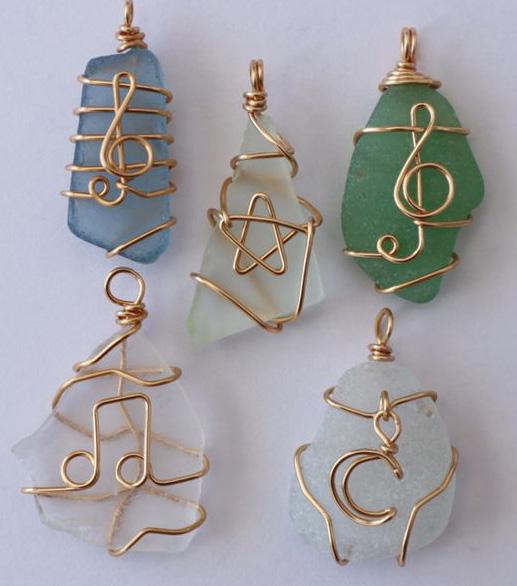
4) Wire Bending - This method of jewelry making involves shaping a malleable wire by bending, twisting, and folding it into different shapes. It’s a great way to get metal jewelry to hold its shape without the need for heat or soldering. Wire bending will require additional tools, including wire cutters, needle-nosed pliers, sandpaper, and clasps. Additionally, a tool known as a mandrel or triblet may be helpful for getting clean shapes with the wire. These are tapered metal rods that you can wrap wire around to get a perfect circle. Beginner friendly wires include copper and silver-plated wire, as they are cheap and less likely to break. The thicknesses of these wires can range from around 0.5-4 mm in diameter. You should choose how thick you want your wire to be based on the type of jewelry you’re making, whether you want to add beads to the wire, and how durable you want your wire to be. Wire bending can still be a relatively affordable option for making jewelry, especially if you already own most of the tools listed above.

 by: Sydney Cornell
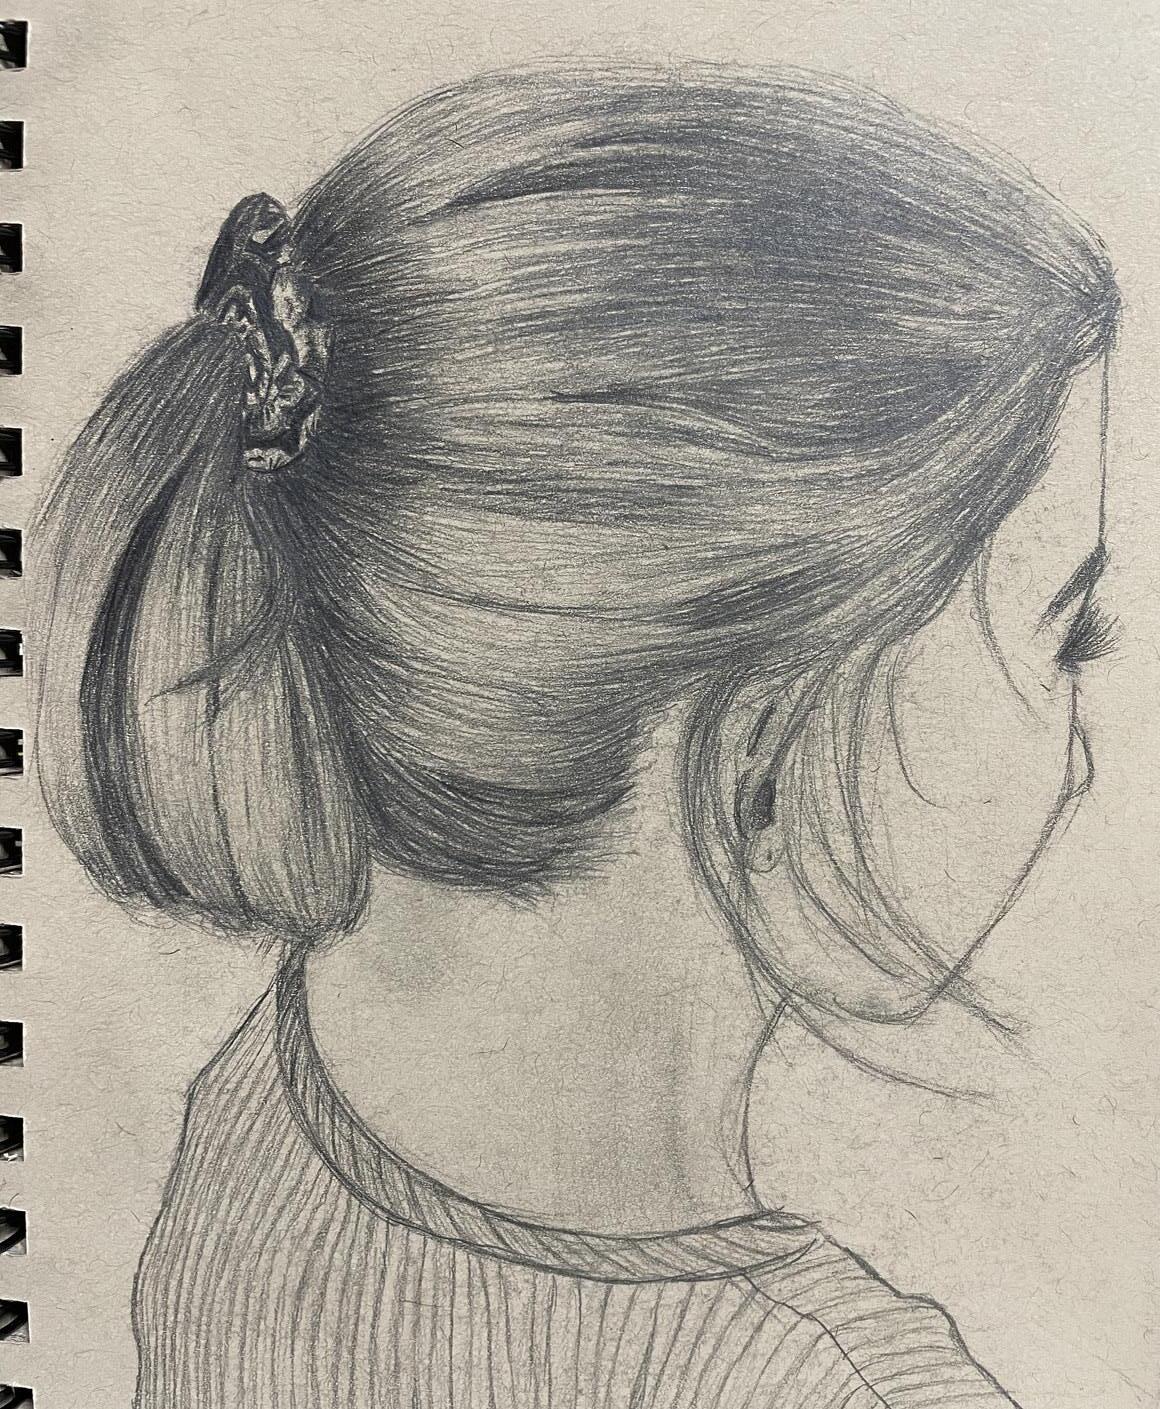
If you are someone who likes to draw, you’re probably very familiar with the phrase “practice makes perfect”. There are many inspiring things to draw, but it takes repetition and attention to detail to make a drawing appear as you would like it to. When someone practices something a lot, their advice can be invaluable in picking up a new drawing skill. It never hurts to have a good starting point and keep refining from there. Follow along to learn how to shade straight to wavy hair!
1. Start with the smallest section of hair that you can divide your drawing into. This can be each piece of a braid, a part of a curl, a strand of straight hair, etc.


2. Draw light lines in the places where the light won’t be reflecting much (the light is source dependent but often reflects on the center of the part of a curl or braid, and varies for straight/ wavy hair). Be sure to only draw along the path of the hair and mind where it’s coming from!
3. Darken the extremities by adding more lines there, and lighten them towards the reflective part. To help achieve this, start each line in the dark area and flick it up off the page in the light area. This will create different thicknesses.
4. To blend the dark and light, add more lines in the center where the light is reflecting. Keep them thin and more spaced apart than those in the dark sections. They should stay as individually visible as possible.

5. Optionally, add a subtle outline around the section that you’ve completed. Doing this for a larger art piece helps to visually separate each strand a little easier, like we are able to in real life.
6. Also optionally, add some stray hairs that don’t quite fit the shape of the hair section. This is down to personal taste and style. I like doing a few hairs that still generally go along the outside of the section, but aren’t fully a part of it.
While tutorials can always seem straightforward and simple, things don’t often turn out how the pictures make them appear after your first attempt. That’s perfectly natural! If you find that you enjoy drawing hair and want to get better at it, then it’s worth the effort of practicing. You can set a dedicated time or space for it, or just doodle in the margins of your notes as a way of working on it. Here’s to many beautiful creations on the road ahead!




Most day-to-day makeup looks aim to complement or enhance the wearer’s natural features, usually without changing their appearance enough to be unrecognizable. On the other end of the spectrum is special effects makeup, otherwise known as SFX makeup, in which cosmetics are used to drastically alter a person’s appearance. For example, SFX makeup could be used to make someone’s skin purple, give someone horns, make someone look decades older, or cover someone in scars. It’s the kind of makeup you’d see watching a fantasy show with mythical creatures, or a scary movie with horrifying monsters. This kind of makeup helps to tell a character’s story, whether they’ve recently been to battle, or come from another planet. Thanks to the use of SFX makeup, you can get an insight to a character’s personality and backstory just by their appearance.
This type of makeup application can be traced back to the film industry in the 1920s. More specifically, a Hollywood actor named Lon Chaney pioneered the use of SFX makeup in film during his career, applying his own cosmetics for his leading roles in The Hunchback of Notre Dame (1923) and The Phantom of the Opera (1925). Professional makeup artist Jack Pierce furthered the popularity of using SFX makeup in Hollywood, creating the iconic monster designs in Frankenstein (1931), Dracula (1931), The Mummy (1932) and The Wolf Man (1941). Because of Chaney’s and Pierce’s influence, SFX cosmetology is still a practice widely used today, especially in television media.
SFX makeup artists employ the use of cosmetics such as prosthetics, latex skin, and airbrushes in order to transform the wearer. It is common for these artisans to work in the entertainment industry. Job opportunities can include doing SFX makeup for movies, theme parks, Halloween costume companies, and social media. However, an interest in trying SFX makeup doesn’t have to be restricted to the silver screen. Many people enjoy doing this kind of makeup on themselves or others as a recreational art form. Professional SFX makeup artists will often use high-end products and fancy tools to create a certain look, which may not be affordable or accessible for a beginner. Instead, selftaught SFX hobbyists can begin experimenting with budget-friendly makeup and tools. That way, beginners can build up their artistry skills before investing in expensive, high-quality cosmetics.
Whether you’re considering a career in cosmetology or just want to be able to create super realistic Halloween costumes, doing SFX makeup will allow you to express your creativity through character design and makeup application.

Pop art is a style of art that combines elements from popular culture, such as comic books and advertisting. It’s characterized by thick black outlines, white highlights, and often the use of dots instead of solid colors. This style challenges the traditional perception of fine art, finding beauty in the mundane and mass production. Because of the simplicity often associated with pop art, you may find that it’s a good style to explore when you first try your hand at SFX makeup. Below is a simple tutorial for a pop art inspired lip makeup look:
#1. Begin by putting on a simple red lipstick. This will be your solid color base. A liquid lipstick that dries down matte allows the red to dry down completely and last all day.
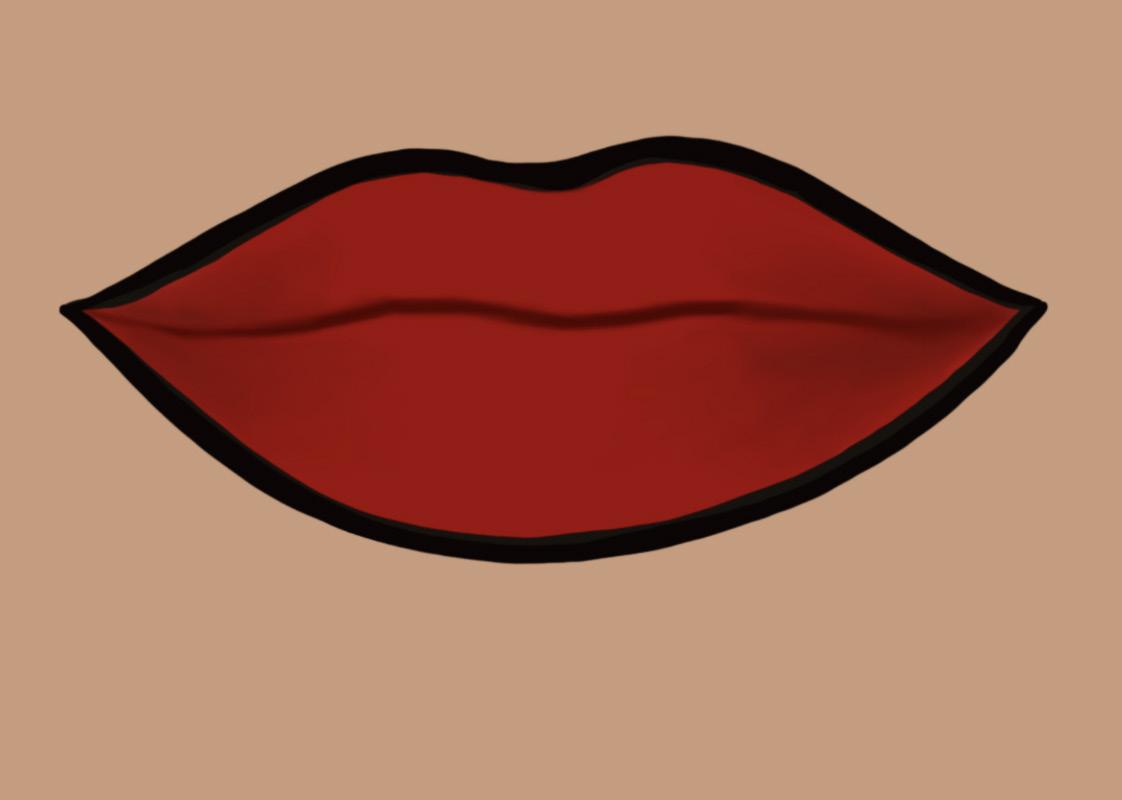

#2. Using a black lip liner, apply a thick black line around the perimeter of your lips. This helps to create that comic-book inspired look.


#3. Time to add details! Using the same black lip liner, line the inner part of your lips. Then, add lip lines extending outward from the center of your mouth.
#4. Finally, using a white lip liner or white eyeliner, add highlights to the edge of your lips, beneath the black outline to complete the look!
In order to begin experiementing with SFX makeup, there are a few basic tools and supplies that you will need to invest in. These products will allow you to transform yourself and others through the art of makeup, and protect your skin from staining and irritants. Note that these products are just suggestions from professionals, and there’s a whole market of products you can purchase varying in price and quality. While first beginning a new hobby, it may be in your best financial interest to shop in a lower price range, and build up a higher quality collection over time.
The first product I would recommend purchasing before you begin applying any makeup would be a priming formula, or a skin prep. This is something you apply to your skin before adding any creams or powders. Some makeup products can be harsh on the skin, or even case staining. Furthermore, a lot of makeup tends to fade or rub off as you wear it throughout the day. A primer, such as this one from Mehron makeup, will both protect your skin from harsh chemicals and act as a sort of glue that holds makeup longer throughout the day.
If you want to create a look involving prosthetics, you’ll need a skin-safe adhesive. This type of adhesive will allow you to stick rubber and was prostheses to yourself for long periods of time without damaging your skin. Using an adhesive such as this one by Pros-Aide will also make the makeup removal process smooth and easy.


Next, synthetic wax is helpful for making your own prostheses, such as scars, wounds, scales, and much more. You can apply this directly to your face, or secure it with adhesive. Unlike premade prosthesis, wax allows you to get creative and reshape your face to your own preference.

Once you’ve finished adding your protheses, you’re next going to want to add color. You can use regular foundations, cream-based facepaints, or airbrushing, for example. On the right is an example of inexpensive cream-based facepaints. This type of paint is opaque enough to conceal your regular skin tone underneath, but still easy to blend and wash off. Water-activated face paints can be another budget friendly option, but be aware that they usually dry down faster!

Once you’ve finished adding color, you’re going to want to add something on top that can lock your artwork in place. One option is a setting spray, which is a mist that seals your makeup and will make it last all day. Another option is a setting powder, such as the NYX powder shown on the left, which will make your makeup matte and also hold it in place.
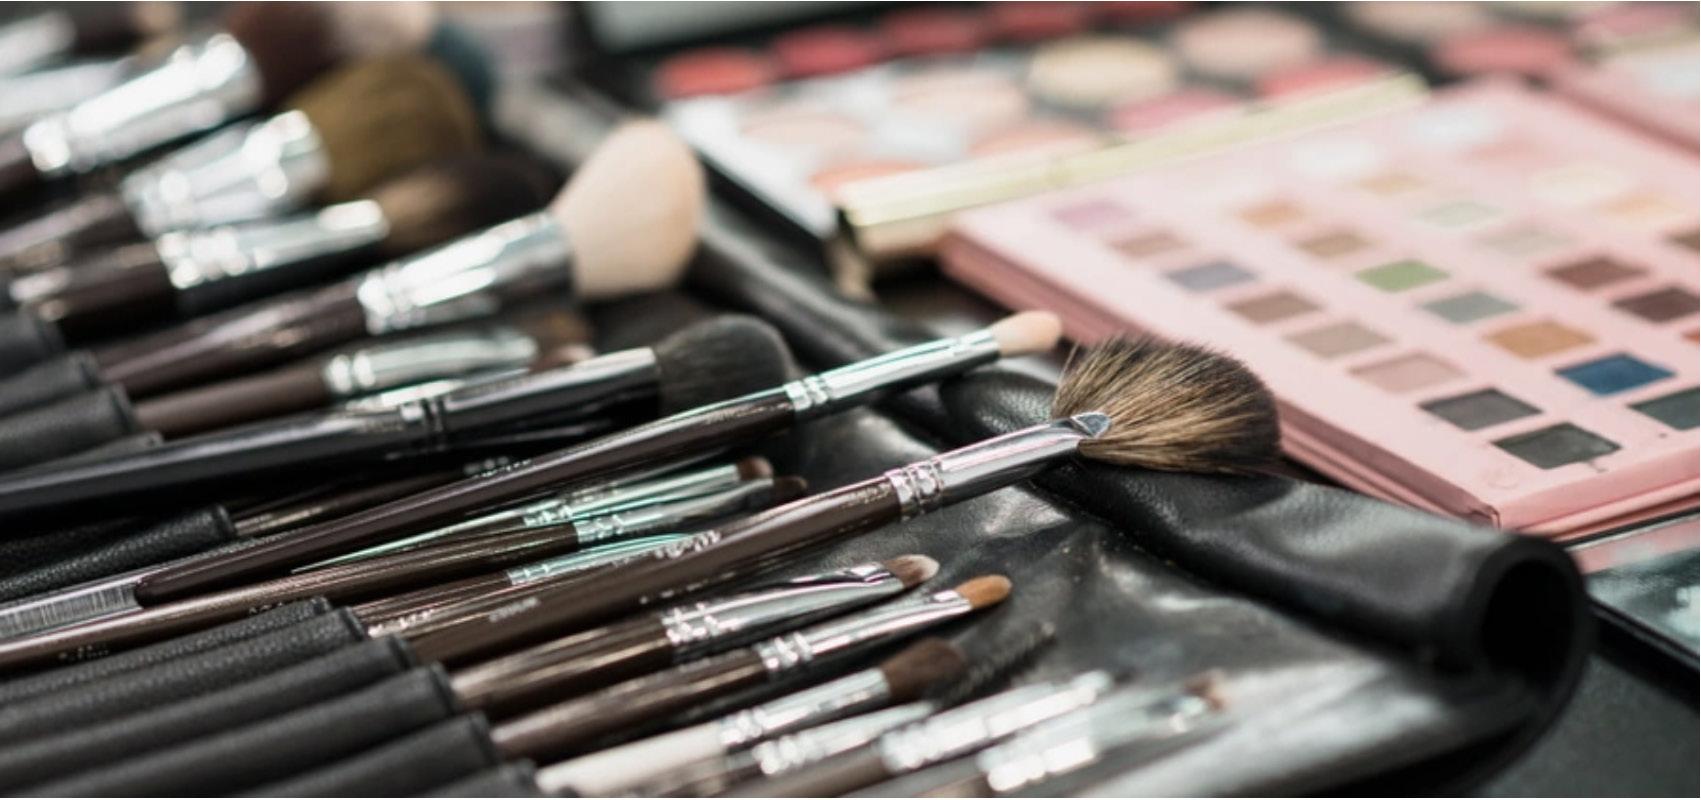
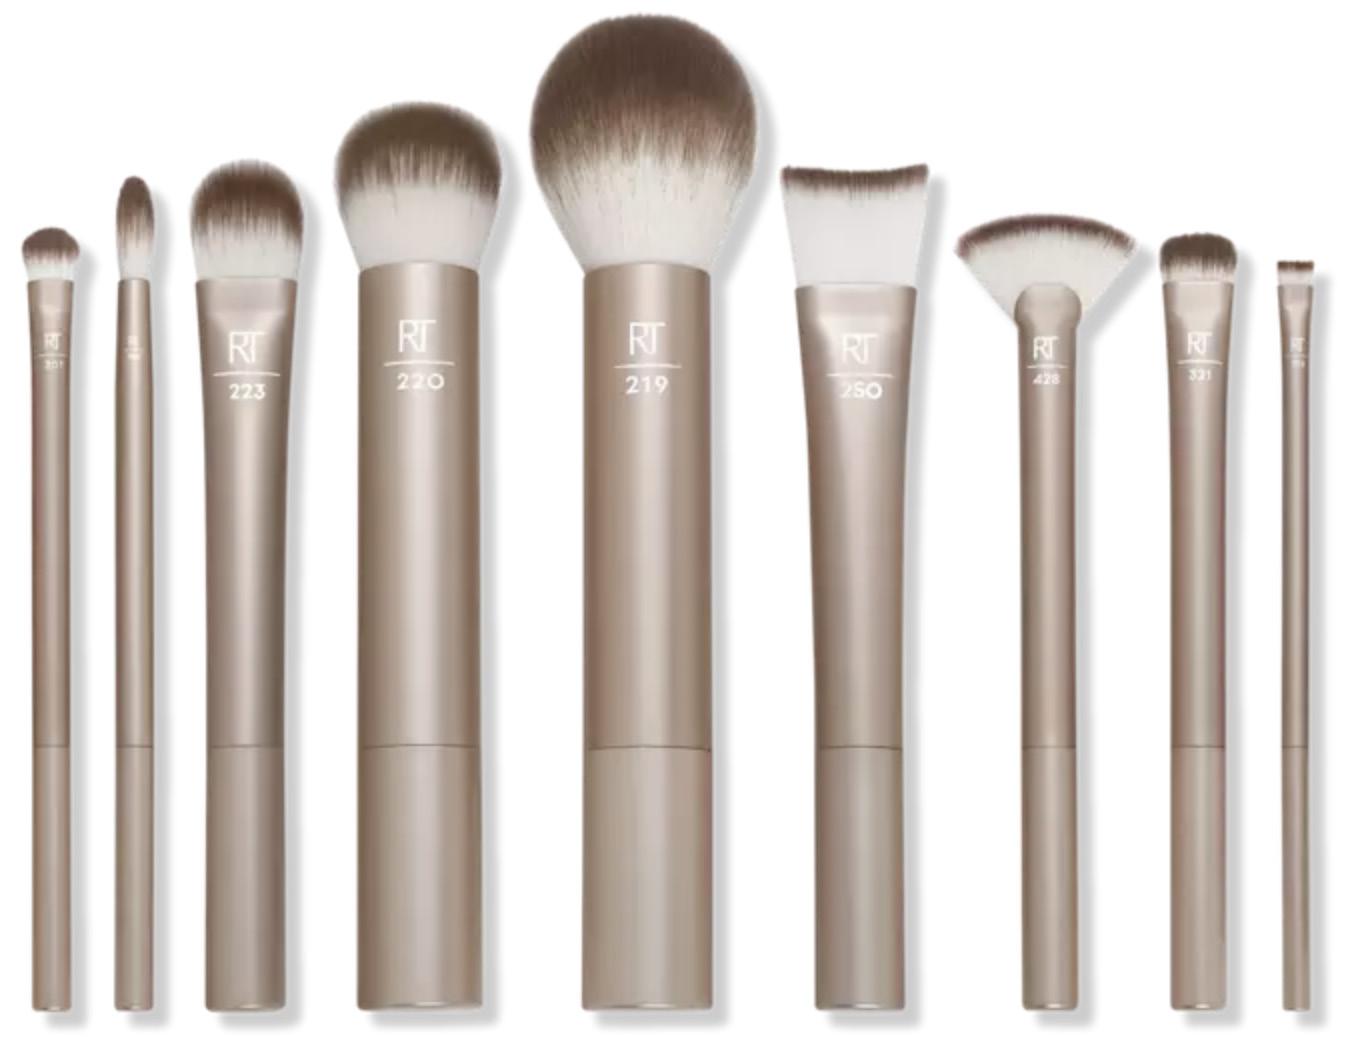
In order to apply face paints and powders, you’ll need brushes. A lot of makeup brushes are made with synthetic fibers, but some are also made of sillicone. It’ll be helpful for you to get a brush kit, so you have a variety of brush sizes to work with, so you can apply everything from your base coat to the finest details.

Finally, once you’re ready to take the makeup off, you should remove it with a makeup remover such as the Ben Nye Remove-It-All. This product will take off face paints, powders, and adhesives. Make sure to also use regular facewash after removing your makeup though, so you don’t have to deal with skin irritation or breakouts!


Rocks come in a large variety of shapes and colors, and what’s considered a good rock depends on the beholder. For some, the size and smoothness are of the foremost importance. For others, the type and overall look of the rock give it its appeal. Because of this subjectivity, a rock collection can be many things to different people. My mom’s rock collection is comprised of heart-shaped rocks, each one with writing that says when and where the rock was found. My personal rock collection is made up mostly of minerals and gemstones that I’ve found. For you, a rock collection could mean something else entirely. With such flexibility in the way of collecting, there’s no limit to the ways you can begin to build one.
There’s no right or wrong way to start, but some places are more useful to different kinds of collectors. For starting a collection like my mom’s, where the value of the rock is tied more to location than the actual rock itself, the world is your oyster! A new addition can be found anywhere (at least, anywhere you can legally take rocks). If you’re more drawn to the spiritual crystal side of rock collecting, you can look for crystal shops in your area. There are also many places to buy from online through Etsy or Instagram. Or if you’re interested in impressive natural specimens and have a decent amount of (monetary) resources at your disposal, you might con-
sider spending time at gem shows, which draw a wide variety of vendors globally. However, if you’re like me and want to build your collection of gems and minerals from personal finds, rockhounding is the way to go! Rockhounding is the act of searching for and finding rocks, something I enjoy for a number of reasons. On a very basic level, I just really love being outdoors. Wandering through nature at my own pace and taking it all in pairs really well with rockhounding. On a deeper level, I never really got over the little kid phase of wanting to pick up anything that I find cool and pocketing it, and I’m able to channel that into a fun and socially acceptable hobby. And just as rock collections are widely variable, so too are people’s motivations for rockhounding. Whether it’s enjoying the hiking aspect, finding a group or community to join, or excitement from finding a cool gem or mineral, rockhounding has something to offer for everyone.
When searching for new rocks to add to your collection – whether through a live sale on Instagram or hiking a trail – you might not find what you’re looking for right away, and that’s okay! Your collection will evolve and change over time the more that you look for rocks and understand what appeals to you. Finding what you personally like and connect with is the key to making your rock collection priceless.

There are a multitude of ways you can begin rock collecting, and a multitude of rocks to collect. Sometimes, it can be difficult to determine how to start. As a new collector, determining the guiding principle of your collection is the first step. Are you drawn to certain stones? Do you prefer to have a sentimental or eclectic collection? Once you’ve settled on a starting concept for your collection, you’re ready to dive in!

If you find what is most appealing to you as a collector is not some objectively valuable quality of the rock, but instead is a characteristic deemed valuable by you, then the world is your oyster in terms of collecting. Whether you’re collecting rocks based on texture, color, natural shape (like my mom’s heart rock collection), or as a token of a special place you visited, there aren’t many restrictions on your collecting ability, aside from ensuring that you are legally able to take rocks from a location. Outside of that, the most important thing to remember for this type of rock collecting is to always keep your collection in the back of your mind. A new addition can be found practically anywhere, you just want to be sure you’re aware of it! It may seem like a struggle at first – especially if you’re going for a specific characteristic like heart shapes – but once you’re in the groove, you’ll be finding eligible rocks when you least expect to.
Many are drawn to this category of collecting
due to belief in the spiritual properties of crystals. If this is your main motivation, or if you just enjoy the aesthetic of crystals, there is a lot available to you. These types are only available through designated stores, but the places that sell crystals often have a variety of shapes and sizes, making it a viable collection form even on a relatively small budget. The best resources for this kind of collection are crystal shops in your area. However, if you find that there isn’t a shop available locally, there are plenty online, especially on Etsy and Instagram. Smaller Instagram sellers often go live to sell their crystals, as they can showcase the best qualities of a crystal and interact with their audience. Joining in these live sales often will naturally connect you to other crystal collectors, making it an easy way to become a part of a larger community.
The potential drawback of this kind of collection is the artificiality of some of the crystals available that you may not want to collect. A number of clear crystals such as ‘opalite’ are really just synthetic glass. You may also come across ‘aura’ quartz, such as rainbow aura or angel aura. While aesthetically beautiful, the colors that they portray are caused by a chemical process involving
a thin coat of metal. Additionally, much of the ‘citrine’ that is sold in crystal shops is not actual citrine, but rather amethyst that is heat treated to get the warm, amber hue. While none of the aforementioned crystals are inherently bad, it is worth evaluating whether you’re okay with having artificially enhanced crystals in your collection before you unknowingly buy one!
Those who are drawn to the natural beauty of gems and minerals, and would like to collect impressive specimens are in good company here. It is worth noting that, depending on the size and rarity of the specimens you are interested in, this category of rock collecting is most contingent on having (monetary) resources at your disposal. Yet, this type of collection is also very achievable without having deep pockets!
Like polished or shaped crystals, the internet is a wonderful resource for this kind of collection. There are a multitude of sellers of natural crystals out there. A Google search will lead you to established websites, but there are definitely smaller presences on Instagram and Etsy as well.
An additional resource that could yield great additions to your collection is a gem show. Gem shows can attract vendors on a global scale, and generally offer a large variety of gems and minerals. From small fragments of opal to amethysts several feet tall, gem shows appeal to virtually every rock collector. While more

impressive specimens can get very pricey, gem shows are often cheaper than online resources because many times you are buying directly from the people or company that sourced the gems, not from a secondary seller. On top of the variety that can be found there, gem shows are an enjoyable outing and can connect you to a larger community of rock collectors!
If you’re someone who’s drawn to the idea of finding your own treasures, rockhounding is the way to go! It is the more time intensive option of starting a collection compared to the other ways listed, but can be done whenever your schedule allows and is a rewarding pasttime. Rockhounding starts with a lot of research into where you can legally collect good gems and minerals, and how to reach the destination. On top of that, depending on how seriously you’d like to rockhound, you may want to look into some equipment to bring along with you, from hiking supplies to buckets and a pick. Rockhounding itself can feel like a slow start, but the more you rockhound, the more you’ll be able to learn what to keep and what to ignore. You’ll also get to know an area, and find good spots that are abundant with what you are looking for. Once you’ve found specimens you’d like to keep, it’s a good idea to follow up with some research. Each has different properties and reactions, so knowing the type will help you with maintenance. From there, what happens to the stone is up to you, from a dedicated collection to making jewelry!
There are a variety of ways to go about building your rock collection, from finding them out in nature to going to shops and shows. Knowing where to begin makes it easy to become invested, and you’ll be building an enviable collection in no time. Rock collecting is a rewarding hobby, no matter the way you choose to do it.


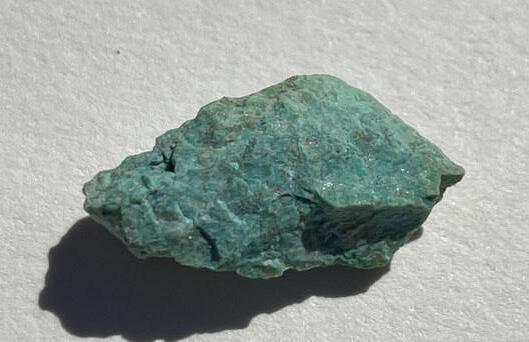
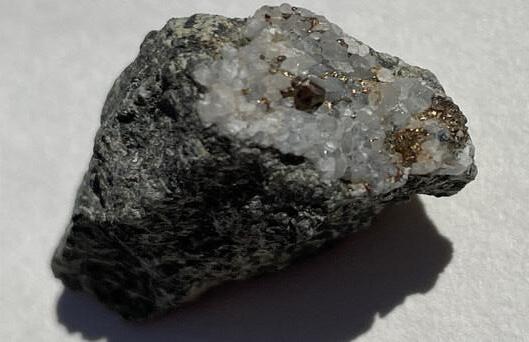
I’m a big fan of all of the aforementioned styles of rock collecting, and have participated in all of them some amount. However, far and away my favorite method of adding to my collection is through rockhounding. I love to go driving and walking in the desert with my family on some weekends, and have found specimens that blew me away as a simple rock enjoyer. Here are some highlights from my personal rock collection! (Please note that all gem/mineral identifications here are based on my own speculation from what I know to be available in the areas I rockhound in, and may not be accurate).

Chrysocolla with quartz growths on 2/3 of the body, and azurite inclusions. Found in Florence, Arizona.

Quartz growths with pyrite forms on top of a rock. Found in Florence, Arizona.
Unknown mineral. Found in Payson, Arizona.


 by: Nestor Coria
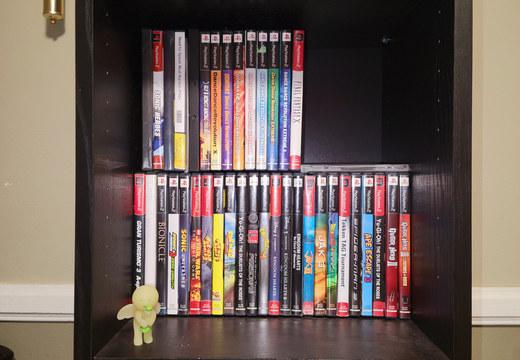

From vintage systems like the Atari 2600 and the Magnavox Odyssey which came out in the 70s to the latest games coming out on consoles like the Nintendo Switch, there are a lot of games out there to collect. Video game collecting is the act of creating a personal library of video games that you can access and own. Collecting is not tied down to particular consoles, platforms, or mediums, giving those who want to get into it a wide variety of places to start their own collection. Whether you’re looking to begin collecting now, interested in finding out more about expanding an existing collection, or you want to find like-minded individuals who share a passion for video games, video game collecting is a fun way to go about sharing more experiences with the medium.
When you think of a video game collection, what comes to mind? An organized library that fills up an entire room? A drawer with loose cartridges? A digital collection on your laptop? When somebody talks about their own collection, they may be referring to any of these configurations, but what mat-
ters here is that they get to define the size of their collection, as well as what can be found in it. Video game collections can be whatever the collecter wants them to be. That being said, there are a lot of variables you can take into consideration when creating your own. The amount of space you have on your devices or on your shelfs, the kinds of
games you want to collect, and the kind of condition do you want the games to be in make up a short list of some considerations you may want to take before starting a collection. These aren’t things that you are required to think about, as your collection is what you make of it, but this is more to show what kinds of things you could consider if you want to make a collection of yours.
Possibly the most important facet of video game collecting is the part where you actually collect the games. The process of collecting games requires you to get out there and search for them, whether it be tracking them down online, or going from store to store with nothing but your luck on your side. There’s a thrill aspect to game collecting, regardless of how you’re coming at it. For those who play all the games in their collections and are more particular about what they add to them, managing to find and buy a game is about the excitement of getting to finally play it. For me, there’s always that feeling of anticipation I get when entering a thrift store or going to an estate sale, a feeling that “this is the place I’ll find the next addition to my collection.”
There are a whole lot of kinds of games out there, and a lot of different ways to collect them. Regardless of how you go about doing it, you stand to gain something out of video game collecting, whether it be the experience of going out and making connections with other people who also collect the games you are interested in, or getting to sit down and play them yourself.

Do you know what kinds of games you’ would like to collect?
yes
Read the article on the next page to learn more! no
Do you want your collection to be digital or physical?
Do you want the games on your computer or on a console?
physical
Do you want to play the games?
Do you have the hardware required to play the games?
Do you own the console you want your games on?
Do you know where to acquire it?
Do you know where you can get the games that you want?
It’s easy for people to feel intimidated by the idea of starting a video game collection — a Google search of “video game collection” will show tall walls of shelves filled to the brim with video games. While these collections are definitely impressive and it may feel daunting to start thinking about how somebody makes it to that level, it’s important to note that these collection didn’t just spring into existence one day. Every collection is made up of individual pieces, and the fun of game collecting is the journey that comes along with collecting them. That being said, it helps to know a couple of things in order to get the ball rolling.
If you already know what you like and what you want, a good way to start a collection is by purchasing those games and working from there. If you don’t, YouTube is an excellent resource for looking up gameplay for games that you may be interested in, and finding out a bit more about what’s out there. For example, if you know that you are interested in racing games and you would like to collect games for the PlayStation 2 (PS2), searching “racing games for the PS2” will bring up videos that show off what kinds of racing games are available on the PlayStation 2. In general, search queries like “[genre] games for the [game console]” will typically bring up many results which go through various titles of games in the specified genre for whatever console you may be
wanting to collect for.
Once you have a better idea of what kinds of games you are looking for, game collecting becomes a matter of finding out how you can go about acquiring those games. If you know what specific game you want to obtain, searching for it on online storefronts or on places like eBay, Amazon, and Facebook Marketplace is a good way to find them. Otherwise, it may be time to begin to take a more active approach to adding games to your collection.
There are many places you can go to find games, and they each present their own benefits and drawbacks. Brick and mortar stores like Target, BestBuy, and GameStop sell video games, and going through what they sell can be a good way to find a new game you want
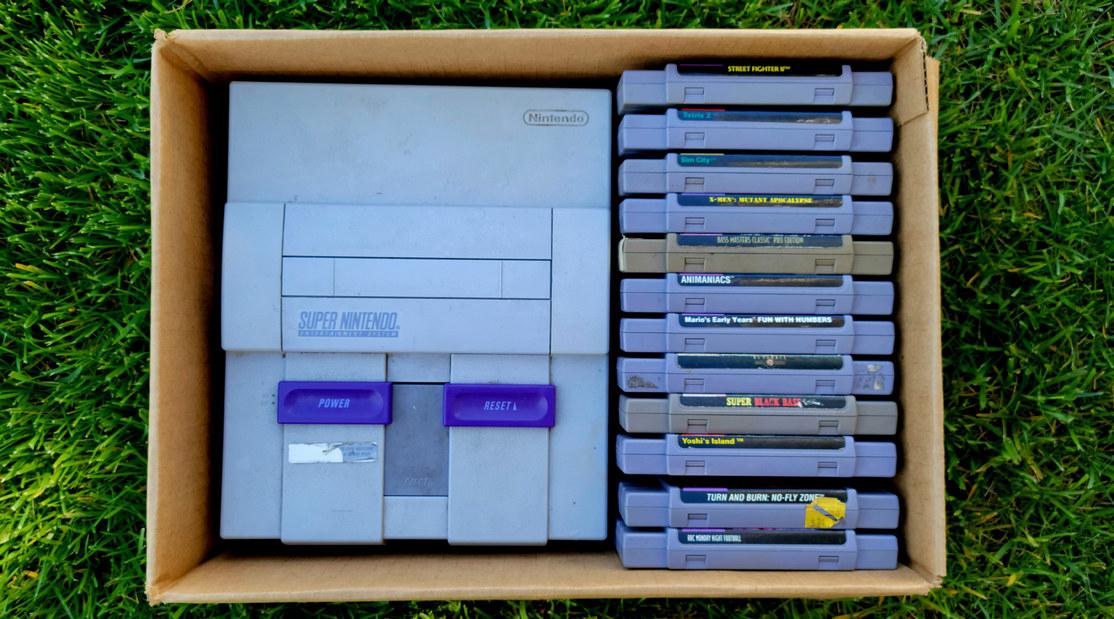
to get, but they tend to only carry more recent games. Places like Goodwill, Salvation Army, and other thrift stores at times carry games and game consoles, and because they are selling second-hand, there is a chance that you can find retro games there. That being said, you aren’t guaranteed to find any games at these stores, and if you do, they may not have anything that you were looking for. These benefits and drawbacks are similar for yard sales, garage sales, and flea markets, but an additional benefit you get from these situations is that you can attempt to haggle with the seller to get a better price.
In my experience, I have had moments where it seemed like every other week I would find multiple games at yard sales and thrift stores, and at other times, it would be several months before I would find even one game that I would want to buy. To me, the aspect of trying my luck at second-hand stores is part of what I really love about the hobby of video game collecting. Even when I don’t find a game I like, I still enjoy the act of searching around for anything else that could be interesting. Every individual piece in my collection came from somewhere and someone, and while it may not fill a room-sized display, the experiences I have had while collecting games are ones I know I will cherish for years to come.
However you go about collecting video games, what’s most important is to do it at your own pace. It’s easy to get caught up in the act of collecting, and if you

find yourself starting to get frustrated over the hobby, it can help to take a step back and think about why you started the hobby in the first place. Video game collecting is about you and your collection, and finding enjoyment in those things. Whether you just want a couple of games, or a whole library, take your time and enjoy the journey.


 by: Lauren Henson
The earliest form of ballroom dancing is believed to have begun at the end of the 16th century in France. A cleric by the name of Jehan Tabourot was the first to officially provide a record of ballroom dancing when he published Orchésographie, his study on late French Renaissance social dance. This type of dance circulated heavily throughout the countryside of Europe, eventually spreading its influence to more densely populated and wealthier regions. During the eighteenth century, social dance was a common practice shared by upper and lower classes, and noblemen were even known to dance side by side with servants at balls playing the symphonies of Mozart and Handel.

By the nineteenth century, waltz had become popularized in Austria and quickly took root in England. Due to the close-frame style of waltz, which requires dance partners to dance pressed against each other, waltz was once considered indecent, which is a far cry from the elegance and sophistication associated with waltz today. However, this form of dance grew to be more socially accepted, and other styles of partner dancing began to emerge as well. By the early twenti-
eth century, there was an explosion of new dance styles emerging, especially due to the debut of jazz music in the United States. This new genre of music inspired a whole new category of ballroom dancing known as Swing. Swing encompasses dance styles such as Lindy Hop, the Jitterbug, Shag, and the Charleston, and it later evolved into a dance style known as Jive. Around the same time an American dancer by the name of Harry Fox invented the Foxtrot by dancing to ragtime tunes. The Foxtrot’s popularity skyrocketed thanks to the couple Vern and Irene Castle, who performed the Foxtrot in Broadway musicals during the early twentieth century.
Ballroom dance in Europe and the US could not have become so diverse without help from dancers originating in Africa and Latin America. For example, the dramatic and intense style of dance known as Tango was invented in Argentina. Additionally, the Puerto Rican dancer Pedro Aguilar was especially skilled in the dance style known as Mambo, which emerged during the 1940s. The Rumba, known today as a graceful and ro-
mantic dance, originated in Africa and spread to Cuba due to the slave trade in the eighteenth and nineteenth century. Son and Danzon were two other popular dances in Cuba that were very similar in style to Rumba. Modern Rumba combines elements of historical Rumba, Son, and Danzon dancing. The Cha-Cha was another Cuban dance that appeared in the 1950s, combining elements of Mambo and Danzon. Similar in origin to Rumba, Samba was a dance style born in Africa, specifically in the regions of Angola and the Congo. Also through the slave trade, this dance made its way over to Brazil, and became a part of Brazilian national identity. Samba is still performed in Brazil today, playing a major role in Brazilian Carnival, danced through the streets of Rio de Janeiro.
From the early to mid 1900s, ballroom dancing was a ubiquitous tradition throughout the US. It was incredibly common for communities to have local ballroom dance halls, where members of the community would show up to social dance to jazz, ragtime, or classical music. However, this tradition seemed to fall out of popularity by the 1960s. This decline in ballroom dance can at least be partly attributed to the era of mass suburbanization in the United States. As people spread out more, it became increasingly challenging to establish the tight-knit communities ballroom dancing was founded on. However, historians give greater credence to the emergence of new genres of music in the 1960s, such as the many varieties of rock n’ roll. Since there was an outburst of so many kinds of new music, each with their own associated dance style, it also became increasingly uncommon for large groups of people
to practice the same kind of dance within a suburban region. In the early twentieth century, the styles of music were limited enough that it was reasonable to expect everyone would have the same music taste and all know how to swing dance or waltz. This shift in the musical scene made ballroom dance a niche category, thereby causing it to lose its widespread popularity in the late twentieth century. However, the art of ballroom dancing has not been lost completely, and is still a hobby you can practice today.
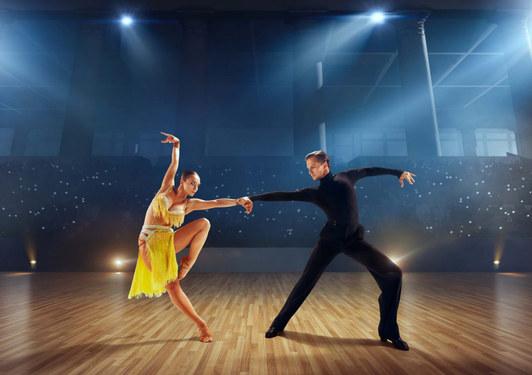
Although not as widespread as a century ago, ballroom dancing still has a small, tight-knit community that you could be a part of today. If you choose to pay your local studio a visit, you could explore smooth ballroom dances such as waltz, tango, foxtrot, viennese waltz, and quickstep. Or, if you’d prefer, you could try your hand at Latin rhythmic dances such as rumba, cha-cha, samba, mambo, jive, or bolero. There’s even a category of “nightclub” dances you could learn if you go social dancing, such as merengue, salsa, bachata, and west-coast swing. Professional ballroom dancing is taught either in large class settings or personal one-on-one lessons. This could be a fun activity to try out with friends on a weekend, or become a weekly routine, depending on how much you enjoy dancing and how much money you’re willing to invest in this hobby. If you do make ballroom dancing a dedicated hobby, you may even be interested in competing in local ballroom competitions with a partner! You’ll find that dancing is a great way to stay active, meet new people, find a community, and have fun!


Dr. Denise Machin has been the Ballroom Dance Director at Pomona College in Claremont, California since 2016. She instructs a variety of ballroom dance classes open to students at the Claremont Consortium and directs the 5C’s ballroom dance club, The Claremont Colleges Ballroom Dance Company (CCBDC). She completed her undergraduate degree at UC Riverside and has a Ph.D. in dance from Cornell University.
Q: When did Dr. Machin begin ballroom dance and what drew her to it?
A: Dr. Denise Machin first began learning ballroom dance when she was in high school. She had always loved dance, which inspired her to take two ballroom classes at her local community college during the summer. Denise immediately fell in love with the social and performance duality of ballroom. She also appreciated aspects of partner dancing that couldn’t be achieved with solo dancing, such as the shapes and forms you can make with a partner. Thus, when applying for college, Denise only considered schools that offered ballroom.
Q: What inspired Dr. Machin to go into dance education?

A: Because Denise had such a love for ballroom dance, she was inspired to share this passion with other people. She decided early on in her career that she didn’t want to go into professional dancing, not wanting the act of dancing itself to become a job. She remains a high-level amateur when competing, but most of her time is spent teaching beginners the basics of a variety of ballroom dance styles.
Q: Does Dr. Machin feel like she’s still learning more about ballroom through her teaching?
A: Dance classes create an environment of constant learning for everyone, including instructors, according to Denise’s experience. Through teaching, she’s noticed similarities in steps across differnet styles of dance. Furthermore, in finding new ways to explain
steps to students, Denise’s own understand of the moves has also expanded.
Q: What was Denise’s vision for CCBDC when she first became director?
A: In Denise’s experience, ballroom dance had once been a much more restrictive and exclusive activity. For example, Prior to Denise’s employment at Pomona College, CCBDC had just begun allowing female students to lead dances, instead of being forced only to follow. Thus, the number of women allowed to join the team was limited by the number of men who signed up and could be leads. Furthermore, it used to be incredibly common for there to be restrictions on dancers’ hairstyles and body types. Many of these rules started breaking down before Denise joined Pomona, but she’s worked hard to erase these restrictions altogether. Everyone who auditions for CCBDC automatically makes the team, and has full freedom to choose whether they want to lead or follow. Thus, Denise makes sure to establish an inclusive environment that spreads the joy of ballroom dance to everyone who’s interested, regardless of gender and physical appearance.
Q: What has been the best part of teaching ballroom:
A: Denise describes the process of her students making progress as magical. She gave the example of students in her intermediate latin dance class learning a samba routine, noting how amazing it was watching them successfully complete a routine they didn’t know at all just a week prior.
Q: What has been the most challenging part of teaching ballroom?
A: Denise notes that the high-achieving population of students she teaches at the 5C’s were all used to being good at so many things. A lot of students haven’t experienced the feeling of being a beginner in years, and struggle with the idea of not being good at something immediately. Not only does Denise have to teach students dance steps, she also has to help them overcome the frustration that comes with being new at something. She rejects the idea that all hobbies need to be monetizable, instead emphasizing the importance of just being able to enjoy activities without being good at them.
Q: What is Dr. Machin’s favorite memory associated with ballroom?
A: Dr. Machin shared a couple memories that stuck out to her in her years of teaching. She recalled her first year directing concert, which is the large performance CCBDC has at then end of the spring semester to showcase routines they’ve been practing all semester. Being that Denise is the sole peson in charge of directing the program, this concert was a very large undertaking. However, she noted that her students rallied behind her and helped pull everything together, and the concert was a huge success. Additionally, when Denise first started at Pomona College, she was still a graduate student at Cornell. During the time when she was defending her dissertation, her students showed their support and appreciation for her by organizng a flash mob and performing for her. (She admits that this display of support did make her tear up).
Q: If someone who’s not currently attending a college with a ballroom team team wanted to get started, what resources would you recommend to them?

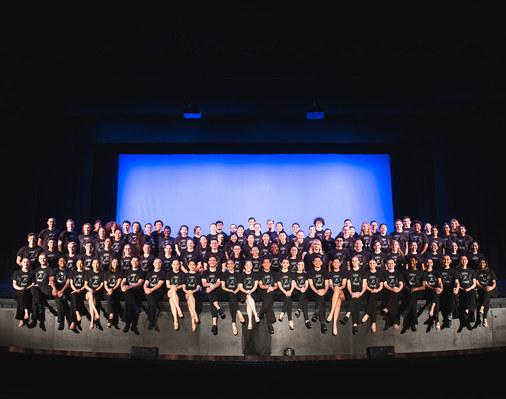
A: According to Denise, the most inexpensive way to start learning ballroom dance is to take classes at a local community college. Furthermore, if you’re interested in participating in ballroom competitions, a lot of bigger colleges allow non-students to join their ballroom team. If you become more committed to this hobby, another option you may want to consider is taking group lessons at nearby dance studios. These lessons usually run from around $15-20 per session, which is more costly than community college classes, but will give you a great community to interact with. If you become very serious about ballroom dance, you may even consider taking private lessons. However, this is the least cost friendly option, running anywhere from $70 to $160 per lesson.
Q: How would Dr. Machin describe the ballroom dance community?
A: Dr. Machin describes knowing ballroom dance like knowing a foreign language - you can learn the exact same moves as someone who’s on the other side of the world. Thus, whether you’re in a group lesson or just out social dancing, you already have something in common with everyone elese in the room. This makes ballroom an expansive and inclusive community. Denise explained how she’s formed connections with other directors of intercollegiate ballroom programs. These people have become like extended family - and play a large role in what makes ballroom such a great community. One final note that Denise hopes to impart is that one bad experience at a dance studio or class shouldn’t discourage you from pursing ballroom altogether. Instead, try finding a different community at a new location. There’s room for everyone in ballroom dance.
Rumba is a style of latin dance that originated in Cuba and was greatly influenced by African styles of dancing. This type of dance uses a 4-count timing; dancers shift their weight from one foot to the other on each count. The rumba basic step - illustrated above - is an essential buiding block for learning and appreciating all of the fun rumba has to offer!
Here’s a brief summary of what happens during each of the two 4-counts that make up the basic:
1 - Transfer your weight to your right foot in position B
2 - Step forward with your left foot to position C
3 - Transfer your weight back to your right foot, still in position B
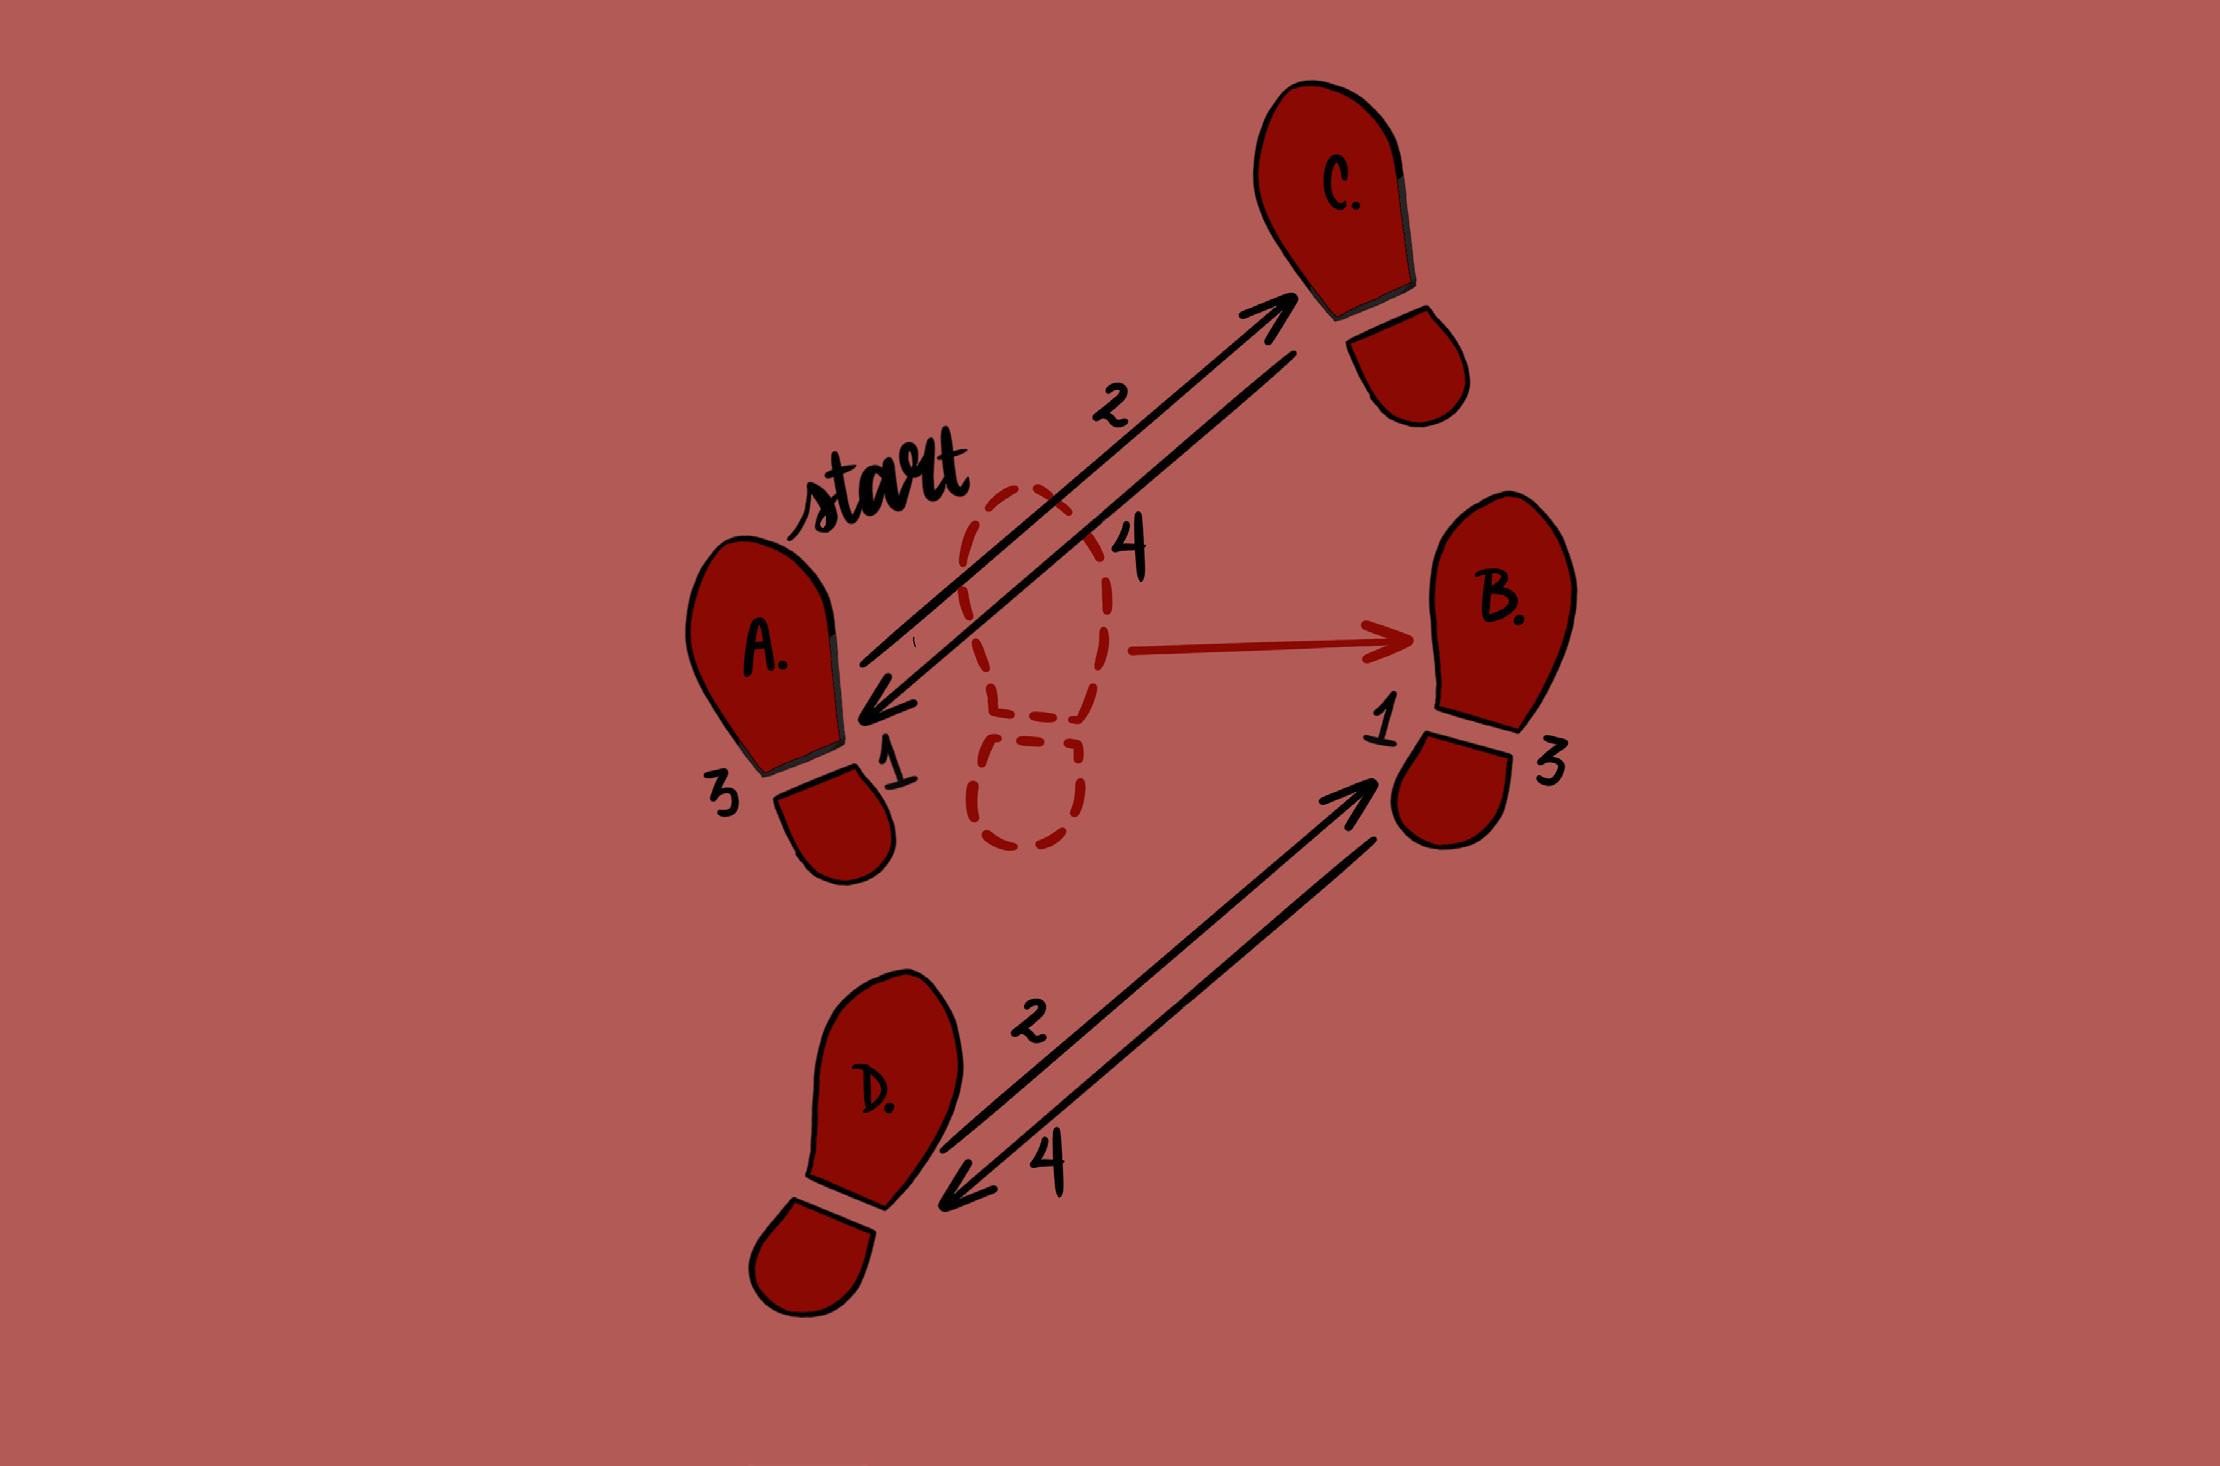
4 - Step back with your left foot to position A
1 - Transfer your weight from your left foot to your right foot
2 - Step backward with your right foot to position D
3 - Transfer your weight back to your left foot, still in postion A
4 - Step forward with your right foot to position B
If you’d like to learn more about the proper technique that goes into these steps - see them in detail on the next page!
First half of the basic - stepping forward with the left foot:
Start with your weight on your left foot in position A and have your right foot in the dotted lines. Your right foot will only ever be in the dotted lines right as you begin, it will not return to this position.
On count 1 slide your right foot to position B and make sure your weight is now on your right foot. Make sure your left foot stays in position A for this first count.
On the count 2, transition your weight back to your left foot as you slide it to position C, keeping your right foot in position B. Although you don’t move your right foot, proper technique is to lift your right heel off of the groud.
You do not take a step during count 3. Instead, you just shift your weight backward onto your right foot and put your right heel back on the groud, still in position B. Your left foot shouldn’t move, but you should point your left toe, lifting the heel slightly.
Finally, to complete this half of the basic, on count 4 you slide your left foot back to position A, without putting weight on it.
Second half of the basic - stepping backward with the right foot:
Now your left foot is in position A and your right foot, which is carrying your weight, is in position B. We just finished a 4-count, now we’re going to complete another 4-count for the back half of the basic. For the first count, you will not need to step, just shift your weight from your right foot to your left foot. This is similar to the weight shift between counts 2 and 3 that you just did before - except for this weight shift both heels remain on the ground.
For count 2, step backward with your right foot to position D, making sure to put your weight on it. Since your left foot will no longer be carrying your weight, point your left toe and lift that heel slightly.
On count 3, you once again do not need to take a step, just shift your weight back onto your left foot and place your heel back down, which is still in position A. Keep your right foot in position D and lift your heel. Finally, on count 4 slide your right foot back to position B, but keep your weight on your left foot. That completes the basic! Now, you can immediately repeat the basic by transferring your weight to your right foot, starting the next 4-count.

Just the Way You Are - Bruno Mars
Quando, Quando, Quando - Michael Buble
You Are the Sunshine of My Life - Stevie Wonder
Fields of Gold - Sting
Tu - Shakira
Killing Me Softly with His Song - Roberta Flack
Falling Into You - Celine Dion
Lovesong - Adele
Love Story - Taylor Swift
Time After Time - Cyndi Lauper
No One - Alicia Keys
Do It To Me - Lionel Richie
Love Yourself - Justin Bieber
Casi un Bolero - Ricky Martin
Liberan Girl - Michael Jackson
 by: Sydney Cornell
For many people, walking is something that is taken for granted and seen as a means to an end (getting from one place to another) as opposed to a pasttime. However, walking can be a rewarding hobby in and of itself. In addition to the number of health benefits (physically and mentally) that can be gained, walking is a great hobby because of its general accessbility and versatility.

One of the more difficult parts of picking up almost any new hobby is the presence of some kind of barrier. They can take a range of forms, from financial to resource availabiltiy. However, walking is a hobby that is accessible to anyone who is capable of doing it. If you are physically able, there is not much else standing in your way other than a little time, motivation, and a place to take a walk.
It may seem that your location restricts the landscapes that are available for walking, but a variety of areas are often available dependent upon your willingness to research or commute. For example, if you live in an urban area but are drawn to walking in nature, there are often greenspaces scattered throughout the city. There may also be other options in the form of conservatories, gardens, farms, and so on. Finding the right environment to walk in may take a little creativity, but
will make the hobby more enjoyable. Walking regularly has been shown to offer a number of health benefits. Physically, walking can strengthen your immune system, lower risk of developing different types of diseases (such as cancers or heart disease), and improve cardiovascular fitness. In terms of mental health, walking is able to decrease stress, improve your mood, and benefit your memory and sleep cycle.
My favorite part of walking as a hobby is its versatility. While walking alone can be enjoyable, it can also be combined with other things to diversify your experiences. The time spent walking can be used for more passive things such as reflection, listening to music, and general observation. On the other hand, walking can be a great part of more active engagement with the world around you, such as catching up with a friend or exploring a new city. With no limit to the different things that it can be paired with, walking is a pasttime that can set the backdrop for no end of new experiences.
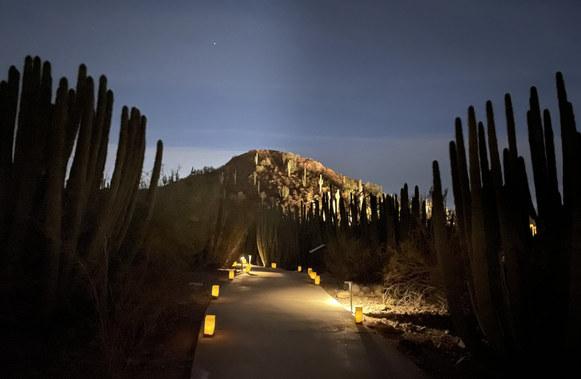
The most explorative part of beginning walking as a hobby is finding different spaces that you can go for a walk in. Your choices will largely depend on your area, resources, interests, and what you’re looking to get out of walking.
If you live in a city area but are a person who enjoys natural scenery, there are often places to walk in the form of green spaces and parks throughout the city. These places are generally created with the intention of allowing more nature into a city’s center and improving the quality of life for the city’s residents. As such, these places are often very open and accessible to go for a stroll. They can range from expanses of grass with pathways and trees for shade, to more landscaped parks with
ing events may sometimes be held there, depending on the space. Such a change in a familiar space can be refreshing, and allow you to connect more with a broader community of people.
a variety of plant life and structures. Going to green spaces and parks are good for people-watching (if you enjoy it), getting fresh air, finding a change of pace and scenery from the city, and can be meditative.

Another benefit of walking often in green spaces or parks located within a city is that community-build-

Gardens and conservatories are other types of spaces that are often available in many areas that generally lack abundant nature, such as cities. Like green spaces and parks, they offer a refreshing change of pace and scenery to every day life, and may also have events that invigorate the space sometimes. There are a few differences, however, that make them a distinctly different option for walking.
Gardens and conservatories are larger and generally more organized than green spaces and parks. There are often more designated paths, and much more diversity in the way of plant and sometimes animal life (depending on the space and if it is indoors or outdoors). Many of them function as educational spaces, which allows your walks to double as experiences for learning about native flora and fauna, gardening practices, etc. Gardens and conservatories may also feel more isolated than green spaces and parks, because trails tend to be more sheltered and people are generally doing their own things. However, because they have dedicated people operating them, there is often admission fees to such spaces. If it seems like gardens and conservatories
are the kind of spaces that you would enjoy taking walks in regularly, they are a worthwhile investment for the beautiful space to roam through, as well as for what they offer the communities that surround them.


Hiking and wandering in natural spaces is a personal favorite pasttime of mine, and a great way to go for a walk. With natural spaces, there is often a lot of plant and animal diversity, but more wild and grown than what you would find in most conservatories or gardens. It’s the best way to truly immerse yourself nature if that’s one of the aims of your walking. Hiking or walking in natural spaces is also often more involved in terms of exercise, and is an activity that can be enjoyed with a friend or group, or that can be done on your own. Of all of the available places to walk, hiking trails and natural spaces are generally the most isolated, allowing you more freedom to do your own thing as an individual or a group.
However, hiking and natural spaces are also often the least accessible option for those living in suburban or urban areas. There are less spaces available nearby, making transportation a necessary consideration in order to reach the space you’d like to walk in. Additionally, hiking trails or other natural spaces entail more research ahead of time, such as when the trail is ‘open’, how difficult it is, recommended items to bring, what is or is not allowed (pets, smoking), and so on. If the hiking in natural spaces route is of interest to you, it is absolutely worth the time and effort put into it, and can be a great way of connecting with yourself and nature.
For those who aren’t very outdoorsy, walking is a great activity that many people do in bigger cities and downtown areas. This form of walking offers different benefits than those previously mentioned for the natural spaces, and it is still a great way to exercise and experience the world.
Because cities have more people and infrastructure, there is more to do in the space. If you don’t enjoy walking for the sake of walking, you have the freedom to go to events, stop in places, window shop, try different eateries, and so on. With the way that cities are set up, you are less confined and can really explore the space you are in. There is no defined trail or path – your walking journey is entirely your own. Cities are also often the most crowded option, but if you enjoy being around other people or are indifferent to crowds, they aren’t a hindrance to the space. Exploring cities are a great way of discovering new places near you, or getting to know a completely different area altogether.
Walking can seem like a boring hobby to invest time in initially, but there are so many different places that can be explored and things to do during it. With the health benefits it offers and the new experiences it can lead to, it’s something that everyone who is physically able to walk should participate in.
What are your favorite places to walk or roam?
Let us know by sending a photo of your favorite place to walk to 340 E. Foothill Blvd., Claremont, CA 91711, and you could be featured in the next issue of Hobbyism!
As I’ve gotten more into walking and hiking over the course of the past few years, I’ve visited a variety of places and made a lot of good memories within them. It’s difficult to pinpoint my favorite areas I’ve walked, but I’ve chosen a few locations that I remember fondly. The highlights of each memory aren’t aspects of the place itself, but the moments I’ve had there and the people I was with. Just walking or exploring a new place can end up being a new small adventure – a wonderful thing in a life where the little things count.

The weather may have been brutal (highest winds I’ve ever seen and practically horizontal raining), but running around the hill area was one of the most invigorating experiences I’ve had. We were soaked to the bone and stumbling all over the place, but it was the highlight of our England trip.

I’ve walked around here a few times with friends for a number of different reasons. From being stopped by a random teenage girl to record her singing on our own Instagram accounts to taking a longer detour on a school trip because the bottom of the bus had been hit, the pier has been a consistent location of events.
I’ve hiked a lot with my friends, but this is easily in my top 3. The mountains had numerous trails that joined and converged in many ways, so it was a lot more exploratory than most other hikes. We spent a good portion of the day ambling around and climbing up rocks together.


If you go rock-climbing, you’ll notice most climbers don’t complete a climb on their first try. They may spend a few hours on just one route, repeatedly falling and reattempting. I used to wonder why this was such a common practice. To me, it seemed more satisfying to complete many easy climbs in the same time they spent failing a hard one. However, I finally understood their mentality after attempting the most challenging climb I had ever done before. As expected, I didn’t complete it on my first try. Yet instead of feeling defeated, I began to ponder what I did wrong and how I could improve. That’s when it hit me – success in rock climbing isn’t based on how many climbs you complete, but by how you apply resilience and problem-solving skills to conquer a challenge.
Rock climbing is a sport that relies on agility, strength, and problem-solving. When outdoors, the goal of rock climbing is to scale up or across rock formations found in nature. Indoor rock climbing has a similar goal, except that climbing routes are predetermined by the climbing gym’s artificial rock formations. From my personal experience, indoor rock climbing has a few benefits, especially for beginners. For example, you can go any time within the gym’s open hours and don’t have to travel to new locations everytime you want to attempt a new route. Plus, indoor climbing gyms often have experienced regulars, who can give you pointers and cheer you on. Thus, climbing can allow you to build a community on top of building your strength.
If you’re interested in visiting the climbing gym nearest to you, there’s a few things you should know. Indoor

climbing gyms will allow you to build up skills and problem-solving techniques by climbing on artificial rock formations. Once you enter the gym, you’ll notice that the rocks on the wall (referred to as “holds”) come in a variety of shapes, sizes, and colors. There’s a general rule for indoor climbing that you should keep in mind: when you begin a route, you’re only allowed to use holds of the same color. These routes typically label the starting holds, the rocks you need to place your hands and feet on in order to begin climbing. You’ve completed the route once both of your hands reach the top of the wall, or a designated hold labeled “finish”. Climbing gyms also label their routes with a difficulty level, and have a variety of beginner-friendly climbs. These beginner routes are more straightforward than intermediate or advanced routes, giving good indication where a climber should place their hands and feet. As the levels grow more difficult, the pathing becomes more ambiguous and the holds come in more difficult shapes. Thus, more experienced climbers get to put their strength and creativity to the test when they attempt harder routes, since they need to figure out their path and how to conserve their energy.
After gaining some experience with indoor climbing, you may feel inspired to try climbing outdoors. Outdoor climbing differs from indoor climbing in that the climbing routes are not laid out for you. Instead of


having color-coordinated holds that indicate where you can put your hands and feet, outdoor climbing occurs on natural rock formations, so the path is a lot less obvious. Outdoor climbing really puts your problem-solving skills to the test because the climber needs to judge for themself what formations can be used as holds, and which pathing gives them the most stability. If you’ve never rock-climbed before, outdoor climbing may be a challenging starting point. However, after learning the basics at an indoor climbing gym, you may find that you enjoy outdoor climbing more and pivot to this climbing scene instead.
One final thing to keep in mind is that rock climbing takes practice. The first few times you climb, you may find yourself struggling to figure out where to place your feet, how to conserve your energy, or maybe even how to get over your fear of falling. Not everyone completes a route when they climb for the first time. I personally couldn’t make it to the top of the wall when I began climbing, and I needed people to help me decide where I needed to place my hands and feet. However, if you stick with climbing, you’ll find that over time, it begins to come naturally. If rock climbing teaches you one thing, it’s how to get back up and try again after you’ve fallen.
Let’s say you go to the climbing gym nearest you for the first time. Yay, time to climb rocks! …Almost. There’s a few things we need to do before picking our first project. First of all, you’ll probably watch a safety video that covers the basics of how to land when you jump off the wall. (Always remember to lean backwards when you fall, never try to land and fall forward!) Next, you’ll need to get some shoes. Climbing shoes are specially designed with a smooth sole to give you traction, yet still allow you to slide your foot around if needed. Climbing gyms almost always have shoes for rental, but you can purchase your own too, especially if you start climbing on a regular basis. Thirdly, you’re gonna need powder chalk.. Climbers always dip their hands in chalk before each climb, to ensure that their hands won’t slip. One useful item you could purchase is a chalk bag that straps around the waist. That way, if you’re halfway up the wall and then start getting sweaty hands, you can easily pause on the wall, re-chalk your hands, and keep climbing.
Now that we have some of the basics out of the way, we’re going to need to choose the type of climbing we want to do today. As previously mentioned, there are three types of climbing a gym might have to offer. First, there’s a style of climbing known as top-roping. In top-roping, the climber wears a harness that can secure a rope hung from the ceiling. One end of the rope is tied to the climber’s harness, and the other given to the belayer. The belayer is the person who stands on the ground and pulls on the rope as the climber gets higher, so they can’t fall. Top-roping routes are usually 40 ft tall, depending on the gym you visit. Once the climber reaches the top of the wall and places both of their hands on the finish, they lean back and grab the rope right above their harness, so only their feet are touching the wall. Then, to get down, the belayer slowly releases the excess rope bit-by-bit. At the same time, the climber slowly kicks against the wall, so they bounce down smoothly. This method of getting down is used so the climber doesn’t have to waste any energy by carefully climbing down, or have to worry about smacking

against the wall as they’re lowered by the belayer. If you’re interested in top-roping for the first time, your local climbing gym will show you how to properly secure the rope to your harness and belay for another person. Additionally, if you don’t have someone to belay you, sometimes climbing gym employees will belay for you, so don’t feel like you always have to show up to the gym with climbing buddies in order to attempt this type of climbing!
Another type of climbing that requires ropes and harnesses is lead-climbing. Similarly to top-roping, one end of the rope will be tied to the climber’s harness and the walls are approximately 40 ft tall. Unlike top-roping, the walls for lead-climbing are dispersed with carabiner hooks, which the climber feeds the rope through as they climb. The belayer stands at the bottom of the wall holding onto all of the excess rope, slowly feeding it to the climber as they get higher. Thus, if the climber falls, they’re only able to fall as far as the next lowest carabiner hook. This type of climbing may be slightly intimidating for new climbers, as they could end up falling a few feet in the air, unlike top-roping, where they wouldn’t really be able to fall at all. Thus, if you’re going to try rope climbing for the first time, I would recommend starting with top-roping and graduating to lead-climbing once you’re comfortable.
Finally, my personal favorite style of climbing is called bouldering. Bouldering is climbing without a harness or a rope. This may sound dangerous, but fear not! Bouldering walls are usually only about 20 feet tall, and the ground is made of very squishy landing pads.


Furthermore, bouldering walls are outwardly sloping, so if you fall, you won’t make contact with the wall on the way down. The difference between bouldering and rope-climbing can be thought of as similar to the difference between sprinting and long-distance running. Whereas in rope-climbing you want to have long term endurance, bouldering requires more immediate strength and speed. You don’t have a rope to help support your weight like in top-roping, so bouldering puts greater strain on your muscles. It also usually has more complicated routes that test your problem-solving skills rather than long routes that test your endurance. To get down from bouldering routes, you either need to climb all the way down the wall, or climb partially down, and then jump from a safe distance. The soft landing pads making jumping off the wall a relatively safe and easy alternative to climbing down fully.
Regardless of which climbing style you choose to begin your climbing journey, you’ll find that rock climbing is an invigorating sport that challenges both your mind and body. Have a safe and fun time climbing friends!
It’s tempting to try to bring your arms in tight when you climb to make sure you don’t fall. Ironically, this is the fastest way to tire your arms out and force yourself to drop before you reach the top of a problem. Thus, it’s best to practice putting trust in your grip, relaxing those muscles, and keeping your arms straight as much as possible when you’re clinging to holds.
A mistake that I made when I first started climbing was that I tried to rely almost solely on my arms and back to scale up the walls. Your legs have a lot more strength though, so definitely try to use your legs to propel yourself upwards! Your arms are more for keeping balance and dexterity, but your legs should carry you.
This may sound a little funny, but when you begin climbing, focus on making as little noise as possible with your feet. Practicing this will train you on committing to decisions, engaging your core, and being aware of your footwork.
Between climbs, make sure to stretch your arms and legs, get blood flowing, and drink water. During long climbs, you can even take pauses to release the wall with one arm at a time so you can stretch and shake out your muscles.
When bouldering, it can be tiring or difficult to climb all the way down, so it’s common for climbers to climb down partially, and then jump from about halfway up the wall. If you’re jumping from a low enough height, it’s possible to land on your feet and be fine. However, when learning to judge how high you can safely jump down from, the best practice is to start off facing the wall, push away, and land on your feet, bending your knees to absorb shock and rolling backwards. Make sure to avoid landing on straight legs or falling forward, as this could lead to injury!
While both of your feet are still on the ground, scout out the handholds and footholds on the problem. You can make a rough plan of the order you want to grab holds, so that way you can save muscle energy during the climb by not having to find a viable foothold on the go. Your rough plan may not work 100%, but it’ll definitely help you save energy and have greater confidence when you climb.
When I first started climbing, I would only attempt problems that had a lot of jugs, which are handholds that curve inward at the top, creating a nice pocket for your hand. This was helpful for a beginner, but eventually I wasn’t learning anything new by only sticking to my jug-heavy routes. Try routes with different types of holds that you’re not used to, such as crimps and slopers, to increase your skill and conquer new challenges.
Both in indoor and outdoor climbing, some routes may cross paths or be placed close enough together so that it’s only safe for one climber to be on that part of the wall at a time. Be aware of where others are climbing, so you don’t interfere with their problem or accidentally cause an injury. Also, it’s common for climbers to spend hours on a specific problem until they complete it. Make sure to avoid being a wall-hog, and give others a chance to use the wall between your attempts. This gives you a chance to rest and make climbing plans anyway, so this common courtesy benefits everyone.
If you bring a belayer, make it someone who’s trustworthy
Your belayer is responsible for making sure that you don’t fall when you’re really high up on the wall. If you don’t 100% trust the person belaying you, I would recommend finding someone else to do the job. You don’t want a belayer who doesn’t pay attention to you when you climb, or risks your safety.
At the start of each climbing session, you should begin with a warm-up route that’s less intense than your normal climbing level. That way, you can loosen up your muscles, remind yourself of basic techniques, and build confidence in your climbing abilities before attempting more difficult problems.
Know the basics of grades, but don’t obsess over them!
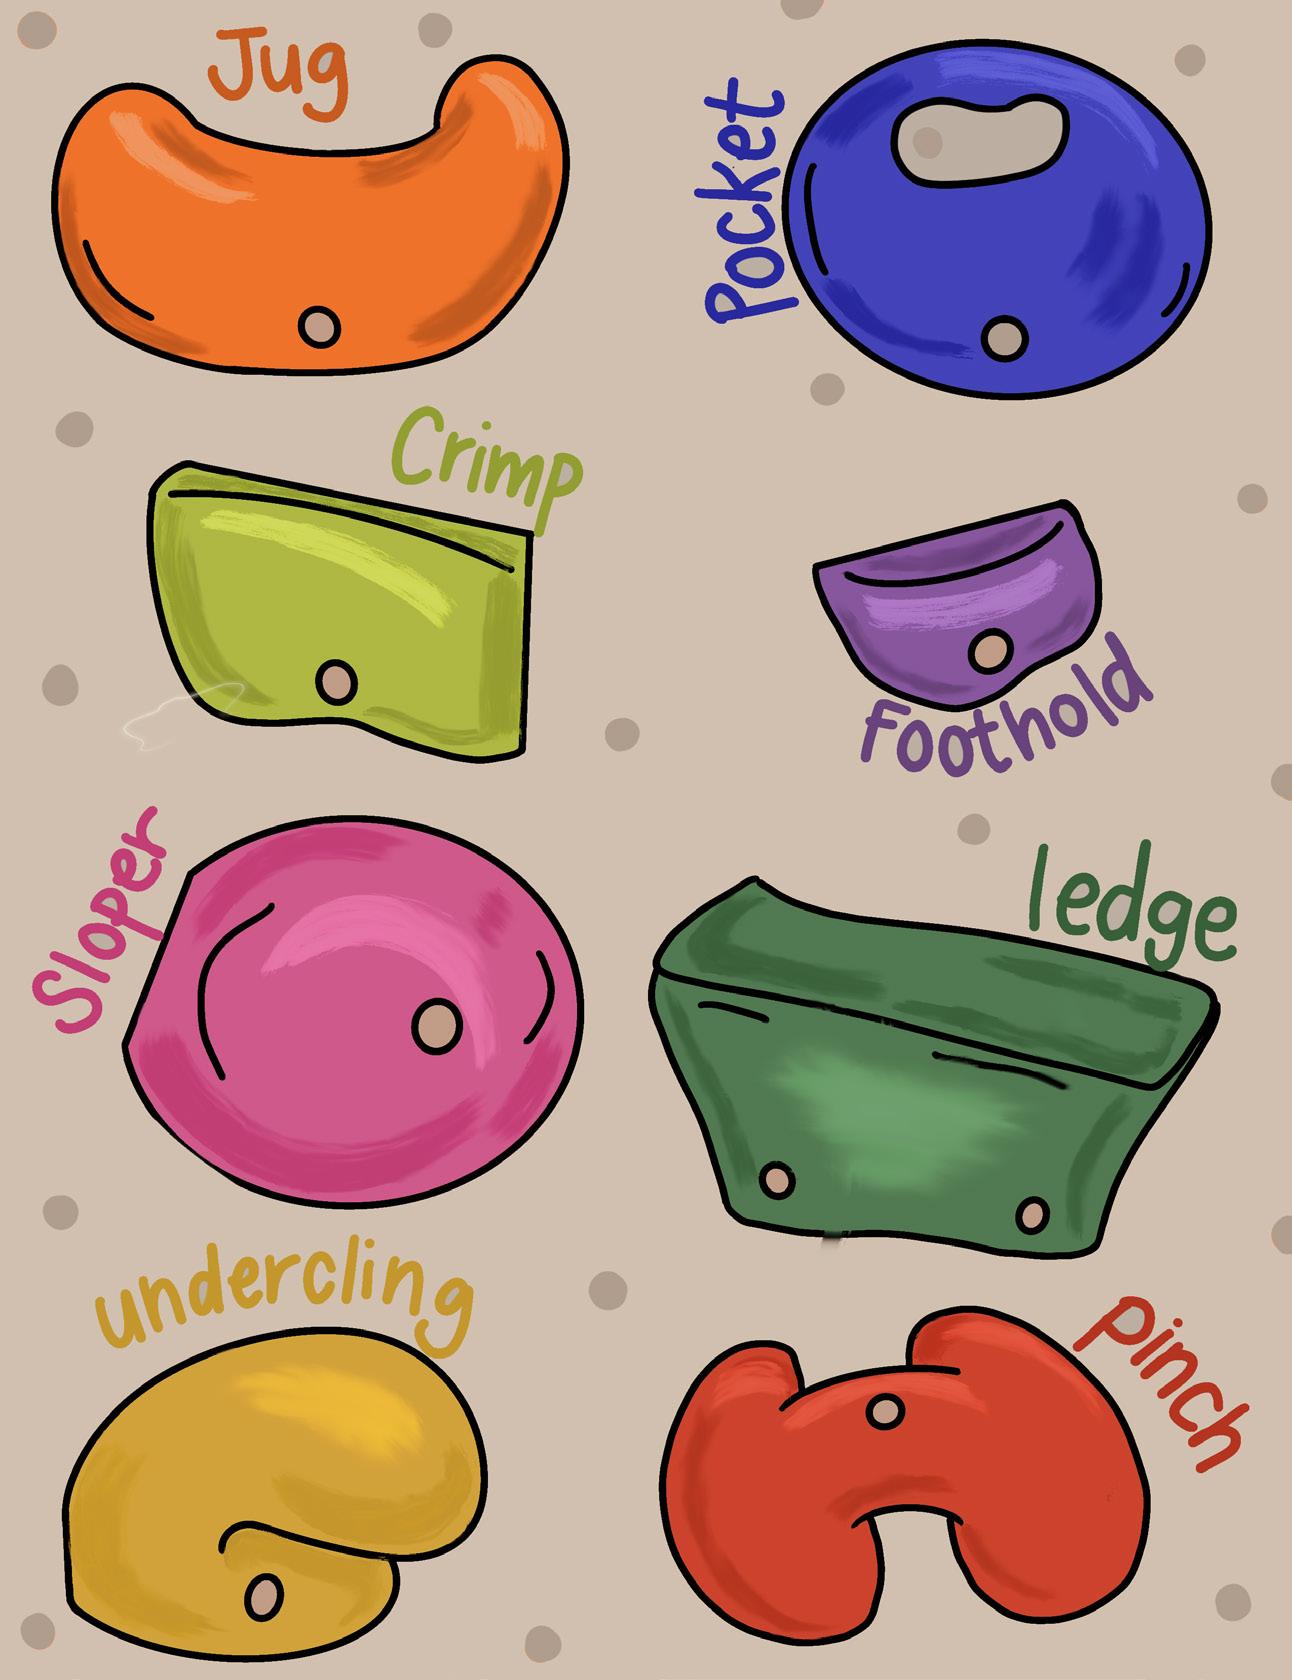
Climbing grades are used to label the difficulty level of climbs. It’s helpful to know which grade you currently can complete to gauge which problems you want to try next. However, moving up in climbing grades is not the sole indicator of progress. Even if you’re climbing at the same level, you’re improving your skills in grip strength, footwork, pacing, and problem solving. Don’t get discouraged if you’re not moving on to higher level grades quickly!
It’s true that some people at the climbing gym just want to climb and not interact with other people. However, don’t be afraid to say hi and engage with other climbers! A lot of people at the gym will be happy to chat with you about rock climbing, and maybe even exchange some tips and tricks. There’s a whole climbing community that you’re more than welcome to be a part of!
 by: Nestor Coria


Music. It belongs to a category of practices which enrich our lives and our spirits. There are many perspectives when it comes to what constitutes it, what exactly it is, and a lot of other details about both the objective and subjective parts of it. When it comes to discussing music, considering these points of view and your own is important, however when it comes to making music, the considerations become a lot more personal.
Music composition, the act of writing music, is similar in many ways to other forms of expressing yourself. Like all forms of expressing yourself, there are people who have their own ideas on what is right or wrong and good or bad, but if you want to compose music, you owe it to yourself to be able to do whatever you want. Similar to the idea that you don’t need to be an artist to doodle on the side of a page, a poet to write a poem on a note, or a photographer to take a photo of a landscape on your phone, composing isn’t something that only professionals do. Whether it be writing out a little tune or a full-blown concerto, you can get into music composition.
Presently, there exist many different ways to “write” music. From the traditional idea of writing in notes on staff paper to free online music sequencers, if you are new to the hobby, you have many options. Which option you decide to use is up to you, however each
option requires a varying amount of understanding and knowledge. For example, when writing on staff paper, while you can choose to use it in any way you want, if you want to share what you wrote for someone else to interpret, you either need to use the language and symbols that people typically expect to see on it, or make a set of instructions and translations to get others on the same page.
With any option that you decide to choose, there are often online resources that can get you started with figuring out how to write out and express yourself
within the confines of the tools you choose. Personally, I have found that for approaches where you can interact and listen to the music you are creating as you write it (such as within music sequencers, or while recording yourself singing or playing an instrument), it is rewarding to noodle around until you begin to understand what it is you are trying to do. YouTube is also another safe option for finding learning resources and explanations of how others go about tackling the task of music composition. For example, the channel “Nahre Sol”, created by the pianist and composer Nahre Sol, has several videos in which Sol describes her composition process. An example of such a video is “What Makes Studio Ghibli Music SO GOOD??!!”, in which she analyzes the compositions of Joe Hisaishi to figure out how somebody can go about composing music in his style.
Once you have settled in and have begun to understand a tool you would like to use to compose music, you may ask yourself how to write something good, or something that you would enjoy. Once you have made it to this point, it is really up to you how you decide to go about achieving this goal. There are certainly textbooks, blog posts, YouTube videos, college courses, and individual opinions on what makes good music, and these can all be great resources to get ideas from, but ultimately, you are in charge of deciding whether the music you compose is good or not.
There are various options for getting started with writing music, and many of them are not prohibitive in terms of cost or means of access. Music composition is an act that many people have undertaken, and that will probably be undertaken for many many years from now, and whether you want to create music for others, or for yourself, it is something that anybody can do to enrich their lives.
In order to get a different perspective on music composition, I interviewed a good friend of mine, Simon Tran, who has composed quite a bit of music for quite a long time. Below is our interview, which was conducted through an online call.
- Hello, can you tell me a little bit about yourself?
Simon Yeah, so, I’m Simon and I’m a games games major at the University of Utah that is studying game design and I am in my, well, about to be in my senior year. And so far I’ve worked on a number of projects ranging from level design to audio design as well as some composing.
I am a musician. I am classically trained in piano, technically, and I’ve worked on music typically for the purpose of accompanying the games that I work on.
- I’m going to ask some questions about composing now, are you ready?
Simon Sure.
- What do you use to compose music?
Simon So the primary tool that I use to compose is digital. I work in a digital audio workstation, or DAW for short, and I prefer to use Steinberg’s Cubase. Along with that I have an electronic keyboard and some MIDI cables so that I can work out some of the composing on the piano, transfer that easily into my digital workspace, and do whatever tweaks I need there, and use whatever virtual or digital instruments I need. On occasion I will use musescore for making sheet music that I use either afterwards or beforehand as reference, usually to sketch out a piece of music before I start getting too deep into it or recording any outside audio.
- Would you recommend that tool to people who are trying to get started?
Simon I wouldn’t recommend Cubase in particular as Cubase is a little bit more on the expensive end and is a little . . . it’s not as friendly as some other options. Though, Cubase is a software that is often used professionally, so it wouldn’t be bad to have it be your first learning experience.
It’s not as accessible as perhaps FL Studio or Reaper. FL Studio is cheaper and generally more accessible to start out in. Reaper, I believe, is free and is actually often preferred in the games industry for doing sound work.
- Can you think of any other suggestions for what tools people can use to start composing?
Simon Other than digital audio workstations, if you want to work more in writing the sheet music or scoring then, as I mentioned earlier, musescore is what I use for making sheet music. It can also be useful if you want to learn how to make music in a more classical approach. Of course, writing sheet music is a little bit of a different process than using a digital workstation.
- Can you explain the difference?
Simon So in a digital workstation, usually you’re not working with sheet music. Usually you have what’s called a piano roll – you have a layout of a piano on the left side and a kind of grid where you can manually place notes wherever you’d like on the right, set to whatever rhythm or time you’d like. It’s a lot more visual and can be more intuitive if you’re not familiar with classical sheet music notation. With sheet music, of course, you’d have to learn the classical notation for where the notes are placed and how to read them, and what they mean. It’s not always the most intuitive, though I do think that
learning how to read sheet music is a very useful skill to have when you make music. Of course there’s plenty of musicians that are very successful that can’t read sheet music.
Simon So I learned a little bit of composition techniques from being a student pianist who, of course, had a teacher who, alongside teaching me how to play piano, taught me a few skills in composing. But the majority of my composing skills didn’t come from my piano lessons. The majority came from just opening up whatever software I liked and kind of just messing around in it.
I think that if you just play with it, you kind of eventually get a feel for what sounds good and what doesn’t. You can also, of course, go on YouTube. There’s plenty of tutorials and lessons on composition or music theory and those sorts of things, which can be very useful, and you get a lot of different perspectives that way. Also just listening, if you listen to a lot of music, you kind of get an idea of what sorts of things are common in a certain genre of music, like different forms or perhaps rhythmic patterns that are common that you can try and mimic.
- If you were to give beginners an exercise to get into composing, what would it be?
Simon If you just listen to music, say you find a song that you like and you’d want to try and compose something that’s similar to that style – I think having that reference and then doing your best to mimic that to the best of your ability is always good practice for learning how different styles of music work. Also, you know, any practice in trying to make something is usually useful. Practice doesn’t have to be good, it just has to be that you made something that maybe is better than the last thing you made. Maybe it’s not, but eventually you might do that, so just consistently trying to copy I think is good practice. Also, I think generally keeping these sort of practice things short – doing more is typically better for practice rather than spending too much time on one thing.
- What kind of music do you write?
Simon I experiment in a few different genres, but usually I write in a more orchestral style, so like kind of something that sounds like a movie soundtrack or some video game soundtracks that have that symphonic orchestra sound to it, but also I do like to write a little bit of rock or metal music. Sometimes mixing those things, sometimes I do things that are more electronic style, like drum and bass or house music or trance. So a wide variety – I try to get experience in a very wide variety of things.
Simon Umm, most of the time I think so, yeah. I can – I can always see the flaws in my own music, right.
I feel like any, any kind of artist when they look at their own work, they’re like, “Well, I don’t like this particular thing about it or I should have done this differently”, and that’s not necessarily a bad thing, but I think it’s good to be able to just enjoy what you’ve made to some kind of extent. I mean, obviously you might not like everything you make, but I think I tend to like most of the stuff I make.
- What do you do when you hit a wall when you’re composing?
Simon Usually the best thing for me when I hit a wall is to stop working for that day. Because bashing your head against a wall usually doesn’t break down the wall, it breaks your head. So I just take a step back, and take a break for the day, cause if I just take a break, I’ll come back the next day. If I have new ideas – maybe if there’s some kind of inspiration that I was using for a particular piece of music, I’ll just go listen to that music. Or maybe I’ll listen to a different song to get a different kind of inspiration, and if there’s something in a different style maybe I can try and think about how I can apply that to what I was working on and come back to it later.
Something else that I sometimes do when I hit a wall is I’ll just start up a new song that is something else completely different based on whatever other inspiration I might have, which can be a dangerous thing because starting up too many proj-
ects might mean never finishing any of them. I think I keep that in check, usually at most three projects at once. I think for other people you just have to know what your limits are before you lose focus.

- What’s your favorite part of composing music?
Simon My favorite for composing music would probably be, well, that it’s fun to listen to. That seems a bit, I feel like an obvious answer, and maybe it doesn’t go too deep, but I think just being able to listen – I think there’s a certain satisfaction to being able to listen to something that I’ve made. I mean, I’m a person who can be a little bit prideful, so naturally I kind of just take pride in stuff that I do. I think having that perspective tends to be helpful anyways, because, you know, I’m not a professional, so I’m not going to sound like a professional, but it’s just fun to see progress in something.
- Any final words for people who want to get into this hobby?
Simon I think, as a hobby, it’s just good not to take it too seriously. Like, obviously like if you want to get good at something you take an amount of seriousness to it – you take it serious enough that you work on it and you kind of give yourself a certain level of discipline and you practice it, but never, I don’t think anyone should ever, pressure themselves too hard where they might burn themselves out, because then they lose the fun part of it, obviously. It’s like, you know, don’t turn the thing you love into a job usually applies to most people. Which, you know, you can turn it into a job. Obviously there’s professional musicians who have a lot of fun, but I think even the people who do music professionally have a tendency to try to keep themselves healthy, to take it lightly.
Just make sure that it’s something that you do for fun and not something that you constantly pressure yourself with, or compare yourself to other musicians. Kind of like how I said earlier, I’m not a professional musician, so I shouldn’t try and compare myself too much to a professional musician. I’m not going to sound like a professional if I’m not one basically.
- Thank you so much! That’s all.
Simon Alright, cool. Go buy my games.
1 Here we have lines pointing at the “staff”, or “stave”, which is made up of the four lines on which most of our other elements lie on top of.
2 This symbol is a “clef”. In particular, the clef that we are looking at is the “treble clef”. It designates what note belongs to each line and space on the staff. The “treble clef” designates the second line from the bottom as the pitch “G”.
3 Here we have the “key signature”. In this case, the key signature is directing those who read the sheet music that the pitch “B” should be “flat”, or brought down, every time that “B” is approached unless instructed otherwise.
4 This is the “time signature”. The top number designates how many “beats” there are in a “measure”. A beat is typically a unit of time with a specified duration. The bottom number designates what note value represents the beat on the staff. In this case we have 4 beats where the “quarter note” represents a beat.
5 This designates each “quarter note” to be the beat at 120 beats per minute (bpm). 120 beats per minute means that each beat, or in this case, each quarter note, has a duration of half a second.
6 These are all “notes”. From left-to-right we have an eighth note, a sixteenth note, a quarter note, a half note, and a whole note. Each note represents some duration of time. In this case, we base ourselves off the quarter note, and so an eighth note has a duration of a quarter of a second and a half note has a duration of one second.
7 These are all “rests”. From left-to-right we have a quarter rest, an eighth rest, and a sixteenth rest. A rest instructs a player to not play a note for the duration of the rest. The rests have durations corresponding to the durations of their note counterparts.
8 These are “accidentals”. From left-to-right we have a natural, a flat, and a sharp. They instruct a player to change the pitch of the note they are next to. A natural means play the note as if it had nothing affecting its pitch, a flat means to lower the pitch, and a sharp means to raise the pitch. For example, the natural sign on the note instructs the player to ignore the flat applied by the key signature.
9 These are barlines. They section off groups of notes into measures, where the amount of notes that fit within a measure being designated by the time signature. At the end of the line is an ending bar line, signaling the end of the song.

The first step for this tutorial, or rather “Step 0” is to install Musescore 4, which you can do from musescore. org. The install program will give you instructions for installing Musescore onto your computer. Once you get that out of the way, we can move on to the tutorial proper!
Step 1: Open MuseScore 4
This should take you to this window. We want to make a score from start to finish, so let’s go ahead and hit the plus icon to create a “New score”.
Step 2: Create your score.
This popup window should appear after clicking the plus icon from the previous step. There are a couple of things going on here.
Firstly, the “Family” column displays different “families”
of instruments to choose from. For example, here we see that the “Woodwinds” family has been selected. Because “Woodwinds” has been selected, we see different types of woodwind instruments under the “Instruments” column.
We are creating a score for piano, so click “Keyboards” under the “Family” column, and then click “Piano” under the “Instruments” column. Your window should look like this now:

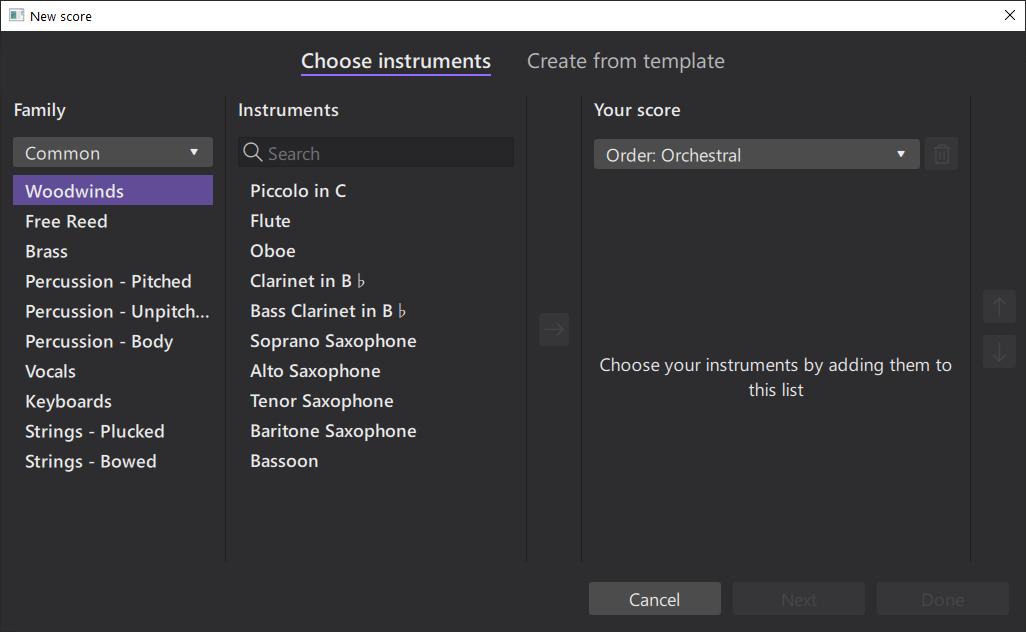
Finally, to add the piano part to our score, click the right-facing arrow icon in the middle of the window. The “Done” button should now be able to be clicked, and you should do just that.
Step 3: Add notes to your score!

This window may appear daunting, but if you have ever used a program like Microsoft Paint, a lot of the same principles apply. In a way, you can consider the note symbols above to be like a palette of paint onto the score which is your canvas.
I suggest you play around here, but if you ever feel like you’re getting lost, there is a “Help” button on the toolbar at the top of the window. Once you click it a dropdown menu will appear, and you can click on “Online handbook” to access documentation for Musescore 4 (this also includes a tutorial on how to make a score! If you feel like you are a bit more on the visual side, that tutorial includes animations to show you how to get through the steps, though they do things a bit differently).
You can listen to your score by hitting the play button near the top of the window, and once you feel comfortable with what you’ve got, you can finally export the score you have created.
Once you are satisfied with your composition, you can export your score. Some reasons you may want to do this is to print it out to share with other people, to print it for yourself to play at the piano, or for having an easy to access file on your computer with your score. Regardless of the reason, we can do so by first clicking on the “Publish” tab, which is located near the top of the window next to the highlighted “Score” tab.
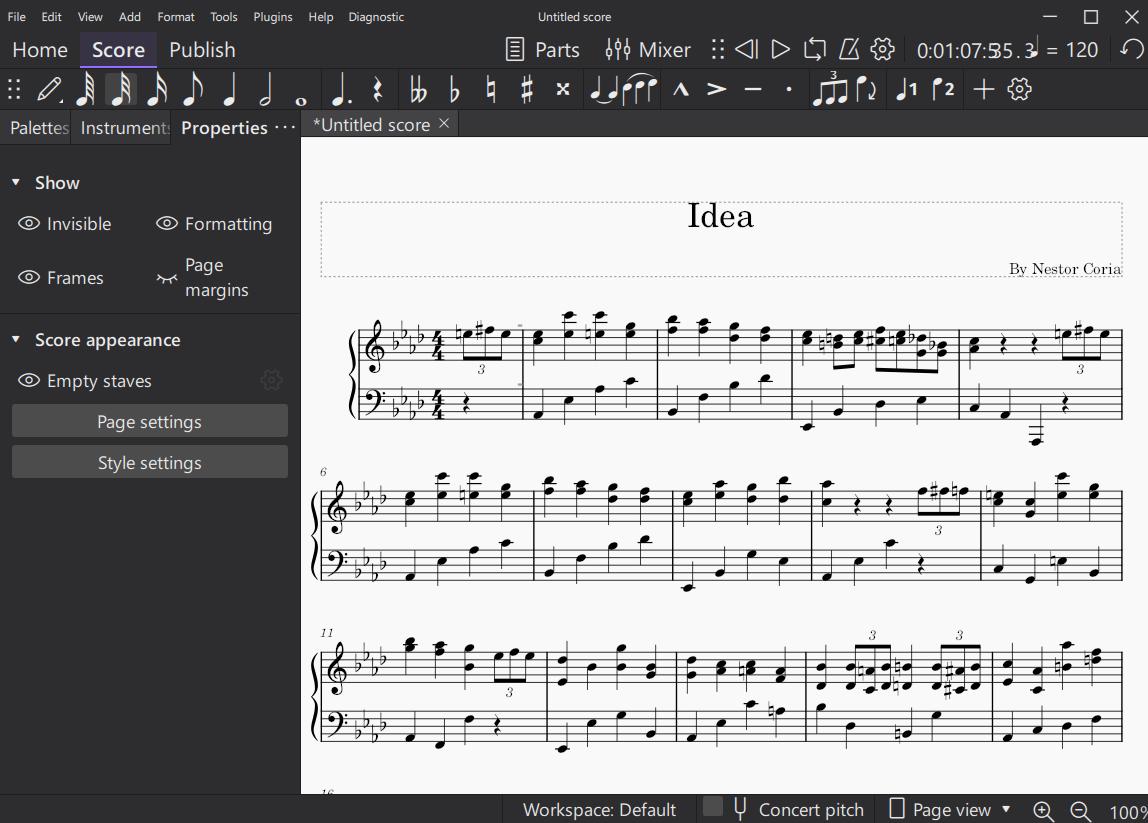

The window should look something like this. Next, you’ll want to hit the button that says “Export”.

This creates a popup window in which you can select how you want to export your score. By clicking on the drop down menu, which currently has “PDF file” selected, you can choose what kind of file format you want your score to be in once you hit the “Export” button. PDFs are nice to print, so I suggest selecting that format. Once you have chosen a format for your score, click the “Export” button. This should take you to your respective computer’s file system and allow you to save your score in whichever location you would like with whatever name you give it.
With that, you should now have a score containing an original composition that you have made! You can go ahead and do whatever you would like with it. Before you close the program, you can save your score by going to the top of the window and clicking “File” and then “Save”, which will allow you to come back to this score and work on it whenever you’d like.
For our inaugural issue of Hobbyism, we asked friends to write to us about a hobby of theirs and a picture to pair up with it. We hope you enjoy them!
Submission by: Roman Herrera
LEGO is the ultimate pastime because it combines the hobbies of collecting and model building for various popular fandoms or real life objects.

Submission by: Michelle Johnson
I recently took up knitting! The current project I’m working on is a patchwork cardigan to get rid of a bunch of smaller yarn leftovers I have, but it’s finally coming together. So far, the hardest part has been not losing my knitting needles between patches.

Submission by: Alina Saratova

Artist statement: People love to idolize women in history for suffering and will do nothing about the suffering of women today.
Submission by: Janette Coria
Growing up, I had always wanted to find a way to create things. I loved stuffed toys and animals, their looks, softness, and charm! Thus, I began to learn how to sew when I was very young, and the hobby has followed me into adulthood and hopefully beyond.

Citations:
Turquoise in Native American Jewelry: The Significance of Turquoise in Native American Culture, https://tskies.com/blogs/news/the-significance-of-turquoise-in-native-american-culture, March 15, 2015
Hilary George-Parkin, The Enduring Power Of Turquoise Jewelry In Native American Cultures, https://www.thezoereport.com/fashion/ turqoise-jewelry, November 29, 2021
Cindra Kline, Santo Domingo Pueblo’s Depression Jewelry, https://www.elpalacio.org/2015/03/santo-domingo-pueblos-depression-jewelry/, 2015
Vintage Turquoise Santo Domingo Depression Era Thunderbird Heishi Necklace, https://homeandaway.gallery/product/depression-era-thunderbird-necklace-1/
Mark St. John Erickson, Williamsburg exhibit reviews folk jewelry spawned by the Great Depression, https://www.dailypress.com/entertainment/arts/dp-fea-thunderbird-jewelry-20150711-story.html, July 11, 2015
Intro to SFX Makeup: Special Effects Makeup in Film, centralcasting.com, October 28, 2019
Lon Chaney, en.wikipedia.com/wiki/Lon_Chaney Jack Pierce, https://en.wikipedia.org/wiki/Jack_Pierce_(make-up_artist)
The History of Ballroom:
The History of Ballroom Dance, Alise Borne, https://blog.dancevision.com/history-of-ballroom-dance, April 12, 2021 Ballroom dance, https://en.wikipedia.org/wiki/Ballroom_dance
A Walk in the Park
5 surprising benefits of walking, https://www.health.harvard.edu/staying-healthy/5-surprising-benefits-of-walking, August 25, 2022 Mayo Clinic Staff, Walking: Trim your waistline, improve your health, https://www.mayoclinic.org/healthy-lifestyle/fitness/in-depth/walking/art-20046261, May 19, 2021
Walking for good health, https://www.betterhealth.vic.gov.au/health/healthyliving/walking-for-good-health
Intro to Climbing: Rock climbing https://en.wikipedia.org/wiki/Rock_climbing
Types of Indoor Climbing: Indoor Climbing 101: Gym Tips and Gear Advice, https://www.switchbacktravel.com/indoor-climbing, January 18, 2020
Tips and Tricks: The 13 Most Important Rock Climbing Tips For Beginners, https://www.insure4sport.co.uk/blog/rock-climbing-tips-for-beginners/, July 12, 2021

“I have no special talents. I am only passionately curious.”
-Albert Einstein