12 minute read
SKILL SET


THERE IS MORE TO LEARN ABOUT FLOATING FLOORS THAN JUST “CLICK IT AND YOU’RE DONE.”
By Carter Swift
Click flooring has become popular with DIY homeowners because of its simplified
“snap-together” installation method. Click flooring requires no glue or nails, eliminating the need for specialized tools and reducing the labor required to complete the job. This type of flooring connects to the surrounding boards with a tongue-and-groove joint to create a floating floor system with a seamless appearance.
“Easy installation” is a relative concept, however, and the job can still be daunting for anyone unaccustomed to flooring work. The following article covers some important things to know if you plan on tackling the job yourself.
TYPES OF CLICK FLOORING
Engineeredflooringismanufactured by adhering genuine hardwood to layers of plywood or Medium Density Fiberboard (MDF).Some engineered flooring can be sanded and refinished, depending on the thickness of the wood veneer.
Laminate flooringis manufactured with a photograph of finished hardwood applied over MDF, which is protected by a wear layer. Laminate flooring cannot be refinished.
Vinyl plank flooring is made without a wood component but can be manufactured with the appearance and texture of wood or even ceramic tile. Because it’s an all-vinyl product, it can be used as waterproof flooring in damp environments.
SITE PREP
If installing a wood floor, it’s a good idea to use a moisture meter to test the moisture


Click flooring is available as laminate, engineered wood, and vinyl plank, which all vary in cost, looks and performance, so do plenty of research when selecting.
content of the subfloor. Moisture can cause cupping, buckling and other related issues. Never install a wood floor over a known moisture condition. Moisture content should be kept below 12 percent to protect wood from rot or decay. Installation of a plastic moisture barrier may help mitigate moisture problems and protect the new flooring.
All subfloors must be flat. This means there should be no high or low spots within 1/8 inch over a 6-ft. span, or 3/16 inch over a 10-ft. span. High spots can be sanded or grinded down and low spots filled withfloor-patching compounds. Set any protruding fasteners flush into the subfloor.
On wood subfloors, take the opportunity to walk over the entire area and listen for any squeaks. If you locate any, drive long screws through the subfloor and into the joists to tighten the connection and arrest any movement that can cause the noise.
UNDERLAYMENT
One key to a successful click flooring installation is choosing the right underlayment. The underlayment is a thin engineered material that usually comes in rolls and lays between the subfloor and the new flooring. Many underlayments include a vapor barrier that helps protect against moisture, mildew and mold. The denser the underlayment, the more it smooths out minor imperfections in the subfloor. Thicker underlayments make walking and standing more comfortable by adding cushion to the hard surface. They can also add a layer of insulation
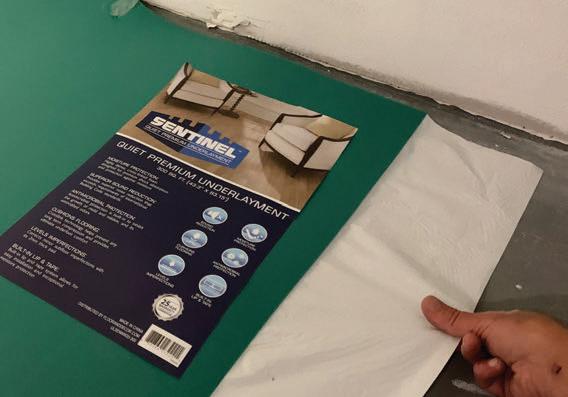
The right underlayment can add moisture protection, insulation, sound absorption and more comfort underfoot.
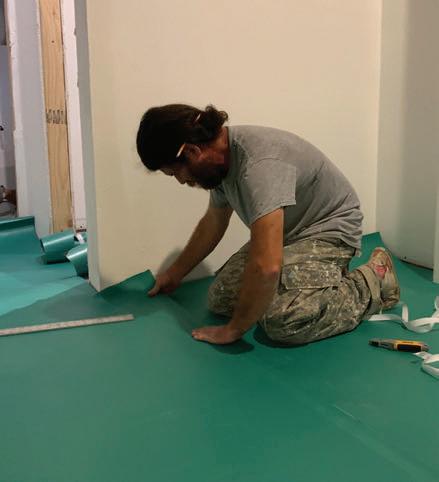
Unroll the underlayment across the floor and cut it to fit along the walls. Butt the seams together, taping if necessary.
and even dampen sound transmission to reduce noise and vibration. The type of underlayment you need depends on the type of material you’re using, whether you’re installing over wood or concrete, and how much comfort you want.
Installing the underlayment is usually a simple procedure. Line up the edges of the underlayment against the wall and cut it to fit using a sharp utility knife. Lay the strips until you’ve covered the subfloor. Make sure seams abut together rather than overlap. Tape the seams if necessary.
When installing wood over concrete, even if your underlayment provides some moisture protection, a 6-mm poly should be installed as an extra vapor barrier to protect beyond the underlayment’s capability.
Some types of click flooring come with an underlayment pad already attached to the bottoms of the boards, but you can usually install an additional pad for extra warmth and comfort. Check the floor manufacturer’s guidelines for additional underlayment approval.
Prior to installation, refer to the manufacturer’s guidelines on how to acclimate the new flooring. The instructions often indicate the flooring should be stored 48 hours in the room where it will be installed, so the material can adjust to the temperature.
LAYOUT
Before laying the floor boards, check the room for square. Use the 3-4-5 rule to check that the corners form right angles. Measure and mark a point that is 4 feet from the corner along one wall. Measure and mark a second point that is 3 feet from the corner on the intersecting wall. A diagonal line between the two points should measure 5 feet if the walls are at 90 degrees. In large rooms, you can double the ratio (i.e., 6-8-10).
The first rule of flooring layout: Make sure your board pattern is square even if the room isn’t. If one wall is significantly out of square, then lay out the floor so the tapered boards will run along the least noticeable wall.
Next, measure the width of the room and divide it by the width of the floor boards. Based on your measurements, will the final row of boards only leave enough room for a partial sliver of flooring? If this is the case, then consider ripping the first row thinner to leave room for a wider, more attractive row of flooring against the opposite wall.
You’ll also need to consider where other fixtures and wall projections will intersect the boards and
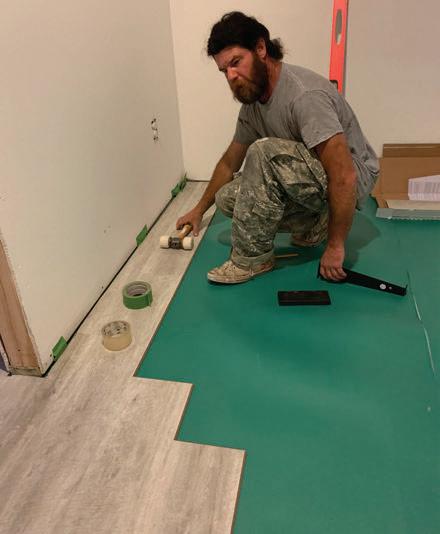
Plan your layout carefully and make sure to establish a square installation with your first rows. Use plastic spacers between the wall and flooring to maintain an expansion gap.
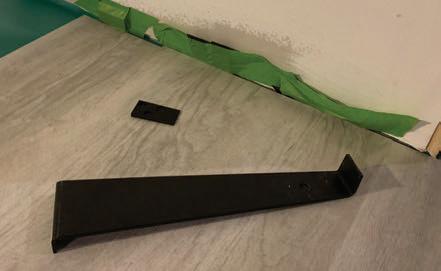
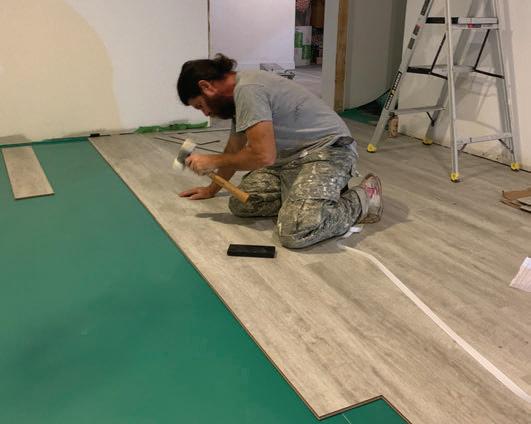
A hammer and tapping block will help to lock together the joints on many types of click flooring. Pro tip: Use stacks of flooring to weigh down the first rows, which tend to shift around from the hammer taps until enough flooring is assembled to provide the adequate weight and friction to prevent movement.
Along the wall edges, you’ll need to lock the flooring joints together by using a hammer and pull-bar rather and tapping block. It may also be helpful to hold the plastic wall spacers in place with painter’s tape. A flooring mallet can help close stubborn flooring seams from the top side.
do your best to avoid small sliver boards whenever possible.
INSTALL THE FLOORING
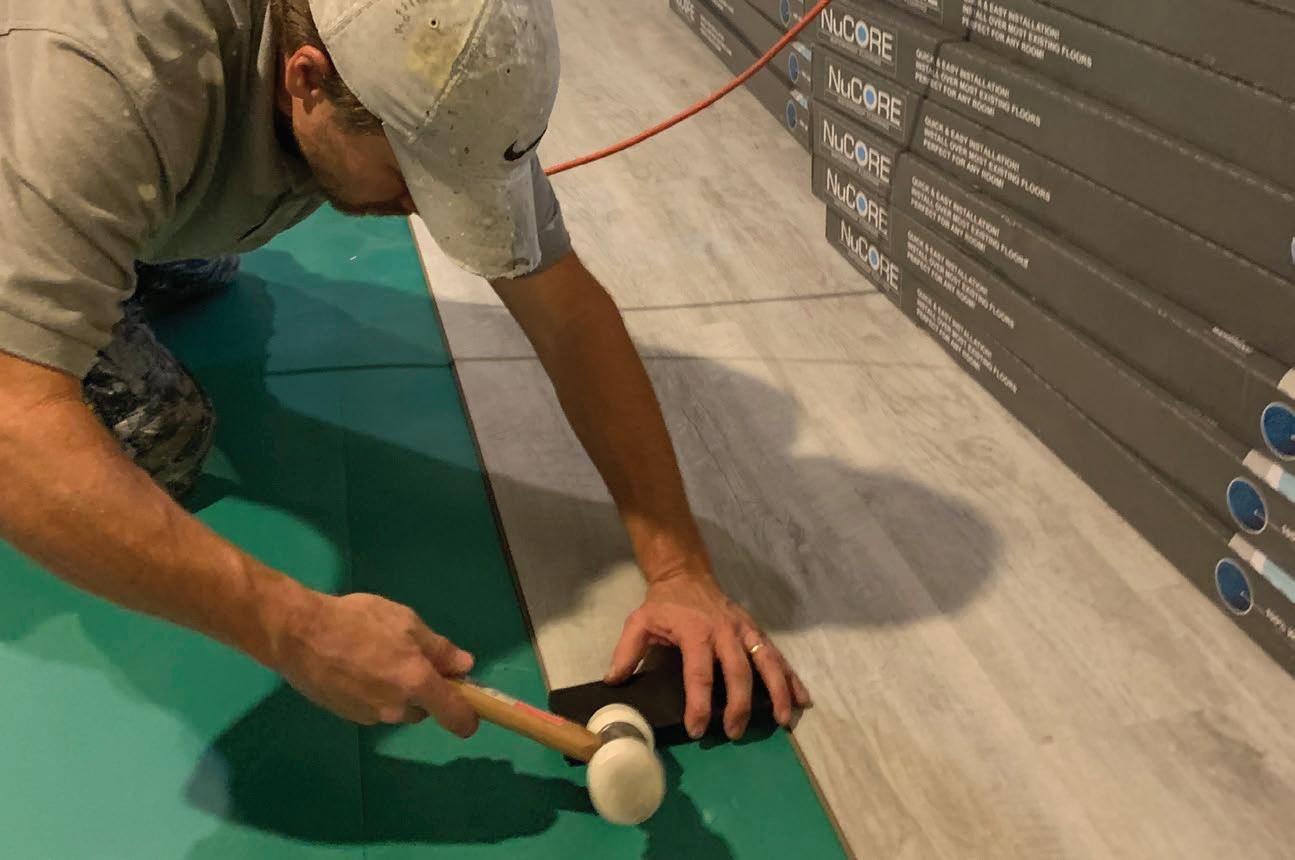
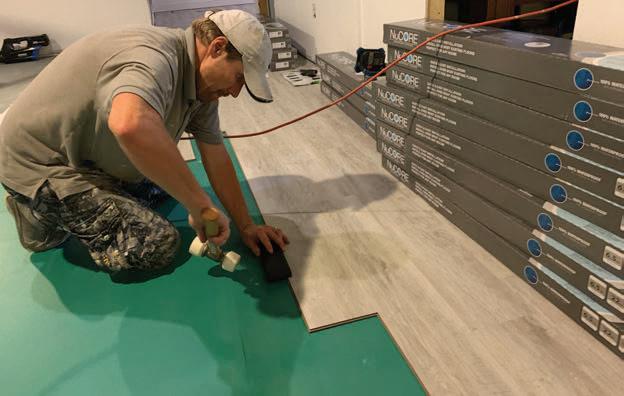
To assemble click flooring, the boards typically connect by inserting the tongue into the groove at roughly a 20-degree angle. Then, press down on the board while applying forward pressure to lock it in.
The simplest type of click flooring, called Angle-Drop flooring, is designed to be installed without tapping or lifting. Angle-Tap flooring is designed to use a hammer to install. Refer to the manufacturer’s instructions for guidance.
A hammer and tapping block can help apply pressure to close the tongue-and-groove joints, but be sure to use a tapping block that won’t damage the boards. A rubber mallet can be useful to smooth out stubborn seams from the top. In general, it’s easier to connect the long joints first and then close the short joints.
Mix the planks before you install them so that you don’t end up with too many light or dark panels next to each other. If installing boards with an artificial wood or tile look, be careful to avoid repeating the pattern by separating identical boards from each other.
As you lay the rows, use plastic spacers or wood blocks to maintain a 1/4-in. gap around between the floor and walls, which allows space for the natural movement and expansion of the floor.
At the end of the rows, you’ll usually have to cut the final board to fit. A powered miter saw or dedicated flooring saw are the best tools to trim the boards. Many times, the cut-off piece can be used to begin the next row of flooring. Stagger the end joints of the rows by 8 inches or more.
Once the flooring is complete, install baseboards and/or shoe molding to conceal the expansion gap along the walls and give the new floor a finished look. H

DECKS THAT
MAKE THE GRADE DECKS BUILT NEAR TO THE GROUND CAN SIMPLIFY CONSTRUCTION—IF YOU BUILD THEM RIGHT.
SKILL LEVEL 3
HARD
Photos Courtesy of Mjolnir Construction
Grade-level decks present an attractive alternative to hardscaping and are often less expensive to build than elevated decks.
“The most popular choice of deck among our customers is a floating deck, which is low to the ground and requires no railing,” says Kerry Murray, owner of Mjolnir Construction of Stittsville, Ontario.
In the U.S., decks built lower than 30 inches from the ground don’t require guardrails. (The rule is 24 inches in Ontario, so check local codes). If a grade-level deck is built as a freestanding structure, it won’t require a ledger connection to the house or the associated hardware, nor will it require excavation for frostdepth footings. In many cases, a ground-level deck won’t even require a building permit.
s
FOOTINGS
Because freestanding or “floating” decks do not require frost-depth footings, the posts and beams can be supported by shallow footings. This is due to the low safety risk of frost heaving on a ground-level deck. You should always check with your local code-enforcement department for specific guidance, however, which might require you to dig a minimum footing depth of 12 inches below the ground.
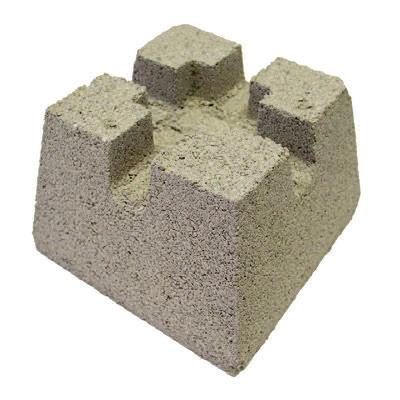
For grade-level freestanding decks, you can skip the time and labor associated with mixing concrete by using precast concrete piers or stacked and glued concrete blocks as footings.
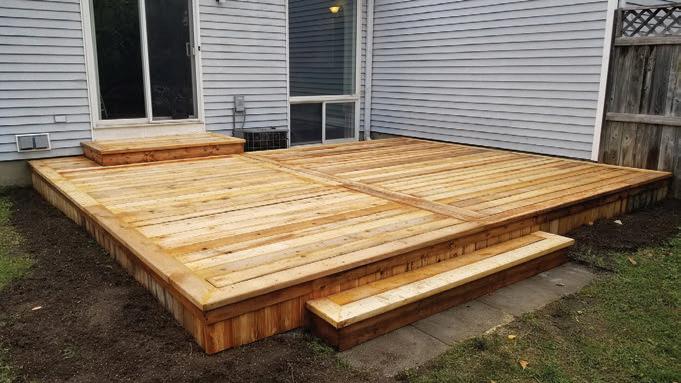
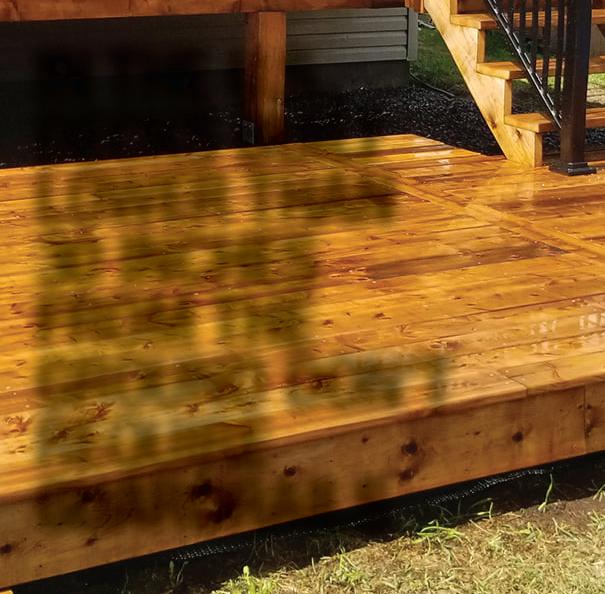
On the deck shown, Mjolnir Construction prevented 100 pieces of lumber from going into the landfill. The customer wanted the deck framed with new pressure-treated material, but for the deck boards and skirting they wanted to use reclaimed 2x6 lumber that had been given to them from a construction site. Mjolnir designed the frame to accommodate the lengths of 2x6 to avoid unnecessary joints in the deck boards, then a good pressure-wash brought out the unique appearance of the wood. After a waterproofing stain is applied, this deck will stand the test of time and demonstrate the company’s commitment to being an environmentally conscious small business.
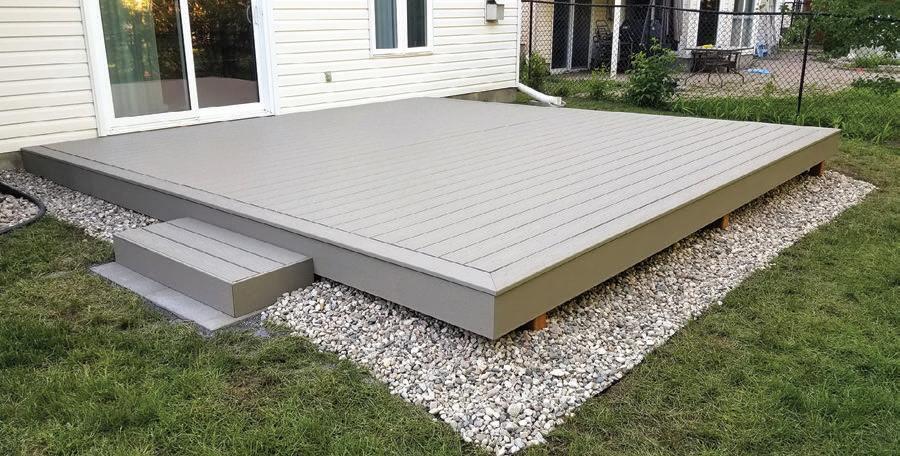
s Composite decking can provide a sleek uniform deck surface in a wide range of lowmaintenance colors and textures. Notice the bed of river rock to facilitate drainage beneath the framing. Photo courtesy of Mjolnir Construction.
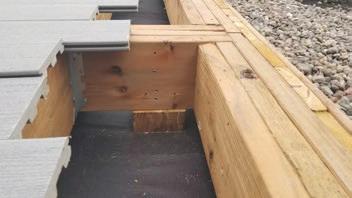
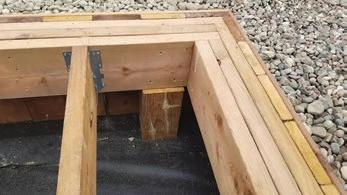
JOISTS & BEAMS
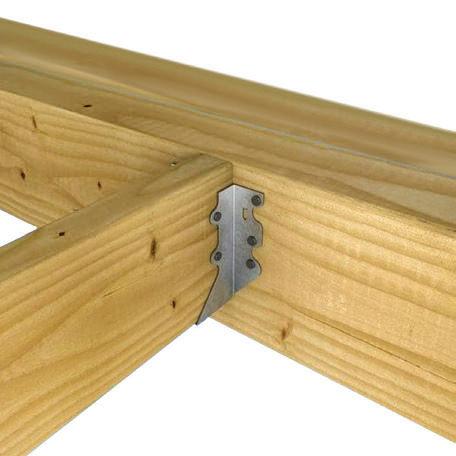
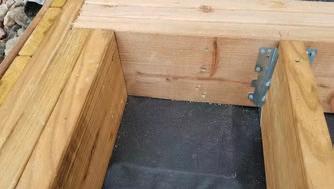
A slope in the grade might allow clearance for a cantilever beam on one side of the deck, but if there’s no room for a beam, then the rim joist will serve as the beam, and the joists will connect to the rim with metal hangers. Corner brackets can help maintain squareness of the deck frame during construction. Double or triple the thickness of the rim to add strength and rigidity to the framing.
You should frame the deck with Ground Contact Lumber. Ground contact means that the pressure-treated lumber is approved for applications that require the component to be either placed on or directly in the ground (such as deck or fence posts). Even if the lumber doesn’t actually touch the ground, this type of lumber should be used because it has extra preservative to better withstand near-to-the-ground conditions where moisture can be more prevalent because ventilation is limited.
Due to the limited ventilation below the deck, another option would be to upgrade the metal
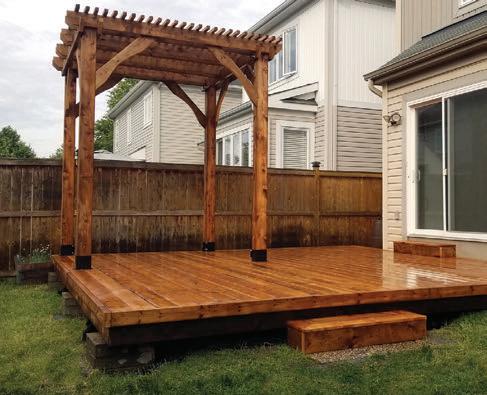
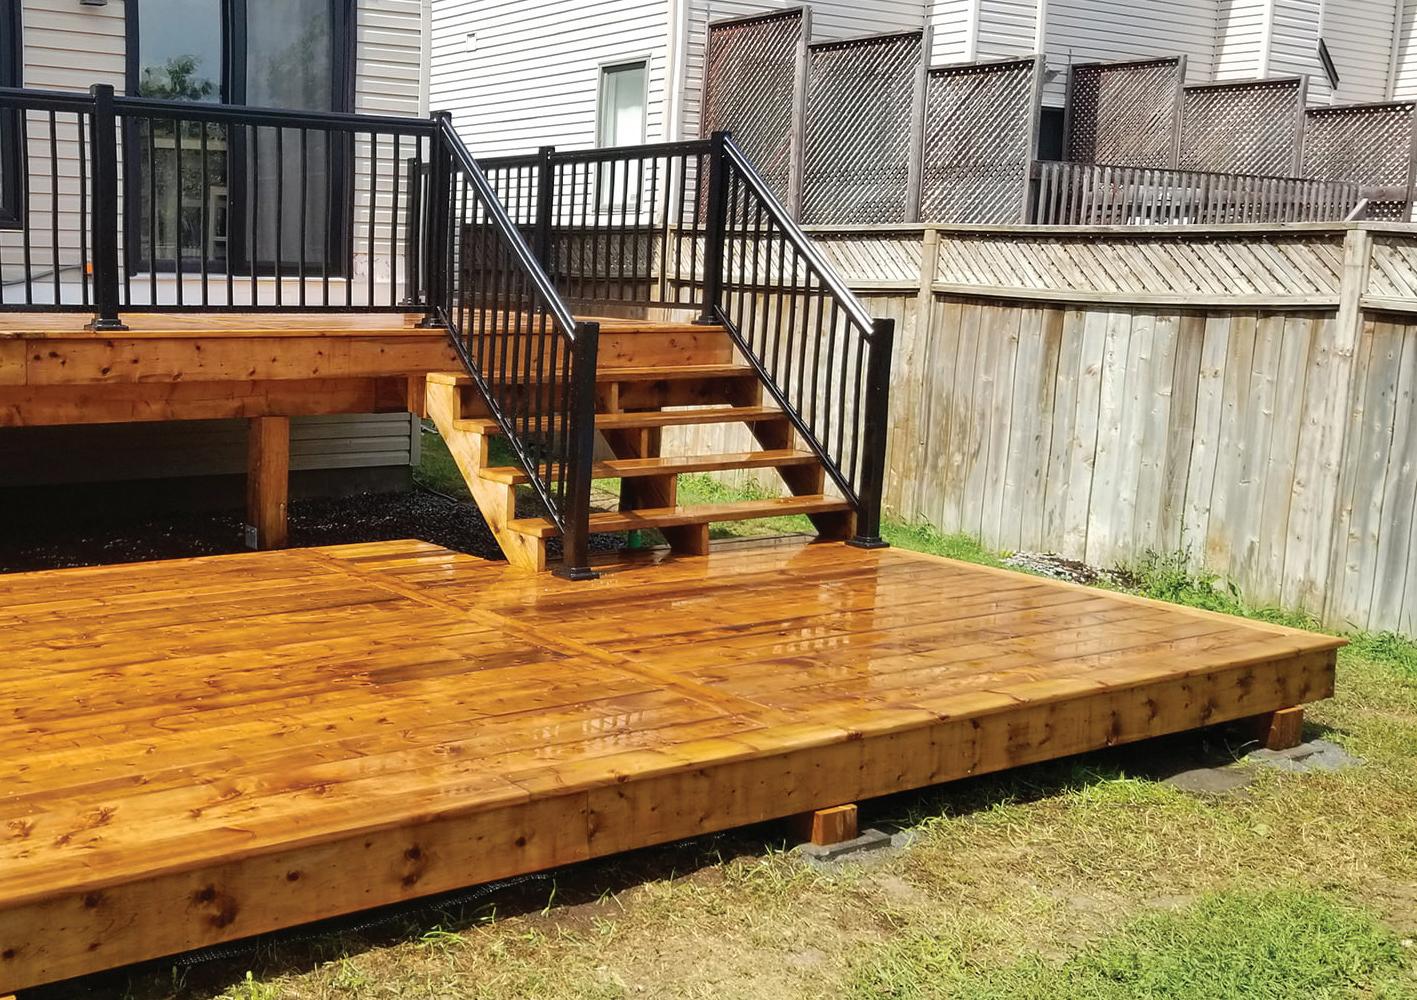
s Grade-level floating platforms can be incorporated into multilevel decks, as shown on this project from Mjolnir Construction.

s In many cases, lack of clearance beneath the deck surface means the rim joist will serve as the beam with the joist connected to it with metal hangers. Fortifying the rim joist by doubling or tripling its thickness will add strength and rigidity to the deck frame.

Landscape fabric beneath the deck frame will prevent weed growth. hangers and hardware to stainless steel which will prevent corrosion.
MOISTURE CONTROL
Since moisture can be an issue for gradelevel decks, you should begin by sloping the earth away from the house foundation to ensure there is positive drainage.
One way to prepare the site for moisture control is to dig out the earth of the deck site, line it with a layer of landscape fabric to prevent weed growth, then backfill with 3/4-in. clear limestone that will shed water away from the framing to facilitate drainage.
Check your decking manufacturer’s recommendations regarding any further requirements for air circulation to prevent any performance problems. Products and guidelines will vary.
H
Editor’s note: Special Thanks to Kerry Murray and Mjolnir Construction for contributing to this article. You can find Mjolnir Construction online at https://mjolnirconstruction.ca and follow their Instagram page @mjolnirconstruction.
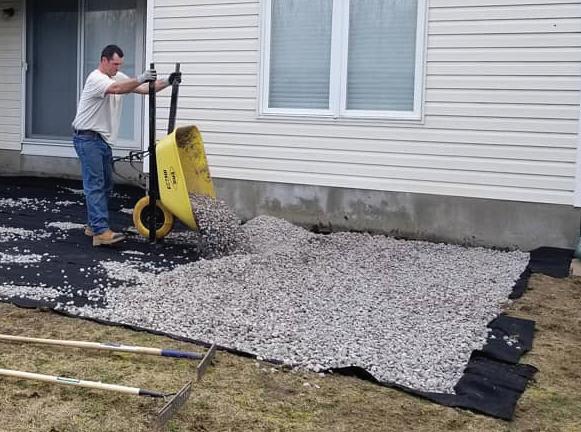
To facilitate drainage, Kerry Murray suggests adding 3/4” clear limestone beneath the deck over the landscape fabric.
Strong Foundation
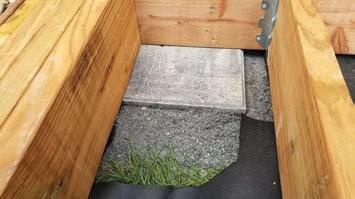
“We were asked how we prepare the base for our floating decks, and here is how,” explains Kerry Murray of Mjolnir Construction. “At the wall of the house, which is the highest point in the yard, we remove the grass and 4 inches of dirt. Then we fill this pocket with limestone and tamp it down to pack it. We lay down a 16"x16"x2" paver stone, which ends up being flush with the finished grade, giving us our base. The beam of our deck then sits directly on top of the paver stone to keep the deck as low as possible to the ground. As the grade drops further away from the house, we simply add a 6x6 post to make up the change in grade.”