2 minute read
FIRST-TIME BUILD

from HOT BIKE MAY 2017

TC BROS. HARDTAIL CONVERSION PART II
With the frame welded it was mock-up time! Here is where you start putting together all the different ideas you have had on how you want your ride to look. I wanted my ride to be aggressive yet smooth and clean.
You need to begin with getting your mounts set up and tacked into place for the oil tank, seat, rear fender, struts, battery box plate, and gas tank. I decided to purchase a 120-volt MIG/Flux cored welder from Harbor Freight to accomplish this and save money. Most welders work by the hour, and it takes a great deal of time measuring and making sure everything is level and in a desired location. This would add up real quick if you did not do it yourself. The investment in your own welder will pay itself back several times over. Note that I just tacked the parts in place. Final welds are done later after you have your bike mocked up. I would only recommend a 120-volt welder for tacking. It just does not have enough power for a full weld with steel this thick.
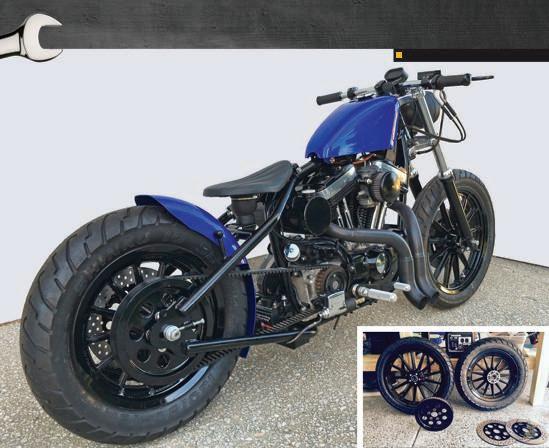
Once you have these key components in place, the build really starts to become exciting. Pay attention to detail and take the time to do some extras. I took the pulley cover and cut a large portion away to expose the pulley. An RSD cover enhanced the look even further. Since I decided to have no front fender, I ground off the fender mounts on the lowers and had them lathed out for a smooth finish. The stock wheels were pitted and tired looking. Purchasing new wheels was out of the question. While I was originally dismantling the bike I not only had the wheels but also the rotors and rear pulley powdercoated gloss black by Sumax. The results were incredible! They looked better than brand new with the sleek blacked-out look.
A small lightweight Antigravity lithium battery saved space and allowed for extra room in the battery box to hide away unsightly wires. A Joker Machine air
Mounting Oil Tank
I cut my own oil tank mounts and used magnetic clamps to hold them and the oil tank into place making sure it was level and had enough spacing from the engine.
Shaving Lower Legs
Since I decided on no front fender I wanted to clean up the lowers by removing the fender mounts. Mounts were ground down, and I had a local shop turn them on a lathe. The bike is completely disassembled. The frame, engine covers, top end of the engine, and rear brake caliper mount will all be painted gloss black.
Caliper Mount
The stock brake caliper housing is used with the hardtail kit. The kit comes with brake anchor hardware. A template is provided that will give the drill points for the hardware. The caliper housings have a large cast portion that originally wrapped around the swingarm. Cut and grinding locations are provided in the directions.
Front Pulley Fab
To give the bike some added character I cut out a portion of the front pulley cover and installed an RSD cover.


