17 minute read
Putting the M into an E39 Touring
Words Barry Sheward/Jeff Heywood - Photos Barry Sheward
In the first instalment we covered how BMR supremo Barry Sheward purchased an E39 540iSE Touring which was, over a period of months, to be transformed into an M5 Touring. The first part covered the total stripdown of the Touring, including the drivetrain removal, plus how the engine and gearbox was extracted from the donor M5 Saloon. The first part ended with the M5 donor heading for the great crusher in the sky, while the Touring’s body shell was off to the bodyshop. Part two follows the Touring as it undergoes surgery to transform it from a load-lugger into a genuine BMW M car, just as it would have left the factory floor at Dingolfing. There’s always a hiccup, though, and a replacement boot floor has prolonged the Touring’s stay at the bodyshop…
Advertisement
On arrival at the bodyshop, before any cutting and welding had taken place, the Touring’s underside was given a thorough power washing using various chemical washing agents to remove years of built up mud and road grime. The process revealled a reasonably clean underside. All four wheel arches received the same attention to make sure there wasn’t any rust lurking anywhere. Only the jacking points and a few small patches had suffered from corrosion, which is unusual on a UK E39 that has seen the worst the British weather could throw at it and many liberal dosings of road salt. Most E39s suffer from corrosion along some of the panel seam joints, which are surprisingly only spot welded. The areas for treatment have been marked off on the photo, the main areas for concern being the rear jacking points.
The next job for the bodyshop was to prepare the boot floor. Barry had liberated one from the M5 Saloon donor car to

The bodyshop gave the Touring’s underside a thorough cleaning with a jet washer before work commenced. The underside was relatively rust-free. Only the jacking points and a few panel seams that were spot-welded needed work, the problem areas are marked with red arrows This photo shows the boot floor from the M5 Saloon with lots of metalwork trimmed away so that it will slot into place in the Touring’s boot. The top right of the photo (marked with an arrow) shows the Touring’s old wheel well and boot floor panel already cut-out

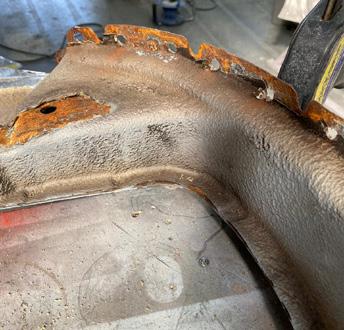
This photo shows the amount of corrosion found on the M5 donor car’s boot floor. Look at how surface rust has travelled under BMW’s own rust proof coating and around the large hole punched out on the panel. The second pointer highlights how corrosion starts to manifest in these seams, showing just how difficult it is to keep the dreaded tin worm at bay on a car constructed mainly from steel
The left-hand photo shows the boot floor strengthening box section cleaned up of all corrosion. The four areas highlighted either side of the box section are where the support for the M5’s twin rear exhaust silencers bolt through the floor. The right hand photo shows the battery replacement panel, again all cleaned up and ready to fit. The battery has to be relocated to the boot to accommodate one of the exhaust silencers under the floor, hence why this panel is flat
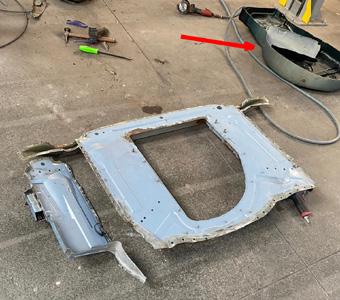
fit into the non-M Touring shell. To get it ready to weld in, lots of metal needed to be trimmed to get the panel to the correct size. This is where the bodyshop technicians ran into problems, as the boot floor from the M5 was quite badly corroded. The easiest and most walletfriendly solution was to purchase a new OEM E39 M5 boot floor from BMW, but a quick call to the local BMW dealer elicited a response that Barry didn’t want to hear – the panel was no longer available…
There was only one thing to do, the bodyshop fabricators had to split apart all the relevant panels that make up the section of flooring, which is ten in total, then start to clean up and cut out all the corrosion. This added quite a significant chunk of time to the process (approximately 30 extra hours), nearly an extra week in unforseen labour charges. A new boot floor panel would have saved a lot of time and money, but when you can’t buy new you have to work with what you have.
Once the panels were thoroughly cleansed of all corrosion, they were rewelded back together before receiving a coat of weld-through etch primer to protect the bare metal surfaces. The workmanship in pulling this panel apart, removing the rust and then piecing it all back together, welding and priming is second to none. The panel is now a piece of art, it’s just a pity it’s going to be installed under the car and will probably never be seen.
There was no turning back at this point, as the Touring’s boot floor and wheel well was removed. The newly refurbished replacement panel from the M5 was offered up to see if it fitted, the bodyshop guys had done an amazing job as it slotted into place perfectly.
The panel was tacked into place and looked superb, just as if BMW had done it at the factory, exactly what Barry set out to do. The next job was to tack a strengthening box into place and then, once the bodyshop fabricator was happy with how the whole panel fitted, it was time to permanently weld the boot floor into place.
Moving topside and into the Touring’s load area, you could see what an amazing job the fabricator has made of the boot floor. All that was left was to prepare the area for paint and give the boot area a coat of Oxford Green. BMW never lacquered areas like the boot, so it received just three coats of flat Oxford Green paint. Even
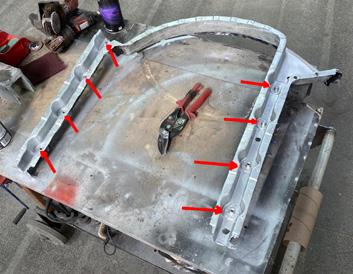
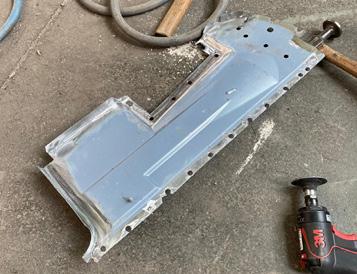
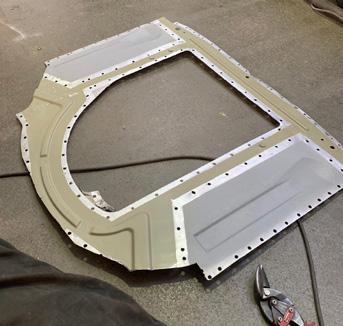
The finished boot floor with rust removed, all ten pieces welded back together, etch primed and ready to fit
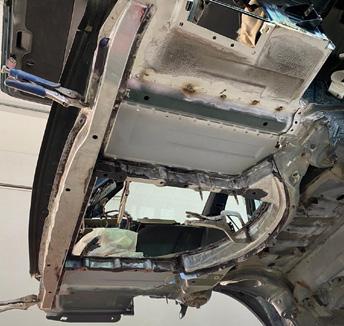
Strengthening box section is tacked into position before being permanently welded to leave a perfect finish The wheel well metal work has been removed and the newly refurbished M5 replacement panel has been offered up for fitting. It passed with flying colours so the job of welding it in place starts… The new floor panel is welded in place and looks superb, giving a factory-like finish to the floor

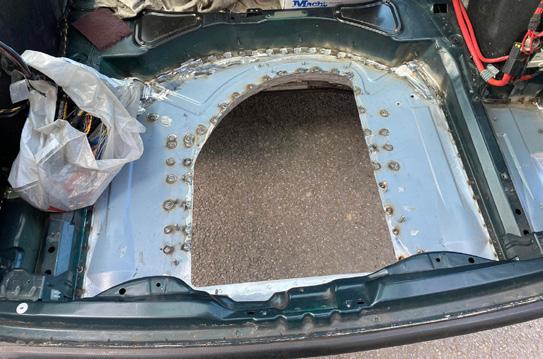
Job done. This is how the new boot floor looks from the inside, leaving a lovely flat floor area which can be used for additional storage once the boot floor carpet is fitted over the top
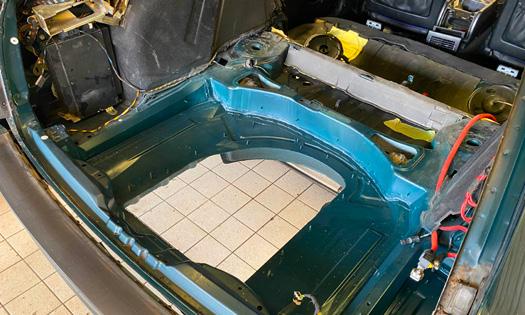
The finished article. It turned into a mammoth task, but the boot floor is now finished. I bet no E39 owners are thinking, ‘what about the big hole?’ For the rest of you, believe it or not, this is filled in by an OEM plastic panel held in place by ten fasteners This is the new battery compartment on the far right hand side of the boot. The vent is there to let any noxious gases escape
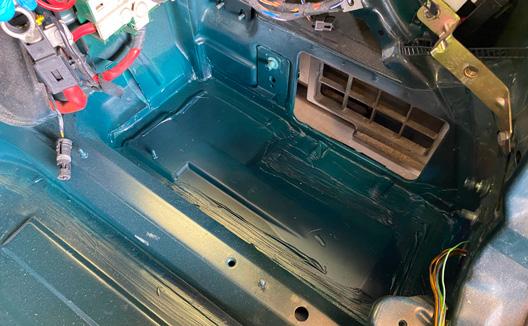
without the shine of a top clear coat, the results are impressive and the boot floor looks just how Barry imagined BMW would have fabricated this area on Richter’s M5 Touring, the only E39 M5 Touring the factory built. On the photo above to the left, you can see the repositioned battery box. In a second photo you can see this battery area with the vent, which helps to dissipate any noxious fumes that may leak from the battery.
The next area to tackle was the corroded jacking points. Did Barry mention they are a weak point on the E39? Okay, he may have mentioned it once or twice. It’s important to stress, though, as this really is the E39’s Achilles heel, especially on the rear points. The first photo in the run of jacking point photos shows the driver’s side rear, which was quite badly corroded. The bodyshop fabricator cut away all the rust until he found sound, rust-free steel and then started to rebuild the jacking point. You can see clearly in the second photo the strengthening applied to this area by BMW so that the car can be lifted from this point without damaging the floor area or twisting the floorpan in any way. Once all the rust was cut away, the area was built up until a factory finish was achieved.
The same process was applied to the passenger side rear jacking point, which had a similar amount of corrosion to the driver’s side. This may look quite drastic to some, but believe me when I say that the jacking points on this E39 Touring were actually quite good, BMR have seen far worse.
Now that the rears were repaired, attention turned to the front jacking areas. One of the points had some superficial corrosion, which was easily dealt with. Although nothing too serious, the front driver’s side jacking point was being slowly eaten away by rust, so the bodyshop cut out all the offending corrosion before building it back up with new metal. This photo again allows us to see the
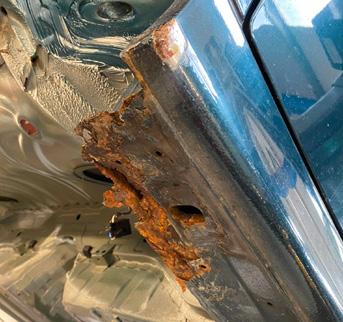
Ouch, that corrosion around the driver’s side jacking point looks nasty, but Barry assures us that it isn’t too bad and is relatively easy to repair
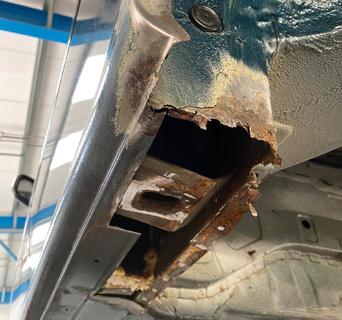
The passenger side rear jacking point had a similar amount of corrosion as the driver’s side. It looks nasty but can be repaired quite easily, if you catch it quick enough…
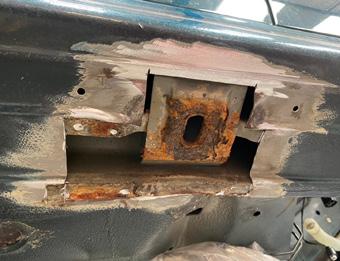
The front jacking points weren’t as bad as the rears, which is often the case. Even so, they still needed metal cutting away before any repairs could begin. Never let a bodyshop talk you into patching these up or applying a rust inhibitor before giving a fresh coat of undercoat, as the tin worm will continue to munch away under whatever coating is applied. The only cure is open metal surgery
strengthening pad applied by BMW during manufacturing. Once all the repairs were complete, the bodyshop set about re-finishing the underside to Barry’s instructions, and there was to be no deviating from his desire to see this car look like a factory finished vehicle. On a lot of restored cars, or on a vehicle that has been freshened up, a bodyshop will often paint the underside black or in body colour, whatever the customer requests. In Barry’s eyes, this is over-finishing, because it isn’t how cars left BMW’s factories. BMW uses a product that has a beige colour, hence the finish on the underneath of Barry’s Touring.
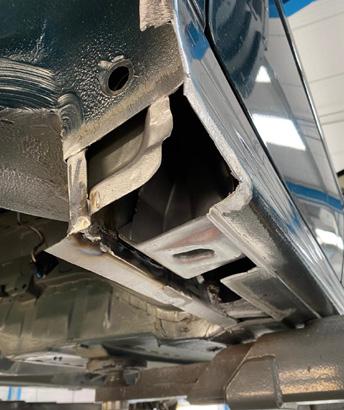
Once the corrosion was cut away, it allowed the fabricator to build up the area around the jacking point, paying particular attention to the strengthening BMW engineered into the area to help support the car when it is being jacked up
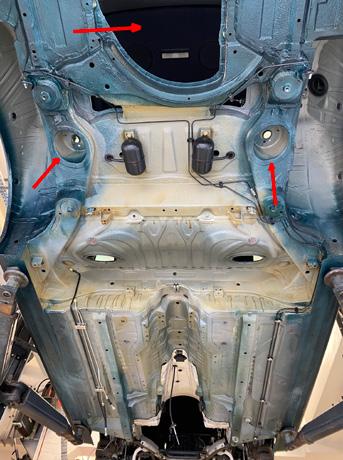
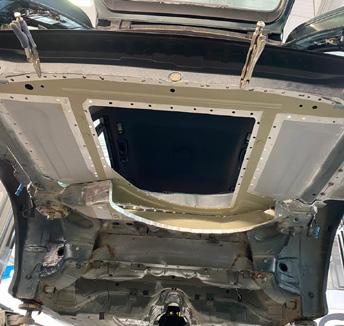
On the home run now with the body repairs. You can see in this photo of the underside that all the areas have been repaired, repainted and refinished. Read the main body of text for the explanation of the finish. Marked off with red pointers are the two towers for the air-spring units. Most of the E39 Touring models have self-levelling rear suspension, and more importantly for Barry, both the E34 M5 and E61 M5 Tourings all had selflevelling rear suspension. So, wanting the car to be just as it might have left the factory, new air springs will be installed into the car. Also highlighted is the ‘plastic’ panel which fills the ‘hole’ in the boot floor
His instructions didn’t just include what colours to paint the car, they explained how to paint it too. At the factory, cars are painted in a booth by robots. When the robots are nearing the completion of their painting cycle, as the nozzle reaches the bottom of a panel, the fan of paint starts to spray the underneath of each and every car. Which is why, when you look at an unmolested BMW that has had no work underneath, be it 6 or 16 years old, you will see the outer edges of the underside in body colour, which is essentially overspray, and the rest in beige. This is just how Barry wanted his Touring finished, exactly as the factory robots would have painted it. So,
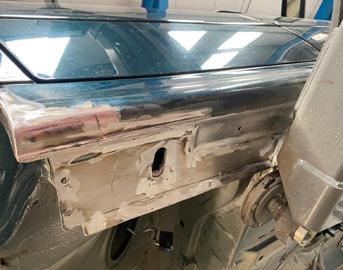
The driver’s side jacking point is nearly complete as the panels are stitched back together, with just the etch primer to apply before painting can begin
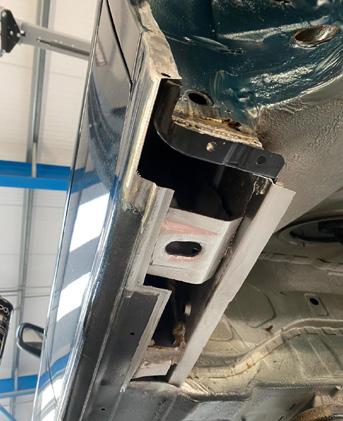
The passenger side rear jacking point is now free of rust and the job of stitching the steel into place to mirror what was there before begins. Minus the rust, of course
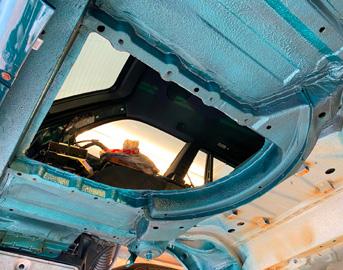
A close up image of the new boot floor seen from the underside in its finished state, but minus the panel filler for the hole
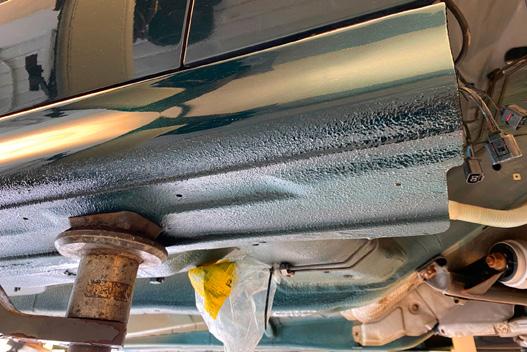
the underside received a 3M sprayable sealer with an e-coat sealer on top. Then the beige sealer went on for that factory look, before the edges got a dusting of Oxford Green paint. Now, for those who always wondered what happened to the exposed inner metal of a car’s box sections, or in the inaccessible areas that have been repaired and boxed in, and how you stop them from rusting, pay attention. All cavities, seams, inaccessible areas and all box sections are flooded with Tectyl ML Cavity Wax Amber, a product that displaces water and provides corrosion protection to the metal panels. The was is visible in

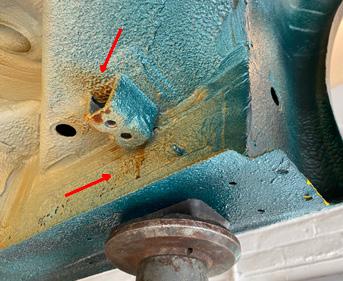
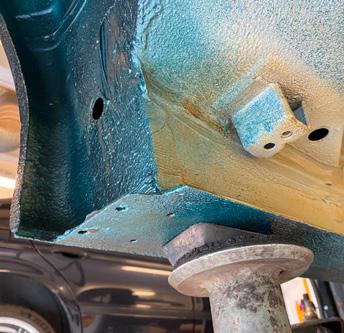
This pic shows a close up of the battery tray as viewed from underneath. You can just about make out the vent to the left of the panel, partially hidden in this shot This image of the driver’s side rear jacking point shows what a first class job the bodyshop has carried out in repairing and refinishing the area to factory standard. The red pointers show where the Tectyl ML Cavity Wax is leaching out of a seam, showing the protection it gives in areas like this… The rear jacking point on the passenger side. Again, the work carried out is up to BMW factory standards
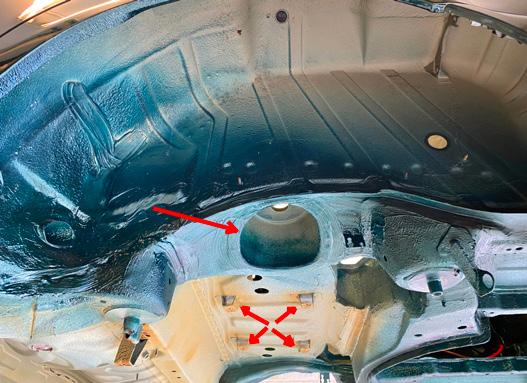
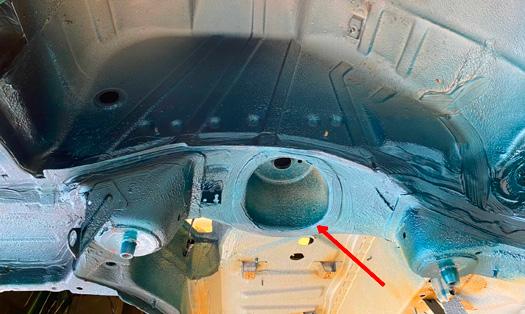
Barry is especially pleased with how the wheel arches have turned out. We all know how cruddy they get with all the muck being thrown up by the wheels, and there are plenty of nooks and crannies where damp mud, salt and other debris can sit and start to slowly eat away at the metal. Both rear wheel arches are in perfect condition and, again, they are finished to factory standards using 3M sealer. Highlighted in both photos is the receptacle for the self-levelling air-spring units. In one of the photos, four brackets have been maked; this is where the compressor units fit for the self-levelling suspension attach. This pic shows the front jacking point after its repair and refinishing. The bodyshop has finished the Oxford Green metallic paint at the sill sightline where the 3M sealer protection starts, protecting the sills and underside panels from stone chips and other road debris
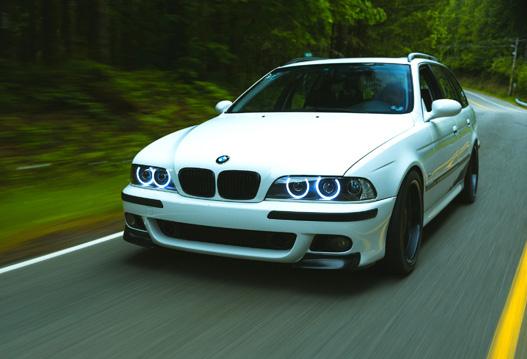
Will Barry make the Caffeine & Machine deadline, and will his build surpass this Alpine white M5 Touring converted in the US by a marque specialist?
the last few photos where it has seeped out of seams and joints. You can see just how effective the wax is as it finds its way through seams, cavities and leaches out onto panels, leaving a light brown stain. The jacking point repairs look really professional now that they are finished, treated, painted and protected. In one of the photos, you can see where the Tectyl cavity wax has weeped out of a seam, it’s a light brown colour; the area is marked on the photo. The front jacking point repair also looks superb and factory, with plenty of 3M protector, plus the whole area was flooded with Tectyl cavity wax for maximum corrosion protection. Barry was extremely happy with the work on the rear wheel arches, too. There was no unexpected surprises when the bodyshop gave them a really good clean, removing years of mud and other road debris that had accumulated in the little hard to reach areas. Thankfully, any corrosion was just minor so, once the bodyshop had removed the corrosion, the panels were treated to the same process as the jacking points: plenty of 3M sealer and cavity wax. When the bodyshell was finally delivered back to BMR’s workshop, Barry was over the moon with the standards of workmanship. The bodyshop had followed his instructions to the word and he now has a solid, rust-free BMW E39 M5 Touring shell ready for reassembly.
Part three follows Barry as he begins to piece together the E39 M5 Touring with one or two minor irritations along the way. Plus he has a deadline to meet, he has promised to finish the car in time to attend a Caffeine & Machine E39 M5 gathering.
Expert Repair & Restoration of All Vehicles We Aim For Perfection Every Time
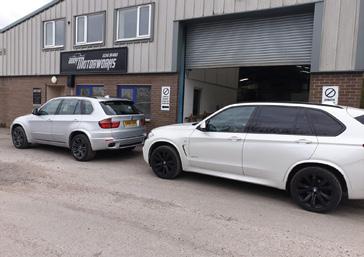
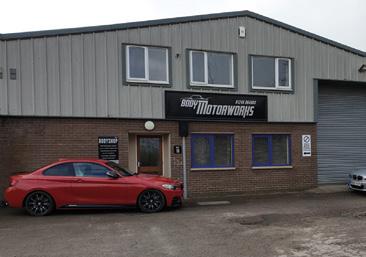
Body Motorworks have over 23 years experience, 14 years of which were spent in a BMW Approved Bodyshop.

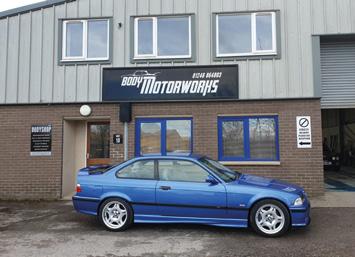
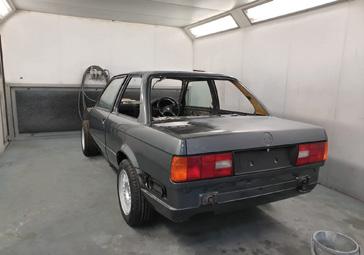
During the time in the BMW Approved Bodyshop, all available training was taken including: • Paint Expert • Paint Technician • BMW ATA
With that in mind, we feel we are in a strong position to deliver the high service that you require. Whether that be a simple SMART repair to remove the scuff on the front bumper or a full restoration project, removing all components, we aim to give 100% to ensure the highest quality workmanship can be achieved. With our unit based in Chesterfield, we have full facilities to conduct a high-quality, professional job including that of a spray bake to enable paint to cure as quickly as possible. This means that the high-quality work you have just paid for, is guaranteed.

Request more information or book one of our services by calling 01246 864803
