6 minute read
Building the ultimate E30 M3
Words Simon Lord/Jeff Heywood ~ Photos – Simon Lord
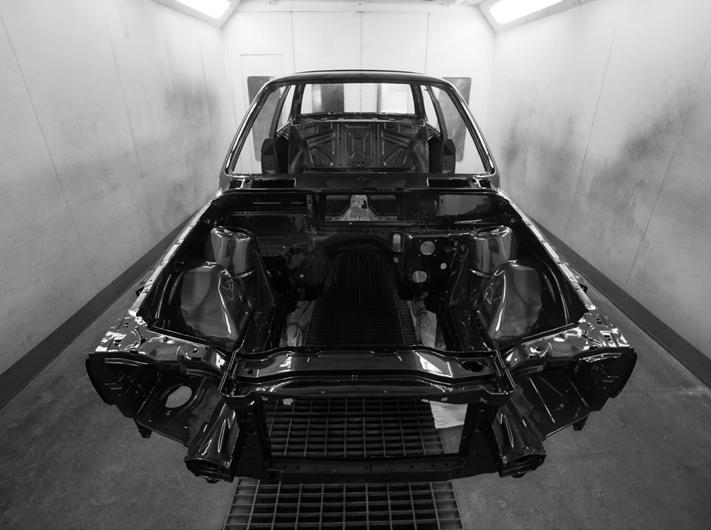
The Redux E30 M3 build No.2 sits in the body shop, ready to be painted
Advertisement
Build No.2 has been a long haul for the Redux team. They have experienced the fallout in parts supply that Brexit has contributed to, followed by the disruption the Covid pandemic brought upon the planet. But, after hundreds of hours of prep were carried out to ensure the M3 receives a flawless paint finish, they are nearing the finishing line. Then the final push can begin to fit the doors, boot, bonnet, spoilers to the bodyshell, followed by hundreds of pieces of trim and the special interior that will see Redux build No2 finally cross the finishing line.
The Paint Process
Many people associate a car’s paint job with the final application of the body colour, the part you usually see on carbased TV shows. However, that stage accounts for only 0.75-1.0% of the whole process. The hundreds of hours of preparation work determine whether it will have a deep, flat, mirror finish or not. Next time you visit a car showroom, look closely at the paint finish of any new car; the best way to do this is to focus on a reflection then move your eyes back and forth along it. The reflection is blurred because the surface of the paint has small dimples known to everyone as orange peel. Major manufacturers like BMW, Audi, Mercedes, even Ferrari, cannot justify the additional time and cost required to create a glasslike flawless finish on all their vehicles; that would take much longer than the vehicle assembly process.
One of the very few exceptions in the automotive world is Rolls Royce, which uses both robots for the initial paint application and humans for additional painting application and the wet sanding. It also has one man, Mark Court, who handpaints every coachline.
This is also how Redux achieves a flawless paint finish, every time. Once the metal fabrication work is complete, the shell is seam brazed with a TIG torch; this means adding brazes by hand at regular intervals along the shell’s interior to provide extra stiffness.
The shell is then media blasted for a second time to remove any debris left by the fabrication or brazing; the underside is then treated with a hot zinc protection spray to provide corrosion protection. Even if this coating is scratched, the zinc retains its protective properties. Immediately upon leaving the blasting bay, an epoxy primer is applied to the bodyshell to protect it against surface corrosion.
With a clean shell, the paint team can

This shot was taken immediately after painting. The shell is left to cure before it receives a wet sanding and final polish to give it a mirror-like finish

The shell’s new paint looks absolutely stunning. Unfortunately you’ll have to wait to see which colour the client chose, hence the black and white photos.
start their preparation work. The first step is seam sealing along the underbody joints to prevent any potential ingress of moisture and dirt. As this build features our new pre-preg carbonfibre body panels, the filler required is minimal (less than 1mm). On older cars, particularly those with hand-beaten panels, this process can be very time-consuming as the filler smooths out any human imperfections. Once the filler has been block sanded, a coat of polyester – the same material as the filler – is applied to all exterior surfaces to ensure a consistent surface finish; otherwise, there will be variations between the metal, carbon, and filler surfaces.
A thin layer of paint, called a guide coat, is then applied on top of the polyester to highlight imperfections. Long sanding blocks then remove it; the guide coat will be taken off the high spots and remain in any low spots, thus highlighting any imperfections.
A urethane coating is then applied to the shell’s underbody and interior panels; because polyester is porous, the urethane coating prevents moisture ingress and is harder wearing than acrylic paint. The underside is tinted body colour, and the interior panels are sprayed black.
Next, the front wings and doors are fitted back onto the shell, this time with their rubber seals and latches in place; as you would expect, the rubber seals affect how they sit. This is done to ensure everything is perfectly aligned, The panel gaps are then block sanded to ensure the polyester surface is consistent, giving a crisp finish when you look along the side of the car. Otherwise, if the doors and body panels are blocked separately, there is a danger of a slight change in surface finish between them. Once complete, the second coat of epoxy primer is applied to the body panels to seal in the porous substrates.
The team then ‘scotch up’ and key any unsealed seams; for example, the roof gutters to minimise the amount of material over the top of the sealer. Once keyed, the seams are heated and left to cure before wet sanding down with 800 grit. The panels must be wet sanded to keep the paper clear of clogging, thus avoiding swirl marks.
After over 300 hours of preparation, the topcoat painting process can finally begin. All the body panels are removed once more, enabling the paint team to access the areas behind them. The body colour spray application takes around 3 to 3.5 hours, after which the shell, body panels, and all other exterior painted parts – bumpers, wing mirrors, spoilers and side skirts – are baked and cured for a couple of days. The paint is then wet sanded and buffed, which takes it ‘from the gun’ finish, which is what you would expect on a new car with a slight level of orange peel, to a mirror finish. Perhaps now you will understand why the major manufacturers cannot justify the additional time and cost.
Final Assembly
Now that the shell, carbonfibre panels and ancillary parts are all painted, the Redux team feel they’ve turned a corner and have entered the home stretch with final assembly left to do along with testing and the unveiling.
All the months of grinding, welding and metal fabrication seem like a distant memory. The hundreds of hours of paint preparation described above have paid dividends; the new colour looks absolutely stunning, and the trick now is not to scratch it! As you’ll have gathered by the moody black and white images, you’ll have to wait a little longer to see which paint option the client chose (my guess is black – Ed).
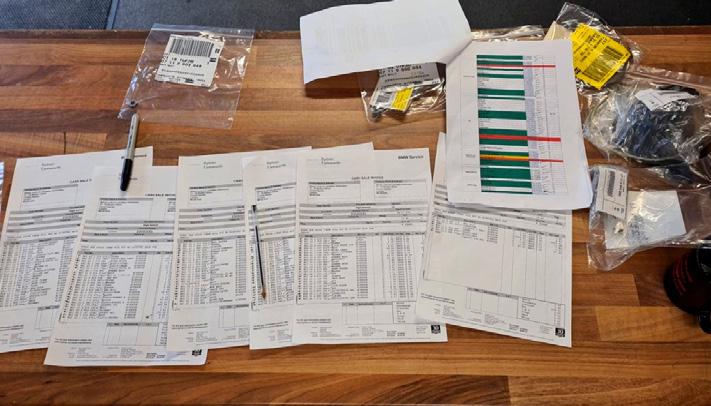
The Redux team now face the fiddly and time consuming job of fixing the hundreds of new and upgraded parts back onto the shell. One of the photos highlights what is happening at the moment: repeatedly checking off lists of parts to ensure a) the team know where everything is, b) they’ve got all the parts they need, c) all the parts are labelled correctly, d) they’ve still got time to order any additional parts they might have forgotten, and e) they know which supplier(s) they need to chase down for parts that haven’t arrived yet.
For everyone on the team, there is great satisfaction in finally seeing everything coming together. It won’t be long before they can step back and admire their handywork. However, there’s much to be finished before the back-slapping and champagne-cork popping can get underway.


