
3 minute read
Squash jumps


SQUASHING JUMPS
BASIC JUMPING A quick recap on the skills we’ve already learned – it’s all about the approach and take-off.
The key difference between basic jumping and squashing a jump is how much air you get after take-off. With basic jumping you come up high over the jump, whereas with squashing you stay closer to the top of the jump. Watch a 4X or downhill racer hitting a jump at speed, and you’ll see that they stop the bike getting too much air by using their body to absorb the upward motion. This saves time and helps to maintain speed.
The main difference in the two techniques is in the take-off. On a jump where you want to get air, you compress into the take-off, and stand tall as you come off the lip. To squash a jump and avoid getting too much air, you need to do the opposite. You need to suck up the energy from the take-off of a jump that forces you in to the air. This will enable you to practise on different shaped jumps and understand what the jump is doing, and avoid being kicked off the ground.
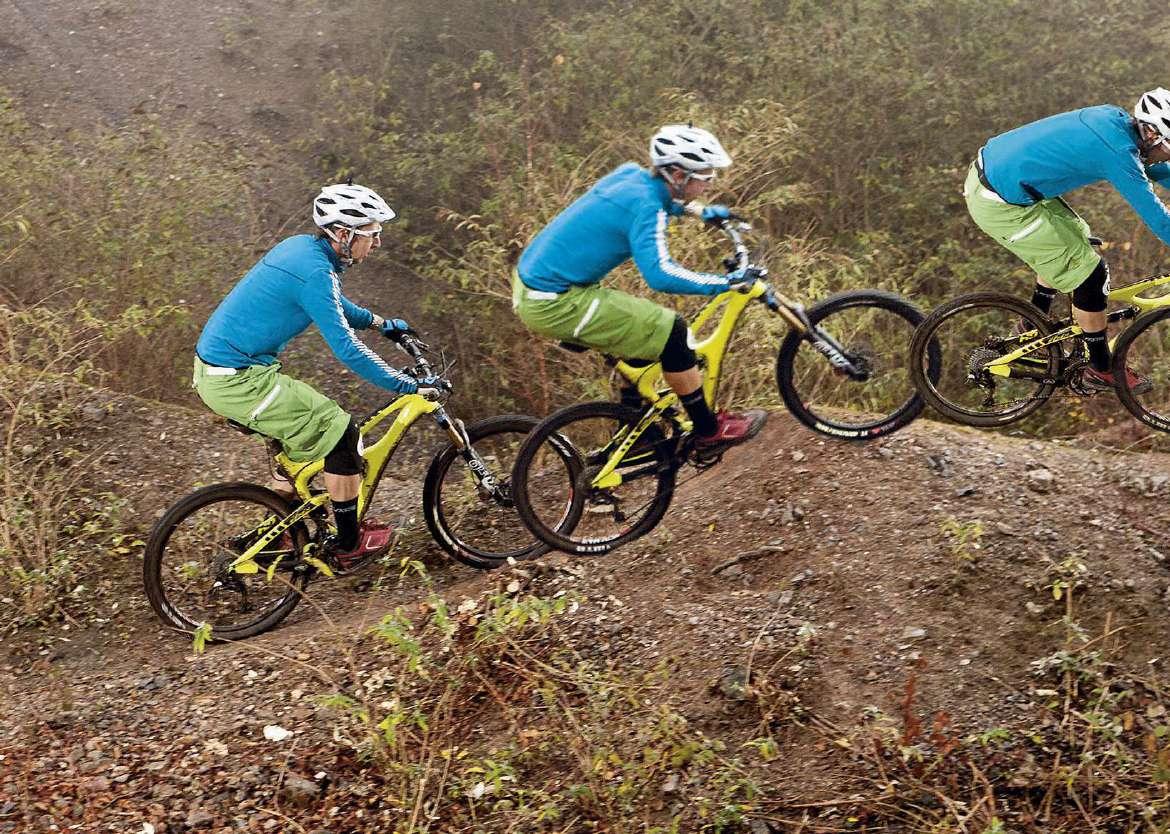
SQUASHING THE JUMP Note the key differences compared to basic jumping – compressing the take-off is the key factor.

COMPRESS
As the front wheel comes off the lip, let the bike come towards you until the back end leaves the lip
APPROACH

Roll into the jump with sufficient speed to jump it. Have your best foot forwards and get out the saddle, ready to act.
COMPRESS
As you hit the transition, compress into it, weighting the bike through the handlebars and pedals.
ABSORB
APPROACH
The approach is key to squashing a jump. Make sure you are in position ready for action – so best foot forwards – and note where the take off lip is. Approach at the same speed as you would to jump it normally.
STA N D TA L L
As you hit the transition, stand tall and let the bike start coming towards you –don’t compress into the transition like you would to get air. As the back end comes off the ground, use the energy from the lip to come up against the bike so you’re standing tall again – this stops the bike coming up and puts you in the right position to push it down towards the lip. Imagine being on a trampoline and absorbing the spring it gives.
STA N D TA L L
As the front wheel comes off the lip, lean back and pop upwards to initiate the upwards motion. Use the energy you gained from compressing into the lip to boost you into the air.
LEVEL OUT

Once airborne, move your bodyweight back and forth and side to side to fly straight and level. Keep your eyes focussed on the run-out area.
NOSE IN
It’ll be smoother if you land into the transition, either front wheel slightly ahead or both wheels together. Extend your arms slightly, stay relaxed, and use your whole body to absorb the impact.
EXTEND
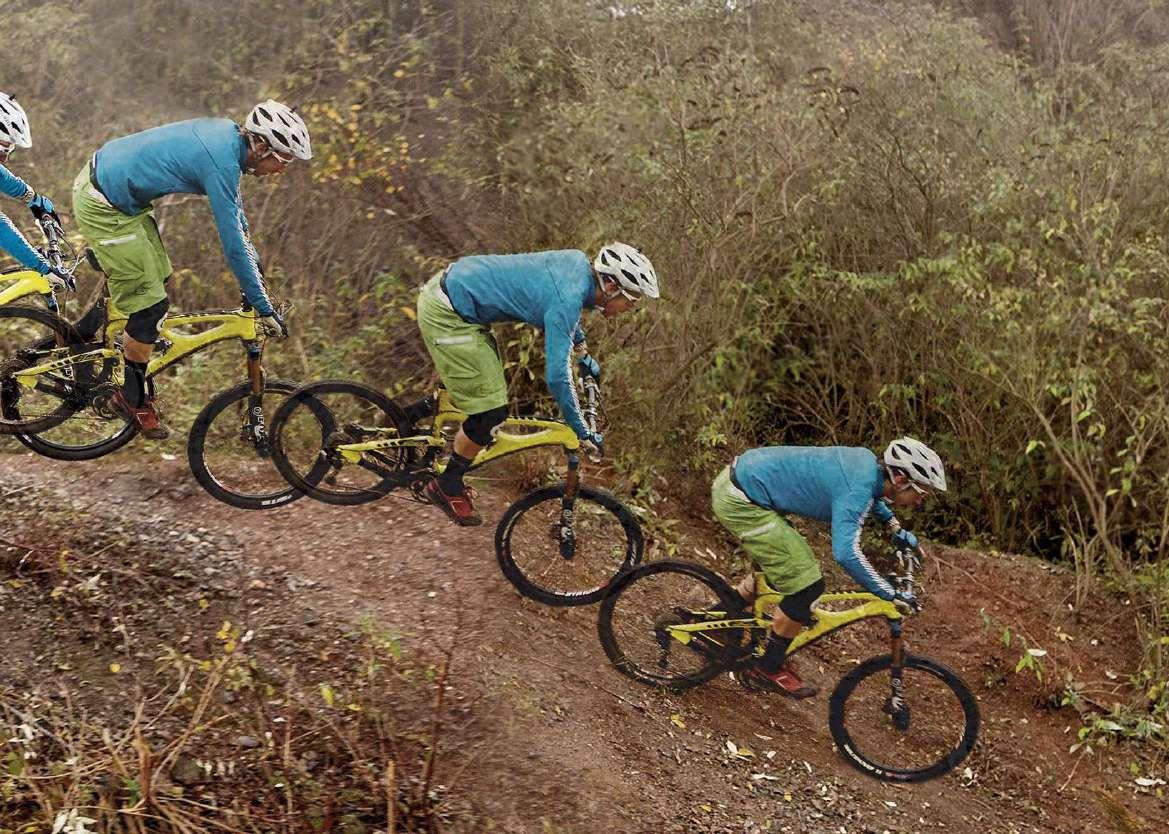
Now that you’re stood up against the bike, you’re in the position to make sure that you can push the bike back to the ground. Extend your arms and legs to push the bike into the landing.
TOUCH DOWN
Extend your arms slightly and stay relaxed, using your whole body to absorb the impact. Your exit speed will be almost the same as your approach – you won’t lose speed like you do when popping high.


