

crisp and the leaves start to fall, there’s no better way to embrace the cozy vibes of autumn than with a home-cookedhearty, meal. 06 PROPAGATING ROSES
CROCK POT COOK AND CARRY SLOW COOKER PRODUCT REVIEW
08 COZY AUTUMN LIVING ROOM MAKEOVER

15 RECIPE - MAPLE PECAN PIE BARS

“Protecting Your Home & Family Since 1959” Roaches, Termites, Ants, Wasps, Bee’s, Silverfish, Rats, Mice, Bed Bugs, Fleas, Ticks, Birds, Squirrels & more.
Executive









BY GRANT PARKER
PROPAGATING ROSES IN THE FALL CAN BE A REWARDING EXPERIENCE, ESPECIALLY IF YOU CHOOSE THE RIGHT VARIETIES AND FOLLOW PROPER TECHNIQUES. WHILE SPRING AND EARLY SUMMER ARE TRADITIONALLY THE PREFERRED TIMES FOR ROSE PROPAGATION, FALL OFFERS ITS OWN UNIQUE ADVANTAGES. COOLER TEMPERATURES REDUCE STRESS ON CUTTINGS, AND THE LONGER ROOTING PERIOD ALLOWS NEW PLANTS TO ESTABLISH THEMSELVES BEFORE THE GROWING SEASON BEGINS IN THE SPRING.
Certain types of roses are particularly well-suited for fall propagation. Among them, Old Garden Roses, Rugosa Roses, and Climbing Roses stand out. These varieties are known for their hardiness and ability to root well from hardwood cuttings, which are ideal for fall propagation.
•Old Garden Roses: These roses, including varieties like Alba, Gallica, and Damask, are known for their robust growth and disease resistance. Their cuttings tend to root well in the cooler fall weather, making them a great choice for fall propagation.
•Rugosa Roses: Renowned for their toughness and ability to thrive in less-than-ideal conditions, Rugosa Roses are another excellent option. They produce thick, woody stems that are perfect for taking hardwood cuttings in the fall.
•Climbing Roses: These roses are often propagated in the fall because their long, flexible canes can be easily rooted. Varieties like ‘New Dawn’ and ‘Zephirine Drouhin’ are popular choices.
1. Select Healthy Stems: Choose mature, healthy stems that have flowered during the season. The wood should be firm and slightly woody, as these hardwood cuttings are ideal for rooting over the winter.
2. Take the Cuttings: Using sharp, sterilized pruners, cut a 6-8 inch section of stem just below a leaf node. Remove any leaves from the lower half of the cutting.
3. Apply Rooting Hormone: Dip the cut end of the cutting in rooting hormone to encourage root development.
4. Plant the Cuttings: Place the cuttings in a pot filled with a well-draining mix of soil and perlite, burying the cuttings about halfway. Water the soil lightly.
5. Protect the Cuttings: Place the pots in a sheltered, frost-free area where they’ll receive indirect light.You can cover them with a plastic bag or place them in a cold frame to maintain humidity and protect them from harsh weather.


BY ANNIE THOMAS
AS THE CRISP AIR OF AUTUMN SETS IN, IT'S THE PERFECT TIME TO GIVE YOUR LIVING ROOM A COZY MAKEOVER. EMBRACE THE SEASON BY INFUSING YOUR SPACE WITH WARM COLORS, PLUSH THROWS, AND CHARMING SEASONAL DECOR. HERE ARE SOME IDEAS TO HELP YOU TRANSFORM YOUR LIVING ROOM INTO A WELCOMING FALL RETREAT.
Start by incorporating autumnal colors into your living room. Warm shades like rich oranges, deep reds, and golden yellows can instantly create a cozy atmosphere. Consider painting an accent wall in a warm hue or adding colorful throw pillows and blankets to your sofa. Look for rugs with fall patterns or colors to anchor the space and add a touch of warmth underfoot.
Layer with Plush Throws
Nothing says fall like snuggling under a soft, plush throw. Choose throws made of materials like wool, fleece, or chenille in autumnal colors or patterns. Drape them over the back of your sofa or chair for easy access and added visual appeal. Layering multiple throws can create a luxurious, inviting look.
Add Seasonal Decor
Pumpkins: Pumpkins are a quintessential fall decoration. Arrange a variety of pumpkins and gourds in different sizes and colors on your coffee table, mantel, or shelves. Opt for
real pumpkins for an authentic touch or go with faux ones that you can reuse year after year.
Dried Flowers: Incorporate dried flowers like mums, lavender, or wheat into your decor. Place them in rustic vases or old mason jars for a charming, seasonal touch. Dried flower arrangements can add texture and color to your space without the worry of wilting.
Candles: Candles add both warmth and ambiance to your living room. Choose candles in fall-inspired scents like cinnamon, apple, or pumpkin spice. Arrange them in decorative holders or trays on your coffee table or mantel. Opt for pillar candles, votives, or even a scented candle centerpiece to create a cozy glow.
Incorporate Textural Elements
To enhance the cozy feel of your living room, add various textures. Layering different materials can make the space feel more inviting. Consider adding a chunky knit pouf or a woven basket to your decor. Use texture-rich fabrics like velvet cushions or a shaggy rug to create a tactile experience.


Embrace Nature
Bring a touch of the outdoors inside by incorporating natural elements. Arrange a bowl of pinecones or acorns on your coffee table or shelves. Use a large branch of bare tree limbs or a bundle of birch logs as a decorative element. These natural touches can enhance the autumnal theme and add an organic feel to your living room.
Set the Scene with Lighting
Lighting plays a crucial role in creating a cozy atmosphere. In addition to candles, use soft, warm light from lamps or string lights. Choose lampshades in autumn colors or textures that complement your fall decor. If you have a fireplace, make it a focal point by decorating the mantel with seasonal items and lighting.
Create a Cozy Reading Nook
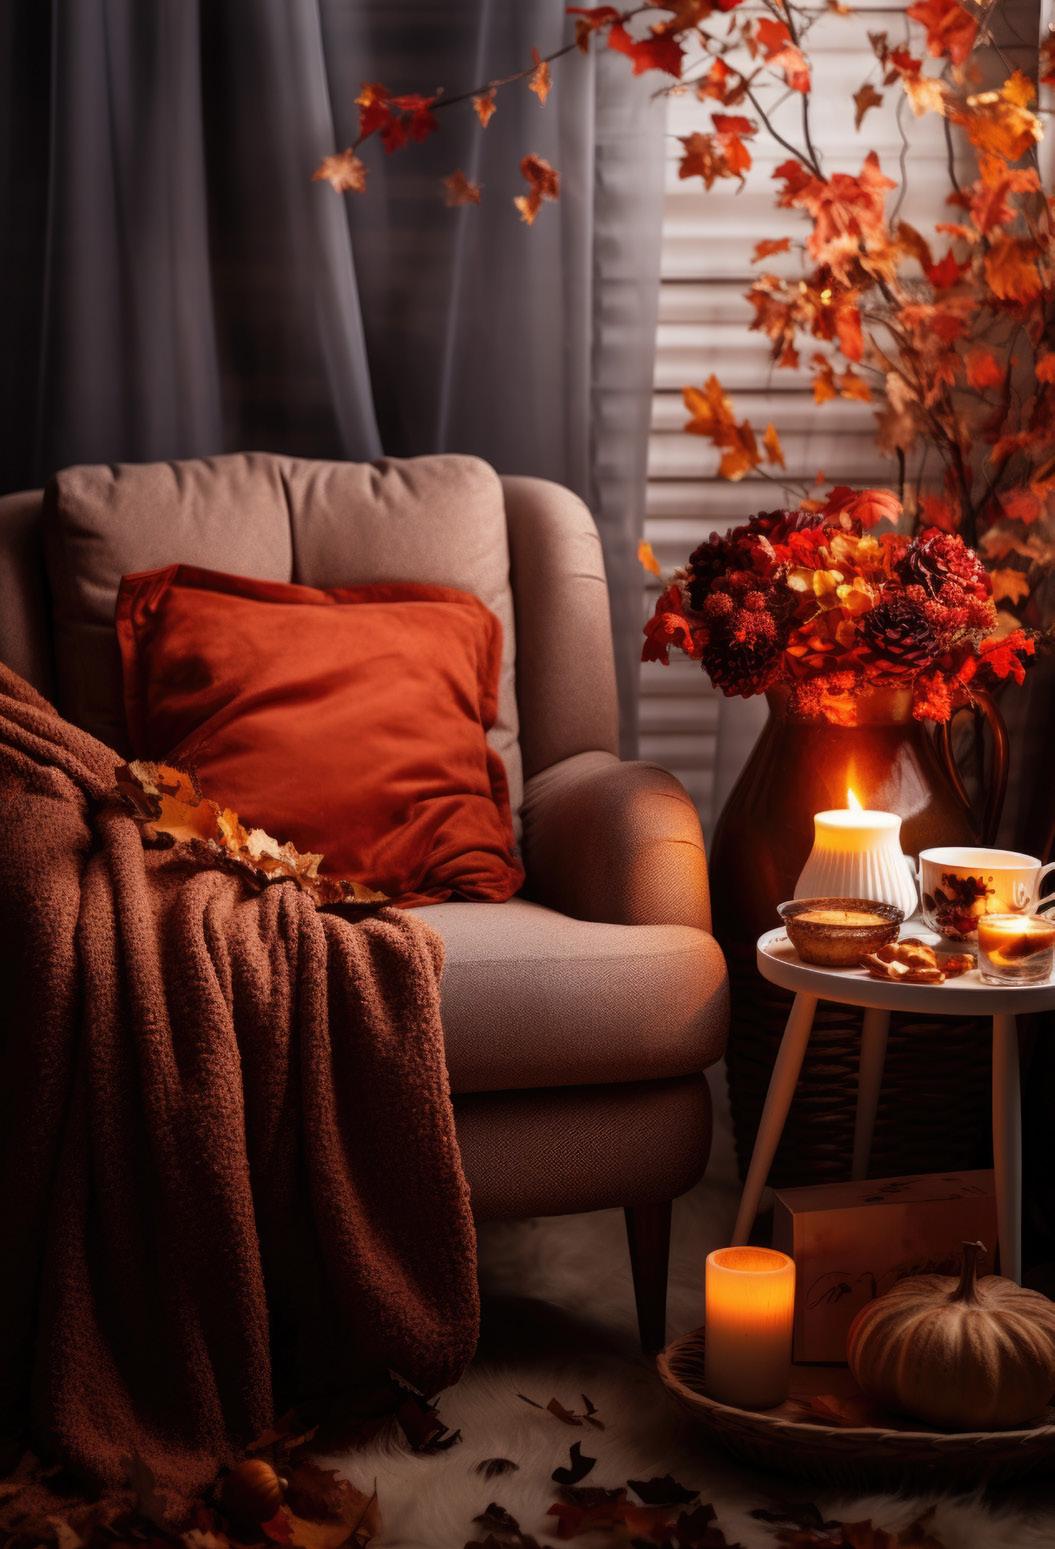
If space allows, set up a cozy reading nook in your living room. Add a comfortable armchair or a small loveseat, and layer it with plush pillows and a soft throw. Place a side table nearby with a lamp, a stack of your favorite books, and a cup of hot cider or tea for a perfect autumn retreat.
Transforming your living room for fall is all about creating a warm and inviting space that reflects the cozy essence of the season. Embrace the autumn season and enjoy a beautifully decorated living room that welcomes you and your guests with open arms.






BY GISELLE PERRY

PLANTING BULBS IS ONE OF THE EASIEST WAYS TO ENSURE YOUR GARDEN BURSTS WITH COLOR YEAR AFTER YEAR. KNOWING WHEN TO PLANT YOUR BULBS IS KEY TO SUCCESS, BUT EQUALLY IMPORTANT IS PLANNING YOUR GARDEN LAYOUT SO THAT YOUR BULBS HAVE THE SPACE AND COMPLEMENTARY SURROUNDINGS THEY NEED TO SHINE. WHETHER YOU'RE PLANTING SPRINGFLOWERING BULBS LIKE TULIPS AND DAFFODILS OR SUMMER BLOOMERS LIKE LILIES AND GLADIOLUS, UNDERSTANDING THE TIMING AND DESIGN WILL HELP YOU CREATE A STUNNING, YEAR-ROUND GARDEN.
SPRING-FLOWERING BULBS
Examples: Tulips, Daffodils, Crocuses, Hyacinths, Snowdrops, Alliums
When to Plant: Fall (September to November)
Bloom Time: Early to late spring, depending on the variety
Details: Spring-flowering bulbs need a cold dormant period during winter to bloom. Plant them in the fall when the soil temperature is around 40-50°F, before the first hard frost.
SUMMER-FLOWERING BULBS
Examples: Lilies, Dahlias, Gladiolus, Calla Lilies, Cannas
When to Plant: Spring (March to May)
Bloom Time: Mid-summer to early fall
Details: Summer-flowering bulbs thrive in warmer soil, so wait until after the last frost to plant them.These bulbs add a tropical flair to your garden with their bold, vibrant blooms.
FALL-FLOWERING BULBS
Examples: Autumn Crocuses, Colchicum, Nerine
When to Plant: Late summer to early fall (August to September)
Bloom Time: Late fall
Details: Fall-flowering bulbs are less common but can extend your garden’s bloom time into the cooler months.


Once you've decided which bulbs to plant, planning their placement in your garden is crucial for long-term success. A design map will help you keep track of where your bulbs are planted, ensuring that you won’t accidentally dig them up during other gardening projects. It also allows you to create a visually appealing garden by incorporating filler plants that will keep the space looking full year-round.
❶ Start with a Layout: Sketch a simple map of your garden, including existing features like trees, shrubs, and pathways. Mark areas that receive full sun, partial shade, or full shade to determine the best spots for your bulbs, as most bulbs prefer sunny locations.
❷ Plan the Layers: Think of your garden in layers.Taller bulbs like alliums or lilies can be planted towards the back, while shorter varieties like crocuses and snowdrops should be placed in the front. This will ensure that all blooms are visible when they emerge.
❸ Mark Your Bulb Placement: On your map, mark where each type of bulb will go. Group bulbs together in clusters for a natural look, and vary the bloom times to extend the flowering season. For example, plant early-blooming crocuses next to mid-season tulips and late-blooming alliums for a continuous display of color.
❹ Leave Space for Filler Plants: Designate areas around your bulbs for filler plants.These plants will provide visual interest throughout the year and act as a backdrop when the bulbs bloom. Ensure that your filler plants won't overshadow or compete with your bulbs for sunlight and nutrients.
Choosing the right filler plants is key to creating a layered garden that looks beautiful even when your bulbs aren't in bloom. These plants will fill in gaps, add texture, and serve as a backdrop for your bulbs when they finally emerge.
Evergreen Groundcovers
Examples: Creeping Jenny, Ajuga, Periwinkle (Vinca minor), Thyme
Benefits: These low-growing plants add greenery and texture to your garden year-round. They work well in between bulbs, covering bare spots in the soil and preventing weeds from taking over.
Ornamental Grasses
Examples: Blue Fescue, Feather Reed Grass, Fountain Grass
Benefits: Grasses provide movement and height to your garden.Their fine texture contrasts beautifully with bold, colorful blooms, and they remain attractive even in winter.
Perennials with Winter Interest
Examples: Heuchera (Coral Bells), Hellebores (Lenten Rose), Sedum
Benefits: Perennials like Heuchera and Hellebores offer foliage that remains


vibrant in the colder months, ensuring your garden doesn’t look barren. Sedum provides late-summer blooms and architectural interest when left standing through winter.
Early Spring Perennials
Examples: Primroses, Lungwort, Bleeding Heart
Benefits: These perennials bloom early in the season, complementing the bulbs and filling in spaces with lush greenery and vibrant flowers.
Shrubs for Structure
Examples: Boxwood, Hydrangeas, Spirea
Benefits: Small shrubs add structure and height to the garden. Boxwoods provide evergreen color, while hydrangeas offer large blooms that can bridge the gap between late spring and summerflowering bulbs.


BY GRANT PARKER
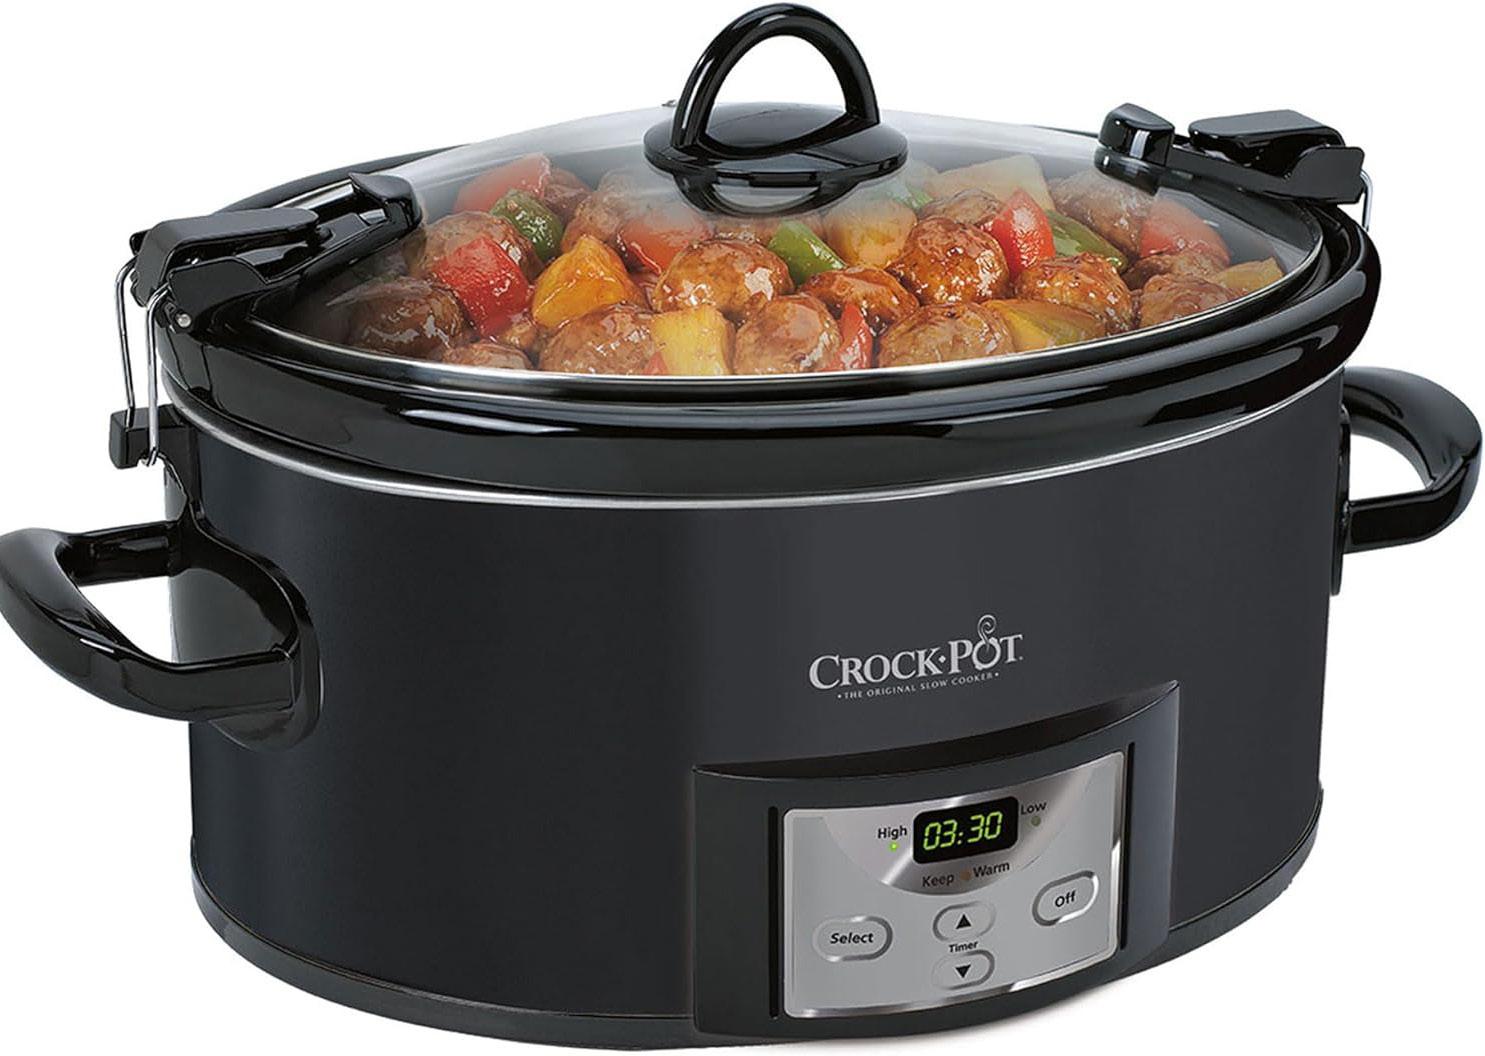
AS THE SEASON TURNS CRISP AND THE LEAVES START TO FALL, THERE’S NO BETTER WAY TO EMBRACE THE COZY VIBES OF AUTUMN THAN WITH A HEARTY, HOME-COOKED MEAL. THE CROCK-POT 6-QUART COOK & CARRY SLOW COOKER IS AN EXCELLENT CHOICE FOR THOSE LOOKING TO MAKE DELICIOUS, WARM MEALS WITH MINIMAL EFFORT.
Key Features
This Crock-Pot model stands out for its simplicity and reliability. With a 6-quart capacity, it’s perfect for family-sized meals or batch cooking, making it a go-to for busy weeknights or leisurely weekends. The size is ideal for cooking large cuts of meat, soups, stews, or casseroles, ensuring you can feed the whole family or have leftovers for the week.
One of the most convenient features of the Cook & Carry is its locking lid. This makes it incredibly easy to transport your meal without worrying about spills, which is perfect if you’re heading to a potluck or bringing dinner to a friend’s house. The locking mechanism is sturdy yet easy to use, giving you peace of mind during transport.
Cooking Versatility
The Crock-Pot 6-Quart Cook & Carry offers three heat settings: high, low, and warm. This allows you to adjust the cooking time to fit your schedule, whether you need a meal ready in a few hours or want it to simmer all day. The warm setting is particularly useful for keeping your meal at the perfect temperature until everyone is ready to eat.


Cleaning up after cooking is often the least enjoyable part of the process, but this Crock-Pot makes it easy. Both the stoneware insert and glass lid are dishwashersafe, so you can spend more time enjoying your meal and less time scrubbing pots and pans.
The Crock-Pot 6-Quart Cook & Carry Slow Cooker is a reliable and
user-friendly choice for anyone looking to make fall comfort food with ease. Its generous capacity, portable design, and straightforward controls make it a kitchen staple that will serve you well throughout the season. Whether you're making a rich beef stew, a savory chicken casserole, or a creamy soup, this slow cooker ensures your meals come out warm, flavorful, and ready to be enjoyed.


BY NELLIE PALMER
For the Crust:
• 1 cup unsalted butter, softened
• 2 cups all-purpose flour
• 1/2 cup brown sugar
• 1/4 teaspoon salt
For the Filling:
• 3/4 cup unsalted butter
• 1 cup brown sugar
.• 1 cup instant oatmeal
• 1/2 cup pure maple syrup
• 3 tablespoons heavy cream
• 2 cups chopped pecans
• 1 teaspoon vanilla extract
1. Preheat the Oven: Preheat your oven to 350°F (175°C). Line a 9x13inch baking dish with parchment paper, leaving some overhang for easy removal later.
2. Make the Crust: In a large bowl, cream together the softened butter, flour, brown sugar, and salt until the mixture resembles coarse crumbs. Press the mixture evenly into the bottom of the prepared baking dish. Bake for 15-20 minutes, or until the edges are lightly golden. Remove from the oven and let cool slightly.
3. Prepare the Filling: While the crust is cooling, melt the butter in a medium saucepan over medium heat. Stir in the brown sugar and maple syrup, bringing the mixture to a gentle boil. Let it boil for 2-3 minutes, stirring constantly. Remove from heat and stir in the heavy cream, oatmeal, chopped pecans and vanilla extract.
4. Assemble and Bake: Pour the pecan filling evenly over the pre-baked crust, spreading it out with a spatula if needed. Return the dish to the oven and bake for an additional 20-25 minutes, or until the filling is set and slightly bubbly around the edges.
5. Cool and Serve: Allow the bars to cool completely in the baking dish. Once cooled, lift them out using the parchment paper overhang and cut them into squares or bars. Enjoy!


