
6 minute read
Fly Tying: The Flying Ant


FLY TYING:
The Flying Ant
Barry Ord Clarke emphasizes the significance of ants in fly fishing, as they often end up on water, sparking feeding frenzies among fish. He recommends having accurate ant imitations due to fish selectivity and introduces a semi-realistic pattern that includes wings, body, legs, and head. Clarke suggests tying black, red, and mixed-color variants to match local ant species, noting that the pattern is effective whether floating or slightly submerged.
By BARRY ORD CLARKE

Generally speaking, ants are probably the most important terrestrial insect for the fly angler, no matter where you fish. They are extremely poor aviators, so they leave the nest in large numbers to increase their chances of establishing a new colony. When they eventually take to the wing, they are placed at the mercy of the wind and end up where it takes them.
If they are unlucky and land on water, especially in large numbers, the fish go into a feeding frenzy. In extreme situations I have experienced that the trout will take just about any fly that is presented to them. But other times they can be so selective that they will only take the perfect pattern with the right silhouette, colour and size. Therefore, its important to have a good imitation at hand.
The Flying Ant is what we call, a semi realistic pattern, that includes the wings, body, legs and head. You can get away with fishing much more simple patterns, but with this one, you also learn several good techniques that you can carry further with you for tying other patterns.
The naturals that you are most likely to encounter when fishing, will be black, but on occasions can also be red, so here are two other variants of this pattern that may be worth you tying, depending on how prevalent ants are for your own fishing!
Both are exactly the same pattern as this, but with a slight change in colour. The first, all in red, including the wings. The second is one that I have increasing success with, is with a red rear body and a black head, simply a mixture of both.
This pattern will float well, especially if treated with a fly floatant. But if your ant sinks a little when fishing, don’t take concern, because they swim as well as they fly.
Material List//
Hook: Mustad dry fly hook size 12-16Thread: Sheer 14/0 blackBody: Super Fine dubbing black, polypropylene or black deer hairWings: Dun cock hackle tipsHackle: Brown saddle hackleHead: Super Fine dubbing black, polypropylene or black deer hair

Secure your dry fly hook in the vice, as shown, with the hook shank horizontal.

Load your bobbin holder with a black tying thread.

Attach your tying thread and run a foundation over the centre hook shank, until the thread hangs approximately vertically with the hook barb.

Cut a short length of black deer hair (or Polypropylene yarn) and tie this in at the rear of the hook.

You will now need a little black super fine dubbing.

Spin a little black dubbing a little at a time onto your tying thread. Take your time and spin the dubbing nice and tight. Wrap the dubbing, starting a little down into the hook bend. Both the body and the head of the ant should be constructed of a very tight hard ball of dubbing.

Once you are happy with the dubbed body, take hold of the deer hair (or Polypropylene yarn) and fold it over the body as shown and tie down. Take care that the fibres in the yarn are parallel and tight.

Select two small dun hackles of the same size for the wings. Prepare them by stripping off the fibres at the base of the hackle stem.

Wrap your tying thread back tight into the rear body, and tie in the first wing with a couple of turns of tying thread. You can now adjust the wing so it lies correctly, by pulling on the hackle stem. Repeat the last step for the second wing. Take care that they are balanced and the correct length, one each side of the rear body.

Once the wings are correct, trim off the surplus hackle stems, so they don’t quite reach to the hook eye. Tie down the stems along the hooks shank, stopping with your tying thread a little behind the hook eye. Leaving enough room for the head.

Tie in a brown hackle by the stem with an X tie, so the hackle stands approximately 90 degrees from the hook shank.

Fold back the deer hair (or Polypropylene yarn) and spin a tiny amount of black dubbing on your tying thread. Wrap the dubbing, again nice and tight to form the head of the ant. Take care not to crowd the hook eye, you should finish a couple of mm behind the eye.

Attach a hackle plier to your hackle tip and wrap your hackle in neat touching turns forward to your tying thread. Secure the hackle with a couple of turns of tying thread and cut away and surplus hackle.

Now fold the deer hair (or Polypropylene yarn) nice and flat over the head of the ant and secure with just a few wraps of tying thread. Once it is in position, nice and tight, trim away the surplus yarn and form a small neat head with tying thread. Make one or two whip finishes.

Remove your tying thread and give the whippings a little drop of varnish, taking care not to get any on the dubbed head. Step 15

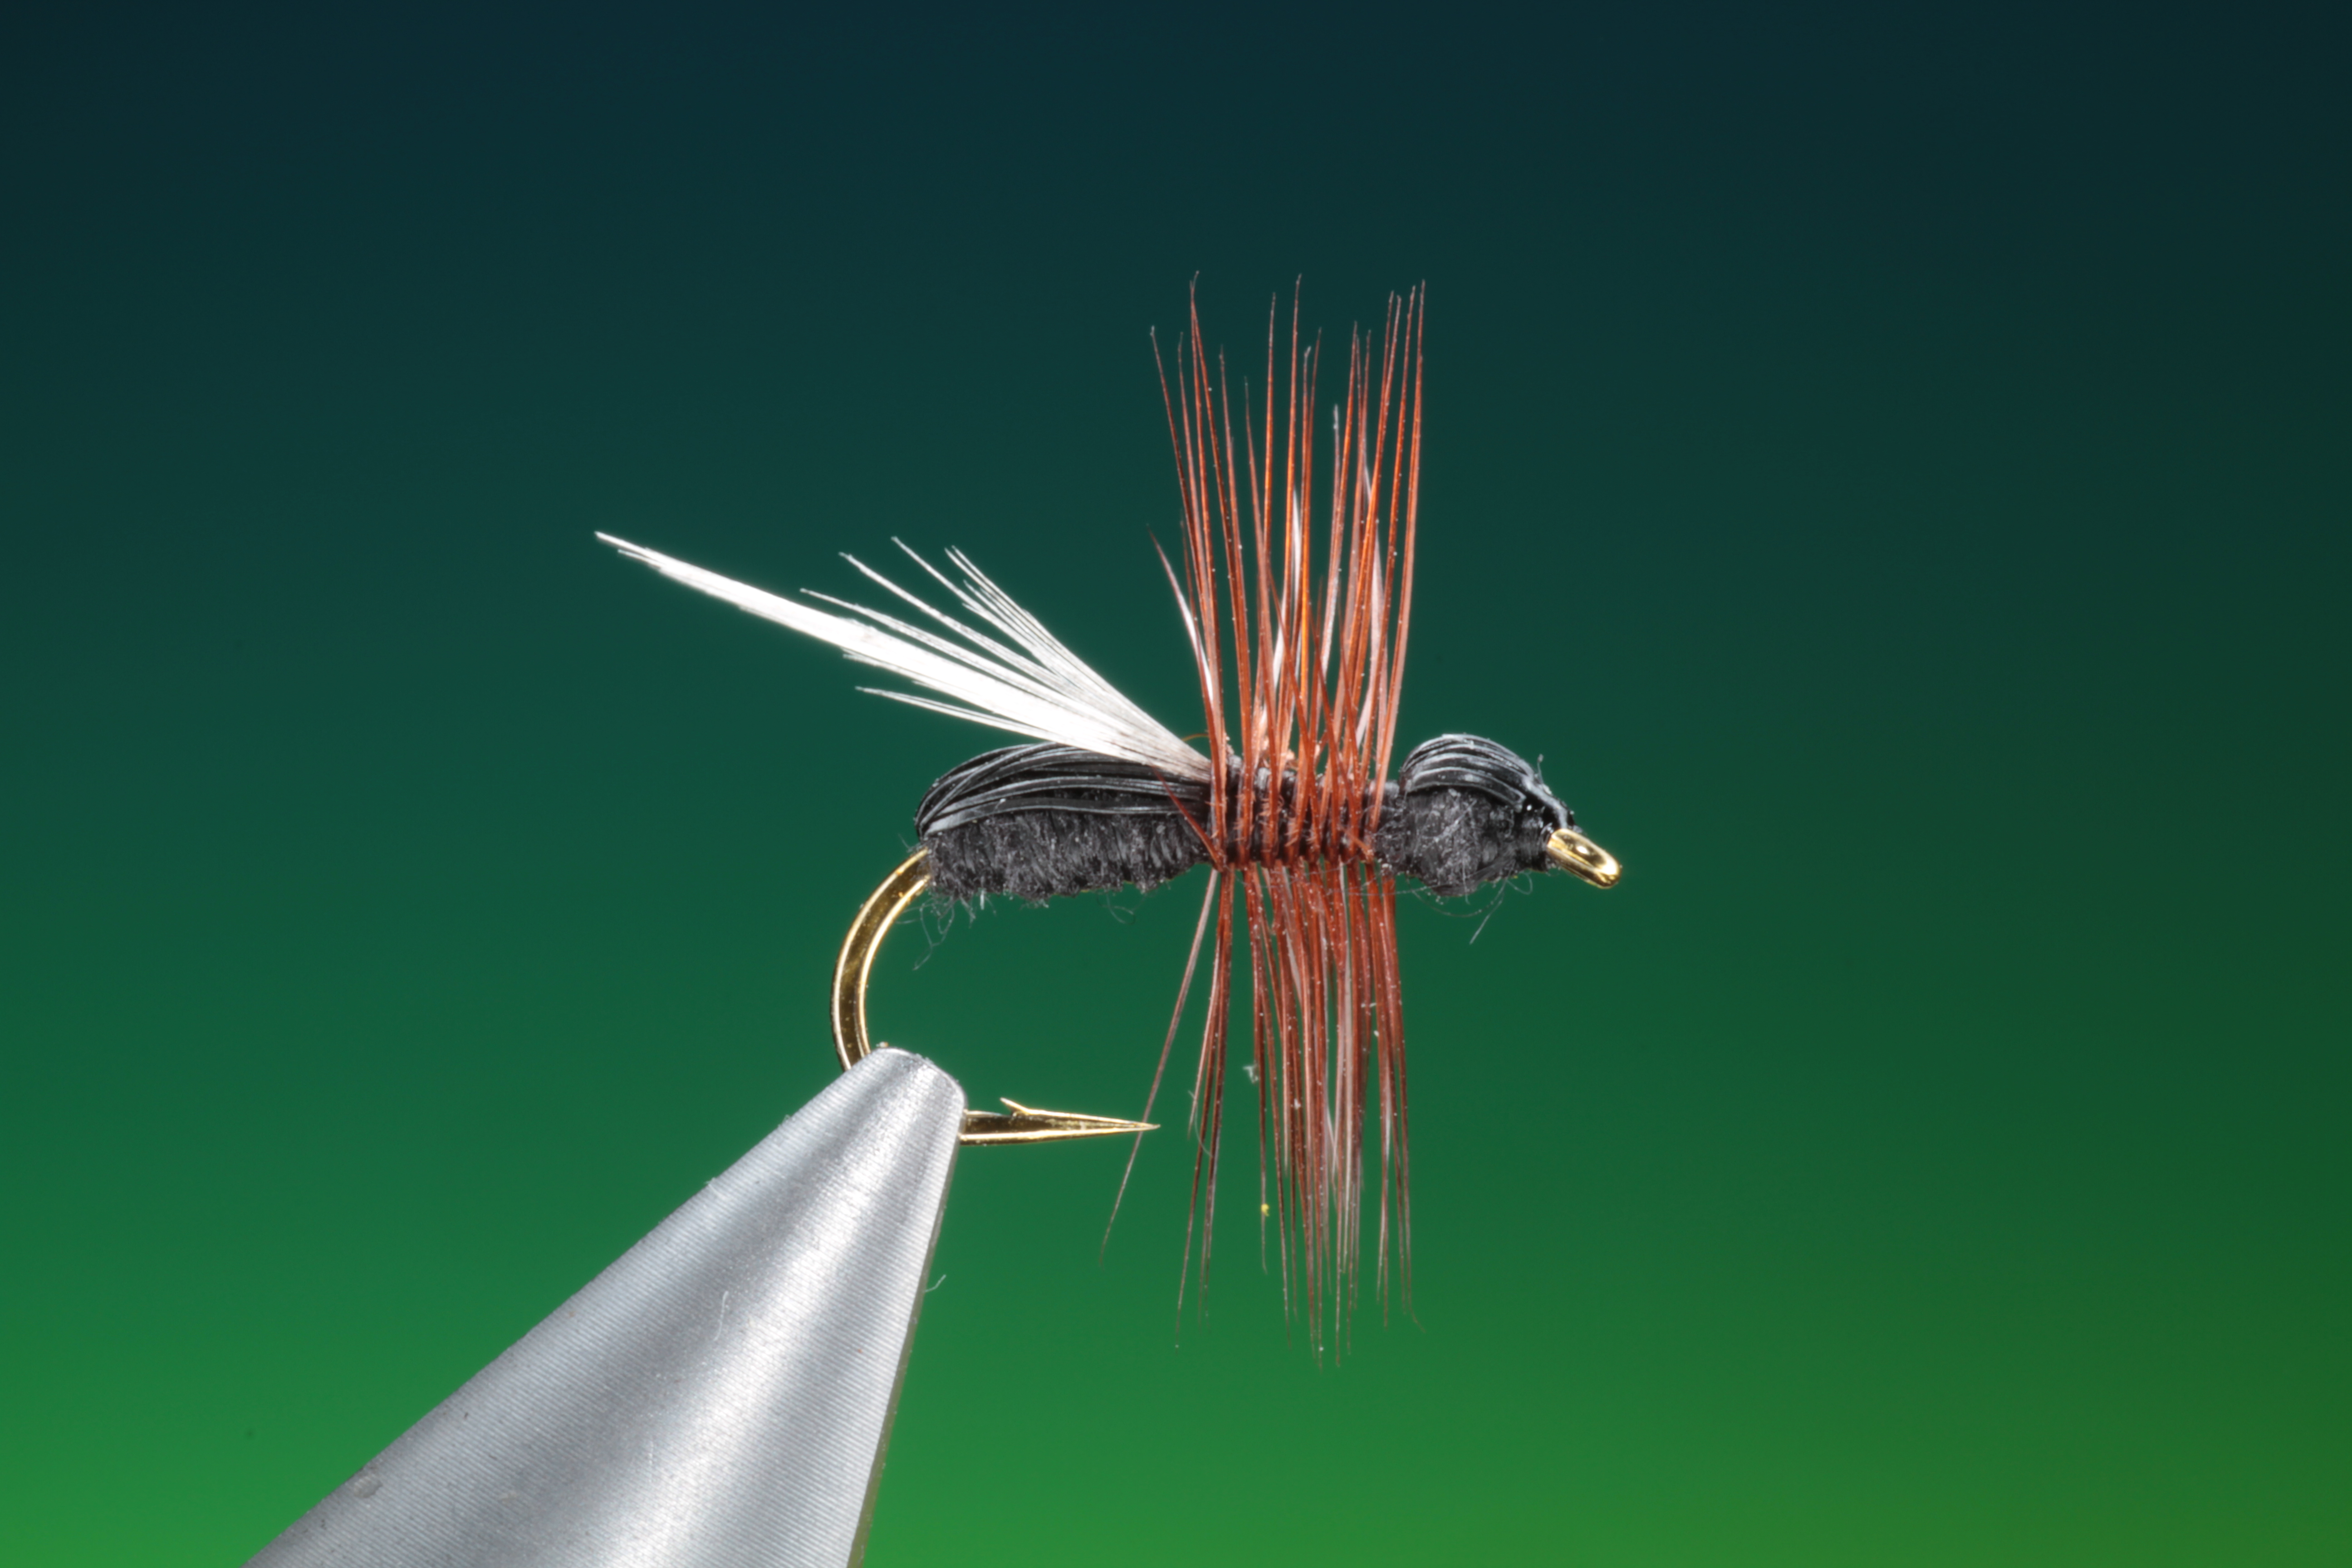
The finished flying ant.

If you would like your fly to have a little lower profile, so it fishes deeper in the surface film of the water, you can carefully trim away the hackle fibres on the underside of the hook as here. This can on occasions give a better and more acceptable presentation for the trout.

A birds eye view of the finished flying ant.


