6 minute read
Denoise


Doherty
About twenty years ago a colleague at UCLA brought me a 16x20 print of one of his digital images. Pointing to an area in the otherwise smooth blue sky of his photograph, he wondered, “what is this pattern that is almost but not entirely unlike grain?” I had no clue. I ventured that it might be electronic distortion, and as a former rock-n-roll musician he understood what I meant.
Advertisement
It was noise. At a technical level, noise is a highly complicated phenomenon (see the Wikipedia entry on “Camera Noise”). For practical purposes, we can think of it like static. It is generated by the electronic processes that create the image file, just as grain is generated by the chemical processes that create a negative. We live with it.
Noise has become less of an issue as camera sensors, firmware, and software have become more sophisticated over the last twenty years. It is still something we need to consider when planning a shoot, however. Under low-light conditions like indoor sporting events or wildlife at dusk, it’s a good idea to have a strategy for dealing with the resulting images.
Why should we “fix” noise? And is it cheating to do so? I think there are two reasons to fix it. One is purely aesthetic. I like to have control over the amount of “grain” in my photographs. My personal preference is not much at all, but I also don’t want it perfectly smooth. It should look like a photograph and not an acrylic.
The second reason is cost. With more time, more expensive equipment, and an expert support staff I might be able to make photographs that look just fine without noise reduction. I don’t have the resources to pull that off, so I use the tools within my reach to achieve the same goal.
It isn’t cheating. None of us sees noise when we are in the field, and we are not adding smoothness to a scene by reducing noise. We are overcoming the limitations of our gear, limitations which are a moving goalpost. My latest camera has a maximum ISO of 25600. In low light it can capture wildlife and people with color fidelity and sharpness that were once were impossible. No one would say that shooting those images today is cheating just because we couldn’t have made them forty years ago. The same can be said for software that reduces the resultant noise. The images produced accurately represent what we saw.
There are multiple approaches to dealing with noise; I will address just two. One is to manually adjust the image. This results in local blurring to blend the noise together, along with a suppression of primary colors in favor of the locally dominant tone. The second, modern approach is artificial intelligence (AI). The software makes a highly educated guess about the subject of your image, and removes noise that does not support its guess. Both of these methods are available in the latest version of Lightroom. Topaz DeNoise AI only does the second one.
In Lightroom Classic 12.3 and later, both the manual and AI methods are contained in the Detail panel of the Develop module (in previous versions only the manual method was available). The manual method is nondestructive, and has several sliders that address two kinds of noise: Luminance and Color.
Luminance Noise is the analog of film grain. It’s monochromatic, and reducing it also reduces the sharpness of the image. Color noise is a mosaic of primary colors, and reducing it does not significantly affect the underlying image quality. It’s the same image, but without color noise.
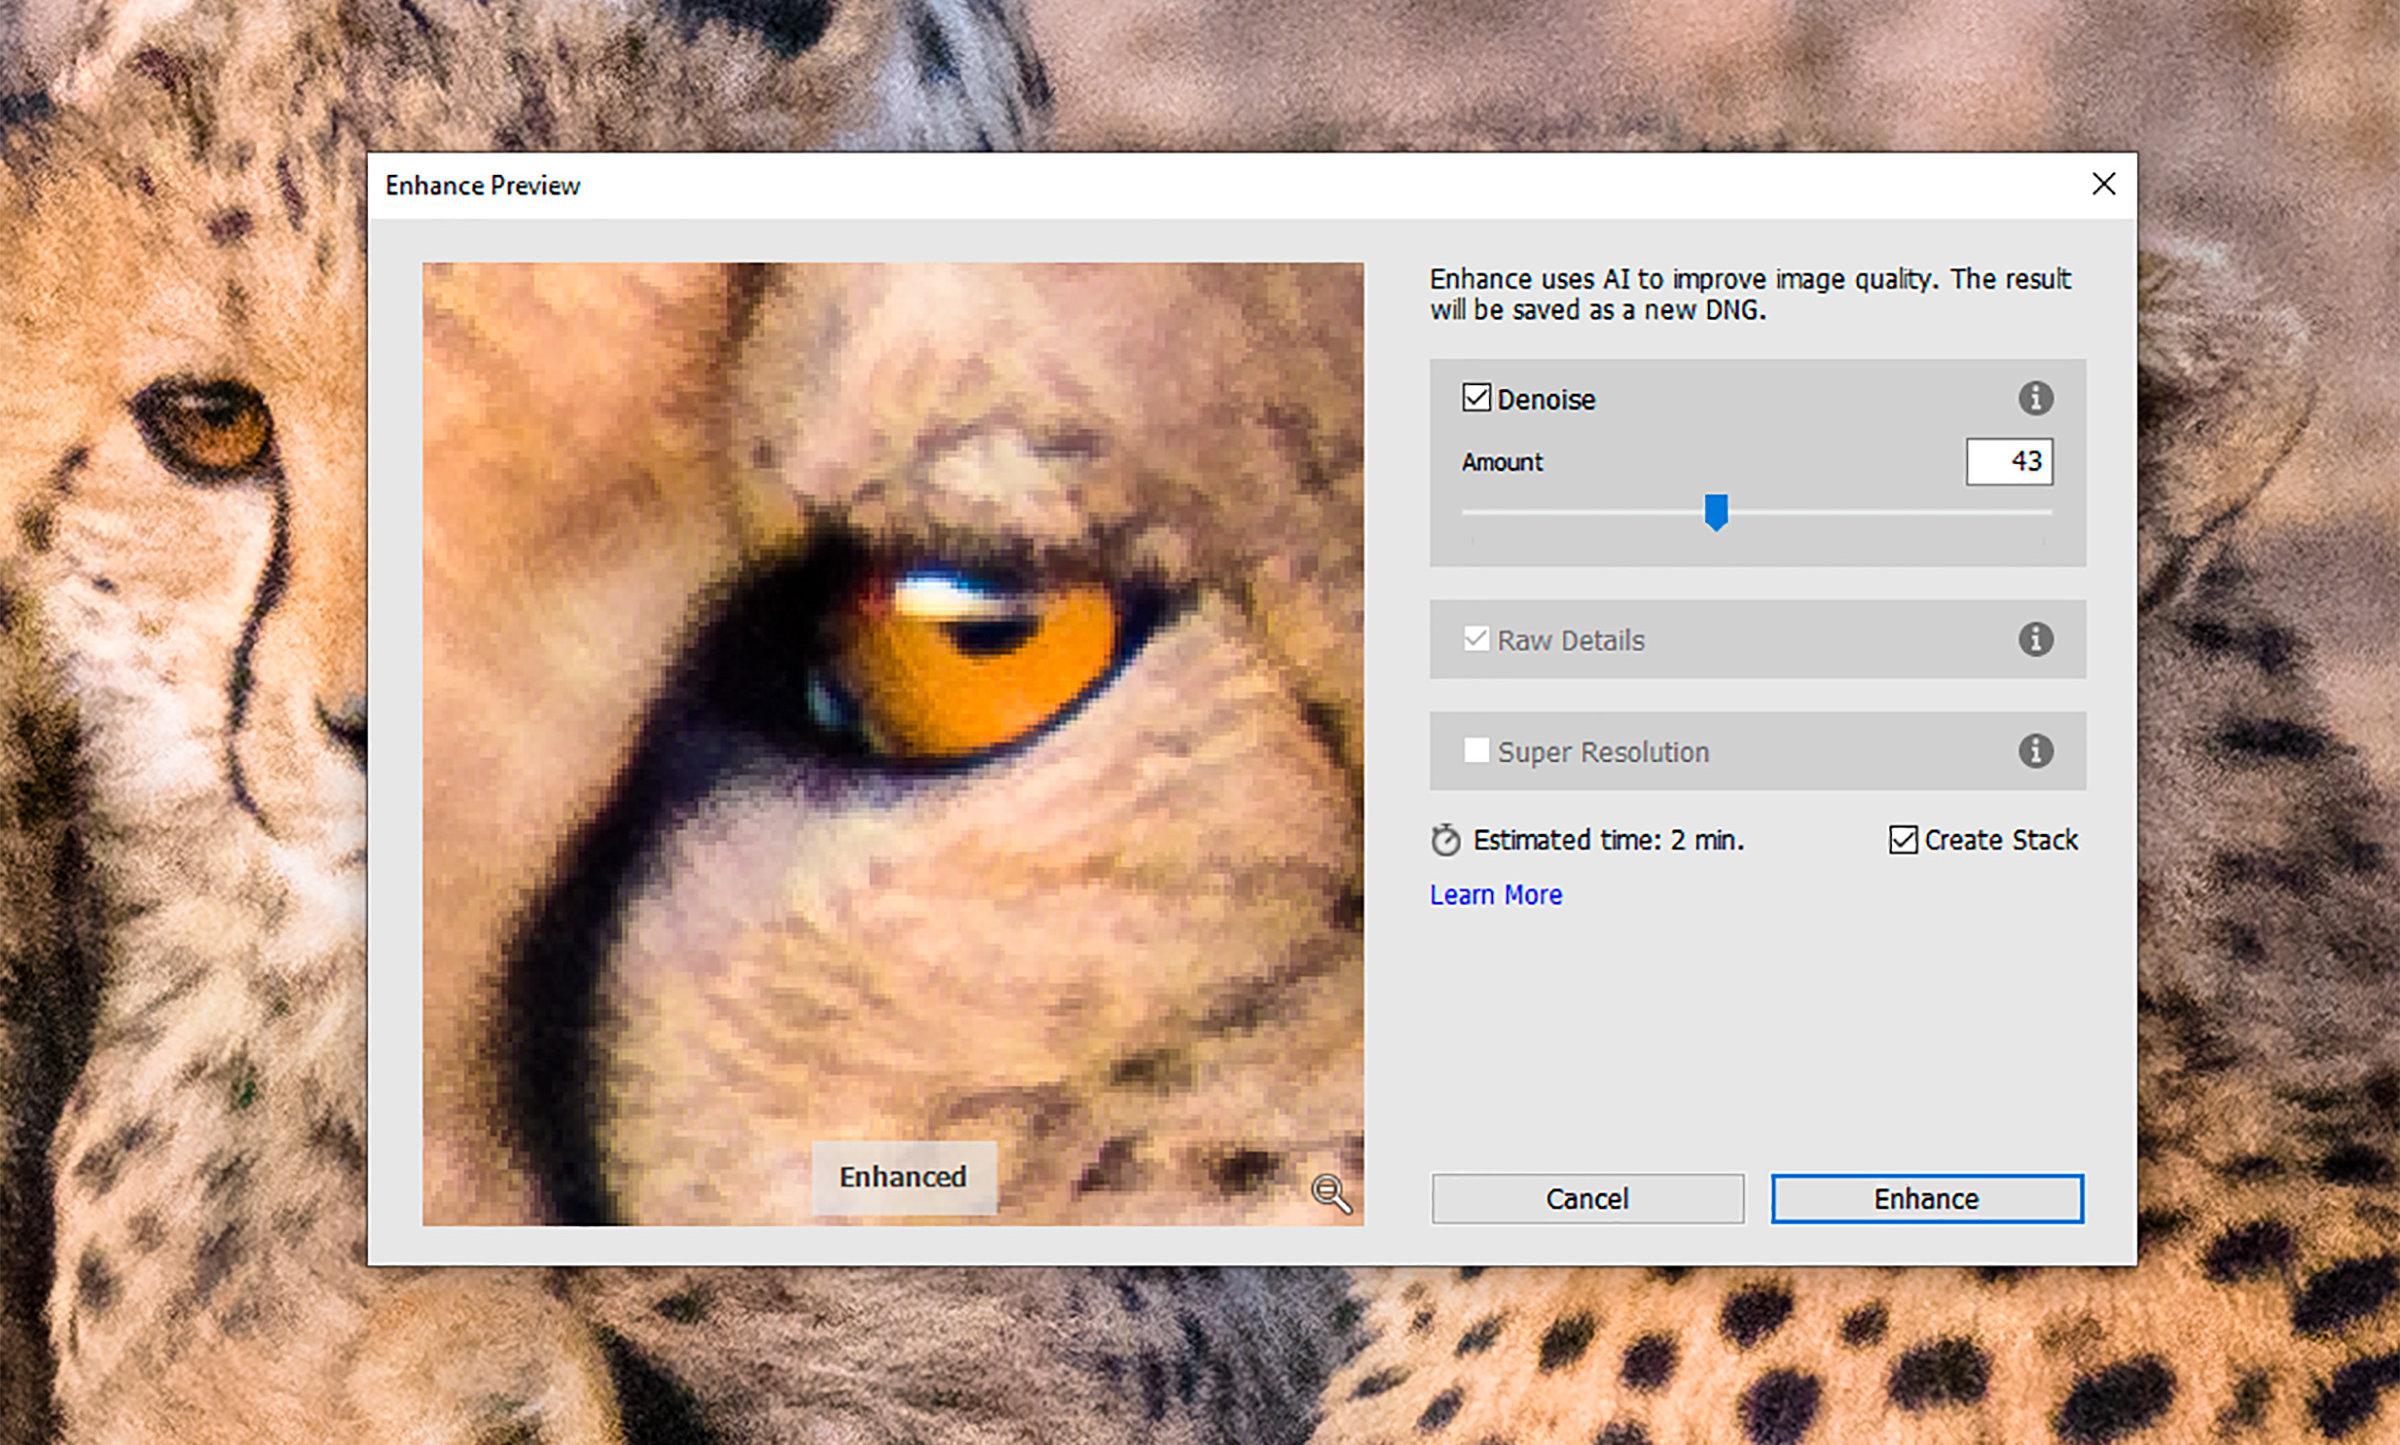
The AI method is listed simply as “Denoise….” In Lightroom it works only on
RAW files, and produces a separate DNG file. When you click the button you get a dialog with limited options for reducing noise. It’s an improvement over the manual method of noise reduction in that it retains sharpness while reducing noise, but it’s also a bit slow. For more detail there is a good tutorial here: https://digital-photography-school.com/howto-do-noise-reduction-in-lightroom/
Topaz DeNoise AI is primarily a noise reduction package, but it also includes algorithms to sharpen images. It works on RAW, TIF, JPEG, and other image files. It can be run as a stand-alone program, or if it’s installed as a plug-in with Adobe products it can be launched from within Lightroom and Photoshop. When launched, you see the image you are working on and the option of changing the way the image is displayed. I prefer to use the 4-Gang view, so I can see different effects on the screen at once. Using this view also lets me know which methods are wrong for a given scene. The software also allows me much more variability than Lightroom’s version does.

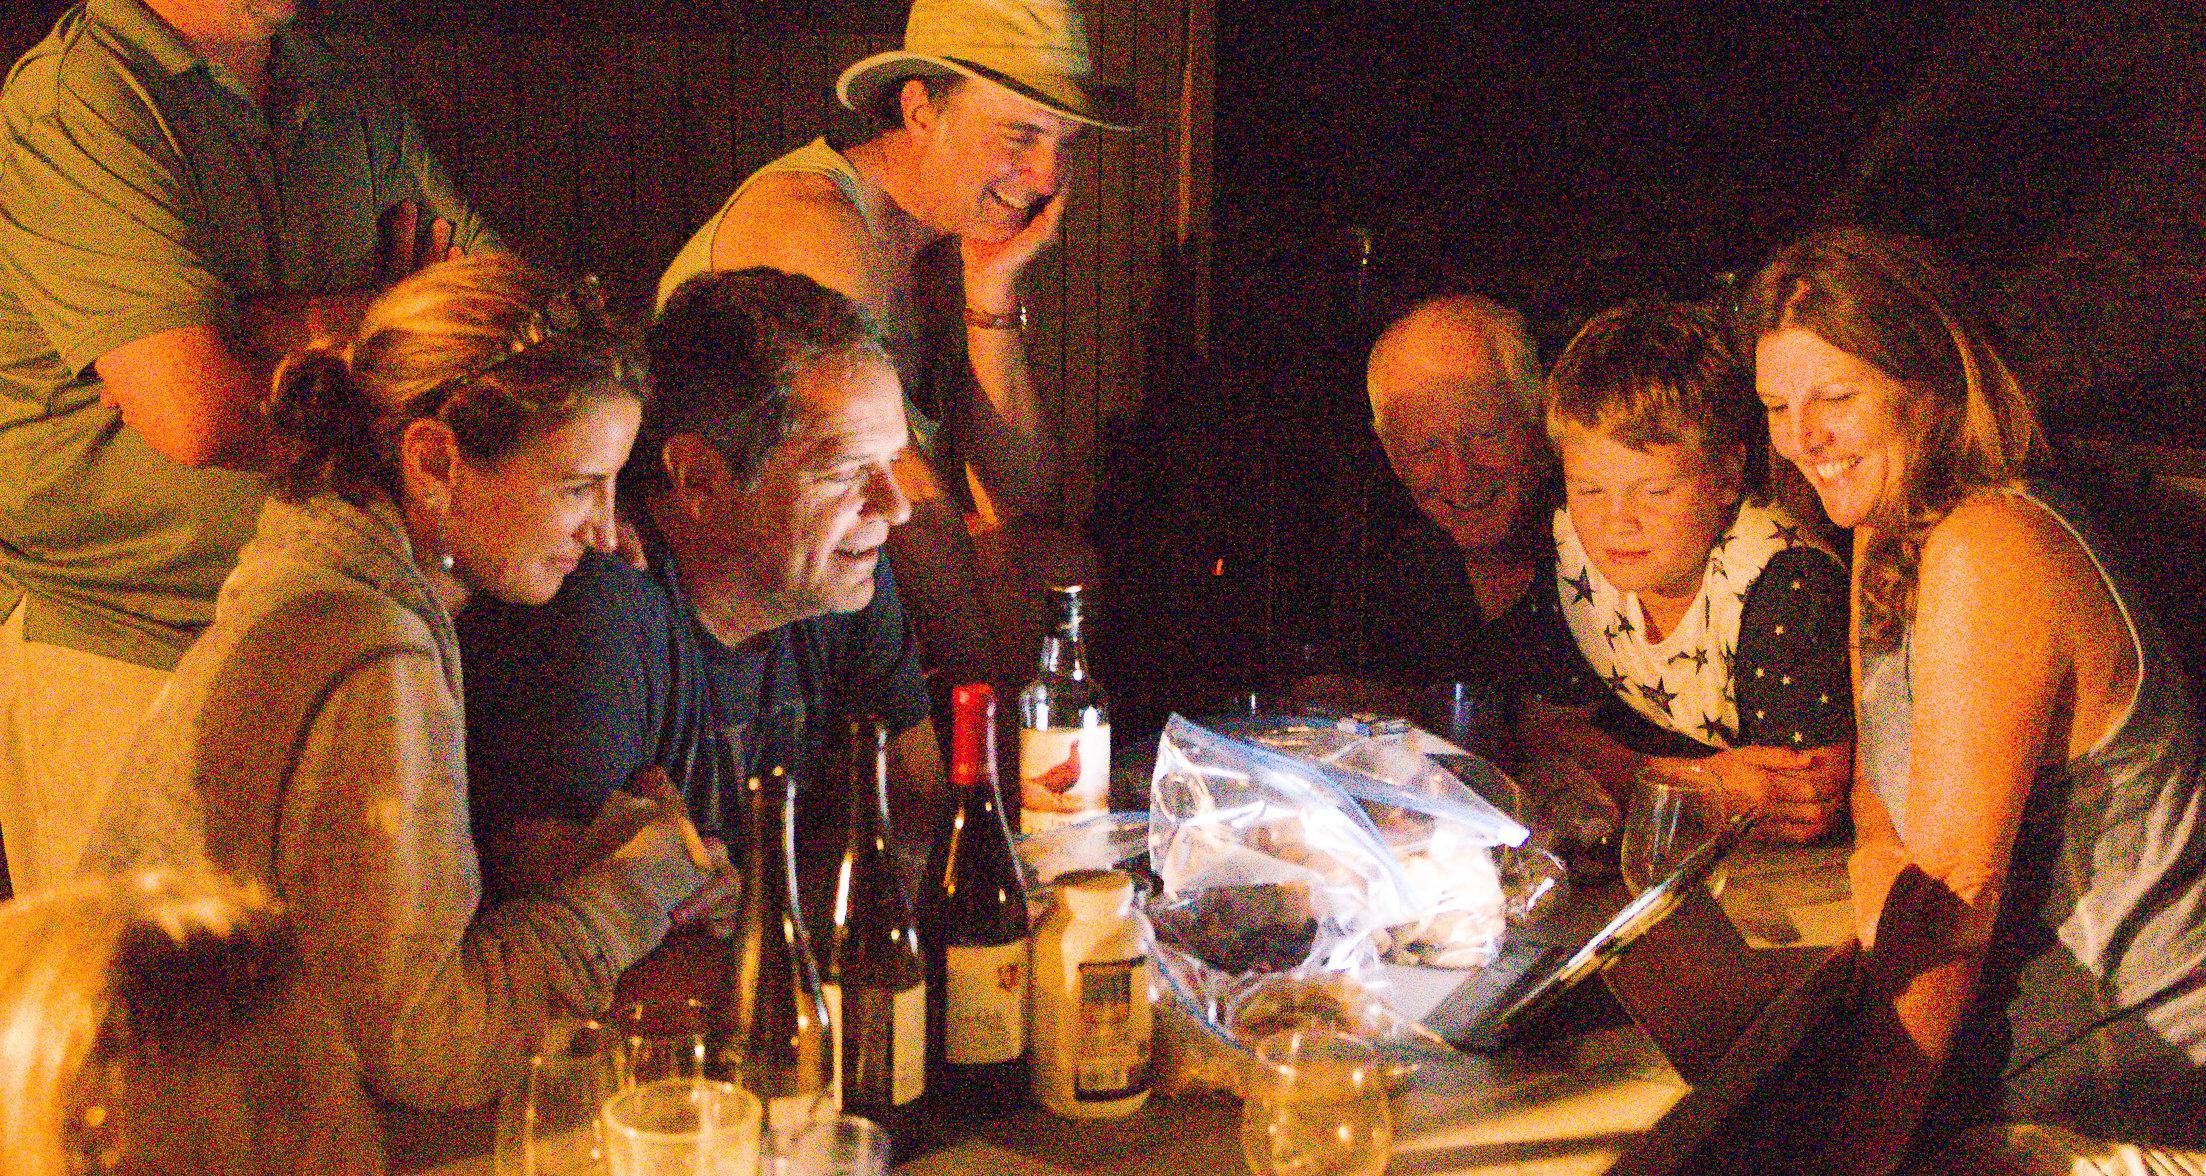
I tried these tools out on a photograph I shot on vacation a few years ago. It’s a modern “gather round the hearth” tableau, with everyone watching a video produced by one of the children. It was an hour after sundown on the east side of a cabin in the woods, and the scene was lit by just two sources: a porch light and the iPad on which the video was displayed. My exposure was 1/20th sec @ f2.8, ISO 25600. The proud father’s face is visible in the shadow at the far end of the table.
Without any treatment of the noise the image looks as expected. It is grainy, with a mosaic of the three primary colors that make up the camera sensor. When I used the manual adjustment tools in Lightroom I was able to eliminate the color noise and somewhat reduce the graininess. Reducing graininess comes at the cost of sharpness, however, so one must strike a balance between the two.
When I applied Lightroom’s Denoise algorithm the results are more satisfactory. The color mosaic is gone, as is most of the grain. The AI apparently recognized these objects as human faces, and sharpened some of the features while retaining the overall feeling that this is a low-light photograph. When I applied Topaz DeNoise AI to the same image, the results were unappealing. The image looks artificial, the faces plastic, like Google Earth’s 3D depiction of the landscape. For this particular photograph I prefer Lightroom AI.


For some other photos, though, I prefer Topaz DeNoise AI. When we went to Kenya I knew two things: I needed a hand-holdable telephoto zoom with a good vibration reduction system; and I was going to need denoise software when I got home. When we returned I purchased Topaz DeNoise AI (Lightroom’s AI offering wasn’t available yet), and I found it to be the perfect tool.

Why is Topaz perfect? For the same reason it was not perfect in the previous photographs. It tries to sharpen details while reducing noise. When there is no detail to sharpen (like my friend’s face) it makes things up. When there is detail, like the coat of an animal, it enhances the detail without looking fake.
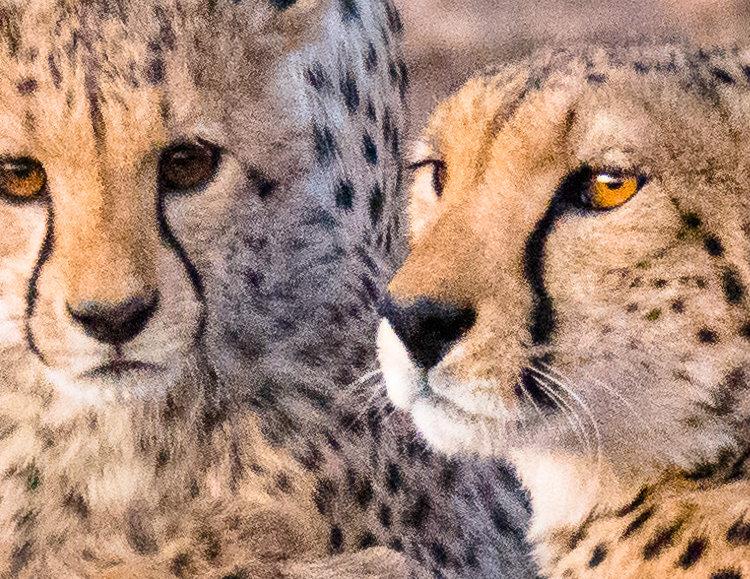
This came in very handy for the photographs we shot in Amboseli on the last day of our Kenya trip. About one-hour before sunset our guide spotted a cheetah family in the shade of a tree. As the sun dipped below the horizon the mother led her four cubs to a small hill, from which they looked around for dinner. I was shooting with a 100-400 Tamron zoom lens at 400mm, handholding it at 1/250 sec @ f8.0 with vibration control turned on. Even at 400mm the cats filled a small portion of the frame, yet I still got usable raw images.
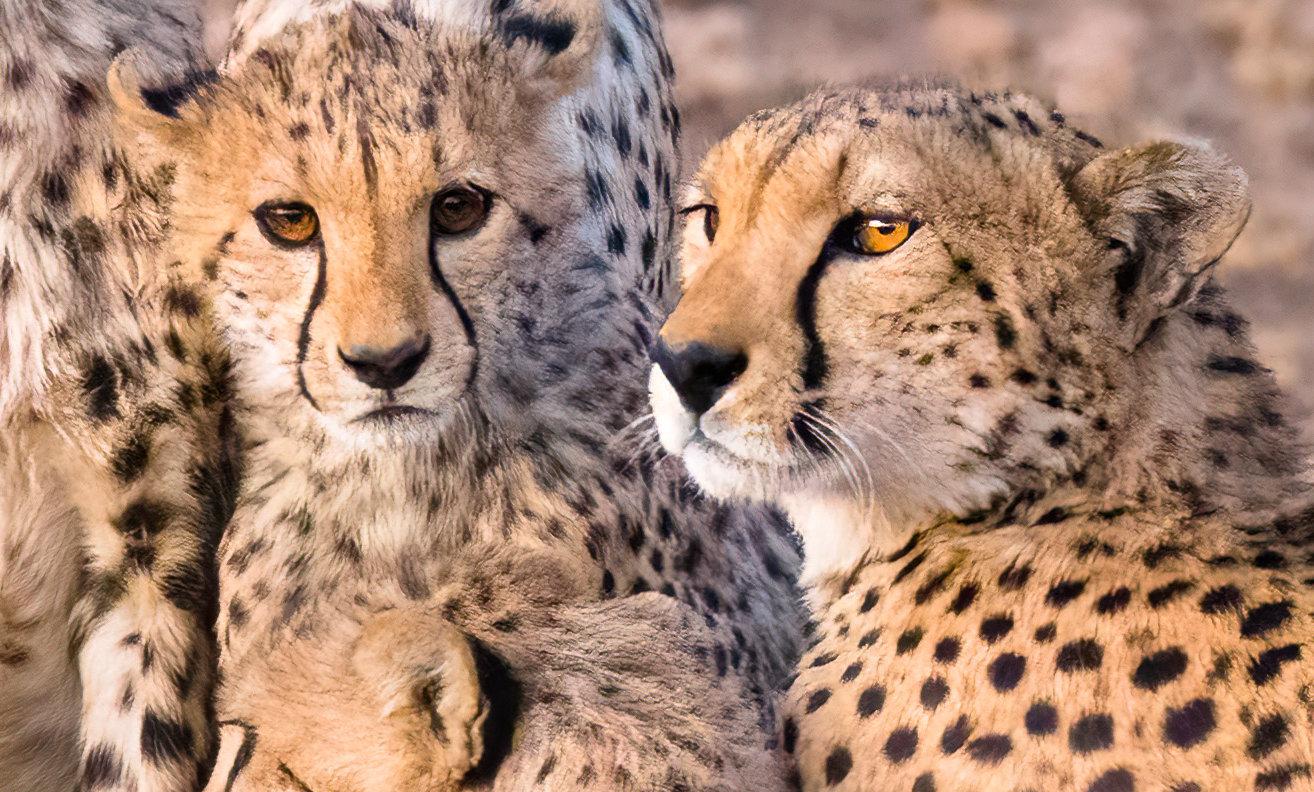
When processed using Lightroom Denoise the image smooths out, and some of the details show better definition. Had Lightroom Denoise been available when we came back from Kenya I might not have purchased Topaz, but it wasn’t. LR Denoise gets me 90% of the way to finished, and Topaz gets me 95% of the way. The catchlights are sharp and clean, the dark markings on their faces are distinct, and their fur is tangible. To me it feels like Topaz DeNoise AI gave me a better, longer lens to shoot with.
My approach to photography can generally be described as “get it right in the camera.” This is a holdover to film days when the choice of camera, lens, lightsource, and film determined the quality of the shot. I still follow that approach in my landscape work, but sometimes I also follow the “shoot it first, fix it later” approach. In the darkroom I used different developers to rescue my film, and different treatments to rescue my prints. Denoise is clearly part of that tradition.


