1 minute read
With Basic Shapes and Tools
a pumpkin. Don’t be afraid to experiment with your shapes – pumpkins aren’t perfect, and a little asymmetry can lend your design a more organic and realistic look.
Next, moving on to the heart of the design - the flowers. Each type of flower was represented by multiple instances of the same basic shapes:

Sunflower: The sunflower was created by using various ellipses for the petals and center. Adjustments to the thickness and shape of the petals was achieved by adjusting nodes to give the petals a non uniform appearance.

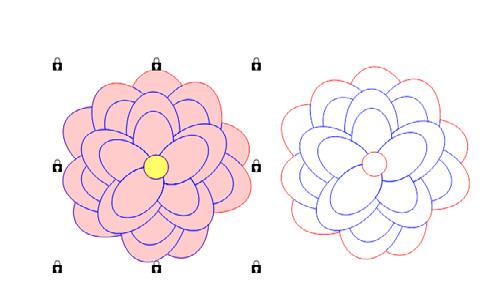
Zinnias: The zinnias were made by creating a five petal flower with the ellipse tool. Various sizes of five petal flowers were then rotated and layered on top of one another.
Delphinium: The stalky delphinium was made using a combination of the ellipse tool and a star shape. Again, a five petal flower using the ellipse tool with a star as the dominant portion of the flower’s center. Multiple flowers were then arranged to resemble the tall stalky flower.
Pansies: The pansies were created by making a four petal flower with the ellipse tool and adding additional nodes to individual petals. The additional nodes were shifted inward and outward to create each wavy petal.
Willow Branch: The willow branch was created using the rectangle tool and several smaller elongated ellipses, some of which were welded to the rectangle to create a unique stem and others to create the buds.
Background: The background was created using three groups of long rectangles placed side by side and rotated at an angle. Any overlay between the rectangles was eliminated by using the Simplify Tool.
Recently I have made more of an effort during designing to reduce the number of pieces that are cut out without compromising the overall design. This is achieved by utilizing the Segment Delete Tool. This tool allows for scored line details to be incorporated onto a single shape.
Coneflower: The petals of the coneflower were made the same as the sunflower, with an additional step of dragging the node on the tip of the petal inward to create a pinched look at the end of the petals. In this case adjusting the nodes help create natural-looking petals. continued here...
When utilizing the Segment Delete Tool for this design, I created a duplicate of each flower I worked on. With the flowers still stacked on one another, I changed the perimeter outline of the bottom flower to red (for cutting) and removed the rest of


