4 minute read
Children’s Product Safety... continued
You can also include other literature in your packaging to provide proper use and care instructions as well as reiterating the age grading. This information helps continue to remind consumers how to stay safe while using your products.
Celebrate!
WOW! That’s it!
You’ve completed:
• Registration with the CPSC
• Age Grading your product
• Testing your product
• Documenting your process to certify your product
• Labeled your product about laser engraving or cutting, we always talk about how the material needs to be in focus with regard to the lens to get the best results. However, that isn’t always the case. Each lens size has a specific distance that the material should be away from the lens to have the correct focal point. You can think of this like a flashlight. As a flashlight shines, it spreads out the further it gets away from the flashlight itself. As a laser beam goes through the lens, it starts to spread out at an angle little by little. The closer you are to the lens, the narrower that beam spot will be. The further away you are, the wider that beam spot will be.
With all of this work that you will do, you’ll be able to better avoid situations catching you off guard. Simply consider your end user, how old they are, and how they would likely use your product, and design around that.
You’ve got this, but if you’re a little apprehensive, I’m here for you! I encourage you to meet me at The Makers Resource Shop or on Facebook in the US Product Safety Compliance group.
I cannot wait to see your products out there!
Misty Henry helps makers build their passions through compassionate guidance of the product safety laws in the US and Canada so they can build a life they dream of without worry. She owns The Makers Resource Shop and you can contact her at hello@ themakersresourceshop.com.


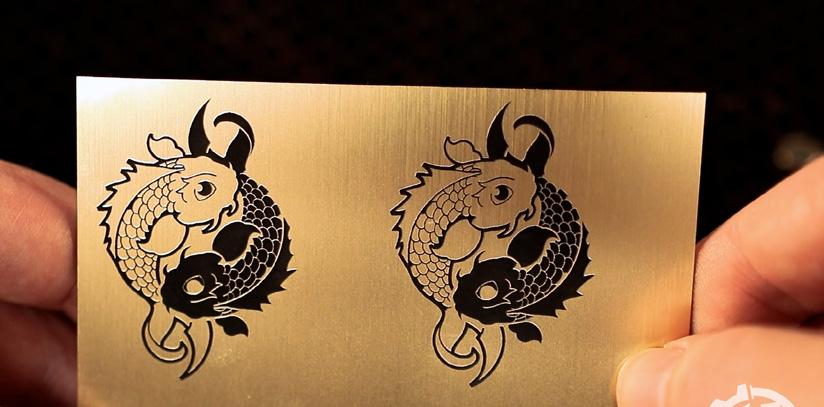
When it comes to engraving multi-ply acrylic if you lower the table a few clicks, it will move further away from the lens causing the beam spot to be wider and machining a slightly wider path each time it passes. This can be very useful with this material. These wider paths that are engraved will overlap each other giving the final engraving a smoother look. The downside to putting the machine out of focus is the lines and details will get slightly larger in the engraving, meaning that line thicknesses will be slightly thicker. If you look at the image below, you will see that some of the lines in the engraving on the right are slightly bolder and thicker than on the right. This can provide a great aesthetic in some cases. Try it out for yourself on a more drastic level to see the effect in action.
Tip 5 – Use acrylic cleaner post engraving. After engraving, it is a good idea in general to clean the engraving. You can do this with just a cloth, water, or even acrylic-specific cleaners. There are a lot of options when it comes to doing this. If you figure out the settings well enough, you often don’t need a cleaner, but if you notice dust or anything else in the engraving, cleaning it post-engraving will help achieve a better result.
There are two cleaners that I have found to be pretty good. The first is Enduramark Green and the second is NOVUS. These cleaners are specifically designed to clean the surface of the acrylic without harming the acrylic itself. Make sure that if you are using a cleaner, it is not going to melt or damage the surface. When cleaning, use a shop cloth like a microfiber cloth or blue shop towels that won’t leave fibers. Don’t use things like normal paper towels as they will leave lint and fibers behind on the acrylic.
Finished Project
There are a ton of ways to get good engraving results on multi-ply acrylic. The most important thing is to make sure you take the time to test the material with your machine to figure out what works best for your setup. What works for me and my machine, won’t be the exact same for you. It will take time to figure it out and you will have some costs when it comes to using materials to do that, but I guarantee you that it will reduce a lot of frustration when you start to make products for your customers.


If you’re using a machine where you cannot manually adjust the height, such as the Glowforge, you can make the material thickness setting thicker than the actual material to artificially throw the machine out of focus. For example, if the material is 0.125” thick, you can put 0.15” or similar to force the laser head out of focus.
Trevor
MATERIALS:
Guest Contributor: Alex Fuentes,
WHAT WOOD WOULD A WOODCHUCK USE (WHAT WOOD SHOULD
Starting a new project in wood can be daunting. There’s just so many wood options out there. Hardwood Vs Plywood, 1/8 thick Vs 1/4 thick. And the choices don’t stop there. There’s also the question of wood species. Do we go with MDF? Baltic Birch? Maybe something more upscale like some Walnut, Sapele, or even some Zebrawood for those lux products. Well, strap in and read on and I will do my best to help shed some light on this dilemma.
Hardwood Vs Plywood
In the laser community, Hardwood normally refers to a wood sheet that’s a solid piece of wood, where plywood is a thin veneer with a core filler (either MDF or wood core).

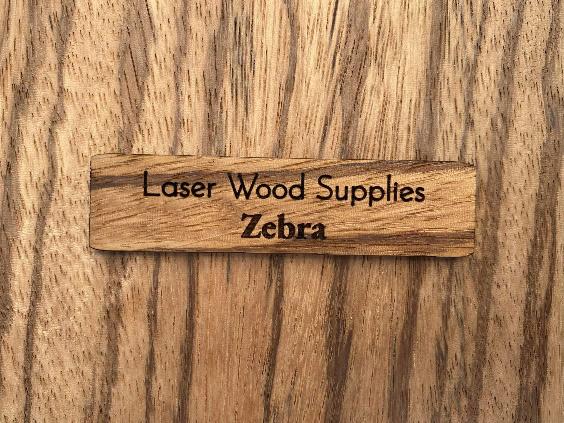
Hardwood: Larger selection of exotic woods, like Zebrawood, Purpleheart, Ambrosia Maple. Cuts well.
Zero staining or painting required, just clear coat to showcase natural beauty.
Most expensive option.
Large pieces can be hard to source. Brittle at 1/8 thickness. It can easily snap along the grain line.
Plywood (mdf core or veneer core): More cost effective than hardwood. Large variety available in large sizes. Can be found in Maple, Walnut, Cherry, Mahogany, and more.
Consistent cuts, especially with an MDF core.
No need to stain, just clear coat.
Lightweight.
Can work well for living hinge projects as its not brittle like hardwood.
Can be expensive.
Burns dirty because of the MDF core. Will require cleaning laser more often.
Now that we know the pros and cons of the two, when do we use what? Well, that’s really up to the artist, but this is my recommendation.
Hardwood is great for jewelry with simple designs (allows the wood to be the highlight) and for high cost art pieces.
MDF core plywood is great for high margin items where using a nicer material will help you stand out from the crowd. Think ornaments, layered designs where weight is a concern. It is also great for projects where you will have a living hinge since its not as brittle as hardwood.
1/8
VS 1/4
This is probably the easiest decision you will make.
1/8 thickness is great for any project where space and/or weight is a concern. Earrings, layered wall pieces, layered ornaments, purses, etc.


