
HOME & GARDEN
SPRING AND SUMMER 2024


Planting for Your Zone LAUNCH


Having trouble getting certain things to grow? You might be planting the wrong things for your home’s growing zone, according to the USDA.
These zones detail the minimum temperatures for growing plants by area. Find the zone for your area, then stick to plants that are best suited for those temps. Your lawn or garden will rebound in no time.
ABOUT THE ZONES
FIND YOUR ZONE
Your growing zone can be found by using the USDA’s helpful interactive map at planthardiness.ars.usda.gov. Simply enter your ZIP code to learn more. Static images are also available for those without faster broadband internet access. You can also get more details about zones at your nearest agricultural extension offices and garden centers. Just remember that the USDA Plant Hardiness Zone Map can’t account for hyper-local conditions, including moisture, soil, humidity, heat or other weather conditions that might impact how plants grow at any specific point in time.
NEW UPDATES


This document is officially known as the USDA Plant Hardiness Zone Map, and it’s meant to set the standard for gardeners to determine which plants thrive by location. There are 11 growing zones in the U.S., with eight located in the lower 48 states. Temperature minimums begin all the way down to -60 to -55 degrees, in Zone 1a. The far warmer Zone 13b, on the other hand, is at the other end of the spectrum with temps in the 65-to-70-degree range. These numbers represent the average coldest temperatures each year, and not the all-time lowest. Be prepared for early spring freezes, where appropriate.
The USDA map is constantly updated with temperature data, with information going back to 1976. The high-resolution interactive map allows page views down to the street level in your community. Zones 12 and 13 have been added more recently to account for new annual extreme minimums. Some zones, like those in Puerto Rico and Hawaii, obviously never freeze but this information nevertheless helps gardeners to plant smarter in tropical and subtropical conditions. Note that zones might change around a larger city since they tend to capture more heat than breezy areas with hills and valleys.
Spring Pruning Tips
With winter receding, make smart cuts now to encourage growth.
Many perennials have foliage that provides protection during the winter, but pruning is still an essential part of their growth process. Likewise, many plants actually make stronger returns if longer branches are trimmed. Here’s how to handle this essential part of spring gardening.
WHEN SHOULD I PRUNE?
The timing for pruning shrubs and trees mostly depends on when they bloom and whether those blooms are on new or old growth, according to the Farmers Almanac. Generally, plants which flower after midsummer each year should be pruned after they flower. A common worry is that over-pruning or pruning at the wrong time might kill a plant, but garden center experts say that it’s rarely fatal. Instead, you’ll simply have fewer blooms or less fruit.
WHAT SHOULD I PRUNE?
Fruit-bearing trees like apple, peach, plum and cherry should be pruned in early spring, as should vines like wisteria and trumpet vine. Shrubs that flower in the spring like rhododendrons and lilacs also need pruning as soon as their first blooms fade. This helps ensure a better bloom the following year. Blackeyed Susan, purple coneflower and globe thistle seed-heads provide a terrific food source for birds, so growers are encouraged to leave them until early spring. Mums, coral bells, hostas, turtleheads and delphiniums need their protective foliage through the winter; now is the time to cut them back.
WHAT DO I USE?
Pruning tools like shears and clippers must be kept sharp in order to do their best work. Clean cuts heal quickly, eventually strengthening the plant. Botched cuts, on the other hand, actually weaken the plant while making it more susceptible to various diseases. Oil the moving parts before spring pruning to make sure everything works smoothly.
HOW TO PRUNE
Some plants require less aggressive pruning. Talk to representatives from your local extension service or gardening center to learn more about how much to prune a particular plant in your area. The Farmers Almanac is also a helpful guide. In general, focus on removing dying or dead branches, and sprouts that have emerged from the trunk. With trees and shrubs, remove all branches that are growing toward the center, downward or across other branches. Prune from the outside growth inward to get the most pleasing shape while promoting growth of stronger new branches.


Ladies' Night Out
THURSDAY, MAY 9
5:00 PM - 8:00 PM


Saving Earth’s Pollinators
Pollinators play a crucial role in bolstering nature and food production.
We tend to think of bees as the only pollinators, and they are perhaps the most important single element in this important process. But butterflies, bats, birds, wasps and beetles also play a role. Unfortunately, some are under generational stress while others are actually in decline. Together, we can make a difference in saving them.

COLLAPSING COLONIES
The USDA reports that more than 100 crops rely on pollinators, with an annual economic impact in the tens of billions. Issues even with one key pollinator can have catastrophic results. For instance, the Western honey bee has been struck by colony collapse disorder. Worker bees are disappearing, leaving only the queen and a few others. The cause is likely environmental stressors, according to the USDA, including pollutants, pests, disease and nutritional deficits. Growers, conservationists and government officials leaped into action, and the bee population began to rebound. Still, there are many others who remain at risk.
been certified through the Bee Better program funded through the USDA’s Natural Resources Conservation Service. Growers and manufacturers earn this certification by using pollinator-friendly practices. Buying things with the Bee Better logo helps support those who in turn support pollinators.
IN THE GARDEN
Try creating landscapes and gardens that feature native species, timing them to flower during different seasons in order to provide a steady source of food for pollinators. Clump flowers with different shapes and colors to attract them. Those who live in areas where monarch butterflies migrate can plant milkweed, which provides food for caterpillars.
NESTING SITES




‘BEE BETTER’
One of the easiest ways to support pollinators is at your local grocer, farmer’s market or shopping center. Look for products that have
Gardeners can also provide nesting sites to encourage these populations to grow. Many prefer specific plants for their young: For hummingbirds, it’s shrubs and trees. Monarchs, on the other hand, like milkweed. Bees prefer to build nests in wood, in the ground or in dry plant stems. If you decide to encourage bees by building a ground-nesting site, make sure it’s facing south so the bees get the most sun and that it is well-drained. Hollow stumps make a great habitat; there are also artificial nesting sites available at retail outlets that add a nice touch to any garden.
Storing Winter

Greenshoot Media
Spring means warming conditions, and less of a need for scarves, gloves and bulky winter items.
Take care to store it all properly, however, or they may not be in the proper condition to keep you cozy again





Spring Energy Savings
A changing season offers new opportunities to use less energy and lower costs.
The first day of spring, for instance, can serve as an annual reminder to check the evaporator coil on your air-conditioning unit, since its cleanliness ensures optimum performance and the lowest utility costs per month. Routine maintenance like replacing air filters can lower your average energy consumption by as much as 15%. Here’s a checklist of other things that can help you go green and save some green, courtesy of the U.S. Department of Energy:
WINDOWS
Open your windows as the mild temperatures of spring arrive, allowing for a cross breeze which will naturally cool rooms without using an air conditioner. Consider updating your home’s window treatments. Energyefficient covers like shades, blinds or film can drastically impact heat gain as temperatures rise in the afternoon. You’ll give the home a fresh new look while reducing energy costs.
Use these new window treatments to bring in more sunlight during daylight hours, then turn off artificial lights. Skylights can also significantly brighten a home — at no charge.
FANS AND VENTS
Experts say you can comfortably raise thermostats by as much as four degrees simply by installing and cooling your home with ceiling fans. You’ll be lowering costs without sacrificing anything in terms of comfort. Engage the venting systems while cooking and after bathing to remove warm, often humid air that can lead to longer operational cycles for your cooling unit.
LEAKS
Many homes lose pricey air conditioning through leaks around windows and doors. Buy weatherstripping or apply lowcost caulk to seal any openings. These cracks make a surprising contribution to high utility costs. For instance, air loss through your air-conditioning unit’s duct system may account for nearly 30% of its energy consumption.
Check for leaks, then seal and insulate them to lower your electricity bills this spring.
OTHER TIPS
Consider installing a programmable thermostat so that you can raise the settings when you’re not home or during off-peak hours, an option that may help reduce energy costs by as much as 10%. Consider using an outdoor grill on nice spring days, rather than heating up your home while using an indoor oven.
Power Washing 101
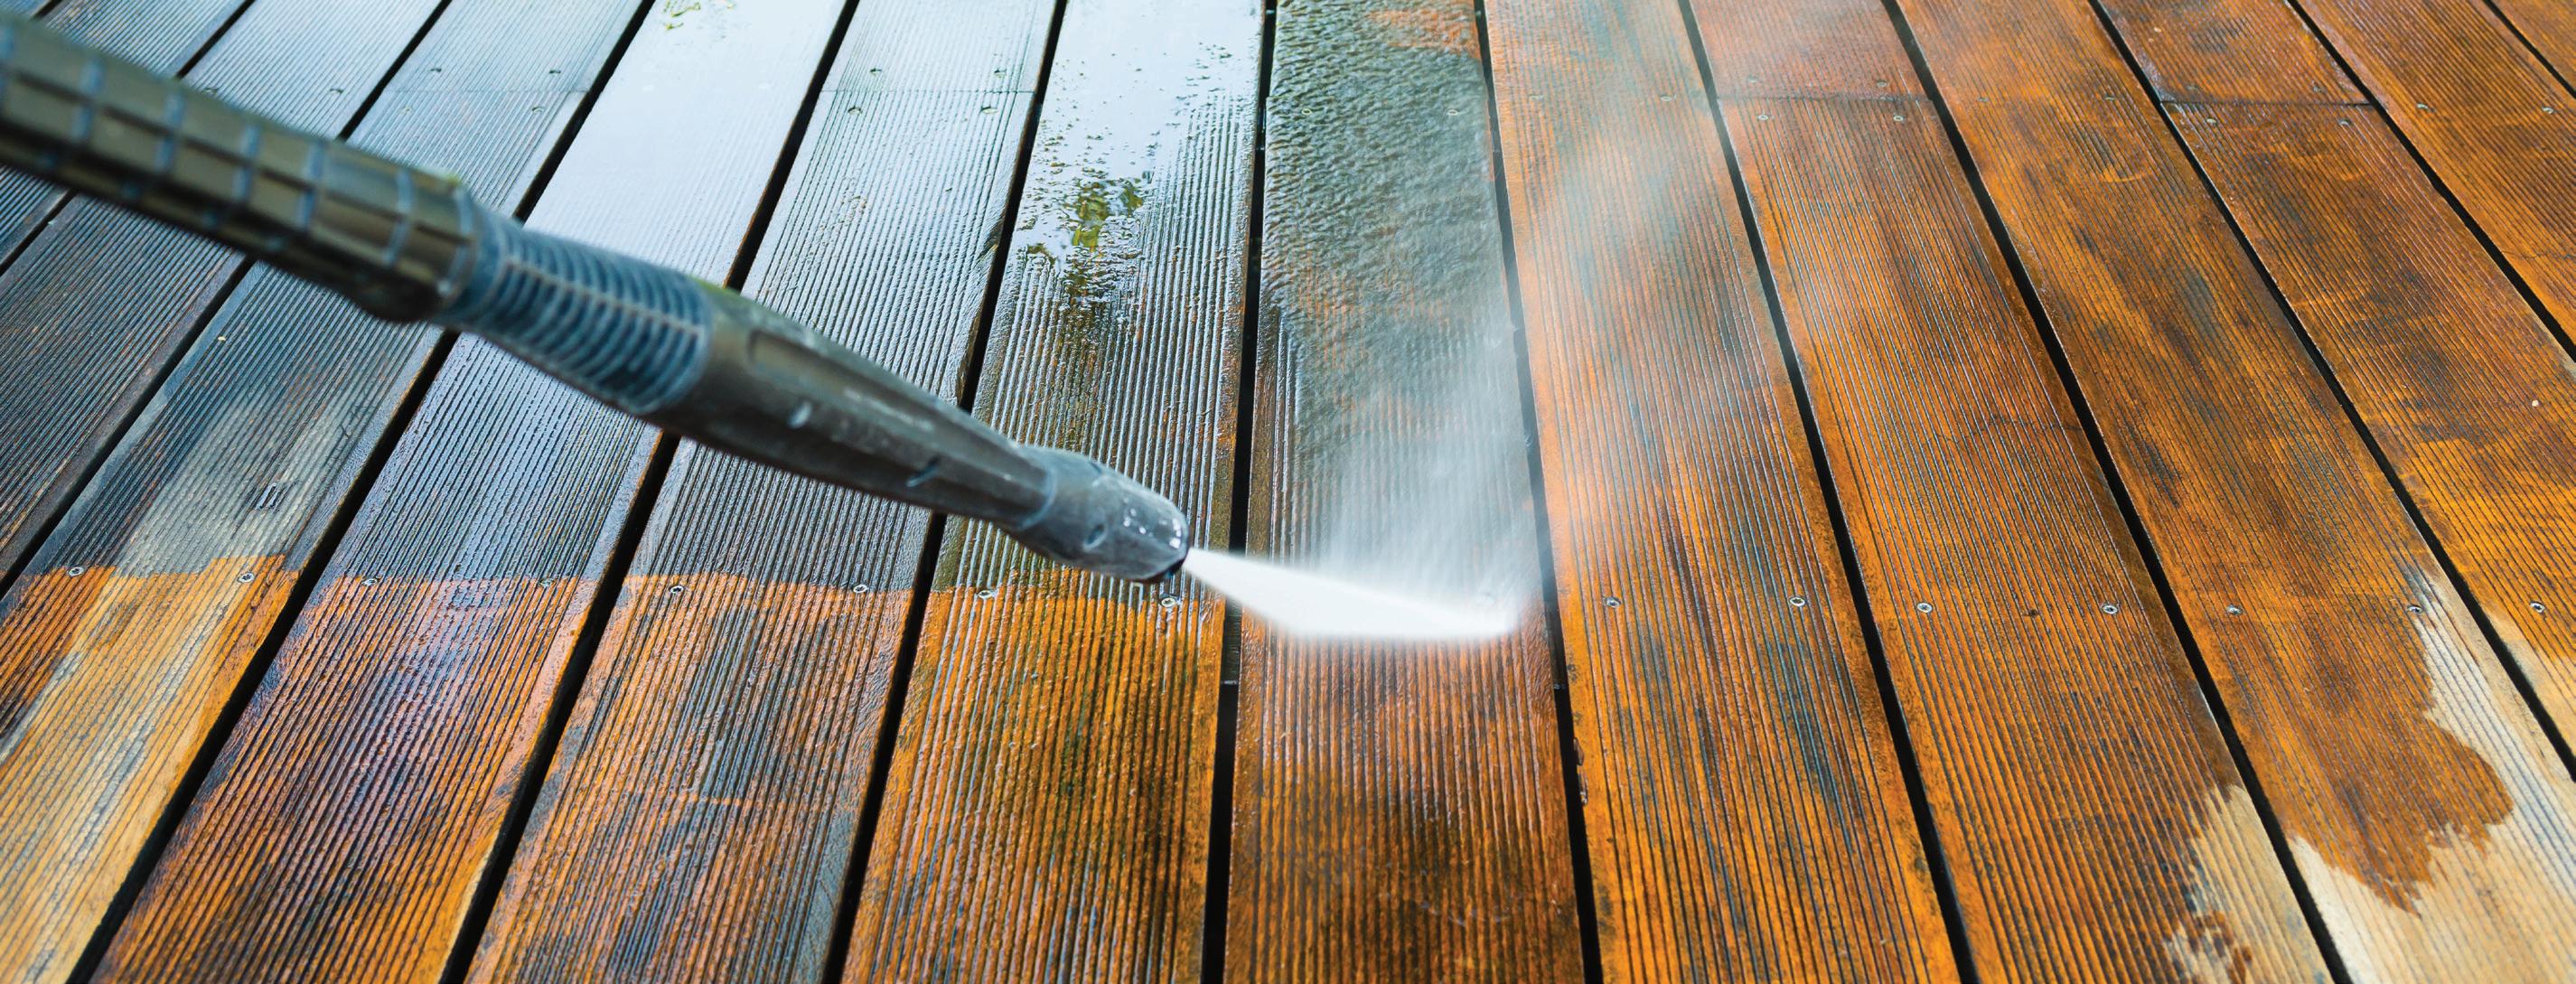
Build-up throughout the winter can leave our windows, doors and home exteriors covered in unsightly muck.
Power washing can leave it all looking as good as new. But don’t stop there: This powerful tool is also great at bringing a host of other things to life in your home and garden, including driveways, grills, outdoor furniture, decks, fences and walkways. Just keep important safety guidelines in mind:
HOW THEY WORK
Power washers may be powered by electricity or gas. Gas-powered units are usually more powerful than the electric versions. They typically deliver up to 3,000 pounds of pressure per square inch, which may be too much for certain materials. That’s why it’s important to match the power of your equipment with the job: Vinyl siding can withstand that level of pressure, but aluminum, soft-grain woods and stucco are only rated to 1,500 PSI.
PREPARING TO WORK
Cover items like air conditioner compressors and light fixtures around the home’s exterior. Protect nearby plants, too. Note the location of outlets and windows, covering sockets with tape and then avoiding those areas. Put on safety gear before engaging the power washer, including work gloves and safety goggles. Pre-wash the exterior with a brush or spray in order to remove loose debris, dirt and mildew. Keep the wand at least six feet away from electric wiring, and stay away from cracks and holes in the exterior.
GETTING UNDERWAY
Mix water and detergent, following manufacturer directions, then attach the power washer to a garden hose. Next, attach the preferred wand or extension to the sprayer. Test the power washer from a distance of three feet back, making slight adjustments until you can clean without creating surface damage. Once you’ve completed the job, turn off the washer and disconnect it from your garden hose. Rinse off any excess soap before storing.
RENTING OR BUYING?
Power washing equipment can be rented through many home improvement and hardware stores. That’s a smart choice when doing annual cleaning of a home exterior,
deck or driveway, since you’re saving the cost of buying an expensive piece of equipment that you won’t otherwise use. It may make sense to purchase if you have more regular jobs.


When to Plant Your Garden

It’s easy to get overexcited, but some seeds aren’t ready to be sown.
Year-round gardening has never been easier with indoor planters and greenhouses. But there’s nothing like a traditional garden, which provides fresh flavors and a chance to enjoy the outdoors. Just be aware that

many plants grow best when planted at a certain time of the year.
KNOW YOUR ZONE
The U.S. Department of Agriculture provides information on growing zones, based on climate and regular weather patterns. You may have to wait until later in the year to plant or, in some cases, your options may be restricted. You’ll also need to study the needs of the plants you’re trying to grow. For instance, popular garden staples like herbs, peppers and tomatoes fare better when they grow as seedlings before being transplanted.
On the other hand, things like beans, corn, peas, carrots, radishes, cucumbers and pumpkins are best planted as seeds. Whatever you choose, pay close attention to the weather. It’s tempting to jump the gun on the first sunny day, but remember soil should be warm over several days in a row before planting seedlings or seeds.
BEST IN SPRING
Start transplanting plants that started indoors each April, and start seeding projects too. Germinating plants need the extra time in the ground. Beets, beans, carrots, corn, lettuce,
cucumbers, melons and onions should be planted in April. Cabbage is one of the easiest things to grow; it’s not too late for peppers and tomatoes, either. If all goes well with peas, they could ready for harvest by May.
EARLY SUMMER
Unfortunately, a check of planting zones shows that many Americans live where April still brings freezing temperatures. That could mean waiting, or being prepared to cover your plants when wintry weather threatens. Most of these plants will thrive in May, if the temperatures where you live mimic those from April elsewhere. Plant beans, squash, melons and cucumbers as temperatures continue to warm in May.
HOTTEST MONTHS
Some plants simply love summer’s heat, including zucchini and summer squash. Plant them in June, with an expected harvest late in July or in early August. Choose bean varieties like Kentucky Wonder, Contender or Topcrop in June and they may be ready to eat before mid-July. Lettuce and carrots can be planted until very late in the summer.
Clothes
continued from page 5
PACK IT AWAY
Winter wear tends to take up a lot of room in drawers and closets. Storing these bulky items allows space for lighter, more spring-time appropriate items. Purchase storage containers that can be concealed in the back of closets or under the bed, since you won’t need easy access to them for many warmer months. These bins, when properly closed, prevent intrusions by unwanted odors, insects and moisture.
Cardboard boxes were commonly used to store clothing in the past, but should be avoided. They’re constructed with paper, acid and glues that can attract pests who will then potentially do great damage to your clothing and you won’t know until the temperatures start falling again.
WATCH THE TEMPS
Climate control is critically important whether you plan to keep winter clothes in your closet, under the bed or in another storage area. Any space must be properly ventilated, cool and dry – with moisture being the most important element to guard against. Avoid keeping things in an unfinished basement, attic or most garages, because they don’t include important safeguards. Weather extremes and potential pest infestations in storage areas that are not climate-controlled can lead directly to permanent damage to your clothes. If it’s increasingly difficult to find room for everything, consider donating some items to charity.


Staying Cool For Less
Warmer months don’t have to mean higher electric bills.
It’s that time of the year when many people’s air conditioners ramp back up to constant use. That often leads to far more expensive utility costs. Luckily, there are a number of recommendations from the U.S. Department of Energy that can help ease the pain.

COOLER HOURS
Take advantage of the periods each day when it’s not so hot. That’s the best time to do chores around the house, so you don’t have to turn the thermostat even further down. You also have an opportunity to capture some cool air. Turn off the AC and open your windows in the morning before everything heats up, or in the evening as night brings more comfortable conditions. Shut the windows and close their coverings in the midmorning hours and leave them closed again until the evening in order to protect your home from the sun’s most powerful rays.
THERMOSTAT
of time. Upon return, place your thermostat back at its usual setting. Turning it down any further won’t cool the space any more quickly, and it forces the unit into a constant motion that is stressful – and expensive. Consider buying a programmable thermostat which can make all of these adjustments automatically.
AROUND THE HOME


ADJUSTMENTS
Turn your thermostat to the highest temperature that you find comfortable, in particular during the day when it will have to work so hard to cool off your living space. Adjust it to even higher temps when you are away, in particular for long periods
How you use fans, baths and showers, and the oven can also have a big impact. A fan moves air around, making it cool enough that thermostats can be turned roughly four degrees higher without a noticeable difference in comfort level. Take cooler, shorter baths and showers — and try to schedule them during the coolest part of the day. Vents and fans can also help evaporate the associated humidity more quickly. Finally, limit the use of your oven, since it can heat up the entire house. Use a stove, toaster oven or air fryer, since they generate far less heat. Be aware of other sources of ambient heat, like clothes and hair dryers, dishwashers, curling irons and electronics. In combination, they can add up, too.
Freshening Up Outside
Greenshoot MediaGive your weather-beaten outdoor furniture a whole new look.
After a few seasons, the sitting area in anyone’s backyard, patio or balcony space can begin to look grimy and old — particularly if you live in a more humid environment. But there’s no need to buy a whole new set of furniture. With the right preparation, the right paint, favorable weather conditions and a little elbow grease, you can get it all looking good as new.
CLEAN SURFACE
Make sure you have a clean surface, otherwise the paint won’t properly adhere to wood, metal or plastic. Wipe away all dust and dirt, as well as any rust or old paint flakes. Try to remove or smooth over any other imperfections. For wood, lightly sand before painting. Wash everything after each step. If hardware is in place, remove it and label everything for easy reattachment later.

RIGHT TOOLS
Make sure you have the right tools before work begins. For instance, brush-on paint may require a pan and stir sticks. You may also need rollers or smaller brushes to get paint in tight spaces within the furniture. Table tops and bulkier items are more easily painted with large rollers. Invest in gloves, painters tape or masking tape, drop cloths and protective eye wear, as needed.
MANY CHOICES
There’s a difference between paints formulated for indoors and outdoors, and plastic furniture requires its own special products in order to bond properly. Make sure you buy the right version. Brush-on paints work best with primer, and make sure both are applied smoothly. Thinner coats go on more easier, while also drying more quickly. Two coats is usually a good rule of thumb on any painting project. There’s no need for primer if you choose a spray paint option. Keep the can the recommended distance from the furniture as you paint, working in bursts to avoid drips.


WHERE YOU PAINT
Check paint can guidelines for temperature ranges, then pay close attention to the weather forecast. Some formulations won’t adhere if it’s too hot or wet outside. Make sure
you paint in a well-ventilated area to avoid the accumulation of potentially toxic fumes. A shady spot will give you a break from the heat while encouraging the paint to dry more evenly. Don’t forget to hydrate!


Keeping Mosquitos Away
There are natural options instead of potentially dangerous chemicals.
Some insects, like pollinators, are welcomed in any backyard or garden. But others are most certainly not — including pesky mosquitoes that seem to appear out of nowhere as temperatures rise each year. Here’s how to fight back, the natural way.
INSIDE THE NUMBERS
Disease-carrying mosquitoes are actually a huge problem globally, killing hundreds of thousands of people each year. That’s more than any other animal or insect. They feed on blood from unwitting host animals, then transfer sometimes deadly pathogens as they move from bite victim to bite victim. Among the most serious diseases associated with mosquitoes are malaria, West Nile virus and dengue fever, but there are many others.
are popular repellents, but often rely on chemicals to do the job. Zappers can be loud and unsightly. That’s why planting certain plants to keep mosquitoes away has become a growing trend. Marigolds and lavender, for instance, emit a smell that drives away these flying pests. Place these hardy plants in pots around your outdoor living space, and they will also produce gorgeous blooms. Rosemary, sage and basil are typically only thought of as herbs used for in our kitchens, but they also keep mosquitos away. Allium likewise have a strong smell that they don’t like — but, unfortunately, you and your guests might not either, since this plant is part of the garlic and onion family. Citronella and bee balm are other commonly used natural alternatives. Lemon-scented plants have also proven to be useful for many.
OTHER OPTIONS


Studies show that mosquitoes are more attracted to people with Type O blood, as well as pregnant women and people who are breathing heavily. Sometimes, it’s simply a matter of timing. You’re most vulnerable to a bite around dusk and dawn, as mosquitoes virtually disappear during other parts of the day.
KEEPING THEM AWAY
Sprays, candles and bracelets
Sometimes using plants to make your outdoor space inhospitable to mosquitoes simply isn’t enough, in particular for those who live in humid climates. If you’re still being hounded, be on the look out for standing water in nearby places. They’re breeding grounds for more mosquitoes. Wear light, breathable long-sleeved clothing and cover your legs. Use overhead fans, if possible, to move the air around. Treat pools and water features to reduce the number of mosquito eggs, as well.
Where to Store It All

Get more out of the outdoors by putting away all that stuff.
Creating and maintaining usable and enjoyable living spaces outside often means accumulating all kinds of gardening supplies, pool accessories and outdoor dining tools, among other things. Keep it all tidy and tucked away with these fun and functional storage options.
GARDENING SUPPLIES
Get more out of your shed by hanging a show rack on the door for smaller tools and other things needed around the lawn and garden, like clippers or gloves. Hooked items can be stored on one of the sidewalls by installing a traditional bathroom towel bar. Repurpose a now-unused baby’s changing table or an old hutch for use as a potting bench.
Attach a pegboard to the wall of the shed or your garage to create a quick and easy organizational hub. Customize it with baskets, shelves and hooks to store away anything you need for outdoor gatherings or
gardening tasks. Place a rolling basket or cart nearby to transport everything.
POOL ACCESSORIES
Mount shelves in your garden shed for clean towels. Plastic stackable storage bins are a great option if you need to round up floaties, pool toys, diving rings and other small items. Pool noodles and skimmers can be tucked away in a wood pallet after it’s been turned on the side. Install coat hooks on the front to dry bathing suits and towels, and to store masks and goggles. For larger pool rings, place shorter flag poles beside the shed.
FOOD AND BEVERAGE
Convert a storage cabinet or hutch into a serving station or bar. The lower shelves or drawers can be used for storage, or remove several of them to create space for a cooler or small refrigerator. Stemware can be hung from a rack at the top. Those who are more adept at woodworking can create more elaborate things like a hanging bar with wood pallets.
ADDITIONAL STORAGE
Newer outdoor furniture options often have modern storage features,
so be on the lookout. Other existing items like beverage carts or raised garden planters can also be updated to help keep your space tidy and neat.
SIDING ROOFING
GUTTERS WINDOWS

A small unused bookcase can be turned into a bench by turning it on the side and adding a cushion.
There’s never been a better time to upgrade your home to the beauty and convenience of maintenance-free vinyl or steel siding, vinyl windows, gutters & various types of roofing.


Thinking About Solar?
Greenshoot MediaIt’s easier to get on board as this new technology becomes more affordable
People are increasingly turning to solar in order to save money and guard against outages. In fact, a system was being installed every few minutes in the U.S., according to one solar-advocacy survey. Because it’s all still so new, however, you’ll need to do your homework to figure out which option is right for you.
HOME SUITABILITY
Customized Insurance & Risk Reduction Strategies
There are a number of factors to consider when deciding if your particular home is suitable for solar. Generally, homeowners need to have a recently installed new roof that faces south, and isn’t subject to long periods of shade. Individual companies may have their own additional requirements, depending on the specific equipment they use.
FINANCIAL CONCERNS
Solar arrays can be expensive, but there are a variety of purchase options. They can be financed through a loan, they can be leased or they can be sold outright. With leases and loans, monthly payments are more affordable — sometimes less than your regular electric bill — but you are required to sign a long-term contract. Power-purchase agreements allow customers to buy the electricity
produced by the installed panels at a set price.
Purchased panels may qualify for special tax credits, while lease and power-purchase agreements do not have this option. Net metering allows homeowners to earn credit on their monthly utility bill for power the panels feed back into the larger electric grid. So shop around and compare the options with local installers. Pay close attention to monthly and upfront costs, as well as whatever tax benefits are available.
IS IT SAFE?
The U.S. Department of Energy recommends that homeowners hire a certified electrician to inspect the system before it goes online. But rest assured, the solar industry is well regulated, and that includes protecting the safety of homeowners. The panels have to meet testing and inspection standards, and installers have to meet strict qualifications. Installed panels must meet local electrical, fire and building codes.
NEED MORE INFO?
The U.S. Department of Energy’s Solar Energy Technologies Office has created a helpful primer called the Homeowner’s Guide to Going Solar. They cover the basics of how the technology works, how to determine your house’s suitability for installation, and the safety and financial considerations that are involved. Visit bit.ly/3rIT1xk.
Is Your HVAC Ready?
Your air conditioning unit has been sitting unused for months, while winter held sway.
Spring’s return is the perfect time to pop the hood and make sure your HVAC is ready to roll for summer. Checks will need to be made inside and out. You don’t want to find out that it’s not working when you need air conditioning the most.
SPRING CHECKLIST
Check outdoor components, cleaning out any branches and leaves that have accumulated over
the winter period. Sometimes small creatures may have even made a home inside the unit, and they’ll need to be removed. Be careful when clearing the area so that critical metal pieces aren’t bent or broken. Corrosion is also a concern, particularly with older units or with homes in coastal or very humid areas. Inside, make sure all of your registers are opened and unobstructed. Examine the inside unit and duct work, keeping a sharp eye out for cracks or leaks. If you find anything concerning, call an HVAC technician to have a look before re-engaging the system.
TURNING IT ON
After your unit has passed all its checks, turn down the thermostat and make sure air is arriving through every air duct and at the set temperature. If your HVAC struggles to reach the desired setting, it’s time to call an expert. The same is true for anyone who doesn’t feel confident in diagnosing some or all of these presummer diagnostic issues. Some companies offer contract service plans, making the whole process less stressful. They can also be more cost-effective, since potential problems will be identified before they become a bigger concern.
DUCT SYSTEM
Consider having your air ducts cleaned by a professional. Ducts that are free of dust and debris will move cool air around the house more freely, without spreading allergycausing particulates like dust, mold, dander or fungi. Changing your air filters every month will also help achieve cleaner air while saving money. Dirty filters cause the system to become overworked, shortening your system’s lifespan. It also increases your immediate costs in the form of higher utility bills. Check your owner’s manual or the instructions on the filter to find out more.


