12 minute read
Expanding Materiality and Utility
EXPANDING MATERIALITY AND UTILITY Hayun Surl
Editors: What is the most challenging aspect of working in clay? Hayun Surl: I believe the most challenging aspect of working in clay is the process of understanding its materiality. Making, drying, glazing, and firing—clay is a very time-sensitive medium. More than administrating the process, I am listening and reacting to what clay needs. This reciprocal process is what leads to good work. Perhaps this is what keeps me humble and constantly motivated to do further research with ceramics.
Advertisement
I am trying to observe the relationship between individuals and the built environment and how individuals affect environments. Regardless of how we think about society, it is apparent that while we constructed it, we are also constantly influenced by it. I practiced pottery as an apprentice in Korea and am currently a graduate student in ceramics at Ohio University (OU) in Athens, Ohio. Living in Korea and now in the US, I have grown to appreciate the differences in perspectives between these two cultures along with the many individual attitudes and outlooks that exist. Under such circumstances, I always challenge myself to communicate with the public outside of the boundaries of art. Some people say that art is the process of representing one’s ego, but I think art should also resonate with the viewers. I think making something that could build common ground among segregated populations is one of the most challenging aspects artists face, and it is also the most important.
Eds: What role does color play in your work? HS: Color is like clothing. I often think about what color would be good for each form even while working with wet clay. Sometimes color accentuates the contour of the piece or the texture on the surface. It can add weight or sometimes make it visually lighter. Moreover, I am fascinated with glaze because the color palette cannot be simplified into one color. If I investigate a yellow glazed surface, I see many yellows. That is true for all colors. Color also plays a role in creating balance with the form. For instance, I enjoy firing pots with large surface areas in wood or salt kilns. Simple and voluminous surfaces serve as nice canvases that accentuate and counterbalance the variety of color created by nature.
Eds: What do you do to push yourself to stay engaged and develop new forms? HS: When it comes to developing new forms, I usually think about the basic property of clay as a material. Then, I try to find connectivity between tradition and contemporary methods.
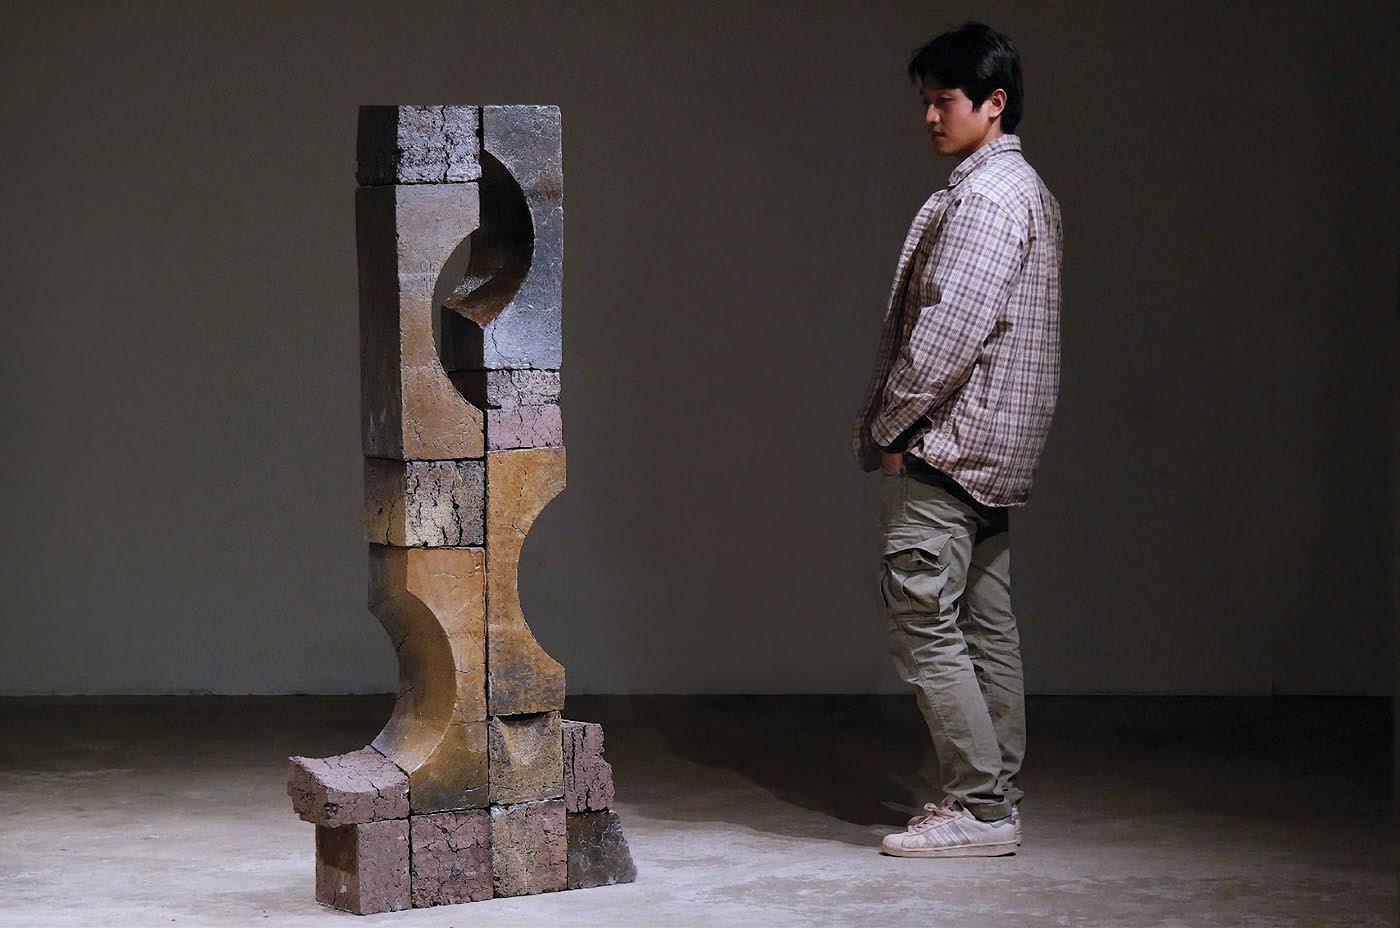
One of the important properties of clay is its plasticity, which enables us to record traces of techniques and touch. One of my approaches is using indigenous clay. Although producing work with local clay is not typical, especially for sculpture, I believe that clay’s dialect (vernacular quality) needs to be explored in order to find new possibilities.
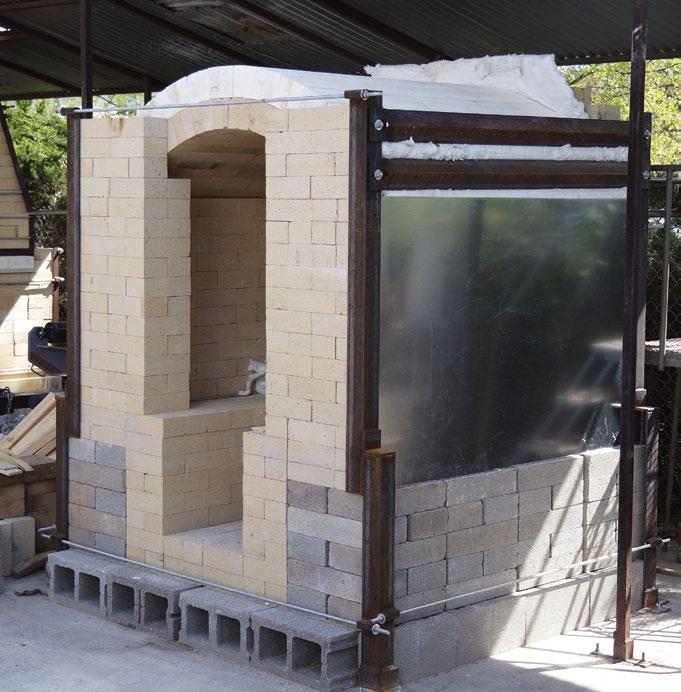
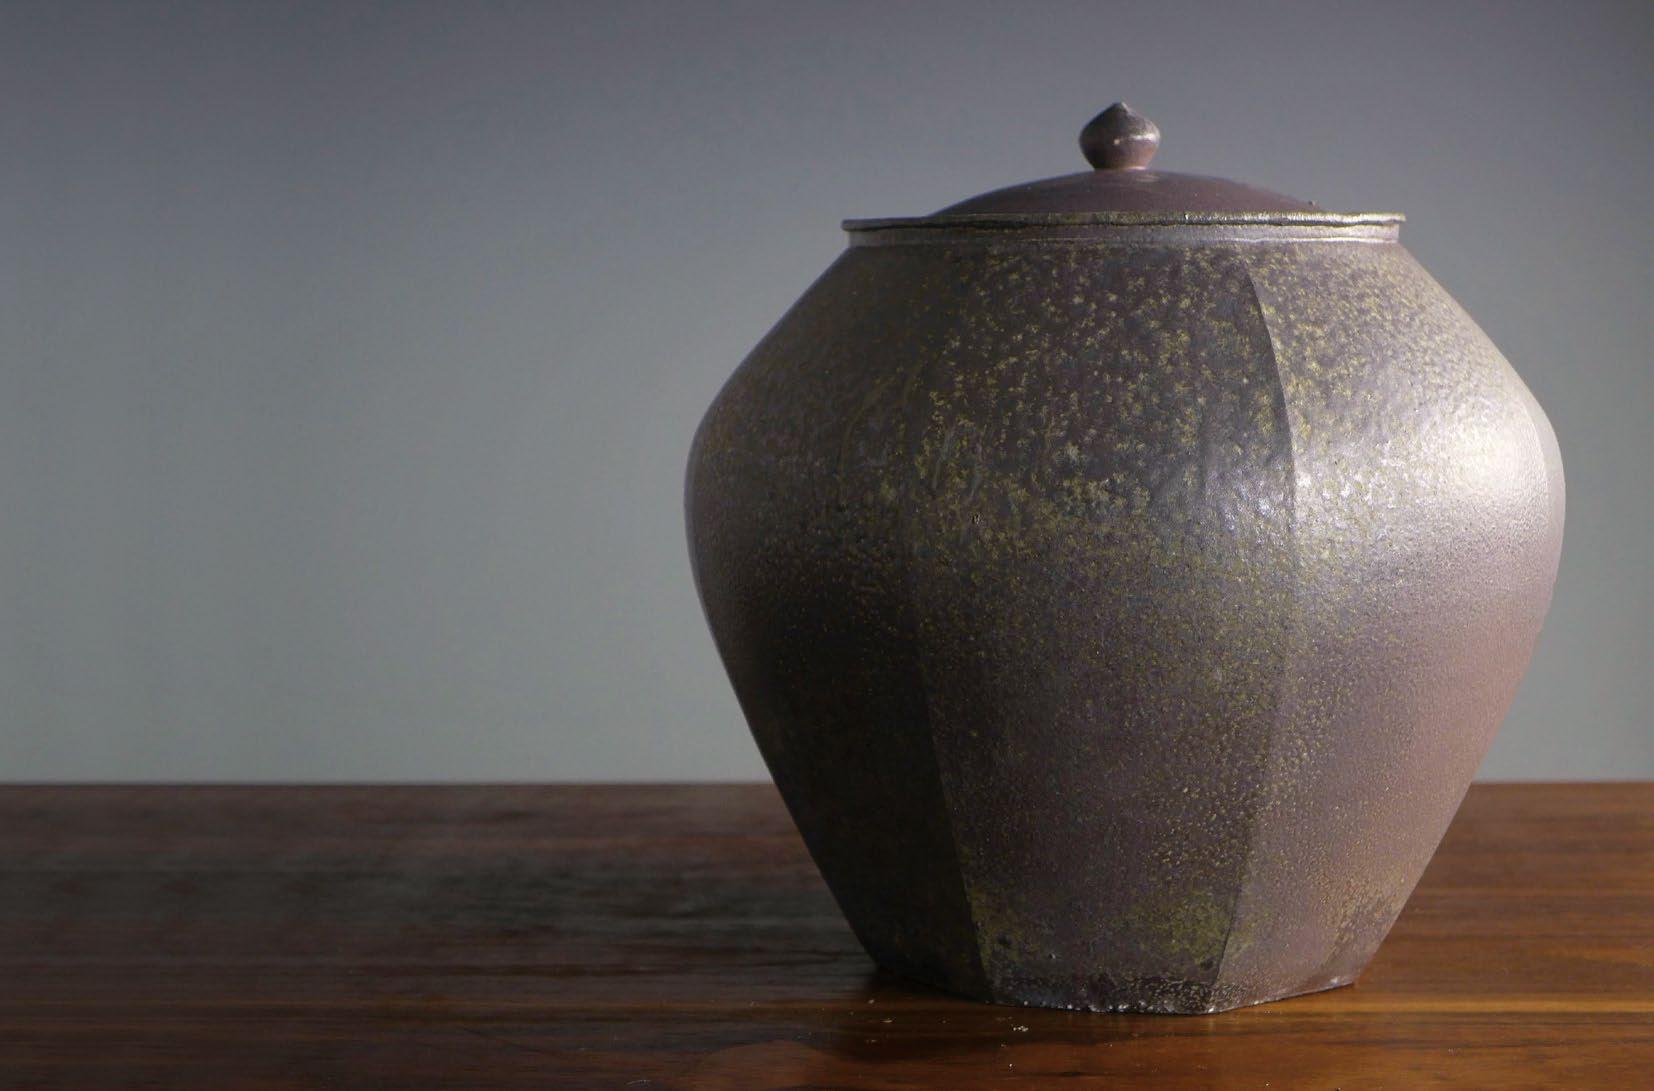
Opposite: Octagonal jar, 10¼ in. (26 cm) in height, iron-rich clay, wood and salt fired to cone 9–10, reduction cooled, 2018. Above: Reduction cooling gas kiln building in progress at Ohio University in Athens, Ohio, 2021. Below: Hayun Surl with Monument, 5 ft. 6 in. (1.7 m) in height, iron-rich clay, salt fired to cone 7, 2020.
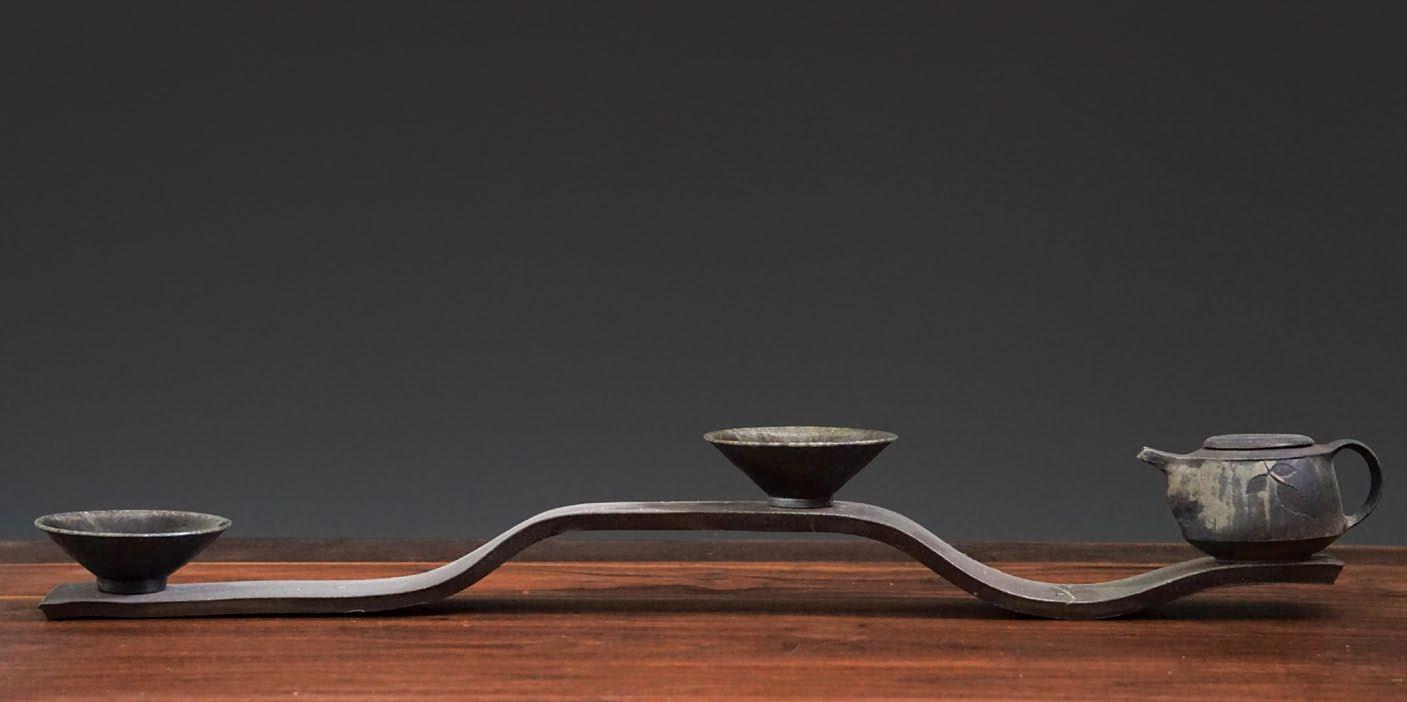
Flow, to 26½ in. (67 cm) in length, iron-rich clay, wood and salt fired to cone 9–10, reduction cooled, 2018.
Materiality holds a transcendent property that is effective in creating a common ground with viewers. As a result, I decided to continue to apply local clay to my sculpture to see what kind of narrative it would embrace and how it would resonate with viewers.
My current work involves using three-dimensional design software, which I am comfortable with because of my background as an interior designer. Historically, clay has been the material that shows instant reaction to human touch. This modern approach could be another way to achieve this effect beyond the relationship between the human hand and clay. I use three-dimensional design software to create something in the digital world that surpasses the limitations of time and space in terms of modeling. After I finish the object in the digital world, I generate the prototype using a three-dimensional printer and convert it into clay. This transition from bits to atoms and applying decoration using indigenous clay is a very exciting and fresh approach for me.
Eds: Could you talk about your recent grant award to build a wood kiln on the OU campus? HS: I am currently building a hybrid gas kiln for reduction cooling. I was fortunate to have many reduction-cooled firing experiences during my apprenticeship in Korea and decided to reinterpret this ancient technique with a contemporary approach.
This reduction-cooled technique originated in the 4th and 5th centuries of the Gaya period (prior to the Silla period) in Korea. It was only performed with a wood kiln, which requires a high temperature (2200–2350°F (1204–1288°C)) and pressure along with introducing carbon while the kiln cools to sintering temperatures. I wanted to ease the difficulty of the traditionally arduous firing process by increasing its efficiency and accessibility to ceramic artists.
I decided to conduct this project because the US ceramics field embraces diversity and an experimental spirit. OU is recognized for experimenting with different types of kiln designs in a contemporary way and studying their structural advantages.
Once the kiln is built (May 2021), it will remain alongside other types of kilns at OU. It will expand opportunities for research for future students and become a tool that will hopefully trigger different ideas for the next innovators.
Eds: What is the most valuable advice you’ve received so far as a ceramic artist? HS: I have been very lucky to meet several great mentors on my way as a ceramic artist. Particularly, I remember one comment from my OU professor Brad Schwieger, “I know you are a potter. What else?” It was very confusing at the time, and I remember thinking to myself, “I thought I was admitted to this school as a potter?”
Schwieger’s artwork bridges the pottery and sculpture world. Additionally, he studied pottery in Japan, so he has a better understanding of the different perspectives between Eastern and Western art. He has been consistently pushing students out of their comfort zones, perhaps to find other parts of themselves.
Korea and the US have different perspectives in terms of seeing the object. In Korea a person is more likely to perceive the form as an object itself. It often does not require further explanation from the artist. However, in the Western contemporary art world, artists’ ideas and narratives are as significant as the object itself. This allows many potters to embed their messages in the surfaces and forms of their work. However, I felt limited expressing myself using vessel forms because of my cultural heritage and my perception of pottery as utilitarian. This is when I started to explore my next steps by making sculpture, and I have now found an inner balance that allows me to appreciate both function and the art of ceramics.
Onggi Making Process
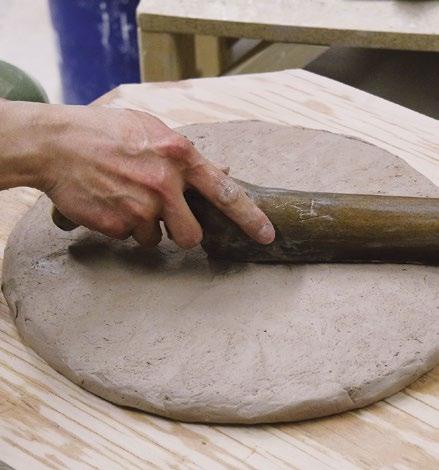
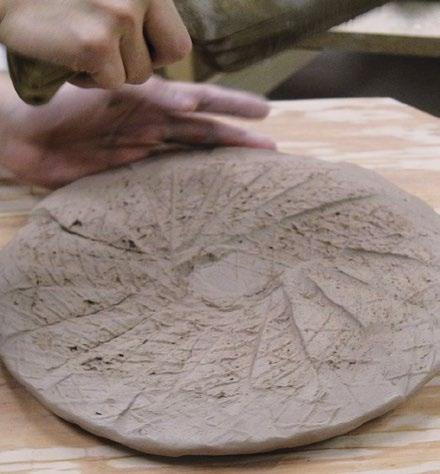
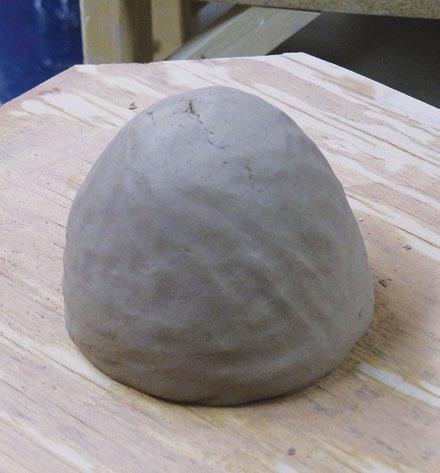
First, take three pounds of clay and tap on the center of the bat (1). Slam the clay toward yourself while rotating it to make a round slab for the bottom part of the Onggi (2).
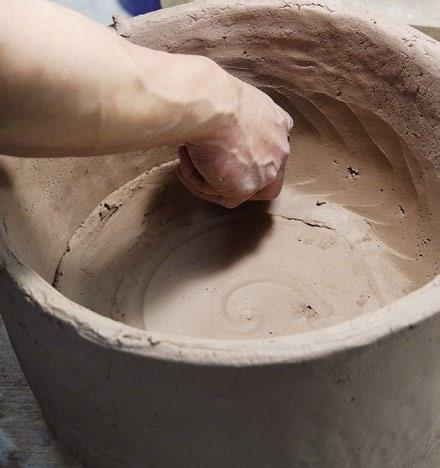
Now, even out the thickness by first using the tool called BangMang-Yi (3). After, smooth the surface using water and a rib. Remove the excess clay (4) and be sure that the size is what you want for the bottom of your Onggi.
Next, make the slab for the wall part of the Onggi. Take about five pounds of clay and make a cube shape by tapping it on the floor or table. Then, stretch it by slamming it down toward yourself until it is about the length of your hand. Once you get the proper length, hold the slab by each end. Begin to stretch the clay horizontally by slamming it to the side, switching between left and right.
It is important to have the clay slab contact the ground or table gradually from one side to the other in order to have an even thickness. After you have achieved the length of the slab you want, make sure to smooth the stretch marks on the surface using your knuckle or a rib to avoid cracks.
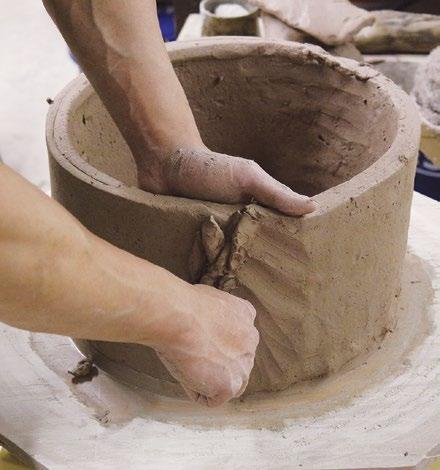
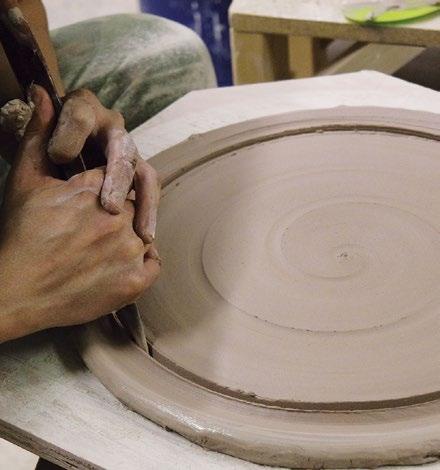
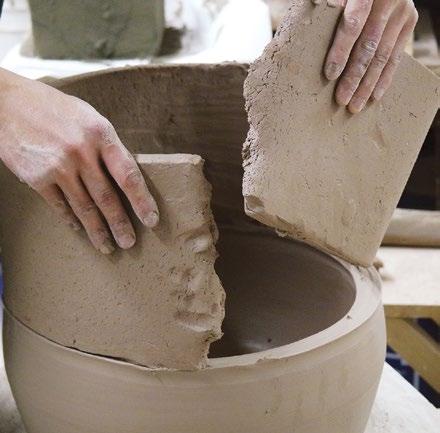
Once you get the right length and width for the wall slab, attach it to the bottom slab. After setting the wall slab on the bottom slab, seal them properly using your finger and rib (5). With the slab attached properly, secure the bond between the bottom and wall slab by adding a 1-inch-thick coil. Grab the coil with little bit of water on your index finger and use your knuckle to fill in the seam between the bottom and wall slab as you are rotating the wheel (6). After you have successfully applied the coil, use the rib to smooth the surface.
For the next step, clap the clay between your hands, one hand outside and one inside the pot—this helps even out the clay thickness. It also helps center the clay while it is rotating on the wheel. Traditionally, Onggi makers use tools called Surae and Dogae for the same purpose, but I found it to be more comfortable to use my hand when I am making a smaller sized Onggi.
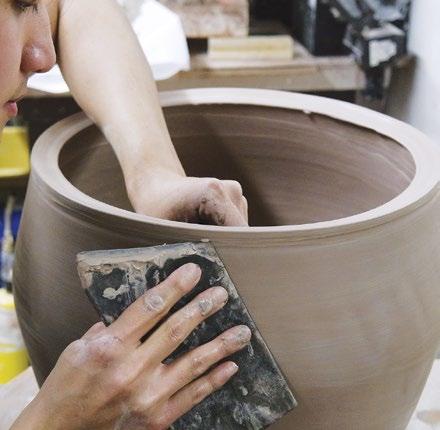
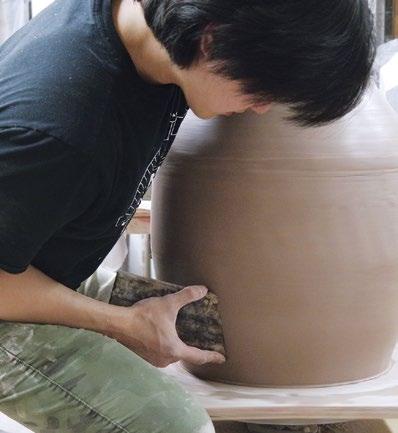
Next, thicken the rim. This will ensure there is enough width for the next slab to sit on. Now is the time to start forming the curved shape of the Onggi. Hold one rib against the inside and one rib opposite it against the outside of the clay wall (7). It is pretty much the same technique as when you are shaping the pot using your fingers, but you can limit the amount of water by using ribs instead.
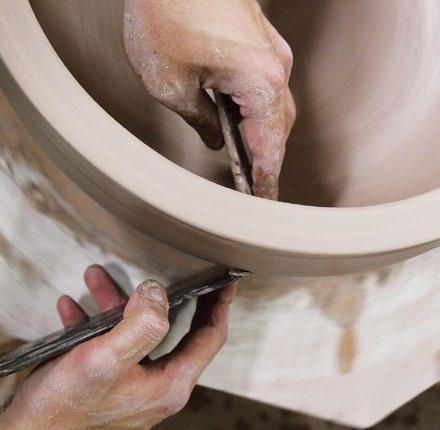
Now that you have established the lower part of the Onggi, repeat the same stacking process two or three more times, adding wall slabs (8) until you reach the height you desire. After establishing the height, even the thickness of the rim using Onggi tools (Surae is the outside padding tool in image 10, Dogae is the inside padding tool in image 10) (9–11).
1 2 3
4 5 6
Thickening the rim is important because it will support the pot’s body while shaping its form using rib tools on the inside and outside. Next, go back to the rim and finish any detail work using water and a leather strap to smooth and compress the clay.
Lastly, make sure you remove all the water that dripped inside the pot and any on the outside. As you may know, too much water can lead to cracks forming in a vessel.
The advantage of this slab building (Taryum) technique is that it needs very little water to efficiently form a vessel’s shape.1 This technique can be used to prevent collapsing and shorten drying times, which benefits the forming process. Additionally, it does not need any bottom trimming since the form is completed on a bat.
Reduction Cooling in a Wood Kiln
I was introduced to reduction cooling techniques during my twoyear apprenticeship under the pottery master, In-Sung Hwang (Studio Daebuyo), in Goesan, Korea. One of the important parts about this technique is that it ensures constant interior gas/fuel/ atmosphere pressure with its completely sealed exterior. This pressure and lack of oxygen triggers a strong chemical reaction between the glaze and clay body.
The process starts once the kiln has reached the maximum desired temperature. Once this has been achieved (typically about cone 11–12 in the front, cone 8–9 in the back for my firings), place a bag of wet pine-tree branches with salt into the firebox—approximately enough to fill a 15-gallon bag.
Then, to keep oxygen from infiltrating the kiln, immediately close the chimney damper and seal the surface of the kiln using wet clay—especially the seams along the door brick. After the kiln is sealed, the carbon and metal oxides in this high-pressure kiln atmosphere will go through a chemical reaction. Substances in the clay body such as silica and iron oxides react with carbon from the wood, creating soot on the surface.
Wood kilns usually enabled this reduction-cooling technique due to the structural property of having an interior firebox. Burning wood inside of the kiln means that the carbon emissions are created internally. Wood-fired reduction-cooled pottery has a distinguishable beauty created by wood ash, the flow of the heat, and the clay reaction with carbon. Each vessel’s appearance is unique due to these factors.
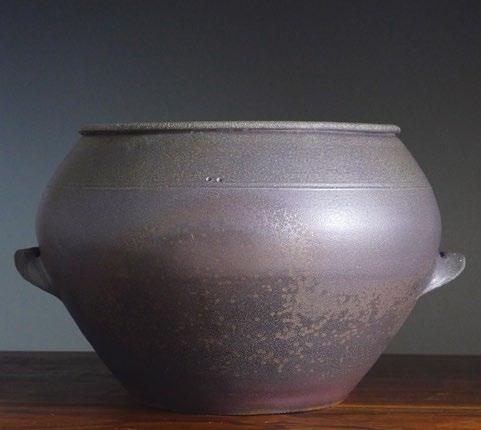
This process can yield significantly different textures not just by changing the surface like glazes, but changing the whole clay body’s color, creating a depth in its black colors (see 12).
1 Reference Videos for Making Onggi using Taryum Technique: • www.instagram.com/p/BwO3vybg9K5/?utm_source=ig_web_copy_link • www.instagram.com/p/BwO5Y3TAkj3/?utm_source=ig_web_copy_link
To learn more, visit www.yoonspottery.com and follow @yoonspottery on Instagram.
7 8 9
10 11 12
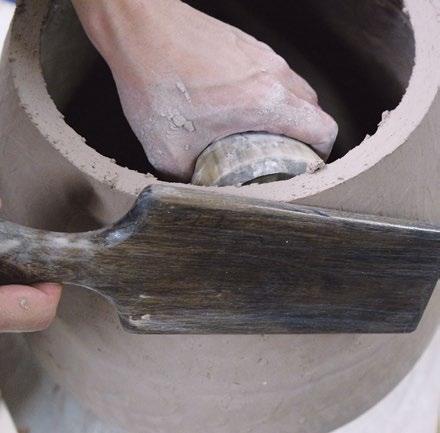
7 Center and smooth the surface using wooden ribs. 8 Attach the next slab and repeat the process. 9 Center and adjust using wooden rib tools. 10 Even the thickness of the wall by using paddling Onggi tools (Surae, outside padding tool, and Dogae, inside padding tool, shown here). 11 Form the Onggi shape by stretching the wall using wooden rib tools. 12 Water storage Onggi, 13 in. (33 cm) in diameter, iron-rich clay, wood and salt fired to cone 9–10, reduction cooled, 2018. All process photos: Rachelle Le Roy.


