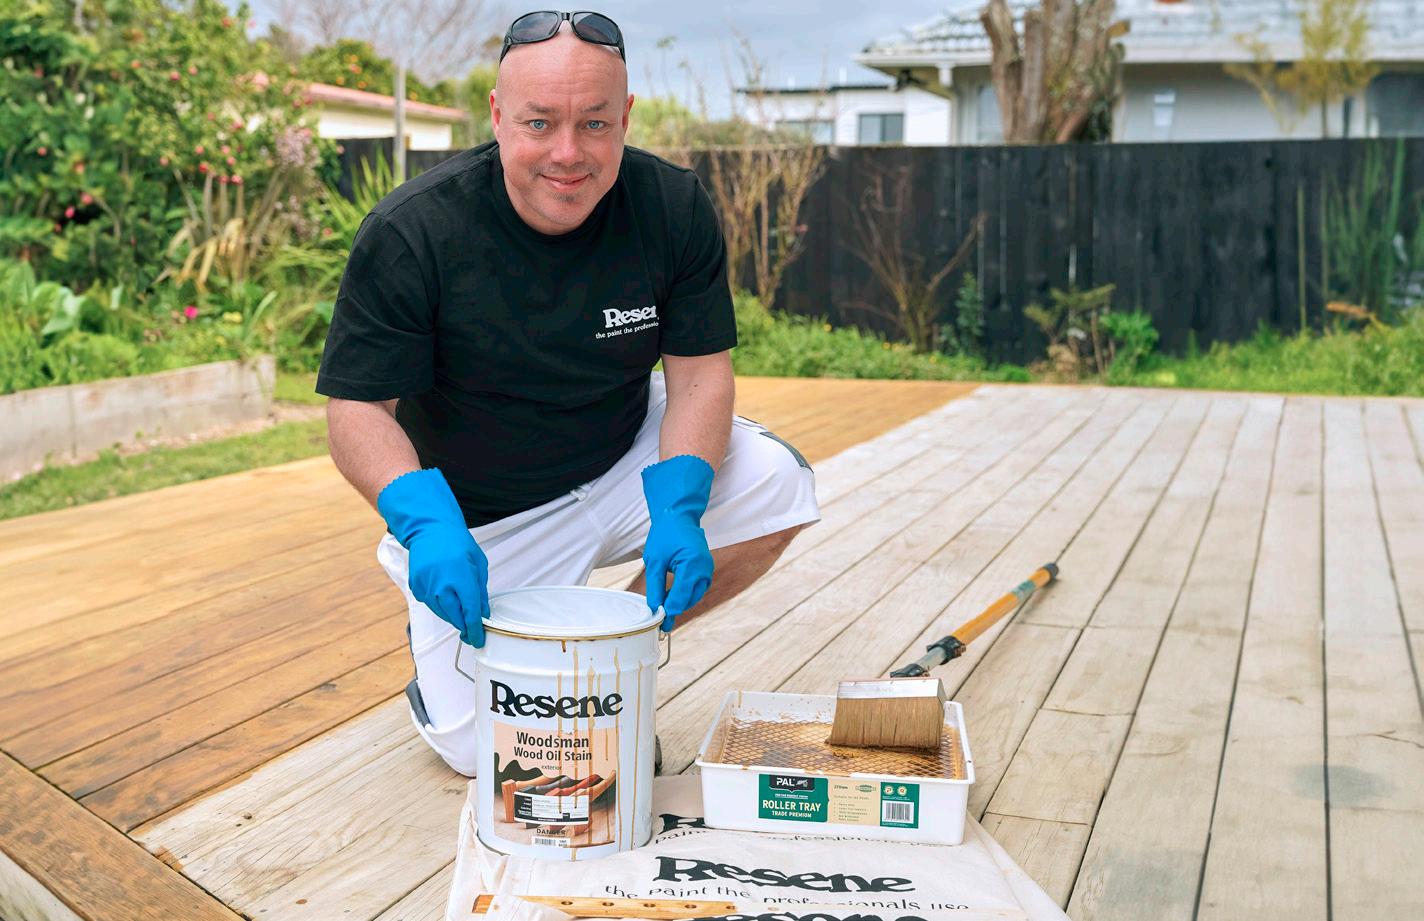
The ultimate guide to mastering your painting projects, inside and out
How to prep and paint like a pro
Decorating 101
• Tricks, tools and tutorials
• How to get started
Interior tips
• What order to paint a room
• Easy colour updates
Exterior advice
• Practical cleaning hacks
• Expert product ideas
Decorating
101
Get set, decorate!
MasterStroke by Resene is here to help you master all your paint and decorating DIY projects. Need to brush up your skills? We've got you covered with expert advice, invaluable tips and inspiring ideas to get you started on the journey to transform your home. Whether you're a seasoned pro or a complete novice, our DIY decorating manual will help you unleash your creativity, explore innovative techniques and learn clever hacks to make your living spaces truly your own. Grow your confidence with every stroke of the brush and get ready to makeover your home from top to bottom, inside and out. This guide has general information for a range of painting projects – check with Resene staff for advice for your project. Colours shown in this publication are a representation only. Please refer to the actual paint or product sample.
Painting and papering checklists
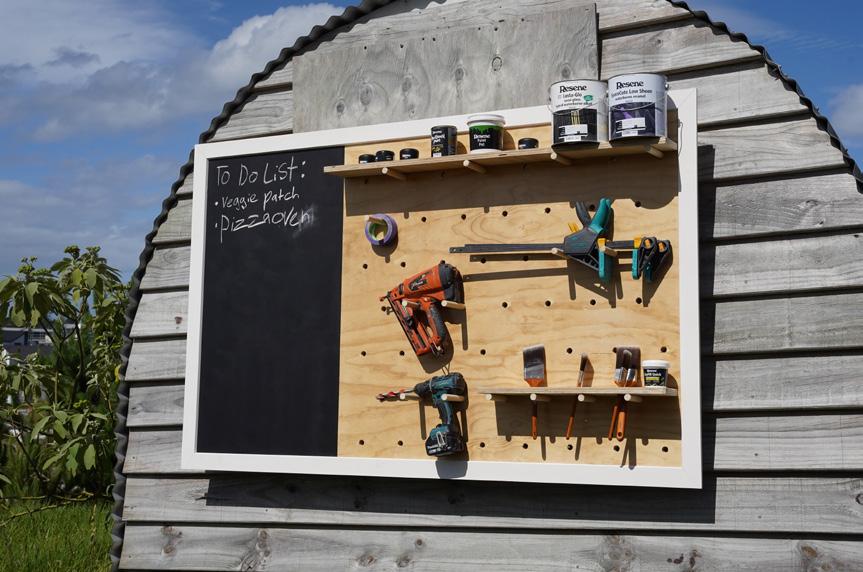
When starting a painting or wallpapering job it's often hard to remember all the equipment you will need. There's nothing worse than starting the job then finding out something is missing, meaning another trip to your local Resene ColorShop or reseller.
Papering
You will need:
• Bucket
• Craft knife
• Ladder
• Layoff brush
• Paper smoother
• Paper tiger stripper
• Paste brush
• Plumbline or level
• Scissors
• Size
• Sponge
• Stripping knife
• Resene Interior Paintwork Cleaner
• Trim guide
• Wallpaper paste
• Wallpaper trough
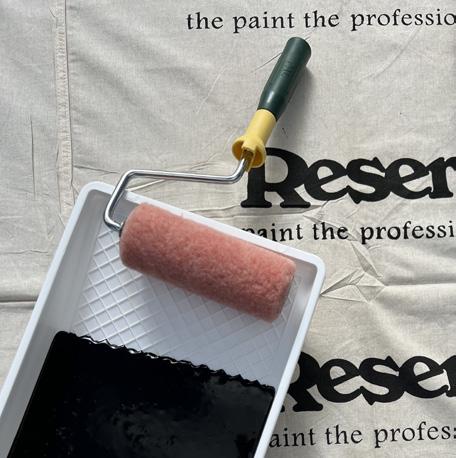
Painting
You will need:
• Extension pole
• Lint-free cloth (for cleaning)
• Paint pot
• Paintbrush
• Putty and/or fillers
• Roller
• Roller tray
• Sandpaper
• Tac rag
• Turps
You may need:
• Brush cleaner
• Dust mask
• Gloves
• Masking tape
• Paint stripper
• Painter's gloves
• Pole sander
• Putty knife
• Rags
• Resene Hot Weather Additive
• Resene Interior Paintwork Cleaner
• Resene Moss & Mould Killer
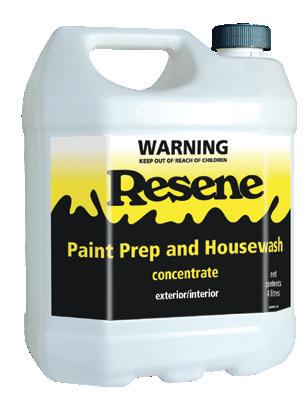
• Resene Paint Prep and Housewash and Resene Bio-Cleaner
• Scraper
• Steel wool
• Window scraper
Your guide to paint finishes
So, you’ve decided to embark on a painting project at home. While the most obvious step in the process is selecting which Resene colours to use, there’s another element you’ll need to consider. Choosing the right paints and stains can have a huge impact on how your paint job looks and wears, and there are quite a few aspects to think about before you dive in.
Not all paint finishes are the same, far from it in fact. In very basic terms, the sheen is defined as the glossiness of the finish. At one end of the spectrum is very shiny, which is a gloss finish, and at the other is a flat finish, which is very matte. It is very common to use different levels of gloss in different areas of your home, both inside and out. Gloss levels impact how the colour appears in certain light. The higher the gloss level, the higher the reflectance – that is, more light will bounce off a wall painted with a high gloss finish than a flat finish.
Typically, higher gloss paints look much cleaner and fresher, while lower sheen paints look
darker and earthier. Surfaces with a gloss finish are smoother to touch and easier to keep clean, while flatter finishes help hide surface imperfections but can be a little bit harder to maintain.
Ceilings
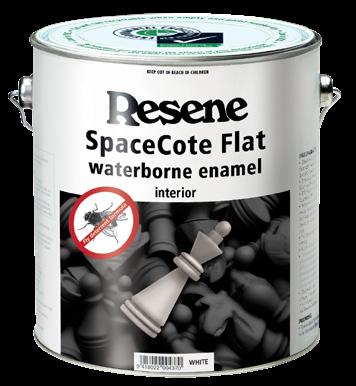
The most popular finish for ceilings is flat and Resene SpaceCote Flat and Resene Ceiling Paint are ideal. Flat finishes diffuse light, so they tend to conceal surface imperfections better than paints with higher sheen levels, plus flat finishes are better for reducing the reflection and glare from pendant lights.
Interior walls
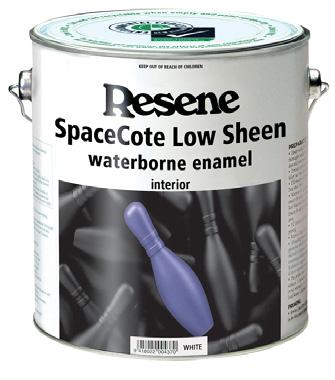
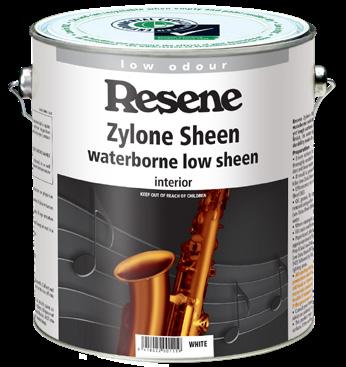
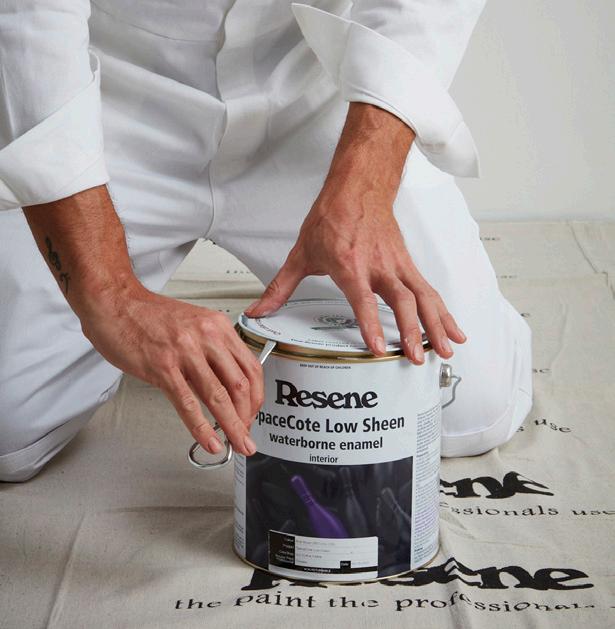
For a low sheen paint for interior walls, use Resene SpaceCote Low Sheen for the most durable finish or Resene Zylone Sheen. Low sheen paints are the most popular finish for interior broadwall areas as they create a soft cosy look while still also being easy to clean.
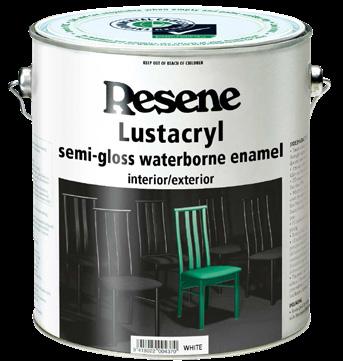
Trim, windows and joinery
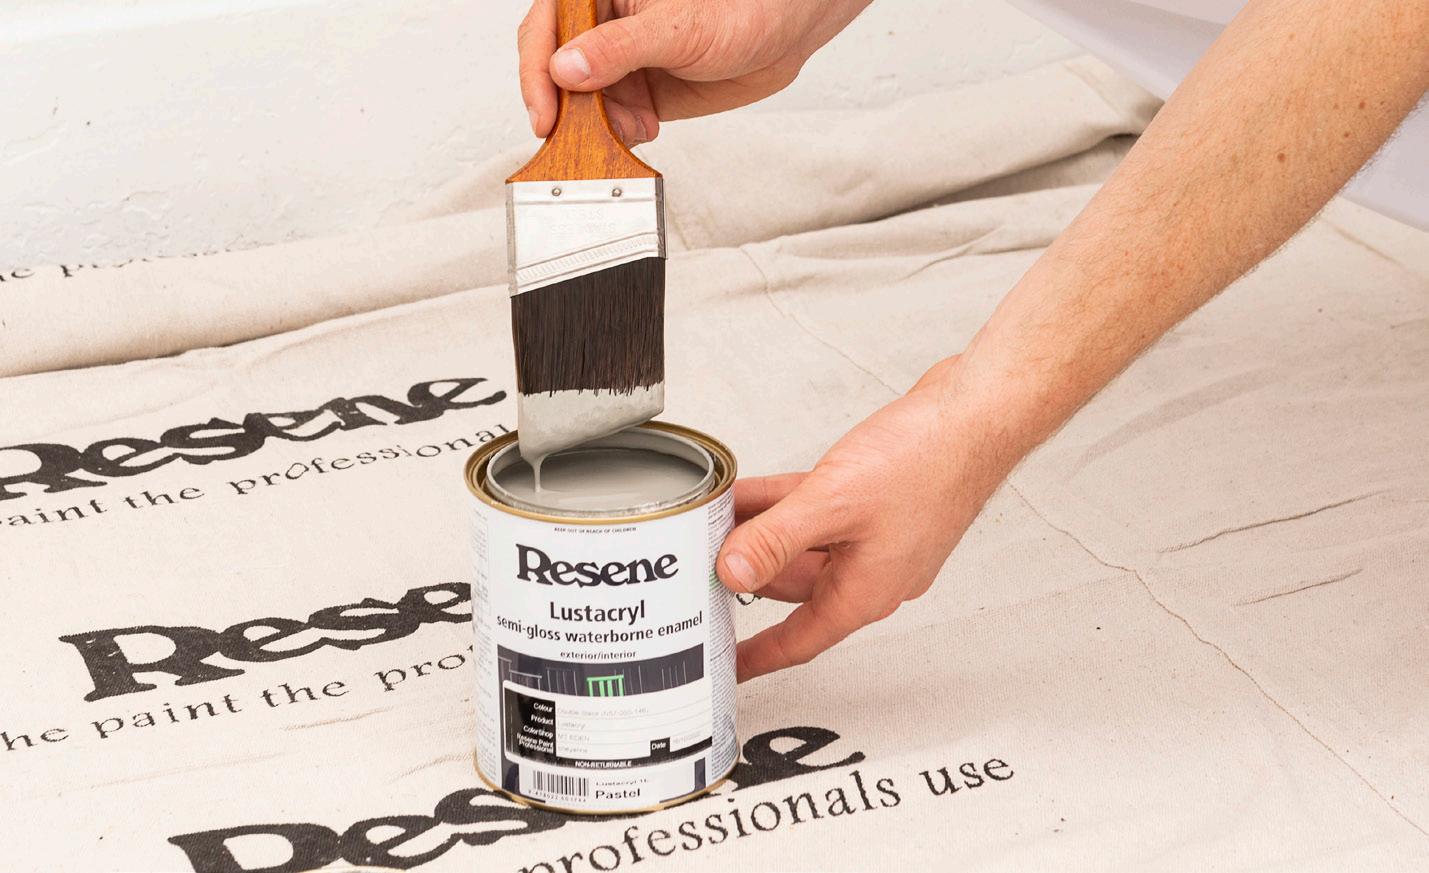
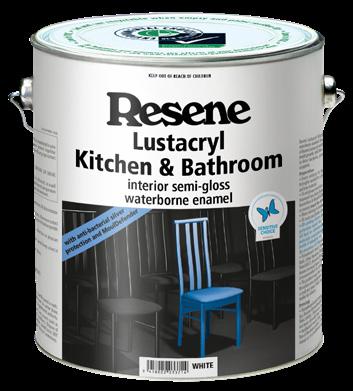
For these areas we recommend Resene Lustacryl. This Resene waterborne semi-gloss enamel is durable and easy-to-clean.
It also creates a subtle point of difference between surfaces and is also a clever way of highlighting character features like architraves, balustrades, panelling or wainscoting.
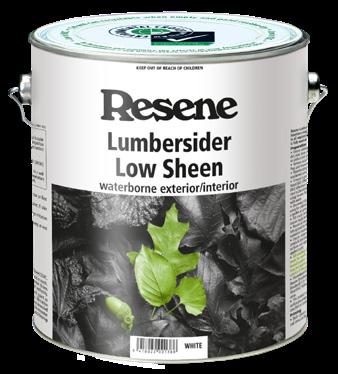
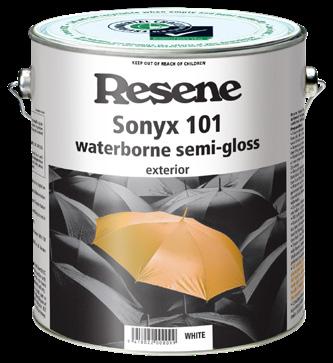
Exterior surfaces
For common rough exterior surfaces such as weatherboards, concrete and plaster, Resene Lumbersider Low Sheen is ideal. This low sheen formula is built to withstand Australasia’s harsh UV light and tough weather conditions. Smoother surfaces can be painted in Resene Sonyx
101 a semi-gloss exterior paint, that’s ideal for architectural builds, weatherboards and exterior concrete surfaces.
Still not sure?
If you need to paint another type of surface, or if you need more info, head straight into your local Resene ColorShop or reseller where you can view the sheen boards that have been created for this very reason. As well as viewing these front on, it’s also a good idea to look at the surface from multiple angles as different sheen levels will reflect the light in
How much paint will I need?
different ways depending where you’re standing. For example, some low sheen finishes may look very matte when viewed straight on, but can show more sheen when viewed from another angle. So be sure to take this into consideration when envisaging your space.
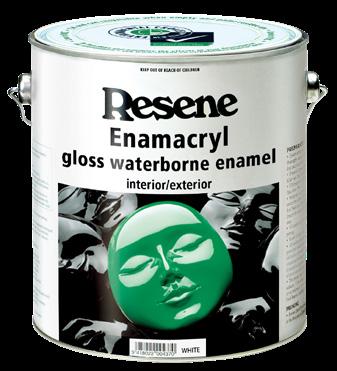
Top tip: Paint areas you really want to stand out in a full gloss finish – like your front door or your windows – using a gloss paint like Resene Enamacryl. This clever, high gloss product makes the surface and colour appear more intense and has a real impact. Use it anywhere that you really want to ‘pop’.
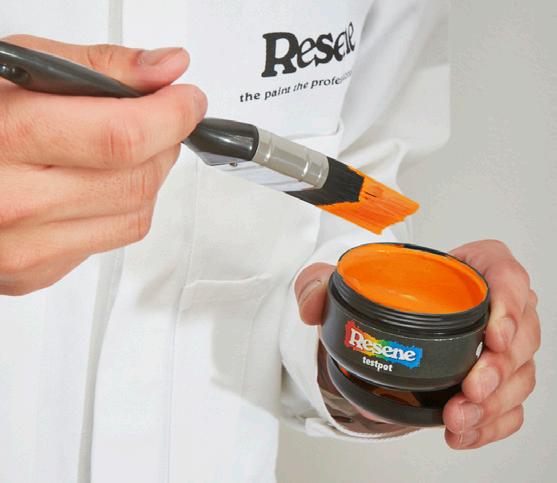
How to use a Resene testpot
Good things come in small packages and Resene testpots are a great example. These handy little tubs of paint colour are the best way to help you choose the perfect colours for your project.
Why use Resene testpots?
While paint samples on colour charts are a great starting point to narrow down your favourites, you need a bigger swatch to help make your final choice. Variations in the colour, such as the undertone, that might seem insignificant on the paint sample become much more obvious once they are on the wall, or placed next to other colours. Colours that may look good in the store can look different when viewed in the light conditions of your home.
How to use Resene testpots
Don’t paint the testpot directly onto the wall as the existing colour will affect how you see the new colour. Instead, use Resene testpots to create your own test swatch. This will mean you not only avoid having to paint over the tested colours later, but you can move the swatch around to try it in different places. To create a test swatch, take a piece of A2
white card and paint it in two coats of your chosen Resene colour using a Resene testpot brush leaving an unpainted border around the edge. Allow the card to dry and use Blu-Tack to attach the card to the wall. Observe the swatch at different times of the day and night to see how the colour changes with different amounts of daylight and under artificial light. Move the swatch onto other walls or rooms to make the same observations. A colour will look quite different in a north-facing room with lots of light compared to a darker south-facing room. If you plan on painting all your rooms in the same wall colours, you may need to choose colours from the same colour family but vary the strength from room to room. For example, paint a sunny north-facing lounge in Resene Double Merino and a darker south-facing bedroom in Resene Half Merino. Generally, it pays to have mid-strength colour on the walls (e.g. Resene Double Merino) and the lightest colour on the ceiling and trims (e.g. Resene Quarter Merino). This is because there is less light on the ceiling so it will appear darker. Or you can go all in and make your ceiling a feature with a bold colour.
Ceiling height Distance around room in metres - Litres needed for walls*
Resene Outrageous.
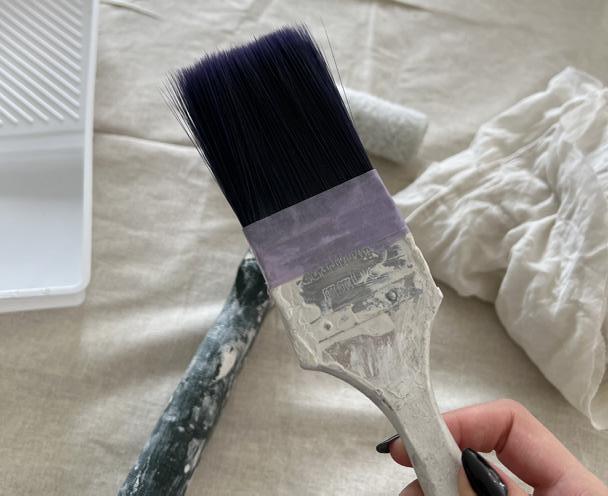
How to use a paintbrush
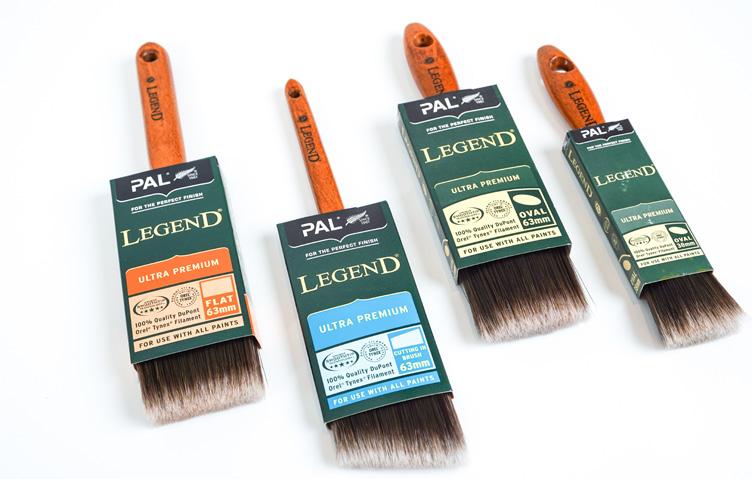
Using a paintbrush might look easy, but DIYers know there are a few tips and tricks that make all the difference when it comes to getting a professional finish. It takes time to become good, accurate and fast with a paintbrush. Have patience with yourself if you’re just starting out. Work on your quality first, then on speed. This will save you from learning bad habits and having to redo sloppy work. The most popular brush sizes are 50-63mm. It’s a good idea to pop into your local Resene
ColorShop or reseller and try a few out. Ask for help if you need it, because there are some important things to consider when you’re choosing paintbrushes. Think about your strength and experience, the type of brush you need, the size of the project, the surfaces you’re painting and the type of paint or stain you’re using. A smaller brush is recommended for those who have smaller hands or who are new to painting as larger brushes can be heavy. When you’re ready to start painting, and while your paintbrush is still clean, work the bristles back and forth across your fingers to remove any dust, dirt or loose bristles. If you’re using waterborne paints, you can lightly moisten a natural bristle brush with water first to help you apply the paint more evenly.
tips
Hold the brush with your first two fingers and thumb, not too tight or too loose. Dip one-third to one-half the length of the bristles into your paint container, removing excess paint by tapping the brush on the side of the container. Avoid dipping the entire length of the bristles in the paint as this will push paint into the ferrule of the paintbrush, which can cause it to clog up. Plus, you’ll likely end up with paint drips making it harder to get a smooth finish. Paint with the tip of your paintbrush, not the sides. Hold the paintbrush at about a 45-degree angle to the surface and work mostly with your wrist rather than your arms and shoulders. For the best results, try and get a good flowing motion with long brushstrokes. A smaller brush is better for more detailed areas and finer cutting in – painting areas where rollers can’t reach, such as where walls meet the ceiling or floor. When cutting in, use the brush on its vertical edge. When you’re painting larger areas, use your brush horizontally. If your brushstrokes become stiff, sticky or non-flowing, you may need to thin the paint. Use the thinner recommended on your paint
container or Resene Hot Weather Additive for most waterborne paints.
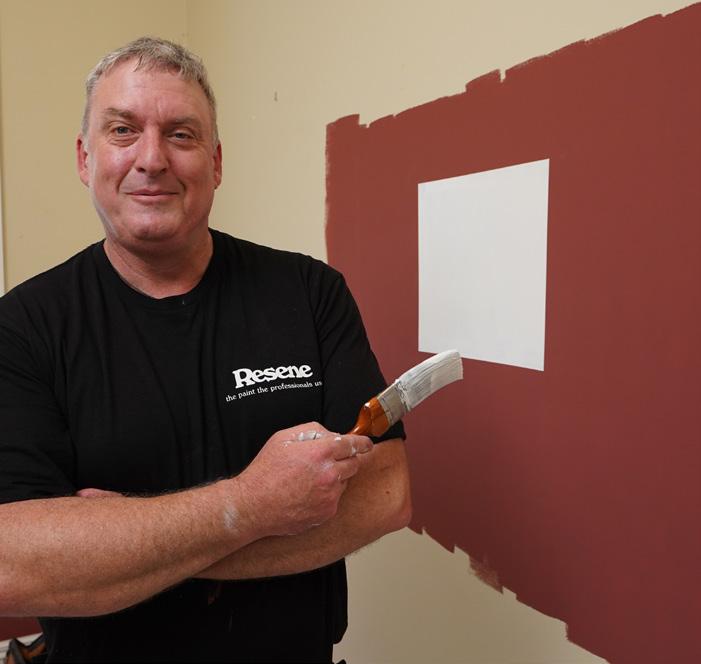
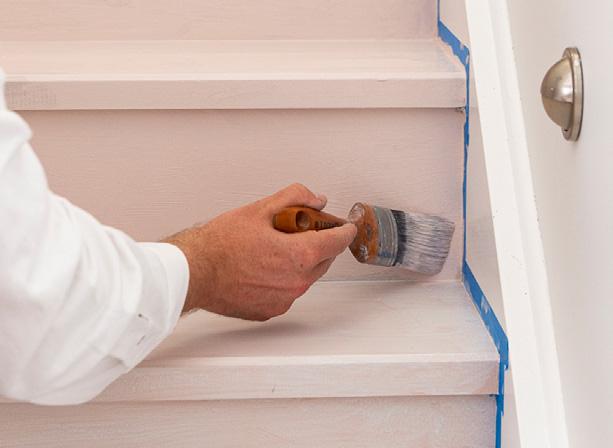
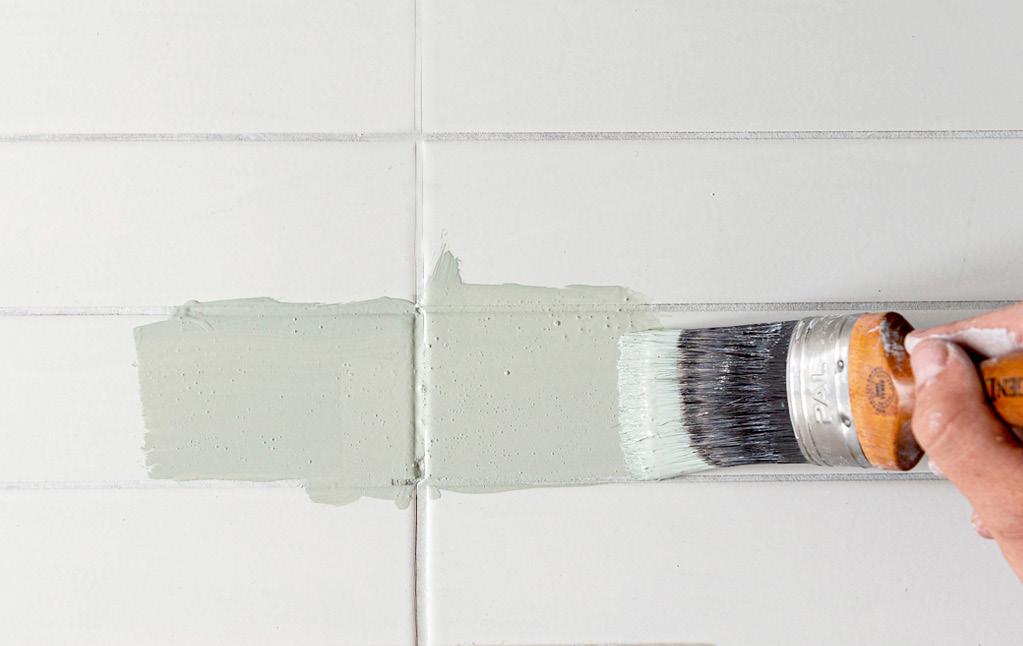
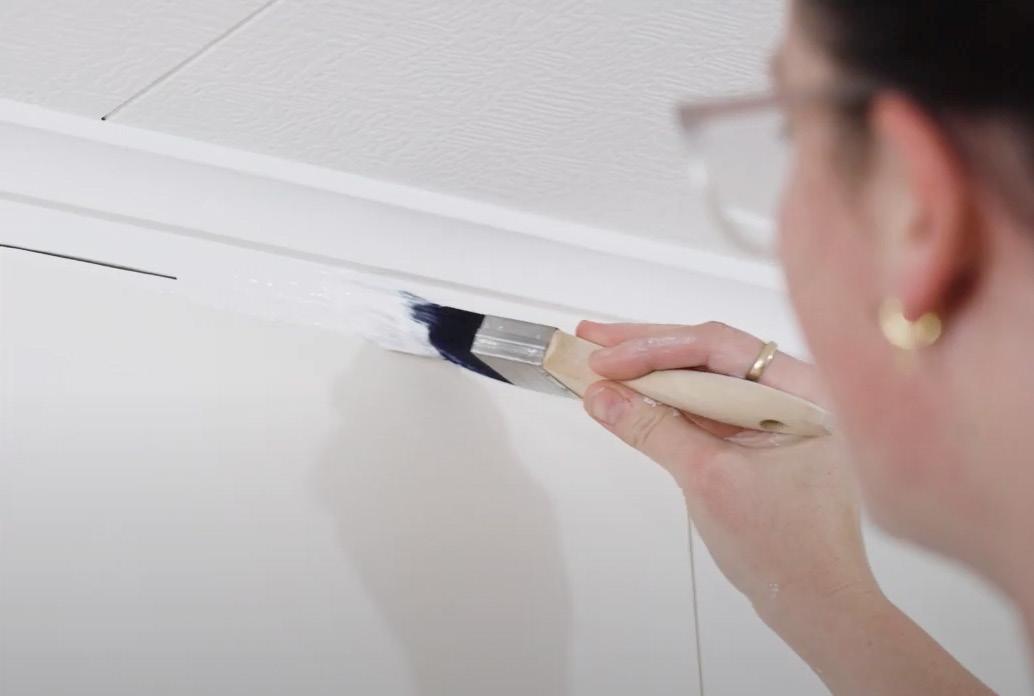
How to cut in
Cutting in is the technique that is used for painting around the edges of your project. This often means the tight areas of a room, such as the edges of walls, the ceiling line, corners, around window and door frames, skirting boards and architraves. Cutting in should be used in these areas before you move to a roller for the rest of the job. Practice makes perfect when it comes to cutting in, but these steps will help you get the best finish.
• Invest in the best-quality brushes you can afford. Not only do premium paintbrushes make the job easier for you, but they produce a much higher quality finish. An oval brush will hold plenty of paint and will create a smooth finish with minimal brushstrokes, while an angled brush has a longer handle and is slimmer, so can be more comfortable if you have smaller hands.
• You only need a small amount of paint for the cutting-in process, around half a litre, so use a Resene paint pot and paint out of that rather than dipping your brush into the larger tin. Start with a damp brush and dip it into the pot. Tap the brush on the side of the paint pot to remove any excess paint.
skirting boards. Essentially, cutting in creates a border.
• Aim for long, smooth, even strokes, making sure that you cut in on every coat of paint that you apply to ensure an even finish.
• When you’re happy with the cut-in line, apply a neater finish by feathering or thinning the edge. Without reloading the brush, drag the tips of the bristles lightly over the outside edge to spread the paint in a thin layer and get rid of any ridges or excess build-up. This feathering step ensures that the cut-in line won’t show up as a stripe after rolling the walls.
Top tip: If you’re nervous about cutting in, you can use masking tape to protect the adjacent wall or frame. That way if your paintbrush goes a bit wide or in less than a straight line than you’d like, you won’t damage the painted surface. Make sure you remove the tape before the paint fully dries.
• Start cutting in from the top of your wall and work your way down the edges of doors, around door frames, window frames, light switches and finally, around the edges of the
Dip one-third to one-half of the length of the bristles in your paint container, then remove excess paint by tapping the brush on the side of the paint pot. Paint colour is Resene Double Stack. More
How to use a paint roller
Every hardworking DIYer would like their painting project to have a polished finish, one that looks like it could have been done by a professional. Rollers are an ideal way to paint a large area quickly and get a top-notch result.
It’s all about the right roller
First up, make sure you choose the right roller for the job. If you’re unsure about what you need, chat to a staff member at a Resene ColorShop or reseller –they can recommend the best roller for the paint you are using and the surface you’re painting.
Roller sizes
The most popular DIY roller sleeves are available in three sizes. The 230mm sleeve is the most popular and is used for larger areas, including most walls and ceilings. The 150mm sleeve can also be used on walls and ceilings but is most suited to smaller surfaces, such as interior doors and cupboards, as well as fencing. The 100mm reach rollers are made using the same fabric but do not hold as much paint as the other sleeves as they’re smaller with less surface area. They are designed for cupboards, doors and hardto-reach areas, such as inside cupboards and shelving. Rollers
with extendable handles allow you to paint higher ceilings or walls more easily.
from top to bottom to get an even, consistent finish. To lay off, make sure the roller sleeve is not fully loaded with paint. Using only light pressure, lay the roller approximately 300mm above the skirting board and slowly roll up towards the scotia, getting as close as practical to it. Lightly roll back towards the skirting board but pull the roller away from the wall about 200mm above the skirting board. Repeat the process, overlapping strokes by approximately half the roller length. Adjust the roller angle to get as close as practical to the edges of corners and around door and window frames. Allow to dry and then apply a second coat. For more expert advice and how-to videos, visit www.masterstrokebyresene.com/how-to/use-a-paint-roller
Sandpaper 101
When it comes to your paint project, it can be tempting to rush in and get that fresh new Resene colour straight on the walls. But without proper preparation, your project could end up looking more slapdash than super flash. Using the correct sandpaper can make all the difference to your finish. So how do we know which one is best for our job?
The nitty gritty
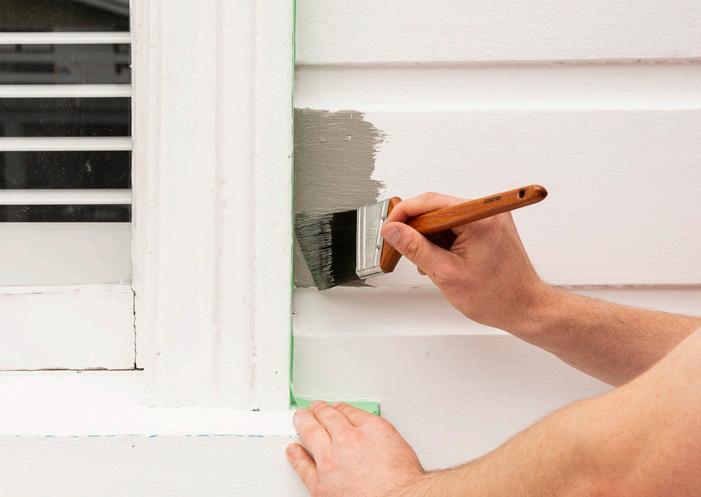
Start with a brush
Use a brush to paint the edges – a 50mm cutting-in brush is a good size. Paint 40-50mm from the edges, outwards.
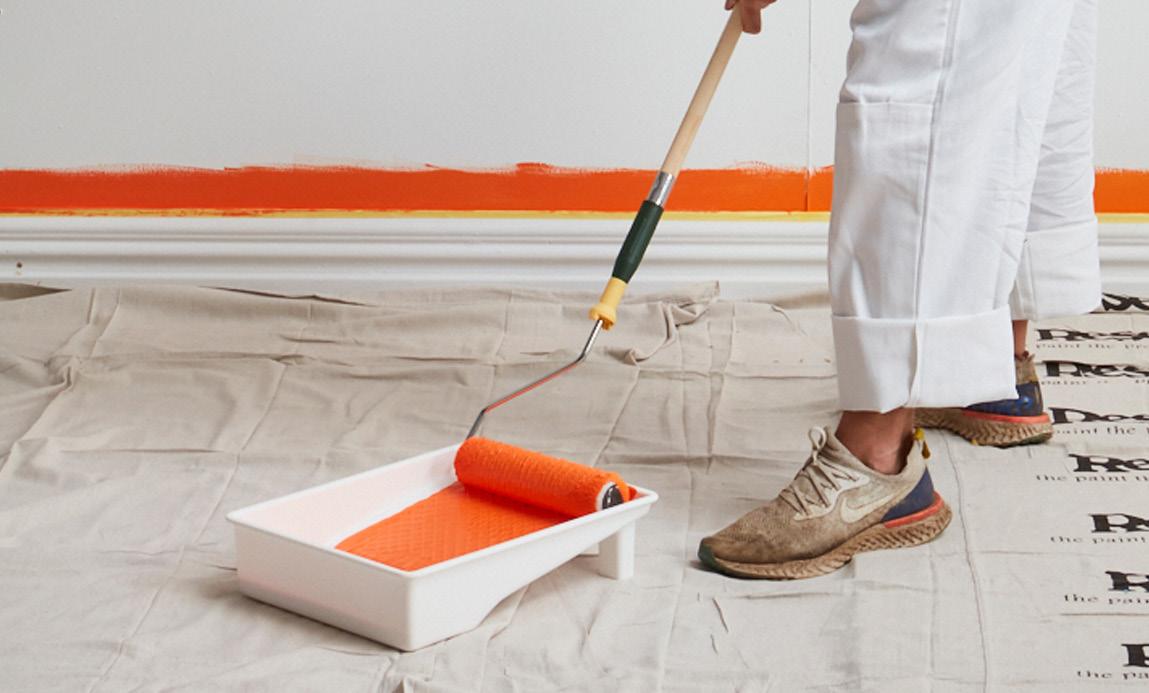
Ready to roll
Add plenty of paint to your tray and load your roller up properly – it should look like a hot dog dipped in batter. Then lay the roller carefully against the wall. Roll upwards first and then continue along the surface, making W-shapes as you go. Make sure you always roll in the same sequence – up and down, rather than side to side.
Laying off
Run the roller as close as possible to skirting boards and corners. Once you have covered approximately 4 square metres of wall, you will need to ‘lay off’
Wipe off
Remember to always wipe off all sanding dust with a clean damp cloth. If you leave sanding dust on the surface, the new paint will stick to it instead of the surface. This will make it difficult for your paint to adhere properly and could lead to flaking paint later.
Mask up
Wear a dust mask when sanding to avoid breathing in the sanding dust.
Sandpaper is rated numerically according to the size of the grit particles. The lower the number, the coarser the grit, and the higher the number, the finer the grit. An 80 grit sandpaper should be used for clearing away excess material, such as old flaking paint or varnish. A sanding block will not only make the job easier but will ensure your sanding surface is flatter. For larger exterior areas such as weatherboards, use 150 grit sandpaper. For interior jobs that need only a light sand, opt for 220-240 grit sandpaper. And for bigger jobs, such as large areas outdoors, consider a power sander. For some projects you will use more than one grade of sandpaper. You might need an 80 grit sandpaper to remove old flaking paint, and then a 150 grit sandpaper to smooth the surface ready for painting. While sanding might not be the most exciting part of your project, don’t be tempted to rush this part of the process. Without proper sanding, imperfections will be magnified when the final coat of paint is applied.
Make sure your Resene paint is evenly loaded onto your roller before moving to the wall. This wall is being painted in Resene Adrenalin.
Painting in different weather conditions
In this part of the world, we’re used to experiencing four seasons in one day. This can mean that the perfect painting day can be impossible to predict or control. The good news is there’s a wide variety of Resene products that can help you adapt as conditions change.
The perfect painting
day
The ideal conditions for painting are 15-20°C with humidity of 70-80% and a very gentle breeze. Ask yourself: “Does the weather pass the washing line test?” If your clothes aren’t drying on the washing line, your paint won’t dry on the walls. Another test to try is applying a thin coat of water to a piece of timber, if the water has not evaporated in 15 minutes, hold off on painting until it does.
than cheap paints. Some paint colours, such as bright organic reds like Resene Red Berry and yellows such as Resene Wild Thing, are more vulnerable to fading caused by UV radiation. For these colours, a final coat of Resene Clearcoat UVS, which contains UV inhibitors, will help maintain the colour’s vibrancy.
Painting in cold temperatures
Painting in sunny weather
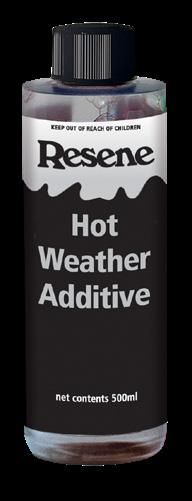
If you can’t avoid painting your exterior in the height of summer, start painting on the shady side of your house and try to stay ahead of the sun. Adding
Resene Hot Weather Additive to exterior paints such as Resene Lumbersider Low Sheen, or interior paints such as Resene SpaceCote, will prevent your paint from drying too quickly, making it easier to maintain a wet edge and get a smooth finish.
Resene waterborne paints are formulated to withstand UV degradation and will last longer
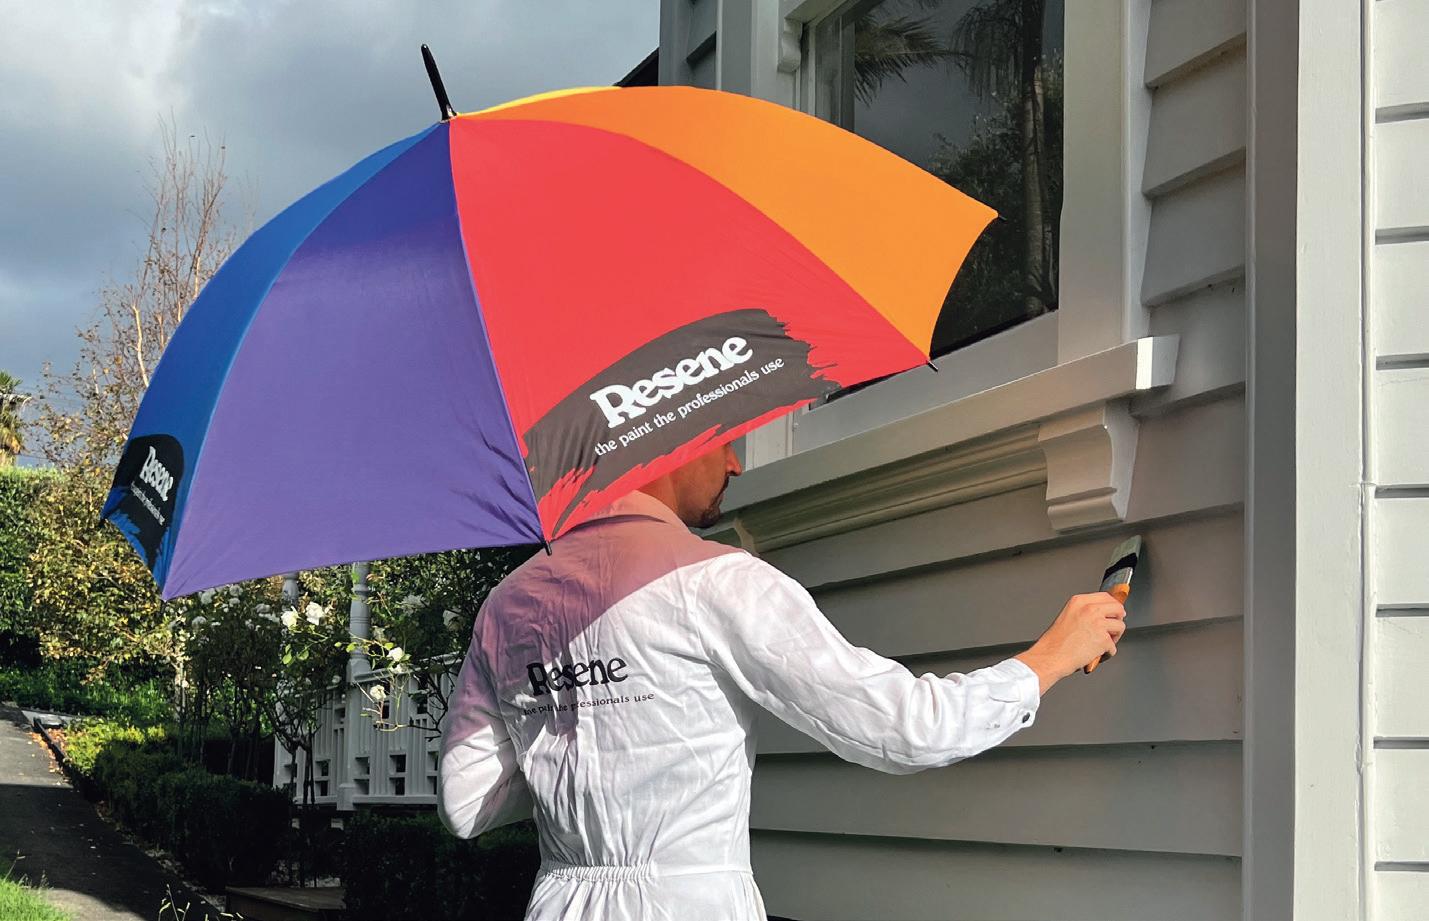
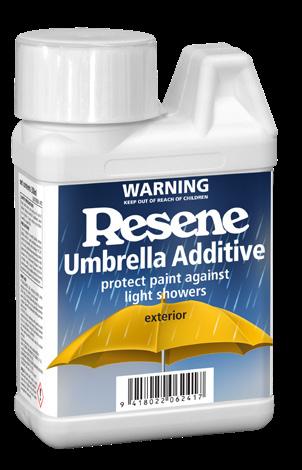
occur, use Resene Umbrella Additive. This product adds a protective layer to your paint so light drops will roll off the surface – even on paint that hasn’t fully dried! It’s not designed for rain or heavy squalls – on those days it’s best to paint indoors instead or focus on prep work.
Other handy additives
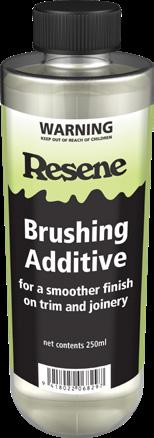
• Resene Brushing Additive is specially formulated for adding to Resene waterborne enamel paints to reduce brush marking and to produce a smoother finish on trim and joinery.
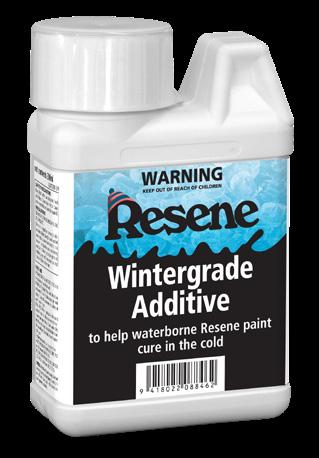
As a rule, waterborne paint won’t dry if the temperature is lower than 10°C. Resene Wintergrade Additive has been designed by the Resene technical team to allow you to paint in temperatures as low as 3°C. It can be added to selected Resene waterborne paints, allowing them to be applied in lower temperatures. If you’re painting indoors, look out for ‘crying windows’ where condensation drips down the glass, making the paint drying process even more difficult. Keep the temperature inside your home around 15-16°C using a heater or heat pump and make sure the room is ventilated to help the paint to cure.
How to paint in humid or rainy conditions
Although it’s best to avoid painting in medium or heavy rain, a few light drops don’t need to dampen your spirits. If you’re painting on a day where a light shower may randomly
How to paint in changing humidity
In spring and autumn, painters should be aware of sudden drops in temperature and rising humidity in the afternoon, which can cause water to condense and form dew (called the ‘dew point’). Between 70% and 80% humidity is the ideal humidity level for painting. To make the most of your project time, plan to have a few jobs you can do no matter what the weather is. For example, have a prep project you can do when it’s raining, an exterior staining or painting project when the weather is dry and an inside project for night-time when it is too dark to do work outdoors. That way you can keep progressing your DIY no matter what the weather is doing.
Our changeable climate means we need to be prepared for every temperature, humidity and rain scenario – but whatever the weather conditions, Resene has you covered.
• Resene MoulDefender is a fungicidal additive designed to be added to waterborne paint to inhibit the growth of mould. Suitable for use inside and out and ideal for wet areas such as kitchens, bathrooms and laundries, Resene MoulDefender will slow down the reappearance of mould. Ask Resene staff to add MoulDefender to your waterborne paint.
• Resene Fly Deterrent is an additive that can be mixed with Resene decorative waterborne paints to reduce fly spots. Fly spots are common in kitchens, living and dining rooms but can be difficult to remove without damaging the paint. Resene Fly Deterrent discourages flies from sitting on painted surfaces –the less they sit, the fewer and smaller the fly spots.
Learn more
This home is painted in Resene Double Concrete.
Four ingenious paint hacks
These hacks are guaranteed to make the painting process easier.
How to correctly open and close a paint can
While a screwdriver may be your first choice of tool to use when opening a paint can, a Resene Can Opener is a far better option. The flat tip ensures no damage is done to the groove, while the looped end makes it easy to grip and work with.
To open a paint can, gently lever the lid loose by working your way round the lip and voila! To get it back on, make sure the lip is nice and clean by wiping it with a cloth – paint build-up can affect the quality of the seal, causing the rim to rust or make it impossible to remove.
Slowly put the lid back on, working your way around the sides. To prevent denting or damaging the lid by hammering directly onto it, take a small block of wood and hammer onto that to get the lid back in place or use a soft mallet.
As paintbrushes can transfer surface contaminants back into the can, always tip as much paint as you need for your current session of painting into a separate Resene paint pot or tray. This also saves you lugging
around a full can of paint.
Once the job is done, some decorators like to cover the top of the paint can with plastic wrap, place the lid on securely and store it upside down. The paint will create a tight seal around the lid and will remain fresh. Make sure you store paint in a cool and dry place, away from extreme heat or cold and out of reach of children. Remember to write on the can where you used the paint before you store it so it's easier to find the right paint if you need to touch up a room later.
Pour your heart out
Tired of getting paint built up around the rim of your paint can? Simply cross two pieces of masking tape over the rim of your paint can to form a V shape, making sure there is an extra length of tape on each side after the crossover point. Tuck the extra tape underneath the crossover point to form a triangle. Now your paint can has a pouring spout to help decant your paint into a Resene paint pot or tray.
Make your paintbrushes last
Your paint finish is only as good as your preparation and the equipment you use. Choosing quality paintbrushes will get the best performance out of your paint, so it’s important to look after and protect them properly. Before you start painting, take some painter’s tape and wrap it around the ferrule (where the bristles meet the metal). Make sure it’s nice and tight, with half on the metal of the handle and half on the bristles. Doing this step ensures paint won’t be right up against the ferrule, which will stop it from drying in the head of the brush and splaying the bristles out, meaning your paintbrush will last a lot longer. Once you’ve finished painting, simply remove the tape. When it comes to cleaning
Paint a sharp line using masking tape
Getting the most crisp, clean and seriously straight paint lines is an art form.
brushes, there are effective and eco-friendly ways to do this. Make sure you remove all the leftover paint on your brush by wiping it onto disposable materials such as old pieces of cardboard. When the paint has dried, you can recycle these – this will help prevent excess paint going down the drain. Instead of washing your paintbrushes under a running tap, wash them in a bucket of clean water. Add a little dishwashing liquid or soap if needed. Once you have washed them, transfer to a second bucket filled with clean water, then squeeze out excess water from the bristles. Don’t throw out the water in either bucket immediately – wait until the next day. By this time, the paint will have settled to the bottom, and you will be able to separate it from the water. Pour the clear water part onto grass or a garden area, scrape out the paint solids and let them dry then dispose of in your rubbish bin.
First, use masking tape to mask off the area you want to fill with your feature colour. Then, paint along the edges of your tape with the same colour paint that is already on the wall. This will bleed through underneath the tape and seal the edge, so when you paint on your feature colour and take off the tape, you end up with a perfectly sharp line.
The bleed-through occurs because the texture on your wall often has a light orange peel stippled texture. When you put masking tape on and paint on top, the paint invariably bleeds into the gaps where the texture is. By painting with the existing colour first, it fills those gaps and gives you a perfect straight line.
Wall painted in Resene Pohutukawa.
Resene Parsley.
Ready to roll
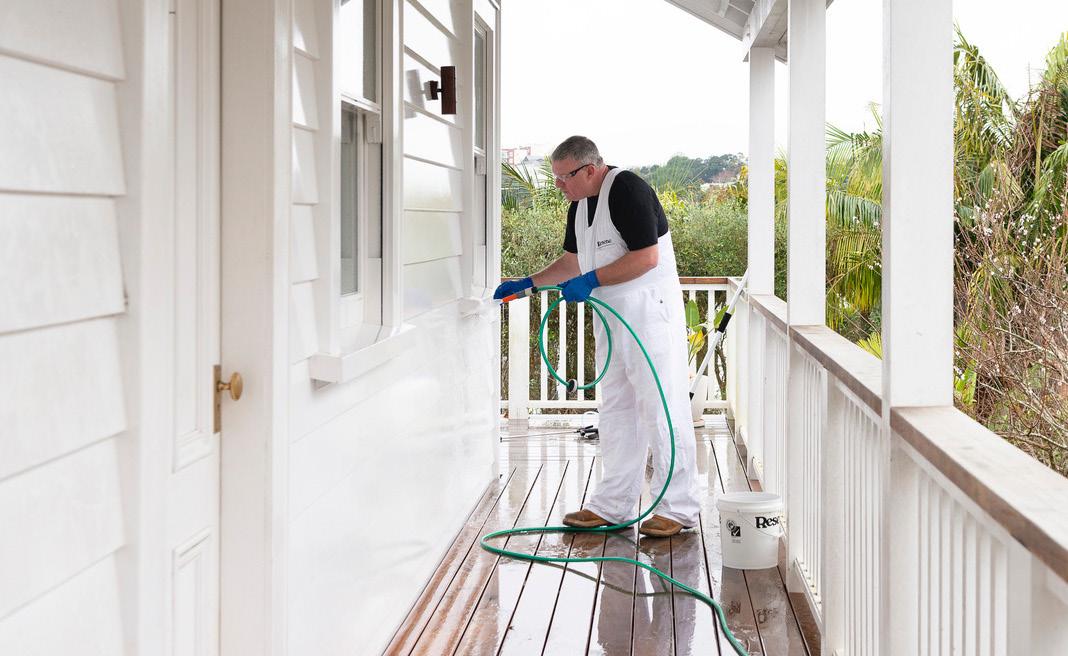
Exterior cleaning
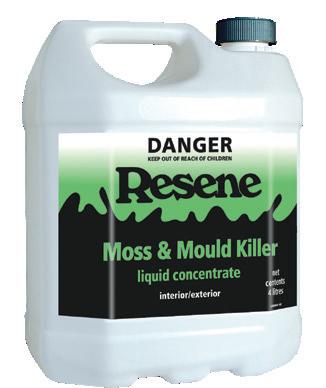
Damp, cold conditions can cause moss, mould, lichen and dirt to build up on paths, patios, decks and driveways, as well as the roof and your home’s paintwork. Resene has a range of outdoor cleaning products that have been designed to help.
Deep impact
Refresh and renew
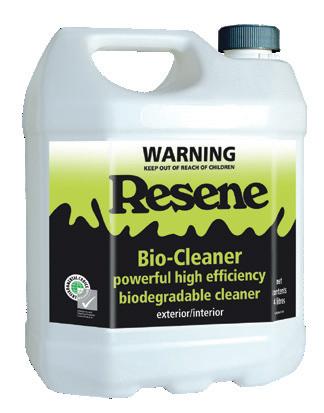
Resene Bio-Cleaner and Resene Paint Prep and Housewash are both powerful and highly efficient ways to get surfaces ready for painting or to use annually to give homes and buildings a refresh. Dilute the cleaner with water, scrub vigorously using a nylon bristle broom or short handle scrubbing brush, then rinse with clean water. It's best to do this on an overcast day so it stays wet for longer.
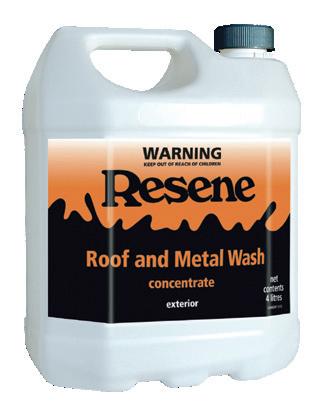
agent that is recommended for all new and previously painted galvanised iron or metal roofs, as well as a general cleaner and pre-treatment for repainting. Mix with water then apply by brush or spray, scrub vigorously and rinse with clean water.
Break the mould
bleach most common moulds and fungus. Dilute the concentrate with water and apply using a brush or sprayer. Leave for 48 hours to allow it to kill the mould spores before rinsing with water.
Before you start painting, freshen up the exterior and interior of your home with these cleaning tips and product recommendations. More tips
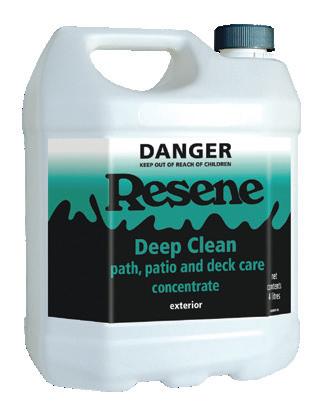
Resene Deep Clean is your saving grace when it comes to cleaning slippery paths, driveways, patios, decks and all of your exterior paintwork. It breaks down contaminants all by itself – once you’ve applied it, nature does the job for you. Use twice a year on concrete and timber surfaces. Start by diluting with the right amount of water, then spray it on and leave it to work.
Raise the roof
Resene Roof and Metal Wash is a cleaning and degreasing
Mould left untreated on paint is a major cause of paint disfigurement and can shorten the life of your paintwork. Resene Moss & Mould Killer is also highly recommended for exterior concrete surfaces where mould growth is normally present. It's a hypochloritebased wash designed to kill and
Top tips for the best outdoor clean
• Clean from the top down. By working this way you will avoid making an area you’ve already cleaned dirty again. Start with your roof, then clean your house, then finish with your decks.
• Try to clean out of direct sunlight. For most cleaning products, the best days to clean are usually overcast but not wet. Your cleaning product will stay wet for longer, giving you more time to get the cleaning done.
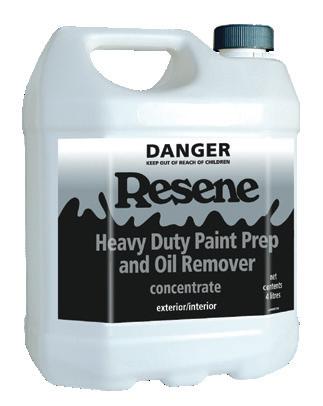
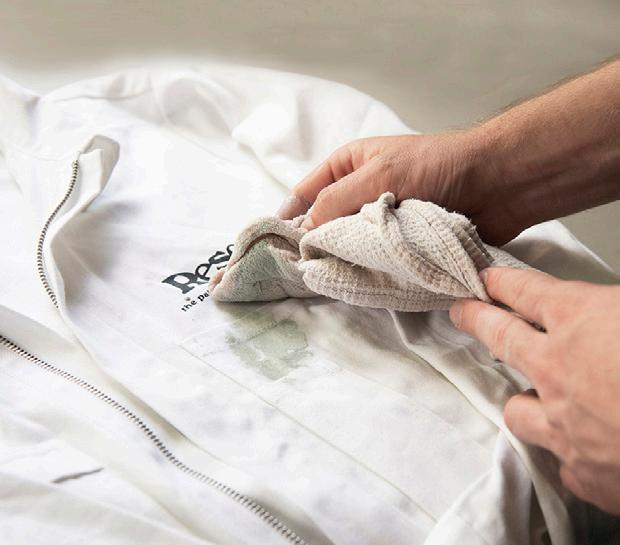
Stain remover
If you have oil stains on your driveway or in your garage, hit them with a dose of Resene Heavy Duty Paint Prep and Oil Remover. Simply dilute the concentrate with water and scrub vigorously to remove marks before rinsing with water.
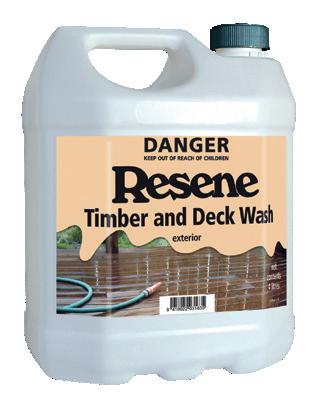
Wood wash
If you’re planning to paint or stain your timber, Resene Timber and Deck Wash will help clean off all the built-up gunk. Mix the concentrate with water and saturate the timber surface. Leave wet for 10-15 minutes, scrub vigorously, then rinse with clean water. If your stain is in good condition and it just needs cleaning, apply Resene Deep Clean and leave it to work with the weather to give you a cleaner finish.
• Don’t mix cleaning products –use the best one for the surface you’re cleaning. While it can be tempting to use one product on everything, chances are you won’t get the best result.
• When scrubbing, scrub with the direction or grain of the surface.
• Most cleaners need rinsing off the surface. Cleaning products can etch surfaces so make sure you keep them wet while you are cleaning then rinse well and allow them to dry before applying any paint or stain.
• Avoid getting cleaning products on any adjacent areas that you are not intending to clean. If this does happen, rinse them off well.
• If you’re working in an enclosed space, make sure you have plenty of ventilation.
• Remember to wear adequate protection – overalls, gloves, eye protection and suitable footwear while you’re cleaning.
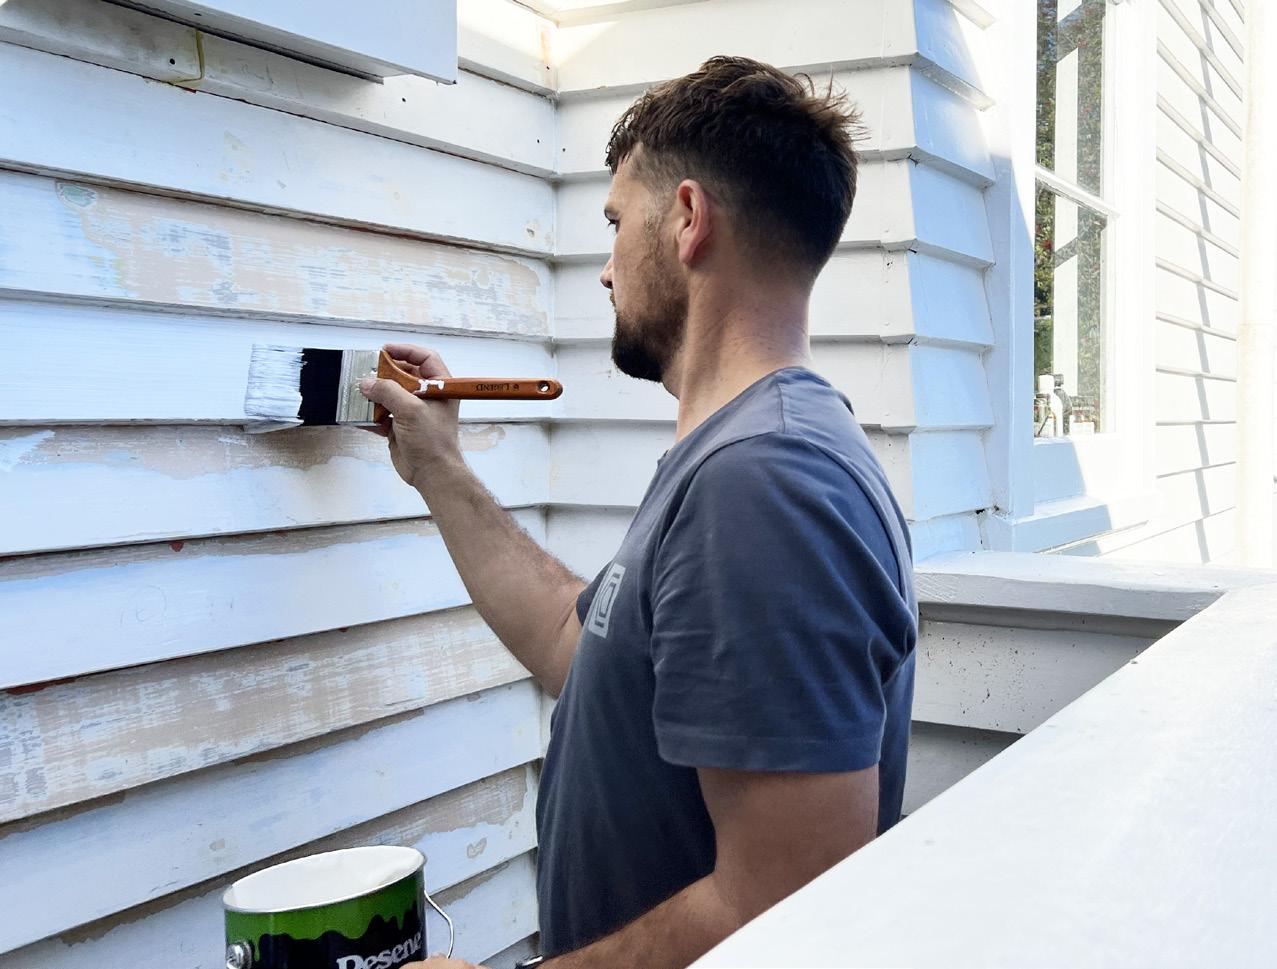
Prep to paint the exterior of your home
Painting your weatherboards might just be one of the biggest DIY projects there is, but with the right planning, prep, products and know-how you’ll have your home looking its best.
Clean and prep
• It’s important to treat moss and mould before painting. Use Resene Moss & Mould Killer, with a particular focus on the south-side of your home, as this is usually where mould occurs.
• Next, clean your exterior with Resene Paint Prep and Housewash or Resene Bio-Cleaner. It’s ideal to do this once or twice a year to keep your paintwork in good condition, which will save you needing to repaint too soon.
• Now it’s time for the real prep. Use either a sander or a scraper to remove bits of loose, flaky paint. Spot prime bare timber with Resene Quick Dry primer undercoat. Use a brush or a roller, depending on the size of the area you’re working on
might need filling. Look for cracks, nail holes, marks and dings, and use Resene EzyFill Quick to fill them.
Prime and paint
• Now the prep is done and the filler is dry, you’re ready to re-prime the whole exterior of your home with Resene Quick Dry primer for maximum flexibility and durability.
• It’s best to start applying the topcoats promptly once the primer is dry, to save yourself more prep work.
• We recommend you choose your paint colour before you start priming. Visit your local Resene ColorShop or reseller and grab a couple of Resene testpots to take home and try.
• Once you’ve decided on a colour, it’s time to apply your topcoats. You’ll do this with a brush, roller and/or spray. Remember to cut in on the bottom side of the weatherboard so all surfaces are coated in paint.
How to prep an interior wall
You will need:
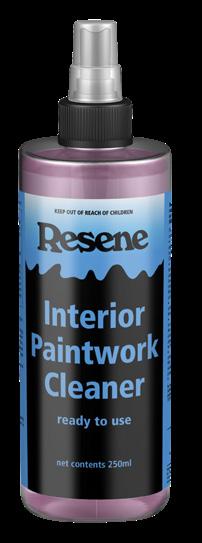
• Resene Interior Paintwork Cleaner
• Sponge
• Bucket
• Lint-free cloth
• Drop cloth
• Sandpaper discs
• Sanding head and pole
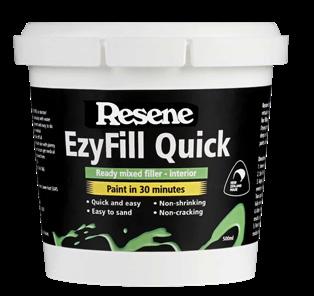
• Resene EzyFill Quick
• Putty knife
• Pencil
• Dusting brush or broom
• Resene Quick Dry waterborne primer undercoat
• Paint can opener
• Paint pots
• Paintbrushes
• Resene paint stirrer
• Resene paint of your choice
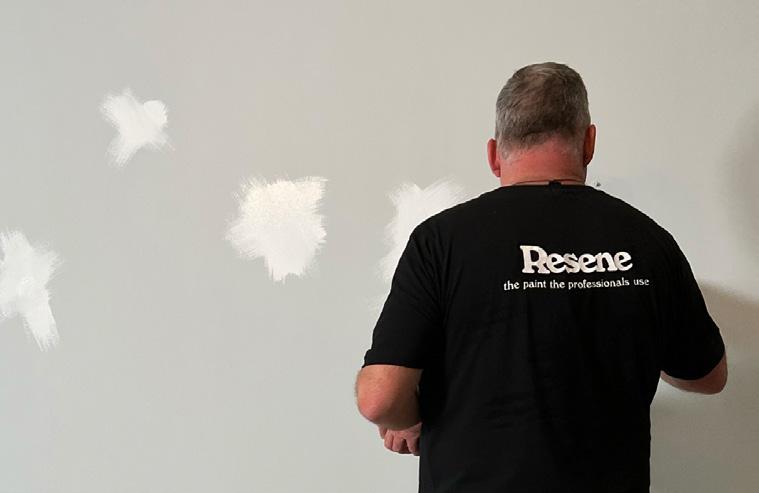
3 Fill holes and cracks Use Resene EzyFill Quick to fix any holes, bumps or imperfections. This lightweight filler is ideal for repairing small imperfections such as hook holes, and the quick-drying formula is ready to paint over in 30 minutes.
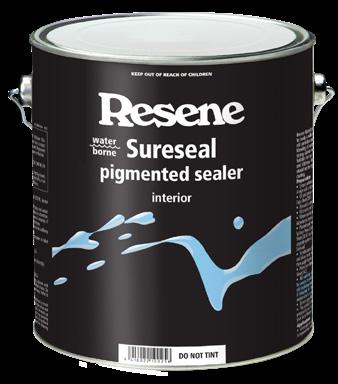
Top tip: Prep new plasterboard walls by applying Resene Broadwall Waterborne Wallboard Sealer in dry areas like bedrooms. This Eco Choice-approved product minimises porosity and textural differences on surfaces. In wet areas, use Resene Waterborne Sureseal instead.
• Take a look around every surface for any imperfections that
Top tip: If you need help with a tricky surface, ask the team at your local Resene ColorShop or reseller, or use the Resene Ask a Paint Expert service online, www.resene.com/paintexpert for advice direct to your inbox.
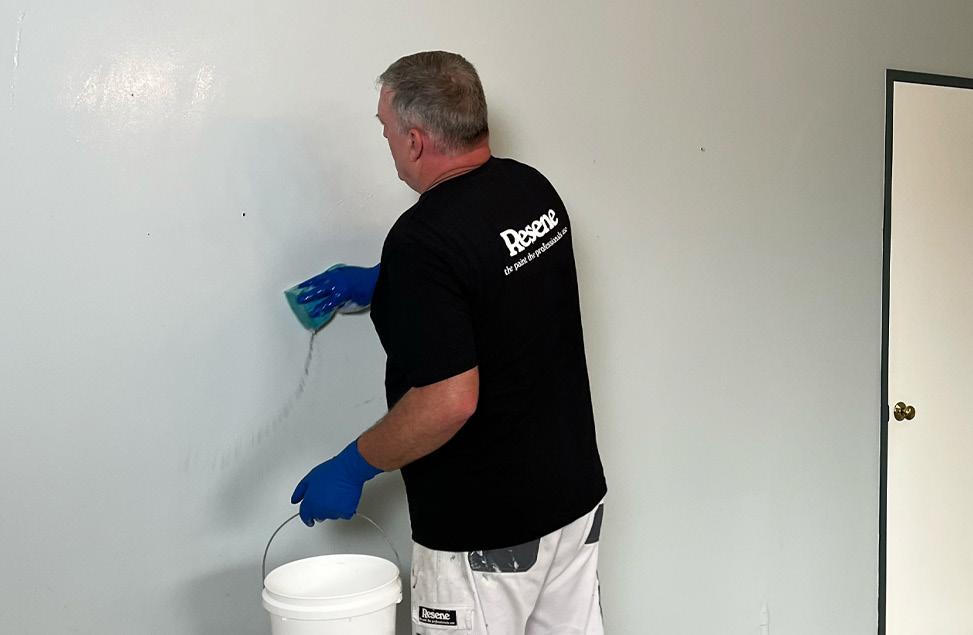
1 Clean the surface Wash your walls with Resene Interior Paintwork Cleaner. Available in both a concentrate and readyto-use formula, this product is your secret weapon for quickly cleaning interior paintwork. To clean the walls, wet a lint-free cloth in the cleaning solution and use gentle strokes to wipe the surface. If using the readyto-use product, dilution is not required and this formula can be sprayed directly on to the wall and wiped with a clean cloth.
2 Dry Wipe the wall using a clean, damp cloth and wait for the surface to dry completely before continuing to the next step.
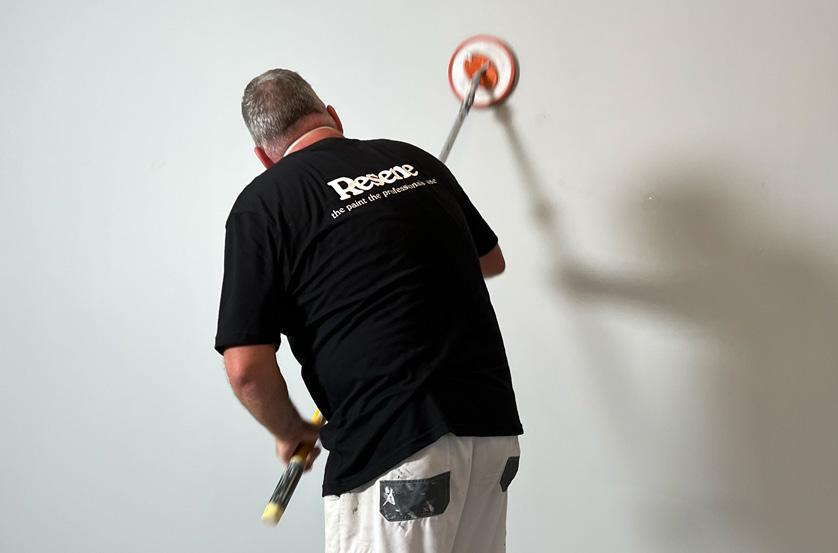
4 Sand If your wall is already painted and in good condition, often all you need is to clean it down, allow it to dry and then apply your topcoats, no sanding needed. If you do need to sand, sand the entire wall to create a smooth surface. An easy way to do this is to use a sanding head on a pole. Dust down the wall afterwards with a dust brush or a broom.
5 Prime Finally, use Resene Quick Dry to spot prime over the areas you’ve filled with Resene EzyFill Quick. When applying the primer, use light brushstrokes in a star-shaped crosshatch motion – this will ensure that no harsh lines will appear when you apply your topcoat. Now you’re ready to apply two coats of your chosen Resene paint.
Interiors
Welcome home
Are you ready to get creative?
Transform your living spaces with a fresh lick of paint and breathe life into tired kitchens, bathrooms, bedrooms and laundries. Whether you're aiming for serene neutrals, vibrant accent walls, feature wallpaper or cosy earth tones, we’ll show you how to paint the interior of your home like a pro.
What order to paint your room
• Start by painting the ceiling.
• Next paint the walls.
• Paint trims such as skirting boards, the scotia, windows and doors.
• On any surface, cut in all tricky areas such as edges, around wall sockets and ceiling roses, before tackling the main surface.
• If you are staining, painting or clear coating your floor, do this task last when all the paint in the room has thoroughly dried.
How to choose paint colours
Colour can enhance a space, so picking interior hues for your home is important. Warm, cool, neutral or bold, it can be hard to know where to start. Colour is wonderful because it does so many things. It makes us feel cheery, it can provide focus or it can be calming. And there is no right or wrong when it comes to choosing paint colours. Start by looking at what you already have in the room: the upholstery of your furnishings, your joinery, benchtops, the flooring, views to the outdoors and your accessories, including artwork. Draw clues from your interior to help strengthen your colour palette. If you have a favourite photo with colours you love, load it into the Resene Colour Palette Generator, www. resene.com/palettegenerator and it will suggest some colours for you.
a colour wheel, as it shows how colours relate to each other and how they work together. Every decorative colour combination can be defined by where it sits on the wheel, a diagram that maps the colours of the rainbow. The wheel makes colour relationships easy to see by dividing the spectrum into 12 basic hues: three primary colours, three secondary colours, and six tertiary colours.
Next, consider which direction your home faces. North-facing, light-filled spaces work best with cool colours. South-facing rooms respond well to warm hues and darker tones. Trust your likes and dislikes, and remember help is available at your local Resene ColorShop or reseller.
The colour wheel
The best way to create colour harmony in your project is with
Terms to get familiar with: tone, tint and shade
Tone refers to the brightness or deepness of a colour. Mixing grey with the colour will affect its tone. Tint refers to a shade of colour. Adding white to a colour will change the tint. And shade refers to the lightness or darkness of a colour. This is also used when referring to similar colours such as ‘shades of green’ or a ‘darker shade of blue’. Mixing black with a colour will alter the shade.
Top tip: When planning colours, for whole house cohesion, a good guide is to stick to either three or five colours when you are new to colour (odd numbers work better than even). That could mean black, white and one other colour, or it could be layers of tonal variations.
The temperature
Colours can also be divided into warm and cool. Blues and greens can introduce a cool mood into a room, with the level of coolness depending on the intensity of the colours. Cool colours may also be used to change the appearance of a room, pushing back walls and furnishings and making the room appear more spacious. They work well in a room with a sunny aspect, where the colours counteract some of the strength of the direct sun. Warm colours, such as red, yellow and apricot, can have the opposite effect, closing in the walls of a room. If the room is large, its dimensions seem decreased, yet this can also provide definition. Warm colours look their best in a not-so-bright room with southern light, so that the bright effect of the sunny colours is not too overbearing.
Whites, off-whites and neutrals
Natural, fresh and classic, whites and neutrals are a timeless colour choice for every type of
Resene Siam
Resene Chelsea Gem
Resene Half Rice Cake
Resene Barely There
Resene Blue Night
Resene Sea Fog
Resene Forecast
Resene Regent Grey
Colour palettes we’re loving – down-to-earth hues
Walls painted in Resene Alabaster, with paint effect in Resene Double Sea Fog mixed with Resene FX Paint Effects Medium. Panelling painted in Resene Eighth Canterbury Clay.
home. But with so many different shades to choose from, how do you know which is the right white for our space? The first thing to decide when choosing a white is if you want your space to feel warmer or cooler. Cool whites work best with contemporary interiors that have lots of windows, whereas warm whites are best for homes with smaller windows or limited light.
Resene Alabaster and Resene Black White are ever-popular cool whites for light, bright, modern homes.
Resene Rice Cake and Resene Merino are warmer whites with yellow undertones, adding a brightness to darker spaces.
How to choose your colour palette
Think about the feel you want for your home. If you love that coastal, holiday vibe, consider a light, airy scheme with crisp, cool neutrals and a splash of blue. Prefer an earthy, natural feel? Combine shades of green with warm neutrals. Add pops of yellow or orange as a nod to the sunshine peeking through.
How to choose the right white paint
There are many different types of white. Experts have, in fact, identified more than 150,000 different types and within the Resene range, there are 100+ white and off-whites to choose from. There’s a reason for white’s enduring popularity. It can make a room look lighter and brighter as well as being a neutral backdrop for existing furniture and fittings. Plus, it never goes out of style.
Warm or cool?
White paint has varying levels of warm and cool tones, thanks to the yellow, green, brown or grey undertones, which can change the look and feel of the paint once it’s on the walls or ceiling. Try to pick a white that brings the right kind of ‘cool’ or ‘warm’ tones to your interior. Ask yourself if you want the space to feel cooler, crisper, warmer or
brighter. Depending on the location and part of the house, using a cool white will generally give you a more modern look and feel, while a warm white will bring in a softer tone and feel. Cool whites tend to suit more contemporary interiors with lots of windows, rather than older homes with smaller windows and less-than-perfect walls. In contemporary spaces try Resene Sea Fog for the internal walls, doors, architraves and skirting boards, but opt for a crisper white such as Resene Alabaster on the ceiling for a calmer, softer feeling. In an older, darker house, such as a villa, try something a little warmer. Try a warmer white such as Resene Quarter Bianca for the walls and Resene Alabaster for internal doors, architraves and ceilings.
Top tips: To keep your white and neutral options simple, use the Resene Whites & Neutrals A4 colour collection – this has all the best whites and neutrals so you can choose colours that you know will still look good in years to come.
How to paint your ceiling
If you need help choosing colours, use the free Ask a Resene Colour Expert service, www.resene.com/colourexpert.
Resene top-selling whites
• Resene Black White
• Resene Alabaster
• Resene Half Black White
• Resene Double Alabaster
• Resene Sea Fog
Ceilings often get overlooked because you normally look at your walls the most. Start by cleaning your ceiling with Resene Interior Paintwork Cleaner, which comes in a convenient spray format. The next step depends on the paint already on your ceiling. For older spaces such as villas or in wet areas, the existing paint could be a glossy oil-based paint, so will need to be sanded. An aged enamel paint will need a heavy sand using an 80 grit sandpaper. Wipe off the sanding dust, then prime with Resene Quick Dry primer. If you’re painting the ceiling in a wet area, use Resene Waterborne Sureseal instead. Dry area ceilings painted in a waterborne flat paint may not need to be sanded prior to painting. You can usually just clean and apply two new topcoats. Painting ceilings can be challenging both physically (reaching up can tire arms) and logistically (due to dripping paint) so work on a small section of the ceiling at a time. For best results, use an extension pole with your roller. Lay off your paint following the direction of the light. When it comes to choosing paint colours, it’s usually best to
an extension pole to make painting your ceiling easier.
Watch
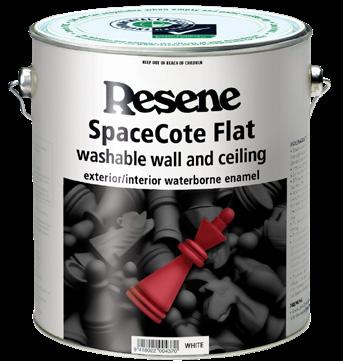
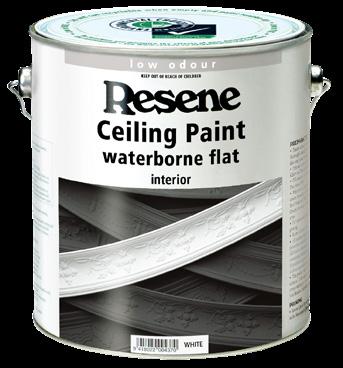
opt for one or two shades lighter than the wall colour unless you want your ceiling to be a feature. No matter which colour you choose, reach for a flat paint, as it will help minimise imperfections. In older homes you can use a higher gloss to accent decorative ceiling features. Flat ceiling paint options include Resene SpaceCote Flat, a washable waterborne enamel wall and ceiling paint (also available in a fly repellent option), Resene Ceiling Paint or Resene Earthsense Ceiling Paint which focuses on using more renewable materials. Resene SpaceCote Flat is the best option if you want to wipe down your ceilings later as other ceiling paints will tend to burnish (mark) if wiped.
For more expert advice and to watch the how-to video, visit www.masterstrokebyresene.com/ ask-an-expert/how-to-paint-ceilings
Resene Alabaster
Resene Black White
Resene Rice Cake
Resene Merino
How to paint your living spaces
When it comes to painting living areas, preparation is key and much depends on whether the wall is new or has been painted previously. If it’s new, make sure the surface is clean and then seal with either Resene Broadwall waterborne wallboard sealer (in dry areas) or Resene Waterborne Sureseal (in wet areas like bathrooms and kitchens).
If the wall has been previously painted, clean it using Resene Interior Paintwork Cleaner.
Most living spaces are finished in low sheen – Resene SpaceCote Low Sheen or Resene Zylone Sheen. These lower sheen finishes give a more soothing finish than higher gloss. For the ceiling use Resene SpaceCote Flat and Resene Lustacryl semi-gloss waterborne enamel for trims and joinery.
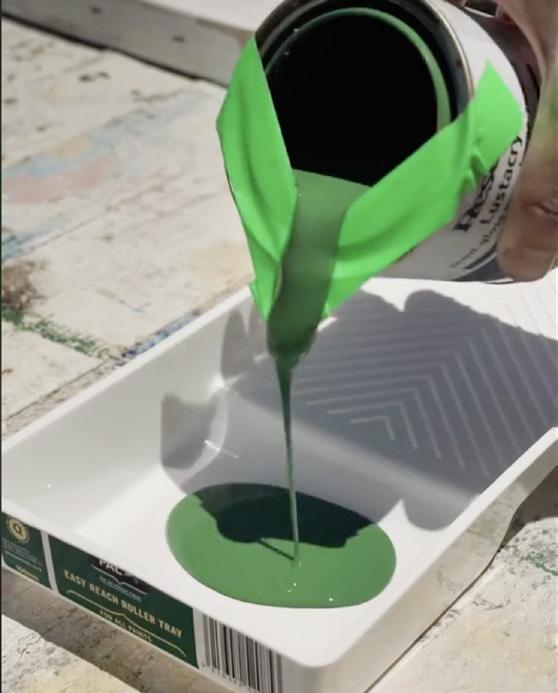
Decant about half a litre of paint, depending on the size of your room, into a paint pot for cutting in. Pour around 1 litre of paint into your roller tray and work the roller well into the paint. Make sure you use the right sleeve for the job. In terms of
Top tip: Take care not to overspread your paint as it can’t protect your surface if you haven’t applied enough. Each can has the recommended spreading rate on it. If the paint has a spreading rate of 12 square metres, that means you should be using 1 litre to paint a wall 4m x 3m. If you end up with lots of leftover paint it usually means you haven’t applied enough. It’s best to apply the right amount of paint to save doing extra coats.
the actual painting, use whichever size brush you’re most comfortable with.
Holding the brush, load it with paint, carefully tap the brush to remove excess paint and cut in one wall at a time. Roll the excess paint off the roller and attach the extension handle which makes it much easier.
Once you’ve loaded the roller with paint, starting at the top, move across the wall in a rough ‘W’ pattern covering approximately one metre square and repeat below until the wall is coated. Then moving away from a light source, ‘lay off’ the paint. Starting at the bottom, do this by starting about 300mm above the skirting, roll down to the skirting and roll up gently in one fluid motion. Overlap by around half the length of the roller and repeat along the length of the wall. This helps to achieve a uniform finish.
Paint your way to a better sleep
Experts believe the colours on your bedroom walls can have a huge impact on your mood, mental wellbeing and even how you sleep. While some shades evoke relaxation, others can stimulate the mind and make you more awake.
No need to be blue
Blue is associated with feelings of calm and serenity and research shows that it can reduce the heart rate, which is helpful when it comes to drifting off to sleep. Try Resene Duck Egg Blue or Resene Emerge.
Going green
Green is serene. If you’re looking to create a restful feeling in your bedroom, reach for Resene Rainee or Resene Secrets.
How to paint over dark interior walls
Need to brighten up your space? Check out these tips on how to paint over dark interior walls with lighter colours.
• Make sure the surface is clean. If the existing paint is sound waterborne paint, no sanding is needed.
• Apply a white basecoat over very dark colours when changing to a pale colour. Use Resene Quick Dry waterborne primer undercoat over the dark paint.
It’s all white
Choosing neutral colours for your bedroom can not only make a room seem larger but can also bounce the light around it depending on which way it’s facing. Dip into Resene Half Rice Cake or Half Resene Sea Fog or warmer neutrals such as Resene Eighth Sisal or Resene Quarter Spanish White.
Think pink
• After the primer, give the wall a very light sand and wipe off sanding dust, then apply your interior Resene paint finish using a roller. Remember –your objective here is to change the colour from dark to light
– make the first coat count.
• To get the best coverage you’re probably looking at two good coats of paint over the undercoat. The important thing to remember for a dramatic colour change is to apply the right amount of paint. Check the coverage on the can and make sure you are not spreading it too far.
Pink is a physically calming colour but is also playful and nostalgic, taking people back to their childhoods. Try Resene Eighth Biscotti or just a hint of pink such as Resene Half Sauvignon. Watch
• Approach the first coat a bit differently from normal painting. You’re trying to change colour, so put the paint on a little bit thicker. Go slow and steady, put on more paint and lay it off. Concentrate on getting as much coverage as possible in your first coat, which will make it easier to get a good finish with the second coat.
For more detailed instructions and to watch the how-to video, visit www.masterstrokebyresene.com/ how-to/paint-over-dark-walls
Resene Wallpaper Collection F170202 teamed with panelling painted in Resene Atomic.
Resene Duck Egg Blue
Resene Emerge
Resene Rainee
Resene Secrets
Resene Eighth Biscotti
Resene Half Sauvignon
How to paint joinery
Windows
If you’re dealing with a previously painted surface, treat any moss and mould with Resene Moss & Mould Killer. Then wash and scrub the window joinery with Resene Paint Prep and Housewash or Resene BioCleaner then sand off any flaking paint using 100-200 grit sandpaper. Prime, or spot prime with Resene Quick Dry primer undercoat.
• Make sure you invest in a good quality cutting-in brush. If you’re not a confident painter, mask the edges of the window with painter’s tape. Remember to remove the masking tape before the paint dries.
• Open the windows and start by painting the inner parts of the window frame – the bits you don’t see when the windows are closed, such as the casement and the rails.
• Next up are the edges of the window itself. Start at the top and work down the sides before painting the hinges and the underside of the window.
• After the internal parts of the
Top tip Resene Lustacryl semi-gloss waterborne enamel and Resene Enamacryl gloss waterborne enamel are recommended for both the interior and exterior of window frames.
window are painted and dry, move on to the main parts of the window. Start at the top sash, then work your way down the side sashes, followed by the mullion rail (centre rail).
• Always make sure the paint has completely dried before you shut your window.
Interior doors
• Remove hardware such as door handles, locks and coat hooks.
• Clean the door using Resene Interior Paintwork Cleaner.
• Once dry, give the door a sand, then wipe off sanding dust using a clean, damp cloth.
• Fill any gaps or cracks using a flexible sealant like Zero Gaps. Sand back filled areas, wipe off sanding dust and spot prime.
• If the existing door paint is waterborne and in good condition, no sanding or priming is needed.
• Apply two coats of Resene Lustacryl Kitchen & Bathroom allowing dry time between coats. Paint the door jamb and sides
Top tip: To make your skirting board pop, paint it in a bright colour or increase the contrast by opting for gloss paint such as Resene Enamacryl.
first, before painting the centre panels and then the outside edges of the door. Cut in around the handle last.
Skirting boards
To paint skirting boards, use waterborne enamels like Resene Lustacryl semi-gloss or Resene Enamacryl gloss. First clean the skirting board with Resene Interior Paintwork Cleaner. If the skirting paint is waterborne and in good condition, no sanding or priming is needed. Next, use Resene EzyFill Quick to fill the gap between the wall and the skirting board and fill any holes.
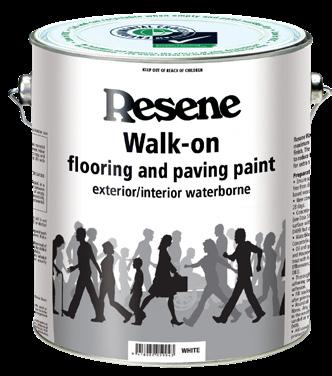
How to paint a wooden floor
Painting a wooden floor is a practical and cost-effective way to inject new life into a dated space. It’s a great DIY project, because painting a floor is no harder or more time-consuming than painting walls.
• Clear the room, remove furniture and sweep and clean the floor thoroughly.
• Use a scraper to remove any loose carpet glue residue, scraping along the grain.
• Using appropriate floor sanding equipment and wearing recommended protective clothing, carefully sand the edges of the floor, sanding in the direction of the grain. Once this is done, sand the rest of the floor.
polyurethane on it, apply a coat of Resene Waterborne Sureseal.
• Give your Resene Walk-on paint a good stir. Cut in around the edges using a brush, then use your roller to paint the whole floor. Apply two coats and always allow drying time between each coat. Remember to lay off your floor with a roller, like you would for your wall.
More tips
Once dry, sand the filled area and clean away any dust before spot priming with Resene Quick Dry. To protect the walls, use low-tack painter’s tape to mask the edge of the skirting board. Paint the flat front of the skirting board with a small flat oval or flat-edged brush. Then paint the top edge carefully with a small cuttingin brush. Remove the masking tape from the wall when the paint is almost dry.
For more expert advice and to watch the how-to video, visit www.masterstrokebyresene.com/how-to/paint-an-interior-door
• Vacuum, clean and wipe over with a slightly damp cloth. Ensure that the floor is dry before going on to the next step.
• Use masking tape to mask the edge of the skirting board that meets the floor. If the timber floor is bare or has been sanded back to bare and has no polyurethane coating on it, then you will need to apply one coat of Resene Quick Dry primer undercoat. If you’re painting directly onto a goodcondition wooden floor with
• Once the final coat of Resene Walk-on is dry, apply Resene Concrete Wax with a roller. Leave for 48 hours before allowing foot traffic on the floor.
Top tip: You can also restain and clear finish timber or repaint other flooring, such as concrete and tiles. For free advice ask Resene ColorShop staff or use the Resene Ask a Paint Expert online, www.resene.com/paintexpert.
To watch a how-to video, visit www.masterstrokebyresene.com/ diy-projects/how-to-paint-wooden-floors
Floor painted in Resene Blanched Pink.
How to use paint to refresh wet areas
Paint is an easy way to give your bathroom and laundry a new look. The prep work is as important as the colour choice, so follow these tips for a long-lasting finish.
Choose your colour
Blues and greens are perennial favourites for bathrooms – given they’re the colour of water and are relaxing to look at.
An ensuite is a personal space, so it’s a good place to be a bit bolder with colour if you want to. And if your colour experiment doesn’t work, just paint it again. If you’re doing a complete bathroom overhaul, choose your bath, shower and fittings first. It’s easier to find a paint colour
waterborne paint dosed with Resene MoulDefender to help put the brakes on future mould growth. Make sure you check and adjust your ventilation too.
Prep work is key
Tips for the laundry
The best Resene products for wet areas
to match bathroomware than it is to find tiles to match your choice of paint colour.
Think about mould
All wet areas are at risk from mould, especially if there’s not adequate ventilation. Mould isn’t just unsightly, if it’s left unchecked it can shorten the life of your paint job by penetrating the surface. If it gets established it can grow through subsequent coats of paint, affecting adhesion and ruining the look of all your hard work. Use Resene Moss & Mould Killer to kill mould and sterilise surfaces and then paint with Resene Kitchen & Bathroom paint with anti-bacterial silver and MoulDefender or ask to get your Resene
The first step is to clean your bathroom thoroughly, then it’s time to sand and wipe clean. Dealing with existing paint in older homes will need a bit of elbow grease. If you’re painting over waterborne paint, you can usually skip the sanding step, unless it is a very hard finish. After sanding, fill any dings or marks with Resene EzyFill Quick, then prime surfaces with Resene Quick Dry undercoat and follow with two coats of topcoat. If the surface has yellowed or has water staining, apply Resene Waterborne Sureseal instead. Learn more
Top tip: Use Resene Waterborne Sureseal pigmented sealer in new wet areas such as kitchens, bathrooms and laundries before painting to create a barrier to protect the plasterboard and plaster stopping from moisture. If not sealed, condensation can be drawn into the paint film and through to the plaster, causing damage.
Resene SpaceCote Kitchen & Bathroom is the perfect choice for laundry walls and ceilings. This waterborne paint range is ideal for wet and steamy areas due to its added antibacterial silver and MoulDefender. It is highly durable, low odour and also Eco Choice-approved. If your laundry features old lino on the floor, you can give it a new lease on life with Resene paints. First, seal the floor with Resene Waterborne Sureseal, before painting with Resene Walk-on, a durable paint designed for floors. Allow to dry before applying Resene Concrete Wax. Paint windows and door architraves in wet areas with Resene Lustacryl Kitchen & Bathroom. This hardwearing waterborne paint is ideal for the trims in wet rooms with enamelstyle toughness and the added benefits of antibacterial silver and MoulDefender. Make use of the vertical space in your laundry by adding shelves. Prime timber shelving with Resene Quick Dry before painting with Resene Lustacryl Kitchen & Bathroom. Make the shelves a feature by painting in a bold modern colour. You can switch out the colours every few seasons without having to repaint the whole room.
• Resene SpaceCote Kitchen & Bathroom is ideal for painting walls and ceilings in wet areas – but don’t paint inside your shower area. This Eco Choiceapproved waterborne paint is highly durable and well-suited for wet, steamy areas such as kitchens and bathrooms due to the added antibacterial silver and MoulDefender.
• Resene Lustacryl Kitchen & Bathroom is a semi-gloss waterborne enamel style paint, that’s ideal for painting joinery and cabinetry in wet, steamy areas. This semi-gloss formula is easy to wipe clean, and features Resene MoulDefender and antibacterial silver.
• Resene Waterborne Sureseal is a pigmented sealer that should be applied before painting new plasterboard in wet areas.
• When repainting any melamine or laminate cabinets, apply Resene Waterborne Smooth Surface Sealer or Resene Laminate and Melamine Primer. Allow to cure for 48 hours before painting.
• Steam and condensation can cause surfactants in new paint to appear as shiny streaks. To ensure your bathroom and ensuite paint finish looks its best, for the first 5-7 showers wipe steam moisture with a lint-free cloth and remove any marks with Resene Interior Paintwork Cleaner.
• Once you have your finished painted area, remember to look after it. See the Resene Caring for your paint finish brochure for cleaning tips.
Resene Wallpaper Collection RD80029 is painted in Resene Obelisk metallic paint, bathroom cabinet in Resene Blast Grey metallic paint and panelling in Resene Alabaster.
How to paint tiles
Replacing bathroom tiles can be a costly and time-consuming undertaking, but did you know that tiles can be painted? Giving old tile floors and walls a new lease of life with paint will not only transform your space, but it will also bring a clean, fresh look to your bathroom.
Use Resene Waterborne Sureseal before applying paint. The best paint option for walls in damp areas like bathrooms and kitchens is Resene SpaceCote
Low Sheen Kitchen & Bathroom, which is a waterborne enamel for a hard wearing and washable finish or choose Resene Lustacryl Kitchen & Bathroom if you’d like a semi-gloss finish.
measure, especially in bathrooms and on flooring in wet areas.
• Some tiles can be sanded lightly to create a rough matt surface. This will help the paint adhere to the tiles better. If your tiles are too hard to sand, just make sure they are well cleaned.
• Wash and rinse off the tiles using a wet sponge and clean water, then leave them to dry completely.
• Use masking tape to protect any areas you don’t want your paint to go, such as where the walls meet the floor and ceiling and any other edges. Press firmly on the edge of the tape along the area to be painted to give a crisp clean finish.
• Clean tiles before you start and use Resene Moss & Mould Killer to treat any moss or mould.
• Once you have gotten rid of grime, use an old toothbrush to scrub your grout lines. Don’t be afraid of doing the whole process again for good
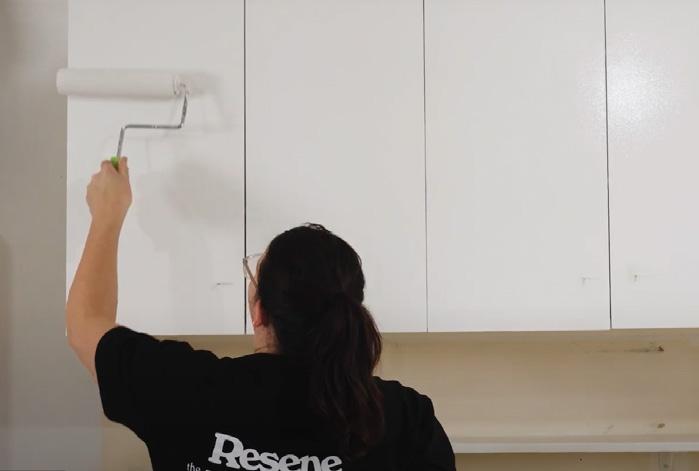
How to paint your kitchen cupboards
If a complete kitchen renovation and refit isn’t in your budget, then save your pennies by rejuvenating tired kitchen cabinets with Resene paint. Painting kitchen cabinets is an easy job for DIYers and is a quick way to freshen up the look with a sleek new finish and on-trend colour.
You will need:
• Resene drop cloth
• Resene paint pot
• Resene paint can opener
• Resene stirrer
• Orbital sander
• Sanding discs (80 grit)
• Dust mask
• Safety glasses
• Dust brush
• Before painting, tiles must be primed with Resene Waterborne Sureseal. This will help your topcoats to grip onto the surface. Leave to dry.
• Now it’s time to apply your topcoats. Apply two coats leaving dry time between coats.
Top tip: Always make sure you have plenty of ventilation when painting, by keeping windows and doors open and using a fan where needed. This is especially important in small rooms or wet areas.
will protect you from any wayward dust particles. If the surface is already painted in a waterborne paint finish in good condition, you can skip the sanding and sealing stage and go straight to step 3.
2 Apply a coat of Resene Waterborne Smooth Surface Sealer or Resene Laminate and Melamine Primer (for laminated or melamine cupboards) or Resene Waterborne Sureseal (for already painted or varnished high gloss cabinetry) and allow it to dry and cure. Resene Waterborne Sureseal will help to block any stains such as fly spots from seeping through the paint and yellowing the finish.
1 Prep the cupboards for painting by sanding the surfaces with 80 grit sandpaper. Wipe away all the sanding dust with a dusting brush or a clean, damp cloth. Note: Make sure you’re wearing the correct PPE (personal protective equipment) when completing this task: a dust mask and safety glasses
3 Apply two coats of your chosen paint. Resene Lustacryl Kitchen & Bathroom is a semi-gloss waterborne enamel style paint featuring anti-bacterial silver protection and MoulDefender making it the ideal choice for using in steamy areas such as kitchens where cleanliness is particularly important. To paint, use the same method as the sealer, using a cutting-in brush followed by a smooth surface roller on the flat areas of the cabinets. Apply two coats, allowing each coat to dry thoroughly in between application. Wrap your
paintbrush in a reusable plastic bag to keep the paint on the brush fresh and ready for the second coat.
Allow to dry. Full cure takes 28 days so take care while the curing is finishing. Enjoy your new look kitchen.
Top tip: If your cabinetry has handles, screw in new handles to add to your fresh new look.
Learn more
Painted in Resene Edward.
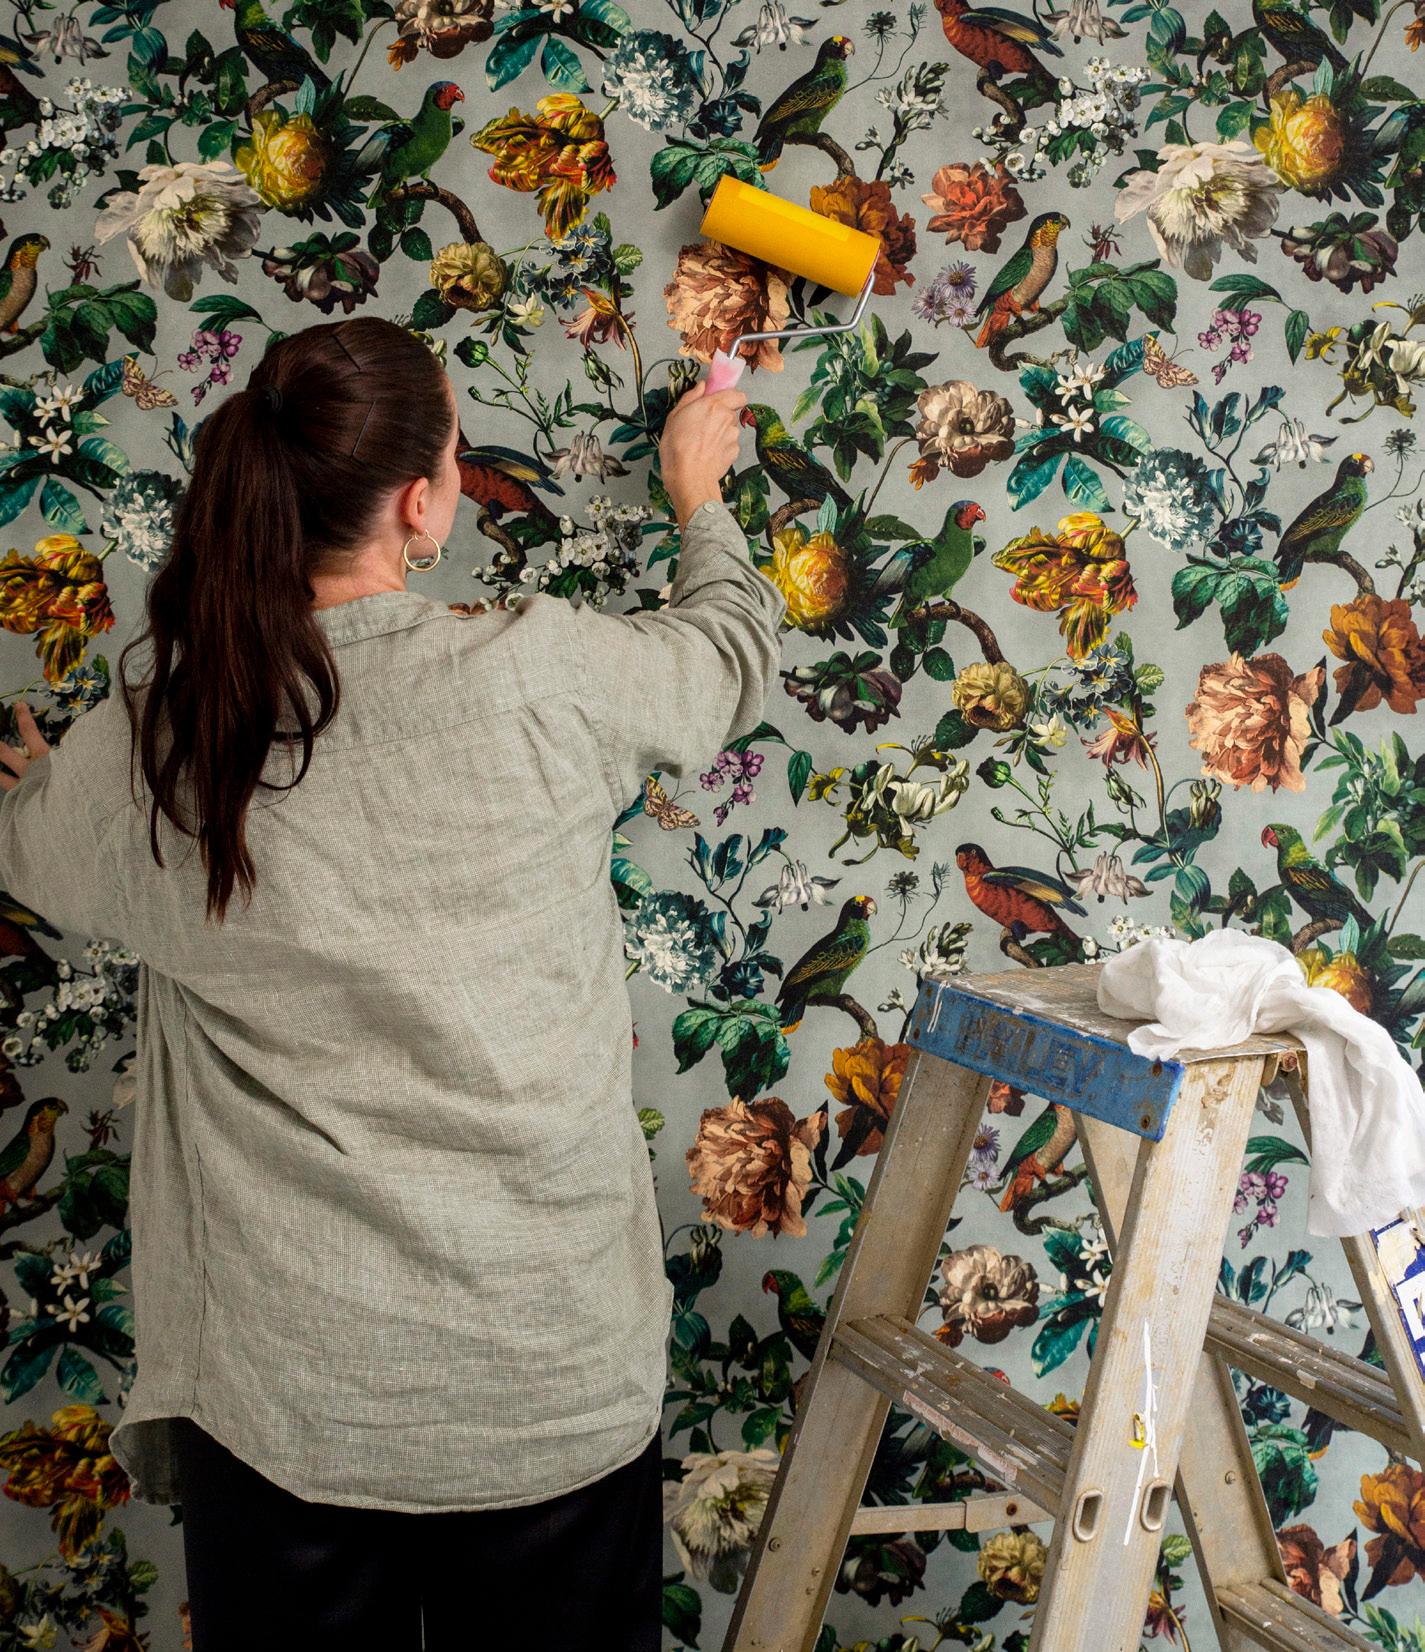
Transform your walls with wallpaper
Gone are the days when wallpapering a room required faffing about pasting strips of wallpaper laid out on a trestle table before dangling soggy paper against the wall. The latest paste-the-wall designs are much easier to hang than their flower power predecessors, and even better, the Resene
it hard to narrow down your choices, consider the following:
1. The room you are decorating and the mood you wish to evoke in that space.
2. The scale of the wallpaper pattern in comparison to the size of your room.
3. The colours in the wallpaper design and colours being used elsewhere in your room.
4. The theme of the print.
5. The placement – will it cover all four walls of your room, or just a feature wall?
Decode the codes
Wallpaper Collection is full of trend-forward modern designs. Follow these design and decorating hacks and you’ll soon be papering like a pro.
Prints are your pal
Wallpaper can add texture and personality to your space, and Resene ColorShops have many wallpaper sample books you can browse through for inspiration. If you’re finding
Interior Paintwork Cleaner and fill any gaps. Seal with Resene Waterborne Sureseal to prevent the wallpaper paste from being absorbed into the plaster.
Size it up
Wallpaper size is a decorator’s secret weapon. Apply a coat of wallpaper size to your walls before applying the wallpaper paste, this will make it easier for you to apply the wallpaper and line up the pattern.
Hang tight
Each design in the Resene Wallpaper Collection has its own codes, which indicate if the wallpaper is a non-woven paste-the-wall design, whether it’s washable – a great option for children’s rooms – and the pattern repeat. This lets you know how far the pattern goes down the wall before it repeats itself. A pattern repeat could be as small as 10cm or many times larger. This will give you an idea of the scale of the pattern as well as how many rolls you might need. On average, one wallpaper roll will provide three ‘drops’ on your wall, but it depends on the pattern repeat and the size of your wall.
Seal the deal
Like most DIY jobs, prepping well is key to a good finish. Clean painted walls with Resene
Resene wallpapers to try
Use a plumbline to mark a straight line then measure the distance of the wall from the ceiling to the skirting board, allowing at least 10cm of overhang at both ends. Apply a thick coat of wallpaper paste to the wall then line up your first strip of wallpaper. Press it into the wall using a rubber press roller or wallpaper brush. When you reach the bottom use a straight edge tool to trim excess.
Top tip: Some wallpapers, especially paper-based designs, can shrink in hot weather. Leave wallpaper to dry in a well-ventilated room. If the room is very hot, you may need to use a fan (or heat pump set to cool) to keep the room at a stable temperature. Never turn the heater on while wallpaper is drying.
For a step-by-step guide on how to hang wallpaper, visit www.masterstrokebyresene.com/wallpaper-hanging-tips
Resene Wallpaper Collection 292151
Resene Wallpaper Collection E307302. See more designs at your Resene ColorShop or view a taste online www.resene.com/wallpaper.
Exteriors
Mastering the outdoors
Painting the exterior of your home might just be one of the biggest DIY projects there is, but freshly-painted walls can instantly boost your home’s street-appeal and have a positive effect on the way you feel about where you live. The key to tackling this task is breaking the project into manageable pieces. Remember, Rome wasn’t built in a day!
How to paint an exterior door
Painting your front door is an ideal weekend project and can be completed in only a few hours and for such a small area it can make a huge impact on your home.
solventborne formulas – and because it’s water-based, clean up is much easier. If you wish to have a very high-sheen finish, opt for Resene Super Gloss, a solventborne enamel. Choose a Resene CoolColour if you’re planning a dark colour.
2 Paint check Establish what type of paint you currently have on the door. Check to see if it’s a solventborne enamel or waterborne enamel by rubbing methylated spirits on it. If it’s waterbased, it will come off onto the cloth. If it’s painted with a solventborne paint, more prep may be required.
3 Remove and mask Take off all hardware from the door, then mask out anything you don't want to get paint on, such as hinges, latches or glass.
4 Sand and wipe Give the door a light sand then wipe off the sanding dust using a clean, damp cloth. Remember to wear a dust mask when sanding. Note: If your paint is flaking, additional sanding may be required.
followed by the vertical ones, making sure your brushstrokes follow the grain of the timber.
7 Finishing touches Don’t forget to paint your doorstep and porch using Resene Walk-on paint, a tough acrylic resin for maximum abrasion resistance. Allow your door and doorstep to fully dry before closing the door.
Top tip: You can also stain your front door with a Resene wood stain. Unless you are restaining the same colour, you will need to remove all the existing coating to allow the new stain to penetrate.
Adore your door
What order to paint your exterior
• Work from the top down
• Clean and prep all areas
• Start by painting the roof, soffits, eaves or fascia
• Paint decorative trims such as fretwork or balustrades
• Next paint walls or the main area of cladding
• Paint windowsills and window trims
• Paint or stain the porch and front deck and paths
Front doors are one of the most used and frequently touched areas of your home, which is why a waterborne enamel such as Resene Enamacryl gloss is recommended due to its durability, fast drying time and enhanced mould resistance. Once painted, surfaces coated in Resene enamel paints can also be easily wiped clean.
Resene Enamacryl is an Eco Choice-approved waterborne paint and has fewer VOCs (volatile organic compounds) than traditional
You will need:
• Drop cloth
• Methylated spirits
• Clean cloth or rag
• Painter’s tape
• Sandpaper
• Dust mask
• Contract Filler
• Resene Quick Dry primer
• Resene Enamacryl or Resene Super Gloss
• Paint pot
• Paintbrushes
1 Protect the floor Start by placing a drop cloth on the floor to protect it from any paint drips.
5 Fill and prime Fill in any holes or defects with contract filler and wait for it to set, then apply one coat of Resene Quick Dry primer and allow it to dry.
6 Paint If you are painting the door jamb, paint this before the main door. If your door has glass, use a cutting-in brush to cut in around the glass, or mask off the glass with masking tape, then paint the panels. Paint the horizontal panels
When it comes to colour, there’s a rainbow of options from Resene, and a colourful door can add personality to your home. Some bold door colours to try include Resene Pohutukawa, Resene Daredevil or Resene Spotlight. If you’re opting for a dark colour such as Resene Nocturnal, ensure you use a Resene CoolColour variant.
Resene Pohutukawa
Resene Daredevil Resene Spotlight
Resene Nocturnal
Watch
Home painted in Resene Grey Friars, front door in Resene Edward and trim in Resene Sea Fog.
Advice for painting weatherboards
Many heritage homes such as villas, bungalows and 1950s houses have timber weatherboards that will at some point need repainting. Repainting weatherboards does take time, but it’s a relatively simple task so ask your family to help.
What type of paint to use on weatherboards
Before you start, consider what type of finish you’d like for your exterior. Resene Lumbersider
Low Sheen is an Eco Choiceapproved paint ideal for a number of exterior projects, including weatherboards. Its low sheen will help to hide surface imperfections. Resene Sonyx 101 is an exterior semi-gloss paint which creates a sleek look,
allowing architectural features such as fretwork to standout. The semi-gloss sheen makes it easier to clean than a low sheen finish. For a high gloss finish, use Resene Hi-Glo or for a matt finish use Resene Lumbersider Matt.
Prep work for repainting weatherboards
The key to a good end result is good preparation. If you’re painting over weatherboards that have previously been painted, first treat moss and mould with Resene Moss & Mould Killer. This can be applied using a garden sprayer and should be left for 48 hours to soak into the timber before rinsing off. Moss and mould l eft untreated can grow through new paint, discolouring and damaging the finish.
The next step is to clean your
home using Resene Paint Prep and Housewash or Resene Bio-Cleaner. This will not only remove dirt, but also any chalky build up from old paint. Once dry, you may need to assess whether your weatherboards need some extra TLC before painting. If you need to sand back flaking paint, use 120-150 grit sandpaper and make sure you wear a mask. Wipe off all sanding dust. Repair any cracks or holes by spot priming with Resene Quick Dry and filling with Resene EzyFill GP, before sanding with 220 grit sandpaper and repriming with Resene Quick Dry.
Painting your weatherboards
Start painting on the shady side of the house. Use a flat brush and paint horizontally across the entire length of the weatherboard, maintaining a wet edge as you go. Start with the top weatherboards and work your way down. You may wish to paint the underside of the weatherboards first using the edge of
your brush, before painting the main part of the board. Divide the exterior into manageable parts, cutting in around hardware such as downpipes or window frames. Always allow the first layer of paint to dry completely before applying a second coat.
Maintaining a wet edge
A wet edge means the end of your painted area is still wet before the next stroke is applied. Keeping a good wet edge will help you get a smoother and better finish. If you allow the paint to dry out halfway along the weatherboard, there may be a visible line – or lap mark – in the paint. If you find your paint is drying too quickly, you may need to add Resene Hot Weather Additive to your paint, which will help slow down the drying time.
Paint it safe
If your house is older and you suspect there may be lead paint on your weatherboards, you’ll need to take extra precautions as lead paint is a serious health hazard. To test for lead paint, pick up a Lead Paint Test Kit from your local Resene ColorShop or reseller. If working with lead paint, always wear a respirator mask and gloves, and never touch lead paint with bare hands or allow paint chips to fall into your garden soil.
Top tips for
successful house painting
• Concentrate on a small area at a time.
• If you’re doing horizontal weatherboards, do the whole weatherboard or stop at a logical break point so you don’t get overlap marks.
• Plan your day and work around the sun so you are painting in the shade. Either work ahead of the sun, or follow it around the house – allowing time for the surface to cool a little – so you’re not working in direct sunlight. That way your paint won’t dry too quickly and you can keep a wet edge. Keep your paint can out of the sun too.
• Be realistic about what you can achieve in a day. Set yourself achievable targets.
• Take regular breaks and drink lots of water. While you are taking a break, wrap your brush or roller in reusable plastic so you can pick up where you left off.
• If you need help with a tricky surface, ask the team at your local Resene ColorShop or reseller, or use the Resene Ask a Paint Expert service online, www.resene.com/paintexpert for free advice direct to your inbox.
• If you’re painting a dark colour outside consider using a Resene CoolColour. A Resene CoolColour looks like a normal colour but thanks to special pigment technology it reflects more heat, so it doesn’t get as hot as a normal colour would. Check with Resene staff whether a Resene CoolColour is right for your project.
These weatherboards are being primed with Resene Quick Dry.
Prep
and paint or
stain a timber fence
Like the bow on a present or a frame around a picture, a freshly painted fence is the finishing touch that will really elevate your home. Fences aren’t just for privacy or aesthetics, they’re a necessity for security and safety, helping to keep pets within your property and kids safe from swimming pools. It pays to look after this essential home feature.
The best paints and stains for fences
Resene Lumbersider Low Sheen is a versatile, durable paint recommended for exterior timber, including fences. Its long-lasting low-sheen formula will withstand harsh UV light, as well as wet and rainy conditions. For a higher sheen semi-gloss finish, try Resene Sonyx 101. Or for a lower sheen, try Resene Lumbersider Matt. To achieve a more
Paint your fence in three easy steps
1 Use a cutting-in brush to paint between the fence posts and the top and bottom of each plank.
Top tip: A good technique when using a paintbrush is to move your wrist rather than your arms and shoulders, and to hold the brush at a 45° angle to the surface.
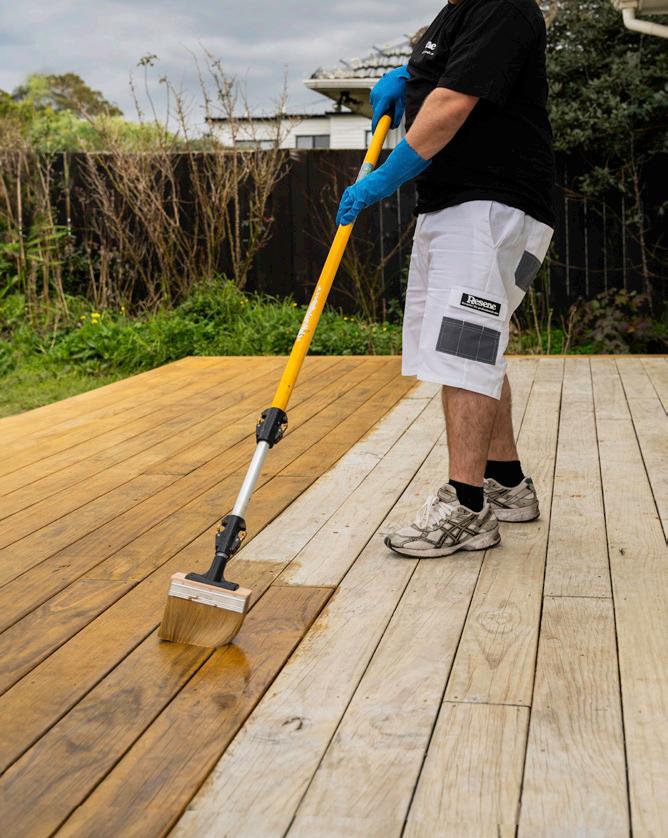
Top tips for painting or staining rough sawn timber
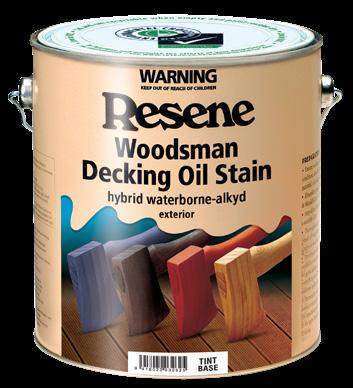
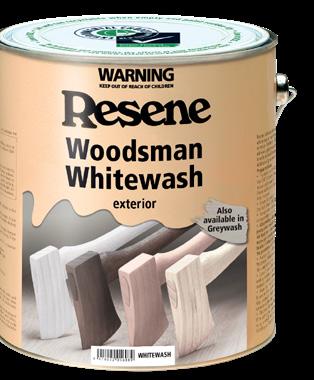
natural look, consider using stain instead of paint. Resene Waterborne Woodsman is a semi-transparent product that allows the natural grain of the timber to show through.
Prep and repair
If your fence isn't brand new, you'll need to give it a good clean before painting or staining. Treat the timber with Resene Moss & Mould Killer, then wash thoroughly with Resene Timber and Deck Wash.
If your fence is extremely weathered you may need to apply spot treatments of Resene TimberLock, a wood preserver and conditioner designed to protect timber from further damage before you paint. For a new timber fence, prime with Resene Quick Dry. If the fence is already painted and the paint is in good condition, you can apply topcoats direct.
2 Paint the main part of the fence using a brush, roller or spray. If choosing a paintbrush, use the largest you can manage – a 75-83mm brush is ideal if you are strong and do a lot of DIY work, but if you are less experienced try a lighter brush, such as a 63-75mm brush. If you’d prefer to use a roller, choose the Resene Deck and Fence roller kit, with a Resene #15 roller – its nap is ideal for rough surfaces. Paint using long strokes following the grain of the timber. Remember to maintain a wet edge, and not allow the paint to dry before the next stroke is applied. If you have a large fence to paint you can hire spray gear. Make sure you practise using it before you tackle your fence. If you have lots of gaps in your fence, a brush or roller will make it easier to control where the paint goes.
Staining exterior timber
Pergolas, retaining walls or fences often use rough sawn or band sawn timber which needs a different painting and staining approach to flat sawn timber such as weatherboards.
Learn more
3 Allow the paint to dry before applying a second coat. If you are using a self-priming paint, such as Resene Lumbersider Low Sheen, apply a third coat for best results.
Resene Waterborne Woodsman wood stain is ideal for many exterior timber projects including weatherboards and fences. If your timber has been previously stained, check what product was used – if an oil-based stain was used, opt for Resene Woodsman Wood Oil Stain. If you’re unsure what product to use, ask the staff at your local Resene ColorShop. Staining timber is often faster than painting, but it will need to be reapplied every two to three summers. Stains are semi-transparent so the colour of the stain can vary. It pays to use a Resene testpot to test the colour on a timber offcut first. When applying a Resene wood stain, allow the stain to soak into the surface of the wood for two to three minutes before using a clean, dry cloth to wipe off any excess stain from the surface.
• The first step is to treat the timber for moss, mould and algae using Resene Moss & Mould Killer. Due to the rugged surface of rough sawn timber, mould spores can penetrate deep into the grain of the wood, and if left untreated they can grow through new paint and damage and discolour the paint. Although it might be tempting to use a water blaster, this is not advised on rough sawn timber as it can damage the fibres of the wood.
• Rough sawn timber will need 30-40% more paint and stain than flat wooden surfaces due to the rugged texture and depth of the wood grain, so factor this into any paint or stain calculations. Remember the stain or paint will absorb quickly into rough sawn timber so it might take longer to apply the first coat and use more product.
• Don’t use a clear finish on your exterior timber as it does not provide any protection against UV damage. If you’d like to keep the natural colour of the timber, choose a colour as close as possible to the natural timber colour and apply that.
For more expert advice and how-to videos, visit www.masterstrokebyresene.com/how-to/prep-and-paint-a-timber-fence
This fence is stained in Resene Pitch Black.
How to stain a deck
A great deck is transformative for you and your home. Decks create welcoming entrances, outdoor dining spaces and excellent areas for entertaining. If your deck is showing signs of winter wear, Resene Woodsman wood stains can take your deck from drab to fab. Resene Woodsman wood stains are semi-transparent in colour and allow the wood grain and natural beauty of the timber to show through. Resene Woodsman will also protect timber from damage from UV light and the elements. Even
stained in a solventborne stain, opt for Resene Woodsman Wood Oil Stain. If your deck is built from kwila, Resene Kwila Timber Stain is a special stain designed to match the natural red-brown colour of kwila and is also suitable for other exotic hardwoods. For a natural lightly oiled look, try Resene Furniture and Decking Oil on your deck.
Give your deck a treat
better, staining your deck is a project that can be completed quickly and easily, making it the perfect job for a DIY weekend.
Which Resene product to choose?
Whether your deck is made of dark and handsome hardwood, or light natural pine, there’s a Resene product – and colour – suitable for every type of deck. Resene Woodsman Decking Oil Stain is especially designed for timber decks. This hybrid waterborne alkyd stain has lower odour and VOCs (volatile organic compounds) than traditional solventborne stains and is available in many colours, including popular hues like Resene Natural, Resene Heartwood, Resene Cedar and Resene Pitch Black. Alternatively, if you are after a traditional looking wood finish, or you are restaining a deck previously
Before you start staining, you need to prep the surface of the deck. First treat for moss and mould using Resene Moss & Mould Killer. If left untreated, moss, mould and fungi can damage timber and discolour the stain. Spray and allow it to soak into the timber for 48 hours to kill all mould spores before scrubbing and rinsing clean. Once the moss has been treated, clean the deck using Resene Timber and Deck Wash using a short-bristled brush before rinsing with water. Remember, because stains are semi-transparent, the cleaner the timber is at the beginning, the better the end result.
Stain and able
When staining a deck, a good result comes down to using the right Resene products
Did you know?
Washing timber before staining opens the wood fibres, helping the stain to penetrate better and for the timber to better soak up the stain. With new timber it’s especially important to clean it first as this can also help remove tannins in the wood, which if left untreated can stain furniture and clothes.
Deck staining tips and tricks
• UV light, rain and the weather are harsh on decks. Properly maintained decks will last longer than decks that are left uncoated.
• Stains are transparent and the colour will vary depending on the type of timber and the number of coats of stain applied. It’s best to test on an inconspicuous area first.
Learn more
and tools and planning your approach (so you avoid walking over your stain or staining yourself into a corner). First use a paintbrush to apply the stain to any fiddly or hard to reach areas such as the sides of the deck or steps. For the flat surfaces of the deck, use a Deckmaster Brush or lambswool applicator pad to apply the stain using long strokes down the length of the planks, following the grain of the timber. In hot weather, stains can dry quickly. To avoid lap marks try to maintain a ‘wet edge’ so your stain doesn’t dry out before the next stroke is applied. To do this, it’s best to work in small sections. The first coat of stain should saturate the timber, but excess puddles of stain can be wiped away using a clean, dry cloth. Allow the first coat to dry before applying a second coat.
• Avoid applying too much stain. It needs to be able to penetrate into the surface.
• The second coat of stain will be easier to apply than the first and the stain will spread easily. Lay off the second coat carefully and wipe away excess stain using a clean, dry cloth to avoid lap marks or drips.
• Old or rough sawn timber will soak up more stain than smooth timber, so you may need to apply more stain.
• For dark-coloured stains, the Resene CoolColour formula is recommended for most projects. This will help your deck stay cooler to touch and reduce the risk of heat related damage.
• Avoid water blasting your deck. This can damage the timber, leading to splinters and a need to replace it faster.
• Apply Resene Deep Clean every 6–12 months to keep your deck looking good. No scrubbing needed!
Resene Kwila
Resene Cedar
Resene Heartwood
This deck is being stained with Resene Woodsman Wood Oil Stain in Resene Natural.
How to refurbish outdoor furniture
In this part of the world, we really put our outdoor furniture to the test. In summer, our UV light levels are much higher than many other countries. On the flip side, high levels of rainfall and ongoing dampness in winter can wreak havoc on outdoor furniture. Luckily, Resene has a range of products that will help rejuvenate your furniture and protect it for the future.
A clean start
Before restaining timber outdoor furniture, you may need to treat it for mould, algae and moss using Resene Moss & Mould Killer – especially if the furniture has been stored outside. Before you treat, make sure you remove any fabric seating parts. Spray fabric with Resene Deep Clean once or twice a year and leave it to work with the weather to clean your fabric. Try it on an inconspicuous area of your fabric first.
After the mould has been treated, clean the furniture to remove dirt and grime using Resene Timber and Deck Wash before hosing down. If your furniture is painted, wash with Resene Paint Prep and Housewash or Resene Bio-Cleaner. Never waterblast furniture as it can damage the fibres of the timber.
After washing, the timber will be furry and there may be
some small patches of stain left. A machine sander will remove these and smooth out the surface for restaining, but you can also do this by hand.
Which stain to choose
There are many types of stains to choose from in the Resene exterior woodcare range.
Resene Woodsman Wood Oil Stain gives a traditional finish. You could also use Resene Waterborne Woodsman, which comes in a wide range of colours and can be used on
beauty of the wood grain still shows through.
a range of outdoor projects. Another option that allows the natural wood grain to show through is Resene Timber and Furniture Gel. This non-drip, easy-to-apply gel formula is ideal when staining furniture with fiddly parts such as slats or dowelling.
For a Scandi look, try a colourwash stain like Resene Woodsman Whitewash or Resene Woodsman Greywash (light or mid). These tend to sit on the surface of the timber more than a Resene Woodsman stain but, unlike paint, the natural
Kwila furniture – weathered or new – can be stained with Resene Kwila Timber Stain. This product is especially designed for kwila but can also be used on other exotic hardwoods. If you’re not sure which product to use, ask your Resene expert. For a soft natural look, try Resene Furniture and Decking Oil, a semi-transparent resin and wax blend that brings out the beauty of timber. It will protect outdoor furniture from UV damage and mould while maintaining its natural look. Resene Furniture and Decking Oil is designed for annual application.
To apply the stain
Resene Woodsman stains can be applied using a brush or a foam speedbrush. Pour your stain into a paint tray and load up the brush – you won’t need much product. Apply the stain in long clean strokes following the grain of the timber. Allow the stain to soak into the timber for two to three minutes before wiping any excess away using a clean, dry cloth. Remember stain is like tinted glass – the more coats you put on, the darker it will get. Most stains will need to be reapplied every two to three summers. Furniture
Outdoor furniture refurbishing tips
• When staining new outdoor furniture, allow it to weather for at least four to five weeks first, if possible. Clean the furniture with Resene Timber and Deck Wash to remove any tannins and to open up the timber to accept the stain.
• Consider adding a pop of colour to your outdoor furniture with your chairs or table painted in a bright red, blue or green using colours like Resene Red Berry, Resene Resolution Blue or Resene Stromboli. Not only will you inject some personality into your space, but you’ll be protecting your furniture from wear and tear, helping to extend its life.
that’s badly weathered may absorb more stain and more product may be required. To help keep lichen at bay, spray your furniture with Resene Deep Clean once or twice a year and it will work with the weather to give you a cleaner surface.
Resene Woodsman Wood Oil Stain in Resene Natural is applied using a foam speedbrush or you can use a regular paintbrush.
Resene Red Berry
Resene Resolution Blue
Resene Stromboli
Clean up
Post-paint hacks
How to clean your paintbrushes
After a long day painting, it’s tempting to just down tools, but taking care of your equipment will help it last the distance and ensure a better-quality job.
• As soon as you’ve finished using your paintbrush, remove any excess paint and soak the bristles in cold water. Next, rinse with plenty of water, making sure you clean up inside the brush, next to the ferrule. The ferrule is the part of the brush that connects the bristles to the handle. Use a brush comb to dislodge any dry paint.
• Once you have cleaned and rinsed your paintbrushes, dab them on newspaper or paper towels or a clean rag to absorb excess water and leave to dry. Store paintbrushes by hanging them up. Use the original cardboard holder the paintbrush is sold in to help keep the shape of the paintbrush.
Top tip: Don’t soak whole paintbrushes in water, commercial cleaners or paint for an extended period of time as they will lose their shape or start to deteriorate. Use Resene Brush Cleaner on brushes occasionally, then follow by washing them in warm, soapy water then rinsing in clean water.
How to get paint out of clothes
For water-based paint
If you have a fresh spill of waterbased paint on your clothes, immediately blot the stain with a wet cloth to remove the excess and to stop it drying. Then get the garment under running water ASAP. If you have one, a soft brush, even an old toothbrush, is perfect for getting residue out of fibres. If the paint has already dried use
need to throw away any rollers coated with these paints.
To clean a roller, follow our MasterStroke by Resene guide.
• Hold the roller by its handle on an angle and use a roller cleaner or Painter’s Multi Tool to scrape the excess paint out of the roller sleeve and into a painting tray.
• Place the roller into a bucket of cold water and leave to soak for a few hours.
Cleaning your roller
By taking care of your paint roller and cleaning it up carefully you can extend its life to use again on future projects. Luckily, as Resene’s waterborne paints such as Resene Lumbersider Low Sheen and Resene SpaceCote are water based, cleaning your roller is a very simple process. Traditional solventborne paints are very hard to remove from rollers and you may find you will
• Wash the roller under running water, pushing your fingers through the pile/nap of the roller sleeve. Keep rinsing the roller until it’s clean.
• Leave the sleeve to dry by standing it vertically on its end. You may want to wrap your roller sleeve in a reusable bag to prevent dust or dirt getting into the fibres.
How to get rid of old paint safely
Whether you’re looking to clear away old paint from the shed or you’re on clean-up for a current DIY project, it’s crucial to dispose of paint safely.
• Clear out the cans. Are you keeping paint for touch-ups or just in case? Make sure you store it properly. Paint can last for many years if it’s stored correctly in a cool area, with the lid on tight.
• Recycle paint that’s still usable. If your paint appears to still be okay, it can be recycled in the PaintWise programme (in New Zealand) or to the Paintback programme (in Australia).
Watch a how-to video, visit www.masterstrokebyresene.com/ how-to/how-to-clean-a-paint-roller
Motsenbocker Lift Off which can also help remove paint and wood stains from carpets, concrete and tiles.
For oil-based paint
Oil-based paint can be more difficult to remove and may even be impossible once it dries. But there is some good news – oilbased paints tend to stay wet longer, buying you more time to take action. Never use water to treat an oil-based paint stain.
Instead, scrape away as much wet paint as you can with a dull knife. Then moisten a clean rag with a little paint thinner and blot the stain until it’s gone.
• Select Resene ColorShops are designated as Resene PaintWise collection centres. Unwanted paint and paint containers can be dropped off for Resene ColorShop staff to check before they accept them. Note: paint lids need to be easily removable and the paint label needs to be legible and match the contents. Resene donates recycled paint to community groups and cans and pails also get recycled.
• You can also donate your leftover paint direct to community groups and schools for them to use on their projects. Make sure you donate the paint while it is still in good condition so it is useful for community projects.
Don’t forget to clean the handle.
Designate yourself a set of painting clothes – that way it won’t matter if you get paint on them.
Get inspired Insider’s guide
Resene
products to discover
Resene Blacktop
If your asphalt driveway is looking the worse for wear, it can be easily reconditioned using Resene Blacktop - a cold-applied, heavy bodied, slip resistant topping for use on asphalt. Based on a bitumen emulsion with graded fillers, Resene Blacktop dries to produce a durable weather and wear resistant finish. For best results apply with a Resene hi-solids roller. Ideal for use on paths, driveways, tennis courts and other recreational areas.
Resene Non-Skid
Resene Non-Skid Deck & Path
is a 100% acrylic coating filled with graded silicas. It has a comfortable grit texture and non-slip finish to give feet and shoes something to grip onto, no matter what the weather. Use it on both concrete and bitumen to give a durable, tough, non-skid finish on all areas where foot traffic is likely.
Resene FX Blackboard Paint
Resene FX Blackboard Paint is a premium washable 100% acrylic coating that comes in classic black, but it’s also available in Resene FX Chalkboard Paint in a range of other fun colours. It’s easy to apply – simply prepare and prime the surface as per normal and then apply two coats of Resene FX Blackboard Paint by brush, roller or spray. It’s also available in a 500ml can, so you only have to buy a small amount to add something a little different.
Resene FX Magnetic Magic
Creating a magnetic masterpiece is easy – simply prepare and prime the surface, apply Resene FX Magnetic Magic and topcoat in your favourite Resene colour. The smoother the finish and the thicker the application, the stronger the magnetic effect will be. Once dry, test your magnets on the Resene FX Magnetic Magic coating to ensure they adhere well before applying topcoats. Ideal for homes, offices and schools.
Top tip: You can combine Resene FX Magnetic Magic as the basecoat and Resene FX Blackboard Paint or Resene FX Chalkboard Paint as the topcoat and create a versatile magnetic blackboard.
How to choose a professional painter
Some paint jobs are harder than others and you may want to call in the professionals. especially for areas like a roof. If you need help finding a painter, fill in the handy Resene Find-A-Painter form at your local Resene ColorShop or www.resene.com/findapainter. Your details will be passed on to up to three professional painters, so you can meet them, compare their quotes and select the one best suited to your job. If sustainability is high on your wish list, consider a Resene Eco.Decorator, www.ecodecorator.co.nz. These professional painters not only use Eco Choice-approved Resene paints, but also make sure paint is applied in a sustainable way and waste materials are cleaned up responsibly.
Top tip: Select one person in your household to be the sole point of contact for your painter. This will eliminate any potential issues that might arise around instructions and paint finishes, etc.
Wall painted in Resene Grey Chateau, floor in Resene
Non-Skid Deck & Path in Resene Half Grey Chateau and Resene Off Piste.
Walls painted in Resene Double Alabaster, Resene FX Magnetic Magic and Resene FX Blackboard Paint.
Wall painted in Resene FX Blackboard Paint.
Looking for a cool creative project that can be tackled in a weekend? Whether you’re after an indoor DIY job or a satisfying outdoor makeover, the experts at Resene and MasterStroke have done all the hard work for you. The only thing you need to do is to decide which one of these projects you are going to start first!
For full instructions and how-to videos, visit www.masterstrokebyresene.com/diy-projects