21 minute read
MGF Newsletter
WELCOME TO THE MGF NEWSLETTER
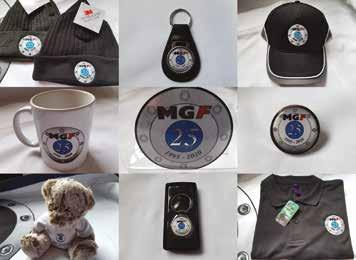
One of the biggest disappointments in a year of disappointments was the inability to hold our Silver Anniversary celebration of the MGF, inspiringly called MGF25, which was scheduled to take place last July. However, we live in anticipation that our disappointment will be reversed, and we can go ahead with the show at the British Motor Museum on Saturday July 24. The whole shebang has been uprooted and transplanted to the new date, so in addition to a large number of MGFs and TFs you will be able to enjoy a series of talks, special displays, MG traders, craft village, competitions and much more, all within the confines of one of the best collections of British motor vehicles in the country. The whole weekend will be enhanced with an evening party featuring our favourite band, Not the Hoople, and the next day, sore heads permitting, an anniversary road run takes place over some of the original 1995 press route from Gaydon to Combe Abbey. Of course, all this is without our COVID-19 binoculars so is subject to change at a moment’s notice, but let’s assume all will be well and if you would like to join us then booking has re-opened for the show, party and road run. Access our new updated show website at MGF25.org for all the latest updates and how to get your tickets. There is a range of merchandise available as well, to add to your MGF souvenir collection, including keyrings, mugs, polo shirts, beanies and baseball hats. To get yours simply go to www.mgfregister.org/shop and look for the MGF25 tab or follow the link from MGF25.org.
Advertisement
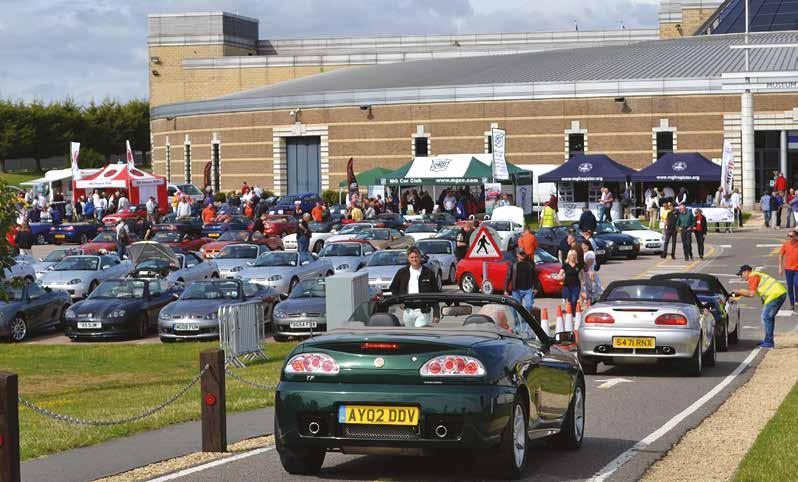
Cars arriving at the British Motor Museum for MGF20
MORE EVENT UPDATES
Sadly, we have postponed our Chairman’s weekend in Northamptonshire, which was due to take place in April and that is looking likely to be the National Event 2022 now, although a date has not been set yet. If MGF25 goes ahead then it is entirely feasible that our events following will also happen, so look out for:August 20-22: Camping in the Chilterns – a weekend under nylon behind the England’s Rose pub in Postcombe, nestled in the lovely Chiltern Hills. Fun and games will be the order of the day. September 17-20: National weekend in Wales based at the Chainbridge Hotel in Llangollen. This is the postponed event from last year and as a result there are some extra rooms now available. December 4-5: Christmas at Cricklade. Our usual annual festive bash in Wiltshire postponed from last year returns with the usual dinner, raffles, dancing and Christmas jumpers. If you are interested in any of these events please contact Ian ‘Worzel’ Wright at events@mgfregister.org
EXCITING START TO THE YEAR
As mentioned in previous columns, we have now established two more Regions for the MGF Register. We are particularly delighted to have representation north of Hadrian’s Wall again. Scotland was one of the original Regions for the Register under Dave Clelland and that was continued by Alan Dunlop. Glenn Nielson has taken up the reins and writes here a little about its history and looks forward to the future when we can once more roam the high roads and low roads. His new group will be called MGFun and Glenn explains the reason for that here:-
MGFun (Scotland)
“MGFun are not the first F and TF group in Scotland. Not long after the F was released, a group called MGF Scotland was created and organised runs and events for Scottish owners and was very successful for several years before dropping off the events radar. Some owners in Scotland still had an appetite for events, so some were organised on the old MG Enthusiasts BBS forum (remember forums?) and an event was organised for September 2002. The people who turned up subsequently became the next group, called Central Scotland MGF (CSMGF). It was run by David Clelland and Gerry Hoirns. Some of you who are long-term F or TF owners may remember “Golden Wheels” owned by Gerry and David’s lovely red MGF Steptronic. CSMGF was very successful at holding monthly meetings and runs throughout the year and introduced the Highlander weekend which attracted F and TF owners from all corners of the UK including Ireland. CSMGF successfully carried the F and TF flag in Scotland from 2002 until 2008. I attended my first MG run with CSMGF in June 2006 and was immediately hooked but unfortunately, in 2008 both David and Gerry pulled their handbrakes on, selected neutral and switched off their interest in CSMGF and the group events came to an end. Again, all was not lost because there was still a strong desire from Scottish F and TF owners to keep events going so 2008 saw the creation of MGFreedom, run by Alan Dunlop and myself. Alan attended the very first CSMGF run in 2002 so he can only be considered as a veteran of the MGF and TF scene in Scotland. To date, Alan remains true to the models and he has a serious F and TF collection. MGFreedom was hugely successful in delivering runs and events in Scotland, nationally and in Europe until around 2016 when events started to dwindle. The now independent MGFreedom group still exists and only focusses on holding the famous annual Highlander event begun by CSMGF in 2002. With MGFreedom concentrating on the Highlander event each year, this left Scotland without a dedicated F and TF group to provide regular runs and events for Scottish owners. The force of the F and TF in Scotland is strong and with Scotland’s amazing roads and wonderful scenery, we have the perfect basis for having MG “Fun”. So what’s the plan? The success of the previous groups cannot be ignored, so I won’t be reinventing the wheel. Initially I aim to run MGFun in line with our forerunners and tweaking things as the group develops. This means: 1. Regular/monthly pub meets 2. Regular/monthly summer runs 3. Annual weekend event 4. Short winter runs 5. Attendance at car shows I need to mention Covid-19 as this is the deciding factor for the foreseeable future and will no doubt impact upon our plans going forward. As I type this in midJanuary 2021, there are already cancelled


MGFun Logo
events in Scotland during 2021 so, when allowed, we will start moving towards having pub meets and organising runs/ events to allow our members to meet in person, but until then MGFun will grow via Facebook and we hope that members in Scotland can join us.” Glenn would love to hear from you, so just search for MGFun on Facebook or check the mgfregister.org website for the link or contact Glenn by email at scotland@mgfregister.org
Midlands Borders
Heading back into England but veering towards Wales we find another new Region headed up by Rob Parry, the Midlands Borders covering Worcestershire, Shropshire, Staffordshire and Herefordshire and Rob sets the scene:“I became an MGF owner by default after persuading my wife that an MGF was far more sensible than the MGB Roadster she had her eyes on in 2001. Her romantically dreaming of driving a classic was for me more a dread of how much time and effort it was going to take to keep the B running as an everyday car! So here we are some 20 years later with more than one MGF in the collection and many thousands of pleasure miles driven with members of the MGF Register and the MGCC. My ambition is that the Region offers you, the members of the Region, the events you would like to attend and ensuring that we have a diverse selection of events from static shows, to coffee and cake runs, Natters and hopefully the odd weekend away. I am eager to hear what you, the members, would like to see from the Region. There is a dedicated Facebook page, alongside a group on the Forum and ,as time allows and we have more photographs and events taking place, both an Instagram and twitter account will be formed. Please guys and girls of the Midlands Borders get in touch and let’s enjoy our cars.” Rob can be contacted at midlands. borders@mgfregiser.org or via his Facebook page (search for MGF Midlands Borders)

With the new regions we should see more regional flags at MGF25
Leicestershire
We welcome both these new Regions which are now active and also look forward to a third coming online soon – Leicestershire. Current Rep Steve White lives near the Leicestershire border and is hoping to set up a group to cover this area. It’s early days in forming the group but Steve says:“It’s been a while since there has been a Rep in the Leicestershire area, and as I live just over the border in Warwickshire, I thought why not give it a shot and see if I can reignite some interest in the region. For those that don’t know me, I have been the Heart of England Region rep for a good few years, organising Natters, runs, days out etc, as well as regularly attending MGCC and MGF Register events. So, here’s your chance to tell me what would entice you to dust off your MGF/TF and come and meet up with some friendly fellow-owners (once we’re allowed to, of course). I was thinking of starting with a monthly pub meet, so ideas on day/time, venues would be welcome and can be sent to me at Leics@mgfregister.org.uk

New Reps needed – North Wales and Lancashire
We are also looking for some new reps to cover regions where we already have a presence. Simon Davies has been running the North Wales and Cheshire region for several years but is looking to step down this year, so if you live in that rough area and fancy a little challenge then please get in touch with us. Neil Rushton has sold his MG TF and so we are also looking for a rep to take over the Lancashire Region. If you live in either of these areas and fancy a little challenge then please get in touch with our Regions Liaison person, Tim ,at regions@mgfregister.org
At Brown & Gammons for some toning SPA WEEK FOR TANGO
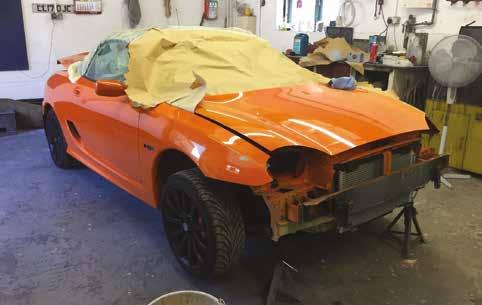
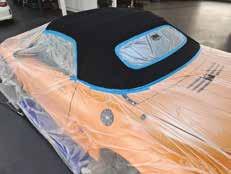
In July 2017 Philip Hayward imported Tango (a Vibrant Orange MGTF LE500) from Guernsey. The tale involved delays flying out, having to stay overnight, problems registering the car in the UK because it was out of scope for an EU transfer – the list goes on! That tale has been told previously, but it was worth it for Philip and a little over three years later it’s easy for him to forget the difficulties getting her home to the UK. However, another difficulty arose common to the orange LE500 and he tells that story here. “A little over nine years in the salty Channel Islands sea air had taken its toll on what was a mismatch of colour. Vibrant Orange-painted LE500s were subject to a paint recall following problems with the lacquer, but I am afraid Tango missed out on the manufacturer’s recall (being overseas in Guernsey) and despite lots of polishing, it never seemed to look evenly shiny – especially so the headlight lenses (on which I tried a number of cleaners including toothpaste!). Also in an attempt to fix the mismatch of colours, we had the bonnet and the bumper repainted in July 2019 and, you guessed it, then the door mirrors and handles repainted in June 2019 – all by Brown & Gammons in Baldock. Moving on a year or so, my son had Paint Protection Film applied to his rather expensive car (not an MG – shame!) and when we collected it from the company who applied the film (Azuri Premium Car Care, based in Stevenage) I started talking to the company owner. And there you have it – I was sucked into giving Tango a professionalgrade ceramic paint protection. According to the Azuri sales brochure, the paintwork undergoes correction and gloss enhancement through a machine polishing process – just like a ladies spa treatment, except that the car process ensures a flawless finish and gloss levels far in excess of standard factory finishes. Is this the case with the ladies? The polish coatings are a multi-layer system, which means the flawless finish of the paintwork is properly protected and easy to maintain. The wheels and brake callipers underwent the same treatment for protection against that harmful brake dust, plus wheel arches as well, for ease of cleaning. What was supposed to be a two-day job turned out to be a week, starting at the opticians (i.e. the headlights). You will see below the before and after – this treatment was a fraction of the price of replacing with brand new headlights. Then came the head gear (the roof); Then the feet and toes (the wheels and wheel arches) Then, finally, a full over body treatment! We feel that the treatment was worth it and Tango is now back to the full Vibrant Orange she was when first built.
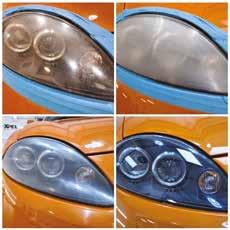
Eye treatment in stages
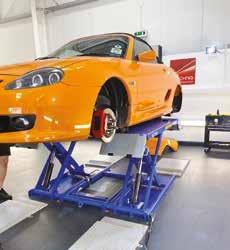
Feet and arches get attention
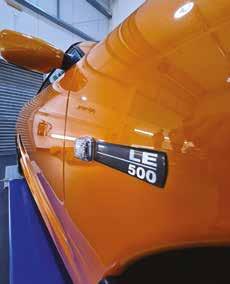
A very shiny LE500 after the spa
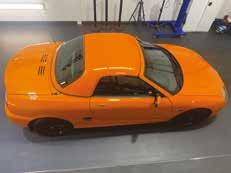
A ROTTEN RADIATOR
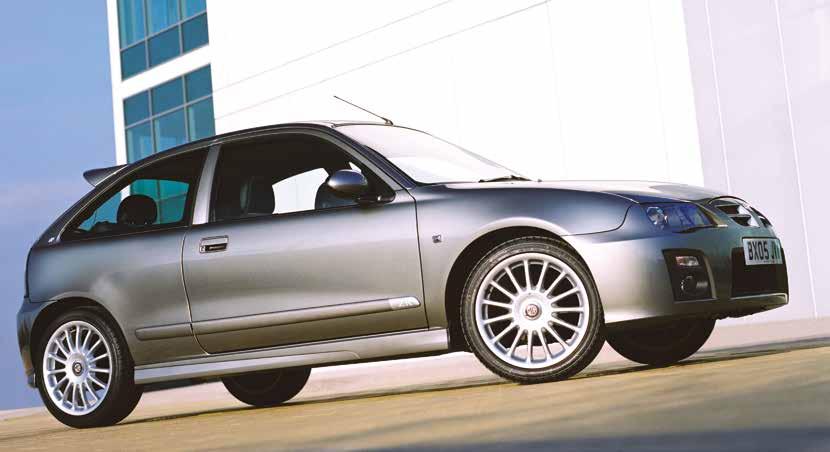
By Andy Knott
Afriend of mine recently contacted me to say that his everyday MG ZR 1.8i had started losing a bit of coolant. After the initial dreaded thought of head gasket failure crossed my mind, he mentioned that he thought it was the radiator. On checking his extensive history file on the car there were no receipts for a replacement one, so it wasn’t bad going for a 16-year-old radiator that’s on a car used in all weathers. Replacing a radiator on a ZR is fairly straightforward, and something that a competent home mechanic could carry out
REPLACING THE RADIATOR
on their driveway or in their garage. A quick check on the local motor factors website revealed that they keep a couple radiators in stock from different manufacturers that would fit; alternatively you could contact a modern MG specialist who advertises within the pages of this magazine. The good thing is that the majority of spares for the Zed range of cars are still easily accessible, and thankfully there are companies such as Discount MG Rover Spares who are having parts re-manufactured to ensure we can keep our Zeds on the road and keep enjoying them.
1
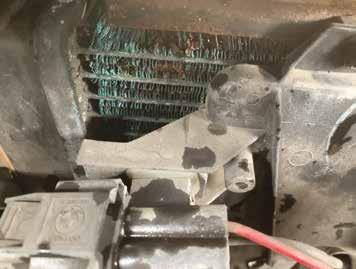
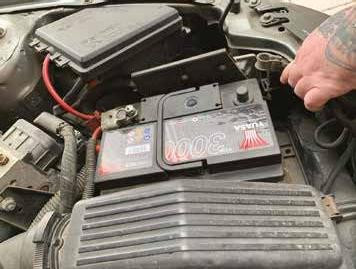
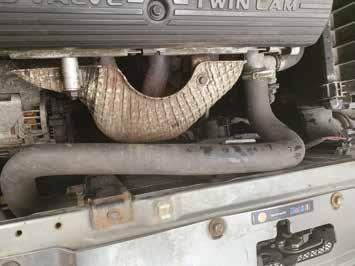
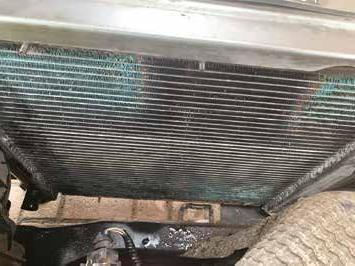
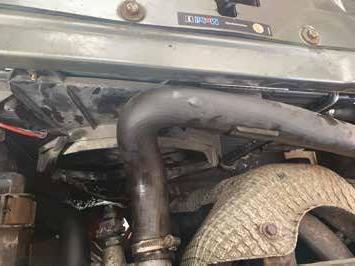
Always disconnect the earth lead before starting work on your car. As can be seen in the photo, the internal core fins of the radiator have rotted away and the radiator is in need of replacement.
2
We removed the undertray to allow easier access to the relevant parts we’d be working on.
If you don’t plan to reuse the coolant please dispose of the old coolant in a responsible manner, and dilute and wash away any spilt coolant as it can be harmful to animals. At this stage you can flush the system through with a lowpressure hose if you desire.
Disconnect the fan harness multi plug and position it out of the way. Ensure the engine is cool before proceeding to drain the old coolant. Turn the heater control to the maximum and remove the expansion tank cap. Place a large container under the hose located at the bottom left corner of the radiator. Slacken the clip on the hose and pull the hose away from the radiator allowing the coolant to drain in to your container placed under it.
We completely removed the top hose to allow easier access to the fan, and then checked the condition of the hose as well.

Remove the two bolts securing the top of the fan assembly housing.
4

6


8
9
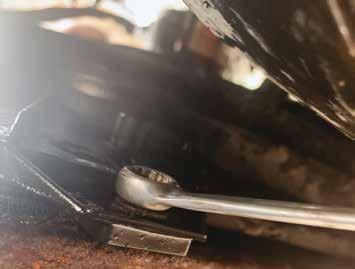
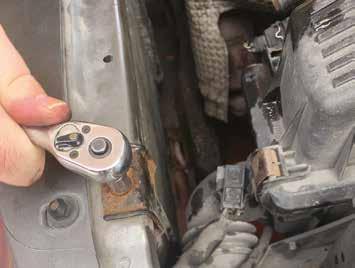
Remove the two lower bolts that secure the fan assembly to the radiator. Due to access, you may find it easier to use a spanner than a socket.
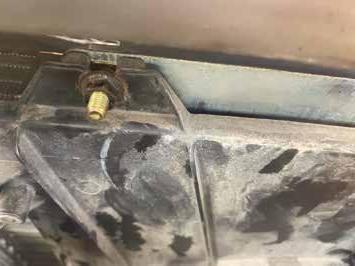
Disconnect any remaining hoses connected to the radiator and then proceed to remove the two bolts securing the radiator mounting brackets to the slam panel crossmember. Disengage the radiator from the lower rubber mountings and remove from the engine bay.
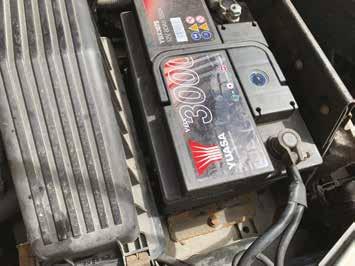
Re-install the upper mounting brackets, torque to 9Nm (7lbf ft). Lift the fan assembly clear of the car. This ZR does not have air conditioning – if you do have air conditioning you will probably have to remove your alternator to allow you to lift the fan assembly out of the car.
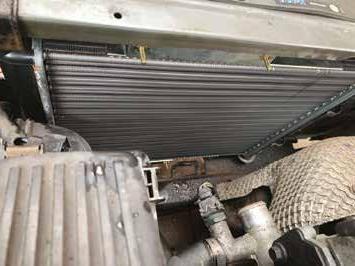
Swap over any mounting fittings required from the old radiator onto the new one and position the new radiator in place, being careful not to damage any of the core fins.
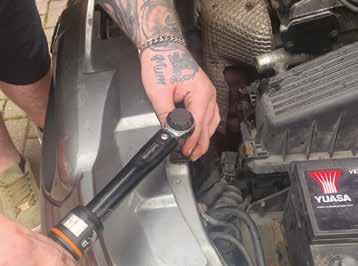
Carefully re-attach the fan assembly to the radiator and torque the nuts to 9Nm (7lbf ft). Plug in the fan harness multiplug.
10
11 12
13 14
15
Re-attach all the hoses, checking the condition of them and the jubilee clips as you go. Double check all connections, as new coolant will show up any weaknesses.
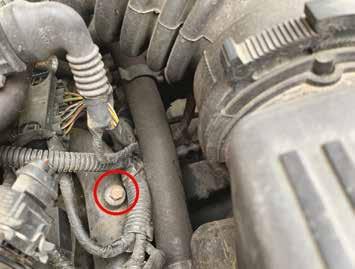
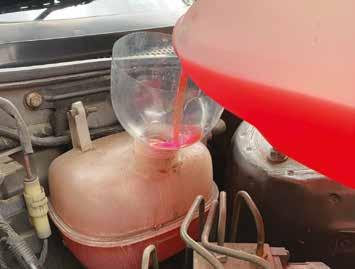
The coolant system in the ZR holds 5.5 litres when dry. We used a premixed OAT pink coolant. Slacken the bleed screw to allow air to escape and slowly pour the coolant into the expansion bottle until coolant can be seen emerging from the bleed screw in a steady stream and then retighten the screw.
Replace the expansion bottle cap, and reconnect the battery. Start the car and let it idle until it has reached normal operating temperature and the fan has kicked in once, all whilst checking for leaks and checking the temperature gauge for signs of overheating. The bleed screw (highlighted in this photo) can be seen on the metal coolant rail, located next to the air filter box assembly.
We then squeeze all the coolant pipes to make sure they’re full of coolant, and to push any trapped air out of the system. Top up the expansion bottle to the visible ‘Max’ seam.
Stop the engine and let it cool completely before removing the expansion bottle filler cap and topping up the coolant to the max line again. If possible, leave your coolant cap off overnight to allow any air to work its way out of the system. I leave the expansion bottle cap on my driver’s seat so I don’t forget to put it on the following morning. Also, if your coolant cap hasn’t been changed in a while I would put a new one on. I change mine yearly, as they are prone to failure. You’re all finished and have a new, shiny radiator which will hopefully last many a year. Do keep checking your coolant level, and temperature gauge over the next few days. If the car is overheating where it didn’t previously the fault is probably trapped air in the system, so repeat the bleeding procedure.
16

17 18

19
HEALTH AND SAFETY
Please do not undertake this work if you don’t have the necessary knowledge, mechanical skills, a suitable working area, the necessary tools or personal protective equipment. Instead, enlist the services of an MG Specialist to carry this work out for you.
20

SNAPPED STUD
By Nic Houslip
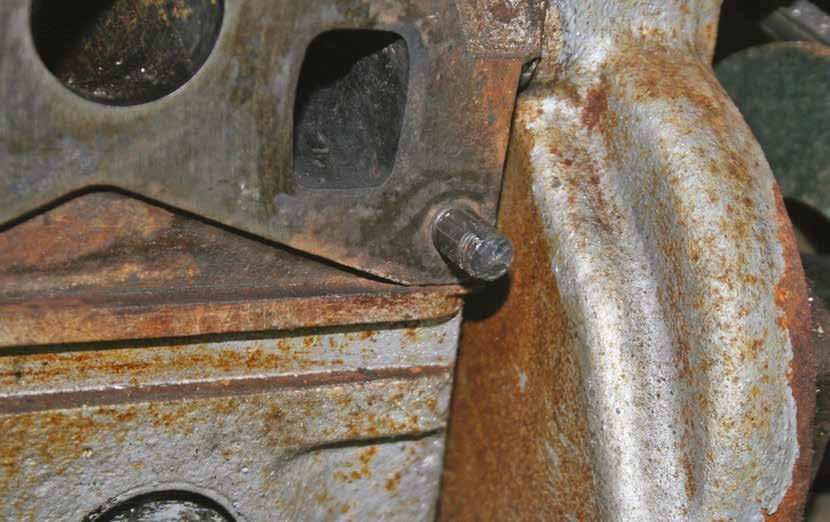
Have you ever broken a stud while removing parts from your engine? It happens, particularly on studs that are exposed to the elements and to heat, as exhaust manifold studs invariably are. In the car that I was working on, the front-most stud holding the exhaust manifold sheared off just below the nut. I was able to remove all the other fixings and the manifold, leaving me with about 1/2” of 3/8” UNF stud protruding from the cylinder head. In cases where the stud breaks flush with or below the surface, you have no option but to drill down centrally and use a stud extractor, but this is really a head off and take it to a machine shop job. They will then have to drill accurately down into the stud, remove it if it will come free with a “screw in” extractor or if that fails, to drill down with larger drills until the root thread diameter is reached and pick out the remaining bits of thread from the hole. This is a difficult and time-consuming job and best avoided, or better still left to an expert.
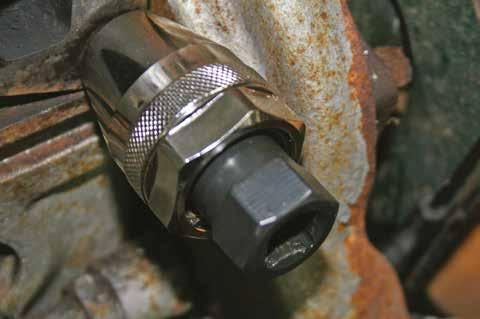
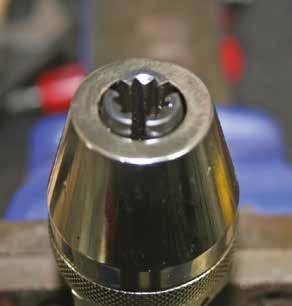
The teeth of the Stud Extractor can clearly be seen in this photo
In this instance there was just enough stud protruding to be able to do something about it, but a first attempt with a self-grip wrench failed because it wasn’t possible to exert enough pressure to grip and turn the stud. Over the years, I’ve bought various unusual tools at events and auto jumbles, mostly on the basis that “it’ll come in
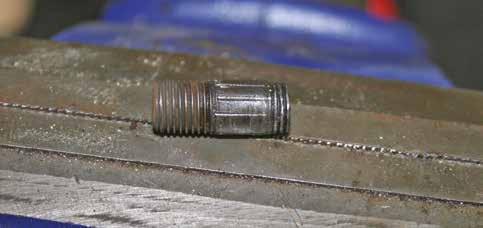
The teeth produce longitudinal marks that can be seen above; it is these that grip the stud tightly
As I have an impact wrench (a very useful battery powered tool) I fitted it to the stud remover. Setting it to run anticlockwise the impact wrench screwed the remainder of the stud out of its hole in about 15 seconds, the length of time showing how tightly it was held by the rust of the ages
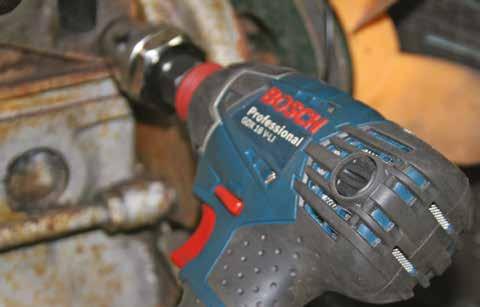
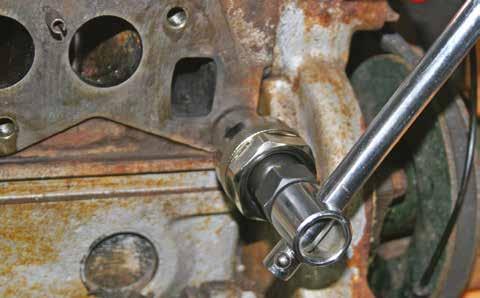
It is possible to use a 1/2” drive bar but this might not be as easy as using an impact wrench, unless you have a very long one and the space to manoeuvre it handy if I never use it”. One that I had had for a long time but never tried was a stud remover that had a cam-shaped wheel with a knurled surface inside a strong circular body that was supposed to grip the stud; unfortunately it needed about a half turn to get a good grip, by which time the body of the tool was up against the timing chest. Time for a cuppa and a search on the internet. Less than 15 minutes later I had located a device that looked like a big, sturdy version of a drill chuck. This seemed to be the tool for the job, so next morning I set off to the local Machine Mart to get one. The picture shows the device mounted onto the stud. It clamps on like a drill chuck, and is designed to be used with an impact wrench, although it could be used with a 1/2” square drive ratchet or breaker bar. Turning the black hexagon-shaped part anticlockwise tightens the jaws, chuck fashion, onto the stud; the more it is turned, the tighter the grip and the teeth inside the jaws bite into the stud. Now, smart readers might notice that the engine is not at all like the MGBs and MGB GT V8s that I’m usually working on. The first clue is that the manifold is on the right-hand side of the engine (unlike the MGB) and that the head is cast iron (unlike the V8). The car was produced in the same time-frame as the B, but about 90 miles north of Abingdon, in the Triumph factory in Canley, Coventry. In case you haven’t guessed, it is a Spitfire MK IV from 1972 that I had been repairing for a fellow Hill Climb and Sprint fanatic (and playwright) from Lancashire. I can honestly recommend this tool as being something that works exceptionally well. It was made by Laser Tools www. lasertools.co.uk and is called the 1/2” D. It will remove studs from 6mm-12mm (1/4” – 1/2”) diameter. It can also be used to remove rounded or rusted nuts with external dimensions similar to the stud diameter, such as those with hexagon heads from 1/4” AF to 1/2” AF or 6mm to 12mm AF. I bought mine from the Machine Mart, at Great Barr, Birmingham www. machinemart.co.uk/p/tool-connectiontc3986-impact-stud-extractor/ At £23.98 it is worth every penny.


