3 minute read
Styles of Photography NIGHT


One of the more challenging, but also the more rewarding, photographs one can take is of a beautiful night scene. While this may immediately evoke visions of grand bridges and trails of car lights zooming by with city lights shining in the distance, this is but one of a myriad of scenes you can capture by using some rather basic principles in photography. With these tools and tips below, you may find that early morning sunrises, evening lighting storms, and even dimly lit forests at midday can take on an entirely different look when one concentrates on capturing every bit of light possible from the environment.
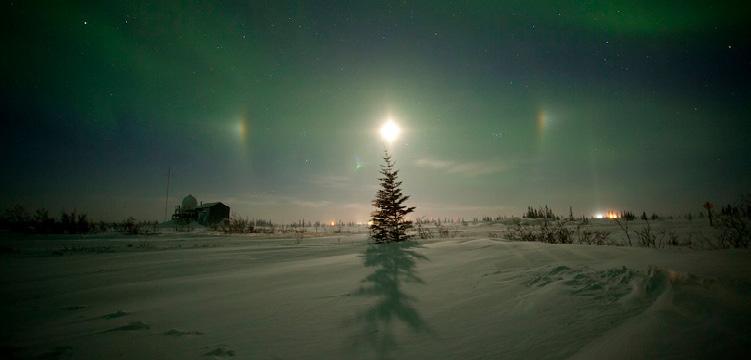
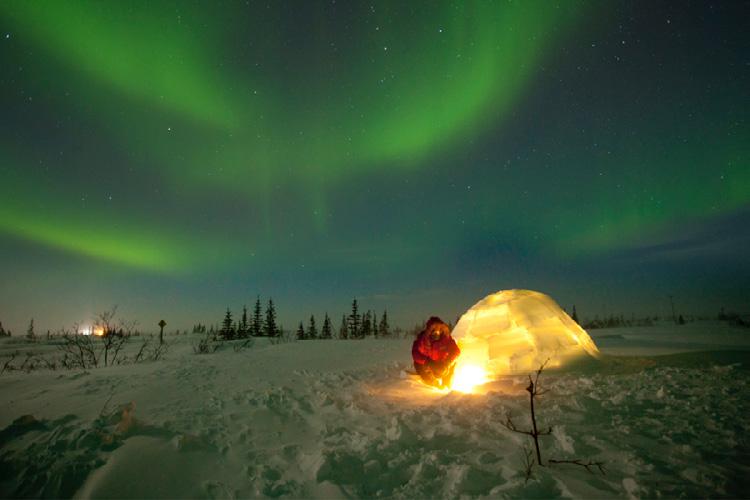
Perhaps the most famous of night photographs comes from above— from astronomical origins—the aurora borealis. While just putting the camera down and sitting back to enjoy the northern lights can be equally rewarding, there’s nothing quite like capturing the essence of the aurora to return home with after an expedition.
The tools needed to capture a photo like the one above are simple but imperative. The first thing you need is light. This is one of the most important things in ALL of photography. It sounds patronizing, but you do have to target a specific and worthy light source to be able to photograph well at night. It could be the aurora borealis, or it could be a lone lantern on a dock, or simply the light bulbs shining from a lodge.
What makes these “night” photos different is the proportion of light being captured by the camera. When the ambient or environmental light is at a minimum, as it is in the above photos, the camera will concentrate on the only sources of light and “boost” them to be quite bright.
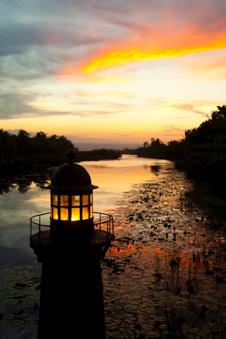
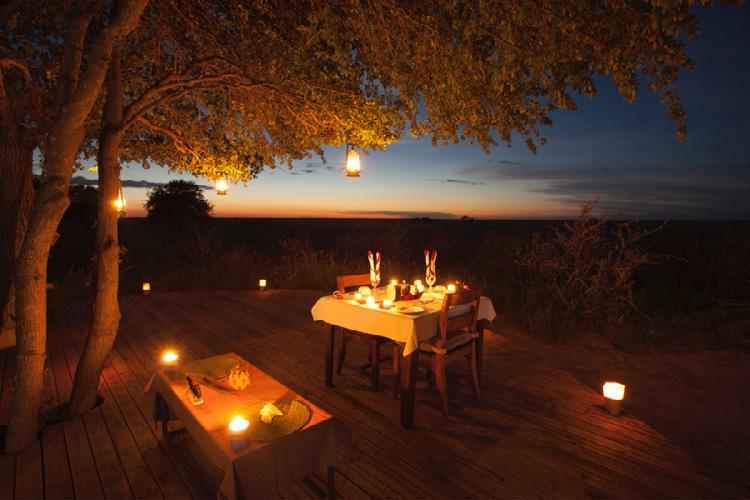
For instance, the above photo was shot just after the sun went under the horizon, producing a beautiful blue hue in the atmosphere. This is known as the “blue” hour in photography. Because the diffuse light of the blue sky is one of the few light sources, it becomes very pronounced, adding a nice effect to the photo.
The question now is, how do you capture enough light in such dimly lit conditions? The answer is by using a tripod and a slower shutter speed. The slower shutter speed allows enough light to “flow” through to the camera’s sensor, while the tripod ensures that there is no resulting blur from the slow shutter. As an added consideration, it’s best to keep the ISO as low as possible (400 or less) due to the pronounced effect of noise on dark areas of the photo.
The camera settings for shots like the above are actually quite basic, and there isn’t too much room for error or imperfection. It comes down to simply choosing a “moderate” f-stop (no need for a huge depth of field since the background is usually dark) and a shutter speed long enough to capture enough light. Depending on the scene before you, the shutter speed can be highly variable but is usually somewhere between 1 and 10 seconds.
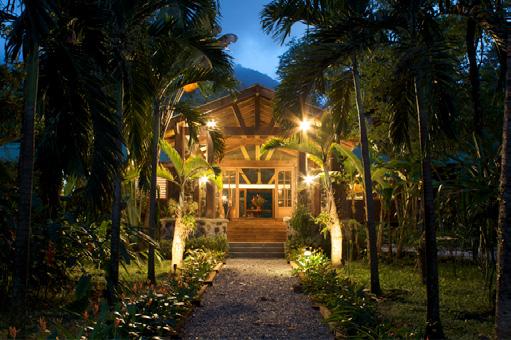
The real technique involved in night photography is properly choosing the scene. It’s essential to have a balance in the light such that one spot isn’t overly bright while the rest of the scene is dark. For that reason, soft mild lights are always best. Candles and moonlight often work best, but incandescent bulbs and other moderate light sources can work just fine.
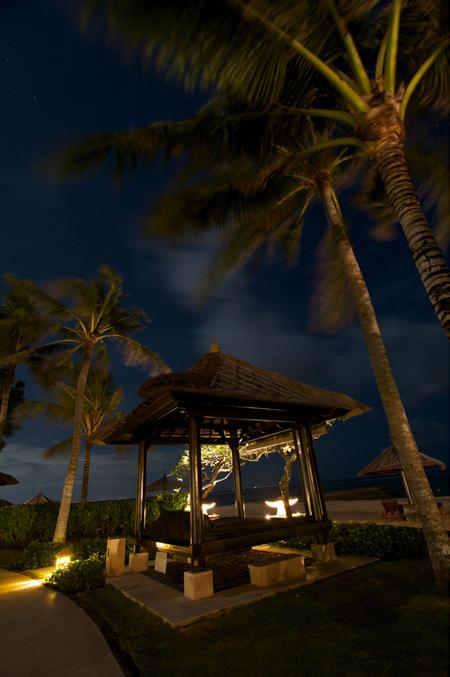
The other major consideration is the composition of your photo, which is just as important as any other photo you ever take. The challenge is that you’re trying to compose your photo in an environment that is very difficult to see via the naked eye. In the above photo, sure, those trees and bushes are nicely illuminated, but to the naked eye, they were pitch black, making it very hard to ensure the lines and composition of the photo worked well. One trick is to take the photo a bit more zoomed out (wider angle) than you’d like so that you can crop and straighten the photo on your computer if it’s a bit off angle.
The above photo illustrates one final consideration. When shooting at slow shutter speeds, remember that the camera is picking up any motion in the photo. That might be a person walking or a swaying palm tree. In the above shot, which was shot with a 4 second shutter speed, the palm tree was swaying, giving it a wispy look. Depending on what you’re aiming for, this could be a desired effect, giving the impression of sea breeze. Or, this might ruin the photo if you view it as a distraction or are trying to get all elements in the photo as crisp as possible. The only way to ameliorate this motion is to speed UP the shutter speed, which requires you to increase your ISO to compensate for the loss of light. With practice, you can find the right balance so that the high ISO doesn’t create a grainy look (similar to old film).
PRO TIPS:
• Look for scenes that have multiple light points so that the scene is evenly lit. Diffuse skies or multiple small light points work best.
• Be sure to bring a tripod. Most shots will be somewhere between 1 and 10 seconds.
• Take the shot wider than normal so that you can crop and straighten the photo in post-processing to reach your desired composition.
• Increase your ISO to increase the amount of light reaching the camera’s sensor. But don’t overdo it. Find a balance, knowing that as you increase the ISO number, you’re decreasing the overall quality of the pixels in the shot.
Styles of Photography