6 minute read
MACRO


Simply put, macro photography is fun. There’s nothing quite like making something minute into the grand, or revealing astounding textures in a seemingly basic flower petal.
What’s more, expanding your range in photography helps you tell a better story with your images. Whether you’re just getting into photography with minimal equipment or are a veteran of the photographic arts looking to try something new, macro photography will add a worthy new dimension to your photography. And I can promise that you’ll love it and have fun.
Perhaps the most surprising thing about macro photography is that it does NOT require any fancy camera gear. Of course like all things, there is specialized equipment to make things easier or help you get better as you go down this road. However, a macro lens or macro flash is not something you have to invest in right away if you’re just beginning.
For ones first dabbling with macro, setting the “macro” feature on a point and shoot camera or using the kit lens that came with your SLR (usually an 18-55mm) will get you instant results.
First things first, let’s talk about what it actually means to be shooting a macro photograph or shooting in macro mode. By definition, shooting in macro means that the size of the image on the sensor is the same size as the object in real life (i.e. a 1:1 reproduction ratio). However, let’s not worry about this at all, as it’s a bit misleading and limiting. For our purposes, we’re going to define macro photography as a technique in which the subject is small, but the resulting photograph makes it look larger than life. Popular subjects are flowers, insects, and other miniature flora and fauna.
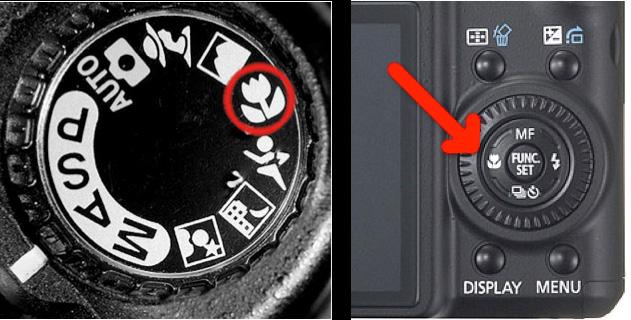
The primary technique for getting great macro shots is to maximize the size of the subject in your camera’s frame. If you have a point and shoot, you’ll have to set the camera on “macro mode” by finding the little flower icon like in the above photo. This will allow you to get very close to the subject, thus increasing the overall size in the photo way beyond what even the biggest zoom could do.
If you have an SLR, you will need to do something a little different. Your camera does not have a button to push to magically configure all settings to macro, so you’ll have to configure the lens manually. But don’t despair SLRs will give macro photographers the widest range of abilities, especially when it comes to depth of field (more on that below). Most wide angle lenses have this same flower icon near the focusing ring of the lens itself, along with the minimum focusing distance listed (e.g., 0.3 meters).
In order to maximize the macro capabilities of your SLR lens, first you must set the focus on manual. Then you must turn your focusing ring to dial in the closest focusing distance. So now you’re probably asking, “how do I focus if I have to keep the camera on manual focus while also keeping the focus only at the closest focusing distance?”.
With macro photography, you will actually have to move yourself to bring the subject into focus. There will be only one sweet spot where the object is in focus, and this corresponds to the largest that the subject will be in your viewfinder and sensor. I like to call this behavior the praying mantis technique, as you’ll likely be swaying slightly back and forth like a praying mantis approaching its prey in order to get the exact focus you need before shooting.
Now, if you are not comfortable with the above technique, you certainly may keep the camera on automatic and just get really close to the flower, insect, or whatever you’re shooting, and just let the camera autofocus per the norm. However, you won’t be maximizing the size of the object on the screen if you don’t get all the way to the minimum focusing distance. Just be aware that the only way to guarantee you’re getting the largest result is to use the above manual technique.
Depth Of Field
So now that we have the procedure for getting into macro mode, what do you do now? Any special settings? Glad you asked.
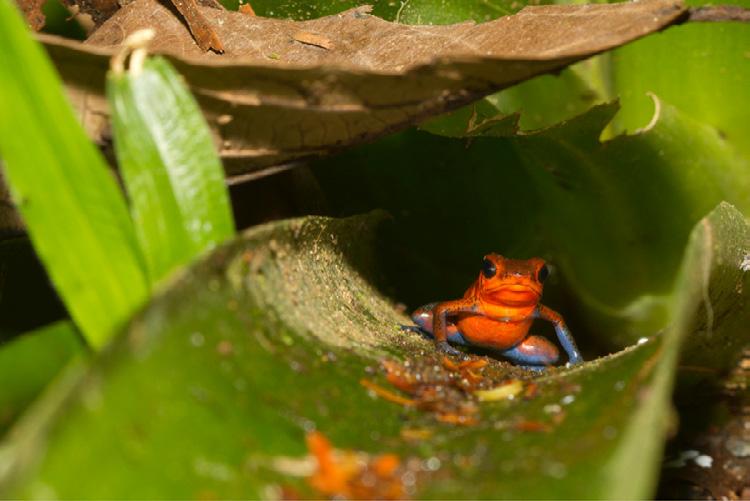
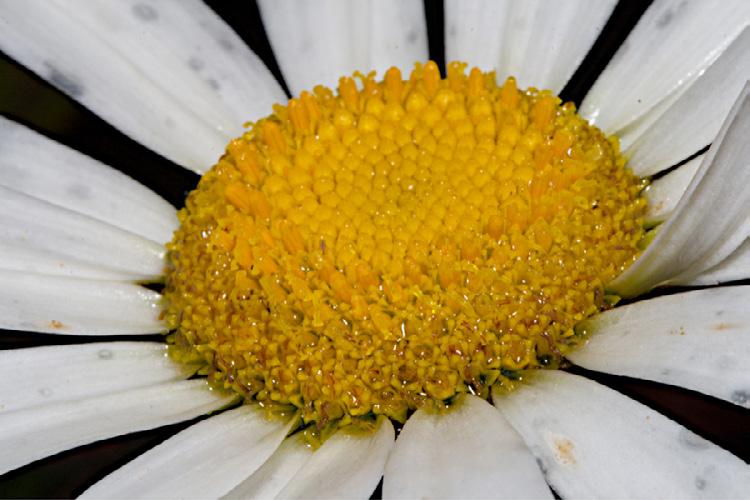
If you have a point and shoot, the macro setting (the little flower button) does everything for you. If you have an SLR, you will need to manually maximize the depth of field by setting your camera to a higher aperture number. What this does is give you maximum focus in your shot. Even though, say, the flower petals and the insect in the above shot are only fractions of an inch apart, depth of field is all relative based on the proportion of the frame. That is, a close-up shot naturally has a very shallow depth of field under normal aperture settings. Thus, when the size of a frog’s eye or butterfly’s wing is the majority of the shot, with a shallow depth of field (f/2.8, f/4, f/5.6), you could get only part of the eye in focus, while the rest is blurry. Sometimes this is nice and artistic, but generally, you want as much in focus as possible with macro photography.
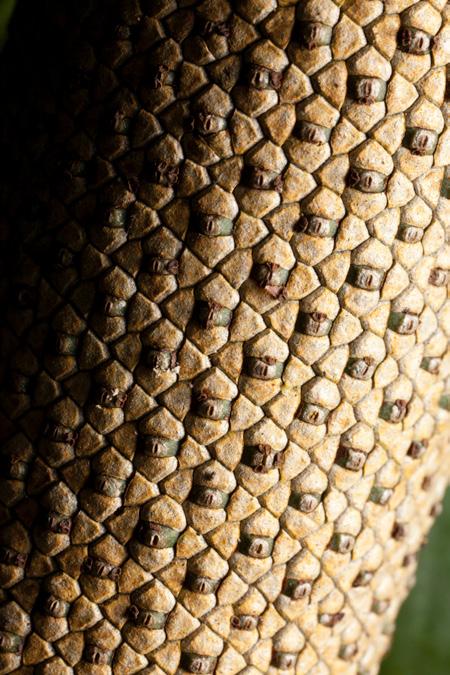
Macro photography is often about seeing something relatively ordinary and turning it into something extraordinary by making it very large so that the naked eye can appreciate the fine details, colors, and textures. Take the above seed pod photographed in the rain forest of Honduras. The entire pod is about the size of a thimble, but by using macro photography and increasing the depth of field, it turns into an evocative mosaic. These are the types of scenes that would normally go unnoticed and unphotographed with traditional photographic techniques. However, the world becomes much larger (or smaller?) with macro photography.
Having a very wide depth of field requires either lots of light or a longer shutter speed (and often a bit of both). Learn more about apertures and f-stops, or just take my word for it.
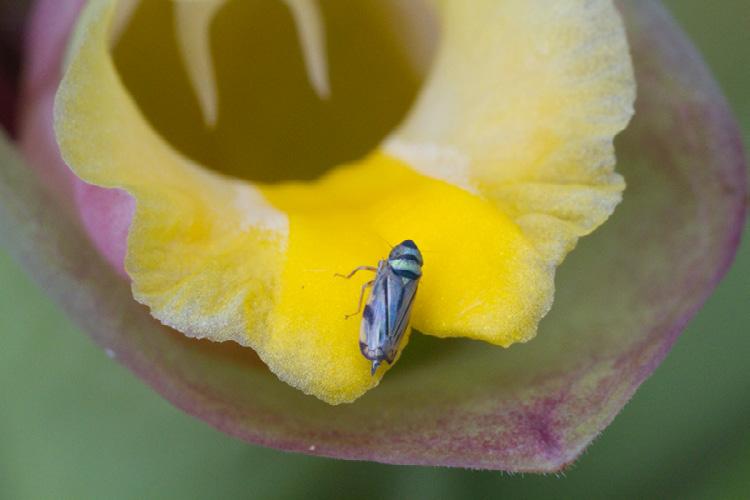
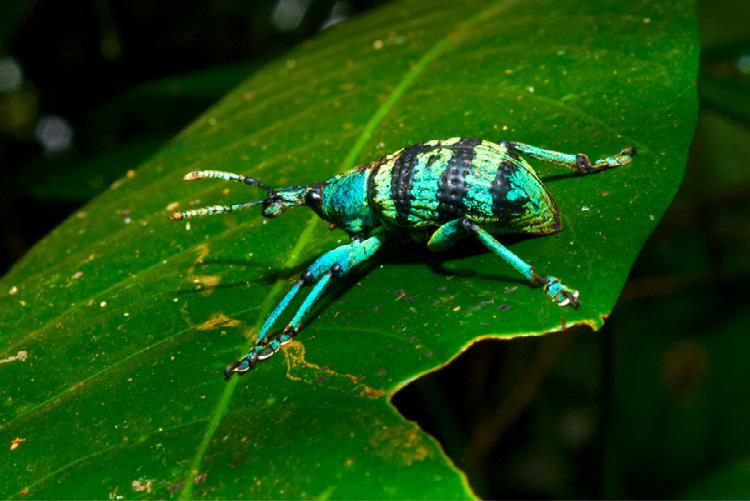
Thus, in dark or dimly lit conditions, like rainforests in Papua New Guinea, where this tropical weevil was photographed, you may have to use flash to inject enough light. Although flash is rarely used in other forms of nature and wildlife photography, it is commonplace to use your flash with macro photography. Again, fancy equipment is not needed to begin your adventure with macro photography, but a good flash can make a significant difference.
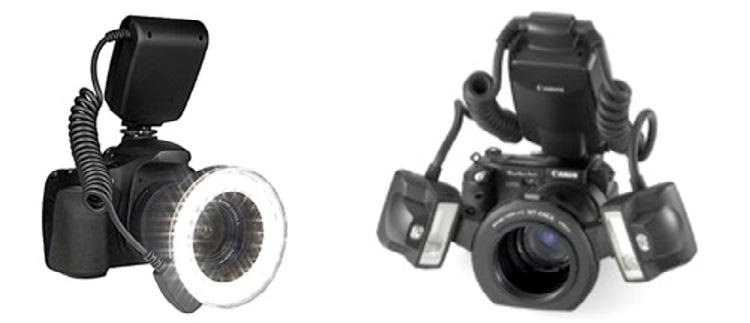
Two commonly found accessories in the world of macro photography are macro flashes (above) and dedicated macro lenses. This section will not go into great detail on hard and fast recommendations on either of these things, as the options out there are numerous. However, if you are indeed interested in expanding your capabilities with macro photography, they will work wonders for you in terms of the quality of your shots and the ease with which you’ll get them.
For photographers looking to increase their range of abilities and add great diversity and intrigue to their photo albums, macro photography will delight the senses. Taking minuscule objects, whether wildflowers or insects found on a trail, or even patterns found on fabrics in markets or bazaars around the world, and making them larger than life is always a crowd pleaser. Often, people have never even conceptualized these small things as being “photographable,” further adding to the allure of the resulting photos.
The technique in macro photography can be simple to read about but often takes practice to put into motion. It requires a keen eye for detail, often a steady hand to get the proper focus, and of course, employing all of the standard techniques of proper lighting and composition to maximize the depth of field so that the textures and colors really pop. And having an SLR will significantly improve your chances of getting the best shot.
Not only will adding macro photography to your portfolio of abilities wow your audience, but it’s also quite fun. Not every day on the trail or in the forest promises big wildlife to photograph at close range. However, with an understanding of basic macro photography techniques, you can turn any afternoon in the park into a jungle of wild and inspiring nature.
Recap
• Rethink what you can do with your photographic story. With macro, small things become instantly amazing, with colors, textures, and patterns surfacing in an entirely new way.
• Practice putting your camera into “macro mode,” so that it becomes second nature when in the field.
• Increase the depth of field as much as you can, given the light around you. If you have a flash, experiment with it and compare the resulting photo with and without it.
• Remember your basic tenets of photography and your already-incredible macro shot will take on a wonderfully aesthetic feel.


