15dfvdfv

Page 1

NOW INCORPORATING

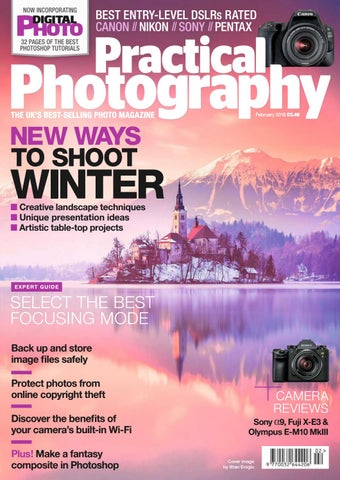
BEST ENTRY-LEVEL DSLRs RATED CANON NIKON SONY PENTAX

32 PAGES OF THE BEST PHOTOSHOP TUTORIALS

THE UK’S BEST-SELLING PHOTO MAGAZINE

February 2018 £5.49

NEW WAYS TO SHOOT

WINTER Q Creative landscape techniques Q Unique presentation ideas Q Artistic table-top projects

E X P E RT G U I D E

SELECT THE BEST FOCUSING MODE Back up and store image files safely Protect photos from online copyright theft Discover the benefits of your camera’s built-in Wi-Fi Plus! Make a fantasy composite in Photoshop

CAMERA REVIEWS

Sony _9, Fuji X-E3 & Olympus E-M10 MkIII

Cover image by Ilhan Eroglu


Welcome Learn from the best

WATCH FREE VIDEOS! Visit our YouTube channel at youtube.com/ ppmagazine to enjoy more than 70 brilliant how-to camera and editing videos.

Thomas Mueller

NATASHA BREEN

On a mission to find beauty in decay, Thomas has visited over 500 abandoned locations and taken thousands of incredible images. Read more on p112

Simone Cmoon Taking the world of astrophotography to mesmerising new heights, Simone’s images capture the breathtaking beauty of the night sky. Turn to p124

IME IS INFINITE AND yet we never seem to have enough of it. Thankfully, all you need to indulge in this month’s issue are 60 minutes and a whole lot of creativity. Why? Because this is the timeconscious issue (that, and we know you’ll be busy visiting family and eating leftover turkey at this time of year). From kitchen utensils and torches, to that old flatbed scanner mothballed in the loft, there’s a lot of mileage in familiar household items – it’s just a question of looking a little differently. It’s also time to dig out your old toys, as we’ve included a light dusting of Star Wars magic to coincide with The Last Jedi taking over our lives (well, mine anyway). Turn to page 38 and find your perfect one-hour photo project. May the Force be with you.

T

38 Choose from nine creative one-hour photo projects

58 Discover three presentation ideas for displaying your work

Ben Hawkins, Group Editor 146 Find the perfect entrylevel DSLR in our group test

Vesa Lehtimaki Seamlessly fusing toys with the real world, Vesa creates photorealistic fine art that Star Wars fans will absolutely love. Use the Force on p50

Subscribe now & get 3 issues for just £5 Choose from print, digital and combo deals and get Practical Photography for less. greatmagazines.co.uk/pp

facebook.com/ PracticalPhotographyMagazine youtube.com/ppmagazine instagram.com/ practicalphotography twitter.com/practphoto

PRACTICALPHOTOGRAPHY.COM 3


Febru

146

On the cover 146 22 58 38 100 109

Best entry-level DSLRs Creative landscape skills Unique presentation ideas Artistic table-top projects Back up and store images Protect photos from theft

Skills&ideas 08

Beyond the lens

Truly stunning images from the world’s best photographers.

22

10 clicks

Discover new ways to shoot winter landscapes in our seasonal special.

38

One-hour projects

Feed your imagination with nine incredible 60-minute photo ideas.

58

DIY presentation ideas

Take a more hands-on approach to displaying your best pictures.

100

Know your stuff

Back up and store images safely, the benefits of built-in Wi-Fi, and more.

112

Beauty in decay

Step into Thomas Mueller’s magical world of abandoned places.

24

Infinite galaxies 124

Simone Cmoon’s nightscapes capture the world as never before.

162

112

Student showcase

At just 12, Josiah Launstein already has a portfolio to be proud of.

Regulars 06

Your free gifts

60 minutes of new videos, toning presets & replacement skies.

33

Guy Richardson

How to stay warm and active when temperatures tumble.

35

Simon Roy

A robin sat on top of a fork handle is just the beginning...

46

4 PRACTICAL PHOTOGRAPHY

120

Camera know-how

Take control of focusing settings to ensure sharper shots.


Subscribe

Photoshop Genius

155

68

NEW! 32-PAGE EDITING GUIDE

Save money with the latest reader offers

Retouch RAW portraits

Fix colours, lift the exposure and smooth out skin in Adobe Lightroom.

72

Make a fantasy composite

Merge multiple images with Layers and silhouettes for truly magical results.

76

3 ways to inject style

Recreate a trio of simple toning techniques in a matter of minutes.

80

72 Create a fantasy composite using Layers and graphic silhouettes

Replace overexposed skies

Drop in one of our free replacement skies and give your landscapes a boost.

82

Create striking silhouettes

Turn your people pictures into colourful pieces of wall art in three easy steps.

84

Shoot a time-stack

Capture the passing of time and freshen up your landscapes with this new project.

90

Photo fixer

PP’s Photoshop genius Dan Mold works his magic on your best images.

FREE! Lightroom presets 96

68 Retouch your RAW portraits in Lightroom in just five simple steps

Tone your pictures in a single click with 25 exclusive presets for Lightroom.

GetIntoGear 138

Sony _9

With 20fps shooting speed and amazing AF tracking, is Sony’s latest mirrorless model really the ‘DSLR killer’?

128

142

Fujifilm X-E3

The sleekest X Series yet takes Fuji further into the world of touchscreens and lightweight ‘go anywhere’ cameras.

144

Olympus E-M10 MkIII

It’s very similar to its predecess in appearance and spec, so is the late E-M10 really worth the upgrade?

146

Entry-level DSLRs

The ten best beginnerfriendly models from Canon, Nikon, Pentax and Sony go head-to-head.

154

Mini tests

Kodak 360º, digital photo frames, camera sliders and more.

51 Make photorealistic scenes using miniature toys and models 138 In-depth review of the Sony _9

See p36


Your FreeGifts

Over an hour of new camera and editing videos, toning presets, replacement skies and much more.

60 MINUTES OF EXPERT ADVICE

The table-top project special! The Practical Photography team head indoors to bring you a variety of brilliant fine art and presentation ideas that will keep you inspired and motivated through the winter months...

Expert tuition

Q Dan uses a premium compact and a drill to get inside an acoustic guitar and find a very different viewpoint of a very familiar object. Q Louise shows off a trio of ingenious presentation ideas, from DIY canvasses to Polaroid-inspired photo scratchcards.

Creative skills

Q Kirk cooks up a tasty food still life setup in his kitchen using a flashgun, diffuser and a sprinkling of creative flair.

Contact us if you have any problems with your free gifts practical.photography@bauermedia.co.uk

Pro hints & tips

Shooting advice

Plus More free photo gifts Camera Buying Guide Unsure about which camera is best for your needs? Our ebook includes reviews, spec and prices for every camera available right now. The latest additions include the Sony _7R III and Panasonic G9.

Practical Photography, Bauer Media, Media House, Lynch Wood, Peterborough, PE2 6EA

THREE BONUS VIDEO GUIDES

Toning presets & skies

Photoshop video lessons

Get 25 one-click Lightroom effects, from moody mono to punchy colour and even artistic borders, plus 13 dramatic skies for improving your overexposed scenics.

Retouch RAW portraits in Lightroom, replace an overexposed sky, and turn your people pictures into colourful silhouettes in Photoshop or Elements.

DOWNLOAD THE DISC CONTENT AT bit.ly/ppdisc1802 6 PRACTICAL PHOTOGRAPHY


THE NEW PERSPECTIVE

I AM THE NEW NIKON FULL FRAME D850. The powerful combination of high speed and high resolution. With Nikon’s 45.7MP back-illuminated FX CMOS sensor and the speed of 9* fps shooting, the new D850 unlocks a new world of opportunity. Whether you’re shooting weddings or landscapes, commercial, sports or fashion, with ISO 64 to 25600, a class-leading optical viewfinder, 153-point AF, silent mode shooting, long battery life, 8K time-lapse** and full frame 4K UHD video, the D850 captures images and video you’d never have thought possible. Equip your new D850 with your prized NIKKOR lenses to capture more. Learn more at Nikon.co.uk *Requires the optional MB-D18 Multi-Power Battery Pack, EN-EL-18a/b battery, BL-5 battery cover and MH-26a charger. **Requires Interval Timer settings and 3rd party software.


The stories behind the world’s greatest shots

8 PRACTICAL PHOTOGRAPHY


Russian sunrise by Daniel Kordan O To take this photo I woke up long before sunrise in a mountain hut at the foot of Taganay National Park, in Russia’s Ural Mountains. I hiked up the mountain in -30°C, reaching the top an hour before sunrise, and then the show began. The clouds turned pink and red, and danced around the sky, so I quickly took advantage of the amazing light. Nikon D810 | 19mm | 1/13sec | f/16 | ISO 160

Daniel Kordan is an award-winning landscape photographer who has featured in National Geographic and includes Apple and RedBull among his key clients. danielkordan.com

PRACTICALPHOTOGRAPHY.COM 9


Shipwreck by Eric Volto O My wife and I like to snorkel down to the wreck of the Pecorella, which is at the exit of a gulf near the town of PortoVecchio in Corsica. This 45m-long boat struck a rock in 1965 and sank almost immediately. Today, it’s 10m deep, but the top of the boat rises to 5m. The sight of this magniďŹ cent wreck living in such accessible waters is fantastic. Nikon D750 | 15mm | 1/250sec | f/10 | ISO 640

Eric Volto has been a diver for over 10 years. He creates amazing underwater photos, but also enjoys heading to dry land to shoot landscape images. 500px.com/ericvolto

10 PRACTICAL PHOTOGRAPHY


BeyondTheLens

PRACTICALPHOTOGRAPHY.COM 11


Displays of power by Alari Kivisaar O When you’re stationed at a wildlife bunker, with eagles visiting the area often, getting a shot of one isn’t particularly hard. However, what is difficult is capturing an image of two fighting. You can wait for hours, or even days, and this moment may never come. If it does eventually happen, it lasts for mere seconds. And if you take your finger off the shutter button you can miss the moment, which is heartbreaking. This time luck and patience were on my side. Nikon D3 | 400mm | 1/1600sec | f/2.8 | ISO 800

Alari Kivisaar is a passionate cityscape, landscape and wildlife photographer who is based in his home town of Haabneeme, Estonia. 500px.com/alarikivisaar

12 PRACTICAL PHOTOGRAPHY


BeyondTheLens

PRACTICALPHOTOGRAPHY.COM 13


Step by step by Mustafa AbdulHadi O I love exploring other cultures, so when I was visiting China I knew that I wanted to catch the Lijiang Impressions show, which demonstrates the traditions and lifestyle of the native people. The ďŹ rst day I went the weather was so foggy that I could barely see anything, which was so disappointing. However, on my second visit I was able to capture this. Canon 5D MkIII | 105mm | 1/500sec | f/8 | ISO 640

Bahrain-based Mustafa AbdulHadi is a designer and freelance photographer who enjoys studying the different aspects of people’s lives. mustafaphoto.com

14 PRACTICAL PHOTOGRAPHY


BeyondTheLens

PRACTICALPHOTOGRAPHY.COM 15


BeyondTheLens

King of the hill by Diana Amelina O I named this image after the universally known children’s game, where the object is to stay on top of a large hill at all costs. The preparation for this shot took some time, as I needed old books and ornate chess pieces. I used an old microphone stand and some string in order to capture the falling pawn in motion. Canon 5D MkII | 50mm | 1/2sec | f/8 | ISO 250

Diana Amelina is a still life photographer based in Moscow, Russia. Her creative reinterpretations of household objects are very popular. 500px.com/eruven

16 PRACTICAL PHOTOGRAPHY


8OWUD IDVW SRZHUIXO DQG LPPHUVLYH SKRWR HGLWLQJ ZKHUHYHU \RX JR

$))Ζ1Ζ7< 3+272 WKH UVW IXOO\ IHDWXUHG WUXO\ SURIHVVLRQDO SKRWR HGLWLQJ WRRO IRU L3DG ȊΖWȇV PRELOH SKRWR HGLWLQJ ȆQHDWȇ QRW ZDWHUHG GRZQȐKDYLQJ VRPHWKLQJ OLNH WKLV IRU L3DG LV H[WUHPHO\ H[FLWLQJ ȋ Ȃ 6/5 /RXQJH Ȋ6HULI KDV SXW D WRQ RI IHDWXUHV LQWR WKLV PRELOH DSSOLFDWLRQ DQG LW ORRNV UDWKHU LPSUHVVLYH ȋ Ȃ ΖPDJLQJ 5HVRXUFH Ȋ7KH L3DG 3UR PDGH LW LPSUHVVLYHO\ HDV\ WR DFKLHYH JUHDW UHVXOWV ZLWK $ɝQLW\ 3KRWRȋ Ȃ 6WX

Editors' Choice

$OVR DYDLODEOH RQ 0DF DQG :LQGRZV _ 1R VXEVFULSWLRQ


CAPTURING NEW DIMENSIONS


Photography: Jianjun Wang

Find out more at phantom.dji.com


Kn wledge THE

The latest news from the world of photography

CA M ER A

New G9 ideal for epic landscapes Micro Four Thirds expert Panasonic has announced the latest addition to its flagship range, the Lumix G9. Aimed at enthusiastlevel photographers, it’s on a par with the excellent GH5, however it has a keener focus on stills rather than video. Offering a 20.3MP Live MOS sensor and 6K photo modes, such as Focus Stacking, Post Focus and burst modes, the G9 has a very impressive spec sheet. A class-leading 20fps burst speed and speedy focus of 0.04sec make the camera perfect for anyone interested in wildlife photography. It also boasts the inclusion of 5-axis in-body Dual I.S. 2 image stabilisation, which promises a massive 6.5 stops of compensation. But the standout feature on the

G9 has to be the new High Resolution mode, which shifts the sensor one pixel at a time. The camera then combines eight resulting shots to create a single image of up to 80MP in size. While it won’t work with motion, it’s a great feature for anyone wanting to capture epic landscapes. Another plus for serious photographers is the EVF, which offers a huge 0.83x magnification and zero blackout. This latest entry is sure to excite those already invested in the Micro Four Thirds system, and on paper looks to incorporate some very impressive features. Check out our full review next issue. The G9 is available from January 2018 for £1499 (body only). panasonic.com

CA M ER A HIR E

Rent-a-Blad Medium-format Hasselblads are the cause of camera envy the world over, and owning one is often seen as the pinnacle of a photographer’s career. Unfortunately, the cost of owning one excludes most of us from even breathing such rarefied air, with body-only prices starting at £8000. However, that’s set to change, as Hasselblad has just launched a rental service where you can obtain the stunning X1D-50C 4116 edition for the grand sum of £78 per day (lenses will set you back another £24 each). If you fall in love with the kit, you can even offset your rental price against the cost of purchase. hasselblad.com

20 PRACTICAL PHOTOGRAPHY

BODY PRICE

£1499 IMAGE RESOLUTION

20.3MP VIDEO

4K

Above The G9 is the latest hero product for the Micro Four Thirds manufacturer, and is aimed squarely at stills photographers.


News

RumourMill Hotly anticipated products we can expect in 2018...

Canon 15-45mm f/1.8-3.5

Drone registration to curb dangerous fl The government is expected to create a bill in 2018 designed to tighten the regulations regarding civilian drone usage. It is anticipated that the Department for Transport will head up this new incentive, which will see police officers demanding drone users cease and desist operation should they infringe on the new laws. One expected inclusion in the bill is mandatory drone registration. This is already compulsory in America for any craft weighing over 250g and, should a similar weight limit be imposed here, it will certainly affect most of DJI’s current line-up. The policy director of the CAA (Civil Aviation Authority) has already acknowledged the economic and workplace benefits, and supports the safe development of drone usage in the UK. He also confirmed that he’s in favour of increasing operator training and creating no-fly zones.

Above A series of high-profile drone-based misadventures is forcing the CAA to rethink the regulations on drone usage by the general public.

SOCI A L M EDI A

Facebook now supports 4K image files News that American social media giant Facebook has incorporated high-resolution photo sharing into its Messenger service is very welcome. Users will now be able to send and receive images at a resolution of 4096x4096 pixels, which is twice the previous limit. Facebook is one of the biggest photo-hosting sites on the planet, and its messaging app sees more than 17 billion images shared every month. Having the ability to show your images as you intended them to be seen, is a real bonus. facebook.com

BOOK

Inspiring scenics from world’s best Edited by our good friend, the talented Ross Hoddinott, this beautiful hardback book features the créme de la créme of landscape photographers. Showcasing some of the most stunning work by renowned artists such as Joe Cornish, Art Wolfe and Tom Mackie, to name but a few, Masters of Landscape Photography is published by Ammonite Press, and is available online and in bookshops now for £25 (RRP). We highly recommend you pick up a copy. ammonitepress.com

Anybody currently in love with their EOS M mirrorless camera is in for a real treat, as we’ve seen a reported Canon patent for a brand new wide aperture zoom lens. Offering a perfect walkabout focal length range of 15-45mm and a maximum aperture of f/1.8-3.5, this lens is set to bring something truly unique to the system. We don’t have an ETA, but all fingers are crossed for a 2018 release. canon.co.uk

Canon EOS 7D MkIII Canon has had a number of big releases this year, but we’ve not seen any sign of the 7D MkIII until now. Rumours have started to circulate that an update to the popular 7D MkII will emerge around March 2018. While there are no official details or specs yet, we’ve heard that Canon has a new type of sensor technology which it will unveil in this model. It’s also expected to be the first non full-frame body to come with 4K UHD video capture, which is a giant leap forward. canon.co.uk

Panasonic Lumix GH5S Speculation is rife that Panasonic will shortly release a Lumix GH5S. This new addition will stand alongside the newly announced G9, offering a more video-orientated experience. While reliable specs are scarce, we expect it to include a lower resolution sensor, which will improve the low light performance. It’ll also include 4K video at 120fps, meaning amazingly high-quality slow motion footage. We’ll share further details as soon as we have them. panasonic.com

PRACTICALPHOTOGRAPHY.COM 21


WINTER LANDSCAPE SPECIAL

What to shoot with your camera right now

22 PRACTICAL PHOTOGRAPHY


SUNRISE

O Investing time and money into a landscape shoot, only to have the weather thwart your efforts, can be really disheartening. However, Adrian Petrisor (500px. com/adypetrisor) didn’t let a disappointing start ruin his shoot. “I was in the Dolomites on a photo tour, and one day we woke up early to catch the sunrise. I stepped outside my cabin and

was greeted by a dark cloudy sky with no chance of a decent sunrise. We were disappointed, but decided to press on and see what we could get. “Once we reached our location we set up our cameras and waited. After 40 minutes of telling jokes and thinking about what to have for breakfast, a little bit of light started to spill

Adrian found that his neutral density filter was too strong for the conditions, so used a polarising filter, which 'only' doubled his exposure.

through the cloud. It only lasted a couple of minutes, but that was enough to capture this shot. “Nature is full of surprises, and even if you see bad weather it’s always worth trying anyway. Some of my best landscape images have been taken after rain or storms.”

Below Adrian shot a long exposure to create a sense of movement with the clouds.

PRACTICALPHOTOGRAPHY.COM 23

Canon 5D MkII | 29mm | 8sec | f/22 | ISO 100

#1 Chase the golden light

TIP EXPERIMENT WITH FILTERS


10Clicks

DRONES

# 2 Search for an unusual viewpoint O If your local area is blessed with a sprinkling of snow this winter, then why not get a fresh perspective on a familiar landscape? Ognian Medarov (500px.com/ognian) used his drone to create a fairytale-like depiction of this snowy valley. “I don’t think there's anyone on Earth who could climb to the top of a mountain and not admire the view when they get there. Mountains

24 PRACTICAL PHOTOGRAPHY

are definitely my favourite places to visit, and I took this shot over a valley between two of them – Rila and Rodopi – here in Bulgaria. “Small streams of very clear cold water pass through the pine forests and meadows. They meander along freely, as if a painter has drawn them on a white sheet. I thought that this would make a great photo, so I sent up

my drone to capture it. “The weather that day was very cloudy, which provided a soft and uniform light. The f/2.8 aperture allowed me to use a fast shutter speed, which was essential in order to reduce the effect of the motor vibration and the wind. “Flying a drone does tend to have its own problematic moments, and this day wasn't any different. I usually

set my device to stay in the air for as long as possible before I fly it back manually. However, due to a technical problem with the display, I had to navigate it back by sight alone. Unfortunately, the drone had merged so well with the white background that I couldn’t see it at all. Eventually, I had to turn on the automatic return so that it didn’t run out of battery.”


Pentax K5 | 90mm | 1/80sec | f/2.8 | ISO 200

TIP USE YOUR DRONE SAFELY Drone use is growing rapidly and it’s important that you fly yours safely and legally. Before taking to the skies, visit dronesafe.uk for official info.

DJI Inspire 1 | 20mm | 1/3000sec | f/2.8 | ISO 100

Above Search for striking visual patterns when flying your drone.

N AT U R E

# 3 Scour your garden O Before you go stomping off into the wilderness to capture epic landscapes, take some time to explore what’s sitting in your own back garden first. Sébastien Blomme (donlopephotography.com) created this shot just steps from his home. “When you’re a macro photographer, winter is often considered an off-season. Motivation is usually quite low, as there aren’t any more butterflies, dragonflies or flowers to play with. Nevertheless, when you’re willing to lay down on the ground, you can still find lots of little beauties to explore. “On this particular morning, I woke early to find that the grass was covered with hoarfrost and the whole landscape

had turned white. Consequently, I decided to take my camera on a little walk. I wanted to take a picture that would make the viewer feel the cold when looking at it. However, before I’d even left my back garden I noticed these small blades of grass covered in ice, and I knew that this would make an excellent photo subject. “One of the first things I learned in macro photography is that it’s better to be at the same level as your subject – even if it’s freezing cold and it’s only two centimetres off the ground! This shoot taught me that it’s not necessary to go to the other side of the earth for great pictures. Sometimes, you literally just need to look at what is at your feet.”

PRACTICALPHOTOGRAPHY.COM 25


10Clicks

COMPOSITION

# 4 Find a natural frame O Whether it’s twisting tree branches curling their way into your shot, or some leaves creeping over the edge of your image, using something in nature to frame your composition can transform a photo. Timothy Poulton (500px.com/tpoulton001) used this technique when travelling in South America. “To be a landscape photographer you need to be a little bit mad. Getting up at silly hours, hiking around in the dark, braving storms and risking life and limb is just part of the job description. However, when you experience the rare commodity of excellent light

26 PRACTICAL PHOTOGRAPHY

it all becomes worth it. “One of my favourite places in the world is Torres del Paine National Park, situated in Chilean Patagonia. The eerie fields are filled with burnt lenga trees, whose tangled trunks appear dark and Dali-esque. These victims of two recent forest fires are a tangible example of the impact humans have on the planet. “As I traversed the Patagonian plains in search of unique compositions, long-legged guanacos grazed amid the grassland, lifting their heads quizzically as I passed. Overhead, majestic caracaras, a type of forest falcon, carved black shapes

Focusing so close to the lens, regardless of aperture, will result in a soft background. Focus stack if front-toback sharpness is essential.

against a stormy sky. With the heavens opening, I scrambled for cover amidst the razor-sharp rocks and prickly chaura shrubs. “When the storm began to subside, I spotted a scary horn-shaped tree and found a spot that framed the peaks of the mountain Los Cuernos perfectly. Positioning myself only a foot away from the tree, I decided to focus on it, softening the mountains and sky slightly to create a sense of depth and distance. With the changeable conditions producing a moody backdrop, I waited to capture the moment when the weather perfectly suited my composition.”

Above Use a wide-angle lens to capture as much of your natural frame as possible.

Fujifilm GFX 50S | 32mm | 1/5sec | f/22 | ISO 100

TIP BE AWARE OF YOUR FOCUS


Canon 5D MkIII | 16mm | 1/60sec | f/4 | ISO 200

T R AV E L

# 5 Explore the wild O It may be the dead of winter, but if you’re serious about your landscapes, that’s no excuse for not getting out there. Head off for an adventure at your closest stretch of nature, such as a national park or a local wood, and you could be rewarded with fantastic winter landscapes. Daniel Ernst (danielernstphoto.com) shot this immersive image while travelling through New Zealand. “I love hiking, as I enjoy being in nature and the physical challenges of preparing for epic adventures. Journeying somewhere new and battling against the natural forces of wind, hail and rain allows me to clear my mind and somehow reset my brain. The longer I spend outside, the more relaxed I feel. Most of the time I don’t have any mobile reception, so I’m not bothered by emails or calls. “I took this shot in New Zealand, while hiking around Queenstown with a friend. We’d hitch-hiked our way from Glenorchy all day, and had decided to spend the

night up on one of the surrounding mountains instead of going to a hostel. After making our way uphill for a while, we found a great open view over the lake and stopped to set up camp. Once we were done I laid in the tent and watched the sun set behind the mountains. As I was enjoying the splendour, I picked up my camera and took a shot laying exactly how I was. “I think people like this photo because it shows an authentic moment that many of us are craving. I get a lot of comments from people who want to escape their daily routine and do something exciting. Many of them want to head out for a hike and camp somewhere beautiful. “This image, with my legs and tent framing the beautiful landscape, allows the viewer to more easily imagine themselves in the same situation. I think this gives my shot a really personal touch. Landscapes are an exciting genre, because no day is the same and you never know what you’re going to get.”

Above Explore your local nature reserve or woodland to find fresh inspiration. Left If you’re handholding like Daniel, use a minimum shutter speed of 1/60sec.

PRACTICALPHOTOGRAPHY.COM 27


10Clicks TIP FIND A CLEAR FOCAL POINT

Canon 7D | 24mm | 1/2000sec | f/8 | ISO 400

With heavy blur creating such an abstract shot, you’ll need a definitive focal point to lead the eye through the frame and stop the shot looking messy.

BLACK & WHITE

# 6 Craft your own mono abstract O Think of the seaside, and the mind conjures up the bright hues of sun, sea and sand. The flat weather of British winter isn’t conducive to such colourful ambitions, but embracing the dark can lead to beautiful black & white abstracts, like this one by Josh Adamski (joshfineart.blogspot.com). “Ever since I was a young boy I’ve always loved going to the beach. The fun of the sand and sea never grows old, and I’ve always tried my best to live close to it. One of my favourite things to do

28 PRACTICAL PHOTOGRAPHY

now is to take a leisurely stroll down the promenade and watch the people as they pass by. This simple pleasure is what inspired the photograph above. “I took this shot with a tripod set at a very low angle in order to capture a family heading off into the distance to see the sunset. I had my Canon 7D and a very versatile 24-105mm lens with me, which was perfect for this photo. “I set the lens to a wide focal length of 24mm so I could capture as much detail as possible, and

achieve the stretched effect that you can see in the promenade. It also made the people themselves appear smaller and more distant. “I loved this photo in its original format, but as soon as I got it home I knew that I could create something even better. I loaded the image into Photoshop and continued to manipulate it until I was happy with the results. I used several different Layers and copious amounts of blur in order to bring about this somewhat dark and mysterious atmosphere.”

Above Convert to black & white in Photoshop by going to Image >Adjustments>Black & White.


L I G H T PA I N T I N G

# 7 Create atmosphere

Above Powerful LED torches are ideal for this light painting technique, and start at just £15.

Canon 5DS R | 28mm | 30sec | f/5.6 | ISO 400

O While epic vistas and extraordinary landscapes are all well and good, you don’t need to visit far-flung locations to capture amazing images. James Mills (500px.com/ jamesmills1) shot this enchanting photo just a stone’s throw from his front door. “I took this shot near my home at Stanton Moor in the Peak District, a magical place littered with Bronze Age remains. It was the first snow of winter and there was a little mist hanging in the air – the perfect combination for a blue hour woodland landscape. “I placed my camera on a tripod and set the exposure to 30sec to capture the ambient light, plus give me enough time to light the path. I clicked the shutter and quickly walked down the trail with my torch, being careful not to get my legs between the light and the camera.”

# 8 Focus accurately O Shooting with a wide aperture on a macro lens can make focusing

tricky. However, by taking your time and double-checking your shot, you can create amazing images like Kimber Leigh (500px.com/kimberleigh). “While walking in my nearby park early on a cold, clear winter morning, I was drawn to the beauty of the golden light sparkling off the frost-covered ground. Every autumn, the lush green needles of the conifer trees burn a brilliant orange, before falling to the ground to form the loveliest carpet of needles and branches. To capture this shot, I laid flat on the ground with the sun behind my subject. I used a wide aperture so that the branch was framed by a soft, dreamy blur of bokeh. My macro lens captured the details of each tiny crystal of ice and the warm glow of the morning sunshine. This moment was fleeting, as the sun soon shifted and the sparkle was gone. Just the memory, and this photo, remained.”

PRACTICALPHOTOGRAPHY.COM 29

Canon 5D MkIII | 100mm | 1/125sec | f/3.2 | ISO 200

MACRO


10Clicks Canon 5D MkII | 17mm | 90sec | f/8 | ISO 200

MINIMALISM

# 9 Capture cloud movement O Being able to record the passage of time is one of the best aspects of landscape photography. Chris Upton (chrisuptonphotography. com) uses ND filters to great effect, and inspires others to do so on his photo tours. “I took this shot at Watergate Bay in Cornwall.

At low tide, with around two miles of golden sand, it’s a great location for capturing minimal seascapes. “On this occasion, the dramatic fast-moving clouds were reflecting in the wet sand. I decided to use a 10-stop ND filter to give the shot more impact. This

meant that I could have a long exposure to capture cloud movement and smooth out the surface water lying on the sand. I also used an ND grad to retain detail in the sky, which meant that my overall exposure was 90sec, which was perfect for this minimal landscape.”

Above Use a remote shutter cable to avoid camera shake.

#10 Shoot a friend O Introducing a figure into your landscape is a fantastic way to expand your portfolio beyond a typical vista. Anthony Sotomayor (500px.com/aroyamotos) took this photo in Iceland. “I shot this image on the way out of a waterfall I was exploring with a friend. There was a large rock, and I asked my friend Sam to stand there, as the light and mist had created a warm magical scene. I knew I wanted to expose for the light source and keep everything else dark, so I aligned Sam between the two walls and pressed the shutter. Sometimes all you need is one shot to capture the moment.”

30 PRACTICAL PHOTOGRAPHY

Canon 5D MkIII | 16mm | 1/250sec | f/2.8 | ISO 400

PORTRAITS


PPFEB18


GUY RICHARDSON ADVENTURES OF A WILD LANDSCAPE PHOTOGRAPHER CHILLED CHALLENGES INTER IS A FANTASTIC TIME OF YEAR TO capture great images. The low sun provides soft directional light throughout the day, and snow and ice transform scenes into something really special. Sunrise and sunset occur at much more sociable hours than other times of the year too. The season does come with a few challenges though, and none more so than the issues it causes our cameras when it’s so cold. Here are my tips for when temperatures tumble.

W Batteries

There’s nothing worse than watching your battery power drain away when you’re out on location, and cold weather only accelerates this. Although camera batteries are now more efficient and powerful than ever, cameras have become equally dependant on them. Be frugal Turn off Live View when you’re not using it, even if you’re just changing a filter or waiting for the light to change. The LCD is one of the biggest consumers of battery power, so only use it when you need it. Plan ahead For longer trips invest in a USB battery charger. That way you can plug it into the car or power bank, keeping you going without having to stop to find and use a plug in a café (though this isn’t always a bad thing!). Keep them warm Carry spare batteries close to your body to keep them warm. A trouser pocket will do the job but an internal chest pocket is even better. If I’m camping, I often drop a couple of batteries into my sleeping bag overnight.

gloves designed with photographers in mind, but I’ve found a thin pair of liner gloves work perfectly with the camera. And when I’m not using my camera, I stick on a thicker pair to keep my hands nice and cosy. Toasty toes Keeping your feet warm and dry is essential when out in the winter months, especially if you’re in mountainous terrain. A long day of walking can be hard on your legs and feet. If you look after your feet, they will look after you. A decent pair of 3 to 4 season waterproof boots will provide you with the warmth and support you need. Don’t forget some warm socks too. Layer up Rather than throwing on the thickest jacket you have only to find out that when you get moving you’re far too hot, try a simple layering system instead. A thin base layer will keep sweat from your skin and an insulated layer, such as a fleece or down jacket, will keep you warm when you’re not moving. Finally, a windproof/waterproof jacket will add that extra layer of protection when you really need it.

“I’LL DROP A COUPLE OF BATTERIES INTO MY SLEEPING BAG...”

Clothing Freezing fingers Operating a camera with fiddly buttons with freezing hands is tricky/almost impossible. There are a number of

Cameras & lenses Home & dry Keeping your equipment dry is essential to making sure it lasts the winter season. I advise keeping it sheltered from the elements at all times. I often use a number of small drybags to store my equipment in my backpack and only take them out when I need them, especially in adverse weather.

Guy Richardson is a professional landscape photographer and time-lapse filmmaker. His images are used by some of the UK’s largest tourism and conservation groups, including Visit Britain and The Woodland Trust. guyrichardson.com

PRACTICALPHOTOGRAPHY.COM 33


Repeat Winner of the TIPA Award

‘ Best Photo Lab Worldwide’ Awarded by the Editors of 28 International Photography Magazines

© Furniture by Vibieffe

Fill your walls with picture-perfect memories. With gallery-quality prints from WhiteWall. Your photographs under acrylic, framed, or in large formats. Our products are ‘Made in Germany’ and crafted by experts who have earned over 100 awards & recommendations. Upload and set your custom format – even from your smartphone.

WhiteWall.co.uk


SIMON ROY ADVENTURES OF A WILDLIFE PHOTOGRAPHER WINTER WONDERS HE COLDER WEATHER, SHORTER DAYS AND lack of natural food make the winter garden an oasis for many wild creatures. The need to feed leads to bolder, more competitive behaviour and this can give the wildlife photographer ample close encounters with usually timid subjects. Unfortunately, it’s not always that easy though, as unpredictable weather can make opportunities fleeting. Being prepared is, therefore, essential. I typically plan my shots in advance, and by that I mean I start putting food out in early autumn. This gives the wildlife time to get used to a setup and become confident with it before the colder weather arrives. One of the classic winter images I aim for every year is a robin sat on top of a snowcovered fork handle. This is an easy winter project that is suitable for photographers of all levels and gardens of all sizes. I start by creating a small feeder using the top half of a plastic bottle screwed into a straight stick and then pushed into the ground. I add seeds or chopped nuts, then wait for a robin to visit. I place a prop, such as a garden fork, next to the feeder with the handle about a foot above, as birds tend to use a higher perch to check for danger before feeding, or to protest from when the food is gone. With everything in place, it’s just a case of waiting for the snow... A few years ago, I had a lovely encounter with a fieldfare that visited my garden for several days. I’d been leaving old apples out on the lawn for the blackbirds, robins and dunnocks, and one morning I looked out and noticed a beautifully marked bird munching away on the fruit. Fieldfares are large, colourful thrushes that migrate to the UK from Scandinavia. I had often seen flocks flying overhead but never had a chance to photograph

T

them. The weather had turned very cold and winter storms were on the horizon. That evening, I threw a few more apples out and was pleasantly surprised the next day to see the bird return. For once the forecast was right and it began to snow. The fieldfare stayed all day and I knew this was a great opportunity to capture some nice images. The next morning, I looked out upon a landscape of brilliant white with only a few trees breaking the void. The light was good and I felt confident the bird would visit again. I wanted to shoot from ground-level, so used a plastic groundsheet to keep me dry and a beanbag to support my gear. I wrapped up in my usual camouflaged clothing but realised I’d stand out too much against the white snow. A bed sheet was the solution, draped over me and my camera with just the front of the lens poking through. I placed some apples on the snow directly in front of my makeshift hide and then crawled in. A short time later I heard the fieldfare calling from the tree above me and then it just dropped in and started to feed. I lined a single AF point over the bird’s eye and took a shot. The sounds of the shutter caused the fieldfare to look up for an instant, but it was quite content, and continued nibbling its prize. By the following morning, both the sun and temperature had risen, the snow was disappearing and my visitor had gone.

“THE NEED TO FEED MAKES THE WINTER GARDEN AN OASIS FOR MANY WILD CREATURES”

Simon Roy is an award-winning wildlife photographer based in Yorkshire. His images have been highly commended in both the British Wildlife Photography Awards and International Garden Photographer of the Year competitions. simonroyphotography.co.uk

PRACTICALPHOTOGRAPHY.COM 35


SUBSCRIPTION OFFER

Get the next 3 issues

for just £5 f to a great start with ney-saving offer!

Option 1

Option 2

Option 3

Delivery to your door plus instant access

Delivery to your door every issue

iPad edition for instant access

Six-monthly Direct Debit: First 3 issues just £5, then £28 every six months

Six-monthly Direct Debit: First 3 issues just £5, then £23 every six months

Six-monthly Direct Debit: First 3 issues just £5, then £15.50 every six months

Annual credit/debit card or PayPal payment: 13 issues for £63 every 12 months

Annual credit/debit card or PayPal payment: 13 issues for £53 every 12 months

Annual credit/debit card or PayPal payment: 13 issues for £31 every 12 months

Cal TERMS & CONDITI ns w se rst ct rices stated on this offer, every 6 issues thereafter unless you are notified otherwise. You will not receive a renewal reminder and the Direct Debit payments will continue to be taken unless you tell us otherwise. This offer cannot be used in conjunction with any other. Cost from landlines for 01 numbers per minute are (approx) 2p to 10p. Cost from mobiles per minute (approx) 10p to 40p. Costs vary depending on the geographical location in the UK. You may get free calls to some numbers as part of your call package – please check with your network provider. Order lines open 8am-9.30pm (Mon-Fri), 8am-4pm (Sat). Calls may be monitored for training. This offer is for UK orders only. Overseas? Please phone +44 1858 438828 for our exclusive money-saving overseas offers. For full terms and conditions, please visit www.greatmagazines.co.uk/offer-terms-and-conditions

36 PRACTICAL PHOTOGRAPHY


fer THAT’S JUST

£1.67 AN ISSUE!

3 reasons to subscribe! 1

Never miss an issue and get your favourite magazine posted directly to your door before it’s even available in the shops!

2

Save money with amazing discount prices that are only available to subscribers. Enjoy your magazine in print, digital or both!

NOW AVAILABLE ON YOUR PHONE

Every issue comes with a FREE disc/ download containing the acclaimed Learn Photography Now TV show and a camera buyer’s guide. PLUS all our digital editions – which are now available for both tablets and iPhones – include additional content and interactive features!

3

Easy online sign up greatmagazines.co.uk/pp PRACTICALPHOTOGRAPHY.COM 37


60 MINUTE SKILLS

ONE HOU P H OTO P R O J EC T S TO S H O OT AT HOME !

38 PRACTICAL PHOTOGRAPHY


Want to create amazing images but can’t find the time? We’ve got the perfect solution – nine superb camera and editing projects that take 60 minutes or less. That’s a brand new portfolio in less than a day! From kitchen utensils and swinging torches to scanner art and fantasy composites, there’s something for all tastes here. Turn the page to get started! >>>

PRACTICALPHOTOGRAPHY.COM 39


1 Shoot perfect ‘flat lay’ still life images at home MEET YOUR GUIDE NATASHA BREEN With almost 10 years’ shooting experience, Natasha is a professional food, product and still life photographer who blogs and shoots for stock agencies like Shutterstock as well as private clients in the industry. breen-photo.com

What draws you to creating these kinds of still lifes? What’s compelling about the ‘flat lay’ look? Flat lay is certainly trendy right now, and you’ll see a lot of it on Instagram. It’s popular in many photography genres, including food. It’s not a good fit for classic still life compositions where you want depth, but what I love about it is how clearly it lets me define the shapes of objects. I like to use it to better show the beauty of many dishes, as well as utensils and tools.

How long does it take you to get one of your flat lay shots? I would say from five to 60 minutes if I have everything I need for shooting. For the picture with the vintage cutlery (right), I set up the scene in about 20 minutes. What camera and lenses do you use, and how do you position yourself? For my flay lay still lifes, I use a Canon 700D with Canon EF 70-200mm f/4L IS USM and Sigma 17-50mm f/2.8 lenses. Some people like to use a tripod for these kinds of shots, but if I’m shooting with studio lights there’s no need – the flash will freeze any camera movement and gives wonderful crisp details. If you’re not using flash it would be different. I also prefer the freedom of shooting handheld – it’s easier to make small adjustments, and using Live View makes composition easier.

Fine arrangement is obviously really important in such images. How do you physically compose your images? I’m really looking for harmony. It’s the same when composing any sort of image, except with still life there’s more control of the objects and

Picking objects & backgrounds

ALL IMAGES BY NATASHA BREEN

Whether you’re shooting flat lay photos like Natasha’s, or regular still life, object and background selection is really important. “I collect both,” says Natasha. “I buy backgrounds, or I find them, or I make them myself in my basement. I need more and more backgrounds, and sometimes I re-do the old surfaces in something new. As for the objects, I buy them in flea markets, on my travels, and even in supermarkets. Sooner or later they all come in useful!”

40 PRACTICAL PHOTOGRAPHY

their position, of the textures, and of the light. I spend lots of time moving the objects around until the balance in the composition feels right. If there’s a lack of harmony, the result will not be good. How important is the lighting of your flay lay subjects? And what flash gear do you use? As with the physical composition, the light must be just right or the picture will lack harmony. Usually I will use a very simple one-light setup either with or without a reflector, depending on how much I want to fill the shadows. But sometimes I will use two flashes, especially if I need to imitate the look of sunshine, or create a high-key, low-contrast look. It’s also important to soften the light, so there’s not too much contrast or distracting highlights and shadows.


One-hour Projects

Expert advice for creating your own flat lay still lifes

Use items from around the house It’s a good bet that you’ve got all the objects you need for a great flay lay at home already. Cutlery is a great example – raid your kitchen drawers for a selection – and take a good look around your house for other items. Other great everyday subjects include tools, bulbs, toys, jewellery, pens and pencils... the list goes on and on.

What’s the top tip you’d What kind of exposure give someone attempting settings do you use for to make images like these? these shots? For example, Really that the objects must to maximise the sharpness be the right kind for a flat lay of details and texture? image. Not all will suit the For me, flat lay images are all style. They will often need to about sharpness, so I want have clear shapes and not enough depth-of-field be too high, which to keep everything can make the in focus, from TIP composition the closest TAKE YOUR uneasy. A lack details of the TIME COMPOSING of reflections objects to also helps the texture You can’t rush still life – the overall of the take the time to perfect the harmony. background. arrangement of your The quality You don’t objects before and texture of need to be shooting. the background thinking about that you use is bokeh here, also really important because all of the object must be clear. I’ll usually for this kind of photography – it has to suit the subjects use an aperture of f/7.1 to f/14. either by complementing or And because I’m lighting with contrasting with them. When the flash, I can keep the ISO you’re starting out, it’s good setting low. This provides the to shoot just a few simple best quality and minimal noise objects before you move onto (which could affect sharpness more complex compositions. or hide the fine details).

Theme objects by colour and tone Consistent colour – or lack of it – ties the elements of your composition into a harmonious whole. Here Natasha used dark bowls and utensils with a similar texture, and placed them on a wooden backdrop she’d painted black. The low-key one-light setup matches perfectly.

Watch the spacing It’s key to create balance in the image, and part of that comes from not overlapping your objects. Everything should have its own space, untroubled by, but working with, the things around it.

PRACTICALPHOTOGRAPHY.COM 41


IDEA

2

Capture an amazing physiogram MEET YOUR GUIDE TIM BERRY

ALL MAGES BY T M BERRY

Tim is Practical Photography’s contributing editor. He has a master’s degree in photography, and has taught at university level. He loves trying new and unusual techniques. O LONG EXPOSURE LIGHT trail techniques are most often associated with starry skies and rush-hour traffic. But why drag yourself outside in winter when you can achieve amazing abstract light painting shots in the warmth of your own home? Physiograms are the perfect indoor project at this time of year. They’re quick and

42 PRACTICAL PHOTOGRAPHY

easy to pull off, total project time is around 30 minutes and all you need is a single-bulb torch, string and some tape. The basic idea is to suspend a torch from the ceiling, with your camera facing upwards on the floor beneath it, then take a long exposure image as the torch swings to and fro on its string. This creates striking spirograph-like geometric trails that are different every time, so each image you take will be completely unique. You can use your camera’s kit lens fully zoomed out for this technique, but if you have a wider-angle lens, such as a Sigma 10-20mm, that will be even better. You can set up in any room in your house, just move any furniture that’s in

the way. If there’s a light fitting in the middle of your room, tie your string to this instead of taping it to the ceiling. It must be completely steady though, as if the fitting moves even slightly as the torch swings you won’t get a perfect physiogram.

Choose your torch As the torch swings, the camera will ‘see’ it from a range of angles, so it needs to be equally bright from all of them. The perfect torch will therefore have a single exposed bulb that is nondirectional. By far the best option is a Mini Maglite (right), which you can buy for around £12. These come with a candle mode, where you can remove the focuser

on the end to leave a bare bulb. LED or incandescent bulbs are both suitable.

Set exposure time You’ll be working in manual for this technique, as you don’t want the camera to expose the ceiling as a midtone grey – you want it jet-black. You can achieve this with a very dark room, an ISO of 100, and an aperture of around f/16. Working with such a narrow aperture will also ensure a large depth-of-field, so the trails will stay sharp as the torch’s distance from the camera changes. However, don’t be tempted by the narrowest aperture your lens will allow, as you’ll get softer images because of an effect


One-hour Projects

Expert advice Set up your shot

1

Hang your torch

3

Focus your shot

Attach the end of your torch to a length of string, then tape the other end of the string to the ceiling with duct tape. Alternatively, attach it to a light fitting if it’s steady enough. Ideally the torch should hang around 3ft from the ground.

2

Choose your settings

4

Take your image

Working in manual exposure mode (M), set an aperture of f/16, an ISO of 100 and a shutter speed of 15-30sec. Set self-timer mode to 2sec, and zoom out as far as your lens allows (about 18mm will be plenty).

TIP USE YOUR FLIP-OUT SCREEN If your camera has a screen that tilts or flips 180°, this will enable you to view each image you take without having to disturb the camera.

known as diffraction. The exposure time you choose is entirely a matter of personal preference. If you’re unsure, start with around 15sec and try a few test shots. Then try some at 30sec, which will give you longer, more intricate patterns. If you own a shutter release cable, you might even want to experiment in Bulb mode, setting an exposure time of a couple of minutes.

Above A Mini Maglite LED torch with candle mode is ideal for this technique, as you can see the bulb clearly from most angles.

The easiest focusing method is to point your camera at the floor from the approximate height of the torch, and half press to focus. Then without knocking the focus ring, switch to MF.

Place your camera below the torch, facing up. Set the torch swinging and give it a few seconds to settle, then press the shutter button. Use the 2 seconds before the shot starts to move out of frame.

Expert advice Quick ways to improve your shots The physiogram will appear white, but if you want to add colour, go to Image>Adjustments>Hue/Saturation. In the panel, tick Colorize. Next, adjust the Hue slider until you find a colour you like and increase the Saturation slider to make it pop. Don’t touch the Lightness slider. Click OK to finish. To give your trails more definition, go to Image>Adjustments>Levels, and move the White Input slider to the left, then click OK. To stack images together for a multi-coloured result, press Ctrl+A and Ctrl+C on one, bring up another, then press Ctrl+V. In the Layers palette, click where it says Normal and choose Lighten. Hit Ctrl+T and resize the box as desired.

PRACTICALPHOTOGRAPHY.COM 43


One-hour Projects

IDEA

3 Make ethereal scanner art

MEET YOUR GUIDE ALEXANDRINA ANA Digital artist Alexandrina creates captivating scanner art, as well as portraits and urbex images. alexandrinaana. deviantart.com

ALL IMAGES BY ALEXANDRINA ANA

What’s the attraction of using a scanner to ‘shoot’ rather than a camera? It’s very different – of course the primary use of a scanner is to replicate documents, but

when you start digitising objects and textures it becomes an artistic tool. A scanner lets you represent objects in a new way – there’s an absence of perspective and depth-of-field. It’s a new way to represent the world around me, and even myself. And it’s accessible, too, as any sort of flatbed scanner can be used. What made you decide to create scanned portraits? I’d made scanned images of objects, like flowers, and wanted to produce something

new. I think this style of portrait can capture the soul, psychology and memories – it’s all much more connected than with a camera; very close, intimate. Done right you can get an ethereal look – an almost underwater quality. How do you go about composing such pictures? It’s a kind of ritual. I carefully place the items I want to include and block the light by darkening the room. Needless to say – as the image is being taken from below – everything needs to be placed upside down. The hardest part is expressing emotions, and not distorting the face or emotions. Try not to press against the glass too heavily and check that the scanner screen is clean for each ‘take’. What about the exposure? Correct scanner exposure is vital, but most automated exposure controls perform adequately. Just like on a DSLR, you can check the image’s histogram to see that

44 PRACTICAL PHOTOGRAPHY

Above Dig your flatbed scanner out of the loft and give it a go.

a full range of tones have been captured and you’ve not lost detail in the highlights or shadows. Most scanners also have adjustable exposure, which can be found in the advanced settings. Are there any other settings that are important? I set the scanning resolution to its highest setting. Some scanners will reset this after every scan, so you may need to save it as a preset. The colour format may be able to change from colour to greyscale or black & white.


IDEA

4

Shoot stunning fiery close-ups MEET YOUR GUIDE MUHAMMAD AL-QATAM

ALL IMAGES MUHAMMAD AL-QATAM

Radiologist by day Muhammad has been a passionate photographer for almost 15 years, shooting many wonderful macro projects for which he’s won numerous awards. 500px.com/alqatam

What got you started shooting macro? I live in Kuwait and the weather is very hot for most of the year, so outdoor shooting is not always a suitable option. Indoor projects like this are a preferred choice – I guess it’s

the same when it’s too cold! Then there are the amazing discoveries that a macro lens brings you. The magnification uncovers a hidden world not usually seen by the naked eye, and it turns everyday objects into something amazing. How did you come up with the idea for this matchsticks project? The idea to shoot macro images of lit matches was inspired by a commercial I’d seen on TV. It was shot using a macro lens and in a super-slow-motion speed showing the shape of the flames. I wanted to get that look in a still.

“THE IDEA TO SHOOT MATCHES WAS INSPIRED BY A COMMERCIAL ON TV...” 46 PRACTICAL PHOTOGRAPHY

How long did you spend on these images? They were shot across a couple of days, but the actual shooting could be done within an hour. It’s captivating, and easy to spend longer as you make adjustments. I started off shooting normal matches, then, after reviewing the shots, I wanted more detail in the heads, so I went to the store and got larger, taller matches. What steps did you take for safety? Since I wanted to shoot the matches bursting into flame, it needed to be done safely. I set up in my kitchen, making sure there were no flammable materials around me, and I had a bucket of water, a damp towel and a fire extinguisher close by just in case. I also used a UV filter on the lens, to protect the front element.

Can you talk us through the process of shooting? With my DSLR on a tripod, I composed with a lab support stand holding the match in place. A good support is vital as you don’t want subject movement. I used off-camera flash to light the match, with a gridded snoot to stop light spilling onto the backdrop. A shutter speed of 1/250sec blended the flash and the flame well. How did you actually light the matches? To avoid getting another match in shot, I used a blowtorch to light them from a distance. Then I triggered the camera’s burst mode via a remote to capture ignition. Using burst mode with high-speed sync flash helps you avoid missing the vital moment.


One-hour Projects

TIP SHOOT IN BURST MODE To maximise your chances of getting ‘that’ perfect moment, shoot in Continuous drive mode.

Did you have any difficulty with the lighting? I experimented a lot, lighting the matchstick from all the angles, with each position giving me a different result. Like any project, you start to build the setup and modify it as you go with small changes in the flash position, power and exposure. What’s the top tip you’d give for a project like this? Plan well. Sketch the setup and list the equipment you need, then experiment with everything and take more shots than you think you need. You’ll be amazed how what you think is bad in-camera can look amazing after editing.

Above & left Muhammad’s macro shots of flaming matches are a simple and effective project anyone can try, capturing moments invisible to the naked eye.

Expert advice Get the focusing spot-on Macro shots require sharp focus and perfect control over depth-of-field to keep the important parts of the composition sharp. In these shots, Muhammad shot at f/13 to keep the whole match head in focus, and made sure to check the focus each time he added a new match. This is important, as even tiny movements from the camera or subject can mean missing focus when you’re shooting macro.

Above Use Live View to check focus before each sequence of shots, making sure it’s accurate.

PRACTICALPHOTOGRAPHY.COM 47


IDEA

5

Make a surreal storybook image MEET YOUR GUIDE KINGSLEY SINGLETON

ALL IMAGES BY KINGSLEY SINGLETON

An expert tutor in camera skills and Photoshop, Kingsley has been teaching creative photography in magazines and courses for over a decade. kingsleysingleton.com O IMAGINE IF YOU COULD be in two places at once. Well, digital cameras and Photoshop can make that possible... in terms of image-making at least. With the right approach you can quickly repeat a person, animal or object multiple times around a picture, making it seem like there are more of them than there are. And

48 PRACTICAL PHOTOGRAPHY

although the concept can seem complex to start with, it’s actually very quick and easy to do – it took well under an hour to make the image above. It is, therefore, a perfect technique if you have a bit of creative energy, and will amuse and amaze the kids, so why not try it over the holidays? Essentially this is a multiple exposure technique, but one that relies on keeping the camera still while the subject moves from frame to frame. All you really need to do it is a tripod, a digital camera and Photoshop.

What can you shoot? Most of the time when people try out this technique, they shoot multiple versions

of themselves at home. There might be five of the same person washing the car, or sitting around in different positions in the living room, but it doesn’t take too much effort to do something with a bit more narrative or quirky appeal. Consider adding some costumes, props or interesting locations and you’ll create something much more striking. In this case, I decided to use a girl, Isabel, as the subject and repeat a single dog, Beadie, around her, as a pack. I didn’t want the picture to be menacing, though, so decided to make the pack sit around Isabel as though she’s subduing them with just a ‘Shhhh’. It doesn’t change the basic

mechanics of the technique, it just makes it extra-interesting.

Controlling the shot The first thing to do was find a quiet woodland area where we wouldn’t be bothered by other people or dogs. I’d have loved a bit of snow and a spare red cape, but time didn’t permit either. What was essential were dog treats and an assistant to fire the shutter when I said (though an infrared remote could have been used instead). The tripod is used to keep the camera position consistent between the separate shots, and in many ways that’s the most important part – if there’s movement it’s harder to make the shots line up convincingly


One-hour Projects TIP KEEP IT CONSISTENT This technique needs focus, aperture and camera position to be the same between shots. Only the ‘actors’ are allowed to change position.

Expert advice Set up your shot

1

Position your tripod

3

Lock the focus

It’s vital that the camera doesn’t move between exposures, so compose the scene as you want it and lock the position off on a tripod. Make sure it won’t be knocked during shooting and don’t move it between shots.

Again, the focus must be in the same point for each of the shots. Using AF, focus on the main subject, then switch to manual focus. This will prevent the camera from needing to focus again.

when editing. Keeping Isabel in the same place by the tree, I used the treats to direct Beadie’s attention to her in each of the exposures, and asked my assistant to hit the shutter release whenever she was doing it a good position. It didn’t matter that I was in the shots, as I’d be masked out later, leaving just the pack. I shot about 100 images but only seven were used in the final image.

Right A tripod is the most important thing here. It prevents camera movement and allows everything to line up perfectly in the edit.

2

Set the exposure

4

Check for problems

Like camera position, depth-offield needs to be consistent so shoot in aperture-priority (A). Set an appropriate f/number for the depth-of-field you want, then take a look at the shutter speed and if it’s less than 1/60sec, increase the ISO.

After shooting a sequence, skip through the images on-screen, checking to make sure the different positions are good and don’t overlap or leave any awkward spaces. If they do, re-shoot.

Expert advice Put it all together in Photoshop First load the pictures you want to use into a ‘stack’. Go to File> Scripts>Load Files into Stack. Next click Browse, locate the files you need, highlight them and press OK. You’ll now have a file with all the images on separate Layers. It’s a simple case of using Layer Masks to pick which parts of them you want to be visible in the final composition. In the Layers palette, click on the top Layer and go to Layer>Layer Mask >Hide All. A black mask will be added, hiding everything on that Layer. Select the Brush Tool, set it to white and paint white over the parts of the picture that are to remain visible. Repeat this on the other Layers, but leave the lowest Layer so it’s kept completely visible.

PRACTICALPHOTOGRAPHY.COM 49


IDEA

6

Make fantasy scenes with toys & models MEET YOUR GUIDE VESA LEHTIMÄKI Vesa Lehtimäki is a graphic designer and illustrator from Helsinki. Check out more of Vesa’s intriguing miniature photography in his book Small Scenes from a Big Galaxy. instagram.com/avanaut

ALL IMAGES BY VESA LEHTIMÄKI

When did you start your miniature photography? My first images were in about 1980. One of them was a Hawker Hurricane under fire while landed. I still have the Hurricane with its twisted prop and molten from the heat of pyrotechnics. Sadly, there are very few images left. Most were thrown away in anger because they were always out of focus. Bad camera. My real passion was ignited by movies like Star Wars. I loved explosions, miniatures, special effects and all that. I would scratch-build ships and try to do the same, to grab myself a piece of that magic.

50 PRACTICAL PHOTOGRAPHY

How do you set up one of your shots? It varies. Sometimes shots are planned, other times they are a spur of the moment thing. I carry a camera when walking our dog and often snap photos where I imagine ‘something’ could be in the scene, like the AT-AT in the mist. Later, I add that something in Photoshop. Take the Snowspeeder in the parking lot (bottom, p51). First I shot the background, then the model in matching lighting on a board to catch real shadows for realism. Then I pasted the whole thing on the backdrop. It’s fairly simple once you get the angles right. For the X-wing (top, p51) there was more effort. I used a very long exposure and ran around in the hay with a flash pointed down to mimic the landing gear lights on the ground. I removed the flash in my hand above the hay in post and added the X-wing to match the light patterns over the top. The X-wing itself was suspended on wires, so I could get under it.

What are the difficulties of shooting models like this? It’s always getting the angles to match. It instantly looks wrong if they don’t align. The Millennium Falcon (above) is the most forgiving of all the models I have – maybe it’s the round shape that allows more room for error. Is the scale of model important? Do larger scales make things easier? Yes and no. My 1/24th scale crafts – the X-wing and Snowspeeder – are fun to work with. They respond well to camera and environmental effects like snow, fog and such. They use 1/24th scale a lot in movies – it’s common from Star Wars to Harry Potter (for example, the giant Hogwarts filming miniature). In that scale, models are big enough to create the illusion of reality in a movie camera, as there’s plenty of detail, but they’re so big they make things difficult. It works like that on my DSLR too. Conversely, the Millennium Falcon in 1/24th scale would be way too big and

very hard to shoot, especially when combining it with blizzard effects, as you’d need more snow. In 1/72nd scale the Falcon works perfectly, especially with the snow I use. I can’t do a close-up of it, but it’s great for filling the frame. How do you match things like the depth-of-field? I eyeball it. To put it simply, if it looks good, it is good. There are lots of complexities, but I tend to play it safe with depth-offield and shoot with small apertures all the time to have as much as possible in focus. Apart from the compositing, is any Photoshop used? With the model photos it’s really all about merging them, for instance masking in the branches in the Falcon shot. I don’t create anything in Photoshop though, I only play with background plates and elements shot with the miniatures. I don’t add lights or things like that in – they are there as practical elements at the time of the exposure.


One-hour Projects

Expert advice for combining models with reality

Use the largest scale models you can The bigger and more detailed the model you use, the easier it will be to make it look like it’s part of the scene – up to a point. Too large and it becomes unwieldy. Here, Vesa used a 1/24th scale resin replica of the screen-used X-wing, and for extra detail “customised it with brass landing gear and fibre optic lights. It weighs a lot and was quite unnerving to suspend on a wire for the shoot”.

Human figures add scale to the image Photographed while walking his dog (not the one in the photo), Vesa says “the lady and the dog just walked into the frame mid-shoot and I left them in as I thought it added a lot to the photograph. The AT-AT model shot (a Revell Snap-Tite kit with some light customisation) was shot on a living room table in ambient light and added later. It’s basically just a silhouette.”

Raid the toybox too

VESA LEHTIMÄKI ©2015 BY DK ALL RIGHTS RESERVED

If you want to try something a little less photorealistic, but equally amazing, check out Vesa’s shots using Lego toys, as featured in his book Small Scenes from a Big Galaxy. What makes these shots special is the attention to detail in lighting, composition and humour. “What makes me tick with photographing Lego,” he says, “is an urge to find something new. It may not always end with the best photograph, but I like the discoveries made when trying something new. I think these photos need to tell a story, or be humorous, so they’re more than just a document of the toy.”

Find great locations as backdrops Familiarity helps the illusion here. We all know what a car park looks like, and how big the spaces are, so the Snowspeeder feels more real. “The combination of warm and cool light was tricky to replicate when shooting the ’speeder, which was shot on a board with lights placed to match the shadows I imagined those in the location would cast,” says Vesa.

PRACTICALPHOTOGRAPHY.COM 51


More creative ideas to try at home Make some amazing images with these quick and easy projects...

VIDEOS WATCH ALL THESE PROJECTS!

Check out this month’s Learn Photography Now show on your free disc/download to see how each of these projects took shape.

#1 Create surreal interiors using musical instruments Is that an architectural interior? No, it’s the inside of a guitar! Inspired by some take-a-second-look promotional images created for the Berlin Philharmonic by photographers MierswaKluska, PP’s resident Photoshop guru Dan Mold decided to give this surreal look a go himself. You can find out how Dan did it in this month’s Learn Photography Now show but, briefly, all you’ll need to try the same technique are some power tools and an old musical

instrument you don’t mind destroying – eBay is a good source of cheap, used ones. Dan used a small Ricoh GR II compact for this technique, as it fitted inside the guitar perfectly, but you could try it with a DSLR and wide-angle macro lens too. A simple torch was used to light the interior from above. Safety glasses and protective gloves are also required, as you’ll need to drill holes and saw the back off the guitar, giving yourself enough room to insert a camera.

“DAN USED A SMALL RICOH GR II COMPACT WHICH FITTED INSIDE THE GUITAR...” 52 PRACTICAL PHOTOGRAPHY

Above Dan shows how to set up and position your camera inside an acoustic guitar. Left Stay safe by asking a friend to help out, and wear safety goggles to protect your eyes.


One Hour Projects

#3 Make a tasty still life with fresh fruit As any student of art and photography knows, fruit is one of the classic still life subjects and there are so many different ways you can use it. In this month’s Learn Photography Now, PP’s Kirk Schwarz shows how to make a classy arrangement with freshly sliced kiwi, watermelon, cranberries, blackberries and more. There’s advice on arranging your still life, taking account of the fruits’ different colours; how to set up and use a simple black backdrop bought from a hobby store; how to give it the look of professional lighting using a single on-camera flashgun with a diffuser; and how to make the most of your subject using a glycerine-and-water spray to make it look fresh and appealing. What’s more, at the end of your shoot, you get to eat the subject. What could be better?

Keep on creating Brilliant presentation for your shots Happy with your photo project creations? Then don’t hide them away. Make sure you show them off with our guide to creative presentation ideas, starting on page 58. You’ll find top tips from PP’s Louise Carey to get you started, including how to make your own canvas prints and photo lanterns.

#2 Make silhouette portraits of your friends and family Remember those Victorian silhouette portraits that used to grace family homes up and down the land? Well here’s the updated version. This simple technique is easy to shoot at home and produces images with great impact. All you need to do it are some willing subjects and a plain background to shoot them against in profile. It’s then a simple matter of cutting them out in Photoshop or Elements, filling them with black, and placing them on a colourful backdrop. Q See the full technique on page 82 of the Photoshop Genius section.

PRACTICALPHOTOGRAPHY.COM 53


Download the app & get a 30-day free trial for your tablet or phone! Packed with over 60 minutes of video lessons!

ery digital issue of the UK’s best otography mag now comes with... Over 60 minutes of hands-on vice and interviews in our arn Photography Now show More intuitive interface improved viewing xtra images and eos to inspire your otography etina-optimised play for incredible ail & clarity

54 PRACTICAL PHOTOGRAPHY

NEW GET THE APP ON YOUR PHONE!


Digital Edition Free Trial Offer!

Bring pictures to life with pan & zoom detail

Take a fresh look at your favourite features

Enjoy lots of exclusive tablet-only content

See the world’s most amazing shots as they were meant to be displayed!

Navigate around the magazine quickly and easily with its slick new design

Be inspired by even more amazing images and behind-the-scenes videos

Learn clever new image-editing skills

Master all the core photo techniques

Find your ideal camera & accessories

Watch tutorial videos and read the step-by-steps at the same time

Improve your skills with advice from the magazine’s team of photographers

Read concise reviews, key specs and prices for every available camera

Try it now! Access your free 30-day trial by downloading the PP app from PRACTICALPHOTOGRAPHY.COM 55


Amazing Contest THE

GREAT BRITISH

PRIZE FUJIFILM X100F VALUE £1329

TREASURE HUNT

PRIZE FUJIFILM X-T20 & XC16-50MM LENS VALUE £949

I N A S S O C I AT I O N W I T H PRIZE FUJIFILM X-T2 & XF18-55MM LENS VALUE £1899

FOUR FUJIFILM CAMERA KITS WORTH £6000 MUST BE WON!

Your next clues:

PRIZE FUJIFILM X-PRO2 & XF23MM LENS VALUE £2178

P

RACTICAL PHOTOGRAPHY, IN ASSOCIATION WITH Fujifilm, has launched the country’s largest photography treasure hunt. We’ve got four amazing Fujifilm X Series camera kits, worth over £6000, up for grabs… and all you need to do is solve the clues and find them! We’ve hidden each camera (well, the activation codes to be precise) in one of four locations around the UK. This is the last set of clues to be released in the mag (the others having been in the December and January issues), with this issue’s clues much more location specific. We’re also revealing additional clues every Friday on our Facebook page. Once you’ve deciphered the riddles and know where to look, travel to your chosen location where you’ll find a hidden box with a ticket inside. Email the code printed on the ticket, the code printed in the mag (see below), your name and contact phone number to xhunt@practicalphotography.co.uk to claim your prize! Don’t worry, you won’t need a spade to take part – we promise there’s no heavy digging required! The clues may be hard to get, but the treasure won’t be. We’d love to see photos and videos of you on the hunt for these amazing prizes, so we’ve created the hashtag #xhunt for you to do just that. Put the hashtag on all your social media posts and tag us on our social channels, which we’ve listed below. Good luck out there! Q See practicalphotography.com/treasurehunt for full T&Cs.

Mag code P P - 3 4 - G 9 - 7 X

Important! How to claim your prize Locate the box, and send the code on the enclosed ticket, the code in the mag, and your name and contact phone number to xhunt@practicalphotography.co.uk

WWW

@PracticalPhotography Magazine

@practphoto

@practicalphotography

Full terms & conditions at practicalphotography.com

PRACTICALPHOTOGRAPHY.COM 57


WATCH THE VIDEO

COM PL ET E GU I DE

Louise brings her DIY projects to life in this month’s Learn Photography Now show. Find it on your disc or download it from bit.ly/ppdisc 1802

TH R E E C R A F T Y D I Y

PR ESEN TAT I O N PROJ ECTS 58 PRACTICAL PHOTOGRAPHY


Three nifty presentation ideas to try...

Project 1 Transfer a print onto a canvas P60

Project 2 Create a scratch-off print P62

Project 3 Make your own photo lantern P64

Are endless folders of photos clogging up your hard drive? Not sure what to do with all your brilliant shots now that they’ve been processed? Consider this PP to the rescue, as we’ve three creative presentation ideas designed to excite and inspire. Read on to discover how to make your photographs the talk of the room and the centre of everyone’s attention.


BEGIN N ER

Transform your favourite photo into a canvas print HE SUPREME quality of a professionallyprinted canvas is indeed a wonder to behold. However, if you’re looking for something a little more personal, why not try

out this creative technique? With some basic craft supplies, a blank canvas and your image printed onto normal copy paper, you can produce your very own canvas print from the comfort of your home.

Above Don’t scrub too vigorously, or you’ll risk getting rid of the bottom layer that has the actual image on it.

60 PRACTICAL PHOTOGRAPHY

Source your products Creating your own photo transfer canvas is a really easy project, but you’ll need a few specialist products. We sourced all of ours from Hobbycraft and Amazon for around £15, but make sure you shop around for the best deal. You’ll need photo transfer medium gel, a blank canvas, a paintbrush, an old gift card that you don’t need anymore, some sponges and the image you want to transfer printed onto ordinary paper. We recommend you use an A4 canvas and print out your shot on A3 paper. This means that you can resize your image so that it’ll overlap the canvas slightly when placed onto it. This will ensure you don’t accidentally transfer a white border. If you don’t have

access to a printer that accommodates A3, then you may want to consider working with an A5 canvas instead. This is because you’ll struggle to transfer an A4 print onto an A4 canvas without having the unsightly effect of the white border transferring onto the canvas as well.

Create your canvas The first thing you’ll need to do is protect whatever surface you’re working on by putting down some old newspaper. Next carefully pour some of the photo transfer medium into a container, and use your paintbrush to liberally coat both the canvas and the front of the image. Ensure that there are no uneven patches, and watch out for any errant brush hairs that may have


DIY Presentation Projects

Expert advice Get your photos professionally printed Preparing your image for print is one of the most important things you can do to ensure you receive a product that truly represents the beauty of your shot. However, with all the different variables you have to think about, it can be difficult to know whether you’re doing the right thing or not. Jan-Ole Schmidt from award-winning photo lab WhiteWall shares his expert advice on preparing pictures for excellent results:

TIP SELECT BRIGHT IMAGES Subtle shadow details in dark images won’t show up as well on a canvas as they do on a screen. Use a highcontrast shot for the best results.

Select your image “Naturally you should spend some time thinking about which image you want to hang on your wall. After all, it’s going to be there for a long time. However, don’t think about it too much. Take note of which photos you look at most often on your computer or mobile phone. Whether you’re drawn to it for the emotions it evokes, or for its technical excellence, you’ll usually find that the solution to your problem has been staring you in the face the entire time.”

Choose the resolution

come off mid-paste. Once you’ve finished with the medium, simply place the image face down on the canvas. This is where the overlapping image border will really help, as you won’t have to be so concerned with getting everything totally straight. However, do try to make sure that the image isn’t completely off-kilter – especially if you’re transferring a landscape with a clearly-defined horizon. Now you’ll need to leave the image to dry. Overnight is preferable, but we left one for around 5 hours and it was fine. Once dry, simply use a damp sponge to lightly rub away the surface layer of the paper. Once you’ve finished scrubbing it away, the next thing to do is to detach the overlapping paper border. Take your time and do this bit carefully, as you don’t want to accidentally rip off the photo layer.

Optimise brightness “Always be aware that both colour and brightness can appear differently on a monitor than they do in print. There are two reasons for this. Firstly, a monitor is illuminated and paper isn’t. Therefore, a monitor can display an image much brighter than the shot actually is. The second reason is that different papers have their own base tone, meaning a pure white will look different from paper to paper, affecting the overall brightness and colour.”

Calibrate colour “If you have a calibrated monitor, ICC profiles are the perfect way to assess how your pictures will look on a specialised product. On WhiteWall.com you can find downloadable ICC colour profiles for many different product options. However, if you don’t have a calibrated monitor, then the online photo lab at WhiteWall offers a hard proof option for all of its various papers. For a lower price, you can order a watermarked test print on the paper of your choice, which will enable you to see how it actually looks on that paper.” Q Discover a variety of printing products at whitewall.com

WHITEWALL.COM

BURST AT PEXELS.COM

“For optimal production, use the highest resolution available and don’t scale your photo up or down. Don’t worry about whether or not the resolution is too low. The WhiteWall configurator is able to show you if the resolution is sufficient to produce at the size you want. Ideally, you don’t want to compress at all. Save it with 8-bit

colour and an sRGB colour space. When in doubt, have WhiteWall optimise your file to achieve the best possible quality.”

Above A high-quality canvas print is the perfect format for displaying your landscape, still life and portrait photography in a very professional way.

PRACTICALPHOTOGRAPHY.COM 61


INTER M EDI ATE

Cr te a scratchcardinspired instant print HE VINTAGE appeal of instant prints has proved both universal and incredibly long-lasting. In a world of technology where no digital image can truly be

trusted, instant cameras are a welcome breath of fresh air that guarantee authenticity, while still maintaining the lightning-quick appeal of smartphone cameras. However, how do you

make the most of your prints once you’ve got them? We’re all used to seeing and sharing images on Instagram and Facebook now, so hiding your images away in a photobook just won’t cut it anymore. Instead, why not try out a unique and creative presentation idea that’ll make you the envy of Pinterest?

Create your paint

Above Scratch away your paint formula with a jagged pattern for the best results – you don’t want it to look too perfect!

Above Make sure that you apply the paint mixture in light, even strokes. Right For the best results, choose an image where the majority of the shot is bright, as this will contrast with the black paint.

62 PRACTICAL PHOTOGRAPHY

Short of pouring yourself a glass of tap water, there isn’t a concoction much simpler to make than this one. All you’ll need is some black acrylic paint, washing up liquid, masking tape, a paintbrush and a container to house the paint (don’t worry – this paint is extremely easy to wash off, so you shouldn’t be apprehensive about using an old Tupperware box).

TIP BE GENTLE WITH THE PRINTS Make sure you don’t scratch too hard when rubbing away the black paint, as you may damage the print underneath and ruin the effect.

You’ll need a ratio of two parts paint to one part washing up liquid, so pour the two in and then mix them together. Make sure the paint isn’t too watery, as this will cause you problems later. To check you’ve got the perfect consistency, place some masking tape on a piece of scrap paper and paint some of your mixture over both surfaces. If you’ve created the correct formula then it should apply to your print with minimal streaking. However, the true test is when you lift off the masking tape, as there should be no bleeding underneath it at all. If there is any, then you’ll


DIY Presentation Projects need to mix in a little more acrylic paint and test it all over again.

Apply the paint

Expert advice Three ways to display your instant prints

It’s best to select the prints that are bright and have lots of colours in them in so that they contrast with the black paint. They’ll also need to have a central composition, as you’ll be keeping some of the mixture around the edges. Place your instant print on the scrap paper and use the masking tape to cover up the white borders. Make sure you cover them perfectly, without overlapping onto the photo, as otherwise you’ll ruin the final result. Don’t worry if you mess up – you can simply run the print under cold water to wash it off and try again. Next, paint your mixture onto the print and then take off the masking tape to allow it to dry for at least a couple of hours. Then simply take a coin and rub off the mixture in the middle to reveal the photo underneath.

“TRY A CREATIVE TECHNIQUE THAT WILL MAKE YOU THE ENVY OF PINTEREST...”

Once you’ve created your scratch-off instant prints, it’s time to find them their own home. Here are three ingenious and stylish ways to display your images...

Washi tape If you’ve ever ventured into the crafty waters of Pinterest, then you’ve likely come across this handy product. With a similar strength to masking tape, washi tape is gentle enough to be used on most painted surfaces. Meanwhile, the variety of vibrant patterns it comes in guarantees you colourful results. Use a variety of tapes to create a powerful collage, or keep it simple with just one for a minimalist approach.

Plant-inspired display

Horizontal fairy lights

If you’d like your photo display to be inspired by the British countryside, buy a fake plant garland from a garden centre to hang in your living room. These garlands can either be hung full-length, or cut into separate sections. All you need to do is attach your instant prints to the garland with some mini wooden pegs, which will add beautifully to the rustic effect.

Don’t pack up those Christmas lights just yet! Fairy lights are perfect for hanging up instant prints all year round. Source some clear suction cup hooks to hang your lights wherever you wish, including walls, windows or doors (battery pack lights work best for this). Then simply use wooden pegs again to attach your photos to the lights.

PRACTICALPHOTOGRAPHY.COM 63


A DVA NCED

Craft a beautiful photo lantern OOKING FOR A DIY challenge and eager to put your crafting skills to the test? If you’re after a fresh spin for a panorama then we’ve just the project for you. Turn your favourite photograph into a living room staple, illuminated from within and taking pride of place as a stylish lamp.

L

Pick your image As you’ll be printing your image on normal copy paper, you’ll want to steer away from big blocks of dark colours. The only time you’ll typically be able to get away with this is if you’re using an image that has a silhouette. However, the vast majority of your shot should be a bright colour, as this will allow the light from the bulb to shine through. You’ll also want to

avoid shots that have lots of intersecting lines, as this will make your life infinitely harder once it comes to placing the paper on your lantern. The photos that will work best for this technique will be panoramas with simple repetitive patterns (such as the flying birds in the our image). If you don’t have any suitable photos in your repertoire, there’s no need to fret. Simply visit a free stock image site such as pexels.com and download one from there.

TIP WORK SWIFTLY The paper will attach to your lantern best when wet. Work quickly to place the paper on and smooth down the wrinkles while it’s still tacky.

Source the products You’ll need a few basic products for this project The first thing to source is a lantern. Unless you have an A3 printer, you’ll want to look for a 6in diameter paper lantern. We’ve found these online for as little as £1.85 each (shipping not

included). You’ll also need Mod Podge Matte Finish, which is an all-in-one glue, sealer and finish, and a paintbrush with which to apply it. To prepare your photo you’ll need a sphere

1

template, plus some scissors to cut out the shapes you’ll need. You can create an accurate template with your lantern’s exact specifications at templatemaker.nl/sphere

Create your template

As we have access to an A3 printer, we’re using a 10in diameter lantern. However, all instructions given will be for a 6in diameter lantern (although you can easily adapt the directions if you wish to print larger). The first thing you’ll need to do is go to templatemaker.nl/sphere and select the Inch option. Next type in Diameter: 6 and Segments: 8. To work out what figure you need for the Rings option, simply count how many spaces there are between the horizontal bands. Now select the PDF option and then the Preview option and press Create. Firstly, you’ll need to save the template for later. Then click the Print icon on the top right of the web page. Make sure the ‘Fit to page’ option isn’t selected (as otherwise it won’t print to size and you’ll have an inaccurate template to work with later). Now all you need to do is press Print and then put aside these templates to use later.

64 PRACTICAL PHOTOGRAPHY


DIY Presentation Projects

2

Prepare your panorama

Your photo lantern should look as seamless as possible, so you’ll need to make the original image totally symmetrical for the best results. To do this, load your image into Photoshop and use the Rectangular Marquee Tool to select the most interesting half of your shot. Then use Ctrl+J to paste your selection as a new Layer. Use Ctrl+T, then right-click on the image and select Flip Horizontal. Now simply arrange the new Layer to create a symmetrical effect. Lastly, go to Layer>Flatten Image to create a single Layer. As you’ll be putting together eight segments, all just under the height of an A4 piece of paper, you’ll need to resize your image appropriately. Go back to your template and open one page in Photoshop. Use the Crop Tool to crop into the top and bottom of the oval. Go to Image>Image Size and write down the height of the template in centimetres. Hit OK to close the Image Size panel.

4

Put your lantern together

Go to File>Print and make sure the box ‘Scale to fit media’ isn’t checked. Press Print, and then use Ctrl+Z to go back to before you cropped in. Now simply repeat those steps until you’ve printed all four sections. Next, take the templates you printed earlier and tape them onto the four sections. Then use scissors to cut around the templates to create the eight segments of your lantern (ignore the tabs on the template and treat it like a normal line). Coat the first segment of the image liberally with Mod Podge and then place it onto the lantern. You’ll want to ensure that the widest part of the section is situated in the centre. The end bits will drop off the end of the lantern and that’s totally fine, as you can trim them at the end. Put on another coat of Mod Podge and use your fingers to smooth down any wrinkles. Do this until the image is totally flush to the lantern. Repeat until finished, then leave to dry overnight. Lastly, enjoy your lantern!

3

Resize the image

Go back to your panorama, go to Image>Image Size and type in the height of your template. Hit OK to apply. Navigate to the template and select the Magic Wand Tool, ensuring that the ‘Contiguous’ option is checked. Click the outside areas of the template while holding down the Shift key, then go to Select>Inverse. Drag the template onto your panorama. If it’s too big, press Ctrl+T and resize it so that it fits perfectly. Repeatedly drag the template while holding down the Alt key to duplicate it until you have eight segments. Place the middle two in the centre of the image, then crop in any excess from the sides. Now you need to separate your panorama into four different sections for printing. Starting from the left, use the Ruler to divide your panorama into four sections, each spanning the length of two of the templates. Delete the template Layers, then use the Crop Tool to select the first segment and crop in.

Next steps Get creative with the show Itching for another crafty project to enjoy? Or simply want to see how these techniques are created in real-time? Watch Louise create the three awesome DIY projects here – plus extra exciting projects from the rest of the PP team – in this month’s Learn Photography Now show. Find it on your free cover disc, or download it today at bit.ly/ppdisc1802

PRACTICALPHOTOGRAPHY.COM 65


The Ultimate in online framing A framed photo is not just for Christmas…

36

NEW Frame Mouldings

m s fro Price

£11

Beautiful, contemporary frames to preserve your precious memories, with over 95 stylish frame colours and profiles, 28 window mount colours and easy online ordering. Plus every framed print is guaranteed for 5 years!

WWW.ONEVISIONIMAGING.COM | 0845 862 0217


NOW INCORPORATING

32

EASY PHOTOSHOP ADVICE THAT REALLY WORKS

EXTRA PAGES OF THE BEST TUTORIALS FOR ALL LEVELS

72

CREATE FANTASY ART USING MULTIPLE IMAGES Tell a story with a Photoshop composite

PHOTOSHOP GENIUS

...

PP’s Photoshop editor, Dan Mold, is an Adobe Certified Associate.

Learn exciting new editing techniques from the UK’s best digital experts... 68

Retouch your portraits

Smooth skin, fix blemishes and correct your colours in Lightroom.

76

Add a stylish tone

Our trio of quick toning effects are sure to make your shots more eye-catching.

80

Fix overexposed skies

Save a landscape shot by swapping a blown out sky with our free replacements.

82

Make custom wall art

Increase the impact of portraits by transforming them into colourful silhouettes.

84

Shoot an epic time-stack

Capture the passing of time and stack the results for abstract landscapes.

90

Photo fixer

PP’s pro image editor Dan Mold retouches a selection of your pictures.

96

Get a new look instantly

Open our 25 free Lightroom presets and enhance your pictures in a single click.

98

Photoshop hacks

Three quick tips that’ll change the way you edit your images forever.

WATCH OUR PHOTOSHOP TUTORIALS Every issue features additional multimedia content that includes Photoshop video lessons to complement our expert step-by-steps. When you see this icon on the page you’ll find extra content on your disc/download. See page 6 for full details.

PRACTICALPHOTOGRAPHY.COM 67


PHOTOSHOPGENIUS

Retouch your RAW portraits in Lightroom

68 PRACTICAL PHOTOGRAPHY


// LIGHTROOM // VIDEO TUTORIAL

Want to get the best out of your people pictures? Kirk Schwarz shows you how to fix colours, lift the exposure and smooth out skin in Lightroom. WHAT ORTRAITS ARE YOU NEED the ideal subject for Q Lightroom 6 or CC getting creative in Q A portrait which needs post-processing. While there’s some attention paying no doubt that a simple, straightto blemishes and out-of-camera JPEG can look skin texture very nice in the family album, a few tweaks in Lightroom will really elevate your people pictures from mere snapshots to pro-level status. All it takes is a series of colour, exposure and blemish removal steps, and you’ll end up with professional-looking portraits in no time at all. If you don’t have Lightroom, you can also use these techniques in Photoshop’s Adobe Camera Raw converter. And you can always export your images into Photoshop at the end of the technique if you want to take anything a step further. Just remember that a great portrait always adheres to the ‘less is more rule’, so don’t overdo it. It’s a good idea to step away from the computer when you hit a creative block, or you might end up adding things unnecessarily, and potentially ruining the final image.

P

What happens if I make a mistake? Unlike Photoshop, none of the editing you apply to an image in Lightroom is destructive. This means all changes to the exposure, colours or tones can be reversed, only becoming permanent when you Export as a JPEG or TIFF. The great thing about this is that you can fine-tune any earlier adjustment you have made, which is perfect if you change your mind halfway through a lengthy edit.

BEFORE

Above I usually underexpose my portraits, with a view to brightening them in post-processing. This is because it’s easier to recover shadows than highlights. Left After a small exposure and contrast boost, some skin smoothing using the Clarity Slider and the Adjustment Brush, and a bit of colour work, the end result looks great.

PRACTICALPHOTOGRAPHY.COM 69


PHOTOSHOPGENIUS

Lightroom interface explained The Lightroom workflow operates in an entirely different way to Photoshop so can seem daunting to get to grips with. But you’ll soon familiarise yourself with the layout when you’ve made a couple of RAW conversions. Here’s what you need to know about the Develop tab, which is where you make your edits...

Filmstrip The Filmstrip sits at the bottom of the interface and lists the images from your latest import. This makes it easy to flick through the images in your current import. You can star rate your shots with number keys 0-5 and, using the Filter you can reduce the images shown in the Filmstrip to just the ones you want to work on.

Modules The most useful modules are the Library, where you can import your pictures, and Develop, which lets you process your RAW files. The Print module is also handy if you want to print directly from Lightroom.

Adjustments The Adjustments are all collapsible panels. Click on them, to expand, and they will reveal the sliders and controls within. These contain powerful editing options, from Exposure to Sharpening, and Noise Reduction to Split Toning.

Toolbar For more precise adjustments, there are a handful of tools found under the histogram. Here you can apply a crop, remove spots, correct red eye, add graduated and radial filters and adjust specific areas of your pictures using the Adjustment Brush Tool.

Below The Exposure slider allows you to raise or lower the overall brightness of the image.

1

Import your image and correct the exposure

Open up Lightroom and go to the Library module, then click on the Import button, or head up to File>Import Photos and Video. Now use the Source panel on the left of the interface to browse through your hard drive and find the RAW file you want to work up. When you’ve found it, make sure it has a tick next to it and hit the Import button to bring it into Lightroom. Go over to the Develop module and click on the Basic panel to expand it, then drag the Exposure slider until the shot looks nice and bright. We’d also recommend adding in a little contrast by dragging the Contrast slider to the right. Use the Shadows and Highlights sliders to recover details, which is great if you don’t want to affect the global exposure.

70 PRACTICAL PHOTOGRAPHY


// LIGHTROOM // VIDEO TUTORIAL

3

2

Clean up the blemishes

Before you smooth out the skin, you should clean up any obvious blemishes. The Spot Removal Tool works much the same as Photoshop’s Heal Tool, and is extremely precise. Make sure you’re set to Heal mode. Add a Feather of at least 50, and Opacity of 100. The size of the brush should be slightly larger than the blemish – change the size of your brush by pressing [ or ]. Now click on the blemish (or paint over a slightly larger area if required) and a second circle will appear. Drag this second point to an area with similar texture and colour, then rinse and repeat.

4

Fine-tune the colours in your shot

RAW files need colour tweaking, which Lightroom’s HSL tab is perfect for. We’re only using the Luminance tab here, which is responsible for the brightness of the colours, but you can change the Hue or Saturation in their responding tabs. Adjust your colour sliders until you’re happy. Next go to the Split Toning panel. Drag the Saturation sliders in both tabs until they’re on 20. This allows you to see the effect. Now drag the Hue slider in the Highlights area to the right, until you’re happy with the effect. We’ve settled on a yellow here to give a warmth to the skin tones. Repeat this process with the Shadows slider, where we have opted for blue. Change the Balance slider until you get the required result (here +79), which puts a bias on the Highlight colours.

Smooth the skin

First you need to select the Adjustment Brush from the Toolbar, making sure you set Feather and Flow to 100. Next, paint over the face, trying to avoid the eyes, hair, lips and nostrils. If you want to see where you’re painting, press O to bring up a red Mask. Any area that’s now coloured red has been brushed over. If you’ve accidentally painted over an area you shouldn’t have, select Erase in the brush panel and brush over it. Once you’re happy with your selection, drag the Clarity slider all the way to the left to -100. Create a new Adjustment Brush pin by pressing New under the Toolbar. Now repeat the last step, but this time only brush over the eyes. Once you have the eyes selected, you can raise the Exposure slider slightly to make them really pop.

5

Apply finishing touches and export

Unlike RAW files, JPEGs have sharpening applied to them in-camera. With this in mind, it’s always a great idea to sharpen an image before exporting it. To do this, go down to the Sharpening panel. Pressing the square cross-hairs at the top of the panel allows you to click on a point to zoom into. We’ve opted for the eyes. Drag the Amount slider to the right, remembering to do so sparingly as an over-sharpened image is not a pretty sight. Once you’re happy with the results, it’s time to export your masterpiece. Go to File>Export and choose the folder location you want to save your work to. Set the Image Format to JPEG and ensure you’ve moved the Quality slider along to the maximum setting of 100. Hit Export to save your shot.

PRACTICALPHOTOGRAPHY.COM 71


PHOTOSHOPGENIUS

Make a fantasy composite

WHAT YOU NEED Q Photoshop or Elements Q A variety of images you’d like to merge together

Dan Mold explains how to merge images with Layers & silhouettes for really abstract results.

F

ANTASY COMPOSITE IMAGES ARE A brilliant way of letting your hair down in Photoshop. You can create scenes that would be impossible to capture in a single still photograph, position your subjects exactly where you want them and change their proportions too. We’ve rounded up a hotchpotch of pictures to create our narrative, including a snap of the Milky Way, a lone tree, some animals, a girl pointing upwards and an old cottage. There are loads of royalty-free image websites, such as pixabay.com or pexels.com, so download a handful of images and use them to make your own narrative, or use them in conjunction with your own shots for more personalised results. In this tutorial we’ll arm you with the knowledge to make accurate selections, reveal how to use Layers to build up the effect, and use Photoshop’s blending modes to change how your pictures interact with each other.

NORTHERN NIGHTS PHOTOGRAPHY

ROOM THE AGENCY

BEFORE

TERRANCE KLASSEN

DAN MOLD

GRANT GLENDINNING

NATHAN KING

Above We merged this assortment of images to create our abstract fantasy dreamworld (right).

72 PRACTICAL PHOTOGRAPHY

AFTER


// PHOTOSHOP & ELEMENTS

PRACTICALPHOTOGRAPHY.COM 73


PHOTOSHOPGENIUS

1

Open your sky and paste in a tree

Open up Photoshop or Elements and head up to File>Open. Navigate your way to a starry sky picture, which will act as your background (if you don’t have one there are many royalty-free images available online that you can use for this technique). Double-click the image to open it, then head back up to File>Open. This time find an image of a tree and double-click it to open it. Hit Ctrl+A to select all of the tree, Ctrl+C to copy it and Ctrl+W to close the tree picture down. Back in the star shot, hit Ctrl+V to paste it in. Head over to the Layers panel (Window>Layers) and change the blending mode from Normal to Hard Light so that you can see the stars in the background. Hit Ctrl+T to put it into Free Transform mode, then resize and drag the tree into position. Make sure your constrain proportions box is ticked when resizing, and hit Return to set it down.

3

2

Turn the foreground black

Press Ctrl+L to bring up the Levels panel and drag the middle midtones slider until the contrast looks how you want it to, then hit OK to apply it. You now need to make the foreground completely black to turn it into a silhouette. Grab the Polygonal Lasso Tool from the Toolbox with Feather set to 0, then click all the way around the foreground area as we have in the image above. Hit D on the keyboard to set Foreground Color to Black. Now fill your selection with this black colour by hitting Alt+Delete. Press Ctrl+D to lose the selection, then touch up any areas you’ve missed using a hard-edged Brush Tool.

Accurately select your subject

Head up to File>Open and find a subject you want to add to your scene. We’ll be using some deer, a house, some birds and a girl to build up the image and create a narrative. With one of your subjects open, click on the Polygonal Lasso Tool from the Toolbox to make it the active tool. Set Feather to 0, then press Ctrl+Plus a few times to zoom in tightly. Click on an outside edge of your subject to begin the selection, then click all the way around it to complete the selection. Hold the Spacebar to bring up the Hand Tool and drag your way around the image. When you’re done you’ll see the marching ants. To remove parts from your selection, hold the Alt key and click around that area to deselect it.

74 PRACTICAL PHOTOGRAPHY

4

Paste it in and make it a silhouette

With the selection now active, hit Ctrl+C to copy it and Ctrl+W to close it down. Back in your composite, hit Ctrl+V to paste it in. Hit Ctrl+T to put the subject into Free Transform mode, and resize and reposition it in your frame just as you did with the tree in Step 1. To turn it into a silhouette, go to your Layers panel and click on the Create new fill or adjustment layer icon and choose Threshold from the list that appears. Right-click on the new Threshold Layer and choose Create Clipping Mask so that it’s only applied to the Layer below, then set the Threshold slider to 255 to turn it totally black. When done, right-click on the Threshold Layer and choose Merge Down to keep your Layers stack tidy.


// PHOTOSHOP & ELEMENTS

6

5

Add more subjects & build up the effect

It’s time to add more pieces to give your scene a story. Repeat steps 3 and 4 with your other subjects and position them around the frame as you wish. To save time you can duplicate a Layer with Ctrl+J and move it into a new position. Resize it, then flip it with Image>Layer>Flip Layer Horizontal in Elements, or Edit>Transform>Flip Layer Horizontal in Photoshop to make it look different. At this point it can be worth double-clicking on your Layer names and renaming each so you know where each image sits in the stack.

7

Make the windows glow

Your house will now be completely black again. Head back up to the Layers panel and click on the house Layer below the one you were just working on, then go to Layer>New Layer. Grab the Brush Tool from the Toolbox and set it to a hard-edged brush with both Opacity and Flow set to 100%. Click on the foreground colour square to change it to a warm orange or yellow. This will become the window light, just hit OK to select the colour. Paint over the part of the house where the windows should be and you’ll see the black window frames once again. When you’ve painted over the whole window area, use a hard-edged Eraser Tool to remove any overspill.

Add the windows

If you add a building to your shot it can be fun to add some warm window light coming through the silhouette. To do this, add your building in the usual way, then duplicate it before you turn it into a silhouette. Turn the bottom building Layer completely black using Threshold as we did in Step 4. Now click on the top house Layer to make it active. This Layer will become the window frames. Click on the Create new fill or adjustment layer icon and choose Threshold from the menu that appears once again. This time drag the Threshold slider until there is just detail in the window frames. Now hit Ctrl+I to invert the Layer so the window frames become black, and change the blending mode of this Layer to Darken.

8

Apply the finishing touches

A colourful gradient is a great way to tie all of the elements together. Click on the Gradient Tool from the Toolbox and click on the Gradient Editor from the Tool Options. Now click on the Foreground to Transparent preset (second from left). In the gradient bar underneath, click on the black Color Stop and change it to a bright red (R:255, G:0, B:0) using the Color Picker, then hit OK. Press OK once more to set it. Go to Layer>New Layer, then click and drag from the top of your image to its base to apply it. Change the blending mode to Screen to fade it in. Finally, go to File>Save As and save your shot under a new filename as a Photoshop file to keep the Layers, or as a JPEG to merge the Layers and save space on your hard drive.

PRACTICALPHOTOGRAPHY.COM 75


PHOTOSHOPGENIUS

3

Ways to inject style instantly This month Dan Mold reveals three of his favourite toning techniques and shows you how to easily recreate them.

T

ONING YOUR IMAGES IS A great way of increasing their appeal. So we’ve rounded up a trio of toning effects, each of which can be completed in just five minutes. Adding colour or contrast will transform your pictures, making them look much more dynamic and eye-catching. Converting your shots to mono, or adding a single toning effect, is a great way of removing colours in the frame that distract the viewer’s eye away from your focal point. This occurs in our busy street scene, which is bursting at the seams with vibrant colours.

WHAT YOU NEED Q Photoshop or Elements Q An image you’d like to add a variety of film effects to

We kick off with this simple but effective cyanotype treatment, where you’ll learn how to apply a single colour tone. Blue will give your picture a nice cool tone, and yellow will give shots a retro sepia vibe. Over the page we’ll show you how to drain away all of the colour in your image to create a mono masterpiece that packs a punch, and how to apply a cinematic orange and teal look to increase contrast and drama. So dig out an image you’d like to work up and let’s get stuck in! Left Taken on the busy streets of Ho Chi Minh City in Vietnam, the original image is packed with colour and detail.

BEFORE

DAN MOLD

Right We’ve added some digital noise and applied a blue tone to turn the image into a retro-style cyanotype.

1Make a single colour tone 1

Turn up the digital noise

Open your shot into Photoshop and hit Ctrl+J to duplicate your Layer, then go up to Filter>Noise>Add Noise. Set Distribution to Gaussian and make sure the Monochromatic box is ticked, then drag the Amount slider in the Add Noise panel until it looks good. Hit OK when you’re done, then head over to the Layers panel (Window>Layers) and change the Opacity of your top Layer to fine-tune the effect further.

76 PRACTICAL PHOTOGRAPHY

AFTER


// PHOTOSHOP & ELEMENTS

2

Apply a tone of your choice

Go to Layer>Flatten Image to merge all of your Layers together. Now hit Ctrl+U on the keyboard to bring up the Hue/Saturation panel. To tone your image with a single colour make sure you tick the Colorize box, as this allows you to add your own colours to the image. Now drag the Hue slider until you find a colour that you like the look of, and pull the Saturation slider to change the strength of the colour. Alternatively, you can drag the Saturation slider to 0 to desaturate your image completely, leaving you with a striking mono effect. Hit OK when you’re done, then go to File>Save As and save your image as a JPEG with a new filename.

PRACTICALPHOTOGRAPHY.COM 77


PHOTOSHOPGENIUS

2 Go mono to increase atmosphere BLACK & WHITE PHOTOGRAPHY allows your viewer to concentrate on the raw emotion and form of your image. Its timeless quality is still popular today, so we’ve come up with an easy way to give your full-colour images the chic, elegant look of a 1940s mono movie (think Casablanca or Double Indemnity). We’ll once again be adding digital noise to simulate film grain, but this method offers a different level of control to the previous technique. A vignette is the final touch that guides the viewer’s eye towards the middle of your shot.

AFTER

2

1

Add some extra film grain

Open your shot and hit Ctrl+ Shift+U to convert your shot to mono. Now go to Filter>Filter Gallery and under the Artistic tab click on Film Grain. Start by setting Grain to 5, Highlight Area to 10 and Intensity to 2. Zoom out so you can see the whole image, then tweak the sliders until you’re happy with the effect. Hit OK to apply the filter when you’re done.

78 PRACTICAL PHOTOGRAPHY

Finish with a vignette

Hit Ctrl+L on the keyboard to bring up the Levels panel. You can add contrast here by dragging the Blacks and Whites sliders under the histogram towards the middle. Now adjust the middle Midtones slider until the overall brightness looks good. At the bottom of the Levels panel you’ll find the Shadows and Highlights sliders. Drag the Shadows slider in a little to make the dark areas brighter and give it a washed-out feel. Lastly, we’ll add a vignette. Go to the Layers panel and click on the Create new fill or adjustment layer icon and choose Levels from the list that appears. Darken the whole shot by dragging the Midtones slider to the right (0.60 in our shot). Click on the Elliptical Marquee Tool from the Toolbox, set Feather to 200px and make a selection from the top left corner to the bottom right corner, then hit Ctrl+I to create the vignette. Lastly, press Ctrl+D to lose your selection.


// PHOTOSHOP & ELEMENTS

3 Use a Hollywood-inspired tone FAVOURED BY FILM BUFFS ALL OVER the world, the orange and teal effect can be applied in just two steps and instantly makes your images look like stills pulled from a big budget blockbuster. This toning technique adds more teal to the shadow areas and more orange to the highlights, creating a powerful contrast between the warm and cool areas.

GENIUS When applying a Gradient Map it’s worth experimenting with other complementary colours, such as green and red or purple and yellow

AFTER

2

1

Create a colourful split tone

Open your image into Photoshop or Elements and head over to the Layers panel (Window>Layers). Click on the Create new fill or adjustment layer icon and choose Gradient Map. In the Gradient Map panel that appears you’ll see a bar that fades from black to white – click on this bar to bring up the Gradient Editor. Click on the Violet, Orange preset. Below the presets you’ll see a bar that fades from purple into orange. Double-click on the purple Color Stop underneath the purple end to bring up the Color Picker, then set this colour to a blueish cyan (R:0, G:110, B:160) and hit OK. Hit OK once more to close the Gradient Editor.

Blend the colours into your picture

Head over to the Layers panel (Window>Layers) and change the blending mode of the Gradient Map Layer to Soft Light to blend the colours of both Layers together gently. It can also be worth experimenting with other blending modes to get the look you’re after and reducing the Layer Opacity if the look is too strong. You’ll now have a highly cinematic and wonderfully moody tone. If your shot is too dark at this point go up to Layer>Flatten Image to merge your Layers together, then hit Ctrl+L to bring up the Layers panel. Drag the middle Midtones slider to the left to brighten the image, or to the right to darken the shot. We set it to 1.30 to make it a little lighter, then dragged the Blacks slider in to 5 to restore a little contrast.

PRACTICALPHOTOGRAPHY.COM 79


PHOTOSHOPGENIUS

Replace an overexposed sky Don’t throw your overexposed landscapes in the trash! Dan Mold shows you how to rescue a blown out sky by dropping in a better one.

L

PART 5/6

WHAT YOU NEED Q Photoshop & Elements Q An image with a blown out sky you’d like to replace

BEFORE

LOUISE CAREY/BAUER

ANDSCAPES ARE ONE OF THE TRICKIEST subjects to expose for, as for the vast majority of the time you’ll be faced with much darker foregrounds than skies. It’s no surprise then that our scenics often come out with well exposed foregrounds, but skies that are far too bright and burned out (like our example shot). Shooting in RAW format will help, as these files capture lots of extra info and detail that can be revealed in postproduction. But sometimes it’s just as easy to simply add a new, better sky from your existing portfolio. This month we’re giving away 13 skies on the free disc/download. So find a shot with a sky that needs replacing, follow the three-step tutorial below, and don’t forget to watch the accompanying video lesson too.

LEARN NEW LANDSCAPE SKILLS

Right The foreground in this shot is perfectly exposed, but the sky is too bright and we’ve lost the highlight detail.

1

Select your foreground

Open your image into Photoshop or Elements and grab the Polygonal Lasso Tool from the Toolbox. Zoom in tightly by hitting Ctrl+Plus a few times and then hold the Spacebar to use the Hand Tool to drag your way around the shot. You need to carefully select the foreground by clicking all the way around it. You’ll see the marching ants when you’re done. Now click on Select and Mask (Refine Edge in older versions). Set Edge Detection Radius to 1px, Feather to 0.5px and Output To as New Layer with Layer Mask, then hit OK.

80 PRACTICAL PHOTOGRAPHY

2

Add and resize your new sky

In the Layers panel (Window>Layers) click on the Background Layer then click on the Create new fill or adjustment layer icon and choose Solid Fill from the list. Make sure the colour is set to pure white by dragging the cursor to the top-left corner of the Color Picker and hit OK. It’s now time to add the sky, so go to File>Open and select a sky you like from the Free Gifts folder. Hit Ctrl+A to select it, Ctrl+C to copy it and Ctrl+W to close it down. Then back in your landscape shot hit Ctrl+V to paste it in. If the sky is the wrong size or needs repositioning, hit Ctrl+T to put it into Free Transform Mode. Drag the sky into position or use the corner handles to resize it – make sure Constrain Proportions is ticked so you don’t distort it. Finally, hit Return to set it down.


// PHOTOSHOP & ELEMENTS // VIDEO ON THE DISC

13

FREE SKIES TO ADD TO YOUR SHOTS

AFTER

3

Blend the sky in for maximum realism

In the Layers panel you can make the sky a little less strong by reducing the Layer Opacity. This will bring through some of the pale white Layer below. You can also hit Ctrl+U to bring up the Hue/Saturation panel, then drag the Saturation and Lightness sliders to make the sky match your foreground. When you’re done, hit OK or click the cross to close the Hue/Saturation panel. If you see a faint white line between your foreground and the sky, click on your foreground Layer Mask and use a black Brush Tool to paint over it and hide the bright white halo. Make sure your Opacity is set to 100% and use the [ and ] keys to resize your brush. When you’re done, go to File>Save As and save as a Photoshop file to keep the Layers intact, or to save space, choose JPEG to merge the Layers.

NEXT MONTH REPOSITION OBJECTS Sometimes your focal point doesn’t sit where you want it to in the frame. Next month we explain how to use the Content Aware Move Tool to reposition people, objects and landmarks in your images, so you can place them exactly where you want and increase the appeal of your landscapes.

PRACTICALPHOTOGRAPHY.COM 81


PHOTOSHOPGENIUS

Create your own striking silhouettes

WHAT YOU NEED Q Photoshop or Elements Q An image you’d like to turn into an artistic silhouette

Dan Mold explains how to turn your people pictures into colourful pieces of wall art.

S

TRIPPING ALL THE colour from a profile portrait to transform it into a silhouette vastly increases its impact, and creates really artistic results that are perfect for hanging on the wall. This simple but impressive technique takes just five minutes, and along the way you’ll learn how to cut out subjects in Photoshop, turn them black and then inject a strong kick of colour by adding a background hue of your choice. When shooting your subject’s profile, use aperturepriority and select f/8 for a strong depth-of-field. Shooting against a clean, white wall isn’t essential but does make it easier to cut them out.

1

Select your model

Open your image into Photoshop or Elements and then click on the Polygonal Lasso Tool from the Toolbox. Make sure Feather is set to 0px and then zoom in tightly on the edge of your portrait by hitting Ctrl+Plus a few times. Now use the Polygonal Lasso Tool to carefully draw all the way around the portrait. Click in small increments, as doubleclicking quickly will create the selection prematurely. Hold the Spacebar down and drag your way around the image. You’ll see the marching ants when you’ve gone all the way around.

82 PRACTICAL PHOTOGRAPHY

BEFORE

Above & right A clean background makes it easier to draw around the profile of the models. It’s really easy, and great fun to turn your friends into silhouettes. You can also add a background colour of your choice to make them stand out even more.

2

Turn it black

Click on Select and Mask (Refine Edge in older versions of Photoshop), then use the Refine Edge Brush Tool to brush over any fly-away hairs that were difficult to select. Now set Output To to New Layer. Click on the Create new fill or adjustment layer icon and choose Threshold from the list that appears, then set the Threshold Level to 255 to turn your profile into a silhouette. Now right-click on the Threshold Layer and choose Merge Down. Use a hard round Brush Tool with an Opacity of 100% to paint over any white specks left in the portrait.

3

Add a hint of colour

To add a colourful backdrop, head over to the Layers panel and click on the Background Layer. Click on the Create new fill or adjustment layer icon, choosing Solid Color from the list. Now use the Color Picker to set which colour you want to use as your backdrop. Strong primary colours work well – just hit OK when you’re done to apply it. If the colour comes through parts of your silhouette, click on the silhouette Layer then use a black Brush Tool to paint over them. When you’re done, go to File>Save As and save your shot under a new filename.


// PHOTOSHOP & ELEMENTS // VIDEO ON THE DISC

PRACTICALPHOTOGRAPHY.COM 83


PHOTOSHOPGENIUS WHAT YOU NEED

Shoot an abstract landscape

Q A DSLR or CSC and some basic equipment Q A cloudy landscape Q Photoshop CC

Dan Mold shows you how to give your landscapes an impressionist feel with a powerful time-stack.

Y

OU’D BE HARD PUSHED TO FIND somebody that isn’t familiar with the term time-lapse. The innovative photographic process is all the rage with nature documentaries and cinematic films as a new way to show time passing. To shoot one, you need to take a sequence of images at regular intervals – for example one every minute – over a period of time. You can then turn these stills into a video to show movement, such as the sun setting over a mountain range, a flower coming into bloom or cars racing through bustling city streets. Our time-stack technique is similar to a time-lapse, but the end result merges all of the pictures into a single image, so you can see the suggestion of movement in just the one frame. So, if you’re looking for an inspirational technique to freshen up your landscapes you need look no further. Over the page we’ll show you exactly how to shoot a series of pictures that can be transformed into either a time-lapse, or our time-stack image. Finally, you’ll learn the secret of how to bring it all together in Photoshop to create this stunning scudding cloud effect.

BEFORE

Above A single shot from the time-stack sequence is nice and sharp, full of colour and pleasing to the eye. Right By stacking lots of images of the same scene taken over the space of an hour we’ve created a staggered effect in the moving clouds. This results in an abstract effect and makes for an eye-catching image.

84 PRACTICAL PHOTOGRAPHY

AFTER


PHOTOSHOP //

3 skills you’ll learn 1

Focus your landscapes

2

Use manual mode

3

How to stack your images

You’ll learn where to set your focus point for maximum sharpness in your landscape images.

Locking the exposure is key to getting consistent results so your merged images look seamless.

We’ll show you how to unleash the power of Photoshop’s Layers to stack your images and create your time-stack.

PRACTICALPHOTOGRAPHY.COM 85


PHOTOSHOPGENIUS

Get your time-stack shots Most of this technique is achieved in-camera, by recording the clouds at regular intervals as they rush across the sky. Using a tripod ensures that all of the images line up perfectly when stacked in Photoshop. You’ll need some core kit, like a DSLR or CSC that has aperture-priority and manual modes, and a wide-angle lens to frame up your landscape. Patience is key, as you’ll need to shoot for about an hour and you’ll end up with around 100 images. It’s vital that you fully charge your camera battery and start with a freshly formatted memory card with

plenty of space for your RAW files. The easiest way to merge the images together is with Photoshop CC using Layers. Take your time-stack images to the next level by starting in the golden hour (the hour before the sun goes down) and finishing at the end of the blue hour (the hour after the sun sets) – or vice-versa when shooting a sunrise. When you’re ready to try out this fantastic landscape technique, make sure you’ve got everything in the equipment list below, then read the step-by-step over the page to get started.

Above Increase sharpness by disabling image stabilisation when using a tripod.

Location You’ll need a landscape with a moving element, like clouds, or water, that can be stacked in Photoshop to create the staggered timestack look.

Interval Timer capability

Camera

You’ll need a camera with an Interval Timer Shooting mode, or an intervalometer (above) to shoot your time-stack pictures.

You’ll need a camera with aperture-priority (A or Av) and manual (M) modes, so a DSLR or mirrorless model is ideal for shooting your time-stack sequence.

Lens

Photoshop We’ll be showing you how to stack all of your exposures together using Layers in the full version of Photoshop CC. A trial can be downloaded from adobe.com

Wide-angle lenses, or the 18mm end of an entry-level kit lens, are great choices for composing your landscapes, as the broader angle-of-view helps you fit in more of your scene.

Three top tips for better time-stacks

1 Shoot in the golden hour

2 Aim for a partly cloudy sky

3 Avoid shooting the sun

You can get a fantastic colour palette by shooting half an hour before sunrise or sunset. Your sky will be packed with brilliant blue and golden tones as the sun comes up or goes down.

This technique works amazingly well when the sky is partly cloudy. The movement and gaps between wispy clouds provide contrast, making the staggered effect more apparent.

Shooting at sunset or sunrise will give you great colours, but shooting into the sun itself will give you an overexposed spot. Instead, try to compose with the sun just outside of the frame edge.

86 PRACTICAL PHOTOGRAPHY


PHOTOSHOP //

1

Frame up using a tripod

When shooting a time-stack image it’s vitally important that you use a tripod to lock your camera off. This ensures that the framing remains exactly the same in each image – that’s essential for stacking your individual pictures in Photoshop later on. Make sure any camera or lens image stabilisation is switched off when shooting on a tripod, as these systems can actually introduce blur into your shots when the camera is static. Frame up on a scene with moving elements, such as clouds, then focus about one-third of the way into the frame to get a strong depth-of-field in your landscape. Lastly, switch the focus to MF to lock it off so that it doesn’t change from one exposure to the next.

2

Dial in your exposure settings

Select aperture-priority mode and choose an aperture of f/16 for good front-to-back sharpness. Make sure you’re shooting RAW, set your ISO to 100 and then take a test shot. If the result is too bright or dark, dial in some exposure compensation to fine-tune the balance. When you’re happy, make a note of the shutter speed then go into manual mode and dial in the same shutter speed, aperture and ISO to lock the exposure.

3

Set up your interval settings

Go into your camera menu and switch on the Interval Timer. Set the interval to 5sec, then set the number of intervals to 1000 and the shots at interval to 1. This means the camera will take one image every five seconds for up to 1000 images. You’ll probably only want 200 images, but setting it high means it won’t stop shooting early, and you can then stop the camera manually when you’re ready to finish.

Pro advice How to fix shooting problems Q CLOUDS GO THE WRONG WAY The best time-stack images are when the clouds are coming towards you. Work out the location you’ll be shooting at in advance and use an app like The Photographer’s Ephemeris (£2.79 Android, £8.99 iOS) to work out where you’ll need to be to shoot towards the setting sun. It’s also a good idea to check the wind direction to work out if the clouds will be coming towards you, or going across the frame.

4

Shoot for about an hour

Make sure you have a fully-charged battery in your camera, then hit Start in your interval shooting options to begin shooting your sequence. For amazing colours, shoot half an hour before and after sunset or sunrise, to get a gradation of warm golden tones and cooler blues and pinks. When you’ve captured all of the shots you want to take, it’s time to work them up into a single time-stack image.

Q CAMERA DOESN’T HAVE A BUILT-IN INTERVAL TIMER If your camera doesn’t have an interval timer built-in you’ll need an intervalometer to make your camera regularly take images in increments of your choice. They don’t have to break the bank, and have loads of functionality for astro and time-lapse shooting too. Hahnel’s Captur Module Timer can currently be picked up for £39.95.

PRACTICALPHOTOGRAPHY.COM 87


PHOTOSHOPGENIUS

Blend your shots to finish the look You’ve done the hard work by braving the TIP frosty winter evenings and capturing your sunset images. The final hurdle is to USE THE bring all of your pictures into ‘HAND’ TRICK Photoshop to create and control the Take a shot of your hand at ‘stacked’ effect. This is really easy to the start and end of your do, but you’ll want to take some sequence, so you know precautionary measures to make sure when you started and you edit all of the images consistently, finished. Easy! otherwise it can spoil the end result. Below we cover how to work up your RAW files, load your images into Photoshop Layers quickly and blend the images together. So read Above Photoshop CC makes it easy to batch edit your RAW files on and get stuck in! and load all of your different exposures into the Layers stack.

1

Open up your RAW images

Use Adobe Bridge to find the RAW files in your time-stack that you want to work on and then right-click on them and choose Open in Camera Raw. Right-click on an image thumbnail on the left and choose Select All, or click on an image thumbnail and hit Ctrl+A. All of your RAW images will now be selected so you can edit them for consistent results.

3

Save and reduce the file size

With the RAW files looking how you want them, make sure they’re all selected, then click on Save Images. Under Destination, create a new folder in which to save your JPEGs. Make sure Format is set to JPEG, Quality is set to 10 and under Image Sizing, tick the Resize to Fit box and set Long Side to 2000 pixels with a Resolution of 240.

88 PRACTICAL PHOTOGRAPHY

2

Process the files consistently

In the Basic panel adjust the Temperature slider until the white balance in your images looks good, and change the Exposure to get the level of brightness as you want it – err a little to the dark side, as the clouds will be very bright. Increase the Contrast, Clarity and Saturation sliders a little and push up the Vibrance slider to +50 to make the colours really pop.

4

Load your shots into the Layers stack

Hit Save and then press Done to exit Adobe Camera Raw. Open up Adobe Bridge and find your processed, resized JPEG images. As you’re dealing with lots of images, having smaller files really helps speed up the processing. Hit Ctrl+A in Bridge to select all of the JPEGs and then go to Tools>Photoshop>Load Files into Photoshop Layers.


PHOTOSHOP //

5

Blend the Layers together

In Photoshop go to your Layers panel (Window>Layers) and you’ll see your time-stack shots loaded into the Layers. Click on the top Layer to select it, then hold the Shift key and click on the bottom Layer to select them all. Change the blending mode from Normal to Lighten. You’ll instantly see the images blend together with the distinctive staggered look.

7

Fine-tune the brightness and contrast

When you’re happy with the distance between the clouds, go to Layer>Flatten Image to merge all of the exposures together. Now you can adjust the contrast by hitting Ctrl+L to bring up the Levels panel. Drag the middle Midtones slider to change the overall brightness, then pull in the Shadows and Highlights sliders to add some contrast.

6

Adjust the distance between clouds

There’s currently a 20-second gap between the clouds in your stack. You can make this longer and increase the space between the clouds (if preferred) by turning off some of the Layers. Click on the eye icon of a Layer to hide it – just be sure to do this in regular intervals, such as by hiding every other Layer, so that the staggered effect remains consistent.

8

Boost colours and save your shot

Hit Ctrl+U to bring up the Hue/Saturation panel and then increase the Saturation slider to around +20 to make the colours stand out a little more (if needed). Finally, head up to File>Save As and save your shot as a JPEG with a Quality of 12 to finish off your time-stack image and save it onto your computer’s hard drive.

How to tell you’ve got the shot right Striking ‘staggered’ effect

2

Gradation in warm and cold tones

3

Clouds are coming towards you

You’ve shot your exposures at regular intervals and blended the wispy clouds together in Photoshop to build up the effect.

1 3 2

1

To get the wonderful range of warm yellows and pinks right through to the cooler blues, you’ll have started shooting before sunset and continued through to the blue hour.

Although hard to judge, this effect works best when the clouds are coming straight towards you rather than to the side. This is tricky to judge but the longer you shoot for, the better your odds.

PRACTICALPHOTOGRAPHY.COM 89


PHOTOSHOPGENIUS

PhotoFixer Stuck in an editing rut with your shots? Send them over to ppsubmissions@bauermedia.co.uk and our Photoshop experts will show you how to professionally retouch them.

BEFORE

A small amount of digital noise is present Image would benefit from a contrast boost

AFTER

Chameleon By Rikki Bowers Dan says: It sounds Rikki says: I took this picture at Bristol Zoo. I was trying to get an angle on this chameleon where it looked natural, without the enclosure in shot. This was difficult because there were a lot of children about and they were bumping me as I was trying to focus. The glass was also very dirty, but an aperture of f/4 gave me a shallow depth-of-field which blurred both the glass and the background. I love how the branches twist and curl – they’re so different to anything I’ve shot before. In Lightroom I applied a slight crop and a low contrast black & white preset.

90 PRACTICAL PHOTOGRAPHY

like Rikki had a lot to contend with to get this shot – keeping still, battling reflections and shooting through dirty glass – but it’s paid off, as it’s an absolute corker. The composition works well, with the chameleon leaning into the active space on the left of the frame. Rikki’s subject is also nice and sharp, as he’s focused on the nearest eye. His wide aperture of f/4 was a good choice as it has created a shallow depth-offield, which brings the viewer’s eye onto his focal point and blurred the dirty glass he was shooting through. We’d never have guessed it was shot in an enclosure, had he not told us. One slight criticism is that there’s a small amount of digital noise in the shot. This is more apparent in the

background, which has a grainy texture to it. Luckily, Rikki shot RAW, so it’s easy to dive back into the RAW file using Photoshop or Lightroom and apply a bit of Noise Reduction. It’s possible to subdue this with the Luminance slider, which softens the whole shot and removes the grainy texture. You can then bring back sharpness in the details by dragging the Sharpness Amount to 50 and Masking slider to around 50-80. While editing the RAW, it’s also worthwhile pushing the contrast a little further. The HSL sliders and Adjustment Brush Tool (Photo Fix 1 & 2) are fantastic ways of controlling the contrast and making your subject pop. Minor niggles aside, Rikki’s technical skills are spot-on and he’s captured a brilliant animal shot that looks like it was taken in the wild. Our editing adjustments take it even further and make it the best it could be.


TIP MAKE USE OF ACTIVE SPACE Rikki positioned the chameleon on the right of the frame, giving it plenty of room on the left. This creates the illusion that it’s moving into this area and strengthens the composition.

Sony _6000 | 35mm | 1/400sec | f/4 | ISO 2000

Photo Fix Take control of your RAWs 1

Use the HSL sliders

The Grayscale panel in both Adobe Camera Raw and Lightroom is ideal for converting to black & white. Click Convert to Grayscale and then use the colour channel sliders to fine-tune the contrast in specific areas of your shot. This helped us lighten the chameleon in this shot, and darken off the green background.

2

Fine-tune your adjustments

If there’s a specific part of your shot that you’d like to edit, use the Adjustment Brush Tool in Lightroom or Adobe Camera Raw. Just brush over the part you want to change and you’ll have access to all of the sliders on the right to tweak that area. We used it to make the chameleon a little brighter by pulling the Exposure and Shadows to the right.

PRACTICALPHOTOGRAPHY.COM 91


PHOTOSHOPGENIUS

Fast lane

BEFORE Colours are dark and muddy

By Declan Delaney Declan says: I’m a big motorsports fan and I took this shot at Donington Park’s Craner Curves. I get the best shots here as there are no obstructions. I like the speed in this shot and the motion in the wheels too, and added a slight crop and colour adjustment in post.

Subject is a little blurry

Dan says: If this isn’t a high-octane shot,

then I don’t know what is! Declan’s panning technique is great – the rider is in focus and the background has been transformed into a fantastic rush of colour. I’d suggest adding extra sharpening to any panning shot because the camera is moving as you shoot, so it’s always going to be a little blurry. Our method below sharpens just the rider to hide any camera shake. A slight boost to the Saturation (Ctrl+U) and overall brightness of the shot using Levels (Ctrl+L) brightens the muddy tones in the original and makes the colours as vibrant as they can be. My only other niggle would be to include more space in front of the rider. This is called ‘active space’ and creates the illusion that the subject has room to move into. This could be achieved with a slightly looser framing or crop. Declan’s clearly had a lot of time to perfect his technique at Donington, and we’re eager to see what he sends in next.

AFTER

Nikon D3200 | 300mm | 1/80sec | f/14 | ISO 100

Photo Fix Sharpen your subject 1

Use a High Pass filter

Open your image into Photoshop or Elements and hit Ctrl+J to duplicate your Layer. Head up to Filter>Other>High Pass and, in the box that appears, set the Radius to a low value of around 3-6px. Hit OK when you’re done. You now need to blend the High Pass filter in, so go to the Layers panel (Window>Layers) and change the blending mode from Normal to Overlay. If the effect is too strong you can lower the Layer’s Opacity.

2

Mask off the effect

The High Pass Layer is currently sharpening the whole Layer, but you just want to sharpen your subject. Click on the Add Layer Mask icon in the Layers panel and then hit Ctrl+I to invert the Layer Mask. Now use a white Brush Tool to paint over the area you want to sharpen, which is the biker in this image.

92 PRACTICAL PHOTOGRAPHY


// PHOTO FIXER

Line breaks up the form of the windows and is a little distracting

Image is a little soft and would benefit from sharpening

BEFORE

AFTER Canon 5D MkIV | 63mm | 1/50sec | f/6.3 | ISO 400

Gherkin By Stephen Pratley

Photo Fix Distractions 1

Stephen says: This angle of the Gherkin reflecting in the Scalpel building really caught my eye. I liked the way the sun highlighted its shape, though it was difficult to get a shot without glare. It was also very windy, so keeping my camera still was a problem too! In Lightroom I tweaked the contrast, clarity and vibrance.

Dan says: Stephen’s framing is clever and he’s done well to compose while standing up in a strong gale. We’ve applied a small amount of sharpening to make the Gherkin pop a bit more, as it’s a little out of focus. The reflection of the Gherkin has been broken up by the black window frames in the Scalpel building, and this gives the image a brilliant abstract feel. My only slight

reservation would be to remove the beam from the top right corner, as it breaks up the uniform window pattern and pulls the eye away (see Photo Fix panel). The glare has been suppressed well, though a polarising filter might help cut these out entirely in the future. Stephen’s got a great eye for photography, and these tweaks take his shot to the top of its game.

Copy a ‘good’ area

Grab the Polygonal Lasso Tool from the Toolbox and click around the area that you want to use to cover the distraction. When you’ve drawn all the way around it you’ll see the marching ants, which show you the area you’ve selected. Hit Ctrl+J now to duplicate this area onto a new separate Layer.

2

Replace the distraction

Hit Ctrl+T to put the new Layer into Free Transform Mode and drag it into place. Hit Return to set it in place, then click on the Add Layer Mask icon in the Layers panel. Use a soft black Brush Tool to blend it into the Background Layer for a seamless finish.

PRACTICALPHOTOGRAPHY.COM 93


SIGNATURE INKJET MEDIA

An inkjet paper that captures and holds all of the shadow and highlight detail we demand

As traditional darkroom printers, it has taken us many years to discover the right inkjet paper for our images that captures and holds all of the shadow and highlight detail we demand. Natural Soft Textured Bright White 315 by Fotospeed, is our paper of choice. - Trevor and Faye Yerbury

PIGMENT INKS

CUT SHEETS

ROLLS

100% COTTON

FREE ICC PROFILES

Signature Natural Soft Textured Bright White 315 inkjet media from £29.99 For more information, call us on 01249 714 555 or drop us an email sales@fotospeed.com

www.fotospeed.com

Fotospeed Printable Pre-Scored Greeting Fotocards...what a good idea!


// PHOTO FIXER

Smooth horizon

BEFORE

By Chris Turner Chris says: I wanted to blur the water, but retain the detail in the rocks with this shot. I ran into the frame, but it was hard to keep still during the exposure! I had a friend illuminate the rocks and myself with a flash to make sure these areas came out sharp.

Contrast and colours would benefit from a slight boost

AFTER

Dan says: Chris has done well to capture an

exposure of several minutes – it’s helped him to smooth out the water into a wonderfully blurred, milky texture. The warm tones in the sky have also been blended together, which gives this image a timeless quality. The picture is a little soft, possibly because the tripod was knocked or blown by a breeze during the two-minute exposure. This is easily done, but a little sharpening brings the detail back – refer back to Photo Fix on page 92 for High Pass Sharpening. Boosting the contrast also helps these areas look a little more punchy. Chris would definitely see a benefit from shooting RAW – there are more editing options and the contrast can be pushed even higher. But it’s possible to increase the contrast of the rocks in his JPEG using Levels (Photo Fix 1) to give it a little extra ‘wow’ factor. Nikon D3200 | 32mm | 127sec | f/22 | ISO 100

Photo Fix Boost contrast selectively 1

Use Levels to brighten

Open your shot into Photoshop or Elements and go to the Layers panel (Window>Layers). Click on the Create new fill or adjustment layer icon and choose Levels from the list that appears. Now drag the middle Midtones slider to 1.20 and the Highlights slider to 200 to brighten the picture a little. Then move the Shadows slider to 20 to add some contrast.

2

Mask it off in specific areas

You may not want the Levels Layer to effect the whole shot, so go to the Layers panel and click on the Layer Mask that comes loaded with the Levels Adjustment Layer. Now grab the Brush Tool and hit D followed by X for a black foreground colour. Set the Brush Opacity to 20% and paint over your image to mask areas off to stop them being brightened.

PRACTICALPHOTOGRAPHY.COM 95


PHOTOSHOPGENIUS

WHAT YOU NEED

Use your free Lightroom presets

Q Any version of Photoshop or Elements Q An image you’d like to tone quickly using our free presets

Give your shots an incredible toning effect in a single click. Dan Mold shows you how to use your free 25 toning presets in Lightroom.

E

DITING IS ESSENTIAL FOR making your shots look as good as possible, but time spent at the computer could be time spent outdoors getting the most out of your hobby and adding more cracking photos to your portfolio. Presets are a fantastic way of speeding up your workflow, as they allow you to apply a whole raft of predetermined adjustments in just a single click. You can then fine-tune the effect easily and produce fantastic results in an instant. To get you started, we’re giving away 25 unique presets on this issue’s free disc/download for quickly toning your shots, giving them a border or converting to black & white. Here’s how you can do it.

1

Create a folder

Open up Lightroom and click Develop at the top of the interface or hit D on the keyboard to go into the Develop module. Now you need to find the Presets panel on the left of the interface and click on the arrow to expand it. Right-click anywhere in the Presets panel and choose New Folder from the list that appears. You can now name the folder using the Folder Name box. We called ours PP Toning Presets to keep things simple, but you could call yours whatever you like. Hit the Create button when you’re done to make the new folder.

96 PRACTICAL PHOTOGRAPHY

Above & right These images have some great compositions but the tones don’t look very eye-catching. We’ve applied several different looks to the images in just a single click using the free toning presets.

2

Import the presets

Make sure your new folder is highlighted in the presets panel, then right-click on the folder and choose Import from the list that appears. Navigate your way to the PP Toning Presets, which is in the Free Gifts folder on your free disc or download. Click on the first preset in the list which is Arty - 1, then hold down the Shift key and click on the last preset which is Split Tone - 5. This will highlight all of the presets. Now hit Import to bring all of them into Lightroom. This saves you from importing each preset, cutting down on time.

3

Fine-tune the results

Now you can apply the presets and experiment with the results. Clicking on a preset will wipe any previous settings applied to the image. You can perfect the results by clicking on a preset you like the look of, then edit the sliders in the Basic panel as you usually would edit your shot to get it looking how you like. If you want to apply several different looks to the same image, right-click the image thumbnail in the filmstrip and choose Create Virtual Copy. You’ll now have an identical image to work on that you can apply a different preset to.


// PHOTOSHOP & ELEMENTS // FREE TEXTURES

DAN MOLD/BAUER

25

EYE35.PIX

CREATIVE LIGHTROOM PRESETS

ARTY 3

ARTY 9

BLACK & WHITE 5

THOM MOORE

DAN MOLD/BAUER

ARTY 1

PRACTICALPHOTOGRAPHY.COM 97


PHOTOSHOPGENIUS

shop

SEE DISC OR DOWNLOAD FOR MORE EDITING ADVICE

Quick tips & keyboard shortcuts that’ll help you process your images faster!

LIGHTROOM

Copy as DNG to save space and maximise compatibility DNG is a RAW format that is universally compatible with any version of RAW editing software. Users of Lightroom have the option to Copy as DNG using the Import dialogue from within the Library module. Here, you use the Source panel on the left to find the RAWs you want to copy over, and then on the right side of the interface click To and choose the place on your hard drive where you want to save your newly converted DNG pictures. In addition to being universally friendly, DNG files in our tests were found to be around 15% smaller in size. Adobe claims this is because the lossless compression used when converting to DNG is more efficient. That means 1TB of RAWs could become around 150GB smaller when converted.

PHOTOSHOP & ELEMENTS

PHOTOSHOP & ELEMENTS

Change Layer Opacity quickly DIRK BLEYER

Changing the size of an image is a crucial part of layering up in Photoshop. But you’ll want to make sure you don’t distort the original aspect ratio if you don’t want to end up with a skewed or squashed picture. The easiest way to resize a Layer is to hit Ctrl+T to put that Layer into Free Transform Mode and drag the corner handles. To lock the aspect ratio make sure the Constrain Proportions box is ticked in Elements, or click the Maintain Aspect Ratio icon in Photoshop (it looks like a chainlink). Alternatively, you can hold the Shift key down as you drag the corner handles for the same effect. Hit the Return key when you’re done to set it down.

Using Layers is a fantastic way of building a composite image. The opacity of your Layers is key to how your images blend in with each other. This can be set manually using the Layer Opacity slider in the Layers panel (Window> Layers). But a much quicker way to set the opacity is to use your number keys – hitting 1 will set the Layer Opacity to 10%, 2 will set it to 20%, and so on. If you hit two keys quickly, such as 5 and 8, the Layer Opacity will be set to that value, 58% in this case. 0 will set the Layer Opacity to 100%.

RICHARD BURDON

Resize your images and Layers without distorting them

Share your shots with us & win! We hope you’ve enjoyed our Photoshop Genius section and would love to see how you’re getting on using our brandnew editing techniques. So why not share your finished shots with us? Each month 98 PRACTICAL PHOTOGRAPHY

we’ll announce our favourite entry on our Facebook page, and the winner will receive a Manfrotto NX camera shoulder bag II. To be in with a chance to win, just follow the Photoshop techniques and

then send your results to us at ppsubmissio bauermedia.co with the subject heading Photoshop Genius. We look forward to seeing them soon.

TOP PRIZES TO BE WON


Visit our website - updated daily

www.parkcameras.com/prp or phone us Monday - Saturday

01444 23 70 54 Experts in photography 30.4 MEGA PIXELS

Unbeatable stock availability

NEW!

No matter what you’re shooting, be assured of uncompromising image quality and a thoroughly professional performance.

42.4 MEGA PIXELS

Receive a FREE G-Technology 4TB hard drive and LP-E6N Battery worth with the EOS 5D Mark IV. Offer ends 17.01.18

Canon EOS M5 24.2

MEGA PIXELS

FREE GIFTS!

Canon EOS 77D 24.2

Body only

+ 15-45mm

£799.00

£899.00

Body only + 18-55 IS STM

£449.00

FREE GIFT!

24.2

MEGA PIXELS

£449.00

£85 cash back

6 FPS

Body only + 18-55 IS STM

£614.00*

£754.00*

Add the Canon EF 50mm f/1.8 STM for only £80!

*Prices after £85 cashback from Canon. Offer ends 17.01.18

Canon EOS 7D Mark II

Canon EOS 6D Mark II

FREE GIFTS!

FREE GIFTS!

Receive a FREE tripod, SD card & bag! Offer ends 31.12.17

Canon EOS 80D

MEGA PIXELS

5 FPS

20.2

MEGA PIXELS 10 FPS

7 FPS

26.2

MEGA PIXELS 6.5 FPS

NOW IN STOCK! Learn more & place an order to receive one of the first in the UK at www.parkcameras.com/sony-a7r-iii Sony RX100 V 20.1

MEGA PIXELS

£100 cash back

4K

Body only + 100-400mm

Body only + 24-105 IS STM

In stock

Spread the cost with

£959.00

£1,349.00 See web

£1,728.00 £2,329.00

£849.00*

our finance options!

FREE Canon LP-E6N batt & 64GB SD card! Ends 31.12.17

FREE Canon LP-E6N batt & 64GB SD card! Ends 31.12.17

*Price after £100 cashback from Sony. Offer ends 21.01.18

FREE Canon LP-E6N battery! Offer ends 31.12.17

Sony a6500

£150 cash back

24.2

Body only

MEGA PIXELS 20 FPS

+16-70mm

After Cashback

£4,499.00

*Prices after £150 cashback from Sony. Offer ends 21.01.18

45.7

Cashback

24.2

£1,129.00 £1,949.00*

MEGA PIXELS

You pay

Sony a9

MEGA PIXELS 11 FPS

Body only + 18-55 IS STM

£1,011.00

4K

In stock at £3,229

18.0

MEGA PIXELS

IS

3.0”

10 fps

.00

Canon EOS 700D

7 FPS

UK stock

4K

3.2”

7 fps

Competitive low pricing

See in store or online for a free 2 year warranty!

4K

3.2”

7 fps

Welcome to full-frame FX splendour like you’ve never seen it before. From the studio to the remotest locations on earth.

100mm f/2.8L Macro IS USM

£799.00

£105

£694.00

16-35mm f/4L IS USM

£899.00

£85

£814.00

Visit our website for information on the latest availability

24-70mm f/4L IS USM

£699.00

£105

£594.00

Nikon D3400

Nikon D500

Nikon D5

70-300mm f/4-5.6 IS II USM

£429.00

£85

£344.00

24.2

20.9

20.8

70-300mm f/4-5.6L IS USM

£1,249.00

£150

£1,099.00

70-200mm f/4.0L IS USM

£1,049.00

£130

£919.00

100-400mm f/4.5-5.6L IS II USM

£1,789.00

£215

£1,574.00

MEGA PIXELS

Body only

+ 18-55 VR

See web

£449.00

Add a Nikon EN-EL14a spare battery for only £52.99!

Tamron 100-400mm

Olympus OM-D E-M10 Mark III NEW!

A highly portable, ultra-telephoto zoom lens with AF precision for shooting instantaneous movement with the utmost clarity.

Learn more at www.parkcameras.com

GoPro HERO6

NEW!

In stock at £789.00

GoPro Karma Drone with HERO6

NEW!

4K

Lowepro ProTactic BP450 AW

Body only £3,499.00

MEGA PIXELS 10 FPS

5 FPS

Learn more at, visit www.parkcameras.com/canon-cashback

f/4.5-6.3 Di VC USD

See website for low prices on lenses

Body only

MEGA PIXELS 12 FPS

XQD Type

+ 16-80 VR

For the range of lenses available, see our website

£1,729.00 £2,479.00

£5,299.00

Spread the cost with finance. See website to learn more.

Make the most of your D5 and save 5% on accessories!

16.1 MEGA PIXELS

8 fps

4K

3.0”

Built for city life; beautifully styled with a retro design combined with the latest in digital camera technology. Watch our hands-on first look video at www.parkcameras.com/olympus-em10-iii

In stock from £629.00

Olymp s E PL8

Olympus E-M5 Mark II

Olympus E-M1 Mark II

16.1

16.1

20.4

MEGA PIXELS 8.5 FPS

MEGA PIXELS

£85 cash back

MEGA PIXELS

4K

£200 cash back

NEW & Now in stock!

NEW & Now in stock!

In stock at only

Body only

+ 14-42 EZ

Body only

+ 12-50mm

Body only

+ 12-40 PRO

£479.00

£1,149.00

£210.00

£429.00

£499.00

£714.00*

£764.00*

£1,599.00*

£2,199.00*

Watch our first look video at www.parkcameras.com

Learn more by watching our video at www.parkcameras.com

For even more Lowepro bags, visit our website

Manfrotto 190GO! Aluminium Tripod

Manfrotto Manhattan Mover 50 Backpack

Manfrotto MHXPRO-3 3-Way Hea

MT190GOA4TB

In stock at only

In stock at only

In stock at only

£149.00

£129.00

£93.95

For even more Manfrotto tripods, visit our website

For even more Manfrotto backpacks, visit our website

For even more Manfrotto heads & accessories, visit our website

Available in black or silver. See website to learn more!

*Prices after £85 cashback from Olympus. Ends 15.01.18

*Prices after £200 cashback from Olympus. Ends 15.01.18

WINTER SALE 2017

STARTS 5PM, 24TH DECEMBER 2017 Visit www.parkcameras.com/winter-sale to learn more!

All prices include VAT @ 20%. All products are UK stock. E&OE. * = Please mention “Practical Photography” for this special price. For our opening times and directions to our BURGESS HILL and LONDON stores, please visit www.parkcameras.com/prp.

Prices correct at time of going to press; Prices subject to change; check website for latest prices.

Exclusive offers, competitions & more at


Know YourStuff All your technique and gear questions answered by our team of experts knowyourstuff@bauermedia.co.uk

PP’s contributing editor has a master’s degree in photography and has taught

undergraduates.

Dan Mold PP’s Photoshop editor is a former Digital Photo staffer who has encyclopedic photo knowledge.

Louise Carey PP’s features editor is an experienced fine art and documentary photographer.

TIP FORMAT CARDS REGULARLY

A photographer friend of mine recently lost a significant number of her images and I’m getting increasingly paranoid about this happening to me. What’s the best way to protect my shots? Paul Taylor, Leicester

Tim says: Secure image storage isn’t exactly the most exciting avenue of photography, but if you don’t put the proper measures in place to protect your files, you’re running a huge risk of serious data loss. These days, almost all of our photos are stored digitally, and it doesn’t take much for the ones and zeros that make up every image file to disappear into the ether for good. At best, you might lose a few throwaway shots you took at the weekend. At worse, you could be saying goodbye to hundreds of thousands of photographs of your children growing up, or irreplaceable memories of your wedding day. Here are some steps you can take to protect your files...

once the card is written over, there’s no way back. As soon as you get home from a shoot, get into the habit of setting your transfer going before you even put the kettle on. Make sure you keep an intuitive and consistent file system so you can always locate an image quickly.

Back up immediately

Follow the 3-2-1 rule

One of the most common causes of data loss comes from the failure to transfer images from a memory card to a hard drive at the earliest opportunity. If not done right away, the chance of accidentally formatting the card to use for something else dramatically increases, and

Many photographers store their images in accordance with the 3-2-1 rule, where images are backed up at least three times, across at least two different types of storage (eg Cloud and hard drive), in more than one location. Working this way makes losing precious data extremely unlikely.

100 PRACTICAL PHOTOGRAPHY

Use both card slots If your camera has two card slots, such as the Canon 5D MkIV or Nikon D610, it’s possible to mirror them so that your images are written to both. This means that if one of the cards becomes corrupted or gets lost, you have your images safely backed up on the other. It’s always best to work this way for very important shoots such as weddings.

You can limit the chances of corruption by formatting your cards in-camera between shoots. Just make sure that you’ve saved your shots! SIMPSON33

Tim Berry

How do I back up and store images safely?

Solid state drives One major drawback of regular hard drives is their fragility. Accidentally drop one on the floor and there’s a good chance that the drive’s spindle will break. Solid state drives, though, like USB sticks and SD cards, have no moving parts so are much tougher. They’re a particularly good idea if you transport your drives to different locations regularly. Bear in mind that solid state tends to be much more expensive.

Above Solid state drives are much less likely to break if dropped.


Expert tip What to do if you lose your images If the worst happens and, for whatever reason, you do lose important data, what you do next could make all the difference when it comes to potential recovery. The most common cause of image loss is accidental deletion or card formatting, in which case you should be able to recover images, as usually the data isn’t actually deleted, but rather marked as ‘available’ should the camera wish to use it. So it’s vitally important that you don’t use the card again following the deletion. Accessing the data is usually only possible with the help of special software. We recommend EaseUS, which is free to use up to 2GB, and won’t break the

bank beyond it. The other option is a device such as Sanho’s HyperDrive ColorSpace UDMA 3 (left), which is essentially a hard drive with a card slot, a screen, and built-in recovery software. These are expensive (£400), but very reliable and easy to use. If your card or hard drive is actually corrupted, you may be able to repair the problem yourself, but if you’re not IT savvy it may be a job for an expert. If a hard drive is making clicking noises, stop using it immediately. This is usually the sound of imminent mechanical failure. The drive may need to be professionally rebuilt, which is very expensive.

Above Access lost data quickly with free software such as EaseUS. Left The Sanho HyperDrive ColorSpace UDMA 3 is a reliable tool for recovering data from formatted memory cards.

PRACTICALPHOTOGRAPHY.COM 101


What exactly is a gimbal and are they worth having for video work? Chris Blake, Morpeth Louise says: A gimbal is a (usually) motorised device for getting smoother, more professional-looking video footage. It can also be used to keep your camera level for stills, though this is less common. There are lots of different types of gimbal on the market, ranging from basic handheld devices to high-end products used in major Hollywood productions. You may also have noticed them used on drones to keep the camera level as the drone tilts. Prices start at around £300 for a handheld device capable of supporting the weight of an entry-level DSLR or CSC. These are perfect for recording footage as you walk. We recommend the Feiyu Tech A1000 (£380), a 3-axis model that offers silent, brushless motors and an automatic shutter, supports up to 1kg and has smooth 360° rotation.

JOHN FINNEY PHOTOGRAPHY

Should I invest in a handheld gimbal for video?

Which entry-level camera is best for landscapes? I shoot landscapes and have a £500 budget for a new camera? Which should I buy? Susan Mucklow, Bridgnorth

Tim says: There are currently at least seven major manufacturers producing entry-level DSLRs and CSCs, so it really is a buyer’s market. If you’ve already bought into a system and have invested money in extra lenses and accessories, it may make sense to stick with it when you upgrade, otherwise you’ll have to buy everything all over again, and sell your existing gear. But if you’re not tied in to any one brand, there’s plenty of choice out there. As you mainly shoot landscapes, focus on features such as resolution, dynamic range and weather-sealing, rather than maximum frame burst and 3D tracking, as these won’t be as useful to you. Kit lenses

are fine for landscapes, but a better option may be a wider-angle lens, so consider buying the camera body-only, then putting the money you save towards a Sigma 10-20mm or similar. If you don’t mind investing in secondhand kit, you can get some amazing bargains that should get you better image quality within your budget than a brand new entry-level camera. Check for condition and, if possible, shutter count, before purchase. A good value used option under the £500 limit is a full-frame Canon 5D MkII, although you’re unlikely to get a lens with it at this price. Even if you’ve always used DSLRs, it’s well worth considering CSCs, which are usually smaller and lighter, and often offer a more impressive spec for the money. Bear in mind, though, that battery life is usually inferior. Let’s check out three of the best sub-£500 landscape cameras on the market.

Three of the best budget landscapes cameras

Canon EOS M100 kit £419 The M100 is an ideal CSC for outdoor photographers because, at just 302g including a battery, it’s incredibly portable. Boasting a 24.2MP resolution, Wi-Fi, and a tilting 3in touchscreen, it comes fully loaded with an impressive spec. Bear in mind that due to its size there’s no viewfinder. canon.co.uk

102 PRACTICAL PHOTOGRAPHY

Nikon D3400 kit £429 This ultra-compact 24MP DSLR might be inexpensive, but according to sensor experts DXO it contains the secondbest APS-C sensor on the market, with a monster dynamic range of 13.9 stops. The camera comes with an 18-55mm kit lens, but doesn’t have touchscreen or Wi-Fi built in. nikon.co.uk

Sony _5100 kit £449 Sony’s highly-rated entry-level APS-C CSC comes with an impressive 24.3MP sensor, a light, compact body, a tiltable 3in screen (though no viewfinder), and Wi-Fi. Its kit lens is 16-50mm, which is slightly wider than most other kit lenses on the market. Battery life is decent at 400 shots. sony.co.uk


Know Your Stuff

Is a CSC good enough for serious sports shooting? I’m a sports photographer and would like your thoughts on whether I should be considering a switch to a CSC. Barry Stevens, Edinburgh

Louise says: Mirrorless cameras, or CSCs, have only been around since 2008, when Panasonic launched the ground-breaking G1. In the past nine years they’ve come on in leaps and bounds, often adopting new technologies considerably earlier than their DSLR counterparts. In other areas, though, including battery life and lens range, they still trail behind, which can be a real problem for pro shooters. A serious sports photographer, for example, might not want to shoot a Premier League match without a lightning-fast 400mm lens and a battery life of 1500 shots. But right now there are only two mirrorless lenses at the equivalent of

400mm or longer at f/4 or wider, and they’re both on Micro Four Thirds, which doesn’t really offer a pro sports body. That said, CSCs are undoubtedly heading in the right direction. Sony in particular, with its new _9, and an _9 II expected before the 2020 Olympics, has some very impressive tech on offer that gives Canon and Nikon’s flagship sports models a real run for their money. If trends continue, it’s likely that within the next five years there will be considerably more pro-spec long telephoto mirrorless lenses on the market, especially for Sony E-mount and Micro Four Thirds, and we’re likely see an increasing number of pros making the jump to a lighter, more versatile mirrorless system. Current rumours suggest Sony is working on a 200-600mm and a 400mm f/2.8, both of which would be very welcome additions for sports and wildlife shooters. Left Sports images tend to be shot on DSLRs. Below The

_9 is the

best CSC for action.

What are the benefits of built-in Wi-Fi? I may upgrade my camera to a newer model which has Wi-Fi. What does this actually do for me? Chadley Johnson, East Sussex Dan says: Wireless connectivity now comes as standard on most DSLRs and CSCs, but if your camera is a slightly older model, there’s a fair chance it won’t be built in. In fact, Nikon didn’t introduce Wi-Fi to a DSLR until as late as October 2013, with the D5300. Wi-Fi might seem like a gimmick, but it can actually be a really useful tool, especially if the camera also has NFC for instant connection. The three key benefits of Wi-Fi are: Q Transferring images from your camera to your phone, tablet or computer without the need for cables or card readers, enabling easy sharing on social media.

MICHAEL BUDDLE

Q Controlling your camera remotely using a phone or tablet. This includes taking photos, focusing and changing key settings, and is ideal for long exposure photography. Q Connecting your camera directly to a wireless printer, eliminating the need for a computer.

Are iPhones now capable of shooting shallow depth-of-field? I’ve heard I can now get a blurry background on an iPhone. Is this true? Nick Barton, Lancaster Dan says: Compared with DSLRs and CSCs, iPhones don’t offer a particular shallow depth-offield. This is because they have tiny sensors (about 1/50th the area of full-frame), and therefore you have to be standing much further from the subject at the same focal length to achieve a

similar composition. The further the focal distance, the larger the depth-of-field. However, newer iPhones have a Portrait mode that uses the two rear cameras to build a depth map, then blurs objects that aren’t on or near the focus point. This fake bokeh is actually very realistic, and gives images a distinctly DSLR look, though close inspection reveals imperfections at the edges.

PRACTICALPHOTOGRAPHY.COM 103


Know Your Stuff XXXXXX XXXX

How do I get sharper shots? I’m concerned that my images aren’t as sharp as they should be. Help! Chris Simpkin, Ayrshire

Dan says: If your images aren’t quite as sharp as you’d expect, there could be several different factors at play, so it’s a good idea to work logically through all of the possible causes. More often than not, the problem comes down to a shutter speed issue, where the camera is moving very slightly during the exposure, although there are many other common reasons for soft or blurry results. Below, we check out six quick and easy ways to ensure every image you take is as sharp as possible...

1

Choose your aperture

Most lenses offer the best optical performance at mid-range apertures, so it’s best to stick to around f/8 where possible. If you want to test the ‘sweet spot’ of a specific lens, take the same image at each aperture stop and compare the results on a computer screen to see which is the sharpest.

4

Select shutter speed

For sharp handheld shots without camera shake, choose a shutter speed that is at least equal to the inverse of your focal length. For example, for 100mm lenses, use 1/100sec or faster. For 400mm, use 1/400sec or faster. If you’re shooting a moving subject, you’ll need even shorter exposure times.

104 PRACTICAL PHOTOGRAPHY

2

Consider depth-of-field

The wider the aperture, the shallower the depth-of-field becomes. If your scene has both objects very close to the camera and in the distant background, and you want them both sharp, be sure to choose a narrow aperture of around f/16. Don’t go too narrow though, as overall sharpness starts to drops off.

5

Focus with Live View

AF is usually very accurate, but not always – sometimes the camera or lens can place sharp focus slightly in front or behind the subject. To guarantee accurate focus, activate Live View, press the Magnify button, switch the lens to MF, then adjust the focus ring until the subject is perfectly sharp.

3

Remove filters

Many photographers leave a UV filter on the end of their lens to protect the front element from scratches. But filters can collect dust and smears, and there’s no guarantee that the glass or coating will be as good as the lens itself. So for very important shots, it’s a good idea to temporarily remove the filter.

6

Keep the camera still

When shooting long exposures from a tripod, it’s easy to assume your camera is perfectly still, but this may not be the case. On windy days, it can wobble around, introducing blur. In this case, remove the strap, avoid using your tripod’s central column, and shield the camera from the wind with your body.


Know Your Stuff

Where are my LCD settings?

How do I shoot a snowy landscape? This year I’m determined to shoot some amazing wintry scenes. Do you have any tips? Emma Southall, March

There used to be settings visible on my screen. How do I get them back? Harpreet Lall, Bath

TIP AVOID LENS FOGGING

ROBERTO MOIOLA / SYSAWORLD

Dan says: The core principles of winter landscape photography aren’t hugely different to other times Taking freezing cold gear into of the year, although there are a few useful tips a warm house can cause that can help you achieve better shots. Perhaps condensation, so allow the most useful is what to do if there’s snow on the your kit to acclimatise ground, which can cause metering and focusing first in the car. issues. When most of the frame is white, your camera will set the snow as a midtone grey, making the scene look muddy and underexposed. Increase exposure compensation by 1-2 stops and keep your eye on the histogram to avoid clipping out the brightest areas to pure white. If your camera struggles to focus in the snow, try moving the focus point to an area of contrast, such as some bare tree branches. Above For If this isn’t possible, just set your lens to manual focus and turn super seasonal the focus ring to infinity in the focus distance window. snowy images, Choose a narrow aperture of f/16, which should ensure sharp increase your results. Snowy scenes and frosty mornings can often benefit exposure comp from a slightly cooler colour temperature, so try choosing a and use a custom WB. custom white balance of around 4000K in your camera’s menu.

Louise says: Almost all modern DSLRs and CSCs allow you to display key settings info on the rear screen, which tends to be easier to see than in the viewfinder or on the top-plate LCD. To turn the display on or off, press the Info button on the back of the camera. You may have to press it several times, as it often toggles through a variety of display functions, including the virtual spirit level and the histogram. Once selected, this key info display will remain visible at all times, unless you are reviewing an image or using the menu. Many photographers prefer to keep the screen off when composing a shot, getting the info they need in the viewfinder display. After-dark photographers, in particular, rarely use this function because looking at a bright screen reduces night vision, and it also decreases battery life.

Are flip-out or tilting screens worth having? I’m buying a new DSLR but don’t know if I really need a tilting screen. What are your thoughts on the matter? Mitch Simmons, Brighton Dan says: Articulated screens are designed to enable you to shoot more easily from a variety of angles, which can be useful in a range photographic situations. Let’s say, for example, you’re a street photographer and you want to work with your camera at your hip. A tiltable screen allows you to glance down to compose and focus accurately, rather than having to guess. Equally, you might be at a gig

and want to hold your camera high above your head for a better view. Simply tilt the screen downwards and you can frame up with ease. The other key advantage of flip-out (but not tilting) screens is that they can be folded inwards against the body for protection against scratches. Traditionally, high-end bodies don’t have articulated screens, as the majority of pros tend to compose through the viewfinder rather than with Live View. However, recent releases such as Sony’s _9, Panasonic’s GH5 and Nikon’s D850 (right) have adopted this functionality.

Below Nikon’s D850 has a 3.2in 2359k-dot tilting touchscreen.

105 PRACTICAL PHOTOGRAPHY


Know Your Stuff

How do I attach a flashgun to a lightstand? I’ve just bought a lightstand but my flashgun doesn’t fit on it. Is there a way to connect them? Rory Benton, Newcastle

Can you suggest creative ideas for the New Year? I need to get my teeth into a meaty photo project in 2018. Do you have any suggestions? Tim Blunt, Plymouth

Tim says: Whether you’ve had some new kit for Christmas and want to put it through its paces, or are just itching to get out and shoot after a couple of dormant winter months, a creative project is the perfect way to kick-start the New Year. Most projects give you some sort of theme or brief to work to, which tends to make it easier to decide what to shoot, and many focus on a specific genre or subject, enabling you to explore a range of different techniques and approaches. Be sure to choose a project that you are confident you have enough time to complete. If you bite off more than you

can chew, you’re far more likely to give up before you really get started. For example, Project 365 (see below) requires you to take a shot every single day without fail for a whole year, which isn’t going to be easy if you have a demanding job. Perhaps one per day for a month, or one per week for a year would be more realistic. Don’t worry if you don’t get amazing results every time you shoot a photograph. This should be as much a learning process as it is a portfolio builder, and no one else ever has to see your less successful images. The very best projects will stretch you to shoot subjects you wouldn’t normally tackle, thereby teaching you lots of new skills along the way. Below, we check out three creative project ideas for the New Year.

Louise says: Most flashguns are designed to be mounted onto a camera, so are fitted with a standard hotshoe connector. If you want to mount one to a lightstand, which have either a 1/4in or 3/8in screw thread (or both), you’ll need an adapter. Buy one with a swivel joint so you can tilt the flashgun up and down, otherwise it will always be angled horizontally. Some of these products, such as Calumet’s Adapter with Hot Shoe Bracket (£15), pictured above, also allow you to connect an umbrella to soften the light. Bear in mind that if you’re using your flashgun with wireless triggers, it’s actually the receiver and not the flash unit that will attach to the top of the bracket, so check that the receiver has a hotshoe connection on the base.

Three great long-term photo projects to try out

Project 365

ABC or numbers project

Stick to one colour

Shooting one image every day is a great way to keep the creative juices flowing through the year. Most photographers focus on a specific subject, such as self-portraits, but you don’t have to. If you’re short on time, a Project 30 may suit better, as it only spans a month.

Keep your eyes open for attractive letters and try to photograph the entire alphabet, or do it with numbers from 1-25. You can then make them into a grid in Photoshop to display on the wall. This is ideal if you don’t have much time, as you can grab shots while out and about.

Over a period of, say, one month, only shoot objects of a particular colour. At first you’ll find it quite hard to find potential subjects, but this a superb eye-opening exercise, and before long you’ll be spotting amazing images you wouldn’t have noticed before.

PRACTICALPHOTOGRAPHY.COM 107


Image © Tom Barnes

*NBHJOF DSFBUJOH ZPVS PXO QSPGFTTJPOBM RVBMJUZ QSJOUT BU IPNF 8JUI 1FSNB+FU JOLKFU NFEJB ZPV DBO EP KVTU UIBU $IPPTF GSPN B TFMFDUJPO PG BXBSE XJOOJOH QBQFST HVBSBOUFFE UP TVJU BMM ZPVS JNBHJOH OFFET XIFUIFS JU CF B NFUBMMJD MVTUSF PS UFYUVSFE p OF BSU 7JTJU XXX QFSNBKFU DPN OPX UP HFU TUBSUFE

TBMFT!QFSNBKFU DPN w


FIZKES

Know Your Stuff

Expert tip! Copyright and the law We asked Jonathan Appleby, a copyright expert at Copytrack, for the low-down on how UK copyright law works...

How do I protect my images once I post them online? I’m paranoid that as soon as I upload my shots online they’ll get stolen and used without my consent. What can I do? Mandy Dewbridge, Chester

Louise says: The digital age has ushered in a whole new photographic era that has brought with it all sorts of advantages. But it’s also led to a dramatic increase in the unauthorised use of images online and elsewhere, often completely without the copyright holder’s knowledge. Anyone who shares their shots on the internet is vulnerable, so it’s worth taking steps to limit your chances of becoming a victim. Some photographers use a watermark to protect their shots. This is fine, although they can be easy to clone or crop out, and often damage the aesthetics of the image. Instead, it’s best to only upload low-res files where possible – this will

also mean the images load faster. If you want to check if one of your images has been stolen, you can use Google’s reverse image search (go to Images, click the camera icon at the right of the search bar, upload your shot and voilà). A more advanced option is to set up an account with Copytrack (copytrack.com), which will search the web for your shots and report back, boasting an accuracy rating of 98%. Copytrack then pursues the user for a post-licensing agreement and ensures proper legal enforcement. Setting up an account with Copytrack is free.

Know your rights If you’re not sure what your legal rights are as a photographer and how copyright works in the UK, take a moment to check out the advice from one of Copytrack’s copyright experts in the panel to the right...

Q Copyright is a legal right that grants the creator of an original work exclusive rights for its use and distribution. Image copyright lasts the lifetime of the creator plus 25 years. After this it can be used by anyone. Such rules are why works from Shakespeare can be created however and whenever one wants without any concern. Q An infringement occurs whenever someone breaks the terms of your copyright. Online this often occurs when users share your images without permission. Due to the availability of content online, infringement sometimes occurs without the abuser knowing they’ve done anything wrong. When your rights have been abused you are able to claim compensation. Q The amount awarded has to be reasonable and proportionate to the infringement committed. Compensation is calculated by working out the profit lost because of the infringement. So, if images are usually sold for £100, anybody who stole your image would have to pay that fee. You would have to prove that you received that much in the past for your work.

Is there an iPhone lightmeter App? I own a number of film cameras, none of which have a built-in lightmeter. Can I do this on my iPhone? Terry Graham, Wiltshire Dan says: All digital cameras and most film cameras have an integrated lightmeter, making it easy for photographers to achieve a balanced exposure. Some very old or basic film cameras don’t have

one, forcing you to make an intelligent guess at exposure settings. One way around this is to buy a dedicated lightmeter, but they’re relatively expensive and another piece of kit you have to carry. You could carry a DSLR and use its meter to calculate settings for your film camera, but the easier option is to use a smartphone app, which will give you surprisingly accurate readings.

Above We recommend Lux for iPhone, which is both free and very easy to use.

PRACTICALPHOTOGRAPHY.COM 109


Flagship Store Opening A D V E R T I S I N G F E AT U R E

WEX PHOTO VIDEO LAUNCHES NEW FLAGSHIP STORE IN LONDON

F

OLLOWING ITS integration with Calumet Photographic and subsequent re-branding, Wex Photo Video has established its position as the UK’s premier destination for WOV[VNYHWOLYZ HUK ÄSTTHRLYZ I` opening the biggest camera store PU [OL JV\U[Y` Located in Whitechapel, East 3VUKVU H ZOVY[ ^HSR MYVT [OL OLHY[ VM [OL *P[` [OL UL^ ÅHNZOPW Z[VYL brings together all the service elements central to Wex Photo Video, with an unrivalled range of WYVK\J[Z VU KPZWSH` H M\SS` [LZ[LK WYL SV]LK ZLSLJ[PVU H YLU[HS KLZR part-exchange and professional YLWHPY ZLY]PJLZ HSS \UKLYWPUULK I` >L_»Z L_WLY[ Z[H HUK H^HYK ^PUUPUN J\Z[VTLY ZLY]PJL

Outstanding features Covering 7000sq ft, Wex Photo Video London is a true destination for imaging enthusiasts and professionals up and down the JV\U[Y` IVHZ[PUN H U\TILY VM outstanding features that elevate it HIV]L H Z[HUKHYK JHTLYH ZOVW 0[ PUJS\KLZ H WLYTHULU[ NHSSLY` MVY photographic exhibitions, a drone ÅPNO[ aVUL H [OLH[YL ZWHJL MVY WYVK\J[ KLTVZ OP [LJO WSH` [HISLZ featuring the latest gear from all the big brands and a dedicated events ÅVVY MVY WYV [HSRZ ^VYRZOVWZ ZLTPUHYZ HUK TLL[ \WZ ;OL UL^ Z[VYL ^HZ V JPHSS` VWLULK PU 5V]LTILY I` SLNLUKHY` )YP[PZO YVJR WOV[VNYHWOLY 1PSS -\YTHUV]ZR` HUK [OL KH` SVUN event saw more than 1100 people ÅVVK [OYV\NO [OL KVVYZ [V LUQV` KLHSZ [HSRZ KLTVUZ[YH[PVUZ HUK JVTWL[P[PVUZ 7YPVY [V [OL .YHUK Opening, a private view evening launched Wex’s More Than an

0THNL JHTWHPNU PTHNLZ HUK ÄSTZ from which will be exhibited PU Z[VYL MVY [OL YLZ[ VM [OL `LHY Attending both events alongside J\Z[VTLYZ ^LYL RL` PUK\Z[Y` ÄN\YLZ QV\YUHSPZ[Z HUK ZVJPHS PUÅ\LUJLYZ H U\TILY VM ^OVT have chosen to host their own ^VYRZOVWZ H[ [OL Z[VYL PU M\[\YL

Customer focused Over the coming months, the WHJRLK ZJOLK\SL VM L]LU[Z H[ >L_ Photo Video London includes a U\TILY VM [V\JO HUK [Y` KH`Z MYVT [OL SPRLZ VM :VU` HUK -\QPÄST H WYV ]PKLV ^VYRZOVW MVJ\ZPUN VU the Canon EOS C200 and an exhibition of winning images from

>L_4VUKH`Z >L_»Z WVW\SHY WOV[V JVTWL[P[PVU VU ;^P[[LY 6]LYHSS [OL UL^ ÅHNZOPW Z[VYL represents the biggest single investment in expanding Britain’s WOV[V YL[HPS JHWHJP[` PU THU` `LHYZ and highlights Wex’s commitment [V WYV]PKPUN L]LY`[OPUN [OLPY customers need, be it gear, technical help, impartial advice, HM[LY ZHSLZ ZLY]PJL VY PUZWPYH[PVU ¸>L HYL PTTLUZLS` WYV\K VM [OPZ NYV\UK IYLHRPUN Z[VYL ¹ ZH`Z >L_ *,6 +H]PK .HYYH[[ ¸0U HU LYH when there are ever fewer IYPJRZ HUK TVY[HY ZWHJLZ MVY photographers and videographers, we hope this new location will be a cherished resource for people of HSS PU[LYLZ[Z HUK ZRPSS SL]LSZ ¹ The new store is located at 37-39 Commercial Road, >OP[LJOHWLS 3VUKVU , 3-

“A TRUE DESTINATION FOR IMAGING PROS & ENTHUSIASTS UP & DOWN THE COUNTRY”

Q For more information, head over to www.wex.co.uk/london

PRACTICALPHOTOGRAPHY.COM 111


112 PRACTICAL PHOTOGRAPHY


PRO SHOWCASE AMAZING IMAGES AND INSIGHT FROM THE WORLD’S BEST PHOTOGRAPHERS

BEAUTY IN

DECAY Thousands of images shot at 500 locations over ten years prove uncovering the hidden charms of abandoned places isn’t just a job for Thomas Mueller, it’s a passion.

Thomas Mueller is a freelance photographer based in Berlin, Germany. He specialises in travel and landscapes, and has been shooting abandoned locations since 2008. thomasmueller.photography

PRACTICALPHOTOGRAPHY.COM 113


OR THOSE OF US WITH AN inner intrepid explorer that’s just waiting to break free and set off on epic adventures, Thomas Mueller’s images are the perfect inspiration. Each one transports you into a different dilapidated building, covered in decades’ worth of grime and dust. Having shot hundreds of abandoned locations the world over, Thomas is now an expert in capturing the eerie beauty of total dereliction. How did you first become interested in photography?

While I bought my first camera in the early 2000s, I didn’t actually stray outside of the auto setting until around 2007, which is when I bought my first DSLR. The most wonderful thing about photography is that

“THERE HAVE BEEN SOME LOCATIONS THAT I’VE VISITED FIVE TIMES BEFORE I COULD GET IN...” 114 PRACTICAL PHOTOGRAPHY

it’s so versatile. I suddenly had a reason to go outside and discover amazing locations. Even the searches themselves were fantastic, never mind actually taking the shots. It really allowed me to relax and forget all of my worries. I also love post-processing my images on the computer. Editing a flat RAW file to give it life is great fun. For me, photography is simply the most beautifully diverse occupation in the world. What drew you to shooting abandoned houses?

Around 2008 I saw a picture of a cinema in a deserted Soviet army barracks. I found the image fascinating, and immediately knew that I wanted to create something like that. I searched for deserted places near me and photographed them. Over time each shoot got more professional, and now I’ve visited over 500 locations scattered all over the world. What fascinates me the most about these places are the visible traces left by time when humans no longer occupy the space. To me, decay is beauty, and I think I’m addicted to capturing it. How do you get into the buildings?

I usually try to find an open door or window. In some circumstances I may have to climb in order to get in.


Pro Showcase Thomas Mueller

However, if absolutely nothing is open then I have to ask in the area for someone who owns a key, or alternatively just come back later and try again. There have been some locations I’ve visited five times before I could finally find a way inside. I would never destroy anything to get into a building, so unfortunately some doors remain closed forever and I just have to accept that.

metal, but he didn’t listen to me at all, and just kept yelling. My guide, who was already 100m along the beach, turned around and walked back at a leisurely pace. It felt like an eternity before he actually got there. Meanwhile, the Nigerian man continued yelling at me and trying to smash my camera. When the guide finally got there he calmed down the man. I’m lucky he was there, otherwise I might not have got off so lightly.

Have you ever had a nightmare shoot?

Yes, definitely. In 2015 I visited friends in Lagos, Nigeria. Before the trip, I scouted some locations on Google Earth and saw that there was a beach with abandoned ships. I was excited to visit this place, so I booked a guide to help me explore. When we got there I walked along the beach and took a few shots. At some point I reached a large scrap heap, which was the remains of a large ship. I took out my camera to get a picture, but suddenly a big Nigerian man came running up to me, agitatedly asking why I was photographing his wife. I then saw that underneath the scrap heap several people were sat in the shade to seek protection from the sun. This man was extremely upset and tried to hit my camera. I kept trying to explain that I was only shooting the scrap

Do you have a favourite story from your experiences shooting these locations?

Above Thomas made great use of the colours and doorways in this mansion. Above left This abandoned conservatory had been overrun by plants, giving the image a spooky, apocalyptic feel.

I remember a beautiful abandoned theatre in France. It’s located in a park that many people travel though during the day. The only access to this theatre is through the basement. To get there, you have to abseil with a rope down the 5m-deep shaft. Because it would have been too noticeable to climb down during the day, my friends and I decided to explore at night instead. We crept through the park to the theatre at midnight. I remember that, because the full moon was so bright we didn’t even need to use our torches. Once we’d made our way into the theatre we illuminated it with over 400 tealights. This process took us over an hour, but when we were done there

PRACTICALPHOTOGRAPHY.COM 115


Pro Showcase Thomas Mueller

Top Thomas’ post-processing proved especially tricky here, as the room was so dark. Above This abandoned Japanese shrine was overflowing with thousands of mortuary tablets.

was a beautifully soft and warm light in the room that we never would have achieved with a flash. It perfectly complemented the 18th century baroque theatre. All the effort we put into this shoot really paid off, as we were rewarded with breathtaking images. After taking our shots we collected up the tealights in order to leave no trace of our presence. We then climbed back out on the rope and left the theatre for the cold, dark night. How much preparation goes into your shoots?

The preparation generally tends to be divided into two different sections. First, I find these lost locations, and then I plan photo tours to get out there and shoot several of them at once. I’ve actually created a database where I input all of the locations I want to visit. Currently there are over 1000 different places worldwide. I usually use Google Image Search, Street View or Satellite View. They’re all really useful tools to find abandoned places. When I’m planning my photo tours, I’ll usually be doing so with two or three friends. We meticulously think about where we’re going, how much time we’ll need at each place and the specific time of day we want to be there. We try to give ourselves the optimal amount of sunlight,

116 PRACTICAL PHOTOGRAPHY

so we’ll drive after dark to our next location so as not to waste any time. However, this is only possible when alternating drivers. I love going on these trips, as we don’t solely visit abandoned buildings – we often shoot landscapes and cityscapes as well. What’s the most unusual location you’ve visited?

On a four-week trip through Japan I visited a variety of abandoned places. One of these was a temple complex known locally as the ‘Temple of Lies’. The story behind this unusual name makes this location even more incredible. In Japan, people commemorate their deceased with Ihai tablets. These small ceremonial placards hold the souls of their loved ones. People paid money to this particular temple, and in return the priest was supposed to pray each day to the souls. However, the priest was exposed as a fraud and a swindler, and the temple was left to decay. Is there a deeper meaning to your work?

For me, photography is a path to relaxation. I love to enter deserted places, take pictures of them, and then use my personal style to create a new interpretation. My images aren’t meant to be a documentation, but rather a way to transport my viewer into a strange


Above This abandoned bar in east Germany was lit with a torch to create the illusion of the lamps being lit. Left Looking like the set of a horror ďŹ lm, Thomas found this old operating theatre in an abandoned asylum in Italy.

PRACTICALPHOTOGRAPHY.COM 117


Above This wonderfully ornate French theatre was lit with over 400 tealights, hence the warm glow.

world outside of their regular daily lives. They should take the ugly face of decay and show its beauty; they should show that nothing lasts for an eternity; they should show what remains when humans leave. What’s your number one tip for photographing abandoned buildings?

You must be really careful whenever you enter anywhere that’s been abandoned. Dangers tend to lurk everywhere – from unsafe floors to collapsing ceilings, there will always be hazards to anticipate. You must wear sturdy shoes, and take a flashlight and mobile phone as well. It’s always best to go with a friend, but it’s of paramount importance that you both behave respectfully. Make sure you don’t break anything, because other photographers will also want to enjoy the amazing location you’ve discovered.

What kit do you use?

I’ve been shooting with Canon for 10 years now, and my current body is a Canon 5D MkIV. I also use several lenses covering a focal length range of 11-400mm. I’ve never really thought about moving to another manufacturer. While Sony and Nikon are undoubtedly better than Canon in some areas, Canon just works best for me overall. To be honest, I don’t really think that the differences are that big between brands. I believe that the photographer is always responsible for great images, not the equipment that they’re using. Since July last year I’ve being experimenting with a DJI Mavic Pro for landscape photography. Its unusual angle opens up previously unimaginable possibilities, but it’s so pleasingly compact that it easily fits into my backpack. What’s the most difficult shoot you’ve been on?

“MY PHOTOGRAPHS AIM TO TAKE THE UGLY FACE OF DECAY AND SHOW ITS BEAUTY...” 118 PRACTICAL PHOTOGRAPHY

My hardest shoot by far has been an abandoned villa in Italy. Inside this building was a beautiful room with stucco on the ceiling and two chandeliers. However, the doors and windows were boarded, so there was barely any daylight in the room. It was so dark that I couldn’t actually see anything. By using an ISO of 25,600 and a 150sec exposure, I was able to


Pro Showcase Thomas Mueller

Pro advice Thomas’ top photo tips CHOOSE YOUR COMPOSITION An image’s composition is incredibly important, though often underestimated. Once you’ve found your subject, take the time to consider how you’re going to capture it. It’s worth doing this, as you can’t correct your position in post-production. If you’re unsure, then just take several pictures from different perspectives.

1

THINK ABOUT YOUR FORMAT Format is a key part of creating a successful image. I don’t just mean portrait and landscape view, but also aspect ratios such as 4:3 or 16:9. Key objects can be cut by later cropping, so ensure that you’ve already thought about what format the shot will end up as.

2

refine my composition. However, for my final image I set my camera to ISO 800 and a 13-minute exposure. I would have liked to have done the shoot with better light, but the circumstances just didn’t allow it. How much editing do you tend to do?

My abandoned building images are almost exclusively HDR. The dynamic range in these buildings is too big to be able to capture with just one image. In addition, HDR emphasises the strange effect of my photographs. However, I try to use this technique in a subtle manner. I bracket with either three or five images, edit them together and then add the final flourishes in Photoshop.

CONSIDER USING A TRIPOD Many images can be taken during the day without a tripod, however I’d still recommend using one anyway. With a handy set of legs you’re able to ensure that your horizon is correctly aligned and that your composition is carefully chosen.

3

PAY ATTENTION TO THE DETAILS Don’t fall into the trap of only focusing on the main subject in your image. Sometimes you can be so fixated on the obvious part of the shot that the smaller details can be missed. You need to make sure that you look around the room to see if there are any elements that are going to disturb your composition. You may even find that you can incorporate these details into your shot.

4

If you could give one piece of advice to budding photographers, what would it be?

The most important thing is that you have fun taking photos and that the whole thing comes from the heart. There’s no need to cover every single different genre of photography, just focus on what you’re interested in. Work hard and shoot often, as that’s the only way that you can develop your skills. Don’t be discouraged by setbacks, just keep going and be yourself. Developing your own style is absolutely key.

PRACTICALPHOTOGRAPHY.COM 119


CAMERA K

HOW

PART FOUR AUTOFOCUS In our Camera Know-how series, we cast an expert eye over the ins and outs of your DSLR’s or CSC’s key features, revealing precisely what they do and how you can make the most of them to boost your photographic skills. In this month’s issue, Ben Davis takes a detailed look at autofocus, and explains how you can take control of your camera’s focusing settings to ensure your shots are always strikingly sharp.

ETTING A PIN-SHARP focus is the most critical step in taking a shot. Unlike exposure or white balance, the focusing can’t be altered in post-processing, so it needs to be spot-on at the moment of capture. The good news is that mastering your camera’s autofocus system is simple, so with a bit of practice you can always be sure that your focus is 100% accurate.

S TIP USE THE CENTRAL POINT The AF points in the centre of the frame tend to be cross-type sensors, which are faster than the AF sensors near the edges.

What is autofocus? Your camera’s autofocus (AF) system is responsible for adjusting elements within the lens to focus the incoming light onto your sensor for a sharp image. The autofocus is usually activated by half pressing the shutter button, which sets it within a fraction of a second. To get the best results, you’ll need to select


Camera Know-how Autofocus LEARN THE LINGO TECH TERMS MADE EASY Don’t be baffled by technical jargon! We cut through some of the most common terms associated with autofocus. Q FOCUS HUNTING When the autofocus struggles to set the focus it rocks back and forth to find a sharp edge. This ‘hunting’ mostly occurs in low light or scenes lacking contrast. Q FRONT/BACK FOCUS This is when your camera is focusing slightly in front of or behind your intended focal point. This may be due to a focusing error, the distance between the camera and the subject changing between focus and capture, or a lens calibration problem. Q ACTIVE AF POINT Cameras have a set number of autofocus (AF) points, which are areas of the frame where the focus can be set. The active AF point is the currently selected focus area, which is highlighted in red within the viewfinder display. It can be moved around the frame using the camera’s D-pad. Q CROSS-TYPE SENSOR These are the most accurate AF sensors in cameras, and they use phase detection focusing. They measure the focus information both horizontally and vertically, working quicker and more precisely than vertical sensors.

TIP STAY SHARP IN THE DARK the optimum focusing mode for the subject you are shooting, choose the active AF point within your frame and then tell your camera when to set the focus.

Q BACK BUTTON FOCUSING Rather than setting the focus by half pressing the shutter button, focus is set by pressing the AF-ON or assigned Function button on the back of the camera. It takes some getting used to, but often results in a more accurate focus.

Focusing can ‘hunt’ in low light. To fix this, either enable the AF-Assist lamp in the menu or focus on an area with more contrast.

How does it work? Both DSLRs and CSCs offer advanced and complex AF systems, using a combination of phase detection and contrast detection. DSLRs now primarily use phase detection to set the focus, as it tends to be faster and more accurate. This system splits the incoming light into two separate beams, which is reflected by the mirror onto the focus sensors. The two light beam signals are compared by the sensors. When the beams become identical this means the image is in focus.

If the signals don’t match, the camera knows whether to bring the focus closer or further away, speeding up the focusing process and reducing the chance of focus hunting. Contrast detection is mostly used by DSLRs or CSCs in Live View mode, and it works by adjusting the optic until the maximum amount of contrast is detected between the pixels.

When should I use it? Most photographers use autofocus for the vast majority of shooting situations, as there are different AF modes designed to match a variety of subjects. However, there are some occasions when setting the focus manually is preferable, as this gives you total control.

Above Most lenses offer a switch to choose between autofocus (AF) or manual focus (M), which is then set using the focus ring.

PRACTICALPHOTOGRAPHY.COM 121


TIP USE AF LOCK

SETTINGS HOW TO SELECT DIFFERENT FOCUSING MODES SLRs AND CSCs OFFER A variety of autofocus modes, with each designed to suit different subjects. To select one of these, first choose either the single or continuous focusing mode. Then select how you want to use the AF sensors – either just one on its own, as a group or to track your subject as it moves. On some CSCs the AF modes are selected in the camera menu, but DSLRs tend to have a button which lets you scroll through the AF modes. Hold this button down and scroll the command dial to peruse the different focusing modes.

In order to keep the focus firmly locked in place while recomposing your frame, simply press and hold the AE-L/AF-L button on the rear of your camera.

D

Left This camera has been set up in single focusing mode (AF-S), with the central AF point selected to focus on.

Q SINGLE AF POINT

Q GROUP AF

Q TRACKING/WIDE AF

When the single AF point mode is selected, you choose only one of the AF points to set the focus. You can select different AF points using the D-pad or AF selector button.

This mode lets you select a group of autofocus points, clustered together to create a larger area of the frame to set the focus from, and is most useful with fast-moving action.

This mode adjusts which AF point is in use as the subject moves across the frame. A single point is used to set the focus, but the AF points ‘follow’ the subject as it moves.

REAL WORLD SHOT USE THE RIGHT FOCUSING MODE FOR YOUR SUBJECT

Single focusing mode

Continuous focusing mode

Manual focusing mode

Single focus mode is the most commonly used AF mode, as it’s designed for subjects that don’t move. This means it’s best for anything from landscapes and portraits to still life and general snaps. With this mode, once the focus has been set – either by half pressing the shutter button or using the AF-ON button – the focus stays locked in place until the AF is activated again. Most cameras emit a beep when the focus has been set this way, although you can disable this noise in the menu if you find it annoying. The single focusing mode is generally referred to as AF-S in the menu of the majority of cameras, but Canon refers to the mode as One Shot.

Continuous focusing mode is called AF-C by most manufacturers, but on Canon cameras the same AF mode is called AI Servo. It’s designed for moving subjects such as sports or wildlife, and the focus will constantly track and adjust to the subject distance so long as the assigned focusing button is pressed down. With this mode the camera carries on focusing for each shot when capturing a burst of images. When shooting with continuous focus it’s better to use the central AF point, as it tends to be the fastest focusing sensor and will help avoid accidentally cropping your subject if it moves too close to the frame edge.

You can set the focus manually by rotating your lens’ focus ring. First you’ll need to either move the AF switch on the lens to the M setting, or set the AF/MF switch on your camera to MF. Setting the focus manually gives you precise control over the area of the image which is sharpest. This is especially useful when shooting macro subjects, scenes that lack contrast or when there’s not enough light for the focusing sensors to work accurately. By rotating the focusing ring left or right you can shift the focal plane closer to or further away from the camera. This means you can take your time to ensure that the most important part of the scene is pin-sharp.

Above The S denotes single point is set.

Above Canon calls this mode AI Servo.

Above Manual focus can be set on lenses.

122 PRACTICAL PHOTOGRAPHY


Camera Know-how Autofocus

THREE PROJECTS TO TAKE CONTROL OF THE FOCUS Put your skills to the test with these three projects that rely on you taking control of the focusing for pin-sharp results. You don’t need any specialist equipment, although a tripod may come in handy!

1

CAPTURE DETAIL IN WILDLIFE OR SPORT

ROLF KOPFLE

To shoot any kind of sport, action or wildlife – or any moving subject – you need to use your camera’s continuous focusing mode. On a Nikon, hold down the AF/M button near the lens mount and rotate the command dial to choose AF-C. On a Canon, hold the AF Drive button near the top LCD, scroll the selector wheel and choose AI Servo. O manufacturers vary, so you may need to check your manual. Decide whether you want to use a single AF spot, a cluster of AF points, or for your AF to track your subject across the frame. Find your image in the viewfinder, hover the active AF point over your subject and half press the shutter button to start focusing. Your camera will now continue focusing for as long as your finger remains on the shutter button, and even between taking shots.

3

PRECISE CONTROL WITH MANUAL

Some shots benefit from shooting with a manual focus, as it allows for more precise control. Switch your lens to manual by selecting M/MF and adjust the focus ring. For the most accurate representation of what’s in focus, turn on your camera’ Live View and zoom into the image on-screen with the magnify button. This closer look will help you achieve a precise focus. Then when you’re ready, simply press the shutter button to capture the image.

2

PIN-SHARP PORTRAITS THE PICTURE PANTRY

A portrait relies on a rock solid focus, and in particular the subject’s eyes need to be the sharpest part of a frame. This can be more difficult when shooting with a shallow depth-o as is often the case with portraits. Set your camera’s autofocus to its single focusing mode. This is AF-S on Nikon and One Shot on Canon, while other brands may vary. Choose to shoot with a single AF point, and move your active AF point with the D-pad so the active AF sensor is the one nearest your subject’s eye. Hover the AF point directly over the eye and half press the shutter to lock the focus.

NEXT ISSUE LEARN HOW TO MASTER YOUR CAMERA’S METERING MODES PRACTICALPHOTOGRAPHY.COM 123


MY PHOTO PROJECT PERSONAL WORK FROM UPCOMING TALENT

INFI

I

G A L A X I ES Divining inspiration from the heavens, Simone Cmoon captures phenomenal nightscapes that reflect the unique beauties of both land and sky.

124 PRACTICAL PHOTOGRAPHY


Aim of project: To remember the sheer splendour of our earth

Factfile Photographer: Simone Cmoon Full-time occupation: Fine art photographer

Location: I’ve been lucky enough to shoot all over the world Time spent: I spend almost every clear moon-free weekend shooting

Duration: I’ve been working on this project for around two and a half years now Images taken: I’ve taken many photographs, but I’m yet to finish working on them Website: cmoonview.ch

PRACTICALPHOTOGRAPHY.COM 125


HERE’S SOMETHING TRULY enchanting about the quiet majesty of the night sky. Stealing out to a magnificent location in the dead of night, under a thick blanket of stars, is on many a photographer’s bucket list. However, Simone Cmoon has transformed her passion for the beauty of nature into a staggeringly exquisite collection of astrophotography ripped straight out of a fairytale. How did you first become interested in photography?

I don’t usually like talking about it, as it’s quite a strange reason to take up photography and a little personal. A few years ago I was in a relationship with a man who became interested in photography. As many people at the beginning of their career do, he dedicated all of his time to his new profession. I eventually got to the point where I had to choose whether I was going to break up with him or buy a camera myself. As I had responsibility for a child and also a dog that required lots of time outdoors, I decided to save the relationship by trying to understand the fascination of taking photos. I soon discovered that I loved this new occupation, and the challenges that came with it. I had vivid visions of the images I wanted to create in my head, but I had to learn new and exciting things in order to make those shots a reality. I mostly self-taught by using

126 PRACTICAL PHOTOGRAPHY

the internet, as there are always very kind people who want to share their knowledge. As my interest in photography grew, my images started to attract interest and were published. I even won several photo contests. I became a Haida filter ambassador and started to give online coaching and workshops. I’m thankful for that relationship, as the passion we shared helped us to motivate each other. The relationship may be over, but my camera is still in use. How and when did you begin this project?

I’ve loved drawing and painting from a young age, and I always found myself focusing on people. I loved creating portraits, and I wasn’t particularly interested in landscapes. This is because I thought it was very difficult to recreate a vista as beautiful as the reality. However, I soon found that photography was completely different. I much preferred to shoot landscapes, as there are so many wonderful places on our planet. I’m determined to share my love for our world, which has to be protected and treated well. When I bought my first camera I went for one that was very cheap, so the noise performance was atrocious as soon as I was in a low light situation. After three months of using it, I could see that while I definitely had potential, my

Above This focus-stacked matrix panorama captures the Teide plateau in Tenerife. Above right Simone shot this image on her Lofoten trip in 2016. Capturing a circle around the moon like this is possible when there are ice crystals in the air.

“I CAPTURE LITTLE PIECES OF NATURE TO REMEMBER HOW BEAUTIFUL OUR WORLD IS...”


Personal Project Simone Cmoon

camera unfortunately didn’t. Consequently, I bought myself a full-frame camera in order to experiment with darker conditions. Night photography is incredibly fascinating. There are so many people on this earth, and so many of them are far away from wilderness. I like to capture little pieces of nature to help us remember how beautiful our world can be. It’s like a never-ending love story. How did it evolve?

My favourite light is the one during sunrise and sunset, when there’s a beautiful warmth and smooth shadows. In the Swiss summer the sunsets are late in the evening. That often meant that I had to stay overnight, as the hike down could be much more difficult and dangerous in the dark. This resulted in my fascination for night images. In clear, dark nights you can see the Milky Way with the naked eye. A friend of mine gave me some helpful tips on the best settings to capture it, and since then I’ve worked hard on improving and optimising my skills. What is it about astro that interests you?

I love the calmness of night-time in the mountains. It’s a true privilege to be able to watch the stars and enjoy nature so far away from civilisation. For me, nightscapes have a particularly magic touch, due to the priceless stars in the sky. However, astro photography can be quite technically challenging. There’s a limit on your exposure time if you don’t use an equatorial mount, as our earth is rotating. If you shoot for too many seconds without using a

Shooting during the day Unfortunately, not every night or location is suitable for Milky Way shots. If there’s light pollution from the moon or cities it just doesn’t work. Fortunately, I also enjoy capturing daylight and our ever-changing weather. One of the best things I did for my daytime landscapes was starting to use filters. I love

contrast in my images, such as rough v soft, bright v dark and wild v calm. Filters allowed me to create different effects, which just made my photographic playground that much bigger. One of my favourite pieces of kit is an ND grad, which allows me to darken my sky for an overall even exposure.

PRACTICALPHOTOGRAPHY.COM 127


“EVERY TIME I TURNED A CORNER, I FOUND MYSELF IN ANOTHER FAIRYTALE LANDSCAPE...” 128 PRACTICAL PHOTOGRAPHY


Personal Project Simone Cmoon

mount then the foreground will be totally still, but the stars will have blurred into trails. Depending on the focal length and the size of your camera’s sensor, you can sometimes have as little as a few seconds to create pin-prick stars. In order to quickly extract as much light as possible, I work with a wide open aperture and a very high ISO. I’ll then take multiple exposures in order to get the foreground as sharp as the sky and to ensure that both parts of the shot are perfectly exposed. How do you find your locations?

I’ve created an extensive database, made up of locations that I want to visit. When I plan a shoot, the first thing I do is check how far I might need to go in order to reach a general location. The next thing to do is see what the weather is like and then plan accordingly. Good weather is such an important factor for landscape photography, so I prefer to

have as much control over what conditions I’m going to experience as possible. Once I’ve arrived, I’ll activate the Live View and try out a series of different compositions. Once I get that ‘wow’ feeling, I’ll ready my camera and check the finer details. What’s your favourite location of all time?

In the two years I’ve been shooting, I’ve been to 13 different countries. However, the most special one was definitely Iceland. I was there in the summer when the routes to the highlands were accessible. It felt like every time I turned a corner I found myself in another fairytale landscape. Even if some locations were crowded with tourists, I found spots with little or no people so I could get the composition I wanted.

Above The foreground was shot during blue hour, with the sky and reflection captured later that night. Left Simone found this small rock formation on a beach in Norway – a long exposure creates a rather alien-like scene.

How much planning do you do for your shoots?

My level of planning depends on if I go on a shoot in my home country of Switzerland, or if I’m travelling

PRACTICALPHOTOGRAPHY.COM 129


Personal Project Simone Cmoon Below The foreground foliage was lit with Simone’s head lamp. Right Two images merged to create this photo – first a low ISO for the foreground, then an exposure of 13sec at ISO 3200 for the sky. Right below Switzerland’s Lake Stellisee shot as a panorama.

instead. If it’s a Swiss location, then I’ll just check the weather and make an early start to ensure I have as much time as possible in the mountains. I also make sure I know the positions of the sun, moon, and the centre of the Milky Way before I leave. If I’m travelling, then I’ll mark several different locations on a map and note down the times for sunrise, sunset and the Milky Way. If I’m going somewhere coastal, then I’ll always make sure that I keep an eye on the tide. Some places can be dangerous at high tide, while others can be simply boring during a low tide. Hiking apps are fantastic for helping me find the best mountain routes, while Skyguide helps me plan shooting the Milky Way. To find potential locations I search for inspirational images on 500px, Instagram, Google Maps and Facebook. I also make sure that I’ve read up on the culture and traditions of the country before I arrive. How much editing do you do?

I tend to do a lot of editing. This is because I use focus stacking, multiple exposures, multiple line panoramas and time-stacking in my photos, and sometimes all at once! I really enjoy processing

“I’M NOT A DOCUMENTARY PHOTOGRAPHER – I’M A DREAMER AND A CREATOR...”

130 PRACTICAL PHOTOGRAPHY

images. I think that one aspect of curating a personal style is the composition and technique when taking a shot. The other part is in post-production, where you’re able to put your own personal note into every photo. I’m not a documentary photographer – I’m a dreamer and a creator. Has anything dangerous ever happened?

My very first two-day hike didn’t go quite according to plan. My backpack was overstuffed and too heavy, as at that time my gear wasn’t optimised for hikes. For example, I took water for two days, which I now no longer do. Instead, when I know that there are rivers in an area, I’ll simply use a water filter in order to stay hydrated. The only way to get up to the glacier I wanted to shoot was by foot, so I trudged my way from 800m above sea level to 2500m. It was a difficult hike, but it was worth it when I got to my desired location. It was amazing arriving at a place that only a few people had ever seen. It was a dreamy landscape, filled with lakes, rivers, waterfalls, ice, rocks and sand. Once I’d finished shooting there, I decided to make my way down via a different route. Eventually, I came to a 100m drop, with no way to get down it except for a metal ladder. Without any head protection, and with a dog in tow that obviously can’t climb down himself, I had no choice but to attempt this route. Firstly, I brought down my equipment while my dog waited for me at the top. Then I had to empty my backpack, climb up again, and put my dog into


my bag before making my way down with trembling knees. My dog definitely realised the danger we were in, as he was incredibly quiet the entire time, even though he must have been very uncomfortable in the backpack. I was so thankful when my feet touched the ground and I knew that we’d both arrived safely. What kit do you use?

I work with a Nikon D810A, which I use for both nightscapes and daytime shoots. This camera is made for astrophotography. Its infrared filter is optimised for H-alpha red tones, which also works perfectly during sunsets and sunrises. I have loads of batteries, as I can’t charge when I’m in the mountains. I usually use my Nikkor 14-24mm f/2.8 lens set to 14mm. However, for my nightscapes I tend to prefer the Sigma Art 20mm f/1.4, which allows me to catch as much light as possible on my sensor. I’m a Novoflex and Haida filter ambassador, and almost every image I take during the day is made with a polariser, neutral density filter or graduated ND. Because I’m often out in the wilderness for two or more days, I’m dependent on a stable, yet lightweight tripod. I love my Novoflex C2844, as it works fantastically well for my needs. For any long exposure that I take, I’ll use a remote shutter release. Meanwhile, I always bring rugged outdoor equipment with me as well. This includes a sleeping bag, tent, headlamp, rain clothes, camping cooker, food, water filter and winter equipment. Why should readers start a personal project?

Working on your own project is a great reason to have a good look at something new, or to deepen your knowledge of a topic you’re already interested in. Whenever I start a new project I’ll mix my already existing skills with new subjects, so I always learn something fresh and exciting. What’s next for you and this project?

I’ve started producing video tutorials to help bring my techniques to others in an easily accessible way. In these videos I cover planning a shot, different photographic techniques and the post-processing skills needed to produce an excellent final image.

Pro advice Simone’s 4-step guide to better personal projects FIND AN IDEA If you want to start a project, you just need an idea. Sometimes it’s helpful to pick something quite specific and focus on it, such as taking all your images in black & white. Or perhaps you’re very interested in a theme, or you’re shocked about something and want to create change. Embracing your emotions will help you create a great personal project. If you’re really

1

interested in something, then you’ll have the energy to chase after it. GO DEEPER If you don’t want to just scrape the surface of your subject, then you’ll need passion for it. Don’t be afraid to spend time informing yourself of the theme you’ve chosen and the equipment you’ll need. There’s always something new to discover!

2

PLAN YOUR TIME Determining deadlines for yourself will help motivate you to complete your project. Don’t be afraid to plan breaks in order to keep a fresh mind.

3

SHOW YOUR WORK Letting others see what you’re working on can be a huge motivational force. Getting someone else’s opinion will give you a

4

GET INVOLVED We want to see your best photo projects! If you have a unique body of work you’d like to share with the world, then drop us a line at practical.photography@ bauermedia.co.uk

different perspective. Just ensure that you don’t get discouraged by any negative comments. You may also want to think about presenting your work in a book, gallery or magazine when your project is finally finished.

PRACTICALPHOTOGRAPHY.COM 131


Norwich - Wex Photo Video

Now incorporating

Unit B, Frenbury Estate, NR 481933 Op i

London - Wex Photo Video 37-39 Commercial Road, E1 1LF. Tel: 02073 801144 Mon - Fri: 8am - 7pm, Saturday: 9am - 6pm

• Over 19,000 Products • Free Delivery on £50 or over • We can deliver on Saturday or Sunday¹ Canon Lenses

EOS 77D

EF 24mm f1.4L II USM .......................£1499 EF-S 35mm f2.8 Macro IS STM .........£395 EF 35mm f1.4 L II USM ......................£1799 EF 100mm f2.8 L IS USM Macro........£799 £694 Inc. £105 Cashback* EF 135mm f2 L USM ..........................£859.97 EF 180mm f3.5 L USM Macro ............£1229 EF 200mm f2.8 L USM MKII...............£699 EF 300mm f2.8 L IS II USM ................£5799 EF 400mm f5.6 L USM .......................£1111.50 EF 8-15mm f4 L USM Fisheye ...........£1119 EF-S 10-18mm f4.5-5.6 IS STM .........£199 EF-S 10-22mm f3.5-4.5 USM .............£499 EF 11-24mm f4 L USM........................£2699 EF 16-35mm f2.8L III USM .................£1949 EF 16-35mm f4 L IS USM...................£899 £814 Inc. £85 Cashback* EF-S 17-55mm f2.8 IS USM ...............£718 EF-S 18-135mm f3.5-5.6 IS USM.......£429 EF 24-70mm f4 L IS USM...................£699 £594 Inc. £105 Cashback* EF 24-70mm f2.8L II USM ..................£1684 EF 28-300mm f3.5-5.6 L IS USM .......£2249 EF 70-200mm f2.8 L IS II USM...........£1899 EF 70-200mm f4 L USM .....................£578 EF 70-300mm f4-5.6 L IS USM ..........£1249 £1099 Inc. £150 Cashback* EF 100-400mm f4.5-5.6 L IS II USM ..£1789 £1574 Inc. £215 Cashback*

EOS 7D Mark II

EOS 6D Mark II

New

£85 Cashback*

26.2 mp 6.5 fps

20.2 mp 10.0 fps 1080p

24.2 mp 6.0 fps 1080p

From £699 £699

77D 77D Body

Full Frame

£1349

7D Mark II

6D Mark II From £1728

£1349

7D Mark II Body

NEW 6D Mark II Body £1728 NEW 6D Mark II + 24-105mm £2379

£614 inc. £85 Cashback*

£839

77D + 18-55mm £754 inc. £85 Cashback*

£1049

77D + 18-135mm

For Canon accessories visit wex.co.uk

£964 inc. £85 Cashback*

EOS 5D Mark IV

EOS 1D X Mark II

50.6 mp 5.0 fps

30.4 mp 7.0 fps

20.2 mp 16.0 fps

Full Frame

Full Frame

Full Frame

EOS 5DS

5DS Body

£2949

5D Mark IV

£2949 £3149

5D Mark IV Body

5DS Body 5DS R Body

£3229 £3229

1D X Mark II 1D X Mark II Body

£4799 £4799

*Canon Cashback ends 17.01.18

Nikon Lenses D850

D5600

New

40mm f2.8 G AF-S DX Micro ...................................£259 85mm f1.8 G AF-S ...................................................£469 105mm f2.8 G AF-S VR IF ED Micro.......................£779 10-24mm f3.5-4.5 G AF-S DX..................................£745 £700 Inc. £45 Cashback* 16-35mm f4 G AF-S ED VR...................................£1059 £989 Inc. £70 Cashback* 18-200mm f3.5-5.6 G AF-S DX ED VR II ................£659 24-70mm f2.8 G AF-S ED.....................................£1629

D7200 24.2 mp 5.0 fps 1080p

45.7 mp 6.0 fps 4K

£3499

D850 NEW D850 Body

24.2 mp 6.0 fps 1080p

D5600

£3499

Body £649 £729 £949

D5600 + 18-55mm D5600 + 18-140mm

From £899 £1099

D7200

D7200 + 18-105mm

*Nikon Cashback ends 09.01.18

X-T2

)XMLÀOP /HQVHV

X-E3

£95 Cashback*

New

24.3 mp 14 fps 1080p

24.3 mp 8.0 fps 4K

X-T2 From

X-E3 From

£1494 X-T2 Body £1494 £1399 Inc. £95 Cashback* X-T2 + 18-55mm £1745 £1654 Inc. £95 Cashback* X-T20 + 16-50mm £899 £804 Inc. £45 Cashback*

£849 X-E3 Body X-E3 + 23mm X-E3 + 18-55mm

£849 £1149 £1249

)RU )XMLÀOP DFFHVVRULHV visit wex.co.uk

16mm f1.4 ....................£729 £634 Inc. £95 Cashback* 23mm f1.4 ....................£748 23mm f2 .......................£369 56mm f1.2 ....................£768 £673 Inc. £95 Cashback* 10-24mm f4 ..................£899 £804 Inc. £95 Cashback* 16-55mm f2.8 ...............£848 £703 Inc. £145 Cashback* 50-140mm f2.8.............£1329 £1184 Inc. £145 Cashback* 55-200mm f3.5-4.8.......£599 100-400mm f4.5-5.6.....£1499 £1354 Inc. £145 Cashback*

A7R Mark II

Sony E-Mount Lenses

A6500

Black or Silver

Black

55mm f1.8 ....................£749 £669 Inc. £80 Cashback* 90mm f2.8 .....................£889 42.0 mp 24.0 mp £809 Inc. £80 Cashback* 5.0 fps 11.0 fps 10-18mm f4 ...................£699 4K video 1080p £659 Inc. £40 Cashback* 16-35mm f4 ...................£1122 £1002 Inc. £120 Cashback* From 16-70mm f4 ...................£779 £699 Inc. £80 Cashback* A7R II Body £2499 A6500 Body £1279 18-105mm f4 G .............£469 £2199 Inc. £300 Cashback* £1129 Inc. £150 Cashback* £429 Inc. £40 Cashback* A7S II Body £2499 A6500 + 16-70mm £2199 24-70mm f2.8 ................£1899 £2199 Inc. £300 Cashback* £2049 Inc. £150 Cashback* £1749 Inc. £150 Cashback* A7 II Body £1199 A6300 Body £829 24-70mm f4 ...................£879 £799 Inc. £80 Cashback* £999 Inc. £200 Cashback* £729 Inc. £100 Cashback* £300 Cashback*

£150 Cashback*

A7R Mark II

A6500

£2499

£1279

Ύ&ƵũŝĮůŵ ĂƐŚďĂĐŬ ĞŶĚƐ ϭϱ Ϭϭ ϭ

*Sony Cashback ends 21.01.18

GX800 OM-D E-M1 II

PEN-F

£200 Cashback*

20.3 mp 10.0 fps 1080p

20 mp 60 fps CMOS

PEN-F From

£949

PEN-F Body £949 PEN-F + 17mm £1149 OM-D E-M5 II Body £849 £764 Inc. £85 Cashback* OM-D E-M5 II + 12-40mm PRO £1249 £1164 Inc. £85 Cashback*

OM-D E-M1 II From

£1849

OM-D E-M1 II Body £1849 £1649 Inc. £200 Cashback* OM-D E-M1 II +12-40mm £2399 £2199 Inc. £200 Cashback*

Olympus Lenses 17mm f1.8 .....................£369 30mm f3.5 .....................£249 45mm f1.8 Pro...............£209 60mm f2.8 Macro ..........£360 £295 Inc. £65 Cashback* 75mm f1.8 .....................£699 £614 Inc. £85 Cashback* 300mm f4 Pro................£2099 7-14mm f2.8 Pro ...........£999 12-40mm f2.8 Pro .........£759 12-100mm f4 Pro ..........£1099 40-150mm f2.8 Pro .......£1099 75-300mm f4.8-6.7........£369 £284 Inc. £85 Cashback*

ΎKůLJŵƉƵƐ ĂƐŚďĂĐŬ ĞŶĚƐ ϭϱ Ϭϭ ϭ

GH5

Panasonic Lenses

New

20.3 mp 12 fps

16 mp 30 fps

4K video

4K video

DMC-GH5

From

£1699 GH5 Body GH5 + 12-60mm f3.5-5.6 GH5 + 12-60mm f2.8-4.0 G80 Body £529 Inc. £100 Cashback* G80 + 12-60mm £699 Inc. £100 Cashback*

DMC-GX800 From

£1699 £1899 £2199 £629 £799

£379

25mm f1.7 ................. £148 12-35mm f2.8 ............ £879 £779 Inc. £100 Cashback* 12-60mm f3.5-5.6...... £359 35-100mm f2.8.......... £969 £869 Inc. £100 Cashback* 45-150mm f4-5.6....... £179 45-175mm f4.0-5.6.... £349 £319 Inc. £30 Cashback* 100-300mm f4-5.6..... £569 100-400mm f4-6.3..... £1299 £1199 Inc. £100 Cashback*

GX800 + 12-32mm £379 GX8 + 12-60mm £749 £649 Inc. £100 Cashback* GX80 + 12-32mm £499 £449 Inc. £50 Cashback* For Panasonic G7 + 14-42mm £499 accessories * £449 Inc. £50 Cashback visit wex.co.uk G7 + 12-60mm £549 £499 Inc. £50 Cashback* *Panasonic Cashback ends 30.01.18


Birmingham - Calumet

Edinburgh - Calumet

Bristol - Calumet

Unit 2, 100 Hagley Road, B16 8LT. Tel: 01213 267636 Mon - Fri: 9am - 5:30pm, Saturday:10am - 4pm

Bonnington Business Centre, EH5 5HG. Tel: 01315 539979 Mon - Fri: 9am - 5:30pm, Saturday:10am - 4pm

Unit 7, Montpelier Central Station Rd, EH5 5HG. Tel: 01179 422000 Mon - Fri: 9am - 5:30pm, Saturday: 10am - 4pm

Belfast - Calumet

Manchester - Calumet

Glasgow - Calumet

Unit 2, Boucher Plaza, BT12 6HR. Tel: 02890 777770 Mon - Fri: 9am - 5:30pm, Saturday: 10am - 4pm

Unit 4, Downing Street, M12 6HHTel: 01612 744455 Mon - Fri: 9am - 5:30pm, Saturday: 9am - 4pm

Block 4, Unit 1, Oakbank Industrial Estate, G20 7LU. Tel: 01612 744455 Mon - Fri: 9am - 5:30pm, Saturday: 9am - 4pm

visit wex.co.uk 01603 208763 Call us Mon-Fri 8am-7pm, Sat 9am-6pm, Sun 10am-4pm

• 30-Day Returns Policy† • Part-Exchange Available • Used items come with a 12-month warranty†† Digital Compact Cameras

20.2 mp 4.2x zoom 1080p

20.1 mp 3x zoom 1080p

20.2 mp 4.2x zoom 1080p

PowerShot G9 X Mark II

PowerShot G7 X Mark II

PowerShot G5 X

£399

£519

£599

16.0 mp 5x zoom

20.3 mp 60x zoom

4K video

4K video

Coolpix W300 £389

16.0 mp 83x zoom

Coolpix B700 £399

to trade

Competitive prices Free collection of your gear

*Canon Cashback ends 17.01.18

Fast turnaround of your quote and credit

wex.co.uk

16.0 mp 80x zoom

20.3 mp 70x zoom

More Camera

Coolpix P900 £529 Coolpix A900 £329 Coolpix B500 £249

for your

Theta V 12 mp 4x zoom

16 mp 5x zoom

4K video

w/proof

Stylus TG-5 £399

Cyber-Shot HX90V .......£339 £289 Inc. £50 Cashback* Cyber-Shot RX100 III ...£579 Cyber-Shot RX100 IV ...£729 Cyber-Shot RX10 III......£1399 £1269 Inc. £130 Cashback* Cyber-Shot RX1R II ......£2999 Cyber-Shot RX100........£349

New

20.1 mp 25x zoom 4K

Cyber-Shot RX10 IV

£1799

*Sony Cashback ends 21.01.18

£399

16.2 mp 3.1x zoom 1080p

Ricoh WG-50 £249

20.9 mp 4K video

Lumix FZ2000 £999

Lumix LX100........... £499 £449 Inc. £50 Cashback* Lumix LX15 ............. £568 £498 Inc. £70 Cashback* Lumix FZ1000 ......... £569 £519 Inc. £50 Cashback* Lumix TZ70 ............. £279

£899 Inc. £100 Cashback*

money

1,000+ used products in stock

14 mp 8gb mem. 4K

GR II Digital £529

40x zoom

up

Accessories including spare batteries are available to buy on our website

£374 inc. £25 Cashback*

£494 inc. £25 Cashback*

Trade in,

IXUS 185 HS............................£99 IXUS 285 HS............................£159 PowerShot SX60 HS ..............£349 PowerShot SX730 HS ............£329 £299 inc. £30 Cashback* PowerShot G3 X .....................£649

wex.co.uk

Lumix FZ330 ........... £449 £399 Inc. £50 Cashback* Lumix FZ82 ............. £329 £279 Inc. £50 Cashback* Lumix TZ100 ........... £528 £478 Inc. £50 Cashback* Lumix TZ80 ............. £329 £299 Inc. £30 Cashback*

24.3 mp CMOS 1080p

X100F £1329

*Panasonic Cashback ends 30.01.18

Memory Cards & Readers 32GB .............. £64.99 Extreme Pro: 95MB/s 64GB ............. £119 SDHC 32GB ...............£29.99 128GB ............ £199 64GB SDXC.....£44.99 SanDisk Ultra 98MB/s SanDisk Extreme Pro: Micro SD Card plus 160MB/s UDMA adapters: CompactFlash 32GB ...............£22.99 16GB ...............£39.99 64GB ...............£40.99

SanDisk USB 3.0 ImageMa Reader

£44.99

eries: 299MB/s SDHC B ................... £99.99 B ................... £179 GB ................. £349

G Series XQD: 440MB/s 32GB ................... £99.99 64GB ................... £199.99 128GB ................. £279

eries: 260MB/s SDHC B ................... £59.99 B ................... £84.99 GB ................. £149

M Series XQD: 440MB/s 32GB ................... £74.99 64GB ................... £129 128GB ................. £199

Pixma Pro 100S

PIXMA Pro 100S ................... £359 PIXMA Pro 10S ..................... £504.99 imagePROGRAF PRO-1000 £999

Photo Bags & Rucksacks

Pro Runner BP 350 AW II capacity: • Pro DSLR with lens • 4-5 additional lenses • Flashgun, tripod, laptop & accessories

Flipside 300 AW II: capacity: • DSLR with up to 70-200 mm attached lens or compact drone • 2 lenses • Compact tripod • 7” tablet

Pro Runner: BP 350 AW II .............. £199 BP 450 AW II .............. £199

Flipside: 300 AW II..................... £112 400 AW II..................... £155

Anvil Slim 11 capacity: • CSC/Small DSLR • 2 lenses • 15” Laptop • Flashgun & accessories

Anvil: Anvil Slim................... £122 Anvil Super................ £134 Anvil Pro.................... £126

Lifestyle Windsor Messenger S: This practical messenger bag features an easily accessible top opening to the main compartment, where a DSLR with 24-70mm f2.8 lens attached and 2 additional lenses can be stored.

Manfrotto Reloader 55 Roller Bag Pro Light Rip-Stop nylon fabric with water-repellent coating to provide solid protection. This comfortable, stylish bag is ideal to travel with.

Reloader 55.....................£279

Hadley colours available: Canvas/Leather: Khaki/Tan, Black/Tan, Black/Black. FibreNyte/Leather: Khaki/Tan, Sage/Tan, Black/Black.

Messenger S ................ £89.95 Messenger M ..................£107 Backpack.........................£149

Digital ..............................£119 Small ...............................£149 Large ...............................£154 Pro Original .....................£189 Hadley One .....................£265

Tripods & Heads MT190XPRO3 • Max Height: 160cm • Min Height: 9cm

MT055XPRO3.......... £165 MK055XPRO3 + X-Pro 3-Way Head £259 MT055CXPRO3 Carbon Fibre ............ £329 MT055CXPRO4 Carbon Fibre ............ £345 MT190XPRO3.......... £149 MT190XPRO4.......... £159

MT190CXPRO3 Carbon Fibre ............ £299 MT190CXPRO4 Carbon Fibre ............ £318 Manfrotto 190 GO Tripod ....................... £149 Manfrotto 190 GO Carbon Fibre ............ £249

ad

Manfrotto Heads: 494RC2 Mini Ball ..... £49 324RC2 Joystick ...... £99 327RC2 Joystick ...... £169

Gitzo Systematic Tripod Series 5 6S G • 278cm Max Height • 10cm Min Height • Carbon Fibre

Systematic Tripods: Series 3 3S L...............£649 Series 5 3S L................£819 Series 5 6S G...............£1099

Gorillapod: Gorillapod 500.......£35 Gorillapod Kit 1K ...£52 Gorillapod Kit 3K....£86 Gorillapod Kit 5K....£172

Lighting & Accessories

430EX III-RT £239 SB-5000 £184 inc. £55 C/b* £499

Lumimuse LED Lights From £44.95

Ezybox SpeedL308s Lite 2 £189 £49.95

Plus III Set £229

Air Lighting Stand £69

3m Heavy Duty Background Support £99

D-Lite RX 4/4 Softbox Set £725

Urban Collapsible Background £174

Terms and Conditions All prices incl. VAT at 20% Prices correct at time of going to press. Free Delivery** available on orders over £50 (based on a 4 day delivery service). For orders under £50 the charge is £2.99** (based on a 4 day delivery service). For Next Working Day Delivery our charges are £4.99**. ¹Saturday deliveries are charged at a rate of £7.95**. ¹Sunday deliveries are charged at a rate £8.95**.(**Deliveries of very heavy items, N.I., remote areas of Scotland & Ch. Isles may be subject to extra charges.) E. & O.E. Prices subject to change. Goods subject to availability. Live Chat operates between 9:30am6pm Mon-Fri and may not be available during peak periods. †Subject to goods being returned as new and in the original packaging. Where returns are accepted in other instances, they may be subject to a restocking charge. ††Applies to products sold in full working condition. Not applicable to items VSHFLÀ FDOO\ GHVFULEHG DV ´,1μ RU LQFRPSOHWH LH being sold for spares only). Wex Photo Video is a trading name of Warehouse Express Ltd (registered as company no. 03366976. VAT number 231 9471 12). ©Warehouse Express Ltd 2017. *CASHBACKS Are redeemed via product registration with the manufacturer. Please refer to our website for details


SRB

PHOTOGRAPHIC Celebrating 50 years of SRB

Get great dea

free UK shipping*

1 9 6 7 - 2 0 1 7

ONLY AT

Shop online at www.srb-photographic.co.uk

www. srb

Call our experts (Mon-fri 9am-4.30pm) 01582 661878 7KH QHZ 3 6L]H Elite Filter System

Square Filters

ČŠ

hic.co.uk

Circular Filters

DGH GHVLJQHG OWHU V\VWHP WKDW e semi-pro P system to a higher level� I &DPHUFUDIW 0DJD]LQH Elite Filter Holder Elite Adaptor Rings Elite Polariser Elite ND1000 Elite 6 stop

TOP SELLER

ÂŁ34.95 ÂŁ5.95 ÂŁ24.95 ÂŁ29.95 ÂŁ29.95 SAVE

Plastic Filter System

Digiscoping Kits from ÂŁ34.95! Step Rings, Macro accessories & much more at our online store!

Dust Blowers from Rainsleeves from Cleaning Kits from Camera Wraps from Cleaning Cloths from Lens Pouch from White Balance Caps from

ÂŁ3.50 ÂŁ5.95 ÂŁ5.95 ÂŁ8.95 ÂŁ1.50 ÂŁ8.50 ÂŁ9.95

Lens Caps Body Caps Rear Lens Caps Petal Hoods Rubber Lens Hoods

ÂŁ3.95 ÂŁ3.50 ÂŁ3.50 ÂŁ10.95 ÂŁ4.95

Close up Lens Sets from ÂŁ19.95 6HW RI OHQVHV ZLWK XSWR GLRSWHU OpTech Comfort ÂŁ9.99 OpTech Wrist Strap ÂŁ9.99 OpTech Tripod Strap ÂŁ19.99

Award-winning SRB Photographic brand

28mm On-it Carbon Fibre Tripod 0D[ + PP 0LQ + PP :HLJKW NJ 0D[ /RDGLQJ NJ &DUU\LQJ &DVH

25mm On-it Carbon Fibre Tripod 0D[ + PP :HLJKW NJ 0D[ /RDGLQJ NJ &DUU\LQJ &DVH only ÂŁ119.95

3KRWR 3OXV

Auto Extension Tubes from Manual Extension Tubes

ÂŁ29.95 ÂŁ17.50

Lens Pockets from Square Filter Wallet Circular Filter Pouch 6HO H 6WLFN %XQGOH Spirit Levels from Bluetooth Remote Lens Pen Memory Card Case Angled View Finder

I &DPHUFUDIW 0DJD]LQH

Colours: Black, Red

&KHFN RXW RXU KXJH UDQJH RI /HQV $GDSWRUV www.srb-photographic.co.uk

ÂŁ34.95

TOP SELLER

Foundation Kit ÂŁ59.95

e* *Exclusiv

SAVE

100mm Starter Ki from ÂŁ139.95

0D[ + PP 0LQ + PP :HLJKW J 0D[ /RDGLQJ NJ &DUU\LQJ &DVH Monopod ÂŁ29.95 Feet/Stand ÂŁ14.95

P Size Hood

LEE Filters

Practical Photography, 2016

“You could easily expect to pay that for the lightweight alloy head alone�

NEW

LEE Filters 100mm System

only ÂŁ149.95

On-it Carbon Fibre Monopod

ÂŁ3.95 ÂŁ9.95 ÂŁ5.95 ÂŁ9.95 ÂŁ3.50 ÂŁ3.95 ÂŁ4.95 ÂŁ9.95 ÂŁ39.95

LEE Filters Seven5 System

Super Stopper ÂŁ99.95

ig Stopper ittle Stopper Landscape Polariser Filter Sets from Digital Starter Kit

LEE Filters SW150 System SW150 Mark II Holder ÂŁ150.00

Seven5 Holder ÂŁ59.50 Adaptor Rings ND Grads ND Filters Big Stopper Little Stopper Super Stopper Polariser Starter Kit Deluxe Kit

ÂŁ17.50 ÂŁ52.00 ÂŁ64.95 ÂŁ65.00 ÂŁ68.00 ÂŁ64.95 ÂŁ190.00 ÂŁ109.00 ÂŁ460.00

ÂŁ99.95 ÂŁ95.99 ÂŁ173.99 ÂŁ100.00 ÂŁ219.95

Mark II Adaptors Screw-in Adaptors ND Filters from Big Stopper Little Stopper Super Stopper Polariser ND Filter Sets Lightshield

ÂŁ89.95 ÂŁ64.95 ÂŁ95.00 ÂŁ132.00 ÂŁ132.00 ÂŁ129.95 ÂŁ180.00 ÂŁ249.00 ÂŁ18.00

Prices correct at time of printing; some prices are subject to change; see website for latest prices. All prices include 20% VAT. UK shipping rates apply. Product stock is subject to change. *Spend ÂŁ40 or over for free UK standard delivery. See website for operating hours, delivery times & prices, and more.


Next month

CONTACT US Practical Photography, Bauer Media, Media House, Lynch Wood, Peterborough, PE2 6EA practical.photography@bauermedia.co.uk

EDITORIAL Phone 01733 468000 Group Editor Ben Hawkins Contributing Editor Tim Berry Photoshop Editor Dan Mold Features Editor Louise Carey Gear Writer Kirk Schwarz Editorial Assistant Emily Thorpe Head of Publishing Shane Collins Senior Art Editor Chris Robinson Videographer Jake Kindred

SPE CI A L IS SU E

Be inspired!

ADVERTISING Phone 01733 395013 Group Commercial Director Charlie Brookes Commercial Manager Anna Skuse Group Sales Manager Trevor Newman Display/Classi Sales Exec Sue Hunter

Make 2018 your most creative year ever

MARKETING Phone 01733 468329 Marketing Manager Lynne Fairburn Marketing Assistant Amy Kirton Direct Marketing Manager Julie Spires Direct Marketing Executive Olivia Caouki Head of Newstrade Marketing Leon Benoiton Newstrade Marketing Manager Samantha Thompson

Q Get ideas from the world’s top pros Q Stay motivated with new projects

PRODUCTION Phone 01733 468341 Print Production Manager Colin Robinson Advertising Production Manager Zoe Bellamy Printed by Wyndeham Southern Print Distributed by Frontline

Q Take your skills to the next level

BAUER CONSUMER MEDIA Managing Director – Hobbies Nicola Bates Editorial Director June Smith-Sheppard Head of Digital Charlie Calton-Watson Group Direct Marketing Director Anne Gowan Finance Director Lisa Hayden Group Finance & Strategy Director Sarah Vickery Group Managing Director Rob Munro-Hall CEO Paul Keenan Practical Photography magazine is published 13 times a year by Bauer Consumer Media Ltd, registered address Media House, Peterborough Business Park, Lynch Wood, Peterborough, PE2 6EA. Registered number 01176085. No part of the magazine may be reproduced in any form in whole or in part, without the prior permission of Bauer. All material published remains the copyright of Bauer and we reserve the right to copy or edit any material submitted to the magazine without further consent. The submission of material (manuscripts or images etc) to Bauer Media, whether unsolicited or requested, is taken as permission to publish that material in the magazine, on the associated website, any apps or social media pages affiliated to the magazine, and any editions of the magazine published by our licensees elsewhere in the world. By submitting any material to us you are confirming that the material is your own original work or that you have permission from the copyright owner to use the material and authorise Bauer to use it as described in this paragraph. You also promise that you have permission from anyone featured or referred to in the submitted material to it being used by Bauer. If Bauer receives a claim from a copyright owner or a person featured in any material you have sent us, we will inform that person that you have granted us permission to use the relevant material and you will be responsible for paying any amounts due to the copyright owner or featured person and/or for reimbursing Bauer for any losses it has suffered as a result. Please note, we accept no responsibility for unsolicited material which is lost or damaged in the post and we do not promise that we will be able to return any material to you. Finally, whilst we try to ensure accuracy of your material when we publish it, we cannot promise to do so. We do not accept any responsibility for any loss or damage, however caused, resulting from use of the material as described in this paragraph. COMPLAINTS: Bauer Consumer Media Limited is a member of the Independent Press Standards Organisation (www.ipso.co.uk) and endeavours to respond to and resolve your concerns quickly. Our Editorial Complaints Policy (including full details of how to contact us about editorial complaints and IPSO’s contact details) can be found at www.bauermediacomplaints.co.uk Our email address for editorial complaints covered by the Editorial Complaints Policy is complaints@bauermedia.co.uk.

GUITAR TAWATCHAI

SUBSCRIPTIONS AND BACK ISSUES To ensure that you don’t miss an issue and for the best subscription offers visit www.greatmagazines.co.uk/pp For subscription or back issue queries please contact CDS Global on bauer@subscription.co.uk Phone from the UK on 0844 848 8872 Phone from overseas on +44 (0)1858 438760

Macro Turn your close-up lens on surprising subjects

FREE SOFTWARE! HDRSOFT PHOTOMATIX 5 WORTH £72

Camera know-how Learn to master metering modes Tested Fuji and Hasselblad mirrorless medium-format giants go head to head On sale 18 January 2018 PRACTICALPHOTOGRAPHY.COM 135


HUNDREDS OF PLACES WHERE YOU CAN SELL YOUR PHOTOS FOR CASH! OUT NOW! The latest edition of The Freelance Photographer’s Market Handbook Described as the photographer’s bible, this 208-page BFP Handbook has hundreds of markets where you can sell your pictures for £££s. It includes magazines, greetings card and calendar publishers, picture libraries, newspapers, book publishers etc. The Freelance Photographer’s Market Handbook gives full details of the type of photos – subject matter etc – being sought, fees paid, and exactly where to send your pictures. Price: £15.95 + £2.00 P&P

NEW! The BFP Freelance Photography Course While the BFP Handbook (above) will show you WHERE to sell your photos, this lavishly illustrated manual will show you HOW to sell them. It’s a practical course with 16 lessons covering everything you need to know to sell your pictures to magazines, greetings cards, calendars, newspapers, books etc. When ordered from the BFP, it comes with a set of tutorials to guide you through the lessons. Price: £25.00 + £2.00 P&P

SPECIAL OFFER: Join the Bureau of Freelance Photographers (BFP) and get 14 months membership for the price of 12! For almost 50 years, the BFP has been helping photographers like you to sell their photos. As well as getting the 208-page Freelance Photographer’s Market Handbook with hundreds of markets for photos, you’ll also receive our monthly Market Newsletter keeping you up to date with current picture needs. You may also take advantage of our Advisory Service offering personal help on any aspect of selling photos. All for just £54 per annum. Join now and get 14 months membership for the price of 12!

To join the BFP I To order BFP books Go to www.thebfp.com Phone 01707 651450 Or send a cheque to: Bureau of Freelance Photographers Freepost Vision House PO Box 474 Hatfield AL10 1FY


Big group test! ENTRY-LEVEL DSLR CAMERAS REVIEWED PAGE 146

GetIntoGear The most in-depth and unbiased reviews of the latest products 138

Sony _9

Sony’s latest offering boasts a 20fps blackout-free shooting speed and amazing AF tracking ability.

142

Fujifilm X-E3

With a 24.3MP sensor and a sleek design, is this your new camera?

144

146

Entry-level DSLRs

Start your DSLR journey with the best beginner camera for you.

154

Mini tests

Action cameras, digital photo frames, hard case bags, shotgun mics and more.

Olympus E-M10 MkIII

Pocket-sized and portable, but does this MkIII offer enough new features to interest you?

Our ratings

Our product awards

TIPA member

Every product is rigorously tested to bring you the most thorough reviews.

These accolades are reserved for exceptional products with unrivalled performance, build quality and value for money.

Practical Photography is a founding member of TIPA, the largest international photography awards body. Find out more about their work at tipa.com

Outstanding Excellent Solid Poor Terrible

BEST IN TEST

HIGHLY RATED

Free ebook! Camera Guide There are 78 more camera reviews on your disc/ download – every DSLR and CSC model you can buy right now!

PRACTICALPHOTOGRAPHY.COM 137


GetIntoGear

1

24.2MP sensor

2

4K UHD video

Sony is renowned for its high-resolution sensors. However, the _9’s lower resolution still offers excellent images, while facilitating the rapid shooting speeds.

1

As well as providing a truly unique performance for high-speed scenes, the _9 manages 4K UHD video at 30fps, as well as Full HD up to 120fps, allowing for slow motion capture.

3

693-point AF

2 HIGHLY RATED

One of the big benefits of mirrorless cameras is the ability to cover more of the sensor with AF points. Sony’s 693 phase detection points manage to fill 93% of the effective frame.

3 BODY PRICE

£4499 IMAGE RESOLUTION

24.2MP VIDEO

4K UHD SON Y

_9

The need for speed

4

Offering an insane 20fps blackout-free shoo amazing AF tracking ability, Kirk Schwarz as Sony _9 really will bring the reign of the DS ROM ITS HUMBLE beginnings as an electronics shop in 1946, Sony has become one of the most diverse and successful companies on the planet. However, it wasn’t until it acquired Konica Minolta in 2006 and released the _100 DSLR that it became a serious contender in the photography market. Sony is now the world’s third largest camera manufacturer and dominates the full-frame mirrorless market with

F

138 PRACTICAL PHOTOGRAPHY

its _7R and _7S ranges. Even so, the buzz that met the _9’s announcement took us by surprise, and led to it being referred to as the DSLR killer...

Main features After its announcement, the photography community quickly labelled the _9 the DSLR slayer, thanks to the CSC’s insane array of impressive features. It offers an astonishing 20fps shooting speed, which is totally blackout-

based phase detection and an AF calculation rate of 60fps, which is virtually uninterrupted

The layout of the

_9’s intuitively designed top-plate should please most users, being compact, intuitive and simple.


CA MER A TEST

Who’s afraid of the dark?

IMAGE QUALITY

We took the _9 along to Stamford RUFC’s training ground to really test its sports shooting ability. This shot was illuminated by nothing but the floodlights, with the ISO set to pping 8000. We had tinuous focus selected nd turned the burst mode to high (aka 20fps). Even in such dark conditions the focus was very impressive, with a good hit-rate. Zooming n reveals some noise, ut considering the ditions it’s extremely respectable, with edges retaining their clarity well.

“693 PHASE DETECTION AF POINTS OFFER A MASSIVE 93% COVERAGE OF THE ENTIRE 35MM FRAME” and allows for quick and accurate focusing. The Eye AF is already much lauded, and is said to be 30% more accurate than Sony’s previous attempts. It maintains focus tracking even when the head isn’t perfectly straight-on, making it very impressive. Under the hood you’ll find the world’s first 24.2MP 35mm stacked CMOS sensor with integral memory, which Sony promises gives readout speeds 20x faster than previous designs. The sensor is powered by a Bionz X processing engine that provides brilliant support for its power-hungry features.

dust- and moisture-resistant. The 1440k-dot 3in rear touchscreen tilts out to 107° upwards and 41° downwards, as well as allowing for touchfocusing. It also includes a rear thumbstick for focusing and menu control, as well as customisable function buttons to assign your most-used settings to. There’s no denying that this camera feels great, though it’s not designed to be a lightweight travel compact. However, at a respectable 673g it is 200g lighter than

the Canon 5D MkIV and virtually half the weight of its intended rivals, the Canon 1D X MkII and Nikon D5.

Performance

The _9 isn’t the easiest camera to transition to from your current DSLRs. Although the basic operation of any camera is the same, if you’re not accustomed to Sony’s CSCs then the _9 takes quite a bit of getting used to. The menu is incredibly in-depth and not what you’d call beginnerfriendly. That said, once you’ve found your feet, there’s no denying the power on offer. The first thing we tried out was the much-hyped Eye AF. The precision and consistency of tracking a person’s face automatically is, quite simply, astonishing.

Above Setting the camera to its highest burst rate results in a blistering, blackout-free 20fps. It achieves this by using the silent electronic shutter.

Tech Focus Rolling shutter

Handling & build You can’t deny that Sony makes attractive cameras, and the _9 is no exception to the rule. It also feels compact in-hand, but extremely sturdy and reliable at the same time. The body is encased in a magnesium alloy structure or maximum durability, and it’s been designed to be both

Perhaps the biggest drawback of an electronic shutter, which fuels the _9’s ability to capture 20fps, is rolling shutter. This happens when you’re shooting a scene with high-speed elements. Because the electronic shutter reads a scene by scanning the sensor top to bottom, one line at a time, an object in motion may have moved between the start of the scan and the end, often ending up with soft results. Luckily, the _9 features a higher than average curtain speed, which drastically reduces the possibility of rolling shutter. While it may still occur, we didn’t see any in testing.

PRACTICALPHOTOGRAPHY.COM 139


GetIntoGear

5

3in tilting touchscreen

While not a massive draw for traditional action photographers, the inclusion of a very responsive 1440k-dot touchscreen is a nice touch. It allows touchfocusing for those times when you have a subject that doesn’t seem to be in a real hurry.

6

6

Excellent EVF

The 3686k-dot EVF is among the best we’ve seen, and the 0.78x magnification really brings the scene to life. It is also virtually lag-free, with the entire experience feeling closer to an optical finder than ever before.

And as such the implications for shooting weddings, events or portraits where you want to maximise your in-focus shot ratio, are massive. We found it worked well even in low light conditions, and it genuinely makes us excited for the torrent of

ALSO CONSIDER THESE

5

future Sony releases. The 20fps blackout-free shooting is also incredible, if not a little unnerving at first. Having spent years reacting to the closing of the viewfinder after every shot, this is an eye-opener, though it does take a little getting

used to. Thanks to the 60fps AF calculations, shooting continuous focus at sporting events or on wildlife shoots is a real game-changer. If you’re looking for a camera that can keep up with high-octane action, then the _9 is definitely for you.

Last Action Heroes

Nikon D5 £5389 Nikon’s flagship body, the D5, is a pairing of speed and precision that’s hard to beat. It boasts a 20.8MP full-frame sensor, 153-point AF system and 12fps burst mode. It also offers Nikon’s highest ever standard ISO sensitivity of 102,400, and a 3.2in 2359k-dot rear touchscreen. Can be paired with a huge number of excellent lenses. nikon.co.uk

140 PRACTICAL PHOTOGRAPHY

Canon 1D X MkII £4799 Canon’s top-flight pro DSLR, the 1D X MkII, is designed for high-end photography and can be found in the bags of sports photographers the world over. Featuring a 20.2MP sensor, 4K UHD video at 60fps and a 14fps continuous shooting speed, it’s ideal for capturing fast-paced action. It also has an excellent range of pro glass to choose from. canon.co.uk

The 24.2MP stacked CMOS sensor, while not as high resolution as Sony’s other offerings, produces exceptionally high quality images, and really earns its sterling reputation. Images are sharp, with beautiful tonal renditions and a colour profile that shows just how far Sony has come in the last decade. An in-built 5-axis image stabilisation is also a real boon for those who are looking to get stable shots with slower shutter speeds, or working handheld under floodlights, with the system managing to offer 5 stops of stabilisation. If you need excellent low light performance, the native ISO ranges from 100-51,200, but this can be expanded to 204,800 when you’re desperate for that must-have shot. This is an area where the _9 performs incredibly well, with images looking good up to ISO 6400. ISO 12,800 is still impressive, with edges appearing relatively sharp, but there is very noticeable colour noise creeping in. At


CA MER A TEST

Get it right in-camera

IMAGE QUALITY

This image of a back-lit horse would present a challenge for most cameras, but the _9 deals with contrast very well and the 24.2MP sensor offers excellent image quality. However, files that need excessive exposure correction won’t fare as well. The was shot against the sunset with the y in silhouette. Ordinarily, we’d bring ut more detail in the shadows, since ighlights are much less receptive. However, because the _9 is ISOvariant, increasing the exposure values in post-processing will result n a considerable amount of noise. nything over +1EV results in messyking images. This isn’t a massive and so long as you know your limits and try to get your images right in-camera, you’ll be fine.

“A BLACKOUT-FREE 20FPS CONTINUOUS SHOOTING SPEED IS A GAME-CHANGER FOR SPORTS SHOOTERS” 25,600 the colour noise is very strong – albeit useable if you’re desperate – but beyond this the quality drops steeply. I did manage to get functioning shots at ISO 8000, with a liberal amount of noise reduction in Photoshop. But it proves the _9 has the necessary chops. Despite the obvious specs appeal and unquestionable performance, there are a few things on the _9 that disappoint. The dynamic range, while very respectable, is a step down from that found on the Sony _7R II or Nikon D850. However, it’s on a par with the Canon 1D X MkII and slightly better than the Nikon D5 according to DXO, who scored it as 13.3 stops. The _9 hasn’t been designed as a landscape camera though, so it’s far from off-putting. Unlike other Sony CSCs and full-frame DSLRs, such as the _7R II, the _9 is ISO-variant. This means you will struggle to pull much information out of the

shadows in post-processing. Actually increasing the exposure values of the RAW will result in a lot of noise artefacts, which wouldn’t be present at the equivalent ISO in-camera. The moral of this story is get it right in-camera. Though it would have been nice if the camera was ISO-invariant (like the _7R II), as this would open up a world of possibilities when it comes to shooting for the edit, we doubt this will prove much of a deterrent for the target audience of pro action shooters. Despite a couple of flaws, this camera is a giant leap in the right direction, and able to go toe-to-toe with the existing industry heavyweights.

Verdict

At £4499, the Sony _9 divides the crowd into two distinct types – those who need it and those who don’t. If you’re in the former camp then we wouldn’t hesitate in recommending it, especially as it’s still cheaper than the Canon 1D X MkII and Nikon D5. This is a camera with a specific design and true sense of purpose. It’s been created for capturing fast-moving objects, and giving top-flight professional action photographers a viable mirrorless alternative. Of course, it was also meant to put fear into the hearts of Canon and Nikon, and judging by the full-frame mirrorless offerings we know they both have slated for 2018, it’s done that job beautifully. Whether the old guard are ready to hang up their mirrors and take a step into the future of photography, however, is yet to be seen.

TECH SPEC Camera: Sony _9 Price: £4499 (body only) Effective resolution: 24.2MP Sensor: 35.6x23.8mm CMOS Processor: Bionz X LCD: 3in 1440k-dot tilting touchscreen Shutter: Bulb, 30-1/8000sec mechanical, 30-16,000sec electronic Autofocus: 693-point phase detection ISO: 100-51,200 (expands to 50-204,800) Shooting speed: 20fps Video: 4K UHD at 30fps, Full HD at 120fps Pop-up flash: No Other features: Eye AF tracking, Picture Effects Connectivity: Wi-Fi, NFC, Bluetooth Battery life: 480 shots Card type: MemoryStick Pro Duo/Pro-HG Duo/Micro, SD/HC/XC, microSD/HC/XC Size (WxHxD): 127x96x63mm Weight: 673g Web: sony.co.uk

THE VERDICT SONY _9

HANDLING FEATURES

PROS 20fps continuous blackout-free shooting speed 693-point AF system Accurate Eye AF Sturdy construction Excellent image quality

IMAGE QUALITY

CONS ISO-variant Not the greatest dynamic range Limited battery life Expensive for enthusiasts

OVERALL SCORE

VALUE FOR MONEY

PRACTICALPHOTOGRAPHY.COM 141


GetIntoGear

1

Compact and capable

At only 337g, this is the smallest X Series camera with a viewfinder. A remarkable feat when you see the image quality.

2

1 2

24.3MP sensor

An X Series staple, the third iteration of the X-Trans sensor offers 24.3MP and a native ISO of 200-12,800. This inclusion puts the X-E3 on a par with the likes of the powerhouse X-T2 or X-Pro2.

KIT PRICE

£1249 IMAGE RESOLUTION

24.3MP

3

Touchscreen

Having removed the additional function buttons, a majority of control is now assigned to the 3in 1040k-dot LCD. Luckily, it works very well, and swiping in different directions will bring up a host of control options.

VIDEO

4K UHD

3

FUJIFILM X-E3

You’ve got the touch Ditching most of its buttons in favour o resulted in the sleekest X Series yet, but will the gamble pay off for the X-E3? Kirk Schwarz takes a closer look. UTTONS ARE A big thing in the world of cameras, and Fujifilm has been praised a lot in the past for including fully customisable function buttons on its releases. But the times, they are a-changing...

B

Main features The X-E3 is the latest addition to the X Series line-up, and it stands out from its predecessors as it has dropped most of the

142 PRACTICAL PHOTOGRAPHY

physical function buttons and D-Pads in favour of a touchscreen. As such it feels like quite the minimalist statement piece, albeit still with the sleek styling of its X Series stablemates. Pop the hood and you’ll find the same 24.3MP X-Trans CMOS III sensor that’s in the higher specced X-T2. A retuning of the AF system now offers an improved 0.06sec AF speed and higher accuracy. This same update also dramatically improves the

AF tracking capabilities. The continuous shooting is capable of 14fps using the electronic shutter, or a respectable 8fps in mechanical mode. The ISO range of 200-12,800 still offers some of the best low light performance in its class, and can be extended to 51,200. For anybody who likes the prospect of capturing more video on their travels, the X-E3 features 4K UHD recording at 30fps, or Full HD at 60fps.

4

A speedy twist

Although mainly touch controlled, the X-E3 still retains the shutter speed and mode dials – perfect for quick changes mid-shoot.

4


CAMER A TEST

Punching above As we’ve come to expect from the X-Trans III sensor, the X-E3 uses its 24.3MP very well. Fujifilm is highly regarded for both its dynamic range as well as its colour rendition, this compact CSC will produce sults right up there with the X-Pro2 or X-T2, sharing many of their core strengths. The ability to use your finger to control the focus points and command the shutter is great. While certainly nothing new, it does add an extra layer of ccessibility to anybody looking an everyday walkabout camera, entry to photography in general, without too many confusing buttons. We also love Fujifilm’s Film Simulation modes, which allow you to add creative colour profiles to your JPEGs. These are designed to give the effect of the company’s old film stock, and look great.

IMAGE QUALITY

Handling & build You’ll immediately notice how light and petite this camera is. At only 337g, it feels like a palm-friendly companion for long days of travel. Mixing magnesium alloy and plastic gives the construction a sturdy feel, while the lack of rear controls offers an extra 43% of room over its predecessor, making it viable for those with larger hands. I was a lot more comfortable with the smaller form than I expected to be.

Performance If you’ve shot with the Fujifilm X-Trans III sensor, you’ll find no surprises here. The image quality is brilliant, and low light performance is very impressive. You’ll be creating images as good as the Fujifilm X-Pro2 for a fraction of the cost. The improved autofocus performance is extremely evident. It doesn’t offer the fastest focusing in the world, but does a very good job and managed accurate acquisition in dark situations during testing. The biggest elephant in the room is the heavy reliance on the 3in 1040k-dot touchscreen, where anything less than excellent is a deal-breaker. Luckily, Fujifilm knows this, and the functionality is top

drawer. As well as allowing you to change focus points at the touch of a finger, or review images as if you were using a smartphone, it also houses extra features. When you swipe across the screen, you’ll get different menus, which display all the controls you’d associate with the function buttons. These include ISO, Film Simulation mode and Drive modes. The swipe didn’t work 100% of the time, but it was responsive enough to put me at ease. We would have liked a tilting screen, but instead it’s fixed. The welcome addition of a joystick on the back of the camera makes changing focal points easy, and offers plenty of precision when browsing the menus. The classic rangefinder inspiration, as seen in the X-Pro series, is very apparent, although the X-E3 doesn’t share the same hybrid EVF enjoyed by its more expensive brother. That said, the 2639k-dot EVF

boasts a respectable 0.62x magnification and feels crisp. The light and compact size works to the X-E3’s advantage, making it incredibly inconspicuous out in the street. Most of the existing Fujifilm lenses sit well on the camera, though the bigger zooms are a bit top heavy. The battery life is also wanting, offering up just 350 shots from a full charge. Sadly, this is still to be expected from most CSCs.

TECH SPEC Camera: Fujifilm X-E3 Kit lens: XF 18-55mm f/2.8-4 R LM OIS Price: £1249 Effective resolution: 24.3MP Sensor: 23.5x15.6mm CMOS Processor: X-Processor Pro LCD: 3in 1040k-dot touchscreen Viewfinder: 2360k-dot EVF Shutter: Bulb, 15min-1/4000sec Autofocus: 325-points, with central 91-point being phase

Verdict

detection

While it may be the new boy on the block, the X-E3 offers the same impressive image quality as the X-T20, though for a slightly higher price point. The increased AF performance and improved touch systems make it stand out, and these are expected to be rolled out across the X Series via firmware updates very soon. If you’re looking for a solid walkabout camera with intuitive touch controls, you won’t go wrong with an X-E3.

ISO: 200-12,800 (expands to 100-51,200) Shooting speed: 14fps for 22 RAWs or 35 JPEGs Video: 4K UHD at 30fps, Full HD at 60fps Connectivity: Wi-Fi, Bluetooth Pop-up flash: No Other features: Film simulation modes, Panorama Battery life: 350 shots Card type: SD, SDHC, SDXC Size (WxHxD): 121x74x43mm Weight: 337g Web: fujifilm-x.com

THE VERDICT FUJIFILM X-E3

HANDLING

PROS Good low light performance Excellent touchscreen Quick and accurate AF Impressive image quality Lightweight and compact

IMAGE QUALITY

CONS Battery life could be better Bigger lenses feel a bit unbalanced No tilting screen

OVERALL SCORE

FEATURES

VALUE FOR MONEY

PRACTICALPHOTOGRAPHY.COM 143


GetIntoGear

1

Lightweight

Weighing in at a svelte 410g, this is the perfect camera for those who want to traverse foreign shores but don’t want much extra weight.

2

2

16MP resolution

16MP may be a bit dated in today’s resolution race, but the MkIII manages to create some excellent images which should be enough to please even the most critical of photographers.

1 3 KIT PRICE

3

Versatile lens

The included M.Zuiko Digital ED 14-42mm f/3.5-5.6 EZ lens offers a 35mm equivalent of 28-84mm. This makes it ideal for capturing a wide variety of shots, including street, landscapes and portraits.

£649 IMAGE RESOLUTION

16.1MP VIDEO

4K UHD

OLY MPUS OM-D E-M10 MK III

Mounting inspiration

4

The E-M10 has always been a popular CSC, but with the MkIII sharing many of the same features as its predecessor, is this new version worth the upgrade? Kirk Schwarz finds out. LYMPUS FIRST released the pocket-sized E-M10 back in 2014. Designed to bring the experience of the flagship E-M1 to the masses, its beginner-friendly feature set was aimed squarely at those taking their first steps in photography. The MkIII still embodies this ethos, and retains a very similar spec list to its predecessors, preferring subtle refinements over radical redesign.

O

144 PRACTICAL PHOTOGRAPHY

Main features The Micro Four Thirds sensor is the same 16.1MP sensor found in both previous models, although this time it uses the TruePic VIII processing engine. It also shares the MkII’s ISO range of 200-25,600, as well as 5-axis in-built image stabilisation, which provides 4 stops of compensation. The EVF and rear tilting touchscreen boast 2360k-dot and 1040k-dot resolutions respectively. Luckily, there are some

new inclusions, such as the 4K UHD video recording at 30fps, a deeper grip and 121-point contrast detection AF system, up from the MkII’s 81 points. The burst speed now manages a fractionally higher 8.6fps in high burst, up from 8.5fps.

Handling & build One area which has received noticeable attention is the design. The MkIII has a larger front grip, which aims to improve the ergonomics. This results in

In-built IS

The in-body 5-axis image stabilisation allows 4 stops of compensation – perfect for handheld shooting.

4


CA MER A TEST

Still a contender The first thing that struck us about the OM-D E-M10 MkIII was the puzzling inclusion of the same 16MP resolution found in its previous two models. However, while the market is heading towards the mid-20MP mark, the Olympus just manages to earn its keep. The quality is very respectable, especially if you’re using it as a walkabout camera. The ability to recover highlights and shadows from RAW files is surprisingly good, and the dynamic range appeared to be solid, his backlit shot into the sun e to capture a good amount of nformation. The 14-42mm kit lens produced some sharp images, and once you get used to the layout (which is part CSC and part compact), switching settings on the fly is very easy. Overall, this is still brilliant option as a catch-all vel camera.

IMAGE QUALITY

a 20g weight boost to 410g, but in practice you won’t feel any difference in handling. Olympus has dropped four of the previous six function buttons, which may irritate some, but makes it an even less intimidating camera for beginners. Overall, the new grip and refined style definitely add something.

Performance The MkIII performs identically to the previous version in almost every way, which isn’t actually a bad thing. The autofocus is responsive in good light, and the additional 40 AF points give you better frame coverage. The auto-tracking modes also work pleasingly well, though there are times when it struggles with fast-moving objects, and obviously isn’t designed for action shots. While there may be four fewer customisable function buttons, this does lessen the confusion for anybody who wants to concentrate on the shooting. Similarly, the D-Pad’s functions are clearly labelled, which is great for de-mystifying some of the operations for those stepping up from smartphones and compact cameras. The menu system is also new, sharing similarities with the flagship

E-M1 MkII, though with less to choose from. Olympus has even made it easier to understand some of the menu options, and included brief mode explanations. The upgraded AF makes full use of the TruePic VIII sensor, and the extra 40 points make a noticeable difference. Even with a backlit subject the focus was effective. However, since it is contrast and not phase detection, there will be times when it struggles, such as in low light or with similar coloured subjects and backgrounds. We were satisfied with the results from our tests though. It also feels speedy and responsive in day-to-day use, and should suit its target audience. Though a focus selection joystick would be a great addition in future models, one feature really conspicuous by its absence is the ability to manually choose between left and right eye priority face detection (though the

camera will still do this automatically). We can only assume this is another step to simplify the shooting process for newcomers. The Art Filters which apply colour presets to your JPEGs now also include the Bleach Bypass option, though some of these filters are a little over the top for us.

TECH SPEC Camera: Olympus OM-D E-M10 MkIII Kit lens: M.Zuiko Digital ED 14-42mm f/3.5-5.6 EZ Price: £649 Effective resolution: 16.1MP Sensor: Micro Four Thirds Processor: TruePic VIII LCD: 3in 1040k-dot

Verdict

tilting touchscreen

This is a very capable camera which should appeal to beginners and mid-level enthusiasts alike. However, 16MP seems a little old hat, as the majority of cameras now come with sensors capable of 20MP and above. The inclusion of 4K UHD video does bring it in line with many of its competitors though. While we doubt it will justify an upgrade for MkII users, this is a solid camera for anybody looking for their first CSC, and you certainly won’t be disappointed with the images you can create.

Viewfinder: 2360k-dot EVF Shutter: Mechanical 60-1/4000sec, Electronic 30-1/16,000sec AF: 121-point contrast detect ISO: 200-25,600 Shooting speed: 8.6fps for 22 RAWs and unlimited JPEGs Video: 4K UHD at 30fps, Full HD at 60fps Connectivity: Wi-Fi Pop-up flash: Yes Other features: Time-lapse Battery life: 330 shots Card type: SD, SDHC, SDXC Size (WxHxD): 122x84x50mm Weight: 410g Web: olympus.co.uk

THE VERDICT OLYMPUS OM-D E-M10 MKIII

HANDLING

PROS Intuitive ergonomics Excellent touchscreen 4K video Lightweight and compact Easy to use for all skill levels

IMAGE QUALITY

CONS 16MP feels a bit low resolution Not a big update over the MkII Limited battery life

OVERALL SCORE

FEATURES

VALUE FOR MONEY

PRACTICALPHOTOGRAPHY.COM 145


10

BEST VALUE ENTRY-LEVEL DSLR KITS

146 PRACTICAL PHOTOGRAPHY


ENTRY-LEVEL DSLRS

Are you the kind of person who uses their smartphone more for taking brilliant shots of your travels, and less for calling your friends? Do you wish you had a slightly better camera, but aren’t sure where to start? While there’s nothing wrong with a phone or compact camera, it’s the step up to the larger APS-C sensors that will give you an instant boost in image quality, and results that’ll astound your friends and family. And as well as producing professionallooking results, DSLRs often have a much greater range of features and functions, so are great for learning and getting more creative too. Let’s take a look at the 10 best value entry-level DSLRs available right now. IN TH E TEST Canon 1300D...................................................£359 ...... P148 Sony _68..........................................................£499 ...... P148 Canon 800D.....................................................£769 ...... P149 Nikon D5300....................................................£529 ...... P149 Nikon D3300....................................................£499 ...... P150 Canon 77D .......................................................£839 ...... P150 Nikon D3400....................................................£429 ...... P151 Pentax K-S2 ....................................................£679 ...... P151 Nikon D5600....................................................£729 ...... P152 Canon 200D.....................................................£539 ...... P152

HOW WE TESTED THE CAMERAS IMAGE QUALITY Each of these cameras has gone through our rigorous testing process. We’ve looked at image quality, sharpness and low light ISO performance, and rated each camera for its abilities. FUNCTIONALITY AND USE We also took into account additional functions, such as touchscreens, button layout and guided menus, which all make the DSLR experience much less intimidating. When we had decided which cameras gave the best user experience, we added our findings to our image quality and price info and rated the cameras accordingly.

PRACTICALPHOTOGRAPHY.COM 147


GetIntoGear

#10

C A NON

#9

KIT LENS

KIT LENS

18-55MM F/3.5-5.6 IS II

18-55MM F/3.5-5.6 SAM DT II

SON Y

1300D £359

_68 £499

Released in mid-2016, the 1300D isn’t quite as advanced as its newer stablemates, and as such packs the older Digic 4+ processor alongside its 18MP sensor. Capable of 3fps, it has an ISO range of 100-6400 for low light photography, which is the lowest here. The 1300D captures Full HD video at 30fps, not the 60fps of its younger siblings, and the 3in 920k-dot rear screen doesn’t flip out or support touch functions, which are welcome inclusions on more modern versions. And while it features the same 9 AF points as the 200D, it lacks Dual Pixel AF – something that has been applauded in the more recent releases. The less advanced featureset prevents the 1300D sitting any higher on our list, but don’t be fooled – this is still a camera that’s capable of creating high-quality images and giving the newer models a run for their money. Take the price and potential image quality into consideration and this becomes a decent choice for th

This 24.2MP SLT (semi-translucent camera) includes a 1440k-dot EVF, which is the only electronic viewfinder in test. This means you can see the effect your settings have on a shot before you take it, which really helps with the learning process. The camera boasts a massive 79-point AF system and a rapid best in test 8fps continuous shooting speed, making it great for capturing action. Like the other DSLRs here, it offers Full HD video but manages an impressive 60fps. It also comes with a top-mounted LCD and image stabilisation – perfect for handheld and slower shutter speeds. The 2.7in rear screen works well, but lacks touch functionality, and at 460k-dot offers the lowest resolution here. The _68 also lacks Wi-Fi, so you have to physically download images from the card. While capable of brilliant image quality, Sony has moved on to mirrorless now so you may feel a little u

PROS Inexpensive Excellent lens range Image quality CONS No touchscreen No Dual Pixel Only 9-point AF

SPEC Resolution: 18MP Sensor: 22.3x14.9mm LCD: 3in 920k-dot ISO: 100-6400 (expands to 12,800) Shooting speed: 3fps for 6 RAWs or 1110 JPEGs Autofocus: 9-point contrast detection Video: Full HD 30fps Pop-up flash: Yes Battery life: 500 shots Card type: SD, SDHC, SDXC Size (WxHxD): 129x101x78mm Weight: 485g canon.co.uk

RATING

CONS Low-res screen No touchscreen No Wi-Fi connectivity

SPEC Resolution: 24.2MP Sensor: 23.5x15.6mm LCD: 2.7in 460k-dot ISO: 100-25,600 Shooting speed: 8fps for 8 RAWs or 112 JPEGs Autofocus: 79-point phase detection Video: Full HD 60fps Pop-up flash: Yes Battery life: 580 shots Card type: MemoryStick Pro-HG Duo/Pro Duo/XC-H, SD/HC/XC Size (WxHxD): 143x104x83mm Weight: 675g sony.co.uk

RATING

SUGGESTED LENS SIGMA 70-300MM F/4-5.6 DG MACRO £129

SUGGESTED LENS SONY DT 50MM F/1.8 SAM £129

Sigma’s large focal length telephoto is ideal for anybody who has an interest in wildlife or sports photography, thanks to its massive zoom range.

The 50mm is a brilliant lens that’s suitable for many everyday shots. Being a prime lens, it works well in low light and produces sharp results.

148 PRACTICAL PHOTOGRAPHY

PROS 79-point AF EVF 8fps burst


ENTRY-LEVEL DSLRS

#8

C A NON

#7

KIT LENS

KIT LENS

18-55MM F/3.5-5.6 IS STM

18-55MM F/3.5-5.6 G AF-P VR

N I KON

800D £769

D5300 £529

Though more advanced than the 200D, the 800D retains many easy-to-use controls. It boasts the same 24.2MP sensor as the 80D, an 100-25,600 ISO range and 49-point Dual Pixel AF. Like the 200D and 77D, the 3in 1040k-dot rear vari-angle touchscreen flips out to 180° for any adventurous vloggers. Unlike the 200D, using the 800D’s optical viewfinder will offer you a bigger choice of 45 AF points. It also manages a maximum 6fps shooting speed in burst mode, which is great for anyone capturing action shots. Full HD movies can be filmed at 60fps, and there’s a time-lapse option which takes individual shots and stitches them together in-camera. The camera’s guided menus provide graphic explanations of shutter speed and aperture. This is a very handy feature if you’re just learning, though you can turn them off should you wish. The 800D is a great camera, though it shares too many similarities with the 200D and 77D to really make it stand out in this line-up.

The D5000 series is a step up from Nikon’s most basic models, and as such some of the features are better suited to helping in the creative learning process. The D5300 still features a 24.2MP sensor and Expeed 4 processor, but it also includes a 39-point AF system, giving you more individual points to nail pin-sharp focus every time. The ISO ranges from 100-12,800, allowing for handheld shots in darker conditions, while the rear screen is a 3.2in 1037k-dot vari-angle LCD. Being able to flip the screen 180° is a great option for avid bloggers who want to appear in-shot. The D5300 boasts a 5fps continuous shooting speed, which is easily enough to tackle most of your action requirements. Due to its more enthusiast-aimed design, it doesn’t have the guided menus found in Nikon’s D3300 and D3400, but otherwise it’s a solid all-round camera which will serve you well for years to come

PROS Shooting speed Dual Pixel AF Guided menus CONS Expensive A bit plasticky Not unique enough in its class

SPEC Resolution: 24.2MP Sensor: 22.3x14.9mm LCD: 3in 1040k-dot vari-angle touch ISO: 100-25,600 (expands to 51,200) Shooting speed: 6fps for 27 RAWs or unlimited JPEGs Autofocus: 45-point cross-type Video: Full HD 60fps Pop-up flash: Yes Battery life: 600 shots Card type: SD, SDHC, SDXC Size (WxHxD): 131x100x76mm Weight: 540g canon.co.uk

RATING

PROS 39-point AF Good ISO range Tilting screen CONS No touchscreen No guided menus Snapbridge software

SPEC Resolution: 24.2MP Sensor: 23.5x16mm LCD: 3.2in 1037k-dot vari-angle ISO: 100-12,800 (expands to 25,600) Shooting speed: 5fps for 13 RAWs or 100 JPEGs Autofocus: 39-point phase detection Video: Full HD 60fps Pop-up flash: Yes Battery life: 600 shots Card type: SD, SDHC, SDXC Size (WxHxD): 125x98x76mm Weight: 530g nikon.co.uk

RATING

SUGGESTED LENS CANON EF 40MM F/2.8 STM £189

SUGGESTED LENS NIKON AF-S DX 18-105MM F/3.5-5.6G ED VR £239

This pancake lens is perfect if you’re trying to keep a low profile. It offers an effective focal length of 64mm, so is great for portraits or candid shots.

A true all-rounder, this lens lets you capture anything from epic landscapes to up-close wildlife, thanks to a massive zoom range and image stabilisation.

PRACTICALPHOTOGRAPHY.COM 149


GetIntoGear

#6

N I KON

#5

KIT LENS

KIT LENS

18-55MM & 70-300MM

18-55MM F/3.5-5.6 IS STM

C A NON

D3300 £499

77D £839

Nikon’s basic entry-level DSLR features a 24.2MP APS-C sensor and is capable of shooting with an ISO range of 100-12,800, making it great for shooting after sunset or indoors. It shares design cues with Nikon’s more advanced line-up of cameras, so is ideal for anybody looking to progress with their passion. Unlike Canon’s layout, the Nikon has both front and rear thumbwheels for easily changing settings on the fly. The D3300’s menu is clearly aimed at the beginner end of the market though, with a guide mode that explains some of the functions in easy to understand graphics. The camera should appeal to action or sports fans, due to the Expeed 4 processor that powers an 11-point AF system and 5fps continuous shooting. The 3in 921k-dot LCD doesn’t boast touchscreen functionality, and is lower resolution than others in test, but it stills looks great and manages to

The most advanced Canon on this list – moving towards enthusiast-level – the 77D features the same 24.2MP sensor found in the 80D, an ISO range of 100-25,600 and a Digic 7 processor, all of which are found in the 200D and 800D. It also shares the same increased 6fps burst mode and 45-point optical viewfinder AF as the 800D. The excellent Dual Pixel AF lets you use the 3in 1040k-dot 180° vari-angle touchscreen to choose your focus point, and the AF manages a rapid 0.03sec focusing speed. Though it shares many similarities with the 200D and 800D, the design of the 77D sets it apart. You’ll find a nod to the more traditional DSLR layouts. These include the rear wheel, similar to the 5D series, and the LCD on the top-plate, which shows your settings and assorted information. These added design cues help to give the 77D a more professional feel. However, this is reflected in the price, with this being the most expensive camera in test.

PROS 5fps burst Guided menus Good ISO performance CONS Only 11 AF points No touchscreen No tilting screen

SPEC Resolution: 24.2MP Sensor: 23.5x15.6mm LCD: 3in 921k-dot tilting ISO: 100-12,800 (expands to 25,600) Shooting speed: 5fps for 11 RAWs or 100 JPEGs Autofocus: 11-point phase detection Video: Full HD 60fps Pop-up flash: Yes Battery life: 700 shots Card type: SD, SDHC, SDXC Size (WxHxD): 124x98x76mm Weight: 460g nikon.co.uk RATING

CONS Similar to 800D Expensive May intimidate new users

SPEC Resolution: 24.2MP Sensor: 22.3x14.9mm LCD: 3in 1040k-dot vari-angle touch ISO: 100-25,600 (expands to 51,200) Shooting speed: 6fps for 27 RAWs or unlimited JPEGs Autofocus: 45-point cross-type Video: Full HD 60fps Pop-up flash: Yes Battery life: 600 shots Card type: SD, SDHC, SDXC Size (WxHxD): 131x100x76mm Weight: 540g canon.co.uk

RATING

SUGGESTED LENS NIKON AF-S DX 35MM F/1.8G £189

SUGGESTED LENS CANON EF-S 24MM F/2.8 STM £134

35mm is an ideal focal length to capture the world around you – able to perfectly frame landscapes, portraits and street shots with ease.

This discrete pancake lens offers a 35mm equivalent focal length of 38mm, making it a perfect all-rounder for travel or day-to-day use.

150 PRACTICAL PHOTOGRAPHY

PROS Top-plate LCD Touchscreen Dual Pixel AF


ENTRY-LEVEL DSLRS

#4

N I KON

#3

KIT LENS

KIT LENS

18-55MM F/3.5-5.6 G AF-P VR

18-50MM F/3.5-5.6 AL WR

PENTA X

D3400 £429

K-S2 £679

This step up from the D3300 shares a number of similarities with its predecessor, and is still capable of creating great images. It features a 24.2MP sensor and Expeed 4 processor, and manages to capture a very respectable 5fps in continuous shooting mode. The guided menu function makes light work of getting to grips with the various settings, while the Wi-Fi and Bluetooth let you transfer JPEGs straight to your phone for sharing on social media. The updated low-energy design and new battery enables 1200 shots on a single charge, which is a real bonus on long days shooting out on location. The camera offers Full HD at 60fps, which rivals the best in test. This is ideal for budding film-makers who want to dabble in both stills and video. Though there’s not much to distinguish this model from its predecessor, both give great results for the price and are a staple of b ddi h h h e.

This often overlooked gem is the only camera in test which comes with weather sealing, so is designed specifically to perform in inclement conditions. Its 20.1MP sensor is lower than others in test, but still manages to create detailed images. The native ISO range of 100-51,200 is the highest in test though, allowing you to take brilliant shots when the light starts to disappear. The 11-point autofocus uses Pentax’s phase matching AF system, which is impressively accurate. The vari-angle 3in 921k-dot screen is among the lowest resolution LCDs here, but still looks good and offers unique compositions thanks to its tilting mechanism. There is also in-built image stabilisation, offering 3.5-stops of compensation, so you can shoot handheld at lower shutter speeds than usual. The K-S2 is a very capable camera, though it lacks the lens range and progression that either Canon or Nikon kits provide.

PROS ISO performance 5fps burst Battery life CONS Plasticky No touchscreen Very similar to D3300

SPEC Resolution: 24.2MP Sensor: 23.5x15.6mm LCD: 3in 921k-dot vari-angle ISO: 100-25,600 Shooting speed: 5fps for 17 RAWs or 100 JPEGs Autofocus: 11-point phase detection Video: Full HD 60fps Pop-up flash: Yes Battery life: 1200 shots Card type: SD, SDHC, SDXC Size (WxHxD): 124x98x76mm Weight: 445g nikon.co.uk

RATING

PROS High ISO range Fast shooting speed Weather sealing CONS No touchscreen Battery life Lower resolution

SPEC Resolution: 20.1MP Sensor: 23.5x15.6mm LCD: 3in 921k-dot vari-angle ISO: 100-51,200 Shooting speed: 5.4fps for 5 RAWs or 20 JPEGs Autofocus: 11-point (9 cross-type) Video: Full HD 30fps Pop-up flash: Yes Battery life: 480 shots Card type: SD, SDHC, SDXC Size (WxHxD): 123x91x73mm Weight: 678g ricoh-imaging.co.uk

RATING

SUGGESTED LENS TAMRON 70-300MM F/4-5.6 DI £129

SUGGESTED LENS PENTAX-DA SMC 50MM F/1.8 £129

If you want to add a superzoom to your arsenal, this brilliant Tamron manages an effective focal length of 450mm, making it ideal for wildlife or portraits.

Pentax’s 50mm is ideal for anybody looking to capture pin-sharp subjects and blurred backgrounds. A great alternative to the supplied kit lens.

PRACTICALPHOTOGRAPHY.COM 151


GetIntoGear

#2

N I KON

#1

KIT LENS

KIT LENS

18-55MM F/3.5-5.6 G AF-P VR

18-55MM F/3.5-5-6 IS STM

C A NON

D5600 £729

200D £539

Taking a step up, the 24.2MP D5600 features a very impressive 3.2in 1037k-dot vari-angle touchscreen, a first for Nikon in this test. It flips out to 180° for vloggers and selfie addicts who want to take advantage of the Full HD video recording at 60fps. It also allows you to film and create time-lapse movies entirely in-camera, which is a great feature. You’ll find the same 39-point AF system as the D5300, which lets you take advantage of the 5fps shooting speed for moving subjects. Wi-Fi, NFC and low-energy Bluetooth functions are all included, allowing for instant transfer and sharing, though the Snapbridge app isn’t as good as others in test, so keep this in mind. Despite being a bit pricier than the other Nikon DSLRs here, the D5600 is a great camera which will easily keep up with your ability as you grow. And the upgraded features, such as the touchscreen and AF system, bring it more in line with industry standards.

Canon’s latest entry-level offering is extremely beginner friendly, with a control layout that will immediately be familiar to anybody making the move up from compacts or smartphones. Like the 77D and 800D, the 200D features the 80D’s 24.2MP sensor, which offers great quality across the Canon range. The camera manages a continuous shooting speed of 5fps, making it equal to the Nikons but not quite as fast as the Sony, and an ISO range of 100-25,600, though quality noticeably drops off from ISO 1600. The AF offers 9 points when using the optical viewfinder, or 49 points with Dual Pixel AF Live View, which covers 80% of the frame when using the 180° tilting rear touchscreen. While it’s less intimating than others in test, the 200D may not be the best to prepare you for a traditional DSLR, given its more compact camera control layout. However, if you want the transition to be as simple as possible, this could well be a bonus.

PROS Touchscreen Wi-Fi, NFC and Bluetooth Image quality CONS Expensive Similar to D5300 Snapbridge

SPEC Resolution: 24.2MP Sensor: 23.5x15.6mm LCD: 3in 960k-dot vari-angle touch ISO: 100-25,600 Shooting speed: 5fps for 17 RAWs or 100 JPEGs Autofocus: 39-point phase detection Video: Full HD 60fps Pop-up flash: Yes Battery life: 800 shots Card type: SD, SDHC, SDXC Size (WxHxD): 124x97x70mm Weight: 465g nikon.co.uk

RATING

CONS Limited optical AF Plasticky Compact camera layout

SPEC Resolution: 24.2MP Sensor: 22.3x14.9mm LCD: 3in 1040k-dot vari-angle touch ISO: 100-25,600 (expands to 51,200) Shooting speed: 5fps for 6 RAWs or unlimited JPEGs Autofocus: 9-point contrast detect Video: Full HD 60fps Pop-up flash: Yes Battery life: 650 shots Card type: SD, SDHC, SDXC Size (WxHxD): 122x93x70mm Weight: 453g canon.co.uk

RATING

SUGGESTED LENS NIKON AF-S 50MM F/1.8G £199

SUGGESTED LENS CANON EF 50MM F/1.8 STM £106

More expensive than the Canon offering, it still offers superior results to the kit lens, while letting you create beautifully blurred backgrounds.

The 50mm is the first non-kit lens many people buy. This inexpensive prime lens offers a great all-round focal length and very sharp results.

152 PRACTICAL PHOTOGRAPHY

PROS Lightweight Dual Pixel AF Touchscreen


ENTRY-LEVEL DSLRS

Overall verdict This test is teeth-clenchingly close. With massive advances in technology practically every year, entry-level cameras are now often just as capable as their more advanced counterparts. So armed with a little bit of skill and a creative eye, there’s nothing on this list that will hold you back. The downside to this is that it’s extremely tough to choose a winner. Canon’s 1300D is massively popular, and offers a great core set of features to aid you on your photographic journey, but it’s getting on a bit. The lack of a tilting touchscreen, lower resolution sensor and limited focus points all count heavily against it. Similarly, the Sony has some features that are best in test – like the 79-point AF, electronic viewfinder and 8fps burst mode – but it’s a lone wolf. The lens range isn’t as good as either Canon or Nikon, and the next step up is an expensive full-frame camera (the £2k+ _99 II).

The winning DSLR is... Canon’s 200D just had to take the top spot. It may lack the increased AF points of the 800D and 77D, but it shares the same sensor, and as such, the same image quality. It’s easy to use, so will appeal to anybody shooting with a

At-a-glance results

phone or compact, while the Dual Pixel AF is class-leading in many ways. Nikon’s D5600 is a serious contender, but is geared a bit more towards serious beginners to enthusiasts, so has a slightly more advanced feel and higher price. That said, it’ll suit those looking for a DSLR that offers more than the simplistic controls of the 200D, or who prefer the way the Nikon handles.

“THE 200D IS THE PERFECT FIRST CHOICE FOR A SIMPLE DSLR” Pentax’s K-S2 is also brilliant, with the weather sealing – unheard of in a beginner-level DSLR – making this an ideal choice for anybody off on all-weather adventures. Like the Canon and Nikon, it’s capable of taking stunning shots, even with a slightly lower resolution 20.1MP sensor. The inclusion of in-body IS is another bonus, letting you get sharp images from handheld shots, even when the lighting is against you.

Resolution

Shooting speed

Weight

BEST IN TEST

HIGHLY RATED

HIGHLY RATED

Size (WxHxD)

Price

CANON 1300D with 18-55mm lens

18MP

3fps

485g

129x101x78mm

£359

CANON 200D with 18-55mm lens

24.2MP

5fps

453g

122x93x70mm

£539

CANON 800D with 18-55mm lens

24.2MP

6fps

540g

131x100x76mm

£769

CANON 77D with 18-55mm lens

24.2MP

6fps

540g

131x100x76mm

£839

NIKON D3300 with 18-55mm & 70-300mm lenses

24.2MP

5fps

460g

124x98x76mm

£499

NIKON D3400 with 18-55mm lens

24.2MP

5fps

445g

124x98x76mm

£429

NIKON D5300 with 18-55mm lens

24.2MP

5fps

530g

125x98x76mm

£529

NIKON D5600 with 18-55mm lens

24.2MP

5fps

465g

124x97x70mm

£729

PENTAX K-S2 with 18-50mm lens

20.1MP

5.4fps

678g

123x91x73mm

£679

SONY _68 with 18-55mm lens

24.2MP

8fps

675g

143x104x83mm

£499

KEY:

Best performing model under our test conditions

RATING

Highly recommended product

PRACTICALPHOTOGRAPHY.COM 153


Minitests Small accessories that could make a huge difference

360° ACTION CA M ER A

Kodak PixPro 4KVR360 £399 lenses, or up to VIDEO 13MP when using 4K a single lens. Video quality is good too, SENSOR though frame rates 2x 20MP drop in 360° mode, WEIGHT with 4K churning 156G out a useable 24fps, or Full HD offering a useable height of 2m, a 30fps. You can even record against waterje slow motion at 120fps, its IPX5 rating but this is done at a much been great to se lower resolution of 720p. rated for immersion, as the It also functions as a newer GoPros are, but we more traditional action cam, assume an additional housing allowing you to use just a will be released shortly. single lens with the 197° Lacking a rear screen field-of-view, which adds may not be an issue when an extra level of versatility you’re filming in 360°, but and does more to justify the for those times you’re only high price point (the same using a single lens, or want as an entry-level DSLR). to check your horizon, Build quality is impressive, there is a dedicated app. so you can confidently and Simply load it onto your safely use it on your wildest smartphone and you’ll be adventures. The white able to see in real-time, plastic feels very premium, remotely activate your shots and the lenses are housed in and also transfer images and removable domes for their video, letting you upload protection. It’s shockproof to a and share images instantly. The dedicated PixPro desktop editing suite lets you trim your footage, change aspect ratios, apply colour corrections and choose starting points, allowing you to tell your audience where to start looking. While it may come with some impressive features for a proprietary 360° software suite, we recommend pairing it with CyberLink’s CyberDirector9, which has an in-depth and Above Upload your ‘tiny planet’ images directly to social media. dedicated 360° editor. If you’re anything like us, you’ll be obsessed with new technology. And in the field of photography, it doesn’t get much newer than 360° cameras. With the ability to shoot or film an entire 360° scene in Full HD or 4K, and then share it as an interactive file to sites such as YouTube and Facebook, this new technology can tell a story like never before. The Kodak 4KVR360 is a very exciting addition to the existing 360° line-up. Footage from the dual 20MP CMOS sensors is stitched together to create high-quality stills and video. The front lens boasts a 197° field-of-view, while the rear lens offers 235°. The uneven lenses allow the PixPro to better stitch the output from the two sensors, creating a more seamless join. Image quality is very impressive for this type of camera, with the camera able to capture up to 27MP stills from the two fixed f/2.4

PETER SIMCOE

154 PRACTICAL PHOTOGRAPHY

Above The protective domes help to withstand drops from up to 2m in height.

Verdict We can’t tell you this is the piece of kit you’ve been waiting for your entire life. It’s still extremely niche technology, and the only way to display your efforts is via social media. However, if you’re constantly on the move, have an exciting life worth sharing and a healthy social media following, this is a great piece of kit that will help add another string to your bow. kodakpixpro.com


HIGHLY RATED

HIGHLY RATED

PHOTO FR A M E

Nixplay Seed W10a £249 Digital photography allows us to shoot millions of images, but we rarely get around to displaying them all. Print is always a stunning option for showing off your work, but nobody has the space to display a lifetime’s worth of shots, so this digital photo frame is a brilliant alternative. The 10in Nixplay Seed is entirely wireless, meaning it draws all of the photos it displays from the Cloud, working with all major social media sites, Dropbox and Flickr. The great thing about this is that you don’t have to spend time constantly updating your SD cards each time you take a new shot. Simply upload the image to Facebook and drag it into a playlist for the Seed to access. This is accomplished via the Nixplay web app, which lets you organise your images as you want them to be

Left The Seed takes your images from the Cloud and displays them in high definition.

displayed on the high definition display. The clever part about this is that you can then share images and albums with family and friends across the world – a real bonus if you share a lot of photos of your children with relatives abroad. One really nice touch is the inclusion of a remote control. You also get 10GB of free Cloud storage, meaning running out of memory needn’t be a concern. The plastic frame has a textured, matt finish and is available in four colours, while the flexible stand at the rear connects to the power lead, keeping the area tidy. It also features a nifty motion detection panel, automatically powering the screen up when somebody walks into the room. nixplay.co.uk

V IDEO ACCESSORY

Kenro Camera Slider £240 If you’ve discovered a passion for video, but struggle to get polished footage, this is for you. Attach your camera to Kenro’s 50cm double distance slider and you can steadily move it a distance of 38cm when resting on a surface. Thanks to the belt-driven mechanism, you can also attach it to a tripod and achieve a 76cm distance with a payload of up to 3kg, or 6kg on a surface. Four individually adjustable feet allow you to level out your slider when it’s not on the tripod, which is a really nice feature. Although it is incredibly smooth and will give you beautiful B-roll, we did notice a slight bump when the camera mount and tripod mount pass. However, this only happens with very slow tracking. While it won’t appeal to casual movie makers, it’s a reasonably-priced option for those looking to create Below Kenro’s slider lets professional-looking you create very smooth footage. kenro.co.uk footage with ease.

will love this wallet-friendly shotgun mic. It comes with a shock-absorbing cradle which attaches to your hotshoe and reduces mechanical noise from your camera. The TakStar offers 10dB enhancement and 200Hz low-frequency attenuation, which can be controlled via the switches on the side. For £20, both build and sound quality are excellent, and the simplicity is perfect for those who are taking their first steps into the world of video. takstar.com

Novo Dura 200 £103 If you ever take your gear abroad, you’ll know many insurance companies demand you use a hard case, and the Dura 200 is a reasonably-priced, tough choice. Rated to IP67, it actually exceeds insurance requirements, being waterproof up to 5m. It incorporates tough ABS injection moulding, stainless steel hinge axis, and an automatic pressure value – a must for hold luggage. Solid construction aside, there’s enough room for a DSLR body and two lenses, which enjoy ample protection thanks to pre-cut foam inserts. The case is a hefty 3.4kg, but is worth its weight in gold. novo-photo.com

PRACTICALPHOTOGRAPHY.COM 155


057 CARBON FIBER TRIPOD

ALUMINIUM TRIPODS RRP MT190X PRO3 3 Section £199.95 MT190X PRO4 4 Section £219.95 MT055X PRO3 3 Section £219.95 190 Go! 4 Section £174.95 290 Dual 3 Section £139.95 290 Xtra 3 Section £104.95 Befree 4 Section £184.95

NOW £149 £149 £159 £129 £110 £79 £139

CARBON FIBRE TRIPODS MT190CX PRO3 3 Section £379.95 MT190CX PRO4 4 Section £394.95 290 Xtra Carbon 3 Section £209.95 MT055CX PRO3 3 Section £429.95 MT055CX PRO3 4 Section £459.95

£299 £299 £159 £329 £339

TRAVELLER CARBON TRIPODS RRP NOW GT1532 3 Section £629.95 £489 GT1542 4 Section £649.95 £499 MOUNTAINEER CARBON TRIPODS GT0532 3 Section GT0542 4 Section GT2542 4 Section

RRP £509.95 £569.95 £759.95

NOW £399 £449 £599

• Extra-rigid carbon fiber 3 or 4 section Legs • Ground Level Adapter to reach ultra-low positions • Levelling bubble to be always level to the horizon • Extremley versatile thanks to the 3 leg angle positions • Robust magnesium spidercast & leg locks

492RC Mini c/w RC2 496RC2 Compact c/w QR Plate RC2 QR Plate RRP £72.95 £55 RRP £89.95 £69

128RC Micro Fluid Video RRP £99.95 £75

MHXPRO 2W XPRO Fluid c/w fluidity selector RRP £129.95 £99

MHXPRO BHQ2 XPRO MHXPRO BHQ6 XPRO Ball in Magnesium Magnesium Ball c/w c/w 200 PL Top Lock Plate RRP £129.95 £99 RRP £169.95 £138

700RC2 Composite Video RRP £99.95 £79

MVH500AH Lightweight Fluid Video Head c/w Flat Base RRP £149.95 £110

MH057M0 Q5 468MGRC3 Hydrostatic 057 Magnesium Ball Ball c/w RC3 Rapid MVH502AH Flat Base MVH502A Pro Fluid c/w Q5 Connect System Video Pro Fluid Video RRP £289.95 £219 RRP £304.95 £229 RRP £194.95 £149 RRP £224.95 £169

324RC2 Light Duty Grip, compact & portable RRP £139.95 £99

327RC2 Light Duty Grip Ball £169.95 £169

MH055M8 Q5 Magnesium Photo Movie c/w QR Plate RRP £339.95 £269

MHXPRO 3W X PRO c/w retractable levers RRP £124.95 £95

RRP 535 Single Leg Tripod £1195.95 546B Twin Leg Middle Spreader Tripod £959.95

234 Monopod Tilt RRP £27.95 £24

234RCMonopod c/w QR, Wide 90º Scope RRP £42.95 £35

MH804 3WMark II in Adapto c/w retractable levers RRP £84.95 £69

460MG Magnesium RRP £114.95 £85

GH1382QD Series 1 GH1382TQD Traveller Quick Release D Series 1 Quick Release D RRP £329.95 £277 RRP £289.95 £259

Systematic Tripod Bag RRP £164.95 £129.95

MT057C3 3 Section MT057C3 G 3 Section Geared MT057C4 4 Section MT057C4 G 4 Section Geared

RRP £679.95 £719.95 £749.95 £799.95

NOW £449 £499 £549 £599

NITROTECH N8 FLUID VIDEO HEAD C/W

G2180 Series 1 GH1720QR Series 1 Counter Balance Video Magnesium 2 Way RRP £229.95 £170 RRP £259.95 £199

2720QR Series 2 Magnetic 2 Way RRP £329.95 £249

GHFG1 Fluid Gimbal Head RRP £399.95

Series 0/1 Mountaineer Series 2/3 Mountaineer RRP £97.95 £79.99 RRP £129.95 £99.99

ALTRA PRO2+ ALUMINIUM TRIPODS (includes FREE Spiked Feet) £199.99 263AB c/w Ballhead 3 Section 263AP c/w Panhead 3 Section £199.99 ALTRA PRO2+ CARBON FIBRE TRIPODS (includes FREE Spiked Feet) GS5370MC Aluminium G1220.129B3 Spikes For Quick Release Plate Tripod (Set Of 3) 263CT 3 Section £289.99 RRP £54.95 £39.99 RRP £54.95 £44.99 264CT 4 Section £299.99

MHXPRO 3WG XPRO Three Way Pan/Tilt RRP £184.95 £149

UNPADDED RRP 60cm £24.95 70cm £29.95 75cm £34.95 80cm £44.95

NOW £22 £24 £28 £39

405 Aluminium RRP £514.95 £379

PADDED RRP NOW 75cm £59.95 £49 80cm £79.95 £59 90cm £89.95 £69 100cm £109.95 £79 120cm £109.95 £85

Pro Light camera Pro Light camera element covers E-702 element covers CRC-12 for AJ-PX270 for DSLR from £69.95 from £114.95

E-704 PL Pro Light Camera Extension Sleeve Kit RRP £79.95 £65

393 Long Lens Monopod Bracket RRP £219.95 £179

VEO2 ALUMINIUM TRAVEL TRIPODS 204 AB c/w Ballhead £79.99 235 AB c/w Ballhead inc Free Shoulder Bag worth £50 £139.99 235 AP c/w Panhead inc Free Shoulder Bag worth £50 £159.99 VEO2 CARBON FIBRE TRAVEL TRIPODS 235 CB c/w Ballhead inc Free Shoulder Bag worth £50 £199.99 265 CB c/w Ballhead inc Free Shoulder Bag worth £50 £249.99

Finance example: 12mths, 0% APR: Cash Price £1475, 10% Deposit £147.50, Monthly Payment £110.62, Total Amount Payable £1475. • 24mths, 9.9% APR: Cash Price £1475, 10% Deposit £147.50, Monthly Payment £60.93, Total Amount Payable £1608.82 36mths, 19.5% APR: Cash Price £1475, 10% Deposit £147.50, Monthly Payment £47.95, Total Amount Payable £1873.70 See website for details: www.uttings.co.uk/Information/Finance. Finance is subject to status, terms & conditions apply.* *Consumer credit service provided by DEKO in association with Close Brothers Retail Finance. DEKO is licensed by the Financial Conduct Authority (Consumer Credit Licence: 0616240) Finance provided by Close Brothers Retail Finance is a trading name of Close Brothers Limited10 Crown Place, London EC2A 4FT.


E+OE Prices subject to change. Goods subject to availability

See website for more lenses


01803 852400

PHONE LINES OPEN

MON -FRI 8am - 5pm,

Email - info@mifsuds.com

SAT 9am - 3pm, SUN CLOSED.

www.mifsuds.com

PAR

SHOP OPEN

Mifsuds Photographic Limited U.K. Stock No Grey Imports 27-29, Bolton Street, Brixham. Dev TQ5 9BZ.

TUE -FRI 10am - 5pm, SAT 9am - 3pm. SUN/MON CLOSED.

WE PART E

S

FAIR PRICES OFF

QUOTED UICKLY ~ OLLECTI

CAN BE A ANGED

e st

fro

For speediest response please email your equipment etails to... inf

QUALITY LENSES DESERVE QU LITY FILTE S

oy

Canon EOS 7D KII

Full Frame

APS-C Body only

£1347

Plus 15-45 £ 68 Plus 18-150 £1198

Canon EOS 5D MKIV

Canon EOS 77D

Body only £3177

Plus 18-55 STM Plus 18-135 STM

Canon EOS 6D MKII

Canon EOS 200D

APS-C Body only

Full Frame

£798

Canon EOS M6 APS-C

Plus 15-45 STM £598 £918 £1148 Plus 18-150 STM

Canon E S

APS-C Body only

Full Frame Body only £1699

APS-C

Plus 18-55 IS ST £678 Canon EOS APS-C Cameras

Canon 300 F2.8 IS L USMII £5299

EOS 80D Body.................................£947 EOS 80D + 18-55 STM ..................£1078 EOS 80D + 18-135 STM ................£1297 EOS 800D Body ..............................£768 EOS 800D + 18-55 STM ..................£868 EOS 760D Body .............. .............£578 EOS 750D Body .............. .............£558 EOS 750D + 18-55 STM .. .............£598 EOS 750D + 18-135 STM ................£798

Full Frame

Nikon D5

Body only price

798

Niko

Nikon D5 Full Frame

£5098

Nikon Full Frame Cameras D810 Body Only...........................£2398 D750 Body only ...........................£1698 D750 + 24-120 F4 VR ...................£2297 MBD-18 grip (D850) ...................... £368 MBD-17 grip (D750) ...................... £348 MBD-12 grip (D810) ...................... £348

WE STOCK COKIN ,

X100f

7500

APS-C Body only £1297 Plus 18-140 VR £1598 Nikon APS-C Cameras D7200 Body only ........................... £888 D7200 + 18-105 VR ......................£1087 D5600 Body Only .......................... £648 D5600 + 18-55 AF-P....................... £728 D5600 + 18-140 VR ........................ £948 D3400 + 18-55 AF-P....................... £438

Nikon 70-200 F2.8 AFS E FL ED VR £2398

Nikon 8-15 F3.5/4.5 AFS E £1298

£1248

APS-C

Body only price

£3499

D Z SERI

X-Pro2 body..........................................£1598 X-T2 + 18-55mm .................................£1848 X-T2 body ..............................................£1648 X-T20 + 18-55mm...............................£1147 X-T20 body...............................................£797 X100f Compact....................................£1248

£898

100

Plus 15-45 STM

£578

£2199

5

£898

Body only

Body only £4798

Body only

Canon EOS

APS-C

Nikon D850

m

6

including: UV, , IR, close-up, s fteners, diff sers, polarisers, rotectors etc PLEASE SEE WEBSITE F R DETAILS www.mifsud .c m

Canon EOS 1DX MKII

Plus 24-105 STM

in i

mifsu

£568 Canon EOS

System

11-22 f4/5.6 IS STM .................. £317 15-45 f3.5/6.3 IS STM ............... £199 18-55 f3.5/5.6 IS STM ............... £199 18-150 f3.5/6.3 IS STM............. £398 22 f2 STM .................................. £198 28 f3.5 Macro IS........................ £289 55-200 f4.5/6.3 IS STM............. £249 NIKON DX NON FULL FRAME LENSES 10.5 F2.8 DX Fisheye . . . . . . . . . .£599 10-20 F4.5/5.6 G VR . . . . . . . . . . .£328 10-24 F3.5/4.5 AFS G . . . . . . . . . .£729 16-80 F2.8/4 AFS ED VR. . . . . . . .£898 16-85 F3.5/5.6 AFS VR . . . . . . . . .£578 18-105 F3.5/5.6 AFS G no box . .£239 18-140 F3.5/5.6 AFS VR . . . . . . . .£469 18-300 F3.5/6.3 AFS VR . . . . . . . .£648 35 F1.8 AFS G . . . . . . . . . . . . . . . . .£188 70-300 F4.5/6.3 AFP VR . . . . . . . .£359 70-300 F4.5/6.3 AFP non VR . . .£299 NIKON FX FULL FRAME LENSES 8-15 F3.5/4.5 AFS E. . . . . . . . . . £1298 14-24 F2.8 AFS G ED. . . . . . . . . £1648 16-35 F4 AFS VR . . . . . . . . . . . . £1058 18-35 F3.5/4.5 AFS G . . . . . . . . . .£658 20 F1.8 AFS G ED. . . . . . . . . . . . . .£697 24 F1.8 AFS G ED. . . . . . . . . . . . . .£678 24-70 F2.8 AFS G ED VR. . . . . . £1598 24-120 F4 AFS G ED VR . . . . . . . .£997 35 F1.4 AFS G . . . . . . . . . . . . . . . £1578 35 F1.8 AFS G . . . . . . . . . . . . . . . . .£478 50 F1.4 AFS G . . . . . . . . . . . . . . . . .£398 50 F1.8 AFS G . . . . . . . . . . . . . . . . .£208 60 F2.8 AFS . . . . . . . . . . . . . . . . . . .£528 70-200 F2.8 AFS E FL ED VR . . £2398 70-200 F4 AFS G ED VR . . . . . . £1238 70-300 F4.5/5.6 E ED VR . . . . . . .£748 85 F1.8 AFS G . . . . . . . . . . . . . . . . .£448 105 F2.8 AFS VR macro . . . . . . . .£788 200-500 F5.6 AFS E ED VR. . . . £1248 300 F2.8 AFS ED VRII . . . . . . . . £4299 300 F4 AFS E PF ED VR. . . . . . . £1528 400 F2.8 G E FL ED VR . . . . . . £10398 500 F4 G E AFS FL ED VR . . . . . £8998

CANON EFS LENSES 10 18 F4.5/5.6 IS STM . . . . . . . £197 18 55 F3.5/5.6 ISII no box. . . . £129 CANON EF FULL FRAME LENSES 8 15 F4 L USM Fisheye. . . . . . . £969 11 24 F4 L USM . . . . . . . . . . . .£2497 14 F2.8 USM MKII . . . . . . . . . .£1749 16 35 F2.8 L USM MKIII . . . . .£1897 16 35 F4 L IS USM. . . . . . . . . . . £866 20 F2.8 USM . . . . . . . . . . . . . . . . £419 24 F1.4 LII USM . . . . . . . . . . . .£1299 24 F2.8 IS USM . . . . . . . . . . . . . . £399 24 70 F2.8 L II USM. . . . . . . . .£1697 24 70 F4 L IS USM. . . . . . . . . . . £724 24 105 F4 L IS USM MKII. . . . . £997 24 105 F3.5/5.6 IS STM . . . . . .£399 28 F2.8 IS USM . . . . . . . . . . . . . . £387 35 F2 IS USM. . . . . . . . . . . . . . . . £468 40 F2.8 STM . . . . . . . . . . . . . . . . £159 50 F1.2 L USM . . . . . . . . . . . . .£1249 50 F1.4 USM . . . . . . . . . . . . . . . . £348 50 F1.8 STM . . . . . . . . . . . . . . . . . £97 70 200 F2.8 IS LII USM. . . . . .£1797 70 200 F2.8 non IS L USM. . .£1197 70 200 F4 L IS USM. . . . . . . . .£1097 70 300 F4/5.6 L IS USM . . . . .£1247

200-400 F4 IS L USM

£9299

10-20 F3.5 EX DC HSM . . . . . .£328 12-24 F4 DG HSM Art . . . . . £1378 12-24 F4.5/5.6 II DG. . . . . . . . .£648 14 F1.8 DG HSM Art . . . . . . £1678 17-50 F2.8 EX DC OS. . . . . . . .£328 18-35 F1.8 DC HSM Art . . . . .£648 18-300 F3.5/6.3 DC mac OS .£368 20 F1.4 DG HSM Art . . . . . . . .£698 24 F1.4 DG HSM Art . . . . . . . .£648 24-35 F2 DG HSM Art . . . . . . .£758 24-70 F2.8 DG OS HSM Art £1398 35 F1.4 DG HSM Art . . . . . . . .£598 50 F1.4 EX DG HSM Art . . . . .£569 50-100 F1.8 DC HSM Art . . . .£948 70-200 F2.8 EX DG OS . . . . . .£898 85 F1.4 DG Art. . . . . . . . . . . . . .£999 100-400 F5-6.3 DG OS HSM Contemporary . . . . . . . .£698

15-30 f2.8 Di VC USD .....................£897 16-300 f3.5/6.3 Di II VC PZD ........£428 18-200 F3.5/6.3 Di II VC.................£188 18-400 f/3.5-6.3 Di II VC HLD .....£648 24-70 f2.8 Di VC USD G2............ £1247 24-70 f2.8 Di VC USD .....................£747

70 300 F4/5.6 IS USM II . . . . . . £448 85 F1.4 L IS USM . . . . . . . . . . .£1568 85 F1.8 USM . . . . . . . . . . . . . . . . £319 100 F2.8 IS L USM macro. . . £797 100 400 F4.5/5.6 IS LII USM £1788 200 400 F4 IS L USM . . . . . . .£9299 200 F2.8 II L USM . . . . . . . . . . . £698 300 F2.8 IS L USM II . . . . . . . .£5299 400 F2.8 IS L USM II . . . . . . . .£8999 400 F4 DO II IS USM . . . . . . . £6498 400 F5.6 L USM . . . . . . . . . . . . . £997 500 F4 IS L USM II . . . . . . . . . £8197 600 F4 IS L USM II . . . . . . . .£10899 12mm ext tube MKII . . . . . . . . . £69 25mm ext tube MKII . . . . . . . . £128 1.4x III extender. . . . . . . . . . . . . £388 2x III extender . . . . . . . . . . . . . . £388 CANON FLASHGUNS/GRIPS MR 14 EX II Ringlight. . . . . . . .£548 MT 26 EX RT mac twin light£1079 430EX III RT Speedlight . . . . . .£238 600EX RT II Speedlight . . . . . . £538 BG E21 (fit 6D MKII) . . . . . . . . . £179 BG E20 (fit 5D MKIV) . . . . . . . . £297 BG E16 (fit 7D MKII) . . . . . . . . . £218 BG E13 (fit 6D) . . . . . . . . . . . . . . £197

400 F2.8 IS L USM II

£8999

105 F2.8 EX DG OS HSM . . . .£358 120-300 F2.8 EX DG OS Sport DEMO NAF FIT ONLY . . . . £2299 135 F1.8 DG HSM Art.. . . . . £1398 150 F2.8 EX DG OS. . . . . . . . . .£778 150-600 F5/6.3 OS Contemp £788

150-600 F5/6.3 OS Sport . . £1328 500 F4 DG OS HSM Sport . £4997 500 F4.5 EX APO DG HSM CAF FIT ONE ONLY. . . . . . . £2797 USB Lens dock. . . . . . . . . . . .£39.99 70-200 f2.8 Di VC USD G2 ......... £1297 70-300 F4/5.6 Di VC USD..............£329 85 f1.8 SP Di VC USD......................£747 100-400 F4.5/6.3 Di VC USD........£789 150-600 F5/6.3 VC USD G2....... £1128 150-600 F5/6.3 SP VC USD ...........£737 Kenko Converters 1.4x or 2x Pro 300 conv each.........£149 Auto ext tube set............................£119

KITS. P E SE SEE WEBSITE FOR F L DETAIL .

X Series lenses and accessories etc 10-24mm F4 XF ......................................£898 14mm F2.8 XF R .....................................£848 16mm F1.4 XF .........................................£898 16-55mm F2.8.........................................£948 18mm F2 XF.............................................£498 18-55mm F2.8/4 OIS ............................£599 18-135mm F3.5/5.6 XF.........................£718 23mm F1.4 XF .........................................£829

23mm F2 XF R WR .................................£418 27mm F2.8 XF .........................................£398 35mm F1.4 XF .........................................£498 35mm F2 R WR........................................£428 50mm F2 R WR........................................£448 50-140mm F2.8 R OIS........................£1428 55-200mm F3.5/4.8 OIS XF.................£677 56mm F1.2 R APD...............................£1328 56mm F1.2 XF .........................................£898

60mm F2.4 XF macro ...........................£648 80mm F2.8 OIS WR macro ...............£1249 90mm F2 R LM WR ................................£898 100-400 F4/5.6 OIS WR ......................... £1698 1.4x XF TC WR..........................................£388 2x XF TC WR .............................................£398 11mm Ext tube......................................... £75 16mm Ext tube......................................... £75 VPB-XT2 Vertical grip............................£289

Family Run Pro Dealership With Friendly, Knowledgeable Staff. Prices Inc VAT - Correct 27/11/2017. E&OE. MORE ON WEBSITE - UPDATED DAILY. ORDERS OVER £100 VALUE INCLUDE UK MAINLAND P&P. ALL U.K. STOCK, NO GREY IMPORTS.


Although we are the best stocked dealer in the West Country, we cannot always have every item listed in stock at all times, so we are happy to reserve new & used items for customers planning to visit. Prices correct 27/11/2017 but subject to change without notice. See website for up to date prices. E&OE.

Website altered daily inc. manufacturers cashback & promotions

www.mifsuds.com Subscribe to our newsletter - send your email address to info@mifsuds.com.

QUALITY USED EQUIPMENT. See website for full list. Call us to check condition. 6 Month warranty on most secondhand. CANON USED

Used Canon EOS 1DX MKI I body box

£3799

Used Canon EOS 7D MKII body box

£999

NIKON USED

Used Nikon D4s body box

£3499

Used Nikon 300mm F2.8 AFS VRI

£2999

Used Nikon D810 body box

£1799

DIGITAL USED

Used Fuji X-Pro2 body box

£999

Used Olympus OM-D E-M1 body Mbox

£599

Used Sony RX10 MKII box

£699

Buy with confidence - all of our used equipment is thoroughly tested and cleaned before being offered for sale CANON DIGITAL AF USED 1DX MKII body box .............£3799 1DX MKI body box .. £1999/2999 1D MKIV body box ..............£1499 1D MKIII body ......................... £499 1Ds MKII body......................... £599 7D MKII body box.................. £999 7D body box............................ £499 6D body box............................ £799 5D MKIV body box................. £2699 5D MKIII body box................. £1699 5D MKI body box ......................£399 80D body box.............................£749 60D body......................................£399 50D body box.............................£299 700D body ...................................£299 600D body ...................................£249 400D body ......................................£99 80D body..................................... £ASK BG E2.............£39 BG E2N..........£49 BG E7.................................................£79 BG E13 ...........................................£119

BG E16 box ..................................£169 TC 80N3 remote........................£85 Angle finder C......................... £139 Powershot G1X....................... £299 Powershot G12....................... £229 CANON EOS M USED EF-M 55-200 F4.5/6.3 IS STM£229 DC1 viewfinder....................... £149 CANON AF FILM BODIES USED EOS 1V HS body..................... £699 EOS 1V body box................... £599 EOS 3HS body inc PB-E2..... £449 EOS 5 body box.........................£79 EOS 50E body.............................£59 EOS 500/500N/1000f b/o ea.£39 EOS 600/650/1000/10 b/o ea£49 EOS 5000/300V body ..............£49 PB E2 drive fits EOS1/3........ £149 BP E1 .............................................£79 CANON AF LENSES USED 8 15 F4 L fisheye.................... £799 10 18 F4.5/5.6 IS STM........... £179

Used Fuji

£1299

Used Hasselblad 503CW Millennium + 80 F2.8 CFE + A12

£2799

Used Rollei 3.5F 6x6 White Face serviced

£1699

Used Nikon

£1299

Used Nikon 500mm F4 AIS

£1399

SIGMA CAF USED 17 50 F2.8 EX DC HSM ............. £249 17-70 F2.8/4 DC OS.................... £249 18-125 F3.8/5.6 HSM................. £149 18-200 F3.5/6.3 DC..................... £149 18-250 F3.5/6.3 DC OS ............. £199 28-135 F3.8/5.6 ...............................£99 28-200 F3.5/5.6 Asph ..............£99 50 F2.8 EX macro ................... £149 50-500 F4/6.3 EX DG OS...... £699 50-500 F4/6.3 EX DG ............ £399 70-200 F2.8 EX DG OS Mint box.................................... £749 70 300 F4/5.6 APO DG............£99 120 300 F2.8 DG OS sport £1999 120 300 F2.8 EX DG .............. £699 150 F2.8 EX DG OS Mint box£599 150 500 F5/6.3 DG OS.............. £449 150 600 F5/6.3 DG OS Sport + TC 1401 kit Mint box...........£1099 180 F2.8 EX DG OS ..................... £899 180 F3.5 EX DG HSM mac....... £399

600 F8 box...................................... £249 TC1401 1.4x conv........................ £189 1.4x EX DG conv .......................... £149 OTHER CAF USED TAM 10-24 F3.5/4.5 Di II ...... £279 TAM 17-50 F2.8 XR DiII ........ £199 TAM 18-200 F3.5/6.3 VC ...... £149 TAM 18-250 F3.5/6.3 DiII..... £149 TAM 28-300 F3.5/6.3 VC...............£449 TAM 28-300 F3.5/6.3 XR Di.........£199 TAM 70-300 F4/5.6 Di USD VC . £199 TAM 70-300 F4/5.6 ........................£99 TAM 150 600 F5/6.3 VC USD. £599 TOK 100 F2.8 ATX........................ £299 Zeiss 50 F1.4 ZE box .................. £399 Triplus ext tubes set......................£69 CANON FLASH USED 430EX MKII....£169 550EX .. £129 580EX box ................................ £179 600EX RT box .......................... £349 MORE ON WEBSITE WWW.MIFSUDS.COM

MBD 14 grip ............................ £149 MBD 12 grip ............................ £229 MBD 10 grip ........................ £49/99 MBD 80 grip ...............................£49 MBD 200 grip.............................£49 NIKON AF FILM BODIES USED F5 body ..................................... £399 F90X body...................................£99 F801/F601/F70 body each ....£49 F55 body......................................£29 NIKON AF LENSES USED 10.5 F2.8 DX ..................................£399 10 24 F3.5/4.5 DX.......................£599 14 F2.8 AFD...................................£899 14 24 F2.8 AFS M box..........£1099 14 24 F2.8 AFS box....................£999 16 F2.8 AFD Fisheye..................£499 16 35 F4 AFS VR ..........................£899 16 85 F3.5/5.6 AFS VR...............£379 17 35 F2.8 AFS box....................£899 17 55 F2.8 AFS .............................£499 18 35 F3.5/4.5 AFD ....................£269 18 55 F3.5/5.6 AFS VR................ £99

18 70 F3.5/4.5 AFS .....................£129 18 105 F3.5/5.6 VR AFS............£179 18 135 F3.5/5.6 AFS DX...........£169 18 140 F3.5/5.6 AFS VR............£299 18 200 F3.5/5.6 AFS VRI...........£299 20 F1.8 AFS G................................£499 20 F2.8 AFD...................................£349 24 70 F2.8 AFS box....................£999 24 85 F3.5/4.5 AFS VR............... £399 24 120 F4 AFS VR........................ £699 24 120 F3.5/5.6 G VR................. £299 24 120 F3.5/5.6 G........................ £199 28 F1.8 AFS G................................ £399 28 100 F3.5/5.6 AF G....................£69 35 F1.8 DX....................................... £149 35 F2 AFD ....................................... £199 45 F2.8 PC E............................. £999 50 F1.4 AFS G .......................... £299 50 F1.8 AFS .............................. £149 55 200 F4/5.6 AFS VR ........... £169 70 200 F2.8 VR II box..........£1299 70 200 F2.8 VR I box............. £999 70 200 F4 AFS VR................... £899

70 300 F4.5/5.6 AFS VR........ £369 70 300 F4.5/5.6 AFD............. £349 70 300 F4/5.6 G non VR..........£99 85 F1.4 AFS M box ............... £949 85 F1.8 AFS .............................. £349 85 F2.8 DN PC E ..................... £999 105 F2.8 AFS VR...................... £499 200 F2 AFS VRII.....................£3799 200 400 F4 AFS VRII............£3499 300 F2.8 AFS VRII .................£3999 300 F2.8 AFS VRI serviced.£2999 300 F4 E AFS PF VR..............£1299 300 F4 AFS box....................... £549 300 F4 AFD (non AFS).......... £369 500 F4 AFS VR .......................£4999 600 F4 AFS EDII ........ £3499/3999 TC17EII....................................... £199 TC20EII....................................... £199 SIGMA NAF USED 18 200 F3.5/6.3 DC mac C...... £199 24 F1.4 DG Art..............................£499 24 35 F2 DG Art box .................£599 24 70 F2.8 EX DG HSM.............£469

24 70 F2.8 EX DG........................£299 24 105 F4 DG OS HSM.............£499 28 200 F3.5/5.6 early................... £69 35 F1.4 DG Art ........................ £499 70 200 F2.8 EX DG OS Mint box.................................... £749 70 300 F4/5.6 APO DG............£99 105 F2.8 EX DG............................. £199 135 400 F4.5/5.6 DG.................. £299 150 F2.8 EX DG OS Mint box.. £599 150 F2.8 EX DG OS ..................... £549 150 500 F5/6.3 DG OS.............. £499 170 500 F5/6.3 D......................... £299 150 600 F5/6.3 DG OS Sport + TC 1401 kit Mint box...........£1099 150 600 F5/6.3 contemp......... £649 TAMRON NAF USED 10 24 F3.5/4.5 DiII....................... £239 11 18 F4.5/5.6............................... £219 18 250 F3.5/6.3 ............................ £149 19 35 F3.5/4.5..................................£99 28 75 F2.8 XR Di........................... £229 28 300 F3.5/6.3 XR Di................ £199

70 300 F4/5.6...................................£79 150 600 F5/6.3 Di VC USD...... £599 OTHER NAF USED TOK 10 17 F3.5/4.5 ATX....... £249 TOK 11 16 F2.8 ATX Pro DXII £349 TOK 12 24 F4 ATX Pro .......... £329 FLASH / ACCESSORIES USED SB 500............................................... £169 SB 600............................................... £169 SB 700............................................... £199 SB 900 box..................................... £249 SB 910 box..................................... £299 SB R1 Ringflash box.................. £349 SU 800 commander.................. £249 DR 5 angle finder........................ £149 DW 21 fits F4........................... £119 MB 10 (fits F90)...............................£29 MB 23 (fits F4)..................................£49 MC 30 remote .................................£45

MORE ON WEBSITE

www.mifsuds.com

Why not register to receive our email newsletters? Simply send your email address to info@mifsuds.com to enrol FUJI DIGITAL USED X Pro2 body box..................£1099 X Pro1 body box.................... £399 X T1 body black...................... £499 X T1 body black...................... £449 X T10 body box ...................... £299 X E1 body silver ..................... £199 14 F2.8 XF R box..................... £499 18 F2 R XF................................. £349 18 55 F2.8/4 XF ...................... £399 23 F1.4 R XF ............................. £699 27 F2.8 XF................................. £249 35 F1.4 R box........................... £399 50 230 F4.5/6.7 XRC ............. £249 90 F2 WR box .......................... £599 XT 2 VPD grip.......................... £229 EF 42 flash box ..........................£99 EF 20 flash box ..........................£59 MINOLTA/SONY DIGITAL USED Sony RX100 MKIII box............ £449 Sony RX10 MKII box ............... £699 Sony A550 body....................... £199 Sony A350 body....................... £149 Sony VG C70AM....................... £139 Sony LA EA4 mount adap ... £189

BRONICA ETRS 645 USED ETRSi + 75 + WLF + 120 back................................ £399 ETRS body ................................ £119 30 F3.5 PE ................................. £699 40 F4 E ....................................... £199 50 F2.8 PE ................................. £349 75 F2.8 PE ................................. £149 150 F3.5 E ....................................£99 150 F3.5 PE M Box................ £149 200 F4.5 PE............................... £199 2x extender.............................. £199 E14 Ext tube ...............................£49 E42 Ext tube ...............................£49 120 RFH........................................£69 135W back ............................... £299 135N back ................................ £169 Polaroid Back .............................£49 AEII prism ................................. £129 Plain prism ..................................£59 Rotary prism...............................£99 Winder early ...............................£79 Speed Grip E...............................£59

35MM & MISCELLANEOUS USED 400mm F2.8 ED AIS

70 200 F4 L USM.................... £399 70 300 F4.5/5.6 IS USM L .... £849 70-300 F4.5/5.6 IS USM ....... £249 75-300 F4/5.6 MKII ...................£99 85 F1.2 L USM ......................... £899 100 F2.8 L IS USM .................. £649 100 F2.8 USM box.................. £299 100-400 F4.5/5.6 LII IS U....£1499 100-400 F4.5/5.6 L IS U........ £799 135 F2 L USM box.................... £699 180 F3.5 L USM macro........... £599 300 F2.8 LII IS U ......................£4699 300 F2.8 LI IS U........................£2999 300 F4 L IS USM box............... £699 400 F4 DO.................................£ASK 400 F2.8 IS USM L ................£4999 500 F4 IS L USM....................£4499 1.4x extender MKIII................. £329 1.4x extender MKII .................. £249 2x extender MKIII..................... £339 2x extender MKII box............. £239 25mm ext tube MKII .................£99

We carry out sensor cleaning on the premises, firmware updating and equipment hire - please enquire for details NIKON DIGITAL AF USED D4s body box........................£3499 D4 body box.............. £1999/2699 D3X body box.......................£1299 D3s body box........................£1299 D3 body box................... £899/999 D2Xs body................................ £399 D810 body box.....................£1799 D810 body .............................£1399 D800E body box ....................£ASK D800 body box......... £1199/1399 D750 body box.....................£1199 D700 body box....................... £599 D610 body ............................... £799 D600 body ............................... £699 D300s body ............................. £349 D300 body box....................... £299 D200 body box....................... £149 D7100 body............................. £449 D7000 body............................. £399 D80 body.................................. £169 D60 body.................................. £149 MBD 16 grip ............................ £199

Sony HVL 43AM box .............. £179 Sony HV56AM........................... £149 Sony HVK F42AM .......................£89 SONY NEX USED NEX 5 body .................................... £129 FE 16 35 F4 ZA OSS E................ £899 FE 16 50 F3.5/5.6 EZ .................. £149 FE 70 200 F4 G OSS box.......... £899 FE 90 F2.8 macro......................... £699 Samyang 100 F2.8 macro....... £229 MINOLTA/SONY AF USED 7xi body .......................................£99 Dynax 5 body.............................£69 5xi body .......................................£49 7000i or 500Si body each......£39 300Si body ..................................£29 11 18 F4.5/5.6 AFD DT......... £259 24 50 F4 .......................................£99 24 85 F3.5/4.5 ......................... £149 28 F2.8 ..........................................£99 28 75 F2.8 AFD ....................... £299 28 80 F4/5.6................................£39 28 85 F3.5/4.5 ............................£99 35 70 F4 .......................................£39 35 70 F3.5/4.5..................................£25

MEDIUM FORMAT 6x45, 6x6, 6x7 & 6x9 USED G617 including 105 F8

10 22 F3.5/4.5 USM EFS ...... £329 14 F2.8 USM LII box ............£1349 15-85 F3.5/5.6 IS USM EFS.. £399 16-35 F2.8 USM LII................. £799 16-35 F4 L................................. £749 17-40 F4 L................................. £449 17-55 F2.8 IS USM EFS ......... £449 17-85 F4/5.6 IS USM................... £199 18-55 F3.5/5.6 IS EFS ....................£99 20 F2.8 USM................................... £349 24 F2.8 STM.................................... £109 24-105 F4 L IS.......................... £599 28 80 F3.5/5.6 USM MKI...... £149 28 80 F3.5/5.6 ............................£79 28 90 F4/5.6................................£99 50 F1.4 USM............................. £279 60 F2.8 IS USM EFS................ £279 65 F2.8 MP E............................ £799 70 200 F2.8 IS USM LII .......£1499 70 200 F2.8 IS USM L............ £999 70 200 F2.8 USM L ................ £799 70 200 F4 L IS USM ............... £699

CANON FD USED A1 body serviced................... £169 AE1 Program body...................£99 24 F2........................................... £299 24 F2.8 ....................................... £149 24 F2.8 breechlock................ £149 28 F2.8 ..........................................£49 35-70 F4 .......................................£69 35-105 F3.5 .............................. £149 50 F1.2 L.................................... £699 50 F1.8 ..........................................£49 50 F2..............................................£49 50 F3.5 macro ............................£99 70-150 F4.5 .................................£29 100 F2.8..................................... £149 100-300 F5.6...............................£79 135 F3.5........................................£49 135 F3.5 (Breechlock)..............£39 200 F4 macro .......................... £299 25mm or 50mm Ext tube ea £29 2x Extender B.............................£49

35 80 f4/5.6.......................................£25 35 105 F3.5/4.5 ...............................£99 50 F2.8 macro............................... £179 70 210 F4.5/5.6 ...............................£69 75 300 F4.5/5.6 ............................ £129 100 300 F4.5/5.6 APO............... £179 100 300 F4.5/5.6.......................... £149 500 F8 mirror................................. £349 VC700 grip.........................................£39 RC1000S cord...................................£29 SONY LENSES USED 16 80 F3.5/4.5 ZA DT................. £499 18 55 F3.5/5.6 SAM.......................£59 18 70 F3.5/5.6..................................£89 18 135 F3.5/5.6 DT SSM........... £329 18 200 F3.5/6.3 DT ..................... £199 55 200 F4/5.6 DT SSM .................£69 75 300 F4.5/5.6 ............................ £129 SIGMA MIN/SONY AF USED 10 20 F3.5 EX............................. £269 10 20 F4/5.6 EX DC ................. £249 18 35 F1.8 Art............................ £549 18 50 F3.5/5.6 DC.......................£69 18 250 F3.5/6.3 DC mac HSM £199 28 105 F2.8/4 ...............................£69

28 135 F3.8/5.6............................£79 28 300 F3.5/6.3 macro........... £149 50 150 F2.8 EX DC MKII......... £399 55 200 F4/5.6 DC OS.................£79 70 300 F4/5.6 DG OS............ £169 70 300 F4/5.6 APO DG............£99 150 500 F5/6.3 APO DG ...... £499 1.4x EX conv ...............................£99 TAM 10 24 F3.5/4.5 DiII ....... £239 TAM 24 70 F3.5/5.6 ..................£49 TAM 90 F2.8 ............................. £249 TAM 90 F2.8 ............................. £179 TAM 200 500 F5/6.3.............. £399 Teleplus 1.4x conv....................£69 Teleplus 2x conv .......................£79 Kenko 1.4x Pro 300DG......... £149 MINOLTA FLASH USED Minolta 5200i.............................£29 Minolta 5400HS.........................£39 Minolta 5600HSD M ...............£79 OLYMPUS 4/3 USED E5 body ..................................... £599 E3 body ..................................... £299 E1 body ........................................£79 E510 body ................................ £149

E500 body ................................ £129 11 22 F2.8/3.5 ......................... £349 12 60 F2.8/4 ED...................... £399 14 42 F3.5/5.6 ............................£49 14 45 F3.5/5.6 ............................£99 14 54 F2.8/3.5 ......................... £199 25 F2.8 ....................................... £179 40 150 F3.5/4.5..........................£99 50 F2 macro............................. £299 50 200 F2.8/3.5 ED................ £399 25mm ext tube..........................£89 VA 1 angle finder......................£69 OLYMPUS MICRO 4/3 USED OMD EM1 body M box ...... £599 OMD E M5 MKII body box.. £499 OMD E M5 body box............ £249 9 18 F4/5.6 ...............................£ASK 12 F2........................................... £479 12 40 F2.8................................. £599 14 42 F3.5/5.6 ......................... £169 14 150 F4/5.6 .......................... £399 17 F1.8 ....................................... £279 25 F1.8 ....................................... £269 40 150 F4/5.6 .......................... £189 MC 14 converter.................... £249

ECG grip .......................................£39 HLD 8 grip...................................£99 HLD 7 grip box..........................£89 HLD 6 grip...................................£79 PANASONIC DIGITAL USED GH2 body ................................. £299 G5 body .................................... £199 G3 body box............................ £199 GX7 body.................................. £349 GF3 body black .........................£99 GF1 body .....................................£99 GF6 body box silver.............. £199 7 14 F4 G .................................. £499 14 42 F3.5/5.6 ......................... £199 14 42 F3.5/5.6 ............................£79 14 45 F3.5/5.6 ......................... £149 14 140 F4/5.8 box ................. £399 20 F1.7.......£199 25 F1.4...... £379 35 100 F4/5.6 .......................... £169 45 150 F4.5/5.6....................... £149 45 200 F4/4.5 box ................. £199 100 300 F4/5.6 MKII.............. £499 100 300 F4/5.6........................ £349 PENTAX DIGITAL USED K100d body ............................. £149

For more used equipment listings please see website www.mifsuds.com

Tripod adapter E .......................£39 Winder early ...............................£49 Metz SCA 386.............................£49 BRONICA SQ 6x6 USED SQB + 80 + WLF + 120 back£399 40 F4 S ....................................... £299 50 F3.5 S.................................... £149 150 F4 PS ......................... £149/199 200 F4.5 PS M box ............... £199 2x PS converter M ................ £179 135N 35mm film back ......... £119 SQAi 120 RFH .............................£79 Plain Prism S Boxed .................£69 AE Prism Early ............................£79 ME Prism Finder ........................£69 Metz SCA 386.............................£49 Pro shade S .................................£59 Lens Hood 65 80.......................£20 SQAi Motorwinder ................ £149 SQAI winder............................. £149 Speed grip S ...............................£79 FUJI USED G617 inc 105 F8 ...................£1299

HASSELBLAD 6x6 USED 503CW Millennium + 80 F2.8 CFE + A12 ...........£2799 501C + 80 CB + A12............£1699 500CM + 80 F2.8 C + A12 + WLF............................ £699 500CM body black ................ £299 500C chrome body ............... £249 503CW winder........................ £179 45º prism late.......................... £299 45º prism early ..........................£99 Sports viewfinder .....................£69 Chimney.......................................£99 A12 chrome latest................. £349 A12 late blk/chr...................... £199 Polaroid back 100.....................£79 50 F4 CF FLE ............................ £849 50 F4 Black T*.......................... £399 100 F3.5 Black T*.................... £399 150 F4 CF.................................. £499 150 F4 Black T* ....................... £299 150 F4 chrome serviced...... £199 250 F5.6 Black T*.................... £199

Vivitar 2x conv ...........................£49 Lens hoods various........... £20/50 MAMIYA 645 MF USED 645 Pro TL + 80 + AE prism + back..................... £599 Plain prism (645 Super)..........£79 645 Super WLF...........................£99 Polariod Back HP401 ...............£29 Polaroid back .............................£29 120 Insert.....................................£20 120 Back.......................................£79 Winder..........................................£79 45 F2.8 N................................... £199 150 F3.5 N ...................................£79 150 F3.8 NL leaf...................... £299 210 F4 N M ................................£79 Ext Tube 1....................................£29 Ext tube 2 ....................................£29 Ext tube 3S..................................£29 Teleplus 2x converter..............£49 Vivitar 2x converter..................£49 MAMIYA TLR 6x6 USED 65 F3.5 box late ...................... £199

65 F3.5 serviced...................... £149 250 f4.5...................................... £179 Porrofinder..................................£59 MAMIYA 6 & 7 RF 6x7 USED 43 F4.5 L + VF box ...............£1199 50 F4.5 L + VF box ................. £799 150 F4.5 M .............................. £399 MAMIYA RB 6x7 USED Pro S body................................ £199 Plain prism early .................... £149 WLF................................................£79 50 F4.5 ....................................... £299 127 F3.5 KL............................... £299 Pro SD ext tube 1 45mm............£99 Pro SD ext tube 2 82mm............£99 MAMIYA RZ 6x7 USED RZ Pro body ............................. £149 120 RFH Pro ................................£99 Polaroid back .............................£79 FE701 prism............................. £299 WLF................................................£79 Winder II.......................................£49 65 F4 box M ........................... £399

90 F3.5 W M box................... £299 180 F4.5 W................................ £199 PENTAX 645MF USED 645 body + insert .................. £199 200 F4 ........................................ £149 300 F4 ........................................ £249 1.4x converter......................... £199 PENTAX 67 USED 45 F4........................................... £399 135 F4 macro late .................. £249 165 F2.8 latest M .................. £499 200 F4 latest ............................ £169 200 F4 early...................................£99 300 F4 early scruffy................... £99 Pentax rear conv 1.4x........... £249 2x rear converter.................... £179 Auto ext tubes ...........................£49 Wooden grip ........................... £169 ROLLEI 6x6 TLR USED 3.5F White Face serviced...£1699

177A flash...£20 244T flash ..£20 277T flash...£25 300TL flash.£49 Winder A.....£20 Winder B....£30 Angle finder B............................£49 CANON BINOCULARS USED 15 x 45 IS................................... £599 CONTAX 35mm RF USED 90 F2.8 G................................... £269 LIGHTMETERS USED Gossen Spot-Master ............. £299 Minolta Flashmeter IV.......... £199 Sekonic L308S......................... £119 MINOLTA MD USED XD7 body black/chrome..... £149 X300 chrome body ..................£49 X300s black body .....................£49 X700 black body .......................£99 XGM chrome body...................£49 28 F3.5 MD. .................................£49 50 F1.7 MD..................................£49 50 F2 MD .....................................£49

70 210 F4 MD.............................£99 2x Converter...............................£79 Ext tube for 50 F3.5..................£29 Ext tube set.................................£49 Auto bellows 1...........................£99 NIKON MF USED FE2 body chrome .................. £349 F2 Photomic body box........ £399 FM2n body chrome .............. £349 FE body black.............................£99 8 F2.8 AIS................................£1499 20 F3.5 AI.................................. £199 24 F2 AI ..................................... £299 24 F2.8 AIS M- box ................ £249 24 F2.8 AI.................................. £199 28 F2.8 E box..............................£69 28-85 F3.5/4.5 AIS.................. £199 35 F2.8 PC................................. £349 35-70 F3.3/4.5 AIS.................. £129 35-70 F3.5 AIS ............................£99 35-105 F3.5/4.5 AIS..................£79

50 F1.2 AIS................................ £399 50 F1.4 AI.................................. £199 50 F1.8 AI.................................. £149 50 F1.8 E.......................................£59 180 F2.8 AIS ED scruffy........ £179 400 F2.8 ED AIS serviced ..£1299 500 F4 AIS...............................£1399 500 F8 mirror........................... £249 SC-17 TTL lead...........................£25 DW-3 WLF find fit F3 ...............£99 PK-11a ext tube.........................£49 PK-12/PK-13 ext tube each ...£49 OLYMPUS OM USED OM-4T body ............................ £249 OM-2SP body.............................£99 OM40 body.................................£79 OM-2n chr body box............ £249 OM-2n body chrome... £149/199 OM-1n body chrome............ £199 OM-1 body............................... £199 24 F2.8 ....................................... £199

28 F2.8 ..........................................£79 35 F2.8 box .................................£99 35-70 F4 .......................................£99 35-105 F3.5/4.5 box.............. £149 35-105 F3.5/4.5..........................£79 50 F1.8 ..........................................£69 80 F4 mac................................. £199 85 F2 box.................................. £249 135 F2.8 box............................ £149 135 F4.5 macro....................... £199 200 F4 ........................................ £149 Vivitar 400 F5.6....................... £149 7, 14, 25 man ext tube ea......£20 14 or 25 auto ext tube ea......£29 60-116 auto ext tube set .... £199 Tripod mount ring....................£59 PENTAX 35mm AF USED Z50P body...................................£49 SFXN body ..................................£49 16-45 F4 .................................... £199 17-70 F4 SDM M- box .......... £299

18 55 F3.5/5.6 ............................£69 28 80 F3.5/5.6 ............................£49 50-200 F4/5.6 DA......................£99 55-300 F4/5.8 ED WR............ £229 55-300 F4/5.8 ED box........... £199 77 F1.8 FA Limited edition . £699 100 F2.8..................................... £149 SIGMA PKAF USED 18-250 F3.5/6.3....................... £199 28-200 F3.5/5.6....................... £149 PENTAX MF USED 35 F2 PK box............................ £199 50 F1.4 PK................................. £149 85 F2 PK .................................... £199 120 F2.8 K................................. £199 135 F3.5 PK .................................£69 150 F3.5 PK box...................... £149 50 F1.4 PK..£99 50 F2 .............£49 50 F4 macro PK..........................£99 TAMRON ADII USED 35-135 F3.5/4.2..........................£99

MORE ON WEBSITE

www.mifsuds.com Please contact us to determine availability before making a lengthy journey

ITEM YOU REQUIRE NOT LISTED? PLEASE GIVE US DETAILS OF WHAT YOU ARE LOOKING FOR AND WE WILL CONTACT YOU WHEN THAT ITEM BECOMES AVAILABLE. Mail order used items sold on 10 day approval. Return in ‘as received’ condition for refund if not satisfied (postage not included - mail order only). E&OE.


MARKET PLACE ACCESSORIES

HOLIDAYS AND COURSES

Photographic Backgrounds

WILDLIFE PHOTO HIDES WORKSHOPS AND HIRE

Hard wearing O low crease O Washable

10 COLOURS INC PLAIN 8’ x 8’ ..... £15 plus P&P BLACK, WHITE & CHROMA 8’ x 12’ ... £24 plus P&P COLOURS 8’ x 16’ ... £29 plus P&P

with Sussex Wildlife Trust Photographer David Plummer

To advertise call Annie Mulcrone on

20 COLOURS

CLOUDED 8’ x 8’ ...... £27 plus P&P 8’ x 12’ .... £44 plus P&P

01733 366374

SPECIAL OFFER: 8 x 12 CLOUDEDS 2 FOR £80 OR 3 FOR £115

01457 764140

www.colourscape.co.uk

www.davidplummerimages.co.uk

or e-mail annie.mulcrone @bauermedia. co.uk

TUITION

To advertise call Annie Mulcrone on 01733 366374 or e-mail annie.mulcrone@bauermedia.co.uk

for a FREE colour brochure or visit...

9[[]kk lg caf_Úk`]j$ god$ jYhlgj$ ogg\dYf\ Zaj\$ \]]j `a\]k

HOLIDAYS AND COURSES

Don’t miss the next issue on sale 18th January


STU DENT SHOWCA SE

A grand adventure Proving age is just a number, Josiah Launstein has created a beautifully crafted wildlife portfolio. O WHILE I MAY ONLY BE 12 YEARS OLD, I’VE BEEN

photographing local wildlife for a little over five years now. My dad is a full-time wildlife photographer, and we own and operate a gallery in a tourist area in the Canadian Rockies. My older sister, Jenaya, became really passionate about photography when she was 13, so I was always going out on trips into the wilderness with my father. By the time I was seven, I started asking my dad if I could use one of his extra cameras. Once I started shooting, it didn’t take long for me to completely fall in love with it. From the beginning, my dad always encouraged me to choose the kit, composition and settings that I wanted for myself. He helped me to understand the basics of exposure and composition, and we’d always go through my images after every day out in the field. We all love shooting together, and there’s always a lot of fun competition between the three of us to see who can get the best photo of the shoot. I’ve purchased my own equipment now and I go out with it almost every day. We live on an acreage below the mountains, so we have animals such as mule deer, foxes, owls and partridges in our own back garden. Last August I flew to Thailand for a Nikon Asia production on my work. When I wasn’t busy on set, I loved photographing the different caterpillars they had there. One of the images I took was subsequently recognised in the 2017 Wildlife Photographer of the Year competition. When asked if I have any advice for other photographers, I always think of something my dad told me when I was first getting into photography – you should always work with a subject that you love. On a more practical level, it’s really important to shoot as often as possible. If I’m not out in the field regularly then I can feel a little rusty once the action starts. I’ve also noticed that I start thinking of more creative ways to photograph my subjects when I’m out with them more often. I’m excited to have started my career in wildlife photography, and this year I’m concentrating on making every photo tell the story of the animal pictured.

Josiah Launstein won the Young Outdoor Photographer of the Year competition in 2014. Other young photographers can enter at opoty.co.uk View more of Josiah’s work at launsteinimagery.com/josiah

162 PRACTICAL PHOTOGRAPHY


Welcome to the family Profoto A1 The A1 is every inch a Profoto light – just smaller. Its round head delivers light that’s both natural and beautiful. And it’s incredibly easy and to use, with superfast recycling and a long-lasting battery, so you’ll never miss a shot. On the move, shooting on-camera or off, this is light shaping excellence everywhere. Discover more at profoto.com


Turn static files into dynamic content formats.

Create a flipbook
Issuu converts static files into: digital portfolios, online yearbooks, online catalogs, digital photo albums and more. Sign up and create your flipbook.