Festive Fare


CHRISTMAS E-BOOK 2022 WWW.NOURISHMAGAZINE.CO.NZ FRESH LOCAL FLAVOUR

I don’t think there is any other time of the year where we talk about food, plan for and eat as much food as we do at Christmas. While some of us find it hard to break from family traditions, where the only dessert that can be served is Nan’s trifle, others try to out do last year’s feast with new, exciting dishes.

While food may be what is bringing us together round the table, and we hope you find some keepers in this collection, just remember this festive season it’s really the people you’re sharing the food with that count.
 RECIPES Vicki Ravlich-Horan, Harriet Boucher IMAGES Ashlee DeCaires, Brydie Thompson, Tracey Heasman, Vicki Ravlich-Horan
PROOF READING Nikki Crutchley DESIGN Sara Cameron
Happy Christmas
Vicki Ravlich-Horan Editor
RECIPES Vicki Ravlich-Horan, Harriet Boucher IMAGES Ashlee DeCaires, Brydie Thompson, Tracey Heasman, Vicki Ravlich-Horan
PROOF READING Nikki Crutchley DESIGN Sara Cameron
Happy Christmas
Vicki Ravlich-Horan Editor
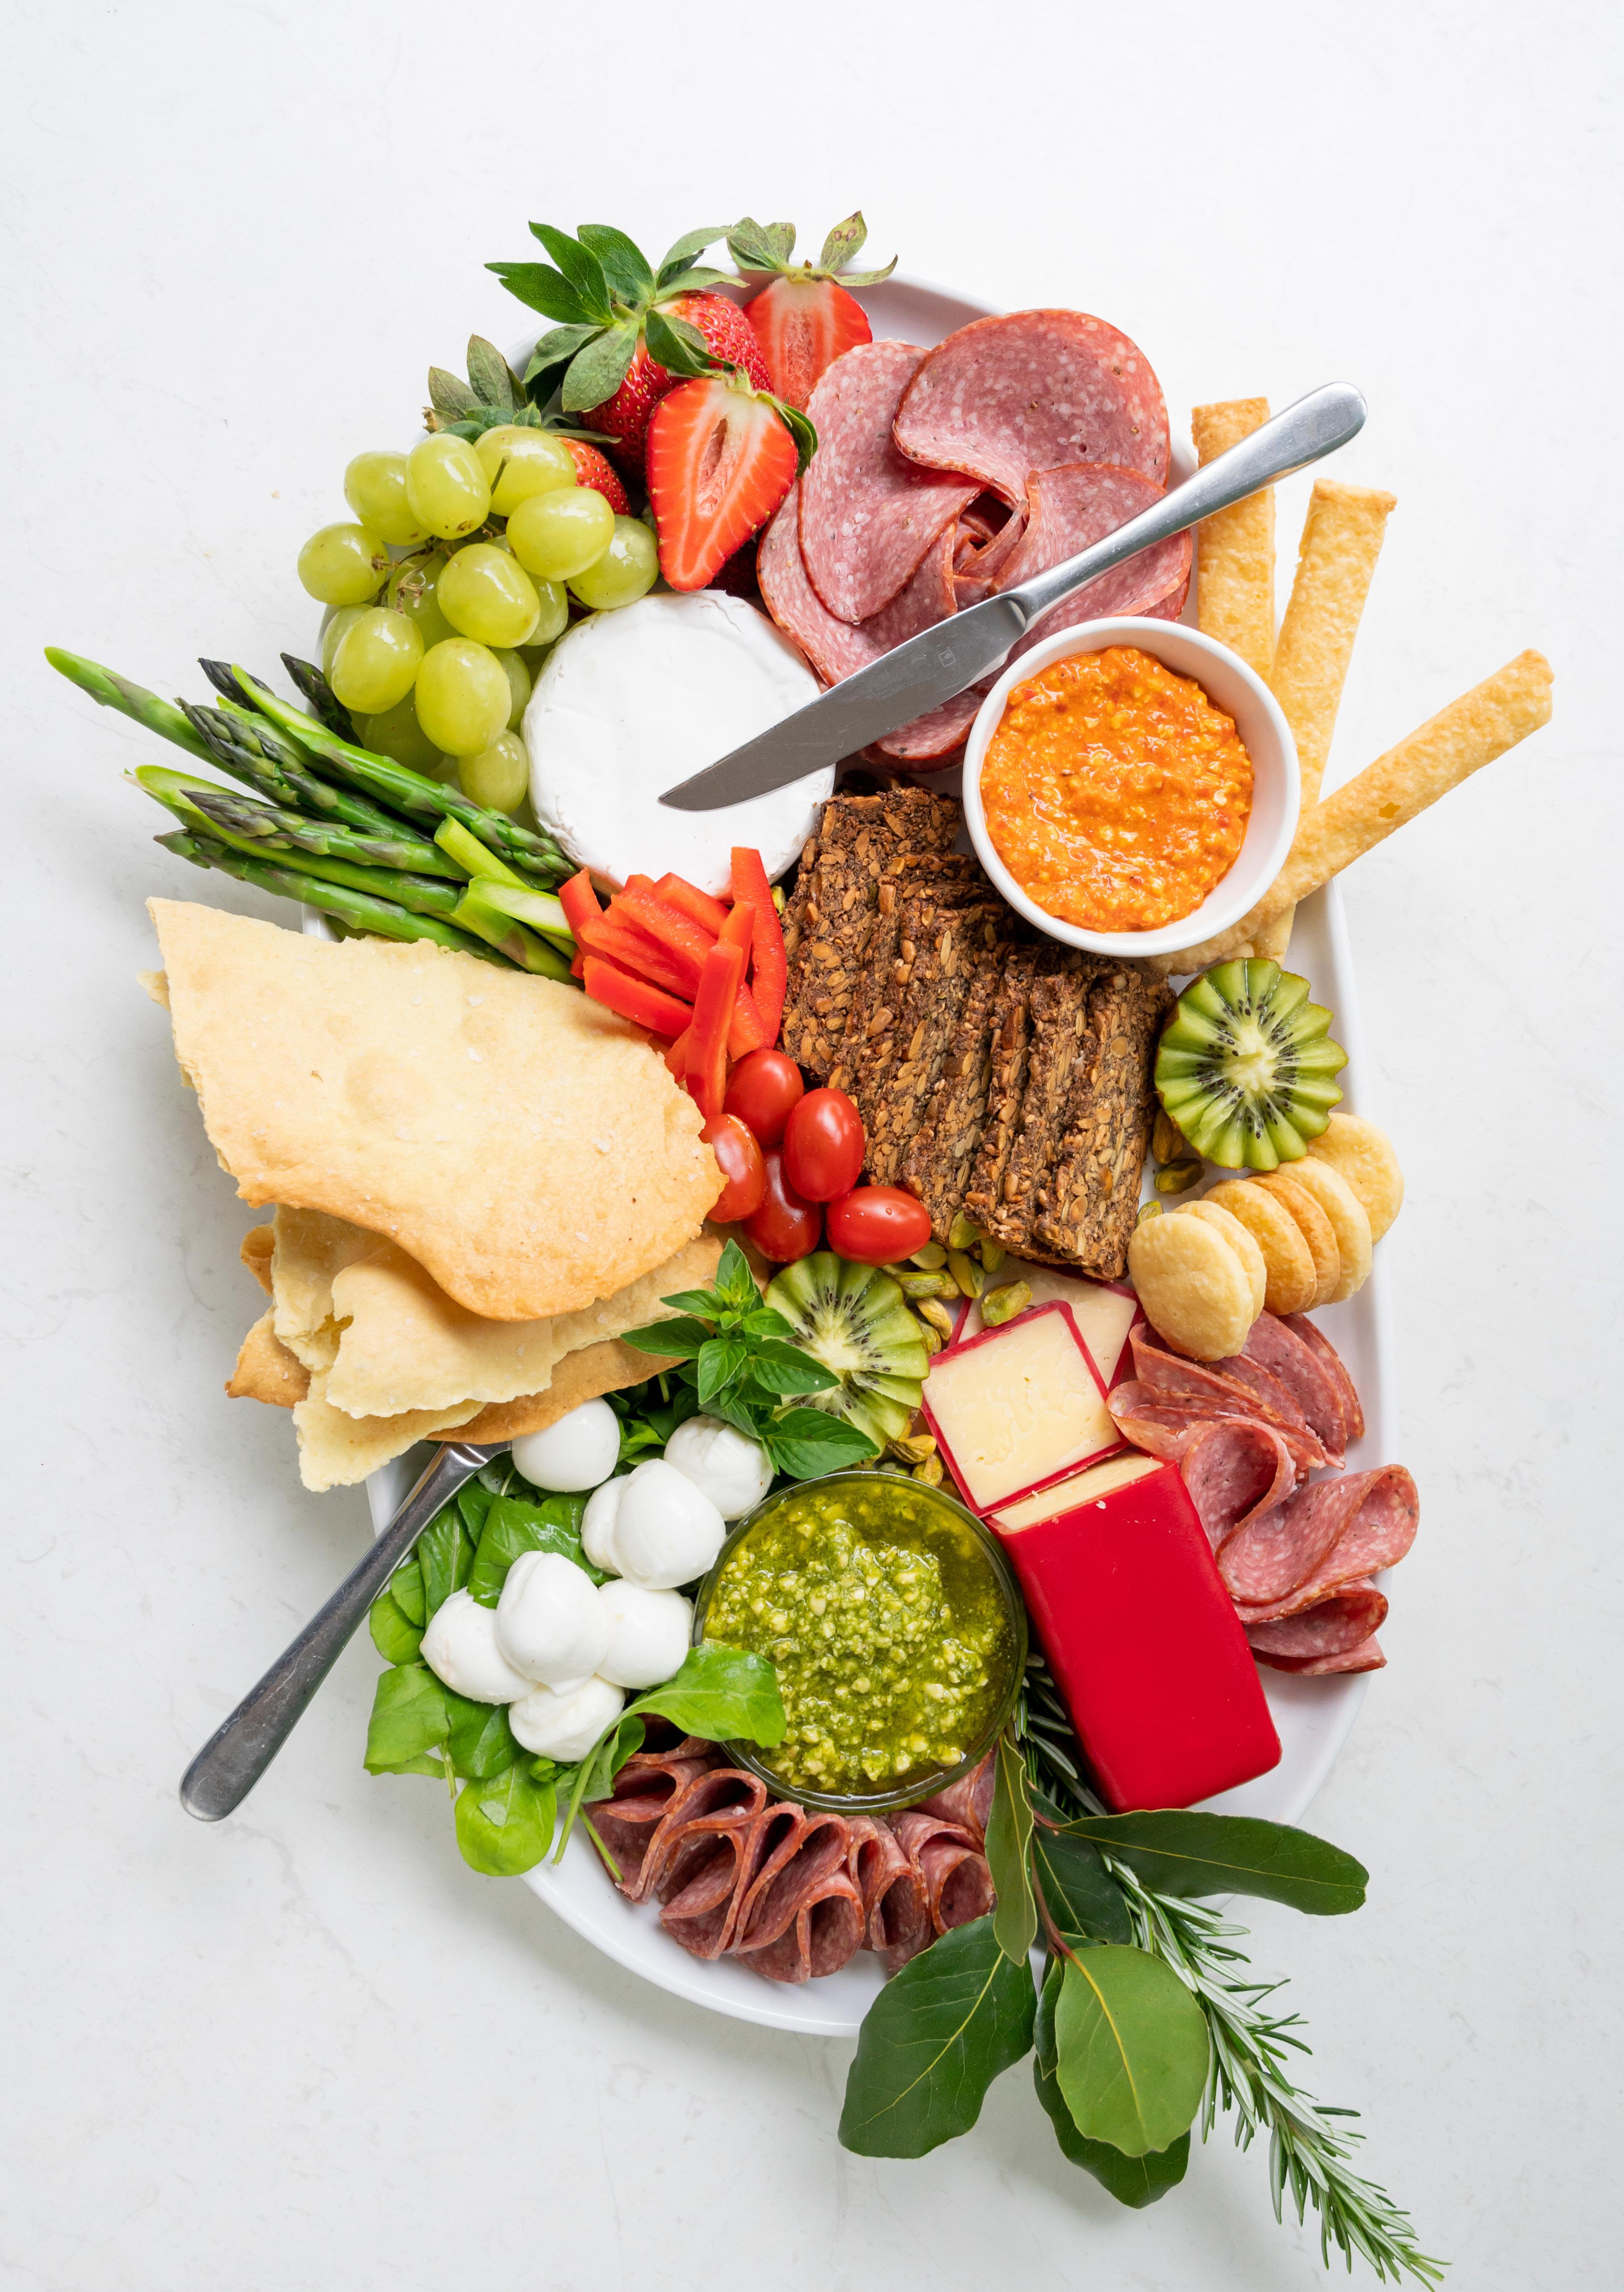
Whether it’s for those pre-Christmas drinks snacky starter before the main event on Christmas Day, a festive platter is a great way to please everyone.

Even if you restrict it to festive red, green and white colours, you can tweak the ingredients and size of your platter to suit. Here are a few of our suggestions on building the perfect platter.
Don’t panic if you don’t have the picture-perfect platter. Get creative using oven trays, enamel dishes, wooden rounds or chopping boards. Add a sheet or two of brown paper on the bottom and it will start looking like a Christmas gift.
Start by filling bowls with the dips and place these on first, followed by the cheeses.
Once these larger items are on, place the cured meats next. We love making a rose out of salami. This is easy to do: fold large, thin salami slices over the rim of a glass, working your way around it in tight layers until the gap is almost closed. Tip the glass onto your platter, then gently wiggle the glass free of the salami and you’ll be left with a stunning rose.
Place handfuls of veggie sticks in next, followed by breads and crackers. Fill any gaps with the fillers, using shot glasses or small ramekins to add variety and height to the platter if needed.
Don’t feel pressured to add all of the ingredients on initially, leave some behind to replenish the board, and if you find you’ve over catered, the extras won’t go to waste.

This beautiful dip also makes a wonderful dressing for pasta or chickpea salad, perfect for leftover roast turkey on Boxing Day.
2 x red capsicums, cut into quarters with seeds removed
4 x tomatoes, cut into quarters
½ red onion, roughly chopped
2 cloves garlic
¼ cup extra virgin olive oil
½ cup roasted cashews (or almonds)
¼ cup grated parmesan
Place the capsicums, tomatoes, onion and garlic in a large roasting pan. Drizzle over 2–3 tablespoons of olive oil and then roast at 180°C for approx. 30–40 minutes. You want everything to be soft, but not coloured.
Place the roasted vegetables along with the remaining ingredients in a food processor. With the motor running, drizzle in remaining olive oil until the pesto is smooth. Check and season to taste.
While the classic basil pesto is always a crowd pleaser and endlessly handy to have on hand, you can make a just as delicious version by changing up the leaves and/or nuts used.
1–2 cloves garlic
4–6 cups of basil (alternatively use rocket, parsley, kale, spinach or a combination of all) zest of 1 and juice of 2 large lemons
1 cup of pine nuts (or alternatively almonds, walnuts or cashews)
1 cup parmesan cheese, grated
½ cup extra virgin olive oil salt & pepper
Place all the ingredients except the oil and salt and pepper into a food processor. Then, with the motor running, slowly drizzle in the olive oil until you have a fine consistency. Taste and season with salt and pepper.
The pesto can be stored in an airtight container in the fridge for a couple of months if the top is covered with oil. Or for longer storage freeze.

These are always a crowd pleaser, whether served on their own or topped with the likes of pesto and sliced cherry tomato.


1 cup flour 100g cold butter, cut into cubes 130g (1 heaped cup) Parmesan, grated pinch cayenne pepper (optional)
Place all the ingredients in the food processor.
Whizz until the mix comes together. If, after a minute or so, it still looks like dry breadcrumbs add a tablespoon of cold water while the motor is running. It should now come together in a ball.
Wrap in cling film and rest in the fridge for at least half an hour. The dough will keep in the fridge for at least a week like this.
On a floured bench roll out the dough to approx. 0.5cm in thickness. (I like to split it in half as it makes it easier to manage). Using a cookie cutter, cut out your shapes and place on a lined oven tray. If it’s hot put the tray of uncooked shortbread in the fridge for 30 minutes before cooking in a 180°C oven for 8–10 minutes. Once cool, store in an airtight container.
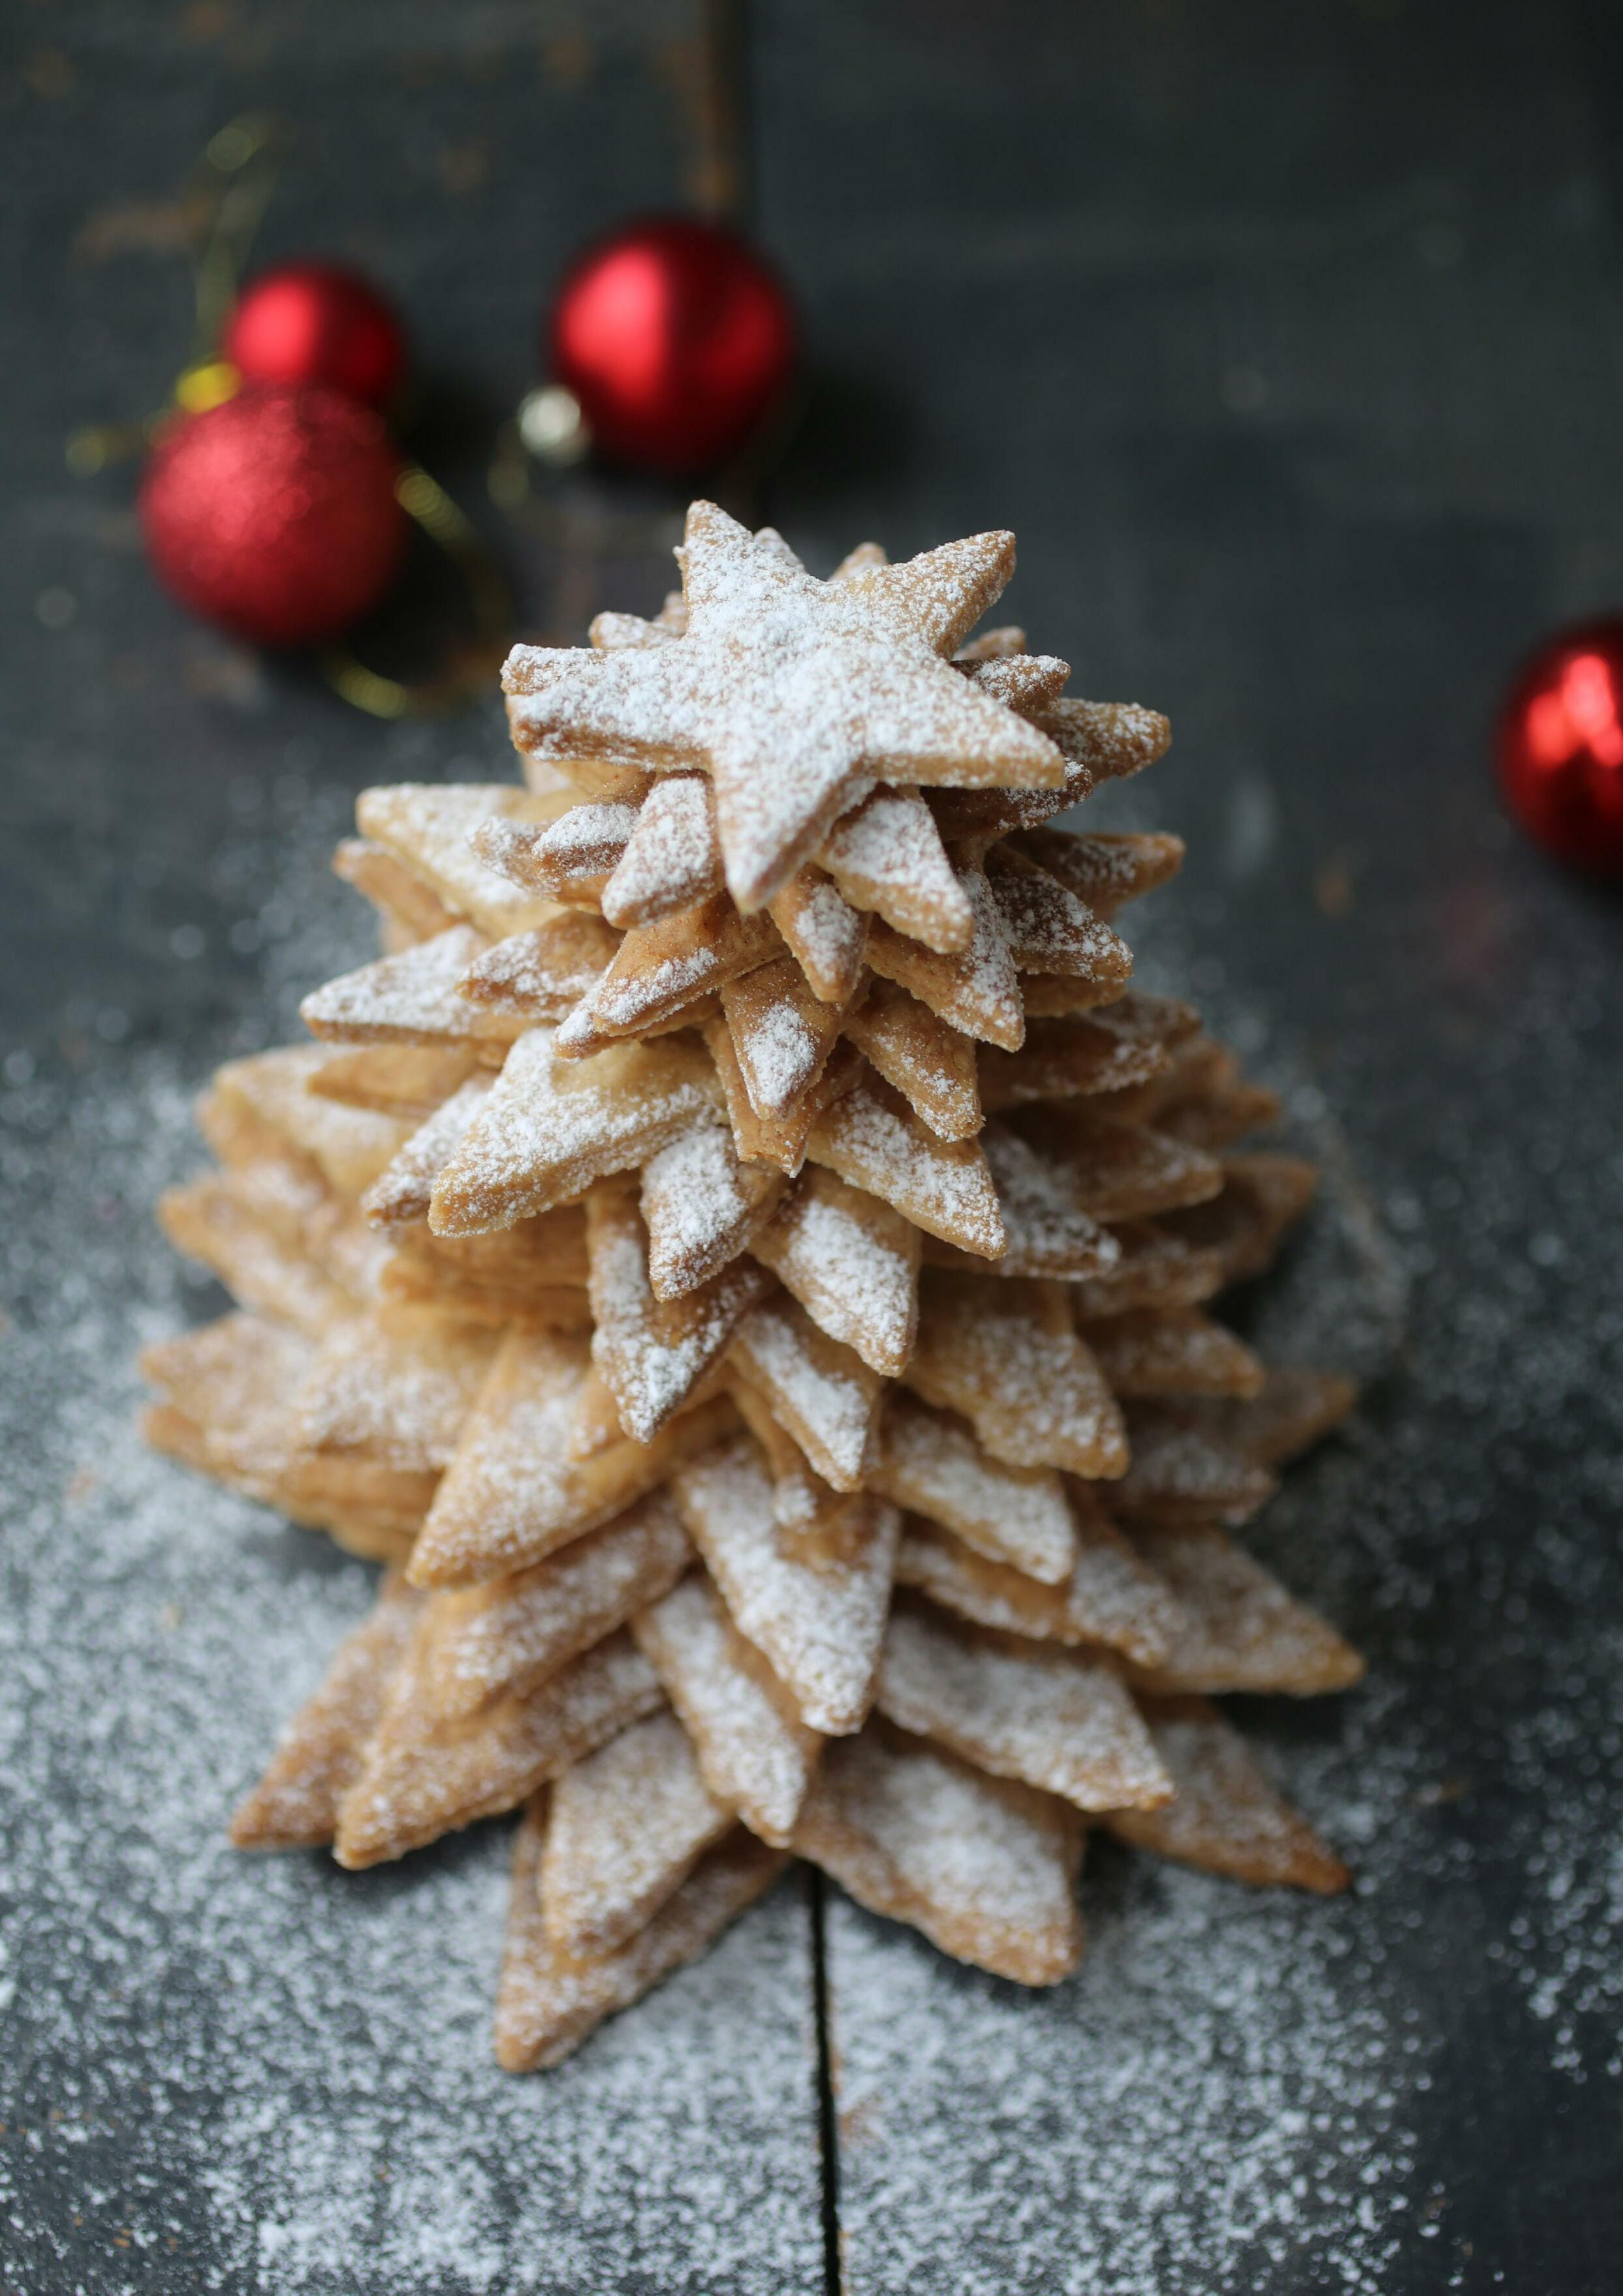
These beautifully buttery shortbread are the perfect accompaniment to a restorative cup of tea during the hectic festive season. They also make a wonderful little gift!
¾ cup sugar
1 tsp cinnamon
1 tsp mixed spice
250g cold butter, chopped 2 cups flour
Place the sugar and spices into a food processor and whizz until they are a fine powder. Add the flour and chopped butter. Process until it forms a dough.
Chill for 30 minutes before rolling out and cutting to shape. Bake at 180°C for approx. 12 minutes.
For a wonderful centrepiece cut the dough into descending size stars and then stack these to make a 3D Christmas tree.
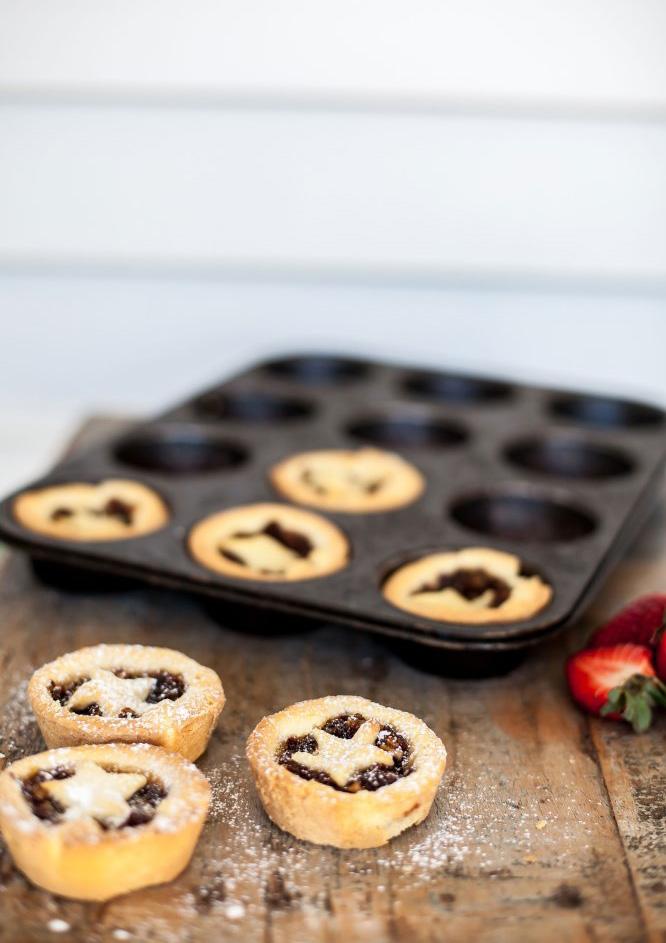
Some of my fondest childhood memories are of my grandmother’s kitchen, from polishing the silver to putting on elaborate tea parties. My grandmother, or Mumma as we called her, was a great cook and at Christmas time she came into her own. Preparations for Christmas would start in July and most of December was a flurry of activity as she created wonderful edible gifts for friends and family. Anyone who stopped by in December was sure to leave with a jar of sugared peanuts or a box of spiced biscuits. But if you were truly privileged you would receive a dozen of her mince pies. I am just so thankful for the times we did have and the amazing tips she passed on. So here is her recipe.
MINCE
2 cups sultanas
2 cups mixed fruit
2 or 3 Granny Smith apples, peeled and roughly chopped juice and rind of 1 orange and 1 lemon
1 cup brown sugar
1 tsp cinnamon
1 tsp mixed spice pinch salt
½ tsp ground cloves ½ tsp nutmeg ½ cup brandy PASTRY
250g butter, softened 1 cup sugar
2 eggs
½ tsp vanilla paste (optional)
3 cups flour
1 tsp baking powder
In a non-metallic bowl mix all the mince ingredients together. Cover and leave in the fridge overnight (or longer). Then in batches mince up in your food processor.
The mince will last ages! In fact it improves with age. Simply store in airtight jars in the fridge. This recipe does make quite a lot so you can use the mince in all sorts of other things like muffins, stir through stewed apple before making an apple pie with a difference or stir through softened vanilla ice cream before refreezing.
For the pastry - in your food processor blend the butter, sugar and eggs and vanilla paste (if using). Once combined add the flour and baking powder. Now at this point you need to forget everything you know about pastry and that it should be handled as little as possible. This pastry loves to be played with. Turn the food processor on and let it go until it forms a ball. You may need to add more flour depending on how big your eggs were. When it comes to a ball, tip out onto a well-floured bench and knead. The pastry will soak up the flour on your bench. What you are looking for is a smooth pastry with no visible sugar granules. It should also be pliable but not sticky. Form into 2 balls and wrap in cling film to rest in the fridge for at least an hour.
To assemble the pies, pre-heat your oven to 180°C and grease some muffin tins. Flour your bench and roll the pastry out to about 2mm thickness. As you roll, turn the pastry often. It should stay together in one piece this way. If not, simply knead together and start again.
Cut out rounds to fit into your muffin tins. The pastry should come about halfway up the tin. Then fill each case with just under a teaspoon of mince and top with a star of the pastry, or you can cover the top completely with pastry. This is always a huge debate in the family as to which is better, so I will leave that up to you.
Then bake in the oven for about 10–12 minutes. You need to keep a good eye on them, as they burn very quickly! You don’t want them to be brown, they simply need to have a little blush of colour. When cool, store them in an airtight container. They freeze well too.
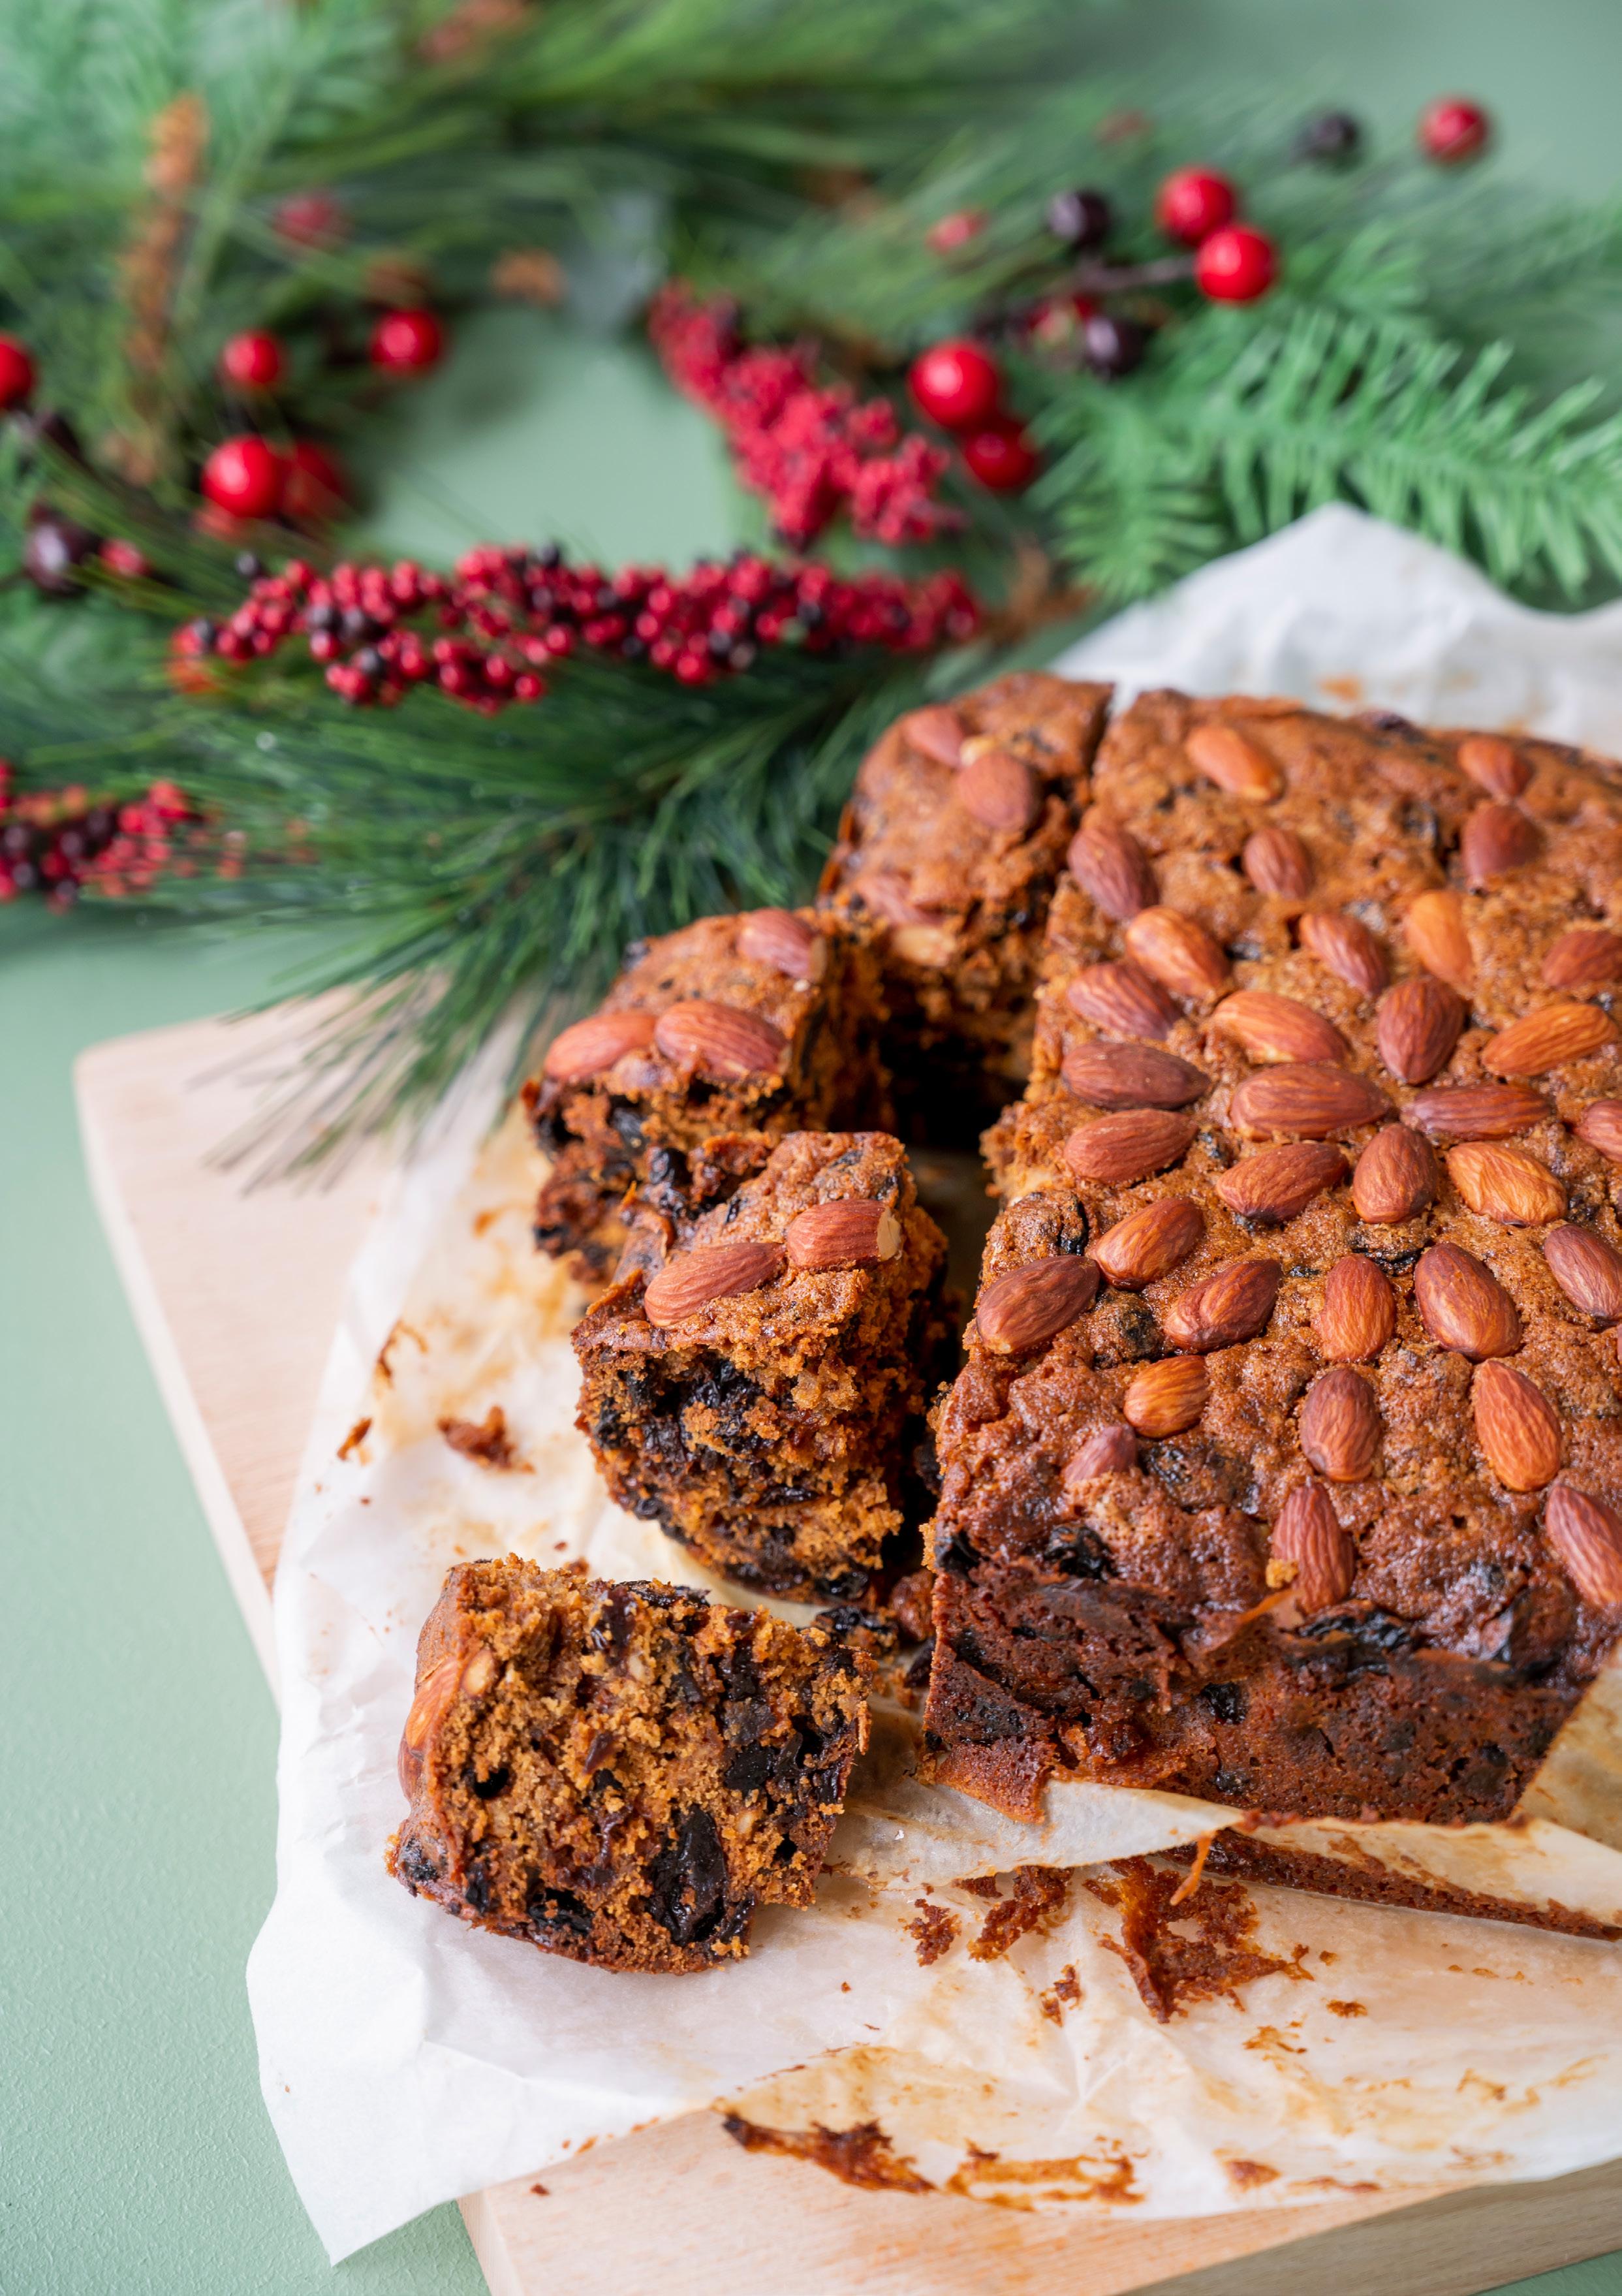
This is a fabulously moist cake, perfect for those of us who never get organised enough to make the Christmas cake in June. Made in large muffin tins it also creates a great cheats Christmas pudding. Simply nuke in the microwave and serve with lashings of custard.
INGREDIENTS
6 cups mixed fruit
1 apple, grated
½ cup whiskey

½ cup orange juice
1 cup brown sugar
185g butter, softened 3 eggs
½ cup ground almonds
1½ cups flour
1 tsp nutmeg
½ tsp each of ground ginger, cloves and cinnamon
½ tsp baking soda
Soak the mixed fruit and apple in the whiskey and orange juice overnight.
Cream the butter and sugar until just combined then add the eggs one at a time, beating until just combined between each addition. Add the soaked fruit and remaining ingredients to the butter mix and stir with a wooden spoon.
Spread mix into a prepared 20cm tin that has been lined with a double layer of baking paper. If not icing, decorate now with nuts or cherries. Bake at 150°C for approx. 3 hours (less if making individual ones).

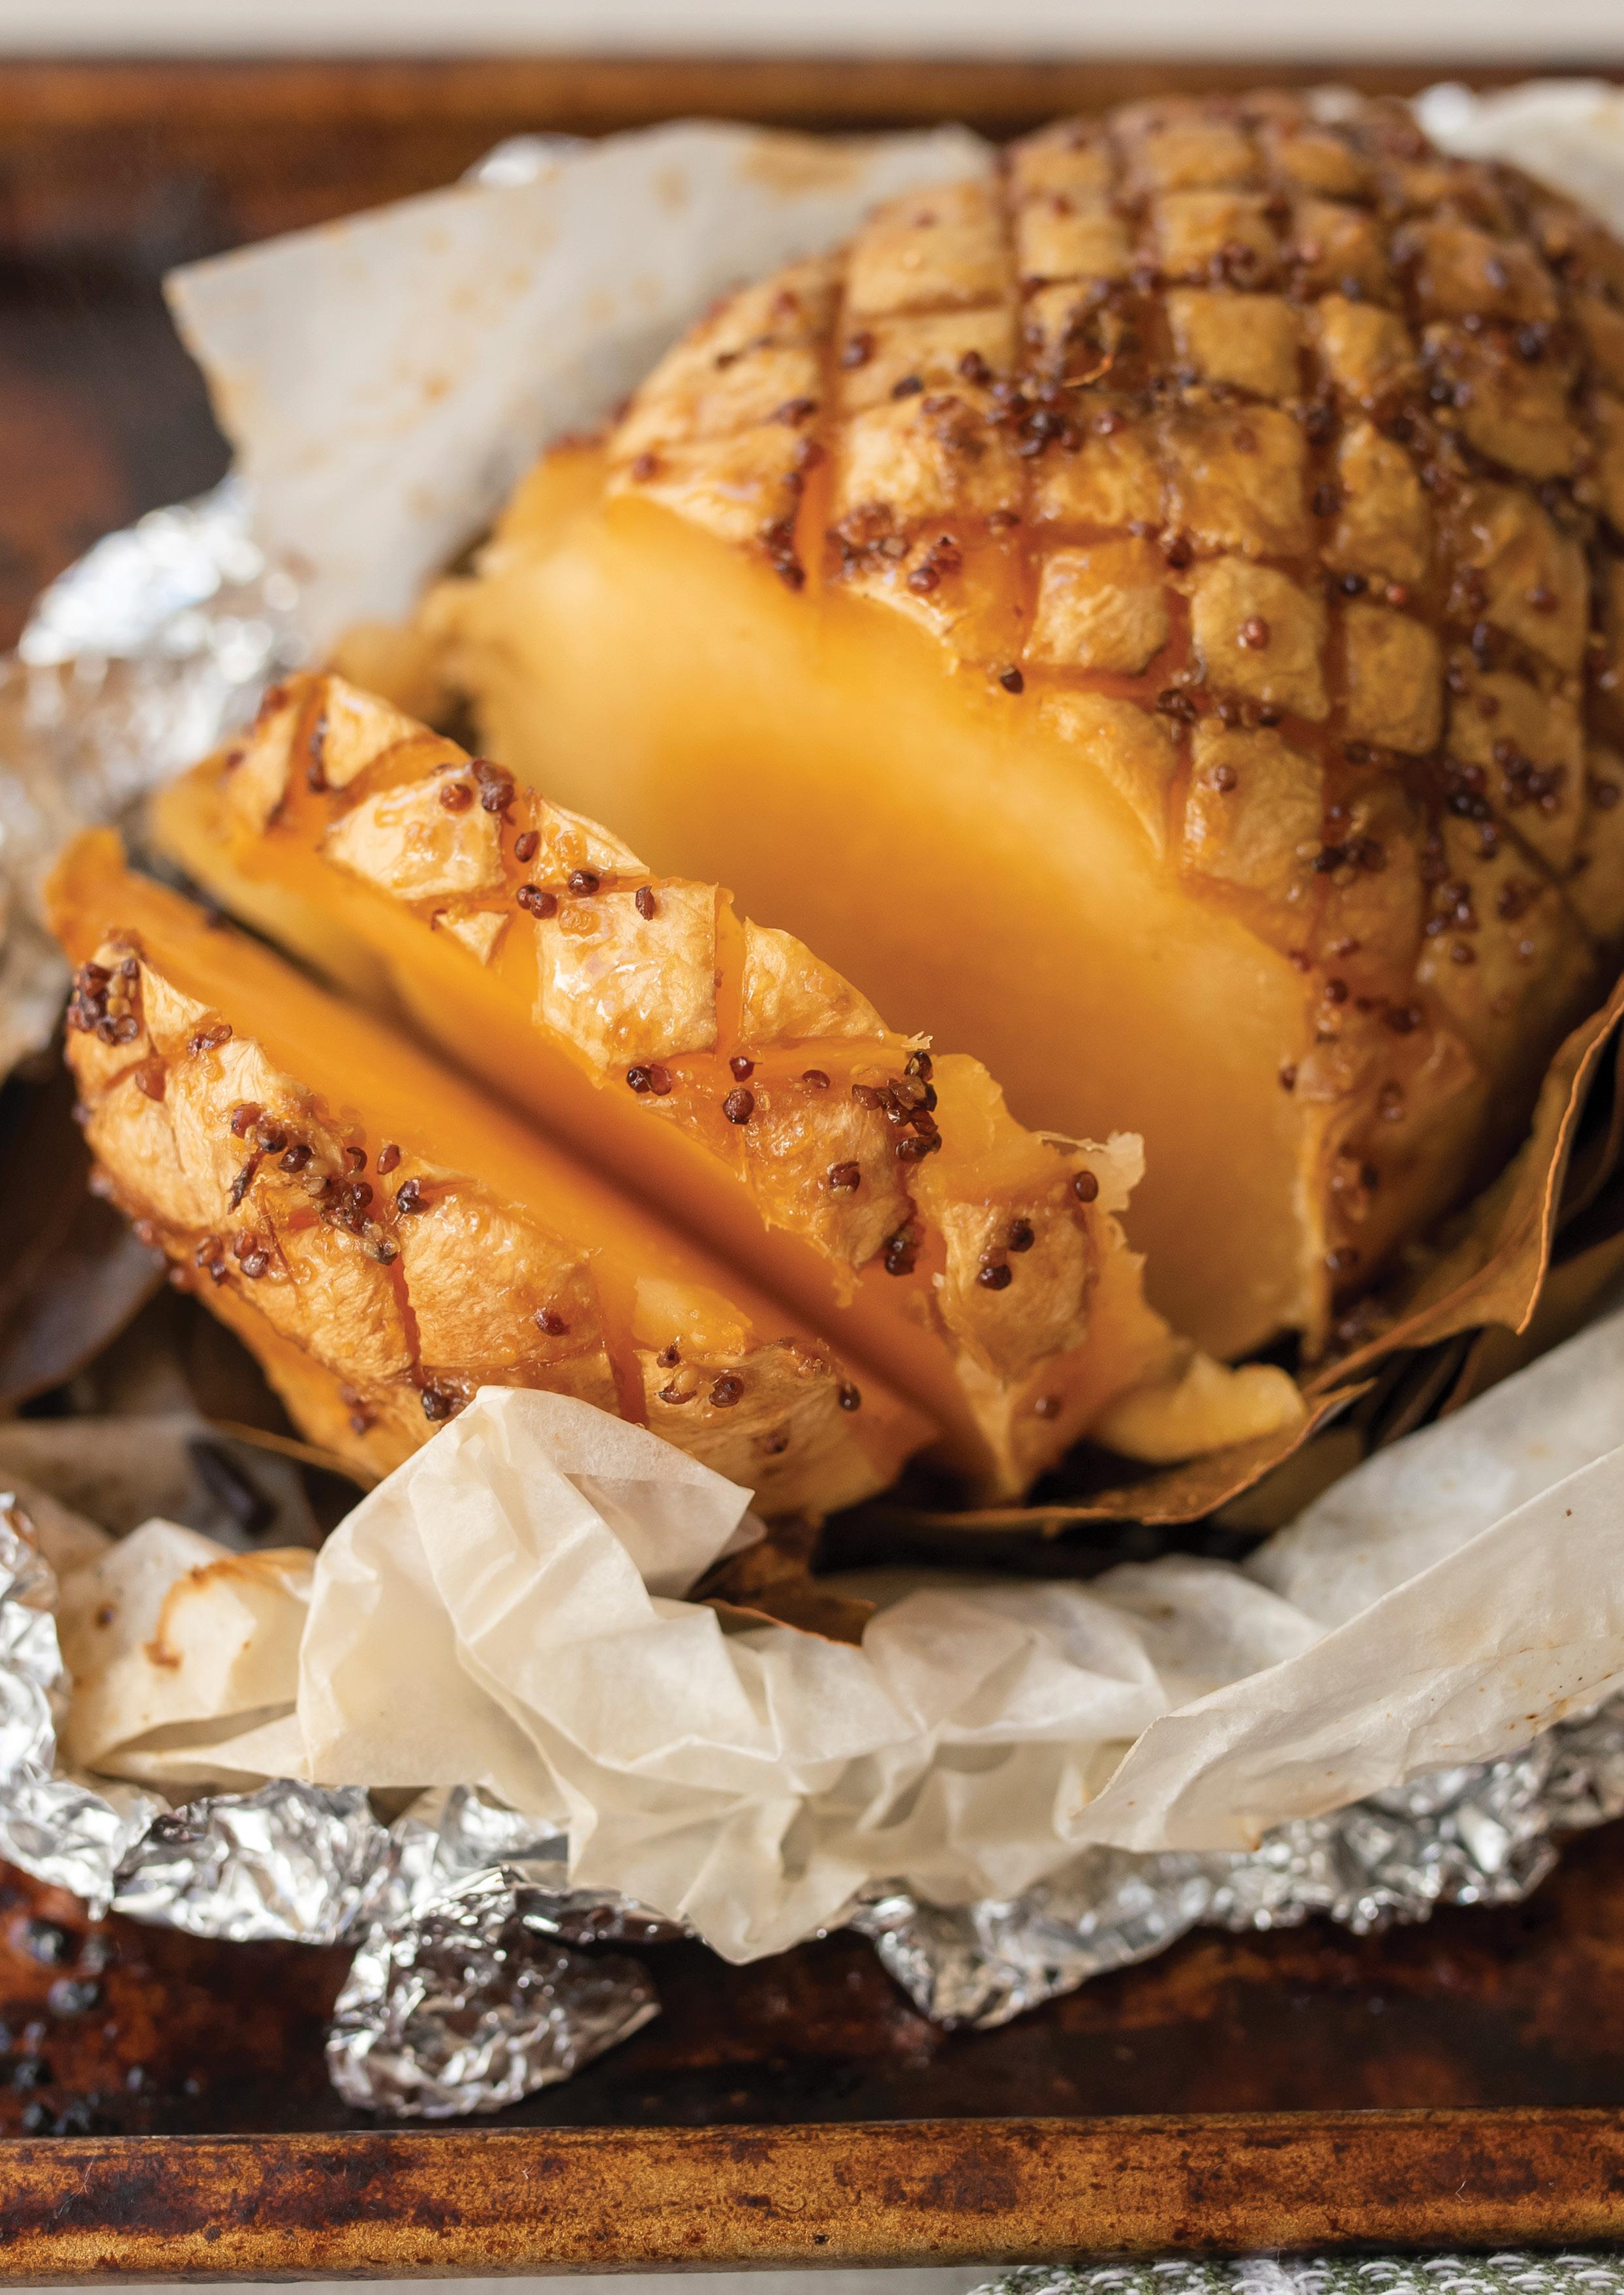
If you’re stuck on what to feed your vegan guests this Christmas, or are opting for a meatless celebration, this is the hero dish for you. This glazed swede has the sweet scent of bay leaf, cloves and sticky muscovado sugar. It will leave everyone curious and wanting more, even those Christmas ham worshippers.
1 whole swede, peeled
12 whole cloves
2 sprigs of fresh bay leaves
3 tbsp olive oil
½ cup water or vegetable stock
₁⁄₃ cup muscovado sugar (or brown sugar)
1 heaped tbsp wholegrain mustard
1 tsp apple cider vinegar salt & pepper
Preheat the oven to 180°C.
Using a sharp knife, score the swede diagonally both ways to create the classic Christmas ham look. Make sure you cut about 1cm deep so the flavours seep through.
Press the cloves into the swede. This takes quite a bit of force!
Line a tray with tin foil. Overlap two pieces if needed, you will be wrapping the swede in this. Then place a sheet of baking paper on top of the foil. Lay the bay leaves on the baking paper, then place the clovestudded swede on top. Drizzle the olive oil on top and give it a good grinding of salt and pepper. Start to bring the foil up around the swede to create a parcel, then pour the water/stock in and seal the tinfoil over the swede, trapping the liquid in.
Bake in the oven for about two hours, then check with a skewer and continue baking until the liquid has evaporated and the swede is soft (up to 4 hours). Add more liquid if needed. This definitely helps speed up the process.
While the swede is baking, mix together the sugar, mustard and vinegar with a little salt and pepper and set aside.
Once the swede is soft, unwrap the top of the tinfoil parcel so it exposes the swede and pour the glaze over. Bake in the oven for a further 20–30 minutes until the glaze is bubbling and sticky.
Transfer the swede to a serving platter, with some fresh bay leaves for decoration, and carve. You can serve this with créme fraîche, or a vegan alternative, but it is delicious on its own.
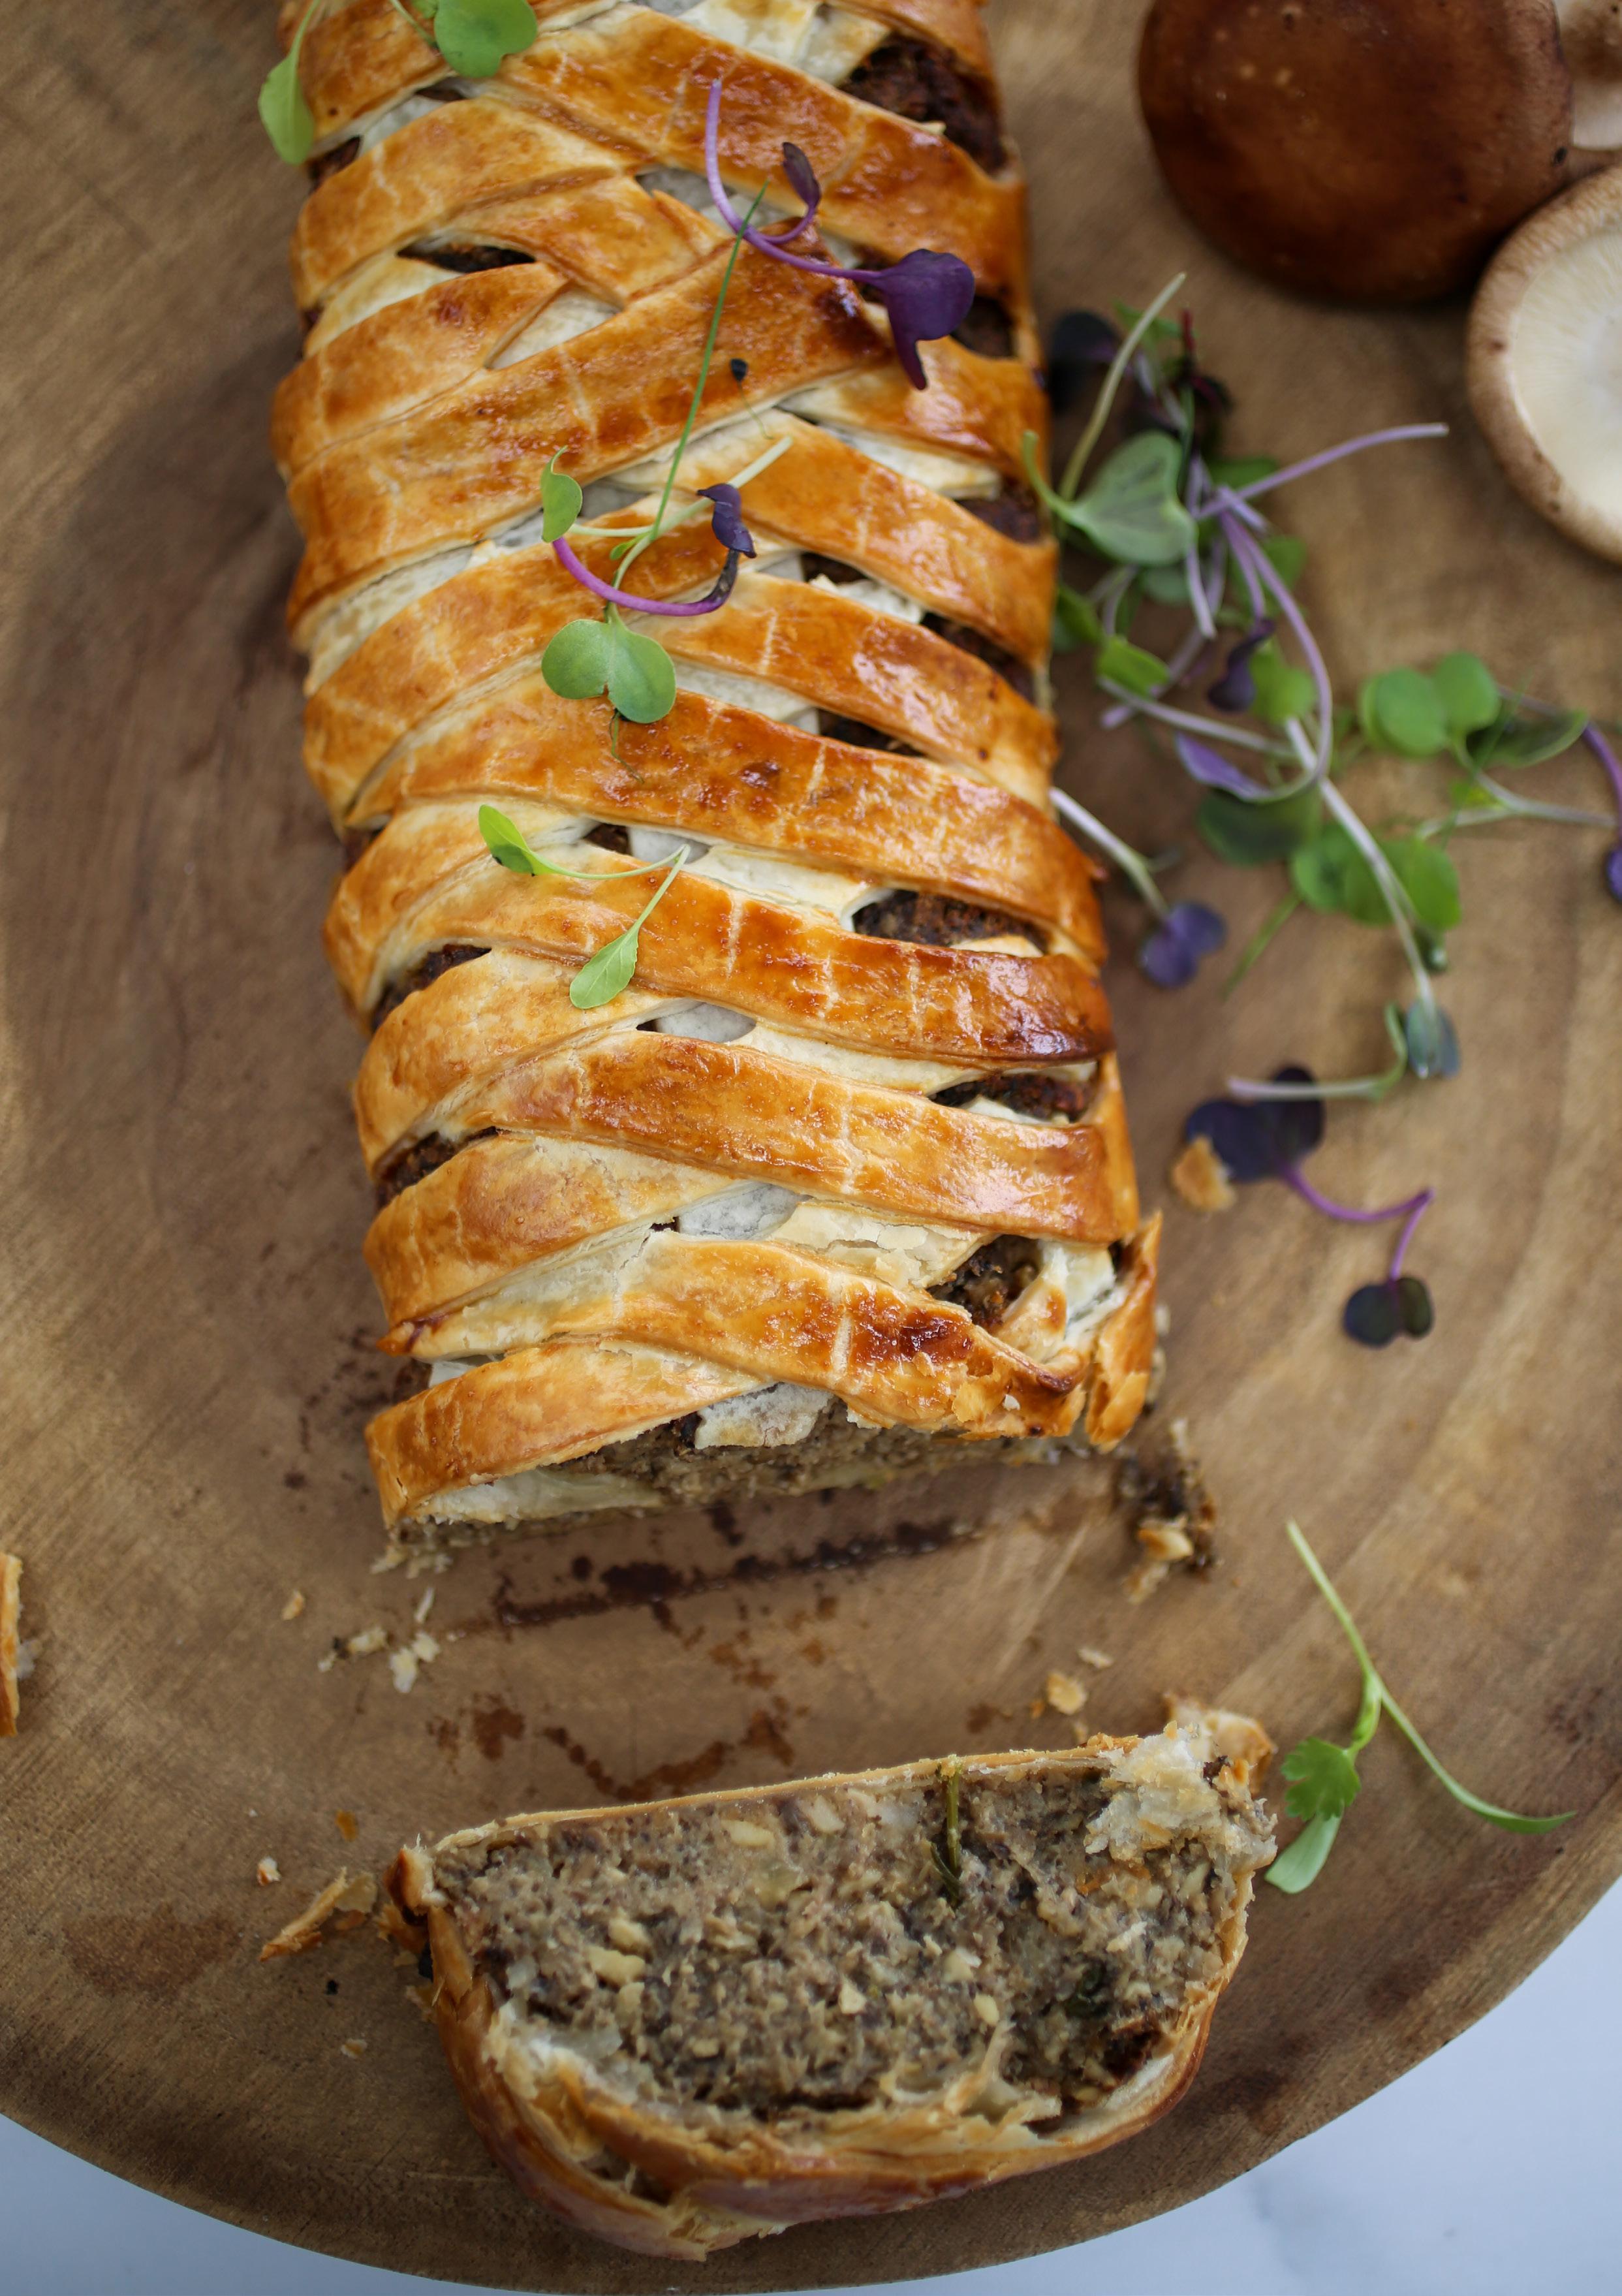
This is a great vegetarian festive dish. The original recipe comes from The Cranks Bible by Nadine Abensur. If you are into vegetarian food I can’t recommend this book enough. I have adapted this recipe slightly, using more mushrooms as well as some dried mushrooms for more depth of flavour.
20g (approx. ¼ cup) dried mushrooms
3 tbsp soy sauce
1 tbsp marsala sherry
6 tbsp hot water
3 large onions
4 cloves of garlic, crushed
500g mushrooms (if available use a mixture of mushrooms)
1½ tbsp dried tarragon
1 cup cashew nuts
1 cup ground almonds
100g fresh breadcrumbs (I made my breadcrumbs from a couple of dayold ciabatta, but any slightly stale bread will work. Alternatively panko breadcrumbs should do the trick too.)
salt & pepper
ready-made flaky pastry
1 egg
The Wellingtons can be prepared ahead of time and chilled once you have wrapped the pastry around the mushroom filling ready to be baked just before serving, making them a very stress-free dish on the day. Serve it with steamed asparagus and cranberry chutney.
Soak the dried mushrooms in the soy sauce, marsala and water. Chop the onions and sauté with two of the cloves of garlic in a little oil. You want the onions to be browned but not burnt.
Once happy with the colour of the onions, set them aside and add a little more oil to the pan along with the mushrooms, remaining garlic and tarragon. There is no need to chop the mushrooms but I do remove the stalks of the large ones.
Cook the mushrooms at quite a high heat for five minutes and then add the dried mushrooms and their soaking liquid. Continue to cook for another five minutes.
While the mushrooms are cooking, whizz the breadcrumbs and then the cashew nuts up in the food processor then combine these with the ground almonds. Set aside and add the onions and mushrooms into the food processor and whizz until smooth. Add the breadcrumbs and nuts and process until smooth. Season with a good pinch of salt and some pepper.
Now to wrap the mixture in pastry. I use ready rolled pastry sheets. You can keep as one large Wellington or divide the mixture into four and wrap the mixture like a parcel in the pastry. Or for a more sophisticated look see below.
At first this may appear complicated, but once you start you will find it’s not that hard. Plus once cooked many of your little mistakes will disappear.
Place the mixture in the middle of the pastry sheet. Shape it into a rectangle log, taking up the middle third of the pastry. If making four individual Wellingtons one pastry sheet should work for each. If making one large one you will need two sheets joined together.
Using a sharp knife, cut a line at a 45° angle from the left hand corner of the pastry to the left hand corner of the mushroom mixture. Continue making similar cuts down the left hand side, approx. 1cm wide. Once done, repeat this on the right hand side.
I have found it easier to cut the last cuts down to a point where they meet so you have a triangle you can then fold in at the bottom. For the top I cut a line directly up from each side of the mushroom mixture creating a triangle of pastry on each side that can be removed and a square flap to fold over the mushroom mixture.
Now starting on the left, fold one strip of pastry over the mushroom mixture followed by a strip from the right. Continue doing this until the entire mixture is covered. You may have an extra strip or two left at the end. I simply cut these off.
Brush with beaten egg all over and bake in a pre-heated 200°C oven for 25-35 minutes until golden brown.
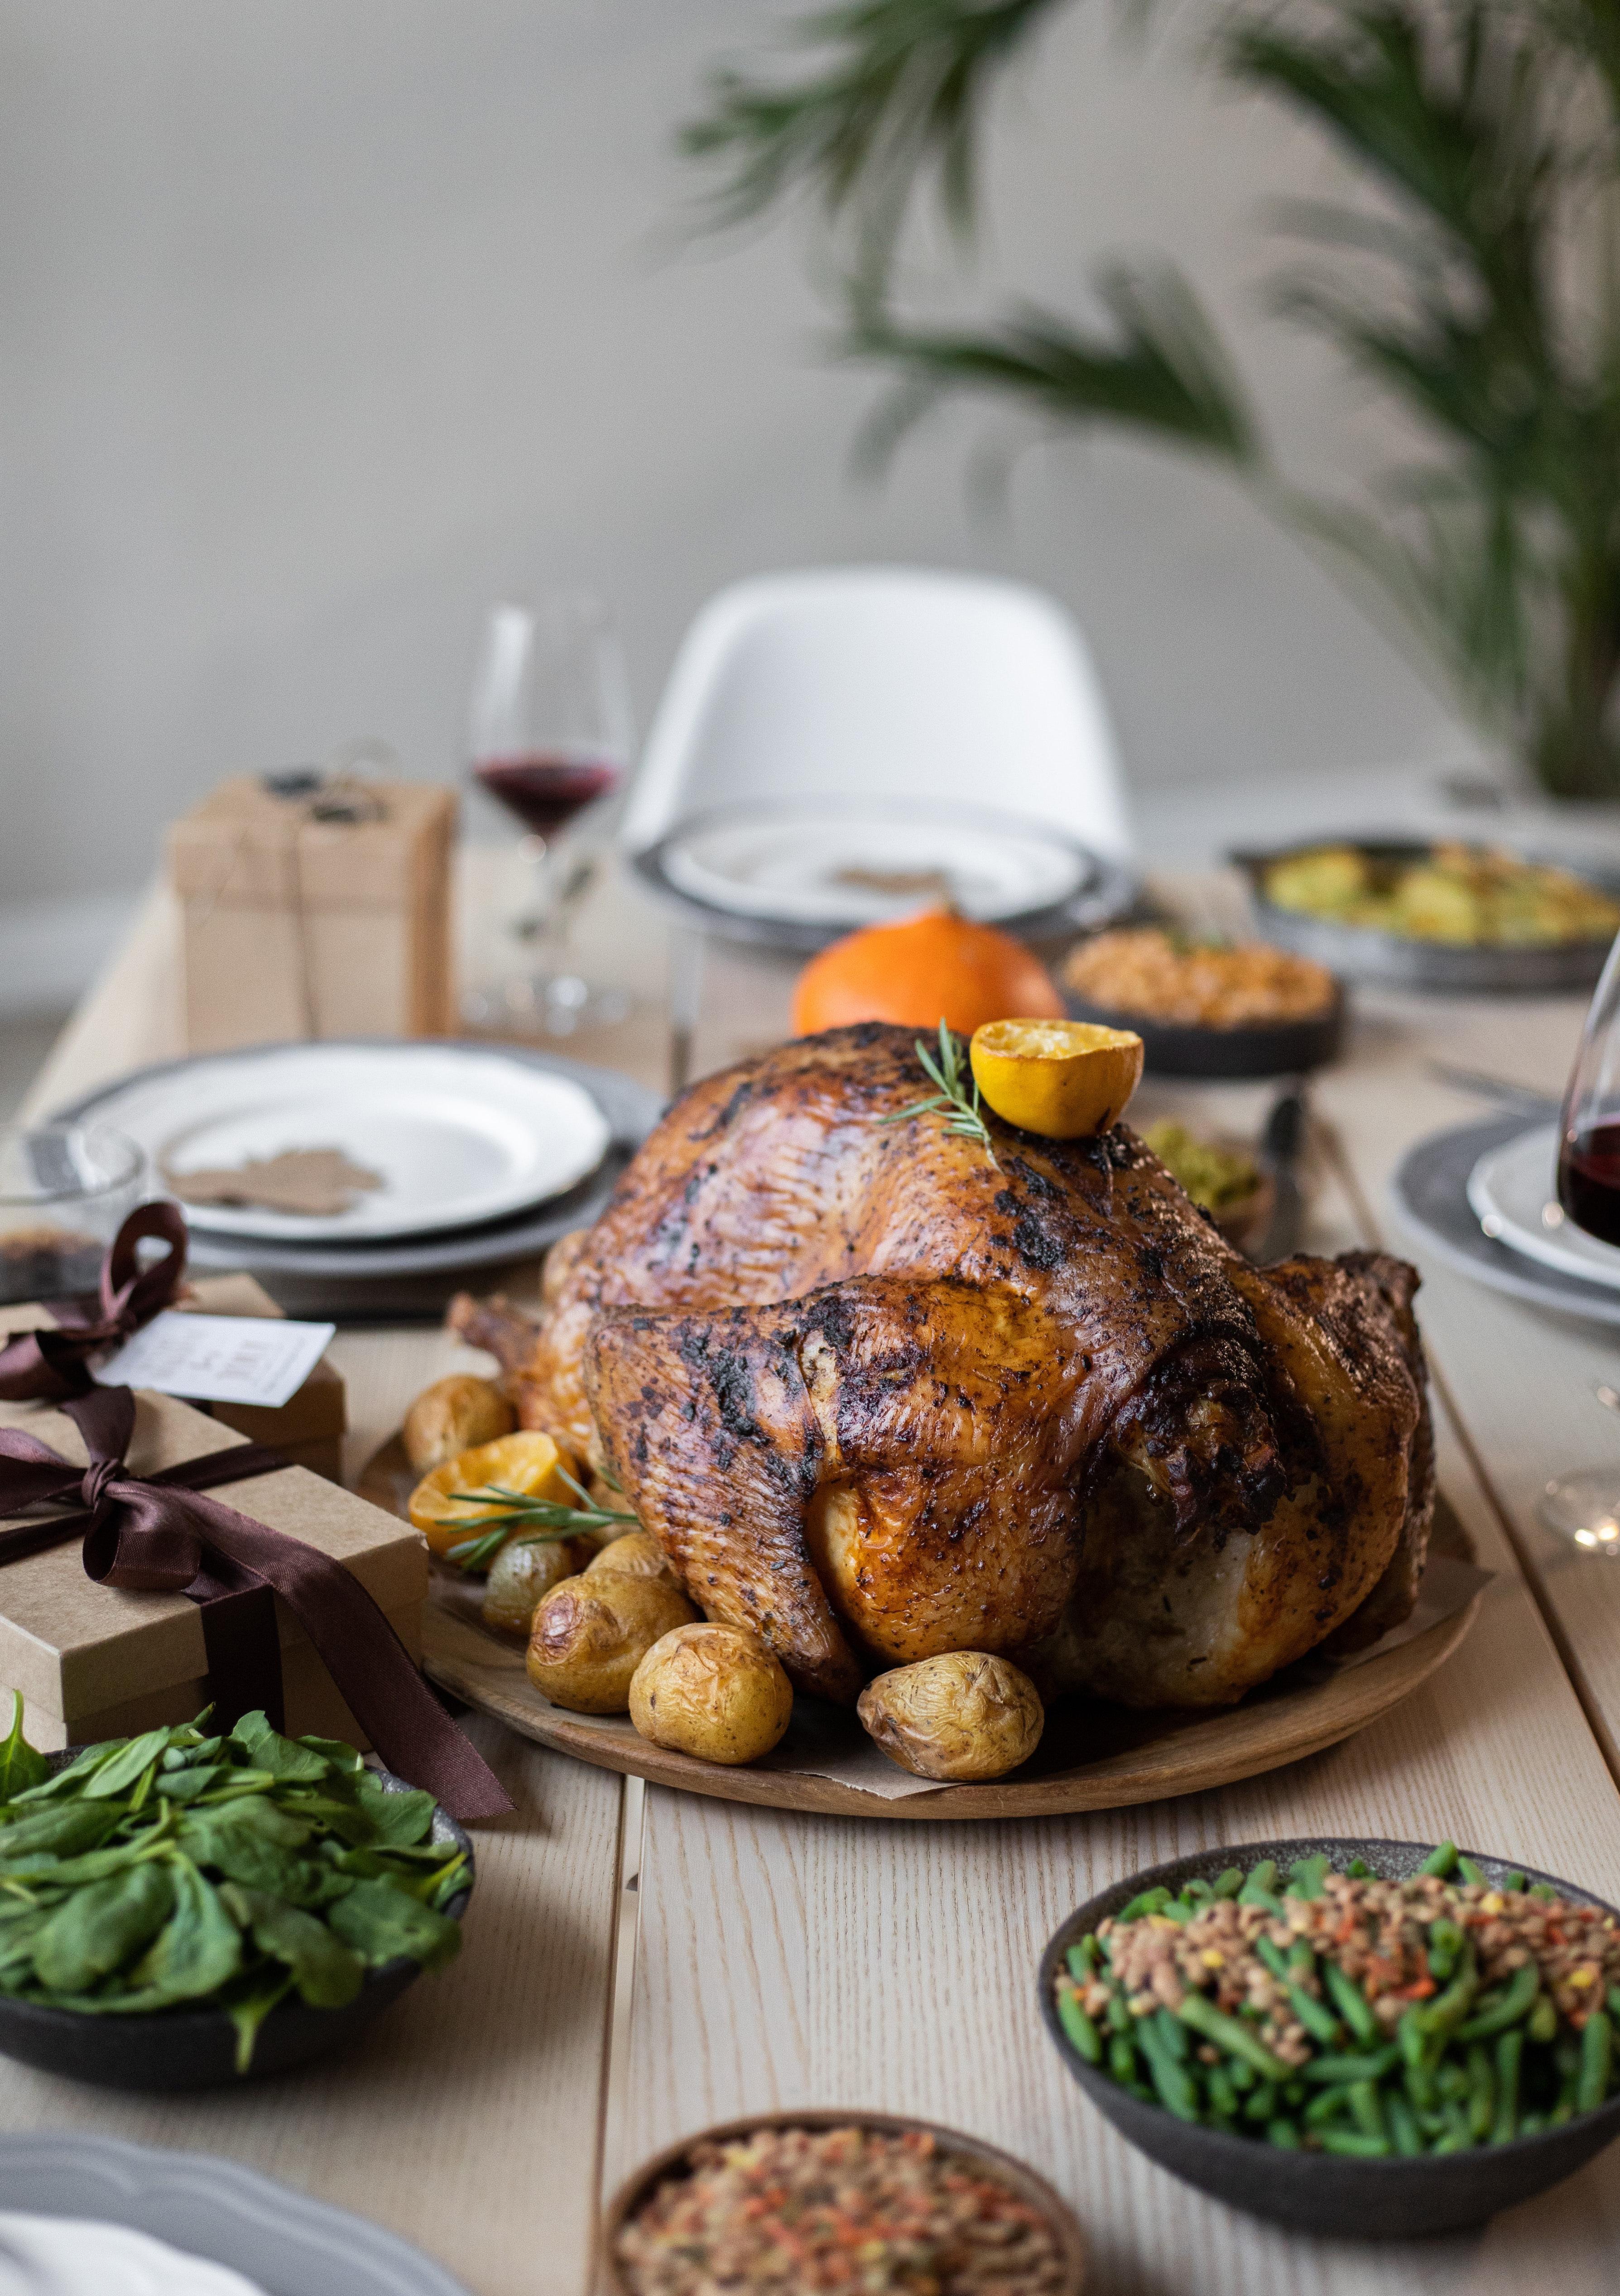
Turkey is part of the poultry family so all the safe food handling practices you employ with chicken apply. Here are some points to remember:
• Chances are you will buy a frozen turkey, so allow plenty of time for this to thaw slowly in the fridge (around 3 days). Don’t be tempted to thaw it on the bench!
• Place the turkey in a large bowl or oven dish while thawing to catch any blood or juice.
• When thawing, place the turkey on the bottom shelf in the fridge so if any juice does spill it won’t drip on any other food.
• Ensure you thoroughly wash your hands, boards or anything else that comes into contact with the turkey.
A 4kg turkey feeds approximately 10 people, 5kg 12 people, and 6kg 16 people.
If feeding a large crowd, say 20, consider buying two 4kg turkeys instead of one large one. This will help when it comes to fitting the bird in the fridge and oven as well as reduce the cooking time and risk of a dry bird!
chilly bin and place the turkey and brine in the chilly bin along with some plastic bags of ice (to keep it cool).
When brining a turkey it is a great opportunity to add some flavour. Simply add lemon peel or slices, peppercorns, juniper berries, bay leaves, rosemary or other aromatic herbs or spices to the brine.
Whether you have brined your turkey or not, if you want crispy golden brown skin, it is important to dry the turkey. Pat it dry with paper towels and then allow the bird to dry for half an hour on the bench (just not in the direct sunlight or a hot spot!).
For extra moisture place softened herb butter between the skin and the turkey breast. Before cooking, season generously then place the turkey in a deep oven tray along with 2–4 cups (depending on the size of the turkey) of good quality chicken stock.
Bake for 30 minutes at 200°C then turn the oven down to 175°C and cook for 15 minutes per 500g (or ½ kg). Test the turkey is cooked by piercing the breast. If the liquid runs clear it is cooked. Or better still use a meat thermometer, and when it reaches 80°C at the thickest part of the turkey it is cooked.
Brine is salted water, often used to preserve things such as olives but also a handy way to keep lean meats from drying out when cooking. Turkey and pork are great examples of this. When meat cooks it loses moisture (around 30%) so by soaking the meat in brine beforehand you add moisture, meaning you have more (moisture) to begin with. The salt also acts as a bit of a tenderiser, breaking down some of the proteins in the meat.
1 cup sugar
1½ cups salt

7 litres of water
Dissolve the sugar and salt in 1 litre of boiling water. Add the remaining water so you are left with a completely cold solution. Immerse your turkey in the brine for 12–18 hours.
If there is not room in your fridge to do this, sterilise a
Remove from the oven and cover in tinfoil to rest for 30 minutes. This will give you plenty of time to cook the vegetables, make the gravy and so on.
21 December – Place frozen turkey in the fridge to defrost Christmas Eve – Brine the turkey Christmas Day – Cook the turkey Boxing Day – Enjoy those turkey leftovers
Brine – the secret to a succulent, juicy turkey

It goes without saying that stuffing is an important part of a roast turkey meal but at what cost? Turkey has a tendency to become very dry if overcooked, so by stuffing the bird with dense stuffing you prolong the cooking period and increase the risk of your bird drying out.
There is also a risk that your stuffing will not be completely cooked and thus the cause of some upset stomachs, or worse, on Boxing Day. To avoid these problems make your stuffing and either wrap in streaky bacon or tin foil and cook beside the turkey.
½ onion, finely chopped 1 cup panko (or fresh) breadcrumbs ½ cup cranberries ½ cup pistachios, roughly chopped 2 tsp Tuscan seasoning 110g brie, chopped 350g good quality pork sausages
Over a low heat carefully sauté the onions until translucent. Place the cooked onion along with the breadcrumbs, cranberries, pistachios, Tuscan seasoning and brie in a bowl. Squeeze the sausage meat out of their casings and add to the other ingredients in the bowl. Using clean hands mix everything together thoroughly.
Form the stuffing into a big (2cm wide) sausage and wrap in either foil or streaky bacon. Bake beside the turkey for an hour.
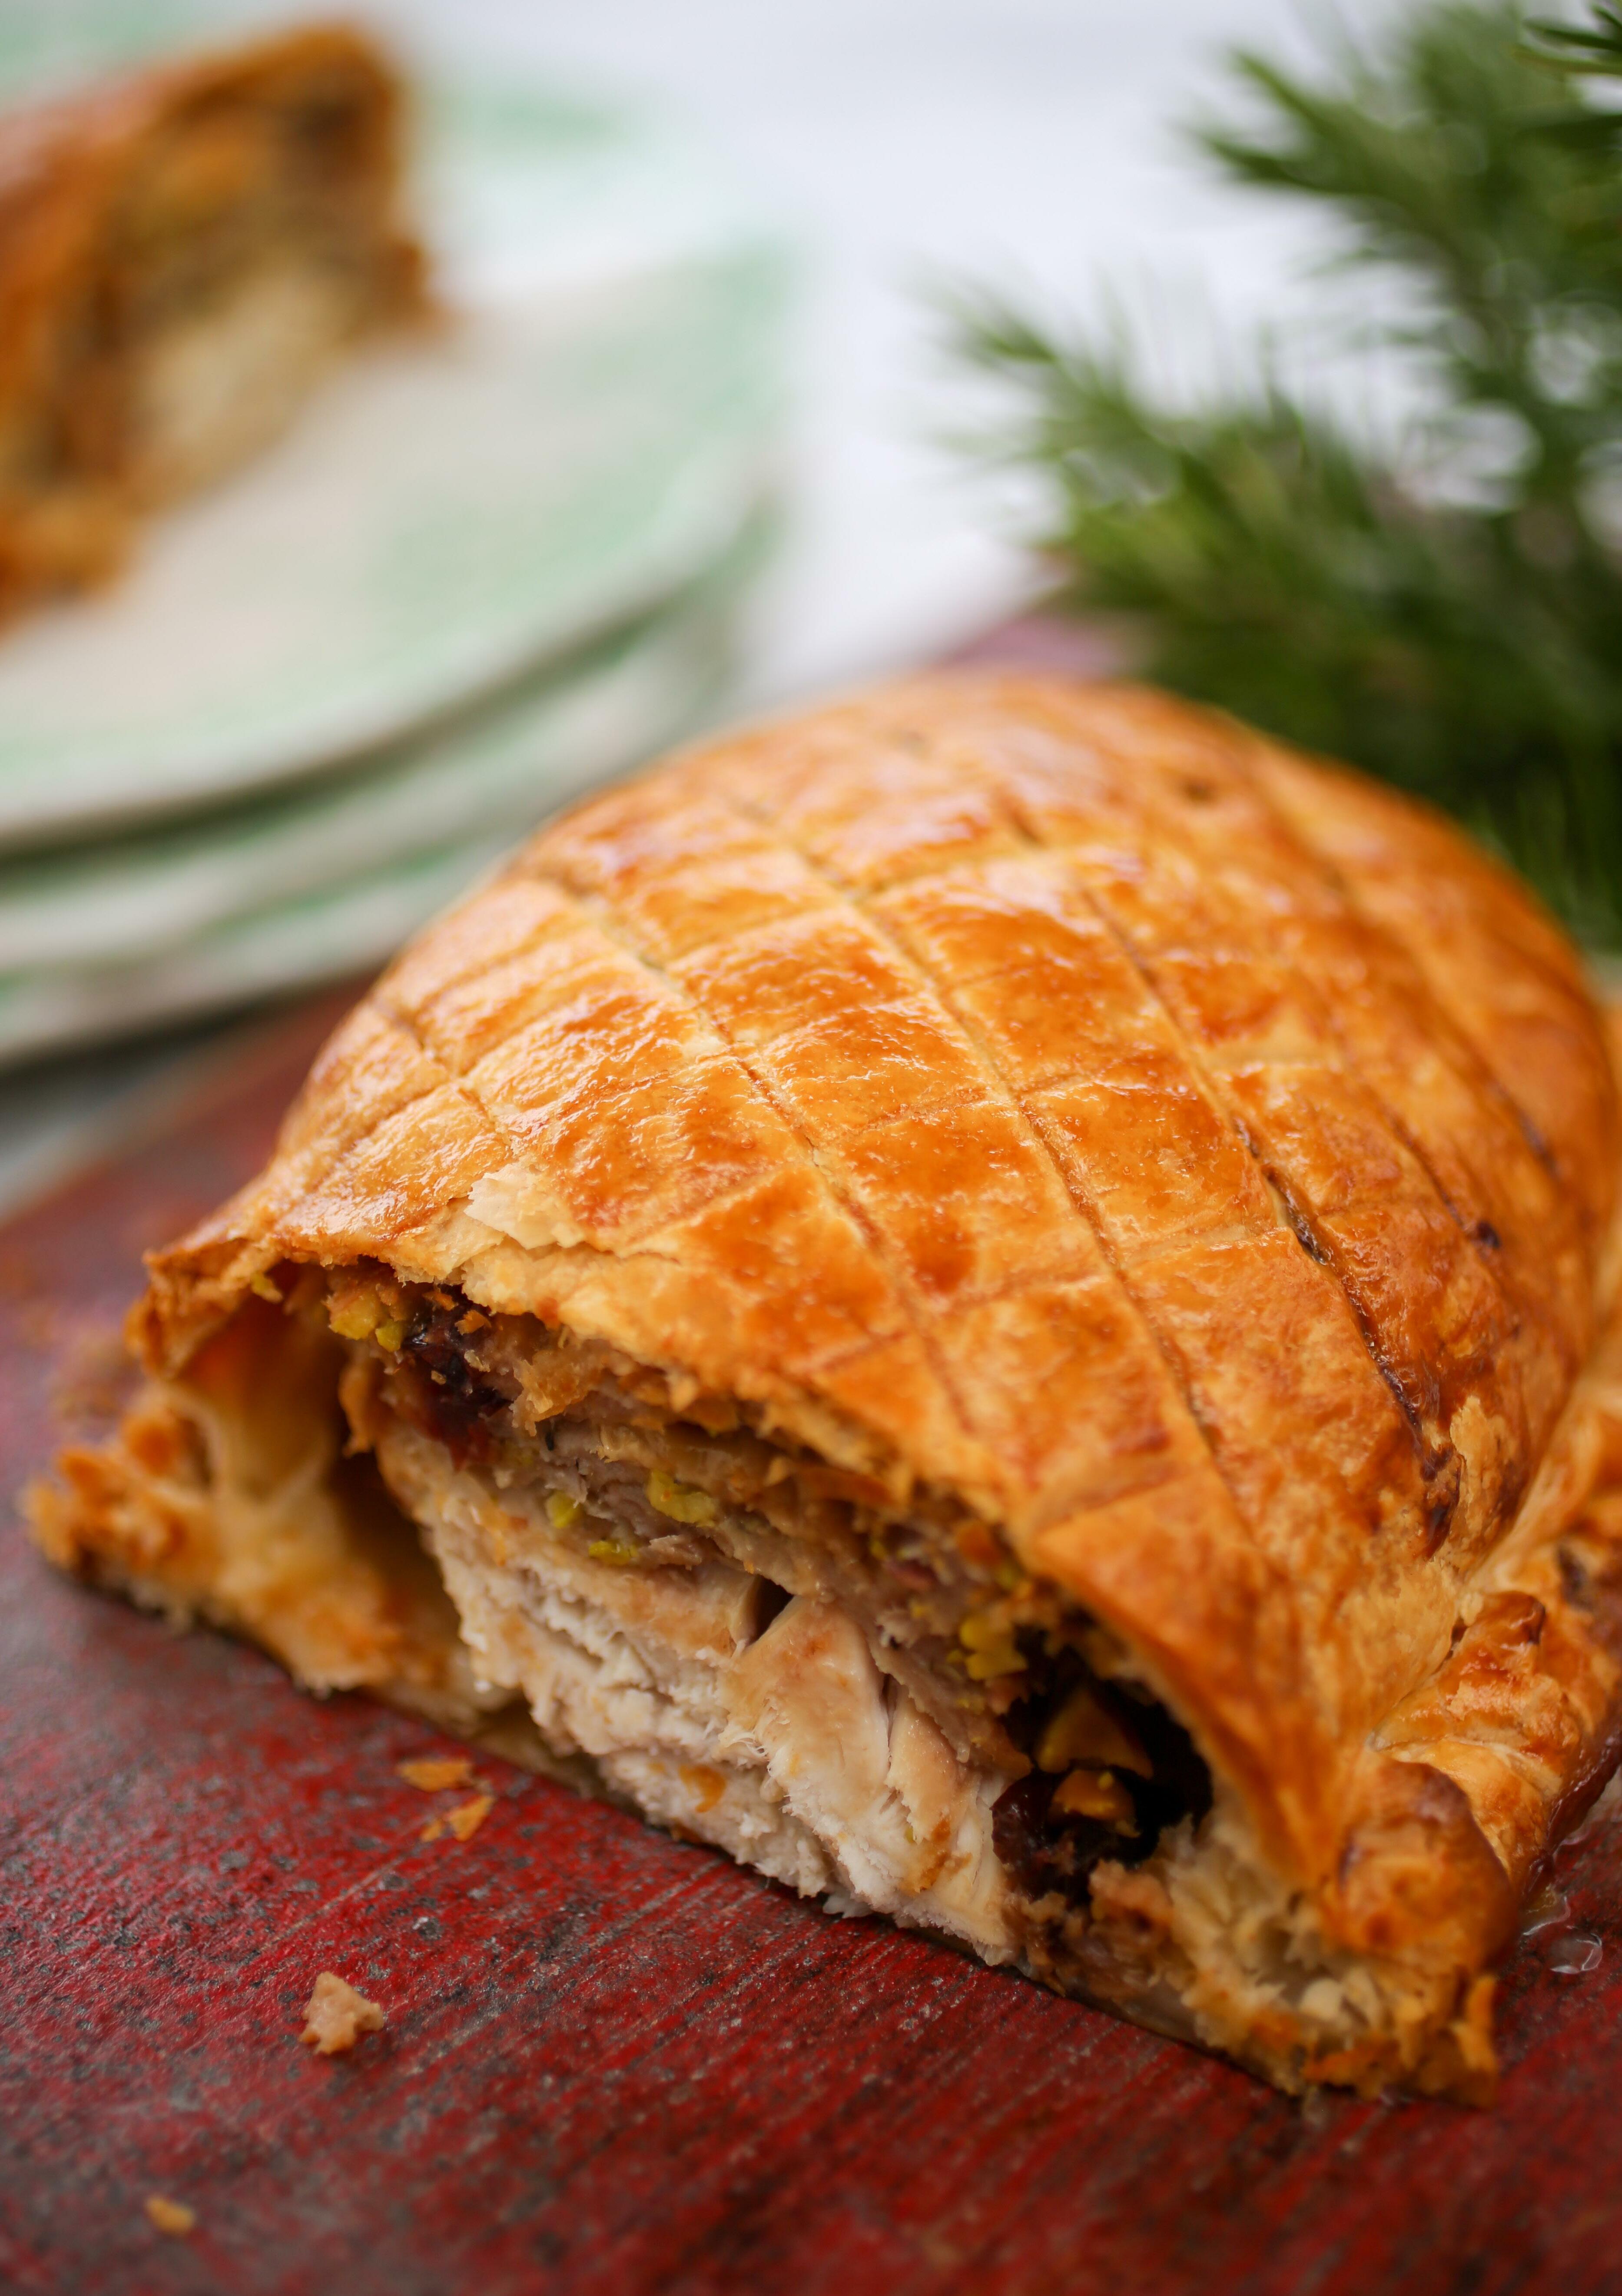
If you aren’t feeding a small crowd for Christmas but still want to enjoy a turkey dinner, this is the perfect dish. The stuffing ensures the turkey breast doesn’t dry out while also giving you the great festive flavours enjoyed with turkey. You can also prepare it the day before, giving you a very fuss free dinner or lunch.
Cranberry, Pistachio and Brie Stuffing 1 turkey breast 400g flaky pastry
Trim the turkey breast so that it is even in shape and thickness. (I cut the thin tip off and placed it on top of the same end of the breast so that it was the same thickness as the fat end.) This will ensure even cooking. Encase the entire breast with the stuffing.
Roll out half the pastry to a rectangle slightly bigger than the encased turkey breast.
Place the pastry on a lined baking tray then the turkey breast on top of this.
Roll out the remaining pastry and lay this over the turkey. Crimp and trim the edges.
Brush with a beaten egg and bake at 200°C for 20 minutes.
Turn down the heat to 180°C and cook for a further 30 minutes and the pastry is golden brown.

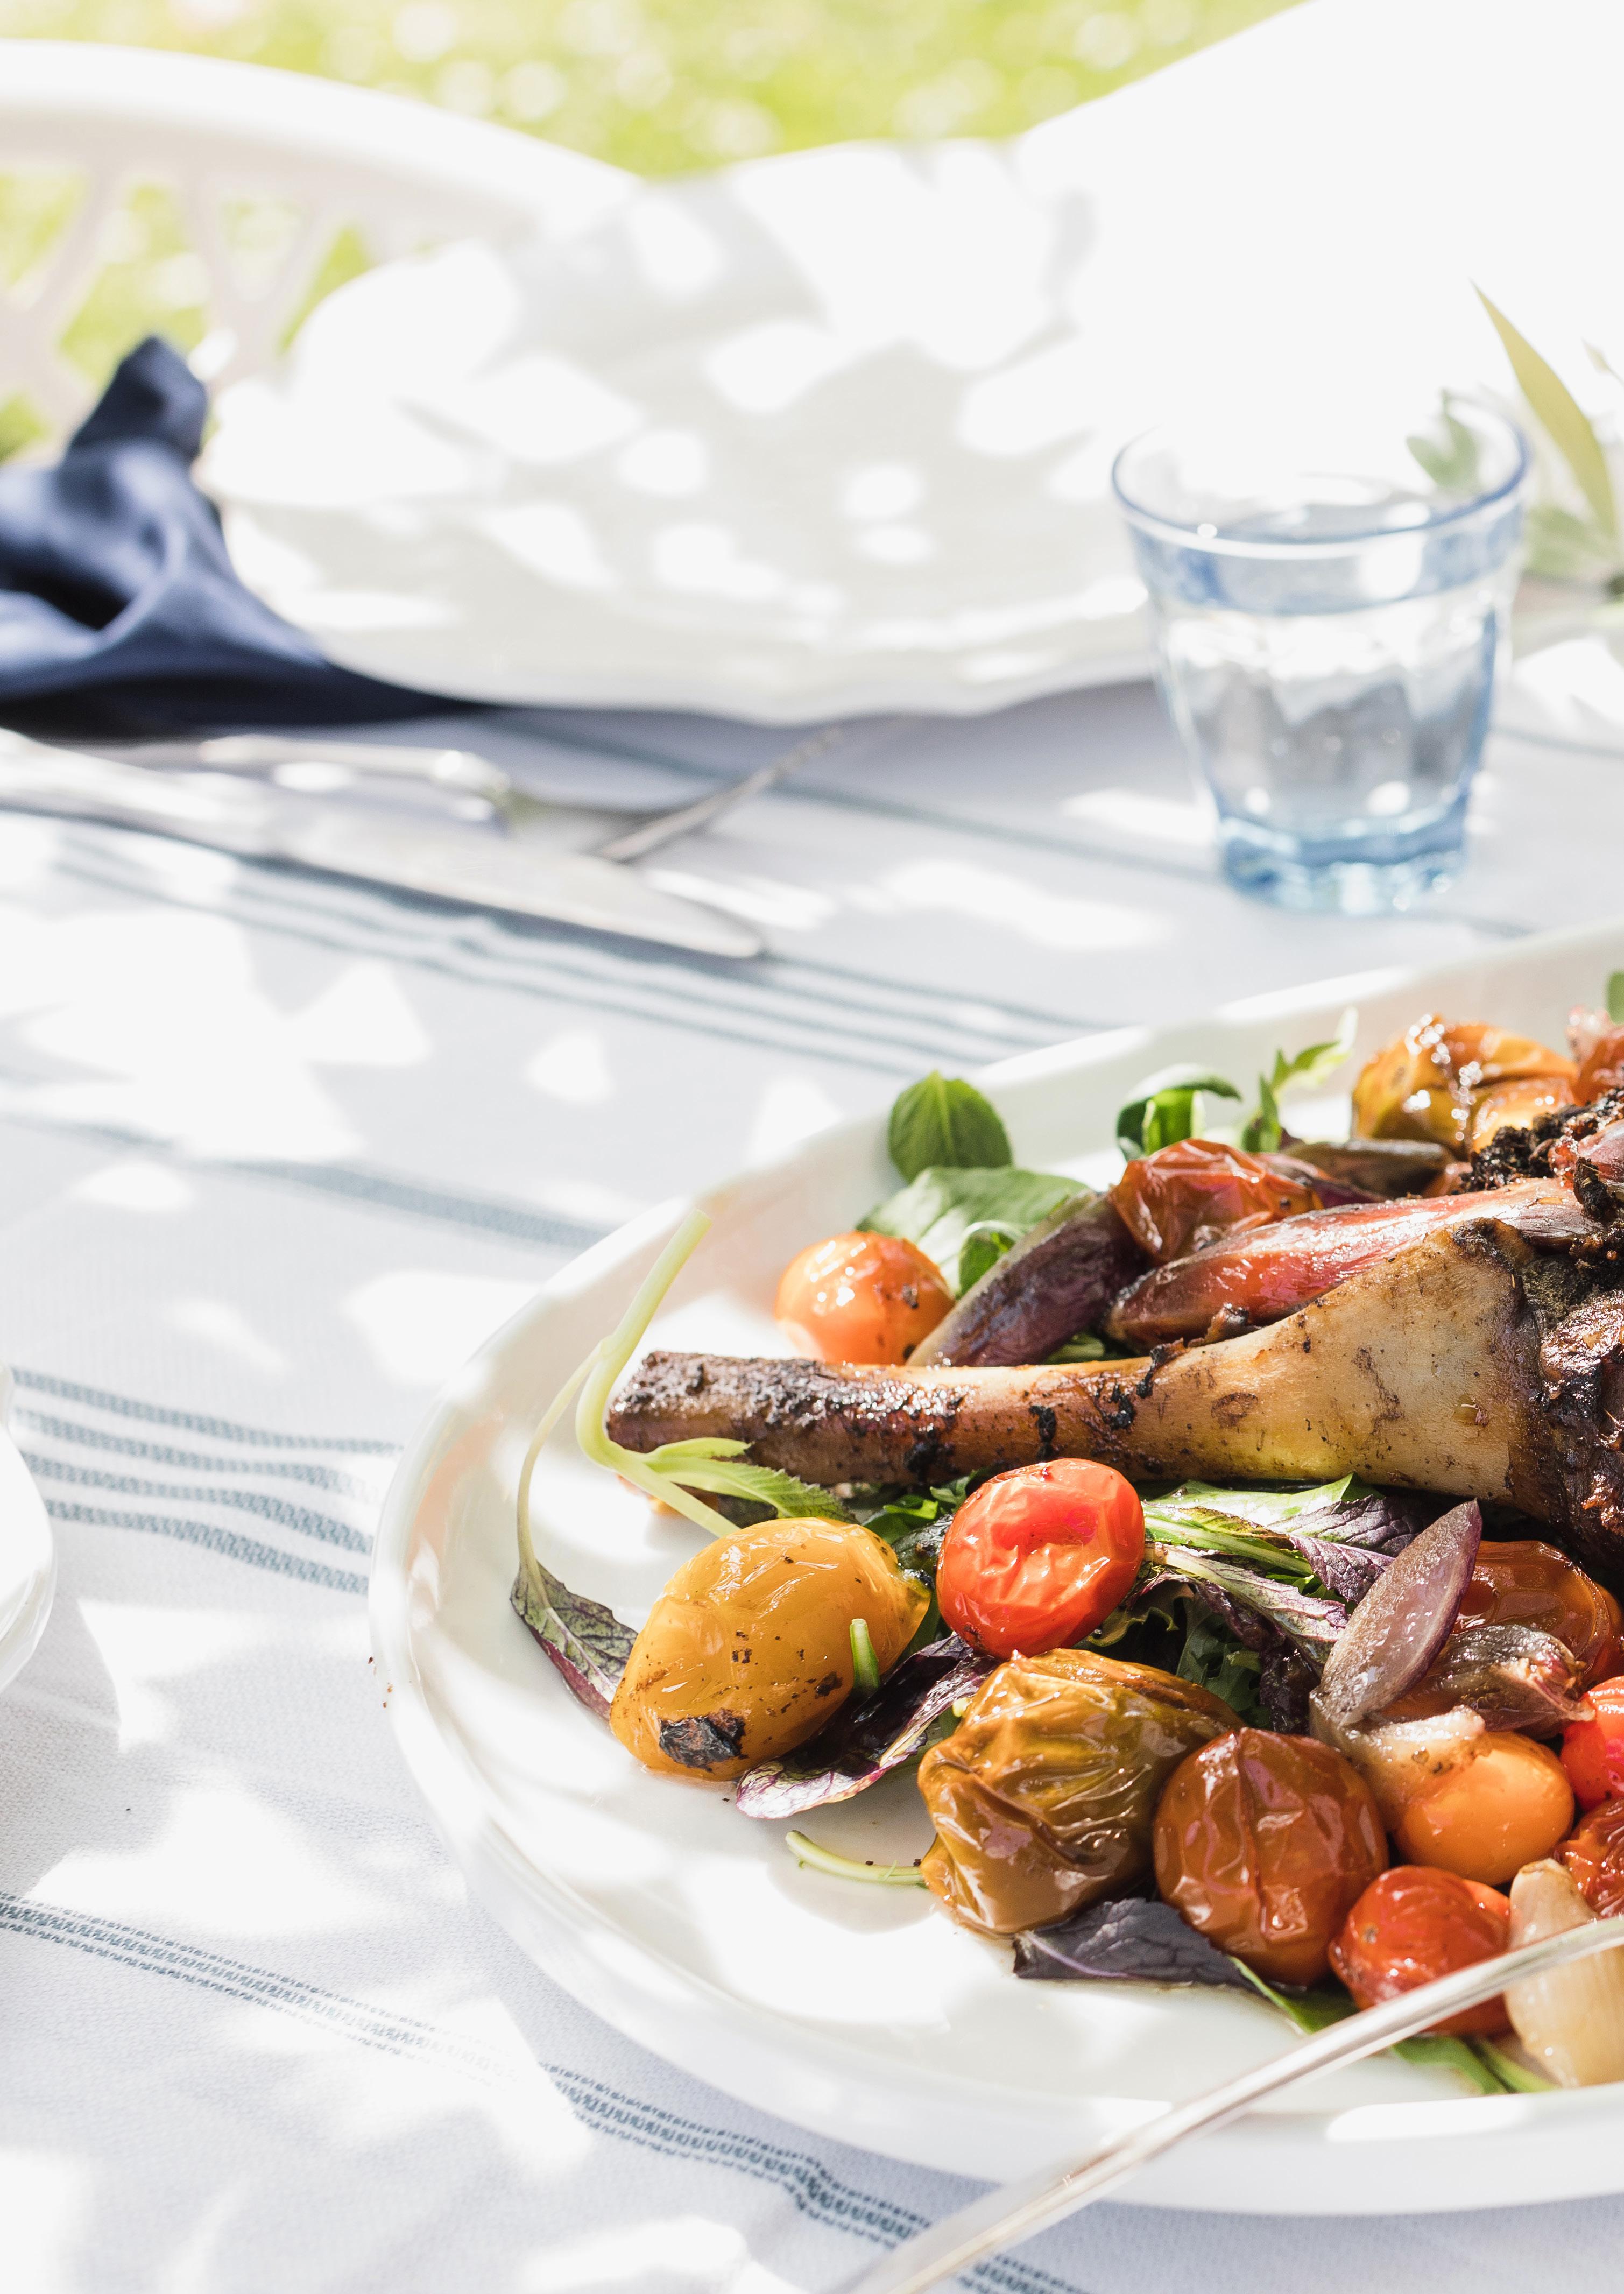
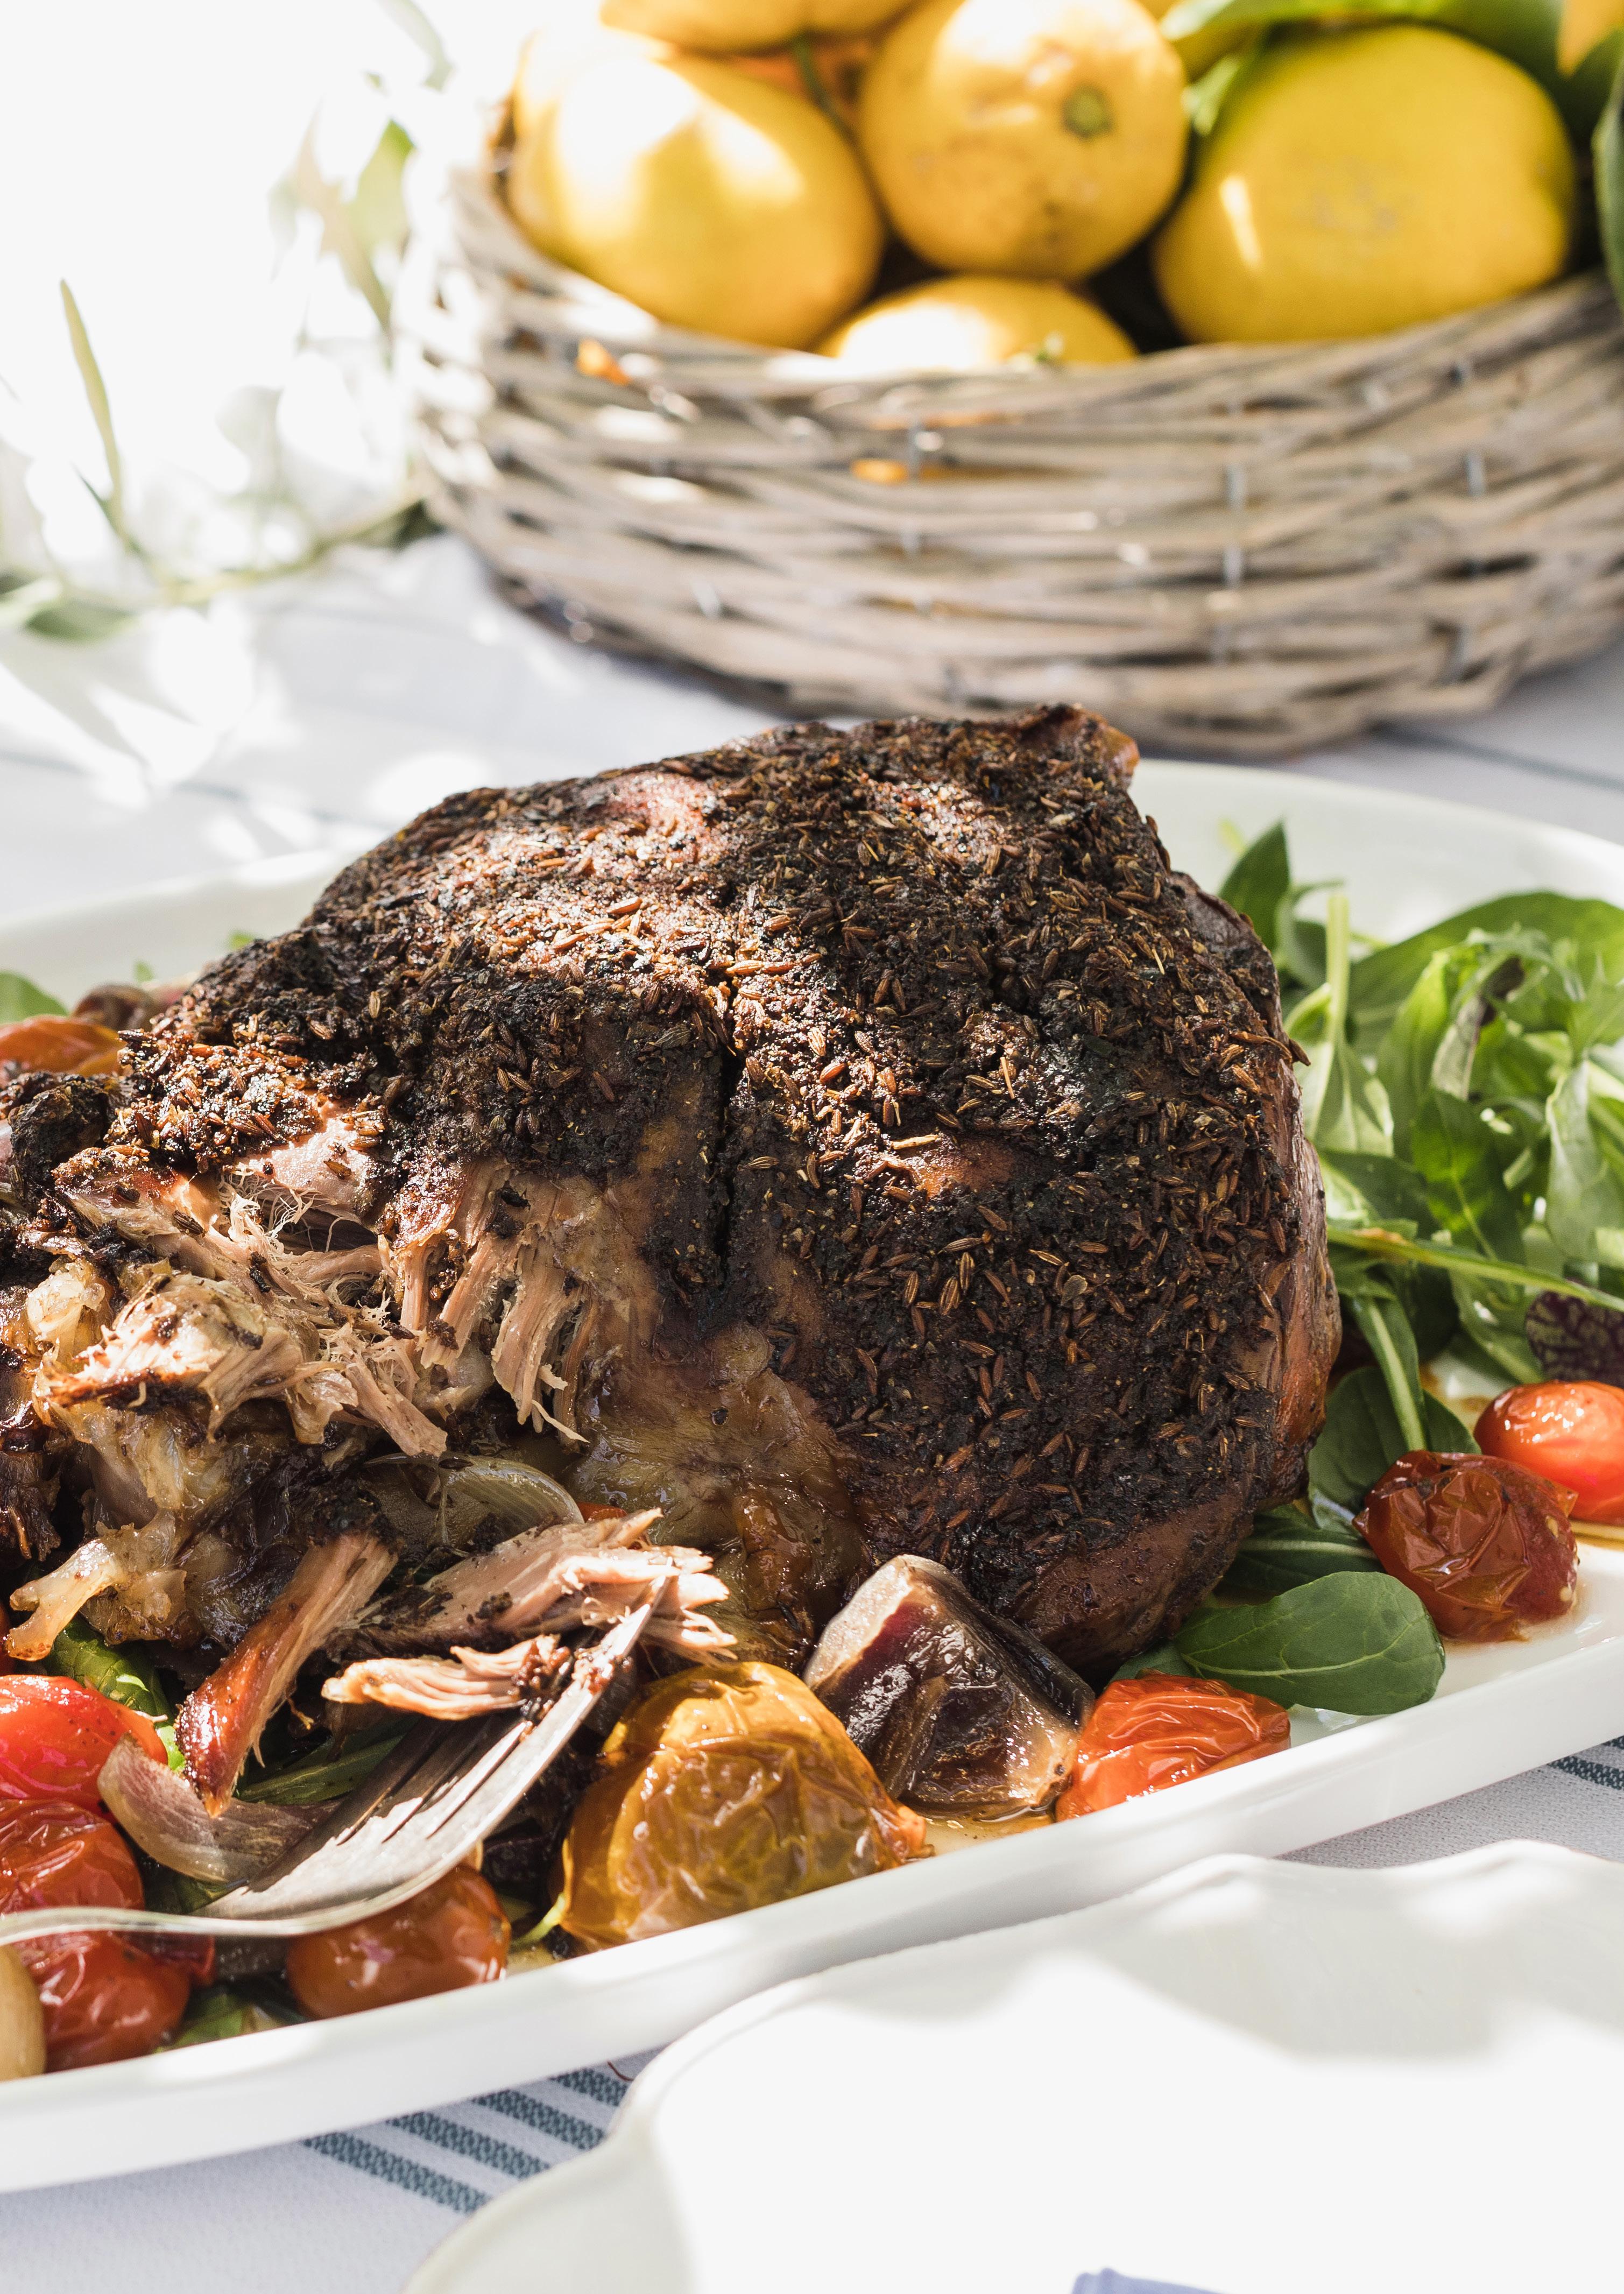
This slow cooked lamb is perfect for the Christmas table. It cooks away slowly while you can get on with the job of opening presents and bottles of Champagne. And while it is cooked in the oven it is equally suited to a Kiwi alfresco Christmas setting.
1 tbsp cumin seeds
1 tsp garlic powder
1–2 tsp Urfa* (optional)
2 tsp sumac
1 tsp ground coriander
1 tbsp dried oregano
¼ cup brown sugar
1 tsp sea salt flakes zest 2 lemons
¼ cup olive oil
½ cup red wine
1–2 cups beef stock
1 leg of lamb
1–2 red onions, cut into thin wedges
2–3 cups small tomatoes (or 2 tins of cherry tomatoes)
Make a rub by mixing the cumin seeds, garlic powder, Urfa (if using), sumac, coriander, oregano, brown sugar, salt, lemon zest and olive oil together. Rub all over lamb and leave to rest overnight.
Next morning place lamb on an oven tray along with the wine and a cup of the stock. Cover with tin foil and roast at 200°C for 15 minutes, then turn the temperature down to 120°C and cook for seven hours. After four hours, add the onion and tomatoes and if liquid is running low add a little more stock. Lamb is ready when it falls of the bone.
*Urfa is a dried chilli pepper from Turkey. Its dark crimson flakes are fantastically sweet with a subtle peppery flavour. The chillies are salted and dried in the sun then wrapped at night to sweat, resulting in a slightly smoky flavour with elements of dried fruit and even tobacco.
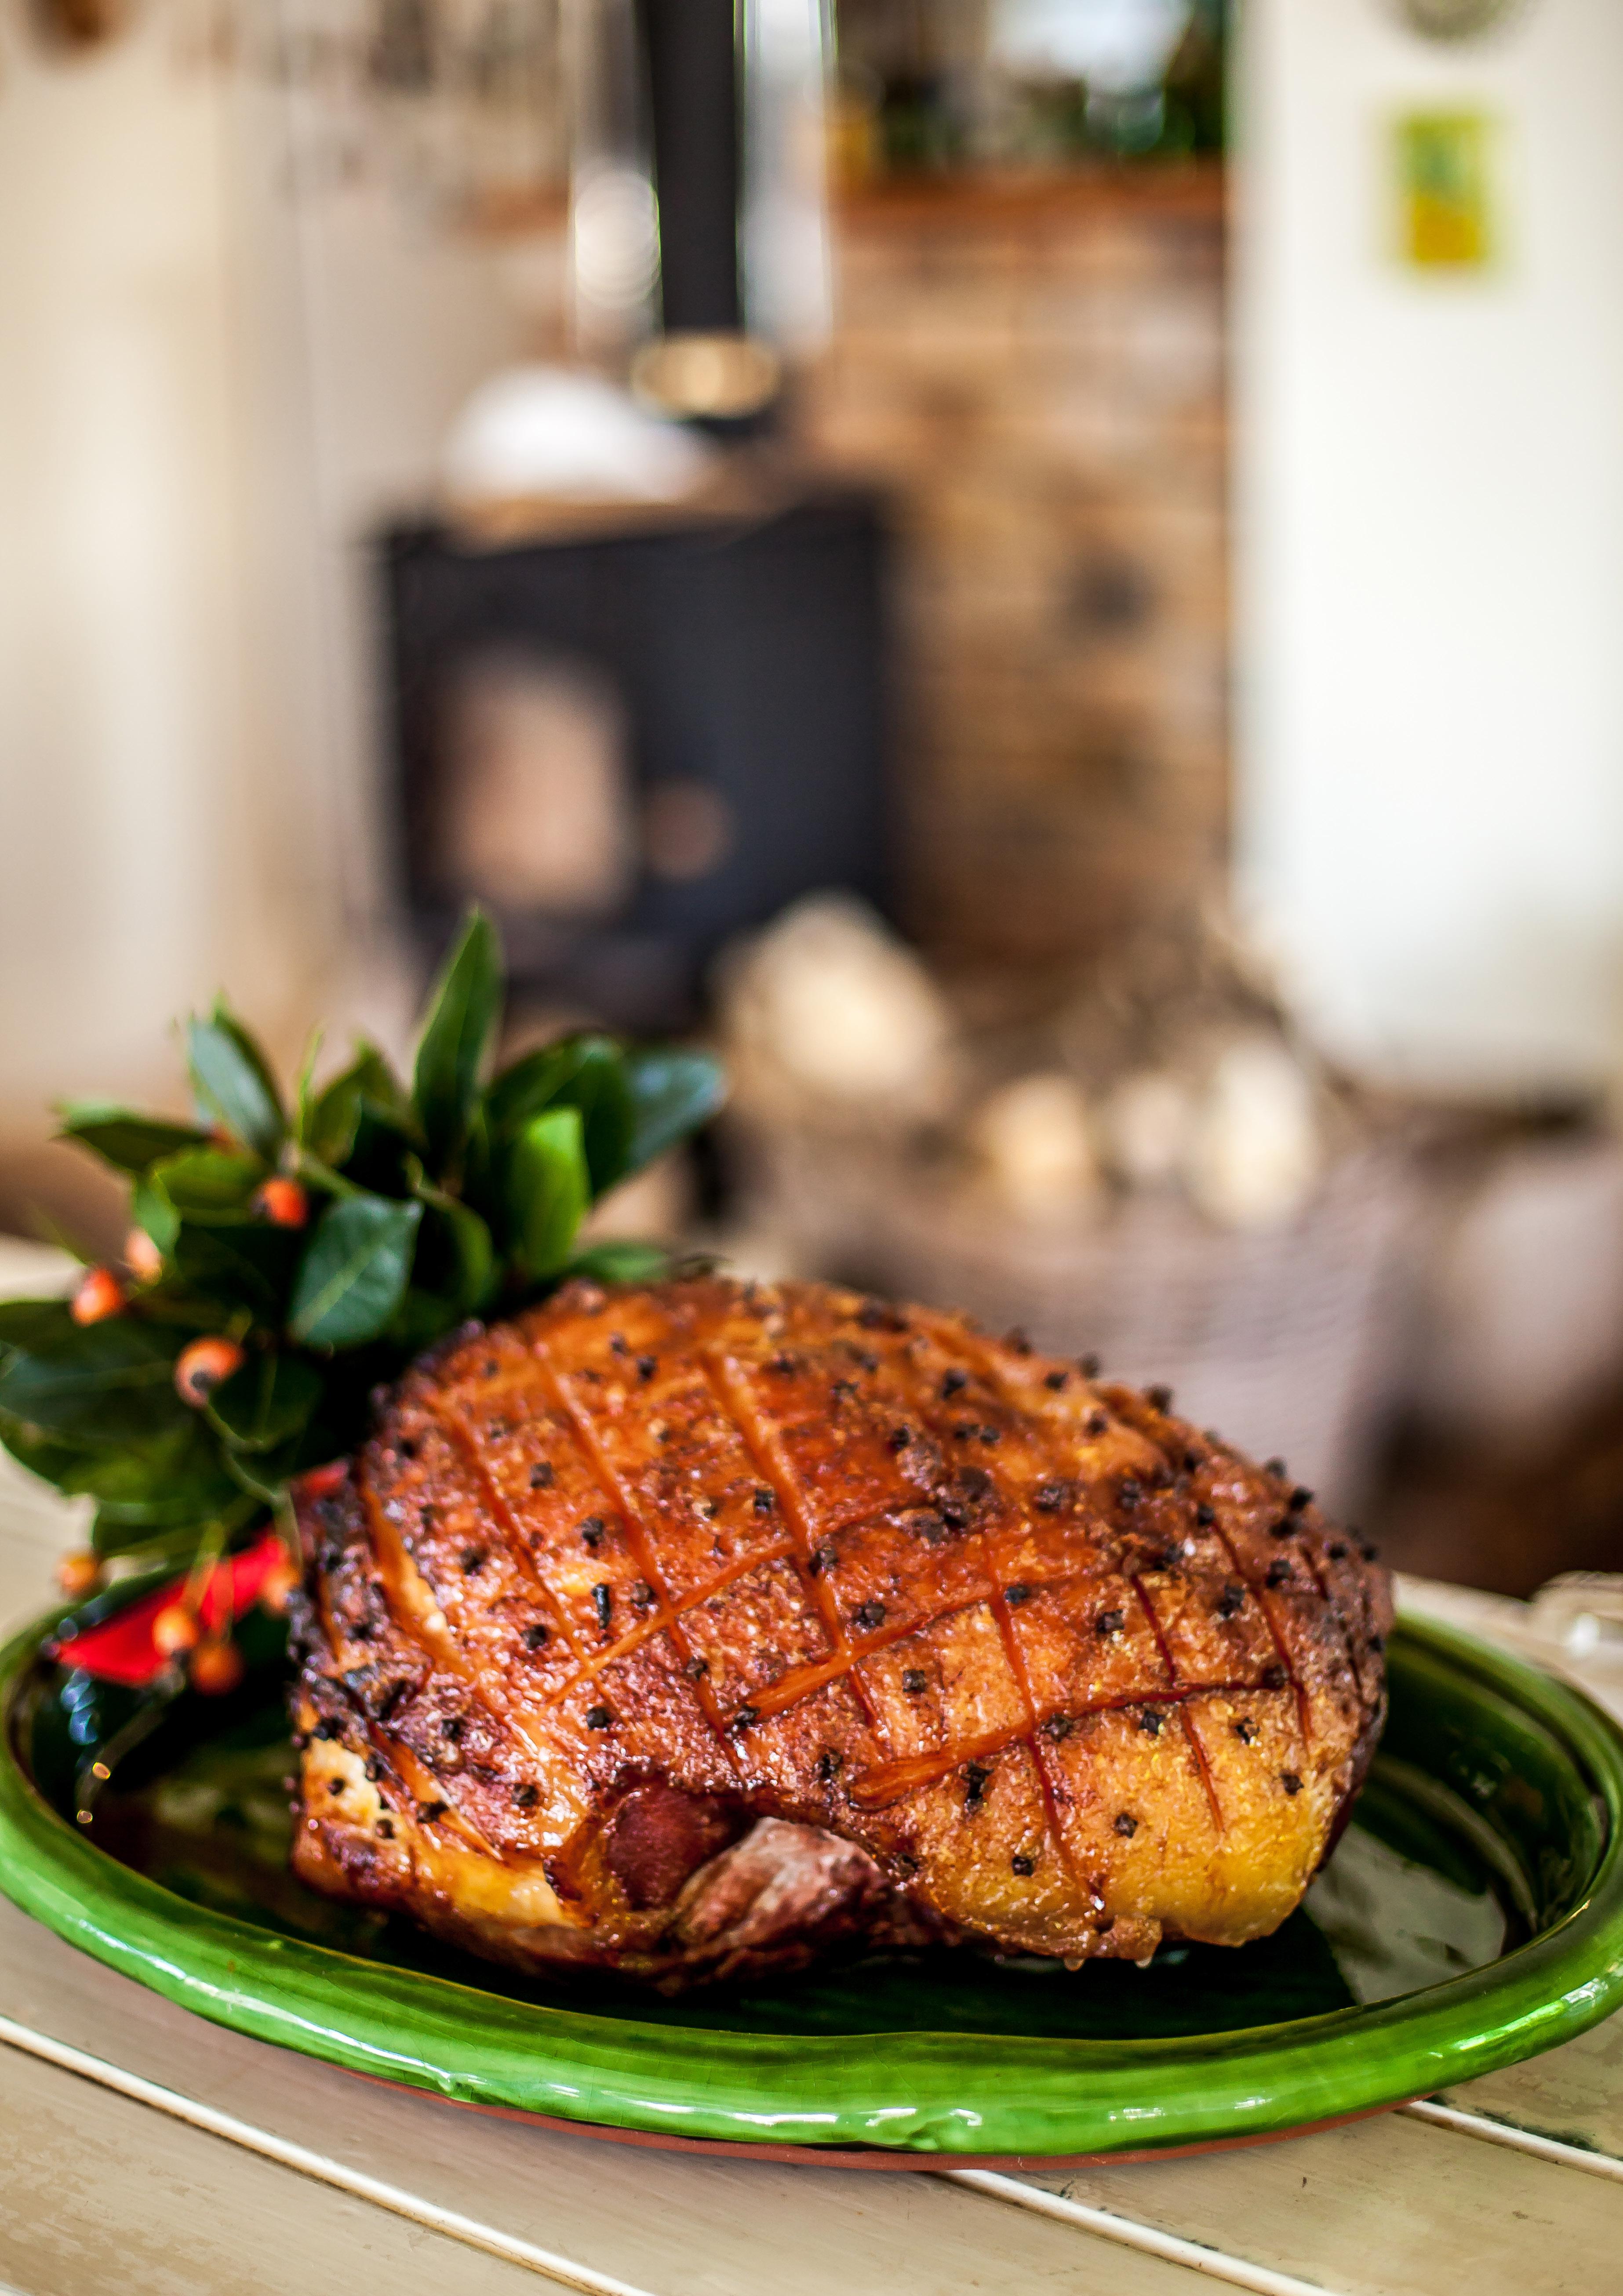
What’s a Christmas without a good old glazed ham? Year in, year out, I never get sick of them; but I know there’s a lot of people who can’t stand the thought, Vicki and my Mum included. The fact is a beautiful ham feeds a crowd and provides delicious leftovers for days to come.
Preheat the oven to 190°C.
Place a cooked ham leg on a chopping board or straight in a large, deep sided roasting dish, rounded side up.
Very carefully peel the skin off the ham, ensuring the fat layer stays on. You may need to use a small, sharp knife to help you with this.
Score the fat in long diagonal cuts, about 2cm apart both ways, to create a diamond pattern. Be careful not to cut into the flesh layer. Transfer the ham to a roasting dish if it isn’t already in one.
Rub your chosen ham glaze into the fat, making sure it seeps into the cuts.
Pour 2 cups of chicken stock, water, orange juice or pineapple juice into the bottom of the tray, then place into the oven. Baste the ham every 20 minutes or so with the pan juices. After an hour, the ham should be ready, but look for an even golden colouring on the fat and check it’s warmed through. You can do this by using a meat thermometer (57° or more) or by placing a knife into the centre, hold it for 30 seconds, then touch the flat side of the blade against the underside of your wrist to see if it’s warmed.
Allow to rest for at least 10 minutes, then carve and serve.
These recipes are based on a ½ leg of ham. They are easily doubled or tripled. It’s better to have more glaze than not enough!
This is a super simple but effective glaze. 2 cups brown sugar
2 cups pineapple juice
Rub the scored ham with the brown sugar. Stud the ham with the whole cloves and then pour over the pineapple juice.
Baste often as the ham bakes.
This adds an element of spice to the often-sweet ham. Gochujang is a Korean chilli paste that’s readily available in specialty food stores, Korean supermarkets, and some supermarkets.
¾ cup brown sugar ¼ cup Gochujang
1 tsp 5 spice powder
3 tbsp soy sauce
1 tbsp rice vinegar
In a bowl, combine all ingredients together, mixing thoroughly.
Pomegranate molasses brings sweet tangy notes that balance out with the salty ham. For best results, use orange juice or pomegranate juice for the 2 cups of liquid needed when roasting.
½ cup pomegranate molasses ¼ cup orange juice
1 cup brown sugar
1 tsp whole seed mustard
1 tsp cinnamon
In a bowl, combine all ingredients together, mixing thoroughly.
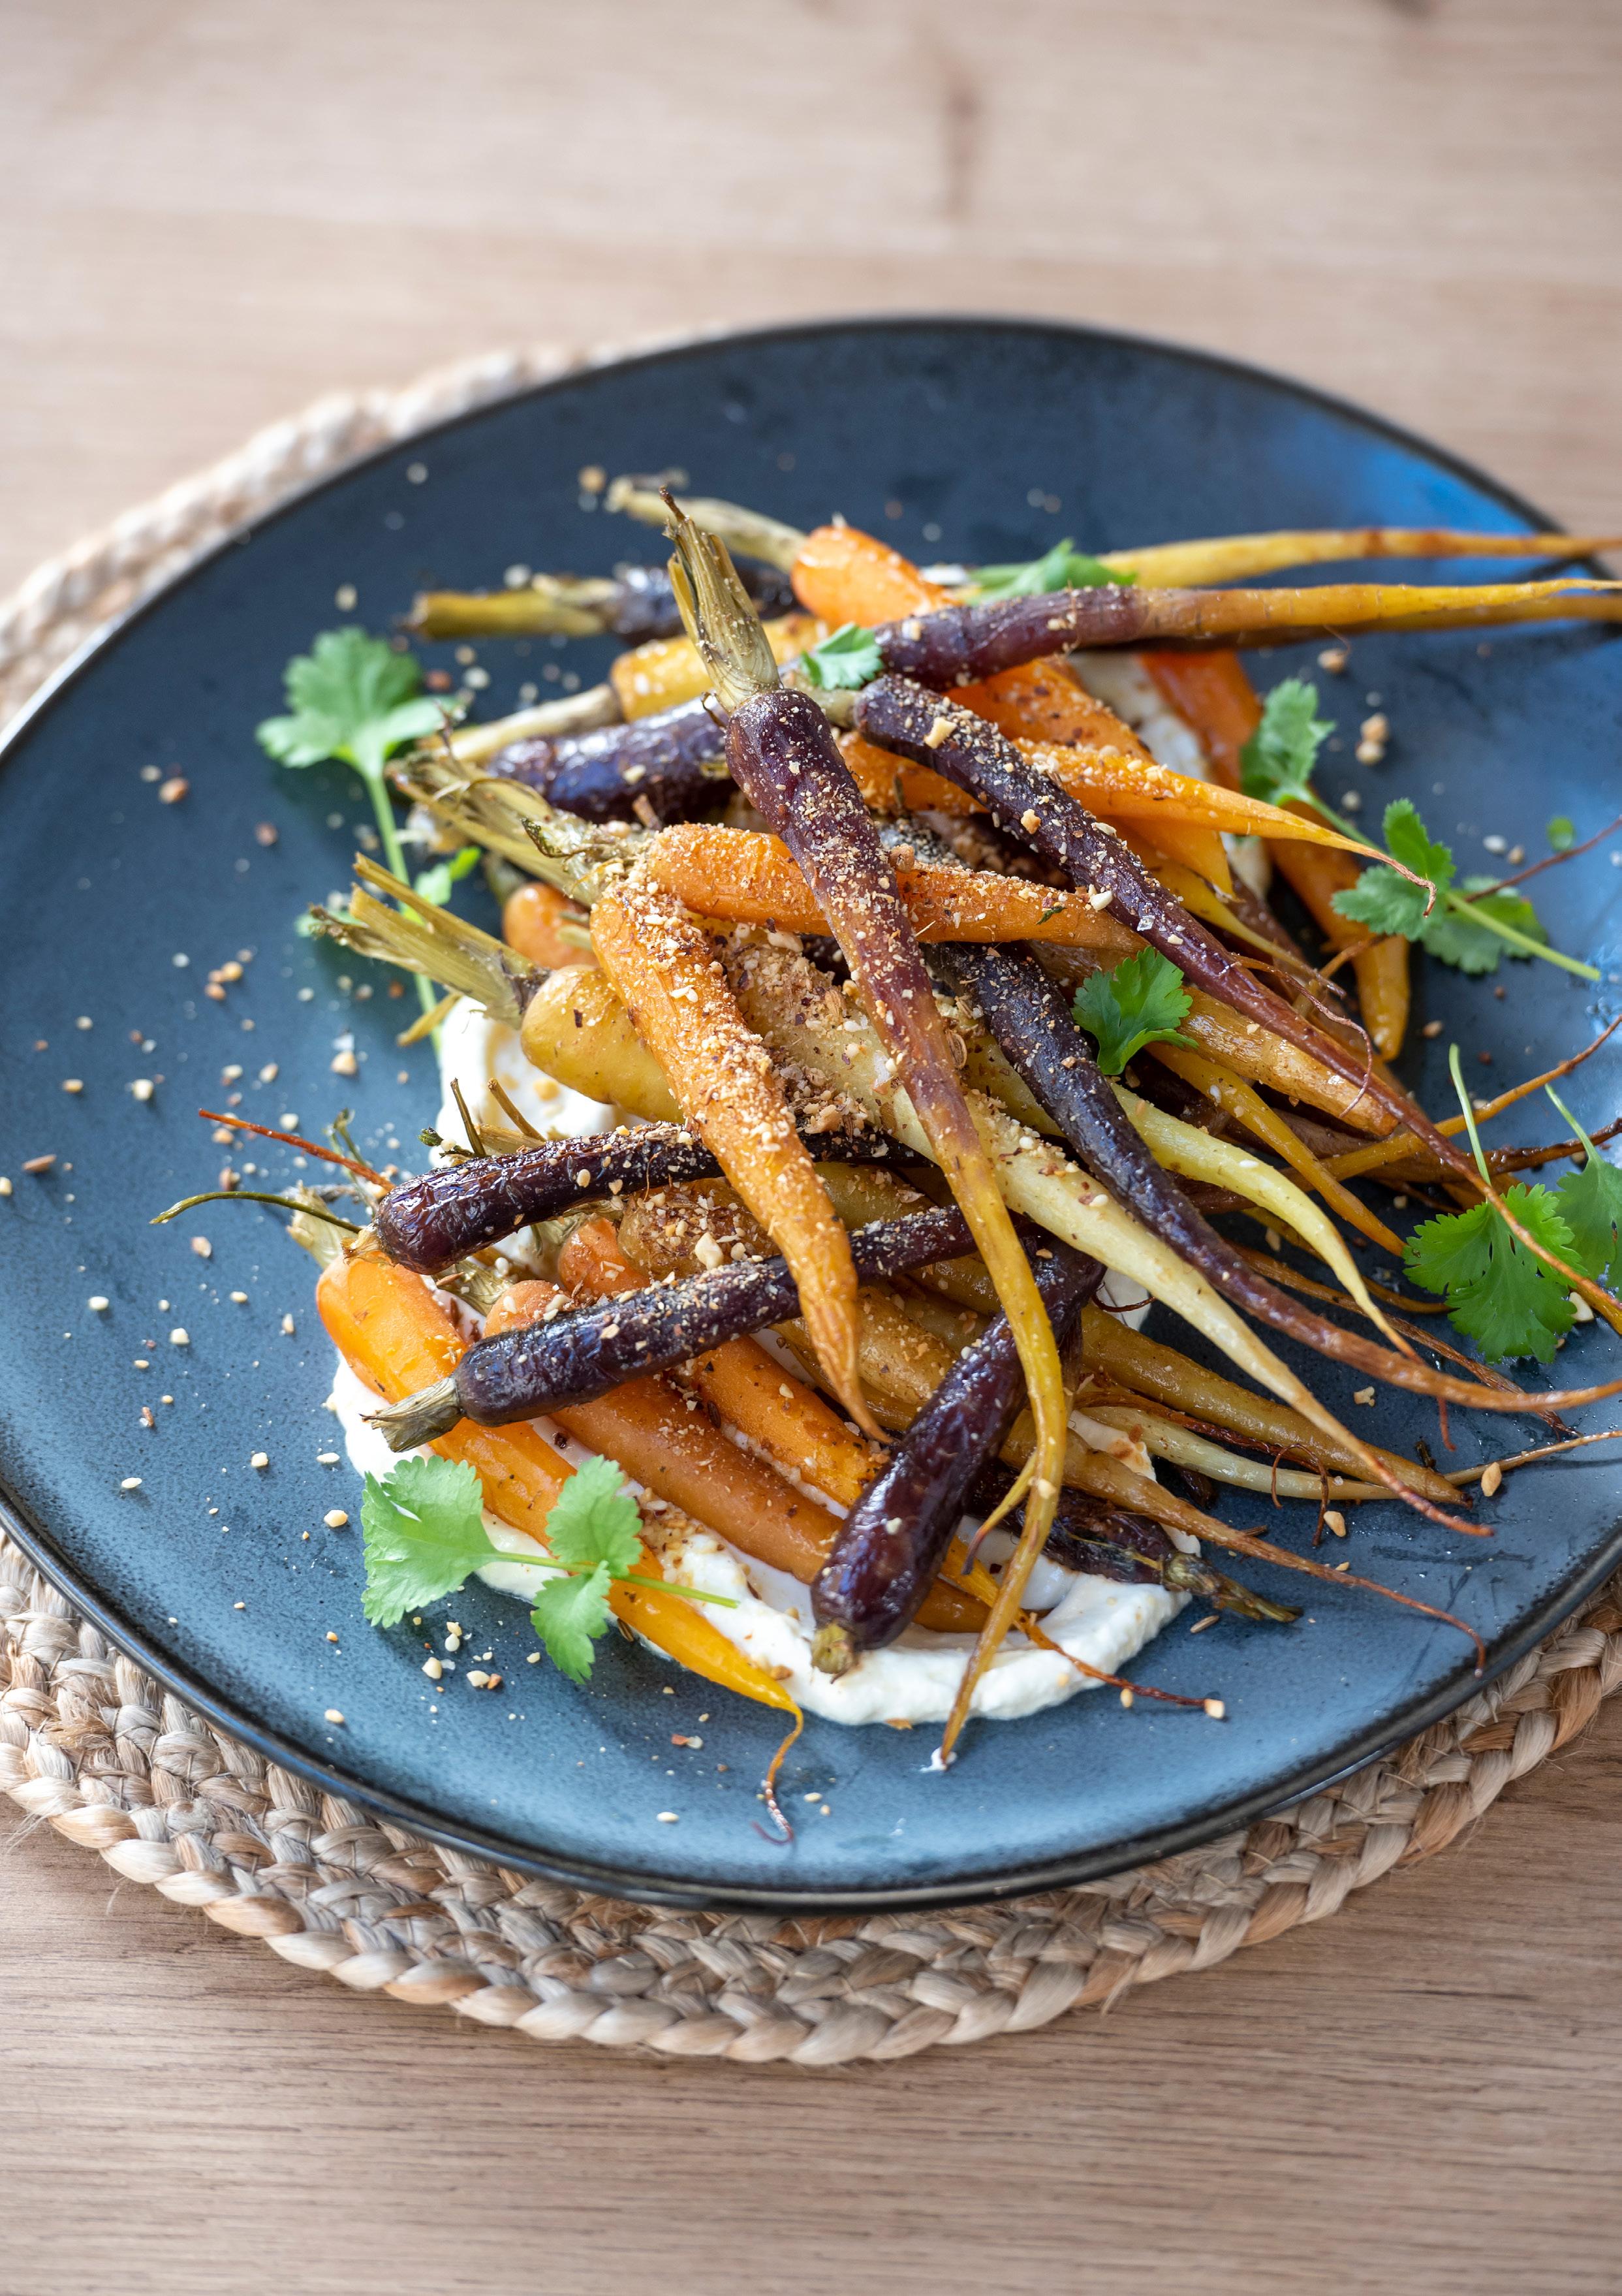
Labneh would be one of my favourite condiments. It’s a thick, strained yoghurt that can be used both sweet and savoury. This is a great recipe to use it in, but it’s also stunning with slow cooked lamb, with eggs, under roasted tomatoes … the list goes on.
350g Greek yoghurt 500g baby carrots
2 tbsp of Vicki’s Nutty Dukkha (recipe on page 38)
Set a fine sieve over a bowl, then place a very clean tea towel or muslin cloth in the sieve. Tip in the yoghurt and place it in the fridge to strain overnight for best results, or a minimum of a few hours. If you use a really good quality yoghurt, you might not see much liquid strain off, but thinner watery yoghurts will seep a surprising amount of liquid! Once the yoghurt has been strained, it’s ready to use.
Preheat the oven to 200°C. Wash the carrots and trim the tops. Place on an oven tray, drizzle with olive oil and season. Roast for 20–25 minutes until starting to colour and soften.
Smear the labneh on the bottom of a serving plate. Place the oven roasted carrots on top, then sprinkle over the dukkha.
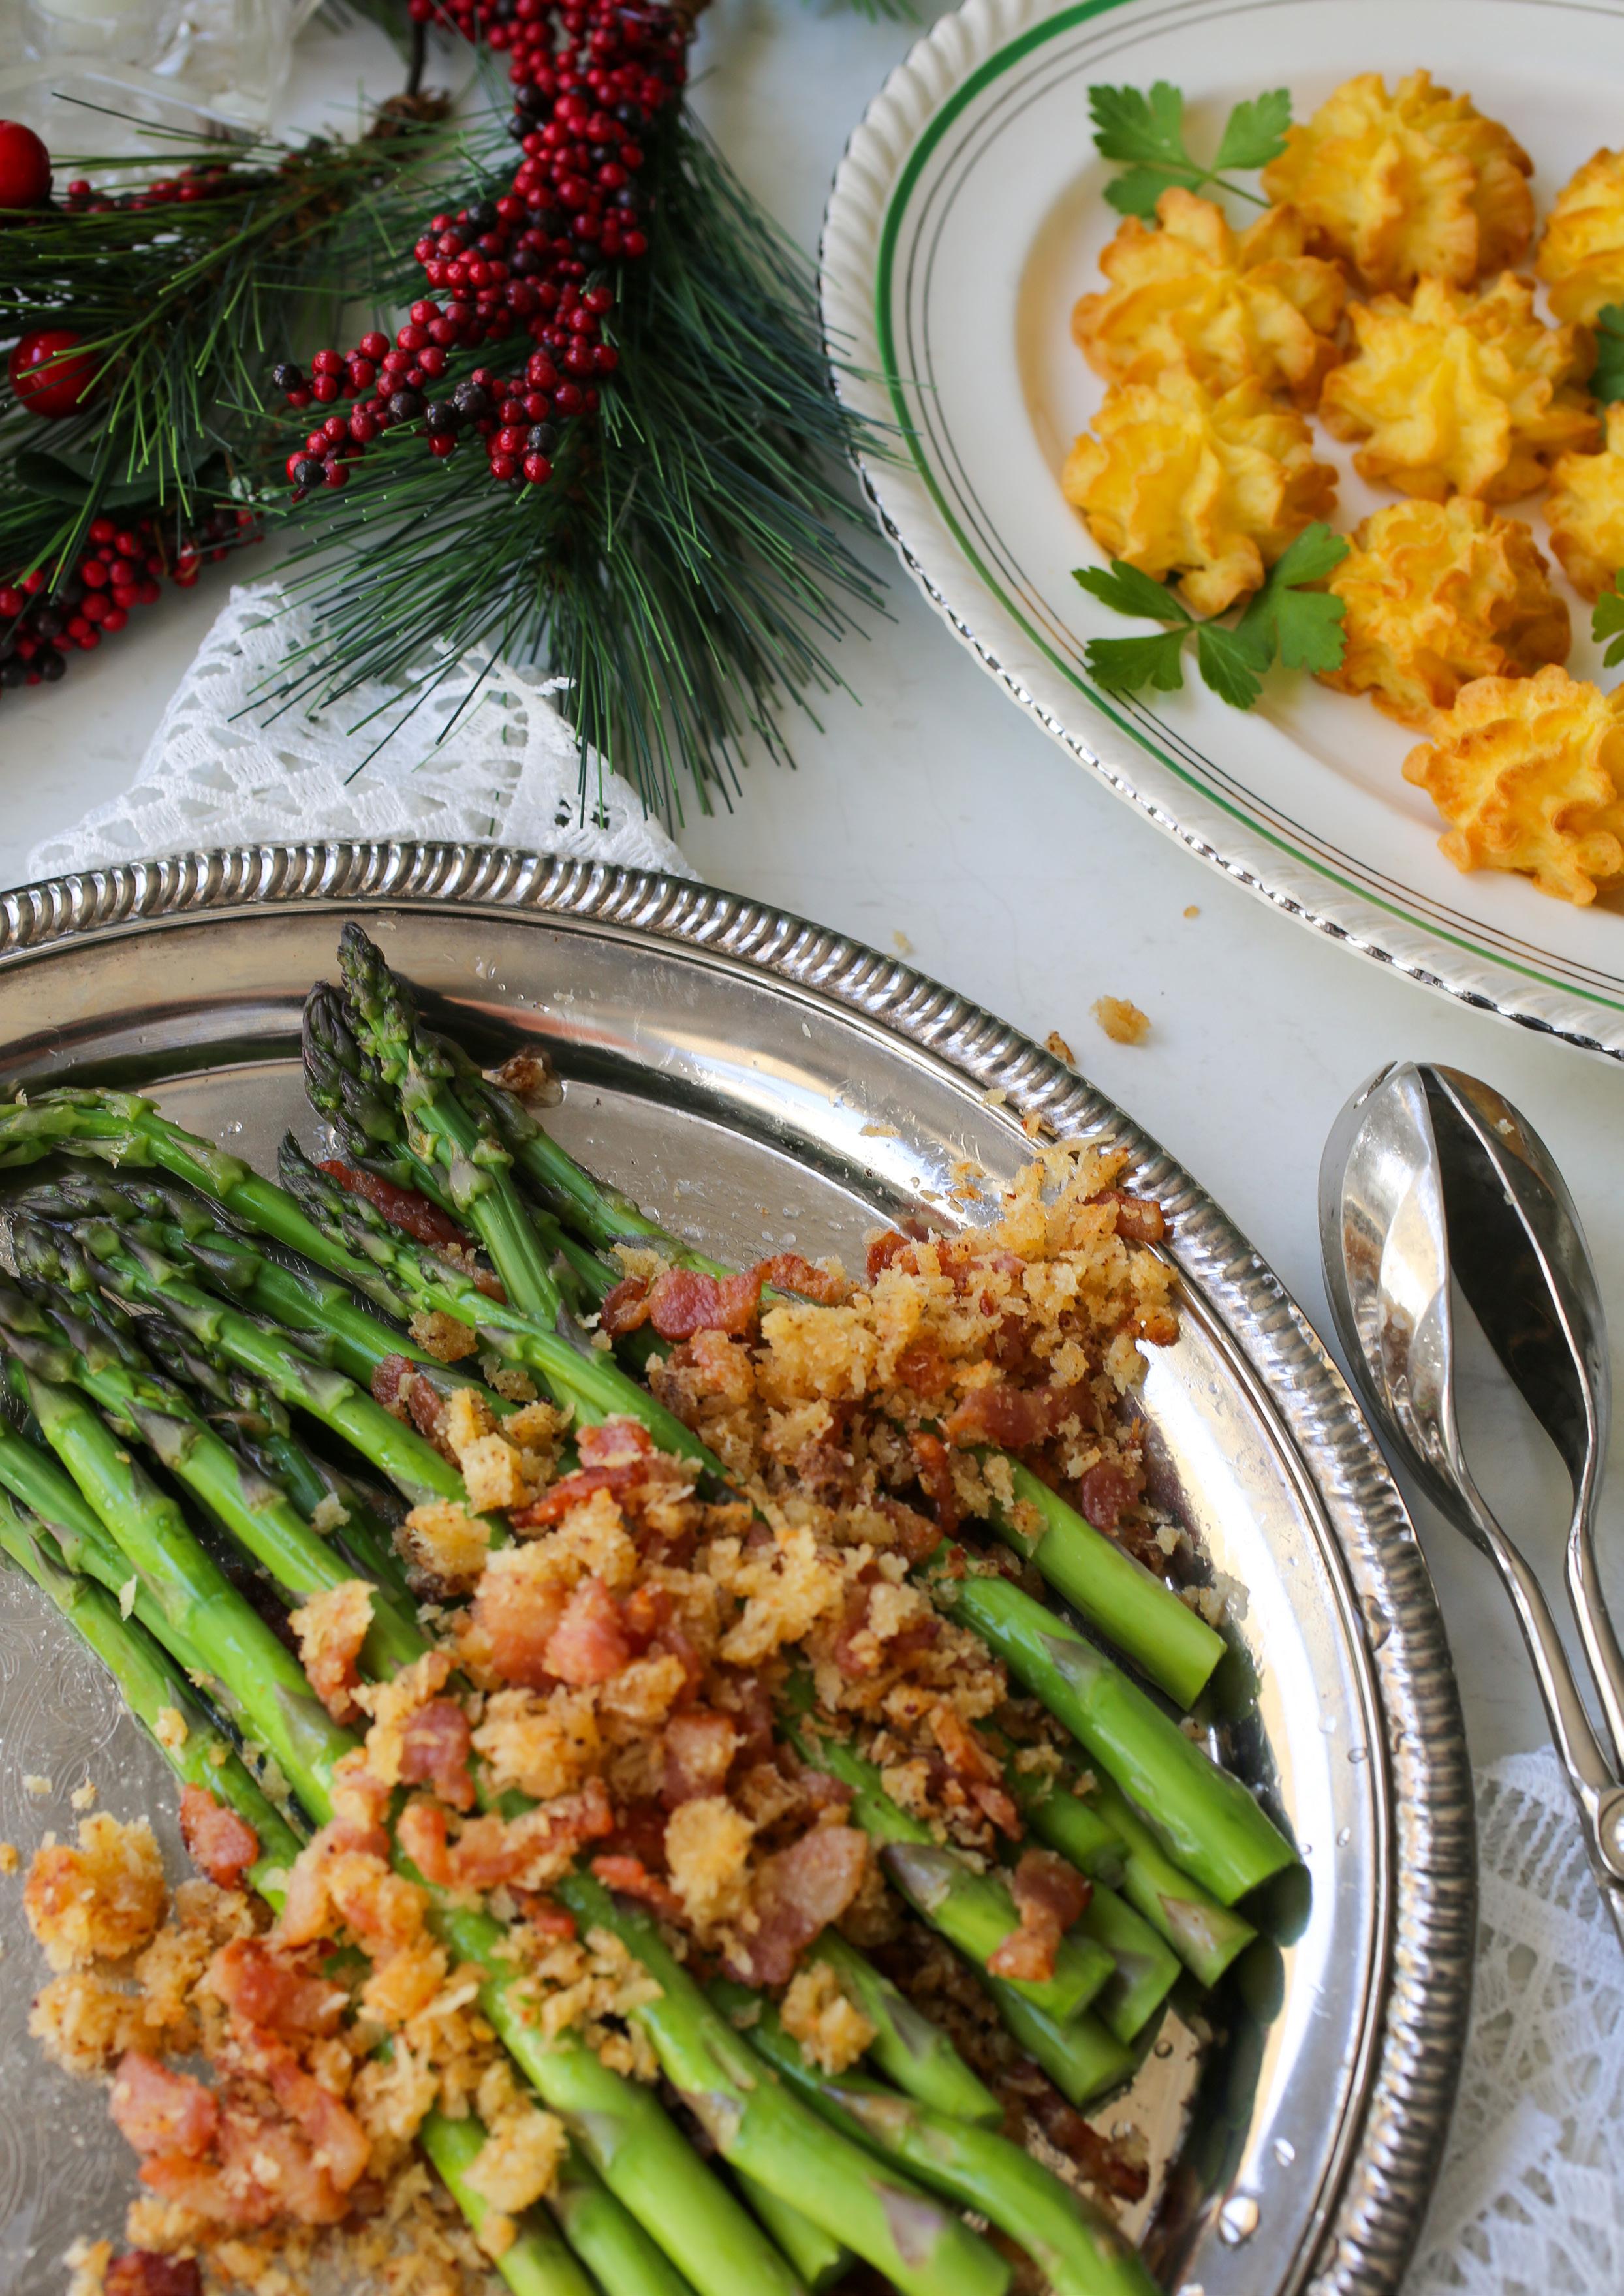
Christmas marks the end of the asparagus season, so make the most of them while you can.
4–6 rashers of bacon, finely chopped
50g butter
1 cup fresh breadcrumbs (Panko will work too)
¼–½ cup parmesan cheese, finely grated

2 bunches of asparagus, steamed, blanched or grilled
Over a low heat melt the butter in a pan and add the bacon. Cook down until the bacon is crispy and all the fat has rendered off. Add breadcrumbs. Cook, stirring often until the crumbs crisp up and turn golden. Stir through the grated parmesan and then take off the heat.
Serve over either blanched, steamed or grilled asparagus.
This very retro way of serving potatoes is another great way for you to be able to prepare ahead, leaving you with a stress-free day whether you are cooking for four or fourteen.
500g Agria potatoes
50g butter
1 egg yolk
Serves 4–6
Peel the potatoes and chop in half, or quarters if large. Just ensure they are all of similar sizes so they cook evenly. Place in a large pot of salted water and bring to the boil. Simmer until the potatoes are cooked through. Drain thoroughly before mashing in the butter. You want a smoothly mashed potato. Stir in the egg yolk.
Fill a large piping bag with a star nozzle with the potato mash and pipe rosettes onto a lined baking tray. The size of these is personal choice, but too small and you will lose the smooth fluffy interior, so aim for a golf ball or larger in size.
At this stage you can refrigerate the potato until ready to bake. Bake at 200°C for 20–30 minutes or until golden brown.
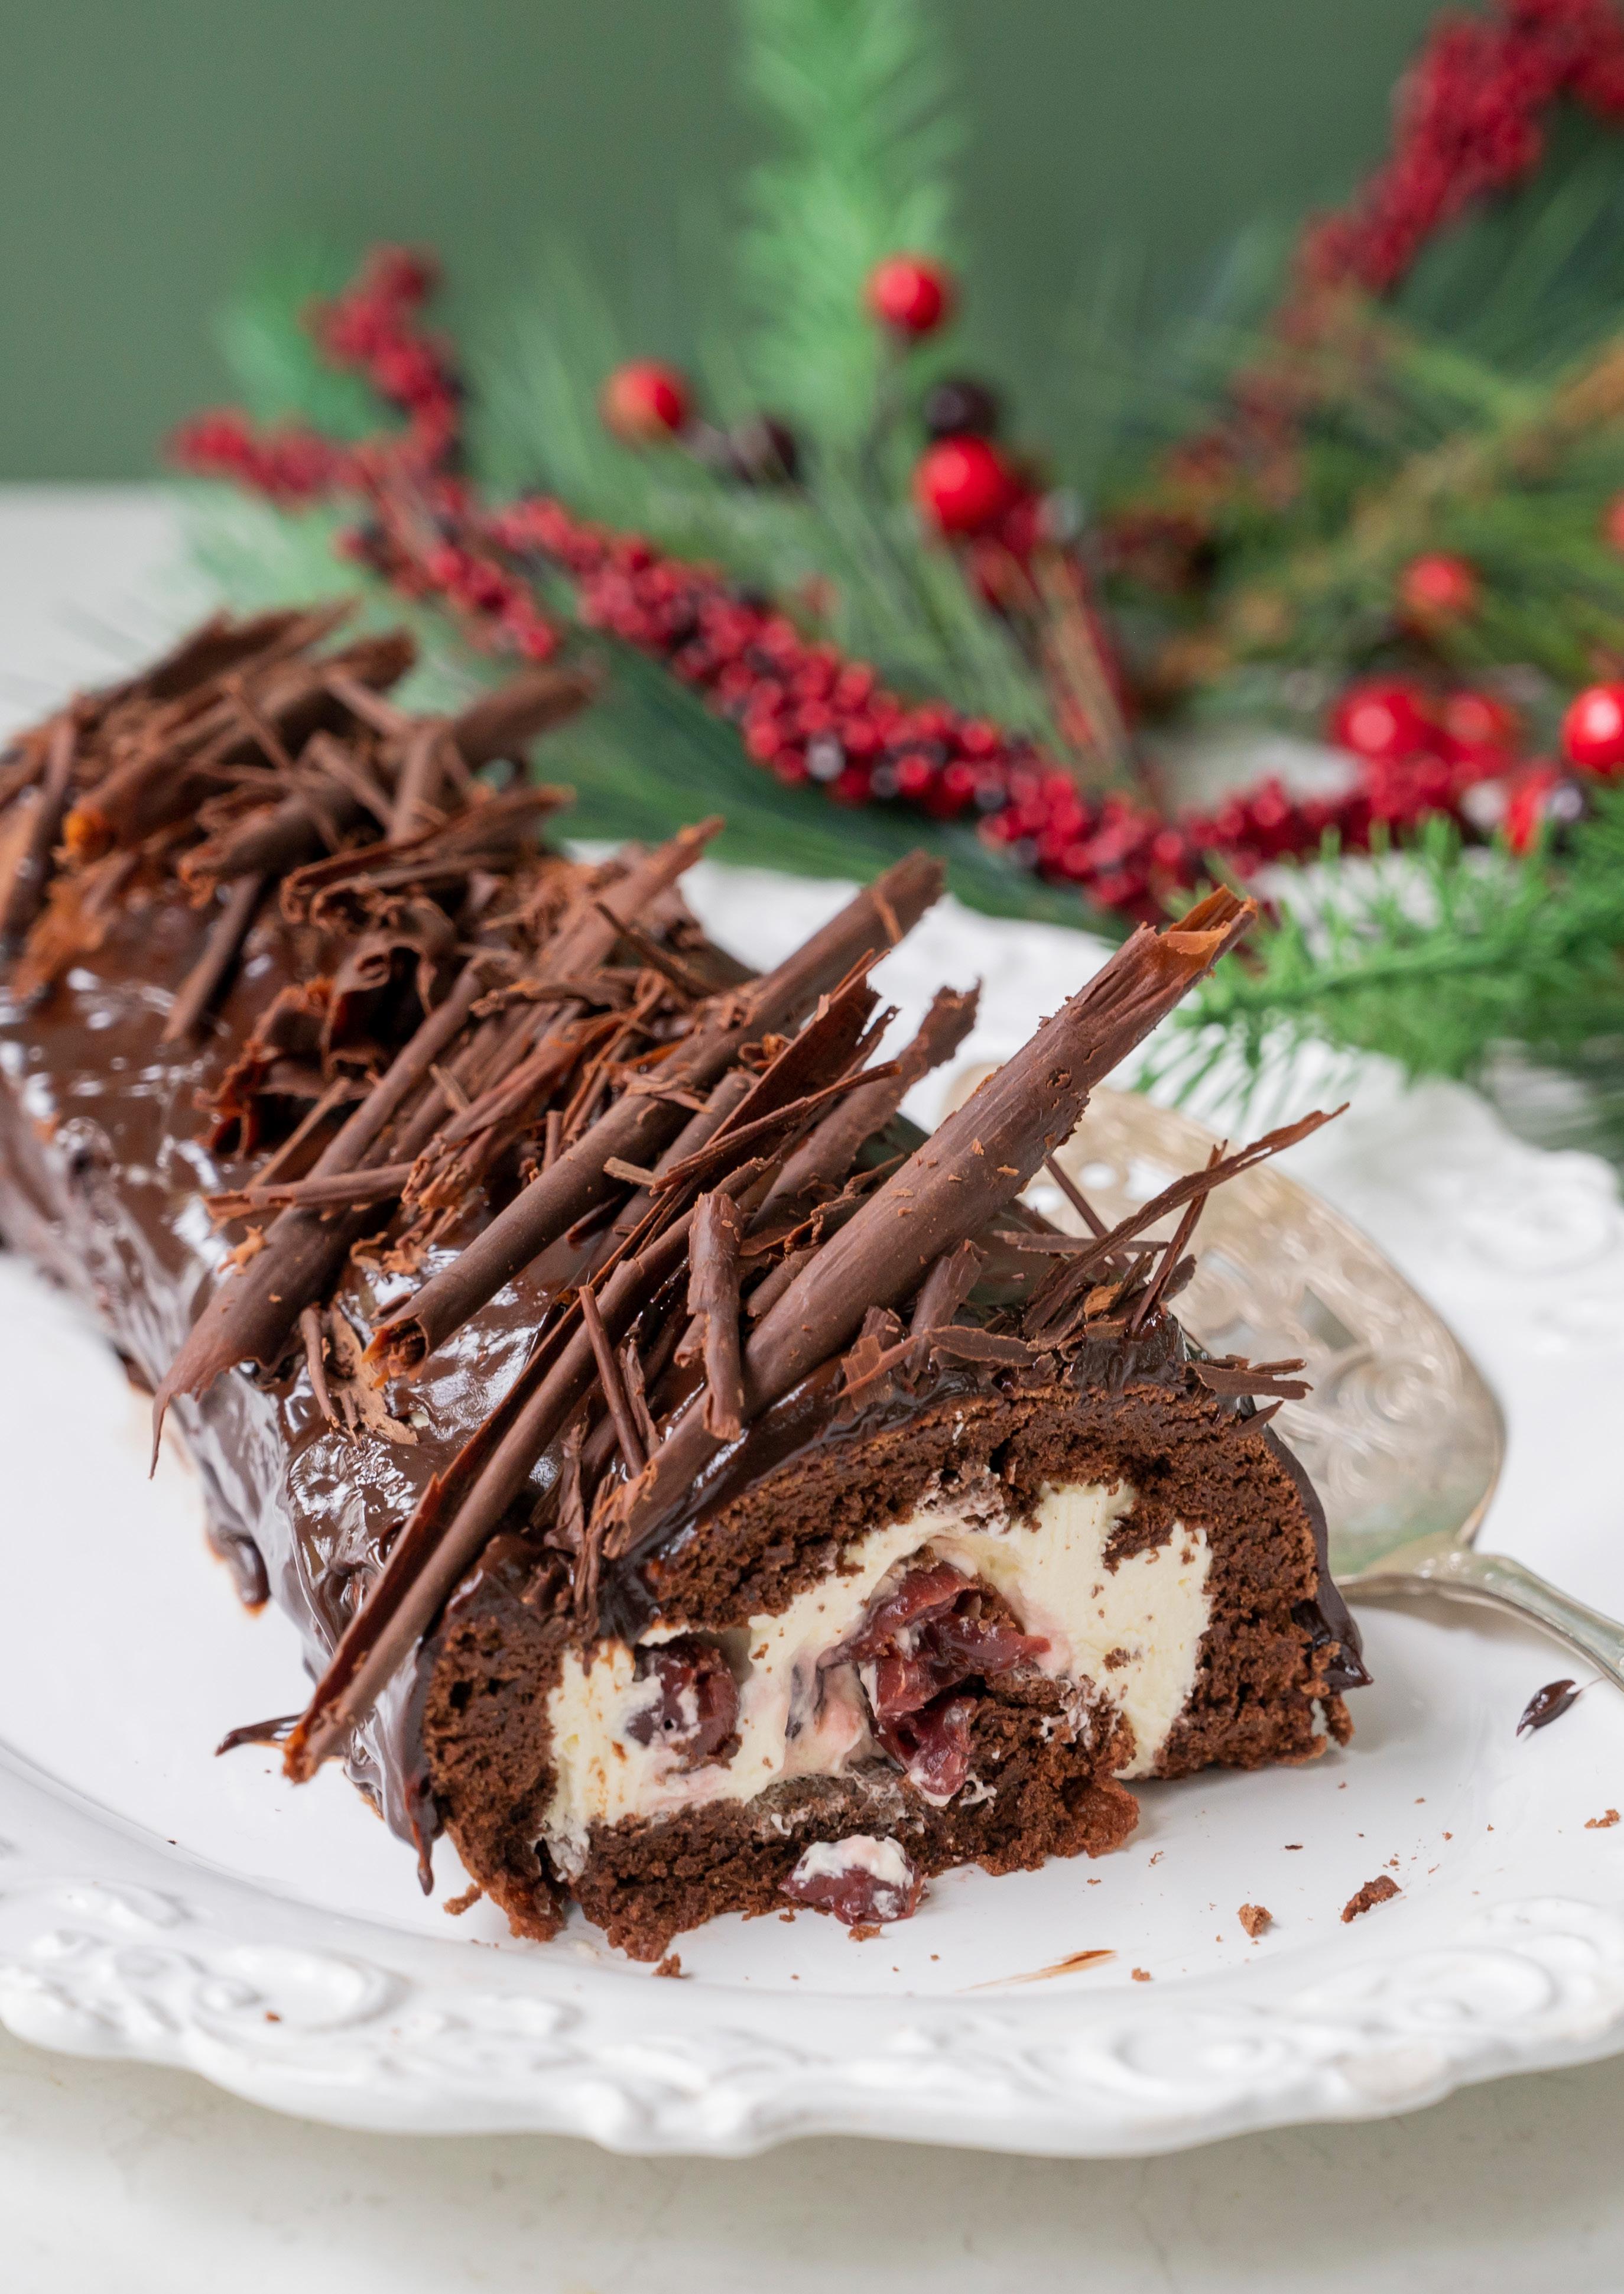
This is a real crowd pleaser. I’ve flavoured the ganache with almond essence and filled the log with cherries for a festive theme, but you can omit the essence and use any berries you like, or leave them out entirely.
250g dark chocolate, finely chopped 6 eggs, separated ¾ cup sugar 2 tbsp cocoa 300ml cream ½ –1 tsp almond essence
2 cups of cherries (tinned Morello or fresh, halved and pitted)
Preheat the oven to 180°C.
Melt 200g of the chocolate either in the microwave or over a bowl set over a pan of simmering water. (Do not let the base of the bowl touch the water.) Set aside to cool.
Place the egg whites in a large bowl and whisk until stiff.
In a separate bowl, beat the egg yolks and sugar until thick and creamy. Pour in the cooled chocolate and gently fold together before adding in the cocoa and mixing until well combined.
Gently stir two large spoonfuls of the egg whites into the chocolate mixture to loosen the mix, then fold in the remaining egg whites using a large metal spoon (you don’t want to squash out the air you have just beaten in). Pour the mixture into a lined a 33cm x 23cm Swiss roll tin.
Bake for 20–25 minutes. Once cooked take the sponge out of the oven and place a piece of baking paper on top along with a clean tea towel. Once cool, invert the sponge on to the tea towel and carefully peel off the original piece of baking paper. Now very carefully roll up the sponge in the baking paper and tea towel.
At this stage you can leave it for a day before filling.
Whip 1 cup of the cream until it just holds its shape. Unroll the sponge and spread with the whipped cream, and sprinkle over the cherries before carefully re-rolling. Don’t panic if it cracks! That is what the chocolate icing is for.
Decorate the top of the roulade with ganache made from melting the remaining chocolate and cream together. Once melted stir in the almond essence then ice the chocolate log. We then decorated it with chocolate shavings.
This twist on the classic English summer pudding uses rich brioche bread. You could also use a Christmas Panettone. Filled with gorgeous white chocolate ice cream and served with fresh berries, it is a real showstopper that will easily feed 20 people. Make it ahead of time for an easy dessert to bring out at the end of the meal.
PUDDING
500g frozen mixed berries
¼ cup sugar
2 cups water
1 large loaf brioche
ICE CREAM
2½ cups cream
1½ cups full fat milk
250g white choc
¼ cup sugar
8 egg yolks
1 chip raspberries
TO SERVE
1 chip fresh raspberries
1 chip strawberries
1 chip blueberries
1 tbsp sugar
Place the frozen berries, sugar and water in a small pot and bring to the boil. Simmer gently for 10 minutes then take off the heat and allow to cool. Once cool, strain to separate the juice from the berries.
Line a 20cm dome cake tin with either cling film or strips of baking paper. This is really just to help you ease the pudding out.
Cut the brioche into approx. 14–16 even slices, then remove the crusts. Dip the bread into the berry juice and line the dome with it, saving 4–5 pieces to finish it once filled with ice cream. Spread drained berries all over the bread.
Make the ice cream.
Place the cream, milk and white chocolate in a medium saucepan. Bring mixture just to a simmer, stirring to melt the chocolate. Whisk egg yolks and sugar in a medium bowl until pale. Gradually whisk in the warm cream mixture. Transfer the now egg and cream mixture back to the saucepan and cook over medium heat, stirring constantly, until thick enough to coat a wooden spoon. Cooking the custard too fast or not stirring will cause it to curdle.
Remove the custard from the heat and allow to cool.
Once the custard is cold, churn it in an ice cream machine according to the manufacturer’s instructions. Once the ice cream has churned, mix in 1 chip of the raspberries then pour into the bread-lined tin.
Working quickly, dip the remaining bread in berry juice and cover the ice cream completely so you have a complete dome. Freeze overnight.
To serve, hull and cut strawberries in half. Mix these with raspberries and blueberries and a tablespoon of sugar. Allow to sit at room temperature for an hour.
Remove the pudding about 10 minutes before you want to serve it. Invert onto your serving dish and decorate with the fresh berries.
Tip – if you can’t be bothered making the ice cream from scratch a good quality store bought vanilla ice cream will work. Just melt it a little so you can stir through raspberries and fill the bread lined tin.

Meringues are a great dessert to have on hand at this time of year. Make them when you have some time and then store in an airtight container. You’ll be thankful when, with the addition of some whipped cream and fresh berries, you have a dessert you can whip together in minutes.

INGREDIENTS
4 size 7 egg whites
1 cup caster sugar
1 tsp vanilla extract
In a large bowl whisk (slowly to begin with) the egg whites to stiff peaks. Slowly add the sugar, one spoonful at a time, while continuing to beat at high speed. Once all the sugar has been added, continue to beat for a further five minutes.
Add a good quality vanilla extract in the last minute of beating.
Spoon or pipe your meringue into preferred shapes onto a lined baking tray and bake at 150°C. Little kisses will take approx. an hour, larger meringues 2–3 hours. Once cooked turn off the oven and leave the meringues in there until completely cooled. Then store in an airtight container until needed.
If flavouring your meringue, this needs to be done carefully and at the last minute. Use a tablespoon of freeze-dried fruit powder or good quality extract. If adding nuts or chocolate/cocoa, carefully fold them through once finished beating. Remember, fat is your enemy, so incorporating these can collapse your meringue. The key to success is to not add too much and to only lightly fold them in.
*The ratio is 1:2 egg white to sugar. The average size egg white is 30g, so for every egg white you need 60g sugar or between a ¼ and ⅓ cup.
Make a deceptively simple dessert from meringues, fresh berries and other goodies you have on hand. The true beauty of this festive wreath is you can cheat and buy marshmallows or macarons, even the meringues and combine them with fresh fruit to create a stunning dessert everyone will love. Simply make a circle of whipped cream on a large platter or board, then top this with meringues of various sizes and shapes interspersed with choc dipped strawberries, fresh raspberries and blueberries, marshmallow, tiny macarons, chocolate shards …


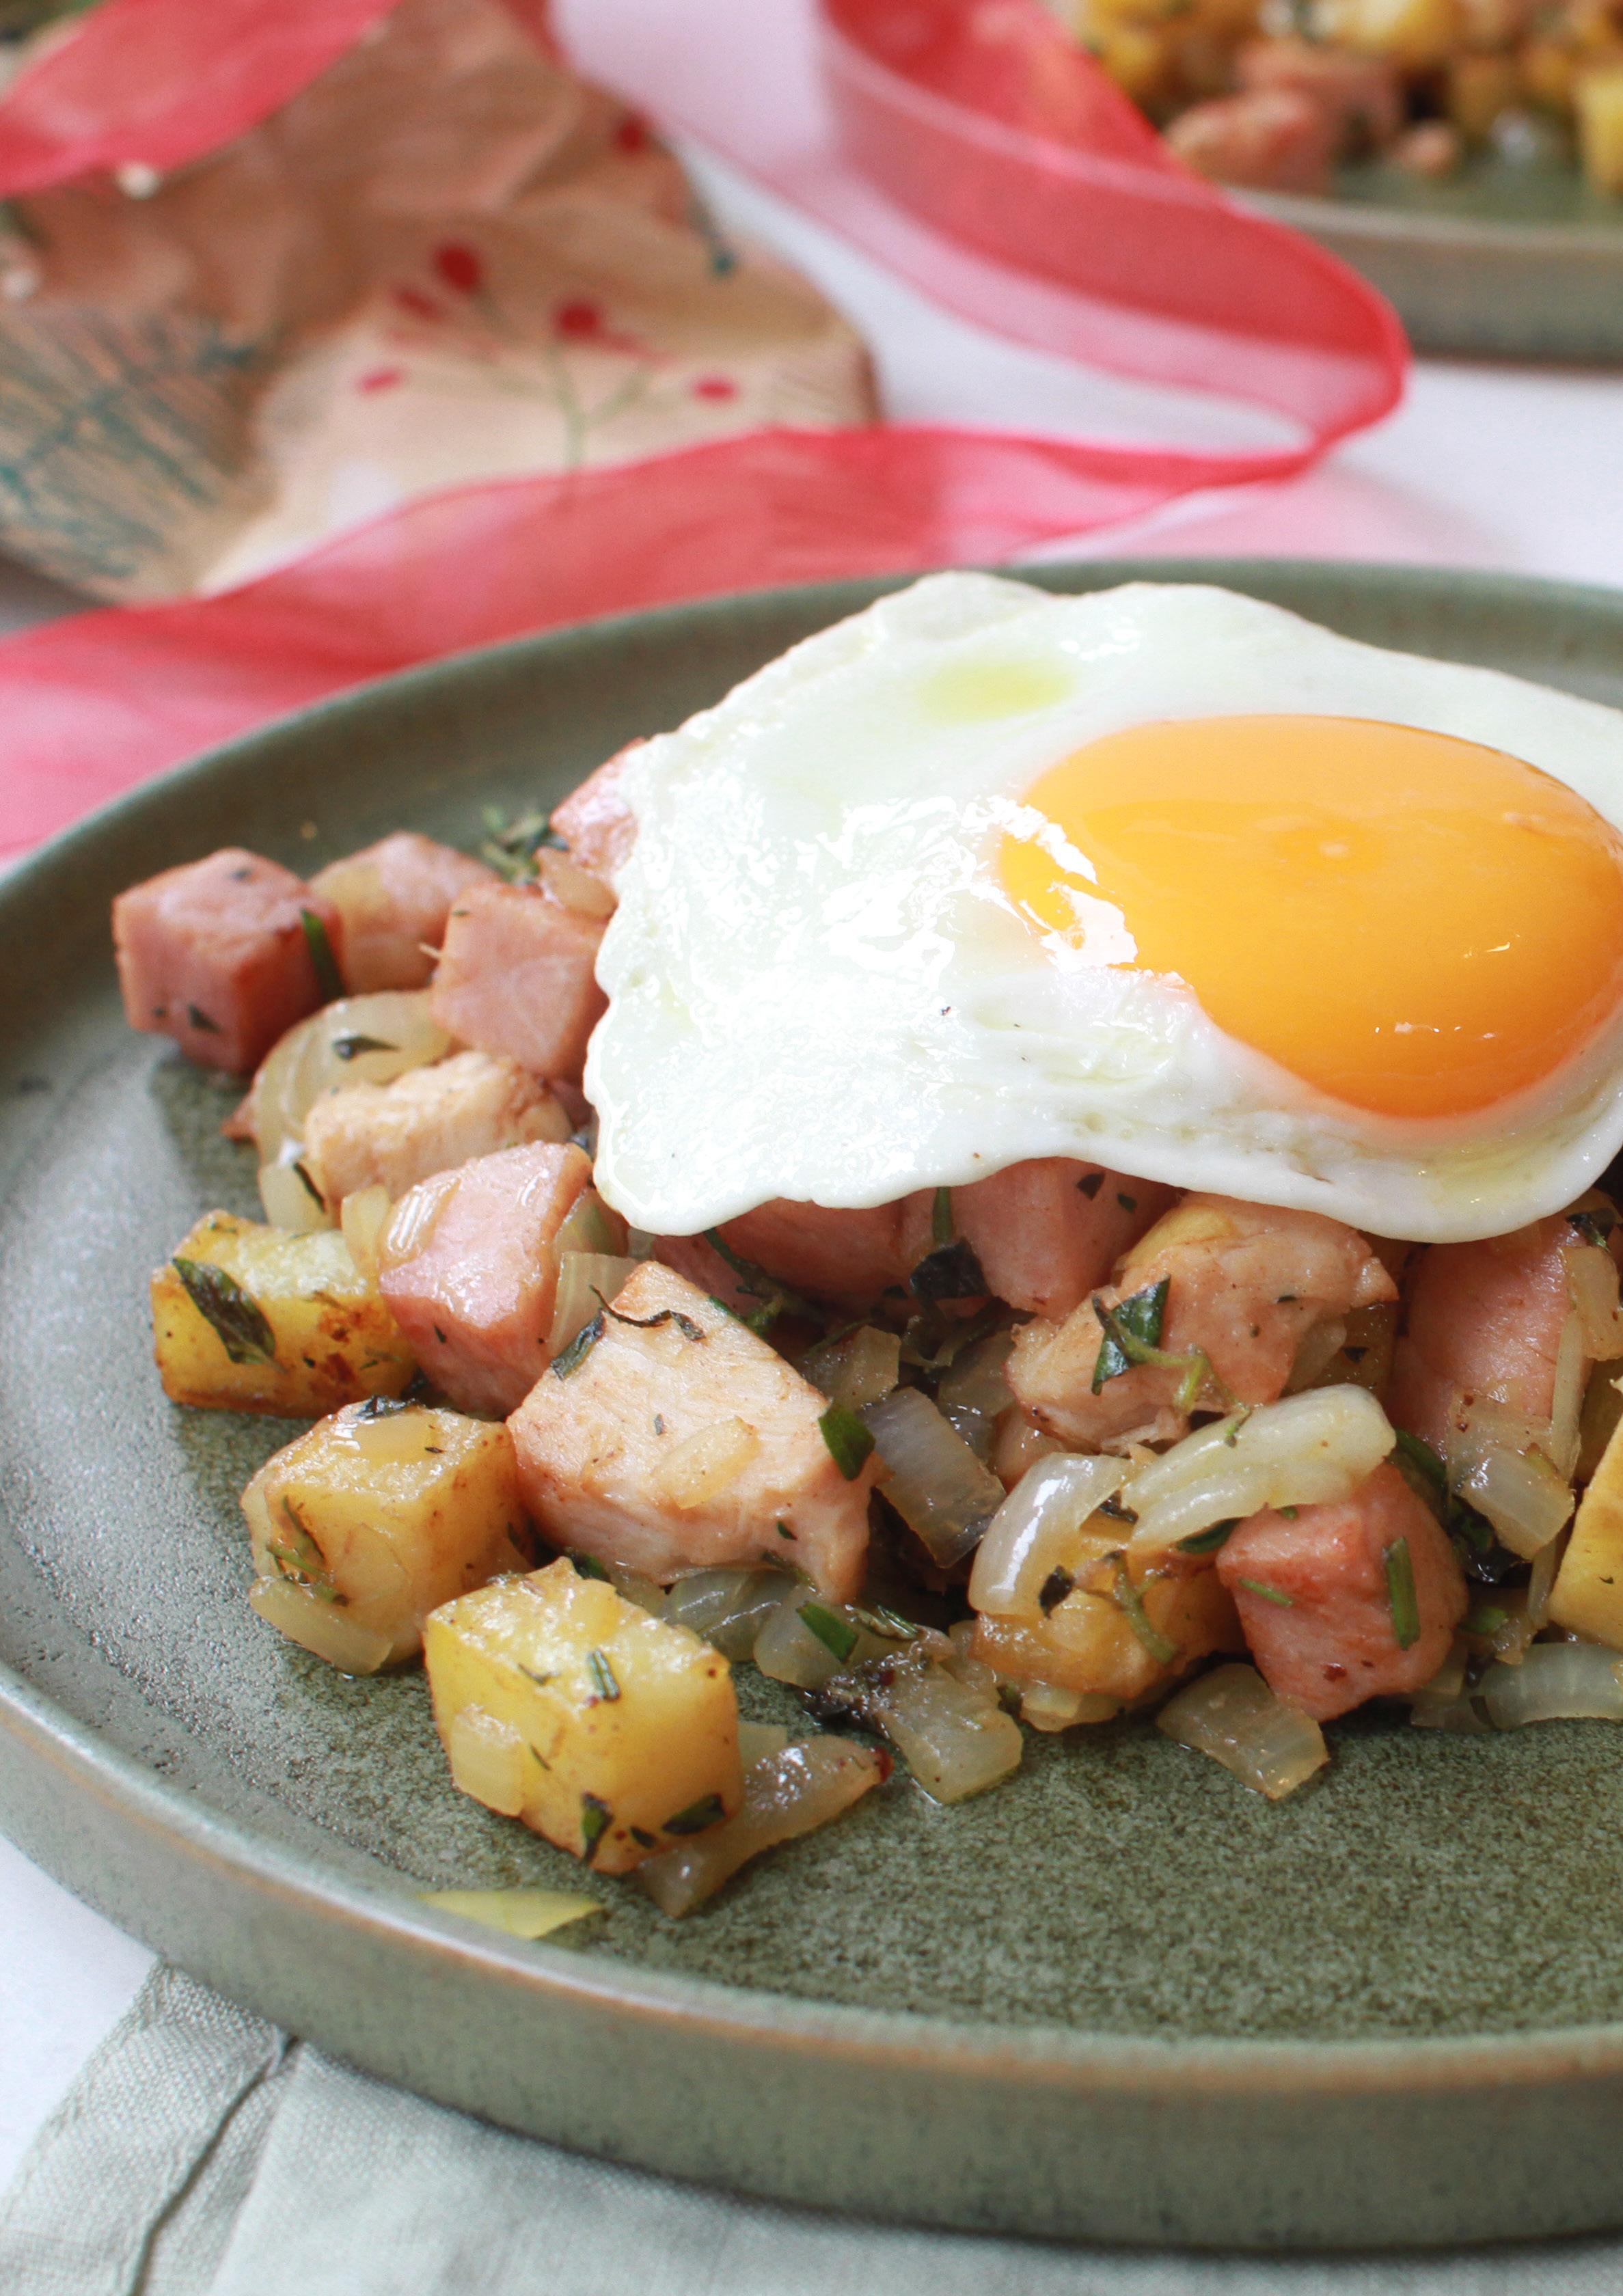
There are always leftovers on Christmas day, especially meat and potatoes. Boxing day hash is the best way to make a quick easy brekkie that doubles as a fridge clear out. Any mix of ham, lamb, chicken, turkey, beef or bacon work well for the meat, don’t be afraid to throw it all in! If there’s leftover spinach or rocket, add this in with the onion and herbs too.
4 cups of diced leftover meat
4 cups of diced cooked potatoes
1 large onion, diced
Handful of mixed herbs (chives, rosemary, oregano, thyme, parsley)
4 fried eggs
Butter, ghee or olive oil
Heat a large non-stick pan over a high heat. Once hot, but not smoking, add in 2-3 tbsp of either butter, ghee or olive oil. Add in the diced meat and potatoes and allow to crisp up on the bottom. Don’t move them around too much to start with or they won’t get crispy! Once you are getting a layer of golden bits, give the pan a good toss to move the meat and potatoes around.
When most of the mix is crispy and golden, add in the diced onion and herbs, then toss through to soften slightly.
Divide the hash amongst four bowls or plates. Serve with a fried egg on top and a dollop of chutney, salsa verde or hollandaise.
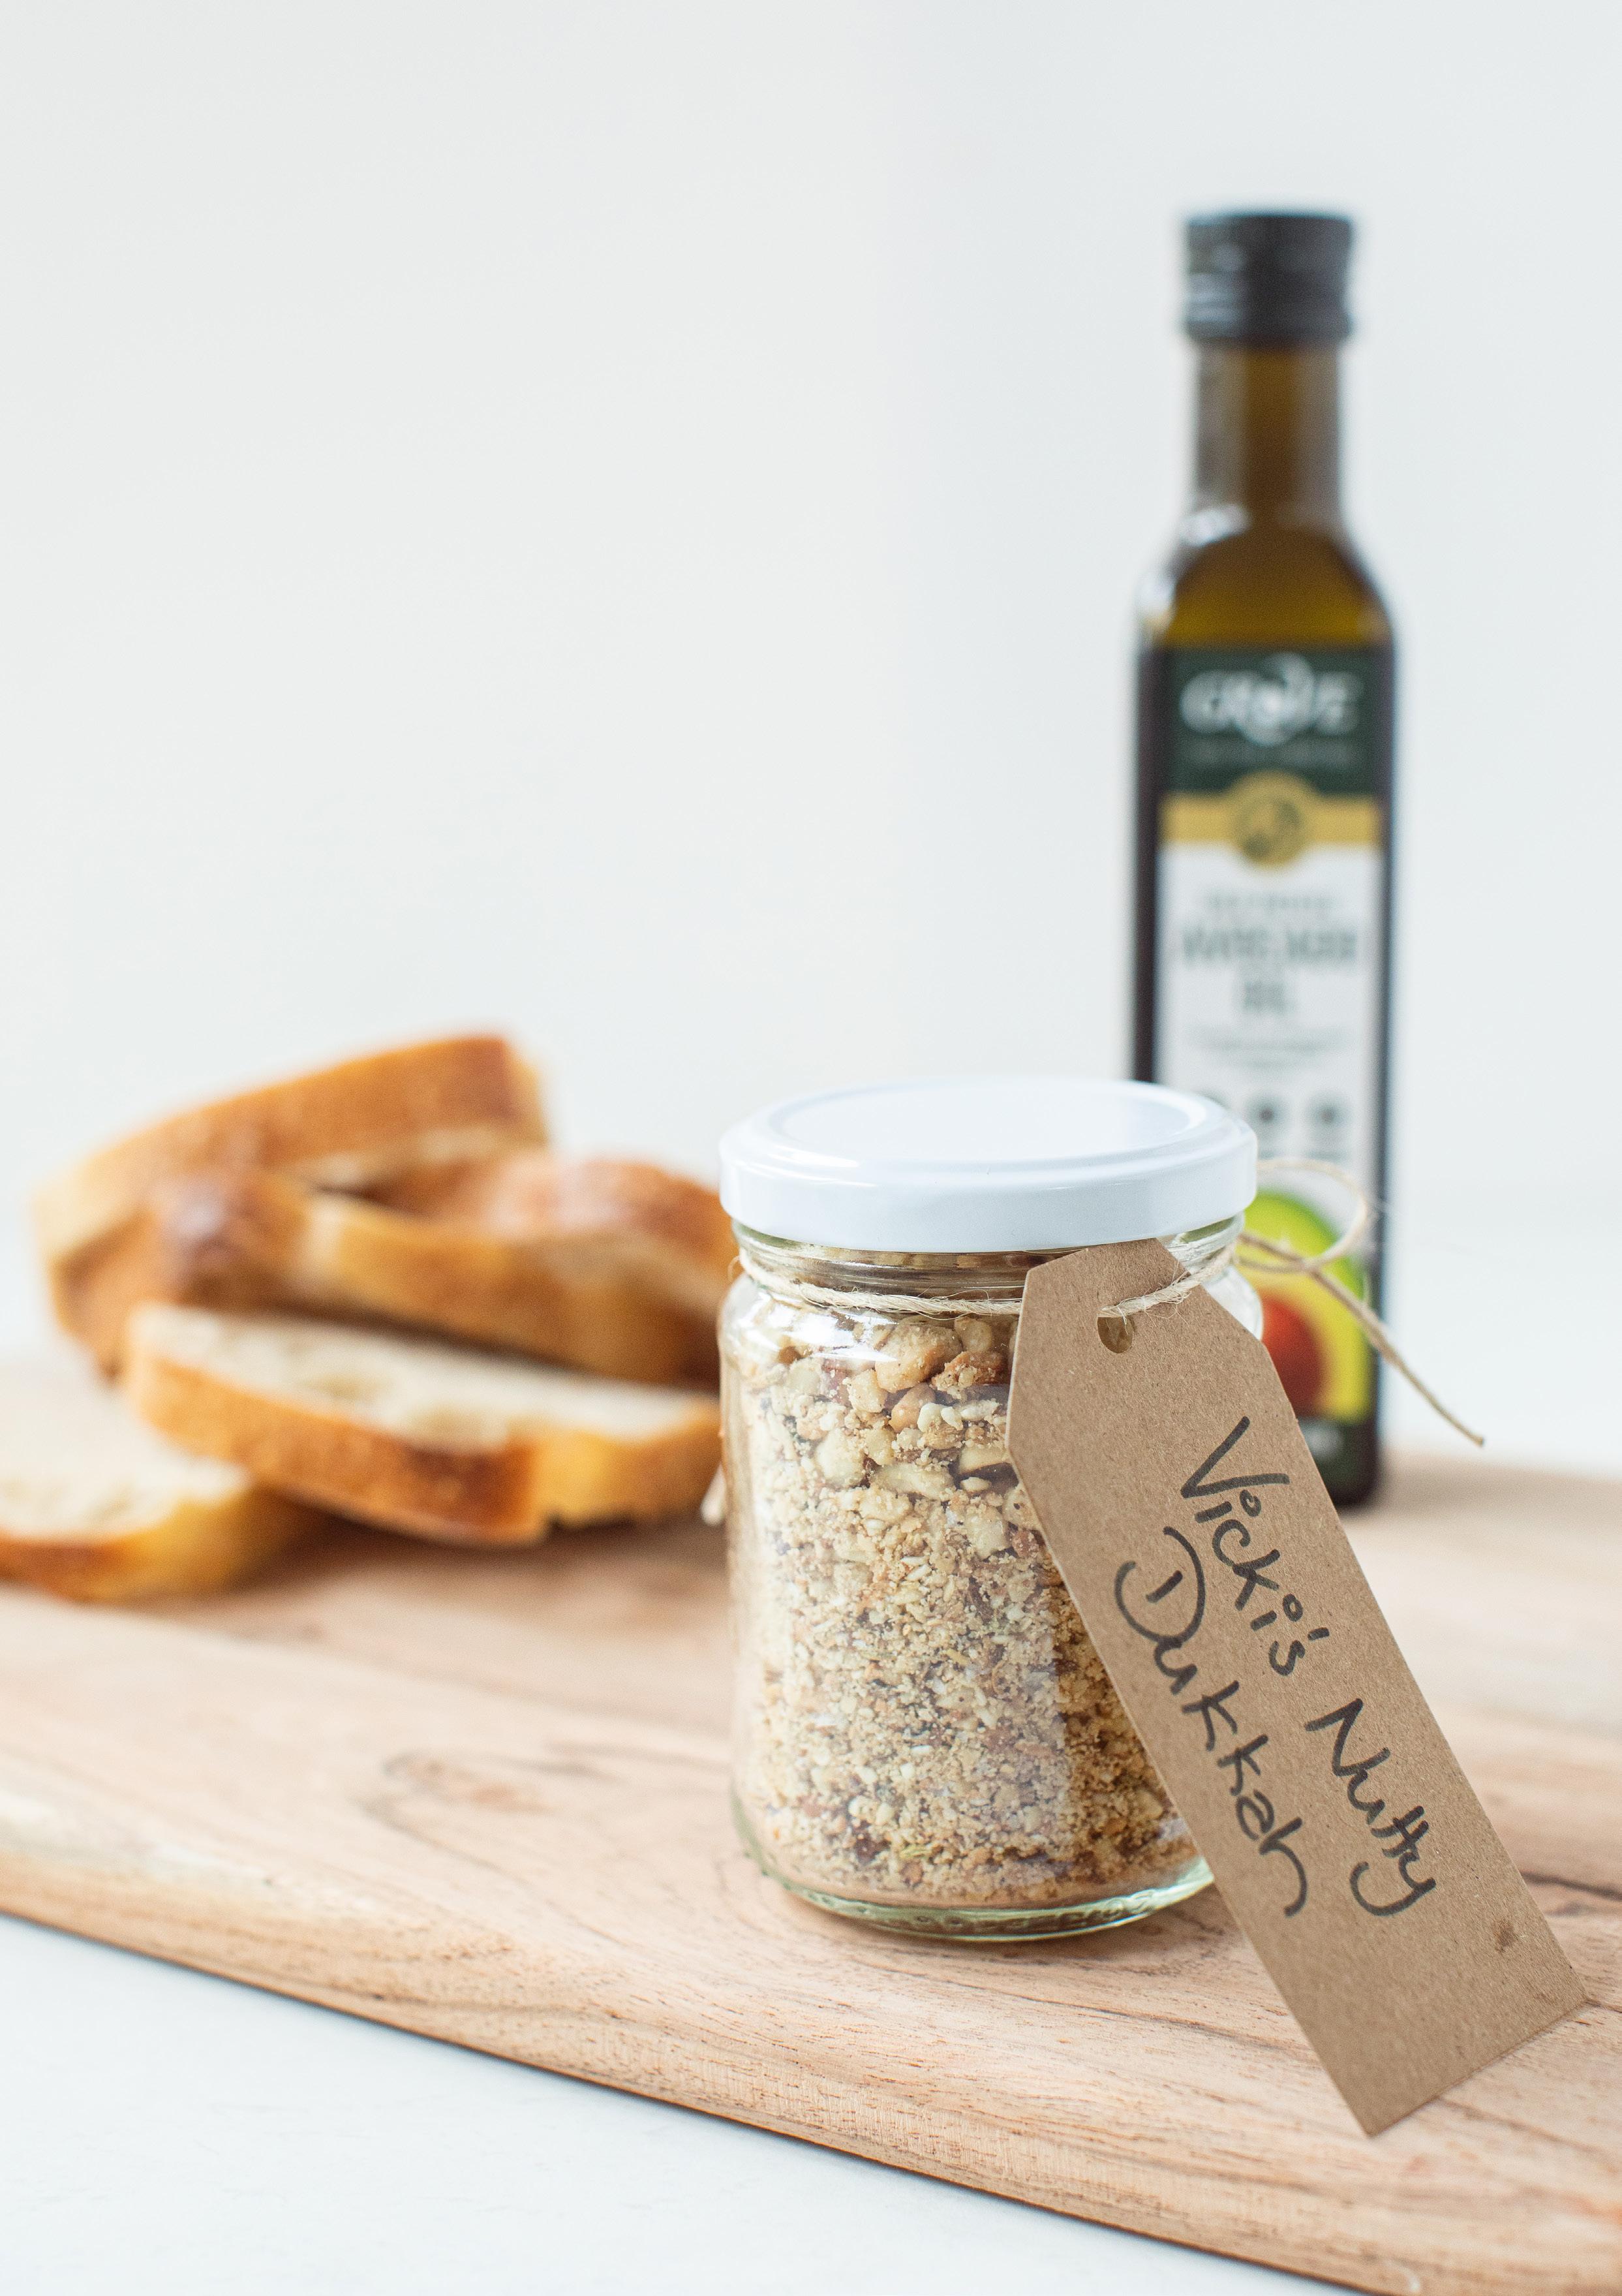
Homemade dukkha is so much better than the store-bought varieties, as fresh is always best when it comes to nuts. Make more than you need and place in cute jars for the perfect little gift.
Use dukkha on top of roasted veggies, salads or hummus, or simply dip fresh torn bread into avocado oil, then into dukkha as a nutty snack.
1 cup nuts (this is up to you, but I use ¼ cup each of cashews, pine nuts, almonds and hazelnuts, walnuts)
1 tbsp coriander seeds
1 tbsp cumin seeds
1 tsp fennel seeds
2 tbsp sesame seeds
1 tsp sea salt flakes
½ tsp cracked pepper
Place the nuts on an oven tray and roast in a moderate oven for 10–15 minutes, being careful not to brown them.
Meanwhile, in a dry pan toast the coriander, cumin, fennel and sesame seeds until they begin to pop.
Take these off the heat and allow to cool along with the roasted nuts. Combine everything in a food processor or mortar and pestle and process or pound until desired consistency. Keep in the fridge to preserve the freshness.