
JUPITER PRO PIR & MW SENSOR INSTRUCTIONS
Issue 01 on 24th April 2024
These instructions are in addition to the standard luminaire instructions that were also supplied with the product you have purchased. They should be read carefully & luminaire installed as per both sets of instructions, then pass on to the appropriate person for retention for future reference & maintenance.
DESCRIPTION
The sensor options offer presence detection to provide automatic control of lighting loads The sensor is programmed using a remote handset.
INSTALLATION
The following PIR or MW sensors can be used on the Jupiter Pro fitting & both can be programmed using the below handset The sensor is installed by screw fixing to the center housing in the fitting,N.B. hand tight only, DO NOT OVER TIGHTEN
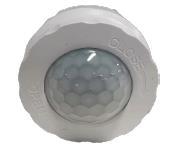
NJP/PRO/PIR/SENSOR
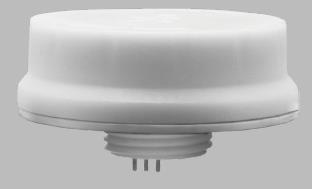
NJP/PRO/MW/SENSOR
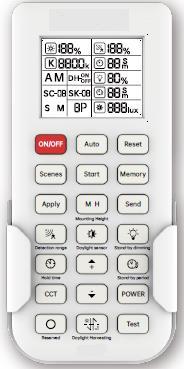
N/HB/PIR-MW/PROG/HS
The luminaire with detector should be sited as per the mounting & detection patterns shown in the appropriate diagrams below:
PIR SENSOR COVERAGE

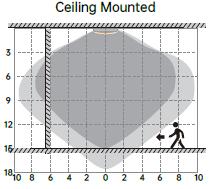
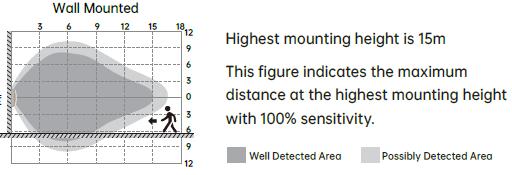
• The diagram is based on a ceiling mounting height. Note that the lower the sensor is installed, the smaller the detection range will be.
• If wall mounted, the detection zone will vary depending on the surroundings but perpendicular reach will be at least 10m
• The distances quoted are approximate & may vary depending on surroundings
• Do not site within 1m of forced air heating or ventilation.
• Do not fix to a vibrating surface.
• Avoid metallic objects directly in front of the sensor head
PROGRAMMING
On first time the sensors is used, light will be ON 100% for approximately 45 seconds then dim to OFF
o Re-trigger the sensor for normal operation
o Program as required – see table on page 3
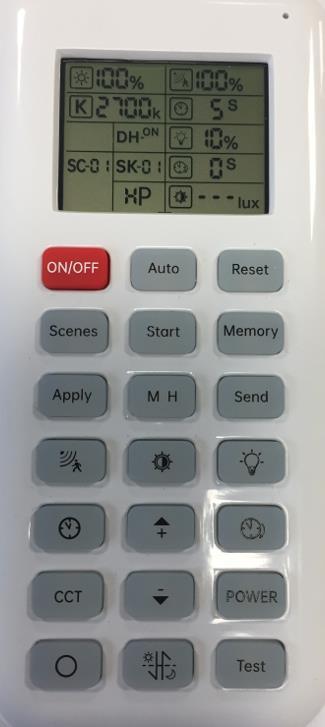
Please use the remote programming handset, handset has an operating range of upto 15m. See table below. N.B. In majority of the cases when programming various parameters the fitting will flash to confirm cammand has been received.
Auto or Manual Mode
Manual on/off
Select Scenes
Apply program settings to sensor
M H - Mounting Height
Lux Setting
Sensor Sensitivity
Hold time
DO NOT USE
RESERVED
Daylight Harvest on/off
Reset to default settings:
Sensor detection area – 100%
Hold time -10mins
Lux setting – Disable
Standby period -10 Secs
Standby-dimming level - 10%
Memory store
Send individual parameters to sensor
Standby dim level
Standby period
up/down parameter adjustment keys
Power setting
2 second quick test
HANDSET BUTTON FUNCTIONS
Buttons Function Description
ON/OFF ON/OFF
Turn ON or OFF light and keep the sensor in ON/OFF mode.
Auto Auto Enter into Sensor AUTO MODE
Reset Reset Go back to default program; Enter into SENSOR MODE and perform the default program.
Function Programming Buttons
Scenes Scenes Store programs (Detection area, holdtime, daylight threshold, standby dim level and standby period) into different scenes and apply them quickly.
Start Start
Press this button to start programming, S icon on LCD screen display; set parameters press MEMORY button, M icon appears on the screen
Memory Memory
Apply Apply
M H Mounting Height
Send Send
Detection Area
Daylight Threshold
Press this button to memorize program and save it into selected SCENE; after pressing the M icon's appears then disappears after 3 seconds confirming scene has been stored
Press this button to send the selected or set program to the detector
Adjust detection area/sensitivity levels according to application, Higher (HP) or lower (LP) heights. Press button to select
Memorize and send the individual parameter settings to the sensor,
Adjust detection area options using up/down arrows - 25%,50%,75% and 100%.
Press this button (Icon starts flashing on the LCD display) to adjust the daylight threshold settings " "(disable), 2lux, 10lux, 30lux, 50lux, 80lux, 120lux, 200lux, 250lux, 300lux, 350lux,400lux, LEN(daylight learning). Use the arrow up/down buttons to make the adjustment
Standy Dim Level
Holdtime
Standby Period
Press this button (Icon starts flashing on the LCD display) adjust standby dim levels, 10%, 20%, 30% and 50%
Use the arrow up/down buttons to make the adjustment
Press this button (Icon starts flashing on the LCD display) adjust from hold time options: 5S, 30S, 1min, 3min, 5min, 10min, 20min and 30min.Use the arrow up/down buttons to make the adjustment
Press this button (Icon starts flashing on the LCD display) Adjust from Standby Period options, 0S, 10S, 30S, 1min, 5min, 10min, 30min, 60min and " " as infinite.
Use the arrow up/down buttons to make the adjustment
Adjust brightness in both ON/OFF mode & SENSOR mode, minimum 10%, max 100%, each press makes 5% change. Use the arrow up/down buttons to make the adjustment
Reserved Button Reserved for the future use
Daylight Harvesting
Test Test Button
Daylight harvesting function enabled or disabled. After changes are made this function is disabled so this button must be re-pressed to show DH ON to activate the daylight harvest function.fitting will flash to indicate this Choose "Daylight sensor" button then adjust to any value higher than 50 Lux
2. Choose "Standby Period" then adjust to 0S
3. Press "DH" daylight harvesting button, till LCD screen show DH-ON
4. This function cannot be turned off by DH-OFF. but it can be turned off by changing any of the parameters
Quick testing button for only 2S ON then OFF. + +
Use the arrow up/down buttons to make the adjustment
RATINGS
Power supply : N/A
Rated Load : N/A
Operating Temperature: -20°C …+70°C
IP Rating IP65
Operating Height 12m (PIR) & 15m (MW)
FAULT FINDING
If you experiencing a problem please check through the following before making contact with NVC:
Fault - Load does not come on
• Check to see if the live supply to the circuit is good.
• If the supply & wiring are good, check the LUX setting. Disable the lux control to check the operation.
Fault - Lights do not go off
• Ensure that the area is left unoccupied for longer than the selected timer setting.
• Make sure that the sensor is not adjacent to circulating air, heaters or lamps.
• If the unit “false triggers” reduce the SENSITIVITY level to narrow the area of detection.
