AGED CARE CLEANERS HANDBOOK

This handbook outlines best-practice cleaning in aged care settings . It is designed for use with Greenspeed’s
It contains step -by-step guidance on how to clean, and what supplies you’ll need to prepare.

Aged Care Cleaners Handbook 2
Content
High - R i s k High Tou ch Sur f ace s in Ag e d C are Env ironment s 4 High Tou ch Sur f ace s in R e s id ent R o om s 5 High Tou ch Sur f ace s in B athro om s 6 High Tou ch Sur f ace s in Nur s e s ’ Station s 7 High Tou ch Sur f ace s in H all w ay s 8 Ke eping Your Tro ll ey Cl ean 9 S et ting up Your Cl eaning Tro ll ey 10 11 12 f or Cl eaning 1 3 B e s t Pr ac tice Cl eaning Pro ce dure 14 H ow To Du s t High an d L ow Sur f ace s 16 How To Clean Frequently Tou ch e d Sur f ace s in R e s id ent R o om s 1 7 H ow To W ip e B athro om Sur f ace s 18 H ow To Wa s h S h ower Wall s 19 H ow To Cl ean Toil et s 2 0 H ow To M op B athro om Fl o or s 2 1 H ow To M op R o om s an d Pub lic A rea Fl o or s 2 2 H ow To Cl ean Gla s s an d Mirror s 2 3 3 Aged Care Cleaners Handbook
s
High-Risk High Touch Surfaces in Aged Care
Environments
Good hygiene and bes t prac tice in cleaning procedures are es s ential in an a g e d c are e nv iro nm e nt . Cleaner s play an impor tant role in keeping all people s afe from germs , bac teria , and virus es .
Germs, bacteria, and viruses may sur vive for weeks or months on dr y surfaces. These surfaces may then be touched by the patients and residents, as well as healthcare providers, visitors, and cleaners.
It is a cleaner’s responsibility to make sure all high touch surfaces are cleaned routinely.
Cleaners must wear new gloves before cleaning a room, and ensure their cleaning equipment (cloths, dusting tools, mops, etc.) are free from germs.
To prevent cros s - contamination , cl oth s an d mop s mu s t b e chang e d b et we en each ro om . A mop or cl oth f rom on e re s id ent ’s ro om mu s t n ot b e u s e d in an oth er.

Aged Care Cleaners Handbook 4
High Touch Surfaces in Resident Rooms
T he high touch sur f ace s in the re s ident ro om are tho s e mo s t fre quentl y touche d when a re s ident get s in and out of the b e d and move s around the ro om .
T h e high tou ch s ur f ace s to b e cl ean e d in a re s id ent s ro om in clu de :
1
2 Nurse call button
3 Bed rails
4 Over bed table
5 Washroom door handle
6 Taps
7 Side table and cupboard doors
8 Remote control
L ight s w itc h D o o r han dl e Shaded area indicates areas of highest contamination and touch 5 Aged Care Cleaners Handbook
High Touch Surfaces in Bathrooms
High touch sur f ace s in a re sident ’s bathro o m s hould b e cleane d ever yday.
T h e high tou c h s ur f ace s to b e cl eane d dail y in clu d e :
1 Door handle
2 Light s witches
3 Sink and taps
4 Paper and soap dispenser
5 Toilet seat and handle
6 Commode
7 Shower rails and taps
8
Co mmo d e Shaded area indicates areas of highest contamination and touch
6 Aged Care Cleaners Handbook
High Touch Surfaces in Nurses’ Stations
T he nur s e s ’ s tation s hould b e cleane d thoroughl y to minimi s e tran s fer of germ s and bac teria b et we en s ta .
T h e high tou ch s ur f ace s to b e cl ean e d in clud e :
2 Key
3 Telephone 4 D
5 Reception counter 6
Co mpute r o n wh e e l s ECG C ar t Shaded area indicates areas of highest contamination and touch 7 Aged Care Cleaners Handbook
1 Computer mouse
board
esk top
Mobile ECG and computer car t s
High Touch Surfaces in Hallways
Hallw ay sur f ace s are high ri s k a s they are touche d fre quentl y by resident s , s ta and any visitor s at an age d c are f acilit y.
T h e high tou ch s ur f ace s to b e cl ean e d in clud e :
1 Door handles
2 Handrails
3 Sanitiser dispensers
4 Wheelchairs
5 Cleaning trolleys
6 Lif t Buttons
B e d Tr ans p o r t
Wh e e l chair
Shaded area indicates areas of highest contamination and touch
8 Aged Care Cleaners Handbook
Keeping Your Trolley Clean

Your trolley i s de s igne d to prevent prev iousl y u s e d cleaning to ol s (mops , cloths etc .) from being lef t on top of the trolley and reused .
At the end of your shif t , you should wipe all high touch sur f ace s on your T h e high tou ch s ur f ace s to b e cl ean e d on your tro ll ey in clu de :
1 Trolley handles
2 Mop handles
3 Dus ter handles
4 Drawers
5 Trolley lids and keys
9 Aged Care Cleaners Handbook
Setting up Your Cleaning Trolley

Your cleaning trolley i s your work s tation and it nee d s to hold ever y thing you nee d to clean and re s to ck the area s you are cleaning .
• Make sure you have enough cloths , mops , and dusting tools .
• Only take consumables like toilet paper, hand towels ,
trolley lid according to the number of rooms being cleaned Prepare according to pre-soaking guide
Place red and blue mop heads in the drawers of your trolley. Prepare according to pre -soaking guide or measuring jug.
Place dus ter and mop handles on the sides of your trolley.
Place other consumables, like paper and bin liners, in drawers.
Place used cloths and mops in the laundr y bag for washing.
Place Handscrubby Flex , Ergo Grip holder bucket under lid.
1 2 3 4 5 6
1 2 3 4 5 6 1 0 Aged Care Cleaners Handbook
Cloth s are s tore d in the bucket s under the centre lid s e c tion of your trolley, and mop s are s tore d in the top drawer.
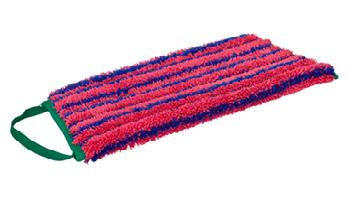
30cm Red Scrub Mops
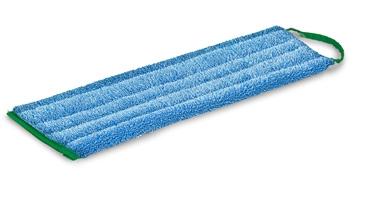
45cm Blue Twist Mops
• Place half of the cloths in a bucket and add half of the required solution.
• Place the rest of the cloths in and add the remaining solution.
• Allow the cloths to absorb the cleaning solution before cleaning
D o s e f or 1 cl oth - 3 3ml
D o s e f or 1 5 cl oth s - 50 0ml
• Place mops side by side inside drawers on the bottom.
• Add pre-measured solution according to number of mops.
• M to distribute evenly. Allow the mops to absorb the cleaning solution

before cleaning.
D o s e f or 1 mop - 20 0ml
D o s e f or 1 5 mop s - 3L
• Place mops side by side inside drawers on the bottom.
• Add pre-measured solution according to number of mops.
• M to dis tribute evenly. Allow the mops to absorb the cleaning solution
before cleaning.
D o s e f or 1 mop - 26 5ml
D o s e f or 1 5 mop s - 4L
1 1 Aged Care Cleaners Handbook
and dis tinguish bet ween common area /room cleaning and bathroom cleaning .
B el ow outlin e s w hat cl oth or mop to u s e in each area .
Red and Pink
Used in bathrooms , washrooms , showers , toilet s , and basins .


Blue
Used in general areas including resident
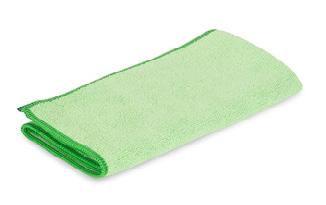
Yellow
Used in highly critical isolation areas where the risk of cros s contamination is greates t. These should be changed of ten.
30cm Red Scrub Mop Green


Blue Twist Mop
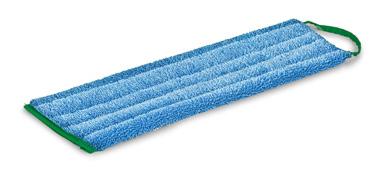
Used to mop public areas and resident rooms.
Used in food preparation / kitchen areas .
1 2 Aged Care Cleaners Handbook
To prevent cro s s contamination , u s e a clean s ide for ever y sur f ace and change to a new cloth in ever y new ro om .
A cloth should be folded correctly 3 times in halves
Star t by folding the cloth in half. Repeat this s tep t wo more times , and the resulting shape should
Always use the clean side of cloth and turn over to a new side when dir t y
Each side of the cloth will clean one surface and needs to be turned over for each new sur f ace.
Once all the sides have been used, unfold and s tar t again using the other side of the cloth. A proper technique uses all 16 sides .
1 2 3 1 3 Aged Care Cleaners Handbook
Best Prac tice Cleaning Procedure
Wash hands and glove up
If your gloves have been used to clean and touch sur f aces in a previous room, you mus t discard those gloves , wash your hands , and dr y them thoroughly before pulling on a new pair of gloves .
Dust all high and low surfaces with a Fox Duster
Clean glass and mirrors
Clean glas s and mirrors with a Glas s
wiping over using a Glas s Cloth. You may use water or window cleaner, to clean before wiping dr y.
Empty and replace bin liner
Tie of f was te bags before removing from bins and replacing bin liners . Place was te in the bag on the back of your trolley.
Wipe resident room high touch surfaces
Wipe frequently touched sur f aces like door handles and light s witches with one then unfold the cloth to wipe bed sur f aces , bedside table, and surrounding furniture. Finish by wiping any visible mark s on walls .
6 Wipe bathroom high touch surfaces
wipe door handles , light s witches , and call buttons using one side of the cloth. Then unfold and wipe handrails and other high touch sur f aces with a new clean side of the cloth.
4 1 2 3 5 14 Aged Care Cleaners Handbook
Best Prac tice
Cleaning Procedure

Clean taps, sink and surrounds
Unfold your cloth to a new side and wipe the sink and surrounding area, s tar ting
use a Handscrubby Flex non-scratching
bag af ter use.
Take a pre -soaked 30 cm Red Scrub Mop
edges towards the centre.
Clean shower and walls
Clean shower walls with a 30 cm Red Scrub Mop on an adjus table handle, or Ergo Grip handle.
Clean toilet
Af ter scrubbing the bowl with a toilet brush, wipe the toilet brush handle with your red cloth as you place the toilet brush back into the holder. Star t by then wipe the internal sur faces under the lid, top of seat, under seat and top of bowl.
Take a pre -soaked 45cm Blue Twis t Mop
edges towards the centre.
10 8 9 7 Aged Care Cleaners Handbook 1 5
Low Surfaces
How To Dust High and
T he Fox D u s ter c an b e u s e d dr y or s lightl y damp, for ta s k s such a s du s ting over a cur tain rail, inside a ceiling vent , on top of a s helf, or b ehind a b o ok s helf.
1 Place cover onto frame.

Use dr y, or dampen with
Bend to desired shape.
Dus t high areas .
Dus t lower sur f aces .
A f ter du s ting an area , remove th e u s e d cove r an d p la ce in the laundr y b ag f or wa s hing .
5 6 4 3 2 1 6 Aged Care Cleaners Handbook
How To Clean Frequently Touched Surfaces in Resident Rooms
To prevent cro s s contamination when cleaning re s ident ro om s , a new clean cloth i s u s e d for ever y ro om .
1
Wash and dr y hands , then put on gloves .
Take a blue pre -soaked cloth from your trolley and fold three times .

Wipe sur f aces closes t to the
Unfold cloth to the nex t side and wipe window sills and other sur f aces .
A f ter w iping an area , p lace u s e d cl oth s in th e laun dr y b ag f or wa s hing .
4 3 2 1 7 Aged Care Cleaners Handbook
How To Wipe
Bathroom Surfaces
Resident bathrooms require a high level of hygiene and cleanlines s , par ticularly if us ed by visitor s .
Toil et s s h oul d b e cl ean e d at th e en d , ju s t be en u s e d to cl ean a toil et s ur f ace it s h oul d b e p lace d in th e tro ll ey f or laund ering .
1 Wash and dr y hands , then put on gloves .
2 cloth from your trolley, fold three times and wipe door handles .
Unfold cloth to the nex t side, wipe light s witches and call buttons .
Unfold to the next side, wipe mirror and sink areas If scrubbing is required, use a Handscrubby Flex non-scratching

Unfold to the nex t side, wipe remaining bathroom sur f aces .
A f ter w iping th e area , p lace u s e d cl oth an d pad s in th e laun dr y b ag f or wa s hing .
5 3 4 1 8 Aged Care Cleaners Handbook
How To Wash
Shower Walls
1 Use a pre-soaked 30cm RED Scrub Mop on a Ergo Grip holder or an ex tendable handle.

2 Scrub the walls high to low.
Walls must be scrubbed and dried properly to ensure no cleaning residuals are lef t on sur f aces .
A f ter s crub bing th e area , remove th e u s e d S crub M op an d p lace in th e laun dr y bag f or wa s hing .
1 9 Aged Care Cleaners Handbook
How To Clean Toilets
1 Wash and dr y hands , put on gloves ,
2 Lif t lid and apply toilet bowl cleaner under toilet bowl rim and inside bowl. Wait a few minutes for the chemicals to work , then scrub the bowl with a cloth and fold three times .
4 Star t wiping the ex ternal areas of the toilet, e g buttons , cis tern, lid, bowl
Unfold cloth to the nex t side and wipe under the lid and on top of the seat.
Unfold cloth to the nex t side and wipe under the seat and on top of the bowl.
A f ter w iping th e area , p lace u s e d cl oth s in th e laun dr y b ag f or wa s hing .
Und e r L id To p of S eat Und e r S eat To p of B ow l Ci s te rn To p of L id Ci s te rn B ut to n s O ute r B ow l B e hin d L id 2 3 4 5 6 7 8 9 1 W iping ord er f or toil et ex ternal area s : 5 6 3 2 0 Aged Care Cleaners Handbook
How To Mop
Bathroom Floors
Us e the following tip s to en sure be s t prac tice metho d s are u s e d :
• P
• Adjus t telescopic handle according to your height, long enough that you can keep your body in a s traight position while cleaning, without needing to s tretch your arms .

1
Attach the 30 cm RED pre -soaked Scrub Mop to the velcro base of the mop frame The large edges of the mop base and mop head should line up.
2 moving towards the centre of the room.
long edge of the mop for ward.
Af ter mo p ping the area , re move the used mop head and place in the laundr y b ag f or wa s hing .
2 1 Aged Care Cleaners Handbook
How To Mop Rooms and Public Area Floors
Use the following tips to ensure best prac tice methods are used when mopping
• Pre -soak 45cm BLUE Twis t Mop heads .
• Adjus t telescopic handle according to cleaner height. Always tr y to keep your body in a s traight position. Never s tretch your arms .
• Mop sec tion by sec tion ensuring edges , corners , and under beds are also mopped.
• Use one mop head per room
Attach the 45cm BLUE pre -soaked Twis t Mop to the velcro base of the mop frame. The large edges of the mop base and mop head should line up.

2 moving towards the centre of the room.
longer front edge of the mop for ward.
Af ter mo p ping the area , re move the u s e d mo p hea d an d p lace in th e laundr y b ag f or wa s hing .
1
2 2 Aged Care Cleaners Handbook
How To Clean
Glass and Mirrors
drie s the sur f ace like a s quee ge e and hold s any re s idual s ins ide 1 to either the Ergo Grip holder or an ex tendable handle for higher glas s .

Spray the sur f ace with water.
Clean and dr y the glas s to a high shine.
Af ter cl eaning the s ur f a ce s , remove th e u s e d cover and p lace in the laundr y b ag f or wa s hing .
3 2 2 3 Aged Care Cleaners Handbook
G E T IN T O U C H yes@nxp.nz 0800 800 547

