Handmade Holiday Gifts from the Kitchen


iamcountryside.com

Index Herbes de Provence Honey Recipe........................................................................... 3 Limoncello Recipe: Make Ahead for Holiday Giving.............................................. 4 Making Chai Tea 101 ....................................................................................................... 6 An Easy Pomegranate Jelly Recipe ............................................................................ 8 Learn How to Make Flavored Vinegar ...................................................................... 10 Homemade Bread Recipes, Canning Jar Cookie Mixes, and More.................. 12 Cranberry-Apple Chutney Recipe For Your Holiday Table .................................. 15 Making Goat Milk Caramels ........................................................................................ 18 Making Marshmallows, Meringues, and Divinity ................................................... 20 Olé Cajeta 22
BACKYARD
HERBES DE PROVENCE HONEY RECIPE
BY RITA HEIKENFELD
Expensive to buy and sometimes hard to find, you can make your own Herbes de Provence recipe blend.
It’s basically a blend of dried herbs that thrive in the sunny Mediterranean climate of Provence in the South of France. All of the herbs in the blend are easy to grow, and are available at your neighborhood grocery store, except perhaps the lavender.
HERBES DE PROVENCE RECIPE
Lavender
(Lavandula augustifolia)
The sweet, intoxicating flavor of lavender is essential and it alleviates anxiety.
Thyme (Thymus vulgaris)
Like a medicine chest in a plant, the thyme plant has a peppery flavor. It relieves congestion.
Oregano (Origanum vulgare) and Marjoram (Origanum majorana)
Culinary cousins, oregano has a distinctive spicy, somewhat sweet taste and is stronger in flavor than marjoram. Marjoram has a grassy, sort of lemony taste. Both herbs are good for joints.
Rosemary (Rosemarinus officinalis)
You’ll recognize the strong pinelike fragrance and flavor of the rosemary plant. Rosemary is good for your memory.
Savory (Satureja hortensis)
Like thyme, savory has a peppery flavor and is a great digestive herb.
Fennel (Foeniculum vulgare)
Licorice-like in flavor, fennel eases a jittery tummy.
Bay (Laurus nobilis)
Tear a fresh bay leaf in two and you’ll be surprised — a little sweet and yet complex. Bay helps control blood sugar.
INGREDIENTS:

4 tablespoons dried thyme leaves
2 tablespoons dried marjoram or 1 tablespoon oregano

1 tablespoon dried rosemary, minced
1 tablespoon dried savory leaves
1 tablespoon dried lavender flowers
1 teaspoon fennel seeds
1 dried bay leaf, crumbled
DIRECTIONS: Stir together and store in airtight container in dry place away from heat and light.
HERBES DE PROVENCE HONEY RECIPE

The herbs, as they infuse the honey, lend a haunting fragrance and delicate flavor. I love this on scones, biscuits, and stirred into yogurt.
1 cup honey, preferably organic and raw 1 tablespoon dried Herbes de Provence
Place honey and herbs in a double boiler. Keep the water at a simmer, not a hard boil. Stir occasionally, letting the herbs infuse for 30 minutes. Strain in very fine strainer. Cool and place in glass jar. Store in pantry for up to a year.
handmade holiday gifts from the kitchen
BEEKEEPING backyardbeekeeping.iamcountryside.com
Limoncello Recipe: Make Ahead for Holiday Giving
 By Rita Heikenfeld
THEHOLIDAYS WILL SOON be upon us, and that means finding the perfect gift for everyone on the list. I’ve got the answer for those hard-to-buyfor folks. Give them a gift from the heart and hands! It’s fun to gather friends and family in your kitchen to make irresistible edible treats. My easy, make-ahead limoncello recipe heads the list. With this limoncello recipe, you’ll be raising a toast and shouting “Saluti!”
For the holidays, nothing beats a home-
made pound cake and the heirloom recipe I’m sharing has a wonderful, light almond flavor. The perfect cake to take to friends.
Salted chocolate clusters fill the bill when you want an easy, trendy candy that rivals its candy shop counterpart.
When time is of the essence (which is most days, right?) whip up the goat cheese log studded with cranberries, herbs, and pine nuts. With its holiday colors of red and green, it makes an unusual savory appetizer.
EASY LIMONCELLO RECIPE
I’ve traveled to Italy several times and on each of those occasions, I enjoyed limoncello. So I just had to develop a limoncello recipe to make at home.
This Italian lemon liqueur is expensive to buy and an elegant addition to your party or dinner drink offerings. The great thing about this limoncello recipe is it keeps just about forever in the freezer. Make now for gift giving.
INGREDIENTS
2½ to 3 pounds lemons**
1 quart/liter good-quality vodka
3 cups granulated sugar
2½ cups water
INSTRUCTIONS
•Pour vodka in a large glass jar.
•Remove peel from lemons with a vegetable peeler or sharp knife. Take off all of the pith — that’s the white part — from the peel as it is really bitter. If you can’t get it all off, do the best you can. Place peel in a glass jar with vodka and cover.
•Let sit at room temperature for at least one week to infuse flavor from the lemon peels. Some recipes recommend a dark place. I like to leave it out on my counter just to see the color change and smell the lemon aroma when I open the jar. The vodka will take on the color and flavor of the lemon as it steeps. You can leave the lemon peels in the vodka for a few weeks.
• After the infusion is complete, strain.
•Bring the sugar and water to a simmer and stir until the sugar dissolves and thickens a bit. Let cool and then add that to vodka mixture and stir until blended.
•Pour into bottles and seal.
•Chill a month in the refrigerator to cure, or two weeks in the freezer before using.
**
Thick-skinned lemons work well in this limoncello recipe. They have more skin surface area and are easier to peel than smaller, thinner-skinned lemons.
4 handmade holiday gifts from the kitchen
CHANGE IT UP!
Sometimes I’ll add the peel of one orange along with the lemon. This double citrus makes the limoncello sweeter.
SO MANY WAYS TO ENJOY THIS LIMONCELLO RECIPE!
Serve straight or over ice chips, mix with sparkling wine or mineral water and a lemon curl, toss with fresh fruit, serve over ice cream, frozen yogurt, or a simple cake.
FRANGIPANE POUND CAKE AKA VISITING CAKE
This is a good keeper, covered, at room temperature. It sounds fancy — frangi pane just means there’s almond flavor in the cake. This is a third generation family cake, and a nice cake to tote. We like to serve it with a glass of homemade eggnog.
INGREDIENTS
Cake
1 cup/2 sticks unsalted butter, room temperature
1 cup granulated sugar
3 large eggs, room temperature
1¾ teaspoons vanilla extract
1 can, 12½ oz., almond filling (not almond paste)
2¼ cups all-purpose flour
2 teaspoons baking powder
½ teaspoon salt
¼ cup milk or half & half
Glaze
1½ cups powdered sugar
2 teaspoons vanilla
3 to 4 tablespoons milk
INSTRUCTIONS
•Preheat oven to 350 degrees F.
•Grease and flour 10-inch tube pan or 12cup Bundt pan.
•Beat butter and sugar until light and fluffy.
• Add eggs, one at a time (beating well after each) and vanilla.
•Mix in almond filling until blended.
•Whisk flour, baking powder, and salt together.
• Add to almond mixture alternately with milk, beginning and ending with flour mixture. Mix until blended. Pour into pan. Bake 50 to 55 minutes or until a toothpick inserted in center comes out clean.
•Cool in pan on wire rack 10 minutes.
•Remove from pan and cool completely on rack.
•Whisk glaze ingredients together. Drizzle glaze on top.
Tip
TESTING BAKING POWDER
If your baking powder has been hanging around in the pantry for a while, it’s best to test the leavening power before baking.
Just add a teaspoon of baking powder into a half cup of warm water. If it fizzes right away, the baking powder has leavening power; if not, toss it out and buy new.
When you open a new can of baking powder, write the month and year somewhere on the can. After opening, baking powder will last a year or so in a cool, dry place away from light.
SALTED DARK CHOCOLATE NUT CLUSTERS
This is the ultimate cluster for the chocolate lover on your list.
INGREDIENTS
18 oz. pkg. bittersweet quality chocolate chunks 6 oz. dried cherries, cut into small slivers 6 oz. slivered almonds, toasted 6 plump dried apricots, diced or snipped into small slivers with scissors Coarse salt to sprinkle on top of clusters
INSTRUCTIONS
•Roast almonds in a 350-degree-F oven just until fragrant and golden, stirring a couple times for a total of six to eight minutes. Be careful as they can burn easily. •Melt chocolate in a nonstick pan over low heat or in a double boiler. Remove from heat when some lumps remain and stir until smooth. •Stir in cherries, almonds, and apricots. •Use a small ice cream scoop or spoon to
scoop out and place on a sprayed parchment lined or waxed paper lined pans.
•Sprinkle very, very lightly with salt (just a few granules) and refrigerate until hard.
I store mine in the refrigerator between pieces of parchment paper.
GOAT CHEESE LOG WITH CRANBERRIES, PINE NUTS, AND HERBS
The cranberries add a sweetness to the pungent goat cheese. The nuts, herbs, and pepper add color and flavor.
INGREDIENTS
1 log, 8 oz., plain goat cheese/chevré
2 oz. cream cheese
⅛ teaspoon cayenne pepper powder or ½ teaspoon black pepper
½ cup dried cranberries, chopped fine
2-3 tablespoons pine nuts, toasted (toasting optional)
Palmful of fresh parsley, minced
2-3 teaspoons fresh or dried rosemary, chopped Crackers, flatbread, or French baguettes
INSTRUCTIONS
•Mix goat cheese, cream cheese, and pepper together.
•Place on a square of plastic wrap and roll up, enclosing in plastic wrap as you go.
Shape into a seven to eight-inch log. This can be done a day ahead.
•Mix cranberries, nuts, parsley, and rosemary together.
•Roll log in the cranberry mixture, coating all sides and pressing gently to make the mixture stick.
•Cover and refrigerate one hour or up to 12 hours. Serve with crackers or bread. ◊
Tips
Toast pine nuts in a dry, nonstick skillet over low heat for just a few minutes. Stir the nuts often, until you see little blotches of brown on them.
Can’t seem to make a smooth log? After rolling in plastic wrap, place in a paper towel cardboard insert cut to fit the roll. With a back and forth motion, continue to roll the log until smooth.
5handmade holiday gifts from the kitchen
It’s important to grease and flour the pan to prevent sticking. After you grease the pan, toss in enough flour to coat bottom and sides. Shake excess out. Or use a baking spray containing flour.
Making Chai Tea 101
By Rita Heikenfeld
IT’S THAT TIME OF YEAR when our kitchens are fragrant with warming spices. Common spices, like cinnamon, cloves, ginger, and nutmeg make their appearance in many holiday dishes and drinks. One of my favorite and immensely popular drinks is my chai tea recipe. This soothing drink not only tastes delicious, there’s a bonus. Chai tea includes tummy-friendly ginger tea benefits, as well as other healthful qualities.
I’m sharing a traditional chai tea recipe using some whole spices. For those of you that prefer quicker versions using ground spices, I’ve got that covered too.
What is Chai Tea?
Traditionally, chai is a sweet, milky tea, originating in India. Sometimes it’s called masala chai. Masala means “spice” and chai means “tea.”
TRADITIONAL CHAI TEA RECIPE
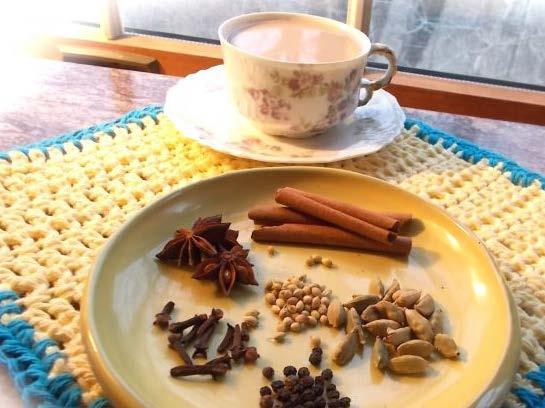
Chai tea is made mostly of spices. Making your own blend of chai allows you to be creative and customize the blend. I will tell you that mixing the spices is like blending a perfume. You decide what to add to make it more to your taste, whether it’s some dried orange peel, fennel seeds, or even dried lemon herbs.
This chai tea recipe makes a special gift. Place the roasted and coarsely pounded blend into a decorative jar and tie a gift tag on it with instructions.
INGREDIENTS
5 tablespoons green cardamom pods or 1 tablespoon cardamom seeds
2 tablespoons whole cloves
1 tablespoon coriander seeds
7 to 8 cinnamon sticks, 2” long each
¼ to ½ teaspoon black peppercorns
2 whole star anise
2 teaspoons ground ginger
1 teaspoon ground nutmeg
INSTRUCTIONS
•Combine all of the ingredients except the ginger and nutmeg in a non-stick, ungreased heavy skillet. Over low heat, toast the spices for about three minutes, until fragrant. Inhale the intoxicat ing aroma! If using cardamom pods, they may start to split and release their seeds.
• Add the ginger and nutmeg and blend. Let cool.
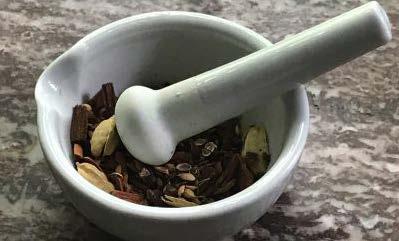
•Pound everything briefly, just enough to crush the spices coarsely. I like to do this with a mortar and pestle, but you can do it in a spice/coffee grinder, or put the spices in a plastic bag and pound with a mallet or rolling pin.
•Transfer to an airtight container where the mixture will keep up to three months.
COFFEE SHOP LATTE STYLE
•Combine one cup milk with up to one tablespoon chai mix and sweetener to taste. (Cane sugar, brown sugar, maple syrup, honey, or stevia are all good choices.) Bring to a simmer and then turn off heat. •Cover and let infuse for 10 minutes while you brew a pot of Assam or Darjeeling (these are Indian teas — you can also use black tea) using two cups boiling water and two teaspoons tea or two bags of tea. Let tea infuse five minutes, then strain.
•Reheat the spiced milk if necessary and strain it into two large teacups. Froth if you choose. Pour in as much hot tea as you like.
Why Chai Tea is Good for You
~ Cardamom is an anti-spasmodic and a digestive stimulant.
~ Cloves are antiseptic — dentists used to use clove oil to soothe gums. Cloves are good for gastric discomfort. This is a warming, healing spice.
~ Cinnamon is pungent and warming and is good for digestion. It is also anti-spasmodic and antiseptic ~ Ginger is among the herbs/spices on my healing herbs list. It helps the circulation, is an expectorant, and is calming to the stomach.
~ Star anise is the star-shaped fruit of an evergreen native to China. It tastes a bit like licorice and is a stimulant and diuretic, and is thought to relieve sore throats.
~ Black pepper has anti-inflammatory qualities.
6 handmade holiday gifts from the kitchen
~ Coriander seeds aid in digestion.
~ Nutmeg helps lower blood pressure.
Quick Chai Tea Recipe
With just a few minutes and ground pantry spices, you can make healthful, satisfying chai tea. Make it plain or add frothed milk for a latte!
PLAIN CHAI TEA INGREDIENTS
2 cups water
1 teaspoon cinnamon
½ teaspoon each: ginger, cardamom, and nutmeg
⅛ teaspoon allspice
Pinch of cloves
2 black tea bags
Sweetener of choice
INSTRUCTIONS
•Bring water and spices to a boil.
•Turn off heat, cover, and let spices infuse for five minutes.
•Turn the heat back on, add the tea, and remove from heat. Cover and let infuse three more minutes.
•Strain. Sweeten to taste.
CHAI LATTE INGREDIENTS
1 cup milk
Sweetener to taste Cinnamon and/or nutmeg (optional)
INSTRUCTIONS
•Bring milk and sweetener to a simmer. Remove from heat and froth if you like.
•Pour a half cup chai tea into a mug and pour in enough warm milk to your liking.
•Sprinkle with a dash of cinnamon and/or nutmeg. Enjoy!
“INSTANT” CHAI TEA RECIPE
Start with chai spice tea bags and you’re good to go!
INGREDIENTS
2 chai spice tea bags
⅓ cup boiling water
¾ cup milk
Sweetener to taste Cinnamon and/or nutmeg (optional)
INSTRUCTIONS
•Infuse the tea in boiling water for three to five minutes, then strain.
•Heat milk, then froth if you like.
•Combine chai tea and milk, sweeten to taste, then sprinkle with cinnamon and/or nutmeg if desired.
CHAI TEA MIX IN A JAR
Let the little ones help mix this up. This is an awesome gift for teachers, neighbors, and service people. This Chai tea recipe makes a rich, creamy drink and is one of my most requested.
handmade holiday gifts from the kitchen
Write instructions for storage and serving on gift tag if you are giving this to someone.
INGREDIENTS
¾ cup powdered milk
1¼ cups non-dairy powdered coffee creamer
1½ cups powdered French vanilla flavored coffee creamer
2 cups sugar
1¼ cups brown sugar, packed
2 cups plain instant tea, unsweetened
1 tablespoon cinnamon or little more to taste
1¼ teaspoon each: ground cloves, ground cardamom
1½ teaspoons nutmeg
¾ teaspoon allspice
¼ teaspoon white or black pepper, finely ground
INSTRUCTIONS
•Whisk all ingredients together.
•In blender or food processor, blend one cup at a time until the mixture is the consistency of fine powder.
•Makes about nine cups of mix. Store tightly at room temperature.
TO SERVE
To serve, stir two heaping tablespoons of chai tea mix into a mug of hot milk or water. I like milk for its creamy texture.
TIPS
4 What’s the best milk for chai tea? That’s up to you. I use whole milk. Half & half, low fat, evaporated, fat-free, or dairyfree works, too. (My neighbor uses milk from the Jersey cow he owns — lucky him!)
4 Why froth? To get coffeehouse quality chai tea, frothing the milk is essential. It lends a creamy and light texture to the tea. Evaporated milk doesn’t froth as well as other milk, but makes for a nice, thicker beverage.
4 Froth the milk with an immersion blender, hand mixer, battery operated frother, or a whisk.
Gilding the Lily
Top your chai tea latte with a dollop of whipped cream, then sprinkle with cinnamon and/or nutmeg if you like.
Pumpkin Chai Latte
You can turn any chai tea latte into pumpkin chai.
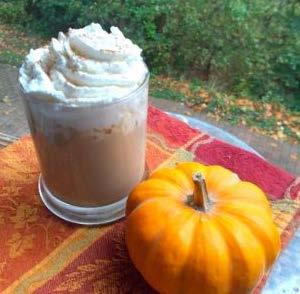
After straining the milk mixture, whisk in pumpkin puree to taste. Start with a tablespoon or so and go from there. Top finished chai with whipped cream and a sprinkling of pumpkin pie spice.
Adding Non-Traditional Herbs
I add dry herbs like lemon verbena, mint, stevia, and rose geranium to add to my dried teas. These lend natural sweetness
nutrition.
7
and
◊
An Easy POMEGRANATE JELLY RECIPE
By MaRissa aMes
FIRST COME THE STRAWBER
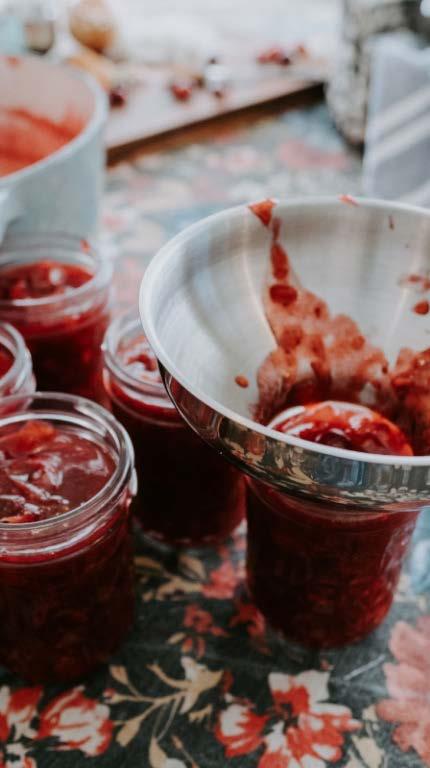
RIES, then the blueberries and peaches. And apples. Lots of apples. Then, about the time we think we’re done with canning season, pomegranates go on sale. We then scramble for a pomegranate jelly recipe before the ruby fruits turn old and leathery.
Pomegranates originated in Iran and made their way through the Mediterra nean, becoming a symbol of Spain when folklore confused the origin with the city of Grenada. Spanish conquistadors brought them to the United States, where they currently flourish in hot, dry areas such as Southern California, Arizona, and Southern Nevada. Within the Northern Hemisphere, pomegranates are in season between September and February. Their jewel-toned, finger-staining juice beckons with promises of nutritional value while their hard kernels and high prices warn you to indulge just a little. But how can you preserve pomegranates for the winter in a stunning and delicious way? Make pomegranate jelly.
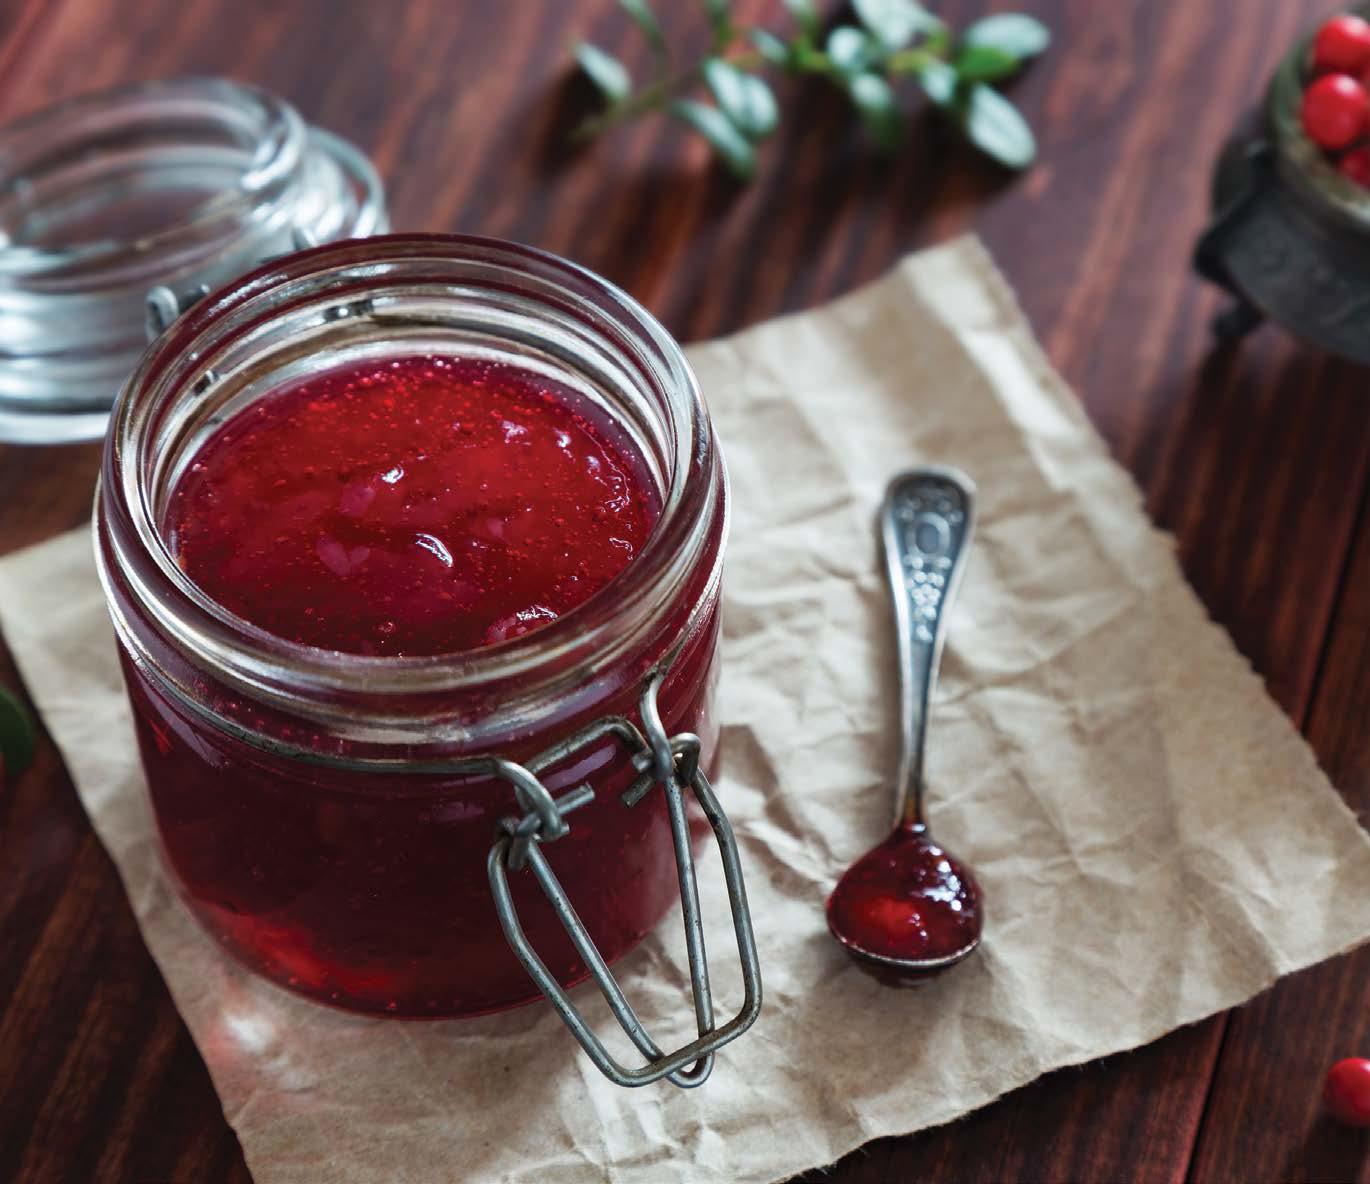
Though several simple recipes exist online and in canning books, I knew I found the right pomegranate jelly recipe on Simply Recipes when it suggested adding lemon juice to help preserve the beautiful color and tangy flavor. Light shines through mason jars, illuminating cranberry-toned jelly and promising a satisfying treat atop hot buttermilk biscuits or artisan bread.
BASIC POMEGRANATE JELLY RECIPE

4 cups pomegranate juice (about 7 ripe pomegranates)
¼ cup lemon juice (3-4 small lemons)
1 box powdered pectin or 6 Tbsp Ball bulk pectin
5 cups white sugar
If you wish to save time or want to make jelly when pomegranates are out of season, you can buy prepared juice. Just be sure it’s 100% pomegranate juice be cause each fruit requires a certain amount of pectin and sugar to allow a good gel.
Old-fashioned juice presses can re duce time but can result in a bitter flavor because the rind and membrane are also squeezed or ground. To get the sweetest, purest juice, cut open the pomegranate and remove the seeds.
With a sharp knife, carefully slice off last few inches at the top and bottom of the fruit, exposing the seeds. Then cut down the length of the rind, just above each dividing membrane, making five or six cuts. Hold the fruit over a bowl and gently twist and pull to break it apart. Now break each individual section, plucking the seeds out of the membranes. Once you have a bowl full of ruby-red seeds, cover them with cold water and gently swish around. The last small pieces of membrane will float to the top so you can scoop them off. Drain the seeds in a colander.
Within a blender or a food processor, pulse the seeds for just a few seconds to release the juice. Place a colander in a bowl then line the colander with a piece of cheesecloth. This will stain your cloth, so use one that you don’t mind getting a little
8 handmade holiday gifts from the kitchen
brown. Let the juice drip through to collect in the bowl. When most of the juice has strained through, wrap the seeds and pulp up in the cheesecloth and gently squeeze out the remaining moisture.
Let the juice sit in a canning jar for a few minutes. Cloudy sediment will soon sink to the bottom. This portion is okay to use but it will result in a cloudier jelly. Save this for a tasty juice drink. Pour off the clearest juice and measure out four cups.
Optional step: If you like a jelly with a little more zing, remove the stem, seeds, and veins from a ripe chili pepper such as a red jalapeno. Pulse the pepper in the blender with the four cups of pomegranate juice. Proceed to make the jelly as directed, pouring the pepper-rich juice into the saucepan. This will not affect the gel nor the safety and will make a unique concoction that is delightful with cream cheese or brie.

If you’re canning the jelly, prepare six or seven clean eight-ounce canning jars by simmering them in hot water. This is easiest to do within your water bath canner, simultaneously while you prepare your jelly. Set the jars in the canning pot and fill with water until the jars are filled and covered. Put the lid on the pot, set it on the stove, and heat on high just until the water steams and little bubbles stick to the outsides of the jars. There is no need to boil the jars. Be sure the jars are scalded and ready to go when the jelly is ready to bottle up. To save space and ensure safe canning, keep the jars within the hot water until they are ready to fill.
Prepare canning lids by placing them plastic-side-up in a shallow saucepan. Cover with water. Heat on medium to low until they simmer. Do not boil.
If you are making the pomegranate jelly recipe for immediate consumption and do not wish to seal it, cook as directed. Once the jelly is done, pour into clean heat-proof containers and refrigerate. Unsealed jelly can last several weeks in the refrigerator.
Combine the pomegranate juice, the lemon juice, and the pectin in a six-quart saucepan. Measure out exactly five cups of sugar and keep it ready in a bowl on the side. Simmer the juice on high heat, stirring constantly to prevent scalding, until it reaches a full rolling boil that cannot be stirred down. Slowly add the sugar, stirring to mix well. Continue stirring constantly until the mixture again reaches a full rolling
boil. Start a timer; stir and boil for exactly two minutes. Remove the pan from the heat and let it sit for a minute. Scoop off foam.
Remove canning jars from the hot water. Pour out any residual water but do not worry about drying the jars. Immediately fill the jars to within one-half inch of the top. Use a clean, damp cloth to wipe the rims, ensuring that absolutely no food remains on surfaces which will contact the lid’s sealing compound. Carefully remove lids from the hot water and place them, compound-side-down, on the jars. Secure with rings and twist until fingertip-tight.
Place the canning jars back in the canning pot, lowering the rack carefully. Be sure the water covers the tops of the jars by at least an inch. Place the lid back on the pot and increase heat to high. Once the water reaches a full rolling boil, set a timer for the appro priate processing time for your elevation.
Once the timer has rung, turn off the heat and remove the lid from the pan. Al low jars to cool for at least five minutes before carefully removing them from the pot. Without tilting the jars, set them on a towel in an area sheltered from drafts. Do not worry about wiping water away; it will soon evaporate. Allow to cool to room temperature, preferably overnight, before labeling the jars and putting them away.
How to Use This Pomegranate Jelly Recipe
Sweet and tangy, pomegranate jelly can accompany breads, biscuits, and pancakes
as well as other fruit spreads. It can also work as an ingredient in more complex foods.
SMOKY POMEGRANATE BARBEQUE SAUCE
In a bowl, mix a half-cup of ketchup and a half-cup pomegranate jelly. Add a quarter-teaspoon liquid smoke, a half-teaspoon garlic salt, a half-teaspoon Dijon mustard, and a tablespoon apple cider vinegar. Mix well and adjust ingredients to taste.
POMEGRANATE PEPPER
TURKEY GLAZE
Mix one cup pomegranate jelly with one teaspoon sambal oleak. If you cannot find sambal, use one teaspoon hot pepper sauce such as Sriracha or Tabasco. Add one tablespoon soy sauce. Brush onto the crisp skin of a cooked turkey prior to serving. Do not cook more than a few minutes with the glaze on the turkey because the sugars will burn.
POMEGRANATE-ORANGE
BALSAMIC DRESSING
Mix one-half cup pomegranate jelly with one-quarter cup balsamic vinegar. Add two tablespoons freshly crushed pomegranates, a teaspoon orange juice concentrate, and a teaspoon of freshly minced basil. Use on a salad made with bitter greens such as a mesclun mix, apples, pecans, crumbled goat cheese, and fresh pomegranate seeds.
9handmade holiday gifts from the kitchen
◊
Learn How to Make Flavored Vinegar
By Rita Heikenfeld and eRin PHilliPs
REMEMBER
WHEN BUYING
vinegar meant choosing between distilled, clear grain vinegar, cider, and a few choices of red and white wine vinegar? That was years ago, of course, and today there seem to be as many kinds of vinegar as wine.
Regardless of the available varieties, it’s still fun, and budget-friendly, to learn how to make flavored vinegar at home. You can make delicious and healthful homemade vinegar recipes with herbs, spices, vegetables, fruits, even flowers. There are just a few things you need to know.
Bottles, Cleaning, and Storage
Vinegar can be infused and stored in any kind of jar with a good seal: canning jars, jars with a tight-fitting cork lid, sanitized recycled glass bottles. Washing in the dishwasher or hot soapy water, rinsing well, and drying is all you need to do. No need to sterilize. Vinegar is anti-bacterial.
Using glass is best. Hot sauce bottles work great for giving infused vinegar in as gifts. They are a nice size and make it easy to dispense the vinegar in controlled amounts. A reused vodka bottle holds large amounts of the vinegar, so use it only for the vinegar you use the most: garlicchive infused white wine vinegar is a good choice.
According to the Vinegar Institute, vinegar’s shelf life is “almost indefinite.” Infused vinegar is best used within a year’s time, though, as it can begin to lose flavor and color. Vinegar should be stored
in a cool, dark place. You can even put them in the refrigerator, though refrigeration is not required.
Strain Before Final Bottling
Although not required, it’s best to strain the infused vinegar before bottling. You can add a fresh herb sprig before sealing. Place the herb stem side down.
Infusing
There are three main methods for how to make flavored vinegar: on the stovetop, on the counter or pantry, or in the herb garden.

How to Make Flavored Vinegar on the Stovetop
Put your ingredients in a non-reactive pan and bring to a low simmer. Cover the pan to seal in the flavors and let it infuse until it smells right. This should take about 20 minutes or so. Strain, cool, and bottle.
How to Make Flavored Vinegar on the Counter or in the Pantry
Stir or shake the ingredients together in a canning jar or other sealable container and let sit on the countertop about two weeks, or until it smells right. Strain, cool, and bottle.
How to Make Flavored Vinegar in the Garden
Bring your vinegar out to the garden, pick and clean your herbs and put them in the vinegar. The choices are endless! Seal the container and leave it in the sun.
It should take about three days to infuse. Again, smell it to decide when it’s done. Strain, cool, and bottle.
Fruit and vegetable vinegar takes longer to infuse, up to one week.
So, now that you know the basics, it’s time to learn how to make a flavored vinegar that is not only less expensive than store-bought, but far healthier. These recipes will amaze you not only in their simplicity but also with the wow factor they give to any food you pair them with.
How to Make Flavored Vinegar from Herbs and Flowers
Many of these recipes begin with wine vinegar. You can purchase wine vinegar already made or learn how to make white wine vinegar. To make your own wine vinegar, mix vinegar with wine in a ratio of three to one. You can make small or large batches.
Whether you make white wine vinegar from clear vinegar or red wine vinegar from cider vinegar, make sure the vinegar contains five percent acid for a safe bottled product. You might even want to try your hand at making your own homemade apple cider vinegar.
Master Recipe
So easy! For every cup of flowers or herbs, add two cups of wine vinegar. This method makes fairly strong vinegar, depending on the flavor profile of the herbs or flowers used. You can always adjust the flavor by adding more wine vinegar after the infusion is complete.
Remember to use only clean, pesticidefree herbs and flowers.
GARLIC CHIVE VINEGAR INGREDIENTS
8 cups garlic chive blossoms, thoroughly rinsed
12 cups white vinegar
4 cups dry white wine
INSTRUCTIONS
•Mix the vinegar and wine to make your white wine vinegar.
•Divide your chive blossoms between sixquart jars (about 1.5 cups/jar).
•Pour three cups white wine vinegar into each jar.
•Screw on lids and let sit on the counter for several weeks. When the vinegar turns fuchsia and the smell is strong, it’s done.
•Strain the vinegar through a fine strainer or line a colander with a coffee filter.
10 handmade holiday gifts from the kitchen
•Taste it and if it’s too strong, add more plain white wine vinegar to it. Add it in small increments as you can always add more but can’t remove it once it’s been mixed in.
•Bottle your garlic-infused vinegar and store up to one year.
INGREDIENTS
1 large egg, room temperature
2 teaspoons Dijon mustard
2 tablespoons tarragon vinegar or more to taste
1 cup grapeseed or canola oil
Salt to taste
INSTRUCTIONS
• Add egg, mustard, and vinegar to the small bowl of a food processor. Process until smooth, about 20 seconds. Scrape the sides.
•With the motor running, begin to very slowly add the oil in a very thin stream. If you add it too quickly, the mayonnaise won’t emulsify.
•When all the oil has been added, scrape the sides and process for 10 seconds or so.
•Taste for seasonings and add salt or a little vinegar if necessary.
•Stir in two teaspoons or so fresh minced tarragon (optional).
TIP: You can also make this in a blender, on low speed, following instructions above.
Fresh fruit and rose petal vinegar make a good combination.

SPICE AND HERB MEDITERRANEAN VINAIGRETTE
This is super simple. Just whisk together 1/3 cup vinegar to ¾ cup olive oil.
This is delicious on a platter of sliced tomatoes topped with feta cheese.
TARRAGON VINEGAR

Follow the garlic chive recipe replacing the chive blossoms with sprigs of tarragon, maintaining the same ratios. You can cut the tarragon into smaller pieces to make it easier to measure out eight cups. Smell and taste it after a couple weeks to determine if it’s ready.
EVEN EASIER: To every cup of purchased real mayonnaise, stir in a tablespoon of tarragon vinegar and some fresh minced tarragon if you have it.
There’s something ethereal about splashing sweet flower petal vinegar on fresh fruit. Get the drift? You’ll soon be mixing and matching herbs, spices, flowers, and vegetables to make your own signature vinegar creations.
SPICED AND HERB MEDITERRANEAN VINEGAR INGREDIENTS
2 cups red or white wine vinegar
4 cloves garlic, smashed
½ teaspoon black peppercorns
2 teaspoons dried basil or 2 tablespoons fresh
1 teaspoon dried oregano or 1 tablespoon fresh
1 teaspoon dried rosemary or 2 teaspoons fresh
INSTRUCTIONS
TARRAGON MAYONNAISE

Slather this anise-flavored mayonnaise on salmon BLTs, stir in a shake of cayenne and use as a dip for steamed artichokes. Dollop on seared steaks. Use in place of regular mayonnaise for chicken salad.
•Pour vinegar into a jar.
• Add herbs and spices.
•When infusion is complete, strain, add a sprig of fresh herb if you like, and bottle.
FRUIT AND VEGETABLE VINEGAR
Use just about any berries or softfleshed fruit for fruit vinegar. Citrus fruit works well, too.
Sometimes I mix the fruit with a spice, like blueberries with a cinnamon stick or purple basil. When fresh cranberries are in season, I will put a couple sprigs of rosemary in the vinegar.
Fruit vinegar adds zing to vinaigrettes for salad greens or can be used as the basis for fruit shrubs.
VEGETABLES
Cucumbers, celery, and hot peppers are just a few of the vegetables for vegetableinfused vinegar.
Add a teaspoon of dill seeds to cucumber vinegar as it’s infusing. Hot peppers and garlic are good vinegar companions. Shallots bring vegetable vinegar to a whole new level. Try vegetable vinegar in grain and bean salads.
MASTER RECIPE
This is easy and foolproof! Use a ratio of a half cup prepared vegetables or fruit for every eight ounces of vinegar. ◊
11handmade holiday gifts from the kitchen
KITCHEN GIFT GUIDE Homemade Bread Recipes, Canning Jar Cookie Mixes, and More


 By eRin PHilliPs
AS WE PREPARE FOR THE HOLIDAYS, I always take a day to make gifts from the kitchen to share with friends, teachers and co-work ers. One of my favorites is a homemade bread recipe from my grandmother. In the last few years, I have also discovered the fun of making “recipe-in-a-jar” creations. These are creative gifts with endless pos sibilities.
Homemade Bread Recipe: Pumpkin Bread in a Coffee Can
My grandma was very actively involved in her church, and around the holidays, she liked to bring gifts for people in the congregation. She would save coffee cans for months ahead of time so she had a big supply ready for baking at Christmas. She lived in suburbia, but she felt the spirit of simple homesteading: putting everything
to good use and finding new purposes for items that others might throw away. My grandma Bettie passed on her homemade bread recipe to my mother and then to me as well, and I’d like to share my experi ence with baking it as a gift of the kitchen this year.
First I had to drink a lot of coffee — not a difficult task for me! I saved three coffee cans, removed the labels from the outside, and cleaned them out well.
I will add a step here, which I forgot to do initially. If your cans have a lip around the top, use a can opener to cut it out.
Removing the rim will allow the bread to slide out of the can when it is cooked.
I didn’t even think about the necessity of this until I went to remove a loaf for my family and it wouldn’t come out! These are the little details grandmas don’t write down in homemade bread recipes. If you forget this step, you can remove the lip after the bread is baked, like I did, but it is more challenging with the bread risen up out of the can.
Another important part of the bread coming out of the coffee cans is properly greasing and flouring them. This is some thing I dreaded as a child because I didn’t like the feel of the Crisco we used.
Start with a big glob of Crisco on your fingers and get in there!
Rub it all around, coating every surface of the inside of the can. When you finish greasing the cans, you will have what I always referred to as “Crisco hands.”
Your best bet for getting it off is to rub your hands together like you were putting on lotion. Rub as much in as you can; then get a dry paper towel and wipe off any excess. Your hands will be baby soft! Whatever you do, don’t try to wash your hands with water. You’ll end up with a goopy mess and you’ll miss out on some serious moisturizing.
Then you have to “flour” the cans as well. I made a little video to explain the process I use for this homemade bread recipe in a can:
So, your cans are ready to go. Put them aside while you make your batter. It’s time to preheat the oven too. Set it to 350 degrees F. I used my stand mixer but you can use a mixing bowl and a spoon if that’s what you have available. Start with
12 handmade holiday gifts from the kitchen
www.youtube.com/ watch?v=BZ5wgSqhPGw
the first six ingredients you need for this homemade bread recipe: nutmeg, cinnamon, sugar, oil, eggs, and salt.
I used our tiny pullet eggs for my baking so I added an extra one since they are so small. As part of our self-sustaining living, we always have a bowl in the fridge for kitchen scraps. When it gets full, we grind it up in the food processor and give it to the chickens. I added my egg shells to this bowl; they provide good calcium for the girls. As long as they are ground up well, they don’t realize they are eating egg shell so (knock-on-wood) it doesn’t lead to egg eating.

Once you have these mixed together, start adding the other ingredients, one at a time. Usually, I don’t like to use commercially canned vegetables, but I didn’t make any canned pumpkin this year, so I got some at the store. I found an organic store brand pumpkin.
I should take a moment to talk about the walnuts. It is really important that you use black walnuts. They have a distinctive flavor that really defines the taste of the pumpkin bread recipe. These are the ones I used.

Before you add the nuts and raisins to your batter, you need to “flour” these as well so that they won’t sink to the bottom of your bread while it’s baking. To do this, put the nuts and raisins in a large bowl or mixing cup. Add some flour on top.
Now shake it very gently. You can get your fingers in and mix them around as well.

Now throw them in too and mix, mix, mix!

You’re ready to fill your prepared coffee cans. Divide the batter evenly between the three cans, and put them in the oven.

The homemade bread recipe says they should cook an hour, but I find they usually take closer to 80 minutes. To check them, stick a sharp knife down in the middle. They are done when the knife comes out clean.
When the bread comes out of the oven, let it sit until it cools. Then cut some squares of plastic wrap to cover the top. Use a pretty fabric bow to tie the plastic wrap down and give it some holiday cheer. You could decorate the can or write a message with a sharpie marker as well.
Recipe-In-A-Jar
Another thing I have gotten into making the last couple years is a recipe-in-a-jar. The idea is that you put all the dry ingredients for a recipe into a pretty jar and give it as a gift. Not only is it beautiful to look at, with all the layers of ingredients, but it is also a fun project for families to do together around the holidays.
When I started, I used prescribed recipes I found in a magazine, but soon I discovered you could do this with many different kinds of foods if you just followed a few rules:
* Pick a recipe with mostly dry ingredients. I try to find something with three or less “wet” or fresh ingredients that will have to be added.
* Consider the jar. You can use any canning jar you have, but vintage or unique jars will only add to the charm of your gift. If you are reusing old jars, just make sure the sterilize them before you add any food.
* Consider the size of the jar. I typically use quart jars for baking recipes and pint jars for soups. You may need to size your recipes down so that the ingredients will fit in a jar. I have found that if you cut a typical cookie recipe in half, it will fit in a quart jar.
* Consider what will layer well. When you are putting the ingredients in the jar, don’t just add them in order; think about what will stay in separate layers and be visually appealing.
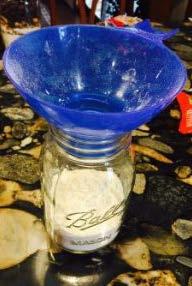
* Add ingredients carefully. I use my wide mouth funnel to allow for easy pouring of ingredients into the jar then carefully spread them into even layers. Try not to splash things around too much (especially flour and sugar) or the inside of your jar won’t stay clean and it won’t be as pretty when you are finished.
* Allergies. In today’s world, you have to be careful about your ingredients and making sure you put a warning on the jar if it contains allergens, especially nuts.
13handmade holiday gifts from the kitchen
If your cans have a lip around the top, use a can opener to cut it out. Start with a big glob of Crisco on your fingers and get in there!
This year, I made two kinds of jars: soup mixes and cookie mixes.
SOUP MIXES
In years past, I made up mixtures of beans, grains, spices and more to put in my jars. This year, I was short on time so I took the easy route: pre-made soup mixes. If you go to your grocery store, you will find many options in the soup aisle.
I chose two from Bob’s Red Mill: Whole Grain and Beans and Vegi. I selected these because I know the com pany makes a quality product and because they are visually a nice mix of colors and textures.
When I got them home, I divided the mixes between four pint jars (each bag will fill two). I put on the lids, topped them with a circle cut from pretty cot ton fabric, and tightened the bands down. Finally, I took the directions from the bag and made a little tag to attach to the jar. Whoever you give your recipe-in-a-jar to will need to know how to make it. Make sure your directions match the quantity you are providing in the jar.
Finally, print and cut out your tag. Punch a hole in it, and use a piece of rib bon to tie it to the jar.

COOKIE MIXES
This time of year, if you walk down the baking aisle, you will find all kinds of special items. I got several kinds of chips and candies to use. When I got them home, I modified the recipes from the backs of the bags for my jars. Here are several examples.
Chocolate Chip Cookies
I followed this recipe almost exactly, cutting it in half to fit in my pint jar.
Christmas M&M’s Cookies
For this jar, I used the Chocolate Chip Cookie recipe but switched out Christ mas M&M’s for the chocolate chips. The red and green M&M’s are so festive. My stepsons always choose this one to take for their teachers.

White Chocolate Cranberry Cookies
This was originally meant to be baked as a blondie bar, but I cut it down for the jar and modified my directions to make a cookie. I also put walnuts in instead of macadamia nuts because that’s what I had in my freezer.
Mint Chocolate Delights
I followed this recipe fairly closely, cutting it in half for the jar. The cocoa powder, along with the mix of green and
brown chips make this one quite festive as well.
Oatmeal Chocolate Chip Cookies
I cut this recipe in half and simplified the ingredients for my jar (by removing the white sugar and the raisins). The oats give it nice texture variation.
As I prepared my jars, I made labels for each. By typing them as I worked, it helped me keep straight which recipe went with which jar, modifications I had made, and if I needed to add any nut warnings. When I was all finished, I printed my tags and cut them out.
Many of the cookie recipes call for vanilla extract. Another fun addition could be to make and include a homemade va nilla extract gift.
These are just a few ideas of easy recipe-in-a-jar gifts that I have made. Depending on the time you have to spend and how devoted you are to simple homesteading, you may make your recipes more homemade, less store-bought. Either way, though, they will be appreciated and enjoyed by the receiver! The possibilities are endless: mixes for tea, waffles, breads, meat rubs. ◊
14
handmade holiday gifts from the kitchen
CRANBERRY-APPLE CHUTNEY RECIPE For Your Holiday Table
ReciPe and PHotos By allison caRRoll duffy
HERE IN MAINE, leaves have aged to rich, deep shades of red and orange, the nights are chilly, and the days crisp — though often gloriously sunny at the same time.
We have a lot of very old apple trees on our property — most with twisted, gnarly trunks, and half falling down. Some years they don’t bear much, but this year they
are laden with fruit.
Last weekend, we spent many hours on ladders picking, and at the end of the day had about 12 bushels of apples put away in the barn waiting to be pressed into cider.
I usually make and can some kind of cranberry chutney around this time of year, in preparation for the holidays. I often include oranges in the chutney, but
this year, given the abundance of apples, a cranberry chutney with apples seems just the thing for the holiday table. This chutney goes beautifully with roast turkey, and is also great on an appetizer tray, as an accompaniment to a crusty baguette and some sharp cheddar cheese.
CRANBERRY-APPLE CHUTNEY
Recipe by Allison Carroll Duffy
Yield: 4-5 half-pint (8 ounce) jars
Before You Begin: Prepare calcium water. To do this, combine 1⁄2 teaspoon calcium powder (in the small packet in your box of Pomona’s pectin) with 1⁄2 cup water in a small, clear jar with a lid. Shake well. Extra calcium water should be stored in the refrigerator for future use.
INGREDIENTS
24 ounces (two 12 oz bags) of fresh cranberries
½ pound apples (about 2 small apples)
⅔ cup diced onion
2 tablespoons peeled, finely-minced ginger root
1 tablespoon mustard seed
2 teaspoons ground cardamom
½ teaspoon ground cinnamon
½ teaspoon ground allspice
½ teaspoon ground cloves
⅔ cup apple cider vinegar
1½ cups water
2 teaspoons calcium water
11/3 cups sugar
2 teaspoons Pomona’s pectin powder
DIRECTIONS
1.) Wash and rinse jars, lids, and screw bands. Set screw bands aside until ready
to use. Place jars in boiling water bath canner with a rack, fill at least ⅔ of the way full with water, and bring to a boil. Boil jars for 10 minutes to sterilize (add 1 additional minute of sterilizing time for every 1,000 feet above sea level), then turn down heat and let jars stand in hot water until ready to use. Place lids in water in a small pan, bring to a low simmer, and hold there until ready to use.
2.) Rinse cranberries, then set aside.
3.) Peel and core the apples, discarding peel and cores. Then dice the apples.
4.) Combine the cranberries, diced apples, diced onion, minced ginger, mustard seed, cardamom, cinnamon, allspice, cloves, vinegar, and the 1½ cups water in a large sauce pan. Cover the mixture and bring to a boil over high heat. Reduce heat and simmer, still covered, for 20 minutes, stirring occasionally. Remove the pan from the heat.
5.) Transfer the mixture into a bowl or other heat-proof container. Then, measure out 4 cups of the mixture. (If you have any left over, you can use it for something else.) Pour the measured quantity of the mixture back into the sauce pan. Add the calcium water, then stir to combine.
15handmade holiday gifts from the kitchen
6.) In a separate bowl, combine the sugar and the pectin powder. Mix well and set aside.
7.) Put the sauce pan on the stove and bring the cranberry-apple mixture up to a rolling boil over high heat. Add the sugarpectin mixture, then stir vigorously for 1 to 2 minutes, still over the highest heat, to dissolve pectin. Return the chutney to a boil, then remove from heat.

8.) Remove hot jars from canner and fill jars with chutney, leaving ¼ inch of headspace. Remove trapped air bubbles, wipe rims with a damp cloth, and put on lids and screw bands, tightening bands only to “fingertip tight” (until resistance is met, and then just the tiniest bit more).
9.) Place jars in the hot water, on the rack inside the canner. (Make sure jars are upright, not touching each other or the sides of the canner, and are covered with at least
1-2 inches of water.) Place the lid on the canner, return the canner to a rolling boil, and boil for 10 minutes.
EDITOR NOTE: Add 1 minute additional processing time for every 1,000 feet above sea level.
10.) Turn off heat and allow canner and jars to sit for 5 minutes. Then, remove jars from canner.
11.) Allow jars to cool undisturbed for 12-24 hours. Then, confirm that jars have sealed. Remove screw bands from sealed jars, rinse off outside of jars if necessary, label jars, and store for later use.
Once you’ve cleaned up those turkey leftovers the next holiday is right around the corner, try a jam that packed a fruity,
tangy punch. It’s perfect for a gift or maybe on the early morning toast by the fire.
CRANBERRY-ORANGE-PEAR
HOLIDAY JAM
Recipe & Photos by Allison Carroll Duffy
Cranberry-Orange-Pear Holiday Jam is a low-honey cooked jam made with Pomona’s Pectin. Pomona’s Pectin contains no sugar or preservatives and jells reliably with low amounts of any sweetener.
Yield: 4 to 5 cups
Before You Begin: Prepare calcium water. To do this, combine ½ teaspoon calcium powder (in the small packet in your box of Pomona’s pectin) with ½ cup water in a small, clear jar with a lid. Shake well. Extra calcium water should be stored in the refrigerator for future use.
16
handmade holiday gifts from the kitchen
INGREDIENTS
12 ounces fresh, whole cranberries
3 medium oranges
3 medium pears
1 tablespoon orange zest
1¼ teaspoons ground ginger
¾ teaspoon ground cardamom
½ teaspoon ground allspice
¼ teaspoon ground cloves
¼ cup lemon juice
4 teaspoons calcium water
1 cup honey
2½ teaspoons Pomona’s pectin powder
DIRECTIONS
1.Wash and rinse jars, lids, and screw bands. Set screw bands aside until ready to use. Place jars in boiling water bath canner with a rack, fill at least ⅔ of the way full with water, and bring to a boil. Boil jars for 10 minutes to sterilize (add 1 additional minute of sterilizing time for every 1,000 feet above sea level), then turn down heat and let jars stand in hot water until ready to use. Place lids in water in a small pan, bring to a low simmer, and hold there until ready to use.
2.Rinse the cranberries in a colander. Transfer the cranberries to a food processor and pulse them until they turn into a very fine mash, or pulp — not quite fully puréed, but almost. Then, transfer the cranberry pulp to a large sauce pan and set it aside.
3.Rinse the oranges well. Using a zester or a very fine grater, grate the outside skin of one or more of the oranges to obtain zest. Measure out 1 tablespoon of orange zest and add it the cranberry pulp.
4.Peel the oranges and discard the remain ing skin. Pull all of the orange segments apart, discard the seeds, and remove and discard all of the membranes from each individual orange segment. Then, transfer the orange segments to the food processor. Pulse the oranges very briefly — just long enough to turn them into pulp. Be careful not to liquefy them. Measure out 11/3 cups of the orange pulp and add it to the cranber ry pulp. (If you are left with extra orange pulp, simply use it for something else.)
5.Peel and core the pears. Transfer the pears to a mixing bowl and mash well. Measure out 11/3 cups mashed pear and add it to the cranberry-orange mixture. (If you are left with extra mashed pear, simply use it for something else.)
6. Add all of the spices, as well as the lemon juice and calcium water, to the mixture. Stir to combine.
7.In a separate bowl, combine the honey and pectin powder. Mix well and set aside.
8.Put the sauce pan on the stove and bring the cranberry-orange-pear mixture up to a rolling boil over high heat. Add the honeypectin mixture, then stir vigorously for 1 to 2 minutes, still over the highest heat, to dissolve pectin. Return jam to a boil, then remove from heat.
9.Remove hot jars from canner and fill jars with jam, leaving ¼ inch of head-
space. Remove trapped air bubbles, wipe rims with a damp cloth, and put on lids and screw bands, tightening bands only to “fingertip tight.”
10.Place jars in the hot water, on the rack inside the canner. (Make sure jars are upright, not touching each other or the sides of the canner, and are covered with at least 1-2 inches of water.) Place the lid on the canner, return the canner to a rolling boil, and boil for 10 minutes.
11.Turn off heat and allow canner and jars to sit for 5 minutes. Then remove jars from canner.
12. Allow jars to cool undisturbed for 12 to 24 hours. Then confirm that jars have sealed. Remove screw bands from sealed jars, rinse off outside of jars if necessary, label jars, and store for later use. ◊
17handmade holiday gifts from the kitchen
Making Goat Milk Caramels
By lacey HugHett
spotty heat coverage or heat too quickly. If the caramel becomes too hot, it will burn or the end product can become firmer than it should be.
Do not let the caramel sauce rise above 248 degrees F. Caramel is a “soft ball” class of candy. If you drop a ball of the cooking caramel sauce into a dish of cold water, it should form a soft, pliable ball of candy. For example, toffee and hard candy have different cooking temperatures because they are in the “hard ball” class, with temperatures ranging from 250-265 degrees F. When this type of candy is dropped into cool water, it becomes hard. If your caramel rises too high and goes into the hard ball range, you will no longer have those soft, delicious caramels you were dreaming about. I, too, have made this mistake. I don’t know what the end product is called; it tastes amazing, but it’s not caramel.
THIS FAST-APPROACHING
holiday season has everyone scram bling to find some tasty, quality candy recipes. Have you tried making goat milk caramel? Heather Ische from Home stead Ranch provided me with a delicious caramel recipe, a little family history, and some good old-fashioned tips for making the best caramels around!
I tried the recipe and it was superb, a sweet, creamy take on a personal family favorite. Better yet, friends or family who are lactose intolerant can usually tolerate these sweets. This caramel isn’t as sweet as a traditional caramel so I found it per fect, particularly for my son, who gener ally can’t tolerate cow milk products.
Heather and Steven got their first goat in 2013 as a companion animal for a horse. They were instantly hooked. The first goat was a pet, and he acted just like a family dog. As their operation grew, the family looked for ways to monetize the goats in order to help with their cost of care. Al though Heather was already making goat milk products, someone recommended creating caramel.
Goat milk and cheese products weren’t as widespread then as they are now. Heather wasn’t entirely sure where to start, but they had a family recipe to use
as a base. After a huge amount of trial and error, she nailed down a perfect caramel recipe with goat milk, and now Heather is a wealth of knowledge and kindly shares it with our readers.

What began as a small operation quickly grew to around a 200-head herd of goats. Homestead Ranch raises mainly LaMan cha goats, but they also include a few Nubian and Alpine goats. They breed for excellent milk lines and sell excess males for meat purposes. The key to a great operation is having multiple streams of income, which they have accomplished via milk products, body care products, and homegrown meat. The quality speaks for itself, so they’ve gathered a following of loyal customers.
The Homestead Ranch website, at www.allthingsranch.com, offers several high-quality recipes and tips for making these sweet treats. Heather advises using a heavy bottomed, large pan, and to only allow the caramel to fill ¾ of the way up the pan. The caramel froths while cooking and can easily spill over. I experienced this firsthand … it was enlightening.
Since caramels burn easily, Heather recommends copper cookware because it heats and cooks more evenly than any other medium. Other pans tend to have
The easiest way to keep caramel at a good, constant heat is to invest in a copper pot and buy a candy thermometer. Heather has perfected these goat caramels and she stressed the importance of not letting it top 248 degrees F.

18 handmade holiday gifts from the kitchen
If you’re not feeling particularly adventurous, I have great news! Heather makes, sells, and ships her caramels from her website year-round. I’m excited to order a batch for myself and my family this fall season.
In addition to the goat milk caramel recipe below, Heather has recipes for cajeta (traditional Mexican caramel sauce — with cinnamon!), caramel pecan cheese-

cake, and goat milk ice cream on her website, among many others. Make sure to stop by for pictures, tips, or to order some yummy products. You can show a little love on her Facebook page, Homestead Ranch LLC, and thank her for sharing these traditional family recipes.
Since I’ve tantalized your taste buds, here is the recipe that Heather gave me, exclusively for our readers! Feel free to
play with the recipe and experiment with different flavors. I love making caramel with a hint of espresso powder because I like the taste of coffee. Heather assured me that different flavors and ingredients can be added to customize the taste of the caramel. If you try this recipe, remember to utilize Heather’s advice and make sure to tell us how it turned out.
Homestead Ranch Goat Milk Caramels
INGREDIENTS
½ cup butter, cut into pieces
1 cup brown sugar
½ cup white sugar
¼ cup honey
1¼ cups goat milk
1¼ cups heavy cream
1¼ tablespoons vanilla extract
Flaky sea salt, to finish. (Optional) Extra butter to coat baking dish
INSTRUCTIONS
•Set a large pot over high heat. Combine butter, brown sugar, white sugar, honey, goat milk, and heavy cream. Stir mixture constantly while keeping candy thermometer partly submerged. When temperature reaches 248 degrees F, remove pot from heat. Add vanilla extract and stir.
•Butter a separate baking dish. Pour mixture into buttered baking dish. Sprinkle salt over caramel. Let cool 30 minutes, and then transfer, uncovered, to refrigerator. Chill several hours until firm before cutting.
May your holiday season be filled with goat milk caramels and other treats — and be just a little bit sweeter!
19handmade holiday gifts from the kitchen
◊
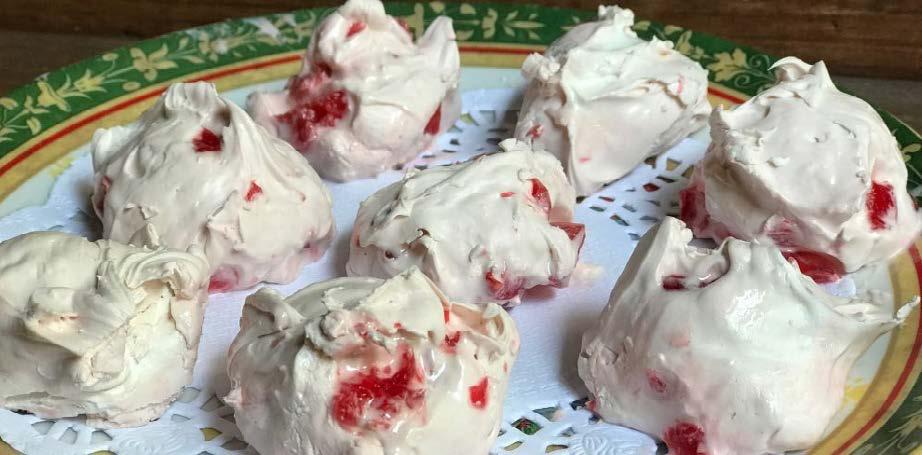
Making Marshmallows, Meringues, and Divinity
By Rita Heikenfeld
CANDIES
MADE WITH EGGS make perfect sense for those who have a flock of “girls” laying faithfully. And the holidays are the perfect time to showcase classic candies that have become treasured traditions.
Three favorites: making marshmallows, meringue cookies, and divinity. All of these delightful confections start with a simple base of egg whites and a few other pantry ingredients.
I love all three because they are a welcome, lighter addition to our holiday dessert trays.
These make a lovely gift with a pair of holiday mugs.
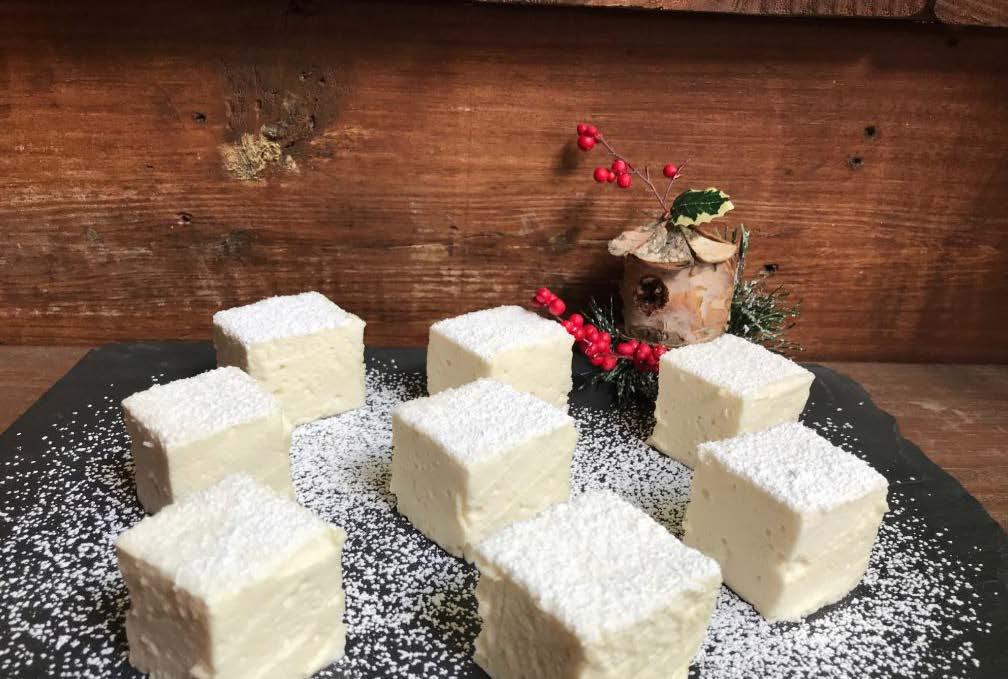
MARSHMALLOWS
INGREDIENTS
Confectioners’ sugar for dusting 4 envelopes, ¼ oz. each, unflavored gelatin 1 cup cold water, divided into ¾ and ¼ cups 2 cups granulated sugar
¼ cup light corn syrup
1 tablespoon vanilla extract or other flavorings (see Other Flavors) 4 large egg whites, room temperature
INSTRUCTIONS
•Line a 9×13 pan or quarter sheet pan with parchment paper, waxed paper, or plastic wrap. Let it hang over the sides to allow for easy removal of marshmallows.
•Sprinkle generously with confectioners’ sugar.
•Sprinkle gelatin on ¾ cup water to rehydrate. Give it a stir. It will get fairly thick.
•Combine sugar, corn syrup, vanilla, remaining ¼ cup cold water, and four egg whites in a mixing bowl.
•Whisk over simmering water (or use a double boiler) until the mixture is hot and sugar has dissolved.
•Stir in softened gelatin and whisk until gelatin dissolves.
•Remove from heat and whip at medium speed until mixture rises in volume and begins to thicken. Turn speed to high and whip until the mixture holds a soft but stable peak.
• Spread in prepared pan and sift confectioners’ sugar all over the top.
•Chill in the refrigerator until fully set, about two hours.
•Cut into 1” squares.
STORING
Store between layers of wax or parchment paper in an airtight container. Keep in dry, cool place for up to one month.
OTHER FLAVORS
Rose or Orange Flower Water Marshmallows: Use three tablespoons of rose or orange flower water and nine tablespoons of cold water (in place of the ¾ cup cold water) for soaking gelatin.
Lemon: Use six tablespoons lemon juice and six tablespoons cold water for soaking the gelatin (in place of ¾ cup cold water).
TIP
Each envelope of unflavored gelatin contains 2¼ to 2½ teaspoons.
20 handmade holiday gifts from the kitchen
MERINGUE COOKIES
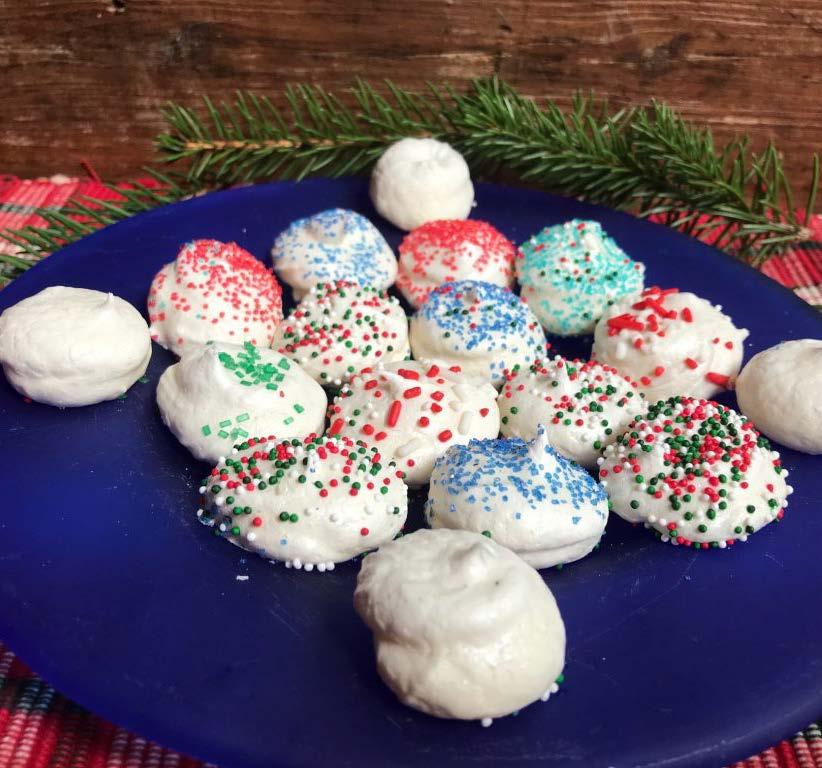
These sweet little bites are lovely as an accompaniment to tea.
INGREDIENTS
4 large egg whites, room temperature
½ teaspoon cream of tartar
⅛ teaspoon salt
1 cup granulated sugar
2 teaspoons vanilla
INSTRUCTIONS
•Preheat oven to 175-200 degrees F.
•Line baking sheets with parchment paper.
•Beat egg whites, using low speed until whites are loose and foamy.
• Add cream of tartar and salt and increase speed to medium. Beat until whites stand in soft but frothy peaks.
•Turn to high and add sugar, about two tablespoons at a time, beating for five seconds after each addition. This assures sugar dissolves and allows for meringues to come out crispy, not too chewy. The meringue will be shiny with a firm peak when you lift the beater.
•Place the meringue into a pastry bag with a star or plain tip and pipe out small meringues. Or plop a small dollop of meringue onto parchment.
•You can place them fairly close together.
•Bake one to two hours, or until meringues are dry and crisp throughout.
•Pull from parchment paper.
STORING
Store up to several weeks at room temperature in airtight containers.
TIP
Oh no, my meringues got soft/sticky in storage! Just rebake them at 175 degrees F for 10 minutes or until they are crisp.
DEVINE DIVINITY
This Southern specialty is a nougat-like confection, often studded with nuts, gumdrop-like candies, or candied fruit.
INGREDIENTS
2½ cups granulated sugar
½ cup light corn syrup
½ cup water (see note)
¼ teaspoon salt
2 large egg whites
¼ teaspoon cream of tartar
2 teaspoons vanilla
½ cup diced candied fruit, patted dry, or gumdrop-like candies, toasted nuts, etc.
INSTRUCTIONS
•Spray baking sheet with cooking spray, line with parchment paper, and then spray the parchment.
•Combine sugar, corn syrup, water, and salt in a three-quart or larger pan.
•Cook over medium heat until mixture cooks to the hardball stage (260 degrees F), stirring only until sugar dissolves.
•Meanwhile, pour egg whites.
•Place whites with cream of tartar and vanilla in a mixing bowl and beat at low speed with the whisk attachment until mixture is foamy. Turn speed to high and beat until stiff peaks form. If peaks form before the syrup reaches 260 degrees F, reduce speed and keep mixing on low.
•Reduce speed to medium and very slowly add the hot syrup in a slow, steady stream.
•Increase speed to high and beat until the mixture is very thick and loses most of its gloss. This took a good 10 minutes in my mixer, so be patient.
•Fold in fruit or nuts if using.
•Dollop divinity onto a prepared pan with two spoons or a small ice cream scoop.
•Let sit until fully set and dry, at least eight hours.
STORING
Store in single layers in a closed container at room temperature for up to two weeks.
TIP
If it’s humid, reduce water by two tablespoons. ◊
21handmade holiday gifts from the kitchen
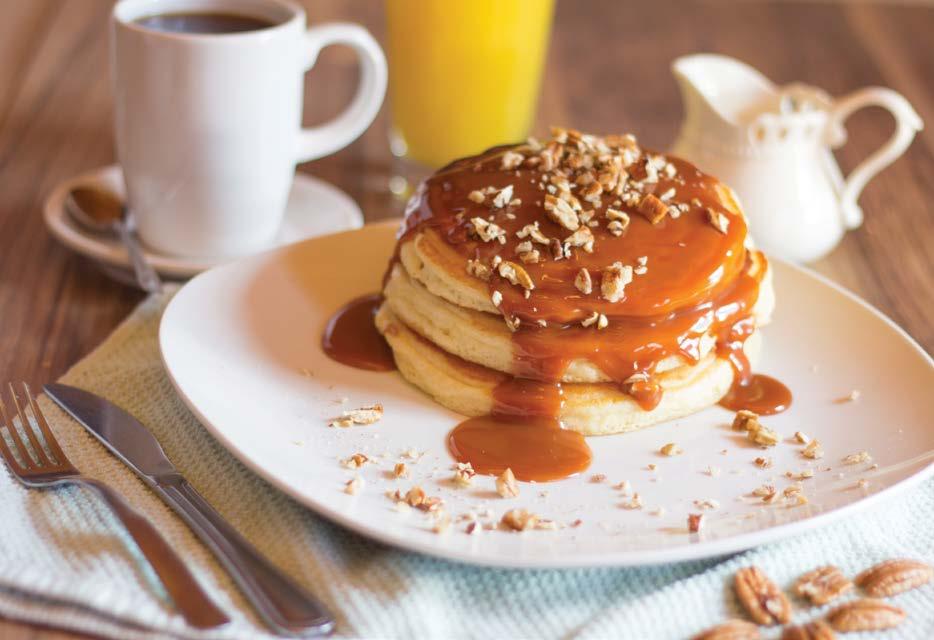
Olé Cajeta!
by CAPPY TOSETTI
Like magic, a simmering pot on the stove can transform a few simple ingredients into a rich and creamy caramelized concoction to be used on ice cream, crêpes, pancakes, cinnamon rolls, cheesecake, scones, fresh fruit, cheeses, and more.
Rachael Van Laanen and husband Scott Brinton milk 40 American Alpine goats at Mystery Bay Farm outside Seattle, Washington. They offer artisan cheeses, yogurt, and cajeta as farmstead products.
“It’s a simple recipe, but it takes plenty of patience during the cooking process,” advises Rachael, “so it’s important to carve out a good amount of time while stirring the pot. It’s a peaceful time, filled with the aroma of sweet caramel in the air.”
Cajeta Recipe
Yield: 2.5 pints
Use large heavy-bottom stainless steel or copper pot.
gallon of goat milk
cups sugar
teaspoon baking soda
cinnamon stick or vanilla bean
Bring milk, sugar, and cinnamon to a rapid simmer on medium heat. Watch pot closely — stir — do not allow to boil over.
Continue simmering until liquid reduces to half.
In a separate pan over medium heat, combine one cup of the hot milk mixture with the baking soda, stirring briskly. Mixture will rise and get frothy. Pour mixture back into a large pot on medium heat, stirring every 10 minutes — approximately an hour.
Keep stirring until mixture is rich amber brown and thick enough to coat back of the spoon.
Once done, remove cinnamon stick/vanilla bean. Let cool. Pour in airtight, sterilized glass jars.
22 handmade holiday gifts from the kitchen
•1
•3
•1
•1
Enjoy!
