5 minute read
MTB-O TIPS
Improve your start procedure
Folding and preparing your map
Adrian Jackson (2004 World MTBO Champ) shows you how.
Premarked maps are the norm at most events nowadays (including all major events!), and standard start procedure gives you only a minute from picking up your map to riding off.
Many people struggle to quickly analyse their map, fold it to fit the mapboard, and plan the first leg before their time is up. How you fold and prepare your map can also impact greatly on how you go out on the course too. With clever folding you can minimise and speed up refolding of the map on the course. Often after a sloppy fold at the start vital route choices can be folded off the map, and can lead to large time losses. Hopefully with these tips you can streamline your map preparation, saving time both at the start and on the course.
General start procedure:
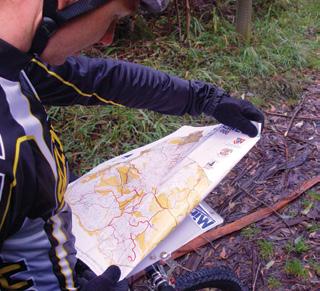
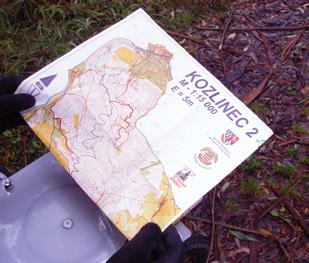
Before you pick up your map look around and pick a few key features that will help you get oriented at the start (i.e. nearby knoll, major road, track junction, etc). Also look around and see how many tracks are leading off which you could go down. Getting to the start and watching a few other people start can help, but don’t assume they are all going the best directions. The hardest starts are when you are immediately faced with many options, and you can often pick these situations before you pick up your map so get ready to navigate carefully! As you get to a minute before you pick up your map undo at least two sides of your board, and all three sides if possible when you are expecting a large map. The first big decision is whether you will fit your course into the board in one go, or whether will you need to refold during the course (top photo). If the course fits in without any folding, or one simple fold that doesn’t go anywhere near the course, then simply slot it in and start planning your course as you do the mapboard up. If you are not immediately sure if the course will fit in one go, then go on with the following steps. Run your eye around the course, and look for areas of the map that your course definitely couldn’t go (i.e. title areas, white space and out-of-theway sections of the map). Fold off these portions, but only if they are about 2cm wide or greater. Narrow sections of map are fiddly to fold, and can be easily folded out of the way by using the edge of the board (photo right). Next, look for sections of the map proper where there is no course printed. You have to quickly look at the legs closest to these areas and decide if there is any possible route choice out that way. Don’t actually plan the leg, simply ask: could I go onto this bit of the map. If the answer is no then fold it off, if you are unsure or think you may then don’t! This stage is the trickiest, and as you practice more you will become quicker in deciding on which sections to fold off. After you have done this for each relevant edge of the map, then reassess whether it will fit into the board. If it still won’t fit in one hit then you will need to refold on the course. Obviously it will be beneficial to refold the minimum number of times on the course. Look at the finish and working backwards put a crease where as much of the last part of the course as possible is on the map when at the size of the board (photo left). Now from the start, pick the control furthest into the course which you could get to
and fold this section, again with the map at the limit of the board size (photo right). Hopefully the two folds will overlap, so that you have a ‘zone’ during the course which you will be able to stop and fold to the final section. Actually pre-creasing the map wherever necessary at the start will save you time on the course, as when you stop to fold you simply can fold at the new crease without thinking. If you are a skilled rider it is even possible to open your mapboard and refold whilst riding! If you had to go through all the steps above it should have hopefully only taken you 40-50 sec, so you still have time to plan the first leg. When time is limited, it is always better to fully plan the first leg rather than to try and hurriedly plan the first two or three. Knowing where you are going right from the first pedal stroke is the key to getting into the rhythm of navigation.
Board styles
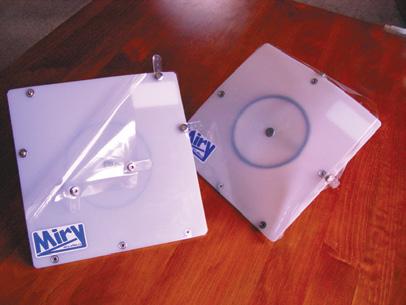
The Miry mapboards which I use come in two styles, the so called ‘wet’ and ‘dry’ boards. The more popular ‘wet’ board has the press studs underneath, and is better in wet conditions. The ‘dry’ board however is my favourite, as with the press studs on top it is possible to have the course
Wet
Dry
hanging out the edges of the board if desired (photo left). It is amazing how often the map is only a few centimetres too big to fit in a normal board, and having the flexibility to let it hang out has saved me many stops to fold my map during courses. Fine tune your technique to suit your particular mapboard, and practice at home with all sorts of maps.


