STP 8-68B13-SM-TG

SOLDIER’S MANUAL AND TRAINER’S GUIDE
MOS 68B
ORTHOPEDIC SPECIALIST

SKILL LEVELS
1, 2, 3
APRIL 2016
HEADQUARTERS, DEPARTMENT OF THE ARMY
DISTRIBUTION RESTRICTION: Distribution authorized to US Government agencies and their contractors only to protect technical and operational information from automatic dissemination under the International Exchange Program or by other means. This determination was made on 12 SEP 2011. US Army Medical Department Center & School, Health Readiness Center of Excellence, MCCS-IN, 3630 Stanley Rd, Ste 101, Joint Base San Antonio-Ft Sam Houston, TX 78234-6100.
This publication supersedes STP 8-91WP1-SM-TG, 5 April 2006.
DESTRUCTION NOTICE: Destroy by any method that will prevent disclosure of contents or reconstruction of the document.
This publication is available at Army Knowledge Online (https://armypubs.us.army.mil/doctrine/index.html). To receive publishing updates, please subscribe at http://www.apd.army.mil/AdminPubs/new_subscribe.asp
CONTENTS
DISTRIBUTION RESTRICTION: Distribution authorized to US Government agencies and their contractors only to protect technical and operational information from automatic dissemination under the International Exchange Program or by other means. This determination was made on 12 September 2011. Other requests for this documentation will be referred to U.S. Army Medical Department Center & School, Health Readiness Center of Excellence, MCCS-IN, 3630 Stanley Rd Suite 101 Joint Base San Antonio-Fort Sam Houston, TX 78234-6100.
DESTRUCTION NOTICE: Destroy by any approved method which will prevent disclosure of contents or reconstruction of this document
*This publication supersedes STP 8-91WP1-SM-TG, 5 April 2006.
*STP 8-68B13-SM-TG i Soldier Training Publication No. 8-68B13-SM-TG Headquarters Department of the Army Washington, DC, 15 April 2016 Soldier's Manual and Training Guide MOS 68B Orthopedic Specialist SKILL LEVELS 1, 2, 3
PAGE Preface .................................................................................................................................... viii Chapter 1. Introduction ..........................................................................................................1-1 1-1. General 1-1 1-2. Training Requirement 1-1 1-3. Battle-Focused Training 1-5 1-4. Task Summary Format ....................................................................................1-6 1-5. Training Execution ...........................................................................................1-7 1-6. Training Assessment .......................................................................................1-9 1-7. Training Support ............................................................................................1-10 Chapter 2. Training Guide 2-1 2-1. General .......................................................................................................2-1 2-2. Part One, Section I. Subject Area Codes ....................................................2-2 2-3. Part One, Section II. Duty Position Training Requirements .........................2-3 2-4. Critical Task List 2-4
Chapter 3. Skill Level Tasks
Contents ii STP 8-68B13-SM-TG 15 April 2016
Skill Level 1 Subject Area 1: Subject Area 1: All General Subjects 081-000-0007 Put on Sterile Gloves 3-1 081-000-0019 Perform Rescue Breathing 3-4 081-000-0017 Treat a Casualty for a Cold Injury 3-7 081-000-0035 Ventilate a Patient with a Bag-Valve-Mask System 3-11 081-000-0099 Apply a Hemostatic Dressing 3- 14 081-000-0016 Treat a Casualty for a Heat Injury ..............................................................3-16 081-000-0018 Administer External Chest Compressions .................................................3-19 081-000-0028 Initiate Treatment for a Respiratory Emergency ........................................3-23 081-000-0033 Operate an Automated External Defibrillator .............................................3-25 081-000-0110 Apply an Elastic Bandage ........................................................................3- 29 081-000-0009 Measure a Patient's Pulse Rate ...............................................................3- 32 081-000-0010 Measure a Patient's Blood Pressure ........................................................3-34 081-000-0008 Measure a Patient's Respirations .............................................................3-38 081-000-0006 Perform a Patient Care Hand Wash 3-40 081-000-0011 Measure a Patient's Temperature ............................................................3-42 081-000-0068 Document Patient Care Using Subjective, Objective, Assessment, Plan Note Format 3- 45 Subject Area 2: Cast Removal 081-68B-1501 Bivalve a Cast 3-47 081-68B-1500 Remove a Cast 3- 53 081-68B-1530 Wedge a Cast 3-57 081-68B-1502 Window a Cast 3- 61 Subject Area 3: Client Intervention - Splinting and Prosthetics 081-68B-1700 Perform Residual Limb Care for the Amputee Patient 3-65 Subject Area 4: General Medical 081-000-0094 Remove a Patient's Ring 3- 69 081-000-0098 Treat a Casualty for Contusions or Abrasions 3-71 081-000-0031 Perform A Wound Irrigation ......................................................................3- 73 081-000-0050 Place Bandage on an Open Wound 3-77 081-000-0072 Perform a Medical Patient Assessment ....................................................3-81
Contents 15 April 2016 STP 8-68B13-SM-TG iii 081-000-0071 Provide Basic Emergency Treatment for a Painful, Swollen, Deformed Extremity 3- 86 081-000-0121 Administer Medications 3-88 081-000-0030 Change a Sterile Dressing 3- 94 081-000-0163 Establish a Sterile Field 3-98 081-000-0051 Close a Minor Laceration 3-101 081-000-0056 Prepare an Injection for Administration 3-104 Subject Area 5: Lower Extremity Casts 081-68B-1304 Apply a Total Contact Cast 3-109 081-68B-1303 Apply a Patella Tendon Weight Bearing Cast .........................................3-118 081-68B-1301 Apply a Long Leg Cast ...........................................................................3-129 081-68B-1302 Apply a Long Leg Cylinder Cast .............................................................3-143 081-68B-1300 Apply a Short Leg Cast ..........................................................................3-152 Subject Area 6: Lower Extremity Splints 081-68B-1100 Apply a Short Leg Splint .........................................................................3-166 081-68B-1101 Apply a Lower Extremity Compression Dressing ....................................3-174 Subject Area 7: Traction 081-68B-1601 Set Up an Orthopedic Bed with Trapeze ................................................3-181 081-68B-1602 Apply Buck's Traction .............................................................................3-185 Subject Area 8: Upper Extremity Casts 081-68B-1202 Apply a Standard Long Arm Cast 3-190 081-68B-1203 Apply an Ulnar Gutter Cast 3-202 081-68B-1201 Apply a Standard Short Arm Cast 3-213 081-68B-1205 Apply a Munster Cast 3-225 081-68B-1206 Apply a Long Arm Cylinder Cast 3-237 081-68B-1204 Apply a Short Arm Thumb Spica Cast 3-246 Subject Area 9: Upper Extremity Splints 081-68B-1002 Apply an Ulnar Gutter Splint 3-256 081-68B-1001 Apply a Short Arm Single Sugar Tong Splint 3-263 081-68B-1006 Apply a Long Arm Double Sugar Tong Splint 3-270 081-68B-1007 Apply an Upper Extremity Compression Dressing ..................................3-278 081-68B-1003 Apply a Radial Gutter Splint ...................................................................3-285 081-68B-1004 Apply a Thumb Spica Splint 3-292 081-68B-1000 Apply a Short Arm Volar Splint ...............................................................3-298
Contents iv STP 8-68B13-SM-TG 15 April 2016 Skill Level SL2 Subject Area 10: General Medical 081-000-0057 Administer an Injection 3-304 081-000-0073 Administer Oxygen 3-309 081-000-0074 Measure a Patient's Pulse Oxygen Saturation 3-313 081-000-0095 Remove a Toenail 3-315 081-000-0103 Treat Common Musculoskeletal Disorders 3-319 081-000-0001 Process Items for Sterilization 3-324 081-000-0060 Set Up an Oxygen Tank 3-327 Subject Area 11: Traction 081-68B-2600 Apply Pelvic Traction ...............................................................................3-330 Subject Area 12: Upper Extremity Casts 081-68B-2200 Apply a Short Arm Cobra Cast ...............................................................3-337 081-68B-2201 Apply a Long Arm Thumb Spica Cast .....................................................3-348 Subject Area 13: Upper Extremity Splints 081-68B-2000 Apply a Coadaptation Splint ..................................................................3-358 Skill Level SL3 Subject Area 14: Body Casts 081-68B-3400 Apply a Hip Spica Cast 3-364 Subject Area 15: Management 081-E68-3001 Apply Business Process Improvement Techniques 3-374 158-100-7012 Develop Subordinates 3-376 081-E91-0047 Supervise Clinical Operations (Include Budget, Medical Equipment, and Supplies) 3-380 Subject Area 16: Upper Extremity Casts 081-68B-3201 Apply a Long Arm Hanging Cast 3-380 081-68B-3200 Apply a Short Arm Radial Gutter Cast 3-396 GLOSSARY ..................................................................................................................... Glossary-1 REFERENCES .................................................................................................. References-1 FIGURES Figure 1-1 Army training and leader development model 1-3 Figure 3-1. Bivalved lower extremity - medial/lateral bivalve 3-48 Figure 3-2. Bivalved long arm cast - anterior/posterior bivalve ....................................3-49
Contents 15 April 2016 STP 8-68B13-SM-TG v Figure 3-3. Cast removal lower extremity - medial lateral view 3-54 Figure 3-4. Cast removal long arm cast - anterior posterior view .................................3-54 Figure 3-5. Total contact cast 3-109 Figure 3-6. Inspecting patient's injured leg wearing gloves ........................................3-111 Figure 3-7. Inspecting patient's injured leg wearing gloves 3-120 Figure 3-8. Distal edge rests on web spacing 3-126 Figure 3-9. Long leg cast ...........................................................................................3-129 Figure 3-10. Inspecting patient's injured leg wearing gloves 3-131 Figure 3-11. Long leg cast third roll application ...........................................................3-137 Figure 3-12. Short leg cast - lateral view 3-152 Figure 3-13. Inspecting patient's injured leg wearing gloves ........................................3-154 Figure 3-14. Gastrocnemius mold 3-158 Figure 3-15. Triangle mold ..........................................................................................3-159 Figure 3-16. Plantar arch mold 3-159 Figure 3-17. Malleolus mold ........................................................................................3-160 Figure 3-18. Calcaneus mold 3-160 Figure 3-19. Achilles mold ...........................................................................................3- 161 Figure 3-20. Distal edge rests on web spacing 3-161 Figure 3-21. 5th metatarsal visible 3-162 Figure 3-22. Short leg splint- posterior 3-166 Figure 3-23. Short leg splint-posterior and medial lateral 3-167 Figure 3-24. Apply a lower extremity compression dressing 3-174 Figure 3-25. Balken overhead traction frame 3-183 Figure 3-26. Telescoping overhead traction frame ......................................................3-183 Figure 3-27. Lateral view of a long arm cast 3-190 Figure 3-28. Cast Rests at the distal palmar crease ....................................................3-198
Contents vi STP 8-68B13-SM-TG 15 April 2016 Figure 3-29. Cast rests at the base of metacarpophalangeal joints 3-198 Figure 3-30. Thumb rests proximal to the snuff box.....................................................3-199 Figure 3-31. Plaster ulnar gutter cast 3-202 Figure 3-32. Thumb rests proximal to the snuffbox......................................................3-209 Figure 3-33. Short arm cast - lateral view 3-213 Figure 3-34. Fiberglass short arm cast - anterior view (volar aspect) 3-214 Figure 3-35. Cast rests at or below distal palmar crease .............................................3-220 Figure 3-36. Cast edge proximal to metacarpophalangeal joints .3-221 Figure 3-37. Thumb rests proximal to the snuffbox......................................................3-221 Figure 3-38. Plaster Munster cast 3-225 Figure 3-39. Distal edge of cast rests at the distal palmar crease ................................3-233 Figure 3-40. Thumb rests proximal to the snuffbox 3-233 Figure 3-41. Long arm cylinder cast ............................................................................3-237 Figure 3-42. Thumb spica cast 3-246 Figure 3-43. Ulnar gutter splint-lateral view .................................................................3-256 Figure 3-44. Ulnar gutter splint-posterior view 3-257 Figure 3-45. Short arm single sugar tong splint ...........................................................3-263 Figure 3-46. Double sugar tong splint 3-270 Figure 3-47. Upper extremity compression dressing 3-278 Figure 3-48. Radial gutter splint 3-285 Figure 3-49. Thumb spica splint 3-292 Figure 3-50. Short arm volar splint 3-298 Figure 3-51. Gluteal injection site diagram 3-305 Figure 3-52. Pelvic traction ..........................................................................................3-330 Figure 3-53. Fiberglass cobra cast - anterior partial lateral view 3-337 Figure 3-54. Fiberglass cobra cast - anterior view .......................................................3-338
Contents 15 April 2016 STP 8-68B13-SM-TG vii Figure 3-55 Coadaptation splint (prior to sling application) 3-358 Figure 3-56. Long arm hanging cast ............................................................................3-380 Figure 3-57 Cast rests at the distal palmar crease 3-388 Figure 3-58. Cast rests at the base of metacarpophalangeal joint ...............................3-389 Figure 3-59 Thumb rests proximal to the snuff box 3-389 TABLES Table 1-2 Relationship of battle-focused training and STP ................................................1-6 Table 2-1 Training locations 2-2 Table 2-2 Sustainment training frequency codes 2-2 Table 2-3 Subject area codes 2-2 Table 2-4 Duty position training requirements 2-3 Table 2-5 MOS training plan 2-4
PREFACE
This publication is for skill level 1, 2, and 3 Soldiers holding military occupational specialty (MOS) 68B and for trainers and first-line supervisors. It contains standardized training objectives, in the form of task summaries, to train and evaluate Soldiers on critical tasks that support unit missions during wartime. Trainers and first-line supervisors should ensure Soldiers holding MOS/SL 68B 1, 2, and 3 have access to this publication. This STP is available for download from the Central Army Registry (CAR).
This publication applies to the Active Army, the Army National Guard (ARNG)/Army National Guard of the United States (ARNGUS), and the U.S. Army Reserve (USAR) unless otherwise stated.
Unless this manual states otherwise, masculine pronouns do not refer exclusively to men.
The proponent of this publication is United States Army Training and Doctrine Command (TRADOC). Send comments and recommendations on DA Form 2028 (Recommended Changes to Publications and Blank Forms) directly to Academy of Health Sciences, ATTN: MCCS-HCM, 3599 Winfield Scott Rd STE B0204, Joint Base San Antonio-Fort Sam Houston, TX 78234-4669.
viii STP 8-68B13-SM-TG 15 April 2016
CHAPTER 1
Introduction
1-1. General. This Soldier training publication (STP) identifies the individual military occupational specialty (MOS) training requirements for Soldiers in MOS 68B. Another source of STP task data is the Central Army Registry (CAR) at the Army Training (and Education) Network. Commanders, trainers, and Soldiers should use the STP to plan, conduct, and evaluate individual training in units. The STP is the primary MOS reference to support the selfdevelopment and training of every Soldier in the unit In conjunction with Army Doctrine Reference Publication (ADRP) 7-0, Training Units and Developing Leaders, Soldier’s Manual of Common Tasks (SMCT) Warrior Skills Level 1, collective training products, the STP establishes effective training plans and programs that integrate leaders, Soldiers and collective tasks. This chapter explains how to use the STP in establishing an effective individual training program, describes doctrinal principles and their implications outlined in ADRP 7-0. Based on these guidelines, commanders and unit trainers must tailor the information to meet the requirements for their specific unit.
1-2. Training Requirement. Every Soldier, noncommissioned officer (NCO), warrant officer, and officer has one primary mission — to be trained and ready to fight and win our nation's wars. Success in battle does not happen by accident; it is a direct result of tough, realistic, and challenging training.
a. Operational Environment.
(1) Commanders and leaders at all levels must conduct training with respect to a wide variety of operational missions across the full spectrum of operations. These operations may include combined arms, joint, multinational, and interagency considerations, and span the entire breadth of terrain and environmental possibilities. Commanders must strive to set the daily training conditions as closely as possible to those expected for actual operations.
(2) The operational missions of the Army include not only war, but also military operations other than war (MOOTW). Operations may be conducted as major combat operations, a small-scale contingency, or a peacetime military engagement. Offensive and defensive operations normally dominate military operations in war along with some small-scale contingencies. Stability operations and support operations dominate in MOOTW. Commanders at all echelons may combine different types of operations simultaneously and sequentially to accomplish missions in war and MOOTW. These missions require training as future conflict will likely involve a mix of combat and MOOTW, often concurrently. The range of possible missions complicates training. Army forces cannot train for every possible mission; they train for war and prepare for specific missions as time and circumstances permit.
(3) One type of MOOTW is the Chemical, Biological, Radiological, and Nuclear (CBRN) event. To assist commanders and leaders in training their units, CBRN-related information is being included in AMEDD collective training. Even though most collective tasks within a military occupational specialty (MOS) training plan (MTP) may support a CBRN event, the ones that will most directly be impacted are clearly indicated with a statement in the CONDITION that reads: "THIS TASK MAY BE USED TO SUPPORT A CBRN EVENT." These collective tasks and any supporting individual tasks in this Soldier’s manual should be considered for training emphasis.
Chapter 1: Introduction 15 April 2016 STP 8-68B13-SM-TG 1-1
(4) Our forces today use a train-alert-deploy sequence. We cannot count on the time or opportunity to correct or make up training deficiencies after deployment.
Maintaining forces that are ready now, places increased emphasis on training and the priority of training. This concept is a key link between operational and training doctrine.
(5) Units train to be ready for war based on the requirements of a precise and specific mission. In the process, they develop a foundation of combat skills that can be refined based on the requirements of the assigned mission. Upon alert, commanders assess and refine from this foundation of skills. In the train-alert-deploy process, commanders use whatever time the alert cycle provides to continue refinement of mission-focused training. Training continues during time available between alert notification and deployment, between deployment and employment, and even during employment as units adapt to the specific battlefield environment and assimilate combat replacements.
b. How the Army Trains the Army.
(1) Training is a team effort and the entire Army — Department of the Army, major commands (MACOMs), the institutional training base, units, the combat training centers (CTCs), each individual Soldier, and the civilian workforce — has a role that contributes to force readiness. Department of the Army and MACOMs are responsible for resourcing the Army to train. The Institutional Army, including schools, training centers, and NCO academies, for example, train Soldiers and leaders to take their place in units in the Army by teaching the doctrine, and tactics, techniques, and procedures (TTP). Units, leaders, and individuals train to standard on their assigned critical individual tasks. The unit trains first as an organic unit and then as an integrated component of a team. Before the unit can be trained to function as a team, each Soldier must be trained to perform their individual supporting tasks to standard. Operational deployments and major training opportunities, such as major training exercises, CTCs, and Combined Arms Training Systems (CATS) evaluations provide rigorous, realistic, and stressful training and operational experience under actual or simulated combat. The operational conditions are to enhance unit readiness and produce bold, innovative leaders. The result of this Army-wide team effort is a training and leader development system that is unrivaled in the world. Effective training produces the force — Soldiers, leaders, and units — that can successfully execute any assigned mission.
(2) The Army Training and Leader Development Model centers on developing trained and ready units led by competent and confident leaders. The model depicts an important dynamic that creates a lifelong learning process. The three core domains that shape the critical learning experiences throughout a Soldier’s and leader’s time span are the operational, institutional, and self-development domains. Together, these domains interact using feedback and assessment from various sources and methods to maximize warfighting readiness. Each domain has specific, measurable actions that must occur to develop our leaders. Refer to Figure 1-1.
• The operational domain includes home station training, CTC rotations, and joint training exercises and deployments that satisfy national objectives. Each of these actions provides foundational experiences for Soldier, leader, and unit development.
• The institutional domain focuses on educating and training Soldiers and leaders on the key knowledge, skills, and attributes required to operate in any
Chapter 1: Introduction 1-2 STP 8-68B13-SM-TG 15 April 2016
environment. The institutional domain includes individual, unit and joint schools, and advanced education.
• The self-development domain, both structured and informal, focuses on taking those actions necessary to reduce or eliminate the gap between operational and institutional experiences.
(3) Throughout this lifelong learning and experience process, there is formal and informal assessment and feedback of performance to prepare leaders and Soldiers for their next level of responsibility. Assessment is the method used to determine the proficiency and potential of leaders against a known standard. Feedback must be clear, formative guidance directly related to the outcome of training events measured against standards.

c. Leader Training and Leader Development.
(1) Competent and confident leaders are a prerequisite to the successful training of units. It is important to understand that leader training and leader development are integral parts of unit readiness. Leaders are inherently Soldiers first and should be technically and tactically proficient in basic Soldier skills. They are also adaptive, capable of sensing their environment, adjusting the plan when appropriate, and properly applying the proficiency acquired through training.
(2) Leader training is an expansion of these skills that qualifies them to lead other Soldiers. As such, doctrine and principles of training require the same level of attention of senior commanders. Leader training occurs in the Institutional Army, the unit, the CTCs, and through self-development. Leader training is just one portion of leader development.
(3) Leader development is the deliberate, continuous, sequential, and progressive process, grounded in Army values, that grows Soldiers and civilians into competent and confident leaders capable of decisive action. Leader development is achieved through the lifelong synthesis of the knowledge, skills, and experiences gained through institutional training and
Chapter 1: Introduction 15 April 2016 STP 8-68B13-SM-TG 1-3
Figure 1-1. Army Training and Leader Development Model
education, organizational training, operational experience, and self-development. Commanders play the key role in leader development that ideally produces tactically and technically competent, confident, and adaptive leaders who act with boldness and initiative in dynamic, complex situations to execute mission-type orders achieving the commander’s intent.
(4) The life cycle management diagram combined with the 68B MOS Training Plan forms the Soldiers career development model. This information, combined with the MOS Training Plan in Chapter 2, forms the career development model for the MOS.
d. Training Responsibility. Soldier and leader training and development continue in the unit. Using the institutional foundation, training in organizations and units focuses and hones individual and team skills and knowledge.
(1) Commander Responsibility.
(a) The unit commander is responsible for the wartime readiness of all elements in the formation. The commander is, therefore, the primary trainer in the organization and is responsible for ensuring that all training conducted is in accordance with the STP and to the Army standard.
(b) Commanders ensure STP standards are met during all training. If a Soldier fails to meet established standards for identified MOS tasks, the Soldier must retrain until the tasks are performed to standard. Training to standard on MOS tasks is more important than completion of a unit training event such as CATS evaluation. The objective is to focus on sustaining MOS proficiency — this is the critical factor commanders must adhere to when training individual Soldiers in units.
(2)
NCO Responsibility.
(a) A great strength of the US Army is its professional NCO Corps who takes pride in being responsible for the individual training of Soldiers, crews, and small teams. The NCO support channel parallels and complements the chain of command. It is a channel of communication and supervision from the Command Sergeant Major (CSM) to the First Sergeants (1SGs) and then to other NCOs and enlisted personnel. NCOs train Soldiers to the non-negotiable standards published in STPs. Commanders delegate authority to NCOs in the support channel as the primary trainers of individual, crew, and small team training. Commanders hold NCOs responsible for conducting standards-based, performance-oriented, battle-focused training and providing feedback on individual, crew, and team proficiency. Commanders define responsibilities and authority of NCOs to their staffs and subordinates.
(b) Professional development programs enhance the individual's career, through developmental assignments, experiential learning, continuing education, workshops and seminars, and by working with experienced professionals. Professional programs strengthen and augment the employee’s skills while building their expertise. A “career map” of these professional programs is available for every Soldier by accessing https://actnow.army.mil, selecting “My Planner” and clicking on the button labeled “Printable Career Map.”
(c) NCOs continue the soldierization process of newly assigned enlisted Soldiers, and begin their professional development. NCOs are responsible for conducting standards-based, performance-oriented, battle-focused training. They identify specific individual, crew, and small team tasks that support the unit’s collective mission essential tasks; plan, prepare, rehearse, and execute training; and evaluate training and conduct after action reviews
Chapter 1: Introduction 1-4 STP 8-68B13-SM-TG 15 April 2016
(AARs) to provide feedback to the commander on individual, crew, and small team proficiency. Senior NCOs coach junior NCOs to master a wide range of individual tasks.
(3) Soldier Responsibility. Each Soldier is responsible for performing individual tasks identified by the first-line supervisor based on the unit’s mission essential task list (METL). Soldiers must perform tasks to the standards included in the task summary. If Soldiers have questions about tasks or which tasks in this manual they must perform, they are responsible for asking their first-line supervisor for clarification, assistance, and guidance. First-line supervisors know how to perform each task or can direct Soldiers to appropriate training materials, including current field manuals, technical manuals, and Army regulations. Soldiers are responsible for using these materials to maintain performance. They are also responsible for maintaining standard performance levels of all Soldiers’ Manual of Common Tasks at their current skill level and below. Periodically, Soldiers should ask their supervisor or another Soldier to check their performance to ensure that they can perform the tasks.
1-3. Battle-Focused Training. Battle focus is a concept used to derive peacetime training requirements from assigned and anticipated missions. The priority of training in units is to train to standard on the wartime mission. Battle focus guides the planning, preparation, execution, and assessment of each organization's training program to ensure its members train as they are going to fight. Battle focus is critical throughout the entire training process and is used by commanders to allocate resources for training based on wartime and operational mission requirements. Battle focus enables commanders and staffs at all echelons to structure a training program that copes with non-mission-related requirements while focusing on mission essential training activities. It is recognized that a unit cannot attain proficiency to standard on every task whether due to time or other resource constraints. However, unit commanders can achieve a successful training program by consciously focusing on a reduced number of METL tasks that are essential to mission accomplishment.
a. Linkage between METL and STP. A critical aspect of the battle focus concept is to understand the responsibility for and the linkage between the collective mission essential tasks and the individual tasks that support them. For example, the commander and the CSM/1SG must jointly coordinate the collective mission essential tasks and supporting individual tasks on which the unit will concentrate its efforts during a given period. This task hierarchy is provided in the task database in the Central Army Registry (CAR). The CSM/1SG must select the specific individual tasks that support each collective task to be trained. Although NCOs have the primary role in training and sustaining individual Soldier skills, officers at every echelon remain responsible for training to established standards during both individual and collective training. Battle focus is applied to all missions across the full spectrum of operations.
b. Relationship of STPs to Battle-focused Training. The two key components of any STP are the Soldier's manual (SM) and trainer’s guide (TG). Each gives leaders important information to help implement the battle-focused training process. The trainer’s guide relates Soldier and leader tasks in the MOS and skill level to duty positions and equipment. It states where the task is trained, how often training should occur to sustain proficiency, and who in the unit should be trained. As leaders assess and plan training, they should rely on the trainer’s guide to help identify training needs.
(1) Leaders conduct and evaluate training based on Army-wide training objectives and on the task standards published in the Soldier's manual task summaries or in the Central Army Registry. The task summaries ensure that --
Chapter 1: Introduction 15 April 2016 STP 8-68B13-SM-TG 1-5
• Trainers in every unit and location define task standards the same way.
• Trainers evaluate all Soldiers to the same standards.
(2) Table 1-2 demonstrates how battle-focused training relates to the trainer’s guide and Soldier's manual:
• The left column shows the steps involved in training Soldiers.
• The right column shows how the STP supports each of these steps.
BATTLE-FOCUS
Select supporting Soldier tasks
Conduct training assessment
Determine training objectives
Determine strategy; plan for training
Conduct pre-execution checks
Execute training; conduct after action review
Evaluate training against established standards
Use TG to relate tasks to METL
Use TG to define what Soldier tasks to assess
Use TG to set objectives
Use TG to relate Soldier tasks to strategy
Use SM task summary as source for task performance
Use SM task summary as source for task performance
Use SM task summary as standard for evaluation
1-4. Task Summary Format. Task summaries outline the wartime performance requirements of each critical task in the SM. They provide the Soldier and the trainer with the information necessary to prepare, conduct, and evaluate critical task training. As a minimum, task summaries include information the Soldier must know and the skills that he must perform to standards for each task. The format of the task summaries included in this SM is as follows:
a. Task Title. The task title identifies the action to be performed.
b. Task Number. A 10-digit number identifies each task or skill. This task number, along with the task title, must be included in any correspondence pertaining to the task.
c. Conditions. The task conditions identify all the equipment, tools, references, job aids, and supporting personnel that the Soldier needs to use to perform the task in wartime. This section identifies any environmental conditions that can alter task performance, such as visibility, temperature, or wind. This section also identifies any specific cues or events that trigger task performance, such as a chemical attack or identification of a threat vehicle.
d. Standards. The task standards describe how well and to what level the task must be performed under wartime conditions. Standards are typically described in terms of accuracy, completeness, and speed.
e. Performance Steps. This section includes a detailed outline of information on how to perform the task. Additionally, some task summaries include safety statements and notes. Safety statements (danger, warning, and caution) alert users to the possibility of immediate death, personal injury, or damage to equipment. Notes provide a small, extra supportive explanation or hint relative to the performance steps.
Chapter 1: Introduction 1-6 STP 8-68B13-SM-TG 15 April 2016
Table 1-2. Relationship of Battle-focused Training and STP
PROCESS STP SUPPORT PROCESS
f. Evaluation Preparation (when used). This subsection indicates necessary modifications to task performance in order to train and evaluate a task that cannot be trained to the wartime standard under wartime conditions. It may also include special training and evaluation preparation instructions to accommodate these modifications and any instructions that should be given to the Soldier before evaluation.
g. Performance Measures. This evaluation guide identifies the specific actions that the Soldier must do to successfully complete the task. These actions are listed in a GO/NO-GO format for easy evaluation. Each evaluation guide contains an evaluation guidance statement that indicates the requirements for receiving a GO on the evaluation.
h. References. This section identifies references that provide more detailed and thorough explanations of task performance requirements than those given in the task summary description.
1-5. Training Execution. All good training, regardless of the specific collective, leader, and individual tasks being executed, must comply with certain common requirements. These include adequate preparation, effective presentation and practice, and thorough evaluation. The execution of training includes preparation for training, conduct of training, and recovery from training.
a. Preparation for Training. Formal near-term planning for training culminates with the publication of the unit training schedule. Informal planning, detailed coordination, and preparation for executing the training continue until the training is performed. Commanders and other trainers use training meetings to assign responsibility for preparation of all scheduled training. Preparation for training includes selecting tasks to be trained, planning the conduct of the training, training the trainers, reconnaissance of the site, issuing the training execution plan, and conducting rehearsals and pre-execution checks. Pre-execution checks are preliminary actions commanders and trainers use to identify responsibility for these and other training support tasks. They are used to monitor preparation activities and to follow up to ensure planned training is conducted to standard. Pre-execution checks are a critical portion of any training meeting. During preparation for training, battalion and company commanders identify and eliminate potential training distracters that develop within their own organizations. They also stress personnel accountability to ensure maximum attendance at training.
(1) Subordinate leaders, as a result of the bottom-up feed from internal training meetings, identify and select the individual tasks necessary to support the identified training objectives. Commanders develop the tentative plan to include requirements for preparatory training, concurrent training, and training resources. At a minimum, the training plan should include confirmation of training areas and locations, training ammunition allocations, training simulations and simulators availability, transportation requirements, Soldier support items, a risk management analysis, assignment of responsibility for the training, designation of trainers responsible for approved training, and final coordination. The time and other necessary resources for retraining must also be an integral part of the original training plan.
(2) Leaders, trainers, and evaluators are identified, trained to standard, and rehearsed prior to the conduct of the training. Leaders and trainers are coached on how to train, given time to prepare, and rehearsed so that training will be challenging and doctrinally correct. Commanders ensure that trainers and evaluators are not only tactically and technically competent on their training tasks, but also understand how the training relates to the organization's METL. Properly prepared trainers, evaluators, and leaders project confidence
Chapter 1: Introduction 15 April 2016 STP 8-68B13-SM-TG 1-7
and enthusiasm to those being trained. Trainer and leader training is a critical event in the preparation phase of training. These individuals must demonstrate proficiency on the selected tasks prior to the conduct of training.
(3) Commanders, with their subordinate leaders and trainers, conduct site reconnaissance, identify additional training support requirements, and refine and issue the training execution plan. The training plan should identify all those elements necessary to ensure the conduct of training to standard. Rehearsals are essential to the execution of good training. Realistic, standards-based, performance-oriented training requires rehearsals for trainers, support personnel, and evaluators. Preparing for training in Reserve Component (RC) organizations can require complex pre-execution checks. RC trainers must often conduct detailed coordination to obtain equipment, training support system products, and ammunition from distant locations. In addition, RC pre-execution checks may be required to coordinate Active Component assistance from the numbered CONUSA, training support divisions, and directed training affiliations.
b. Conduct of Training. Ideally, training is executed using the crawl-walk-run approach. This allows and promotes an objective, standards-based approach to training. Training starts at the basic level. Crawl events are relatively simple to conduct and require minimum support from the unit. After the crawl stage, training becomes incrementally more difficult, requiring more resources from the unit and home station, and increasing the level of realism. At the run stage, the level of difficulty for the training event intensifies. Run stage training requires optimum resources and ideally approaches the level of realism expected in combat. Progression from the walk to the run stage for a particular task may occur during a one-day training exercise or may require a succession of training periods over time. Achievement of the Army standard determines progression between stages.
(1) In crawl-walk-run training, the tasks and the standards remain the same; however, the conditions under which they are trained change. Commanders may change the conditions, for example, by increasing the difficulty of the conditions under which the task is being performed, increasing the tempo of the task training, increasing the number of tasks being trained, or by increasing the number of personnel involved in the training. Whichever approach is used, it is important that all leaders and Soldiers involved understand in which stage they are currently training and understand the Army standard.
(2) An AAR is immediately conducted and may result in the need for additional training. Any task that was not conducted to standard should be retrained. Retraining should be conducted at the earliest opportunity. Commanders should program time and other resources for retraining as an integral part of their training plan. Training is incomplete until the task is trained to standard. Soldiers will remember the standard enforced, not the one discussed.
c. Recovery from Training. The recovery process is an extension of training, and once completed, it signifies the end of the training event. At a minimum, recovery includes conduct of maintenance training, turn-in of training support items, and the conduct of AARs that review the overall effectiveness of the training just completed.
(1) Maintenance training is the conduct of post-operations preventive maintenance checks and services, accountability of organizational and individual equipment, and final inspections. Class IV, Class V, training aids, devices, simulators, and simulations (TADSS), and other support items are maintained, accounted for, and turned in, and training sites and facilities are closed out.
Chapter 1: Introduction 1-8 STP 8-68B13-SM-TG 15 April 2016
(2) AARs conducted during recovery focus on collective, leader, and individual task performance, and on the planning, preparation, and conduct of the training just completed. Unit AARs focus on individual and collective task performance, and identify shortcomings and the training required to correct deficiencies. AARs with leaders focus on tactical judgment. These AARs contribute to leader learning and provide opportunities for leader development. AARs with trainers and evaluators provide additional opportunities for leader development.
1-6. Training Assessment. Assessment is the commander's responsibility. It is the commander's judgment of the organization's ability to accomplish its wartime operational mission. Assessment is a continuous process that includes evaluating individual training, conducting an organizational assessment, and preparing a training assessment. The commander uses his experience, feedback from training evaluations, and other evaluations and reports to arrive at his assessment. Assessment is both the end and the beginning of the training management process. Training assessment is more than just training evaluation, and encompasses a wide variety of inputs. Assessments include such diverse systems as training, force integration, logistics, and personnel, and provide the link between the unit's performance and the Army standard. Evaluation of training is, however, a major component of assessment. Training evaluations provide the commander with feedback on the demonstrated training proficiency of Soldiers, leaders, battle staffs, and units. Commanders cannot personally observe all training in their organization and, therefore, gather feedback from their senior staff officers and NCOs.
a. Evaluation of Training. Training evaluations are a critical component of any training assessment. Evaluation measures the demonstrated ability of Soldiers, commanders, leaders, battle staffs, and units against the Army standard. Evaluation of training is integral to standardsbased training and is the cornerstone of leader training and leader development. STPs describe standards that must be met for each Soldier task.
(1) All training must be evaluated to measure performance levels against the established Army standard. The evaluation can be as fundamental as an informal, internal evaluation performed by the leader conducting the training. Evaluation is conducted specifically to enable the individual undergoing the training to know whether the training standard has been achieved. Commanders must establish a climate that encourages candid and accurate feedback for the purpose of developing leaders and trained Soldiers.
(2) Evaluation of training is not a test; it is not used to find reasons to punish leaders and Soldiers. Evaluation tells Soldiers whether or not they achieved the Army standard and, therefore, assists them in determining the overall effectiveness of their training plans. Evaluation produces disciplined Soldiers, leaders, and units. Training without evaluation is a waste of time and resources.
(3) Evaluations are used by leaders as an opportunity to coach and mentor Soldiers. A key element in developing leaders is immediate, positive feedback that coaches and leads subordinate leaders to achieve the Army standard. This is a tested and proven path to develop competent, confident adaptive leaders.
b. Evaluators. Commanders must plan for formal evaluation and must ensure the evaluators are trained. These evaluators must also be trained as facilitators to conduct AARs that elicit maximum participation from those being trained. External evaluators will be certified in the tasks they are evaluating and normally will not be dual-hatted as a participant in the training being executed.
Chapter 1: Introduction 15 April 2016 STP 8-68B13-SM-TG 1-9
c. Role of Commanders and Leaders. Commanders ensure that evaluations take place at each echelon in the organization. Commanders use this feedback to teach, coach, and mentor their subordinates. They ensure that every training event is evaluated as part of training execution and that every trainer conducts evaluations. Commanders use evaluations to focus command attention by requiring evaluation of specific mission essential and battle tasks. They also take advantage of evaluation information to develop appropriate lessons learned for distribution throughout their commands.
d. After Action Review. The AAR, whether formal or informal, provides feedback for all training. It is a structured review process that allows participating Soldiers, leaders, and units to discover what happened during the training, why it happened, and how it can be done better. The AAR is a professional discussion that requires the active participation of those being trained.
1-7. Training Support. This manual includes the following information which provides additional training support information.
a. Glossary. The glossary, which follows the last appendix, is a single comprehensive list of acronyms, abbreviations, definitions, and letter symbols.
b. References. This section contains two lists of references, required and related, which support training of all tasks in this SM. Required references are listed in the conditions statement and are required for the Soldier to do the task. Related references are materials that provide more detailed information and a more thorough explanation of task performance.
Chapter 1: Introduction 1-10 STP 8-68B13-SM-TG 15 April 2016
CHAPTER 2
Trainer’s Guide
2-1 General. The MOS Training Plan (MTP) identifies the essential components of a unit training plan for individual training. Units have different training needs and requirements based on differences in environment, location, equipment, dispersion, and similar factors. Therefore, the MTP should be used as a guide for conducting unit training and not a rigid standard. The MTP consists of two parts. Each part is designed to assist the commander in preparing a unit training plan that satisfies integration, cross training, training up, and sustainment training requirements for soldiers in this MOS.
Part One of the MTP shows the relationship of an MOS skill level between duty position and critical tasks. These critical tasks are grouped by task commonality into subject areas.
Section I lists subject area numbers and titles used throughout the MTP. These subject areas are used to define the training requirements for each duty position within an MOS.
Section II identifies the total training requirement for each duty position within an MOS and provides a recommendation for cross training and train-up/merger training.
• Duty Position Column. This column lists the duty positions of the MOS, by skill level, which have different training requirements.
• Subject Area Column. This column in Section 2-3 lists, by numerical key, the subject areas a Soldier must be proficient in to perform in that duty position.
• Cross Train Column. This column lists the recommended duty position for which Soldiers should be cross-trained.
• Train-up/Merger Column. This column lists the corresponding duty position for the next higher skill level or MOS the Soldier will merge into on promotion.
Part Two lists, by general subject areas, the critical tasks to be trained in an MOS and the type of training required (resident, integration, or sustainment).
• Subject Area Column. This column lists the subject area number and title in the same order as Section I, Part One of the MTP.
• Task Number Column. This column lists the task numbers for all tasks included in the subject area.
• Title Column. This column lists the task title for each task in the subject area.
• Training Location (TL) Column. This column identifies the training location and how the training is distributed to the Soldier (institutional, operational, or self-development). This STP uses codes to define the environments where training takes place. For
Chapter 2: Trainer’s Guide 15 April 2016 STP 8-68B13-SM-TG 2-1
example, if the task is first trained to standard in the unit, the word “OP” will be in this column. Table 2-1 contains a list of training locations and their corresponding brevity codes.
Table 2-1. Training locations
• Sustainment Training Frequency (STF) Column. This column indicates the recommended frequency at which the tasks should be trained to ensure Soldiers maintain task proficiency. Table 2-2 identifies the frequency codes used in this column.
• Sustainment Training Skill Level (STSL) Column. This column lists the skill levels of the MOS for which Soldiers must receive sustainment training to ensure they maintain proficiency to Soldier’s manual standards. See Figure 2-3.
2-2. Part One, Section I. Subject Area Codes.
Table 2-3 is a list of subject areas appearing in chapter three. The columns reflect which subject areas coincide across skill levels (SL).
Chapter 2: Trainer’s Guide 2-2 STP 8-68B13-SM-TG 15 April 2016
INST Institutional OP Operational S-D Self-Development
AN Annually SA Semi-annually MO Monthly BW Biweekly OTHER
Table 2-2. Sustainment training frequency codes
SUBJECT AREAS SL1 SL2 SL3 All General Subjects X Cast Removal X Client Intervention - Splinting and Prosthetics X General Medical X X Lower Extremity Casts X Lower Extremity Splints X Traction X X Upper Extremity Casts X X X
Table 2-3. Subject area codes
NOTE: The following list represents the order in which subject areas appear in the ST P.
Chapter 2: Trainer’s Guide 15 April 2016 STP 8-68B13-SM-TG 2-3 Upper Extremity Splints X X Body Casts X Management X
Skill Level 1 1 All General Subjects 2 Cast Removal 3 Client Intervention - Splinting and Prosthetics 4 General Medical 5 Lower Extremity Casts 6 Lower Extremity Splints 7 Traction 8 Upper Extremity Casts 9 Upper Extremity Splints Skill Level 2 10 General Medical 11 Traction 12 Upper Extremity Casts 13 Upper Extremity Splints Skill Level 3 14 Body Casts 15 Management 16 Upper Extremity Casts
2-3. Part One, Section II, Duty Position Training Requirements.
Table 2-4 shows duty positions as they relate to subject areas and positions in which Soldiers may train up along their career path.
SKILL LEVEL DUTY POSITION SUBJECT AREAS CROSS TRAIN TRAIN-UP/MERGER SL1 Orthopedic Specialist 1-9 N/A Orthopedic Sergeant SL2 Orthopedic Sergeant 1-13 N/A Orthopedic Sergeant SL3 Orthopedic Sergeant 1-16 N/A Orthopedic NCO
Table 2-4. Duty position training requirements
2-4. Part Two, Critical Tasks List.
MOS TRAINING PLAN
MOS
Table 2-5 cross references each task in all skill levels for a specific MOS with training location (TL), sustainment training frequency (STF), and sustainment training skill level (STSL).
Chapter 2: Trainer’s Guide 2-4 STP 8-68B13-SM-TG 15 April 2016
68H
Task Number Title TL STF STSL Skill Level 1 Subject Area 1: All General Subjects 081-000-0007 Put on Sterile Gloves INST SA 1-2 081-000-0019 Perform Rescue Breathing INST QT 1-2 081-000-0017 Treat a Casualty for a Cold Injury INST SA 1-2 081-000-0035 Ventilate a Patient with a Bag-Valve-Mask System INST AN 1-2 081-000-0099 Apply a Hemostatic Dressing INST SA 1-2 081-000-0016 Treat a Casualty for a Heat Injury INST SA 1-2 081-000-0018 Administer External Chest Compressions INST SA 1-2 081-000-0028 Initiate Treatment for a Respiratory Emergency INST SA 1-2 081-000-0033 Operate an Automated External Defibrillator (AED) INST SA 1-2 081-000-0110 Apply an Elastic Bandage INST SA 1-2 081-000-0009 Measure a Patient's Pulse Rate INST SA 1-2 081-000-0010 Measure a Patient's Blood Pressure INST SA 1-2 081-000-0008 Measure a Patient's Respirations INST SA 1-2 081-000-0006 Perform a Patient Care Handwash INST SA 1-2 081-000-0011 Measure a Patient's Temperature INST SA 1-2 081-000-0068 Document Patient Care Using Subjective, Objective, Assessment, Plan Note Format INST SA 1-2 Subject Area 2: Cast Removal 081-68B-1501 Bivalve a Cast INST SA 1-2 081-68B-1500 Remove a Cast INST SA 1-2 081-68B-1503 Wedge a Cast INST SA 1-2 081-68B-1502 Window a Cast INST SA 1-2 Subject Area 3: Client Intervention - Splinting and Prosthetics 081-68B-1700 Perform Residual Limb Care for the Amputee Patient INST SA 1-2 Subject Area 4: General Medical 081-000-0094 Remove a Patient's Ring INST SA 1-2 081-000-0098 Treat a Casualty for Contusions or Abrasions INST AN 1-2 081-000-0031 Perform a Wound Irrigation INST AN 1-2 081-000-0050 Place Bandage on an Open Wound INST SA 1-2 081-000-0072 Perform a Medical Patient Assessment INST SA 1-2 081-000-0071 Provide Basic Emergency Teatment for a Painful, Swollen, Deformed Extremity INST AN 1-2 081-000-0121 Administer Medications INST AN 1-2 081-000-0030 Change a Sterile Dressing INST AN 1-2 081-000-0163 Establish a Sterile Field INST AN 1-2
Table 2-5. MOS training plan
Chapter 2: Trainer’s Guide 15 April 2016 STP 8-68B13-SM-TG 2-5 Task Number Title TL STF STSL 081-000-0051 Close a Minor Laceration INST SA 1-2 081-000-0056 Prepare an Injection for Administration INST AN 1-2 Subject Area 5: Lower Extremity Casts 081-68B-1304 Apply a Total Contact Cast INST SA 1-2 081-68B-1303 Apply a Patella Tendon Weight Bearing Cast INST SA 1-2 081-68B-1301 Apply a Long Leg Cast INST SA 1-2 081-68B-1302 Apply a Long Leg Cylinder Cast INST AN 1-2 081-68B-1300 Apply a Short Leg Cast INST SA 1-2 Subject Area 6: Lower Extremity Splints 081-68B-1100 Apply a Short Leg Splint INST SA 1-2 081-68B-1101 Apply a Lower Extremity Compression Dressing INST SA 1-2 Subject Area 7: Traction 081-68B-1601 Set Up an Orthopedic Bed with Trapeze INST SA 1-2 081-68B-1602 Apply Buck's Traction INST SA 1-2 Subject Area 8: Upper Extremity Casts 081-68B-1202 Apply a Standard Long Arm Cast INST SA 1-2 081-68B-1203 Apply an Ulnar Gutter Cast ISNT SA 1-2 081-68B-1201 Apply a Standard Short Arm Cast INST SA 1-2 081-68B-1205 Apply a Munster Cast INST SA 1-2 081-68B-1206 Apply a Long Arm Cylinder Cast INST SA 1-2 081-68B-1204 Apply a Short Arm Thumb Spica Cast INST SA 1-2 Subject Area 9: Upper Extremity Splints 081-68B-1002 Apply an Ulnar Gutter Splint INST SA 1-2 081-68B-1001 Apply a Short Arm Single Sugar Tong Splint INST SA 1-2 081-68B-1006 Apply a Long Arm Double Sugar Tong Splint ISNT SA 1-2 081-68B-1007 Apply an Upper Extremity Compression Dressing INST SA 1-2 081-68B-1003 Apply a Radial Gutter Splint INST SA 1-2 081-68B-1004 Apply a Thumb Spica Splint INST SA 1-2 081-68B-1000 Apply a Short Arm Volar Splint INST SA 1-2 Skill Level 2 Subject Area 10: General Medical 081-000-0057 Administer an Injection OP AN 2-3 081-000-0073 Administer Oxygen OP AN 2-3 081-000-0074 Measure a Patient's Pulse Oxygen Saturation OP SA 2-3 081-000-0095 Remove a Toenail OP AN 2-3 081-000-0103 Treat Common Musculoskeletal Disorders OP AN 2-3 081-000-0001 Process Items for Sterilization OP AN 2-3 081-000-0060 Set Up an Oxygen Tank OP SA 2-3 Subject Area 11: Traction 081-68B-2600 Apply Pelvic Traction OP SA 2-3 Subject Area 12: Upper Extremity Casts 081-68B-2200 Apply a Short Arm Cobra Cast OP SA 2-3 081-68B-2201 Apply a Long Arm Thumb Spica Cast OP AN 2-3 Subject Area 13: Upper Extremity Splints 081-68B-2000 Apply a Coadaptation Splint OP SA 2-3
2-6 STP 8-68B13-SM-TG 15 April 2016 Task Number Title TL STF STSL Skill Level 3 Subject Area 14: Body Casts 081-68B-3400 Apply a Hip Spica Cast OP AN 3-4 Subject Area 15: Management 081-E68-3001 Apply Business Process Improvement Techniques INST AN 3-4I 081-E91-0049 Identify the Medical Systems/Programs that Enable Effective Operations INST AN 3-4 158-100-7012 Develop Subordinates INST AN 3-4 081-E91-0047 Supervise Clinical Operations (Include Budget, Medical Equipment, and Supplies) INST AN 3-4 Subject Area 16: Upper Extremity Casts 081-68B-3201 Apply a Long Arm Hanging Cast OP AN 3-4 081-68B-3200 Apply a Short Arm Radial Gutter Cast OP AN 3-4
Chapter 2: Trainer’s Guide
Chapter 3
MOS/Skill Level Tasks
Skill Level SL1
Subject Area 1: All General Subjects
Put on Sterile Gloves
081-000-0007
Conditions: You are assign to a medical treatment facility (MTF), Role I-IV. You have a patient who requires routine care using sterile gloves. You have running water, soap, paper towels, sterile gloves of various sizes, and flat, clean, dry, working surface. You are not in a chemical, biological, radiological, nuclear (CBRN) environment.
Standards: Put on sterile gloves on clean hands without contaminating the gloves.
Performance Steps:
1. Select a proper size sterile glove package.
2. Inspect the package for possible contamination.
NOTE: If the package appears damage or contaminated, discard and select another package
a. Water spots and moisture.
b. Rips, openings, and tears to the package.
c. Any other evidence that the package is not sterile.
3. Perform a patient care handwash. (See task # 081-000-0006.)
4. Open the sterile package.
a. Place the package on a flat, clean, dry surface in the area where the gloves are to be worn.
b. Peel the outer wrapper open to completely expose the inner package.
c. Open the inner package touching only the folded side of the wrapper.
d. Position the package so that the cuff end is nearest you.
5. Unfold the inner package.
a.Grasp the lower corner of the package.
b. Open the package to a fully flat position without touching the gloves.
6 Expose both gloves.
a.Grasp the lower corners on the folder.
b.Pull gently to the side without touching the gloves.
7. Put on the first glove.
a.Grasp the cuff at the folded edge and remove it from the wrapper.
b. Step away from the table or tray.
Chapter 3: Skill Level Tasks 15 April 2016 STP 8-68B13-SM-TG 3-1
c.Keeping your hands above the waist, insert the fingers of the other hand into the glove.
d.Pull the glove on touching only the exposed inner surface of the glove.
NOTE: If there is difficulty in getting your fingers fully fitted into the glove fingers; make the adjustment after both gloves are on.
8.Put on the second glove.
a.Insert the fingertips of the gloved hand under the edge of the folded over cuff.
NOTE: You may keep the gloved thumb up and away from the cuff area or you may insert it under the edge of the folded over cuff with the fingertips.
b.Keeping your hands above the waist, insert the fingers of the ungloved hand into the glove.
c.Pull the glove on.
d.Do not contaminate either glove.
9.Adjust the gloves to fit properly.
a.Grasp and pick up the glove surfaces on the individual fingers to adjust them.
b.Pick up the palm surfaces and work your fingers and hands into the gloves.
c.Interlock the gloved fingers and work the gloved hands until the gloves are firmly on the fingers.
NOTE: If either glove tears while putting them on or adjusting the gloves, remove both gloves and repeat the procedure.
Evaluation Preparation:.You must evaluate the students on their performance of this task in a field condition related to the actual task.
Performance Measures
1 Selected a proper size sterile glove package.
2 Inspected the package for possible contamination.
3 Performed a patient care handwash.
4 Opened the sterile package.
5 Unfolded the inner package.
6 Exposed both gloves.
7 Put on the first glove.
8 Put on the second glove.
9 Adjusted the gloves to fit properly.
3-2 STP 8-68B13-SM-TG 15 April 2016
Chapter 3: Skill Level Tasks
GO NO GO
Evaluation Guidance: Score each Soldier according to the performance measures in the evaluation guide. Unless otherwise stated in the task summary, the Soldier must pass all performance measures to be scored GO. If the Soldier fails any step, show what was done wrong and how to do it correctly.
15 April 2016 STP 8-68B13-SM-TG 3-3
Chapter 3: Skill Level Tasks
References Required Related None None
Perform Rescue Breathing
081-000-0019
Conditions: You are in a contemporary medical operational environment. You have a casualty requiring rescue breathing. You have available a bag-valve-mask (BVM) system, airway adjuncts, supplemental oxygen), and pocket mask with one way valve. You have taken body substance isolation (BSI) precautions.
Standards: Perform rescue breathing observing the rise and fall of the casualties chest during each ventilation. Continue procedure until either the casualty starts to breathe, you are relieved by another qualified person,or physically able to continue.
CAUTION: All body fluids should be considered potentially infectious. Always observe body substance isolation (BSI) precautions by wearing gloves and eye protection as a minimal standard of protection.
Performance Steps:
1. Open the airway. (See task 081-000-0004.)
a. Use the head-tilt/chin-lift maneuver when there is no suspected spinal injury.
WARNING: Foreign body airway obstruction (FBAO) such as those caused by food or small objects are difficult to see and can cause both partial and complete airway obstructions
b. Use the jaw thrust maneuver when trauma is observed or there is a suspected spinal injury.
NOTE: Several factors can make it difficult to establish a patent airway such as trauma to the face that causes swelling and bleeding that will make it difficult to keep the airway clear.
2. Ventilate the casualty using either mouth-to-mouth, mouth-to-mask, or bag-valve-mask (BVM) system:
a. Mouth-to-mouth method.
(1) Maintain the chin-lift while pinching the nostrils closed using the thumb and index fingers of your hand on the casualty's forehead.
(2) Take a regular breath and make an airtight seal around the casualty's mouth with your mouth.
(3) Give one slow breath (lasting 1 second) into the casualty's mouth, watching for the chest to rise and fall and listening and feeling for air to escape during exhalation.
NOTE: You must let go of the casualty's nose once you have given the breath and you are watching for the rise and fall of their chest, in order to feel the air escape upon your cheek.
b. Mouth-to-mask.
NOTE: The face mask is an important part of infection control to the rescuer. Rescuer breaths are delivered to the casualty through the one-way valve of the mask. There is no direct contact with the casualty's mouth.
(1) Insert an appropriate airway adjunct.
Chapter 3: Skill Level Tasks 3-4 STP 8-68B13-SM-TG 15 April 2016
(2) Connect the mask to an appropriate oxygen source, if available, at a flow rate of 15 liters per minute (lpm).
(3) Place the mask over the casualty's face, beginning at the top of the nose and walking the mask down so that it rests just below the lower lip.
(4) Form a tight seal between the mask and the casualty's face while maintaining a head tilt or jaw thrust.
(5) Breathe into the mask with a full breath.
c. Bag-valve-mask (BVM) system.
NOTE: Kneel above the casualty's head to perform this.
(1) Insert an appropriate airway adjunct.
(2) Connect BVM to oxygen at 15 liters per minute (lpm) if available.
(3) Position the mask on the casualty's face.
(4) Form a "C" around the ventilation port. Hold your index finger over the lower part of the mask and your thumb over the upper part of the mask. Use the third, fourth and fifth fingers under the casualty's jaw to hold the mask in place.
NOTE: The most difficult part of performing rescue breathing using the BVM system is maintaining an adequate seal. The American Heart Association recommends two rescuer BVM ventilation; in this method, one rescuer maintains a two-hand seal while the other rescuer squeezes the bag.
(5) Squeeze the bag every 5 to 6 seconds. Deliver each breath over 1 second, just enough to produce visible chest rise.
(6) Release pressure from the bag and allow the casualty to exhale passively.
3. Reposition the head to ensure an open airway and attempt the breath again if the chest does not rise or breath does not enter with first breath.
4. Check the carotid pulse for at least 5 seconds but no longer than 10 seconds.
a. Place the index and middle fingers into the groove beside the casualty's Adam's apple.
b. Feel for a pulse within 5-10 seconds.
5. Continue rescue breathing.
a. Ventilate the casualty at the appropriate rate.
(1) Adult: 12-20 breaths per minute.
(2) Children (one year of age to the onset of puberty): 15-30 breaths per minute (mouth-to-mouth or mouth-to-nose).
(3) Infants (less than one year of age): 25-50 breaths per minute (mouth-to-nose).
b.Watch for rising and falling of the chest.
Evaluation Preparation: You must evaluate the students on their performance of this task in a field condition related to the actual task.
Performance Measures GO NO GO
1. Opened the airway. (See task 081-000-0004.)
2. Ventilated the casualty using either mouth-to-mouth, mouth-to-mask, or bag-valve-mask method.
3. Repositioned the head to ensure an open airway and attempt the
Chapter 3: Skill Level Tasks 15 April 2016 STP 8-68B13-SM-TG 3-5
breath again if the chest does not rise or breath does not enter with first breath.
4 Checked the carotid pulse for at least 5 seconds but no longer than 10 seconds.
5. Continued rescue breathing.
Evaluation Guidance: Score each Soldier according to the performance measures in the evaluation guide. Unless otherwise stated in the task summary, the Soldier must pass all performance measures to be scored GO. If the Soldier fails any step, show what was done wrong and how to do it correctly.
References
Chapter 3: Skill
3-6 STP 8-68B13-SM-TG 15 April 2016
GO NO GO
Level Tasks
Performance Measures
Required Related None None
Treat a Casualty for a Cold Injury
081-000-0017
Conditions: You are performing daily duties in a cold environment. You encounter a casualty with a cold weather injury. You will need dry clothing or similar material, sterile dressings, a thermometer, and an automated record or tactical combat casualty care card.
Standards: Treat the cold weather related injury providing quick first aid measures and administering quick life-saving steps without causing further injury.
Performance Steps:
1. Recognize the signs and symptoms of cold injuries.
a. Chilblains are caused by repeated prolonged exposure of bare skin to low temperatures from 60 degrees Fahrenheit (° F) down to 32° F.
(1) Acutely red, swollen, hot, tender, and/or itching skin.
(2) Surface lesions with shedding of dead tissue, or bleeding lesions.
b. Frostbite is caused by exposure of the skin to cold temperatures that are usually below 32°F depending on the windchill factor, length of exposure, and adequacy of protection.
NOTE: The onset is signaled by a sudden blanching of the skin of the nose, ears, cheeks, fingers, or toes followed by a momentary tingling sensation. Frostbite is indicated when the face, hands, or feet stop hurting.
(1) First Degree.
(a) Epidermal injury; limited to skin that has brief contact with cold air or metal.
(b) No blister or tissue loss; healing occurs in 7-10 days.
(2) Second Degree.
(a) Involves epidermis and superficial dermis.
(b) Redness of the skin in light-skinned individuals and grayish coloring of the skin in dark-skinned individuals, followed by a flaky sloughing of the skin.
(c) Blister formation 24 to 36 hours after exposure followed by sheet-like sloughing of the superficial skin.
(d) No permanent loss of tissue; healing occurs in 3-4 weeks.
(3) Third Degree.
(a) Involves the epidermis and dermis layers.
(b) Frozen skin stiff with restricted mobility.
(c) After tissue thaws, skin swells along with blood-filled blister.
(d) Skin loss occurs slowly; healing is delayed.
(4) Fourth degree.
(a) Frozen tissue involves full thickness skin with muscle and bone involvement.
(b) Necrotic tissue develops along with sloughing of tissue and auto amputation of nonviable tissue.
CAUTION: With generalized hypothermia, the entire body has cooled with the core temperature below 95°F
c.Generalized hypothermia is caused by prolonged exposure to low temperatures, especially with wind and wet conditions, and it may be caused by immersion in cold water.
(1) Moderate hypothermia.
Chapter 3: Skill Level Tasks 15 April 2016 STP 8-68B13-SM-TG 3-7
NOTE: This condition should be suspected in any chronically ill person who is found in an environment of less than 50°F.
(a) Conscious, but usually apathetic or lethargic.
(b) Shivering, with pale, cold skin, slurred speech, poor muscle coordination, faint pulse.
(2) Severe hypothermia.
(a) Unconscious or stuporous.
(b) Ice cold skin.
(c) Inaudible heart beat or irregular heart rhythm.
(d) Unobtainable blood pressure.
(e) Unreactive pupils.
(f) Very slow respirations.
d.Immersion syndrome (immersion foot, trench foot and hand) is caused by fairly long (hours to days) exposure of the feet or hands to wet conditions at temperatures from about 50° F down to 32° F.
(1) Minimal.
(a) Increased blood flow to feet.
(b) Slight sensory change for 2-3 days.
(c) Self limiting injury with no signs of injury after 7 days.
(2) Mild.
(a) Edema, hyperemia and sensory changes remain for 2-3 days.
(b) Loss of sensation found on bottom of feet and toes for 4-9 weeks after injury.
(c) Blisters and skin loss does not occur.
(d) Casualty can walk when walking does not cause pain.
(3) Moderate.
(a) Edema, hyperemia, blisters and mottled skin appear 2-3 days after injury.
(b) Loss of sensation and edema for 2-3 weeks.
(c) Blister sloughing occurs, no loss of deep tissue.
(4) Severe.
(a) Severe edema and gangrene present 2-3 days after injury.
(b) Loss of sensation, edema for 2-3 weeks.
(c) Significant tissue loss with auto-amputation.
(d) Casualties will have permenant disability.
e.Snow blindness.
(1) Scratchy feeling in the eyes as if from sand or dirt.
(2) Watery eyes.
(3) Pain, possibly as late as 3 to 5 hours later.
(4) Reluctant or unable to open eyes.
2. Treat the cold injury.
a.Chilblains.
(1) Apply local re-warming within minutes.
CAUTION: Do not treat with ointments.
(2) Protect lesions (if present) with dry sterile dressings.
b.Frostbite.
(1) Apply local re-warming using body heat.
(2) Loosen or remove constricting clothing and remove jewelry.
CAUTION: Do not message the skin or rub anything on the frozen parts.
Chapter 3: Skill Level Tasks 3-8 STP 8-68B13-SM-TG 15 April 2016
(3) Increase insulation and exercise the entire body as well as the affected body part(s).
(4) Move the casualty to a sheltered area, if possible.
(5) Fingers and toes should be separated and protected with dry sterile gauze.
(6) Protect the affected area from further cold or trauma.
(7) Evacuate the casualty.
NOTE: For frostbite of a lower extremity, evacuate the casualty by litter, if possible.
CAUTION: Do not allow the casualty to use tobacco or alcohol.
c. Generalized hypothermia.
(1) Moderate.
(a) Remove the casualty from the cold environment.
(b) Replace wet clothing with dry clothing.
(c) Cover the casualty with insulating material or blankets.
(d) Avoid unnecessary movement from the casualty.
NOTE: If far from a medical treatment facility and the situation and facilities permit, immerse the casualty in a tub of 104-108° Fahrenheit (° F) water. Avoid re-warming with intense sources of heat (campfire).
CAUTION: Do not give the casualty alcohol or caffeine drinks.
(e) If casualty is conscious, slowly give high caloric sweet warm fluids.
(f) Wrap the casualty from head to toe.
(g) Evacuate the casualty lying down.
(2) Severe.
(a) Cut away wet clothing and replace it with dry clothing.
(b) Maintain the airway. (See task 081-000-0004.)
NOTE: Do not use artificial airways or suctioning devices.
CAUTION: Do not hyperventilate the casualty. Keep the rate of artificial ventilation at approximately 8 to 10 per minute.
_1_ Administer oxygen.
CAUTION: Do not hyerventilate the casualty. Keep the rate of artificial ventilation as approximately 8 to 10 per minute.
_2_ Assist with ventilation if the casualty's respiration rate is less than five per minute.
NOTE: Do not use artificial airways or suctioning devices.
(c) Initiate an intravenous (IV) infusion of any crystalloid fluid, warmed up to 109 degrees. Do not infuse cold IV fluids.
(d) Evacuate the casualty.
Chapter 3: Skill Level Tasks 15 April 2016 STP 8-68B13-SM-TG 3-9
NOTE: The treatment of moderate hypothermia is aimed at preventing further heat loss and rewarming the casualty as rapidly as possible. Re-warming a casualty with severe hypothermia is critical to saving his life, but the kind of care re-warming requires is nearly impossible to carry out in the field. Evacuate the casualty promptly to a medical treatment facility. Use stabilizing measures en route.
d. Immersion syndrome.
CAUTION: Never massage the skin. After re-warning the affected part, it may become swollen, red, and hot. Blisters usually form due to circulation return.
(1) Dry the affected part immediately and gradually re-warm it in warm air.
(2) Protect the affected part from trauma and secondary infection.
(3) Fingers and toes should be seaparated and protected with a dry sterile gauze.
(4) Elevate the affected part.
(5) Evacuate the casualty as soon as possible.
e. Snow blindness. Cover the eyes with a dark cloth and evacuate the casualty to a medical treatment facility.
3. Record treatment.
Evaluation Preparation: You must evaluate the students on their performance of this task in a field condition related to the actual task.
Performance Measures GO NO GO
1 Recognized the signs and symptoms of cold injuries.
2 Treated the cold injury.
3 Recorded treatment.
Evaluation Guidance: Score each Soldier according to the performance measures in the evaluation guide. Unless otherwise stated in the task summary, the Soldier must pass all performance measures to be scored GO. If the Soldier fails any step, show what was done wrong and how to do it correctly.
3-10 STP 8-68B13-SM-TG 15 April 2016
Chapter 3: Skill Level Tasks
References Required Related None None
Ventilate a Patient with a Bag-Valve-Mask System
081-000-0035
Conditions: You are in a medical contemporary operational environment. You have an unconscious patient requiring ventilation. You have a bag-valve-mask (BVM) system, oropharyngeal airway (OPA), supplemental oxygen, a Department of Defense (DD) Form 1380, Tactical Combat Casualty Care (TCCC) Card, or automated health record, and pen available. You have performed a patient care hand wash. You are not in a chemical, biological, radiological, nuclear (CBRN) environment.
Standards: Ventilate the patient with a BVM system until spontaneous breathing returns, until a normal rate and depth of respiration is achieved, or until directed to stop by a medical officer.
CAUTION: All body fluids should be considered potentially infectious. Always observe body substance isolation (BSI) precautions by wearing gloves and eye protections as a minimal standard of protection.
Performance Steps:
1. Position yourself at the top of the patient's head.
2. Open the patient's airway using the head-tilt, chin-lift or jaw thrust maneuver. (See task 081-000-0004.)
NOTE: An operational BVM should have a self-refilling bag, a non-rebreathing outlet valve, oxygen reservoir, a one-way inlet valve, and a transparent face mask.
3. Insert an appropriate airway adjunct.
NOTE: Do not attempt to use an oropharyngeal airway (OPA) on a conscious or semiconscious patient. If the patient is unresponsive an OPA or a nasopharyngeal airway (NPA) should be inserted to help maintain a patent airway.
4. Assemble the BVM system, selecting the correct size of mask for the patient.
NOTE: Ensure the bag is operational. An operational BVM should have a self-refilling bag, a non-rebreathing outlet valve, oxygen reservoir and a transparent face mask.
5. Hold mask in place over patient's mouth and nose.
a. Position thumb over the part of the mask covering the bridge of the nose and index finger over the part covering the cleft above the chin.
b. Seal the mask firmly on the face by pushing down with the thumb and index finger while pulling up on the mandible with the other finger to maintain the head-tilt, chin-lift maneuver.
6. Ventilate the patient using the one-rescuer method, if appropriate.
a. Maintain a leak proof mask seal with one hand. Use firm pressure to hold the mask in position and to maintain a seal on the patient's face.
b. Squeeze the bag with one hand while observing the chest rise to make certain the lungs are being inflated effectively.
Chapter 3: Skill Level Tasks 15 April 2016 STP 8-68B13-SM-TG 3-11
NOTE: The bag may alternatively be compressed against your body or forearm to deliver a greater tidal volume to the patient or help with hand fatigue.
c Ventilate patient for approximately one minute and then connect to oxygen (if available) to increase the percentage of oxygen from 55 percent (%) to approximately 90-100%.
d. Continue squeezing the bag once every 5 to 6 seconds (10-12 breaths/minute), for an adult patient.
7. Ventilate the patient using the two-rescuer method, if appropriate.
a. Hold the mask in place with two hands.
(1) Place your little, ring, and middle fingers along the mandible.
(2) Place your thumb on the upper portion of the mask above the valve connection.
(3) Place your index finger on the lower portion of the mask under the valve connection.
(4) With your other hand, duplicate the above steps (mirror image) to achieve a leak proof seal.
b. Have your assistant continue squeezing the bag with two hands until the chest rises; squeeze once every 5 to 6 seconds (10-12 breaths/minute), for an adult.
NOTE: Oxygen should be connected to the reservoir (if available) at 15 lpm. This will increase the oxygen from 55% to approximately 90-100%. Ventilations should not be interrupted for more than 30 seconds at any time.
8. Observe for rise and fall of the patient's chest.
a.If the chest does not rise, reposition the airway.
b.If the chest rises and falls, continue with step 10.
9. Continue ventilations.
a. Observe for spontaneous respirations
b. Periodically check the pulse.
c.Observe for vomiting or secretions in or around the mouth or mask.
10. Document all medical care.
Evaluation Preparation: You must evaluate the students on their performance of this task in a field condition related to the actual task.
Performance Measures
1 Postioned themselves at the top of the patient's head.
2 Opened the patient's airway using the head-tilt, chin-lift or jaw thrust maneuver. (See task 081-000-0004.)
3. Inserted appropriate airway adjunct.
4. Assembled the BVM system, selecting the correct size of mask for patient.
5. Held mask in place over patient's mouth and nose.
Chapter 3: Skill Level Tasks 3-12 STP 8-68B13-SM-TG 15 April 2016
NO GO
GO
6 Ventilated the patient using the one-rescuer method, if appropriate.
7 Ventilated the patient using the two-rescuer method, if appropriate.
8. Observed for rise and fall of the patient's chest.
9. Continued ventilations.
10. Documented all medical care.
Evaluation Guidance: Score each Soldier according to the performance measures in the evaluation guide. Unless otherwise stated in the task summary, the Soldier must pass all performance measures to be scored GO. If the Soldier fails any step, show what was done wrong and how to do it correctly.
References
Required
DD Form 1380
Related
None
Chapter 3: Skill Level Tasks 15 April 2016 STP 8-68B13-SM-TG 3-13
GO NO GO
Performance Measures
Apply a Hemostatic Dressing
081-000-0099
Conditions: You have encountered a casualty who is bleeding externally. The wound is either not amenable to a tourniquet or a tourniquet is in place and alternate means of hemorrhage control are necessary. You will need a roll of combat gauze, cotton gauze (either wad or rolled) emergency bandage or elastic bandage, 3 inch tape, pen and Department of Defense (DD) Form 1380, Tactical Combat Casualty Care (TCCC) Card You have taken body substance isolation precautions and are not in a CBRN environment.
Standards: Apply a hemostatic dressing to control bleeding without causing further harm the casualty.
Performance Steps:
1. Remove all clothing or equipment to obtain access to the wound.
2. Identify the point of bleeding within the wound.
a. Remove any pooled blood from the wound cavity with your hand or a wad of cotton gauze.
b. Locate the bleeding vessel(s).
3. Pack combat gauze directly over the source of bleeding.
4. Pack the wound with the entire dressing. More than one combat gauze may be required.
5. Apply direct pressure for 3 minutes.
a. Periodically check the dressing to ensure proper placement and bleeding control.
b.If the bandage becomes completely soaked through and there is still active bleeding, pack a second combat gauze into the wound.
6. Bandage wound to secure the dressing in place.
a.If the wound cavity is deep, apply cotton gauze (either wad or rolled) over the dressing.
b. Secure dressing in place with either an emergency bandage or an elastic bandage.
7. Secure the bandage in place with tape.
8. Document treatment on the TCCC
Evaluation Preparation: You must evaluate the students on their performance of this task in a field condition related to the actual task.
Performance Measures
1 Removed all clothing or equipment to obtain access to the wound.
2 Identified the point of bleeding within the wound.
3 Packed combat gauze directly over the source of bleeding.
GO NO GO
Chapter 3: Skill Level Tasks 3-14 STP 8-68B13-SM-TG 15 April 2016
Performance Measures
4 Packed the wound with the entire dressing.
5 Applied direct pressure for 3 minutes.
6 Bandaged wound to secure the dressing in place.
7 Secured the bandage in place with tape.
8 Documented treatment on the TCCC
Evaluation Guidance: Score each Soldier according to the performance measures in the evaluation guide. Unless otherwise stated in the task summary, the Soldier must pass all performance measures to be scored GO. If the Soldier fails any step, show what was done wrong and how to do it correctly.
References
Required
DD Form 1380
Related
None
Chapter 3: Skill Level Tasks 15 April 2016 STP 8-68B13-SM-TG 3-15
GO NO GO
Treat a Casualty for a Heat Injury
081-000-0016
Conditions: A casualty is suffering from a heat injury. All other more serious injuries have been assessed and treated. You will need water, a thermometer, intravenous (IV) administration set, Ringer's Lactate or sodium chloride, ice sheets, if available, stethoscope, sphygmomanometer, and a automated record or Department of Defense (DD) Form 1380, Tactical Combat Casualty Care (TCCC) Card
Standards: Provide the correct treatment for the heat injury without causing further injury to the casualty.
CAUTION: All body fluids should be considered potentially infectious. Always observe body substance isolation (BSI) precautions by wearing gloves and eye protection as a minimal standard of protection.
Performance Steps:
1. Identify the type of heat injury based upon the following characteristic signs and symptoms:
a. Heat cramps muscle cramps of the arms, legs, and/or abdomen.
b. Heat exhaustion.
(1) Often
(a) Profuse sweating and pale (or gray), moist, cool skin.
(b) Headache.
(c) Weakness.
(d) Dizziness.
(e) Loss of appetite or nausea.
(f) Normal or slightly elevated body temperature; or as high as 104 °F (rarely).
(2) Sometimes--
(a) Heat cramps.
(b) Nausea (with or without vomiting).
(c) Urge to defecate.
(d) Chills.
(e) Rapid breathing.
(f) Tingling sensation of the hands and feet.
(g) Confusion.
NOTE: A key to distinguishing heat stroke from other heat disorders is the elevation of body temperature and altered mental status. Any casualty warm to the touch with an altered mental status should be suspected of having heat stroke and treated aggressively.
c Heat stroke.
(1) Rapid onset with the core body temperature rising to above 106 °F within 10 to 15 minutes.
(2) Hot, dry skin.
(3) Headache.
NOTE: Early in the progression of heat stroke, the skin may be moist or wet.
Chapter 3: Skill Level Tasks 3-16 STP 8-68B13-SM-TG 15 April 2016
(4) Dizziness.
(5) Headache.
(6) Nausea.
(7) Confusion.
(8) Weakness.
(9) Loss of consciousness.
(10) Possible seizures.
(11) Pulse and respirations are weak and rapid.
2. Provide the proper treatment for the heat injury.
a. Heat cramps.
(1) Move the casualty to a cool shaded area, if possible.
(2) Loosen the casualty's clothing unless he is in a chemical environment.
(3) Rest the cramping muscles.
(4) Oral rehydration with water or electrolyte solution.
(5) Evacuate the casualty if the cramps are not relieved after treatment.
NOTE: Do not give salt tablets.
b. Heat exhaustion.
(1) Conscious casualty.
(a) Move the casualty to a shaded area, if possible.
(b) Loosen and/or remove the casualty's clothing and boots unless he is in a chemical environment.
(c) Pour water on the casualty and fan him, if possible.
(d) Oral rehydration unless nauseated. If nauseated, initiate intravenous (IV) hydration.
(e) Place casualty in an ice sheet if available.
(f) Elevate the casualty's legs.
(g) Provide oxygen to the casualty, if not already done as part of the initial assessment.
(2) An unconscious casualty or one who is nauseated, unable to retain fluids, or whose symptoms have not improved after 20 minutes.
(a) Cool the casualty as in step 2b(1).
(b) Initiate an IV infusion of ringer's lactate or sodium chloride.
(c) Evacuate the casualty.
(d) Transport the casualty on his side if they are nauseated.
CAUTION: Heat stroke is a medical emergency. If the casualty is not cooled rapidly, the body cells, especially the brain cells, are literally cooked; irreversible damage is done to the central nervous system. The casualty must be evacuated to the nearest medical treatment facility immediately
c. Heat stroke.
(1) Conscious casualty.
(a) Cool the casualty with any means available, even before taking the clothes off.
(b) Remove the casualty's outer garments and/or protective clothing.
(c) Lay the casualty down and elevate his legs.
(d) Immerse the casualty in cold water, or use an ice sheet if available.
(e) Ice packs in groin, axillae and around the neck, if available.
Chapter 3: Skill Level Tasks 15 April 2016 STP 8-68B13-SM-TG 3-17
Chapter 3: Skill Level Tasks
(f) Provide supplemental oxygen, if available.
(g) Initiate an IV infusion of Ringer's lactate or sodium chloride.
(h) Evacuate the casualty.
(2) Unconscious casualty or one who is vomiting or unable to retain oral fluids.
(a) Cool the casualty as in steps 2c(1a-f) but give nothing by mouth.
(b) Initiate an IV.
(c) Evacuate the casualty.
3. Record the treatment given. (See task 081-000-0013.)
Evaluation Preparation: You must evaluate the students on their performance of this task in a field condition related to the actual task.
Performance Measures
1. Identified the type of heat injury.
2 Provided the proper treatment for the heat injury.
3 Recorded the treatment given. (See task 081-000-0013 )
GO NO GO
Evaluation Guidance: Score each Soldier according to the performance measures in the evaluation guide. Unless otherwise stated in the task summary, the Soldier must pass all performance measures to be scored GO. If the Soldier fails any step, show what was done wrong and how to do it correctly.
3-18 STP 8-68B13-SM-TG 15 April 2016
References Required Related DD Form 1380 None
Administer External Chest Compressions
081-000-0018
Conditions: You have an unresponsive, apneic and pulseless casualty. You will need a pocket mask with one-way-valve, oxygen, bag-valve-mask, pen and Standard Form (SF) 600, Medical Record - Chronological Record of Medical Care. Another Soldier who is cardiopulmonary resuscitation (CPR) qualified, may arrive and be available to assist you, while you are performing single rescuer CPR. You have taken appropriate body substance isolation precautions and are not in a chemical, biological, radiological, and nuclear environment.
Standards: Administer CPR until the pulse is restored or until you are relieved by other competent person(s), are too exhausted to continue, the casualty is pronounced dead by an authorized person.
CAUTION: All body fluids should be considered potentially infectious. Always observe body substance isolation (BSI) precautions by wearing gloves and eye protection as a minimal standard of protection.
Performance Steps:
1. Establish unresponsiveness (gently shake the casualty, asking, "Are you OK?")
a.Assess the victim for a response and look for normal or abnormal breathing.
NOTE: If there is no response and no breathing or no normal breathing (i.e. only gasping), shout for help.
b.Tap the casualty's shoulder and shout, "Are you all right?"
c.If the casualty is unresponsive, continue with step 2.
d.If responsive, continue evaluating the casualty.
2. Activate the Emergency Response System.
3. Check for signs of circulation.
a. Attempt to palpate the casualty's carotid pulse (do not take more than 10 seconds).
b.If the casualty has a carotid pulse but is not breathing, perform rescue breathing (see task 081-000-0019).
c.If you do not definitely feel a pulse within 10 seconds, perform 5 cycles of compressions and breaths (30:2 ratio) starting with compressions (C-chest compression, Aairway maintenance, and B-breathing sequence).
4. Begin chest compressions.
a. Ensure that the casualty is positioned on a hard, flat surface, in a supine position. Kneel next to the casualty.
NOTE: If you suspect the casualty has a head or neck injury, try to keep the head, neck and torso in a line when rolling the casualty to a face up position.
b. Position yourself at the casualty's side.
c. Place the heel of one hand on the center of the casualty's chest on the lower half of the breastbone.
Chapter 3: Skill Level Tasks 15 April 2016 STP 8-68B13-SM-TG 3-19
NOTE: You may either extend or interlace your fingers but keep your fingers off the casualty's chest.
d. Put the heel of your other hand on top of the first hand.
NOTE: You may either extend or interlace your fingers, but keep your fingers off of the casualty's chest.
e. Straighten your arms and lock your elbows and position your shoulders directly over your hands.
f. Give 30 compressions.
(1) Push hard and fast.
(2) Press down at least 2 inches (5 centimeter, or “cm”) with each compression.
NOTE: For each chest compression, make sure you push straight down on the casualty's breast bone. This will require hard work. Adequate depth must be attained for at least 23 of the 30 compressions.
g. Deliver compressions in a smooth fashion at a rate of at least 100 per minute, (i.e. an adequate rate would be 30 compressions in 18 seconds or less).
h. At the end of each compression, make sure you allow the chest to recoil (re-expand) completely.
CAUTION: Do not move the casualty while CPR is in progress unless the casualty is in a dangerous environment, or if you cannot perform CPR effectively in the casualty's present position or location.
i. Minimize interruptions.
NOTE: Do not remove the heel of your hand from the casualty's chest or reposition your hands between compressions.
5. Open the airway. (See task 081-COM-1023.)
NOTE: There are two methods of opening the airway to provide breaths, the head tilt-chin lift or the Jaw Thrust.
6.Give two full rescue breaths.
a. Move quickly to the casualty's head and lean over his mouth.
b.Give two full rescue breaths (each lasting 1 second).
NOTE: Deliver air over one second to make the casualty's chest rise.
7. Continue to alternate between chest compressions and ventilations (30:2) until:
a. The casualty is revived.
b. You are too exhausted to continue.
c. You are relieved by another health care provider.
d.The casualty is pronounced dead by an authorized person.
e. A second rescuer states, "I know CPR," and joins you in performing two-rescuer CPR.
8. Limit pulse checks.
Chapter 3: Skill Level Tasks 3-20 STP 8-68B13-SM-TG 15 April 2016
9 Perform two-rescuer CPR, if applicable.
NOTE: When performing two-rescuer CPR, the rescuers must change position every 2 minutes to avoid fatigue and increase the effectiveness of compressions.
a.Compressor: Give 30 chest compressions at the rate of 100 per minute.
b. Compress the chest at least 2 inches (5 centimeter).
c. Allow the chest to recoil competely after each compression.
d. Minimize interruptions in compressions, (limit any interruptions to less than 10 seconds).
e. Count compressions aloud.
f. Switch duties with the second rescuer every 5 cycles or about 2 minutes, taking less than 5 seconds to switch.
g. Ventilator: Maintain an open airway. (See task 081-COM-1023.)
CAUTION: Do not push on the abdomen. If the casualty vomits, turn the casualty on his side, clear the airway (suction), and the continue CPR (If you suspect trauma, logroll the patient as a unit, clear the airway (suction), and then continue CPR).
h.Give breaths, watching for chest rise and avoiding excessive ventilation.
NOTE: If signs of gastric distension are noted, do the following: 1. Recheck and reposition the airway. 2. Watch for rise and fall of the chest. 3. Ventilate the casualty only enough to cause the chest to rise.
If the casualty is intubated, the ratio of breaths to compressions becomes asynchronous. Give 100 compressions per minute with a ventilation rate of approximately 10 to 12 per minute.
i. Encourage the first rescuer/compressor to perform compressions that are deep enough and fast enough to allow complete chest recoil between compressions.
j. Switch duties with the second rescuer every 5 cycles or about 2 minutes taking less than 5 seconds to switch.
10. Continue to perform CPR as stated in the task standard.
NOTE: The rescuer doing rescue breathing should recheck the carotid pulse every 3 to 5 minutes.
CAUTION: During evacuation, CPR or rescue breathing should be continued en route if necessary.
11. Continue evaluating the casualty when the pulse and breathing are restored. If the casualty's condition permits, place him in the recovery position. (See task 081-COM-1023.)
12. Document the procedure on the SF 600.
Evaluation Preparation: You must evaluate the students on their performance of this task in a field condition related to the actual task.
Chapter 3: Skill Level Tasks 15 April 2016 STP 8-68B13-SM-TG 3-21
1. Established unresponsiveness.
2. Activated the Emergency Response System.
3. Checked for signs of circulation.
4. Began chest compressions.
5. Opened the airway.
6. Gave two full rescue breaths.
7. Continued to alternate between compressions and ventilations (30:2).
8. Limited pulse checks.
9. Performed two-rescuer CPR if applicable.
10. Continued to perform CPR as stated in the task standard.
11. Continued to evaluate the casualty when the pulse and breathing was restored.
12. Documented the procedure on the SF 600.
Evaluation Guidance: Score each Soldier according to the performance measures in the evaluation guide. Unless otherwise stated in the task summary, the Soldier must pass all performance measures to be scored GO. If the Soldier fails any step, show what was done wrong and how to do it correctly.
References
Required
Related SF 600 STP 21-1-SMCT
3-22 STP 8-68B13-SM-TG 15 April 2016
GO NO GO
Chapter 3: Skill Level Tasks
Performance Measures
Initiate Treatment for a Respiratory Emergency
081-000-0028
Conditions: You have a conscious patient with a respiratory emergency. You will need a stethoscope, pulse oximeter, oxygen tank, nasal cannula, oxygen mask and tubing, hand held metered dose inhaler (MDI) with spacer and the patient's medical records or a Department of Defense (DD) Form 1380, Tactical Combat Casualty Care (TCCC) Card You are not in a chemical, biological, radiological, nuclear (CBRN) environment.
Standards: Initiate treatment for the respiratory emergency without causing further harm to the patient.
Performance Steps:
1. Examine the patient.
CAUTION: A patient experiencing respiratory distress can rapidly progress to full arrest. Always be prepared to utilize advanced airway procedures
a. Assess the airway and open it, if necessary. (See task 081-000-0004.)
(1) Ask the patient a question requiring more than a yes or no answer.
(2) Note whether or not the patient can speak in full sentences.
(3) Look for the presence of drooling that may indicate a partial or complete airway obstruction.
b. Assist with artificial ventilations if respiratory effort and rate are inadequate.
(1) Look for the rise and fall of the chest during inspiration and expiration.
(2) Listen for the presence of noisy respirations (e.g., stridor, wheezing).
c. Apply supplemental oxygen by mask or nasal cannula.
NOTE: Any patient complaining of difficulty breathing should receive supplemental oxygen.
d. Place the patient in the position of comfort.
NOTE: Most patients experiencing difficulty breathing prefer to remain in a seated position.
e. Obtain a complete set of vital signs to include pulse oximetry, if available.
2. Perform a focused physical examination.
a. Listen to the anterior and posterior lung fields with the stethoscope.
b. Look at the chest and abdomen and note the presence of any retractions.
c. Check the skin for the presence of cyanosis.
d. Check the lower extremities for the presence of edema.
3. Obtain a focused history.
a. Ask the patient if there is an existing condition such as asthma.
b. Ask the patient if he is taking any medications.
c.Question the patient about allergies to medications.
d. Ask the patient if difficulty breathing was of sudden or gradual onset.
4. Assist the patient in using a metered dose inhaler.
Chapter 3: Skill Level Tasks 15 April 2016 STP 8-68B13-SM-TG 3-23
NOTE: This step may only be performed if the patient has an inhaler prescribed to him.
a. Perform the five rights of medication usage.
b Have the patient exhale deeply.
c. Have the patient place his lips around the opening and press the inhaler to activate the spray as he inhales deeply.
d. Instruct the patient to hold his breath as long as possible before exhaling.
e. Repeat steps 4b through 4d.
5. Document the procedure.
6. Transport the patient.
Evaluation Preparation: You must evaluate the students on their performance of this task in a field condition related to the actual task.
Performance Measures
1 Examined the patient.
2 Performed a focused physical examination.
3 Obtained a focused history.
4 Assisted the patient in using a metered dose inhaler.
5 Documented the procedure.
6 Transported the patient.
Evaluation Guidance: Score each Soldier according to the performance measures in the evaluation guide. Unless otherwise stated in the task summary, the Soldier must pass all performance measures to be scored a GO. If the Soldier fails any step, show what was done wrong and how to do it correctly.
References
3-24 STP 8-68B13-SM-TG 15 April 2016
Chapter 3: Skill Level Tasks
GO NO GO
Required Related DD Form 1380 None
Operate an Automated External Defibrillator
081-000-0033
Conditions: You have a patient in ventricular fibrillation or pulseless ventricular tachycardia and is receiving basic cardiac life support from a single rescuer. You will need an automated external defibrillator (AED), an airway adjunct, a bag-valve-mask (BVM) system and oxygen. You are not in a chemical, biological, radiological, nuclear (CBRN) environment.
Standards: Operate the AED following the voice prompt, visual prompts and apply Cardiopulmonary Resuscitation until emergency help arrives. The operation of the AED must include all steps in sequence and without electrocuting the bystanders or yourself.
WARNING: If the patient has sustained trauma before collapse, do not attach the AED
Performance Steps:
1. Take appropriate body substance isolation (BSI) precautions.
2. Briefly question the rescuer about the arrest event.
a. How long has the patient been in arrest?
b. How long has CPR been in progress?
c. Do you know two man CPR?
3. Direct rescuer to stop CPR.
4. Determine need for an AED.
a.Is patient unresponsive to verbal and painful stimuli?
b.Is patient apneic?
c.Is patient pulseless?
5. Direct rescuer to continue CPR.
6. Turn on AED.
WARNING: Do nto attach child pads to an adult patientt.
7. Attach the pads to patient's bare chest.
NOTE: Follow the AED manufacturer's guidelines on attaching pads to patient and turning on the machine.
a. The sternum pad is placed on the right upper border of the sternum on the anterior chest wall. The top edge should be just below the clavicle. This is the negative electrode.
b.The apex pad is placed over the left lower ribs at the anterior axillary line. This is the positive electrode.
8. Direct rescuer to stop CPR.
WARNING: The AED will analyize any detectable rythm. If anyone is touching the patient, the machine may not recommend a shock.
Chapter 3: Skill Level Tasks 15 April 2016 STP 8-68B13-SM-TG 3-25
9. Ensure everyone and everything is clear of the patient.
a.Gives the order "All Clear".
b. Visually checks to ensure no one is in contact with the patient.
c. Visually checks to ensure nothing is in direct contact with the electrodes such as IV lines, monitor wires or a bed frame.
10. Initiate analysis of the rythm.
NOTE: Certain AEDs have an analyze button that will need to be pressed to analyze the rhythm and others will analyze automatically. Refer to the manufacturer's instructions for the type of AED used.
CAUTION: Do not defibrillate if anyone is touching the patient or the patient is wet (dry the patient), touching metal, (move the patient), or wearing a medication patch (remove the patch with a gloved hand).
11. Press the shock button if AED indicates shock is advised.
a.Gives the order "All Clear."
b. Visually checks to ensure no one is in direct contact with the patient.
c. Visually checks to ensure no one is in direct contact with any electrically conductive material touching the patient such as IV lines, monitor cables or a bed frame.
12. Direct resumption of CPR.
13. Gather additional information about the arrest event.
14.Confirm effectiveness of CPR.
a. Check pulse during compressions.
b. Look for rise and fall of chest during ventilations.
15. Inserts or direct insertion of a simple airway adjunct.
NOTE: Steps 15 and 16 can be done at any time during the task.
16. Connect oxygen to BVM and turn flow meter to 15 lpm.
17. Ventilate or direct assistant to resume ventilations on the patient.
18. Ensure CPR continues without unnecessary interruptions.
19. Reanalyze rhythm after a full cycle of CPR (approximately 2 minutes), ensure patient is clear.
20. Repeat defibrillator steps 8-12.
21. Transport the patient to a higher level of medical care.
NOTE: Verbalize transportation of the patient.
Evaluation Preparation: You must evaluate the students on their performance of this task in a field condition related to the actual task.
Chapter 3: Skill Level Tasks 3-26 STP 8-68B13-SM-TG 15 April 2016
1 Took appropriate body substance isolation precautions.
2 Briefly questioned the rescuer about the arrest event.
3. Directed rescuer to stop CPR.
4. Determined need for an AED.
5. Directed rescuer to continue CPR.
6. Turned on AED.
7. Attached pads to patient's bare chest.
8. Directed rescuer to stop CPR.
9 Ensured everyone and everything is clear of the patient.
10 Initiated analysis of the rythm.
11 Pressed the shock button if AED indicates shock is advised.
12 Directed resumption of CPR
13 Gathered additional information about arrest event.
14 Confirmed effectiveness of CPR.
15 Inserted or directed insertion of an airway adjunct.
16 Connected oxygen to BVM and turn flow meter to 15 lpm.
17 Ventilated or directed assistant to resume ventilations on the patient.
18 Ensured CPR continued without unnecessary interruptions.
19 Reanalyzed patient rhythm after full cycle of CPR (approximately 2 minutes), ensuring patient is clear.
20 Repeated defibrillator sequence steps 8-12.
21 Transported the patient to a higher level of medical care.
Evaluation Guidance: Score each Soldier according to the performance measures in the evaluation guide. Unless otherwise stated in the task summary, the Soldier must pass all performance measures to be scored GO. If the Soldier fails any step, show what was done wrong and how to do it correctly.
Chapter 3: Skill Level Tasks 15 April 2016 STP 8-68B13-SM-TG 3-27
GO NO GO
Performance Measures
Chapter 3: Skill Level Tasks
3-28 STP 8-68B13-SM-TG 15 April 2016 References Required Related None None
Apply an Elastic Bandage
081-000-0110
Conditions: You are in a medical treatment facility. You have a patient needing an elastic bandage applied. You will need roller bandages, adhesive tape, scissors, and an automated record or Standard Form (SF) 600, Medical Record - Chronological Record of Medical Care.
Standards: Apply an elastic bandage without causing any further injury to the patient.
CAUTION: All body fluids should be considered potentially infectious. Always observe body substance isolation (BSI) precautions by wearing gloves and eye protection as a minimal standard of protection.
Performance Steps:
1. Select the appropriate bandaging material for the injury.
NOTE: The width of the bandage to use is determined by the size of the part to be covered. As a general rule, the larger the part or area, the wider the bandage.
a. Use gauze or a flex roller for bleeding injuries of the forearm, upper arm, thigh, and lower leg.
b. Use a flexible roller gauze bandage for bleeding injuries of the hand, wrist, elbow, shoulder, groin, knee, ankle, and foot.
c. Use an elastic roller bandage for amputations, arterial bleeding, sprains, and torn muscles:
(1) Hand - 2 inch bandage.
(2) Lower arm, lower leg, and foot - 3 inch bandage.
(3) Thigh and chest - 4 to 6 inch bandage.
NOTE: Elastic roller bandages may be used wherever pressure support or restriction of movement is needed. They should not be used to secure dressings.
2. Prepare the patient for bandaging.
a. Position the body part to be bandaged in a normal resting position (position of function).
NOTE: Bending a bandaged joint changes the pressure of the bandage in places of stress (elbow, knee, and ankle).
b. Ensure that the body part to be bandaged is clean and dry.
c. Place pads over bony places or between skin surfaces to be bandaged (such as fingers and armpits).
CAUTION: Do not wrap too tightly. The roller bandage may act as a tourniquet on an injured limb, causing further damage
3. Apply the anchor wrap.
a. Lay the bandage end at an angle across the area to be bandaged.
b. Bring the bandage under the area, back to the starting point, and make a second turn.
Chapter 3: Skill Level Tasks 15 April 2016 STP 8-68B13-SM-TG 3-29
c Fold the uncovered triangle of the bandage end back over the second turn.
d.Cover the triangle with a third turn, completing the anchor.
4. Apply the bandage wrap to the injury.
a. Use a circular wrap to end other bandage patterns, such as a pressure bandage, or to cover small dressings.
b. Use a spiral wrap for a large cylindrical area such as a forearm, upper arm, calf, or thigh. The spiral wrap is used to cover an area larger than a circular wrap can cover.
c. Use a spiral reverse wrap to cover small to large conical areas, for example, from ankle to knee.
d. Use a figure eight wrap to support or limit joint movement at the hand, elbow, knee, ankle, or foot.
e. Use a spica wrap (same as the figure eight wrap) to cover a much larger area such as the hip or shoulder.
f. Use a recurrent wrap for anchoring a dressing on fingers, the head, or on a stump.
NOTE: Bandage width depends on the site: 1 inch wide for fingers and 3, 4, or 6 inches wide for the stump or head.
5. Check circulation after application of the bandage.
a. Check the pulse distal to the injury.
b. Check for capillary refill (<2 seconds is normal), if applicable.
c.Inspect the skin below the bandaging for discoloration.
d. Ask the patient if any numbness, coldness, or tingling sensations are felt in the bandaged part.
e. Remove and reapply the bandage, if necessary.
6. Check for irritation.
a. Ask the patient if the bandage rubs.
b. Check for bandage wrinkles near the skin surface.
c. Check for red skin or sores (ulcers) when the bandage is removed.
d. Remove and reapply the bandage, if necessary.
7. Elevate injured extremities to reduce swelling (edema) and control bleeding, if appropriate.
8. Record the treatment given.
Evaluation Preparation: You must evaluate the students on their performance of this task in a field condition related to the actual task.
Performance Measures
1 Selected the appropriate bandaging material for the injury.
2. Prepared the patient for bandaging.
3. Applied the anchor wrap.
4. Applied the bandage wrap to the injury.
Chapter 3: Skill Level Tasks 3-30 STP 8-68B13-SM-TG 15 April 2016
NO GO
GO
5 Checked circulation after application of the bandage.
6 Checked for irritation.
7. Elevated the injured extremities to reduce swelling (edema) and control bleeding, if appropriate.
8. Recorded the treatment given.
Evaluation Guidance: Score each Soldier according to the performance measures in the evaluation guide. Unless otherwise stated in the task summary, the Soldier must pass all performance measures to be scored GO. If the Soldier fails any step, show what was done wrong and how to do it correctly.
References
Chapter 3: Skill Level Tasks 15 April 2016 STP 8-68B13-SM-TG 3-31
GO NO GO
Performance Measures
Required Related SF 600 None
Measure a Patient's Pulse Rate
081-000-0009
Conditions: Your location is in a medical treatment facility, Role I thru Role IV. You have a patient requiring vital signs. You have a watch with a second hand, pen and an automated record or Standard Form (SF) 600, Medical Record - Chronological Record of Medical Care. You perform a patient care hand wash. You are not in a chemical, biological, radiological, nuclear (CBRN) environment.
Standards: Assess the patient's pulse rate, counting the exact rate, and alerting supervisor on abnormal quality and rate.
CAUTION: All body fluids should be considered potentially infectious. Always observe body substance isolation (BSI) precautions.
Performance Steps:
1. Position the patient so the pulse site is accessible.
2. Palpate (feel) the pulse site.
a. Place the tips of your index and middle fingers on the pulse site.
NOTE: Do not use your thumb to palpate a pulse as your thumb has its own pulse.
b. Apply moderate pressure with your fingers to palpate the pulse.
NOTE: In responsive patients, older than 1 year, you should palpate the radial pulse at the wrist. In unresponsive patients, older than 1 year, you should palpate the carotid pulse at the neck. In patients less than 1 year of age, palpate the brachial pulse.
3. Count the number of pulses felt in a 30 second period and multiply by two.
NOTE: A pulse that is weak, difficult to palpate, or irregular should be palpitated and counted for a full minute. The normal pulse rates (at rest) are as follows:
Adults: 60-100 beats/minute (min).
Children (1-6 years) 70-120 beats/min.
Infants: (6-12 months): 80-140 beats/min.
Infants: (0-5 months): 90-140 beats/min.
Pulse rates in an adult patient that exceed 100 beats/min are described as tachycardia.
Pulse rates less than 60 beats/min are described as bradycardia. Pulse rates can vary from patient to patient. In well-conditioned athletes or patients taking certain heart medications, the pulse rate may be considerably lower. In these adult patients, bradycardia may be considered normal.
4. Evaluate the pulse rhythm (regularity):
a. Regular rhythm.
(1) Usually easy to find.
(2) Has a regular rate and rhythm.
(3) Varies with the individual.
b. Irregular rhythm (any change from a regular beating pattern).
Chapter 3: Skill Level Tasks 3-32 STP 8-68B13-SM-TG 15 April 2016
NOTE: If the pulse is irregular or intermittent, you should palpate a second pulse at the carotid or femoral site. All patients presenting with an irregular pulse rhythm should be referred to a medical officer.
5. Evaluate the pulse strength:
a. Strong (full) pulse.
(1) Usually easy to find.
(2) Beats evenly and forcefully.
b. Bounding (stronger than normal) pulse.
(1) Easy to find.
(2) Exceptionally strong heartbeats that make the arteries difficult to compress.
c. W eak (thready) pulse.
(1) Usually difficult to find.
(2) Weak and thin.
6. Record the rate, rhythm, strength, and any significant deviations from normal on the appropriate medical forms, according to local protocols and SOP.
7. Report any significant pulse abnormalities to your supervisor immediately.
Evaluation Preparation: You must evaluate the students on their performance of this task in a field condition related to the actual task.
Performance Measures
1. Positioned the patient so the pulse site was accessible.
2. Palpated the pulse site.
3 Counted and evaluated the pulse rate.
4 Evaluated the pulse rhythm.
5 Evaluated the pulse strength.
6 Recorded the rate, rhythm, strength, and any significant deviations from normal on the appropriate medical forms.
7 Reported any significant pulse abnormalities to the supervisor immediately.
Evaluation Guidance: Score each Soldier according to the performance measures in the evaluation guide. Unless otherwise stated in the task summary, the Soldier must pass all performance measures to be scored GO. If the Soldier fails any step, show what was done wrong and how to do it correctly.
Chapter 3: Skill Level Tasks 15 April 2016 STP 8-68B13-SM-TG 3-33
GO
GO NO
References Required Related SF 600 None
Measure a Patient's Blood Pressure
081-000-0010
Conditions: You are in a medical contemporary operational environment. You have a patient requiring vital signs. You have a stethoscope, a sphygmomanometer, pen and an automated record or Standard Form (SF) 600, Medical Record - Chronological Record of Medical Care. You perform a patient care hand wash. You are not in a chemical, biological, radiological, nuclear (CBRN) environment.
Standards: Assess the patient's blood pressure reading within no more than 4 millimeter of mercury, recording the systolic and diastolic readings while alerting supervisor of abnormal ranges.
CAUTION: All body fluids should be considered potentially infectious. Always observe body substance isolation (BSI) precautions
Performance Steps:
1. Explain the procedure to the patient.
a. The length of time the procedure will take.
b.The site to be used.
c.The physical sensations the patient will feel.
2. Select the proper size of sphygmomanometer cuff.
NOTE: The cuff width should wrap around the arm 1-1.5 times and take up two-thirds of the upper arm length, if using the brachial artery, and two-thirds of the upper leg length if using the popliteal artery.
NOTE: A cuff that is too small may result in falsely high readings; a cuff that is too large may result in falsely low readings.
3. Check the equipment.
a. Ensure the cuff is completely deflated and fully retighten the one-way valve thumbscrew.
b. Ensure the sphygmomanometer pressure gauge is reading zero.
NOTE: The following procedures describe the procedure for obtaining a blood pressure reading using the upper arm (brachial artery).
4. Place the blood pressure cuff on the patient's arm.
a. Locate the brachial pulse.
NOTE: Measuring the blood pressure of a standing patient will result in a slightly higher reading.
b. Palpate the brachial pulse.
c.Wrap the blood pressure cuff snugly around the arm
d. Support the arm so it is in a relaxed state.
5. Position the stethoscope.
Chapter 3: Skill Level Tasks 3-34 STP 8-68B13-SM-TG 15 April 2016
a. Palpate the arm with the blood pressure cuff, just above the crease of the arm to locate the strongest pulse.
b. Place the diaphragm of the stethoscope over the brachial pulse site.
c. Hold the diaphragm in place with your non-dominant hand.
6. Inflate the blood pressure cuff.
NOTE: When the blood pressure (BP) cuff has inflated enough to stop blood flow you should hear no sounds through the stethoscope. The gauge should read 30 to 40 millimeters of Mercury (mmHg) above the person's normal BP reading. If this value is unknown you can inflate the cuff to 160 - 180 millimeters of mercury (mmHg). (If pulse sounds are heard right away, inflate to a higher pressure).
a. Close the valve on the sphygmomanometer.
b. Begin inflating the cuff using the ball-pump as you listen to the pulse sounds.
c. Stop inflating at 30 mmHg above the last pulse sound.
CAUTION: The cuff should not remain inflated for more than 2 minutes.
7. Deflate the blood pressure cuff slowly.
NOTE: The American Heart Association recommends that the pressure should fall at 2 - 3 millimeters of Mercury per second, anything faster may likely result in an inaccurate measurement.
a. Open the valve slowly.
b. Begin deflation while listening for pulse sound.
8. Determine the blood pressure reading.
NOTE: If a stethoscope is not used, complete the following steps:
NOTE: If in a very noisy environment where hearing the pulse waves is difficult or impossible, the palpation method may be used:
(1) With your nondominant hand, palpate the radial pulse (at the wrist) on the same arm as the cuff.
(2) While palpating the radial pulse, rapidly inflate the cuff until you can no longer feel the pulse under your fingertips, and then inflate an additional 30 mmHg above where you last felt the radial pulse.
(3) Rotate the thumbscrew in a counter clockwise motion, allowing the cuff to deflate slowly at about 3 mmHg per second.
(4) Watch the gauge, when you again feel the radial pulse return, note the reading on the gauge (systolic blood pressure). The diastolic pressure cannot be determined using this method. If the procedure must be repeated, wait at least 1 minute before repeating the procedure.
(5) As soon as you note the systolic reading, open the valve by rotating the thumbscrew and release the remaining air rapidly.
a. Listen for the systolic reading.
Chapter 3: Skill Level Tasks 15 April 2016 STP 8-68B13-SM-TG 3-35
NOTE: The first occurrence of rhythmic sounds heard as blood begins to flow through the artery is the patient's systolic pressure. This may resemble a tapping noise at first.
b. Listen for the Diastolic Reading.
NOTE: Continue to listen as the BP cuff pressure drops and the sounds fade. Note the gauge reading when the rhythmic sounds stop. This will be the diastolic reading.
9. Record the blood pressure on the appropriate medical forms.
a. Record the systolic reading over the diastolic reading, for example 120/80.
NOTE: If obtaining the blood pressure without a stethoscope (by palpation), record the systolic reading alone alongside the letter "P", for example 120/P.
b. Record all readings in even numbers.
NOTE: Record the blood pressure readings with the time it was taken.
10. Evaluate the blood pressure readings by noting the normal ranges for the blood pressure:
a. Adults: 90-140 mmHg (systolic); 60-90 mmHg (diastolic).
b. Children(1-10 years): 80-110 mmHg (systolic).
c.Infants(0-12 months): 70 mmHg (systolic).
NOTE: Blood pressure readings vary with age and gender. A patient has hypotension when the blood pressure is lower than the normal range; the patient has hypertension when the blood pressure is higher than the normal range.
11. Report any abnormal blood pressure findings to the supervisor immediately.
Evaluation Preparation: You must evaluate the students on their performance of this task in a field condition related to the actual task.
1 Explained the procedure to the patient.
2 Selected the proper size of sphygmomanometer cuff.
3 Checked the equipment.
4. Placed the blood pressure cuff on the patient's arm.
5. Positioned the stethoscope.
6. Inflated the blood pressure cuff.
7. Deflated the blood pressure cuff slowly.
8. Determined the blood pressure.
Chapter 3: Skill Level Tasks 3-36 STP 8-68B13-SM-TG 15 April 2016
Performance
GO NO GO
Measures
Performance
9 Recorded the blood pressure on the appropriate medical forms.
10 Evaluated the blood pressure.
11. Reported any abnormal readings to the supervisor immediately.
Evaluation Guidance: Score each Soldier according to the performance measures in the evaluation guide. Unless otherwise stated in the task summary, the Soldier must pass all performance measures to be scored GO. If the Soldier fails any step, show what was done wrong and how to do it correctly.
Chapter 3: Skill Level Tasks 15 April 2016 STP 8-68B13-SM-TG 3-37
Measures GO NO GO
SF 600 None
References Required Related
Measure a Patient's Respirations
081-000-0008
Conditions: Your location is in a medical treatment facility, Role I thru Role IV. You have a patient requiring vital signs. You have a watch with a second hand, pen and an automated record or Standard Form (SF) Form 600, Medical Record - Chronological Record of Medical Care You perform a patient care hand wash. You are not in a chemical, biological, radiological, nuclear (CBRN) environment.
Standards: Assess the patient's respiration rate including accurate breathing rate, determining normal and abnormal rate.
Performance Steps:
CAUTION: All body fluids should be considered potentially infectious. Always observe body substance isolation (BSI) precautions.
1. Count the number of times the chest rises (inspiration) and returns to its normal position (expiration) for 30 seconds and mutiply by two.
NOTE: Each respiratory cycle (inspiration/expiration)counts as one respiration. The patient should not be aware that his respirations are being counted. The conscious patient that is aware his respirations are being counted will often alter his respiratory rate by breathing slower and deeper. If a patient is speaking, this too may result in an inaccurate assessment of respirations. Normal respirations for each age group are as follows:
a. Adults: 12-20 breaths/minute (min).
b. Children: (1-10 years) 15-30 breaths/min.
c.Infants: (6-12 months) 25-50 breaths/min.
d.Infants: (0-5 months) 25-40 breaths/min.
2. Evaluate the respirations:
a. Depth.
(1) Normal: deep, even movement of the chest.
(2) Shallow: minimal rise and fall of the chest and abdomen.
(3) Labored: increased effort to breathe, with possible gasping.
b. Quality (character).
(1) Normal: effortless, automatic, regular rate, even depth, noiseless, and free of discomfort.
(2) Dyspnea: difficult or labored breathing.
(3) Tachypnea: rapid respiratory rate; usually is a rate exceeding 24 breaths/min (adult).
(4) Noisy: snoring, rattling, wheezing (whistling), or grunting.
(5) Apnea: temporary absence of breathing.
3. Observe for physical characteristics of abnormal respirations:
a. Appearance: the patient may appear restless, anxious, pale, ashen, or cyanotic (blue skin color).
b. Position: the patient may alter his position by leaning forward with his hands on his legs (tripod position) or may be unable to breathe while lying down.
Chapter 3: Skill Level Tasks 3-38 STP 8-68B13-SM-TG 15 April 2016
4. Record the rate of respirations and any observations noted (depth and quality) on the appropriate medical forms, according to local protocols and SOP.
5. Report any abnormal respirations to your supervisor immediately.
Evaluation Preparation: You must evaluate the students on their performance of this task in a field condition related to the actual task.
Performance Measures
1. Counted the number of times the chest rises (inspiration) and returns to its normal position (expiration) for 30 seconds and mutiply by two.
2. Evaluated the respirations.
3. Observed for physical characteristics of abnormal respirations.
4. Recorded the rate of respirations and any observations noted (depth and quality) on the appropriate medical forms,according to local protocols and SOP.
5. Reported any abnormal respirations to the supervisor immediately.
Evaluation Guidance: Score each Soldier according to the performance measures in the evaluation guide. Unless otherwise stated in the task summary, the Soldier must pass all performance measures to be scored GO. If the Soldier fails any step, show what was done wrong and how to do it correctly.
References
Chapter 3: Skill Level Tasks 15 April 2016 STP 8-68B13-SM-TG 3-39
GO NO GO
Required Related SF 600 None
Perform a Patient Care Hand Wash
081-000-0006
Conditions: You are assigned to medical treatment facility, Role I-IV. You must wash your hands prior to any patient care. You will have running water, hand sterilizer product, soap, towels (cloth or paper), and a towel receptacle or trash can. You are not in a chemical, biological, radiological, nuclear (CBRN) environment.
Standards: Perform patient care hand wash until there is no visible dirt or soil, and without contaminating hands.
Performance Steps:
1. Prepare to perform the hand-wash
NOTE: Rings should not be worn. If rings are worn, they should be of simple design with few crevices for harboring bacteria. Fingernails should be clean, short, and free of nail polish.
a. Remove wristwatch and jewelry
b. Roll shirt sleeves to above the elbows
NOTE: Rings should not be worn. If rings are worn, they should be of simple design with few crevices for harboring bacteria. Fingernails should be clean, short, and free of nail polish.
2. Clean hands using soap and water.
a.Wet hands with water.
b. Apply enough soap to cover all hand surfaces.
c. Rub hand together scrubbing all surfaces: palm-to-palm; Palm to palm with fingers interlaced; Backs of fingers to opposing palms with fingers interlocked.
d. Rinse hands with water.
e. Dry hands thoroughly with a single use towel.
f. Use towel to turn off faucet.
g. Dispose of used towel.
3. Clean hands using alcohol-based formulation
a. Apply a palm-full of the product in a cupped hand, covering all surfaces.
b. Rub hand together scrubbing all surfaces: palm-to-palm; Palm to palm with fingers interlaced; backs of fingers to opposing palms with fingers interlocked.
c. Air-dry hands
Evaluation Preparation: You must evaluate the students on their performance of this task in a field condition related to the actual task.
Measures
1 Prepared to perform the hand wash.
2 Cleaned hands using soap and water.
3 Cleaned hands using alcohol- based formulation.
Chapter 3: Skill Level
3-40 STP 8-68B13-SM-TG 15 April 2016
Tasks
GO NO GO
Performance
Evaluation Guidance: Score each Soldier according to the performance measures in the evaluation guide. Unless otherwise stated in the task summary, the Soldier must pass all performance measures to be scored GO. If the Soldier fails any step, show what was done wrong and how to do it correctly.
15 April 2016 STP 8-68B13-SM-TG 3-41
Chapter 3: Skill Level Tasks
References Required Related None None
Measure a Patient's Temperature
081-000-0011
Conditions: Your location is in a medical treatment facility, Role I thru Role IV. You have a patient requiring vital signs. You have a thermometer (electronic, glass, & tympanic), watch, alcohol pads, cover probes, water soluble lubricant, pen and an automated record or Standard Form (SF) 600, Medical Record - Chronological Record of Medical Care You perform a patient care hand wash. You are not in a chemical, biological, radiological, nuclear (CBRN) environment.
Standards: Measure a patient's temperature, correctly placing the thermometer and recording the temperature the nearest 0.2 degrees Fahrenheit (° F).
CAUTION: All body fluids should be considered potentially infectious so always observe body substance isolation (BSI) precautions by wearing gloves and eye protection as a minimal standard of protection.
Performance Steps:
1. Determine which site to use.
CAUTION: Do not take an oral temperature when the patient 1. Has had recent facial or oral surgery. 2. Is unable to follow directions (confused, disturbed, or heavily sedated). 3. Is being administered oxygen by mouth or nose. 4. Is likely to bite down on the thermometer. 5. Has smoked, chewed gum or has eaten or drank anything hot or cold within the last 15 to 30 minutes.
a. Take an oral temperature if the patient is a conscious adult or child who can follow directions and can breathe normally through their nose.
CAUTION: Do not attempt to take a tympanic temperature if the patient has had recent facial or ear surgery or has cerumen (ear wax) impaction.
b. Obtain the patient's temperature using the tympanic method if the patient has recently had something to eat or drink.
CAUTION: Do not attempt to take a rectal temperature if the patient has had recent rectal surgery, unless directed to by a medical officer. Do not attempt to take a rectal temperature on an infant unless directed by a medical officer.
c.Obtain the patient's temperature by the rectal method if the oral or tympanic methods are ruled out by the patient's condition.
d.Obtain the patient's temperature by the axillary (least preferred) method if the patient's condition rules out using the other methods.
2. Select the appropriate thermometer:
a. Tympanic thermometer.
b.Oral thermometer: has a blue tip and may be labeled "Oral."
c. Rectal thermometer: has a red tip and may be labeled "Rectal."
d. Axillary temperatures may be obtained using an oral thermometer.
Chapter 3: Skill Level Tasks 3-42 STP 8-68B13-SM-TG 15 April 2016
3. Explain the procedure to the patient.
4. Position the patient appropriately:
a.Tympanic method. Position the patient with their head turned to make the ear canal easily accessible.
b.Oral method. Position the patient seated or lying down.
c. Rectal method. Position the patient lying on either side with the top knee flexed.
d. Axillary method. Position the patient either seated or lying face up with the armpit exposed.
5. Measure the temperature.
a. Place the thermometer at the proper site:
(1) Oral method. Ensure cover probe is firmly attached to the appropriate probe attachment. Digital disinfect the thermometer with an alcohol pad. Insert it into the disposable sheath opening; then twist to tear the seal at the dotted line. Pull it apart. Place the thermometer underneath the patient’s tongue. Instruct the patient to close their lips around the instrument firmly but not to bite down.
CAUTION: The rectal thermometer with the cover probe attached must be lubricated with a water soluble lubricant prior to insertion. Once inserted, do not let go of the thermometer.
(2) Rectal method. Ensure cover probe is firmly attached to the appropriate probe. In an adult, insert the thermometer 1 to 2 inches into their rectum. Lift the patient’s upper buttock and ask the patient to take a slow deep breath. This helps relax the anal sphincter to ease insertion of the thermometer.
(3) Tympanic method. Pull the ear pinna upward and rearward; insert the thermometer speculum into the ear canal snugly to create a seal, pointing toward the nose.
(4) Axillary method. Pat the armpit dry and place the tip end of an oral thermometer with cover probe firmly attached, in the center of the armpit with the probe attachment tip protruding to the front of the patient's body. Place the patient's arm across his chest.
b. Leave the thermometer in place for the required time:
(1) Oral method: must remain in place for at least 3 minutes.
NOTE: If using a digital oral thermometer, leave in place until testing is complete. The digital unit will normally have an audible tone.
(2) Rectal method: must be held in place for at least 2 minutes.
(3) Tympanic method: must remain in place until an audible signal occurs and the patient's temperature appears on the digital display.
(4) Axillary method: must remain in place for at least 10 minutes.
6. Remove the thermometer and eject the cover probe, or discharge the protective plastic sheath as appropriate.
7. Read the temperature scale or digital display.
8. Evaluate the temperature reading. The normal temperature ranges are as follows:
a. Oral method: 97.0° to 99.0° F.
b. Rectal method: 98.0° to 100.0° F.
c.Tympanic method: 97.0° to 99.0° F.
d. Axillary method: 96.0° to 98.0° F.
Chapter 3: Skill Level Tasks 15 April 2016 STP 8-68B13-SM-TG 3-43
9. Place the thermometer back on the charger or turn off as appropriate.
10. Record the patient's temperature to the nearest 0.2° F on the appropriate medical forms. Record a rectal temperature with an "R" on the patient's record; with an axillary reading, use an "A" on the patient's record.
11. Report any significant temperature abnormalities to the supervisor immediately.
Evaluation Preparation: You must evaluate the students on their performance of this task in a field condition related to the actual task.
Performance Measures
1. Determined an appropriate site to use.
2. Selected the appropriate thermometer.
3. Explained the procedure to the patient.
4. Positioned the patient appropriately.
5. Measured the temperature.
6 Removed the thermometer and ejected cover probe or discharged the plastic sheath appropriately.
7 Read the temperature from the digital display.
8 Evaluated the temperature.
9 Placed the thermometer back on the charger or turned off as appropriate.
10 Recorded the temperature to the nearest 0.2° F correctly on the appropriate medical forms. Recorded a rectal temperature with an "R" on the patient's record; with an axillary reading, used an "A" on the patient's record.
11 Reported any significant temperature abnormalities to the supervisor immediately.
Evaluation Guidance: Score each Soldier according to the performance measures in the evaluation guide. Unless otherwise stated in the task summary, the Soldier must pass all performance measures to be scored GO. If the Soldier fails any step, show what was done wrong and how to do it correctly.
3-44 STP 8-68B13-SM-TG 15 April 2016
Chapter 3: Skill Level Tasks
GO NO GO
Required Related SF 600 None
References
Document Patient Care Using Subjective, Objective, Assessment, Plan Note Format
081-000-0068
Conditions: You are in a medical contemporary operational environment. You are treating a patient and must record the treatment given. You have available automated health record, a black-inked pen, and Standard Form (SF) 600, Medical Record - Chronological Record of Medical Care. Some iterations of this task can be performed in mission oriented protective posture (MOPP4).
Standards: Document care including factual patient's subjective, object, assessment, and plan. All entries must be legible and generally free of errors without skipped line or space.
CAUTION: All body fluids should be considered potentially infectious. Always observe body substance isolation (BSI) precautions by wearing gloves and eye protection as a minimal standard of protection.
Performance Steps:
1. Record the patient's name, rank, social security number, date and time.
2. Write subjective data.
a. Chief complaint.
b.The patient's statements regarding the illness or injury history to include onset, provokes, quality, radiates, severity, time (OPQRST).
c. Usually expressed in the patient's own words.
3. Write objective data.
a.Observations by the Soldier Medic that support or are related to the subjective data, to include sight, sound, touch, and smell.
b. Physical assessment data to include the patient's vital signs.
c. Lab and radiology results.
4. Write the assessment/analysis.
a. Your interpretation of the patient's problem/condition.
b. Conclusions reached based upon analysis of the subjective and objective data.
5. Write the plan.
a. Course of action to resolve the problem.
(1) Treatments made.
(2) Profiles.
(3) Medications.
(4) Patient education.
b. Follow-up appointment or referral.
c. Each item in your plan should be numbered.
6. Correct recording errors, if applicable.
a. Draw a single line through the error.
b.Write the word error above it.
c. Initial next to the error.
d. Record the note correctly.
Chapter 3: Skill Level Tasks 15 April 2016 STP 8-68B13-SM-TG 3-45
7. Finish the entry with your signature, printed name, rank, and title.
NOTE: Medical confidentiality of all patient information must be guarded. Unauthorized disclosure of medical information is grounds for Uniform Code of Military Justice (UCMJ) action against the informant.
Evaluation Preparation: You must evaluate the students on their performance of this task in a field condition related to the actual task.
Performance Measures
1. Recorded the patient's name, rank, SSN, date and time.
2. Wrote subjective data.
3. Wrote objective data.
4. Wrote the assessment/analysis.
5. Wrote the plan.
6. Corrected errors, if applicable.
7. Finished the entry with your signature, printed name, rank, and title.
GO NO GO
Evaluation Guidance: Score each Soldier according to the performance measures in the evaluation guide. Unless otherwise stated in the task summary, the Soldier must pass all performance measures to be scored GO. If the Soldier fails any step, show what was done wrong and how to do it correctly.
Chapter 3: Skill
3-46 STP 8-68B13-SM-TG 15 April 2016
Level Tasks
References Required Related SF 600 None 10 US CODE 47 UCMJ
Subject Area 2: Cast Removal
Bivalve a Cast
081-68B-1501
Conditions: You are presented with physician's orders to bivalve a cast on an orthopedic patient. The patient is sitting or supine on an orthopedic examination bed and may be accompanied by a family member/chaperone. Nursing personnel and physician are available. You will need the patient's medical record or Standard Form (SF) 513, Medical Record - Consultation Sheet, the local standard operating procedure (SOP), cast saw with vacuum, cast spreader, hearing protection, eye protection, work cart/station, fiberglass casting gloves, examination gloves, scissors, roll of adhesive tape, webril roll, elastic bandages or fiberglas/plaster rolls, hospital pads (chux) or bed sheet, bucket of tepid water with plastic bag, box of alcohol pads or damp wash towel, sink with faucet, and trash receptacle.
Standards: Bivalve the cast without causing harm to the patient. Cut along the medial and lateral or anterior and posterior aspect, re-pad and secure the halves together with an elastic bandage or plaster/fiberglass, as applicable. Padding should be less than 1/4 - 1/2 inch between the separated halves. The elastic bandage or plaster/fiberglass roll is applied within the existing cast dimensions. The capillary refill returns within 1 - 3 seconds. Bivalving faciliates performance of a wound check, dressing change, suture removal, xray procedures and air travel by the patient.
Performance Steps:
1. Review the order from the physician.
2. Gather equipment and materials.
a. Gather equipment.
(1) scissors
CAUTION: The dust that is produced during the removal of the cast is a carcinogenic. All cast saws must be attached to a cast cutter vacuum.
(2) Cast saw.
(3) Cast spreader.
(4) Hearing protection.
(5) Eye protection.
CAUTION: The temperature of the water must be tepid (70° - 80° F) to reduce further injury (possible burns) to the patient. The technician must change the water after each cast application, as the residue in the cast bucket will act as an accelerator causing the casting material to increase in heat emission.
(6) Bucket of tepid water with plastic bag
b.Assemble materials.
(1) Examination gloves
(2) Elastic bandages
(3) Webril.
(4) Felt pads
(5) Plaster or fiberglass rolls
Chapter 3: Skill Level Tasks 15 April 2016 STP 8-68B13-SM-TG 3-47
(6) Box of alcohol pads or damp wash towel
(7) Hospital pads (chux) or bed sheets
(8) Cast care booklet or equivalent
(9) Adhesive tape
3. Tell the patient your name and job title.
4 Position the patient supine in the middle of the bed or sitting in a chair.
CAUTION: The patient may be scared of the cast removal process. Demonstrate to the patient how the cast saw operates and what to expect during the removal process
5. Explain the procedure to the patient.
6. Don safety equipment (patient and technician).
7. Inspect the cast.
CAUTION: Always practice body substance isolation (BSI) prior to applying traction, splints, or casts to patients.
a. Place examination gloves on hands.
b. Ask the patient if the cast was exposed to water of if the cast padding was pulled out.

NOTE: Depending on the length of time the cast has been on, the technician must look for soft spots, missing webril, and signs the cast was exposed to water.
c Locate the bony prominences (e.g., ulnar styloid, malleolus) and external pins (if applicable).
8. Cut along the medial and lateral aspect of the cast.
NOTE: All casts are cut along the medial and lateral aspect except for the long arm casts, which are cut along the anterior/posterior aspect. (See Figure 3-1 and 3-2.)
3-48 STP 8-68B13-SM-TG 15 April 2016
Chapter 3: Skill Level Tasks
Figure 3-1. Bivalved lower extremity - medial/lateral bivalve
a. Place a privacy pad or bed sheet on the patient's lap or above the cast area.
b. Place the cast cutter plug in the electrical wall outlet.
c.Grasp the cast cutter handle between the thumb and index finger.
d. Rest the thumb on the cast handle maintaining contact throughout the procedure.

e.Turn on the cast saw.
f. Place the cast saw on the medial aspect.
CAUTION: Do not bring the blade out of the cutting groove, do not drag the saw, or leave it in one place too long. This will cause the blade to produce friction (heat up), and burn or cut the patient.
g. Apply pressure to the saw using an up and down motion of the wrist. When resistance is absent, lift the blade up and advance in the direction of the cut.
h. Place the cast saw on the lateral aspect.
i. Repeat substep 8.g.
j. Turn the cast saw off and unplug cord from the wall outlet.
9. Separate the cast.
a. Place the cast spreader edge in the precut line.
b. Pull the handles together.
c. Remove the outside shell of the cast along the precut edge.
NOTE: The remaining shell functions as a splint.
10. Cut the underlying cast padding.
11. Inspect the patient's skin.
Chapter 3: Skill Level Tasks 15 April 2016 STP 8-68B13-SM-TG 3-49
Figure 3-2. Bivalved long arm cast - anterior/posterior bivalve
NOTE: Report the presence of any unusual skin conditions such as drainage, blisters, rashes, and pressure sores to the physician and follow the physician's instructions.
12. Apply treatment to the wound, if applicable.
CAUTION: Separation greater than 1/2 inch between the cut edges can result in window edema and hinder circulation.
13. Repad the cast with felt or webril between the cast's cut edges.
14. Secure the cast halves together with elastic bandage or plaster/fiberglass roll, as applicable.
a. Elastic bandage
(1) Wrap the bivalved cast with an elastic bandage conforming to the existing cast dimensions.
(2) Secure the elastic bandage with clips.
(3) Cover the clips with adhesive tape.
b.Plaster/fiberglass roll.
CAUTION: If the casting material is removed while bubbles are still present, dry spots will be visible during application. Dry spots cause integrity breakdown of the cast.
(1) Place the plaster/fiberglass roll in the bucket of tepid water and remove when bubbles cease to rise.
(2) Squeeze the roll together (do not wring the roll).
NOTE: Gently squeeze the roll inward to evenly distribute the water and prevent telescoping of the roll during application.
(3) Wrap the bivalved cast with the plaster/fiberglass roll conforming to the existing cast dimensions.
(4) Overlap the plaster/fiberglass with each turn by 1/4 - 1/2 the previous wrap.
NOTE: The top of the plaster/fiberglass should bisect the middle of the previous layer and present evenly applied casting material.
(5) Laminate the casting material.
15. Check the patient's capillary refill.
a. Squeeze the patient's applicable phalanges; nail beds will turn white.
b. Release the patient's applicable phalanges; nail beds will return pink.
c.Inform the physician and follow the physician's instructions.
16. Clean the plaster resin off the patient's skin using a damp wash towel or alcohol pads.
NOTE: Use alcohol pads or fresh water from the faucet and not from the casting bucket.
17. Give the patient verbal and written instructions on cast care.
18. Annotate the procedure applied to the patient in the medical record or SF 513.
Chapter 3: Skill Level Tasks 3-50 STP 8-68B13-SM-TG 15 April 2016
NOTE: Record the procedure applied and cast care instructions provided to the patient in patient's medical record or SF 513 and sign your name.
a. Record the procedure applied and cast care instructions provided.
b. Sign your name.
19. Escort or direct the patient to the front desk to make a follow-up appointment.
Evaluation Preparation: You must evaluate the students on their performance of this task in a field condition related to the actual task.
Performance Measures
1. Reviewed the order from the physician.
2. Gathered equipment and materials.
3. Told the patient your name and job title.
4. Positioned the patient supine in the middle of the bed or sitting in a chair.
5 Explained the procedure to the patient.
6 Donned safety equipment (patient and technician).
7 Inspected the cast.
8 Cut along the medial and lateral aspect of the cast.
9 Separated the cast.
10 Cut the underlying cast padding.
11 Inspected the patient's skin.
12 Applied treatment to the wound, if applicable.
13 Repadded the cast with felt or webril between the cast's cut edges.
14. Secured the cast halves together with elastic bandage or plaster/fiberglass roll, as applicable.
15 Checked the patient's capillary refill.
16. Cleaned the plaster resin off the patient's skin using a damp wash towel or alcohol pads.
17. Gave the patient verbal and written instructions on cast care.
Chapter 3: Skill Level Tasks 15 April 2016 STP 8-68B13-SM-TG 3-51
GO NO GO
18 Annotated the procedure applied to the patient in the medical record or SF 513.
19 Escorted or directed the patient to the front desk to make a follow-up appointment.
Evaluation Guidance: Score each Soldier according to the performance measures in the evaluation guide. Unless otherwise stated in the task summary, the Soldier must pass all performance measures to be scored GO. If the Soldier fails any step, show what was done wrong and how to do it correctly. References
3-52 STP 8-68B13-SM-TG 15 April 2016 Performance Measures GO NO GO
Chapter 3: Skill Level Tasks
Required Related SF 513 None
Remove a Cast 081-68B-1500
Conditions: You are presented with physician's orders to remove a cast on an orthopedic patient. The patient is sitting or supine on an orthopedic examination bed and may be accompanied by a family member/chaperone. Nursing personnel and physician are available. You will need the patient's medical record or Standard Form (SF) 513, Medical RecordConsultation Sheet, the local standard operating procedure (SOP), cast saw with vacuum, cast spreader, hearing protection, eye protection, work cart/station, examination gloves, scissors, hospital pads (chux) or bed sheet, and trash receptacle.
Standards: Remove the cast without causing injury to the patient. Cut along the medial and lateral aspect or anterior and posterior aspect.
Performance Steps:
1. Review the order from the physician.
2. Gather equipment and materials.
a. Gather equipment.
(1) Scissors.
CAUTION: The dust that is produced during the removal of the cast is a carcinogenic. All cast saws must be attached to a cast saw vacuum.
(2) Cast saw.
(3) Cast spreader
(4) Hearing protection
(5) Eye protection.
b.Assemble materials.
(1) Examination gloves
(2) Hospital pads (chux) or bed sheet
c. Place the equipment and materials on the work cart/station.
3. Tell the patient your name and job title.
4. Position the patient supine in the middle of the bed or sitting in a chair.
CAUTION: The patient may be scared of the cast removal process. Demonstrate to the patient how the cast saw operates and what to expect during the removal process.
5. Explain the procedure to the patient.
6. Don safety equipment (patient and technician).
7. Inspect the cast.
CAUTION: Always practice body substance isolation (BSI) prior to applying traction, splints, or casts to patients.
Chapter 3: Skill Level Tasks 15 April 2016 STP 8-68B13-SM-TG 3-53
Chapter 3: Skill Level Tasks
a. Place examination gloves on hands.
b. Ask the patient if the cast was exposed to water or if the cast padding was pulled out. NOTE: Depending on the length of time the cast has been on, the technician must look for soft spots, missing webril, and signs the cast was exposed to water.


c Locate the bony prominences (e.g., ulnar styloid, malleolus) and external pins (if applicable).
8. Cut the cast along the medial and lateral aspect. (See Figure 3-3 and
NOTE: All casts are cut along the medial and lateral aspect except for the long arm casts, which are cut along the anterior/posterior aspect.
3-54 STP 8-68B13-SM-TG 15 April 2016
3-4.)
Figure 3-3. Cast removal lower extremity - medial lateral view
Figure 3-4. Cast removal long arm cast - anterior posterior view
a. Place a privacy pad or bed sheet on the patient's lap or above the cast area.
b.Place the cast cutter plug in the electrical wall outlet.
c.Grasp the cast cutter handle between the thumb and index finger.
d. Rest the thumb on the cast handle maintaining contact throughout the procedure.
e.Turn on the cast saw.
f. Place the saw blade on the medial aspect.
CAUTION: Do not bring the blade out of the cutting groove, do not drag the saw, or leave it in one place too long. This will cause the blade to produce friction (heat up), and burn or cut the patient.
g. Apply pressure to the saw using an up and down motion of the wrist. When resistance is absent, lift the blade up and advance in the direction of the cut.
h. Place the saw blade on the lateral aspect.
i. Repeat substep 8.g.
j. Turn the cast saw off and unplug cord from the wall outlet.
9. Separate the cast.
a. Place the cast spreader edge in the precut line.
b. Pull the handles together.
10. Cut the underlying cast padding.
11. Remove the anterior and posterior shells.
12. Inspect the patient's skin.
NOTE: Report the presence of any unusual skin conditions such as drainage, blisters, rashes, and pressure sores to the physician and follow the physician's instructions.
13. Check patient's capillary refill.
a. Squeeze patient's fingers/toes; nail beds will turn white
CAUTION If capillary refill is delayed for more than 2 seconds, inform physician and follow physician's instructions.
b. Release patient's fingers/toes; nail beds will return pink.
14. Give the patient verbal and written instructions on post cast care.
15. Annotate the procedure applied to the patient in the medical record or SF 513.
a. Record the procedure applied and cast care instructions provided.
b. Sign your name.
16. Escort or direct the patient to the front desk to make a follow-up appointment.
Evaluation Preparation: You must evaluate the students on their performance of this task in an operational condition related to the actual task.
Chapter 3: Skill Level Tasks 15 April 2016 STP 8-68B13-SM-TG 3-55
1 Reviewed the order from the physician.
2 Gathered equipment and materials.
3. Told the patient your name and job title.
4. Positioned the patient supine in the middle of the bed or sitting in a chair.
5. Explained the procedure to the patient.
6. Donned safety equipment (patient and technician).
7. Inspected the cast.
8. Cut the cast along the medial and lateral aspect.
9. Separated the cast.
10. Cut the underlying cast padding.
11 Removed the anterior and posterior shells.
12 Inspected the patient's skin.
13 Checked patient's capillary refill.
14 Gave the patient verbal and written instructions on post cast care.
15 Annotated the procedure applied to the patient in the medical record or SF 513.
16 Escorted or directed the patient to the front desk to make a follow-up appointment.
Evaluation Guidance: Score each Soldier according to the performance measures in the evaluation guide. Unless otherwise stated in the task summary, the Soldier must pass all performance measures to be scored GO. If the Soldier fails any step, show what was done wrong and how to do it correctly.
Chapter 3: Skill Level Tasks 3-56 STP 8-68B13-SM-TG 15 April 2016
GO NO GO
Performance Measures
References Required Related SF 513 None
Wedge a Cast
081-68B-1530
Conditions: You are presented with a physician's order to wedge a cast of an orthpedic patient. The patient is sitting or supine on an orthopedic examination bed and may be accompanied by a family member/chaperone. Nursing personnel and physician are available. You will need the patient's medical record or Standard Form (SF) 513, Medical Record - Consultation Sheet, the local standard operating procedure (SOP), workcart/station, marking pen, cast saw, cast spreader, eye protection, hearing protection, examination gloves, scissors, fiberglass rolls, hospital pads (chux) or bed sheet, bucket of tepid water with plastic bag, sink with faucet, plastic or wooden spacers, cast care booklet or equivalent, and trash receptacle.
Standards: Wedge the cast without causing harm to the patient. Apply the appropriate wedge procedure. Secure the wedge with fiberglass. The capillary refill returns within 1 - 3 seconds.
NOTE: Wedging is performed on a casted patient to correct bone and soft tissue deformities.
Performance Steps:
1. Review the order from the physician.
NOTE: The physician draws a line at the site of the fracture.
2. Gather the equipment and materials.
NOTE: The physician's order, technician's preference, availability of supplies, and/or patient's extremity size determine which casting material (fiberglass/plaster) is used.
a. Gather equipment.
(1) Cast saw with vacuum.
(2) Cast spreader.
(3) Hearing protection.
(4) Eye protection.
(5) Scissors.
CAUTION: The temperature of the water must be tepid (70° - 80° F) to reduce further injury (possible burns) to the patient. The technician must change the water after each cast application, as the residue in the cast bucket will act as an accelerator causing the casting material to increase in heat emission.
(6) Bucket of tepid water with plastic bag
b.Assemble materials.
(1) Fiberglass rolls (3 or 4 inch)
(2) Examination gloves
(3) Plastic or wooden wedges
(4) Hospital pads (chux) or bed sheets
(5) Cast care booklet or equivalent
c. Place on work cart/station.
3. Tell the patient your name and job title.
Chapter 3: Skill Level Tasks 15 April 2016 STP 8-68B13-SM-TG 3-57
CAUTION: The patient may be scared of the cast removal process. Demonstrate to the patient how the cast saw operates and what to expect during the removal process.
4. Explain the procedure to the patient.
5. Don safety equipment (patient and technician).
6. Inspect the cast.
a. Place examination gloves on hands.
NOTE: Always practice body substance isolation prior to applying traction, splints, or casts to patients.
b. Ask the patient if the cast was exposed to water or padding was pulled out.
c. Identify the location of the wound and the bony prominences.
7. Cut the wedge on the cast.
a. Place a hospital pad or bed sheet on the patient's lap or above the cast area.
CAUTION: The dust that is produced during the removal of the cast is a carcinogenic. All cast saws must be attached to a cast cutter vacuum.
b. Plug the cast saw plug in the wall outlet.
c.Grasp the cast saw handle between the thumb and index finger.
d. Rest the thumb on the cast handle maintaining contact throughout the procedure.
e.Turn the cast saw on.
CAUTION Do not bring the blade out of the cutting groove, do not drag the saw, or leave it in one place too long. This will cause the blade to produce friction (heat up), and burn or cut the patient.
f Apply pressure to the saw using an up and down motion of the wrist along the cut line drawn by the physician.
NOTE: Nursing assistant grasps the distal edge of casted extremity of the patient.
g. Lift the blade up, advancing in the direction of the cut.
h.Turn the cast saw off.
i. Unplug the cast saw cord from the wall outlet.
8 Perform the applicable wedge procedure (closed/open).
a. Closed wedge procedure.
NOTE: The closed wedge is used for correction of bony deformity and produces impaction. The segment is removed and the cast is closed.
(1) Remove the cut section of the casting material.
(2) Close the opening by gently compressing the segments together (use other medical staff, if available).
b.Open wedge procedure.
Chapter 3: Skill Level Tasks 3-58 STP 8-68B13-SM-TG 15 April 2016
NOTE: The open wedge is the sectioning of the cast and pulling apart of the two sections with a small block of wood or spacer inserted.
(1) Place the edge of the cast spreader in the cut section of the cast and pull the segments apart.
(2) Place the wooden or plastic wedge in the cut section of cast.
(3) Remove the cast spreader when the wedge is inserted.
9. Reapply fiberglass casting material to secure the wedge.
NOTE: Ensure the wedging correction is secure by going far enough proximally and distally from the segmented area and the cast repair is thoroughly dry.
10. Check the patient's capillary refill.
a. Squeeze patient's phalanges; nail beds will turn white.
b. Release patient's phalanges, nail beds will return pink.
c.Inform the physician and follow the physician's instructions.
11. Give the patient verbal and written instructions on cast care.
a. Provide the patient with a copy of the clinic hours and telephone number. Instruct the patient to call the cast clinic with any concerns or questions regarding their cast. For after duty hours concerns, instruct the patient to report to the emergency room.
b. Provide the patient with a cast care booklet or written instructions.
c.Instruct the patient to elevate the extremity above the heart, and extend, flex, and wiggle applicable extremities or phalanges (demonstrate for patient) to reduce swelling.
d Instruct the patient on what not to do.
(1) Do not stick anything down the cast.
(2) Do not remove the cast.
(3) Do not alter the cast (e.g., writing on it, coloring).
12. Annotate the procedure applied to the patient in the medical record or SF 513.
a. Record the procedure applied and cast care instructions provided.
b. Sign your name.
13. Escort or direct the patient to the front desk to make a follow-up appointment.
Evaluation Preparation: You must evaluate the students on their performance of this task in a field condition related to the actual task.
1 Reviewed the order from the physician.
2 Gathered the equipment and materials.
3. Told the patient your name and job title.
4. Explained the procedure to the patient.
5. Donned safety equipment (patient and technician).
Chapter 3: Skill Level Tasks 15 April 2016 STP 8-68B13-SM-TG 3-59
GO NO GO
Performance Measures
6 Inspected the cast.
7 Cut the wedge on the cast.
8. Performed the applicable wedge procedure (closed/open).
9. Reapplied fiberglass casting material to secure the wedge.
10. Checked the patient's capillary refill.
11. Gave the patient verbal and written instructions on cast care.
12. Annotated the procedure applied to the patient in the medical record or SF 513.
13. Escorted or directed the patient to the front desk to make a follow-up appointment.
Evaluation Guidance: Score each Soldier according to the performance measures in the evaluation guide. Unless otherwise stated in the task summary, the Soldier must pass all performance measures to be scored GO. If the Soldier fails any step, show what was done wrong and how to do it correctly.
3-60 STP 8-68B13-SM-TG 15 April 2016
Chapter 3: Skill Level Tasks
GO NO GO
Performance Measures
Required Related SF 513 None
References
Conditions: You are presented with a physician's order to window a cast of an orthpedic patient. The patient is sitting or supine on an orthopedic examination bed and may be accompanied by a family member/chaperone. Nursing personnel and physician are available. You will need the patient's medical record or Standard Form (SF) 513, Medical RecordConsultation Sheet, the local Standard Operating Procedures (SOP), workcart/station, marking pen, cast saw, cast spreader, eye protection, hearing protection, examination gloves, scissors, roll of adhesive tape, elastic bandages, kerlix, webril rolls, hospital pads (chux) or bed sheet, sink with faucet, cast care booklet or equivalent, and trash receptacle.
Standards: Window the cast according to the physician's orders without causing harm to the patient. Treat the wound appropriately. Replace the segment and secure the segment with the appropriate material. The capillary refill returns within 1 -3 seconds.
NOTE: Windowing is used to remove a piece of the cast, usually square or rectangular, to allow for inspection and treatment of a wound or to relieve pressure at a specific point.
Performance Steps:
1 Review the order from the physician.
NOTE: The physician will draw a square, outlining the wound.
2. Gather the equipment and materials.
a. Gather equipment.
(1) Cast saw with vacuum.
(2) Cast spreader.
(3) Hearing protection.
(4) Eye protection.
(5) Scissors.
b.Assemble materials.
(1) Elastic bandages.
(2) Webril (2 or 3 inch)
(3) Kerlix (4 x 4s).
(4) Examination gloves
(5) Hospital pads (chux) or bed sheets
(6) Cast care booklet or equivalent
(7) Adhesive tape (1 inch)
c. Place equipment and materials on the work cart/station.
3. Tell the patient your name and job title.
CAUTION: The patient may be scared of the cast removal process. Demonstrate to the patient how the cast saw operates and what to expect during the removal process.
4. Explain the procedure to the patient.
5. Don safety equipment (patient and technician).
Chapter 3: Skill Level Tasks 15 April 2016 STP 8-68B13-SM-TG 3-61
Window a Cast 081-68B-1502
6. Position the patient supine in the middle of the bed.
7. Inspect the cast.
a. Place examination gloves on hands.
NOTE: Always practice body substance isolation prior to applying traction, splints, or casts to patients.
b. Ask the patient if the cast was exposed to water or if the cast padding was pulled out.
c. Locate the approximate location of the wound.
8. Cut a window at a 45 degree angle on the cast.
a. Place a hospital pad or bed sheet on the patient's lap or above the cast area.
b. Plug the cast saw cord into the wall outlet.
c.Grasp the cast saw handle between the thumb and index finger.
d.Turn on the cast saw.
e. Apply pressure to the saw at a 45 degree anlgle using an up and down motion of the wrist and lifting the blade in the direction of the marked outline.
f. Turn the cast saw off.
g.Unplug cast saw from wall outlet.
9. Separate the window from the cast.
a. Place the cast spreader edge in the cut section of the cast.
b. Pull the handles together.
10. Remove the window portion of the cast.
11. Cut the underlying cast padding with scissors.
12. Treat the wound, as applicable.
a. Inspect the skin/wound.
NOTE: Report the presence of any unusual skin conditions such as drainage, blisters, rashes, or pressure sores to the physician and follow the physician's instructions.
b. Provide appropriate treatment for the wound, if necessary.
13. Repad the windowed cast.
a.Insert kerlix 4 x 4s to the wound site.
NOTE: Webril can be used for additional cast padding, if necessary.
b. Refit the window on the cast.
NOTE: If the patient needs to return for a wound check, dressing change, or suture removal, line the opening with webril to allow easy removal of the window.
14. Secure the window with an elastic bandage.
a.Wrap the windowed cast with an elastic bandage.
b. Secure the bandage with clips.
c. Secure the clips with adhesive tape.
Chapter 3: Skill Level Tasks 3-62 STP 8-68B13-SM-TG 15 April 2016
15. Check patient's capillary refill.
a. Squeeze patient's fingers/toes; nail beds will turn white.
b. Release patient's fingers/toes; nail beds will return pink.
c.Inform the physician and follow the physician's instructions.
16. Give the patient verbal and written instructions on cast care.
a. Provide the patient with a copy of the clinic hours and telephone number. Instruct the patient to call the cast clinic with any concerns or questions regarding their cast. For after duty hours concerns, instruct the patient to report to the emergency room.
b. Provide the patient with a cast care booklet or written instructions.
c.Instruct the patient to elevate the extremity above the heart, and extend, flex, and wiggle applicable extremities or phalanges (demonstrate for patient) to reduce swelling.
d. Instruct the patient on what not to do.
(1) Do not stick anything down the cast.
(2) Do not remove the cast.
(3) Do not alter the cast (e.g., writing on it, coloring).
17. Annotate the procedure applied to the patient in the medical record or SF 513.
a. Record the procedure applied and cast care instructions provided.
b. Sign your name.
18. Escort or direct the patient to the front desk to make a follow-up appointment.
Evaluation Preparation: You must evaluate the students on their performance of this task in a field condition related to the actual task.
Performance Measures
1 Reviewed the order from the physician.
2 Gathered the equipment and materials.
3 Told the patient your name and job title.
4 Explained the procedure to the patient.
5 Donned safety equipment (patient and technician).
6 Positioned the patient supine in the middle of the bed.
7. Inspected the cast.
8. Cut a window at a 45 degree angle on the cast.
9. Separated the window from the cast.
10. Removed the window portion of the cast.
11. Cut the underlying cast padding with scissors.
Chapter 3: Skill Level Tasks 15 April 2016 STP 8-68B13-SM-TG 3-63
GO NO GO
12 Treated the wound, as applicable.
13 Repadded the windowed cast.
14. Secured the window with an elastic bandage.
15. Checked patient's capillary refill.
16. Gave the patient verbal and written instructions on cast care.
17. Annotated the procedure applied to the patient in the medical record or SF 513.
18. Escorted or directed the patient to the front desk to make a follow-up appointment.
Evaluation Guidance: Score each Soldier according to the performance measures in the evaluation guide. Unless otherwise stated in the task summary, the Soldier must pass all performance measures to be scored GO. If the Soldier fails any step, show what was done wrong and how to do it correctly. References
3-64 STP 8-68B13-SM-TG 15 April 2016
GO NO GO
Chapter 3: Skill Level Tasks
Performance Measures
Required Related SF 513 None
Subject Area 3: Client Intervention - Splinting and Prosthetics
Perform Residual Limb Care for the Amputee Patient
081-68B-1700
Conditions: A residual limb patient has presented to the orthopedic clinic or other hospital setting, with a written and/or verbal order from a physician, ready for stump care and the prosthetic phase of treatment. You will need the patient's medical record, Standard Form (SF) 600, Medical Record - Chronological Record of Medical Care, or SF 513, Medical RecordConsulation Sheet, the local standard operating procedures (SOP), a pen, a treatment table, a hospital gown or equivalent, examination gloves, various sized residual limb socks, elastic bandages (ace wraps) with clips, a bed sheet, a pillow, and a pillowcase.
Standards: Perform residual limb care according to clinic protocol without causing further harm to the patient. Apply the bandage diagonally with greater pressure on the distal aspect of the residual limb and anchored one joint above the residual limb. Observe proper safety precautions and monitor the patient for adverse reactions to the procedure. Residual limb care is used to prevent or control edema, decrease the severity and longevity of phantom sensation/pain, and maintain proper residual limb shape (a cone shape). An improperly applied bandage can cause edema, skin abrasions and create an undesirable shape or fleshly rolls, which make fitting or using a prosthesis difficult.
Performance Steps:
1. Review the order from the physician.
2. Identify the treatment area and the applicable wrapping technique.
3. Gather equipment and materials.
a. Pen
b. Treatment table.
c.Hospital gown or equivalent
d. Examination gloves
e. Residual limb socks (various sizes)
f.Elastic bandages (ace wraps) with clips
g. Bed sheet
h. Pillow
i. Pillowcase
4. Prepare the treatment table using a clean bed sheet, pillow, and pillowcase.
5. Tell the patient your name and job title.
6. Verify the patient's identity.
7. Explain the procedure to the patient.
8. Prepare the patient for treatment.
CAUTION: Always practice body substance isolation prior to providing treatment to patients.
Chapter 3: Skill Level Tasks 15 April 2016 STP 8-68B13-SM-TG 3-65
a. Place examination gloves on hands.
b. Assist in removing clothing and provide a hospital gown or equivalent, if necessary.
c. Position the patient on the treatment table according to the area to be treated.
CAUTION: Use caution around the incision point as not to disrupt the sutures or staples.
9. Remove the existing bandage, if applicable.
10. Inspect the limb for contraindications to residual limb care treatment.
11. Apply the bandages to the residual limb.
CAUTION: Applying the bandage circumferentially will cause a tourniquet effect on the residual limb.
a. Apply the bandage diagonally going from distal to proximal on the extremity.
NOTE: Pressure is greatest distally and decreased proximally (alleviated over a bony prominence). This will ensure the residual limb is cone shaped.
b. Overlap the bandages by 1/3 the width, avoiding any open areas.
c.Anchor the bandages with the bandage clips one joint above the residual limb.
12. Verify the application of the bandage meets the standard.
a. Ask the patient if the pressure of the wrap is felt more in the distal area. If it is not, remove the bandages and rewrap.
b. Ensure the bandages are anchored one joint above the residual limb.
c. Ensure the bandages are wrapped diagonally, not circumferentially.
13. Provide the patient with verbal and written instructions on residual limb care.
a. Keep the residual limb wrapped at all times.
b. Perform basic residual limb hygiene as directed.
(1) Wash with antiseptic soap nightly.
(2) Dry the residual limb without abrading the skin.
(3) Apply topical medication as prescribed.
(4) Do not shave residual limb.
(5) Visually inspect the limb for signs of infection.
c. Change the bandages at least twice daily or when visibly soiled.
NOTE: Reapply the wraps every 3 to 4 hours. This exposes the residual limb to air and prevents the wraps from becoming loose.
(1) Visuaully inspect the residual limb each time the bandages are changed for signs of infection.
(2) Apply a new bandage as instructed.
(3) Check the wrapping technique after reapplication.
(a) Should not be too loose.
(b) Should not be too tight.
(c) Should not be any exposed areas of skin under the bandages.
d. Change the residual limb sock as needed.
Chapter 3: Skill Level Tasks 3-66 STP 8-68B13-SM-TG 15 April 2016
NOTE: As soon as the sock is removed, gently hand wash it with mild soap and water. Rinse and lay flat to allow it to dry thoroughly. Vigorous scrubbing, hanging over clothesline, or drying in dryer will misshape the sock
14. Assist the patient, as needed.
a.Out of the position of treatment.
b.With clothing, if necessary.
15. Annotate the procedure applied to the patient and patient understanding of residual limb care in the medical record or SF 513/SF 600.
a. Record the procedure applied and cast care instructions provided.
b. Sign your name.
16. Escort or direct the patient to the front desk to make a follow-up appointment, as applicable.
Evaluation Preparation: You must evaluate the students on their performance of this task in a field condition related to the actual task.
Performance Measures GO NO GO
1. Reviewed the order from the physician.
2 Identified the treatment area and the applicable wrapping technique.
3 Gathered equipment and materials.
4 Prepared the treatment table using a clean bed sheet, pillow, and pillowcase.
5 Told the patient your name and job title.
6 Verified the patient's identity.
7 Explained the procedure to the patient.
8 Prepared the patient for treatment.
9 Removed the existing bandage, if applicable.
10. Inspected the limb for contraindications to residual limb care treatment
11 Applied the bandages to the residual limb.
12. Verified the application of the bandage meets the standard.
13. Provided the patient with verbal and written instructions on residual limb care.
Chapter 3: Skill Level Tasks 15 April 2016 STP 8-68B13-SM-TG 3-67
14 Assisted the patient, as needed after completing the treatment.
15 Annotated the procedure applied to the patient and patient understanding of residual limb care in the medical record or SF 513/SF 600.
16. Escorted or directed the patient to the front desk to make a follow-up appointment, as applicable.
Evaluation Guidance: Score each Soldier according to the performance measures in the evaluation guide. Unless otherwise stated in the task summary, the Soldier must pass all performance measures to be scored GO. If the Soldier fails any step, show what was done wrong and how to do it correctly.
References
Required
SF 513
SF 600
Related
None
3-68 STP 8-68B13-SM-TG 15 April 2016 Performance
GO NO GO
Chapter 3: Skill Level Tasks
Measures
Subject Area 4: General Medical Remove a Patient's Ring
081-000-0094
Conditions: You have a patient who requires a ring to be removed. You will need a Penrose drain, water-soluble lubricant, and a 25 inch length of umbilical tape or string, or thick silk suture. You are not in a chemical, biological, radiological, nuclear (CBRN) environment.
Standards: Remove the patient's ring without causing further injury to the patient.
Performance Steps:
1. Lubricate the digit with a water-soluble lubricant and apply traction on the ring while turning in a circular motion.
NOTE: Frequently a ring must be removed to prevent laceration of tissue or vascular compromise.
2. Attempt to remove the ring using the string-wrap method.
a.Wrap the penrose drain circumferentially around the finger in a distal to proximal direction to reduce soft tissue swelling. For maximal effect, the wrap should stay in place for a few minutes.
b. A 20 to 25 inch piece of string, umbilical tape or thick silk suture is first passed between the ring and the finger. If there is marked soft tissue swelling, the tip of a hemostat may be passed under the ring to grasp the string and pull it through the ring.
c.The distal string is wrapped clockwise around the swollen finger (proximal to distal) to include the proximal interphalangeal (PIP) joint and the entire swollen finger.
(1) The wrapping is begun next to the ring and should be snug enough to compress the swollen tissue.
(2) The successive loops of the wrap are placed next to each other to keep any swollen tissue from bulging between the strands.
d.When the wrapping has been completed, the proximal end of the string is carefully unwound in the same clockwise direction, forcing the ring over that portion of the finger that has been compressed by the wrap.
3. If unsuccessful, a ring cutter should be used if there is excessive swelling.
a.The ring cutter has a small hook that fits under the ring and serves as a guide for a saw-toothed wheel that cuts the metal.
b.The cut ends of the ring are spread using large hemostats and the ring is removed.
4. Do not cause further injury to the patient.
Evaluation Preparation: You must evaluate the students on their performance of this task in a field condition related to the actual task.
Performance Measures
1. Lubricated the digit with a water-soluble lubricant and applied traction on the ring while turning in a circular motion.
Chapter 3: Skill Level Tasks 15 April 2016 STP 8-68B13-SM-TG 3-69
GO NO GO
2 Attempted to remove the ring using the string-wrap method.
3 If unsuccessful, a ring cutter was used if there is excessive swelling.
4 Did not cause further injury to the patient.
Evaluation Guidance: Score each Soldier according to the performance measures in the evaluation guide. Unless otherwise stated in the task summary, the Soldier must pass all performance measures to be scored GO. If the Soldier fails any step, show what was done wrong and how to do it correctly.
3-70 STP 8-68B13-SM-TG 15 April 2016
GO NO GO
Chapter 3: Skill Level Tasks
Performance Measures
Required Related None None
References
Treat a Casualty for Contusions or Abrasions
081-000-0098
Conditions: You have a casualty with a contusion or an abrasion. All other more serious injuries have been assessed and treated. You will need the casualty's medical record, normal saline, sterile water, gauze, exam gloves, marker, a needle, number 11 blade or tissue forceps, dressing materials, wrap, antibiotic ointment, splinting material, ice, and tape. You are not in a chemical, biological, radiological, nuclear (CBRN) environment.
Standards: Treat the casualty for contusions or abrasions without causing further injury
Performance Steps:
1. Solicit the casualty's history.
2. Assess injury for underlying complications.
a. Abrasions.
(1) Depth of wound (relates to method of anesthesia and cleaning).
(2) Amount of body surface (fluid loss can be significant in children).
(3) Amount of contamination (precursor to infection).
b Contusions.
(1) Underlying fracture. Forceful impact of objects creating injury can result in fractures.
(2) Vascular involvement (extensive bleeding into tissue).
(3) Check distal circulation.
(4) Measure or mark the outline of the contusion.
(5) Measure circumference of injured extremity, and compare measurement to uninjured extremity.
(6) Neurological involvement. Test the sensation and movement of the injured part. Any signs of neurologic deficit may indicate a serious complication.
3. Treat the abrasion.
a. Principles of management are as follows:
(1) Prevention of infection.
(2) Promotion of rapid healing.
(3) Prevention of "tattooing" from retained foreign bodies.
b.Wound must be gently but thoroughly scrubbed with normal saline.
c Remove all foreign matter that cannot be scrubbed out by using a needle, number 11 blade, or tissue forceps.
d. Apply antibiotic ointment.
e. Administer antibiotic therapy, if needed. Antibiotic therapy may be indicated for prophylaxis (consult medical officer).
f.Give casualty instructions on wound care and signs and symptoms of infection.
(1) Topical antibiotic ointment applied three times or four times a day.
(2) Dressing changed every 2 to 3 days with gentle cleaning.
(3) Monitor abrasion for signs and symptoms of infection.
4. Treat the contusion.
a. Ensure that there is no underlying fracture or evidence of any neurological or vascular involvement.
Chapter 3: Skill Level Tasks 15 April 2016 STP 8-68B13-SM-TG 3-71
b. Pad and splint injury, if needed.
c. Manage complications appropriately (consult medical officer if question of underlying injury).
(1) Apply splint or cast to fractures (following medical officer's recommendation).
(2) Refer vascular or neurologic injury to a medical officer.
d. Prescribe rest, ice, compression, and elevation (RICE).
(1) Wrap injured area with a roller bandage to compress the wound and slow bleeding into the tissue.
(2) Apply ice to area over the wound
(3) If wound is significant, have casualty keep area elevated
5. Record all treatment in the casualty's medical record.
Evaluation Preparation: You must evaluate the students on their performance of this task in a field condition related to the actual task.
Performance Measures GO NO GO
1. Solicited the casualty's history.
2. Assessed the injury for underlying complications.
3. Treated the abrasion.
4. Treated the contusion.
5. Recorded all treatment in the casualty's medical record.
Evaluation Guidance: Score each Soldier according to the performance measures in the evaluation guide. Unless otherwise stated in the task summary, the Soldier must pass all performance measures to be scored GO. If the Soldier fails any step, show what was done wrong and how to do it correctly.
References
Required
None
Related
None
3-72 STP 8-68B13-SM-TG 15 April 2016
Chapter 3: Skill Level Tasks
Perform a Wound Irrigation
081-000-0031
Conditions: You need to perform a wound irrigation. You will need protective pads, irrigating syringe, examination gloves, sterile gloves, mask, prescribed irrigating solution, sterile dressing, catch basin, sterile gauze sponges, a sterile solution basin, and Standard Form (SF) 600, Medical Record - Chronological Record of Medical Care You are not in a chemical, biological, radiological, nuclear (CBRN) environment.
Standards: Perform a wound irrigation without violating aseptic techniques or causing further injury to the patient.
CAUTION: All body fluids should be considered as potentially infectious so always observe body substance isolation (BSI) precautions by putting on clean gloves and an eye shield or face guard as a minimal standard of protection
Performance Steps:
1. Identify the patient.
2. Explain the procedure to the patient.
3. Provide privacy, if possible, and position the patient at an angle that allows the irrigating solution to run from the upper end of the wound downward.
4. Place the waterproof protective pad and clean basin or irrigating pouch directly under the area to be irrigated.
5. Drape the patient with a bath blanket to expose only the wound.
6. Remove the used outer dressing and discard in a marked biohazard bag. Discard gloves and wash hands.
7. Prepare the irrigation equipment.
a.Open irrigation tray, using sterile technique, (establish a sterile field using the wrapper of the sterile solution basin).
b. Verify the prescribed irrigating solution.
c.Open the irrigation solution; place the cover on the table, with the inside facing upward.
d. Carefully pour the solution from the supply bottle into the irrigation bottle/syringe, pour solution with the bottle label facing your palm (if the bottle has been opened previoiusly, pour off a small amount of the solution into a trash receptacle).
e. Leave the cover off of the irrigation supply bottle, with the inside of the cover pointing upward.
8. Put on a mask and eye protection.
9. Open the sterile dressing tray if one is to be used.
10. Put on sterile gloves. (See task 081-000-0007.)
Chapter 3: Skill Level Tasks 15 April 2016 STP 8-68B13-SM-TG 3-73
11. Use sterile forceps to remove the inner dressings.
12. Carefully assess the amount and character of drainage, the size and condition of the wound and surrounding tissue.
13. Irrigate the wound.
a. Hold the syringe just above the wound's top edge without touching it, and force fluid into the wound, slowly and continuously.
b. Use enough force to flush out debris, but do not squirt or splash fluid.
c.Irrigate all portions of the wound (do not force solution into the wound's pockets).
d. Continue irrigating until the solution draining from the wound's bottom end is clear.
e. Repeat steps 13a and 13c until the wound is clear of debris and/or drainage.
f.Observe the drainage for blood or characteristics such as unusual color, odor, or consistency.
NOTE: If signs of infection are observed, notify the medical officer immediately.
CAUTION: Use extra care when irrigating a wound in which an abscess has formed. Check all internal surfaces of the wound to inspect for "sinus tract" (resembles tunnels in which purulence or "pus" may be collected). This may require using the gloved hand or a sterile object to gently pull back the flesh. Be careful not to tear healing tissue.
14. Dry the wound and apply a sterile dressing.
a. Using sterile 4x4 pads, gently pat the wound's edges (unless the wound is to have a wet-to-dry dressing; then dry only the surrounding skin). Work from cleanest to most contaminated.
NOTE: Moving from clean to contaminated helps to prevent the spread of pathogens. If the wound is dry, the dressings will remain dry longer and contamination will not spread.
b. Apply a sterile dressing to the wound. (See task 081-000-0030.)
c. Remove the catch basin and protective pad, if they are still in place.
15. Remove the mask, eye protection, and gloves.
16. Reposition the patient for comfort, if necessary.
17. Clean and store the equipment in accordance with local SOP.
18. Perform a patient care hand-wash. (See task 081-000-0006.)
19. Record the procedure on the appropriate medical form.
20. Do not violate aseptic technique, or cause further injury to the patient.
Evaluation Preparation: You must evaluate the students on their performance of this task in a field condition related to the actual task.
Performance Measures GO NO GO
1. Identified the patient.
Chapter 3: Skill Level Tasks 3-74 STP 8-68B13-SM-TG 15 April 2016
2 Explained the procedure to the patient.
3 Provided privacy, if possible, and positioned the patient at an angle that allowed the irrigating solution to run from the upper end of the wound downward.
4 Placed a waterproof protective pad and clean basin or irrigating pouch directly under the area to be irrigated.
5. Draped the patient with a bath blanket to expose only the wound.
6. Removed the used outer dressing and discarded it in a marked biohazard bag.
7 Prepared the irrigation equipment.
8. Put on a mask and eye protection.
9. Opened the sterile dressing tray if one was used.
10. Put on sterile gloves.
11. Used sterile forceps to remove the inner dressings.
12. Carefully assessed the amount and character of drainage, the size and condtion of the wound and surrounding tissue.
13 Irrigated the wound.
14 Dried the wound and applied a sterile dressing.
15 Removed the mask, eye protection, and gloves.
16 Repositioned the patient for comfort, if necessary.
17 Cleaned and stored the equipment in accordance with local SOP.
18 Performed a patient care hand-wash.
19 Recorded the procedure on the appropriate medical form.
20 Did not violate aseptic technique, or cause further injury to the patient.
Evaluation Guidance: Score each Soldier according to the performance measures in the evaluation guide. Unless otherwise stated in the task summary, the Soldier must pass all performance measures to be scored GO. If the Soldier fails any step, show what was done wrong and how to do it correctly.
Chapter 3: Skill Level Tasks 15 April 2016 STP 8-68B13-SM-TG 3-75
GO NO GO
Performance Measures
Chapter 3: Skill Level Tasks
3-76 STP 8-68B13-SM-TG 15 April 2016 References Required Related SF 600 None
Place Bandage on an Open Wound
081-000-0050
Conditions: You have a patient with an open wound that needs bandaged. You have treated all other immediate life threats and taken body substance isolation (BSI) precautions. You will need sterile roller bandages, sterile gauze pads, 4 inch gauze rolls, self-adhering bandages, tape, pen, and Standard Form (SF) 600, Medical Record - Chronological Record of Medical Care You are not in a chemical, biological, radiological, nuclear (CBRN) environment.
Standards: Bandage an open wound without causing further injury to the patient.
CAUTION: All body fluids should be considered potentially infectious. Always observe body substance isolation (BSI) precautions by wearing gloves and eye protection as a minimal standard of protection.
Performance Steps:
1. Perform an emergency medical technician-basic (EMT-B) trauma assessment. (See task 081-68W -0053.)
2. Select the bandaging material for the injury.
3. Explain the procedure to the patient.
4. Ask the patient about any allergies to adhesive tape.
5. Check distal pulses for circulation, motor and sensory (CMS) prior to application of bandage to an open wound.
6. Prepare the patient for bandaging by positioning the body part in a position of function, if able.
7. Place a water proof pad (chux) underneath the patient.
8. Apply the dressing to the wound.
a. The dressing should be large enough to extend beyond the wound on all sides.
NOTE: If necessary, apply additional dressings to adequately cover the wound.
b. Avoid touching the dressing in the area that will come in contact with the wound.
NOTE: If sterile dressings are not available; select the cleanest material available.
c.Grasp the dressing by the corner, taking it directly from its protective pack and place it on the wound.
WARNING: Do not remove the first dressing if it becomes blood soaked. This dressing is helping with the formation of a clot.
d. If dressing becomes blood soaked, add additional dressings on top.
Chapter 3: Skill Level Tasks 15 April 2016 STP 8-68B13-SM-TG 3-77
9. Select the most appropriate size bandage to secure the dressing in place.
a.Tape may be appropriate for small wounds or wounds to the torso.
b. For wounds on the head or extremeties, roller gauze or triangular bandages work best.
NOTE: Point pressure can occur if you bandage around a very small area. Avoid bandaging over a joint.
10. Apply the bandage.
a. For wounds of the hand, maintian position of function during bandaging by placing a roll of gauze in the patient's hand prior to applying the bandage.
NOTE: When bandaging the hands and feet, if possible, leave the fingers and toes exposed so CMS can be assessed.
b.Start at the narrowest part of the limb and work your way up from there.
c.To begin the bandage, make two or three wraps directly over one another to ensure a firm foundation for the bandage.
d.Overlap each spiral approximately one-thrid (1/3) to one-half (1/2) to ensure adequate coverage of the dressing.
e. Secure the self-adhering roller bandage with several overlying wraps.
f. Overlap the bandage, keeping it snug.
NOTE: Be careful not to interfere with circulation.
g. The bandage should extend beyond the dressing on all sides.
CAUTION: Make sure there are no loose ends of cloth, gauze or tape that could get caught when the patient is transported.
h. Secure the bandage with tape or a square knot.
11. Check circulation after application of the bandage.
a. Check pulse distal to the wound.
b. Check CMS function to ensure that the bandage is not too tight.
c. Check for capillary refill (<2 seconds is normal), if applicable.
d.Inspect the skin below the bandaging for pale or cyanotic skin.
e. Ask the patient if they are experiencing any numbness, tingling sensation, coldness in the bandaged part or pain.
NOTE: These are indicators that the bandage may be too tight.
12. Check for irritation.
a. Ask the patient if the bandage rubs.
b. Check for bandage wrinkles near the skin surface.
c. Check for red skin or sores (ulcers) when the bandage is removed.
d. Remove and reapply only the bandage if necessary.
NOTE: If appropriate, immobilize the limb and watch to see that the bleeding remains controlled and check for edema during transport.
13. Keep the patient at rest.
Chapter 3: Skill Level Tasks 3-78 STP 8-68B13-SM-TG 15 April 2016
14. Evacuate the patient if necessary.
15. Record the treatment.
Evaluation Preparation: You must evaluate the students on their performance of this task in a field condition related to the actual task.
Performance Measures GO NO GO
1. Performed an EMT-B trauma assessment.
2. Selected the bandaging material for the injury.
3. Explained the procedure to the patient.
4. Asked the patient about any allergies to adhesive tape.
5. Checked distal pulses for circulation, motor and sensory (CMS) prior to application of bandage to an open wound.
6 Prepared the patient for bandaging by positioning the body part in a position of function, if able.
7 Placed a water proof pad (chux) underneath the patient.
8 Applied the dressing to the wound.
9 Selected the most appropriate sized bandage to secure the dressing in place.
10 Applied the bandage.
11 Checked circulation after application of the bandage.
12 Checked for irritation.
13 Kept the patient at rest.
14 Evacuated the patient if necessary.
15. Recorded the treatment.
Evaluation Guidance: Score each Soldier according to the performance measures in the evaluation guide. Unless otherwise stated in the task summary, the Soldier must pass all performance measures to be scored GO. If the Soldier fails any step, show what was done wrong and how to do it correctly.
Chapter 3: Skill Level Tasks 15 April 2016 STP 8-68B13-SM-TG 3-79
Chapter 3: Skill Level Tasks
3-80 STP 8-68B13-SM-TG 15 April 2016 References Required Related SF 600 None
Perform a Medical Patient Assessment
081-000-0072
Conditions: You have a patient requiring a medical assessment. You will need a stethoscope, sphygmomanometer, and airway adjuncts. You have performed a patient care hand wash and You are not in a chemical, biological, radiological, nuclear (CBRN) environment.
Standards: Perform a medical patient assessment without causing further injury.
Performance Steps:
1. Take body substance isolation precautions.
2. Perform scene size-up.
a. Determine the safest route to access the patient.
b. Determine the mechanism of injury/nature of illness.
c. Determine the number of patients.
d. Request additional help if necessary.
e. Consider stabilization of the spine.
3. Perform an initial assessment.
a. Form a general impression of the patient and the patient's environment.
b. Assess the patient's mental status using the alert, verbal, pain, unresponsive (AVPU) scale.
(1) A - Alert and oriented.
(2) V - Responsive to verbal stimuli.
(3) P - Responsive to painful stimuli.
(4) U - Unresponsive.
c. Determine the chief complaint/apparent life-threatening condition.
d Assess the airway.
(1) Perform an appropriate maneuver to open and maintain the airway, if necessary. (See task 081-COM-1023.)
(2) Insert an appropriate airway adjunct, if necessary. (See tasks 081-000-0034, 081-000-0067, and 081-000-0077.)
e. Assess breathing.
(1) Determine the rate, depth, and ease of breathing, by observing the chest for rise and fall and assess for signs of difficulty breathing, such as increased rate and use of accessory muscles.
(2) Administer oxygen, if necessary using the appropriate delivery device. (See tasks 081-000-0073 and 081-000-0019.)
f. Assess circulation.
(1) Check skin color, temperature, and moisture.
(2) Assess the pulse for rhythm and force.
(a) Check the radial pulse in adults.
(b) Check the radial pulse and capillary refill in children under 6 years old.
(c) Check the brachial pulse and capillary refill in infants.
(3) Check for major bleeding.
(4) Control major bleeding. (See tasks 081-000-0064 and 081-000-0036.)
(5) Treat for shock. (See task 081-000-0043.)
g.Identify priority patients and make a transport decision.
Chapter 3: Skill Level Tasks 15 April 2016 STP 8-68B13-SM-TG 3-81
NOTE: High priority conditions that require immediate transport include poor general impression, unresponsive, responsive but not following commands, difficulty breathing, shock, complicated childbirth, chest pain with systolic blood pressure less than 100, uncontrolled bleeding, and severe pain.
4. Conduct a rapid physical exam if the patient is unconscious. Inspect each of the following areas for deformities, contusions, abrasions, punctures or penetration, burns, tenderness, lacerations, swelling (DCAP-BTLS).
a. Assess the head.
b. Assess the neck.
c.Assess the chest.
d. Assess the abdomen.
e. Assess the pelvis.
f. Assess the extremities.
g. Assess the posterior.
5.Gather a SAMPLE (S-symptoms, A-allergies, M-medications, P-past medical history, Llast oral intake, E-events) history from the patient.
a. Signs and symptoms. Gather history of the present illness, onset, provocation, quality, radiation, severity, and time (OPQRST) from the patient.
(1) Respiratory.
(a) Onset - When did it begin?
(b) Provocation - What were you doing when this came on?
(c) Quality - Can you describe the feeling you have?
(d) Radiation - Does the feeling seem to spread to any other part of your body? Do you have pain or discomfort anywhere else in your body?
(e) Severity - On a scale of 1 to 10, how bad is your breathing trouble (10 is worst, 1 is best)?
(
f) Time - How long have you had this feeling?
(g) Interventions - Have you taken any medication to help you breathe? Did it help?
(2) Cardiac.
(a) Onset - When did it begin?
(b) Provocation - What were you doing when this came on?
(c) Quality - Can you describe the feeling you have?
(d) Radiates - Does the feeling seem to spread to any other part of your body? Do you have pain or discomfort anywhere else in your body?
(e) Severity - On a scale of 1 to 10, how bad is your chest pain (10 is worst, 1 is best)?
(
f) Time - How long have you had this feeling?
(g) Interventions - Have you taken any medication to help you? Did it help?
(3) Altered mental status.
(a) Description of the episode - Can you tell me what happened? How did the episode occur?
(b) Onset - How long ago did it occur?
(c) Duration - How long did it last?
(d) Associated symptoms - Was the patient sick or complaining of not feeling well before this happened?
(e) Evidence of trauma - Was the patient involved in falls or accidents recently?
(
f) Interventions - Has the patient taken anything to help with this problem? Did it help?
(g) Seizures - Did the patient have a seizure?
Chapter 3: Skill Level Tasks 3-82 STP 8-68B13-SM-TG 15 April 2016
(h) Fever - Did the patient have a fever? What was the patient's temperature?
(4) Allergic reaction.
(a) History of allergies - Do you have any allergies?
(b) What were you exposed to - Is there any chance that you were exposed to something that you may be allergic to?
(c) How were you exposed - How did you come into contact with ___________ (whatever the patient is allergic to)?
(d) Effects - What kind of symptoms are you having? How long after you were exposed did the symptoms start?
(e) Progression - How long after you were exposed did the symptoms start? Are they worse now than they were before?
(
f) Interventions - Have you taken anything to help? Did it help?
(5) Poisoning/overdose.
(a) Substance - What substance was involved?
(b) When did you ingest/become exposed - When did the exposure/ingestion occur?
(c) How much did you ingest - How much did the patient ingest?
(d) Over what time period - Over how long a period did the ingestion occur?
(e) Interventions - What interventions did the family or bystanders take?
(
f) Estimated weight - What is the patient's estimated weight?
(6) Environmental emergency.
(a) Source - What caused the injury?
(b) Environment - Where did the injury occur?
(c) Duration - How long were you exposed?
(d) Loss of consciousness - Did you lose consciousness at any time?
(e) Effects (general or local) - What signs and symptoms are you having? What effect did being exposed have on the patient?
(7) Obstetrics.
(a) Are you pregnant?
(b) How long have you been pregnant?
(c) Are you having pain or contractions?
(d) Are you bleeding? Are you having any discharge?
(e) Do you feel the need to push?
(
f) When was your last menstrual period?
(8) Behavioral.
(a) How do you feel?
(b) Determine suicidal tendencies - Do you have a plan to hurt yourself or anyone else?
(c) Is the patient a threat to self or others?
(d) Is there a medical problem?
(e) Interventions?
b. Allergies.
c. Medications.
d. Past pertinent history.
e. Last oral intake.
f. Event(s) leading to present illness.
6. Perform a focused physical examination on the affected body part/system.
7. Obtain baseline vital signs. (See tasks 081-000-0011, 081-000-0009, 081-000-0008, and 081-000-0010.)
Chapter 3: Skill Level Tasks 15 April 2016 STP 8-68B13-SM-TG 3-83
8. Provide medication, interventions, and treatment as needed. (See tasks 081-000-0014, 081-000-0063, 081-000-0025, 081-000-0026, 081-000-0033, 081-000-0028, 081-000-0139, 081-000-0045, 081-000-0016, 081-000-0017, 081-000-0043, and 081-000-0053.)
9. Reevaluate the transport decision.
10. Consider completing a detailed physical examination.
11. Perform ongoing assessment.
a. Repeat the initial assessment.
b. Repeat vital signs.
c.Repeat the focused assessment regarding the patient's complaint or injuries.
d. Check effectiveness of interventions.
e. Confirm priority.
Evaluation Preparation: You must evaluate the students on their performance of this task in a field condition related to the actual task.
Performance Measures GO
1. Took body substance isolation precautions.
2. Performed a scene size-up.
3. Performed an initial assessment.
4. Conduct a rapid physical exam if the patient is unconscious. Inspect each of the following areas for DCAP-BTLS.
5 Gathered a SAMPLE history from the patient.
6 Performed a focused physical examination on the affected body part/system.
7 Obtained baseline vital signs.
8 Provided medication, interventions, and treatment.
9 Reevaluated the transport decision.
10 Considered completing a detailed physical examination.
11 Performed ongoing assessment.
Evaluation Guidance: Score each Soldier according to the performance measures in the evaluation guide. Unless otherwise stated in the task summary, the Soldier must pass all performance measures to be scored GO. If the Soldier fails any step, show what was done wrong and how to do it correctly.
3-84 STP 8-68B13-SM-TG 15 April 2016
Chapter 3: Skill Level Tasks
GO
NO
15 April 2016 STP 8-68B13-SM-TG 3-85 References Required Related None None
Chapter 3: Skill Level Tasks
Provide Basic Emergency Treatment for a Painful, Swollen, Deformed Extremity
081-000-0071
Conditions: You have a casualty who has a musculoskeletal injury. More serious injuries have been assessed and treated. You will need cravats, dressings, splinting materials, and Department of Defense (DD) Form 1380, Tactical Combat Casualty Care (TCCC) Card. You are not in a chemical, biological, radiological, nuclear (CBRN) environment.
Standards: Immobilize the injured extremity without causing further injury to the casualty.
CAUTION: All body fluids should be considered potentially infectious. Always observe body substance isolation (BSI) precautions by wearing gloves and eye protection as a minimal standard of protection.
Performance Steps:
1. Identify the signs and symptoms of a musculoskeletal injury.
a. Pain and tenderness, especially when the injured part is touched or moved.
b. Deformity or angulation.
NOTE: When in doubt, look at the uninjured side and compare it to the injured one.
c Crepitus.
d.Edema (swelling).
e. Ecchymosis (bruising).
f. Exposed bone.
g. Joints locked into position.
h. Impaired circulation, motor function, and sensation.
2. Splint the extremity. (See task 081-000-0066.)
NOTE: 1. In order for any splint to be effective, it must immobilize the adjacent joints and bone ends. 2. If the casualty is unstable, immobilize on a long spine board and transport immediately.
a. Assess pulse, motor function, and sensation (PMS).
(1) Check for a pulse distal to the injury.
(2) Ask if the casualty can feel your touch distal to the injury.
(3) Ask the casualty to wiggle his fingers or toes, grasp your fingers, or push his feet against your hands.
NOTE: If the fracture is open, apply a dressing to control bleeding and to protect the area.
b. Manually stabilize the injury site. This can be done by you, your assistant, or the casualty.
NOTE: Maintain manual stabilization or traction during positioning and until the splinting process is complete.
c. Attempt to realign an angulated fracture once, if necessary.
Chapter 3: Skill Level Tasks 3-86 STP 8-68B13-SM-TG 15 April 2016
NOTE: Attempt to realign only if there is impaired circulation (loss of distal pulses, cold to the touch) or the extremity is so grossly angulated that splinting would not be effective.
(1) Gently grasp the distal extremity while your assistant places one hand above and one hand below the injury site.
(2) Gently pull manual traction in the direction of the long axis of the bone.
(3) If resistance is felt or it appears the bone ends will come through the skin, top and splint the extremity in the position found. Evacuate the casualty as soon as possible.
(4) If no resistance is felt, maintain gentle traction until the extremity is properly splinted.
d. Measure or adjust the splint. Apply padding.
e. Apply and secure the splint to immobilize adjacent bones.
f. Splint the extremity in the position of function.
g. Reassess PMS distal to the injury.
3. Treat for shock. (See task 081-000-0043.)
4. Consider administration of pain medication.
5. Document all care given on the DD Form 1380. (See tasks 081-000-0068 and 081-000-0013.)
6. Transport to the nearest medical treatment facility.
Evaluation Preparation: You must evaluate the students on their performance of this task in a field condition related to the actual task.
1 Identified the signs and symptoms of a musculoskeletal injury.
2 Splinted the extremity.
3 Treated for shock.
4 Considered administration of pain medication.
5 Documented all care given on DD Form 1380.
6 Transported to the nearest medical treatment facility.
Evaluation Guidance: Score each Soldier according to the performance measures in the evaluation guide. Unless otherwise stated in the task summary, the Soldier must pass all performance measures to be scored GO. If the Soldier fails any step, show what was done wrong and how to do it correctly.
Chapter 3: Skill Level Tasks 15 April 2016 STP 8-68B13-SM-TG 3-87
Performance Measures GO NO GO
References Required Related DD Form 1380 None
Administer Medications
0081-000-0121
Conditions: You have a patient requiring medication to be administered. You have the patient's medical records and a medical officer's order to give the medication. You will need prescribed medication, calibrated disposable medicine cups, tray, non-sterile gloves, sterile gauze, sterile normal saline, tongue depressor, sterile medication chamber T-piece, corrugated tubing, nonrebreather mask, airflow tubing, a source of compressed air or oxygen with flowmeter, nebulizer kit, metered dose inhaler mouthpiece, Department of the Army (DA) Form 4678, Therapeutic Documentation Care Plan (Medication), DA Form 3949, Controlled Substances Record, and a pen. A patient care handwash has been performed. You are not in a chemical, biological, radiological, nuclear (CBRN) environment.
Standards: Administer medications with zero errors in accordance with the medical officer's orders and without causing harm/injury to the patient.
Performance Steps:
1. Check the DA Form 4678 against the medical officer's orders.
NOTE: Always use body substance isolation (BSI) precautions when administering common medications, at a minimum gloves and eye protection.
a. Right medication.
b. Right dose of medication.
c. Right patient.
d. Right route of administration.
e. Right time to be administered.
2. Select the medication.
NOTE: Take the DA Form 4678 with you when giving medications. This provides a means for a final check before giving the medication(s). This also allows you to document the administration before leaving the patient and prevents forgetting to document or documenting on the wrong patient's DA Form 4678.
a. Check the medication label three times to ensure that the correct medication is being prepared for administration.
(1) First time when removing the container from the storage shelf.
(2) Second time when preparing the medication dose.
(3) Third time when returning the container to the storage shelf.
b. Check the expiration date of the medication.
c. Handle only one medication at a time.
NOTE: If unfamiliar with a medication, look it up to determine contraindications, precautions, and side effects before preparing it for administration.
3. Confirm patient identity.
a. Ask patient for their full name.
b. Check patient's identification band.
Chapter 3: Skill Level Tasks 3-88 STP 8-68B13-SM-TG 15 April 2016
c Have patient state their date of birth.
4. Ask patient about any allergies.
NOTE: Checking for allergies is essential to prevent patient injury. Allergies include foods and latex.
a. Check patient's clinical records for allergies.
b. Check patient's wrist for allergy bands or bracelet(s).
5 Explain the procedure to the patient.
6. Administer by mouth/orally (po) medications.
a. Calculate the amount of medication required to equal the prescribed dose.
b. Prepare the prescribed dose of medication.
(1) Tablets or capsules. Transfer the prescribed dose of tablets or capsules to the medicine cup.
(2) Liquids.
(a) Pour the prescribed dose of liquid medication into the medicine cup.
(b) Small amounts of liquid medication should be drawn up in a syringe.
(3) Powders.
(a) Pour the correct dose of powdered or granulated medication into the medicine cup.
(b) Pour the required amount of water or juice into a paper cup.
(4) Unit-dose. Keep all unit-dose medications in their individual packages until you are with the patient.
NOTE: Open the packages in front of the patient and pour the medications into a clear medication cup or into the patient's hand (if the patient requests this and is reliable).
c Sign for controlled drugs on DA Form 3949, in accordance with local standing operating procedure (SOP).
d. Correctly identify the patient.
e. Locate the correct medication.
f.Give the medication to the patient at the prescribed time.
CAUTION: Do not leave a medication tray, package, or cup within the reach of patient. If you must leave the room, take the medication with you.
(1) Tablets, capsules, or liquids. Observe the patient swallow the tablets, capsules, or liquids.
(2) Buccal and sublingual administration.
CAUTION: Do not give liquids to a patient receiving buccal medication because some buccal tablets can take up to 1 hour to be absorbed.
(a) Place the tablet in the buccal pouch (between the cheek and gum).
NOTE: Alternate sides of the mouth for repeat doses to prevent continuous irritation of the same site.
Chapter 3: Skill Level Tasks 15 April 2016 STP 8-68B13-SM-TG 3-89
WARNING: If the patient smokes, tell them not to do so before the drug has dissolved because nicotine's vasoconstrictive effects slows absorption.
(b) Sublingual administration (place the tablet under the patient's tongue).
NOTE: Instruct the patient to keep the medication in place until it dissolves. Caution them against chewing the tablet or touching it with their tongue to prevent accidental swallowing. Inform the angina patient to wet the nitroglycerin tablet with saliva and to keep it under their tongue until it has been fully absorbed.
(c) Translingual administration. Tell the patient to hold the medication canister vertically, with the valve head at the top and spray the orifice as close to their mouth as possible.
(d) Instruct them to spray the dose onto their tongue by pressing the button firmly.
WARNING: Remind the patient using a translingual aerosol form that they should not inhale the spray but should release it under tongue. Also tell them to wait 10 seconds or so before swallowing.
7. Administer aerosolized and powdered respiratory medications.
NOTE: Avoid treatments immediately before and after meals. This helps decrease the chance of vomiting or appetite suppression, especially with medications that cause the patient to cough or expectorate or those that are taken in conjunction with percussion/bronchial drainage.
a. Prepare to administer inhalation medication.
(1) Review the medical officer's order.
(a) Determine the drug schedule and the number of prescribed inhalations.
(b) Compare the medication administration record with the medical officer's order and medication label.
(2) Assess the patient's medical history to identify contraindications/allergies to drug administration.
(3) Identify the patient and provide privacy.
(4) Explain the procedure to the patient.
(5) Wash your hands and follow standard precautions.
(6) Arrange equipment.
(7) Assess the patient's respiratory status and report unexpected findings to the medical officer.
b. Assess the patient's knowledge and ability to handle the required equipment.
(1) Knowledge of disease and drug therapy.
(2) Willingness to learn.
(3) Ability to demonstrate use of the required equipment.
(a) Handicap such as blindness.
(b) Ability to form an airtight seal with mouth.
(c) Appropriate strength.
c. Administer the medication.
(1) Liquid metered dose inhaler.
(a) Ensure the patient is in a sitting or standing position.
(b) Insert the medication canister stem down into the longer part of the metered dose dispenser.
Chapter 3: Skill Level Tasks 3-90 STP 8-68B13-SM-TG 15 April 2016
(c) Hold the canister upright and shake to mix the medication and propellant before each use.
(d) Remove the mouthpiece cover and have the patient hold the mouthpiece 2 inches from his mouth.
(e) Have the patient take a deep breath through pursed lips and then exhale to promote greater inspiratory volume.
(
f) Instruct the patient to inhale slowly, through the mouth, as the canister is depressed. Have the patient inhale for 3 to 5 seconds.
(g) Instruct the patient to hold his breath for 10 seconds and then exhale slowly through pursed lips.
(2) Dry powder inhaler.
(a) Have the patient hyperextend the neck.
(b) Ask the patient to place his lips around the mouth of the dispenser.
(c) Ensure there is an airtight seal.
(d) Have the patient depress the canister while taking a quick deep breath.
(e) Instruct the patient to hold his breath for 10 seconds.
(
f) Have the patient exhale slowly through pursed lips.
(g) Instruct the patient to wait 2 minutes between puffs, if more than one puff is ordered.
(3) Inhaler with a spacing device.
(a) Shake the inhaler.
(b) Remove the mouthpiece cover.
(c) Insert the metered dose inhaler into the spacer device.
(d) Have the patient place in mouth and close lips.
(e) Instruct the patient to breathe normally through the spacer device mouthpiece.
(
f) Have the patient depress the canister one time.
(g) Ask the patient to breathe in slowly for 5 seconds.
(h) Have the patient hold his breath for 5 to 10 seconds and then slowly exhale.
(
i) Wait the appropriate interval and repeat the procedure for the prescribed number of puffs.
(4) Small volume nebulizer.
(a) Assemble equipment according to manufacturer's instructions.
(b) Add the prescribed medication and diluent to the nebulizer.
(c) Keep the nebulizer vertical while connecting it to a T-piece side arm.
(d) Attach corrugated tubing to one end of the T-piece.
(e) Attach the mouthpiece to the other end of the T-piece.
(
f) Attach the airflow tubing to the nebulizer.
(g) Attach the other end of the airflow tubing to the air or oxygen source.
(h) Have the patient hold the mouthpiece between the lips using gentle pressure.
(
i) Turn the nebulizer on and set the driving air or oxygen to 8 liters/min.
(
j) Ask the patient to take a slow deep breath, pause, and exhale passively.
(k) Observe to determine if a mist forms. If a mist does not form, the nebulizer is not operating correctly.
(
l) Monitor for tachycardia during medication administration.
(m) Tap the nebulizer cup periodically to prevent obstruction.
(n) Turn off the compressor or oxygen when administration is complete.
(o) Encourage the patient to rinse his mouth after treatment is complete, especially if steroids were used.
(p) Reset oxygen to the prescribed rate if ordered.
Chapter 3: Skill Level Tasks 15 April 2016 STP 8-68B13-SM-TG 3-91
d. Evaluate the patient's response to treatment and report unexpected outcomes to the charge nurse or medical officer.
(1) Respiratory rate.
(2) Lung sounds.
8. Clean and store all equipment.
9. Record the administration of all medications on the appropriate medical forms.
a.Initial the DA Form 4678.
b. Annotate the nursing notes when administering controlled drugs, nonscheduled (PRN) medications, and other medications as required by local policy.
(1) Name of the medication.
(2) Time the medication was administered.
(3) Reason for the medication.
10. Record the omission of a medication on the appropriate medical forms whenever a scheduled medication is not administered.
a. Annotate DA Form 4678 by placing a circle in the initial block.
b. Annotate the nursing notes.
(1) Name of the medication.
(2) Time it should have been administered.
(3) Reason it was not administered.
(4) Follow-up action taken.
Evaluation Preparation: You must evaluate the students on their performance of this task in a field condition related to the actual task.
1 Checked the DA Form 4678 against the medical officer's orders.
2 Selected the medication.
3 Confirmed patient identity.
4 Asked patient about any allergies.
5 Explained the procedure to the patient.
6 Administered by mouth/oral (po) medications.
7. Administered aerosolized and powdered respiratory medications.
8. Cleaned and stored all equipment.
9. Recorded the administration of all medications on the appropriate medical forms.
10. Recorded the omission of a medication on the appropriate medical forms whenever a scheduled medication was not administered.
Chapter
Skill
3-92 STP 8-68B13-SM-TG 15 April 2016
3:
Level Tasks
Performance Measures GO NO GO
Evaluation Guidance: Score each Soldier according to the performance measures in the evaluation guide. Unless otherwise stated in the task summary, the Soldier must pass all performance measures to be scored GO. If the Soldier fails any step, show what was done wrong and how to do it correctly. References
DA Form 4678
15 April 2016 STP 8-68B13-SM-TG 3-93
Chapter 3: Skill Level Tasks
Required Related DA Form 3949 None
Change a Sterile Dressing
081-000-0030
Conditions: You have a patient with a wound that requires a sterile dressing change. You will need exam gloves, a protective pad, scissors, sterile gloves, sterile gauze, basin, surgical sponges, face mask, swabs, hand towels, tape, dressings, sterile cleaning solution, adhesive solvent, and forceps. You are not in a chemical, biological, radiological, nuclear (CBRN) environment.
Standards: Change a sterile dressing without violating aseptic technique.
Performance Steps:
1. Verify the medical officer's orders.
2. Identify the patient.
3. Gather the required supplies.
4. Perform a patient care hand-wash. (See task 081-000-0006.)
5. Explain the procedure to the patient.
6. Prepare the patient.
a. Expose the wound by moving the patient's clothing and folding the bed linens away from the wound area, if necessary.
b. Position the patient to provide maximum wound exposure.
c. Place a protective pad under the patient.
7. Prepare the work area.
a. Clear the bedside stand or table.
b. Cut the required tape strips and attach them where they are accessible.
8. Put on a mask and exam gloves.
9. Remove the outer dressing.
WARNING: Do not peel the tape away from the wound.
a. Loosen the ends of the tape by peeling toward the wound while supporting the skin around the wound.
b.Grasp the edge of the dressing and gently remove it from the wound.
c. Note any drainage, color, and odor associated with the dressing.
d.If the dressing is grossly saturated, discard the dressing and the gloves in a contaminated waste container otherwise, dispose of in regular trash.
10. Perform a patient care hand-wash.
11. Establish a sterile field. (See task 081-000-0163.)
Chapter 3: Skill Level Tasks 3-94 STP 8-68B13-SM-TG 15 April 2016
12. Put on a mask and sterile gloves.
13. Remove the inner dressings.
a. Using forceps, remove the dressings one at a time.
b. Note any drainage, color, and odor associated with the dressings.
c. Discard the dressings in a contaminated waste container.
d. Drop the forceps on the glove wrap.
14. Assess the wound for:
a. Redness, swelling, foul odor, and/or bleeding.
CAUTION: Notify the supervisor if any of the above conditions are present.
b. Drainage that contains blood, serum, or pus (usually yellow but may be blood-tinged, greenish, or brown).
NOTE: If drainage is present, inform the medical officer and request orders to irrigate the wound. (See task 081-000-0031.)
15. Clean the wound with sterile gauze soaked with a sterile cleaning solution in accordance with medical officers orders and/or local standard operating procedure (SOP).
a. Linear wound.
(1) First stroke. Clean the area directly over the wound with one wipe and discard the gauze.
(2) Second stroke. Clean the skin area on one side next to the wound with one wipe and discard the gauze.
(3) Third stroke. Clean the skin area on the other side next to the wound with one wipe and discard the gauze.
(4) Continue the procedure alternating sides of the wound, working away from the wound until the area is cleaned.
b. Circular wound.
(1) First stroke. Start at the center of the wound, wipe the wounded area with an outward spiral motion, and then discard the gauze.
(2) Second stroke. Clean the skin area next to the wound using an outward spiral motion, approximately one and one half revolutions, and then discard the gauze.
(3) Using successive outward, spiral strokes of approximately one and one half revolutions, clean the entire area around the wound.
16. Change sterile gloves.
17. Remove adhesive from around the wound, if necessary.
a. Using a solvent-soaked cotton tipped applicator or gauze pad, rub gently over the adhesive residue in accordance with medical officers orders and/or local SOP.
b.Observe the skin for signs of irritation.
18. Apply a sterile dressing.
NOTE: If the wound has a drain inserted, cut the dressing halfway through and position it around the drain.
19. Remove sterile gloves and face mask.
Chapter 3: Skill Level Tasks 15 April 2016 STP 8-68B13-SM-TG 3-95
20. Secure the dressing with tape.
NOTE: Write the date and time the dressing was changed on a piece of tape, initial it, and secure the tape to the dressing.
a. Apply tape to the edge of the dressing with half of the tape on the dressing and the other half on the skin.
b.Write the date and time the dressing was changed on a piece of tape, initial it, and secure the tape to the dressing.
21. Dispose of contaminated materials in appropriate waste container in accordance with local SOP.
22. Perform a patient care hand-wash.
23. Record the procedure on the appropriate form in accordance with local SOP.
a. Record the date and time of the dressing change.
b. Document assessment of the wound's appearance.
(1) Type and amount of drainage, if any.
(2) Characteristics of the wound before and after cleaning.
Evaluation Preparation: You must evaluate the students on their performance of this task in a field condition related to the actual task.
Performance Measures
1 Verified the medical officer's orders.
2 Identified the patient.
3 Gathered the required supplies.
4 Performed a patient care hand-wash.
5 Explained the procedure to the patient.
6 Prepared the patient.
7 Prepared the work area.
8. Put on a mask and exam gloves.
9. Removed the outer dressing.
10. Performed a patient care hand-wash.
11. Established a sterile field.
12. Put on a mask and sterile gloves.
3-96 STP 8-68B13-SM-TG
April 2016
Chapter 3: Skill Level Tasks
15
GO NO GO
Performance Measures
13 Removed the inner dressings.
14 Assessed the wound for.
15. Cleaned the wound with sterile gauze soaked with a sterile cleaning solution in accordance with medical officers orders and/or local SOP.
16. Changed sterile gloves.
17. Removed adhesive from around the wound, if necessary.
18. Applied a sterile dressing.
19. Removed sterile gloves and face mask.
20. Secured the dressing with tape.
21. Disposed of contaminated materials in the appropriate waste container in accordance with local SOP.
22 Performed a patient care hand-wash.
23 Recorded the procedure on the appropriate form in accordance with local SOP.
Evaluation Guidance: Score each Soldier according to the performance measures in the evaluation guide. Unless otherwise stated in the task summary, the Soldier must pass all performance measures to be scored a GO. If the Soldier f ails any step, show what was done wrong and how to do it correctly.
Chapter 3: Skill Level Tasks 15 April 2016 STP 8-68B13-SM-TG 3-97
GO NO GO
References Required Related None None
Establish a Sterile Field
081-000-0163
Conditions: You need to establish a sterile field. You will need sterile packs, sterile drapes and towels, a small solution basin, sterile liquids, sterile needles and syringes, sterile gloves, and a flat, clean, dry surface. You have performed a patient care handwash. You are not in a chemical, biological, radiological, nuclear (CBRN) environment.
Standards: Establish a sterile field without violating aseptic technique.
Performance Steps:
1. Obtain sterile equipment and supplies in accordance with local standard operating procedure (SOP).
2. Select a flat, clean, dry surface.
NOTE: Choose a surface away from drafts, if possible.
3. Create a sterile field with a double-wrapped sterile package.
a. Lift the top flap of the sterile pack away from the body without crossing your hand or arm over the sterile field.
b.Lift the remaining flaps, one at a time, away from the center without crossing your hand or arm over the sterile field.
4. Introduce sterile items onto the sterile field.
NOTE: The outer two inch border of the sterile field is considered contaminated. Items that fall into that area are considered contaminated and should not be used. If an item rolls from the two inch border onto the sterile field, the sterile field is considered contaminated and the procedure must be stopped immediately and the procedure must be repeated using a new sterile pack.
a. Commercially prepacked items (syringes, sutures, needles, etc.).
(1) Keeping your hands on the outside of the sterile wrapper, grasp the opening edge of the package.
(2) Carefully fold (roll) each end of the wrapper back toward your wrists.
(3) Without contaminating the contents, drop them onto the sterile field.
NOTE: If the wrapper has been punctured, torn, or has water marks, the item is no longer sterile.
b. Centralized material service (CMS) items wrapped in double muslin wrappers.
(1) Remove the outer wrapper.
(2) Grasp the edge of the item being unwrapped, keeping your hand on the outside of the inner wrapper.
(3) Fold each edge of the wrapper slowly back over your wrist of the hand holding the item.
(4) Drop the item onto the sterile field.
5 Open sterile liquids.
Chapter 3: Skill Level Tasks 3-98 STP 8-68B13-SM-TG 15 April 2016
NOTE: 1. Liquids prepared in CMS are considered sterile if a vacuum release sound is heard when the bottle is opened. If there is no sound, the bottle is considered unsterile, and a new bottle must be obtained before continuing the procedure. 2. Some commercially prepared bottles of sterile solution may not make a vacuum release sound.
a. Remove the outer protective bottle seal, if necessary, and remove the cap.
b. Hold the cap in one hand, or place the cap so the top rests on the table.
NOTE: The bottle rim and inside of the cap are considered sterile.
CAUTION: Discard the sterile solution under any of the following conditions: 1. Anyone touches the bottle rim. 2. The lip of the bottle touches non-sterile items. 3. Someone touches the inside of the cap or the part of the cap that touches the container is placed on the table.
6. Pour sterile liquids.
a. Hold the bottle with the label against your palm.
b. Pour a small amount of the liquid from the bottle into a waste receptacle.
c. Hold the bottle about 6 inches above the container into which the liquid is to be poured.
d. Slowly pour a steady stream to avoid splashing, thus preventing contamination.
e. Replace the cap without contaminating the bottle.
f.Write the date and time the bottle was opened and your initials on the label. Return the bottle to the storage area or discard it in accordance with local SOP.
NOTE: If the sterile field is contaminated at any time, the procedure must be stopped immediately. Repeat all steps using new sterile equipment.
Evaluation Preparation: You must evaluate the students on their performance of this task in a field condition related to the actual task.
Performance Measures
1 Obtained sterile equipment and supplies in accordance with local standard operating procedure.
2 Selected a flat, clean, dry surface.
3 Created a sterile field with a double-wrapped sterile package.
4 Introduced sterile items onto the sterile field.
5 Opened sterile liquids.
6 Poured sterile liquids.
Evaluation Guidance: Score each Soldier according to the performance measures in the evaluation guide. Unless otherwise stated in the task summary, the Soldier must pass all performance measures to be scored GO. If the Soldier fails any step, show what was done wrong and how to do it correctly.
Chapter 3: Skill Level Tasks 15 April 2016 STP 8-68B13-SM-TG 3-99
GO NO GO
Chapter 3: Skill Level Tasks
3-100 STP 8-68B13-SM-TG 15 April 2016 References Required Related None None
Close a Minor Laceration
081-000-0051
Conditions: You have a casualty with a minor laceration requiring closure. The laceration does not involve the face, hands, feet, or genitalia. You will need sterile suture set, appropriate type and size of suture, staples, skin adhesive, steri strips, lidocaine 1% with and without epinephrine, saline irrigation solution, antiseptic solution, sterile gloves, antibiotic ointment, sterile dressing, and Standard Form (SF) 600, Medical Record - Chronological Record of Medical Care You are not in a chemical, biological, radiological, nuclear (CBRN) environment.
Standards: Close a minor laceration. Properly clean, anesthetize, and provide medical treatment to the injured area without causing further harm.
Performance Steps:
1. Prepare the injury area.
a. Assist the patient into the appropriate position for skin prep of the suture site.
b. Expose the preparation area.
c. Assess the patient's skin condition in the preparation area.
d. Position a chux (linen-saver pad) beneath the patient to catch spills and avoid linen changes.
e. Proceed with a 10 minute scrub to ensure a clean preparation area.
NOTE: Use a benzalkonium chloride antiseptic cleaning agent solution, in case the patient has an allergy to betadine or iodine.
f.Wash the area with a guaze pad dipped in the antiseptic soap solution.
g. Using a circular motion, start at the suture site and work outward toward the periphery of the area to avoid recontaminating the clean area.
h. Apply light friction while washing to improve the antiseptic effect of the solution.
2. Anesthetize the area. (See task 081-68W -0090.)
3 Select the proper method of closure.
a. Skin adhesive.
(1) Hold the wound edges together and slightly everted with tissue forceps.
(2) Apply adhesive with the applicator tip by lightly wiping along the long axis of the wound.
NOTE: Three to four thin layers should be applied successively. Avoid droplets or a single thick layer.
(3) Hold the wound edges together for approximately 1 minute.
(4) Instruct the casualty not to apply ointment or dressing to the wound.
b.Steri strips.
(1) Apply benzoin to a 2 to 3 cm area beyond the wound edges. Do not allow benzoin to enter the wound.
(2) Using forceps, attach the strip to the skin on one side and then pull the steri strip across the wound to close the wound edges.
Chapter 3: Skill Level Tasks 15 April 2016 STP 8-68B13-SM-TG 3-101
(3) Start in the center and progress toward each end. Leave some space between individual strips.
(4) Instruct the casualty not to get the area wet.
c. Staples.
(1) Hold the wound edges together with tissue forceps.
(2) Place the stapling device gently against the skin surface.
(3) Slowly squeeze the trigger.
(4) Evenly place only the necessary amount of staples to close the wound.
NOTE: There is little to no benefit to locally infiltrating an area for 1 to 2 staples to be placed. The anesthetic is more discomforting than the procedure.
d Suture.
(1) Select the proper size and type of material.
(2) Check for adequate anesthesia by grasping the wound edges with tissue forceps. Note if the casualty can feel pain.
(3) Grasp the needle with the needle holder about 1/2 to 1/3 the distance from where the suture is attached.
(4) Hold the needle holder in the palm, using the index finger for fine control.
(5) Enter the skin at approximately a 90 degree angle on the far side of the wound and exit on the near side.
NOTE: You should enter and exit the skin about 2 millimeter from the edge. Entry and exit points should be directly across from each other.
(6) Pull the suture through the wound until approximately a 2 cm tail remains on the far side of wound.
(7) Hold the end of the suture attached to the needle in the nondominant hand.
(8) Hold the needle holder in the dominant hand.
(9) Loop the suture twice around the needle holder.
(10) Grasp the free end of the suture with the blades of the needle holder.
(11) Cross the hands so that the hand holding the swaged end is on the far side and the hand holding the needle holder and free end are on the near side of the wound.
(12) Pull upward on the suture ends when clinching the first throw.
(13) Adjust the tension of the first throw so that the wound edges come together snugly but not tightly.
(14) For the second throw of the knot, the needle end is on the far side of the wound and the free end on the near side.
(15) Hold the needle end of the suture in the nondominant hand and lay the needle holder on top.
(16) Loop the suture only once around the needle holder.
(17) Grasp the free ends with the blades of the holder.
(18) Cross the hands so that the sutures smoothly intertwine.
CAUTION: Take care not to cinch down too tightly on the second throw because the tightness will be transmitted to the wound.
(19) Cinch down the throw.
(20) Pull the knot to the side so that it will not directly overlie the laceration.
(21) The pattern of looping the suture around the holder on alternate sides of the wound is repeated until the desired number of throws are completed.
Chapter 3: Skill Level Tasks 3-102 STP 8-68B13-SM-TG 15 April 2016
(22) Cut the ends of the suture material to approximately 3 to 5 centimeters length.
4. Apply antibiotic ointment to the site.
5. Apply a sterile dressing to the site.
6. Remove gloves.
7. Document the procedure.
Evaluation Preparation: You must evaluate the students on their performance of this task in a field condition related to the actual task.
Performance Measures
1. Prepared the injury area.
2. Anesthetized the area.
3. Selected the proper method of closure.
4. Applied antibiotic ointment to the site.
5 Applied a sterile dressing to the site.
6 Removed gloves.
7 Documented the procedure.
GO NO GO
Evaluation Guidance: Score each Soldier according to the performance measures in the evaluation guide. Unless otherwise stated in the task summary, the Soldier must pass all performance measures to be scored GO. If the Soldier fails any step, show what was done wrong and how to do it correctly.
Chapter 3: Skill Level Tasks 15 April 2016 STP 8-68B13-SM-TG 3-103
Related SF 600 None
References Required
Prepare an Injection for Administration
081-000-0056
Conditions: You must prepare an injection for administration. You will need needles, syringes, medication, alcohol sponges, dry sterile gauze, and a medical officer's order. You have performed a patient care hand-wash. You are not in a chemical, biological, radiological, nuclear (CBRN) environment
Standards: Prepare an injection for administration. Select, inspect, and assemble the appropriate needle and syringe. Draw the correct medication. Follow aseptic technique throughout the procedure.
Performance Steps:
1. Select an appropriate needle.
a. Select a needle with the proper length based upon the following factors:
(1) The type of injection to be given (subcutaneous, intramuscular, or intradermal).
(2) The size of the patient (thin, obese).
(3) The injection site (1 inch for deltoid, 1 1/2 inches for gluteus maximus).
b. Select a needle with the proper gauge based upon the thickness of the medication to be injected.
NOTE: The gauge of the needle is indicated by the numbers 10 through 27. The higher the number, the smaller the diameter (bore) of the needle. A small bore needle is indicated for thin medications. A large bore needle is indicated for thick medications.
2. Select an appropriate syringe.
a. Check the drug manufacturer's specifications to determine whether a glass or plastic syringe should be used for the medication.
NOTE: Some medications deteriorate in a plastic syringe. Drug manufacturer's specifications provide guidance.
b. Ensure that the total capacity of the syringe, usually measured in cubic centimeters (cc), is appropriate for the amount of medication to be administered.
c. Check the intervals of the calibration marks on the syringe.
3. Inspect the needle and syringe packaging for defects such as open packages, holes, and water spotting.
NOTE: Discard the equipment if any defect is found.
4. Unpack the syringe.
a.If the syringe is in a flexible wrapper, peel the sides of the wrapper apart to expose the rear end of the syringe barrel.
CAUTION: The needle adapter and the shaft of the plunger are sterile. Contamination could cause infection in the patient. The outside of the syringe barrel does not have to be kept sterile.
b. Grasp the syringe by the barrel with the free hand.
Chapter 3: Skill Level Tasks 3-104 STP 8-68B13-SM-TG 15 April 2016
c Pull the syringe from the packaging.
d.If the syringe is packaged in a hard plastic tube container, press down and twist the cap until a distinct "pop" is heard. If the "pop" is not heard, the seal has been previously broken and the equipment must be discarded.
5. Inspect the syringe.
a.Grasp the flared end of the syringe and pull the plunger back and forth to test for smooth, easy movement.
b. Visually check the rubber stopper (inside the syringe) to ensure that it is attached securely to the top end of the plunger, forming a seal.
c.If the plunger is stuck or does not move smoothly, discard the syringe.
d. Push the plunger fully into the barrel until ready to fill the syringe with medication.
CAUTION: All parts of the needle are sterile. Be careful not to touch the hub. This would contaminate the needle and possibly pass an infection to the patient. Only the outside of the needle cover may be touched.
6. Unpack the needle.
a.If the needle is packaged in a flexible wrapper, peel the sides of the wrapper apart to expose the needle hub.
b.If the needle is packaged in a hard plastic tube, twist the cap of the tube until a "pop" is heard. Remove the cap to expose the needle hub. If a "pop" is not heard, the seal has been previously broken, and the equipment must be discarded.
7. Attach needle to the syringe.
a.Insert the needle adapter of the syringe into the hub of the needle.
b.Tighten the needle by turning 1/4 of a turn to ensure that it is securely attached.
8. Inspect the needle.
a. Hold the needle and syringe upright and remove the protective cover from the needle by pulling it straight off.
NOTE: A twisting motion may pull the needle off the hub.
b. Visually inspect the needle for burrs, barbs, damage, and contamination. If the needle has any defects or damage, replace it with another sterile needle.
c. Place the protective cover back on the needle utilizing the "scoop" method.
9. Place the assembled needle and syringe on the work surface.
a. Leave the protective cover on the needle.
b. Leave the plunger pushed fully into the barrel.
c. Keep the assembled needle and syringe continually within range of vision.
NOTE: When you assemble a needle and syringe, you are responsible for maintaining sterility and security of the equipment.
10. Verify the drug label and check the container for defects.
a. Compare the medication with the medical officer's orders. The medication label must be verified three times.
(1) When obtained from the place of storage.
(2) When withdrawing the medication.
Chapter 3: Skill Level Tasks 15 April 2016 STP 8-68B13-SM-TG 3-105
(3) When returning the container to storage.
b. Examine the container.
(1) Examine the rubber stopper for defects, such as small cores or plugs torn from the stopper.
(2) Hold the vial to the light to check for foreign particles and changes in color and consistency. If the solution is in a dark vial, withdraw some solution to perform the checks.
(3) Check the date a multidose vial was opened and check the expiration date of the medication.
(4) Determine whether the medication was stored properly, such as under refrigeration.
NOTE: If there is any evidence of contamination, discard the container and obtain another.
11. Prepare medication for injection.
a. Draw medication from a stoppered vial which contains a prepared solution.
(1) Remove the protective cap.
(2) Clean the stopper and neck of the vial with an alcohol sponge.
(3) Pick up the assembled needle and syringe and remove the protective needle cover.
(4) Slowly draw the plunger to the prescribed cc mark of medication.
(5) Pick up the vial and insert the needle into the rubber stopper, exerting slight downward and forward pressure. Ensure that the needle tip passes completely through the cap.
NOTE: To avoid contamination, the hub of the needle should not touch the rubber cap.
(6) Push the plunger fully into the barrel to inject the air.
(7) With the vial inverted (and keeping the needle tip in the solution), pull the plunger back to the desired cc mark, withdrawing the medication.
(8) Withdraw the needle from the container.
(9) Verify the correct dosage against the medical officer's orders by raising the syringe to eye level and ensuring that the forward edge of the plunger is exactly on the prescribed cc mark.
b. Draw medication from a stoppered vial which contains a powdered medication which must be prepared.
(1) Remove the protective caps from the vial containing the powdered medication and the vial containing the sterile diluent.
(2) Clean the stoppers of both vials with alcohol sponges.
(3) Withdraw the required diluent, using the same procedure as for a stoppered vial. (See steps 11a(3) through 11a(8).)
(4) Hold the vial with the powdered medication horizontally, insert the needle through the stopper, and inject the diluent.
NOTE: If the vial with powdered medication contains air, the diluent may be difficult to inject. Air may have to be withdrawn to allow the diluent to be injected.
(5) Withdraw the needle.
(6) Gently invert the vial several times until all the powder is dissolved. Visually inspect the solution to ensure that it is well-mixed.
(7) Change the needle (or needle and syringe) and insert it into the vial of reconstituted solution.
(8) Withdraw the prescribed amount of medication. (See step 11a(7).)
(9) Withdraw the needle from the container.
Chapter 3: Skill Level Tasks 3-106 STP 8-68B13-SM-TG 15 April 2016
(10) Verify the correct dosage. (See step 11a(9).)
c. Draw medication from an ampule.
(1) Lightly tap the upright ampule to force any trapped medication from the ampule neck and top.
(2) Clean the neck of the ampule with an alcohol sponge and wrap it with the same sponge.
(3) Grasp the ampule with both hands and snap the neck by bending it away from the break line, directing it away from yourself and others.
(4) Inspect the ampule for minute glass particles. If any are found, discard the ampule.
(5) Remove the protective cover from the assembled needle and syringe.
(6) Insert the needle and withdraw the medication by holding the ampule vertically or by placing the ampule upright on a flat surface.
(7) Withdraw the prescribed medication, being careful not to touch the outside edge or bottom of the ampule with the needle.
(8) Withdraw the needle.
(9) Verify the correct dosage. (See step 11a(9).)
12. Check the syringe for air bubbles.
a. Hold the syringe with the needle pointing up.
b. Pull back on the plunger slightly to clear all the medication from the needle shaft.
c.Tap the barrel lightly to force bubbles to the top of the barrel.
d. Pull the plunger back slightly and push it forward until the solution is in the needle hub, clearing it of bubbles.
13. Re-verify the correct dosage. (See step 11a(9).)
14. Cover the needle with the protective needle cover utilizing the "scoop" (one-handed technique) method.
a. Place the needle cover on flat surface.
b. Hold syringe in the dominant hand, scoop the needle cap onto the needle.
c.Tip syringe vertically to slide cover over needle.
d. Do NOT hold onto the needle cap with nondominant hand while scooping. Keep nondominant hand well away from needle cap.
e. Secure the needle cap by grasping it near the hub.
15. Do not violate aseptic technique.
Evaluation Preparation: You must evaluate the students on their performance of this task in a field condition related to the actual task.
Performance Measures GO NO GO
1. Selected an appropriate needle.
2. Selected an appropriate syringe.
3. Inspected the needle and syringe packaging for defects such as open packages, holes, and water spotting.
4. Unpacked the syringe.
Chapter 3: Skill Level Tasks 15 April 2016 STP 8-68B13-SM-TG 3-107
Performance Measures
5 Inspected the syringe.
6 Unpacked the needle.
7. Attached needle to the syringe.
8. Inspected the needle.
9. Placed the assembled needle and syringe on the work surface.
10. Verified the drug label and checked the medication container for defects.
11. Prepared medication for injection.
12. Checked the syringe for air bubbles.
13. Re-verified the correct dosage.
14. Covered the needle with the protective needle cover utilizing the "scoop" (one-handed technique) method.
15 Did not violate aseptic technique.
Evaluation Guidance: Score each Soldier according to the performance measures in the evaluation guide. Unless otherwise stated in the task summary, the Soldier must pass all performance measures to be scored GO. If the Soldier fails any step, show what was done wrong and how to do it correctly.
3-108 STP 8-68B13-SM-TG 15 April 2016
Chapter 3: Skill Level Tasks
GO NO GO
References Required Related None None
Subject Area 5: Lower Extremity Casts
Apply a Total Contact Cast
081-68B-1304
Conditions: You are presented with a physician's written or verbal order to apply a total contact cast to an orthopedic patient. The patient is sitting or supine on an orthopedic examination bed and may be accompanied by a family member. Nursing personnel and physician are available. You will need the patient's medical record or Standard Form (SF) 513, Medical RecordConsultation Sheet, the local standard operating procedure (SOP), work cart/station, fiberglass rolls, roll of stockinette, examination gloves, cast saw, cast spreader, eye protection, hearing protection, scissors, roll of adhesive tape, hospital pads (chux) or bed sheets, felt pads, hospital gown or equivalent, goniometer, bucket of tepid water with plastic bag, cast care booklet or equivalent, sink with faucet, cast shoe, crutches, and trash receptacle.
Standards: Apply the total contact cast to the patient's injured leg from the toes, with the tips of the toes covered, to 3 - 3 1/2 inches distal to the popliteal space (bend of the knee). The cast immobilizes the ankle, tibia/fibula, foot, and phalanges, with the ankle at 90 degrees of dorsiflexion. The cast eliminates inversion and eversion of the foot, rotation of the tibia/fibula and range of motion (ROM) of the phalanges.
Performance Steps:
NOTE: This cast is used for wound management and limb preservation on diabetic patients. (See Figure 3-5.)
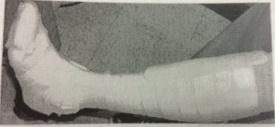
1. Review the order from the physician.
2. Gather the equipment and materials.
NOTE: The physician's order, technician's preference, availability of supplies, and/or patient's extremity size determine which size casting material is used.
a. Gather equipment.
(1) Goniometer.
(2) Scissors.
(3) Utility cart.
Chapter 3: Skill Level Tasks 15 April 2016 STP 8-68B13-SM-TG 3-109
Figure 3-5. Total contact cast
(4) Cast saw
(5) Cast spreader
(6) Eye protection
(7) Hearing protection
(8) Bucket of tepid water with plastic bag
b.Assemble materials.
(1) Stockinette (3 or 4 inch)
(2) Felt padding (2, 3 or 4 inch)
(3) Fiberglass rolls (4 or 5 inch)
(4) Examination gloves
(5) Hospital pad (chux) or bed sheets
(6) Box of alcohol pads or a damp wash towel.
(7) Roll of surgical tape (1 inch)
(8) Hospital gown.
(9) Cast care booklet or equivalent.
(10) Cast shoe.
(11) Crutches.
c. Place the equipment and materials on the work cart/station.
3. Tell the patient your name and job title.
CAUTION: During cast application, a chemical response (exothermic reaction) will occur. This is a safe and common occurrence. The cast will initially become warm and cool down within 2-5 minutes. However, if it doesn't cool down or there is an increase of heat intensity during the cast application, the cast may need to be removed.
4. Explain the procedure to the patient.
5. Don safety equipment (patient and technician).
6. Inspect the patient's lower extremities.
CAUTION: Always practice body substance isolation prior to applying traction, splints, or casts to patients
a. Place examination gloves on hands.
b. Remove the patient's shoes and socks from both feet. Roll pants up above the knee.
NOTE: If patient is unable to get the pant leg easily above knee, provide the patient with a hospital gown. If unavailable, cut the pants at the seam. Always provide the patient with privacy when they are disrobing (e.g., bed curtain, bed sheet).
c.Place the patient in supine on the examination bed.
d.Inspect the patient's injured leg for any skin conditions (e.g., cuts, abrasions, lacerations, and skin rashes). (See Figure 3-6.)
3-110 STP 8-68B13-SM-TG 15 April 2016
Chapter 3: Skill Level Tasks
NOTE: Inform the physician if conditions are present and follow the physician's orders.
e. Examine both legs for jewelry and remove, if found.
NOTE: All jewelry on the injured leg and ankle must be removed. Give the jewelry to a family member or secure it with the patient's belongings according to the local SOP.
7. Check the patient's capillary refill.

a. Squeeze the patient's toes; nail beds will turn white.
CAUTION: If capillary refill is delayed for more than 2 seconds, inform the physician and follow the physician's instructions.
b. Release the patient's toes; nail beds will return pink.
8. Prepare the stockinette.
NOTE: The stockinette is a form of protection against the exothermic reaction caused by casting materials and generally used for all casts except on patients who have had recent surgery, recently reduced fractures, or as directed by the physician.
a. Place a hospital pad or bed sheet on the patient's lap.
NOTE: All patients should be given a covering (e.g., chux, bed sheet) to reduce damaging their clothing during the casting process and protect their privacy.
b. Place the work cart/station at the edge of the bed.
Chapter 3: Skill Level Tasks 15 April 2016 STP 8-68B13-SM-TG 3-111
Figure 3-6. Inspecting patient's injured leg wearing gloves
NOTE: Numerous props may be used (e.g. orthopedic bump, T stand, nursing assistant). Technician preference will determine if a prop is used.
c Place the patient's uninjured ankle at a 90 degree angle.
NOTE: Measurements are taken on the uninjured leg to prevent further pain to the patient's injured leg.
d. Measure from 1 inch distal to the tips of the phalanges to 2 inches distal to the popliteal space for the stockinette length.
NOTE: For proper measurement of the stockinette, the patient's ankle must be at a 90 degree angle. Nursing personnel may assist with taking measurements. Instruments of measurement may vary (e.g., tape measure or webril).
e. Pull down the stockinette and cut the measured length.
f. Roll the stockinette leaving a 1 - 2 inch cuff at the distal end and place on work cart/station for later use.
9. Apply the stockinette to the patient's injured leg.
NOTE: Prior to the application of the stockinette, webril can be placed between the toes to absorb moisture.
a. Hold open the sides of the stockinette.
b. Place the injured foot in the open end of the stockinette.
c. Roll the stockinette on the injured ankle/leg from 1 inch distal to the phalanges to 2 inches distal to the popliteal space.
NOTE: Rolling the stockinette on promotes a better fit. The patient may assist in rolling up the stockinette past the knee.
d. Pinch the stockinette at the base of the ankle and cut a 45 degree angle.
NOTE: Cutting the stockinette reduces the chance of pressure sores developing from excessive stockinette rubbing or bunching up under the cast.
e. Smooth out the stockinette.
f. Fold over the distal edge of the stockinette.
10. Set the patient's injured ankle at 90 degrees of dorsiflexion.
NOTE: All short leg walking casts are applied in a neutral position (90 degrees dorsiflexion), absent of inversion and eversion, unless otherwise indicated by physician.
a. Place the ankle in a neutral position.
b. Place the stationary arm of the goniometer parallel to the fibula.
c. Place the protractor of the goniometer on the lateral malleolus.
d.Place the moving arm of the goniometer bisecting the lateral edge of the heel and the head of the 5th metatarsal.
e. Position the ankle until the goniometer measures 90 degrees of dorsiflexion.
Chapter 3: Skill Level Tasks 3-112 STP 8-68B13-SM-TG 15 April 2016
f.Instruct assisting personnel to maintain this position until the fiberglass application is completed or otherwise instructed.
NOTE: Bracing the forearm under the knee reduces muscle strain for the patient and assists with proper ankle anglulation.
11. Apply felt to injured ankle/leg.
a. Apply a 3 inch wide felt strip to the anterior aspect of the leg.
b. Apply a felt strip down the medial and lateral aspects of the leg from the dorsum to the tibial tuberosity.
c. Apply two circular pieces of felt to cover both the medial and lateral malleolus.
d. Apply felt across the tips of the toes from the dorsum to plantar surface of the foot.
e. Secure all felt padding to the stockinette.
NOTE: Webril or tape can be used to secure the felt.
12. Prepare the casting materials, as applicable.
CAUTION It is mandatory for the technician to use gloves to prevent chemical burns to the hands.
a. Place the gloves on hands.
b. Open the fiberglass casting package.
NOTE: Open one fiberglass package at a time. As fiberglass comes in contact with the air, the roll will start to cure (set).
13. Apply the first fiberglass layer.
CAUTION: If the casting material is removed while bubbles are still present, dry spots will be visible during application. Dry spots cause integrity breakdown of the cast.
a. Place the fiberglass roll in the bucket of tepid water and remove when bubbles cease to rise.
b. Squeeze the roll together (do not wring the roll).
NOTE: Gently squeeze the roll inward to evenly distribute the water and prevent telescoping of the roll during application.
CAUTION: Keep the fiberglass roll on the extremity as it is applied to reduce possible constrictive edema caused by applying the fiberglass too tight.
c Place the edge of the casting material distal to the edge of the felt padding and wrap two rotations around the foot to secure the edge. Ensure the toes are covered.
d. Continue wrapping up the foot, around the ankle and up the leg ending 3 - 3 1/2 inches distal to the popliteal space.
e. Overlap the fiberglass with each turn by 1/4 - 1/2 the previous wrap.
NOTE: The top of the fiberglass should bisect the middle of the previous layer and present evenly applied casting material.
Chapter 3: Skill Level Tasks 15 April 2016 STP 8-68B13-SM-TG 3-113
14. Laminate the casting materials.
CAUTION: To reduce cast indentations, which can cause pressure sore to the patient's skin under the cast, keep finger tips off the cast during the application and molding process. If the patient feels pressure sores or hot spots developing under the cast, the cast must be removed immediately and started over with step 2.
a. Place the palm of each hand on the cast.
b.Rub the cast material in the direction it was applied.
NOTE: Laminating the cast material fills in the pores, which assists in providing strength to the cast.
c. Continue rubbing the cast until the tone/texture changes or until the cast begins to harden.
NOTE: The dull white color indicates the casting material is beginning to cure.
15. Apply the second fiberglass layer (repeat steps 13 - 14).
16. Mold the cast material.
NOTE: All casts require a mold. Molds are done simultaneously. Go back and forth between the molds as the cast cures.
a. Place the palm of the hand on the gastrocnemius muscle and apply pressure. Hold until contours take shape.
NOTE: A flat board can also be used to mold the gastrocnemius.
b. Place the lateral aspect of both thumbs (forming a triangle) on the tibia. Apply even pressure up and down the tibia. Hold until the contours take shape.
c. Place the lateral aspect of both thumbs (forming a 'c') on the malleolus. Apply even pressure to the border of the malleolus. Hold until the contours take shape.
d. Place the palm of the hand on the calcaneus and apply pressure. Hold until contour takes shape.
e. Place the index finger and thumb on the achilles and apply even pressure. Hold until contour takes shape.
f.Go back and forth between the molds until the cast is cured.
g. Remove the hands when the contours of the leg have been shaped and the cast is cured.
h.Instruct the assistant to remove the hand from under the stockinette at the patient's foot.
17. Trim the cast to meet the cast standards.
a. Verify the alignment of the ankle with a goniometer.
(1) Repeat steps 9b-9d.
(2) Verify the ankle measures at 90 degrees of dorsiflexion.
(3) Remove the cast and start over with step 2.
b.Verify the cast dimensions.
(1) Tips of toes are covered by the cast.
Chapter 3: Skill Level Tasks 3-114 STP 8-68B13-SM-TG 15 April 2016
(2) The proximal cast edge rests 3 - 3 1/2 inches distal to the popliteal space.
(3) Trim back the cast material until the dimensions meet the standard.
c. Trim the proximal and distal edges of the cast.
(1) Cut the outside edge of the cast padding.
(2) Pull down the webril and stockinette.
(3) Tape down the edges of the stockinette and webril, if necessary.
18. Apply the final fiberglass layer (repeat steps 13 - 14).
NOTE: The last roll in all casting applications is commonly referred to as the beautification roll or the money roll. Take pride in your work.
19. Apply a cast shoe.
NOTE: Cast shoes are available in small, medium, and large sizes. The technician can determine which size is appropriate by asking the patient their foot size or by sizing the patient's foot after casting application.
20. Administer crutch ambulation instructions.
21. Give the patient verbal and written instructions on cast care.
a. Provide the patient with a copy of the clinic hours and telephone number. Instruct the patient to call the cast clinic with any concerns or questions regarding their cast. For after duty hours concerns, instruct the patient to report to the emergency room.
b. Provide the patient with a cast care booklet or written instructions.
c.Instruct the patient to elevate the leg and extend and flex and extend toes to increase circulation in the foot.
d. Instruct the patient on what not to do.
(1) Do not stick anything down the cast.
(2) Do not remove the cast.
(3) Do not alter the cast (e.g., writing on it, coloring).
e.Instruct the patient to use crutches and not to place any pressure on the cast for 2448 hrs.
22. Annotate the procedure applied to the patient in the medical record or SF 513.
a. Record the procedure applied and cast care instructions provided.
b. Sign your name.
23. Escort or direct the patient to the front desk to make a follow-up appointment.
Evaluation Preparation: You must evaluate the students on their performance of this task in a field condition related to the actual task.
Performance Measures
1. Reviewed the order from the physician.
2. Gathered the equipment and materials.
3. Told the patient your name and job title.
Chapter 3: Skill Level Tasks 15 April 2016 STP 8-68B13-SM-TG 3-115
NO GO
GO
4 Explained the procedure to the patient.
5 Donned safety equipment (patient and technician).
6. Inspected the patient's injured leg/ankle.
7. Checked the patient's capillary refill.
8. Prepared the stockinette.
9. Applied the stockinette to the patient's injured leg.
10. Set the patient's injured ankle at 90 degrees of dorsiflexion.
11. Applied felt to the injured leg/ankle.
12 Prepared the casting materials, as applicable.
13 Applied the first fiberglass layer.
14 Laminated the casting materials.
15 Applied the second fiberglass layer (repeated steps 13 - 14).
16 Molded the cast material.
17 Trimmed the cast to meet the cast standards.
18 Applied the final fiberglass layer (repeated steps 13 - 14).
19 Applied a cast shoe, if the cast is applied as a weight bearing cast.
20 Administered crutch ambulation instructions.
21 Gave the patient verbal and written instructions on cast care.
22 Annotated the procedure applied to the patient in the medical record or SF 513.
23 Escorted or directed the patient to the front desk to make a follow-up appointment.
Evaluation Guidance: Score each Soldier according to the performance measures in the evaluation guide. Unless otherwise stated in the task summary, the Soldier must pass all performance measures to be scored GO. If the Soldier fails any step, show what was done wrong and how to do it correctly.
3-116 STP 8-68B13-SM-TG 15 April 2016
GO NO GO
Chapter 3: Skill Level Tasks
Performance Measures
Chapter 3: Skill Level Tasks 15 April 2016 STP 8-68B13-SM-TG 3-117 References Required Related SF 513 None
Apply a Patella Tendon Weight Bearing Cast
081-68B-1303
Conditions: You are presented with a physician's written or verbal order to apply a patella tendon bearing cast to an orthopedic patient. The patient is sitting or supine on an orthopedic examination bed and may be accompanied by a family member. Nursing personnel and physician are available. You will need the patient's medical record or Standard Form (SF) 513, Medical Record - Consultation Sheet, the local standard operating procedure (SOP), work cart/station, plaster or fiberglass rolls, box of plaster reinforcement sheets, webril rolls, roll of stockinette, examination gloves, scissors, cast saw, cast spreader, eye protection, hearing protection, roll of adhesive tape, hospital pads (chux) or bed sheets, hospital gown, goniometer, bucket of tepid water with plastic bag, cast saw, cast spreader, safety glasses, hearing protection, cast care booklet or equivalent, box of alcohol pads or damp wash towel, sink with faucet, cast shoe, crutches, flat board, and trash receptacle.
Standards: Apply the patella tendon bearing cast to the patient's injured leg from the web spacing of the phalanges to 3 inches distal to the popliteal space. The medial/lateral aspect of the cast encompases the formoral condyles ending proximal to the knee joint; the posterior aspect leaves the popliteal space open for extension and flexion; and the anterior aspect rests at the patella tendon. The cast immobilizes the ankle and tibia/fibula, with the ankle at 90 degrees of dorsiflexion; eliminates inversion and eversion of the ankle; and allows full range of motion (ROM) of the phalanges and limited ROM of the knee (extension/flexion only). The capillary refill returns within 1 - 3 seconds.
NOTE: This cast is primarily used for fibula fractures and soft tissue injures of the foot and ankle.
Performance Steps:
1. Review the order from the physician.
2. Gather the equipment and materials.
NOTE: The physician's order, technician's preference, availability of supplies, and/or patient's extremity size determine which casting material (fiberglass/plaster) is used.
a. Gather equipment.
(1) Goniometer
(2) Scissors.
(3) Utility cart
(4) Cast saw
(5) Cast spreader
(6) Safety glasses
(7) Hearing protection.
CAUTION: The temperature of the water must be tepid (70 - 80° F) to reduce further injury (possible burns) to the patient. The technician must change the water after each cast application, as the residue in the cast bucket will act as an accelerator causing the casting material to increase in heat emission.
Chapter 3: Skill Level Tasks 3-118 STP 8-68B13-SM-TG 15 April 2016
(8) Bucket of tepid water with plastic bag
b.Assemble materials.
(1) Stockinette (3 or 4 inch)
(2) W ebril rolls (3 and 4)
(3) Plaster (4 and 6 inch) or fiberglass (4 or 5 inch) rolls
(4) Examination gloves
(5) Hospital pad (chux) or bed sheet
(6) Box of plaster reinforcement sheets (5 x 30 inch)
(7) Box of alcohol pads or a damp wash towel
(8) Roll of surgical tape (1 inch)
(9) Hospital gown
(10) Cast care booklet or equivalent.
(11) Cast shoe
(12) Crutches.
c. Place the equipment and materials on the work cart/station.
3. Tell the patient your name and job title.
CAUTION: During cast application, a chemical response (exothermic reaction) will occur between the water and the plaster (gypsum). This is a safe and common occurrence. The cast will initially become warm and cool down within 2-5 minutes. However, if it doesn't cool down or there is an increase of heat intensity during the cast application, the cast may need to be removed.
4. Explain the procedure to the patient.
5. Don safety equipment (patient and technician).
6. Inspect the patient's injured leg/ankle.
CAUTION: Always practice body substance isolation prior to applying traction, splints, or casts to patients.
a. Place examination gloves on hands.
b. Remove the patient's shoes and socks from both feet. Roll pants up above the knee.
NOTE: If patient is unable to get the pant leg easily above knee, provide the patient with a hospital gown. If unavailable, cut the pants at the seam. Always provide the patient with privacy when they are disrobing (e.g., bed curtain, bed sheet).
c Place the patient in supine, prone, or sitting position on the examination bed.
d.Inspect the patient's injured leg for any skin conditions (e.g., cuts, abrasions, lacerations, and skin rashes). (See Figure 3-7.)
Chapter 3: Skill Level Tasks 15 April 2016 STP 8-68B13-SM-TG 3-119
NOTE: Inform the physician if conditions are present and follow the physician's orders.
e. Examine both legs for jewelry and remove if found.
NOTE: All jewelry on the injured leg and ankle must be removed. Give the jewelry to a family member or secure it with the patient's belongings according to the local SOP.
7. Check the patient's capillary refill.
a. Squeeze the patient's toes; nail beds will turn white.
CAUTION: If capillary refill is delayed for more than 2 seconds, inform the physician and follow the physician's instructions.
b. Release the patient's toes; nail beds will return pink.
8 Prepare the stockinette.
NOTE: The stockinette is a form of protection against the exothermic reaction caused by casting materials and generally used for all casts except on patients who have had recent surgery, recently reduced fractures, or as directed by the physician.
a. Place a hospital pad or bed sheet on the patient's lap.
NOTE: All patients should be given a covering (e.g., chux, bed sheet) to reduce damaging their clothing during the casting process and protect their privacy.
b. Place the work cart/station at the edge of the bed.
Chapter 3: Skill Level Tasks 3-120 STP 8-68B13-SM-TG 15 April 2016
Figure 3-7. Inspecting patient's injured leg wearing gloves
NOTE: Numerous props may be used (e.g. orthopedic bump, T stand, nursing assistant). Technician preference will determine if a prop is used.
c Place the patient's uninjured ankle at a 90 degree angle.
NOTE: Measurements are taken on the uninjured leg to prevent further pain to the patient's injured leg.
d. Measure from 3 inches proximal to the patella to the tips of the phalanges for the stockinette length.
e. Pull down the stockinette and cut the measured length.
f. Roll the stockinette leaving a 1 - 2 inch cuff at the distal end and place on work cart/station for later use.
9. Apply the stockinette to the patient's injured leg.
a. Drape a privacy pad/sheet over the patient's lap.
b. Hold open the sides of the stockinette.
c. Place the injured foot in the open end of the stockinette.
d. Roll the stockinette on the injured ankle/leg from 1 inch distal to the toes to 3 inches proximal to the patella.
NOTE: Rolling the stockinette on promotes a better fit. The patient may assist in rolling up the stockinette past the knee.
e. Pinch the stockinette at the base of the tibia/fibula and cut a 45 degree angle.
NOTE: Cutting the stockinette reduces the chance of pressure sores developing from excessive stockinette rubbing or bunching up under the cast.
f.Smooth out the stockinette.
10. Set the patient's injured ankle at 90 degrees of dorsiflexion.
NOTE: All short leg walking casts are applied in a neutral position (90 degrees dorsiflexion), absent of inversion and eversion, unless otherwise indicated by physician.
a. Place the ankle in a neutral position.
b. Place the stationary arm of the goniometer parallel to the fibula.
c. Place the protractor of the goniometer on the lateral malleolus.
d.Place the moving arm of the goniometer bisecting the lateral edge of the heel and the head of the 5th metatarsal.
e. Position the ankle until the goniometer measures 90 degrees of dorsiflexion.
f. Instruct assisting personnel to maintain this position until the fiberglass/plaster application is completed or otherwise instructed.
NOTE: Bracing the forearm under the knee reduces muscle strain for the patient and assists with proper ankle anglulation.
CAUTION: If the cast padding is wrinkled it must be removed and new padding applied. Wrinkled padding can cause pressure sores which can lead to ulcers.
Chapter 3: Skill Level Tasks 15 April 2016 STP 8-68B13-SM-TG 3-121
11. Apply the webril (cast padding).
CAUTION: Keep the webril roll on the extremity as it is applied to reduce possible constrictive edema caused by applying the webril too tight.
a. Place the webril end at the distal aspect of the toes and and wrap two rotations.
NOTE: The technician may also start 1 inch proximal to the distal edge of the stockinette.
CAUTION: The peroneal nerve is located on the lateral side of the leg. If the nerve is constricted it could die and cause drop foot, known as nerve palsy. This is an irreversible condition. Locate the fibula notch/head and measure 1 finger width below to prevent this condition
b. Continue wrapping up the foot, around the ankle, ending 1/2 inch distal to the proximal edge of the stockinette.
c.Overlap the webril by 1/4 - 1/2 the previous wrap with each turn.
NOTE: The top of the webril should bisect the middle of the previous layer covering up the shallow line and present evenly applied padding.
12. Prepare the casting materials, as applicable.
CAUTION: It is mandatory for the technician to use gloves to prevent chemical burns to the hands.
a. Place the gloves on hands and open the fiberglass casting package.
NOTE: Open one fiberglass package at a time. As fiberglass comes in contact with the air, the roll will start to cure (set).
b. Prepare the reinforcement splint(s).
NOTE: Splints are used to strengthen and support the cast. Fiberglass casts do not require a splint due to the strength of the fiberglass casting material.
(1) Posterior aspect splint.
NOTE: The posterior splint is used to strengthen and support the posterior side of the injured leg/ankle.
(a) Open the box of 5 x 30 inch plaster reinforcement sheets. Remove and unwrap the package. Locate the edge of one stack and remove it from the package. Place it on the work cart/station.
NOTE: The 5 x 30 inch plaster splints are usually stacked in increments of five from the manufacturer. If not prestacked, count out five layers of plaster sheets.
(b) Measure from 3 inches distal to the popliteal space (or one finger breath from the fibula notch/head) to the web spacing of the phalanges.
Chapter 3: Skill Level Tasks 3-122 STP 8-68B13-SM-TG 15 April 2016
NOTE: Measurements are taken on the uninjured leg to prevent further pain to the patient's injured leg.
(c) Place the stack of five plaster sheets next to the measured length, cut off the excess amount, and place the stack on the work cart/station for later use.
(d) Discard the excess material in the trash receptacle.
(2) Femoral condyle aspect splint.
NOTE: This splint is designed to prevent rotation of the tibia/fibula.
(a) Open the box of 5 x 30 inch plaster reinforcement sheets. Remove and unwrap the package. Locate the edge of one stack and remove it from the package. Place it on the work cart/station.
(b) Locate the femoral condyles on the lateral/medial side of the knee.
(c) Place one sheet on the lateral side of the femoral condyle and draw a horseshoe line on the plaster sheet that matches with the medial femoral condyle.
(d) Repeat substep 12.b.(2)(d) for the lateral femoral condyle.
(e) Cut the outlined pattern for all sheets. Place on the work cart/station for later use.
(f) Discard the excess material in the trash receptacle.
13. Apply the first plaster/fiberglass layer.
NOTE: Examination gloves are recommended to protect the technician's hands as the resin in the plaster may cause the skin on the hands to dry up.
CAUTION: If the casting material is removed while bubbles are still present, dry spots will be visible during application. Dry spots cause integrity breakdown of the cast.
a. Place the plaster/fiberglass roll in the bucket of tepid water and remove when bubbles cease to rise.
b. Squeeze the roll together (do not wring the roll).
NOTE: Gently squeeze the roll inward to evenly distribute the water and prevent telescoping of the roll during application.
CAUTION: Keep the plaster/fiberglass roll on the extremity as it is applied to reduce possible constrictive edema caused by applying the plaster/fiberglass too tight.
c Place the edge of the casting material at the web spacing of the phalanges and wrap two rotations.
NOTE: The technician may also start 1 inch proximal to the edge of the webril.
d. Continue wrapping up the foot, around the ankle, and up the leg ending 3 inches proximal to the popliteal space.
e.Overlap the plaster/fiberglass with each turn by 1/4 - 1/2 the previous wrap.
NOTE: The top of the plaster/fiberglass should bisect the middle of the previous layer and present evenly applied casting material.
Chapter 3: Skill Level Tasks 15 April 2016 STP 8-68B13-SM-TG 3-123
14. Laminate the casting materials.
CAUTION: To reduce cast indentations, which can cause pressure sore to the patient's skin under the cast, keep finger tips off the cast during the application and molding process. If the patient feels pressure sores or hot spots developing under the cast, the cast must be removed immediately and started over with step 2.
a. Place the palm of each hand on the cast.
b. Rub the cast material in the direction it was applied.
NOTE: Laminating the cast material fills in the pores, which assists in providing strength to the cast.
c. Continue rubbing the cast until the tone/texture changes or until the cast begins to harden.
NOTE: The dull white color indicates the plaster is beginning to cure.
15. Apply the reinforcement splints.
NOTE: The reinforcement splint is used to strengthen and support the cast. If using fiberglass, go to step 16.
a. Apply the posterior aspect splint.
(1) Place the splint in the bucket of tepid water, wait for the bubbles to subside, then remove the splint from the water.
(2) Squeeze the splint together to eliminate excess water.
(3) Place the splint on the cast from the web space of the phalanges to one finger width below the fibular notch/head or 3 inches distal to the popliteal space.
(4) Laminate the splint to the cast.
(5) Maintain the patient's ankle at 90 degrees of dorsiflexion until the splint adheres to the cast material.
b. Apply the femoral condyle splints.
(1) Place a splint in the bucket of tepid water, wait for bubbles to subside, then remove the splint from the water.
(2) Squeeze the plaster splint together.
(3) Extend the plaster splint and squeegee out the excess water.
NOTE: Place the index and middle fingers on either side of the splint and move fingers down the splint.
(4) Place the splint on the medial aspect extending above and below the extension joint.
NOTE: This splint must extend above and below the extension joint.
(5) Repeat substeps a - c.
(6) Place the splint on the lateral aspect extending above and below the entension joint.
(7) Smooth out the splint.
(8) Laminate the splint to the cast (repeat step 13).
Chapter 3: Skill Level Tasks 3-124 STP 8-68B13-SM-TG 15 April 2016
16. Apply the second plaster/fiberglass layer (repeat steps 13 - 14).
17. Mold the cast material.
NOTE: All casts require a mold. Molds are done simultaneously. Go back and forth between the molds as the cast cures.
a. Place the palm of the hand on the gastrocnemius muscle and apply pressure. Hold until contours take shape.
NOTE: A flat board can also be used to mold the gastrocnemius.
b. Place the lateral aspect of both thumbs (forming a triangle) on the tibia. Apply even pressure up and down the tibia. Hold until the contours take shape.
c. Place the lateral aspect of both thumbs (forming a 'c') on the malleolus. Apply even pressure to the border of the malleolus. Hold until the contours take shape.
d. Place one palm of one hand on the medial side of the femoral condyle and the palm of other hand on the lateral side of the femoral condyle. Press the palms together and conform the plaster to the femoral condyles (hold for 5-30 seconds) or until the plaster/fiberglass begins to cure.
e. Place the palm of the hand on the calcaneus and apply pressure. Hold until contour takes shape.
f. Place the palm of the hand on the plantar arch and apply pressure. Hold until contour takes shape.
g.Go back and forth between the molds until the cast is cured.
h. Remove the hands from the cast when the contours have been shaped and the cast is cured.
18. Trim the cast to meet the cast standards.
a. Trim the flanges.
CAUTION: The finished edge of the cast should end proximal to the base of the fifth metatarsophalangeal joint (MTPJ) to avoid nerve impingement.
(1) Draw a curved line (half moon shape) on the medial and lateral sides of the cast that matches with the outer border of the femoral condyle mold.
NOTE: Continue to trim the cast if the 5th metatarsal is not observed.
(2) Connect the medial and lateral curved lines on the anterior aspect of the cast at 1 1/2 - 2 inches distal to the patella tendon.
(3) Connect the medial and lateral curved lines on the posterior aspect of the cast at 3 inches distal to the tip of the popliteal space.
(4) Trim the outline and place the excess casting materials in the trash receptacle.
b. Verify the alignment of the ankle with a goniometer.
(1) Repeat steps 10b-d.
(2) Verify the ankle measures at 90 degrees of dorsiflexion.
(3) Remove the cast and start over with step 2.
c. Verify the cast dimensions.
(1) The proximal edge rests 3 inches distal to the popliteal space.
(a) The anterior aspect rests at the patella tendon.
(b) The posterior aspect leaves the popliteal space open for extension and flexion.
Chapter 3: Skill Level Tasks 15 April 2016 STP 8-68B13-SM-TG 3-125
(c) The medial/lateral aspect encompases the formoral condyles ending proximal to the knee joint.
(2) The distal edge of the cast rests on the web spacing of the phalanges. (See Figure 3-8.)
d. Check the ROM of the knee and phalanges.
(1) Instruct the patient to extend and flex the knee.
(2) Instruct the patient to extend and flex the toes.
e.Trim back the cast material until the dimensions and ROM standards are met.
f.Trim the distal and proximal edges of the cast.

(1) Cut the outside edge of the cast padding.
(2) Pull down the webril and stockinette.
(3) Tape down the edges of the stockinette and webril, if necessary.
19. Apply the final plaster/fiberglass layer (repeat steps 13 - 14).
20. Check the patient's capillary refill (repeat step 7).
21. Clean the plaster resin off the patient's skin using a damp wash towel or alcohol pads.
NOTE: Use alcohol pads or fresh water from the faucet and not from the casting bucket.
22. Apply a cast shoe.
NOTE: Cast shoes are available in small, medium, and large sizes. The technician can determine which size is appropriate by asking the patient their foot size or by sizing the patient's foot after casting application.
23. Administer a crutch ambulation instructions.
24. Give the patient verbal and written instructions on cast care.
3-126 STP 8-68B13-SM-TG 15 April 2016
Chapter 3: Skill Level Tasks
Figure 3-8. Distal edge rests on web spacing
a. Provide the patient with a copy of the clinic hours and telephone number. Instruct the patient to call the cast clinic with any concerns or questions regarding their cast. For after duty hours concerns, instruct the patient to report to the emergency room.
b Provide the patient with a cast care booklet or written instructions.
c.Instruct the patient to elevate the leg and extend and flex and extend toes to increase circulation in the foot.
d. Instruct the patient on what not to do.
(1) Do not stick anything down the cast.
(2) Do not remove the cast.
(3) Do not alter the cast (e.g., writing on it, coloring).
e.Instruct the patient to use crutches and not to place any pressure on the cast for 2448 hrs.
25. Annotate the procedure applied to the patient in the medical record or SF 513.
a. Record the procedure applied and cast care instructions provided.
b. Sign your name.
26. Escort or direct the patient to the front desk to make a follow-up appointment.
Evaluation Preparation: You must evaluate the students on their performance of this task in a field condition related to the actual task.
Performance Measures GO NO GO
1 Reviewed the order from the physician.
2 Gathered the equipment and materials.
3 Told the patient your name and job title.
4 Explained the procedure to the patient.
5 Donned safety equipment (patient and technician).
6 Inspected the patient's injured leg/ankle.
7 Checked the patient's capillary refill.
8 Prepared the stockinette.
9 Applied the stockinette to the patient's injured leg.
10 Set the patient's injured ankle at 90 degrees of dorsiflexion.
11 Applied the webril (cast padding).
12. Prepared the casting materials, as applicable.
13. Applied the first plaster/fiberglass layer.
14. Laminated the casting materials.
Chapter 3: Skill Level Tasks 15 April 2016 STP 8-68B13-SM-TG 3-127
Performance Measures
15 Applied the reinforcement splints, if using plaster.
16 Applied the second plaster/fiberglass layer (repeated steps 13 - 14).
17. Molded the cast material.
18. Trimmed the cast to meet the cast standards.
19. Applied the final plaster/fiberglass layer (repeated steps 13 - 14).
20. Checked the patient's capillary refill (repeated step 7).
21. Cleaned the plaster resin off the patient's skin using a damp wash towel or alcohol pads.
22. Applied a cast shoe, if the cast was applied as a weight bearing cast.
23. Administered crutch ambulation instructions.
24. Gave the patient verbal and written instructions on cast care.
25 Annotated the procedure applied to the patient in the medical record or SF 513.
26 Escorted or directed the patient to the front desk to make a follow-up appointment.
Evaluation Guidance: Score each Soldier according to the performance measures in the evaluation guide. Unless otherwise stated in the task summary, the Soldier must pass all performance measures to be scored GO. If the Soldier fails any step, show what was done wrong and how to do it correctly. References
3-128 STP 8-68B13-SM-TG 15 April 2016
Chapter 3: Skill Level Tasks
GO NO GO
Required Related SF 513 None
Apply a Long Leg Cast
081-68B-1301
Conditions: You are presented with a physician's written or verbal order to apply a long leg cast (LLC) to an orthopedic patient. The patient is sitting or supine on an orthopedic examination bed and may be accompanied by a family member. Nursing personnel and physician are available. You will need the patient's medical record or Standard Form (SF) 513, Medical Record - Consultation Sheet, the local standard operating procedures (SOP), work cart/station, plaster or fiberglass rolls, box of plaster reinforcement sheets, webril rolls, roll of stockinette, examination gloves, scissors, cast saw, cast spreader, eye protection, hearing protection, roll of adhesive tape, hospital pads (chux) or bed sheets, hospital gown, goniometer, bucket of tepid water with plastic bag, cast care booklet or equivalent, box of alcohol pads or damp wash towel, sink with faucet, cast shoe, crutches, and trash receptacle.
Standards: Apply the LLC to the patient's injured leg from the web spacing of the toes to 4 inches distal to the groin (on the medial side) and flared within 2 inches distal to the greater trochanter on the lateral side. The cast immobilizes the ankle and knee, with the ankle at 90 degrees of dorsiflexion and the knee between 0 - 15 degrees of flexion; eliminates inversion and eversion of the ankle; and allows full range of motion (ROM) of the phalanges. The capillary refill returns within 1 - 3 seconds.This cast is used to treat injuries of the knee, femur and proximal tibia/fibula fractures.
NOTE: See Figure 3-9 for long leg cast.

Chapter 3: Skill Level Tasks 15 April 2016 STP 8-68B13-SM-TG 3-129
Figure 3-9. Long leg cast
Performance Steps:
1. Review the order from the physician.
2. Gather the equipment and materials.
NOTE: The physician's order, technician's preference, availability of supplies, and/or patient's extremity size determine which casting material (fiberglass/plaster) is used.
a. Gather equipment.
(1) Goniometer
(2) Scissors.
(3) Utility cart
(4) Cast saw.
(5) Cast spreader.
(6) Hearing protection.
(7) Eye protection.
CAUTION: The temperature of the water must be tepid (70° - 80°F) to reduce further injury (possible burns) to the patient. The technician must change the water after each cast application, as the residue in the cast bucket will act as an accelerator causing the casting material to increase in heat emission.
(8) Bucket of tepid water with plastic bag
b.Assemble materials.
(1) Stockinette (2, 3, or 4 inch)
(2) W ebril rolls (3, 4, and 6 inch).
(3) Plaster (4 and 6 inch) or fiberglass (4 or 5 inch) rolls
(4) Examination gloves.
(5) Hospital pad (chux) or bed sheet.
(6) Box of plaster reinforcement sheets (5 x 30 inch)
(7) Box of alcohol pads or a damp wash towel.
(8) Roll of surgical tape (1 inch)
(9) Hospital gown
(10) Cast care booklet or equivalent
(11) Cast shoe
(12) Crutches
c. Place equipment and materials on the work cart/station.
3. Tell the patient your name and job title.
CAUTION: During cast application a chemical response (exothermic reaction) will occur between the water and the plaster (gypsum). This is a safe and common occurrence. The cast will initially become warm and cool down within 2-5 minutes. However, if it doesn't cool down or there is an increase of heat intensity during the cast application, the cast may need to be removed.
4. Explain the procedure to the patient.
5. Don safety equipment (patient and technician).
STP 8-68B13-SM-TG 15 April 2016
Chapter 3: Skill Level Tasks 3-130
6. Inspect the patient's injured leg/ankle.
CAUTION: Always practice body substance isolation prior to applying traction, splints, or casts to patients
a. Place examination gloves on hands.
b. Remove the patient's shoes, socks, and pants.
NOTE: Provide the patient with a hospital gown. If unavailable, cut the pant leg at the seam. Always provide the patient with privacy when they are disrobing (e.g., bed curtain, bed sheet).
c. Place the patient in the supine or sitting position on the examination bed.
d.Inspect the patient's legs for any skin conditions (e.g., cuts, abrasions, lacerations, and skin rashes). (See Figure 3-10.)
NOTE: Inform the physician if conditions are present and follow the physician's orders.
e. Examine both legs for jewelry and remove if found.
NOTE: All jewelry on the injured leg and ankle must be removed. Give the jewelry to a family member or secure it with the patient's belongings according to the local SOP.
7. Check the patient's capillary refill.
a. Squeeze the patient's toes; nail beds will turn white.
Chapter 3: Skill Level Tasks 15 April 2016 STP 8-68B13-SM-TG 3-131
Figure 3-10. Inspecting patient's injured leg wearing gloves
CAUTION: If capillary refill is delayed for more than 2 seconds, inform the physician and follow the physician's instructions.
b. Release the patient's toes; nail beds will return pink.
8. Prepare the stockinette.
NOTE: The stockinette is a form of protection against the exothermic reaction caused by casting materials and generally used for all casts except on patients who have had recent surgery, recently reduced fractures, or as directed by the physician.
a. Place a hospital pad or bed sheet on the patient's lap.
NOTE: All patients should be given a covering (e.g., chux, bed sheet) to reduce damaging their clothing during the casting process and protect their privacy.
b. Place the work cart/station at the edge of the bed.
NOTE: Numerous props may be used (e.g. orthopedic bump, T stand, nursing assistant). Technician preference will determine if a prop is used.
c. Place the patient's uninjured ankle at a 90 degree angle to the tibia and the knee between 0 - 15 degrees of flexion using the goniometer for accuracy.
NOTE: Measurements are taken on the uninjured leg to prevent further pain to the patient's injured leg.
d. Measure from 1 inch distal to the phalanges to 2 inches distal to the groin for the stockinette length.
NOTE: Nursing personnel may assist with taking measurements. Instruments of measurement may vary (e.g., tape measure or webril).
e. Pull down the stockinette and cut the measured length.
f. Roll the stockinette leaving a 1 - 2 inch cuff at the distal end and place on the work cart/station for later use.
9. Apply the stockinette to the patient's injured leg.
a. Hold open sides of the stockinette.
b. Place the injured foot in the open end of the stockinette.
c. Roll the stockinette on the injured ankle/leg from the phalanges to the groin.
NOTE: Rolling the stockinette on promotes a better fit. The patient may assist in rolling the stockinette past the greater trochanter.
d. Pinch the stockinette at the base of the tibia/fibula and back of knee and cut at a 45 degree angle.
NOTE: Cutting the stockinette reduces the chance of pressure sores developing from excessive stockinette rubbing or bunching up under the cast.
Chapter 3: Skill Level Tasks 3-132 STP 8-68B13-SM-TG 15 April 2016
e. Smooth out the stockinette.
10. Set the patient's injured ankle at 90 degrees of dorsiflexion.
NOTE: The ankle is always positioned at a 90 degree angle (dorsiflexion), absent of inversion and eversion, unless otherwise indicated by physician's order.
a. Place the ankle in a neutral position.
b. Place the stationary arm of the goniometer parallel to the fibula.
c. Place the protractor of the goniometer on the lateral malleolus.
d.Place the moving arm of the goniometer bisecting the lateral edge of the heel and the head of the fifth metatarsal.
e. Position the ankle until the goniometer measures 90 degrees of dorsiflexion.
f.Instruct assisting personnel to maintain this position until the fiberglass/plaster application is completed or otherwise instructed.
NOTE: Bracing the forearm under the knee reduces muscle strain for the patient and assists with proper ankle anglulation.
CAUTION: If the cast padding is wrinkled it must be removed and new padding applied. Wrinkled padding can cause pressure sores, which can lead to ulcers.
11. Apply the webril (cast padding) to the lower portion of the patient's injured leg.
CAUTION: Keep the webril roll on the extremity as it is applied to reduce possible constrictive edema caused by applying the webril too tight.
a. Place the webril end at the distal aspect of the toes and and wrap two rotations.
NOTE: The technician may also start 1 inch proximal to the distal edge of the stockinette.
CAUTION: The peroneal nerve is located on the lateral side of the leg. If the nerve is constricted it could die and cause drop foot, known as nerve palsy. This is an irreversible condition. Locate the fibula notch/head and measure 1 finger width below to prevent this condition.
b. Continue wrapping up the foot, around the ankle, ending 1/2 inch distal to the popliteal space.
c.Overlap the webril by 1/4 - 1/2 the previous wrap with each turn.
NOTE: The top of the webril should bisect the middle of the previous layer covering up the shallow line and present evenly applied padding.
12. Prepare the casting materials, as applicable.
CAUTION: It is mandatory for the technician to use gloves to prevent chemical burns to the hands.
a. Place gloves on hands and open the fiberglass casting package.
Chapter 3: Skill Level Tasks 15 April 2016 STP 8-68B13-SM-TG 3-133
NOTE: Open one fiberglass package at a time. As fiberglass comes in contact with the air, the roll will start to cure (set up).
b. Prepare the plaster reinforcement splint(s).
NOTE: The plaster reinforcement splint is used to strengthen and support the cast. Fiberglass casts do not require a splint due to the strength of the fiberglass casting material.
(1) Prepare the posterior aspect splint.
NOTE: The plaster reinforcement splint will be prepared for the posterior side of the injured leg/ankle.
(a) Open the box of 5 x 30 inch plaster reinforcement sheets. Remove and unwrap the package. Locate the edge of one stack and remove it from the package. Place it on the work cart/station.
NOTE: The 5 x 30 inch plaster splints are usually stacked in increments of five from the manufacturer. If not prestacked, count out five layers of plaster sheets.
(b) Measure from 3 inches distal to the popliteal space to the web spacing of the toes.
NOTE: Measurements are taken on the uninjured leg to prevent further pain to the patient's injured leg.
(c) Place the stack of five plaster sheets next to the measured length, cut off the excess amount, and place the stack on the work cart/station for later use.
(d) Discard the excess material in the trash receptacle.
(2) Prepare the femoral condyle splint.
NOTE: This splint is designed to assist in reinforcing the cast at the knee region.
(a) Open the box of 5 x 30 inch plaster reinforcement sheets. Remove and unwrap the package. Locate the edge of two stacks. Place it on the work cart/station.
(b) Measure on the medial and lateral sides of the leg from 4 inches distal to the groin, across the knee, to the distal edge of the calf muscle.
(c) Place two stacks of five plaster sheets next to the measured length, cut off the excess amount, and place the stack on the work cart/station.
(d) Discard the excess material in the trash receptacle.
13. Apply the first plaster/fiberglass layer to the lower leg.
NOTE: Examination gloves are recommended to protect the technician's hands as the resin in the plaster may cause the skin on the hands to dry up.
CAUTION: If the casting material is removed while bubbles are still present, dry spots will be visible during application. Dry spots cause integrity breakdown of the cast.
Chapter 3: Skill Level Tasks 3-134 STP 8-68B13-SM-TG 15 April 2016
a. Place the plaster/fiberglass roll in the bucket of tepid water and remove when bubbles cease to rise.
b. Squeeze the roll together (do not wring the roll).
NOTE: Gently squeeze the roll inward to evenly distribute the water and prevent telescoping of the roll during application.
CAUTION: Keep the plaster/fiberglass roll on the extremity as it is applied to reduce possible constrictive edema caused by applying the plaster/fiberglass too tight.
c Place the edge of the casting material at the web spacing of the toes and wrap two rotations to secure the edge.
d. Continue wrapping up the foot, around the ankle and up the leg ending 1/2 inch distal to the proximal edge of the webril.
e.Overlap the plaster/fiberglass with each turn by 1/4 - 1/2 the previous wrap.
NOTE: The top of the plaster/fiberglass should bisect the middle of the previous layer and present evenly applied casting material.
14. Laminate the casting materials.
CAUTION: To reduce cast indentations, which can cause pressure sore to the patient's skin under the cast, keep finger tips off the cast during the application and molding process. If the patient feels pressure sores or hot spots developing under the cast, the cast must be removed immediately and started over with step 2.
a. Place palm of each hand on the cast.
b. Rub the cast material in the direction it was applied.
NOTE: Laminating the cast material fills in the pores, which assists in providing strength to the cast.
c Continue rubbing the cast until the tone/texture changes or until the cast begins to harden.
NOTE: The dull white color indicates the plaster is beginning to cure.
15. Apply the posterior aspect splint.
NOTE: If using fiberglass, skip and go to step 16.
a. Place the splint in the bucket of tepid water, wait for the bubbles to subside, then remove the splint from the water.
b. Squeeze the splint together to eliminate excess water.
c. Place the reinforcement splint on the posterior side of the cast in line with the web spacing of the foot and below the tibial tuberosity.
d.Laminate the splint to the cast.
e. Maintain patient's ankle at 90 degrees of dorsiflexion until the splint adheres to the cast material.
16. Apply the second plaster/fiberglass layer to the lower leg (repeat steps 13 -14).
Chapter 3: Skill Level Tasks 15 April 2016 STP 8-68B13-SM-TG 3-135
CAUTION: Excessive pressure may result in further patient injury. Talk to the patient while performing this procedure (e.g., How do you feel? Is the pressure too much?).
17. Mold the cast material to the lower leg.
NOTE: All casts require molding. Molds are done simultaneously. Go back and forth between the molds as the cast cures.
a. Place the palm of the hand on the gastrocnemius muscle and apply pressure. Hold until contours take shape.
NOTE: A flat board can also be used to mold the gastrocnemius.
b. Place the lateral aspect of both thumbs (forming a triangle) on the tibia. Apply even pressure up and down the tibia. Hold until the contours take shape.
c. Place the palm of the hand on the plantar arch and apply pressure. Hold until contour takes shape.
d. Place the lateral aspect of both thumbs (forming a 'c') on the malleolus. Apply even pressure to the border of the malleolus. Hold until the contours take shape.
e. Place the palm of the hand on the calcaneus and apply pressure. Hold until contour takes shape.
f. Go back and forth between the molds until the cast is cured.
g. Remove the hands from the cast when the contours of the lower leg have been shaped and the cast is cured.
h.Instruct the assistant to remove the hand from under the stockinette at the patient's foot.
18. Check the alignment of the injured ankle with a goniometer.
a. Repeat steps 10b-d.
b Verify the ankle measures at 90 degrees of dorsiflexion.
c. Remove the cast and start over with step 2.
19. Check the ROM of the phalanges.
a. Instruct the patient to extend and flex toes.
b. Continue to trim back the cast material until full ROM is met.
20. Check the capillary refill (repeat step 7).
21. Set the injured knee at 0 - 15 degrees of flexion.
NOTE: The patient will not be able to maintain this position. Technicians may use an assistant or other support. Family members, nursing staff, a thigh stand, or an orthopedic bump can be used to assist in maintaining the proper flexion of the patient's knee. If no assistance is available, do not begin the upper portion of the cast until the heel of the cast has dried.
a. Place the knee in a neutral position.
b. Place the stationary arm of the goniometer, so that it bisects the lateral aspect of the femur.
c. Place the protractor of the goniometer on the lateral aspect of the knee.
d.Place the moving arm of the goniometer, so that it bisects the lateral aspect of the fibula.
Chapter 3: Skill Level Tasks 3-136 STP 8-68B13-SM-TG 15 April 2016
e. Position the knee until the goniometer measures between 0 - 15 degrees of flexion. f Instruct assisting personnel to maintain this position until the fiberglass/plaster application is completed or otherwise instructed.
22. Apply the webril to the upper portion of the patient's injured leg.
CAUTION: To reduce possible constrictive edema caused by applying webril too tight, keep the webril on the extremity as it is applied.
a. Place the webril end at the proximal edge of the previous applied webril, wrap around the knee in a figure eight, and continue up the leg.
NOTE: There must be webril to webril contact to facilitate an evenly applied cast and to reduce cast complications.
b. Angle the webril roll and continue wrapping past the greater trochanter ending 1/2 inch distal to the medial and lateral stockinette edge.
NOTE: The webril can be cut or torn to redirect the roll at an angle.
c.Overlap the webril by 1/4 - 1/2 the previous wrap with each turn.
NOTE: The top of the webril should bisect the middle of the previous layer covering up the shadow line and present evenly applied padding.
d. Remove the webril and return to step 21 to reposition the knee.
23. Apply the first plaster/fiberglass layer to the upper leg.( See Figure 3-11)

Chapter 3: Skill Level Tasks 15 April 2016 STP 8-68B13-SM-TG 3-137
Figure 3-11. Long leg cast third roll application
a. Repeat steps 13a-b.
CAUTION: To reduce possible constrictive edema caused by applying plaster/fiberglass too tight, keep the casting materials on the extremity as it is applied.
b. Place the edge of the casting material on the proximal portion of the short leg cast (SLC) and wrap two rotations to secure the edge.
c. Continue wrapping around the knee in a figure eight, up the leg, angling the cast material, and ending 4 inches distal to the groin and within 2 inches distal to the greater trochanter.
d.Overlap the plaster/fiberglass by 1/4 - 1/2 the previous wrap with each turn.
NOTE: The top of the plaster/fiberglass should bisect the middle of the previous layer and present an evenly applied application.
24. Laminate the first plaster/fiberglass layer to the upper leg.
25. Apply the femoral condyle splint.
NOTE: If using fiberglass, skip and go to step 26.
a. Repeat steps 15a-b.
b. Place the splint on the medial aspect extending above and below the extension joint.
NOTE: This splint must extend above and below the extension joint, where the SLC connects to the LLC.
c Repeat substeps a-c.
d. Place the splint on the lateral aspect extending above and below the entension joint.
e. Smooth out the splint.
f. Laminate the splint to the cast.
26. Apply the second plaster/fiberglass layer to the upper leg (repeat steps 23 - 24).
27. Mold the cast material.
NOTE: Molds are done simultaneously. Go back and forth between the molds as the cast cures.
a. Mold the cast material to the upper leg (quadrilateral mold).
(1) Place the palm of one hand on the lateral side of the quadrilateral muscle.
(2) Place the palm of the other hand on the medial side of the quadrilateral muscle.
(3) Press the palms together and conform the plaster to the leg. Hold for 5 - 30 seconds or until plaster/fiberglass is cured.
NOTE: Have patient place the injured leg on a pillow to reduce leg strain.
b. Mold the cast material to the femoral condyles (proximal to the knee).
(1) Place the palm of one hand on the medial side of the femoral condyle.
(2) Place the palm of the other hand on the lateral side of the femoral condyle.
(3) Press the palms together and conform the plaster to the femoral condyles. Hold for 5 - 30 seconds or until plaster/fiberglass is cured.
Chapter 3: Skill Level Tasks 3-138 STP 8-68B13-SM-TG 15 April 2016
28. Trim the cast to meet the cast standards.
a. Verify the alignment of the knee with a goniometer.
(1) Repeat steps 21b - d.
(2) Verify the knee measures between 0 - 15 degrees of flexion.
(3) Remove the cast and start over with step 2.
b. Verify the alignment of the injured ankle with a goniometer.
(1) Repeat steps 10b-d.
(2) Verify the ankle measures at 90 degrees of dorsiflexion.
(3) Remove the cast and start over with step 2.
c. Verify the cast dimensions.
(1) The distal edge of the cast rests at the web spacing of the foot with the 5th metatarsal visible.
(2) The proximal edge of the cast rests 4 inches distal to the groin on the medial aspect and within 2 inches distal to the greater trochanter on the lateral aspect.
d. Check the ROM of the phalanges.
(1) Instruct the patient to extend the toes.
(2) Instruct the patient to flex the toes.
e.Trim back the cast material until the dimensions and ROM standards are met.
f.Trim the distal and proximal edges of the cast.
(1) Cut the outside edge of the cast padding.
(2) Pull down the webril and stockinette.
(3) Tape down the edges of the stockinette and webril, if necessary.
29. Apply the final plaster/fiberglass layer.
a. Repeat steps 13a-b.
b. Place the edge of the casting material at the web spacing of the toes and wrap two rotations to secure the edge.
c. Continue wrapping up the foot, around the ankle, up the leg, figure 8 around the knee, continue up the leg, ending 4" distal to the groin and within 2" of the greater trochanter
30. Laminate the cast.
31. Check the patient's capillary refill (repeat step 7).
32. Clean the plaster resin off the patient's skin using a damp wash towel or alcohol pads.
NOTE: Use alcohol pads or fresh water from the faucet and not from the casting bucket.
33. Apply a cast shoe.
NOTE: Cast shoes are available in small, medium, and large sizes. The technician can determine which size is appropriate by asking the patient their foot size or by sizing the patient's foot after casting application.
34. Administer crutch ambulation instructions.
35. Give the patient verbal and written instructions on cast care.
a. Provide the patient with a copy of the clinic hours and telephone number. Instruct the patient to call the cast clinic with any concerns or questions regarding their cast. For after duty hours concerns, instruct the patient to report to the emergency room.
b. Provide the patient with a cast care booklet or written instructions.
Chapter 3: Skill Level Tasks 15 April 2016 STP 8-68B13-SM-TG 3-139
c.Instruct the patient to elevate the leg and extend and flex and extend toes to increase circulation in the foot.
d. Instruct the patient on what not to do.
(1) Do not stick anything down the cast.
(2) Do not remove the cast.
(3) Do not alter the cast (e.g., writing on it, coloring).
e.Instruct the patient to use crutches and not to place any pressure on the cast for 2448 hrs.
36. Annotate the procedure applied to the patient in the medical record or SF 513.
a. Record the procedure applied and cast care instructions provided.
b. Sign your name.
37. Escort or direct the patient to the front desk to make a follow-up appointment.
Evaluation Preparation: None.
Performance Measures
1. Reviewed the order from the physician.
2. Gathered the equipment and materials.
3 Told the patient your name and job title.
4 Explained the procedure to the patient.
5 Donned safety equipment (patient and technician).
6 Inspected the patient's injured leg/ankle.
7 Checked the patient's capillary refill.
8 Prepared the stockinette.
9 Applied the stockinette to patient's injured leg.
10 Set the patient's injured ankle at 90 degrees of dorsiflexion.
11 Applied the webril to the lower portion of the patient's injured leg.
12 Prepared te casting materials, as applicable.
13 Applied the first plaster/fiberglass layer to the lower leg.
14. Laminated the casting materials.
15. Applied the posterior aspect splint, if using plaster.
16. Applied the second plaster/fiberglass layer to the lower leg (repeated
8-68B13-SM-TG 15 April 2016
Chapter 3: Skill Level Tasks 3-140 STP
GO NO GO
steps 13 -14).
17 Molded the cast to the lower leg.
18. Checked the alignment of the injured ankle with a goniometer.
19. Checked the ROM of the phalanges.
20. Checked the capillary refill (repeated step 7).
21. Set the injured knee at 0 - 15 degrees of flexion.
22. Applied the webril to the upper portion of the patient's injured leg.
23. Applied the first plaster/fiberglass layer to the upper leg.
24 Laminated the first plaster/fiberglass layer to the upper leg.
25 Applied the femoral condyle splint, if using plaster casting materials.
26 Applied the second plaster/fiberglass layer to the upper leg (repeated steps 23 - 24).
27 Molded the cast material.
28 Trimmed the cast to meet the cast standards.
29 Applied the final plaster/fiberglass layer.
30 Laminated the cast.
31 Checked the patient's capillary refill (repeated step 7).
32 Cleaned the plaster resin off the patient's skin using a damp wash towel or alcohol pads.
33 Applied a cast shoe, if the cast is applied as a weight bearing cast.
34. Administered crutch ambulation instructions.
35. Gave the patient verbal and written instructions on cast care.
36. Annotated the procedure applied to the patient in the medical record or SF 513.
37. Escorted or directed the patient to the front desk to make a follow-up appointment.
Chapter 3: Skill Level Tasks 15 April 2016 STP 8-68B13-SM-TG 3-141
GO NO GO
Performance Measures
Chapter 3: Skill Level Tasks
Evaluation Guidance: Score each Soldier according to the performance measures in the evaluation guide. Unless otherwise stated in the task summary, the Soldier must pass all performance measures to be scored GO. If the Soldier fails any step, show what was done wrong and how to do it correctly.
3-142 STP 8-68B13-SM-TG 15 April 2016
References Required Related SF 513 None
Apply a Long Leg Cylinder Cast
081-68B-1302
Conditions: You are presented with a physician's written or verbal order to apply a long leg cylinder cast (LLCC) to an orthopedic patient. The patient is sitting or supine on an orthopedic examination bed and may be accompanied by a family member. Nursing personnel and physician are available. You will need the patient's medical record or Standard Form (SF) 513, Medical Record - Consultation Sheet, the local standard operating procedure (SOP), work cart/station, plaster or fiberglass rolls, box of plaster reinforcement sheets, webril rolls, roll of stockinette, examination gloves, scissors, cast saw, cast spreader, eye protection, hearing protection, roll of adhesive tape, hospital pads (chux) or bed sheets, hospital gown, goniometer, bucket of tepid water with plastic bag, cast care booklet or equivalent, box of alcohol pads or damp wash towel, sink with faucet, cast shoe, crutches, and trash receptacle.
Standards: Apply the LLCC to patient's leg from 3 inches proximal to the medial malleolus to 4 inches distal to the groin (on the medial side) and flared within 2 inches distal to the greater trochanter on the lateral side. The cast immobilizes the knee, with the knee between 0 - 15 degrees of flexion; eliminates rotation of the leg; and allows full range of motion (ROM) of the ankle and phalanges. The capillary refill returns within 1 - 3 seconds.
NOTE:This cast is primarily used to treat popliteal (knee) dislocations.
Performance Steps:
1. Review the order from the physician.
2. Gather the equipment and materials.
NOTE: The physician's order, technician's preference, availability of supplies, and/or patient's extremity size determine which casting material (fiberglass/plaster) is used.
a. Gather equipment.
(1) Goniometer
(2) Scissors.
(3) Utility cart
(4) Cast saw
(5) Cast spreader
(6) Hearing protection
(7) Eye protection
CAUTION: The temperature of the water must be tepid (70° - 80° F) to reduce further injury (possible burns) to the patient. The technician must change the water after each cast application, as the residue in the cast bucket will act as an accelerator causing the casting material to increase in heat emission.
(8) Bucket of tepid water with plastic bag.
b.Assemble materials.
(1) Stockinette (2, 3, or 4 inch).
(2) W ebril rolls (3, 4, and 6 inch).
(3) Plaster (4 and 6 inch) or fiberglass (4 or 5 inch) rolls.
Chapter 3: Skill Level Tasks 15 April 2016 STP 8-68B13-SM-TG 3-143
(4) Examination gloves.
(5) Hospital pad (chux) or bed sheet
(6) Box of plaster reinforcement sheets (5 x 30 inch)
(7) Box of alcohol pads or a damp wash towel.
(8) Roll of surgical tape (1 inch)
(9) Hospital gown
(10) Cast care booklet or equivalent
(11) Cast shoe
(12) Crutches
c. Place equipment and materials on the work cart/station.
3. Tell the patient your name and job title.
CAUTION: During cast application a chemical response (exothermic reaction) will occur between the water and the plaster (gypsum). This is a safe and common occurrence. The cast will initially become warm and cool down within 2-5 minutes. However, if it doesn't cool down or there is an increase of heat intensity during the cast application, the cast may need to be removed.
4. Explain the procedure to the patient.
5. Don safety equipment (patient and technician).
6. Inspect the patient's injured leg/ankle.
CAUTION: Always practice body substance isolation prior to applying traction, splints, or casts to patients.
a. Place examination gloves on hands.
b. Remove the patient's shoes, socks, and pants.
NOTE: Provide the patient with a hospital gown. If unavailable, cut the pant leg at the seam. Always provide the patient with privacy when they are disrobing (e.g., bed curtain, bed sheet).
c Place the patient in the supine on the examination bed.
d. Examine the patient's legs for any skin conditions (e.g., cuts, abrasions, lacerations, and skin rashes).
NOTE: Inform the physician if conditions are present and follow the physician's orders.
e. Examine both legs for jewelry and remove if found.
NOTE: All jewelry on the injured leg and ankle must be removed. Give the jewelry to a family member or secure it with the patient's belongings according to the local SOP.
7. Check the patient's capillary refill.
a. Squeeze the patient's toes; nail beds will turn white.
CAUTION: If capillary refill is delayed for more than 2 seconds, inform the physician and follow the physician's instructions.
3-144 STP 8-68B13-SM-TG 15 April 2016
Chapter 3: Skill Level Tasks
b. Release the patient's toes; nail beds will return pink.
8. Prepare the stockinette.
NOTE: The stockinette is a form of protection against the exothermic reaction caused by casting materials and generally used for all casts except on patients who have had recent surgery, recently reduced fractures, or as directed by the physician.
a. Place a hospital pad or bed sheet on the patient's lap.
NOTE: All patients should be given a covering (e.g., chux, bed sheet) to reduce damaging their clothing during the casting process and protect their privacy.
b. Place the work cart/station at the edge of the bed.
NOTE: Numerous props may be used (e.g. orthopedic bump, T stand, nursing assistant). Technician preference will determine if a prop is used.
c. Place the patient's uninjured knee between 0 - 15 degrees of flexion using the goniometer for accuracy.
NOTE: Measurements are taken on the uninjured leg to prevent further pain to the patient's injured leg.
d. Measure from 1 inch distal to the malleolus to 1 inch proximal to the greater trochanter for the stockinette length.
NOTE: Nursing personnel may assist with taking measurements. Instruments of measurement may vary (e.g., tape measure or webril).
e. Pull down the stockinette and cut the measured length.
f. Roll the stockinette leaving a 1 - 2 inch cuff at the distal end and place on the work cart/station for later use.
9. Apply the stockinette to the patient's injured leg.
NOTE: A plaster LLCC has a high incidence of slipping 2 - 3 days after application. Therefore, the technician may prefer to use an adhesive applicator to reduce cast slippage. Tincture of benzoin should be applied to the injured leg prior to the webril application. It is technician preference to use tincture of benzoin or the stockinette. If the patient is allergic to benzoin, mastisol can be used as the skin adherent.
a. Hold open sides of the stockinette.
b. Place the injured foot in the open end of the stockinette.
c. Roll the stockinette on the injured ankle/leg from 1 inch distal to the malleolus to 1 inch proximal to the greater trochanter.
NOTE: Rolling the stockinette on promotes a better fit. The patient may assist in rolling the stockinette past the greater trochanter.
Chapter 3: Skill Level Tasks 15 April 2016 STP 8-68B13-SM-TG 3-145
d. Pinch the stockinette at the base of the tibia/fibula and back of knee and cut at a 45 degree angle.
NOTE: Cutting the stockinette reduces the chance of pressure sores developing from excessive stockinette rubbing or bunching up under the cast.
e. Smooth out the stockinette.
10. Set the injured knee at 0 - 15 degrees of flexion.
NOTE: All LLCs are applied with the knee between 0 - 15 degrees of flexion, unless otherwise indicated by the physician's orders. The patient will not be able to maintain this position. Technicians may use an assistant or other support. Family members, nursing staff, a thigh stand, or an orthopedic bump can be used to assist in maintaining the proper flexion of the patient's knee.
a. Position the patient's injured knee between 0 - 15 degrees of flexion.
b. Place the stationary arm of the goniometer parallel to the fibula.
c. Place the protractor of the goniometer on the lateral aspect of the knee.
d.Place the moving arm of the goniometer in line with the lateral edge of the femur.
e. Position the knee until the goniometer measures between 0 - 15 degrees of flexion.
f. Instruct assisting personnel to maintain this position until the fiberglass/plaster application is completed or otherwise instructed.
CAUTION: If the cast padding is wrinkled it must be removed and new padding applied. Wrinkled padding can cause pressure sores, which can lead to ulcers.
11. Apply the webril (cast padding) to the patient's injured leg.
CAUTION: Keep the webril roll on the extremity as it is applied to reduce possible constrictive edema caused by applying the webril too tight. The peroneal nerve is located on the lateral side of the leg. If the nerve is constricted it could die and cause drop foot, known as nerve palsy. This is an irreversible condition. Locate and apply extra padding to the fibula notch/head.
a. Place the webril end 2 inches proximal to the medial malleolus and wrap two rotations around the ankle.
b. Continue wrapping up the leg, figure eight around the knee, and continue up the leg.
c. Angle the webril roll and continue wrapping past the greater trochanter ending 1/2 inch distal to the medial and lateral stockinette edge.
d.Overlap the webril by 1/4 - 1/2 the previous wrap with each turn.
NOTE: The top of the webril should bisect the middle of the previous layer covering up the shallow line and present evenly applied padding.
12. Prepare the casting materials, as applicable.
CAUTION: It is mandatory for the technician to use gloves to prevent chemical burns to the hands.
a. Place gloves on hands and open the fiberglass casting package.
Chapter 3: Skill Level Tasks 3-146 STP 8-68B13-SM-TG 15 April 2016
NOTE: Open one fiberglass package at a time. As fiberglass comes in contact with the air, the roll will start to cure (set up).
b. Prepare the femoral condyle splint.
NOTE: This splint is designed to assist in reinforcing the cast at the knee region.
(1) Open the box of 5 x 30 inch plaster reinforcement sheets. Remove and unwrap the package. Locate the edge of two stacks and remove them from the package. Place them on the work cart/station.
(2) Measure on the medial and lateral sides of the leg from 4 inches distal to the groin, across the knee, to the distal edge of the calf muscle.
(3) Place two stacks of five plaster sheets next to the measured length, cut off the excess amount, and place the stack on the work cart/station.
(4) Discard the excess material in the trash receptacle.
13. Apply the first plaster/fiberglass layer.
NOTE: Examination gloves are recommended to protect the technician's hands as the resin in the plaster may cause the skin on the hands to dry up.
CAUTION If the casting material is removed while bubbles are still present, dry spots will be visible during application. Dry spots cause integrity breakdown of the cast.
a. Place the plaster/fiberglass roll in the bucket of tepid water and remove when bubbles cease to rise.
b. Squeeze the roll together (do not wring the roll).
NOTE: Gently squeeze the roll inward to evenly distribute the water and prevent telescoping of the roll during application.
CAUTION: Keep the plaster/fiberglass roll on the extremity as it is applied to reduce possible constrictive edema caused by applying the plaster/fiberglass too tight. The peroneal nerve is located on the lateral side of the leg. If the nerve is constricted it could die and cause drop foot, known as nerve palsy. This is an irreversible condition. Locate the fibula notch/head and measure one finger width below to prevent this condition.
c Place the edge of the casting material 3 inches proximal to the medial malleolus and wrap two rotations to secure the edge.
NOTE: The technician may also start 1 inch proximal to the edge of the webril.
d. Hold the fiberglass/plaster roll diagonal to the cast and continue wrapping up the leg, figure eight around the knee, and end 4 inches distal to the groin and within 2 inches of the greater trochanter.
e.Overlap the plaster/fiberglass with each turn by 1/4 - 1/2 the previous wrap.
NOTE: The top of the plaster/fiberglass should bisect the middle of the previous layer and present evenly applied casting material.
14. Laminate the casting materials.
Chapter 3: Skill Level Tasks 15 April 2016 STP 8-68B13-SM-TG 3-147
CAUTION: To reduce cast indentations, which can cause pressure sore to the patient's skin under the cast, keep finger tips off the cast during the application and molding process. If the patient feels pressure sores or hot spots developing under the cast, the cast must be removed immediately and started over with step 2.
a. Place palm of each hand on the cast.
b. Rub the cast material in the direction it was applied.
NOTE: Laminating the cast material fills in the pores, which assists in providing strength to the cast.
c. Continue rubbing the cast until the tone/texture changes or until the cast begins to harden.
NOTE: The dull white color indicates the plaster is beginning to cure.
15. Apply the femoral condyle splints.
NOTE: If using fiberglass, skip and go to step 16.
a. Place a splint in the bucket of tepid water, wait for bubbles to subside, then remove the splint from the water.
b. Squeeze the plaster splint together.
c. Extend the plaster splint and squeegee out the excess water.
NOTE: Place the index and middle fingers on either side of the splint and move fingers down the splint.
d. Place the splint on the medial aspect extending above and below the extension joint.
NOTE: This splint must extend above and below the extension joint, where the SLC connects to the LLC.
e. Repeat substeps a-c.
f. Place the splint on the lateral aspect extending above and below the entension joint.
g. Smooth out the splint.
h. Laminate the splint to the cast.
16. Apply the second plaster/fiberglass layer (repeat steps 13 - 14).
CAUTION: Excessive pressure may result in further patient injury. Talk to the patient while performing this procedure (e.g., How do you feel? Is the pressure too much?).
17. Mold the cast material to the leg.
NOTE: All casts require molding. Molds are done simultaneously. Go back and forth between the molds as the cast cures.
a. Gastrocnemius mold.
NOTE: A flat board can also be used to mold the gastrocnemius.
Chapter 3: Skill Level Tasks 3-148 STP 8-68B13-SM-TG 15 April 2016
(1) Place the palm of the hand on the gastrocnemius muscle.
(2) Apply firm and gradual pressure and follow the contour of the muscle.
(3) Hold until the contours take shape.
b. Tibia mold (triangle mold).
(1) Place the lateral aspect of both thumbs, forming a triangle, on the tibia.
(2) Apply even pressure up and down the tibia.
(3) Hold until the contours take shape.
c. Quadrilateral aspect.
NOTE: Place the injured leg on a pillow to reduce leg strain.
(1) Place the palm of one hand on the lateral side of the quadrilateral muscle.
(2) Place the palm of the other hand on the medial side of the quadrilateral muscle.
(3) Press the palms together and conform the cast material to the leg. Hold for 5 - 30 seconds or until the plaster/fiberglass begins to cure.
d. Femoral condyle mold.
(1) Place the palm of one hand on the medial side of the femoral condyle.
(2) Place the palm of other hand on the lateral side of the femoral condyle.
(3) Press palms together and conform the plaster to the femoral condyles. Hold for 530 seconds or until the plaster/fiberglass begins to cure.
e.Soleus mold.
(1) Place the heels of the hands on each side of the soleus.
(2) Apply firm and gradual pressure until the contours take shape.
f.Go back and forth between the molds until the cast is cured.
g. Remove the hands from the cast when the cast is cured.
18. Trim the cast to meet the cast standards.
a. Verify the alignment of the knee with a goniometer.
(1) Repeat steps 10b - d.
(2) Verify the knee measures between 0 - 15 degrees of flexion.
(3) Remove the cast and start over with step 2.
b.Verify the cast dimensions.
(1) The distal edge of the cast rests 3 inches proximal to the medial malleolus.
(2) The proximal edge of the cast rests 4 inches distal to the groin on the medial aspect and within 2 inches distal to the greater trochanter on the lateral aspect.
c Check the ROM of the ankle and phalanges.
(1) Instruct the patient to extend and flex the ankle.
(2) Instruct the patient to extend and flex toes.
d.Trim back the cast material until the cast dimensions and ROM standards are met.
e. Trim the proximal and distal edges of the cast.
(1) Cut the outside edge of the cast padding.
(2) Pull down the webril and stockinette.
(3) Tape down the edges of the stockinette and webril, if necessary.
19. Apply the final plaster/fiberglass layer (repeat steps 13 - 14).
20. Check the patient's capillary refill (repeat step 7).
21. Clean the plaster resin off the patient's skin using a damp wash towel or alcohol pads.
NOTE: Use alcohol pads or fresh water from the faucet and not from the casting bucket.
Chapter 3: Skill Level Tasks 15 April 2016 STP 8-68B13-SM-TG 3-149
22. Administer crutch ambulation instructions.
23. Give the patient verbal and written instructions on cast care.
a. Provide the patient with a copy of the clinic hours and telephone number. Instruct the patient to call the cast clinic with any concerns or questions regarding their cast. For after duty hours concerns, instruct the patient to report to the emergency room.
b. Provide the patient with a cast care booklet or written instructions.
c.Instruct the patient to elevate the leg and extend and flex the foot and toes to increase circulation in the foot.
d. Instruct the patient on what not to do.
(1) Do not stick anything down the cast.
(2) Do not remove the cast.
(3) Do not alter the cast (e.g., writing on it, coloring).
e.Instruct the patient to use crutches and not to place any pressure on the cast for 2448 hrs.
24. Annotate the procedure applied to the patient in the medical record or SF 513.
a. Record the procedure applied and cast care instructions provided.
b. Sign your name.
25. Escort or direct the patient to the front desk to make a follow-up appointment.
Evaluation Preparation: You must evaluate the students on their performance of this task in a field condition related to the actual task.
Performance Measures GO
1 Reviewed the order from the physician.
2 Gathered the equipment and materials.
3 Told the patient your name and job title.
4 Explained the procedure to the patient.
5 Donned safety equipment (patient and technician).
6 Inspected the patient's injured leg/ankle.
7 Checked the patient's capillary refill.
8 Prepared the stockinette.
9 Applied the stockinette to the patient's injured leg.
10. Set the injured knee at 0 - 15 degrees of flexion.
11. Applied the webril to the patient's injured leg.
12. Prepared the casting materials, as applicable.
Chapter 3: Skill Level Tasks 3-150 STP 8-68B13-SM-TG 15 April 2016
NO GO
Performance Measures
13 Applied the first plaster/fiberglass layer.
14 Laminated the casting materials.
15. Applied the femoral condyle splints,If using fiberglass, skip and go to step 16.
16. Applied the second plaster/fiberglass layer (repeated steps 13 - 14).
17. Molded the cast to the leg.
18. Trimmed the cast to meet the cast standards.
19. Applied the final plaster/fiberglass layer (repeated steps 13 - 14).
20. Checked the patient's capillary refill (repeated step 7).
21. Cleaned the plaster resin off the patient's skin using a damp wash towel or alcohol pads.
22 Administered crutch ambulation instructions.
23 Gave the patient verbal and written instructions on cast care.
24 Annotated the procedure applied to the patient in the medical record or SF 513.
25 Escorted or directed the patient to the front desk to make a follow-up appointment.
Evaluation Guidance: Score each Soldier according to the performance measures in the evaluation guide. Unless otherwise stated in the task summary, the Soldier must pass all performance measures to be scored GO. If the Soldier fails any step, show what was done wrong and how to do it correctly.
References
Required
None
Chapter 3: Skill Level Tasks 15 April 2016 STP 8-68B13-SM-TG 3-151
GO NO GO
Related SF 513
Apply a Short Leg Cast
081-68B-1300
Conditions: You are presented with a physician's written or verbal order to apply a short leg cast (SLC) to an orthopedic patient. The patient is sitting or supine on an orthopedic examination bed and may be accompanied by a family member. Nursing personnel and physician are available. You will need the patient's medical record or Standard Form (SF) 513, Medical Record - Consultation Sheet, the local standard operating procedures (SOP), work cart/station, plaster or fiberglass rolls, box of plaster reinforcement sheets, webril rolls, roll of stockinette, examination gloves, cast saw, cast spreader, eye protection, hearing protection, scissors, roll of adhesive tape, hospital pads (chux) or bed sheets, hospital gown, goniometer, bucket of tepid water with plastic bag, cast care booklet or equivalent, box of alcohol pads or damp wash towel, sink with faucet, cast shoe, crutches, and trash receptacle.
Standards: Apply the SLC to the patient's injured leg from the web spacing of the toes to 3 - 3 1/2 inches distal to the popliteal space (bend of the knee). The cast immobilizes the ankle and tibia/fibula, with the ankle at 90 degrees of dorsiflexion. The cast eliminates inversion and eversion of the ankle, rotation of the tibia and fibula, and allows full range of motion (ROM) of the phalanges. The capillary refill returns within 1 - 3 seconds. This cast is used for soft tissue injuries and fractures of the foot and or ankle.

NOTE: See Figure 3-12 for lateral view of short leg cast.
Performance Steps:
1. Review the order from the physician.
2. Gather the equipment and materials.
NOTE: The physician's order, technician's preference, availability of supplies, and/or patient's extremity size determine which casting material (fiberglass/plaster) is used.
a. Gather equipment.
(1) Goniometer
3-152 STP 8-68B13-SM-TG 15 April 2016
Chapter 3: Skill Level Tasks
Figure 3-12. Short leg cast - lateral view
(2) Scissors.
(3) Utility cart
(4) Cast saw
(5) Cast spreader
(6) Eye protection
(7) Hearing protection
CAUTION: The temperature of the water must be tepid (70° - 80° F) to reduce further injury (possible burns) to the patient. The technician must change the water after each cast application, as the residue in the cast bucket will act as an accelerator causing the casting material to increase in heat emission.
(8) bucket of tepid water with plastic bag
b.Assemble materials.
(1) Stockinette (3 or 4 inch).
(2) W ebril rolls (3 and 4).
(3) Plaster (4 and 6 inch) or fiberglass (4 or 5 inch) rolls.
(4) Examination gloves.
(5) Hospital pad (chux) or bed sheet.
(6) Box of plaster reinforcement sheets (5 x 30 inch).
(7) Box of alcohol pads or a damp wash towel.
(8) Roll of surgical tape (1 inch).
(9) Hospital gown.
(10) Cast care booklet or equivalent
(11) Cast shoe.
(12) Crutches
c. Place the equipment and materials on the work cart/station.
3. Tell the patient your name and job title.
CAUTION: During cast application, a chemical response (exothermic reaction) will occur between the water and the plaster (gypsum). This is a safe and common occurrence. The cast will initially become warm and cool down within 2-5 minutes. However, if it doesn't cool down or there is an increase of heat intensity during the cast application, the cast may need to be removed.
4. Explain the procedure to the patient.
5. Don safety equipment (patient and technician).
6. Inspect the patient's injured leg/ankle.
CAUTION: Always practice body substance isolation prior to applying traction, splints, or casts to patients.
a. Place examination gloves on hands.
b. Remove the patient's shoes and socks from both feet. Roll pants up above the knee.
NOTE: If patient is unable to get the pant leg easily above knee, provide the patient with a hospital gown. If unavailable, cut the pants at the seam. Always provide the patient with privacy when they are disrobing (e.g., bed curtain, bed sheet).
Chapter 3: Skill Level Tasks 15 April 2016 STP 8-68B13-SM-TG 3-153
c Place the patient in supine, prone, or sitting position on the examination bed.
d. Inspect the patient's injured leg for any skin conditions (e.g., cuts, abrasions, lacerations, and skin rashes). (See Figure 3-13.)

NOTE: Inform the physician if conditions are present and follow the physician's orders.
e. Examine both legs for jewelry and remove if found.
NOTE: All jewelry on the injured leg and ankle must be removed. Give the jewelry to a family member or secure it with the patient's belongings according to the local SOP.
7. Check the patient's capillary refill.
a. Squeeze the patient's toes; nail beds will turn white.
CAUTION: If capillary refill is delayed for more than 2 seconds, inform the physician and follow the physician's instructions.
b. Release the patient's toes; nail beds will return pink.
8. Prepare the stockinette.
NOTE: The stockinette is a form of protection against the exothermic reaction caused by casting materials and generally used for all casts except on patients who have had recent surgery, recently reduced fractures, or as directed by the physician.
a. Place a hospital pad or bed sheet on the patient's lap.
3-154 STP 8-68B13-SM-TG 15 April 2016
Chapter 3: Skill Level Tasks
Figure 3-13. Inspecting patient's injured leg wearing gloves
NOTE: All patients should be given a covering (e.g., chux, bed sheet) to reduce damaging their clothing during the casting process and protect their privacy.
b. Place the work cart/station at the edge of the bed.
NOTE: Numerous props may be used (e.g. orthopedic bump, T stand, nursing assistant). Technician preference will determine if a prop is used.
c Place the patient's uninjured ankle at a 90 degree angle.
NOTE: Measurements are taken on the uninjured leg to prevent further pain to the patient's injured leg.
d. Measure from 2 inches proximal to the popliteal space to 1 inch distal to the phalanges for the stockinette length.
NOTE: For proper measurement of the stockinette, the patient's ankle must be at a 90 degree angle. Nursing personnel may assist with taking measurements. Instruments of measurement may vary (e.g., tape measure or webril).
e. Pull down the stockinette and cut the measured length.
f.Roll the stockinette leaving a 1 - 2 inch cuff at the distal end and place on work cart/station for later use.
9. Apply the stockinette to the patient's injured leg.
a. Hold open the sides of the stockinette.
b. Place the injured foot in the open end of the stockinette.
c. Roll the stockinette on the injured ankle/leg from 1 inch distal to the phalanges to 2 inches proximal to the popliteal space.
NOTE: Rolling the stockinette on promotes a better fit. The patient may assist in rolling up the stockinette past the knee.
d. Pinch the stockinette at the base of the tibia/fibula and cut a 45 degree angle.
NOTE: Cutting the stockinette reduces the chance of pressure sores developing from excessive stockinette rubbing or bunching up under the cast.
e. Smooth out the stockinette.
10. Set the patient's injured ankle at 90 degrees of dorsiflexion.
NOTE: All short leg walking casts are applied in a neutral position (90 degrees dorsiflexion), absent of inversion and eversion, unless otherwise indicated by physician.
a. Place the ankle in a neutral position.
b. Place the stationary arm of the goniometer parallel to the fibula.
c. Place the protractor of the goniometer on the lateral malleolus.
d.Place the moving arm of the goniometer bisecting the lateral edge of the heel and the head of the 5th metatarsal.
e. Position the ankle until the goniometer measures 90 degrees of dorsiflexion.
Chapter 3: Skill Level Tasks 15 April 2016 STP 8-68B13-SM-TG 3-155
f.Instruct assisting personnel to maintain this position until the fiberglass/plaster application is completed or otherwise instructed.
NOTE: Bracing the forearm under the knee reduces muscle strain for the patient and assists with proper ankle anglulation.
CAUTION: If the cast padding is wrinkled it must be removed and new padding applied. Wrinkled padding can cause pressure sores which can lead to ulcers.
11. Apply the webril (cast padding).
CAUTION: Keep the webril roll on the extremity as it is applied to reduce possible constrictive edema caused by applying the webril too tight.
a. Place the webril end at the distal aspect of the toes and and wrap two rotations.
NOTE: The technician may also start 1 inch distal to the edge of the stockinette.
CAUTION: The peroneal nerve is located on the lateral side of the leg. If the nerve is constricted it could die and cause drop foot, known as nerve palsy. This is an irreversible condition. Locate the fibula notch/head and measure 1 finger width below to prevent this condition.
b. Continue wrapping up the foot, around the ankle, ending 1/2 inch distal to the proximal edge of the stockinette.
c.Overlap the webril by 1/4 - 1/2 the previous wrap with each turn.
NOTE: The top of the webril should bisect the middle of the previous layer covering up the shallow line and present evenly applied padding.
12. Prepare the casting materials, as applicable.
CAUTION: It is mandatory for the technician to use gloves to prevent chemical burns to the hands.
a. Place the gloves on hands and open the fiberglass casting package.
NOTE: Open one fiberglass package at a time. As fiberglass comes in contact with the air, the roll will start to cure (set).
b. Prepare the plaster reinforcement splint for the posterior aspect of the cast.
NOTE: The plaster reinforcement splint is prepared for the posterior side of the injured leg/ankle and is used to strengthen and support the cast. Fiberglass casts do not require a splint due to the strength of the fiberglass casting material.
(1) Open the box of 5 x 30 inch plaster reinforcement sheets. Remove and unwrap the package. Locate the edge of one stack and remove it from the package. Place it on the work cart/station.
Chapter 3: Skill Level Tasks 3-156 STP 8-68B13-SM-TG 15 April 2016
NOTE: The 5 x 30 inch plaster splints are usually stacked in increments of five from the manufacturer. If not prestacked, count out five layers of plaster sheets.
(2) Measure from 3 inches distal to the popliteal space to the web spacing of the toes.
NOTE: Measurements are taken on the uninjured leg to prevent further pain to the patient's injured leg.
(3) Place the stack of five plaster sheets next to the measured length, cut off the excess amount, and place the stack on the work cart/station for later use.
(4) Discard the excess material in the trash receptacle.
13. Apply the first plaster/fiberglass layer.
NOTE: Examination gloves are recommended to protect the technician's hands as the resin in the plaster may cause the skin on the hands to dry up.
CAUTION: If the casting material is removed while bubbles are still present, dry spots will be visible during application. Dry spots cause integrity breakdown of the cast.
a. Place the plaster/fiberglass roll in the bucket of tepid water and remove when bubbles cease to rise.
b. Squeeze the roll together (do not wring the roll).
NOTE: Gently squeeze the roll inward to evenly distribute the water and prevent telescoping of the roll during application.
CAUTION: Keep the plaster/fiberglass roll on the extremity as it is applied to reduce possible constrictive edema caused by applying the plaster/fiberglass too tight.
c.Place the edge of the casting material at the web spacing of the toes and wrap two rotations.
NOTE: The technician may also start 1 inch proximal to the edge of the webril.
d. Continue wrapping up the foot, around the ankle and up the leg ending 1/2 inch distal to the proximal edge of the webril.
e.Overlap the plaster/fiberglass with each turn by 1/4 - 1/2 the previous wrap.
NOTE: The top of the plaster/fiberglass should bisect the middle of the previous layer and present evenly applied casting material.
14. Laminate the casting materials.
a. Place the palm of each hand on the cast.
b. Rub the cast material in the direction it was applied.
NOTE: Laminating the cast material fills in the pores, which assists in providing strength to the cast.
c. Continue rubbing the cast until the tone/texture changes or until the cast begins to harden.
Chapter 3: Skill Level Tasks 15 April 2016 STP 8-68B13-SM-TG 3-157
NOTE: The dull white color indicates the plaster is beginning to cure.
15. Apply the posterior aspect splint.
NOTE: If using fiberglass, skip and go to step 16.
a. Place the splint in the bucket of tepid water, wait for the bubbles to subside, then remove the splint from the water.
b. Squeeze the splint together to eliminate excess water.
c. Place the reinforcement splint on the posterior side of the cast in line with the web spacing of the foot and below the tibial tuberosity.
d.Laminate the splint to the cast.
e. Maintain the patient's ankle at 90 degrees of dorsiflexion until the splint adheres to the cast material.

16. Apply the second plaster/fiberglass layer (repeat steps 13 - 14).
17. Mold the cast material.
NOTE: All casts require a mold. Molds are done simultaneously. Go back and forth between the molds as the cast cures.
a. Place the palm of the hand on the gastrocnemius muscle and apply pressure. Hold until contours take shape. (See Figure 3-14.)
NOTE: A flat board can also be used to mold the gastrocnemius.
b. Place the lateral aspect of both thumbs (forming a triangle) on the tibia. Apply even pressure up and down the tibia. Hold until the contours take shape. (See Figure 3-15.)
3-158 STP 8-68B13-SM-TG 15 April 2016
Chapter 3: Skill Level Tasks
Figure 3-14. Gastrocnemius mold
c. Place the palm of the hand on the plantar arch and apply pressure. Hold until contour takes shape. (See Figure 3-16.)

d. Place the lateral aspect of both thumbs (forming a 'c') on the malleolus. Apply even pressure to the border of the malleolus. Hold until the contours take shape. (See Figure 3-17.)

Chapter 3: Skill Level Tasks 15 April 2016 STP 8-68B13-SM-TG 3-159
Figure 3-15. Triangle mold
Figure 3-16. Plantar arch mold
e. Place the palm of the hand on the calcaneus and apply pressure. Hold until contour takes shape. (See Figure 3-18.)
f. Place the index finger and thumb on the achilles and apply even pressure. Hold until contour takes shape. (See Figure 3-19.)


Chapter 3: Skill Level Tasks 3-160 STP 8-68B13-SM-TG 15 April 2016
Figure 3-17. Malleolus mold
Figure 3-18. Calcaneus mold
g.Go back and forth between the gastrocnemius muscle, tibia, plantar arch, malleolus, calcaneus, and achilles until the cast is cured.
h. Remove the hands from the cast when the contours of the malleolus, tibia, calcaneus, achilles, and arch have been shaped and the cast is cured.

i. Instruct the assistant to remove the hand from under the stockinette at the patient's foot.
18. Trim the cast to meet the cast standards.

a. Verify the alignment of the ankle with a goniometer.
(1) Repeat steps 10b-d.
(2) Verify the ankle measures at 90 degrees of dorsiflexion.
(3) Remove the cast and start over with step 2.
b.Verify the cast dimensions.
(1) The distal edge of the cast rests on the web spacing of the foot. (See Figure 3-20.)
Chapter 3: Skill Level Tasks 15 April 2016 STP 8-68B13-SM-TG 3-161
Figure 3-19. Achilles mold
Figure 3-20. Distal edge rests on web spacing
(2) The 5th metatarsal is visible and has full ROM. (See Figure 3-21.)
(3) The proximal cast edge rests 1 inch below the fibula head/notch or 3 - 3 1/2 inches distal to the popliteal space.
c. Check the ROM of the phalanges and knee.
(1) Instruct the patient to extend and flex toes.
(2) Instruct the patient to extend and flex the knee.
d.Trim back the cast material until the dimensions and ROM standards are met.
e. Trim the proximal and distal edges of the cast.
CAUTION: The finished edge of the cast should end proximal to the base of the fifth metatarsophalangeal joint (MTPJ) to avoid nerve impingement.

(1) Cut the webril at the distal and proximal edges and at the base of the MTPJs.
NOTE: Continue to trim the cast if the 5th metatarsal is not observed.
(2) Fold and tack down the webril and stockinette with casting material.
(3) Tape down the edges of the stockinette and webril, if necessary.
19. Apply the final plaster/fiberglass layer (repeat steps 13 - 14).
NOTE: The last roll in all casting applications is commonly referred to as the beautification roll or the money roll. Take pride in your work.
Chapter 3: Skill Level Tasks 3-162 STP 8-68B13-SM-TG 15 April 2016
Figure 3-21. 5th metatarsal visible
20. Check the patient's capillary refill (repeat step 7).
21. Clean the plaster resin off the patient's skin using a damp wash towel or alcohol pads.
NOTE: Use alcohol pads or fresh water from the faucet and not from the casting bucket.
22. Apply a cast shoe.
NOTE: Cast shoes are available in small, medium, and large sizes. The technician can determine which size is appropriate by asking the patient their foot size or by sizing the patient's foot after casting application.
23. Administer a crutch ambulation instructions (refer to task 081-000-0177).
24. Give the patient verbal and written instructions on cast care.
a. Provide the patient with a copy of the clinic hours and telephone number. Instruct the patient to call the cast clinic with any concerns or questions regarding their cast. For after duty hours concerns, instruct the patient to report to the emergency room.
b. Provide the patient with a cast care booklet or written instructions.
c.Instruct the patient to elevate the leg and extend and flex and extend toes to increase circulation in the foot.
d. Instruct the patient on what not to do.
(1) Do not stick anything down the cast.
(2) Do not remove the cast.
(3) Do not alter the cast (e.g., writing on it, coloring).
e.Instruct the patient to use crutches and not to place any pressure on the cast for 2448 hrs.
25. Annotate the procedure applied to the patient in the medical record or SF 513.
a. Record the procedure applied and cast care instructions provided.
b. Sign your name.
26. Escort or direct the patient to the front desk to make a follow-up appointment.
Evaluation Preparation: You must evaluate the students on their performance of this task in a field condition related to the actual task.
Performance Measures
1 Reviewed the order from the physician.
2 Gathered the equipment and materials.
3 Told the patient your name and job title.
4. Explained the procedure to the patient.
5. Donned safety equipment (patient and technician).
6. Inspected the patient's injured leg/ankle.
Chapter 3: Skill Level Tasks 15 April 2016 STP 8-68B13-SM-TG 3-163
NO GO
GO
Performance Measures
7 Checked the patient's capillary refill.
8 Prepared the stockinette.
9. Applied the stockinette to the patient's injured leg.
10. Set the patient's injured ankle at 90 degrees of dorsiflexion.
11. Applied the webril (cast padding).
12. Prepared the casting materials, as applicable.
13. Applied the first plaster/fiberglass layer.
14. Laminated the casting materials.
15 Applied the posterior aspect splint, if using plaster.
16 Applied the second plaster/fiberglass layer (repeated steps 13 - 14).
17 Molded the cast material.
18 Trimmed the cast to meet the cast standards.
19 Applied the final plaster/fiberglass layer (repeated steps 13 - 14).
20 Checked the patient's capillary refill (repeated step 7).
21 Cleaned the plaster resin off the patient's skin using a damp wash towel or alcohol pads.
22 Applied a cast shoeshoe, if the cast is applied as a weight bearing cast.
23 Administered a crutch ambulation instructions.
24 Gave the patient verbal and written instructions on cast care.
25 Annotated the procedure applied to the patient in the medical record or SF 513.
26. Escorted or directed the patient to the front desk to make a follow-up appointment.
Evaluation Guidance: Score each Soldier according to the performance measures in the evaluation guide. Unless otherwise stated in the task summary, the Soldier must pass all performance measures to be scored GO. If the Soldier fails any step, show what was done wrong and how to do it correctly.
3-164 STP 8-68B13-SM-TG 15 April 2016
Chapter 3: Skill Level Tasks
GO NO GO
Chapter 3: Skill Level Tasks 15 April 2016 STP 8-68B13-SM-TG 3-165 References Required Related SF 513 None
Subject Area 6: Lower Extremity Splints
Apply a Short Leg Splint
081-68B-1100
Conditions: You are presented with a physician's order to apply a short leg splint to an orthopedic patient. The patient is sitting or supine on an orthopedic examination bed and may be accompanied by a family member. Nursing personnel and physician are available. You will need the patient's medical record or Standard Form (SF) 513, Medical Record - Consultation Sheet, work cart/station, plaster rolls, plaster reinforcement sheets, webril rolls, examination gloves, scissors, elastic bandages, tape, hospital pads (chux) or bed sheets, disposable gown/paper shorts, goniometer, bucket of tepid water with plastic bag, cast care booklet or equivalent, box of alcohol pads or a damp wash towel, sink with faucet, crutches, trash receptacle, and the local standard operating procedure (SOP).
Standards: Apply the short leg splint to the posterior of the injured leg from the tips of the toes to 3 - 3 1/2 inches distal to the popliteal space (bend of the knee) with elastic bandages. The splint immobilizes the ankle and lower leg, with the ankle at 90 degrees of dorsiflexion; eliminates inversion/eversion; and allows full range of motion (ROM) of the knee and limited ROM of the toes. The capillary refill returns within 1 - 3 seconds.
NOTE: The splint is used for soft tissue injuries of the foot and fractures of the foot (tarsals and metatarsals) and ankle. See Figure 3-22 and 3-23 for examples

3-166 STP 8-68B13-SM-TG 15 April 2016
Chapter 3: Skill Level Tasks
Figure 3-22. Short leg splint- posterior
Performance Steps:
1. Review the order from the physician.
2. Gather the equipment and materials.
NOTE: Physician's order, technician's preference, availability of supplies, and/or patient's extremity size determines which casting material size is used.
a. Gather the equipment.
(1) Scissors.
(2) Goniometer.
(3) Crutches.
(4) Utility cart.
CAUTION: The temperature of the water must be tepid (70° - 80° F) to reduce further injury (possible burns) to the patient. The technician must change the water after each cast application, as the residue in the cast bucket will act as an accelerator causing the casting material to increase in heat emission.
(5) Bucket of tepid water with plastic bag
b.Assemble the materials.
(1) W ebril rolls (4 or 6 inch)
(2) Plaster rolls (4, 5, or 6 inch)
(3) Examination gloves
(4) Hospital pad (chux) or bed sheets
(5) Box of plaster reinforcement sheet (5 x 30)
(6) Box of alcohol pads or damp wash towel
(7) Elastic bandages (4 or 6 inch)
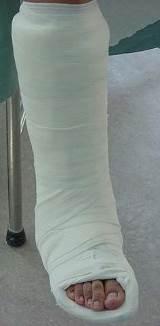
Chapter 3: Skill Level Tasks 15 April 2016 STP 8-68B13-SM-TG 3-167
Figure 3-23. Short leg splint-posterior and medial lateral
(8) Cast care booklet or equivalent
(9) Disposable gown/paper shorts
(10) adhesive tape (1 inch)
c. Place the equipment and materials on the work cart/station.
3 Tell the patient your name and job title.
CAUTION: During the splinting application a chemical response (exothermic reaction) will occur between the water and the plaster (gypsum). This is a normal common occurrence and safe chemical reaction. The splint will initially become warm and cool down within 2 - 5 minutes. However, if it doesn't cool down or there is an increase of heat intensity during the splint application, the splint may need to be removed.
4. Explain the procedure to the patient.
5. Inspect the patient's injured leg/ankle.
CAUTION: Always practice body substance isolation prior to applying traction, splints, or casts to patients.
a. Place examination gloves on hands.
b. Instruct the patient to remove shoes and socks from both feet and roll the pant leg above the knee of the injured leg.
NOTE: If patient is unable to get pants easily above knee, provide patient with paper shorts or hospital gown. If unavailable, cut the pant leg at the seam.
c Place the patient in the supine position on the examination bed.
d.Inspect both legs for any skin conditions (e.g., cuts, abrasions, lacerations, and skin rashes).
NOTE: Inform the physician if skin conditions are present and follow the physician's instructions.
e. Examine both legs for jewelry and remove if found.
NOTE: All jewelry must be removed. Give the jewelry to the family member, secure with the patient, or secure the belongings according to the local SOP.
6. Check the patient's capillary refill.
a. Squeeze the patient's toes; nail beds will turn white.
CAUTION: If the capillary refill is delayed for more than 2 seconds, inform the physician and follow the physician's instructions.
b. Release the patient's toes; nail beds will return pink.
7. Prepare the plaster splint.
a. Prepare the webril.
(1) Place the hospital pad or bed sheet on the patient's lap.
Chapter 3: Skill Level Tasks 3-168 STP 8-68B13-SM-TG 15 April 2016
NOTE: All patients should be given a covering (e.g., chux, bed sheet) to reduce damaging their clothing during the casting procedure.
CAUTION: The peroneal nerve is located on the lateral side of the knee. If the nerve is constricted it could die and cause drop foot, known as nerve palsy. This is an irreversible condition. Measure one fingerbreadth below the fibula head and provide extra padding to the area to prevent further injury to the patient.
(2) Locate the fibula head on the uninjured leg.
(3) Place the uninjured ankle at a 90 degree angle to the tibia.
NOTE: There are several ways to position and maintain the ankle at a 90 degree angle. The patient could maintain the angle or nursing personnel or family member can assist. It is the technician's preference.
(4) Measure and tear the webril to the appropriate length.
NOTE: Webril or the plaster splint may be used to measure the distance from the toes to the popliteal region.
(a) Measure from 1 inch distal to the tips of the toes distal to the popliteal region.
(b) Measure from one fingerbreadth from the fibula head on the lateral side of knee, around the heel, up the leg to the point opposite of the starting location.
(5) Place the measured webril on the work station/cart.
(6) Roll out two to four additional layers to the same length and place on the middle of the previous webril.
b.Open a box of 5 x 30 inch plaster reinforcement sheets. Remove and unwrap a package. Locate the edge of six stacks and remove from the package. Place on the work cart/station.
NOTE: The 15 - 20 plaster sheets are needed for all lower extremity splints. The 5 x 30 inch plaster splints are usually stacked in increments of five from the manufacturer. If not prestacked, count out 15 - 20 layers of plaster sheets, in groups of five. The technician may choose to use 5 or 6 inch plaster rolls.
c Place three stacks of sheets on each webril and cut excess as needed.
NOTE: The sheets should be centered on the webril leaving a 1/2 inch edge on all sides.
8. Set the patient's injured ankle at 90 degrees of dorsiflexion.
a. Position the patient's injured ankle at a 90 degree angle to the tibia.
NOTE: There are several ways to maintain the ankle at a 90 degree angle. The patient could maintain the ankle position, nursing personnel or family member may assist, a thigh holder may be used, or you can place the patient in the prone position. It is the technician's preference.
b. Place the stationary arm of the goniometer parallel to the fibula.
c. Place the protractor of the goniometer on the lateral malleolus.
d. Place the moving arm of the goniometer in line with the lateral edge of the heel and the head of the fifth metatarsal (little toe).
e. Position the ankle until the goniometer measures 90 degrees of dorsiflexion.
Chapter 3: Skill Level Tasks 15 April 2016 STP 8-68B13-SM-TG 3-169
NOTE: To assist the patient in maintaining a 90 degree angle, have the patient bend the knee and point toes upward or simulate squashing a bug with the heel of their foot. This will assist in maintaining the ankle at a 90 degree angle. The technician may use their own style to assist the patient.
9. Apply the splint(s) appropriate for the injury and according to the physician's orders.
NOTE: All short leg splints are applied in a neutral position (90 degrees dorsiflexion) absent of inversion and eversion, unless otherwise indicated by the physician.
a. Apply the posterior (L) splint to the injured leg.
CAUTION: If an orthopedic assitive device is used, the circulation to the toes and foot may be constricted. Always communicate with the patient and remove device if patient complains of numbness or tingling or if the technician observes a color change in the foot.
(1) Maintain the ankle at a 90 degree angle to the tibia.
(2) Hold each end of the plaster sheets, place in the bucket of tepid water, and remove when bubbles cease to rise.
(3) Squeeze the splint together.
NOTE: Squeezing the roll together equally distributes the water. Wringing the roll quickens the drying time of the splint and may cause the plaster not to cure.
(4) Place the plaster sheets centered and 1/2 inch from the edge of the webril.
(5) Laminate the plaster splint.
(6) Fold over the edges of the webril.
(7) Place an additional layer of webril over the folded edges.
(8) Place the padded splint on the posterior side of the leg from the tips of the toes to 3 inches distal to the popliteal space.
b. Apply the medial/lateral (U) splint to injured leg, if applicable.
(1) Follow steps 9a(2) - 9a(7).
(2) Place the padded splint on the medial side of the leg around the heel and up the lateral aspect of the leg 3 - 3 1/2 inches distal to the popliteal space.
10. Secure the splint to the injured leg.
a. Place the edge of the elastic bandage at the base of the phalanges and wrap two rotations around the foot to secure the edge.
b. Continue up the foot and leg until the splint is completely covered.
(1) Fold down and hold the excess ends of the webril while continuing to wrap the bandage until the splint is completely covered.
(2) Temporarily secure the elastic bandage with clips.
c.Tape down the elastic bandage between the clips.
d. Remove the clips and dispose of them in the trash receptacle.
11. Mold the splint to the ankle/leg.
NOTE: Molds are done simultaneously. Go back and forth between the molds as the splint cures.
Chapter 3: Skill Level Tasks 3-170 STP 8-68B13-SM-TG 15 April 2016
a. Place the palm of the hand on the gastrocnemius muscle and apply pressure. Hold until the contour takes shape.
b. Place the lateral aspect of both thumbs on the malleolus and apply even pressure. Hold until the contour takes shape.
c. Place the palm of the hand on the calcaneus and apply pressure. Hold until the contour takes shape.
d. Place the palm of the hand on the planter arch and apply pressure. Hold until the contour takes shape.
CAUTION: Excessive pressure may result in further patient injury. Talk to the patient while performing this procedure (e.g., How do you feel? Is the pressure too much?).
e. Apply firm and gradual pressure, then go back and forth between the gastrocnemius muscle, plantar arch, malleolus, calcaneus, and achilles until the splint is cured.
f. Remove the hands from the splint when the contours of the malleolus, tibia, calcaneus, achilles, and arch have been shaped and the splint is cured.
12. Trim the splint to meet the standards.
a. Verify the alignment of the injured ankle with goniometer.
(1) Repeat steps 8b - 8d.
(2) Verify the goniometer measures 90 degrees of dorsiflexion.
(3) Remove the splint and go to step 9 to restart the process.
b.Verify the splint dimensions.
(1) The tips of the toes are visible.
(2) The splint edges rest 1 inch below the fibula head/notch to the tips of the toes.
(3) The splint edges rest 3 - 3 1/2 inches distal to the popliteal space to the tips of the toes.
(4) Remove the splint and go to step 9.
c. Check the ROM of the phalanges and knee.
(1) Instruct the patient to extend and flex the toes.
(2) Instruct the patient to extend and flex the knee.
(3) Trim back the splint until full ROM is met.
13. Check the patient's capillary refill on the splinted leg. (Repeat step 6)
14. Clean the plaster off the patient's skin using a damp towel or alcohol pads.
NOTE: Use alcohol pads or fresh water from the faucet and not from the casting bucket.
15. Administer crutch ambulation instructions.
16. Give the patient verbal and written instructions on splint care.
a. Provide the patient with a copy of the clinic hours and telephone number. Instruct the patient to call the cast clinic with any concerns or questions regarding their cast. For after duty hours concerns, instruct the patient to report to the emergency room.
b. Provide the patient with a cast care booklet or written instructions.
c.Instruct the patient to elevate the leg and flex and extend toes to increase circulation in the foot.
d. Instruct the patient to use crutches when walking.
e. Instruct the patient on what not to do:
(1) Do not stick any objects down the splint.
Chapter 3: Skill Level Tasks 15 April 2016 STP 8-68B13-SM-TG 3-171
(2) Do not remove the splint.
(3) Do not alter the splint (e.g., writing or coloring the cast).
17. Annotate the procedure applied to the patient in the medical record or SF 513.
a.Record the procedure applied and cast care instructions provided.
b. Sign your name.
18. Escort or direct the patient to the front desk to make a follow-up appointment.
Evaluation Preparation: None
Performance Measures GO NO GO
1. Reviewed the order from the physician.
2. Gathered the equipment and materials.
3. Told the patient your name and job title.
4. Explained the procedure to the patient.
5. Inspected the patient's injured leg/ankle.
6 Checked the patient's capillary refill.
7 Prepared the plaster splint.
8 Set the patient's injured ankle at 90 degrees of dorsiflexion.
9 Applied the splint(s) appropriate for the injury and according to the physician's orders.
10 Secured the splint to the injured leg.
11 Molded the splint to the ankle/leg.
12 Trimmed the splint to meet the standards.
13 Checked the patient's capillary refill on the splinted leg. (Repeated step 6)
14 Cleaned the plaster off the patient's skin using a damp towel or alcohol pads.
15. Administered crutch ambulation instructions.
16. Gave the patient verbal and written instructions on splint care.
17. Annotated the procedure applied to the patient in the medical record or SF 513.
STP 8-68B13-SM-TG 15 April 2016
Chapter 3: Skill Level Tasks 3-172
18 Escorted or directed the patient to the front desk to make a follow-up appointment.
Evaluation Guidance: Score each Soldier according to the performance measures in the evaluation guide. Unless otherwise stated in the task summary, the Soldier must pass all performance measures to be scored GO. If the Soldier fails any step, show what was done wrong and how to do it correctly.
References
Required
Related SF 513
None
Chapter 3: Skill Level Tasks 15 April 2016 STP 8-68B13-SM-TG 3-173 Performance Measures GO NO GO
Apply a Lower Extremity Compression Dressing
081-68B-1101
Conditions: You are presented with a physician's order to apply a lower extremity compression dressing (Bulky Jones) to an orthopedic patient. The patient is sitting or supine on an orthopedic examination bed and may be accompanied by a family member. Nursing personnel and physician are available. You will need the patient's medical record or Standard Form (SF) 513, Medical Record - Consultation Sheet, work cart/station, plaster rolls, plaster reinforcement sheets, webril rolls, purified cotton, kerlix bandages, examination gloves, scissors, elastic bandages, tape, hospital pads (chux) or bed sheets, disposable gown/paper shorts, goniometer, bucket of tepid water with plastic bag, cast care booklet or equivalent, box of alcohol pads or a damp wash towel, sink with faucet, crutches, trash receptacle, and the local standard operating procedure (SOP).
Standards: Apply the lower extremity compression dressing with purified cotton and a reinforcement splint to the injured leg from the web space of the toes to 3-3 1/2 inches distal to the popliteal region. The splint immobilizes the ankle and lower leg, with the ankle at 90 degrees of dorsiflexion; eliminates inversion/eversion; and allows full range of motion (ROM) of the uninjured phalanges. The capillary refill returns within 1 - 3 seconds. The splint is used for soft tissue injuries of the foot and fractures of the foot (tarsals and metatarsals) and ankle.

NOTE: See Figure 3-24 for example for a lower extremity compression dressing.
Performance Steps:
1. Review the order from the physician.
2. Gather the equipment and materials.
NOTE: Physician's order, technician's preference, availability of supplies, and/or patient's extremity size determines which casting material size is used.
3-174 STP 8-68B13-SM-TG 15 April 2016
Chapter 3: Skill Level Tasks
Figure 3-24. Apply a lower extremity compression dressing
a. Gather the equipment.
(1) Scissors.
(2) Goniometer
(3) Crutches
(4) Utility cart
CAUTION: The temperature of the water must be tepid (70° - 80° F) to reduce further injury (possible burns) to the patient. The technician must change the water after each cast application, as the residue in the cast bucket will act as an accelerator causing the casting material to increase in heat emission.
(5) bucket of tepid water with plastic bag.
b.Assemble the materials.
(1) W ebril rolls (4 or 6 inch).
(2) Plaster rolls (4, 5, or 6 inch).
(3) Examination gloves.
(4) Purified cotton roll.
(5) Hospital pad (chux) or bed sheets.
(6) Box of plaster reinforcement sheet (5 x 30).
(7) Box of alcohol pads or damp wash towel.
(8) Pastic bandages (4 or 6 inch).
(9) Cast care booklet or equivalent.
(10) Disposable gown/paper shorts.
(11) Adhesive tape (1 inch)
c. Place the equipment and materials on the work cart/station.
3. Tell the patient your name and job title.
CAUTION: During the splinting application a chemical response (exothermic reaction) will occur between the water and the plaster (gypsum). This is a normal common occurrence and safe chemical reaction. The splint will initially become warm and cool down within 2 - 5 minutes. However, if it doesn't cool down or there is an increase of heat intensity during the splint application, the splint may need to be removed.
4. Explain the procedure to the patient.
5. Inspect the patient's injured leg/ankle.
CAUTION: Always practice body substance isolation prior to applying traction, splints, or casts to patients.
a. Place examination gloves on hands.
b.Instruct the patient to remove shoes and socks from both feet and roll the pant leg above the knee of the injured leg.
NOTE: If patient is unable to get pants easily above knee, provide patient with paper shorts or hospital gown. If unavailable, cut the pant leg at the seam.
c. Place the patient in the supine position on the examination bed.
d.Inspect both legs for any skin conditions (e.g., cuts, abrasions, lacerations, and skin rashes).
Chapter 3: Skill Level Tasks 15 April 2016 STP 8-68B13-SM-TG 3-175
NOTE: Inform the physician if skin conditions are present and follow the physician's instructions.
e. Examine both legs for jewelry and remove if found.
NOTE: All jewelry must be removed. Give the jewelry to the family member, secure with the patient, or secure the belongings according to the local SOP.
6. Check the patient's capillary refill.
a. Squeeze the patient's toes; nail beds will turn white.
CAUTION: If the capillary refill is delayed for more than 2 seconds, inform the physician and follow the physician's instructions.
b. Release the patient's toes; nail beds will return pink.
7. Prepare the plaster splint.
a. Prepare the webril.
(1) Place the hospital pad or bed sheet on the patient's lap.
NOTE: All patients should be given a covering (e.g., chux, bed sheet) to reduce damaging their clothing during the casting procedure.
CAUTION: The peroneal nerve is located on the lateral side of the knee. If the nerve is constricted it could die and cause drop foot, known as nerve palsy. This is an irreversible condition. Measure one fingerbreadth below the fibula head and provide extra padding to the area to prevent further injury to the patient.
(2) Locate the fibula head on the uninjured leg.
(3) Place the uninjured ankle at a 90 degree angle to the tibia.
NOTE: There are several ways to position and maintain the ankle at a 90 degree angle. The patient could maintain the angle or nursing personnel or family member can assist. It is the technician's preference.
(4) Measure and tear the webril to the appropriate length.
NOTE: Webril or the plaster splint may be used to measure the distance from the toes to the popliteal region.
(a) Measure from the tips of the toes to the popliteal space.
(b) Measure from 1/2 inch - 1 inch above the fibula head on the lateral side of knee, around the heel, up the leg to the point opposite of the starting location.
(5) Place the measured webril on the work station/cart.
(6) Roll out two to four additional layers to the same length and place on the middle of the previous webril.
b.Open a box of 5 x 30 inch plaster reinforcement sheets. Remove and unwrap a package. Locate the edge of six stacks and remove from the package. Place on the work cart/station.
NOTE: The 15 - 20 plaster sheets are needed for all lower extremity splints. The 5 x 30 inch plaster splints are usually stacked in increments of five from the manufacturer. If not pre-
Chapter 3: Skill Level Tasks 3-176 STP 8-68B13-SM-TG 15 April 2016
stacked, count out 15 - 20 layers of plaster sheets, in groups of five. The technician may choose to use 5 or 6 inch plaster rolls.
c Place three stacks of sheets on each webril and cut excess as needed.
NOTE: The sheets should be centered on the webril leaving a 1/2 inch edge on all sides.
8. Prepare purified cotton roll (Bulky Jones).
a. Open the package and remove cotton roll.
b. Locate edge of protective wrap and extend the cotton roll.
c. Unroll the cotton.
d.Tear the cotton roll in half. Place on work cart/station.
9. Set the patient's injured ankle at 90 degrees of dorsiflexion.
a. Position the patient's injured ankle at a 90 degree angle to the tibia.
NOTE: There are several ways to maintain the ankle at a 90 degree angle. The patient could maintain the ankle position, nursing personnel or family member may assist, a thigh holder may be used, or you can place the patient in the prone position. It is the technician's preference.
b. Place the stationary arm of the goniometer parallel to the fibula.
c. Place the protractor of the goniometer on the lateral malleolus.
d. Place the moving arm of the goniometer in line with the lateral edge of the heel and the head of the fifth metatarsal (little toe).
e. Position the ankle until the goniometer measures 90 degrees of dorsiflexion.
NOTE: To assist the patient in maintaining a 90 degree angle, have the patient bend the knee and point toes upward or simulate squashing a bug with the heel of their foot. This will assist in maintaining the ankle at a 90 degree angle. The technician may use their own style to assist the patient.
10 Apply the splint(s) appropriate for the injury and according to the physician's orders.
a. Apply the purified cotton roll to the injured ankle, foot, and leg.
(1) Place the edge of the cotton roll at the tips of the phalanges and begin wrapping around the foot two rotations to secure the edge.
(2) Continue up the foot and leg ending 2 inches distal to the popliteal space.
(3) Secure the cotton roll with bandage or webril.
b. Apply the posterior (L) splint to the injured leg.
CAUTION: If an orthopedic assitive device is used, the circulation to the toes and foot may be constricted. Always communicate with the patient and remove device if patient complains of numbness or tingling or if the technician observes a color change in the foot.
(1) Maintain the ankle at a 90 degree angle to the tibia.
(2) Hold each end of the plaster sheets, place in the bucket of tepid water, and remove when bubbles cease to rise.
(3) Squeeze the splint together.
NOTE: Squeezing the roll together equally distributes the water. Wringing the roll quickens the drying time of the splint and may cause the plaster not to cure.
Chapter 3: Skill Level Tasks 15 April 2016 STP 8-68B13-SM-TG 3-177
(4) Place the plaster sheets centered and 1/2 inch from the edge of the webril.
(5) Laminate the plaster splint.
(6) Fold over the edges of the webril.
(7) Place an additional layer of webril over the folded edges.
(8) Place the padded splint on the posterior side of the leg from the web spacing of the toes to 3 - 3 1/2 inches distal to the popliteal space.
c Apply the medial/lateral (U) splint to injured leg, if applicable.
(1) Follow steps 10a(2) - 10a(7).
(2) Place the padded splint from one fingerbreadth below the fibula head on the lateral side of knee, around the heel, up the leg to the point opposite of the starting location.
11. Secure the splint to the injured leg.
a. Place the edge of the elastic bandage at the base of the phalanges and wrap two rotations around the foot to secure the edge.
b. Continue up the foot and leg until the splint is completely covered.
(1) Fold down and hold the excess ends of the webril while continuing to wrap the bandage until the splint is completely covered.
(2) Temporarily secure the elastic bandage with clips.
c.Tape down the elastic bandage between the clips.
d. Remove the clips and dispose of them in the trash receptacle.
12. Mold the splint to the ankle/leg.
NOTE: Molds are done simultaneously. Go back and forth between the molds as the splint cures.
a. Place the palm of the hand on the gastrocnemius muscle and apply pressure. Hold until the contour takes shape.
b. Place the lateral aspect of both thumbs on the malleolus and apply even pressure. Hold until the contour takes shape.
c. Place the palm of the hand on the calcaneus and apply pressure. Hold until the contour takes shape.
d. Place the palm of the hand on the planter arch and apply pressure. Hold until the contour takes shape.
CAUTION: Excessive pressure may result in further patient injury. Talk to the patient while performing this procedure (e.g., How do you feel? Is the pressure too much?).
e. Apply firm and gradual pressure, then go back and forth between the gastrocnemius muscle, plantar arch, malleolus, calcaneus, and achilles until the splint is cured.
f. Remove the hands from the splint when the contours of the malleolus, tibia, calcaneus, achilles, and arch have been shaped and the splint is cured.
13. Trim the splint to meet the standards.
a. Verify the alignment of the injured ankle with a goniometer.
(1) Repeat steps 9b - 9d.
(2) Verify the goniometer measures 90 degrees of dorsiflexion.
(3) Remove the splint and go to step 10 to restart the process.
b.Verify the splint dimensions.
Chapter 3: Skill Level Tasks 3-178 STP 8-68B13-SM-TG 15 April 2016
(1) The splint edges rest 1 inch below the fibula head/notch to the web spacing of the toes.
(2) The splint edges rest 3 - 3 1/2 inches distal to the popliteal space to the tips of the toes.
c. Verify the ROM of the phalanges and knee.
(1) Instruct the patient to extend and flex the toes.
(2) Instruct the patient to extend and flex the knee.
(3) Trim back the splint material until the dimensions and ROM standards are met.
14. Check the patient's capillary refill on the splinted leg. (Repeat step 6)
15. Clean the plaster off the patient's skin using a damp towel or alcohol pads.
NOTE: Use alcohol pads or fresh water from the faucet and not from the casting bucket.
16. Administer crutch ambulation instructions.
17. Give the patient verbal and written instructions on splint care.
a. Provide the patient with a copy of the clinic hours and telephone number. Instruct the patient to call the cast clinic with any concerns or questions regarding their cast. For after duty hours concerns, instruct the patient to report to the emergency room.
b. Provide the patient with a cast care booklet or written instructions.
c.Instruct the patient to elevate the leg and flex and extend toes to increase circulation in the foot.
d. Instruct the patient to use crutches when walking.
e. Instruct the patient on what not to do:
(1) Do not stick any objects down the splint.
(2) Do not remove the splint.
(3) Do not alter the splint (e.g., writing or coloring the cast).
18. Annotate the procedure applied to the patient in the medical record or SF 513.
a. Record the procedure applied and cast care instructions provided.
b. Sign your name.
19. Escort or direct the patient to the front desk to make a follow-up appointment.
Evaluation Preparation: You must evaluate the students on their performance of this task in a field condition related to the actual task.
1 Reviewed the order from the physician.
2 Gathered the equipment and materials.
3. Told the patient your name and job title.
4. Explained the procedure to the patient.
5. Inspected the patient's injured leg/ankle.
Chapter 3: Skill Level Tasks 15 April 2016 STP 8-68B13-SM-TG 3-179
GO
Performance Measures GO NO
Performance Measures
6 Checked the patient's capillary refill.
7 Prepared the plaster splint.
8. Prepared purified cotton roll (Bulky Jones).
9. Set the patient's injured ankle at 90 degrees of dorsiflexion.
10. Applied the splint(s) appropriate for the injury and according to the physician's orders.
11. Secured the splint to the injured leg.
12. Molded the splint to the ankle/leg.
13. Trimmed the splint to meet the standards.
14. Checked the patient's capillary refill on the splinted leg. (Repeated step 6)
15 Cleaned the plaster off the patient's skin using a damp towel or alcohol pads.
16 Administered crutch ambulation instructions.
17 Gave the patient verbal and written instructions on splint care.
18 Annotated the procedure applied to the patient in the medical record or SF 513.
19 Escorted or directed the patient to the front desk to make a follow-up appointment.
Evaluation Guidance: Score each Soldier according to the performance measures in the evaluation guide. Unless otherwise stated in the task summary, the Soldier must pass all performance measures to be scored GO. If the Soldier fails any step, show what was done wrong and how to do it correctly.
Chapter
3-180 STP 8-68B13-SM-TG 15 April 2016
3: Skill Level Tasks
GO NO GO
Required Related SF 513 None
References
Subject Area 7: Traction
Set Up an Orthopedic Bed with Trapeze
081-68B-1601
Conditions: You are presented with a physician's order to set up an orthopaedic bed with trapeze for an orthopaedic patient. The patient is on a powered controlled orthopaedic bed and may be accompanied by a family member/chaperone. Nursing personnel and physician are available. You will need long plain bars, intravenous (IV) posts with clamps, double clamp bars, single plain bars, cross clamps, trapeze with hand grip, and examination gloves.
Standards: Secure the overhead four poster traction frame to the orthopaedic bed. The bed/frame is fully operational.
Performance Steps:
1. Review the order from the physician.
NOTE: The traction frame is set up in the absence of the patient to eliminate possible injury to the patient.
2. Gather needed equipment.
a. Orthopaedic bed
b.IV post clamps.
c. Single plain bars
d. Double clamp bars.
e. Cross clamps
f. Long plain bars
3. Check serviceability of overhead traction frame and bed.
a.Inspect traction equipment for cracked, dented, and warped bars, or broken handles. Open all clamp holders.
b.Inspect orthopaedic bed.
(1) Bed rails are in the upright position and locked.
(2) Bed electrical cord/plug are not frayed.
(3) Remote control buttons are operational (e.g., head/foot elevation, raise/lower position, and nurse call button).
(4) Bed wheels are locked.
NOTE: Inform nurse if bed is nonoperational and obtain another bed.
c.Inform orthopaedic supervisor if equipment is unserviceable and secure serviceable equipment.
4. Tell the patient your name and job title.
5. Insert each of the four IV post clamps into the IV post holders.
NOTE: The IV holders are located in each corner of the bed frame.
Chapter 3: Skill Level Tasks 15 April 2016 STP 8-68B13-SM-TG 3-181
6. Secure two plain bars into four IV post clamps.
a. Place the plain bar ends in the clamp holder.
NOTE: The clamp knob should be positioned to the outside of the bed for easier access by the technician.
b. Adjust the bars and close the clamps.
CAUTION:It is extremely important for the plain bar to sit flush inside the clamp holder. An uneven fit could cause further injury to the patient.
NOTE: It is the technician's preference to start at the foot or the head of the bed. Safety first, Safety always.
c. Lock the clamp bar holders.
7. Secure the four double clamp bars to the end of the plain bars.
a. Attach four double clamp bars (swivel end up) vertical to the plain bar at the foot/head of the bed.
b.The double clamp bar should be fastened 1/2-1 inch from the end of the horizontal bar.
c. Fasten the bars further away to provide the most support to the frame.
d. Place the knob of the double clamp bar facing outward to prevent complete detachment of the clamp, should the knob become loose.
e. Verify the bars at the foot line up with the bars at the head of the bed.
8. Secure first long plain bar into the double clamp bar holders at one end of the bed.
a. Place the plain bar ends in the clamp bar holders.
b. Adjust the bar and close the clamps.
NOTE: Do not lock the clamp until both ends of the bar are flush and fitted evenly.
c Lock the clamp bar holders.
9. Secure the remaining bars into the double clamp holders (repeat step 8).
10. Fasten two cross clamps to the long plain bars.
11. Secure cross clamps onto the plain bar.
a. Place the plain bar ends into the clamp holders.
b. Adjust the bar and close the clamps.
c. Lock the clamp bar holders.
12. Secure trapeze with handgrip to the plain bar.
a. Place the trapeze clamp holder onto the plain bar.
b. Adjust the clamp holder and close the clamp.
c. Lock the clamp bar holder.
d. Secure the handgrip to the clamp knob.( See Figure 3-25 and 3-26)
Chapter 3: Skill Level Tasks 3-182 STP 8-68B13-SM-TG 15 April 2016
Evaluation Preparation: You must evaluate the students on their performance of this task in a field condition related to the actual task.
Performance Measures GO NO GO
1 Reviewed the order from the physician.

2 Gathered needed equipment.
3 Checked serviceability of overhead traction frame and bed.

Chapter 3: Skill Level Tasks 15 April 2016 STP 8-68B13-SM-TG 3-183
Figure 3-25. Balken overhead traction frame
Figure 3-26. Telescoping overhead traction frame
Performance Measures
4 Told the patient your name and job title.
5 Inserted each of the four IV post clamps into the IV post holders.
6. Secured two plain bars into four IV post clamps.
7. Secured the four double clamp bars to the end of the plain bars.
8. Secured first long plain bar into the double clamp bar holders at one of the bed.
9. Secured the remaining bars into the double clamp holders (repeated step 8).
10. Fastened two cross clamps to the long plain bars.
11 Secured cross clamps onto the plain bar.
12 Secured trapeze with handgrip to the plain bar. References
Skill
3-184 STP 8-68B13-SM-TG 15 April 2016
Chapter 3:
Level Tasks
GO NO GO
Required Related None None
Apply Buck's Traction
081-68B-1602
Conditions: You are presented with a physician's written or verbal order to apply Buck's leg traction to an orthopaedic patient. The patient is supine on a power controlled orthopaedic bed with overhead traction frame and may be accompanied by a family member. Nursing personnel and physician are available. You will need the patient's medical record or Standard Form (SF) 513, Medical Record - Consultation Sheet, work cart/station, traction cart, spool of traction cord, pulley with attachment, 5 or 9 inch single clamp bar, pillow, weight carrier, 10 lb cast iron weight plate (weights are packaged in 1, 2, 5, and 10 lb increments), roll of 2 inch paper tape, Buck's traction boot or 36-48 inch long adhesive vent foam strap, spreader block, skin adherent (benzoin or mastisol) applicators, roll of 2 inch webril or felt, 3 or 4 inch elastic bandages, scissors, ruler, goniometer, examination gloves, trapeze, trash receptacle, and Zimmer Traction Handbook: A Complete Reference Guide to the Basics of Traction.
Standards: Apply adhesive vent foam strap or Buck's traction boot to patient's injured leg. The patient is positioned supine on the bed. Tie traction cord to the spreader block, thread through the pulley, and tie to weight carrier at the foot of the bed. Apply weight plates identified in the physician's order to the weight carrier. The heel and lower leg are suspended and supported off the bed by a pillow placed under the knee. Administer a capillary refill test to the toes, which is passed successfully.
Performance Steps:
1. Review order from the physician.
2. Gather equipment and materials.
a.Gather equipment to include spreader block, pulley, weight carrier, weight plates, single clamp bar, adhesive vent foam strap or Buck's traction boot. Place on work cart/station.
b. Assemble materials to include paper tape, elastic bandages, spool of traction cord, pillow, webril, skin adherent with applicators, examination gloves, scissors, and goniometer. Place on work cart/station.
3. Check serviceability of overhead traction frame and bed.
a.Inspect traction equipment for cracked, dented, warped bars, or broken handles. Open all clamp holders.
NOTE: Turn all unserviceable equipment over to supervisor and continue to gather serviceable equipment.
b. Inspect orthopaedic bed as follows:
(1) Bed rails are in the upright position and locked.
(2) Electrical cord/plug are not frayed.
(3) Remote control buttons are operational (e.g., head/foot elevation, raise/lower position, and nurse call button).
(4) Bed wheels are locked.
c. Re-check overhead traction frame and bed.
(1) All clamps are tightened and locked.
(2) Bed rails are upright and locked.
(3) Bed wheels are locked.
Chapter 3: Skill Level Tasks 15 April 2016 STP 8-68B13-SM-TG 3-185
4. Tell the patient your name and job title.
5. Explain the procedure to the patient.
NOTE: Buck's traction is designed to reduce muscle strain, and assist in alignment of lower extremity bones. Adhesive vent foam strap with spreader block or buck's traction boot is secured to the injured leg with elastic bandages or straps. A pillow is placed under the knee to reduce bed sores and ulcers of the heel.
6. Position the patient in the middle of the bed.
7. Prepare patient's injured leg and ankle for Buck's traction.
a. Put on examination gloves.
b. Remove patient's shoes and socks.
c.Inspect both lower legs for any skin conditions (e.g., cuts, abrasions, lacerations, or rashes).
d.Pad medial/lateral malleolus (ankle) of the injured leg.
8. Check patient's capillary refill of both feet.
a. Squeeze patient's toes; nail beds will turn white.
b. Release patient's toes; nail bed will return pink.
9. Apply skin adherent to patient's injured leg.
a. Pad the malleolus with webril.
b. Ask patient if they have ever had a skin rash after the use of benzoin or after eating shellfish.
c. Use applicator to apply tincture of benzoin to the medial/lateral aspect of the injured leg beginning 1 inch distal to the fibula notch/head and ending 1 inch proximal to the malleolus (ankle).
d. Apply mastisol as in step 9c.
10. Secure the vent foam strap with spreader block to injured leg.
NOTE: If using Buck's traction boot, go to step 12.
NOTE: The vent foam strap upon being secured should rest 1 inch distal to the fibular notch.
a. Begin 1 inch proximal to the fibular notch/head, down the medial side of the leg, continuing around the heel and ending on the lateral side opposite the start point.
b. Place the edge of the elastic bandage on the malleolus and begin wrapping around the malleolus two rotations to secure the edge.
c. Fold down and hold excess ends, and continue wrapping the bandage until vent foam is completely covered. Secure with clips and tape down between the clips.
d.Tape down the elastic bandage between the clips.
e. Remove the clips and dispose of them in trash receptacle.
f. Slide the spreader block between the vent foam strap.
CAUTION: When applying Buck's traction boot, assistance must be used to prevent further injury to the patient. The Buck's boot is available in small, medium, and large.
Chapter 3: Skill Level Tasks 3-186 STP 8-68B13-SM-TG 15 April 2016
11. Place Buck's traction boot under injured leg to 1 inch distal to the fibular notch and secure with straps.
12. Secure the 5 or 9 inch single clamp bar (horizontally) to crossbar at foot of bed in alignment with the 2nd and 3rd phalanges (toes) of the injured leg/foot.
13. Secure the pulley attachment to the middle of the single clamp bar.
14. Tie traction cord to spreader block and weight carrier.
a. Remove 4-6 feet of traction cord from the spool.
b. Cut traction cord.
c.Tie a nonslip knot to the end of spreader block.
d.Thread opposite end of traction cord through pulley directly at the foot of the bed.
e. Tie a nonslip knot to the hook on the weight carrier.
15. Place a pillow lengthwise under the injured leg to elevate the heel off the bed.
16. Apply weight plates to the weight carrier.
17. Elevate or raise the foot of the bed until traction cord is parallel to the floor.
18. Check single clamp bar alignment with the patient's injured leg.
NOTE: If the single clamp bar alignment is not centered, re-check traction cord in step 18.
19. Check patient's capillary refill of both feet.
a. Squeeze patient's toes; nail beds will turn white.
b. Release patient's toes; nail beds will return pink.
20. Re-check overhead traction frame and bed.
a. All clamps are tightened and locked.
b. Bed rails are upright and locked.
c. Bed wheels are locked.
21. Inspect traction equipment.
a.The weight carrier is hanging freely without touching the bed/floor.
b. All knots are secured (taped).
c.The traction cord is centered on the track of the pulley.
d.The traction cord is hanging freely without touching the bed or frame.
22. Give patient verbal instruction on Buck's traction.
a. Press the nurse call button on the side of the bed rails for assistance.
b. Buck's traction boot can only be removed with physician's permission.
c. The Buck's traction boot or adhesive vent foam strap should not impede circulation to the foot and toes.
Evaluation Preparation: You must evaluate the students on their performance of this task in a field condition related to the actual task.
Chapter 3: Skill Level Tasks 15 April 2016 STP 8-68B13-SM-TG 3-187
Performance Measures
1 Reviewed order from the physician.
2 Gathered equipment and materials.
3. Checked serviceability of overhead traction frame and bed.
4. Told the patient your name and job title.
5. Explained the procedure to the patient.
6. Positioned the patient in the middle of the bed.
7. Prepared patient's injured leg and ankle for Buck's traction.
8. Checked patient's capillary refill of both feet.
9 Applied skin adherent to patient's injured leg.
10 Secured the vent foam strap with spreader block to injured leg.
11 Placed Buck's traction boot under injured leg to 1 inch distal to the fibular notch and secured with straps.
12 Secured the 5 or 9 inch single clamp bar (horizontally) to crossbar at foot of bed in alignment with the 2nd and 3rd phalanges (toes) of the injured leg/foot.
13 Secured the pulley attachment to the middle of the single clamp bar.
14 Tied traction cord to spreader block and the weight carrier.
15 Placed a pillow lengthwise under the injured leg to elevate the heel off the bed.
16 Applied weight plates to weight carrier.
17 Elevated or raised the foot of the bed until traction cord is parallel to the floor.
18 Checked single clamp bar alignment with the patient's injured leg.
19 Checked patient's capillary refill of both feet.
20. Re-checked overhead traction frame and bed.
21. Inspected traction equipment.
22. Gave patient verbal instructions on Buck's traction.
3-188 STP 8-68B13-SM-TG 15 April 2016
Chapter 3: Skill Level Tasks
GO NO GO
Evaluation Guidance: Score each Soldier according to the performance measures in the evaluation guide. Unless otherwise stated in the task summary, the Soldier must pass all performance measures to be scored GO. If the Soldier fails any step, show what was done wrong and how to do it correctly.
References
Required
SF 513
Zimmer Traction Handbook
Related
None
15 April 2016 STP 8-68B13-SM-TG 3-189
Chapter 3: Skill Level Tasks
Subject Area 8: Upper Extremity Casts
Apply a Standard Long Arm Cast

081-68B-1202
Conditions: You are presented with a physician's written or verbal order to apply a standard long arm cast (LAC) to an orthopedic patient. The patient is sitting on an orthopedic examination bed and may be accompanied by a family member. Nursing personnel and physician are available. You will need the patient's medical record or Standard Form (SF) 513, Medical Record - Consultation Sheet, the local standard operating procedures (SOP), work cart/station, sink with faucet, roll of stockinette, webril rolls, plaster or fiberglass rolls, box of plaster reinforcement sheets, examination gloves, scissors, cast saw, cast spreader, eye protection, hearing protection, roll of adhesive tape, hospital pads (chux) or bed sheets, goniometer, bucket of water with plastic bag, box of alcohol pads or damp wash towel, cast care booklet or equivalent, sling, and trash receptacle.
Standards: Apply the LAC to the patient's injured arm from the distal palmar crease (DPC)/metacarpophalangeal head joints (MCPJs) to 2 - 2 1/2 inches distal to the axilla region. The cast immobilizes the wrist and elbow, with the wrist at 0 - 15 degrees of extension and the elbow at 90 degrees of flexion eliminates ulnar and radial deviation, pronation, and supination from the wrist/forearm; and allows full range of motion (ROM) of the thumb and phalanges. The capillary refill returns within 1 - 3 seconds. The long arm cast is used for proximal/distal ulna/radius fractures, elbow injuries/fractures, and humerus fractures.
NOTE: See Figure 3-27 for example.
Performance Steps:
1. Review the order from the physician.
2. Gather the equipment and materials.
NOTE: The physician order, technician's preference, availability of supplies, and/or patient's extremity size will determine which casting material (fiberglass/ plaster) is used.
3-190 STP 8-68B13-SM-TG 15 April 2016
Chapter 3: Skill Level Tasks
Figure 3-27. Lateral view of a long arm cast
a. Gather equipment.
(1) Goniometer
(2) Scissors.
(3) Utility cart
(4) Cast saw
(5) Cast spreader
(6) Eye protection
(7) Hearing protection
CAUTION; The temperature of the water must be tepid (70°- 80° F) to reduce further injury (possible burns) to the patient. The technician must change the water after each application, as the residue in the cast bucket will act as an accelerator causing the casting material to increase in heat emission.
(8) bucket of tepid water with plastic bag.
b. Assemble materials.
(1) Roll of stockinette (1 inch and 2, 3 or 4 inch).
(2) W ebril rolls (2 & 3 inch).
(3) Plaster (3 & 4 inch) or fiberglass (2 or 3 inch & 4 inch) rolls.
(4) Box of plaster reinforcement sheets (4 x 15 and 5 x 30).
(5) Examination gloves.
(6) Box of alcohol pads or damp wash towel.
(7) Hospital pads (chux) or bed sheets.
(8) Cast care booklet or equivalent
(9) Sling.
(10) Surgical tape (1 inch)
c. Place the equipment and materials on the work cart/station.
3. Tell the patient your name and job title.
CAUTION: During cast application a chemical response (exothermic reaction) will occur between the water and the plaster (gypsum). This is a safe and common occurrence. The cast will initially become warm and cool down within 2-5 minutes. However, if it doesn't cool down or there is an increase of heat intensity during the cast application, the cast may need to be removed.
4. Explain the procedure to the patient.
5. Don safety equipment (patient and technician).
6. Inspect the patient's arms.
CAUTION: Always practice body substance isolation (BSI) prior to applying traction, splints, or casts to patients
a. Place examination gloves on hands.
b. Place the patient sitting or supine on the examination bed.
c.Inspect both arms for any skin conditions (e.g., cuts, abrasions, lacerations, and skin rashes).
NOTE: Inform the physician if skin conditions are present and follow the physician's instructions.
Chapter 3: Skill Level Tasks 15 April 2016 STP 8-68B13-SM-TG 3-191
d. Examine both arms and wrists for jewelry and remove if found.
NOTE: All jewelry on the injured hand and wrist must be removed. Give the jewelry to a family member or secure it with the patient's belongings according to the local SOP.
7. Check the capillary refill of the patient's hands/fingers.
a. Squeeze the patient's fingers; nail beds will turn white.
CAUTION: If the capillary refill is delayed for more than 2 seconds, inform the physician and follow the physician's instructions.
b. Release the patient's fingers; nail beds will return pink.
8. Prepare the stockinette.
NOTE: The stockinette is a form of protection against the exothermic reaction caused by the casting materials. It is generally used for all casts except on patients who have had recent surgery, recently reduced fractures, or as directed by the physician.
a. Place a hospital pad or bed sheet on the patient's lap.
NOTE: All patients should be given a covering (e.g., chux, bed sheet) to reduce damaging their clothing during the casting process.
b. Place the work cart/station at the edge of the bed.
NOTE: Numerous props may be used (e.g. orthopedic bump, T stand, finger trap stand, nursing assistant). Technician preference will determine if a prop is used.
c Place the patient's uninjured elbow at a 90 degree angle.
d. Forearm stockinette.
(1) Measure from 2 inches distal to the MCPJs to the axilla region for the stockinette length.
(2) Pull down the stockinette from the stockinette container and cut the measured length.
e. Thumb stockinette.
(1) Measure from 1/2 inch distal to the tip of the thumb to the base of the wrist for the stockinette length.
(2) Pull down the stockinette and cut the measured length.
(3) Cut a vertical slit to allow the stockinette to rest flat from the web spacing, between the thumb and the 2nd phalange, and the base of the wrist.
f. Roll the stockinette leaving a 1 - 2 inch cuff at the distal end and place on the work cart/station for later use.
9. Apply the stockinette to the patient's injured arm.
a. Forearm stockinette.
(1) Hold open the sides of the stockinette.
(2) Place the injured hand in the stockinette opening.
(3) Roll the stockinette on the injured arm from 2 inches distal to the MCPJs to the axilla region.
Chapter 3: Skill Level Tasks 3-192 STP 8-68B13-SM-TG 15 April 2016
NOTE: Rolling the stockinette on promotes a better fit.
(4) Pinch the stockinette at the base of the thumb and cubitum area and make a 1/2 inch cut at a 45 degree angle.
NOTE: An alternative and authorized method is to cut the stockinette prior to application.
(5) Place the thumb through the precut hole.
(6) Smooth out the stockinette.
b. Thumb stockinette.
(1) Roll the stockinette from 1/2 inch distal to the tip of the thumb to the base of the wrist.
(2) Smooth out the stockinette.
10. Set the patient's injured wrist at 0 - 15 degrees extension.
NOTE: All hand casts are applied absent of pronation, supination, radial, or ulnar deviation unless directed by the physician.
a. Position the patient's injured elbow at a 90 degree angle to the upper torso.
NOTE: Family member(s), nursing staff, an orthopedic technician, or finger traps can be used to assist in positioning the patient's arm.
b. Place the patient's index finger and thumb in opposition to one another.
NOTE: Placing the thumb and forefinger in opposition to one another assists the patient in maintaining the wrist in a neutral position. This is commonly referred to as the can of coke position.
c Place the stationary arm of the goniometer vertically, bisecting the ulnar.
d. Place the protractor of the goniometer on the ulnar styloid.
e. Place the moving arm of the goniometer vertically, bisecting the lateral side of the 5th metacarpal.
f. Position the wrist until the goniometer measures between 0 - 15 degrees of extension.
11. Set the injured elbow at 90 degrees flexion.
a.Place the stationary arm of the goniometer so that it bisects the middle of the humerus and deltoid muscle.
b. Place the protractor of the goniometer on the olecranon (elbow), forming a 90 degree angle.
c.Place the moving arm of the goniometer so that it bisects the middle of the forearm and the 2nd and 3rd phalanges.
d. Position the elbow until the goniometer measures 90 degrees of flexion.
CAUTION: Wrinkled padding can cause pressure sores which can lead to ulcers. If the cast padding is wrinkled, it must be removed and new padding applied.
12. Apply the webril (cast padding) to the injured arm.
Chapter 3: Skill Level Tasks 15 April 2016 STP 8-68B13-SM-TG 3-193
CAUTION: Keep the webril roll on the extremity as it is applied to reduce possible constrictive edema caused by applying the webril too tight.
a. Place the webril end on the ulnar styloid and wrap two rotations around the wrist.
NOTE: The webril application is started at the wrist to provide an anchor and extra padding to the ulnar styloid.
b. Continue wrapping through the palm ending 1/2 inch proximal to the distal edge of the stockinette, back up the forearm, figure eight around the elbow, and ending 1/2 inch distal to the proximal edge of the stockinette.
NOTE: The webril can be cut or torn (horizontally) when wrapping through the palm and elbow to provide a better fit. Technician preference will determine which technique to use.
c.Overlap the webril by 1/4 - 1/2 the previous wrap with each turn.
NOTE: The top of the webril should bisect the middle of the previous layer covering up the shallow line and present evenly applied padding.
13. Prepare the casting materials, as applicable.
CAUTION: It is mandatory to use gloves to prevent the technician from receiving chemical burns while applying a fiberglass cast.
a. Place the gloves on hands and open the fiberglass casting package.
NOTE: Open one fiberglass package at a time. As the fiberglass roll comes in contact with the air, the roll will start to cure (set).
b. Prepare the plaster reinforcement splint(s).
NOTE: The plaster reinforcement splint is used to strengthen and support the cast. Upper extremity fiberglass casts do not require a splint due to the strength of the fiberglass casting material.
(1) Prepare the splint for the volar aspect of the cast.
NOTE: The volar aspect of the arm is located on the palm side of the hand.
(a) Open the box of 4 x 15 reinforcement plaster sheets. Remove the sheets from the box and unwrap the package. Peel back the edges of five sheets and remove from the stack. Place the sheets on the work cart/station.
(b) Place the patient's uninjured hand in the supine position (palm up) and locate the DPC, thenar eminance, and the cubitum space.
NOTE: The DPC is furthest diagonal line on the volar aspect of the hand. The thenar muscle is at the base of the thumb on the volar aspect of the hand. The crease is noticeable when the thumb and 5th phalange (pinky finger) are brought together. The cubitum space is located at the bend of the arm.
Chapter 3: Skill Level Tasks 3-194 STP 8-68B13-SM-TG 15 April 2016
(c) Remove one plaster sheet from the stack of five.
(d) Place the sheet next to the uninjured arm to obtain the sheet length, and the DPC and thenar muscle contours.
NOTE: To increase patient cleanliness, the sheet does not have to rest on the hand/forearm.
(e) Draw a diagonal line on the plaster sheet that matches with the DPC of the patient's hand.
NOTE: The diagonal cut facilitates full ROM of the fingers (extension and flexion).
(f) Draw a curved line (half moon shape) on the plaster sheet that matches with the outer border of the thenar muscle on the patient's hand.
NOTE: The half moon pattern enables the thenar muscle to be observable and the thumb to adduct to all fingers promoting full ROM.
(g) Place the measured sheet on the stack and cut the outlined patterns and excess length for all sheets. Place the stack on the work cart/station for later use.
(h) Discard excess material in the trash receptacle.
(2) Prepare the splint for the posterior aspect of the cast.
(a) Open the box of 5 x 30 plaster sheets. Remove the sheets from the box and unwrap the package. Locate edge of one stack and remove the stack from the package.
NOTE: The 5 x 30 plaster splints are usually stacked in increments of five from the manufacturer. If not prestacked, count out five layers.
(b) Position the patient's uninjured elbow at a 90 degree angle.
NOTE: Family members, nursing staff, orthopedic technician, or finger trap stand can be used to assist in positioning the patient's arm.
(c) Place the distal end of the plaster stack on the lateral aspect of the mid forearm and instruct the patient or assistant to hold the distal end. Simultaneously bring the proximal end 2 inches distal to the axilla or resting on the insertion of the deltoid muscle. Fold down the proximal end, cut off the excess, and place the stack on the work cart/station for later use.
14. Apply the first plaster/fiberglass layer.
NOTE: Examination gloves are recommended to protect the technician's hands as the resin in the plaster may cause the skin on the hands to dry up.
CAUTION: If the casting material is removed while bubbles are still present, dry spots will be visible during application. Dry spots cause integrity breakdown of the cast.
a. Place the plaster/fiberglass roll in a bucket of tepid water and remove when the bubbles cease to rise.
b. Squeeze the roll together (do not wring the roll).
NOTE: Gently squeeze the roll inward to evenly distribute the water and prevent telescoping of the roll during application.
Chapter 3: Skill Level Tasks 15 April 2016 STP 8-68B13-SM-TG 3-195
c Place the edge of the casting material on the ulnar styloid and wrap two rotations around the wrist to secure the edge.
NOTE: The cast is most susceptible to losing strength in the palm region. Therefore, a twisting or cut method is authorized. Technicians may have their own preference to these methods. “the twisting method.” The twisting method provides strength to the cast. As the roll is pushed through the palm, pinch the sides of the plaster roll together (not recommended for fiberglass) twist and evenly space the casting material on thewebril. Smooth out with volar side of fingers. “the cut method.” The cutting method provides cast cosmetics. As the roll is pushed through the palm, make a horizontal cut to the proximal edge of the plaster/fiberglass roll and smooth out with volar aspect of fingers or palm.
d. Continue wrapping through the palm ending 1/2 inch proximal to the distal edge of the webril, back up the forearm, figure of eight around the elbow, and ending 1/2 inch distal to the proximal edge of the webril.
e.Overlap the plaster/fiberglass by 1/4 or 1/2 the previous wrap.
NOTE: The top of the plaster/fiberglass should bisect the middle of the previous layer and present an evenly applied cast. Depending on the size of the patient's forearm and biceps region, more than two rolls may be needed for the initial roll. Begin the extra roll where the previous roll left off.
15. Laminate the casting material.
CAUTION: To reduce cast indentations, which can cause pressure sores to the patient's skin under the cast, keep fingertips off the cast during application and molding process. If the patient feels pressure sores or hot spots developing under the cast, remove the cast immediately and start over with step 2.
a. Place palm of each hand on the cast.
b.Rub the cast material in the direction it was applied.
NOTE: Laminating the cast material fills in the pores, which assists in providing strength to the cast.
c Continue rubbing the cast until the tone/texture changes.
NOTE: The dull white color indicates the plaster is beginning to cure.
16. Apply the plaster reinforcement splint(s).
NOTE: If using fiberglass, skip and go to step 17.
a. Apply the splint to the volar aspect of cast.
(1) Place the splint in a bucket of tepid water, wait for the bubbles to subside, then remove the splint from the water.
(2) Squeeze the splint together to eliminate excess water.
(3) Place the reinforcement splint on the volar side of the cast in line with the DPC and the outer border of the thenar muscle.
(4) Laminate the splint to the cast.
(5) Maintain the patient's wrist between 0 - 15 degrees of extension.
Chapter 3: Skill Level Tasks 3-196 STP 8-68B13-SM-TG 15 April 2016
NOTE: Place the patient's thumb and index finger in opposition to one another.
b. Apply the splint to the posterior aspect of the cast.
(1) Place the splint in a bucket of tepid water, wait for the bubbles to subside, then remove the splint from the water.
(2) Squeeze the splint together to eliminate excess water.
(3) Place the reinforcement splint centered and on the posterior side of the elbow extending from mid forearm to 1/2 inch distal to the webril edge.
(4) Laminate the splint to the cast.
(5) Maintain the patient's elbow at 90 degrees of flexion.
NOTE: Family member(s), nursing staff, an orthopedic technician, or a finger trap stand can be used to assist in positioning the patient's arm.
17. Apply the second plaster/fiberglass layer (repeat steps 14 - 15).
18. Mold the cast.
NOTE: All casts require molding. Molds are done simultaneously. Go back and forth between the molds as the cast cures.
a. Interosseous.
NOTE: The interosseous mold is used to prevent movement of the injured wrist in the cast and promote fracture healing.
(1) Place the heel of one hand on the volar aspect of the distal wrist.
(2) Place the heel of the second hand on the dorsal aspect of the distal wrist.
(3) Squeeze the heels of each hand together.
b. Bicipital.
NOTE: The bicipital mold is used to prevent movement of the humerus in the cast and promote fracture healing.
(1) Place the palm of one hand on the biceps muscle.
(2) Place the palm of the second hand on the triceps muscle.
(3) Press the palms together to conform the plaster/fiberglass to the upper arm.
CAUTION: Excessive pressure may result in further patient injury. Talk to the patient while performing this procedure (e.g., How do you feel? Is the pressure too much?).
c Apply firm and gradual pressure beginning at the wrist, progress up the forearm and upper arm while maintaining the patient's wrist and elbow in the correct position.
d. Remove the hands from the cast when the contours of the upper arm, forearm and wrist have been shaped and the cast is cured.
19. Trim the cast to meet the cast standards.
a. Verify the alignment of the wrist with a goniometer.
(1) Repeat steps 10c - e.
(2) Verify the wrist measures between 0 - 15 degrees of extension.
(3) Remove the cast and start over with step 2.
Chapter 3: Skill Level Tasks 15 April 2016 STP 8-68B13-SM-TG 3-197
b. Verify the alignment of the elbow with a goniometer.
(1) Repeat steps 11a - c.
(2) Verify the elbow measures at 90 degrees of flexion.
(3) Remove the cast and start over with step 2.
c. Verify the cast dimensions.
(1) On the volar side, the distal edge of the cast rests within 1/8 inch of the DPC. (See Figure 3-28.)
(2) On the dorsal side, the distal edge of the cast rests within 1/2 inch of the base of the MCPJs. (See Figure 3-29.)
CAUTION: The finished edge of the cast should end priximal to the base of the thumb to avoid radial nerve impingement.
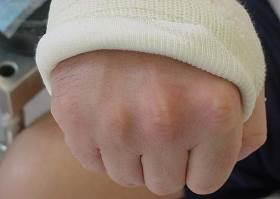
(3) The cast edge at the base of the thumb rests proximal to the snuff box. (See Figure 3-30.)
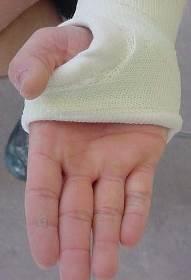
3-198 STP 8-68B13-SM-TG 15 April 2016
Chapter 3: Skill Level Tasks
Figure 3-28. Cast Rests at the distal palmar crease
Figure 3-29. Cast rests at the base of metacarpophalangeal joints
(4) The proximal edge of the cast rests 2 - 2 1/2 inches distal to the axilla region.
d. Check the ROM of the phalanges and thumb.
NOTE: The patient should be able to freely extend and flex the fingers and touch the thumb to all fingers.
(1) Instruct the patient to extend and flex fingers.
(2) Instruct the patient to rotate thumb and touch all fingers to the thumb.
e.Trim back the cast material until the dimensions and ROM standards are met.
f. Trim the proximal and distal edges of the cast.
(1) Cut the outside edge of the cast padding.
(2) Pull down the webril and stockinette.
(3) Tape down the edges of the stockinette and webril, if necessary.
20. Apply the final plaster/fiberglass layer (repeat steps 14 - 15).
NOTE: The last roll in all casting applications is commonly referred to as the beautification roll or the money roll. Take pride in your work.
21. Check the patient's capillary refill on the casted hand (repeat step 7).
22. Clean the plaster resin off the patient's skin using a damp wash towel or alcohol pads.

NOTE: Use alcohol pads or fresh water from the faucet and not from the casting bucket.
23. Give the patient verbal and written instructions on cast care.
a. Provide the patient with a copy of the clinic hours and telephone number. Instruct the patient to call the cast clinic with any concerns or questions regarding their cast. For after duty hours concerns, instruct the patient to report to the emergency room.
b. Provide the patient with a cast care booklet or written instructions.
Chapter 3: Skill Level Tasks 15 April 2016 STP 8-68B13-SM-TG 3-199
Figure 3-30. Thumb rests proximal to the snuff box
c Instruct the patient to elevate the extremity above the heart, and extend, flex, and wiggle fingers (demonstrate for patient) to reduce swelling.
d. Instruct the patient on what not to do.
(1) Do not stick anything down the cast.
(2) Do not remove the cast.
(3) Do not alter the cast (e.g., writing on it, coloring).
24. Fit the sling to the patient, as required.
NOTE: Considerations for applying a sling include elderly patients, severity of fractures (e.g., Colles', Smith's, Bennett's), patient's comfort, and physician's or technician's preference.
25. Annotate the procedure applied to the patient in the medical record or SF 513.
a. Record the procedure applied and cast care instructions provided.
b. Sign your name.
26. Escort or direct the patient to the front desk to make a follow-up appointment.
Evaluation Preparation: None
Performance Measures
1 Reviewed the order from the physician.
2 Gathered the equipment and materials
3 Told the patient your name and job title.
4 Explained the procedure to the patient.
5 Donned safety equipment (patient and technician).
6 Inspected the patient's arms.
7 Checked the capillary refill of the patient's hands/fingers.
8 Prepared the stockinette.
9 Applied the stockinette to the patient's injured arm.
10. Set the patient's injured wrist at 0 - 15 degrees extension.
11. Set the injured elbow at 90 degrees flexion.
12. Applied the webril (cast padding) to the injured arm.
13. Prepared the casting materials, as applicable.
14. Applied the first plaster/fiberglass layer.
STP 8-68B13-SM-TG 15 April 2016
Chapter 3: Skill Level Tasks 3-200
GO NO GO
15 Laminated the casting material.
16 Applied the plaster reinforcement splint(s), if using plaster.
17. Applied the second plaster/fiberglass layer (repeated steps 14 -15 ).
18. Molded the cast.
19. Trimmed the cast to meet the cast standards.
20. Applied the final plaster/fiberglass layer (repeated steps 14 - 15).
21. Checked the patient's capillary refill on the casted hand (repeated step 7).
22. Cleaned the plaster resin off the patient's skin using a damp wash towel or alcohol pads.
23 Gave the patient verbal and written instructions on cast care.
24 Fit the sling to the patient, as required.
25 Annotated the procedure applied to the patient in the medical record or SF 513.
26 Escorted or directed the patient to the front desk to make a follow-up appointment.
Evaluation Guidance: Score each Soldier according to the performance measures in the evaluation guide. Unless otherwise stated in the task summary, the Soldier must pass all performance measures to be scored GO. If the Soldier fails any step, show what was done wrong and how to do it correctly. References
Chapter 3: Skill Level Tasks 15 April 2016 STP 8-68B13-SM-TG 3-201
GO NO GO
Performance Measures
Required Related SF 513 None
Apply an Ulnar Gutter Cast
081-68B-1203
Conditions: You are presented with a physician's order to apply an ulnar gutter cast to an orthopedic patient. The patient is sitting on an orthopedic examination bed and may be accompanied by a family member/chaperone. Nursing personnel and physician are available. You will need the patient's medical record or Standard Form (SF) 513, Medical RecordConsultation Sheet, the local standard operating procedures (SOP), work cart/station, plaster or fiberglass rolls, box of plaster reinforcement sheets, webril rolls, stockinette, examination gloves, scissors, cast saw, cast spreader, eye protection, hearing protection, roll of adhesive tape, hospital pads (chux) or bed sheet, goniometer, bucket of tepid water with plastic bag, sling, cast care booklet or equivalent, box of alcohol pads or damp wash towel, sink with faucet, and trash receptacle.
Standards: Apply the ulnar gutter cast to the patient's injured arm from 1/8 - 1/4 inch beyond the tips of the 4th and 5th phalanges, with the 4th and 5th metacarpal heads covered, to 1 - 1 1/2 inches distal to the cubitum space. The cast immobilizes the wrist and 4th and 5th phalanges, with the wrist set at 15 - 30 degrees of extension and the 4th and 5th phalanges set at 70 - 90 degrees of flexion; eliminates rotation and overlapping of the 4th and 5th phalanges; eliminates ulnar and radial deviation, pronation, and suppination; and allows full range of motion (ROM) of the elbow, thumb, and uninjured phalanges. The capillary refill returns within 1 - 3 seconds.
NOTE: The ulna gutter cast is used for fractures and soft tissue injuries involving the 4th and 5th metacarpal joints and phalanges. (See Figure 3-31.)
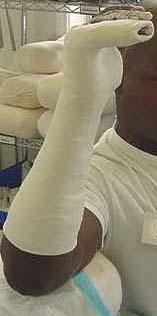
Chapter 3: Skill Level Tasks 3-202 STP 8-68B13-SM-TG 15 April 2016
Figure 3-31. Plaster ulnar gutter cast
Performance Steps:
1 Review the order from the physician.
2. Gather the equipment and materials.
NOTE: The physician's order, technician's preference, availability of supplies, and/or patient's extremity size determine which casting material (fiberglass/plaster) is used.
a. Gather the equipment.
(1) Scissors.
(2) Goniometer.
(3) Utility cart
(4) Cast saw.
(5) Cast spreader.
(6) Eye protection .
(7) Hearing protection.
CAUTION: The temperature of the water must be tepid (70° - 80° F) to reduce further injury (possible burns) to the patient. The technician must change the water after each cast application, as the residue in the cast bucket will act as an accelerator causing the casting material to increase in heat emission.
(8) Bucket of tepid water with plastic bag
b.Assemble the materials.
(1) W ebril rolls (1 inch and 2 or 3 inch)
(2) Plaster (4 inch) or fiberglass rolls (2 or 3 inch).
(3) Stockinette roll (1 inch and 2 or 3 inch)
(4) Adhesive tape (1 inch)
(5) Cast care booklet or equivalent
(6) Examination gloves
(7) Hospital pad (chux) or bed sheet
(8) Sling
(9) Box of plaster reinforcement sheets (4 x 15)
(10) Box of alcohol prep pads or damp wash towel
c. Place the equipment and materials on the work cart/station.
3. Tell the patient your name and job title.
CAUTION: During cast application a chemical response (exothermic reaction) will occur between the water and the plaster (gypsum). This is a safe and common occurrence. The cast will initially become warm and cool down within 2 - 5 minutes. However, if it doesn't cool down or there is an increase of heat intensity during the cast application, the cast may need to be removed
4. Explain the procedure to the patient.
5. Don safety equipment (patient and technician).
6. Inspect the patient's arms.
Chapter 3: Skill Level Tasks 15 April 2016 STP 8-68B13-SM-TG 3-203
CAUTION: Always practice body substance isolation prior to applying traction, splints, or casts to patients.
a. Place examination gloves on hands.
b. Place the patient sitting or supine on the examination bed.
c.Inspect both arms for any skin conditions (e.g., cuts, abrasions, lacerations, and skin rashes).
NOTE: Inform the physician if skin conditions are present and follow the physician's instructions.
d. Examine both arms and wrists for jewelry and remove if found.
NOTE: All jewelry on the injured hand and wrist must be removed. Give the jewelry to a family member or secure it with the patient's belongings according to the local SOP.
7. Check the capillary refill of the patient's hands/fingers.
a. Squeeze the patient's fingers; nail beds will turn white.
CAUTION: If the capillary refill is delayed for more than 2 seconds, inform the physician and follow the physician's instructions.
b. Release the patient's fingers; nail beds will return pink.
8. Prepare the stockinette.
NOTE: The stockinette is a form of protection against the exothermic reaction caused by casting materials and generally used for all casts except on patients who have had recent surgery, recently reduced fractures, or as directed by the physician.
a. Place a hospital pad or bed sheet on the patient's lap.
NOTE: All patients should be given a covering (e.g., chux, bed sheet) to reduce damaging their clothing during the casting process.
b. Place the work cart/station at the edge of the bed.
NOTE: Numerous props may be used (e.g. orthopedic bump, T stand, finger trap stand, nursing assistant). Technician preference will determine if a prop is used.
c Place the patient's uninjured elbow at a 45 degree angle to the upper torso.
d. Forearm stockinette.
(1) Measure from 1 - 1 1/2 inches to the distal interphalangeal joint (DIPJ) to the cubitum space (bend of elbow) for the stockinette length.
(2) Pull down the stockinette and cut the measured length.
e. Phalange stockinette.
(1) Measure from 1/2 inch distal to the tips of the 4th and 5th phalanges to the base of the wrist for the stockinette length.
(2) Pull down the stockinette and cut the measured length.
(3) Cut a vertical slit to allow the stockinette to rest flat from the web spacing, between the 3rd and 4th phalanges, and the base of the wrist.
f. Thumb stockinette.
Chapter 3: Skill Level Tasks 3-204 STP 8-68B13-SM-TG 15 April 2016
(1) Measure from 1/2 inch distal to the tip of the thumb to the base of the wrist for the stockinette length.
(2) Pull down the stockinette and cut the measured length.
(3) Cut a vertical slit to allow the stockinette to rest flat from the web spacing, between the thumb and the 2nd phalange, and the base of the wrist.
g. Roll each stockinette leaving a 1 - 2 inch cuff at the distal end and place on the work cart/station for later use.
9. Place a webril strip between the 4th and 5th phalanges.
NOTE: The webril padding is placed between the phalanges to reduce maceration of the phalanges. The 4th and 5th phalanges can be taped together to reduce rotation of the fracture.
10. Apply the stockinette to the injured arm and phalanges.
a. Forearm stockinette.
(1) Hold open the sides of the stockinette.
(2) Place the injured hand in the open end of the stockinette.
(3) Roll the stockinette on the injured arm from 1 - 1 1/2 inch distal to the DIPJ to the cubitum space (bend of elbow).
NOTE: Rolling the stockinette on promotes a better fit.
(4) Pinch the stockinette at the base of the 5th phalange and make a 1/2 inch cut at a 45 degree angle.
NOTE: An authorized alternative method is to cut the stockinette prior to the application.
(5) Pinch the stockinette at the base of the thumb and make a 1/2 inch cut at a 45 degree angle.
(6) Place the patient's thumb and 4th and 5th phalanges through the applicable precut hole.
(7) Smooth out the stockinette.
b. 4th and 5th phalanges.
(1) Roll the stockinette from 1/2 inch distal to the tips of the 4th and 5th phalanges to the base of the wrist.
(2) Smooth out the stockinette.
c. Thumb.
(1) Roll the stockinette from 1/2 inch distal to the tip of the thumb to the base of the wrist.
(2) Smooth out the stockinette.
11. Set the patient's injured wrist at 15 - 30 degrees extension.
NOTE: All hand casts are applied absent of pronation, supination, and radial or ulnar deviation unless directed by physician.
a. Place the patient's index finger and thumb in opposition to one another.
NOTE: Placing the thumb and forefinger in opposition to one another assists the patient in maintaining wrist in neutral position. This is commonly referred to as the can of coke position.
Chapter 3: Skill Level Tasks 15 April 2016 STP 8-68B13-SM-TG 3-205
b. Place the 4th and 5th phalanges in the flexed position and the wrist in extension.
c. Place the stationary arm of the goniometer so that it bisects the ulna.
d. Place the protractor of the goniometer on the ulnar styloid.
e. Place the moving arm of the goniometer so that it bisects the lateral side of the 5th metacarpal.
f. Position the wrist until the goniometer measures 15 - 30 degrees of extension.
12. Set the 4th and 5th phalanges at 70 - 90 degrees of flexion.
a. Maintain the 4th and 5th phalanges in the flexed position and the wrist in extension.
b. Place the stationary arm of the goniometer so that it bisects the 5th metacarpal.
c. Place the protractor of the goniometer on the metacarpal head.
d. Place the moving arm of the goniometer so that it bisects the lateral side of the 5th phalange.
e.Position the phalanges until the goniometer measures 70 - 90 degrees of flexion.
CAUTION: Wrinkled padding can cause pressure sores which can lead to ulcers. If the cast padding is wrinkled, it must be removed and new padding applied.
13. Apply cast padding (webril) to injured phalanges, wrist, and forearm.
CAUTION: Keep the webril roll on the extremity as it is applied to reduce possible constrictive edema caused by applying the webril too tight.
a. Place the edge of the webril on the ulnar styloid and two rotations around the wrist.
NOTE: The webril application is started at the wrist to provide an anchor and extra padding to the ulnar styloid.
b. Continue wrapping through the palm, around the 4th and 5th phalanges, back up the wrist covering the 4th and 5th metacarpal heads, and up the forearm ending 1/2 inch distal to the proximal edge of the stockinette.
NOTE: The webril can be cut or torn (horizontally) when wrapping through the palm to provide a better fit. Technician preference will determine which technique to use.
c.Overlap the webril by 1/4 - 1/2 the previous wrap with each turn.
NOTE: The top of the webril should bisect the middle of the previous layer covering up the shallow line and present evenly applied padding.
14. Prepare the casting materials, as applicable.
CAUTION: It is mandatory to use gloves to prevent the technician from receiving chemical burns while applying a fiberglass cast.
a. Place the gloves on hands and open the fiberglass casting package.
NOTE: Open one fiberglass package at a time. As fiberglass comes in contact with the air, the roll will start to cure (set).
b. Prepare the plaster reinforcement splint for the ulnar aspect of the cast.
Chapter 3: Skill Level Tasks 3-206 STP 8-68B13-SM-TG 15 April 2016
NOTE: The ulnar aspect of the arm is located on the lateral (pinky finger) side of the hand/forearm. If using fiberglass casting materials, go to step 15.
(1) Open the box of 4 x 15 plaster reinforcement sheets. Remove the sheets from the box and unwrap the package. Peel back the edges of five sheets and removethe sheets from the stack. Place the sheets on the work cart/station.
(2) Place the patient's uninjured 4th and 5th phalanges at a 90 degree angle to the floor.
(3) Remove one plaster sheet from the stack of five.
(4) Place the sheet next to the uninjured arm to obtain the sheet length.
5) Draw a vertical line (V cut) on the plaster sheet that provides equal sheet coverage of the 4th and 5th phalanges.
(6) Place the measured sheet on the stack and cut the outlined pattern and excess length for all sheets. Place the stack on the work cart/station for later use.
(7) Discard excess material in the trash receptacle.
15. Apply the first plaster/fiberglass layer.
NOTE: Examination gloves are recommended to protect the technician's hands as the resin in the plaster may cause the skin on the hands to dry up.
CAUTION: If the casting material is removed while bubbles are still present, dry spots will be visible during application. Dry spots cause integrity breakdown of the cast.
a. Place the plaster or fiberglass roll in bucket of tepid water and remove when bubbles cease to rise.
b. Squeeze the roll together (do not wring the roll).
NOTE: Gently squeeze the roll inward to evenly distribute the water and prevent telescoping of the roll during application.
c.Place the edge of the casting material on the ulnar styloid and wrap two rotations around the wrist to secure the edge.
NOTE: The cast is most susceptible to losing strength in the palm region. Therefore, a twisting or cut method is authorized. Technicians may have their own preference to these methods. “the twisting method.” The twisting method provides strength to the cast. As the roll is pushed through the palm, pinch the sides of the plaster roll together (not recommended for fiberglass) twist and evenly space the casting material on the webril. Smooth out with volar side of fingers. “the cut method.” The cutting method provides cast cosmetics. As the roll is pushed through the palm, make a horizontal cut to the proximal edge of the plaster/fiberglass roll and smooth out with volar aspect of fingers or palm.
d. Continue wrapping through the palm ending at the DPC, around the 4th and 5th phalanges, back up the wrist covering the 4th and 5th metacarpal heads, and up the forearm ending 1/2 inch distal to the proximal edge of the webril.
e.Overlap the plaster/fiberglass by 1/4 - 1/2 the previous wrap.
NOTE: The top of the plaster/fiberglass should bisect the middle of the previous layer and present an evenly applied cast.
Chapter 3: Skill Level Tasks 15 April 2016 STP 8-68B13-SM-TG 3-207
16. Laminate the casting material.
CAUTION: To reduce cast indentations, which can cause pressure sores to the patient's skin under the cast, keep fingertips off the cast during the application and molding process. If the patient feels pressure sores or hot spots developing under the cast, remove the cast immediately and start over with step 2.
a. Place palm of each hand on the cast.
b. Rub the cast material in the direction it was applied.
NOTE: Laminating the cast material fills in the pores, which assists in providing strength to the cast.
c. Continue rubbing the cast until the tone/texture changes.
NOTE: The dull white color indicates the plaster is beginning to cure.
17. Apply the reinforcement splint to the ulnar aspect of the cast.
NOTE: The reinforcement splint is used to strengthen and support the cast. If using fiberglass, go to step 18.
a. Place the splint in the bucket of tepid water, wait for the bubbles to subside, then remove the splint from the water.
b. Squeeze the splint together to eliminate excess water.
CAUTION: Keep the plaster/fiberglass roll on the extremity as it is applied to reduce possible constrictive edema caused by applying the plaster/fiberglass too tight.
c Place the reinforcement splint on the ulnar side of the cast around the 4th and 5th phalanges.
d. Laminate the splint to the cast.
e. Maintain the patient's wrist between 15 - 30 degrees of extension and the 4th and 5th phalanges between 70 - 90 degrees of flexion.
18. Apply the second plaster/fiberglass layer (repeat steps 15 - 16).
CAUTION: Excessive pressure may result in further patient injury. Talk to the patient while performing this procedure (e.g., How do you feel? Is the pressure too much?).
19. Mold the cast.
NOTE: All casts require molding. Molds are done simultaneously. Go back and forth between the molds as the cast cures.
a. Interosseous mold.
NOTE: The interosseous mold is used to prevent movement of the wrist in the cast and promote fracture healing.
(1) Place the heel of one hand on the volar aspect of the wrist.
Chapter 3: Skill Level Tasks 3-208 STP 8-68B13-SM-TG 15 April 2016
(2) Place the heel of the second hand on the dorsal aspect of the wrist.
(3) Squeeze the heels of the hands together.
(4) Apply firm and gradual pressure beginning at the wrist and progress up the forearm while maintaining the wrist in the correct position.
b. Phalange mold.
NOTE: The physician may assist in the molding of the phalanges.
(1) Place the heel of one hand on the ulnar aspect of the cast.
(2) Place the heel of the second hand on the dorsal aspect of the 4th and 5th phalanges.
(3) Apply firm and gradual pressure to fold down the 4th and 5th phalanges until 7090 degrees of flexion is met.
c. Remove the heels of the hands from the cast when the contours of the forearm, wrist and phalanges have been shaped and the cast is cured.
20. Trim the cast to meet the cast standards.
a. Verify the alignment of the wrist with a goniometer.
(1) Repeat steps 11c - e.
(2) Verify the wrist measures between 15 - 30 degrees of extension.
(3) Remove the cast and start over with step 2.
b. Verify the alignment of the phalanges with a goniometer.
(1) Repeat steps 12b - d.
(2) Verify the 4th and 5th phalange measure between 70 - 90 of flexion.
(3) Remove the cast and start over with step 2.
c. Verify the cast dimensions.
(1) The cast edge rests within 1/8 inch of the distal palmar crease.
CAUTION: The finished edge of the cast should end proximal to the base of the thumb to avoid radial nerve impingement.
(2) The cast edge rests proximal to the snuff box. (See Figure 3-32.)

Chapter 3: Skill Level Tasks 15 April 2016 STP 8-68B13-SM-TG 3-209
Figure 3-32. Thumb rests proximal to the snuffbox
CAUTION: The finished edge of the cast should end distal to the volar and dorsal sides of the 4th and 5th phalanges to avoid flexion of the phalanges.
(3) The cast extends 1/8 - 1/4 inch distal to the tips of the 4th and 5th phalanges.
(4) The 4th and 5th metacarpal heads are covered.
(5) The proximal edge rests 1 - 1 1/2 inch distal to the cubitum space.
d. Check the ROM of the elbow and uninjured phalanges and thumb.
(1) Instruct the patient to extend and flex the uninjured fingers and touch the thumb to the uninjured fingers.
(2) Instruct the patient to extend and flex the elbow.
e.Trim back the cast material until the dimensions and ROM standards are met.
f. Trim the proximal and distal edges of the cast.
(1) Cut the outside edge of the cast padding.
(2) Pull down the webril and stockinette.
(3) Tape down the edges of the stockinette and webril, if necessary.
21. Apply the final plaster/fiberglass layer (repeat steps 15 - 16).
22. Check the patient's capillary refill on the casted hand (repeat step 7).
23. Clean the plaster resin off the patient's skin using a damp wash towel or alcohol pads.
24. Give the patient verbal and written instructions on cast care.
a. Provide the patient with a copy of the clinic hours and telephone number. Instruct the patient to call the cast clinic with any concerns or questions regarding their cast. For after duty hours concerns, instruct the patient to report to the emergency room.
b. Provide the patient with a cast care booklet or written instructions.
c.Instruct the patient to elevate the extremity above the heart, and extend, flex, and wiggle fingers (demonstrate for patient) to reduce swelling.
d. Instruct the patient on what not to do.
(1) Do not stick anything down the cast.
(2) Do not remove the cast.
(3) Do not alter the cast (e.g., writing on it, coloring).
25. Fit the sling to the patient, as required.
NOTE: Considerations for applying a sling include elderly patients, severity of fractures (e.g., Colles', Smith's, Bennett's), patient's comfort, and physician's or technician's preference.
26. Annotate the procedure applied to patient in medical record or SF 513.
a. Record the procedure applied and cast care instructions provided.
b. Sign your name.
27. Escort or direct the patient to the front desk to make a follow-up appointment.
Evaluation Preparation: You must evaluate the students on their performance of this task in a field condition related to the actual task.
Chapter 3: Skill Level Tasks 3-210 STP 8-68B13-SM-TG 15 April 2016
Performance Measures
1 Reviewed the order from the physician.
2 Gathered the equipment and materials.
3. Told the patient your name and job title.
4. Explained the procedure to the patient.
5. Donned safety equipment (patient and technician).
6. Inspected the patient's arms.
7. Checked the capillary refill of the patient's hands/fingers.
8. Prepared the stockinette.
9 Placed a webril strip between the 4th and 5th phalanges.
10 Applied the stockinette to the injured arm and phalanges.
11 Set the patient's injured wrist at 15 - 30 degrees extension.
12 Set the 4th and 5th phalanges at 70 - 90 degrees of flexion.
13 Applied the cast padding (webril) to the injured phalanges, wrist, and forearm.
14 Prepared the casting materials, as applicable.
15 Applied the first plaster/fiberglass layer.
16 Laminated the casting material.
17 Applied the reinforcement splint to the ulnar aspect of the cast, if using plaster.
18 Applied the second plaster/fiberglass layer (repeated steps 15 - 16).
19 Molded the cast.
20 Trimmed the cast to meet the cast standards.
21 Applied the final plaster/fiberglass layer (repeated steps 15 - 16).
22. Checked the patient's capillary refill on the casted hand (repeated step 7).
23. Cleaned the plaster resin off the patient's skin using a damp wash towel or alcohol pads.
Chapter 3: Skill Level Tasks 15 April 2016 STP 8-68B13-SM-TG 3-211
GO NO GO
24 Gave the patient verbal and written instructions on cast care.
25 Fit the sling to the patient, as required.
26. Annotated the procedure applied to the patient in the medical record or SF 513.
27. Escorted or directed the patient to the front desk to make a follow-up appointment.
Evaluation Guidance: Score each Soldier according to the performance measures in the evaluation guide. Unless otherwise stated in the task summary, the Soldier must pass all performance measures to be scored GO. If the Soldier fails any step, show what was done wrong and how to do it correctly.
References
Required
SF 513
Related
None
Chapter 3: Skill Level Tasks 3-212 STP 8-68B13-SM-TG 15 April 2016 Performance Measures GO NO GO
Apply a Standard Short Arm Cast
081-68B-1201
Conditions: You are presented with a physician's written or verbal order to apply a standard short arm cast (SAC) to an orthopedic patient. The patient is sitting on an orthopedic examination bed and may be accompanied by a family member. Nursing personnel and physician are available. You will need the patient's medical record or Standard Form (SF) 513, Medical Record - Consultation Sheet, the local standard operating procedures (SOP), work cart/station, plaster or fiberglass rolls, box of plaster reinforcement sheets, webril rolls, roll of stockinette, examination gloves, scissors, cast saw, cast spreader, eye protection, hearing protection, roll of adhesive tape, hospital pads (chux) or bed sheets, goniometer, bucket of tepid water with plastic bag, sling, cast care booklet or equivalent, box of alcohol pads or damp wash towel, sink with faucet, and trash receptacle.
Standards: Apply the SAC to the patient's injured arm from the distal palmar crease (DPC)/metacarpophalangeal head joints (MCPJs) to 1 - 1 1/2 inches distal to the cubitum space (bend of the elbow). The cast immobilizes the wrist and forearm, with the wrist at 0 - 15 degrees of extension; eliminates ulnar and radial deviation; and allows full range of motion (ROM) of the elbow, thumb, and fingers. The capillary refill returns within 1 - 3 seconds. The short arm cast is used for fractures of the wrist or carpal bones and general soft tissue injuries with associated pain.
NOTE: See Figure 3-33 and 3-34 for an example of the short arm cast.
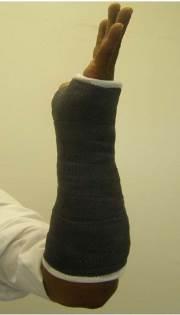
Chapter 3: Skill Level Tasks 15 April 2016 STP 8-68B13-SM-TG 3-213
Figure 3-33. Short arm cast - lateral view
Performance Steps:
1. Review the order from the physician.
2. Gather the equipment and materials.
NOTE: The physician's order, technician's preference, availability of supplies, and/or patient's extremity size determine which casting material (fiberglass/plaster) is used.

a. Gather equipment.
(1) Goniometer
(2) Scissors.
(3) Utility cart
(4) Cast saw.
(5) Cast spreader.
(6) Hearing protection.
(7) Eye protection.
CAUTION: The temperature of the water must be tepid (70° - 80° F) to reduce further injury (possible burns) to the patient. The technician must change the water after each cast application, as the residue in the cast bucket will act as an accelerator causing the casting material to increase in heat emission.
(8) Bucket of tepid water with plastic bag.
b.Assemble materials.
(1) Stockinette roll (1 inch and 2 or 3 inch)
(2) W ebril rolls (2 or 3 inch)
(3) Plaster (2 & 3 inch) or fiberglass (2 or 3 inch) rolls
(4) Box of plaster reinforcement sheets (4 x 15 inch)
(5) Examination gloves.
(6) Box of alcohol pads or damp wash towel
(7) Hospital pads (chux) or bed sheets
(8) Cast care booklet or equivalent
(9) Sling
Chapter 3: Skill Level Tasks 3-214 STP 8-68B13-SM-TG 15 April 2016
Figure 3-34. Fiberglass short arm cast - anterior view (volar aspect)
(10) Adhesive tape (1 inch)
c Place equipment and materials on the work cart/station.
3. Tell the patient your name and job title.
CAUTION: During cast application a chemical response (exothermic reaction) will occur between the water and the plaster (gypsum). This is a safe and common occurrence. The cast will initially become warm and cool down within 2-5 minutes. However, if it doesn't cool down or there is an increase of heat intensity during the cast application, the cast may need to be removed.
4. Explain the procedure to the patient.
5. Don safety equipment (patient and technician).
6.Inspect the patient's arms.
CAUTION: Always practice body substance isolation prior to applying traction, splints, or casts to patients.
a. Place examination gloves on hands.
b. Place the patient sitting or supine on the examination bed.
c. Inspect both arms for any skin conditions (e.g., cuts, abrasions, lacerations, and skin rashes).
NOTE: Inform the physician if skin conditions are present and follow the physician's instructions.
d. Examine both arms and wrists for jewelry and remove if found.
NOTE: All jewelry on the injured hand and wrist must be removed. Give the jewelry to a family member or secure it with the patient's belongings according to the local SOP.
7. Check the capillary refill of the patient's hands/fingers.
a. Squeeze the patient's fingers; nail beds will turn white.
CAUTION: If the capillary refill is delayed for more than 2 seconds, inform the physician and follow the physician's instructions.
b. Release the patient's fingers; nail beds will return pink.
8. Prepare the stockinette.
NOTE: The stockinette is a form of protection against the exothermic reaction caused by casting materials and generally used for all casts except on patients who have had recent surgery, recently reduced fractures, or as directed by the physician.
a. Place a hospital pad or bed sheet on the patient's lap.
NOTE: All patients should be given a covering (e.g., chux, bed sheet) to reduce damaging their clothing during the casting process.
Chapter 3: Skill Level Tasks 15 April 2016 STP 8-68B13-SM-TG 3-215
b. Place the work cart/station at the edge of the bed.
NOTE: Numerous props may be used (e.g. orthopedic bump, T stand, finger trap stand, nursing assistant). Technician preference will determine if a prop is used.
c Place the patient's uninjured elbow at a 90 degree angle.
d. Forearm stockinette.
(1) Measure from the cubitum space (bend of the elbow) to 2 inches distal to the MCPJs for the stockinette length.
(2) Pull down the stockinette from the stockinette container and cut the measured length.
e. Thumb stockinette.
(1) Measure from 1/2 inch distal to the tip of the thumb to the base of the wrist for the stockinette length.
(2) Pull down the stockinette and cut the measured length.
(3) Cut a vertical slit to allow the stockinette to rest flat from the web spacing, between the thumb and the 2nd phalange, and the base of the wrist.
f. Roll the stockinette leaving a 1-2 inch cuff at the distal end and place on the work cart/station for later use.
9. Apply the stockinette to the patient's injured arm.
a. Forearm stockinette.
(1) Hold open the sides of the stockinette.
(2) Place the injured hand through the open end of the stockinette.
(3) Roll the stockinette on the injured arm from 2 inches distal to the MCPJs to the cubitum space (bend of the elbow).
NOTE: Rolling the stockinette on promotes a better fit.
(4) Pinch the stockinette at the base of the thumb and make a 1/2 inch cut at a 45 degree angle.
NOTE: An authorized alternative method is to cut the stockinette prior to the application.
(5) Place the thumb through the precut hole.
(6) Smooth out the stockinette.
b. Thumb stockinette.
(1) Roll the stockinette from 1/2 inch distal to the tip of the thumb to the base of the wrist.
(2) Smooth out the stockinette.
10. Set the patient's injured wrist at 0 - 15 degrees extension.
NOTE: All hand casts are applied absent of pronation, supination, radial, or ulnar deviation unless directed by the physician.
a. Place the patient's index finger and thumb in opposition to one another.
NOTE: Placing the thumb and forefinger in opposition to one another assists the patient in maintaining the wrist in a neutral position. This is commonly referred to as the can of coke position.
Chapter 3: Skill Level Tasks 3-216 STP 8-68B13-SM-TG 15 April 2016
b. Place the stationary arm of the goniometer vertically, bisecting the ulnar
c. Place the protractor of the goniometer on the ulnar styloid.
d. Place the moving arm of the goniometer vertically, bisecting the lateral side of the 5th metacarpal.
e. Position the wrist until the goniometer measures between 0 - 15 degrees of extension.
CAUTION: Wrinkled padding can cause pressure sores which can lead to ulcers. If the cast padding is wrinkled, it must be removed and new padding applied.
11. Apply the webril (cast padding) to the injured wrist/forearm.
CAUTION: Keep the webril roll on the extremity as it is applied to reduce possible constrictive edema caused by applying the webril too tight.
a. Place the webril end on the ulnar styloid and wrap two rotations around the wrist.
NOTE: The webril application is started at the wrist to provide an anchor and extra padding to the ulnar styloid.
b. Continue wrapping through the palm ending 1/2 inch proximal to the distal edge of the stockinette, back up the forearm, and ending 1/2 inch distal to the proximal edge of the stockinette.
NOTE: The webril can be cut or torn (horizontally) when wrapping through the palm to provide a better fit. Technician preference will determine which technique to use.
c.Overlap the webril by 1/4 - 1/2 the previous wrap with each turn.
NOTE: The top of the webril should bisect the middle of the previous layer covering up the shallow line and present evenly applied padding.
12. Prepare the casting materials, as applicable.
CAUTION: It is mandatory to use gloves to prevent the technician from receiving chemical burns while applying a fiberglass cast.
a. Place gloves on hands and open the fiberglass casting package.
NOTE: Open one fiberglass package at a time. As fiberglass comes in contact with the air, the roll will start to cure (set).
b. Prepare the plaster reinforcement splint for the volar aspect of the cast.
NOTE: The volar aspect of the arm is located on the palm side of the hand/forearm. The plaster reinforcement splint is used to strengthen and support the cast. Fiberglass casts do not require a splint due to the strength of the fiberglass casting material.
(1) Open the box of 4 x 15 reinforcement plaster sheets. Remove the sheets from the box and unwrap the package. Peel back the edges of five sheets and remove from the stack. Place the sheets on the work cart/station.
Chapter 3: Skill Level Tasks 15 April 2016 STP 8-68B13-SM-TG 3-217
(2) Place the patient's uninjured hand in the supine position (palm up) and locate the DPC, thenar eminance, and the cubitum space.
NOTE: The DPC is furthest diagonal line on the volar aspect of the hand. The thenar muscle is at the base of the thumb on the volar aspect of the hand. The crease is noticeable when the thumb and 5th phalange (pinky finger) are brought together. The cubitum space is located at the bend of the arm.
(3) Remove one plaster sheet from the stack of five.
(4) Place the sheet next to the uninjured arm to obtain the sheet length, and the DPC and thenar muscle contours.
NOTE: To increase patient cleanliness, the sheet does not have to rest on the hand/forearm.
(5) Draw a diagonal line on the plaster sheet that matches with the DPC of the patient's hand.
NOTE: The diagonal cut facilitates full ROM of the fingers (extension and flexion).
(6) Draw a curved line (half moon shape) on the plaster sheet that matches with the outer border of the thenar muscle on the patient's hand.
NOTE: The half moon pattern enables the thenar muscle to be observable and the thumb to adduct to all fingers promoting full ROM.
(7) Place the measured sheet on the stack and cut the outlined patterns and excess length for all sheets. Place the stack on the work cart/station for later use.
(8) Discard excess material in the trash receptacle.
13. Apply the first plaster/fiberglass layer.
NOTE: Examination gloves are recommended to protect the technician's hands as the resin in the plaster may cause the skin on the hands to dry up.
CAUTION: If the casting material is removed while bubbles are still present, dry spots will be visible during application. Dry spots cause integrity breakdown of the cast.
a. Place the plaster/fiberglass roll in the bucket of tepid water and remove when the bubbles cease to rise.
b. Squeeze the roll together (do not wring the roll).
NOTE: Gently squeeze the roll inward to evenly distribute the water and prevent telescoping of the roll during application.
c. Place the edge of the casting material on the ulnar styloid and wrap two rotations around the wrist to secure the edge.
NOTE: The cast is most susceptible to losing strength in the palm region. Therefore, a twisting or cut method is authorized. Technicians may have their own preference to these methods. “the twisting method.” The twisting method provides strength to the cast. As the roll is pushed
Chapter 3: Skill Level Tasks 3-218 STP 8-68B13-SM-TG 15 April 2016
through the palm, pinch the sides of the plaster roll together (not recommended for fiberglass) twist and evenly space the casting material on the webril. Smooth out with volar side of fingers. “the cut method.” The cutting method provides cast cosmetics. As the roll is pushed through the palm, make a horizontal cut to the proximal edge of the plaster/fiberglass roll and smooth out with volar aspect of fingers or palm.
d. Continue wrapping through the palm ending 1/2 inch proximal to the distal edge of the webril, back up the forearm, and ending 1/2 inch distal to the proximal edge of the webril.
e.Overlap the plaster/fiberglass by 1/4 - 1/2 the previous wrap.
NOTE: The top of the plaster/fiberglass should bisect the middle of the previous layer and present an evenly applied cast.
14. Laminate the casting material.
CAUTION:To reduce cast indentations, which can cause pressure sores to the patient's skin under the cast, keep fingertips off the cast during the application and molding process. If the patient feels pressure sores or hot spots developing under the cast, remove the cast immediately and start over with step 2.
a. Place the palm of each hand on the cast.
b. Rub the cast material in the direction it was applied.
NOTE: Laminating the cast material fills in the pores, which assists in providing strength to the cast.
c. Continue rubbing the cast until the tone/texture changes.
NOTE: The dull white color indicates the plaster is beginning to cure.
15. Apply the reinforcement splint to the volar aspect of the cast.
NOTE: If using fiberglass casting materials, go to step 16 (skip step 15).
a. Place the splint in the bucket of tepid water, wait for the bubbles to subside, then remove the splint from the water.
b. Squeeze the splint together to eliminate excess water.
CAUTION: Keep the plaster/fiberglass roll on the extremity as it is applied to reduce possible constrictive edema caused by applying the plaster/fiberglass too tight.
c Place the reinforcement splint on the volar side of the cast in line with the DPC and the outer border of the thenar muscle.
d.Laminate the splint to the cast.
e. Maintain the patient's wrist between 0 - 15 degrees of extension.
NOTE: Place the patient's thumb and index finger in opposition to one another.
16. Apply the second plaster/fiberglass layer (repeat steps 13 - 14).
Chapter 3: Skill Level Tasks 15 April 2016 STP 8-68B13-SM-TG 3-219
CAUTION: Excessive pressure may result in further patient injury. Talk to the patient while performing this procedure (e.g., How do you feel? Is the pressure too much?)
17. Mold the cast material to the wrist/forearm.
NOTE: All casts require molding. Molds are done simultaneously. Go back and forth between the molds as the cast cures. The interosseous mold is used to prevent movement of the wrist in the cast and promote fracture healing.
a. Place the heel of one hand on the volar aspect of the distal wrist.
b. Place the heel of the second hand on the dorsal aspect of the distal wrist.
c. Squeeze the heels of each hand together.
d. Apply firm and gradual pressure beginning at the wrist and progress up the forearm while maintaining the patient's wrist in the correct position.
e. Remove the heels of each hand from the cast when the contours of the wrist and forearm have been shaped and the cast is cured.

18. Trim the cast to meet the cast standards.
a. Verify the alignment of the wrist with a goniometer.
(1) Repeat steps 10b - d.
(2) Verify the wrist measures between 0 - 15 degrees of extension.
(3) Remove the cast and start over with step 2.
b.Verify the cast dimensions.
(1) The distal edge of the cast, on the volar side, rests within 1/8 inch of the DPC. (See Figure 3-35.)
(2) The distal edge of the cast on the dorsal side, rests within 1/2 inch of the base of the MCPJs. (See Figure 3-36.)
3-220 STP 8-68B13-SM-TG 15 April 2016
Chapter 3: Skill Level Tasks
Figure 3-35. Cast rests at or below distal palmar crease
CAUTION: The finished edge of the cast should end proximal to the base of the thumb to avoid radial nerve impingement

(3) The cast edge at the base of the thumb rests proximal to the snuffbox.
Figure
(4) The proximal edge of the cast rests 1 - 1 1/2 inches distal to the cubitum space. c. Check the ROM of the elbow, phalanges and thumb.
NOTE: The patient should be able to freely extend and flex the fingers and touch the thumb to all fingers.
(1) Instruct the patient to extend and flex fingers.
(2) Instruct the patient to rotate thumb and touch all fingers to the thumb.
(3) Instruct the patient to extend and flex the elbow.

Chapter 3: Skill Level Tasks 15 April 2016 STP 8-68B13-SM-TG 3-221
Figure 3-36. Cast edge proximal to metacarpophalangeal joints
(See
3-37.)
Figure 3-37. Thumb rests proximal to the snuffbox
d. Continue to trim back the cast material until the dimensions and ROM standards are met.
e.Trim the distal and proximal edges of the cast.
(1) Cut the outside edge of the cast padding.
(2) Pull down the webril and stockinette.
(3) Tape down the edges of the stockinette and webril, if necessary.
19. Apply the final plaster/fiberglass layer (repeat steps 13 - 14).
NOTE: The last roll in all casting applications is commonly referred to as the beautification roll or the money roll. Take pride in your work.
20. Check the patient's capillary refill on the casted hand (repeat step 7).
21. Clean the plaster resin off the patient's skin using a damp wash towel or alcohol pads.
NOTE: Use alcohol pads or fresh water from the faucet and not from the casting bucket.
22. Give the patient verbal and written instructions on cast care.
a. Provide the patient with a copy of the clinic hours and telephone number. Instruct the patient to call the cast clinic with any concerns or questions regarding their cast. For after duty hours concerns, instruct the patient to report to the emergency room.
b. Provide the patient with a cast care booklet or written instructions.
c.Instruct the patient to elevate the extremity above the heart, and extend, flex, and wiggle fingers (demonstrate for patient) to reduce swelling.
d. Instruct the patient on what not to do.
(1) Do not stick anything down the cast.
(2) Do not remove the cast.,
(3) Do not alter the cast (e.g., writing on it, coloring).
23. Fit the sling to the patient, as required.
NOTE: Considerations for applying a sling include elderly patients, severity of fractures (e.g., Colles', Smith's, Bennett's), patient's comfort, and physician's or technician's preference.
24. Annotate the procedure applied to the patient in the medical record or SF 513.
a. Record the procedure applied and cast care instructions provided.
b. Sign your name.
25. Escort or direct the patient to the front desk to make a follow-up appointment.
Evaluation Preparation: You must evaluate the students on their performance of this task in a field condition related to the actual task.
Performance Measures
1. Reviewed the order from the physician.
2. Gathered the equipment and materials.
3. Told the patient your name and job title.
Chapter 3: Skill Level Tasks 3-222 STP 8-68B13-SM-TG 15 April 2016
GO NO GO
4 Explained the procedure to the patient.
5 Donned safety equipment (patient and technician).
6. Inspected the patient's arms.
7. Checked the capillary refill of the patient's hands/fingers.
8. Prepared the stockinette.
9. Applied the stockinette to the patient's injured arm.
10. Set the patient's injured wrist at 0 - 15 degrees extension.
11. Applied the webril (cast padding) to the injured wrist/forearm.
12 Prepared the casting materials, as applicable.
13 Applied the first plaster/fiberglass layer.
14 Laminated the casting material.
15 Applied the reinforcement splint to the volar aspect of the cast, if using plaster.
16 Applied the second plaster/fiberglass layer (repeated steps 13 - 14).
17 Molded the cast material to the wrist/forearm.
18 Trimmed the cast to meet the cast standards.
19 Applied the final plaster/fiberglass layer (repeated steps 13 - 14).
20 Checked the patient's capillary refill on the casted hand (repeated step 7).
21 Cleaned the plaster resin off the patient's skin using a damp wash towel or alcohol pads.
22 Gave the patient verbal and written instructions on cast care.
23 Fit the sling to the patient, as required.
24. Annotated the procedure applied to the patient in the medical record or SF 513.
25. Escorted or directed the patient to the front desk to make a follow-up appointment.
Chapter 3: Skill Level Tasks 15 April 2016 STP 8-68B13-SM-TG 3-223
GO NO GO
Performance Measures
Chapter 3: Skill Level Tasks
Evaluation Guidance: Score each Soldier according to the performance measures in the evaluation guide. Unless otherwise stated in the task summary, the Soldier must pass all performance measures to be scored GO. If the Soldier fails any step, show what was done wrong and how to do it correctly.
3-224 STP 8-68B13-SM-TG 15 April 2016
References Required Related SF 513 None
Apply a Munster Cast
081-68B-1205
Conditions: You are presented with a physician's written or verbal order to apply a Munster cast to an orthopedic patient. The patient is sitting on an orthopedic examination bed and may be accompanied by a family member. Nursing personnel and physician are available. You will need the patient's medical record or Standard Form (SF) 513, Medical Record - Consultation Sheet, the local standard operating procedure (SOP), work cart/station, plaster or fiberglass rolls, box of plaster reinforcement sheets, webril rolls, stockinette, examination gloves, scissors, cast saw, cast spreader, eye protection, hearing protection, roll of adhesive tape, hospital pads (chux) or bed sheets, goniometer, bucket of tepid water with plastic bag, sling, cast care booklet or equivalent, box of alcohol pads or damp wash towel, sink with faucet, and trash receptacle.
Standards: Apply the Munster cast to patient's injured arm from the distal palmar crease (DPC)/metacarpophalangeal joints (MCPJs) to 3 inches proximal to the elbow. The cast immobilizes the wrist and forearm, with the wrist set at 0 - 15 degrees of extension; eliminates ulnar and radial deviation, pronation, supination and rotation; and allows extension and flexion of the elbow. Capillary refill returns within 1 - 3 seconds. The Munster cast is used for distal radial, ulna and wrist fractures. It is primarily used in elderly patients to avoid complications with ROM.
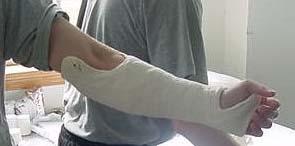
NOTE: See Figure 3-38 for an example of a plaster Munster cast.
Performance Steps:
1. Review the order from the physician.
2. Assemble equipment and materials.
NOTE: The physician's order, technician's preference, availability of supplies, and/or patient's extremity size determine which casting material (fiberglass/plaster) is used.
a. Gather the equipment.
(1) Goniometer.
(2) Scissors.
Chapter 3: Skill Level Tasks 15 April 2016 STP 8-68B13-SM-TG 3-225
Figure 3-38. Plaster Munster cast
(3) Cast saw
(4) Cast spreader
(5) Eye protection
(6) Hearing protection
(7) Utility cart
CAUTION:The temperature of the water must be tepid (70° - 80° F) to reduce further injury (possible burns) to the patient. The technician must change the water after each application, as the residue in the cast bucket will act as an accelerator causing the casting material to increase in heat emission.
(8) Bucket of tepid water with plastic bag.
b.Assemble the materials.
(1) Stockinette (1 inch and 2, 3 or 4 inch).
(2) W ebril rolls (2 or 3 inch).
(3) Plaster (3 or 4 inch) or fiberglass (2 or 3 inch) rolls.
(4) Box of plaster reinforcement sheets (4 x 15 inch).
(5) Examination gloves.
(6) Roll of adhesive tape (1 inch).
(7) Hospital pads (chux) or bed sheets.
(8) Sling.
(9) Cast care booklet or equivalent.
(10) Box of alcohol pads or damp wash towel.
c. Place the equipment and materials on the work cart/station.
3. Tell the patient your name and job title.
CAUTION: During the cast application a chemical response (exothermic reaction) will occur between the water and the plaster (gypsum). This is a safe and common occurrence. The cast will initially become warm and cool down within 2 - 5 minutes. However, if it doesn't cool down or there is an increase of heat intensity during the cast application, the cast may need to be removed
4. Explain the procedure to the patient.
5. Don safety equipment (patient and technician).
6. Inspect the patient's arms.
CAUTION: Always practice body substance isolation prior to applying traction, splints, or casts to patients.
a. Place examination gloves on hands.
b. Place the patient sitting or supine on the examination bed.
c.Inspect both arms for any skin conditions (e.g., cuts, abrasions, lacerations, and skin rashes).
NOTE: Inform the physician if skin conditions are present and follow the physician's instructions.
d. Examine both arms and wrists for jewelry and remove if found.
Chapter
3-226 STP 8-68B13-SM-TG 15 April 2016
3: Skill Level Tasks
NOTE: All jewelry on the injured hand and wrist must be removed. Give the jewelry to a family member or secure it with the patient's belongings according to the local SOP.
7. Check the patient's capillary refill.
a. Squeeze the patient's fingers; nail beds will turn white
CAUTION: If the capillary refill is delayed for more than 2 seconds, inform the physician and follow the physician's instructions.
b. Release the patient's fingers; nail beds will return pink.
8. Prepare the stockinette.
NOTE: The stockinette is a form of protection against the exothermic reaction caused by casting materials and generally used for all casts except on patients who have had recent surgery, recently reduced fractures, or as directed by the physician.
a. Place the hospital pad or bed sheet over the patient's lap.
NOTE: All patients should be given a covering (e.g., chux, bed sheet) to reduce damaging their clothing during the casting process.
b. Place the work cart at the side of bed.
NOTE: Numerous props may be used (e.g. orthopedic bump, T stand, finger trap stand, nursing assistant). Technician preference will determine if a prop is used.
c.Place the patient's uninjured elbow at a 45 degree angle to the upper torso.
d. Forearm stockinette.
(1) Measure from 2 inches distal to the MCPJs to the midhumerus to obtain the stockinette length.
(2) Pull down the stockinette from the stockinette container and cut the measured length.
e. Thumb stockinette.
(1) Measure from 1/2 inch distal to the tip of the thumb to the base of the wrist for the stockinette length.
(2) Pull down the stockinette and cut the measured length.
(3) Cut a vertical slit to allow the stockinette to rest flat from the web spacing, between the thumb and the 2nd phalange, and the base of the wrist.
f. Roll the stockinette leaving a 1-2 inch cuff at the distal end and place on the work cart/station for later use.
9 Apply the stockinette to the patient's injured arm.
a. Forearm stockinette.
(1) Hold open the sides of the stockinette.
(2) Place the injured hand in the open end of the stockinette.
(3) Roll stockinette on the injured arm 1 inch distal to the MCPJs, to 3 inches proximal to the olecranon (elbow).
NOTE: Rolling the stockinette on promotes a better fit.
Chapter 3: Skill Level Tasks 15 April 2016 STP 8-68B13-SM-TG 3-227
(4) Pinch the stockinette at the base of the thumb and make a 1/2 inch cut at a 45 degree angle.
NOTE: An alternative and authorized method is to cut the stockinette prior to application.
(5) Place the thumb through the precut hole.
(6) Smooth out the stockinette.
b. Thumb stockinette.
(1) Roll the stockinette from 1/2 inch distal to the tip of the thumb to the base of the wrist.
(2) Smooth out the stockinette.
10. Set the patient's injured wrist to 0 - 15 degrees extension.
NOTE: All hand casts are applied absent of pronation, supination, radial, or ulnar deviation unless directed by physician.
a. Position the patient's elbow at a 45 degree angle to upper torso.
b. Place the patient's index finger and thumb in opposition to one another.
NOTE: Placing the thumb and forefinger in opposition to one another assists the patient in maintaining the wrist in a neutral position. This is commonly referred to as the can of coke position.
c. Place the stationary arm of the goniometer vertically, bisecting the ulnar.
d. Place the protractor of the goniometer on the ulnar styloid.
e.Place the moving arm of the goniometer vertically, bisecting the lateral side of the 5th phalange (pinky finger).
f. Position the wrist until the goniometer measures 0 - 15 degrees extension.
CAUTION: Wrinkled padding can cause pressure sores which can lead to ulcers. If the cast padding is wrinkled, it must be removed and new padding applied.
11. Apply the cast padding (webril) to the patient's injured arm.
CAUTION: Keep the cast padding on the extremity throughout the application to avoid causing circulation compromise of the patient's hand/fingers.
a. Place the edge of the webril on the ulnar styloid and wrap two rotations around the wrist.
NOTE: The webril application is started at the wrist to provide an anchor and extra padding to the ulnar styloid.
b. Continue wrapping through the palm to 1/2 inch proximal to the distal edge of the stockinette, back up the forearm, figure eight around the elbow, and end 1/2 inch distal to the proximal edge of the stockinette.
NOTE: Wrap the cast padding in an overlapping figure of eights over the cubitum space. This will assist in reducing wrinkles and provide the supracondylar with additional padding. The
Chapter 3: Skill Level Tasks 3-228 STP 8-68B13-SM-TG 15 April 2016
webril can be cut or torn (horizontally) when wrapping through the palm to provide a better fit. Technician preference will determine which technique to use.
c.Overlap the webril by 1/4 - 1/2 the previous wrap with each turn.
NOTE: The top of the webril should bisect the middle of the previous layer covering up the shallow line and present evenly applied padding.
12. Prepare the casting materials, as applicable.
CAUTION: It is mandatory to use gloves to prevent the technician from receiving chemical burns while applying a fiberglass cast.
a. Place the gloves on hands and open the fiberglass casting package.
NOTE: Open one fiberglass package at a time. As fiberglass roll comes in contact with the air, the roll will start to cure (set).
b. Prepare the plaster reinforcement splint(s).
NOTE: The plaster reinforcement splint is used to strengthen and support the cast. Fiberglass casts do not require a splint due to the strength of the fiberglass casting material.
(1) Volar aspect splint.
NOTE: The volar aspect of the arm is located on the palm side of the hand/forearm.
(a) Open the box of 4 x 15 plaster reinforcement sheets. Remove the sheets from the box and unwrap the package. Peel back the edges of five sheets, and remove them from the stack. Place the sheets on the work cart/station.
(b) Place the patient's uninjured hand in the supine position (palm up) and locate the DPC, thenar eminance, medial and lateral supracondylar, and cubitum space.
NOTE: The DPC is the furthest diagonal line on the volar aspect of the hand. The thenar muscle is at the base of the thumb (heel of hand). The crease is noticeable when the thumb and 5th phalange (pinky finger) are brought together. The supracondylar are on the lateral/medical sides of the elbow. The cubitum space is at the bend of the arm.
(c) Remove one plaster sheet from the stack of five.
(d) Place the sheet next to the injured arm to obtain the sheet length and DPC and thenar muscle contours.
NOTE: To increase patient cleanliness the plaster sheet does not have to rest on the hand/forearm.
(e) Draw a diagonal line on the plaster sheet that matches with the DPC of patient's hand.
NOTE: The diagonal line facilitates free range of motion (ROM) of the fingers (extension and flexion).
Chapter 3: Skill Level Tasks 15 April 2016 STP 8-68B13-SM-TG 3-229
(f) Draw a curved line (half moon shape) on the plaster sheet that matches with the outer border of the thenar muscle on the patient's hand.
NOTE: The half moon pattern enables the thenar muscle to be observable and the thumb to adduct to all fingers promoting full ROM.
(g) Place the measured sheet on the stack and cut the outlined patterns and excess length for all sheets. Place the stack on the work cart/station for later use.
(h) Discard the excess material in the trash receptacle.
(2) Supracondylar (olecranon) region splint.
NOTE: The splints (flanges) prevent rotation of the forearm.
(a) Open the box of 4 x 15 plaster reinforcement sheets. Remove the sheets from the box and unwrap the package. Peel back the edges of five sheets, and remove them from the stack. Fold the sheets in half, then place the sheets on the work cart/station.
(b) Place the sheets next to the medial and lateral supracondylar.
(c) Draw a curved line (half moon shape) on the plaster sheet that matches with the medial and lateral supracondylar of the uninjured arm.
(d) Cut the outlined patterns and place the stack on the work cart/station for later use.
(e) Discard the excess material in the trash receptacle.
13. Apply the first plaster/fiberglass layer.
NOTE: Examination gloves are recommended to protect the technician's hands as the resin in the plaster rolls may cause the skin on the hands to dry up.
CAUTION: If the casting material is removed while bubbles are still present, dry spots will be visible during application. Dry spots cause integrity breakdown of the cast
a. Place the plaster or fiberglass roll in bucket of tepid water and remove when bubbles cease to rise.
b. Squeeze the roll together (do not wring the roll).
NOTE: Gently squeeze the roll inward to evenly distribute the water and prevent telescoping of the roll during application.
c.Place the edge of the casting material on the ulnar styloid and wrap two rotations around the wrist secure the edge.
NOTE: The cast is most susceptible to losing strength in the palm region. Therefore, a twisting or cut method is authorized. Technicians may have their own preference to these methods. “the twisting method.” The twisting method provides strength to the cast. As the roll is pushed through the palm, pinch the sides of the plaster roll together (not recommended for fiberglass) twist and evenly space the casting material on the webril. Smooth out with volar side of fingers. “the cut method.” The cutting method provides cast cosmetics. As the roll is pushed through the palm, make a horizontal cut to the proximal edge of the plaster/fiberglass roll and smooth out with volar aspect of fingers or palm.
Chapter 3: Skill Level Tasks 3-230 STP 8-68B13-SM-TG 15 April 2016
d. Continue wrapping through the palm to 1/2 inch proximal to the distal edge of the webril (at the DPC), back up the forearm, figure eight around the elbow, and end 1/2 inch distal to the proximal edge of the webril.
e. Overlap the cast material by 1/4 - 1/2 the previous wrap.
NOTE: The top of the cast material should bisect the middle of the previous layer and present evenly applied padding.
14. Laminate the casting material.
CAUTION: To reduce cast indentations, which can cause pressure sores to the patient's skin under the cast, keep fingertips off the cast during the application and molding process. If the patient feels pressure sores or hot spots developing under the cast, remove the cast immediately and start over with step 2.
a. Place the palm of each hand on the cast.
b. Rub the cast material in the direction it was applied.
NOTE: Laminating the cast material fills in the pores, which assists in providing strength to the cast.
c. Continue rubbing the cast until the tone/texture changes.
NOTE: The dull white color indicates the plaster is beginning to cure.
15. Apply the plaster reinforcement splints.
NOTE: The reinforcement splint is used to strengthen and support the cast. If using fiberglass, go to step 16.
a. Apply the volar aspect splint.
(1) Place the splint in tepid water, wait for bubbles to subside, and remove from water
(2) Squeeze the splint together to remove excess water.
CAUTION: Keep the plaster/fiberglass roll on the extremity as it is applied to reduce possible constrictive edema caused by applying the plaster/fiberglass too tight.
(3) Place reinforcement splint to the volar side of the cast in line with the DPC and the outer border of the thenar muscle.
(4) Laminate the splint to the cast (refer to step 14).
(5) Maintain patient's wrist between 0 - 15 degrees of extension.
b. Apply the supracondylar splints.
(1) Place the splint in tepid water, wait for bubbles to subside, and remove from water.
(2) Squeeze the splint together to eliminate excess water.
(3) Extend the splint, place index and middle finger on either side of the splint, and squeegee out excess water.
(4) Place one splint on the lateral side of the supracondylar region.
(5) Laminate the splint to the cast.
(6) Place the other splint on the medial side of the supracondylar region.
(7) Laminate the splint to the cast.
Chapter 3: Skill Level Tasks 15 April 2016 STP 8-68B13-SM-TG 3-231
16. Apply the second plaster/fiberglass layer (repeat steps 13 - 14).
17. Mold the cast to the wrist and forearm.
NOTE: All casts require molding. Molds are done simultaneously. Go back and forth between the molds as the cast cures.
a. Interosseous mold.
NOTE: The interosseous mold is used to prevent movement of the wrist in the cast and promote fracture healing
(1) Place the heel of one hand on the volar aspect of the distal wrist.
(2) Place the heel of the second hand on the dorsal aspect of the distal wrist.
(3) Squeeze the heels of each hand together.
(4) Apply firm and gradual pressure beginning at the wrist and progress up the forearm while maintaining the patient's wrist in the correct position.
(5) Remove the heels of each hand from the cast when the contours of the wrist and forearm have been shaped and the cast is cured.
b. Medial and lateral supracondylar mold.
(1) Place the lateral aspect of each thumb and index finger on the lateral and medial condyle.
(2) Apply firm and gradual pressure in a rotational motion around the condyles.
(3) Maintain the patient's arm at 45 degrees of extension.
(4) Remove hands from the cast when the contours of the condylars have been shaped and the cast is cured.
18. Trim the cast to meet the cast standards.
a. Trim the flanges.
(1) Draw a curved line (half moon shape) on the medial and lateral side of the cast that matches with the outer border of the supracondylar mold.
(2) Connect the medial and lateral curved lines on the anterior aspect of the cast at 1 1/2 - 2 inches distal to the elbow flexion crease.
(3) Connect the medial and lateral curved lines on the posterior aspect of the cast at 3 inches distal to the tip of the olecranon.
(4) Cut the outline and place the excess casting materials in the trash receptacle.
b. Verify the alignment of the wrist with the goniometer.
(1) Repeat steps 10c - e.
(2) Verify the wrist measures between 0 - 15 degrees extension.
(3) Remove the cast and start over with step 2.
c. Verify the cast dimensions.
(1) The distal edge of the cast, on the volar side, rests within 1/8 inch of the DPC. (See Figure 3-39.)
Chapter 3: Skill Level Tasks 3-232 STP 8-68B13-SM-TG 15 April 2016
(2) The distal edge of the cast, on the dorsal side, rests within 1/2 inch of the base of the MCPJs.
CAUTION: The finished edge of the cast should end proximal to the base of the thumb to avoid radial nerve impingement.


(3) The cast edge at the base of the thumb rests proximal to the snuffbox. (See Figure 3-40.)
(4) The cubitum space is visible.
Chapter 3: Skill Level Tasks 15 April 2016 STP 8-68B13-SM-TG 3-233
Figure 3-39. Distal edge of cast rests at the distal palmar crease
Figure 3-40. Thumb rests proximal to the snuffbox
(5) The flanges are 3 inches proximal to the medial and lateral condylar region.
d. Check the ROM of the phalanges, thumb, and elbow.
(1) Instruct the patient to extend and flex fingers.
(2) Instruct the patient to rotate thumb and touch all fingers to the thumb.
(3) Instruct the patient to extend and flex the elbow.
e.Trim back the cast material until the dimensions and ROM standards are met.
f.Trim the distal and proximal edges of the cast.
(1) Cut the outside edge of the cast padding.
(2) Pull down the webril and stockinette.
(3) Tape down the edges of the stockinette and webril, if necessary.
19. Apply the final plaster layer (repeat steps 13 - 14).
20. Check the patient's capillary refill on the casted hand (repeat step 7).
21. Clean the plaster resin off the patient's skin using a damp wash towel or alcohol pads.
NOTE: Use alcohol pads or fresh water from the faucet and not from the casting bucket.
22. Give the patient verbal and written instructions on cast care.
a. Provide the patient with a copy of the clinic hours and telephone number. Instruct the patient to call the cast clinic with any concerns or questions regarding their cast. For after duty hours concerns, instruct the patient to report to the emergency room.
b. Provide the patient with a cast care booklet or written instructions.
c.Instruct the patient to elevate the extremity above the heart, and extend, flex, and wiggle fingers (demonstrate for patient) to reduce swelling.
d. Instruct the patient on what not to do.
(1) Do not stick anything down the cast.
(2) Do not remove the cast.
(3) Do not alter the cast (e.g., writing on it, coloring).
23. Fit the sling to the patient as required.
NOTE: Considerations for applying a sling include elderly patients, severity of fractures (e.g., Colles', Smith's, Bennett's), patient's comfort, and physician's or technician's preference.
24. Annotate the procedure applied to the patient in medical record or SF 513.
25. Escort or direct the patient to the front desk to make a follow-up appointment.
Evaluation Preparation: You must evaluate the students on their performance of this task in a field condition related to the actual task.
Performance Measures
1. Reviewed the order from the physician.
2. Assembled equipment and materials.
3. Told the patient your name and job title.
Chapter 3: Skill Level Tasks 3-234 STP 8-68B13-SM-TG 15 April 2016
GO NO GO
4 Explained the procedure to the patient.
5 Donned safety equipment (patient and technician).
6. Inspected the patient's arms.
7. Checked the patient's capillary refill.
8. Prepared the stockinette.
9. Applied the stockinette to the patient's injured arm.
10. Set the patient's injured wrist to 0 - 15 degrees extension.
11. Applied the cast padding (webril) to the patient's injured arm.
12 Prepared the casting materials, as applicable.
13 Applied the first plaster/fiberglass layer.
14 Laminated the casting material.
15 Applied the plaster reinforcement splints, if using plaster.
16 Applied the second plaster/fiberglass layer (repeated steps 13 - 14).
17 Molded the cast to the wrist and forearm.
18 Trimmed the cast to meet the cast standards.
19 Applied the final plaster roll (repeated steps 13 - 14).
20 Checked the patient's capillary refill on the casted hand (repeated step 7).
21 Cleaned the plaster resin off the patient's skin using a damp wash towel or alcohol pads.
22. Gave the patient verbal and written instructions on cast care.
23. Fit the sling to the patient as required.
24. Annotated the procedure applied to the patient in medical record or SF 513.
25. Escorted or directed the patient to the front desk to make a follow-up appointment.
Chapter 3: Skill Level Tasks 15 April 2016 STP 8-68B13-SM-TG 3-235
GO NO GO
Performance Measures
Chapter 3: Skill Level Tasks
Evaluation Guidance: Score each Soldier according to the performance measures in the evaluation guide. Unless otherwise stated in the task summary, the Soldier must pass all performance measures to be scored GO. If the Soldier fails any step, show what was done wrong and how to do it correctly.
3-236 STP 8-68B13-SM-TG 15 April 2016
References Required Related SF 513 None
Apply a Long Arm Cylinder Cast
081-68B-1206
Conditions: You are presented with a physician's written or verbal order to apply a long arm cylinder cast to an orthopedic patient. The patient is sitting on an orthopedic examination bed and may be accompanied by a family member. Nursing personnel and physician are available. You will need the patient's medical record or Standard Form (SF) 513, Medical RecordConsultation Sheet, the local standard operating procedure (SOP), work cart/station, sink with faucet, roll of stockinette, webril rolls, plaster or fiberglass rolls, box of plaster reinforcement sheets, examination gloves, scissors, cast saw, cast spreader, eye protection, hearing protection, roll of adhesive tape, hospital pads (chux) or bed sheets, goniometer, bucket of water with plastic bag, box of alcohol pads or damp wash towel, cast care booklet or equivalent, sling, and trash receptacle.
Standards: Apply the long arm cylinder cast to the injured arm from 1 inch proximal to the ulnar styloid to 2 - 2 1/2 inches distal to the axilla region. The cast immobilizes the elbow and forearm, with the elbow at 90 degrees of flexion and the forearm absent of pronation or supination; eliminates rotation of the forearm, elbow, and humerus; and allows full range of motion (ROM) of the hands and fingers. The capillary refill returns within 1-3 seconds. The long arm cylinder cast is used to treat midhumerus and proximal humerus fractures.

NOTE: See Figure 3-41 for an example of a long arm cylinder cast.
Performance Steps:
1. Review the order from the physician.
2. Gather the equipment and materials.
NOTE: The physician order, technician's preference, availability of supplies, and/or patient's extremity size will determine which casting material (fiberglass/ plaster) is used.
Chapter 3: Skill Level Tasks 15 April 2016 STP 8-68B13-SM-TG 3-237
Figure 3-41. Long arm cylinder cast
a. Gather equipment.
(1) Goniometer
(2) Scissors.
(3) Utility cart
(4) Cast saw
(5) Cast spreader
(6) Hearing protection
(7) Eye protection
CAUTION: The temperature of the water must be tepid (70°- 80°F) to reduce further injury (possible burns) to the patient. The technician must change the water after each application, as the residue in the cast bucket will act as an accelerator causing the casting material to increase in heat emission
(8) Bucket of tepid water with plastic bag.
b.Assemble materials.
(1) Roll of stockinette (1 inch and 2, 3 or 4 inch).
(2) W ebril rolls (2 & 3 inch).
(3) Plaster (3 & 4 inch) or fiberglass (2 or 3 inch & 4 inch) rolls.
(4) Box of plaster reinforcement sheets (5 x 30).
(5) Examination gloves.
(6) Box of alcohol pads or damp wash towel.
(7) Hospital pads (chux) or bed sheets.
(8) Cast care booklet or equivalent
(9) Sling.
(10) Surgical tape (1 inch)
c. Place the equipment and materials on the work cart/station.
3. Tell the patient your name and job title.
CAUTION: During cast application a chemical response (exothermic reaction) will occur between the water and the plaster (gypsum). This is a safe and common occurrence. The cast will initially become warm and cool down within 2-5 minutes. However, if it doesn't cool down or there is an increase of heat intensity during the cast application, the cast may need to be removed.
4. Explain the procedure to the patient.
5. Don safety equipment (patient and technician).
6. Inspect the patient's arms.
CAUTION: Always practice body substance isolation (BSI) prior to applying traction, splints, or casts to patients.
a. Place examination gloves on hands.
b. Place the patient sitting or supine on the examination bed.
c.Inspect both arms for any skin conditions (e.g., cuts, abrasions, lacerations, and skin rashes).
NOTE: Inform the physician if skin conditions are present and follow the physician's instructions.
STP 8-68B13-SM-TG 15 April 2016
Chapter 3: Skill Level Tasks 3-238
d. Examine both arms and wrists for jewelry and remove if found.
NOTE: All jewelry on the injured hand and wrist must be removed. Give the jewelry to a family member or secure it with the patient's belongings according to the local SOP.
7. Check the capillary refill of the patient's hands/fingers.
a. Squeeze the patient's fingers; nail beds will turn white.
CAUTION: If the capillary refill is delayed for more than 2 seconds, inform the physician and follow the physician's instructions.
b. Release the patient's fingers; nail beds will return pink.
8. Prepare the stockinette.
NOTE: The stockinette is a form of protection against the exothermic reaction caused by the casting materials. It is generally used for all casts except on patients who have had recent surgery, recently reduced fractures, or as directed by the physician.
a. Place a hospital pad or bed sheet on the patient's lap.
NOTE: All patients should be given a covering (e.g., chux, bed sheet) to reduce damaging their clothing during the casting process.
b. Place the work cart/station at the edge of the bed.
NOTE: Numerous props may be used (e.g. orthopedic bump, T stand, finger trap stand, nursing assistant). Technician preference will determine if a prop is used.
c Place the patient's uninjured elbow at a 90 degree angle.
d. Forearm stockinette.
(1) Measure from 2 inches distal to the ulnar styloid to the axilla region for the stockinette length.
(2) Pull down the stockinette from the stockinette container and cut the measured length.
e. Thumb stockinette.
(1) Measure from 1/2 inch distal to the tip of the thumb to the base of the wrist for the stockinette length.
(2) Pull down the stockinette and cut the measured length.
(3) Cut a vertical slit to allow the stockinette to rest flat from the web spacing, between the thumb and the 2nd phalange, and the base of the wrist.
f. Roll the stockinette leaving a 1 - 2 inch cuff at the distal end and place on the work cart/station for later use.
9. Apply the stockinette to the patient's injured arm.
a. Forearm stockinette.
(1) Hold open the sides of the stockinette.
(2) Place the injured hand in the stockinette opening.
(3) Roll the stockinette on the injured arm from 2 inches distal to the ulnar styloid to the axilla region.
Chapter 3: Skill Level Tasks 15 April 2016 STP 8-68B13-SM-TG 3-239
NOTE: Rolling the stockinette on promotes a better fit.
(4) Pinch the stockinette at the cubitum space and make a 1/2 inch cut at a 45 degree angle.
NOTE: An alternative and authorized method is to cut the stockinette prior to application.
(5) Smooth out the stockinette.
b. Thumb stockinette.
(1) Roll the stockinette from 1/2 inch distal to the tip of the thumb to the base of the wrist.
(2) Smooth out the stockinette.
10. Set the injured elbow at 90 degrees flexion.
a.Place the stationary arm of the goniometer so that it bisects the middle of the humerus and deltoid muscle.
b. Place the protractor of the goniometer on the olecranon (elbow), forming a 90 degree angle.
c. Place the moving arm of the goniometer so that it bisects the middle of the forearm and the 2nd and 3rd phalanges.
d. Position the elbow until the goniometer measures 90 degrees of flexion.
CAUTION: Wrinkled padding can cause pressure sores which can lead to ulcers. If the cast padding is wrinkled, it must be removed and new padding applied
11. Apply the webril (cast padding) to the injured forearm.
CAUTION: Keep the webril roll on the extremity as it is applied to reduce possible constrictive edema caused by applying the webril too tight.
a. Place the webril end 1 inch distal to the ulnar styloid and wrap two rotations around the forearm.
NOTE: The webril application is started at the base of the ulnar styloid to provide an anchor and extra padding to the ulnar styloid.
b. Continue wrapping up the forearm, figure eight around the elbow, and end 1/2 inch distal to the proximal edge of the stockinette.
c.Overlap the webril by 1/4 - 1/2 the previous wrap with each turn.
NOTE: The top of the webril should bisect the middle of the previous layer covering up the shallow line and present evenly applied padding.
12. Prepare the casting materials, as applicable.
CAUTION: It is mandatory to use gloves to prevent the technician from receiving chemical burns while applying a fiberglass cast.
a. Place the gloves on hands and open the fiberglass casting package.
Chapter 3: Skill Level Tasks 3-240 STP 8-68B13-SM-TG 15 April 2016
NOTE: Open one fiberglass package at a time. As the fiberglass roll comes in contact with the air, the roll will start to cure (set).
b. Prepare the splint for the posterior aspect of the cast.
NOTE: The plaster reinforcement splint is used to strengthen and support the cast. Fiberglass casts do not require a splint due to the strength of the fiberglass casting material.
(1) Open the box of 5 x 30 plaster sheets. Remove the sheets from the box and unwrap the package. Locate edge of one stack and remove the stack from the package.
NOTE: The 5 x 30 plaster splints are usually stacked in increments of five from the manufacturer. If not prestacked, count out five layers.
(2) Position the patient's uninjured elbow at a 90 degree angle.
NOTE: Family members, nursing staff, orthopedic technician, or finger trap stand can be used to assist in positioning the patient's arm.
(3) Place the distal end of the plaster splint on the posterior aspect of the arm 1 inch proximal to the ulnar styloid to 2 inches distal to the axilla region or resting at the base of the deltoid muscle. Fold down the proximal end, cut off the excess, and place the stack on the work cart/station for later use.
13. Apply the first plaster/fiberglass layer.
NOTE: Examination gloves are recommended to protect the technician's hands as the resin in the plaster may cause the skin on the hands to dry up.
CAUTION: If the casting material is removed while bubbles are still present, dry spots will be visible during application. Dry spots cause integrity breakdown of the cast.
a. Place the plaster/fiberglass roll in a bucket of tepid water and remove when the bubbles cease to rise.
b. Squeeze the roll together (do not wring the roll).
NOTE: Gently squeeze the roll inward to evenly distribute the water and prevent telescoping of the roll during application.
c Place the edge of the casting material 1/2 inch proximal to the distal edge of the webril and wrap two rotations around the forearm to secure the edge.
NOTE: The cast is most susceptible to losing strength in the palm region. Therefore, a twisting or cut method is authorized. Technicians may have their own preference to these methods.
• “the twisting method.” The twisting method provides strength to the cast. As the roll is pushed through the palm, pinch the sides of the plaster roll together (not recommended for fiberglass) twist and evenly space the casting material on thewebril. Smooth out with volar side of fingers.
• “the cut method.” The cutting method provides cast cosmetics. As the roll is pushed through the palm, make a horizontal cut to the proximal edge of the plaster/fiberglass roll and smooth out with volar aspect of fingers or palm.
Chapter 3: Skill Level Tasks 15 April 2016 STP 8-68B13-SM-TG 3-241
d. Continue wrapping up the forearm, figure eight around the elbow, and end 1/2 inch distal to the proximal edge of the webril.
e.Overlap the plaster/fiberglass by 1/4 or 1/2 the previous wrap.
NOTE: The top of the plaster/fiberglass should bisect the middle of the previous layer and present an evenly applied cast. Depending on the size of the patient's forearm and biceps region, more than two rolls may be needed for the initial roll. Begin the extra roll where the previous roll left off.
14. Laminate the casting material.
CAUTION: To reduce cast indentations, which can cause pressure sores to the patient's skin under the cast, keep fingertips off the cast during application and molding process. If the patient feels pressure sores or hot spots developing under the cast, remove the cast immediately and start over with step 2.
a. Place palm of each hand on the cast.
b. Rub the cast material in the direction it was applied.
NOTE: Laminating the cast material fills in the pores, which assists in providing strength to the cast.
c. Continue rubbing the cast until the tone/texture changes.
NOTE: The dull white color indicates the plaster is beginning to cure.
15. Apply the splint to the posterior aspect of the cast.
NOTE: If using fiberglass, skip and go to step 16.
a. Place the splint in a bucket of tepid water, wait for the bubbles to subside, then remove the splint from the water.
b. Squeeze the splint together to eliminate excess water.
c. Place the reinforcement splint on the posterior side of the elbow extending from the axilla region to mid forearm.
d.Laminate the splint to the cast.
e. Maintain the patient's elbow at 90 degrees of flexion.
NOTE: Family member(s), nursing staff, an orthopedic technician, or a finger trap stand can be used to assist in positioning the patient's arm.
16. Apply the second plaster/fiberglass layer (repeat steps 13 - 14).
CAUTION: Excessive pressure may result in further patient injury. Talk to the patient while performing this procedure (e.g., How do you feel? Is the pressure too much?).
17. Mold the cast.
NOTE: All casts require molding. Molds are done simultaneously. Go back and forth between the molds as the cast cures.
Chapter 3: Skill Level Tasks 3-242 STP 8-68B13-SM-TG 15 April 2016
NOTE: The interosseous mold is used to prevent movement of the injured wrist in the cast and promote fracture healing.
(1) Place the heel of one hand on the volar aspect of the cast.
(2) Place the heel of the second hand on the dorsal aspect of the cast.
(3) Squeeze the heels of each hand together.
b. Bicipital.
NOTE: The bicipital mold is used to prevent movement of the humerus in the cast and promote fracture healing.
(1) Place the palm of one hand on the biceps muscle.
(2) Place the palm of the second hand on the triceps muscle.
(3) Press the palms together to conform the plaster/fiberglass to the upper arm.
c. Apply firm and gradual pressure beginning at the ulnar styloid, progress up the forearm and upper arm while maintaining the patient's elbow in the correct position.
d. Remove the hands from the cast when the contours of the forearm and upper arm have been shaped and the cast is cured.
18. Trim the cast to meet the cast standards.
a. Verify the alignment of the elbow with a goniometer.
(1) Repeat steps 10a - c.
(2) Verify the elbow measures at 90 degrees of flexion.
(3) Remove the cast and start over with step 2.
b.Verify the cast dimensions.
(1) The distal edge of the cast rests 1 inch proximal to the ulnar styloid.
(2) The proximal edge of the cast rests 2 - 2 1/2 inches distal to the axilla region.
c. Check the ROM of the wrist, phalanges and thumb.
NOTE: The patient should be able to freely extend and flex the fingers and touch the thumb to all fingers.
(1) Instruct the patient to rotate wrist.
(2) Instruct the patient to extend and flex fingers.
(3) Instruct the patient to rotate thumb and touch all fingers to the thumb.
d.Trim back the cast material until the dimensions and ROM standards are met.
e. Trim the proximal and distal edges of the cast.
(1) Cut the outside edge of the cast padding.
(2) Pull down the webril and stockinette.
CAUTION: The finished edge of the cast should end priximal to the base of the thumb to avoid radial nerve impingement
(3) Tape down the edges of the stockinette and webril, if necessary.
19. Apply the final plaster/fiberglass layer (repeat steps 13 - 14).
20. Check the patient's capillary refill on the casted hand (repeat step 7).
Chapter 3: Skill Level Tasks 15 April 2016 STP 8-68B13-SM-TG 3-243
a. Forearm.
21. Clean the plaster resin off the patient's skin using a damp wash towel or alcohol pads.
NOTE: Use alcohol pads or fresh water from the faucet and not from the casting bucket.
22. Give the patient verbal and written instructions on cast care.
a. Provide the patient with a copy of the clinic hours and telephone number. Instruct the patient to call the cast clinic with any concerns or questions regarding their cast. For after duty hours concerns, instruct the patient to report to the emergency room.
b. Provide the patient with a cast care booklet or written instructions.
c.Instruct the patient to elevate the extremity above the heart, and extend, flex, and wiggle fingers (demonstrate for patient) to reduce swelling.
d. Instruct the patient on what not to do.
(1) Do not stick anything down the cast.
(2) Do not remove the cast.
(3) Do not alter the cast (e.g., writing on it, coloring).
23. Fit the sling to the patient, as required.
NOTE: Considerations for applying a sling include elderly patients, severity of fractures (e.g., Colles', Smith's, Bennett's), patient's comfort, and physician's or technician's preference.
24. Annotate the procedure applied to the patient in the medical record or SF 513.
a. Record the procedure applied and cast care instructions provided.
b. Sign your name.
25. Escort or direct the patient to the front desk to make a follow-up appointment.
Evaluation Preparation: You must evaluate the students on their performance of this task in a field condition related to the actual task. Performance Measures
1 Reviewed the order from the physician.
2 Gathered the equipment and materials
3 Told the patient your name and job title.
4 Explained the procedure to the patient.
5. Donned safety equipment (patient and technician).
6. Inspected the patient's arms.
7. Checked the capillary refill of the patient's hands/fingers.
8. Prepared the stockinette.
9. Applied the stockinette to the patient's injured forearm.
Chapter 3: Skill Level Tasks 3-244 STP 8-68B13-SM-TG 15 April 2016
GO NO GO
Performance Measures
10 Set the injured elbow at 90 degrees flexion.
11 Applied the webril (cast padding) to the injured arm.
12. Prepared the casting materials, as applicable.
13. Applied the first plaster/fiberglass layer.
14. Laminated the casting material.
15. Applied the splint to the posterior aspect of the cast, if using plaster.
16. Applied the second plaster/fiberglass layer (repeated steps 13 - 14).
17. Molded the cast.
18 Trimmed the cast to meet the cast standards.
19 Applied the final plaster/fiberglass layer (repeated steps 13 - 14).
20 Checked the patient's capillary refill on the casted hand (repeated step 7).
21 Cleaned the plaster resin off the patient's skin using a damp wash towel or alcohol pads.
22 Gave the patient verbal and written instructions on cast care.
23 Fit the sling to the patient, as required.
24 Annotated the procedure applied to the patient in the medical record or SF 513.
25 Escorted or directed the patient to the front desk to make a follow-up appointment.
Evaluation Guidance: Score each Soldier according to the performance measures in the evaluation guide. Unless otherwise stated in the task summary, the Soldier must pass all performance measures to be scored GO. If the Soldier fails any step, show what was done wrong and how to do it correctly.
Chapter 3: Skill Level Tasks 15 April 2016 STP 8-68B13-SM-TG 3-245
GO NO GO
References Required Related SF 513 None
Apply a Short Arm Thumb Spica Cast
081-68B-1204
Conditions: You have a physician's written or verbal orders to apply a short arm thumb spica cast to an orthopedic patient. The patient is sitting on an orthopedic examination bed and may be accompanied by a family member/chaperone. Nursing personnel and physician are available. You will need the patient's medical record or Standard Form (SF) 513, Medical Record - Consultation Sheet, the local standard operating procedures (SOP), work cart/station, roll of stockinette, plaster or fiberglass rolls, box of plaster reinforcement sheets, webril rolls, cast saw, cast spreader, eye protection, hearing protection, roll of adhesive tape, examination gloves, scissors, hospital pads (chux) or bed sheet, goniometer, bucket of tepid water with plastic bag, sling, cast care booklet or equivalent, box of alcohol pads or damp wash towel, sink with faucet, and trash receptacle.
Standards: Apply the short arm thumb spica cast to the patient's injured arm from 1/8 - 1/4 inch beyond the tip of the injured thumb down the radial side of the hand, up the arm to 1 - 1 1/2 inches distal to the cubitum space (bend of elbow). The cast immobilizes the wrist, with the wrist set at 0 - 15 degrees of extension and the thumb in opposition to the index finger; eliminates ulnar and radial deviation, supination, and pronation; and allows full range of motion (ROM) to the elbow and uninjured phalanges. The capillary refill returns within 1 - 3 seconds. This cast is used for soft tissue injuries of the thumb, and scaphoid injuries/fractures.

NOTE: See Figure 3-42 for a thumb spica cast
Performance Steps:
1. Review the order from the physician.
2. Gather equipment and materials.
Chapter 3: Skill Level
3-246 STP 8-68B13-SM-TG 15 April 2016
Tasks
Figure 3-42. Thumb spica cast
NOTE: Physician's order, technician's preference, availability of supplies, and/or patient's extremity size will determine which casting material (fiberglass/plaster) will be used.
a. Gather equipment.
(1) Scissors.
(2) Goniometer
(3) Utility cart
(4) Cast saw
(5) Cast spreader
(6) Eye protection
(7) Hearing protection
CAUTION: The temperature of the water must be tepid (70° - 80°F) to reduce further injury (possible burns) to the patient. The technician must change the water after each application, as the residue in the cast bucket will act as an accelerator causing the casting material to increase in heat emission.
(8) Bucket of tepid water with plastic bag.
b.Assemble materials.
(1) Stockinette roll (1 and 3 inch).
(2) W ebril rolls (2 or 3 inch).
(3) Examination gloves.
(4) Hospital pad (chux) or bed sheet.
(5) Sling
(6) Box of plaster reinforcement sheets (4 x 15).
(7) Alcohol pads or damp wash towel
(8) Plaster rolls (3 or 4 inch) or fiberglass rolls (2 or 3 inch).
(9) Adhesive tape (1 inch)
(10) Cast care booklet
c Place equipment and materials on the work cart or station.
3. Tell the patient your name and job title.
CAUTION: During casting application a chemical response (exothermic reaction) will occur between the water and the plaster (gypsum). This is a safe and common occurrence. The cast will initially become warm and cool down within 2 - 5 minutes. However, if it doesn't cool down or there is an increase of heat intensity during the cast application, the splint may need to be removed.
4. Explain the procedure to the patient.
5. Don safety equipment (patient and technician).
6. Inspect the patient's arms.
CAUTION: Always practice body substance isolation prior to applying traction, splints, or casts to patients.
a. Place examination gloves on hands.
b. Place the patient sitting or supine on the examination bed.
Chapter 3: Skill Level Tasks 15 April 2016 STP 8-68B13-SM-TG 3-247
c Inspect both arms for any skin conditions (e.g., cuts, abrasions, lacerations, and skin rashes).
NOTE: Inform physician if conditions are present and follow physician's instructions.
d. Examine both arms and wrists for jewelry and remove if found.
NOTE: All jewelry on both hands and wrists must be removed. Give jewelry to family member or secure with patient's belongings according to the local SOP.
7. Check the capillary refill of the patient's hands/fingers.
a. Squeeze the patient's fingers; nail beds will turn white.
CAUTION: If capillary refill is delayed for more than 2 seconds, inform the physician and follow the physician's instructions.
b. Release the patient's fingers; nail beds will return pink.
8. Prepare the stockinette(s).
NOTE: The stockinette is a form of protection against the exothermic reaction caused by casting materials and generally used for all casts except on patients who have had recent surgery, recently reduced fractures, or as directed by the physician.
a. Place the hospital pad or bed sheet on the patient's lap.
NOTE: All patients should be given a covering (e.g., chux, bed sheet) to reduce damaging their clothing during the casting process.
b. Place the work cart at the edge of the bed.
NOTE: Numerous props may be used (e.g. orthopedic bump, T stand, finger trap stand, nursing assistant). Technician preference will determine if a prop is used.
c Place the patient's uninjured elbow at a 45 degree angle to the upper torso.
d. Forearm stockinette.
(1) Measure from 1 inch distal to the metacarpal heads to the cubitum space (bend of elbow) for the stockinette length.
(2) Pull down the stockinette and cut the measured length.
e. Thumb stockinette.
(1) Measure from 1/2 inch distal to the tip of the thumb to the base of the wrist for the stockinette length.
(2) Pull down the stockinette and cut the measured length.
(3) Cut a vertical slit to allow the stockinette to rest flat from the web spacing, between the thumb and the 2nd phalange, and the base of the wrist.
f. Roll the stockinette leaving a 1 - 2 inch cuff at the distal edge, then place on the work cart/station for later use.
9. Apply the stockinette to the injured arm and thumb.
a. Forearm stockinette.
(1) Hold open the sides of the forearm stockinette.
Chapter 3: Skill Level Tasks 3-248 STP 8-68B13-SM-TG 15 April 2016
(2) Place the injured hand in the open end of the stockinette.
(3) Roll the stockinette on the injured arm from 1 inch distal to the metacarpal heads to the cubitum space (bend of elbow).
NOTE: Rolling the stockinette on promotes a better fit.
(4) Pinch the stockinette at the base of the thumb and make a 1/2 inch cut to the stockinette.
(5) Place the patient's thumb through the precut hole.
(6) Smooth out the stockinette.
b. Thumb stockinette.
(1) Roll the stockinette from 1/2 inch distal to the tip of the thumb to the base of the thumb.
(2) Smooth out the stockinette.
10. Place the patient's index finger and thumb in opposition to one another.
NOTE: Placing the thumb and forefinger in opposition to one another assists the patient in maintaining the wrist in a neutral position and reduces the strain on the thumb ligament. This is commonly referred to as the can of coke position.
11. Set the patient's injured wrist at 0 - 15 degrees of extension.
NOTE: All hand casts are applied absent of pronation, supination, radial, or ulnar deviation unless directed by the physician.
a. Place the injured elbow at a 45 degree angle to the upper torso.
b. Place the stationary arm of the goniometer so that it bisects the ulna
c. Place the protractor of the goniometer on the ulnar styloid.
d. Place the moving arm of the goniometer so that it bisects the lateral side of the 5th metacarpal.
e.Position the wrist until the goniometer measures 0 - 15 degrees of extension.
CAUTION: Wrinkled padding can cause pressure sores which can lead to ulcers. If the cast padding is wrinkled, it must be removed and new padding applied.
12. Apply the webril (cast padding) to the injured thumb, wrist, and forearm.
CAUTION: Keep the webril roll on the extremity as it is applied to reduce possible constrictive edema caused by applying the webril too tight.
a. Place the edge of the webril on the ulnar styloid and wrap two rotations around the wrist.
NOTE: The webril application is started at the wrist to provide an anchor and extra padding to the ulnar styloid. The webril application can also be started at the distal edge of the thumb.
b. Continue wrapping through the palm, around the thumb, back up the forearm ending 1 inch distal to the proximal edge of the stockinette.
Chapter 3: Skill Level Tasks 15 April 2016 STP 8-68B13-SM-TG 3-249
NOTE: The webril can be cut or torn (horizontally) when wrapping through the palm to provide a better fit. Technician preference will determine which technique to use.
c.Overlap the webril by 1/4 - 1/2 the previous wrap with each turn.
NOTE: The top of the webril should bisect the middle of the previous layer covering up the shallow line and present evenly applied padding.
13. Prepare the casting materials, as applicable.
CAUTION: It is mandatory to use gloves to prevent the technician from receiving chemical burns while applying a fiberglass cast.
a. Place the gloves on hands and open the fiberglass casting package.
NOTE: Open one fiberglass package at a time. As fiberglass comes in contact with the air, the roll will start to cure (set).
b. Prepare the plaster reinforcement splint for the radial aspect of the cast.
(1) Open the box of 4 x 15 plaster reinforcement sheets. Remove the sheets from the box and unwrap the package. Peel back the edges of five sheets and remove from the stack. Place on work cart/station.
(2) Place the patient's uninjured thumb in opposition to the index finger.
(3) Remove one plaster sheet from the stack of five.
(4) Place the sheet from the tip of the thumb to the cubital space to obtain the sheet length.
(5) Draw a horizontal line on each side of the plaster sheet at the base of the thumb.
(6) Place the measured sheet on stack, and cut the outlined pattern and excess length for all sheets. Place the stack on the work cart/station for later use.
(7) Discard the excess material in the trash receptacle.
14. Apply the first plaster/fiberglass layer.
NOTE: Examination gloves are recommended to protect the technician's hands as the resin in the plaster may cause the skin on the hands to dry up.
CAUTION: If the casting material is removed while bubbles are still present, dry spots will be visible during application. Dry spots cause integrity breakdown of the cast.
a. Place the plaster or fiberglass roll in bucket of tepid water and remove when bubbles cease to rise.
b. Squeeze the roll together (do not wring the roll).
NOTE: Gently squeeze the roll inward to evenly distribute the water and prevent telescoping of the roll during application.
c. Place the edge of the casting material on the ulnar styloid and wrap two rotations around the wrist to secure the edge.
NOTE: The cast is most susceptible to losing strength in the palm region. Therefore, a twisting or cut method is authorized. Technicians may have their own preference to these methods.
Chapter 3: Skill Level Tasks 3-250 STP 8-68B13-SM-TG 15 April 2016
• “the twisting method.” The twisting method provides strength to the cast. As the roll is pushed through the palm, pinch the sides of the plaster roll together (not recommended for fiberglass) twist and evenly space the casting material on the webril. Smooth out with volar side of fingers.
• “the cut method.” The cutting method provides cast cosmetics. As the roll is pushed through the palm, make a horizontal cut to the proximal edge of the plaster/fiberglass roll and smooth out with volar aspect of fingers or palm.
d. Continue wrapping through the palm ending at the DPC, around the thumb, back up the forearm, ending 1/2 inch distal to the proximal edge of the webril.
e.Overlap the plaster/fiberglass by 1/4 - 1/2 the previous wrap.
NOTE: The top of the plaster/fiberglass should bisect the middle of the previous layer and present an evenly applied cast.
15. Laminate the casting material.
CAUTION: To reduce cast indentations, which can cause pressure sores to the patient's skin under the cast, keep fingertips off the cast during the application and molding process. If the patient feels pressure sores or hot spots developing under the cast, remove the cast immediately and start over with step 2.
a. Place the palm of each hand on the cast.
b. Rub the cast material in the direction it was applied.
NOTE: Laminating the cast material fills in the pores, which assists in providing strength to the cast.
c Continue rubbing the cast until the tone/texture changes.
NOTE: The dull white color indicates the plaster is beginning to cure.
16. Apply the reinforcement splint to the radial aspect of the cast.
NOTE: The reinforcement splint is used to strengthen and support the cast. If using fiberglass, go to step 17.
a. Place the splint in the bucket of tepid water, wait for the bubbles to subside, then remove the splint from the water.
b. Squeeze the splint together to eliminate excess water.
CAUTION: Keep the plaster/fiberglass roll on the extremity as it is applied to reduce possible constrictive edema caused by applying the plaster/fiberglass too tight.
c. Place the reinforcement splint on the radial side of the cast around the thumb.
d.Laminate the splint to the cast.
e. Maintain the patient's wrist between 0 - 15 degrees of extension and the thumb in opposition to the index finger.
17. Apply the second plaster/fiberglass layer (repeat steps 14 - 15).
Chapter 3: Skill Level Tasks 15 April 2016 STP 8-68B13-SM-TG 3-251
CAUTION: Excessive pressure may result in further patient injury. Talk to the patient while performing this procedure (e.g., How do you feel? Is the pressure too much?).
18. Mold the casting material to the thumb/wrist/forearm.
NOTE: All casts require molding. Molds are done simultaneously. Go back and forth between the molds as the cast cures.
a. Interosseous mold.
NOTE: The interosseous mold is used to prevent movement of the wrist in the cast and promote fracture healing.
(1) Place the heel of one hand on the volar aspect of the distal wrist.
(2) Place the heel of the second hand on the dorsal aspect of the distal wrist.
(3) Squeeze the heels of the hands.
(4) Apply firm and gradual pressure beginning at the wrist and progress up the forearm.
b. Thumb Mold.
(1) Cup the injured thumb with one hand.
(2) Apply firm and gradual pressure beginning at the tip of the thumb and progress up the forearm.
c. Maintain the the thumb and wrist in correct position.
d. Remove the heels of the hands from the cast when the contours of the forearm, wrist and thumb have been shaped and the cast is cured.
19. Trim the cast to meet the cast standards.
a. Verify the thumb is in opposition to the index finger.
NOTE: If the thumb is not in opposition to the index finger, remove the cast and start over with step 2.
b. Verify the alignment of the wrist with the goniometer.
(1) Repeat steps 12b - d.
(2) Verify the wrist measures between 0 - 15 degrees of extension.
(3) Remove the cast and start over with step 2.
c. Verify the cast dimensions.
CAUTION: To avoid further injury to the patient, the finished edge of the cast should end distal to the tip of the thumb.
(1) The cast edge rests 1/8 - 1/4 inch beyond the tip of the thumb.
(2) The cast edge rests within 1/8 inch of the distal palmar crease.
(3) The cast edge should rest 1 - 1 1/2 inch distal to the cubital space.
d. Check the ROM of the elbow and phalanges.
NOTE: The patient should be able to freely extend and flex the phalanges and touch the uninjured phalanges to the thumb.
(1) Instruct the patient to extend and flex the uninjured phalanges.
(2) Instruct the patient to extend and flex the elbow.
Chapter 3: Skill Level Tasks 3-252 STP 8-68B13-SM-TG 15 April 2016
(3) Continue to trim back the cast material until full ROM is met.
e.Trim back the cast material until the dimensions and ROM standards are met.
f.Trim the proximal and distal edges of the cast.
(1) Cut the outside edge of the cast padding.
(2) Pull down the webril and stockinette.
(3) Tape down the edges of the stockinette and webril, if necessary.
20. Apply the final plaster layer (repeat steps 14 - 15).
21. Check the patient's capillary refill on the casted hand (repeat step 7).
22. Clean the plaster resin off the patient's skin using a damp wash towel or alcohol pads.
NOTE: Use alcohol pads or fresh water from the faucet and not from the casting bucket.
23. Give the patient verbal and written instructions on cast care.
a. Provide the patient with a copy of the clinic hours and telephone number. Instruct the patient to call the cast clinic with any concerns or questions regarding their cast. For after duty hours concerns, instruct the patient to report to the emergency room.
b. Provide the patient with a cast care booklet or written instructions.
c.Instruct the patient to elevate the extremity above the heart, and extend, flex, and wiggle fingers (demonstrate for patient) to reduce swelling.
d. Instruct the patient on what not to do.
(1) Do not stick anything down the cast.
(2) Do not remove the cast.
(3) Do not alter the cast (e.g., writing on it, coloring).
24. Fit the sling to the patient, as required.
NOTE: Considerations for applying a sling include elderly patients, severity of fractures (e.g., Colles', Smith's, Bennett's), patient's comfort, and physician's or technician's preference.
25. Annotate the procedure applied to patient in medical record or SF 513.
a. Record the procedure applied and cast care instructions provided.
b. Sign your name.
26. Escort or direct the patient to the front desk to make a follow-up appointment.
Evaluation Preparation: You must evaluate the students on their performance of this task in a field condition related to the actual task.
Performance Measures GO NO GO
1 Reviewed the order from the physician.
2. Gathered equipment and materials.
3. Told the patient your name and job title.
4. Explained the procedure to the patient.
Chapter 3: Skill Level Tasks 15 April 2016 STP 8-68B13-SM-TG 3-253
Performance Measures
5 Donned safety equipment (patient and technician).
6 Inspected the patient's arms.
7. Checked the capillary refill of the patient's hands/fingers.
8. Prepared the stockinette(s).
9. Applied stockinette to patient's injured arm and thumb.
10. Placed the patient's index finger and thumb in opposition to one another.
11. Set the patient's injured wrist at 0 - 15 degrees of extension.
12. Applied webril (cast padding) to the injured thumb, wrist, and forearm.
13. Prepared the casting materials, as applicable.
14. Applied the first plaster/fiberglass layer.
15 Laminated the casting material.
16 Applied the reinforcement splint to radial aspect of cast, if using plaster.
17 Applied the second plaster/fiberglass layer (repeated steps 14 - 15).
18 Molded the casting material to the thumb/wrist/forearm.
19 Trimmed the cast to meet the cast standards.
20 Applied the final plaster layer (repeated steps 14 - 15).
21 Checked the patient's capillary refill on the casted hand (repeated step 6).
22 Cleaned the plaster resin off the patient's skin using a damp wash towel or alcohol pads.
23. Gave the patient verbal and written instructions on cast care.
24. Fit the sling to the patient, as required.
25. Annotated the procedure applied to patient in medical record or SF 513.
26. Escorted or directed the patient to the front desk to make a follow-up
3-254 STP 8-68B13-SM-TG 15 April 2016
Chapter 3: Skill Level Tasks
GO NO GO
Evaluation Guidance: Score each Soldier according to the performance measures in the evaluation guide. Unless otherwise stated in the task summary, the Soldier must pass all performance measures to be scored GO. If the Soldier fails any step, show what was done wrong and how to do it correctly. References
Chapter 3: Skill Level Tasks 15 April 2016 STP 8-68B13-SM-TG 3-255
Measures GO NO GO
Performance
appointment.
Required Related SF 513 None
Subject Area 9: Upper Extremity Splints
Apply an Ulnar Gutter Splint
081-68B-1002
Conditions: You are presented with a physician's written or verbal order to apply a ulnar gutter splint to an orthopedic patient. The patient is sitting on an orthopedic examination bed and may be accompanied by a family member/chaperone. Nursing personnel and physician are available. You will need the patient's medical record or Standard Form (SF) 513, Medical Record - Consultation Sheet, work cart/station, plaster rolls, box of plaster reinforcement sheets, webril rolls, elastic bandages, examination gloves, scissors, adhesive tape, hospital pads (chux) or bed sheet, goniometer, bucket of tepid water with plastic bag, sling, cast care booklet or equivalent, box of alcohol pads or damp wash towel, sink with faucet, trash receptacle, and the local Standard Operating Procedures (SOP).
Standards: Apply the ulnar gutter splint to the patient's injured arm from the tip of the 4th and 5th phalanges to 1 - 1 1/2 inch distal to the cubitum space and secure with elastic bandages. The splint immobilizes the wrist (15-30 degrees of dorsal flexion) and the 4th and 5th phalanges (70-90 degrees of flexion). The splint eliminates ulnar and radial deviation, pronation, and supination; and allows full range of motion (ROM) to the uninjured phalanges and thumb. The capillary refill returns within 1 - 3 seconds.
NOTE: See Figure 3-43 and Figure 3-44 for an example of an ulnar gutter splint
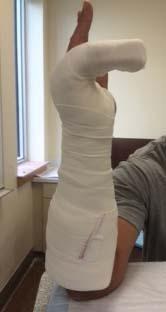
3-256 STP 8-68B13-SM-TG 15 April 2016
Chapter 3: Skill Level Tasks
Figure 3-43. Ulnar gutter splint-lateral view
Performance Steps:
1. Review the order from the physician.
2. Gather equipment and materials.
NOTE: Physician's order, technician's preference, availability of supplies, and/or patient's extremity size determines which casting material size is used.

a. Gather equipment.
(1) Scissors.
(2) Goniometer
(3) Utility cart
CAUTION: The temperature of the water must be tepid (70° - 80° F) to reduce further injury (possible burns) to the patient. The technician should draw room temperature water and initially use a thermometer to gauge water temperature. The technician must change the water after each application, as the residue in the cast bucket will act as an accelerator causing the casting material to increase in heat emission.
(4) Bucket of tepid water with plastic bag
b.Assemble materials.
(1) W ebril rolls (4 inch).
(2) Plaster rolls (4 inch)
(3) Elastic bandages (2 inch).
(4) Examination gloves
(5) Hospital pad (chux) or bed sheet.
(6) Sing.
(7) Box of plaster reinforcement sheets (4 x 15 or 5 x 30).
(8) Box of alcohol pads or damp wash towel.
(9) Cast care booklet.
(10) Adhesive tape (1 inch).
Chapter 3: Skill Level Tasks 15 April 2016 STP 8-68B13-SM-TG 3-257
Figure 3-44. Ulnar gutter splint-posterior view
c.Open and remove two plaster rolls from packages and place on work cart/station.
d. Place on work cart or station.
3. Tell the patient your name and job title.
CAUTION: During the splinting application a chemical response (exothermic reaction) will occur between the water and the plaster (gypsum). This is a safe and common occurrence. The splint will initially become warm and cool down within 2 - 5 minutes. However, if it doesn't cool down or there is an increase of heat intensity during the splint application, the splint may need to be removed
4. Explain the procedure to the patient.
5. Inspect the patient's arms.
CAUTION: Always practice body substance isolation (BSI) prior to applying traction, splints, or casts to patients.
a. Place examination gloves on hands.
b. Place the patient in the sitting or supine position on the examination bed.
c. Roll the patient's shirt sleeve above the elbow on the injured side.
d. Inspect both arms for any skin conditions (e.g., cuts, abrasions, lacerations, and skin rashes).
NOTE: Inform the physician if conditions are present and follow the physician's instructions.
e. Examine both arms and wrists for jewelry and remove if found.
NOTE: All jewelry on both hands and wrists must be removed. Give the jewelry to a family member, secure with the patient, or secure the belongings according to the local SOP.
6. Check capillary refill of patient's hands/fingers.
a Squeeze patient's fingers; nail beds will turn white.
CAUTION: If capillary refill is delayed for more than 2 seconds, inform the physician and follow the physician's instructions
b. Release patient's fingers; nail beds will return pink.
7. Prepare the plaster splint for the ulnar side of the hand and forearm.
NOTE: Extremity size will determine the splint size (i.e. 4 x 15 or 5 x 30).
a. Prepare webril (cast padding) for the ulnar gutter splint.
(1) Place hospital pad or bed sheet on patient's lap.
NOTE: All patients should be given a covering (e.g., chux, bed sheet) to reduce damaging their clothing during the casting process and for privacy.
(2) Position the patient's uninjured elbow at a 45 degree angle to the floor.
Chapter 3: Skill Level Tasks 3-258 STP 8-68B13-SM-TG 15 April 2016
(3) Measure from 1 inch distal to the tips of 4th and 5th phalanges, down the ulna to distal to the cubitum space.
(4) Place the measured webril on the work cart/station.
(5) Roll out two to four additional layers to the same length and bisect the middle of the previous webril.
b. Open the applicable size box of plaster reinforcement sheets. Remove the sheets from the box and unwrap the package. Peel back the edges of 10-15 sheets and remove from the stack. Place on work cart/station.
NOTE: The technician may choose to use plaster rolls in lieu of pre-sized reinforcement sheets.
c. Locate the 4th and 5th metacarpals.
d. Remove one plaster sheet from the stack of 10-15.
e. Place the sheet on the dorsal side of the patient's hand/forearm, distal to the 4th and 5th phalanges and covering the metacarpals.
NOTE: The plaster sheets must be wide enough to cover the 4th and 5th metacarpals circumferentially and long enough (distal to the injured phalanges to 1 – 1 ½ inch to the cubitum space) to protect the injury.
f. Hold the plaster sheet vertically and cut a line in the middle of the plaster sheet.
g. Place the sheet on the stack, cut the outlined pattern and excess length for all sheets, and place on work cart/station for later use.
NOTE: Discard all excess material in the trash receptacle.
8. Set the patient's injured wrist with the goniometer.
a. Position the patient's injured elbow on the bump at a 45 degree angle to the upper extremity.
b. Place the stationary arm of the goniometer so that it bisects the lateral aspect of the ulnar.
c. Place the protractor of the goniometer on the ulnar styloid.
d. Place the moving arm of the goniometer so that it bisects the 5th phalange.
e. Position the wrist until the goniometer measures between 15 - 30 degrees of dorsal flexion.
9. Set the patient's 4th and 5th phalanges with the goniometer.
a. Place the stationary arm of the goniometer so that it bisects the lateral aspect of the ulnar.
b. Place the protractor of the goniometer on the ulnar styloid.
c.Place the moving arm of the goniometer so that it bisects the 5th phalange.
d. Set the injured phalanges until the goniometer measures between 70-90 degrees of flexion.
10. Apply the ulnar gutter splint to the injured hand/arm.
NOTE: Assistance may be used prior to securing splint.
a. Place a strip of webril between the injured phalanges.
b. Place the plaster sheets in bucket of tepid water and remove when bubbles cease to rise.
Chapter 3: Skill Level Tasks 15 April 2016 STP 8-68B13-SM-TG 3-259
c Squeeze the sheets together to eliminate excess water.
NOTE: Do not wring the sheets. This will cause the roll to dry more quickly.
d. Place the plaster sheets centered and 1/2 inch from the edge of the padding.
e. Laminate the plaster splint.
f.Fold over the edges of the padding.
g. Place an additional layer of padding over the folded edges.
h. Place the padded splint from the tips of the injured phalanges to 1 - 1 1/2 inches distal to the cubitum space.
11. Secure the ulnar gutter splint to the injured phalanges and arm.
a. Place the edge of the elastic bandage on the ulnar styloid and wrap two rotations around the wrist to secure the edge.
b. Continue through the palm, around the 4th and 5th phalanges to 1 - 1 1/2 inches distal to the cubitum space.
c. Secure the elastic bandage with clips at the back of the wrist.
d. Tape down the elastic bandage between the clips.
e. Remove the clips and dispose of them in trash receptacle.
12. Mold the casting material to the forearm/wrist.
NOTE: The mold is used to prevent movement of the metacarpals in the splint and promote fracture healing.
a. Place the heel of the hand on the dorsal aspect of the injured phalanges and apply gradual pressure.
NOTE: The physician may apply an additional mold.
b. Maintain patient's injured phalanges in the correct position.
c. Remove the palm of the hand from the splint when the contours of the phalanges and wrist have been shaped, the phalanges are between 70-90 degrees of flexion, and the splint is cured.
13. Trim the splint to meet the standards.
a. Verify the alignment of the injured wrist and injured fingers with goniometer.
(1) Repeat steps 8a-d.
(2) Verify the wrist measures between 15-30 degrees of dorsal flexion.
NOTE: If wrist is not within 15-30 degrees of dorsal flexion or ulnar or radial deviation are present, remove splint and go to step 10.
(3) Repeat steps 9a-c.
(4) Verify the phalanges are set at 70-90 degrees of flexion.
NOTE: If the wrist or phalanges are not within parameters or ulnar or radial deviation is present, remove splint and go to step 10.
b. Check the splint dimensions.
Chapter 3: Skill Level Tasks 3-260 STP 8-68B13-SM-TG 15 April 2016
(1) The splint edges are 1 - 1 1/2 inches distal to the cubitum space and 1/8-1/4 inch distal to the injured phalanges' tips.
(2) The splint is covering both the 4th and 5th metacarpals and is 1/8-1/4 inch distal to the injured phalanges.
c. Check the ROM of the phalanges and thumb.
(1) Instruct the patient to extend and flex the uninjured fingers.
(2) Instruct the patient to rotate the thumb.
(3) Trim back the splint material until the dimensions and ROM standards are met.
14. Check the patient's capillary refill (refer to step 6).
15. Clean the plaster off the patient's skin using a damp wash towel or alcohol pads.
16. Fit the patient with a sling.
17. Give the patient verbal and written instructions on splint care.
a. Provide the patient with a copy of the clinic hours and telephone number. Instruct the patient to call the cast clinic with any concerns or questions regarding their cast. For after duty hours concerns, instruct the patient to report to the emergency room.
b. Provide the patient with a cast care booklet or written instructions.
c.Instruct the patient to elevate the arm and flex and extend the uninjured fingers to increase circulation in the hand.
d. Instruct the patient on what not to do:
(1) Do not stick any objects down the splint.
(2) Do not remove the splint.
(3) Do not alter the splint (e.g., writing or coloring the cast).
18. Annotate the procedure applied to the patient in the medical record or SF 513
a. Record the procedure applied and cast care instructions provided.
b. Sign your name.
19. Escort or direct the patient to the front desk to make a follow-up appointment.
Evaluation Preparation: You must evaluate the students on their performance of this task in a field condition related to the actual task.
Performance Measures GO NO GO
1 Reviewed the order from the physician.
2. Gathered equipment and materials.
3. Told the patient your name and job title.
4. Explained the procedure to the patient.
5. Inspected the patient's arms.
6. Checked capillary refill of patient's hands/fingers.
Chapter 3: Skill Level Tasks 15 April 2016 STP 8-68B13-SM-TG 3-261
Performance Measures
7 Prepared the plaster splint for the ulnar side of the hand and forearm.
8 Set the patient's injured wrist with the goniometer.
9. Set the patient's 4th and 5th phalanges with the goniometer.
10. Applied the ulnar gutter splint to the injured hand/arm.
11. Secured the ulnar gutter splint to injured phalanges and arm.
12. Molded the casting material to the forearm/wrist.
13. Trimmed the splint to meet the standards.
14. Checked patient's capillary refill (referred to step 6).
15 Cleaned the plaster off the patient's skin using a damp wash towel or alcohol pads.
16. Fitted the patient with a sling.
17 Gave the patient verbal and written instructions on splint care.
18 Annotated the procedure applied to patient in medical record or SF 513.
19 Escorted or directed the patient to the front desk to make a follow-up appointment.
Evaluation Guidance: Score each Soldier according to the performance measures in the evaluation guide. Unless otherwise stated in the task summary, the Soldier must pass all performance measures to be scored GO. If the Soldier fails any step, show what was done wrong and how to do it correctly.
3-262 STP 8-68B13-SM-TG 15 April 2016
Chapter 3: Skill Level Tasks
GO NO GO
References Required Related SF 513 None
Apply a Short Arm Single Sugar Tong Splint

081-68B-1001
Conditions: You are presented with a physician's written or verbal order to apply a short arm single sugar tong splint to an orthopedic patient. The patient is sitting on an orthopedic examination bed and may be accompanied by a family member/chaperone. Nursing personnel and physician are available. You will need the patient's medical record or Standard Form (SF) 513, Medical Record - Consultation Sheet, work cart/station, plaster rolls, box of plaster reinforcement sheets, webril rolls, elastic bandages, examination gloves, scissors, adhesive tape, hospital pads (chux) or bed sheet, goniometer, bucket of tepid water with plastic bag, sling, cast care booklet or equivalent, box of alcohol pads or damp wash towel, sink with faucet, trash receptacle, and the local standard operating procedure (SOP)
Standards: Apply the short arm single sugar tong splint (STS) to the patient's injured arm within 1/8 of the metacarpophalangeal joints (MCPJs), down the dorsal aspect of the arm, around the elbow to the distal palmar crease (DPC), and secure with elastic bandages. The splint immobilizes the wrist and elbow. The splint eliminates ulnar and radial deviation, pronation, and supination; and allows full range of motion (ROM) to the uninjured phalanges and thumb. The capillary refill returns within 1 - 3 seconds.
NOTE: See Figure 3-45 for an example short arm single sugar tong splint.
Performance Steps:
1. Review the order from the physician.
Chapter 3: Skill Level Tasks 15 April 2016 STP 8-68B13-SM-TG 3-263
Figure 3-45. Short arm single sugar tong splint
2. Gather equipment and materials.
NOTE: Physician's order, technician's preference, availability of supplies, and/or patient's extremity size determines which casting material size is used.
a. Gather equipment.
(1) Scissors.
(2) Goniometer
(3) Utility cart
(4) Bucket of tepid water with plastic bag
b.Assemble materials.
(1) W ebril rolls (4 inch).
(2) Plaster rolls (4 inch)
(3) Elastic bandages (2 inch).
(4) Examination gloves.
(5) Hospital pad (chux) or bed sheet.
(6) Sling.
(7) Box of plaster reinforcement sheets (4 x 15 or 5 x 30).
(8) Box of alcohol pads or damp wash towel.
(9) Cast care booklet.
(10) Adhesive tape (1 inch).
c. Open and remove two plaster rolls from packages and place on work cart/station.
d. Place the materials on work cart/station.
3. Tell the patient your name and job title.
CAUTION: During the splinting application a chemical response (exothermic reaction) will occur between the water and the plaster (gypsum). This is a safe and common occurrence. The splint will initially become warm and cool down within 2 - 5 minutes. However, if it doesn't cool down or there is an increase of heat intensity during the splint application, the splint may need to be removed.
4. Explain the procedure to the patient.
5. Inspect patient's arms.
CAUTION: Always practice body substance isolation (BSI) prior to applying traction, splints, or casts to patients.
a. Place examination gloves on hands.
b. Place the patient in the sitting or supine position on the examination bed.
c. Roll the patient's shirt sleeve above the elbow on the injured side.
d.Inspect both arms for any skin conditions (e.g., cuts, abrasions, lacerations, and skin rashes).
NOTE: Inform physician if conditions are present and follow physician's instructions.
e. Examine both arms and wrists for jewelry and remove if found.
NOTE: All jewelry on both hands and wrists must be removed. Give the jewelry to a family member, secure with the patient, or secure the belongings according to the local SOP.
Chapter
3-264 STP 8-68B13-SM-TG 15 April 2016
3: Skill Level Tasks
6. Check capillary refill of patient's hands/fingers.
a. Squeeze patient's fingers; nail beds will turn white.
b. Release patient's fingers; nail beds will return pink.
CAUTION: The temperature of the water must be tepid (70°-80° F) to reduce further injury (possible burns) to the patient.
7. Prepare the plaster splint for the volar and dorsal aspect of the forearm.
NOTE: Extremity size will determine the splint size (i.e. 4 x 15 or 5 x 30).
a. Prepare webril (cast padding) for the sugar tong splint.
CAUTION: All patients should be given a covering (e.g., chux, bed sheet) to reduce damaging their clothing during the casting process and for privacy.
(1) Place hospital pad or bed sheet on patient's lap.
(2) Position the patient's uninjured elbow at a 90 degree angle to the floor. Locate the DPC and MCPJs.
NOTE: The DPC is the distal diagonal line on the volar aspect of the hand. The MCPJs are the knuckles on the posterior aspect of the hand.
(3) Measure within 1 inch distal to the MCPJs, posteriorly around the elbow, to the DPC.
(4) Place the measured webril on work cart/station.
(5) Roll out two to four additional layers to the same length and bisect the middle of the previous webril.
b.Open the applicable size box of plaster reinforcement sheets. Remove the sheets from the box and unwrap the package. Peel back the edges of 10-15 sheets and remove from the stack. Place on work cart/station.
NOTE: The technician may choose to use plaster rolls in lieu of pre-sized reinforcement sheets.
c Locate DPC and the MCPJs.
d. Remove one plaster sheet from the stack of 10-15.
e. Place sheet next to uninjured arm to obtain sheet length and the DPC and MCPJs contours.
f. Hold the plaster sheet vertically and cut a line in the middle of the plaster sheet.
g. Place the sheet on the stack, cut the outlined pattern and excess length for all sheets, and place on work cart/station for later use.
8. Set the patient's injured wrist with goniometer.
a. Position the patient's injured elbow on the bump at a 90 degree angle to the upper torso.
b. Place the stationary arm of the goniometer so that it bisects the lateral aspect of the ulnar.
c.Place the protractor of the goniometer on the ulnar styloid.
d. Place the moving arm of the goniometer so that it bisects the 5th phalange.
e. Position the wrist until the goniometer measures between 0-15 degrees of dorsal extension.
Chapter 3: Skill Level Tasks 15 April 2016 STP 8-68B13-SM-TG 3-265
9. Set the patient's injured elbow with goniometer.
a. Place the stationary arm of the goniometer so that it bisects the lateral aspect of the humerus.
b. Place the protractor of the goniometer on the olecranon process (elbow).
c. Place the moving arm of the goniometer so that it bisects the forearm.
d. Position the elbow until the goniometer measures 90 degrees of flexion.
10. Apply single tong splint to injured arm.
NOTE: Assistance may be used prior to securing splint.
a. Place the plaster sheets in bucket of tepid water and remove when bubbles cease to rise.
b. Squeeze the sheets together to eliminate excess water.
NOTE: Do not wring the sheets. This will cause the roll to dry more quickly.
c. Place the plaster sheets centered and 1/2 inch from the edge of the padding.
d. Laminate the plaster splint.
e. Fold over the edges of the padding.
f. Place an additional layer of padding over the folded edges.
g. Place the padded splint from the base of the MCPJs posteriorly around the elbow to the DPC.
11. Secure the sugar tong splint to the injured arm.
a. Place the edge of the elastic bandage on the ulnar styloid and wrap two rotations around the wrist to secure the edge.
b. Continue through the palm, back up the forearm, and figure of eight around the elbow covering all padding.
c. Secure the elastic bandage with clips.
d.Tape down the elastic bandage between the clips.
e. Remove the clips and dispose of them in trash receptacle.
12. Mold the casting material to the forearm/wrist.
a.Interosseous mold.
NOTE: Molds are done simultaneously. Go back and forth between the molds as the cast cures.
(1) Place the heel of one hand on the volar aspect of the distal wrist.
(2) Place the heel of the second hand on the dorsal aspect of the distal wrist.
(3) Squeeze the heels of the hands together.
(4) Apply firm and gradual pressure beginning at the wrist and progress up the forearm.
(5) Maintain patient's wrist in the correct position.
(6) Remove heels of hands from the splint when the contours of the wrist and forearm have been shaped and the splint is cured.
b. Mold splint to the elbow.
(1) Place the heel of one hand on the anterior aspect of the elbow.
(2) Place the heel of one hand on the posterior aspect of the elbow.
Chapter 3: Skill Level Tasks 3-266 STP 8-68B13-SM-TG 15 April 2016
(3) Apply firm and gradual pressure at the elbow, and maintain the elbow in the correct position.
(4) Remove heels of the hands from the splint when contours of the elbow have been shaped and splint is cured.
13. Trim the splint to meet the standards
a. Verify the alignment of the wrist/elbow with a goniometer.
(1) Repeat steps 8a-d.
(2) Verify the wrist measures between 0 - 15 degrees of extension.
NOTE: If the wrist is not within 0 - 15 degrees of extension or ulnar/radial deviation is present, remove the splint and go to step 10.
(3) Repeat steps 9a-c.
(4) Verify the elbow measures at 90 degrees flexion.
NOTE: If the elbow is not within 90 degrees flexion, remove the splint and go to step 10.
b. Check the splint dimensions.
(1) The dorsal edge of the splint is at the base of the MCPJs.
(2) The volar edge of the splint edge is flush with the DPC.
c. Check the range of motion (ROM) of the phalanges and elbow.
(1) Instruct the patient to extend and flex fingers and touch thumb to all fingers.
(2) Instruct the patient to extend and flex the elbow.
(3) Trim back the splint material until the dimensions and ROM standards are met.
14. Check the patient's capillary refill (refer to step 6).
15. Clean the plaster off the patient's skin using a damp wash towel or alcohol pads.
NOTE: Use alcohol pad or fresh water from the faucet and not from the casting bucket.
16. Fit the patient with a sling.
NOTE: Considerations for applying a sling include elderly patients, severity of fractures (e.g., Colles', Smith's, Bennett's), patient's comfort, and physician's or technician's preference.
17. Give the patient verbal and written instructions on splint care.
a. Provide the patient with a copy of the clinic hours and telephone number. Instruct the patient to call the cast clinic with any concerns or questions regarding their cast. For after duty hours concerns, instruct the patient to report to the emergency room.
b. Provide the patient with a cast care booklet or written instructions.
c.Instruct the patient to elevate the arm and flex and extend the uninjured fingers to increase circulation in the hand.
d.Tell the patient: Do not stick any objects down the splint, do not remove the splint, and do not alter the cast (e.g., cutting, removing padding).
18. Annotate the procedure applied to the patient in the medical record or SF 513 (Medical Record – Consultation Sheet).
Chapter 3: Skill Level Tasks 15 April 2016 STP 8-68B13-SM-TG 3-267
NOTE: Record the procedure applied and cast care instructions provided to the patient in patient's medical record or SF 513 and sign your name.
a. Record the procedure applied and splint care instructions provided.
b. Sign your name.
19. Escort or direct the patient to the front desk to make a follow-up appointment.
Evaluation Preparation: You must evaluate the students on their performance of this task in a field condition related to the actual task.
Performance Measures
1. Reviewed the order from the physician.
2. Gathered equipment and materials.
3. Told the patient your name and job title.
4. Explained the procedure to the patient.
5. Inspected the patient's arms.
6 Checked capillary refill of patient's hands/fingers.
7 Prepared the plaster splint for the volar aspect of the hand.
8 Set the patients injured wrist with goniometer.
9 Set the patient's injured elbow with goniometer.
10 Applied volar splint to injured arm.
11 Secured the volar splint to the injured arm.
12 Molded the casting material to the forearm/wrist.
13 Trimmed the splint to meet the standards.
14 Checked patient's capillary refill (referred to step 6).
15 Cleaned the plaster off patient's skin using a damp wash towel or alcohol pads.
16. Fitted the patient with a sling.
17. Gave the patient verbal and written instructions on splint care.
18. Annotated the procedure applied to the patient in the medical record or SF 513.
STP 8-68B13-SM-TG 15 April 2016
Chapter 3: Skill Level Tasks 3-268
GO NO GO
19 Escorted patient to the front desk to make a follow-up appointment.
Evaluation Guidance: Score each Soldier according to the performance measures in the evaluation guide. Unless otherwise stated in the task summary, the Soldier must pass all performance measures to be scored GO. If the Soldier fails any step, show what was done wrong and how to do it correctly.
Chapter 3: Skill Level Tasks 15 April 2016 STP 8-68B13-SM-TG 3-269 Performance Measures GO NO GO
References Required Related SF 513 None
Apply a Long Arm Double Sugar Tong Splint
081-68B-1006
Conditions: You are presented with a physician's written or verbal order to apply a long arm double sugar tong splint (DSTS) to an orthopedic patient. The patient is sitting on an orthopedic examination bed and may be accompanied by a family member/chaperone. Nursing personnel and physician are available. You will need the patient's medical record or Standard Form (SF) 513, Medical Record - Consultation Sheet, work cart/station, plaster rolls, box of plaster reinforcement sheets, webril rolls, elastic bandages, examination gloves, scissors, adhesive tape, hospital pads (chux) or bed sheet, goniometer, bucket of tepid water with plastic bag, sling, cast care booklet or equivalent, box of alcohol pads or damp wash towel, sink with faucet, trash receptacle, and the local standard operating procedures (SOP).
Standards: Apply the long arm double sugar tong splint to the patient's injured arm from the base of the metacarpophalangeal joints (MCPJs), posteriorly around the elbow to the distal palmar crease (DPC) and from the base of the deltoid muscle, around the elbow to 2 inches distal of axilla region, and secure with elastic bandages. The splint immobilizes the wrist and elbow. The splint eliminates ulnar and radial deviation, pronation, and supination; and allows full range of motion (ROM) to the uninjured phalanges and thumb. The capillary refill returns within 1 - 3 seconds.
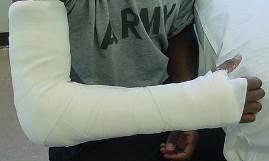
NOTE: See Figure 3-46 for an example of a double sugar tong splint.
Performance Steps:
1. Review the order from the physician.
2. Gather equipment and materials.
NOTE: Physician's order, technician's preference, availability of supplies, and/or patient's extremity size determines which casting material size is used.
a. Gather equipment.
(1) Scissors.
(2) Goniometer
(3) Utility cart
Chapter
Skill
3-270 STP 8-68B13-SM-TG 15 April 2016
3:
Level Tasks
Figure 3-46. Double sugar tong splint
CAUTION: The temperature of the water must be tepid (70° - 80° F) to reduce further injury (possible burns) to the patient. The technician should draw room temperature water and initially use a thermometer to gauge water temperature. The technician must change the water after each application, as the residue in the cast bucket will act as an accelerator causing the casting material to increase in heat emission.
(4) Bucket of tepid water with plastic bag
b.Assemble materials.
(1) W ebril rolls (4 inch)
(2) Plaster rolls (4 inch)
(3) Elastic bandages (2 inch)
(4) Examination gloves.
(5) Hospital pad (chux) or bed sheet
(6) Sling.
(7) Box of plaster reinforcement sheets (4 x 15 or 5 x 30).
(8) Box of alcohol pads or damp wash towel.
(9) Cast care booklet.
(10) Adhesive tape (1 inch).
c.Open and remove two plaster rolls from packages and place on work cart/station.
d. Place the materials on work cart/station.
3. Tell the patient your name and job title.
CAUTION: During the splinting application a chemical response (exothermic reaction) will occur between the water and the plaster (gypsum). This is a saf e and common occurrence. The splint will initially become warm and cool down within 2 - 5 minutes. However, if it doesn't cool down or there is an increase of heat intensity during the splint application, the splint may need to be removed
4. Explain the procedure to the patient.
5. Inspect patient's arms.
CAUTION: Always practice body substance isolation (BSI) prior to applying traction, splints, or casts to patients
a. Place examination gloves on hands.
b. Place the patient in the sitting or supine position on the examination bed.
c. Roll the patient's shirt sleeve above the elbow on the injured side.
d.Inspect both arms for any skin conditions (e.g., cuts, abrasions, lacerations, and skin rashes).
NOTE: Inform physician if conditions are present and follow physician's instructions.
e. Examine both arms and wrists for jewelry and remove if found.
NOTE: All jewelry on both hands and wrists must be removed. Give the jewelry to a family member, secure with the patient, or secure the belongings according to the local SOP.
6. Check capillary refill of patient's hands/fingers.
a. Squeeze patient's fingers; nail beds will turn white.
Chapter 3: Skill Level Tasks 15 April 2016 STP 8-68B13-SM-TG 3-271
CAUTION: If capillary refill is delayed for more than 2 seconds, inform physician and follow physician's instructions
b. Release patient's fingers; nail beds will return pink.
CAUTION: The temperature of the water must be tepid (70°-80° F) to reduce further injury (possible burns) to the patient.
CAUTION: The technician must change the water after each application, as the residue in the cast bucket will act as an accelerator causing the casting material to increase in heat emission
7. Prepare the webril (cast padding) for the first and second splint.
NOTE: Extremity size will determine the splint size (i.e. 4 x 15 or 5 x 30).
a. Prepare webril (cast padding) for the first splint.
CAUTION: All patients should be given a covering (e.g., chux, bed sheet) to reduce damaging their clothing during the casting process and for privacy.
(1) Place hospital pad or bed sheet on patient's lap.
(2) Position the patient's uninjured elbow at a 90 degree angle to the floor. Locate the DPC and MCPJs.
NOTE: The DPC is the distal diagonal line on the volar aspect of the hand. The MCPJs are the knuckles on the dorsal side of the hand.
(3) Measure from the MCPJs, posteriorly around the elbow, to the DPC.
(4) Place the measured webril on work cart/station.
(5) Roll out two to four additional layers to the same length and bisect the middle of the previous webril.
b. Prepare webril (cast padding) for the second splint.
(1) Measure from the base of the deltoid muscle, laterally around the elbow, to the axilla region.
(2) Place the measured webril on work cart/station.
(3) Roll out two to four additional layers to the same length and bisect the middle of the previous webril.
8. Prepare plaster splint for the volar and dorsal aspects of the forearm.
a.Open the applicable size box of plaster reinforcement sheets. Remove the sheets from the box and unwrap the package. Peel back the edges of 10-15 sheets and remove from the stack. Place on work cart/station.
b. Locate DPC and MCPJs.
c. Remove one plaster sheet from the stack of 10-15.
d. Place sheet next to uninjured arm to obtain sheet length and the DPC and MCPJs contours.
e. Hold the plaster sheet vertically and cut a line in the middle of the plaster sheet.
f. Place the sheet on the stack, cut the outlined pattern and excess length for all sheets, and place on work cart/station for later use.
9. Prepare plaster splint for the anterior and posterior aspects of the upper arm.
Chapter 3: Skill Level Tasks 3-272 STP 8-68B13-SM-TG 15 April 2016
a. Remove one plaster sheet from the stack of 10-15.
b. Place the sheet from the base of the deltoid muscle, around the elbow to the axilla region.
c.Place the sheet on the stack, cut the outlined pattern and excess length for all sheets, and place on work cart/station for later use.
10. Set the patient's injured wrist with goniometer.
a. Position the patient's injured elbow on the bump at a 90 degree angle to the upper torso.
b. Place the stationary arm of the goniometer so that it bisects the lateral aspect of the ulnar.
c. Place the protractor of the goniometer on the ulnar styloid.
d. Place the moving arm of the goniometer so that it bisects the 5th phalange.
e. Position the wrist until the goniometer measures between 0-15 degrees of dorsal extension.
11. Set the patient's injured elbow with goniometer.
a. Place the stationary arm of the goniometer so that it bisects the lateral aspect of the humerus.
b.Place the moving arm of the goniometer so that it bisects the forearm.
c. Place the protractor of the goniometer on the olecranon process (elbow).
d. Position the elbow until the goniometer measures 90 degrees of flexion.
12. Apply the first splint to the injured wrist and forearm.
NOTE: Assistance may be used prior to securing splint.
a. Place the plaster sheets in bucket of tepid water and remove when bubbles cease to rise.
b. Squeeze the sheets together to eliminate excess water.
NOTE: Do not wring the sheets. This will cause the roll to dry more quickly.
c Place the plaster sheets centered and 1/2 inch from the edge of the padding.
d. Laminate the plaster splint.
e. Fold over the edges of the padding.
f. Place an additional layer of padding over the folded edges.
g. Place the padded splint from the base of the MCPJs posteriorly around the elbow to the DPC.
13. Apply the second splint to the injured upper arm.
a. Repeat steps 12a-f.
b. Place the padded splint from the base of the deltoid muscle posteriorly around the elbow to the DPC.
14. Secure the double sugar tong splint to the injured arm.
a. Place the edge of the elastic bandage on the ulnar styloid and wrap two rotations around the wrist to secure the edge.
b. Continue through the palm, back up the forearm, and figure of eight around the elbow covering all padding.
c. Secure the elastic bandage with clips.
Chapter 3: Skill Level Tasks 15 April 2016 STP 8-68B13-SM-TG 3-273
d Tape down the elastic bandage between the clips.
e. Remove the clips and dispose of them in trash receptacle.
15. Mold the casting material to the forearm/wrist.
a. Interosseous mold.
NOTE: Molds are done simultaneously. Go back and forth between the molds as the cast cures.
(1) Place the heel of one hand on the volar aspect of the distal wrist.
(2) Place the heel of the second hand on the dorsal aspect of the distal wrist.
(3) Squeeze the heels of the hands together.
(4) Apply firm and gradual pressure beginning at the wrist and progress up the forearm.
(5) Maintain patient's wrist in the correct position.
(6) Remove heels of hands from the splint when the contours of the wrist and forearm have been shaped and the splint is cured.
b. Mold splint to the elbow.
(1) Place the heel of one hand on the anterior aspect of the elbow.
(2) Place the heel of one hand on the posterior aspect of the elbow.
(3) Apply firm and gradual pressure at the elbow, and maintain the elbow in the correct position.
(4) Remove heels of the hands from the splint when contours of the elbow have been shaped and splint is cured.
c. Bicipital.
NOTE: The bicipital mold is used to prevent movement of the humerus in the cast and promote fracture healing.
(1) Place the palm of one hand on the biceps muscle.
(2) Place the palm of the second hand on the triceps muscle.
(3) Press the palms together to conform the plaster to the upper arm.
(4) Apply firm and gradual pressure beginning at the ulnar styloid, progress up the forearm and upper arm whilemaintaining the patient's elbow in the correct position.
(5) Remove the hands from the splint when the contours of the forearm and upper arm have been shaped and the splint is cured.
16. Trim the splint to meet the standards.
a. Verify the alignment of the injured wrist/elbow with goniometer.
(1) Repeat steps 10b-e.
(2) Verify the wrist measures between 0-15 degrees of extension.
NOTE: If wrist is not within 0-15 degrees of extension or ulnar or radial deviation are present, remove splint and go to step 12.
(3) Repeat steps 11a-d.
(4) Verify the elbow measures at 90 degrees of flexion.
NOTE: If wrist is not within 90 degrees of flexion, remove splint and go to step 13.
b. Check the splint dimensions.
Chapter 3: Skill Level Tasks 3-274 STP 8-68B13-SM-TG 15 April 2016
(1) The distal edge of the splint is at the base of the MCPJs.
(2) The volar edge of the splint edge is flush with the DPC.
(3) The proximal edge of the splint rest 2 inches distal to the axilla region or at the base of the deltoid muscle.
c. Check the range of motion (ROM) of the phalanges and elbow.
(1) Instruct the patient to extend and flex fingers and touch thumb to all fingers.
(2) Instruct the patient to abduct and adduct shoulders.
17. Check the patient's capillary refill (refer to step 6).
18. Clean the plaster off the patient's skin using a damp wash towel or alcohol pads.
NOTE: Use alcohol pad or fresh water from the faucet and not from the casting bucket.
19. Fit the patient with a sling.
NOTE: Considerations for applying a sling include elderly patients, severity of fractures (e.g., Colles', Smith's, Bennett's), patient's comfort, and physician's or technician's preference.
20. Give the patient verbal and written instructions on splint care.
a. Provide the patient with a copy of the clinic hours and telephone number. Instruct the patient to call the cast clinic with any concerns or questions regarding their cast. For after duty hours concerns, instruct the patient to report to the emergency room.
b. Provide the patient with a cast care booklet or written instructions.
c. Instruct the patient to elevate the arm and flex and extend the uninjured fingers to increase circulation in the hand.
d.Tell the patient: Do not stick any objects down the splint, do not remove the splint, and do not alter the cast (e.g., cutting, removing padding).
21. Annotate the procedure applied to the patient in the medical record or SF 513 (Medical Record – Consultation Sheet).
NOTE: Record the procedure applied and cast care instructions provided to the patient in patient's medical record or SF 513 and sign your name.
a. Record the procedure applied and splint care instructions provided.
b. Sign your name.
22. Escort or direct the patient to the front desk to make a follow-up appointment.
Evaluation Preparation: You must evaluate the students on their performance of this task in a field condition related to the actual task.
Performance Measures
1. Reviewed the order from the physician.
2. Gathered equipment and materials.
3. Told the patient your name and job title.
GO NO GO
Chapter 3: Skill Level Tasks 15 April 2016 STP 8-68B13-SM-TG 3-275
4 Explained the procedure to the patient.
5 Inspected the patient's arms.
6. Checked capillary refill of patient's hands/fingers.
7. Prepared the webril (cast padding) for the first and second splint.
8. Prepared plaster splint for the volar and dorsal aspects of the forearm.
9. Prepared plaster splint for the anterior and posterior aspects of the upper arm.
10. Set the patients injured wrist with goniometer.
11. Set the patient's injured elbow with goniometer.
12. Applied the first splint to the injured wrist and forearm.
13. Applied the second splint to the injured upper arm.
14 Secured the double sugar tong splint to the injured arm.
15 Molded the casting material to the forearm/wrist.
16 Trimmed the splint to meet the standards.
17 Checked patient's capillary refill (referred to step 6).
18 Cleaned the plaster off patient's skin using a damp wash towel or alcohol pads.
19 Fitted the patient with a sling.
20 Gave the patient verbal and written instructions on splint care.
21 Annotated the procedure applied to the patient in the medical record or SF 513.
22 Escorted or directed patient to the front desk to make a follow-up appointment.
Evaluation Guidance: Score each Soldier according to the performance measures in the evaluation guide. Unless otherwise stated in the task summary, the Soldier must pass all performance measures to be scored GO. If the Soldier fails any step, show what was done wrong and how to do it correctly.
Chapter
3-276 STP 8-68B13-SM-TG 15 April 2016
3: Skill Level Tasks
GO NO GO
Performance Measures
Chapter 3: Skill Level Tasks 15 April 2016 STP 8-68B13-SM-TG 3-277 References Required Related SF 513 None
Apply an Upper Extremity Compression Dressing
081-68B-1007
Conditions: You are presented with a physician's written or verbal order to apply a upper extremity compression dressing to an orthopedic patient. The patient is sitting on an orthopedic examination bed and may be accompanied by a family member/chaperone. Nursing personnel and physician are available. You will need the patient's medical record or Standard Form (SF) 513, Medical Record - Consultation Sheet, work cart/station, plaster rolls, box of plaster reinforcement sheets, webril rolls, elastic bandages, examination gloves, scissors, adhesive tape, hospital pads (chux) or bed sheet, goniometer, bucket of tepid water with plastic bag, sling, cast care booklet or equivalent, box of alcohol pads or damp wash towel, sink with faucet, trash receptacle, and the local standard operating procedures (SOP).
Standards: Apply the upper extremity compression dressing with kerlix and a reinforcement splint to the injured arm from 1/8 inch from the distal palmar crease (DPC) to 1-1 1/2 inch distal to the cubitum space and secure with elastic bandages. The splint immobilizes the wrist and forearm. The splint eliminates ulnar and radial deviation, pronation, and supination; and allows full range of motion (ROM) to the uninjured phalanges, elbow, and thumb. The capillary refill returns within 1 - 3 seconds.

NOTE: See Figure 3-47 for an example of an upper extremity compression dressing.
Performance Steps:
1. Review the order from the physician.
2. Gather equipment and materials.
NOTE: Physician's order, technician's preference, availability of supplies, and/or patient's extremity size determines which casting material size is used.
a. Gather equipment.
(1) Scissors.
(2) Goniometer.
3-278 STP 8-68B13-SM-TG 15 April 2016
Chapter 3: Skill Level Tasks
Figure 3-47. Upper extremity compression dressing
(3) Utility cart
CAUTION: The temperature of the water must be tepid (70 - 80° F) to reduce further injury (possible burns) to the patient. The technician should draw room temperature water and initially use a thermometer to gauge water temperature. The technician must change the water after each application, as the residue in the cast bucket will act as an accelerator causing the casting material to increase in heat emission
(4) Bucket of tepid water with plastic bag
b.Assemble materials.
(1) W ebril rolls (4 inch)
(2) Plaster rolls (4 inch).
(3) Kerlix fluffs
(4) Kerlix rolls.
(5) Elastic bandages (2 inch).
(6) Examination gloves.
(7) Hospital pad (chux) or bed sheet.
(8) Sling.
(9) Box of plaster reinforcement sheets (4 x 15 or 5 x 30).
(10) Box of alcohol pads or damp wash towel.
(11) Cast care booklet.
(12) Adhesive tape (1 inch).
c. Open and remove two plaster rolls from packages and place on work cart/station.
d. Place the materials on work cart/station.
3. Tell the patient your name and job title.
CAUTION: During the splinting application a chemical response (exothermic reaction) will occur between the water and the plaster (gypsum). This is a safe and common occurrence. The splint will initially become warm and cool down within 2 - 5 minutes. However, if it doesn't cool down or there is an increase of heat intensity during the splint application, the splint may need to be removed
4. Explain the procedure to the patient.
5. Inspect patient's arms.
CAUTION: Always practice body substance isolation (BSI) prior to applying traction, splints, or casts to patients.
a. Place examination gloves on hands.
b.Place the patient in the sitting or supine position on the examination bed.
c. Roll the patient's shirt sleeve above the elbow on the injured side.
d.Inspect both arms for any skin conditions (e.g., cuts, abrasions, lacerations, and skin rashes).
NOTE: Inform physician if conditions are present and follow physician's instructions.
e. Examine both arms and wrists for jewelry and remove if found.
Chapter 3: Skill Level Tasks 15 April 2016 STP 8-68B13-SM-TG 3-279
NOTE: All jewelry on both hands and wrists must be removed. Give the jewelry to a family member, secure with the patient, or secure the belongings according to the local SOP.
6. Check capillary refill of patient's hands/fingers.
a. Squeeze patient's fingers; nail beds will turn white.
CAUTION: If capillary refill is delayed for more than 2 seconds, inform physician and follow physician's instructions.
b. Release patient's fingers; nail beds will return pink.
CAUTION: The temperature of the water must be tepid (70°-80° F) to reduce further injury (possible burns) to the patient.
7. Prepare the plaster splint for the volar aspect of the hand.
NOTE: Extremity size will determine the splint size (i.e. 4 x 15 or 5 x 30).
a. Prepare webril (cast padding) for the volar splint.
(1) Place hospital pad or bed sheet on patient's lap.
(2) Position the patient's uninjured elbow at a 45 degree angle to the floor. Locate the DPC, thenar muscle, and the cubitum space.
NOTE: The DPC is furthest diagonal line on the volar aspect of the hand. The thenar muscle is at the base of the thumb on the volar aspect of the hand. The crease is noticeable when the thumb and 5th phalange (pinky finger) are brought together. The cubitum space is located at the bend of the arm.
(3) Measure from 1 inch distal to the DPC to 1 inch distal to the cubitum space.
(4) Place the measured webril on work cart/station.
(5) Roll out two to four additional layers to the same length and bisect the middle of the previous webril
b.Open the applicable size box of plaster reinforcement sheets. Remove the sheets from the box and unwrap the package. Peel back the edges of 10-15 sheets and remove from the stack. Place on work cart/station.
NOTE: The technician may choose to use plaster rolls in lieu of pre-sized reinforcement sheets.
CAUTION: All patients should be given a covering (e.g., chux, bed sheet) to reduce damaging their clothing during the casting process and for privacy.
(1) Place the patient's uninjured hand in the supine position (palm up) and locate the DPC, thenar eminance, and the cubitum space.
(2) Remove one plaster sheet from the stack of five.
(3) Place the sheet next to the uninjured arm to obtain the sheet length, and the DPC and thenar muscle contours.
(4) Draw a diagonal line on the plaster sheet that matches with the DPC of the patient's hand.
NOTE: The diagonal cut facilitates full ROM of the fingers (extension and flexion).
Chapter 3: Skill Level Tasks 3-280 STP 8-68B13-SM-TG 15 April 2016
(5) Draw a curved line (half moon shape) on the plaster sheet that matches with the outer border of the thenar muscle on the patient's hand.
NOTE: The half moon pattern enables the thenar muscle to be observable and the thumb to adduct to all fingers promoting full ROM
(6) Place the measured sheet on the stack and cut the outlined patterns and excess length for all sheets. Place the stack on the work cart/station for later use.
(7) Discard excess material in the trash receptacle.
8. Set the patients injured wrist with goniometer.
a. Position the patient's injured elbow on the bump at a 45 degree angle to the upper extremity.
b.Place the stationary arm of the goniometer so that it bisects the lateral aspect of the ulnar.
c. Place the protractor of the goniometer on the ulnar styloid.
d. Place the moving arm of the goniometer so that it bisects the 5th phalange.
e.Position the wrist until the goniometer measures between 0-15 degrees extension.
9. Apply kerlix fluffs.
a.Prepare kerlix fluffs.
(1) Open kerlix fluff package.
(2) Remove and unfold the kerlix fluffs.
(3) Place kerlix fluffs between each phalange.
b. Secure kerlix fluffs with kerlix roll.
(1) Hold kerlix roll with one hand.
(2) Place the edge of the kerlix roll on the ulnar styloid and begin wrapping around the wrist two rotations to secure the edge.
(3) Continue through the palm, fan folding between the phalanges back up the forearm ending 1 inch distal to the cubitum space.
10. Apply volar splint to injured arm.
NOTE: Assistance may be used prior to securing splint.
a. Place the plaster sheets in bucket of tepid water and remove when bubbles cease to rise.
b. Squeeze the sheets together to eliminate excess water.
NOTE: Do not wring the sheets. This will cause the roll to dry more quickly.
c Place the plaster sheets centered and 1/2 inch from the edge of the padding.
d. Laminate the plaster splint.
e. Fold over the edges of the padding.
f. Place an additional layer of padding over the folded edges.
g. Place the padded splint on the volar aspect of the hand aligned with the DPC and the thenar muscle.
11. Secure the volar splint to the injured arm.
a. Place the edge of the elastic bandage on the ulnar styloid and wrap two rotations around the wrist to secure the edge.
Chapter 3: Skill Level Tasks 15 April 2016 STP 8-68B13-SM-TG 3-281
b. Continue through the palm and back up the forearm covering all padding.
c. Secure the elastic bandage with clips at the back of the wrist.
d.Tape down the elastic bandage between the clips.
e. Remove the clips and dispose of them in trash receptacle.
12. Mold the casting material to the forearm/wrist.
a. Place the heel of one hand on the volar aspect of the distal wrist.
b Place the heel of the second hand on the dorsal aspect of the distal wrist.
c. Squeeze the heels of the hands together.
d. Apply firm and gradual pressure beginning at the wrist and progress up the forearm.
e. Maintain patient's wrist in the correct position.
f.Remove heels of hands from the splint when the contours of the wrist and forearm have been shaped and the splint is cured.
13. Trim the splint to meet the standards.
a. Verify the alignment of the injured wrist with a goniometer.
(1) Repeat steps 8a-c.
(2) Verify the wrist measures between 0-15 degrees of extension.
NOTE: If wrist is not within 0-15 degrees of extension or ulnar or radial deviation are present, remove splint and go to step 9.
b. Verify the splint dimensions.
(1) The splint edge is resting on the DPC.
(2) The splint edge is resting on the thenar muscle border.
(3) The proximal edge is 1-1 ½ inches from the cubitum space.
c. Check the range of motion (ROM) of the phalanges and elbow.
(1) Instruct the patient to extend and flex fingers and touch thumb to all fingers.
(2) Instruct the patient to extend and flex the elbow.
(3) Trim back the splint material until the dimensions and ROM standards are met.
14. Check the patient's capillary refill (refer to step 6).
15. Clean the plaster off the patient's skin using a damp wash towel or alcohol pads.
NOTE: Use alcohol pad or fresh water from the faucet and not from the casting bucket.
16. Fit the patient with a sling.
NOTE: Considerations for applying a sling include elderly patients, severity of fractures (e.g., Colles', Smith's, Bennett's), patient's comfort, and physician's or technician's preference.
17. Give the patient verbal and written instructions on splint care.
a. Provide the patient with a copy of the clinic hours and telephone number. Instruct the patient to call the cast clinic with any concerns or questions regarding their cast. For after duty hours concerns, instruct the patient to report to the emergency room.
b. Provide the patient with a cast care booklet or written instructions.
c.Instruct the patient to elevate the arm and flex and extend the uninjured fingers to increase circulation in the hand.
d.Tell the patient: Do not stick any objects down the splint, do not remove the splint, and do not alter the cast (e.g., cutting, removing padding).
Chapter 3: Skill Level Tasks 3-282 STP 8-68B13-SM-TG 15 April 2016
18. Annotate the procedure applied to the patient in the medical record or SF 513
NOTE: Record the procedure applied and cast care instructions provided to the patient in patient's medical record or SF 513 and sign your name.
a. Record the procedure applied and splint care instructions provided.
b. Sign your name.
19. Escort or direct the patient to the front desk to make a follow-up appointment.
Evaluation Preparation: None.
Performance Measures
1. Reviewed the order from the physician.
2. Gathered equipment and materials.
3. Told the patient your name and job title.
4. Explained the procedure to the patient.
5. Inspected the patient's arms.
6 Checked capillary refill of patient's hands/fingers.
7 Prepared the plaster splint for the volar aspect of the hand.
8 Set the patients injured wrist with goniometer.
9 Applied kerlix fluffs.
10 Applied volar splint to injured arm.
11 Secured the volar splint to the injured arm.
12 Molded the casting material to the forearm/wrist.
13 Trimmed the splint to meet the standards.
14 Checked patient's capillary refill (referred to step 6).
15 Cleaned the plaster off patient's skin using a damp wash towel or alcohol pads.
16. Fitted the patient with a sling.
17. Gave the patient verbal and written instructions on splint care.
18. Annotated the procedure applied to the patient in the medical record or SF 513.
Chapter 3: Skill Level Tasks 15 April 2016 STP 8-68B13-SM-TG 3-283
NO GO
GO
Chapter 3: Skill Level Tasks
19 Escorted or directed patient to the front desk to make a follow-up appointment.
Evaluation Guidance: Score each Soldier according to the performance measures in the evaluation guide. Unless otherwise stated in the task summary, the Soldier must pass all performance measures to be scored GO. If the Soldier fails any step, show what was done wrong and how to do it correctly.
References
Required
SF 513
Related
None
3-284 STP 8-68B13-SM-TG 15 April 2016 Performance Measures GO NO GO
Apply a Radial Gutter Splint
081-68B-1003
Conditions: You are presented with a physician's written or verbal order to apply a radial gutter splint to an orthopedic patient. The patient is sitting on an orthopedic examination bed and may be accompanied by a family member/chaperone. Nursing personnel and physician are available. You will need the patient's medical record or Standard Form (SF) 513, Medical Record - Consultation Sheet, work cart/station, plaster rolls, box of plaster reinforcement sheets, webril rolls, elastic bandages, examination gloves, scissors, adhesive tape, hospital pads (chux) or bed sheet, goniometer, bucket of tepid water with plastic bag, sling, cast care booklet or equivalent, box of alcohol pads or damp wash towel, sink with faucet, trash receptacle, and the local standard operating procedure (SOP)
Standards: Apply the radial gutter splint to the patient's injured arm from the tip of the index and middle fingers to 1 - 1 1/2 inch distal to the cubitum space and secure with elastic bandages. The splint immobilizes the wrist, with the wrist at 15 - 30 degrees of dorsal flexion an the 1st and 2nd phalanges at 70 - 90 degrees of flexion; eliminates ulnar and radial deviation, pronation, and supination; and allows full range of motion (ROM) to the uninjured phalanges and thumb. The capillary refill returns within 1 - 3 seconds.

NOTE: See Figure 3-48 for an example of a radial gutter splint.
Performance Steps:
1. Review the order from the physician.
2. Gather equipment and materials.
NOTE: Physician's order, technician's preference, availability of supplies, and/or patient's extremity size determines which casting material size is used.
a. Gather equipment.
(1) Scissors.
(2) Goniometer
Chapter 3: Skill Level Tasks 15 April 2016 STP 8-68B13-SM-TG 3-285
Figure 3-48. Radial gutter splint
(3) Utility cart
CAUTION: The temperature of the water must be tepid (70° - 80°F) to reduce further injury (possible burns) to the patient. The technician should draw room temperature water and initially use a thermometer to gauge water temperature. The technician must change the water after each application, as the residue in the cast bucket will act as an accelerator causing the casting material to increase in heat emissION.
(4) Bucket of tepid water with plastic bag
b.Assemble materials.
(1) W ebril rolls (4 inch)
(2) Plaster rolls (4 inch).
(3) Elastic bandages (2 inch)
(4) Examination gloves.
(5) Hospital pad (chux) or bed sheet.
(6) Sling .
(7) Box of plaster reinforcement sheets (4 x 15 or 5 x 30).
(8) Box of alcohol pads or damp wash towel.
(9) Cast care booklet.
(10) Adhesive tape (1 inch).
c. Open and remove two plaster rolls from packages and place on work cart/station.
d. Place on work cart or station.
3. Tell the patient your name and job title.
CAUTION: During the splinting application a chemical response (exothermic reaction) will occur between the water and the plaster (gypsum). This is a safe and common occurrence. The splint will initially become warm and cool down within 2 - 5 minutes. However, if it doesn't cool down or there is an increase of heat intensity during the splint application, the splint may need to be removed.
4. Explain the procedure to the patient.
5. Inspect the patient's arms.
CAUTION: Always practice body substance isolation (BSI) prior to applying traction, splints, or casts to patients.
a. Place examination gloves on hands.
b. Place the patient in the sitting or supine position on the examination bed.
c. Roll the patient's shirt sleeve above the elbow on the injured side.
d.Inspect both arms for any skin conditions (e.g., cuts, abrasions, lacerations, and skin rashes).
NOTE: Inform the physician if conditions are present and follow the physician's instructions.
e. Examine both arms and wrists for jewelry and remove if found.
NOTE: All jewelry on both hands and wrists must be removed. Give the jewelry to a family member, secure with the patient, or secure the belongings according to the local SOP.
Chapter 3: Skill Level Tasks 3-286 STP 8-68B13-SM-TG 15 April 2016
6. Check capillary refill of patient's hands/fingers.
a. Squeeze patient's fingers; nail beds will turn white.
CAUTION: If capillary refill is delayed for more than 2 seconds, inform the physician and follow the physician's instructions.
b. Release patient's fingers; nail beds will return pink.
7. Prepare the plaster splint for the radial side of the hand and forearm.
NOTE: Extremity size will determine the splint size (i.e. 4 x 15 or 5 x 30).
a. Prepare webril (cast padding) for the radial gutter splint.
(1) Place hospital pad or bed sheet on patient's lap.
NOTE: All patients should be given a covering (e.g., chux, bed sheet) to reduce damaging their clothing during the casting process and for privacy.
(2) Position the patient's uninjured elbow at a 45 degree angle to the floor.
(3) Measure from 1 inch distal to the tips of 1st and 2nd phalanges to 1 inch distal to the cubitum space.
(4) Place the measured webril on the work cart/station.
(5) Roll out two to four additional layers to the same length and bisect the middle of the previous webril.
b.Open the applicable size box of plaster reinforcement sheets. Remove the sheets from the box and unwrap the package. Peel back the edges of 10-15 sheets and remove from the stack. Place on work cart/station.
NOTE: The technician may choose to use plaster rolls in lieu of pre-sized reinforcement sheets.
c Locate the 1st and 2nd metacarpals.
d. Remove one plaster sheet from the stack of 10-15.
e. Place the sheet on the dorsal side of the patient's hand/forearm, distal to the 1st and 2nd phalanges and covering the metacarpals.
NOTE: The plaster sheets must be wide enough to cover the volar and dorsal aspects of the 1st and 2nd metacarpals and long enough (distal to the injured phalanges to 1 – 1 ½ inch to the cubitum space) to protect the injury.
f Hold the plaster sheet vertically and cut a line in the middle of the plaster sheet.
NOTE: The vertical cut needs to be long enough to enable full ROM of the thumb and enables the plaster to be evenly centered both on the dorsal and volar sides of the phalanges.
g. Place the sheet on the stack, cut the outlined pattern and excess length for all sheets, and place on work cart/station for later use.
NOTE: Discard all excess material in the trash receptacle.
8. Set the patient's injured wrist between 15 - 30 degrees of dorsal flexion.
Chapter 3: Skill Level Tasks 15 April 2016 STP 8-68B13-SM-TG 3-287
a. Position the patient's injured elbow on the bump at a 45 degree angle to the upper extremity.
b. Place the stationary arm of the goniometer so that it bisects the lateral aspect of the ulnar.
c. Place the protractor of the goniometer on the ulnar styloid.
d.Place the moving arm of the goniometer so that it bisects the 5th phalange.
e. Position the wrist until the goniometer measures between 15 - 30 degrees of dorsal flexion.
9. Set the patient's 1st and 2nd phalanges between 70-90 degrees of flexion.
a.Place the stationary arm of the goniometer so that it bisects the 1st metacarpal.
b. Place the protractor of the goniometer on the head of the first metacarpal.
c. Place the moving arm of the goniometer so that it bisects the 1st phalange.
d. Set the injured phalanges until the goniometer measures between 70-90 degrees of flexion.
10. Apply the radial gutter splint to the injured hand/arm.
NOTE: Assistance may be used prior to securing splint.
a. Place a strip of webril between the injured phalanges.
b. Place the plaster sheets in bucket of tepid water and remove when bubbles cease to rise.
c. Squeeze the sheets together to eliminate excess water.
NOTE: Do not wring the sheets. This will cause the roll to dry more quickly.
d Place the plaster sheets centered and 1/2 inch from the edge of the padding.
e. Laminate the plaster splint.
f. Fold over the edges of the padding.
g. Place an additional layer of padding over the folded edges.
h. Place the padded splint from the tips of the injured phalanges to 1 - 1 1/2 inches distal to the cubitum space.
11. Secure the radial gutter splint to the injured phalanges and arm.
a. Place the edge of the elastic bandage on the radial styloid and wrap two rotations around the wrist to secure the edge.
b.Continue through the palm, around the index and middle phalanges to 1 - 1 1/2 inches distal to the cubitum space.
c. Secure the elastic bandage with clips at the back of the wrist.
d.Tape down the elastic bandage between the clips.
e. Remove the clips and dispose of them in trash receptacle.
CAUTION: Excessive pressure may result in further patient injury. Talk to the patient while performing this procedure (e.g., How do you feel? Is the pressure too much?).
12. Mold the casting material to the forearm/wrist.
NOTE: Molds are done simultaneously. Go back and forth between the molds as the cast cures.
a. Interosseous mold.
Chapter 3: Skill
3-288 STP 8-68B13-SM-TG 15 April 2016
Level Tasks
NOTE: The interosseous mold is used to prevent movement of the wrist in the cast and promote fracture healing.
(1) Place the heel of one hand on the volar aspect of the distal wrist.
(2) Place the heel of the second hand on the dorsal aspect of the distal wrist.
(3) Squeeze the heels of the hands together.
(4) Apply firm and gradual pressure beginning at the wrist and progress up the forearm.
(5) Maintain patient's wrist in the correct position.
(6) Remove heels of hands from the splint when the contours of the wrist and forearm have been shaped and the splint is cured.
b. 2nd and 3rd metacarpal mold.
NOTE: This mold is used to prevent movement of the metacarpals in the splint and promote fracture healing.
(1) Place the heel of the hand on the dorsal aspect of the injured phalanges and apply gradual pressure.
NOTE: The physician may apply an additional mold.
(2) Maintain patient's injured phalanges in the correct position.
(3) Remove the palm of the hand from the splint when the contours of the phalanges and wrist have been shaped, the phalanges are between 70-90 degrees of flexion, and the splint is cured.
13. Check the ROM of the phalanges and thumb.
a. Instruct the patient to extend and flex the uninjured fingers.
b. Instruct the patient to rotate the thumb.
c. Trim back the splint until full ROM is met.
14. Check the alignment of the injured wrist and injured fingers with goniometer.
a. Verify the wrist is set at 15 - 30 degrees of flextion (refer to steps 8b-d).
b. Verify the phalanges are set at 70 - 90 degrees of flexion (refer to steps 9a-c).
c. Remove the splint and return to step 2.
15. Check the splint dimensions.
a.The splint edges are 1 - 1 1/2 inches distal to the cubitum space and 1/2 inch distal to the injured phalanges' tips.
b.The splint is covering both the 1st and 2nd metacarpals and is 1/2 inch distal to the injured phalanges.
c. Remove the splint and go to step 2.
16. Check the patient's capillary refill (refer to step 6).
17. Clean the plaster off the patient's skin using a damp wash towel or alcohol pads.
18. Fit the patient with a sling.
19. Give the patient verbal and written instructions on splint care.
Chapter 3: Skill Level Tasks 15 April 2016 STP 8-68B13-SM-TG 3-289
a. Provide the patient with a copy of the clinic hours and telephone number. Instruct the patient to call the cast clinic with any concerns or questions regarding their cast. For after duty hours concerns, instruct the patient to report to the emergency room.
b. Provide the patient with a cast care booklet or written instructions.
c.Instruct the patient to elevate the arm and flex and extend the uninjured fingers to increase circulation in the hand.
d. Instruct the patient on what not to do:
(1) Do not stick any objects down the splint.
(2) Do not remove the splint.
(3) Do not alter the splint (e.g., writing or coloring the cast).
20. Annotate the procedure applied to the patient in the medical record or SF 513.
a. Record the procedure applied and cast care instructions provided.
b. Sign your name.
21. Escort or direct the patient to the front desk to make a follow-up appointment.
Evaluation Preparation: You must evaluate the students on their performance of this task in a field condition related to the actual task.
Performance Measures
1 Reviewed the order from the physician.
2 Gathered equipment and materials.
3 Told the patient your name and job title.
4 Explained the procedure to the patient.
5 Inspected the patient's arms.
6 Checked capillary refill of patient's hands/fingers.
7 Prepared the plaster splint for the radial side of the hand and forearm.
8 Set the patient's injured wrist with the goniometer.
9 Set the patient's 1st and 2nd phalanges with the goniometer.
10. Applied radial gutter splint to injured hand/arm.
11. Secured radial gutter splint to injured phalanges and arm.
12. Molded the casting material to the forearm/wrist.
13. Checked the ROM of the phalanges and thumb.
14. Checked the alignment of the injured wrist and injured fingers with goniometer.
STP 8-68B13-SM-TG 15 April 2016
Chapter 3: Skill Level Tasks 3-290
GO NO GO
15 Checked splint dimensions.
16 Checked patient's capillary refill (referred to step 6).
17. Cleaned the plaster off the patient's skin using a damp wash towel or alcohol pads.
18. Fit the patient with a sling.
19. Gave the patient verbal and written instructions on splint care.
20. Annotated the procedure applied to patient in medical record or SF 513.
21. Escorted patient to front desk to make a follow-up appointment.
Evaluation Guidance: Score each Soldier according to the performance measures in the evaluation guide. Unless otherwise stated in the task summary, the Soldier must pass all performance measures to be scored GO. If the Soldier fails any step, show what was done wrong and how to do it correctly.
Chapter 3: Skill Level Tasks 15 April 2016 STP 8-68B13-SM-TG 3-291
Measures GO NO GO
Performance
Required Related SF 513 None
References
Apply a Thumb Spica Splint
081-68B-1004
Conditions: You are presented with a physician's written or verbal order to apply a thumb spica splint to an orthopedic patient. The patient is sitting on an orthopedic examination bed and may be accompanied by a family member/chaperone. Nursing personnel and physician are available. You will need the patient's medical record or Standard Form (SF) 513, Medical Record - Consultation Sheet, work cart/station, plaster rolls, box of plaster reinforcement sheets, webril rolls, elastic bandages, examination gloves, scissors, adhesive tape, hospital pads (chux) or bed sheet, goniometer, bucket of tepid water with plastic bag, sling, cast care booklet or equivalent, box of alcohol pads or damp wash towel, sink with faucet, trash receptacle, and the local standard operating procedures (SOP).
Standards: Apply a thumb spica splint to the patient's injured arm from the tip of the thumb to 1 inch distal to the cubitum space and secure with elastic bandages. The splint immobilizes the wrist and thumb. The splint eliminates ulnar and radial deviation, pronation, and supination; and allows full range of motion (ROM) to the uninjured phalanges. The capillary refill returns within 1 - 3 seconds.
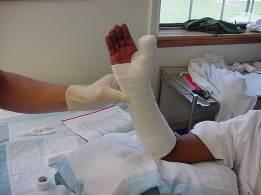
NOTE: See Figure 3-49 for an example of a thumb spica splint.
Performance Steps:
1. Review the order from the physician.
2. Gather equipment and materials.
NOTE: Physician's order, technician's preference, availability of supplies, and/or patient's extremity size determines which casting material size is used.
a. Gather equipment.
(1) Scissors.
(2) Goniometer
(3) Utility cart
3-292 STP 8-68B13-SM-TG 15 April 2016
Chapter 3: Skill Level Tasks
Figure 3-49. Thumb spica splint
CAUTION: The temperature of the water must be tepid (70° - 80° F) to reduce further injury (possible burns) to the patient. The technician should draw room temperature water and initially use a thermometer to gauge water temperature. The technician must change the water after each application, as the residue in the cast bucket will act as an accelerator causing the casting material to increase in heat emission.
(4) Bucket of tepid water with plastic bag
b. Assemble materials.
(1) W ebril rolls (4 inch)
(2) Plaster rolls (4 inch)
(3) Elastic bandages (2 inch)
(4) Examination gloves.
(5) Hospital pad (chux) or bed sheet
(6) Sling.
(7) Box of plaster reinforcement sheets (4 x 15 or 5 x 30).
(8) Box of alcohol pads or damp wash towel.
(9) Cast care booklet.
(10) Adhesive tape (1 inch).
c.Open and remove two plaster rolls from packages and place on work cart/station.
d. Place the materials on work cart/station.
3. Tell the patient your name and job title.
CAUTION: During the splinting application a chemical response (exothermic reaction) will occur between the water and the plaster (gypsum). This is a safe and common occurrence. The splint will initially become warm and cool down within 2 - 5 minutes. However, if it doesn't cool down or there is an increase of heat intensity during the splint application, the splint may need to be removed
4. Explain the procedure to the patient.
5. Inspect patient's arms.
CAUTION: Always practice body substance isolation (BSI) prior to applying traction, splints, or casts to patients
a. Place examination gloves on hands.
b. Place the patient in the sitting or supine position on the examination bed.
c. Roll the patient's shirt sleeve above the elbow on the injured side.
d.Inspect both arms for any skin conditions (e.g., cuts, abrasions, lacerations, and skin rashes).
NOTE: Inform physician if conditions are present and follow physician's instructions.
e. Examine both arms and wrists for jewelry and remove if found.
NOTE: All jewelry on both hands and wrists must be removed. Give the jewelry to a family member, secure with the patient, or secure the belongings according to the local SOP.
6. Check capillary refill of patient's hands/fingers.
a. Squeeze patient's fingers; nail beds will turn white.
Chapter 3: Skill Level Tasks 15 April 2016 STP 8-68B13-SM-TG 3-293
CAUTION: If capillary refill is delayed for more than 2 seconds, inform physician and follow physician's instructions
b. Release patient's fingers; nail beds will return pink.
CAUTION: The temperature of the water must be tepid (70°-80° F) to reduce further injury (possible burns) to the patient.
CAUTION: The technician must change the water after each application, as the residue in the cast bucket will act as an accelerator causing the casting material to increase in heat emission.
7. Prepare the plaster splint for the thumb spica splint.
NOTE: Extremity size will determine the splint size (i.e. 4 x 15 or 5 x 30).
a. Prepare webril (cast padding) for the thumb spica splint.
CAUTION: All patients should be given a covering (e.g., chux, bed sheet) to reduce damaging their clothing during the casting process and for privacy.
(1) Place hospital pad or bed sheet on patient's lap.
(2) Position the patient's uninjured elbow at a 45 degree angle to the floor.
(3) Measure from 1 inch distal to the tip of the thumb to the cubitum space.
(4) Place the measured webril on work cart/station.
(5) Roll out two to four additional layers to the same length and bisect the middle of the previous webril.
b Open the applicable size box of plaster reinforcement sheets. Remove the sheets from the box and unwrap the package. Peel back the edges of 10-15 sheets and remove from the stack. Place on work cart/station.
NOTE: The technician may choose to use plaster rolls in lieu of pre-sized reinforcement sheets.
c Remove one plaster sheet from the stack of 10-15.
d. Place sheet next to uninjured arm to obtain sheet length.
8. Set the patients injured wrist with goniometer.
a Position the patient's injured elbow on the bump at a 45 degree angle to the upper extremity.
b. Place the stationary arm of the goniometer so that it bisects the lateral aspect of the ulnar.
c. Place the protractor of the goniometer on the ulnar styloid.
d. Place the moving arm of the goniometer so that it bisects the 5th phalange.
e. Position the wrist until the goniometer measures between 0-15 degrees of dorsal extension.
9. Apply thumb spica splint to injured thumb.
NOTE: Assistance may be used prior to securing splint.
Chapter 3: Skill Level Tasks 3-294 STP 8-68B13-SM-TG 15 April 2016
a. Place the plaster sheets in bucket of tepid water and remove when bubbles cease to rise.
b. Squeeze the sheets together to eliminate excess water.
NOTE: Do not wring the sheets. This will cause the roll to dry more quickly.
c Place the plaster sheets centered and 1/2 inch from the edge of the padding.
d. Laminate the plaster splint.
e. Fold over the edges of the padding.
f. Place an additional layer of padding over the folded edges.
g. Place the padded splint from the tip of the injured thumb to 1 inch distal to the cubitum space.
10. Secure the thumb spica splint to the injured thumb and arm.
a. Place the edge of the elastic bandage on the ulnar styloid and wrap two rotations around the wrist to secure the edge.
b. Continue through the palm, around the thumb, and back down the forearm ending 1 inch distal to the cubitum space.
c. Secure the elastic bandage with clips.
d.Tape down the elastic bandage between the clips.
e. Remove the clips and dispose of them in trash receptacle.
11. Mold the casting material to the thumb.
NOTE: Molds are done simultaneously. Go back and forth between the molds as the cast cures.
a. Place the heel of one hand around the thumb (cup mold).
b. Apply firm and gradual pressure beginning at the tip of the thumb and progress down the radius.
c. Maintain patient's wrist in the correct position.
d. Remove heels of hands from the splint when the contours of the thumb and forearm wrist have been shaped and the splint is cured.
12. Trim the splint to meet the standards.
a. Verify the alignment of the injured wrist with a goniometer.
(1) Repeat steps 8a-e.
(2) Verify the wrist measures between 0-15 degrees of extension.
NOTE: If wrist is not within 0-15 degrees of extension or ulnar or radial deviation are present, remove splint and go to step 9.
b. Verify the splint dimensions.
(1) The splint edge is 1/8-1/4 inch distal to the injured tip of the thumb.
(2) The proximal edge is 1-1 ½ inches from the cubitum space.
c. Check the range of motion (ROM) of the phalanges.
(1) Instruct the patient to extend and flex uninjured fingers.
(2) Instruct the patient to extend and flex the elbow.
(3) Trim back the splint material until the dimensions and ROM standards are met.
13. Check the patient's capillary refill (refer to step 6).
Chapter 3: Skill Level Tasks 15 April 2016 STP 8-68B13-SM-TG 3-295
14. Clean the plaster off the patient's skin using a damp wash towel or alcohol pads. NOTE: Use alcohol pad or fresh water from the faucet and not from the casting bucket.
15. Fit the patient with a sling.
NOTE: Considerations for applying a sling include elderly patients, severity of fractures (e.g., Colles', Smith's, Bennett's), patient's comfort, and physician's or technician's preference.
16. Give the patient verbal and written instructions on splint care.
a. Provide the patient with a copy of the clinic hours and telephone number. Instruct the patient to call the cast clinic with any concerns or questions regarding their cast. For after duty hours concerns, instruct the patient to report to the emergency room.
b. Provide the patient with a cast care booklet or written instructions.
c.Instruct the patient to elevate the arm and flex and extend the uninjured fingers to increase circulation in the hand.
d.Tell the patient: Do not stick any objects down the splint, do not remove the splint, and do not alter the cast (e.g., cutting, removing padding).
17. Annotate the procedure applied to the patient in the medical record or SF 513.
NOTE: Record the procedure applied and cast care instructions provided to the patient in patient's medical record or SF 513 and sign your name.
a. Record the procedure applied and splint care instructions provided.
b. Sign your name.
18. Escort or direct the patient to the front desk to make a follow-up appointment.
Evaluation Preparation: You must evaluate the students on their performance of this task in a field condition related to the actual task.
Performance Measures
1 Reviewed the order from the physician.
2 Gathered equipment and materials.
3 Told the patient your name and job title.
4 Explained the procedure to the patient.
5 Inspected the patient's arms.
6 Checked capillary refill of patient's hands/fingers.
7. Prepared the plaster splint for the thumb spica splint.
8. Set the patients injured wrist with goniometer.
9. Applied thumb spica splint to the injured thumb.
Chapter 3: Skill Level Tasks 3-296 STP 8-68B13-SM-TG 15 April 2016
GO
GO NO
10 Secured the thumb spica splint to the injured thumb and arm.
11 Molded the casting material to the thumb.
12. Trimmed the splint to meet the standards.
13. Checked patient's capillary refill (referred to step 6).
14. Cleaned the plaster off patient's skin using a damp wash towel or alcohol pads.
15. Fitted the patient with a sling.
16. Gave the patient verbal and written instructions on splint care.
17. Annotated the procedure applied to the patient in the medical record or SF 513.
18 Escorted or directed the patient to the front desk to make a follow-up appointment.
Evaluation Guidance: Score each Soldier according to the performance measures in the evaluation guide. Unless otherwise stated in the task summary, the Soldier must pass all performance measures to be scored GO. If the Soldier fails any step, show what was done wrong and how to do it correctly. References
Chapter 3: Skill Level Tasks 15 April 2016 STP 8-68B13-SM-TG 3-297
GO NO GO
Performance Measures
Required Related SF 513 None
Apply a Short Arm Volar Splint
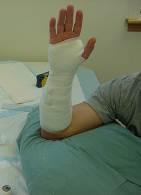
081-68B-1000
Conditions: You are presented with a physician's written or verbal order to apply a short arm volar splint to an orthopedic patient. The patient is sitting on an orthopedic examination bed and may be accompanied by a family member/chaperone. Nursing personnel and physician are available. You will need the patient's medical record or Standard Form (SF) 513, Medical Record - Consultation Sheet, work cart/station, plaster rolls, box of plaster reinforcement sheets, webril rolls, elastic bandages, examination gloves, scissors, adhesive tape, hospital pads (chux) or bed sheet, goniometer, bucket of tepid water with plastic bag, sling, cast care booklet or equivalent, box of alcohol pads or damp wash towel, sink with faucet, trash receptacle, and the local standard operating procedure (SOP)
Standards: Apply the short arm volar splint to the patient's injured arm within 1/8 inch from the distal palmar crease (DPC) to 1-1 1/2 inch distal to the cubitum space and secure with elastic bandages. The splint immobilizes the wrist and forearm. The splint eliminates ulnar and radial deviation, pronation, and supination; and allows full range of motion (ROM) to the uninjured phalanges, elbow, and thumb. The capillary refill returns within 1 - 3 seconds.
NOTE: See Figure 3-50 for an example of a short arm volar splint.
Performance Steps:
1. Review the order from the physician.
2. Gather equipment and materials.
NOTE: Physician's order, technician's preference, availability of supplies, and/or patient's extremity size determines which casting material size is used.
a. Gather equipment.
(1) Scissors.
(2) Goniometer.
(3) Utility cart
Chapter
Skill
3-298 STP 8-68B13-SM-TG 15 April 2016
3:
Level Tasks
Figure 3-50. Short arm volar splint
CAUTION: The temperature of the water must be tepid (70° - 80° F) to reduce further injury (possible burns) to the patient. The technician should draw room temperature water and initially use a thermometer to gauge water temperature. The technician must change the water after each application, as the residue in the cast bucket will act as an accelerator causing the casting material to increase in heat emission.
(4) Bucket of tepid water with plastic bag
b.Assemble materials.
(1) W ebril rolls (4 inch)
(2) Plaster rolls (4 inch)
(3) Elastic bandages (2 inch)
(4) Examination gloves.
(5) Hospital pad (chux) or bed sheet
(6) Sling.
(7) Box of plaster reinforcement sheets (4 x 15 or 5 x 30).
(8) Box of alcohol pads or damp wash towel.
(9) Cast care booklet.
(10) Adhesive tape (1 inch).
c.Open and remove two plaster rolls from packages and place on work cart/station.
d. Place the materials on work cart/station.
3. Tell the patient your name and job title.
CAUTION: During the splinting application a chemical response (exothermic reaction) will occur between the water and the plaster (gypsum). This is a safe and common occurrence. The splint will initially become warm and cool down within 2 - 5 minutes. However, if it doesn't cool down or there is an increase of heat intensity during the splint application, the splint may need to be removed
4. Explain the procedure to the patient.
5. Inspect patient's arms.
CAUTION: Always practice body substance isolation (BSI) prior to applying traction, splints, or casts to patients.
a. Place examination gloves on hands.
b. Place the patient in the sitting or supine position on the examination bed.
c. Roll the patient's shirt sleeve above the elbow on the injured side.
d.Inspect both arms for any skin conditions (e.g., cuts, abrasions, lacerations, and skin rashes).
NOTE: Inform physician if conditions are present and follow physician's instructions.
e. Examine both arms and wrists for jewelry and remove if found.
NOTE: All jewelry on both hands and wrists must be removed. Give the jewelry to a family member, secure with the patient, or secure the belongings according to the local SOP.
6. Check capillary refill of patient's hands/fingers.
a. Squeeze patient's fingers; nail beds will turn white.
Chapter 3: Skill Level Tasks 15 April 2016 STP 8-68B13-SM-TG 3-299
CAUTION: If capillary refill is delayed for more than 2 seconds, inform physician and follow physician's instructions.
b. Release patient's fingers; nail beds will return pink.
CAUTION: The temperature of the water must be tepid (70°-80° F) to reduce further injury (possible burns) to the patient
7. Prepare the plaster splint for the volar aspect of the hand.
NOTE: Extremity size will determine the splint size (i.e. 4 x 15 or 5 x 30).
a. Prepare webril (cast padding) for the volar splint.
(1) Place hospital pad or bed sheet on patient's lap.
(2) Position the patient's uninjured elbow at a 45 degree angle to the floor. Locate the DPC, thenar muscle, and the cubitum space.
NOTE: The DPC is furthest diagonal line on the volar aspect of the hand. The thenar muscle is at the base of the thumb on the volar aspect of the hand. The crease is noticeable when the thumb and 5th phalange (pinky finger) are brought together. The cubitum space is located at the bend of the arm.
(3) Measure from 1 inch distal to the DPC to 1 inch distal to the cubitum space.
(4) Place the measured webril on work cart/station.
(5) Roll out two to four additional layers to the same length and bisect the middle of the previous webril
b.Open the applicable size box of plaster reinforcement sheets. Remove the sheets from the box and unwrap the package. Peel back the edges of 10-15 sheets and remove from the stack. Place on work cart/station.
NOTE: The technician may choose to use plaster rolls in lieu of pre-sized reinforcement sheets.
CAUTION: All patients should be given a covering (e.g., chux, bed sheet) to reduce damaging their clothing during the casting process and for privacy.
(1) Place the patient's uninjured hand in the supine position (palm up) and locate the DPC, thenar eminance, and the cubitum space.
(2) Remove one plaster sheet from the stack of five.
(3) Place the sheet next to the uninjured arm to obtain the sheet length, and the DPC and thenar muscle contours.
(4) Draw a diagonal line on the plaster sheet that matches with the DPC of the patient's hand.
NOTE: The diagonal cut facilitates full ROM of the fingers (extension and flexion).
(5) Draw a curved line (half moon shape) on the plaster sheet that matches with the outer border of the thenar muscle on the patient's hand.
NOTE: The half moon pattern enables the thenar muscle to be observable and the thumb to adduct to all fingers promoting full ROM.
Chapter 3: Skill Level Tasks 3-300 STP 8-68B13-SM-TG 15 April 2016
(6) Place the measured sheet on the stack and cut the outlined patterns and excess length for all sheets. Place the stack on the work cart/station for later use.
(7) Discard excess material in the trash receptacle.
8. Set the patients injured wrist with goniometer.
a. Position the patient's injured elbow on the bump at a 45 degree angle to the upper extremity.
b. Place the stationary arm of the goniometer so that it bisects the lateral aspect of the ulnar.
c. Place the protractor of the goniometer on the ulnar styloid.
d.Place the moving arm of the goniometer so that it bisects the 5th phalange.
e. Position the wrist until the goniometer measures between 0-15 degrees extension.
9. Apply volar splint to injured arm.
NOTE: Assistance may be used prior to securing splint.
a. Place the plaster sheets in bucket of tepid water and remove when bubbles cease to rise.
b. Squeeze the sheets together to eliminate excess water.
NOTE: Do not wring the sheets. This will cause the roll to dry more quickly.
c Place the plaster sheets centered and 1/2 inch from the edge of the padding.
d. Laminate the plaster splint.
e. Fold over the edges of the padding.
f.Place an additional layer of padding over the folded edges.
g. Place the padded splint on the volar aspect of the hand aligned with the DPC and the thenar muscle.
10. Secure the volar splint to the injured arm.
a. Place the edge of the elastic bandage on the ulnar styloid and wrap two rotations around the wrist to secure the edge.
b. Continue through the palm and back up the forearm covering all padding.
c. Secure the elastic bandage with clips at the back of the wrist.
d.Tape down the elastic bandage between the clips.
e. Remove the clips and dispose of them in trash receptacle.
11. Mold the casting material to the forearm/wrist.
a. Place the heel of one hand on the volar aspect of the distal wrist.
b. Place the heel of the second hand on the dorsal aspect of the distal wrist.
c. Squeeze the heels of the hands together.
d. Apply firm and gradual pressure beginning at the wrist and progress up the forearm.
e. Maintain patient's wrist in the correct position.
f. Remove heels of hands from the splint when the contours of the wrist and forearm have been shaped and the splint is cured.
12. Trim the splint to meet the standards.
a. Verify the alignment of the injured wrist with a goniometer.
(1) Repeat steps 8a-c.
(2) Verify the wrist measures between 0-15 degrees of extension.
Chapter 3: Skill Level Tasks 15 April 2016 STP 8-68B13-SM-TG 3-301
NOTE: If wrist is not within 0-15 degrees of extension or ulnar or radial deviation are present, remove splint and go to step 9.
b. Verify the splint dimensions.
(1) The splint edge is resting on the DPC.
(2) The splint edge is resting on the thenar muscle border.
(3) The proximal edge is 1-1 ½ inches from the cubitum space.
c. Check the range of motion (ROM) of the phalanges and elbow.
(1) Instruct the patient to extend and flex fingers and touch thumb to all fingers.
(2) Instruct the patient to extend and flex the elbow.
(3) Trim back the splint material until the dimensions and ROM standards are met.
13. Check the patient's capillary refill (refer to step 6).
14. Clean the plaster off the patient's skin using a damp wash towel or alcohol pads.
NOTE: Use alcohol pad or fresh water from the faucet and not from the casting bucket.
15. Fit the patient with a sling.
NOTE: Considerations for applying a sling include elderly patients, severity of fractures (e.g., Colles', Smith's, Bennett's), patient's comfort, and physician's or technician's preference.
16. Give the patient verbal and written instructions on splint care.
a. Provide the patient with a copy of the clinic hours and telephone number. Instruct the patient to call the cast clinic with any concerns or questions regarding their cast. For after duty hours concerns, instruct the patient to report to the emergency room.
b. Provide the patient with a cast care booklet or written instructions.
c.Instruct the patient to elevate the arm and flex and extend the uninjured fingers to increase circulation in the hand.
d.Tell the patient: Do not stick any objects down the splint, do not remove the splint, and do not alter the cast (e.g., cutting, removing padding).
17. Annotate the procedure applied to the patient in the medical record or SF 513 (Medical Record – Consultation Sheet).
NOTE: Record the procedure applied and cast care instructions provided to the patient in patient's medical record or SF 513 and sign your name.
a. Record the procedure applied and splint care instructions provided.
b. Sign your name.
18. Escort or direct the patient to the front desk to make a follow-up appointment.
Evaluation Preparation: You must evaluate the students on their performance of this task in a field condition related to the actual task.
1. Reviewed the order from the physician.
Chapter 3: Skill Level Tasks 3-302 STP 8-68B13-SM-TG 15 April 2016
Performance Measures GO NO GO
2 Gathered equipment and materials.
3 Told the patient your name and job title.
4. Explained the procedure to the patient.
5. Inspected the patient's arms.
6. Checked capillary refill of patient's hands/fingers.
7. Prepared the plaster splint for the volar aspect of the hand.
8. Set the patients injured wrist with goniometer.
9. Applied volar splint to injured arm.
10 Secured the volar splint to the injured arm.
11 Molded the casting material to the forearm/wrist.
12 Trimmed the splint to meet the standards.
13 Checked patient's capillary refill (referred to step 6).
14 Cleaned the plaster off patient's skin using a damp wash towel or alcohol pads.
15 Fitted the patient with a sling.
16 Gave the patient verbal and written instructions on splint care.
17 Annotated the procedure applied to the patient in the medical record or SF 513.
18 Escorted patient to the front desk to make a follow-up appointment.
Evaluation Guidance: Score each Soldier according to the performance measures in the evaluation guide. Unless otherwise stated in the task summary, the Soldier must pass all performance measures to be scored GO. If the Soldier fails any step, show what was done wrong and how to do it correctly.
Chapter 3: Skill Level Tasks 15 April 2016 STP 8-68B13-SM-TG 3-303
GO NO GO
Performance Measures
References Required Related SF 513 None
Skill Level SL2
Subject Area 10: General Medical Administer an Injection
081-000-0057
Conditions: You have a patient who needs an injection and have verified the medical officer's order. You have performed a patient care hand-wash.You will need syringe(s) with the prepared medication(s), antiseptic pads, alcohol sponge swabs, sterile gauze, adhesive tape, and the patient's record. You are not in a chemical, biological, radiological, nuclear (CBRN) environment
Standards: Administer the injection in accordance with the medical officer's order without violating aseptic technique or causing injury to the patient.
Performance Steps:
1. Verify the required injection(s) with the medical officer's order.
1. If there is a known allergy, do not administer the injection. Consult your supervisor. 2. Determine if a female patient is pregnant because of possible side effects of certain immunizing agents on the unborn child. If there is a question, do not administer the injection without written authorization.
WARNING:
2. Identify the patient by asking the patient's name and checking the identification tag or band. Ask the patient if he has any allergies or has experienced a drug reaction.
WARNING: Have an emergency tray available for the immediate treatment of serious reactions. Include a constricting band and a syringe containing a 1:1000 solution of epinephrine
3. Verify that the appropriate needle, syringe, and medication are being used. (See task 081-000-0056).
4. Do not violate aseptic technique.
5. Select and expose the injection site.
a. Intramuscular injection.
(1) The upper arm deltoid muscle the outer 1/3 of the arm between the lower edge of the shoulder bone and the armpit. Approximately three finger widths below the shoulder bone is the safe area.
WARNING: Do not give the injection in an area outside the upper-outer quadrant. The needle may do irreparable damage to the sciatic nerve or pierce the gluteal artery and cause significant bleeding.
(2) Buttocks the upper-outer quadrant of either buttock.
Chapter 3: Skill Level Tasks 3-304 STP 8-68B13-SM-TG 15 April 2016
NOTE: To identify the injection site, draw an imaginary horizontal line across the buttocks from hip bone to hip bone. Then divide each buttock in half with an imaginary vertical line. (See Figure 3-51).
(3) Outer thigh the area between a hand's width above the knee and a hand's width below the groin.
b. Subcutaneous injection.
(1) Upper arm.
(2) Anterior thigh.
(3) Abdomen.
c. Intradermal injection.
(1) Inner forearm.
(2) Back of the upper arm.
(3) On the back below the shoulder blades.
6. Position the patient.
a. Intramuscular.
(1) Upper arm standing or sitting with the area completely exposed, muscles relaxed, and the arm at the side.
(2) Buttocks lying face down or leaning forward and supported by a stable object with the weight shifted to the leg that will not be injected. The area is completely exposed.
NOTE: If the patient is lying in a prone position (face down), place the toes together with the heels apart. This will relax the muscles of the buttocks.
(3) Outer thigh- -lying face up or seated with the area completely exposed.
b. Subcutaneous.

(1) Upper arm see step 5a(1).
(2) Outer thigh--lying face up or seated, with the area completely exposed.
Chapter 3: Skill Level Tasks 15 April 2016 STP 8-68B13-SM-TG 3-305
Figure 3-51. Gluteal injection site diagram
c Intradermal.
(1) Inner forearm standing, sitting, or lying. Palm up, with the arm supported and relaxed.
(2) Upper arm see step 5a(1).
(3) Back seated, leaning forward and supported on a stable object, or lying face down.
7. Clean the injection site.
a.Intramuscular and subcutaneous.
(1) Open the antiseptic pad package.
(2) Begin at the injection site and with a spiral motion, clean outward 3 inches.
b. Intradermal.
(1) Use ethyl alcohol or acetone germicide and a sterile sponge.
(2) Begin at the injection site and with a spiral motion, clean outward 3 inches.
NOTE: The antiseptic pad may be held between the last two fingers for use when the needle is removed.
8. Remove the needle cover without bending or touching the needle.
9. Prepare the skin for the injection.
a.Intramuscular and subcutaneous. Form a fold of skin at the injection site by pinching the skin gently between the thumb and the index finger of the nondominant hand. Do not touch the injection site.
CAUTION: Do not retract or move the skin laterally.
b. Intradermal. Using the thumb of the nondominant hand, apply downward pressure directly below and outside the prepared injection site. Hold the skin taut until the needle has been inserted.
10. Insert the needle.
a.Intramuscular. With the dominant hand, position the needle, bevel up, at a 90 degree angle to, and about 1/2 inch from, the skin surface. Plunge the needle firmly and quickly straight into the muscle.
b. Subcutaneous. With the dominant hand, position the needle, bevel up, at a 45 degree angle to the skin surface. Plunge the needle firmly and quickly into the fatty tissue below the skin.
c.Intradermal. With the dominant hand, position the needle, bevel up, at a 15 to 20 degree angle to the skin surface. Insert it just under the skin until the bevel is covered. Do not move the skin.
11. Release the hold on the skin.
12. Administer the medication.
a. Intramuscular and subcutaneous.
(1) Aspirate by pulling back slightly on the plunger of the syringe.
(a) If blood appears, stop the procedure. Go to step 3 and begin the procedure again. Use a new needle, syringe, and medication, and select a different injection site.
WARNING: Failure to aspirate could cause the medication to be injected into the blood stream
Chapter 3: Skill Level Tasks 3-306 STP 8-68B13-SM-TG 15 April 2016
(b) If no blood appears, continue the procedure.
(2) Using a slow continuous movement, completely depress the plunger, injecting the medication.
NOTE: Rapid pressure may cause a burning pain.
(3) Place an antiseptic pad (or sterile 2 x 2) lightly over the injection site and withdraw the needle at the same angle at which it was inserted. Gently massage the injection site with the pad, unless this is contraindicated for the medication that has been injected.
(4) Put an adhesive bandage strip over the injection site if bleeding occurs.
b. Intradermal.
NOTE: Do not aspirate.
(1) Push the plunger slowly forward until all medication has been injected and a wheal appears at the site of the injection.
(a) If a wheal does not appear, go to step 3 and begin the procedure again. Use a new needle, syringe, and medication and select a different injection site.
(b) If a wheal appears, continue the procedure.
(2) Quickly withdraw the needle at the same angle at which it was inserted.
(3) Without applying pressure, cover the injection site with dry sterile gauze.
(4) Instruct the patient not to scratch, rub, or wash the injection site.
(5) If appropriate, instruct the patient when and where to have the test read in accordance with local SOP.
13. Check the site for bleeding.
14. Observe the patient for adverse reactions in accordance with local SOP. (See task 081000-0032.)
15. Dispose of the needle and syringe in accordance with local SOP.
16. Record the procedure on the appropriate form.
17. Do not cause further injury to the patient.
Evaluation Preparation: You must evaluate the students on their performance of this task in a field condition related to the actual task.
Performance Measures
1 Verified the required injection(s) with the medical officer's order.
2 Identified the patient by asking the patient's name and checking the identification tag or band. Asked the patient if he has any allergies or has experienced a drug reaction.
3. Verified that the appropriate needle, syringe, and medication are being used.
GO NO GO
Chapter 3: Skill Level Tasks 15 April 2016 STP 8-68B13-SM-TG 3-307
4 Did not violate aseptic technique.
5 Selected and exposed the injection site.
6. Positioned the patient.
7. Cleaned the injection site.
8. Removed the needle cover without bending or touching the needle.
9. Prepared the skin for injection.
10. Inserted the needle.
11. Released the hold on the skin.
12 Administered the medication.
13 Checked the site for bleeding.
14 Observed the patient for adverse reactions in accordance with local SOP.
15 Disposed of the needle and syringe in accordance with local SOP.
16 Recorded the procedure on the appropriate form.
17 Did not cause further injury to the patient.
Evaluation Guidance: Score each Soldier according to the performance measures in the evaluation guide. Unless otherwise stated in the task summary, the Soldier must pass all performance measures to be scored GO. If the Soldier fails any step, show what was done wrong and how to do it correctly. References
3-308 STP 8-68B13-SM-TG 15 April 2016
Chapter 3: Skill Level Tasks
GO NO GO
Performance Measures
Required Related
None None
Administer Oxygen
081-000-0073
Conditions: You have a patient requiring oxygen administration. You will need an oxygen tank with a PIN index system, a pressure regulator with a pressure gauge an adjustable-liter-flow outlet, a key or wrench, sterile water, humidifier, non-rebreather mask (NRB) with extension tubing, a nasal cannula, pen and Standard Form (SF) 600, Medical Record - Chronological Record of Medical Care You have taken body substance isolation precautions and You are not in a chemical, biological, radiological, nuclear (CBRN) environment.
Standards: Administer oxygen therapy without causing further harm to the patient.
CAUTION: All body fluids should be considered potentially infectious. Always observe body substance isolation (BSI) precautions by wearing gloves and eye protection as a minimal standard of protection.
1. Explain procedure to patient.
2. Assemble the equipment.
NOTE: Ensure the cylinder (bottle or tank) is labeled for medical oxygen. All medical grade oxygen cylinders are color coded green, silver or chrome to make easy identification of the cylinder. They come in a variety of sizes, each size designated by a specific color.
a. Remove protective seal.
b. Crack the main cylinder for one second to remove dust, debris, and check for leaks.
NOTE: Make sure cylinder is stabilized during entire process of assembly and once in use by patient.
c Place yoke of the regulator over the cylinder valve and align the pins.
d. Hand-tighten the T-screw on the regulator.
e.Open the main cylinder valve to check the pressure.
NOTE: The safe residual level of the oxygen at which the cylinder should be replaced has been established to be 200 pounds per square inch (psi).
WARNING: Disposable humidifiers are available for one-time use.
CAUTION: Humidified oxygen is usually more comfortable to the patient and is particularly helpful for children and for chronic obstructive pulmonary disease (COPD) patients. They provide moisture to the dry oxygen.
f. Attach the oxygen delivery device to the regulator.
NOTE: Compressed oxygen that is stored in cylinders is extemely dry and can cause dryness and irritation to the mucous membranes, especially in the nasal passages.
3. Position patient in position of comfort.
Chapter 3: Skill Level Tasks 15 April 2016 STP 8-68B13-SM-TG 3-309
4. Determine oxygen delivery device.
a. A bag-valve-mask (BVM) system is the delivery device of choice for patient's with signs of severe inadequete breathing. (See task 081-000-0035)
b. A non-rebreather mask (NRB) is usually the delivery device of choice in the prehospital setting for patients with signs of inadequate breathing, who are cyanotic, have chest pain, severe trauma, signs of shock or an altered mental status.
c. A nasal cannula is appropriate for those who are unable to tolerate a NRB.
5. Adminster oxygen with appropriate device.
a. Apply the NRB.
(1) Select the correct sized mask.
NOTE: The apex of the mask should fit over the bridge of the patient's nose and extend to rest on the chin, covering the mouth and nose completely. NRB masks come in different sizes for adults, children and infants.
(2) Connect tubing to regulator.
(3) Set the regulator to 15 lpm (liters per minute). The oxygen concentration delivered is usually around 90 percent.
(4) Fill the resevoir bag completely.
NOTE: You may need to press down on the rubber valve gasket found covering the one-way valve between the mask and the reservoir. This will cause the bag to f ill much faster.
(5) Fit mask to patient's face.
(a) Bring elastic strap around the back of the head and secure it.
(b) Form the soft metal piece at the top of the mask to conform to the patient's nose.
(c) Instruct the patient to breathe normally.
(d) Continually monitor the reservoir bag to ensure that it remains filled during inhalation.
b. Apply the nasal cannula.
(1) Connect tubing to regulator.
(2) Insert the two prongs of the cannula into the patient's nostrils with the tab pointing down.
NOTE: Make sure nasal prongs are pointing downward.
WARNING: Do not make tubing too tight. If an elastic strap is used, adjust it so it is secure and comfortable.
(3) Position tubing over and behind each ear. Gently secure it by sliding the adjuster underneath the chin.
(4) Set the regulator to 1-6 lpm. The delivered oxygen concentration ranges from 22 to 44 percent.
(5) Instruct patient to breathe normally.
(6) Check the cannula position periodically to ensure that it has not dislodged.
6. Continue to monitor patient.
Chapter 3: Skill Level Tasks 3-310 STP 8-68B13-SM-TG 15 April 2016
NOTE: Continue to monitor patient for worsening vital signs, confusion, restlessness and altered mental status.
7. Check the equipment.
NOTE: Ensure tubing connections and device are secure, especially with movement of the patient. Monitor oxygen flow. Change the delivery device and tubing every 24 hours, or more often in accordance with local protocols. If humidifier is attached, water should be changed every shift or more often in accordance with with local protocols.
8. Calculate the duration of flow of the oxygen cylinder.
a. Determine the remaining pressure in the tank by reading the regulator guage.
b. Determine the safe residual level of the oxygen cylinder.
NOTE: The safe residual level of the oxygen at which the cylinder should be replaced has been established to be 200 psi.
c. Determine the available cylinder pressure by subtracting the safe residual level from the remaining pressure. Example: 2,000 psi remaining pressure minus 200 psi safe residual level = 1,800 psi available pressure.
d. Determine the conversion factor for the oxygen cylinder in use.
NOTE: Each type of oxygen cylinder, depending on its size, employs a specific conversion factor. D size oxygen cylinder 0.16; E size oxygen cylinder 0.28; G size oxygen cylinder 2.41; H size oxygen cylinder--3.14; K size oxygen cylinder--3.14; M size oxygen cylinder--1.56.
e. Determine available liters by multiplying the conversion factor by the amount of available pressure. Example: A “D” size cylinder is being used. 0.16 conversion factor x 1,800 psi available pressure = 288 liters of oxygen available for use.
f. Determine the flow rate as prescribed by medical direction.
g. Determine the duration of the oxygen by dividing the available liters by the flow rate. Example: 288 available liters divided by the prescribed flow rate of 15 lpm = 19.2 minutes duration of oxygen flow.
9. Follow safety precautions.
a. Never allow combustible materials such as oil or grease to touch the cylinder, regulator, fittings, valves or hoses.
b. Ensure "OXYGEN" and "NO SMOKING" signs are posted wherever oxygen is used or stored.
WARNING: The principle danger in using oxygen is fire. The presence of oxygen in increased concentrations makes all materials more combustible. Materials that burn slowly in ordinary air, burn violently and even explosively in the presence of oxygen
c.Inform the patient and visitors about the restrictions.
d. Use only non-sparking wrenches on oxygen cylinders.
e. Position oxygen cylinders away from doors and high traffic areas.
f. Secure and store oxygen cylinders in an upright postion.
Chapter 3: Skill Level Tasks 15 April 2016 STP 8-68B13-SM-TG 3-311
WARNING: When you are working with an oxygen cylinder, never place any part of your body over the cylinder valve. A full cylinder is at 2,000 psi and if the tank is punctured or if a valve breaks off, any oxygen cylinder can accelerate with enough force to penetrate concrete walls. A loosely fitting regulator can be blown off the cylinder with sufficient force to decapitate a person, penetrate the body or demolish any object in its path.
g. Keep all valves closed when the oxygen cylinder is not in use, even if the tank is empty.
Evaluation Preparation: You must evaluate the students on their performance of this task in a field condition related to the actual task.
Performance Measures
1. Explained procedure.
2. Assembled equipment.
3 Positioned patient.
4 Determined oxygen delivery device.
5 Administered oxygen with appropriate device.
6 Monitored patient.
7 Checked equipment.
8 Calculated duration of flow.
9 Followed safety precautions.
Evaluation Guidance: Score each Soldier according to the performance measures in the evaluation guide. Unless otherwise stated in the task summary, the Soldier must pass all performance measures to be scored GO. If the Soldier fails any step, show what was done wrong and how to do it correctly.
References
3-312 STP 8-68B13-SM-TG 15 April 2016
Chapter 3: Skill Level Tasks
NO GO
GO
600
Required Related SF
None
Measure a Patient's Pulse Oxygen Saturation
081-000-0074
Conditions: You are in a medical treatment facility. Your assigned patient requires oxygen saturation assessment You will need a pulse oximetry device, sensing probe, alcohol swabs, pen, automated record or Standard Form (SF) 600, Medical Record-Chronological-Record of Medical Care. You have performed a patient care hand wash.
Standards: Measure a patient's pulse oxygen saturation, notifying medical officer of abnormal readings and documenting the exact measurement indicated on the device screen.
Performance Steps:
CAUTION: All body fluids should be considered potentially infectious. Always observe body substance isolation (BSI) precautions by wearing gloves and eye protection as a minimal standard of protection.
1. Select the appropriate sensing probe location for the patient:
a. For adults, sensing probes can be placed on the index, middle, or ring finger.
b. Sensing probes can also be placed on the toe unless the patient has decreased circulation to the lower extremities.
c. Earlobe clips and neonate sensing probes for the foot are available for infants and newborns.
2. Wipe the selected site with alcohol to ensure it is clean and dry.
3. Apply the sensor so that the emitting light is directly opposite to the detector.
4. Attach the sensor cable to the machine and turn the power on.
5. Notify the medical officer if the digital readout is below the prescribed parameters.
NOTE: Normal pulse oximetry values will be greater than 95% in room air, with the majority being between 98% and 100%. Factors that may provide falsely high readings include carbon monoxide poisoning, hypovolemia, and certain types of toxins.
6. Document the oximeter reading, the location of the device, the time taken, and the amount of oxygen being delivered (if applicable).
7. Take appropriate measures for continuous monitoring, if applicable.
a. Ensure the alarms are on before leaving the patient.
NOTE: Monitors come with preset limits. These limits can be changed per medical officer's order.
CAUTION: The pulse oximeter is just a tool; do not rely on it solely for indications of the patient's condition. Treat the patient, not the machine.
b. Move sensing probe locations every 2 hours; move adhesive sensors every 4 hours.
Chapter 3: Skill Level Tasks 15 April 2016 STP 8-68B13-SM-TG 3-313
Evaluation Preparation: You must evaluate the students on their performance of this task in a field condition related to the actual task.
Performance Measures
1 Selected the appropriate sensing probe location for the patient.
2 Wiped the selected site to ensure it was clean and dry.
3. Applied the sensor so that the emitting light was directly opposite to the detector.
4. Attached the sensor cable to the monitor and turned the power on.
5. Notified the medical officer if the digital readout was below the prescribed parameters.
6. Documented the oximeter reading, the location of the device, the time taken, and the amount of oxygen being delivered (if applicable).
7 Took appropriate measures for continuous monitoring, if applicable.
GO NO GO
Evaluation Guidance: Score each Soldier according to the performance measures in the evaluation guide. Unless otherwise stated in the task summary, the Soldier must pass all performance measures to be scored GO. If the Soldier fails any step, show what was done wrong and how to do it correctly.
References
3-314 STP 8-68B13-SM-TG 15 April 2016
Chapter 3: Skill Level Tasks
Required Related SF 600 None
Remove a Toenail
081-000-0095
Conditions: You have a patient requiring a toenail extraction. You will need a medical officer’s order for a toenail extraction, appropriate antimicrobial solution, sterile normal saline or sterile water, non adherent dressing, 3-5 milliliter (ml) syringe with two long (1-1.5 inch) needles, 25 gauge (g) and 21g, 1% lidocaine local anesthetic without epinephrine, nail anvil splitter (English), two sterile forceps or hemostats (straight), sterile cotton-tipped applicators, penrose drain used as a tourniquet, 4x4 sterile gauze sponges, dressing materials, infectious waste receptacle, sharp’s container, tape, and Standard Form (SF) 600, Chronological Record of Medical Care, and pen. You are not in a chemical, biological, radiological, nuclear (CBRN) environment.
Standards: Perform toenail removal in accordance with established procedures without causing harm or further injury to patient.
NOTE:When irritation and/or infection are more widespread or include the entire toe, removal of a portion of the nail and debridement of the inflamed tissue may be required. Toenail removal may be total or partial. Total nail removal is rarely needed but may be used when infection of both lateral nailfolds is present, particularly if the condition is present for more than a month.
Performance Steps:
1. Solicit a patient history and verify patient’s signature on consent form.
2. Gather equipment.
3. Prepare the patient.
a. Explain procedure.
b. Place the patient supine with knees flexed and feet flat.
c. Cleanse the digit with an antimicrobial scrub.
d. Exsanguinate the toe by squeezing or wrapping, and apply a tourniquet at the base of the toe.
e. Apply sterile drapes to completely surround the wound and to cover all unprepared areas adjacent to the site.
f. Administer local anesthetic by ring block technique
(1) Digital cutaneous nerves run along the medial and lateral aspects of each digit and can be blocked at any level above the distal phalanx.
(2) Use the 25g needle to raise a skin wheal by administering approximately 0.25 ml of the anesthetic directly over the lateral and medial cutaneous nerve.
(3) Change to 21g needle and advance the needle perpendicular to the nerve until bone is reached; inject approximately 1 ml of the anesthetic.
(4) Slide the needle up and down on the dorsal and volar aspects of the digit; injecting approximately 0.5 ml of the anesthetic in each side.
(5) Discard used needles and syringe in sharp’s container immediately after use.
(6) It takes 5 to 10 minutes for complete anesthesia to develop.
4. Remove partial toenail.
a. Perform a patient care hand wash and put on sterile gloves.
Chapter 3: Skill Level Tasks 15 April 2016 STP 8-68B13-SM-TG 3-315
b. Once anesthesia has been achieved, use a straight hemostat to firmly secure a wide rubber band around the base of the digit to serve as a tourniquet.
c. Stabilize the digit in the nondominant hand.
CAUTION: Take care to perform a controlled division along the longitudinal lines of the nail for several millimeters past the proximal nailfold (cuticle).
d. Insert a single blade of the other straight hemostat between the nail bed and the nail to loosen and lift the nail. Split the nail with nail splitter in a longitudinal direction (distal to proximal) to include the base of the nail that rests beneath the cuticle.
NOTE: An English anvil nail splitter is desirable to begin the procedure, but sharp scissors or a No. 11 blade will work.
e. With the second straight hemostat, grasp the portion of the loosened nail and remove it using a steady pulling motion with a simultaneous upward twist of the hand toward the affected side completely removing the section of the nail.
f. Debride the nail groove.
(1) Inspect the remnant to be certain that the entire piece of nail of has been removed as desired.
(2) Sharply remove any remaining or swollen/heaped-up skin and all hyperkeratotic debris.
g. Remove the tourniquet and assess for hemostasis.
h. Apply a topical antibiotic ointment (not containing neomycin) to the nail bed and cover the digit with a sterile nonadherent dressing, followed by a dry sterile wrap or tubular gauze and tape in place.
i. Discard soiled/blood soaked gauze and disposable drapes in infectious waste receptacle, in accordance with infection control guidelines and local facilities SOP (standard operating procedures).
j. Cleanse all instruments used in procedure in accordance with local facilities SOP.
k. Remove gloves.
l. W ash hands.
5. Remove complete toenail.
a. Perform a patient care hand-wash and put on sterile gloves.
b.Once anesthesia has been achieved, use a straight hemostat to firmly secure a wide rubber band around the base of the digit to serve as a tourniquet.
c. Stabilize the digit in the nondominant hand.
CAUTION: It is important to completely free the proximal nail at its base (under the edge of the cuticle) to allow removal and to expose the germinal tissue of the nail bed.
d. Insert a single blade of the other straight hemostat (or the periosteal elevator) between the nail bed and the toenail to loosen and lift the nail; advance the instrument with a continued upward pressure against the nail and away from the nail bed to minimize injury and bleeding.
e.With the second straight hemostat, grasp the loosened nail and remove it using a steady pulling motion with a simultaneous upward twist of the hand toward the affected side completely removing the nail.
f. Debride the nail grooves as needed.
(1) Inspect the remnant to be certain that the entire piece of nail has been removed as desired.
Chapter 3: Skill Level Tasks 3-316 STP 8-68B13-SM-TG 15 April 2016
(2) Sharply remove any remaining or swollen/heaped-up skin and all hyperkeratotic debris.
g. Remove the tourniquet and assess for hemostasis.
h. Apply a topical antibiotic ointment to the nail bed and cover the digit with a sterile gauze sponge dressing or tubular gauze and tape in place.
i. Discard soiled/blood soaked gauze and disposable drapes in infectious waste receptacle, in accordance with infection control guidelines and local facilities SOP.
j. Cleanse all instruments used in procedure in accordance with local facilities SOP.
k. Remove gloves.
l. W ash hands.
6. Provide patient follow-up instructions.
a. Rest the foot (toe) during the initial 24 hours after the procedure.
b. Elevate the extremity when possible.
c. Return in 24 hours for dressing change, at which time you should re-apply the topical antibiotic ointment, apply a less bulky dressing and encourage ambulation and a return to normal activity within the next 48 hours.
d. Soaking the open wound in warm water for 20 minutes, twice a day is soothing and allows the patient to view the healing process.
e. Tell patient to expect some clear to yellow fluid drainage (exudate) from the toe that may continue for three weeks. Complications include nail regrowth, infection, growth of an inclusion cyst, and delayed healing.
NOTE: If the condition returns, podiatric referral is recommended for more extensive nailbed ablation.
f. Emphasize proper toenail hygiene and schedule a follow-up visit for 30 days to assess healing.
7. Document the procedure on appropriate form.
a.Patient’s tolerance of procedure.
b. Teaching instructions given patient.
Evaluation Preparation: You must evaluate the students on their performance of this task in a field condition related to the actual task.
1 Solicited a patient history and verified patient’s signature on consent form.
2 Gathered equipment.
3 Prepared the patient.
4. Removed partial toenail.
5. Removed complete toenail.
6. Provided patient follow-up instructions.
Chapter 3: Skill Level Tasks 15 April 2016 STP 8-68B13-SM-TG 3-317
Measures GO NO GO
Performance
Chapter 3: Skill Level Tasks
7 Documented the procedure on the appropriate form.
Evaluation Guidance: Score each Soldier according to the performance measures in the evaluation guide. Unless otherwise stated in the task summary, the Soldier must pass all performance measures to be scored GO. If the Soldier fails any step, show what was done wrong and how to do it correctly.
References
Required
Related SF 600
None
3-318 STP 8-68B13-SM-TG 15 April 2016 Performance Measures GO NO GO
Treat Common Musculoskeletal Disorders
081-000-0103
Conditions: You have a patient who presents you with a musculoskeletal complaint. You will need a shoulder sling, splint, ace wrap, crutches, anti-inflammatory drugs, ice packs, and patient's medical record. You are not in a chemical, biological, radiological, nuclear (CBRN) environment.
Standards: Treat common musculoskeletal or foot complaints without causing further harm to the patient.
Performance Steps:
1. Review the patient's medical record, if available.
2. Obtain a history.
a. O = onset. When did it start? What were you doing when it started? What was the position of the foot (inverted, supinated)?
b. P = provocative and palliative factors. What makes it better? What makes it worse? Is there any pain without weight bearing?
c.Q = quality. Is it sharp, dull, aching, pounding, constant, or intermittent? What is the character of the pain?
d. R = region and radiation. Where exactly is the pain? Does it seem to spread anywhere or does it stay right there? Is there any involvement of other joints?
e. S = severity. How bad is the pain? Is it incapacitating? Does it cause you to change your activity?
f.T = time, temporal characteristics (duration). When does it hurt? How long does it last? Have you had prior episodes? Any history of trauma or prior surgery?
3. Manage cervical pain.
a. Cervical strain.
(1) A strain happens when a muscle-tendon unit is overloaded or stretched.
(2) Motion of the neck becomes painful.
(3) Peaks after several hours or the next day.
(4) Treat with nonsteroidal anti-inflammatory drugs (NSAIDs), heat, massage, and other therapeutic modalities.
b. Cervical sprain.
(1) Movement is limited.
(2) Ligamentous disruption may be extensive enough to result in instability with associated neurologic involvement.
(3) Routine cervical spine radiographs are indicated.
(4) Treatment of a cervical sprain consists of immobilization, rest, support, and NSAIDs.
(5) Return to participation is permitted when motion and muscle strength normalize.
c. Cervical fracture. Any patient suspected of cervical fracture or having any neurologic deficit as a result of a cervical injury requires x-rays and must be evaluated by a medical officer.
4. Manage low back pain (lumbosacral strain mild to moderate).
a. Signs and symptoms.
(1) Usually have reduced range of motion.
Chapter 3: Skill Level Tasks 15 April 2016 STP 8-68B13-SM-TG 3-319
(2) Discomfort which is localized to the lumbar-sacral area.
(3) Palpable muscle tenderness/spasm.
(4) Negative straight leg raise (SLR).
b.Treatment. Decrease activity and ice massages. Medications, if required, usually consist of anti-inflammatory drugs and/or muscle relaxants. Often obesity is a factor in low back pain and patients should be encouraged to lose weight.
5. Manage shoulder pain.
a.Rotator cuff tear.
(1) Usually presents with shoulder pain/tenderness.
(2) History of trauma.
(3) Patient is unable to abduct the arm or hold it abducted against gravity.
(4) Treat initially with a shoulder sling and oral anti-inflammatory drugs (ASA, Motrin). Any shoulder complaint with a history of trauma must be referred to a medical officer.
b. Impingement Syndrome (shoulder pain).
(1) Most common cause of shoulder pain and refers to mechanical compression and/or wear of the rotator cuff tendons.
(2) Any process which compromises this normal gliding function may lead to mechanical impingement.
(3) Most commonly seen in tennis players, pitchers and swimmers.
(4) The first step in treating shoulder impingement is to eliminate any identifiable cause or contributing factor.
(5) Non-steroidal anti-inflammatory medication may be used.
(6) The mainstay of treatment involves exercises to restore normal flexibility and strength to the shoulder girdle.
c. Acute bursitis.
(1) Usually produces pain with movement.
(2) Follows overuse in most instances.
(3) Most frequently tender to palpation over subdeltoid bursa.
(4) Treated with anti-inflammatory drugs and progressive shoulder exercises. There should be a reduction of certain physical activities including lifting, pushups and pulling for 7 days.
d. Septic arthritis.
(1) Should be considered if the patient has a fever or other signs and symptoms of inflammation.
(2) Emergent referral to a medical officer is indicated.
e. Dislocation.
(1) Usually follows a history of trauma but may occur spontaneously in some people.
(2) Sudden onset of pain with gross deformity of shoulder joint.
(3) Severe limitation of motion.
(4) X-ray should be done to rule out (R/O) associated fracture if a history of trauma. Often deferred until after reduction in order not to delay.
(5) Splint and assess distal pulses.
(6) Prompt referral to a medical officer.
(7) Pain medication and/or muscle relaxant may be used to relieve anxiety, pain and muscle spasm prior to reducing.
6. Manage knee pain.
a. Septic knee joint.
(1) Hot, tender knee with or without swelling.
(2) Orthopedic emergency requiring referral to a medical officer.
Chapter 3: Skill Level Tasks 3-320 STP 8-68B13-SM-TG 15 April 2016
b. Sprain/strain.
(1) Tenderness over medial collateral ligament (MCL)or lateral collateral ligament (LCL) without laxity may indicate grade I sprain or strain.
(2) If mild laxity and tenderness of MCL/LCL is present, possible grade II sprain.
(3) If ecchymosis, effusion present with laxity, possible grade III sprain (torn ligament).
(4) Initial treatment consists of ice packs, ace wrap and elevation for the first 24 hours. Crutches may be indicated for comfort. Anti-inflammatory agents are used as required.
c. Patellar dislocation. Gross instability of the patella indicates that injury to the soft tissues of the medial aspect of the knee has been extensive.
(1) When dislocation of the patella occurs alone, it may be caused by a direct force or activity of the quadriceps, and the direction of dislocation of the patella is usually lateral.
(2) Spontaneous reduction may occur if the knee joint is extended.
(3) Initially treat with rest, ice, compression, elevation (RICE), NSAID, profile, and crutches if unstable. Will need ortho referral to evaluate for arthroscopic surgery.
d. Retropatellar (patellofemoral) pain syndrome.
(1) ) The symptoms probably represent the majority of knee pain complaints in athletes.
(2) Vague knee pain, which is usually after several hours of exercise.
(3) Walking downhill or downstairs, bending at the knees, and kneeling exacerbates pain.
(4) Initially treat with RICE, nonsteroidal anti-inflammatory drugs (NSAID), stretches and exercises to strengthen quadriceps. Physical therapy consult for prolonged cases.
7. Manage foot pain.
a. Perform a physical examination (PE).
(1) Inspect the problem area.
(2) Determine the range of motion.
(3) Palpate the problem area.
(4) Check muscle strength.
b.Refer to a medical officer (MO) for X-rays of problem area, if appropriate and available.
c. Formulate assessment based upon history, PE and/or X-rays.
8. Manage ankle injuries.
a.Grade I ankle sprain.
(1) Antalgic gait.
(2) Able to bear weight.
(3) Minimal edema.
(4) Mild tenderness of malleolar area.
(5) Negative drawer sign.
(6) Initially treated with ice, compression, and elevation for 24-48 hrs. Crutches are indicated for up to 48 hrs in Grade I sprains. Anti-inflammatory agents (Motrin) and ace wrap protection are indicated for 5-7 days; with gradually increased exercises.
b.Grade II ankle sprain.
(1) Unable to bear weight.
(2) Edema.
(3) Possible ecchymosis.
(4) Acute tenderness.
(5) Negative drawer sign.
(6) Neurovascular status intact.
(7) Range of motion reduced.
(8) An x-ray should be done to rule out an associated fracture.
Chapter 3: Skill Level Tasks 15 April 2016 STP 8-68B13-SM-TG 3-321
(9) May require posterior or "U" splinting for 3-5 days with ice, elevation, crutches and analgesics (Motrin). An ace wrap is indicated with gradual increase of activity after 72 to 96 hours.
c. Grade III ankle sprain.
(1) Unable to bear weight.
(2) Edema.
(3) Ecchymosis present.
(4) Acute tenderness.
(5) Positive drawer sign.
(6) Neurovascular status may be compromised.
(7) Range of motion markedly reduced.
(8) Should be referred to a MO for x-rays to be done to rule out an associated fracture.
(9) Immobilization using either a splint or non-weight bearing cast. Initially, ice, compression, and elevation are used to reduce edema and pain. Crutches, without weight bearing, and follow-up with podiatry or orthopedics is usually indicated. Nonsteroidal antiinflammatory drugs or a mild narcotic will often be needed for pain relief. In all sprains, physical activity must be reduced appropriately and will vary in length from 72 hours to several weeks.
9. Manage achilles tendonitis.
a. Pain, swelling, tenderness along tendon.
b.Treat Achilles tendonitis with RICE, NSAIDs, ice for twenty minutes after activity, heel lift, and crutches if severe.
10. Manage metatarsalgia.
a.Pain under the metatarsals that is exacerbated with functional activities and may present as burning.
b. Commonly seen in women and in the second metatarsal.
c.Important to rule out stress fracture, neuroma, and avascular necrosis of the metatarsal head.
d. Conservative management is directed at relieving the pressure beneath the area of maximum pain.
e.The patient should obtain a shoe of appropriate style and adequate size to allow an orthotic device to be inserted.
11. Manage bunion.
a. Excessive bony growth (exostosis) on the head of the first metatarsal.
b. Callous formation and bursal inflammation.
c.The patient should be encouraged to wear shoes of adequate size and shape.
d. Pads may be placed in the first web space or over the median eminence to help take pressure off of a painful median eminence.
e. Pads may also be placed underneath the metatarsal heads to take pressure off painful calluses or sesamoids.
f. Podiatric surgical intervention may be considered.
12. Manage plantar fasciitis.
a.Inflammation of plantar aponeurosis.
b. Tenderness along plantar fascia.
c.Treatment of pain 1-2 weeks in duration is with NSAIDs, rest, and stretches.
d.The patient should perform ice massages with a cold bottle under the arch after activity.
e.Over the counter insole arch support may help alleviate tension on the arch.
Chapter 3: Skill Level Tasks 3-322 STP 8-68B13-SM-TG 15 April 2016
f Chronic pain may require a podiatry consult.
13. Record all treatment in the patient's medical record.
Evaluation Preparation: You must evaluate the students on their performance of this task in a field condition related to the actual task.
Performance Measures GO NO GO
1 Reviewed the patient's medical record if available.
2. Obtained history.
3. Managed cervical pain.
4. Managed low back pain.
5. Managed shoulder pain.
6. Managed knee pain.
7. Managed foot pain.
8. Managed ankle injuries.
9. Managed Achilles tendonitis.
10. Managed Metatarsalgia.
11 Managed bunion.
12 Managed plantar fasciitis.
13 Recorded all treatment in the patient's medical record.
Evaluation Guidance: Score each Soldier according to the performance measures in the evaluation guide. Unless otherwise stated in the task summary, the Soldier must pass all performance measures to be scored GO. If the Soldier fails any step, show what was done wrong and how to do it correctly.
References
Chapter 3: Skill Level Tasks 15 April 2016 STP 8-68B13-SM-TG 3-323
Required
Related None None
Process Items for Sterilization
081-000-0001
Conditions: Upon receipt of medical items, in the Sterile Processing Department/Central Material Service (SPD/CMS) or other designated area. You will need manufacturer's instructions, two basins/sinks, enzymatic detergent, sponges, brushes, clean towels, distilled/potable water, personal protective equipment (PPE) - disposable gowns/gloves and eye protection, if available use: washer-sterilizer or washer decontaminator, and an ultrasonic cleaner.
Standards: Clean items using manual and if available mechanical methods until bio burden free with out damage, in accordance with the manufactures instructions.
Special Condition: Items refers to instruments.
Performance Steps:
1. Put on PPE - pair of disposable gloves and face/eye shield.
2. Sort soiled items into common characteristics groups.
NOTE: Heat sensitive submergible, Heat resistant submergible, Heat sensitive--not submergible
3. Sort the common characteristic group into major categories of construction.
NOTE: Sharps, including scissors and cutting-edge instruments. Endoscopic, including cystoscopes and bronchoscopes. Delicate, including plastic instruments. Regular, including retractors and clamps. Special, including electric bone saws and electric dermatomes.
4. Clean heat sensitive submergible items manually.
a. Prepare the basins.
(1) Fill the first basin with a warm detergent solution.
(2) Fill the second basin with warm water 27° to 44° celsius (80° to 110° F).
b. Disassemble the items, as necessary, according to manufacturer's instructions.
c. W ash the items.
(1) Submerge in the detergent solution.
(2) Use a brush on hinged, ratchet and box lock, and serrated edge items.
NOTE: Keep the brush submerged during the scrubbing process.
(3) Support delicate nonsharp items with the fingers and clean them with a small soft brush.
(4) Clean delicate items which are sharp or pointed with a cotton tip applicator.
(5) Disassemble and clean the inner and outer surfaces of endoscopic equipment with a soft brush.
(6) Use a pipe cleaner to clean the small diameter, tubular inner areas of the endoscopic equipment.
d. Rinse the items.
Chapter 3: Skill Level Tasks 3-324 STP 8-68B13-SM-TG 15 April 2016
(1) Rinse nondelicate items in a basin of warm water.
(2) Rinse delicate and endoscopic items by:
(a) Transfer items into a basin of warm water.
(b) Empty the basin and refill it with warm water.
(c) Repeat steps 4d(2)(a) and 4d(2)(b) until all the detergent has been removed.
e. Air dry the heat sensitive items in a warm area on a tray and blow dry cannulated and rubber tubing.
f. Place the items in a tray.
(1) Open all ratchet and box lock instruments.
(2) Place large bulky instruments in the bottom of the tray.
(3) Place sharp and delicate instruments on top.
NOTE: Do not let the sharp points or edges contact other surfaces, points, or edges.
CAUTION: Items which are not heat resistant and submergible are not to be cleaned by this method.
NOTE: The use of a washer-sterilizer eliminates handwashing of instruments that are not damaged by heat. Such items can be cleaned by using the manual method.
5. Clean nonheat sensitive submergible items mechanically.
a. Clean items manually.
b. Load the pan in the washer-decontaminator.
c. Close and secure the door.
d. Select the washer-decontaminator settings for items being cleaned.
e. Start washer-decontaminator
f. Open the door at the end of the cycle.
g. Allow the items to dry thoroughly while in the washer-decontaminator.
NOTE: If an ultrasonic cleaning unit is available, remove the instruments immediately from the washer-sterilizer and put them in the ultrasonic cleaner.
h. Take the items to the prep area.
6. Clean submergible items using ultrasonic washer.
NOTE: Heat sensitive submergible and heat resistant submergible items may be cleaned in the ultrasonic cleaner.
a. Open all jointed items.
b. Disassemble items, as necessary, in accordance with manufacturer's instructions.
c. Load the items loosely in the tray.
NOTE: Do not stack the instruments over 3 inches high in the tray. Do not mix stainless steel instruments with aluminum, brass, or copper items.
d. Place small delicate instruments so they will not move.
e. Fill the wash chamber with water and add detergent.
f. Close the lid.
g. Dry the items thoroughly with a clean towel when the cycle is completed.
Chapter 3: Skill Level Tasks 15 April 2016 STP 8-68B13-SM-TG 3-325
7. Clean non-submergible items manually.
a.Wipe the items with a damp cloth that has been soaked with a detergent-disinfectant.
b.Wipe the items again with a damp cloth soaked in clean water.
NOTE: If the instrument has an optic lens, wipe the lens with a cotton tip applicator dipped in alcohol.
8. Lubricate hinged and box lock items.
Evaluation Preparation: You must evaluate the students on their performance of this task in a field condition related to the actual task.
Performance Measures
1. Put on PPE - a pair of disposable gloves and face/eye shield.
2. Sorted the soiled items into common characteristics groups.
3 Sorted the common characteristic groups into major ctegories of construction.
4. Cleaned heat sensitive submergible items manually.
5 Cleaned nonheat sensitive submergible items mechanically.
6 Cleaned submergible items ultrasonically.
7 Cleaned nonsubmergible items manually.
8 Lubricated hinged, ratchet, and box lock items.
Evaluation Guidance: Score each Soldier according to the performance measures in the evaluation guide. Unless otherwise stated in the task summary, the Soldier must pass all performance measures to be scored GO. If the Soldier fails any step, show what was done wrong and how to do it correctly.
References Required
STP 8-68B13-SM-TG 15 April 2016
Chapter 3: Skill Level Tasks 3-326
GO NO GO
Related None Manufacturers manuals
Set Up an Oxygen Tank
081-000-0060
Conditions: You need to set up an oxygen tank. You have already performed a patient care hand-wash. You will need a full oxygen cylinder with a regulator/flow meter, non-sparking cylinder wrench, oxygen regulator/flow meter for D cylinders, yoke attachment, humidifier, sterile water, oxygen cylinder transport carrier and/or stand oxygen, oxygen administration device, and warning signs. You are not in a chemical, biological, radiological, nuclear (CBRN) environment.
Standards: Set up the oxygen tank without violating safety precautions or endangering patients or yourself.
CAUTION: All body fluids should be considered potentially infectious. Always observe body substance isolation (BSI) precautions by wearing gloves and eye protection as a minimal standard of protection.
NOTE: Most of pre-hospital care, oxygen is given with a D sized oxygen cylinder. This task is written for a D sized oxygen cylinder.
Performance Steps:
1. Obtain the necessary equipment.
CAUTION: Always ensure that the cylinder selected contains oxygen and not some other compressed gas. United States oxygen cylinders are color coded green, silver or chrome with a green area around the valve stem on top. The international code is white.
a. Oxygen cylinder.
NOTE: Check the oxygen cylinder tag to determine whether the tank is "FULL", "IN USE" (partially full), or "EMPTY".
b Cylinder with regulator/flowmeter.
NOTE: When the cylinder regulator pressure gauge reads 200 psi or lower, the oxygen tank is considered empty. The pressure-compensated flowmeter is affected by gravity and must be maintained in an upright position. The Bourdon gauge flowmeter is not affected by gravity and can be used in any position.
c. Humidifier.
d. Sterile water.
e. Non-sparking cylinder wrench.
f. Oxygen cylinder transport carrier and/or stand.
g. Oxygen administration device appropriate for the patient or as ordered by the medical officer (nasal cannula, non-rebreather mask, or Bag Valve Mask (BVM) device with reservoir).
h. W arning signs.
(1) "NO SMOKING".
CAUTION: Because of the extreme pressure in oxygen tanks, they should be handled with great care. Do not allow tanks to be banged together, dropped, or knocked over.
Chapter 3: Skill Level Tasks 15 April 2016 STP 8-68B13-SM-TG 3-327
(2) "OXYGEN IN USE".
2. Secure the oxygen cylinder.
a. Upright position or in accordance with local SOP.
b. Secured with straps or in a stand.
c. Away from doors and areas of high traffic.
3. Remove the cylinder valve cap.
NOTE: The cylinder valve cap may be noisy or difficult to remove; however, the threads of the cylinder cap should never be oiled.
4. Use either the hand wheel or a non-sparking wrench to "crack" (slowly open and quickly close) the cylinder to flush out any debris.
5. Attach the regulator/flowmeter to the cylinder.
a. Locate the three holes on the oxygen cylinder stem and ensure that an "O" ring is present.
NOTE: If the "O" ring is not present, an oxygen leak will occur.
b. Examine the yoke attachment and locate the three corresponding pins on the yoke attachment.
NOTE: The compressed gas industry uses a "pin-indexing system" for portable gas cylinders. The locations of the pins on the yoke match only the regulator/flowmeter for an oxygen cylinder.
c. Slide the yoke attachment over the cylinder stem, ensuring that the pins are seated in the proper holes.
d. Turn the vise-like screw on the side of the yoke attachment to secure it.
e. Open the valve to test for leaks, and then close it.
NOTE: If there is a leak, check the regulator connection and obtain a new regulator/flowmeter and/or cylinder, if necessary. When in-wall oxygen is available, it will be attached to the oxygen outlet as follows: a. Turn the flow adjusting valve of the flowmeter to the OFF position. b. Insert the flowmeter adapter into the opening outlet and press until a firm connection is made.
6. Fill the humidifier bottle to the level indicated (about two-thirds full) with sterile water.
7. Attach the humidifier to the flowmeter.
NOTE: If an oxygen tube connector adapter is present, remove it from the flowmeter by turning the wing nut.
a. Attach the humidifier to the flowmeter with the wing nut on the humidifier.
NOTE: Not all humidifiers have "wing" style nuts. Some have regular "bolt" style nuts.
b. Secure the nut by hand-tightening it.
Chapter 3: Skill Level Tasks 3-328 STP 8-68B13-SM-TG 15 April 2016
NOTE: Humidifiers and tubing should be changed at least once every 24 hours (or more often in accordance with local SOP).
CAUTION: "OXYGEN" and "NO SMOKING" signs should be posted in the areas where oxygen is in use or stored
8. Post warning signs.
9. Report and/or record completion of the procedure.
Evaluation Preparation: You must evaluate the students on their performance of this task in a field condition related to the actual task.
Performance Measures
1. Obtained the necessary equipment.
2. Secured the oxygen cylinder.
3. Removed the cylinder valve cap.
4. Used either the hand wheel or a non-sparking wrench to "crack" (slowly open and quickly close) the cylinder to flush out any debris.
5 Attached the regulator/flowmeter to the cylinder.
6 Filled the humidifier bottle to the level indicated (about two-thirds full) with sterile water.
7 Attached the humidifier to the flowmeter.
8 Posted warning signs.
9 Reported and/or recorded completion of the procedure.
Evaluation Guidance: Score each Soldier according to the performance measures in the evaluation guide. Unless otherwise stated in the task summary, the Soldier must pass all performance measures to be scored GO. If the Soldier fails any step, show what was done wrong and how to do it correctly.
References
Chapter 3: Skill Level Tasks 15 April 2016 STP 8-68B13-SM-TG 3-329
GO NO GO
Required Related None AR 700-68
Subject Area 11: Traction
Apply Pelvic Traction
081-68B-2600
Conditions: You are presented with a physician's written or verbal order to apply pelvic traction to an orthopedic patient. The patient is supine on a power controlled orthopedic bed with an overhead traction frame and may be accompanied by a family member. Nursing personnel and physician are available. You will need the patient's medical record or Standard Form (SF) 513, Medical Record - Consultation Sheet, the local standard operating procedures (SOP), adjustable pelvic traction belt with straps and D-ring attachments, S-hooks, spool of traction cord, pulleys with attachment, single clamp bars, plain single bar, cross clamps, weight plates, weight carriers, surgipads or webril, roll of adhesive tape, goniometer, scissors, examination gloves, work cart/station, trapeze, and trash receptacle.
Standards: Apply pelvic traction to the patient's injured hips without causing further injury to the patient. Apply the pelvic traction belt and the weight plates according to the physician's order. The pelvic straps are set between a 30 - 45 degree angle to the bed. The belt does not restrict the patient's breathing. The capillary refill returns within 1 - 3 seconds. Pelvic traction is designed for treatment of sciatica (a nerve located on the back of the leg), muscle spasms in the lower back, and trial treatment of nerve root disorders.
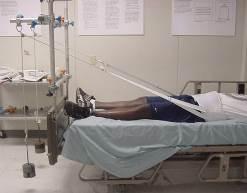
NOTE: See Figure 3-57 for an example of pelvic traction.
Performance Steps:
1. Review the order from the physician.
2. Gather the equipment and materials.
a. Gather equipment.
(1) Pelvic traction belt with D rings.
(2) Pulleys.
(3) W eight carriers.
(4) W eight plates (5 lbs).
Chapter 3: Skill
3-330 STP 8-68B13-SM-TG
April 2016
Level Tasks
15
Figure 3-52. Pelvic traction
NOTE: Weight plates are added according to the physician's orders and may be in increments other than 5 lbs (1, 2, 4, 5, or 10 lb increments).
(5) Single clamp bars (5 or 9 inch)
(6) Single plain bar
(7) Cross clamps
(8) Hooks
(9) Scissors.
(10) Goniometer
b.Assemble materials.
(1) Roll of adhesive tape (2 inch)
(2) Elastic bandages.
(3) Spool of traction cord
(4) W ebril (2 inch) or surgipads (8 x 7 inch).
(5) Examination gloves.
c. Place equipment and materials on the work cart/station.
3. Check the serviceability of the overhead traction frame and bed.
a.Inspect the traction equipment for cracked, dented, and warped bars, or broken handles. Open all clamp holders and place on the work cart/station.
NOTE: Turn all unserviceable equipment over to supervisor and continue to gather serviceable equipment.
b. Inspect the orthopedic bed as follows:
(1) Bed rails are in the upright position and locked.
(2) Bed electrical cord/plug are not frayed.
(3) Remote control buttons are operational (e.g., head/foot elevation, raise/lower position, and nurse call button).
(4) Bed wheels are locked.
NOTE: Inform nurse if the bed failed inspection and inspect another bed.
c.Inform the nurse if the bed failed inspection and inspect another bed.
4. Tell the patient your name and job title.
CAUTION: The trapeze handle should be secured to the trapeze clamp when not in use to prevent further injury to patient. Technician will demonstrate for patient or family member(s).
5. Explain the procedure to the patient.
6. Position the patient in the middle of the bed.
NOTE: Nursing personnel may be needed with patient positioning.
7. Check the patient's capillary refill of both feet.
a. Squeeze the patient's toes; nail beds will turn white.
CAUTION: If capillary refill is delayed for more than 2 seconds inform the physician and follow the physician's orders.
Chapter 3: Skill Level Tasks 15 April 2016 STP 8-68B13-SM-TG 3-331
b. Release the patient's toes; nail beds will return pink.
8. Prepare the patient's hips and legs for pelvic traction.
CAUTION: Always practice body substance isolation (BSI) when applying traction, splints, or casts to patients
a. Put on examination gloves.
b. Pull the privacy curtain around the bed.
CAUTION: Always have the same gender chaperone available when patient's clothing needs to be removed. Give clothing items to family member or nursing personnel.
c. Remove the patient's shoes, socks, and pants and provide the patient with a hospital gown or equivalent.
d.Inspect both lower extremities for any skin conditions (e.g., cuts, abrasions, lacerations, or skin rashes).
CAUTION: Padding is used to reduce any chafing that may occur while the patient's lower extremity is in pelvic traction.
9. Pad the medial/lateral aspects of the iliac crest.
NOTE: Webril or surgipads may be used.
10. Measure the patient's waist over the padding for pelvic traction belt sizing.
NOTE: A variety of measuring devices may be used: 1) the patient may be asked their waist or hip size; 2) a variety of pelvic belts may be fitted to the patient; or 3) a tape measure may be used.
a. Measure around the crest of the ileum (outside of hip).
b.Obtain the correct sized belt and place on the work cart/station for later use.
11. Secure the two cross clamps to the center of each vertical double clamp bar at the foot of the bed.
12. Secure the single plain bar to the cross clamps.
a.Insert one end in the clamp bar holder and lock in place.
b.Place the opposite end in the cross clamp holder, adjust the bar, and lock in place.
13. Secure the two single clamp bars (5 or 9 inch) horizontally to the cross bar at the foot of the bed.
a. Secure the first single clamp bar lateral to the right femur and pelvis.
b. Secure the second single clamp bar lateral to the left femur and pelvis.
14. Secure the pulley attachment to each single clamp bar.
15. Apply the pelvic traction belt to the patient.
NOTE: Nursing personnel may be used for the application of the pelvic belt.
Chapter
Skill
3-332 STP 8-68B13-SM-TG 15 April 2016
3:
Level Tasks
a. Release the back panel straps on the pelvic belt.
b.Palpate for the patient's greater trochanter.
NOTE: Prior to placing your hands on a patient, inform the patient what you are doing and why you are doing it.
c Place the pelvic belt under the patient's legs.
d. Slide the belt above the greater trochanter.
e. Adjust the belt proximal to the middle of the patient's back with the bottom of the belt 1 inch above the patient's greater trochanter.
f. Secure the back panel ends to the belt.
g. Secure the Velcro ends of the pelvic belt around the patient's waist.
h. Verify the belt is not restricting the patient's breathing.
(1) Assess the patient's breathing.
(2) Ask the patient if they are having difficulty breathing.
16. Place the straps on the pelvic belt.
a. Place one pelvic belt strap to the posterior aspect of the belt, bisecting the hip.
b.Place the second pelvic belt strap to the lateral aspect of the belt, bisecting the femur.
17. Verify the belt fits properly.
a. Adjust the straps on the pelvic belt to ensure a proper fit.
b. Adjust the padding between the buckles and the patient's skin, as needed to prevent injury to the patient.
18. Attach the S hooks to the D rings.
19. Tie the traction cords to the S hooks and weight carriers.
a. Cut the traction cord in two 10 foot segments.
b.Tie a nonslip knot to the S hooks of the D rings.
c.Thread the opposite end of the traction cords through each of the pulleys at the foot of the bed.
d. Tie a nonslip knot to each hook on the weight carriers.
20. Apply weight plates to the weight carriers according to the physicians orders.
NOTE: Weight plates are typically added in 5 lb increments.
21. Set the pelvic straps between a 30 - 45 degree angle to the bed.
a. Place the stationary arm of the goniometer so that it bisects the lateral aspect of the top strap.
b. Place the protractor of the goniometer on the buckle of the strap.
c. Place the moving arm of the goniometer so that it bisects the bottom strap.
d. Elevate or lower the bed, accordingly, to position the straps until the goniometer measures between 30 - 45 degrees of flexion.
22. Check the single clamp bars alignment to patient's legs.
a. The first single clamp bar is lateral to the right femur and pelvis.
b.The second single clamp bar is lateral to the left femur and pelvis.
23. Check the patient's capillary refill of both feet (repeat step 8).
Chapter 3: Skill Level Tasks 15 April 2016 STP 8-68B13-SM-TG 3-333
24. Inspect the overhead traction frame and bed.
a. All clamps are tightened and locked.
b. Bed rails are upright and locked.
c. Bed wheels are locked.
25. Inspect the traction equipment.
a.The weight carriers are hanging freely without touching the bed/frame/floor.
b. All knots are secured (taped).
c. All traction cords are centered on the track of the pulleys.
All traction cords are hanging freely without touching the bed or frame.
26. Give the patient verbal instructions on pelvic traction.
a.The pelvic belt should not impede breathing.
b. Press the nurse call button on the side of the bed rails for assistance.
c. Padding should always be placed at or around the iliac crest to reduce skin irritation and pressure.
27. Annotate the procedure applied to the patient in the medical record or SF 513.
a. Record the procedure applied and cast care instructions provided.
b. Sign your name.
28. Escort or direct the patient to the front desk to make a follow-up appointment.
Evaluation Preparation: You must evaluate the students on their performance of this task in a field condition related to the actual task.
Performance Measures
1 Reviewed the order from the physician.
2 Gathered the equipment and materials.
3 Checked the serviceability of the overhead traction frame and bed.
4 Told the patient your name and job title.
5 Explained the procedure to the patient.
6 Positioned the patient in the middle of the bed.
7. Checked the patient's capillary refill of both feet.
8. Prepared the patient's hips and legs for pelvic traction.
9. Padded the medial/lateral aspects of the iliac crest.
10. Measured the patient's waist over the padding for pelvic traction belt sizing.
11. Secured the two cross clamps to the center of each vertical double
STP 8-68B13-SM-TG 15 April 2016
Chapter 3: Skill Level Tasks 3-334
GO NO GO
Performance Measures
clamp bar at the foot of the bed.
12 Secured the single plain bar to the cross clamps.
13. Secured the two single clamp bars (5 or 9 inch) horizontally to the cross bar at the foot of the bed.
14. Secured the pulley attachment to each single clamp bar.
15. Applied the pelvic traction belt to the patient.
16. Placed the straps on the pelvic belt.
17. Verified the belt fits properly.
18. Attached the S hooks to the D rings.
19. Tied the traction cords to the S hooks and weight carriers.
20. Applied weight plates to the weight carriers according to the physicians orders.
21 Set the pelvic straps between a 30 - 45 degree angle to the bed.
22 Checked the single clamp bars alignment to patient's legs.
23 Checked the patient's capillary refill of both feet (repeated step 7).
24 Inspected the overhead traction frame and bed.
25 Inspected the traction equipment.
26 Gave the patient verbal care instructions on pelvic traction.
27 Annotated the procedure applied to the patient in the medical record or SF 513.
28 Escorted or directed the patient to the front desk to make a follow-up appointment.
Evaluation Guidance: Score each Soldier according to the performance measures in the evaluation guide. Unless otherwise stated in the task summary, the Soldier must pass all performance measures to be scored GO. If the Soldier fails any step, show what was done wrong and how to do it correctly.
Chapter 3: Skill Level Tasks 15 April 2016 STP 8-68B13-SM-TG 3-335
GO NO GO
Chapter 3: Skill Level Tasks
3-336 STP 8-68B13-SM-TG 15 April 2016 References Required Related SF 513 None
Subject Area 12: Upper Extremity Casts
Apply a Short Arm Cobra Cast
081-68B-2200
Conditions: You have a physician's written or verbal order to apply a short arm cobra cast to an orthopedic patient. The patient is sitting on an orthopedic examination bed and may be accompanied by a family member/chaperone. Nursing personnel and physician are available. You will need the patient's medical record or Standard Form (SF) 513, Medical RecordConsultation Sheet, the local standard operating procedures (SOP), work cart/station, plaster or fiberglass rolls, box of plaster reinforcement sheets, webril rolls, roll of stockinette, examination gloves, scissors, cast saw, cast spreader, eye protection, hearing protection, roll of adhesive tape, hospital pads (chux) or bed sheets, goniometer, bucket of tepid water with plastic bag, sling, cast care booklet or equivalent, box of alcohol pads or damp wash towel, sink with faucet, and trash receptacle.
Standards: Apply the short arm cobra cast to the patient's injured arm from 1/8 - 1/4 inch beyond the tips of the phalanges down the dorsal/volar aspect of the hand, and covering the metacarpophalangeal joints (MCPJs) to 1 - 1 1/2 inches distal to the cubitum space (bend of elbow). The cast immobilizes the wrist and phalanges, with the wrist at 15 - 30 degrees extension and the phalanges at 70 - 90 degrees flexion; eliminates rotation and overlapping of the phalanges; eliminates ulnar and radial deviation, supination and pronation; and allows full range of motion (ROM) to the elbow and thumb. The capillary refill returns within 1 - 3 seconds.
NOTE: The cobra cast is used to treat multiple fractures of the metacarpals, 2nd through 4th metacarpals, and injuries and fractures of the wrist. (See Figures 3-58 and 3-59.)

Chapter 3: Skill Level Tasks 15 April 2016 STP 8-68B13-SM-TG 3-337
Figure 3-53. Fiberglass cobra cast - anterior partial lateral view
Performance Steps:
1. Review the order from the physician.
2. Gather the equipment and materials.
NOTE: The physician's order, technician's preference, availability of supplies, and/or patient's extremity size determine which casting material (fiberglass/plaster) is used.
a. Gather the equipment.
(1) Goniometer.
(2) Scissors.
(3) Utility cart.
(4) Cast saw.
(5) Cast spreader.
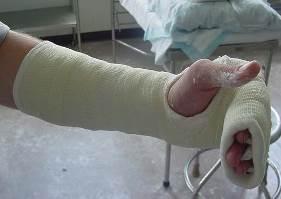
(6) Hearing protection.
(7) Eye protection.
CAUTION: The temperature of the water must be tepid (70° - 80°F) to reduce further injury (possible burns) to the patient. The technician must change the water after each cast application, as the residue in the cast bucket will act as an accelerator causing the casting material to increase in heat emission.
(8) bucket of tepid water with plastic bag
b. Assemble materials.
(1) Stockinette roll (1 inch and 2 or 3 inch)
(2) W ebril rolls (2 or 3 inch)
(3) Plaster (3 inch) or fiberglass (2 or 3 inch) rolls
(4) Box of plaster reinforcement sheets (4 x 15 inch)
(5) Examination gloves
(6) Box of alcohol pads or damp wash towel
(7) Hospital pads (chux) or bed sheets
(8) Cast care booklet or equivalent
(9) Sling
(10) Adhesive tape (1 inch)
c. Place the equipment and materials on the work cart/station.
Chapter 3: Skill Level Tasks 3-338 STP 8-68B13-SM-TG 15 April 2016
Figure 3-54. Fiberglass cobra cast - anterior view
3. Tell the patient your name and job title.
CAUTION: During cast application a chemical response (exothermic reaction) will occur between the water and the plaster (gypsum). This is a safe and common occurrence. The cast will initially become warm and cool down within 2-5 minutes. However, if it doesn't cool down or there is an increase of heat intensity during the cast application, the cast may need to be removed
4. Explain the procedure to the patient.
5. Don safety equipment (patient and technician).
6. Inspect the patient's arms.
CAUTION: Always practice body substance isolation prior to applying traction, splints, or casts to patients.
a. Place examination gloves on hands.
b. Place the patient sitting or supine on the examination bed.
c.Inspect both arms for any skin conditions (e.g., cuts, abrasions, lacerations, and skin rashes).
NOTE: Inform the physician if skin conditions are present and follow the physician's instructions.
d. Examine both arms and wrists for jewelry and remove if found.
NOTE: All jewelry on both hands and wrist must be removed. Give jewelry to family member or secure with patient's belongings in the non-commissioned officer in charge’s (NCOIC’s) office.
7. Check the capillary refill of the patient's hands/fingers.
a. Squeeze the patient's fingers; nail beds will turn white.
CAUTION: If the capillary refill is delayed for more than 2 seconds, inform the physician and follow the physician's instructions.
b. Release the patient's fingers; nail beds will return pink.
8. Prepare the stockinette.
NOTE: The stockinette is a form of protection against the exothermic reaction caused by casting materials and generally used for all casts except on patients who have had recent surgery, recently reduced fractures, or as directed by the physician.
a. Place a hospital pad or bed sheet on the patient's lap
NOTE: All patients should be given a covering (e.g., chux, bed sheet) to reduce damaging their clothing during the casting process.
b. Place the work cart/station at the edge of bed.
Chapter 3: Skill Level Tasks 15 April 2016 STP 8-68B13-SM-TG 3-339
NOTE: Technician preference will determine if orthopaedic bump is used. A number of props may be use (e.g., T stand, finger trap stand, nursing assistant).
c Place the patient's uninjured elbow at a 45 degree angle to the upper torso.
d. Forearm stockinette.
(1) Measure from 2 inches distal to the phalanges to the cubitum space (bend of elbow) for the stockinette length.
(2) Pull down the stockinette from the stockinette container and cut the measured length.
e. Thumb stockinette.
(1) Measure from 1/2 inch distal to the tip of the thumb to the base of the wrist for the stockinette length.
(2) Pull down the stockinette and cut the measured length.
(3) Cut a vertical slit to allow the stockinette to rest flat from the web spacing, between the thumb and the 2nd phalange, and the base of the wrist.
f. Roll the stockinette leaving a 1 - 2 inch cuff at the distal edge and place on the work cart/station for later use.
9. Apply the stockinette to the patient's injured arm.
a. Forearm stockinette.
(1) Place webril (casting padding) strips between the patient's fingers.
NOTE: Padding reduces chafing and skin sores from developing.
(2) Hold open the sides of the stockinette.
NOTE: One inch stockinette can be applied to each phalange in addition to the hand and arm stockinette.
(3) Place the injured hand in the open end of the stockinette.
(4) Roll the stockinette on the injured arm from 2 inches distal to the phalanges to the cubitum space (bend of elbow).
NOTE: Rolling the stockinette on promotes a better fit.
(5) Pinch the stockinette at the base of the thumb and make a 1/2 inch cut at a 45 degree angle.
(6) Place the patient's thumb through the precut hole.
(7) Smooth out the stockinette.
b. Thumb stockinette.
(1) Roll the stockinette from 1/2 inch distal to the tip of the thumb to the base of the wrist.
(2) Smooth out the stockinette.
10. Set the patient's injured wrist at 15 - 30 degrees extension.
NOTE: All hand casts are applied absent of pronation, supination, and radial or ulnar deviation unless directed by physician.
a. Place the patient's index finger and thumb in opposition to one another.
Chapter 3: Skill Level Tasks 3-340 STP 8-68B13-SM-TG 15 April 2016
NOTE: Placing the thumb and forefinger in opposition to one another assists the patient in maintaining wrist in neutral position. This is commonly referred to as the can of coke position.
b. Place the stationary arm of the goniometer so that it bisects the ulna.
c. Place the protractor of the goniometer on the ulnar styloid.
d. Place the moving arm of the goniometer so that it bisects the lateral side of the 5th metacarpal (pinky finger).
e.Position the wrist until the goniometer measures 15 - 30 degrees of extension.
11. Set the phalanges at 70 - 90 degrees of flexion.
a. Maintain the phalanges in the flexed position and the wrist in extension.
b.Place the stationary arm of the goniometer so that it bisects the 5th metacarpal.
c Place the protractor of the goniometer on the metacarpal head.
d. Place the moving arm of the goniometer so that it bisects the lateral side of the 5th phalange.
e. Position the phalanges until the goniometer measures 70 - 90 degrees of flexion.
CAUTION: Wrinkled padding can cause pressure sores which can lead to ulcers. If the cast padding is wrinkled, it must be removed and new padding applied.
12. Apply the webril (cast padding) to the injured phalanges, wrist, and forearm.
CAUTION: Keep the webril roll on the extremity as it is applied to reduce possible constrictive edema caused by applying the webril too tight.
a. Place the edge of the webril on the ulnar styloid and wrap two rotations around the wrist.
NOTE: The webril application is started at the wrist to provide an anchor and extra padding to the ulnar styloid.
b. Continue wrapping through the palm, around the phalanges, back up the forearm, and end 1/2 inch distal to the proximal edge if the stockinette.
c.Overlap the webril by 1/4 - 1/2 the previous wrap with each turn.
NOTE: The top of the webril should bisect the middle of the previous layer covering up the shallow line and present evenly applied padding.
13. Prepare the casting materials, as applicable.
CAUTION: It is mandatory to use fiberglass casting gloves to prevent the technician from receiving chemical burns while applying a fiberglass cast.
a. Place fiberglass casting gloves on hands and open the fiberglass casting package.
NOTE: Open one fiberglass package at a time. As fiberglass comes in contact with the air, the roll will start to cure (set).
b. Prepare plaster reinforcement splint for the dorsal and volar aspects of the cast. (1) Volar aspect.
Chapter 3: Skill Level Tasks 15 April 2016 STP 8-68B13-SM-TG 3-341
NOTE: The volar aspect of the arm is located on the palm side of the hand/forearm. The plaster reinforcement splint is used to strengthen and support the cast. Fiberglass casts do not require a splint due to the strength of the fiberglass casting material.
(a) Open the box of 4 x 15 reinforcement plaster sheets. Remove the sheets from the box and unwrap the package. Peel back the edges of five sheets and remove from the stack. Place the sheets on the work cart/station.
(b) Place the patient's uninjured hand in the supine position (palm up) and locate the distal palmar crease (DPC), thenar eminance, and the cubitum space.
NOTE: The DPC is furthest diagonal line on the volar aspect of the hand. The thenar muscle is at the base of the thumb on the volar aspect of the hand. The crease is noticeable when the thumb and 5th phalange (pinky finger) are brought together. The cubitum space is located at the bend of the arm.
(c) Remove one plaster sheet from the stack of five.
(d) Place the sheet next to the uninjured arm to obtain the sheet length, and the DPC and thenar muscle contours.
NOTE: To increase patient cleanliness, the sheet does not have to rest on the hand/forearm.
(e) Draw a diagonal line on the plaster sheet that matches with the DPC of the patient's hand.
NOTE: The diagonal cut facilitates full ROM of the fingers (extension and flexion).
(f) Draw a curved line (half moon shape) on the plaster sheet that matches with the outer border of the thenar muscle on the patient's hand.
NOTE: The half moon pattern enables the thenar muscle to be observable and the thumb to adduct to all fingers promoting full ROM.
(g) Place the measured sheet on the stack and cut the outlined patterns and excess length for all sheets. Place the stack on the work cart/station for later use.
(h) Discard excess material in the trash receptacle.
(2) Dorsal aspect.
(a) Open the box of 4 x 15 reinforcement plaster sheets. Remove the sheets from the box and unwrap the package. Peel back the edges of five sheets and remove from the stack. Place the sheets on the work cart/station.
(b) Place the patient's uninjured phalanges between 70 - 90 degrees of flexion.
(c) Remove one plaster sheet from the stack of five.
(d) Place the sheet on the dorsal aspect of the hand from the tip of the phalanges to the cubital space to obtain the sheet length.
(e) Place the measured sheet on the stack, cut the outlined pattern and excess length for all sheets, and place on the work cart/station for later use.
(f) Discard the excess materials in a trash receptacle.
14. Apply the first plaster/fiberglass layer.
NOTE: Examination gloves are recommended to protect the technician's hands as the resin in the plaster may cause the skin on the hands to dry up.
Chapter 3: Skill Level Tasks 3-342 STP 8-68B13-SM-TG 15 April 2016
CAUTION: If the casting material is removed while bubbles are still present, dry spots will be visible during application. Dry spots cause integrity breakdown of the cast.
a. Place the plaster/fiberglass roll in the bucket of tepid water and remove when the bubbles cease to rise.
b. Squeeze the roll together (do not wring the roll).
NOTE: Gently squeeze the roll inward to evenly distribute the water and prevent telescoping of the roll during application.
c Place the edge of the casting material on the ulnar styloid and wrap two rotations around the wrist to secure the edge.
NOTE: The cast is most susceptible to losing strength in the palm region. Therefore, a twisting or cut method is authorized. Technicians may have their own preference to these methods.
• “the twisting method.” The twisting method provides strength to the cast. As the roll is pushed through the palm, pinch the sides of the plaster roll together (not recommended for fiberglass) twist and evenly space the casting material on the webril. Smooth out with volar side of fingers.
• “the cut method.” The cutting method provides cast cosmetics. As the roll is pushed through the palm, make a horizontal cut to the proximal edge of the plaster/fiberglass roll and smooth out with volar aspect of fingers or palm.
d. Continue wrapping through the palm, around the phalanges, back up the forearm, and end 1/2 inch distal to the proximal edge of the webril.
e.Overlap the plaster/fiberglass by 1/4 - 1/2 the previous wrap.
NOTE: The top of the plaster/fiberglass should bisect the middle of the previous layer and present an evenly applied cast.
15. Laminate the casting material.
CAUTION: To reduce cast indentations, which can cause pressure sores to the patient's skin under the cast, keep fingertips off the cast during the application and molding process. If the patient feels pressure sores or hot spots developing under the cast, remove the cast immediately and start over with step 2.
a. Place the palm of each hand on the cast.
b. Rub the cast material in the direction it was applied.
NOTE: Laminating the cast material fills in the pores, which assists in providing strength to the cast.
c. Continue rubbing the cast until the tone/texture changes.
NOTE: The dull white color indicates the plaster is beginning to cure.
16. Apply the reinforcement splint to the volar and/or dorsal aspects of cast, as applicable.
NOTE: If using fiberglass casting materials, go to step 15 (skip step 14).
Chapter 3: Skill Level Tasks 15 April 2016 STP 8-68B13-SM-TG 3-343
a. Volar aspect.
(1) Place the splint in the bucket of tepid water, wait for the bubbles to subside, then remove the splint from water.
(2) Squeeze the splint together to eliminate excess water.
CAUTION: Keep the plaster/fiberglass roll on the extremity as it is applied to reduce possible constrictive edema caused by applying the plaster/fiberglass too tight.
(3) Place the reinforcement splint on the volar aspect of the cast.
(4) Laminate the splint to the cast.
(5) Maintain the patient's wrist between 15 - 30 degrees of extension and the phalanges between 70 - 90 degrees of flexion.
b. Dorsal aspect.
(1) Repeat steps 16a(1) - (2).
(2) Place the reinforcement splint on the dorsal aspect of the cast.
(3) Repeat steps 16a(4) - (5).
17. Apply the second plaster/fiberglass layer (repeat steps 14 - 15).
CAUTION: Excessive pressure may result in further patient injury. Talk to the patient while performing this procedure (e.g., How do you feel? Is the pressure too much?).
18. Mold the casting material.
NOTE: All casts require molding. Molds are done simultaneously. Go back and forth between the molds as the cast cures.
a. Interosseus mold.
NOTE: The interosseous mold is used to prevent movement of the wrist in the cast and promote fracture healing.
(1) Place the heel of one hand on the volar aspect of the distal wrist.
(2) Place the heel of the second hand on the dorsal aspect of the distal wrist.
(3) Squeeze the heels of the hands.
(4) Apply firm and gradual pressure beginning at the wrist and progress up the forearm while maintaining the wrist in correct position.
(5) Remove the heel of each hand from the cast when the contours of the wrist and forearm have been shaped and the cast is cured.
b.Phalange(s) mold.
(1) Cup the injured phalanges with one hand.
(2) Apply firm and gradual pressure beginning at the tip of the phalanges and progress up the forearm while maintaining the phalanges and wrist in the correct position.
(3) Remove the heel of each hand from the cast when the contours of the phalanges, wrist, and forearm have been shaped and the cast is cured.
19. Trim the cast to meet the cast standards.
a. Verify the alignment of the wrist with a goniometer.
(1) Repeat steps 10b-d.
(2) Verify the wrist measures between 15 - 30 degrees of extension.
(3) Remove the cast and start over with step 2.
Chapter 3: Skill Level Tasks 3-344 STP 8-68B13-SM-TG 15 April 2016
b. Verify the alignment of the phalanges with a goniometer.
(1) Repeat steps 11b - d.
(2) Verify the phalange measure between 70 - 90 of flexion.
(3) Remove the cast and start over with step 2.
c. Verify the cast dimensions.
(1) The distal edge of the cast rests 1/8 - 1/4 inch distal to the tips of the phalanges.
(2) The proximal edge of the cast rests 1 - 1 1/2 inches distal to the cubital space.
(3) The MCPJs are covered.
d. Check the ROM of the thumb and elbow.
(1) Instruct the patient to extend and flex the thumb.
(2) Instruct the patient to extend and flex the elbow.
e.Trim back the cast material until the dimensions and ROM standards are met.
f. Trim the proximal and distal edges of the cast.
(1) Cut the outside edge of the cast padding.
(2) Pull down the webril and stockinette.
CAUTION: The finished edge of the cast should end priximal to the base of the thumb to avoid radial nerve impingement.
(3) Tape down the edges of the stockinette and webril, if necessary.
20. Apply the final plaster/fiberglass layer (repeat steps 14 - 15).
21. Check the patient's capillary refill (repeat step 6).
22. Clean the plaster resin off the patient's skin using a damp wash towel or alcohol pads.
23. Give the patient verbal and written instructions on cast care.
a. Provide the patient with a copy of the clinic hours and telephone number. Instruct the patient to call the cast clinic with any concerns or questions regarding their cast. For after duty hours concerns, instruct the patient to report to the emergency room.
b. Provide the patient with a cast care booklet or written instructions.
c.Instruct the patient to elevate the extremity above the heart, and extend, flex, and wiggle fingers (demonstrate for patient) to reduce swelling.
d. Instruct the patient on what not to do.
(1) Do not stick anything down the cast.
(2) Do not remove the cast.
(3) Do not alter the cast (e.g., writing on it, coloring).
24. Fit the sling to the patient, as required.
NOTE: Considerations for applying a sling include elderly patients, severity of fractures (e.g., Colles', Smith's, Bennett's), patient's comfort, and physician's or technician's preference.
25. Annotate the procedure applied to the patient in the medical record or SF 513.
a. Record the procedure applied and cast care instructions provided.
b. Sign your name.
26. Escort or direct the patient to the front desk to make a follow-up appointment.
Chapter 3: Skill Level Tasks 15 April 2016 STP 8-68B13-SM-TG 3-345
Evaluation Preparation: You must evaluate the students on their performance of this task in a field condition related to the actual task.
Performance Measures GO
1. Reviewed the order from the physician.
2. Gathered the equipment and materials.
3. Told the patient your name and job title.
4 Explained the procedure to the patient.
5 Donned safety equipment (patient and technician).
6 Inspected the patient's arms
7 Checked the capillary refill of the patient's hands/fingers
8 Prepared the stockinette
9 Applied the stockinette to the patient's injured arm
10 Set the patient's injured wrist at 15 - 30 degrees extension
11 Set the phalanges at 70 - 90 degrees of flexion
12 Applied the webril (cast padding) to the injured phalanges, wrist, and forearm
13 Prepared the casting materials, as applicable
14 Applied the first plaster/fiberglass layer
15 Laminated the casting material
16. Applied the reinforcement splint to the volar and/or dorsal aspects of cast, as applicable.
17. Applied the second plaster/fiberglass layer (repeat steps 14 - 15)t.
18. Molded the casting material.
19. Trimmed the cast to meet the cast standards.
20. Applied the final plaster/fiberglass layer (repeat steps 14 - 15).
21 Checked the patient's capillary refill (repeat step 6)
22 Cleaned the plaster resin off the patient's skin using a damp wash
8-68B13-SM-TG
April 2016
Chapter 3: Skill Level Tasks 3-346 STP
15
GO
NO
towel or alcohol pads.
23. Gave the patient verbal and written instructions on cast care.
24. Fit the sling to the patient, as required.
25. Annotated the procedure applied to the patient in the medical record or SF 513.
26 Escorted or directed the patient to the front desk to make a follow-up appointment.
Evaluation Guidance: Score each Soldier according to the performance measures in the evaluation guide. Unless otherwise stated in the task summary, the Soldier must pass all performance measures to be scored GO. If the Soldier fails any step, show what was done wrong and how to do it correctly.
References
Chapter 3: Skill Level Tasks 15 April 2016 STP 8-68B13-SM-TG 3-347
GO NO GO
Performance Measures
SF
None
Required Related
513
Apply a Long Arm Thumb Spica Cast
081-68B-2201
Conditions: You have a physician's written or verbal orders to apply a long arm thumb spica cast to an orthopedic patient. The patient is sitting on an orthopedic examination bed and may be accompanied by a family member/chaperone. Nursing personnel and physician are available. You will need the patient's medical record or Standard Form (SF) 513, Medical Record - Consultation Sheet, the local standard operating procedures (SOP), work cart/station, roll of stockinette, plaster or fiberglass rolls, box of plaster reinforcement sheets, webril rolls, cast saw, cast spreader, eye protection, hearing protection, roll of adhesive tape, examination gloves, scissors, hospital pads (chux) or bed sheet, goniometer, bucket of tepid water with plastic bag, sling, cast care booklet or equivalent, box of alcohol pads or damp wash towel, sink with faucet, and trash receptacle.
Standards: Apply the long arm thumb spica cast to the patient's injured arm from 1/8 - 1/4 inch beyond the tip of the injured thumb down the radial side of the hand and arm to 2 - 2 1/2 inches distal to the axilla. The cast immobilizes the wrist, with the wrist set at 0 - 15 degrees of extension, thumb in opposition to the index finger, and the elbow set at 90 degrees of flexion; eliminates ulnar and radial deviation, supination, and pronation; and allows full range of motion (ROM) to the phalanges. The capillary refill returns within 1 - 3 seconds. This cast is used for thumb soft tissue injuries, scaphoid injuries/fractures, distal humerus/olecranon fractures and elbow dislocations.
Performance Steps:
1. Review the order from the physician.
2. Gather equipment and materials.
NOTE: Physician's order, technician's preference, availability of supplies, and/or patient's extremity size will determine which casting material (fiberglass/plaster) will be used.
a. Gather equipment.
(1) Scissors.
(2) Goniometer
(3) Uility cart
(4) Cast saw
(5) Cast spreader
(6) Hearing protection
(7) Eye protection
CAUTION: The temperature of the water must be tepid (70° - 80° F) to reduce further injury (possible burns) to the patient. The technician must change the water after each application, as the residue in the cast bucket will act as an accelerator causing the casting material to increase in heat emission.
(8) Bucket of tepid water with plastic bag.
b.Assemble materials.
(1) Stockinette roll (1 inch and 2, 3 or 4 inch).
(2) W ebril rolls (2 or 3 inch and 4 inch).
Chapter 3: Skill Level Tasks 3-348 STP 8-68B13-SM-TG 15 April 2016
(3) Examination gloves
(4) Hospital pad (chux) or bed sheet
(5) Sling
(6) Box of plaster reinforcement sheets (4 x 15 and 5 x 30)
(7) Alcohol pads or damp wash towel
(8) Plaster rolls (3 and 4 inch) or fiberglass rolls (2 inch and 3 or 4 inch)
(9) Adhesive tape (1 inch)
(10) Cast care booklet
c. Place equipment and materials on the work cart or station.
3. Tell the patient your name and job title.
CAUTION: During casting application a chemical response (exothermic reaction) will occur between the water and the plaster (gypsum). This is a safe and common occurrence. The cast will initially become warm and cool down within 2 - 5 minutes. However, if it doesn't cool down or there is an increase of heat intensity during the cast application, the splint may need to be removed.
4. Explain the procedure to the patient.
5. Don safety equipment (patient and technician).
6. Inspect the patient's arms.
CAUTION: Always practice body substance isolation prior to applying traction, splints, or casts to patients.
a. Place examination gloves on hands.
b. Place the patient sitting or supine on the examination bed.
c.Inspect both arms for any skin conditions (e.g., cuts, abrasions, lacerations, and skin rashes).
NOTE: Inform physician if conditions are present and follow physician's instructions.
d. Examine both arms and wrists for jewelry and remove if found.
NOTE: All jewelry on both hands and wrists must be removed. Give jewelry to family member or secure with patient's belongings according to the local SOP.
7. Check the capillary refill of the patient's hands/fingers.
a. Squeeze the patient's fingers; nail beds will turn white.
CAUTION: If capillary refill is delayed for more than 2 seconds, inform the physician and follow the physician's instructions.
b. Release the patient's fingers; nail beds will return pink.
8. Prepare the stockinette.
Chapter 3: Skill Level Tasks 15 April 2016 STP 8-68B13-SM-TG 3-349
NOTE: The stockinette is a form of protection against the exothermic reaction caused by casting materials and generally used for all casts except on patients who have had recent surgery, recently reduced fractures, or as directed by the physician.
a. Place the hospital pad or bed sheet on the patient's lap.
NOTE: All patients should be given a covering (e.g., chux, bed sheet) to reduce damaging their clothing during the casting process.
b. Place the work cart at the edge of the bed.
NOTE: Numerous props may be used (e.g. orthopedic bump, T stand, finger trap stand, nursing assistant). Technician preference will determine if a prop is used.
c. Place the patient's uninjured elbow at a 45 degree angle to the upper torso.
d. Forearm stockinette.
(1) Measure from 2 inches distal to the metacarpolphalangeal joints (MCPJs) to the axilla region for the stockinette length.
(2) Pull down the stockinette and cut the measured length.
e. Thumb stockinette.
(1) Measure from 1/2 inch distal to the tip of the thumb to the base of the wrist for the stockinette length.
(2) Pull down the stockinette and cut the measured length.
(3) Cut a vertical slit to allow the stockinette to rest flat from the web spacing, between the thumb and the 2nd phalange, and the base of the wrist.
f. Roll the stockinette leaving a 1 - 2 inch cuff at the distal edge, then place on the work cart/station for later use.
9. Apply the stockinette to the patient's injured arm and thumb.
a. Forearm stockinette.
(1) Hold open the sides of the stockinette.
(2) Place the injured hand in the open end of the stockinette.
(3) Roll the stockinette on the injured arm from 2 inches distal to the MCPJs to the axilla region.
NOTE: Rolling the stockinette on promotes a better fit.
(4) Pinch the stockinette at the base of the thumb and make a 1/2 inch cut at a 45 degree angle.
(5) Place the patient's thumb through the precut hole.
(6) Smooth out the stockinette.
b. Thumb stockinette.
(1) Roll the stockinette from 1/2 inch distal to the tip of the thumb to the base of the wrist.
(2) Smooth out the stockinette.
10. Set the patient's injured wrist at 0 - 15 degrees of extension.
NOTE: All hand casts are applied absent of pronation, supination, radial, or ulnar deviation unless directed by the physician.
a. Position the patient's injured elbow at a 90 degree angle to the upper torso.
Chapter 3: Skill Level Tasks 3-350 STP 8-68B13-SM-TG 15 April 2016
NOTE: Family member(s), nursing staff, an orthopedic technician, or finger traps can be used to assist in positioning the patient's arm.
b. Place the patient's index finger and thumb in opposition to one another.
NOTE: Placing the thumb and forefinger in opposition to one another assists the patient in maintaining the wrist in a neutral position and reduces the strain on the thumb ligament. This is commonly referred to as the can of coke position.
c Place the stationary arm of the goniometer vertically, bisecting the ulnar.
d. Place the protractor of the goniometer on the ulnar styloid.
e. Place the moving arm of the goniometer vertically, bisecting the lateral side of the 5th metacarpal.
f. Position the wrist until the goniometer measures 0 - 15 degrees of extension.
11. Set the injured elbow at 90 degrees of flexion.
a.Place the stationary arm of the goniometer so that it bisects the middle of the humerus and deltoid muscle.
b. Place the protractor of the goniometer on the olecranon (elbow), forming a 90 degree angle.
c. Place the moving arm of the goniometer so that it bisects the middle of the forearm and the 2nd and 3rd phalanges.
d. Position the elbow until the goniometer measures 90 degrees of flexion.
CAUTION: Wrinkled padding can cause pressure sores which can lead to ulcers. If the cast padding is wrinkled, it must be removed and new padding applied
12. Apply the cast padding (webril) to the injured thumb, wrist, and forearm.
CAUTION: Keep the webril roll on the extremity as it is applied to reduce possible constrictive edema caused by applying the webril too tight.
a. Place the edge of the webril on the ulnar styloid and wrap two rotations around the wrist.
NOTE: The webril application is started at the wrist to provide an anchor and extra padding to the ulnar styloid. The webril application can also be started at the distal edge of the thumb.
b. Continue wrapping through the palm, around the thumb ending 1/2 inch proximal to the distal edge of the stockinette, back up the forearm, figure eight around the elbow, and end 1/2 inch distal to the proximal edge of the stockinette.
NOTE: The webril can be cut or torn (horizontally) when wrapping through the palm to provide a better fit. Technician preference will determine which technique to use.
c.Overlap the webril by 1/4 - 1/2 the previous wrap with each turn.
NOTE: The top of the webril should bisect the middle of the previous layer covering up the shallow line and present evenly applied padding.
13. Prepare the casting materials, as applicable.
Chapter 3: Skill Level Tasks 15 April 2016 STP 8-68B13-SM-TG 3-351
CAUTION: It is mandatory to use gloves to prevent the technician from receiving chemical burns while applying a fiberglass cast.
a. Place the gloves on hands and open the fiberglass casting package.
NOTE: Open one fiberglass package at a time. As fiberglass comes in contact with the air, the roll will start to cure (set).
b. Prepare the plaster reinforcement sheets.
(1) Radial aspect
(a) Open the box of 4 x 15 plaster reinforcement sheets. Remove the sheets from the box and unwrap the package. Peel back the edges of five sheets and remove from the stack. Place on work cart/station.
(b) Place the patient's uninjured thumb in opposition to the index finger.
(c) Remove one plaster sheet from the stack of five.
(d) Place the sheet from the tip of the thumb to the cubital space to obtain the sheet length.
(e) Draw a horizontal line on each side of the plaster sheet at the base of the thumb.
NOTE: The lines at the base of the thumb are designed for the splint to lay flat on the cast.
(f) Place the measured sheet on stack, and cut the outlined pattern and excess length for all sheets. Place the stack on the work cart/station for later use.
(g) Discard the excess material in the trash receptacle.
(2) Posterior aspect
(a) Open the box of 5 x 30 plaster sheets. Remove the sheets from the box and unwrap the package. Locate the edge of one stack and remove it from the package.
NOTE: The 5 x 30 plaster splints are usually stacked in increments of five from the manufacturer. If not prestacked, count out five layers.
(b) Position the patient's elbow at a 90 degree angle to upper torso.
NOTE: Family members, nursing staff, orthopaedic technician, or finger traps can be used to assist in positioning the patient's arm.
(c) Place the distal end of the plaster stack on the lateral aspect of the midforearm and instruct the patient or assistant to hold the distal end. Simultaneously bring the proximal end 2 inches distal to the axilla or resting on the base of the deltoid muscle. Fold down the proximal end, cut off the excess, and place the stack on the work cart/station for later use.
14. Apply the first plaster/fiberglass layer.
NOTE: Examination gloves are recommended to protect the technician's hands as the resin in the plaster may cause the skin on the hands to dry up.
CAUTION: If the casting material is removed while bubbles are still present, dry spots will be visible during application. Dry spots cause integrity breakdown of the cast.
a. Place the plaster or fiberglass roll in bucket of tepid water and remove when bubbles cease to rise.
Chapter 3: Skill Level Tasks 3-352 STP 8-68B13-SM-TG 15 April 2016
b. Squeeze the roll together (do not wring the roll).
NOTE: Gently squeeze the roll inward to evenly distribute the water and prevent telescoping of the roll during application.
c Place the edge of the casting material on the ulnar styloid and wrap two rotations around the wrist to secure the edge.
NOTE: The cast is most susceptible to losing strength in the palm region. Therefore, a twisting or cut method is authorized. Technicians may have their own preference to these methods.
• “the twisting method.” The twisting method provides strength to the cast. As the roll is pushed through the palm, pinch the sides of the plaster roll together (not recommended for fiberglass) twist and evenly space the casting material on the webril. Smooth out with volar side of fingers.
• “the cut method.” The cutting method provides cast cosmetics. As the roll is pushed through the palm, make a horizontal cut to the proximal edge of the plaster/fiberglass roll and smooth out with volar aspect of fingers or palm.
d. Continue wrapping through the palm, around the thumb ending 1/2 inch proximal to the distal edge of the stockinette, back up the forearm, figure eight around the elbow, and end 1/2 inch distal to the proximal edge of the stockinette.
e Overlap the plaster/fiberglass by 1/4 - 1/2 the previous wrap.
NOTE: The top of the plaster/fiberglass should bisect the middle of the previous layer and present an evenly applied cast.
15. Laminate the casting material.
CAUTION: To reduce cast indentations, which can cause pressure sores to the patient's skin under the cast, keep fingertips off the cast during the application and molding process. If the patient feels pressure sores or hot spots developing under the cast, remove the cast immediately and start over with step 2.
a. Place the palm of each hand on the cast.
b. Rub the cast material in the direction it was applied.
NOTE: Laminating the cast material fills in the pores, which assists in providing strength to the cast.
c Continue rubbing the cast until the tone/texture changes.
NOTE: The dull white color indicates the plaster is beginning to cure.
16. Apply the plaster reinforcement splint(s).
NOTE: The reinforcement splint is used to strengthen and support the cast. If using fiberglass, go to step 17.
a. Apply the radial aspect splint.
Chapter 3: Skill Level Tasks 15 April 2016 STP 8-68B13-SM-TG 3-353
(1) Place the splint in the bucket of tepid water, wait for the bubbles to subside, then remove the splint from the water.
(2) Squeeze the splint together to eliminate excess water.
CAUTION: Keep the plaster/fiberglass roll on the extremity as it is applied to reduce possible constrictive edema caused by applying the plaster/fiberglass too tight.
(3) Place the reinforcement splint on the radial side of the cast around the thumb.
(4) Laminate the splint to the cast.
(5) Maintain the patient's wrist between 0 - 15 degrees of extension and the thumb in opposition to the index finger.
b. Apply the posterior aspect splint.
(1) Place the plaster splint in the bucket of tepid water, wait for the bubbles to subside, then remove the splint from the water.
(2) Squeeze the plaster splint together to eliminate excess water.
(3) Place the reinforcement splint centered and on the posterior side of the elbow extending from mid forearm to 1/2 inch distal to the webril edge.
(4) Laminate the splint to the cast.
(5) Maintain the patient's elbow at 90 degrees of flexion.
NOTE: Family member(s), nursing staff, an orthopedic technician, or a finger trap stand can be used to assist in positioning the patient's arm.
17. Apply the second plaster/fiberglass layer (repeat steps 14 - 15).
CAUTION: Excessive pressure may result in further patient injury. Talk to the patient while performing this procedure (e.g., How do you feel? Is the pressure too much?).
18. Mold the casting material.
NOTE: All casts require molding. Molds are done simultaneously. Go back and forth between the molds as the cast cures.
a Bicipital mold.
NOTE: The bicipital mold is used to prevent movement of the humerus in the cast and promote fracture healing.
(1) Place the palm of one hand on the biceps muscle.
(2) Place the palm of the second hand on the triceps muscle.
(3) Press the palms together to conform the plaster/fiberglass to the upper arm.
b. Interosseous mold.
NOTE: The interosseous mold is used to prevent movement of the wrist in the cast and promote fracture healing.
(1) Place the heel of one hand on the volar aspect of the distal wrist.
(2) Place the heel of the second hand on the dorsal aspect of the distal wrist.
(3) Squeeze the heels of the hands.
(4) Apply firm and gradual pressure beginning at the wrist and progress up the forearm while maintaining the wrist in correct position.
Chapter 3: Skill Level Tasks 3-354 STP 8-68B13-SM-TG 15 April 2016
(5) Maintain the patient's wrist in the correct position.
c Thumb Mold.
(1) Cup the injured thumb with one hand.
(2) Squeeze the thumb.
(3) Apply firm and gradual pressure beginning at the tip of the thumb and progress up the forearm while maintaining the thumb and wrist in correct position.
d. Remove the heels of the hands from the cast when the contours of the wrist and forearm have been shaped and the cast is cured.
19. Trim the cast to meet the cast standards.
a. Verify the alignment of the wrist with the goniometer.
(1) Repeat steps 10c - e.
(2) Verify the wrist measures between 0 - 15 degrees of extension.
(3) Remove the cast and start over with step 2.
b. Verify the alignment of the elbow with a goniometer.
(1) Repeat steps 11a - c.
(2) Verify the elbow measures at 90 degrees of flexion.
(3) Remove the cast and start over with step 2.
c. Verify the cast dimensions.
CAUTION: To avoid further injury to the patient, the finished edge of the cast should end distal to the tip of the thumb.
(1) The distal edge of the cast at the thumb rests 1/8 - 1/4 inch beyond the tip of the thumb.
(2) The distal edge of the cast, volar aspect, rests within 1/8 inch of the distal palmar crease.
(3) The proximal edge of the cast rests 2 - 2 1/2 inches distal to the axilla region.
d. Check the ROM of the phalanges.
NOTE: The patient should be able to freely extend and flex the fingers and touch the thumb to all fingers.
(1) Instruct the patient to extend and flex the uninjured fingers.
(2) Instruct the patient to extend and flex the elbow.
e.Trim back the cast material until the dimensions and ROM standards are met.
f.Trim the proximal and distal edges of the cast.
CAUTION: The finished edge of the cast should end priximal to the base of the thumb to avoid radial nerve impingement
(1) Cut the outside edge of the cast padding.
(2) Pull down the webril and stockinette.
(3) Tape down the edges of the stockinette and webril, if necessary.
20. Apply the final plaster layer (repeat steps 14 - 15).
21. Check the patient's capillary refill on the casted hand (repeat step 7).
22. Clean the plaster resin off the patient's skin using a damp wash towel or alcohol pads.
Chapter 3: Skill Level Tasks 15 April 2016 STP 8-68B13-SM-TG 3-355
NOTE: Use alcohol pads or fresh water from the faucet and not from the casting bucket.
23. Give the patient verbal and written instructions on cast care.
a. Provide the patient with a copy of the clinic hours and telephone number. Instruct the patient to call the cast clinic with any concerns or questions regarding their cast. For after duty hours concerns, instruct the patient to report to the emergency room.
b. Provide the patient with a cast care booklet or written instructions.
c.Instruct the patient to elevate the extremity above the heart, and extend, flex, and wiggle fingers (demonstrate for patient) to reduce swelling.
d. Instruct the patient on what not to do.
(1) Do not stick anything down the cast.
(2) Do not remove the cast.
(3) Do not alter the cast (e.g., writing on it, coloring).
24. Fit the sling to the patient, as required.
NOTE: Considerations for applying a sling include elderly patients, severity of fractures (e.g., Colles', Smith's, Bennett's), patient's comfort, and physician's or technician's preference.
25. Annotate the procedure applied to patient in medical record or SF 513.
a. Record the procedure applied and cast care instructions provided.
b. Sign your name.
26. Escort or direct the patient to the front desk to make a follow-up appointment.
Evaluation Preparation: You must evaluate the students on their performance of this task in a field condition related to the actual task.
Performance Measures
1 Reviewed the order from the physician.
2 Gathered equipment and materials.
3 Told the patient your name and job title.
4 Explained the procedure to the patient.
5 Donned safety equipment (patient and technician).
6 Inspected the patient's arms.
7 Checked the capillary refill of the patient's hands/fingers.
8 Prepared the stockinette.
9. Applied the stockinette to the patient's injured arm and thumb.
10. Set the patient's injured wrist at 0 - 15 degrees of extension.
11. Set the injured elbow at 90 degrees of flexion.
Chapter 3: Skill Level Tasks 3-356 STP 8-68B13-SM-TG 15 April 2016
GO NO GO
12 Applied the cast padding (webril) to the injured thumb, wrist, and forearm.
13 Prepared the casting materials, as applicable.
14 Applied the first plaster/fiberglass layer.
15. Laminated the casting material.
16. Applied the the plaster reinforcement splint(s), if using plaster.
17. Applied the second plaster/fiberglass layer (repeated steps 14 - 15).
18. Molded the casting material.
19. Trimmed the cast to meet the cast standards.
20. Applied the final plaster layer (repeated steps 14 - 15).
21. Checked the patient's capillary refill on the casted hand (repeated step 7).
22 Cleaned the plaster resin off the patient's skin using a damp wash towel or alcohol pads.
23 Gave the patient verbal and written instructions on cast care.
24 Fit the sling to the patient, as required.
25 Annotated the procedure applied to patient in medical record or SF 513.
26 Escorted or directed the patient to te front desk to make a follow-up appointment.
Evaluation Guidance: Score each Soldier according to the performance measures in the evaluation guide. Unless otherwise stated in the task summary, the Soldier must pass all performance measures to be scored GO. If the Soldier fails any step, show what was done wrong and how to do it correctly.
Chapter 3: Skill Level Tasks 15 April 2016 STP 8-68B13-SM-TG 3-357
GO NO GO
Performance Measures
References Required Related SF 513 None
Subject Area 13: Upper Extremity Splints
Apply a Coadaptation Splint
081-68B-2000
Conditions: You are presented with a physician's written or verbal order to apply a coadaptation splint to an orthopedic patient. The patient is sitting on an orthopedic examination bed and may be accompanied by a family member/chaperone. Nursing personnel and physician are available. You will need the patient's medical record or Standard Form (SF) 513, Medical Record - Consultation Sheet, work cart/station, plaster rolls, box of plaster reinforcement sheets, webril rolls, elastic bandages, examination gloves, scissors, adhesive tape, hospital pads (chux) or bed sheet, goniometer, bucket of tepid water with plastic bag, sling, cast care booklet or equivalent, box of alcohol pads or damp wash towel, sink with faucet, trash receptacle, and the local standing operating procedures (SOP).
Standards: Apply the coadaptation splint to the injured humerus/shoulder 1 inch superior to the acromioclavicular joint (AC) joint, 2 inches distal the axilla region with the elbow flexed at a 90 degree angle, and secure with elastic bandages. The elbow (90 degree angle) and humerus are immobilized by the splint. The splint eliminates rotation of the humerus and allows full range of motion of the wrist and phalanges. The capillary refill returns within 1 - 3 seconds.

NOTE: See Figure 3-60 for an example of a coadaptation splint.
Performance Steps:
1. Review the order from the physician.
2. Gather equipment and materials.
NOTE: Physician's order, technician's preference, availability of supplies, and/or patient's extremity size determines which casting material size is used.
3-358 STP 8-68B13-SM-TG 15 April 2016
Chapter 3: Skill Level Tasks
Figure 3-55. Coadaptation splint (prior to sling application)
a. Gather equipment.
(1) Scissors.
(2) Goniometer
(3) Utility cart
CAUTION: The temperature of the water must be tepid (70° - 80° F) to reduce further injury (possible burns) to the patient. The technician should draw room temperature water and initially use a thermometer to gauge water temperature. The technician must change the water after each application, as the residue in the cast bucket will act as an accelerator causing the casting material to increase in heat emission
(4) Bucket of tepid water with plastic bag.
b.Assemble materials.
(1) W ebril rolls (4 inch).
(2) Plaster rolls (4 inch).
(3) Elastic bandages (2 inch).
(4) Examination gloves.
(5) Hospital pad (chux) or bed sheet.
(6) Sling.
(7) Box of plaster reinforcement sheets (4 x 15 or 5 x 30).
(8) Box of alcohol pads or damp wash towel.
(9) Cast care booklet.
(10) Adhesive tape (1 inch).
c.Open and remove two plaster rolls from packages and place on work cart/station.
d.Place the materials on work cart/station.
3. Tell the patient your name and job title.
CAUTION: During the splinting application a chemical response (exothermic reaction) will occur between the water and the plaster (gypsum). This is a safe and common occurrence. The splint will initially become warm and cool down within 2 - 5 minutes. However, if it doesn't cool down or there is an increase of heat intensity during the splint application, the splint may need to be removed
4. Explain the procedure to the patient.
5. Inspect patient's arm.
CAUTION: Always practice body substance isolation (BSI) prior to applying traction, splints, or casts to patients
a. Place examination gloves on hands.
b. Place the patient in the sitting or supine position on the examination bed.
c. Roll the patient's shirt sleeve above the elbow on the injured side.
d.Inspect both arms for any skin conditions (e.g., cuts, abrasions, lacerations, and skin rashes).
NOTE: Inform physician if conditions are present and follow physician's instructions.
e. Examine both arms and wrists for jewelry and remove if found.
Chapter 3: Skill Level Tasks 15 April 2016 STP 8-68B13-SM-TG 3-359
NOTE: All jewelry on both hands and wrists must be removed. Give the jewelry to a family member, secure with the patient, or secure the belongings according to the local SOP.
6. Check capillary refill of patient's hands/fingers.
a. Squeeze patient's fingers; nail beds will turn white.
CAUTION: If capillary refill is delayed for more than 2 seconds, inform physician and follow physician's instructions.
b. Release patient's fingers; nail beds will return pink.
CAUTION: The temperature of the water must be tepid (70°-80° F) to reduce further injury (possible burns) to the patient.
7. Prepare the cast padding (webril) for coadaptation splint.
NOTE: Extremity size will determine the splint size (i.e. 4 x 15 or 5 x 30).
a. Prepare webril (cast padding) for the splint.
CAUTION: All patients should be given a covering (e.g., chux, bed sheet) to reduce damaging their clothing during the casting process and for privacy.
(1) Place hospital pad or bed sheet on patient's lap.
(2) Position the patient's uninjured elbow at a 90 degree angle.
(3) Locate the acromioclavicular (AC) joint and 2 inches distal to the axilla region.
(4) Measure from 1 inch proximal to the AC joint to 2 inches posteriorly around the elbow, to 2 inches distal to the axilla region.
(5) Place the measured webril on work cart/station.
(6) Roll out two to four additional layers to the same length and bisect the middle of the previous webril
(7) Discard all excess material in the trash receptacle.
b.Open the applicable size box of plaster reinforcement sheets. Remove the sheets from the box and unwrap the package. Peel back the edges of 10-15 sheets and remove from the stack. Place on work cart/station.
NOTE: The technician may choose to use plaster rolls in lieu of pre-sized reinforcement sheets.
c Remove one plaster sheet from the stack of 10-15.
d. Place sheet from the base of the deltoid muscle around the elbow to 2 inches from the axilla region.
e. Place the sheet on the stack, cut the outlined pattern and excess length for all sheets, and place on work cart/station for later use.
8. Set the patient's injured elbow with goniometer.
a. Position the patient's injured elbow on the bump at a 90 degree angle to the upper torso.
b. Place the stationary arm of the goniometer so that it bisects the lateral aspect of the humerus.
c. Place the protractor of the goniometer on the olecranon process (elbow).
d.Place the moving arm of the goniometer so that it bisects the forearm.
Chapter 3: Skill Level Tasks 3-360 STP 8-68B13-SM-TG 15 April 2016
e. Position the elbow until the goniometer measures 90 degrees flexion.
9. Apply the coadaptation splint to the injured arm.
NOTE: Assistance may be used prior to securing splint.
a. Place the plaster sheets in bucket of tepid water and remove when bubbles cease to rise.
b. Squeeze the sheets together to eliminate excess water.
NOTE: Do not wring the sheets. This will cause the roll to dry more quickly.
c Place the plaster sheets centered and 1/2 inch from the edge of the padding.
d. Laminate the plaster splint.
e. Fold over the edges of the padding.
f. Place an additional layer of padding over the folded edges.
g. Place the padded splint from the superior aspect of the AC joint, down the arm, over the elbow, posteriorly up the arm, ending 2 inches distal to the axilla region.
NOTE: The elbow should be flexed at 90 degrees or according to physician's order.
10. Secure the coadaptation splint to the injured arm.
a.Place the edge of the elastic bandage on the AC joint and begin wrapping around the shoulder two rotations to secure the edge.
b. Continue through the axilla, down the forearm, and figure of eight around the elbow.
c. Secure the elastic bandage with clips.
d.Tape down the elastic bandage between the clips.
e. Remove the clips and dispose of them in trash receptacle.
11. Mold the casting material to the arm.
a. Place the palm of hand on the triceps muscle and apply pressure. Hold until contours take shape.
b. Place the palm of hand on the olecranon (elbow) and apply pressure. Hold until contours take shape.
c. Place the palm of hand along the ulnar and apply pressure. Hold until contours take shape.
12. Trim the splint to meet the standards.
a. Verify the alignment of the injured elbow with goniometer.
(1) Repeat steps 8b-d.
(2) Verify the wrist measures between 0-15 degrees of extension.
NOTE: If wrist is not within 0-15 degrees of extension or ulnar or radial deviation are present, remove splint and go to step 9.
b. Verify the splint dimensions.
(1) The proximal edge of the splint is superior to the AC joint.
(2) The splint's proximal edge rests 2 inches distal to the axilla region or at the base of the deltoid muscle.
c. Check the range of motion (ROM) of the phalanges and shoulder.
(1) Instruct the patient to extend and flex fingers and touch thumb to all fingers.
Chapter 3: Skill Level Tasks 15 April 2016 STP 8-68B13-SM-TG 3-361
(2) Instruct the patient to extend and flex wrist.
13. Check the patient's capillary refill (refer to step 6).
14. Clean the plaster off the patient's skin using a damp wash towel or alcohol pads.
NOTE: Use alcohol pad or fresh water from the faucet and not from the casting bucket.
15. Fit the patient with a sling.
NOTE: Considerations for applying a sling include elderly patients, severity of fractures (e.g., Colles', Smith's, Bennett's), patient's comfort, and physician's or technician's preference.
16. Give the patient verbal and written instructions on splint care.
a. Provide the patient with a copy of the clinic hours and telephone number. Instruct the patient to call the cast clinic with any concerns or questions regarding their cast. For after duty hours concerns, instruct the patient to report to the emergency room.
b. Provide the patient with a cast care booklet or written instructions.
c.Instruct the patient to elevate the arm and flex and extend the uninjured fingers to increase circulation in the hand.
d.Tell the patient: Do not stick any objects down the splint, do not remove the splint, and do not alter the cast (e.g., cutting, removing padding).
17. Annotate the procedure applied to the patient in the medical record or SF 513.
NOTE: Record the procedure applied and cast care instructions provided to the patient in patient's medical record or SF 513 and sign your name.
a. Record the procedure applied and splint care instructions provided.
b. Sign your name.
18. Escort or direct the patient to the front desk to make a follow-up appointment.
Evaluation Preparation: You must evaluate the students on their performance of this task in a field condition related to the actual task.
Performance Measures
1 Reviewed the order from the physician.
2. Gathered equipment and materials.
3. Told the patient your name and job title.
4. Explained the procedure to the patient.
5. Inspected the patient's arms.
6. Checked capillary refill of patient's hands/fingers.
GO NO GO
Chapter 3: Skill Level Tasks 3-362 STP 8-68B13-SM-TG 15 April 2016
Performance Measures
7 Prepared the cast padding (webril) for coadaptation splint.
8 Set the patient's injured elbow with goniometer.
9. Applied the coadaptation splint to the injured arm.
10. Secured the coadaptation splint to the injured arm.
11. Molded the casting material to the arm.
12. Trimmed the splint to meet the standards.
13. Checked patient's capillary refill (referred to step 6).
14. Cleaned the plaster off patient's skin using a damp wash towel or alcohol pads.
15. Fitted the patient with a sling.
16. Gave the patient verbal and written instructions on splint care.
17 Annotated the procedure applied to the patient in the medical record or SF 513.
18 Escorted or directed patient to the front desk to make a follow-up appointment.
Evaluation Guidance: Score each Soldier according to the performance measures in the evaluation guide. Unless otherwise stated in the task summary, the Soldier must pass all performance measures to be scored GO. If the Soldier fails any step, show what was done wrong and how to do it correctly.
Chapter 3: Skill Level Tasks 15 April 2016 STP 8-68B13-SM-TG 3-363
GO NO GO
References Required Related SF 513 None
Skill Level SL3
Subject Area 14: Body Casts
Apply a Hip Spica Cast
081-68B-3400
Conditions: You are notified that a child patient has been taken to the operating for the the placement of a hip spica cast. Operating room (OR) personnel have prepared the OR and the patient. The child is supine on a hip spica table or fracture table, draped and ready for placement of the cast. You are there to assist the physician in the application of the cast. Operating room personnel and physician are available. You will need the patient's medical record, Standard Form (SF) 600, Medical Record - Chronological Record of Medical Care or SF 513, Medical Record - Consultation Sheet, the local standard operating procedures (SOP), work cart/station, treatment room, sink with faucet, roll of stockinette, webril rolls, plaster or fiberglass rolls, box of plaster reinforcement sheets, fiberglass casting gloves, examination gloves, scissors, cast saw, cast spreader, eye protection, hearing protection, roll of adhesive tape, gown, blanket, pillow, hospital pads (chux) or bed sheets, 18 inch wooden/metal bar (strut), goniometer, bucket of water with plastic bag, orthopedic felt pads or equivalent, hand towels, box of alcohol pads or damp wash towel, cast care booklet or equivalent, and trash receptacle.
Standards: Apply the hip spica cast without causing further harm to the patient and without breaking OR protocols. Assist the physician apply the hip spica cast variation according to the physician's orders. The cast eliminates movement of the torso and injured leg; allows full range of motion (ROM) of the neck, shoulders, and uninjured extremities based on the variation applied. The child's airway and digestion are unrestricted. The capillary refill on both feet return within 1 -3 seconds.
NOTE: While the hip spica cast itself is not a surgical procedure, it is generally applied after a surgical procedure or in lieu of a surgical procedure in the operating room. The hip spica cast is frequently applied to children, but can also be applied to adolescents and adults.
NOTE: The measurement for proximal and distal edge placement of materials will vary based on the size of the patient. The smaller measurement range is applicable to infants and increases to the largest measurement for adults.
NOTE: See Figure 3-61 and 3-62 for examples of the task.
Performance Steps:
1. Review the order from the physician.
2. Gather the equipment and materials not available in the OR.
NOTE: The physician's order, technician's preference, availability of supplies, and/or patient's extremity size will determine which casting material (fiberglass/ plaster) is used.
3. Transport the equipment and materials to the OR.
4. Perform a surgical scrub (see task 081-68D-0001).
Chapter 3: Skill Level Tasks 3-364 STP 8-68B13-SM-TG 15 April 2016
5. Visually inspect the patient's torso and legs for any contraindications to application of the cast.
6. Check the patient's capillary refill.
a. Squeeze the patient's fingers/toes; nail beds will turn white.
b. Release the patient's fingers/toes; nail beds will return pink.
c.Inform the physician and follow the physician's instructions.
7. Prepare the applicable stockinettes.
a. Torso stockinette.
(1) Measure the length from the nipple line - 1 inch below the nipple line to midthigh.
NOTE: The proximal measurement is based on the size the patient (infant, child, adolescent, or adult).
(2) Cut the measured length.
b. Full leg stockinette.
(1) Measure from midthigh to 1 inch distal to the phalanges.
(2) Cut the measured length.
c. Half leg stockinette.
(1) Measure from midthigh to 1 inch below the knee to 2 inches above the knee.
NOTE: The distal measurement is based on the size the patient (infant, child, adolescent, or adult).
(2) Cut the measured length.
d. Roll up each stockinette leaving a 1 to 2 inch cuff at the distal edge. Place on work cart/station for later use.
8. Prepare the felt pads.
a. Measure the length of the sacral region across the hips.
b. Measure the length of the iliac crests anteriorly.
c. Measure the length midaxillary across the chest.
d Measure the length of the spine.
e. Place the orthopedic felt next to the measured lengths, cut off the excess, and place the prepared pads on the work cart/station.
9. Assist the physician apply the stockinettes applicable to the variation ordered.
a. Remove the sheet or blanket from the patient, if applicable.
b. Apply the full leg stockinette.
(1) Hold open the leg stockinette.
(2) Roll the stockinette up the patient's injured leg from 1 inch distal to the phalanges to midthigh.
(3) Pinch the stockinette at the base of the tibia/fibula and back of knee and cut at a 45 degree angle.
c. Apply the half leg stockinette.
(1) Hold open the half leg stockinette.
(2) Roll the stockinette up the patient's injured leg from 1 inch below the knee to 2 inches above the knee to midthigh.
Chapter 3: Skill Level Tasks 15 April 2016 STP 8-68B13-SM-TG 3-365
NOTE: The distal measurement is based on the size the patient (infant, child, adolescent, or adult).
d. Apply the torso stockinette.
(1) Hold open sides of torso stockinette.
NOTE: Assistance from OR or nursing personnel can be used.
(2) Roll the stockinette over upper torso from midthigh to the nipple line to 1 inch below the nipple line.
NOTE: The proximal measurement is based on the size the patient (infant, child, adolescent, or adult).
(3) Adjust the stockinette to the torso.
(4) Cut the medial aspect of the stockinette.
e. Smooth out the stockinettes and tape the cut ends together.
10. Assist the physician position the patient on the hip spica table.
a. Adjust the patient's position so the patient is supine and the patient's groin is up against the peroneal post.
b. Place the spinous processes bar between the patient's skin and the applied stockinette for easy removal of the patient from the hip spica table.
c Adjust the patient's position so the scapula is flush with the edge of the hip spica table.
d.Instruct the OR or nursing assistant(s) to hold the patient's legs.
NOTE: The physician's order will determine the degree of flexion of the injured knee and the adduction or abduction of the hips.
11. Assist the physician apply the felt padding to the appropriate areas.
NOTE: The orthopedic felt is applied to all bony prominences to reduce friction and cast complications. The physician's order will determine whether the pads or webril are applied first.
a. Place the measured felt posterior across the sacral region to rest on both iliac crests.
b. Place the measured felt anterior across the axillary region distal to the nipple line.
c.Place the measured felt vertical on the spine to encompass the length of the spine.
d. Apply felt padding to any other areas of special attention, as appropriate.
12. Place a folded hand towel over the area of the diaphragm.
CAUTION: Keep the cast padding on the extremity throughout the application to avoid causing circulation compromise of the child's chest.
13. Assist the physician apply the webril (cast padding) to the patient's torso and leg(s), according to the variation ordered by the physician.
a. Unilateral hip spica.
(1) Place the webril end at the nipple line - 2 inches below the nipple line and wrap two rotations, continue wrapping down the torso, overlapping figure eight between the torso (inguinal region), and continue to the distal aspects.
Chapter 3: Skill Level Tasks 3-366 STP 8-68B13-SM-TG 15 April 2016
NOTE: The proximal measurement is based on the size the patient (infant, child, adolescent, or adult).
(a) End 1 inch below the greater trochanter on the uninjured side.
(b) Continue wrapping down the leg, ending at the distal aspect of the phalanges on the injured side.
(2) Overlap the webril by 1/4 - 1/2 the previous wrap with each turn.
b.One and one-half hip spica.
(1) Place the webril end at the nipple line - 2 inches below the nipple line and wrap two rotations, continue wrapping down the torso, overlapping figure eight between the torso (inguinal region), and continue to the distal aspects.
NOTE: The proximal measurement is based on the size the patient (infant, child, adolescent, or adult).
(a) Continue wrapping down the leg, ending at the distal aspect of the knee to 3 inches above the knee on the uninjured side.
NOTE: The distal measurement is based on the size the patient (infant, child, adolescent, or adult).
(b) Continue wrapping down the leg, ending at the distal aspect of the phalanges on the injured side.
(2) Overlap the webril by 1/4 - 1/2 the previous wrap with each turn.
c. Bilateral hip spica.
(1) Place the webril end at the nipple line - 2 inches below the nipple line and wrap two rotations, continue wrapping down the torso, overlapping figure eight between the torso (inguinal region), continue wrapping down the leg, ending at the distal aspect of the phalanges on both legs.
NOTE: The proximal measurement is based on the size the patient (infant, child, adolescent, or adult).
(2) Overlap the webril by 1/4 - 1/2 the previous wrap with each turn.
d. Non-mobile infant hip spica.
(1) Place the webril end at the nipple line - 2 inches below the nipple line and wrap two rotations, continue wrapping down the torso, overlapping figure eight between the torso (inguinal region), continue wrapping down the leg, ending at the distal aspect of the knee to 3 inches above the knee on both legs.
NOTE: The proximal and distal measurement is based on the size the patient (infant, child, adolescent, or adult).
(2) Overlap the webril by 1/4 - 1/2 the previous wrap with each turn.
14. Prepare casting materials, as applicable.
CAUTION It is mandatory for the technician to use gloves to prevent chemical burns to the hands.
a. Place the gloves on hands and open the fiberglass casting package.
Chapter 3: Skill Level Tasks 15 April 2016 STP 8-68B13-SM-TG 3-367
b. Prepare the reinforcement splints for the posterior, lateral, and inguinal aspects of the cast on the injured side.
(1) Open a box of 5 x 30 inch plaster reinforcement sheets. Remove and unwrap the package. Locate the edges of three stacks and remove them from the package, then place on the work cart/station.
(2) Posterior aspect splint.
(a) Measure across the sacral region over both hips.
(b) Place a stack of five plaster sheets next to the measured length, cut off the excess amount, and place the stack on the work cart/station.
(3) Lateral and inguinal aspect splint.
(a) Measure across the pubic area and around each hip.
(b) Place a stack of five plaster sheets next to the measured length, cut off the excess amount, and place the stack on the work cart/station.
c.Discard the excess material in the trash receptacle.
15. Assist the physician apply the first plaster/fiberglass layer to the patient's torso and leg(s), according to the variation ordered by the physician.
NOTE: Apply casting material to the torso from the proximal to distal aspect. Casting material can be applied all at once or separately (torso/leg). The placement of the proximal edge must not impede breathing or digestion but still secure the pelvic girdle in the desired position.
CAUTION: If the casting material is removed while bubbles are still present, dry spots will be visible during application. Dry spots cause integrity breakdown of the cast.
a. Place the plaster or fiberglass roll in the bucket of tepid water and remove when bubbles cease to rise.
b. Squeeze the roll together (do not wring the roll).
c. Unilateral hip spica.
(1) Place the webril end 1 - 3 inches below the nipple line and wrap two rotations, continue wrapping down the torso, overlapping figure eight between the torso (inguinal region), and continue to the distal aspects.
NOTE: The proximal measurement is based on the size the patient (infant, child, adolescent, or adult).
(a) End at the greater trochanter, encompassing the iliac crest on the uninjured side.
(b) Continue wrapping down the leg, ending at the web spacing of the phalanges on the injured side.
(2) Overlap the plaster/fiberglass by 1/4 to 1/2 the previous wrap.
d.One and one-half hip spica.
(1) Place the webril end 1 - 3 inches below the nipple line and wrap two rotations, continue wrapping down the torso, overlapping figure eight between the torso (inguinal region), and continue to the distal aspects.
NOTE: The proximal measurement is based on the size the patient (infant, child, adolescent, or adult).
Chapter 3: Skill Level Tasks 3-368 STP 8-68B13-SM-TG 15 April 2016
(a) Continue wrapping down the leg, ending 1 to 4 inches above the knee on the uninjured side.
NOTE: The distal measurement is based on the size the patient (infant, child, adolescent, or adult).
(b) Continue wrapping down the leg, ending at the web spacing of the phalanges on the injured side.
(2) Overlap the webril by 1/4 to 1/2 the previous wrap with each turn.
e. Bilateral hip spica.
(1) Place the webril end 1 to 3 inches below the nipple line and wrap two rotations, continue wrapping down the torso, overlapping figure eight between the torso (inguinal region), continue wrapping down the leg, ending at the web spacing of the phalanges on both legs.
NOTE: The proximal measurement is based on the size the patient (infant, child, adolescent, or adult).
(2) Overlap the webril by 1/4 to 1/2 the previous wrap with each turn.
f.Non-mobile infant hip spica.
(1) Place the webril end 1/2 to 1 inch below the nipple line and wrap two rotations, continue wrapping down the torso, overlapping figure eight between the torso (inguinal region), continue wrapping down the leg, ending 1 inch above the knee on both legs.
NOTE: The proximal measurement is based on the size the infant.
(2) Overlap the webril by 1/4 to 1/2 the previous wrap with each turn.
16. Assist the physician laminate the casting material.
17. Assist the physician apply the reinforcement splints to the posterior, lateral, and inguinal region aspects of the cast.
NOTE: If using fiberglass, skip and go to step 18.
a. Posterior aspect splint.
(1) Place the splint a bucket of tepid water, wait for the bubbles to subside, then remove the splint from the water.
(2) Squeeze the splint together to elinate excess water.
(3) Place the splint across the sacral area posteriorly over both hips.
(4) Laminate the splint to the cast.
b. Lateral and inguinal region splints.
(1) Place one of the remaining splints in a bucket of tepid water, wait for the bubbles to subside, then remove the splint from the water.
(2) Squeeze the splint together to eliminate excess water.
(3) Place the splint medially across the pubic area and around one hip.
(4) Repeat substeps 15.b.(1)-(2) for the remaining splint.
(5) Place the splint medially across the pubic area and around the opposite hip (forming a figure of eight around the hips).
(6) Laminate the splints to the cast.
c. Instruct the assistant to maintain the patient's knee and ankle in a neutral position.
Chapter 3: Skill Level Tasks 15 April 2016 STP 8-68B13-SM-TG 3-369
18. Assist the physician apply the second plaster/fiberglass layer (repeat steps 15 - 16).
19. Assist the physician mold the cast to the body contours.
NOTE: Molds are done simultaneously. Go back and forth between the molds as the cast cures.
a. Place heel of hands on iliac crests and apply firm pressure.
b. Place the heel of the hands at the femoral condyles and apply firm pressure down the leg.
c. Place the heel of the hands on the torso and apply firm pressure.
d. Apply firm and gradual pressure back and forth from the iliac crests to the femoral condyles and legs.
e. Remove heels of the hands from cast when the body contours have been shaped and the cast is cured.
20. Assist the physician trim the cast to meet the standards applicable to the variation applied.
a. Trim the cast to fit the patient.
(1) Remove the patient from the fracture or hip spica table.
(2) Place a clean sheet on the bed and gently lay the patient on the bed.
(3) Draw a straight line anteriorly below the xiphoid process.
(4) Draw a curved line anteriorly above the pubis symphysis arch around each leg.
(5) Continue the line across the lower buttock region in a curved fashion above the coccyx and connect it to the opposite trimming line.
(6) Draw a 4 inch radius outline anteriorly at the abdomen.
(7) Cut the previous drawn outlines with the cast saw.
(8) Remove the towel from the diaphram area and place the excess cast material in the trash receptacle.
CAUTION: If breating is restricted and can't be alleviated by cast trimming, remove the cast and start over with step 2.
b. Instruct the patient to inhale and exhale to determine airway compliance.
c. Verify the cast dimensions of the variation applied.
NOTE: Cast dimensions vary based on the size of the patient.
(1) Unilateral hip spica.
(a) The proximal edge of the cast rests 1 to 3 inches below the nipple line.
(b) The distal edge of the cast on the injured leg rests at the web spacing of the toes.
(c) The distal edge of the cast on the uninjured leg rests at the greater trochanter encompassing the iliac crest.
(2) One and one-half hip spica.
(a) The proximal edge of the cast rests 1 to 3 inches below the nipple line.
(b) The distal edge of the cast on the injured leg rests at the web spacing of the toes.
(c) The distal edge of the cast on the uninjured leg rests 1 to 4 inches above the knee.
(3) Bilateral long leg hip spica.
(a) The proximal edge of the cast rests 1 to 3 inches below the nipple line.
Chapter 3: Skill Level Tasks 3-370 STP 8-68B13-SM-TG 15 April 2016
(b) The distal edge of the cast rests at the web spacing of the toes on both legs.
(4) Non-Mobile Infant Hip Spica.
(a) The proximal edge of the cast rests 1/2 to 1 inch below the nipple line.
(b) The distal edge of the cast rests 1 inch above the knee on both legs.
c Check the ROM of the torso and legs.
(1) Unilateral hip spica.
(a) Instruct the patient to sit in a chair from a standing position, if applicable.
(b) Instruct the patient to rotate the shoulders.
(c) Instruct the patient to extend/flex the uninjured leg.
(d) Instruct the patient extend and flex the phalanges on the injured leg.
(2) One and one-half hip spica.
(a) Instruct the patient to sit in a chair from a standing position, if applicable.
(b) Instruct the patient to rotate the shoulders.
(c) Instruct the patient to extend/flex the uninjured knee.
(d) Instruct the patient extend and flex the phalanges on the injured leg.
(3) Bilateral hip spica.
(a) Instruct the patient to rotate the shoulders.
(b) Instruct the patient extend and flex the phalanges on both legs.
(4) Non-Mobile infant hip spica.
(a) Hold the infant up into a sitting position.
(b) Rotate the infant's shoulders.
(c) Extend and flex the knees on both legs.
d.Trim back the cast material until the dimensions, ROM, and breathing standards are met.
e.Trim the distal and proximal edges of the cast.
(1) Cut the outside edge of the cast padding.
(2) Pull down the webril and stockinette.
(3) Tape down the edges of the stockinette and webril, if necessary.
21. Assist the physician apply the final plaster/fiberglass layer (repeat steps 15 - 16).
22. Assist the physician attach the wooden bar (strut) to the medial aspect of the injured and uninjured leg according to the variation applied.
a. Measure the distance between the legs.
b. Place the strut next to the measured length and cut off the excess amount.
c. Place both strut ends on the cast at the applicable locations, wrap the casting material in a figure eight around one end of the strut and cast, continue wrapping across the strut to the other end of the strut and cast.
d.Laminate the casting material.
23. Check the patient's capillary refill (repeat step 6).
24. Clean the plaster resin off the child's skin using a damp wash towel, or alcohol pads.
25. Give the patient or parent(s) verbal and written instructions on cast care.
a. Provide the parents with a copy of the clinic hours and telephone number. Instruct the patient to call the cast clinic with any concerns or questions regarding their cast. For after duty hours concerns, instruct the patient to report to the emergency room.
b. Provide the parents with a cast care booklet or written instructions.
c.Instruct the parents on what not to do.
(1) Do not stick anything down the cast.
Chapter 3: Skill Level Tasks 15 April 2016 STP 8-68B13-SM-TG 3-371
(2) Do not remove the cast.
(3) Do not alter the cast (e.g., writing on it, coloring).
26. Annotate the procedure applied to the patient in the medical record or SF 513/SF 600.
a. Record the procedure applied and cast care instructions provided.
b. Sign your name.
27. Escort or direct the parent(s) to the front desk to make a follow-up appointment.
Evaluation Preparation: You must evaluate the students on their performance of this task in a operational (field or hospital) condition related to the actual task.
Performance Measures
1. Reviewed the order from the physician.
2. Gathered the equipment and materials not available in the OR.
3 Transported the equipment and materials to the OR.
4 Performed a surgical scrub.
5 Visually inspected the patient's torso and legs for any contraindications to application of the cast.
6 Checked the patient's capillary refill.
7 Prepared the applicable stockinettes.
8 Prepared the felt pads.
9 Assisted the physician apply the stockinettes applicable to the variation ordered.
10 Assisted the physician position the patient on the hip spica table.
11 Assisted the physician apply the felt padding to the appropriate areas.
12 Placed a folded hand towel over the area of the diaphragm.
13. Assisted the physician apply the webril (cast padding) to the patient's torso and leg(s), according to the variation ordered by the physician.
14 Prepared casting materials, as applicable.
15. Assisted the physician apply the first plaster/fiberglass layer to the patient's torso and leg(s), according to the variation ordered by the physician.
16. Assisted the physician laminate the casting material.
3-372 STP 8-68B13-SM-TG 15 April 2016
Chapter 3: Skill Level Tasks
NO GO
GO
17 Assisted the physician apply the reinforcement splints to the posterior, lateral, and inguinal region aspects of the cast.
18 Assisted the physician apply the second plaster/fiberglass layer (repeat steps 15 - 16).
19. Assisted the physician mold the cast to the body contours.
20. Assisted the physician trim the cast to meet the standards applicable to the variation applied.
21. Assisted the physician apply the final plaster/fiberglass layer (repeat steps 15 - 16).
22. Assisted the physician attach the wooden bar (strut) to the medial aspect of the injured and uninjured leg according to the variation applied.
23 Checked the patient's capillary refill (repeat step 6).
24 Cleaned the plaster resin off the child's skin using a damp wash towel, or alcohol pads.
25 Gave the patient or parent(s) verbal and written instructions on cast care.
26 Annotated the procedure applied to the patient in the medical record or SF 513/SF 600.
27 Escorted or directed the parent(s) to the front desk to make a followup appointment.
Evaluation Guidance: Score each Soldier according to the performance measures in the evaluation guide. Unless otherwise stated in the task summary, the Soldier must pass all performance measures to be scored GO. If the Soldier fails any step, show what was done wrong and how to do it correctly.
Chapter 3: Skill Level Tasks 15 April 2016 STP 8-68B13-SM-TG 3-373
GO NO GO
Performance Measures
References Required Related SF 513 None SF 600
Subject Area 15: Management
Apply Business Process Improvement Techniques
081-E68-3001
Conditions: As a supervisor assigned to a fixed medical facility operating in a garrison environment with assigned staff members. You have access to weekly workload reports and note that there are several business processes needing to be improved. You will need access to the required references and local standard operating procedures (SOPs).
Standards: Apply business process improvement techniques to improve the efficiency of your work area and staff members.
Performance Steps
1. Define the problem by performing the following steps:
a. Identify need for project.
b. Develop problem and goal statements for assigned work area.
c. Gather customer comments/feedback.
d. Begin process mapping.
(1) Develop supplier, input, process, output and customer (SIPOC) diagram.
(2) Develop value stream map for assigned work area.
2. Measure collected data by performing the following actions:
a.Implement data collection plan.
b. Conduct measurement analysis.
c. Process performance metrics by using one of the following tools:
(1) Center of data: Mean and median.
(2) Spread of data: Standard deviation and range.
(3) Sigma Quality Level (SQL).
(4) Process lead time (PLT).
(5) Little's Law.
3. Anaylze problem area by peforming the following steps:
a. Create cause and effect diagrams.
b. Identify root cause analysis - 5 Why's (who, what, when, where and why).
c.Identify the seven types of waste - transportation, inventory, motion, wait, over processing, over production and defects (TIMWOOD).
d. Calculate process cycle efficency (PCE) for assigned work area.
4.Improve problem area by performing the following actions:
a.Generate and prioritize ideas.
b. Create pilot plan.
c. Develop implementation plan.
5. Control problem process by using SOPs and other supportive documentation.
6.Implement course of action by identifying the revised process and plan of attack.
Chapter 3: Skill Level Tasks 3-374 STP 8-68B13-SM-TG 15 April 2016
Evaluation Preparation: Evaluator must be familiar with FORSCOM policies, MEDCOM policies and the Army's "Lean Six Sigma" processes.
Performance Measures
1. Defined the problem by performing the following steps:
2. Measured collected data by performing the following actions:
3. Anaylzed problem area by peforming the following steps:
4. Improved problem area by performing the following actions:
5. Controlled problem process by using standard operating procedures (SOPs) and other supportive documentation.
6. Implemented course of action by identifying the revised process and plan of attack.
GO NO GO
Evaluation Guidance: Score the Soldier GO if all performance measures are passed. Score the Soldier NO GO if any performance measure is failed. If the Soldier scores NO GO, show what was done wrong and how to do it correctly.
References:
Chapter 3: Skill Level Tasks 15 April 2016 STP 8-68B13-SM-TG 3-375
Required Related Lean Six Sigma Pocket Toolbook None
Develop Subordinates
158-100-7012
Conditions: You are assigned to a leadership position and given the requirement to develop your subordinates as outlined in FM 6-22, Army Leadership. This task should not be trained in mission-oriented protective posture (MOPP) 4.
Standard: Demonstrate competency by: 1) correctly assessing the developmental needs of subordinates; 2) conducting professional growth counseling resulting in an individual development plan (IDP); 3) your actions to encourage and support your subordinates' ability to grow, and; 4) your ability to conduct performance counseling.
Performance Steps
1. Assess developmental needs of subordinates.
a.Observe subordinates' performance in the core leader competencies.
b. Record observations.
c. Determine if the performances meet, exceed, or fall below expected standards.
2 Conduct professional growth counseling.
a.Inform subordinates of your observations.
b. Get feedback from subordinate.
3. Assist subordinates in designing an IDP.
a.Identify actions to correct weaknesses.
b.Identify actions to sustain strengths.
c. Obtain subordinates' agreement to the plan.
4. Develop subordinates on the job.
a. Provide opportunities on the job.
b. assign tasks to provide practice in areas of subordinates' weaknesses.
c. Provide challenging, mission-oriented training to improve practice.
5. Create a positive learning environment.
6. Share relevant personal experience with subordinates.
7. Provide counseling, coaching, or matching, as required.
8. Conduct periodic performance counseling. (as required).
a. Review the IDP to assess subordinates' progress.
b. Modify the IDP if necessary.
Evaluation Preparation: You must evaluate the students on their performance of this task in a Army Medical Department area related to the actual task.
Performance Measures
1. Assessed developmental needs of subordinates.
GO NO GO
3-376 STP 8-68B13-SM-TG 15 April 2016
Chapter 3: Skill Level Tasks
Performance Measures
2. Conducted professional growth counseling.
3. Assisted subordinates in designing an IDP.
4. Developed subordinates on the job.
5. Created a positive learning environment.
6. Shared relevant personal experience with subordinates.
7. Provided counseling, coaching, or matching, as required.
8. Conducted periodic performance counseling, as required.
Evaluation Guidance: Score each Soldier according to the performance measures in the evaluation guide. Unless otherwise stated in the task summary, the Soldier must pass all performance measures to be scored GO. If the Soldier fails any step, show what was done wrong and how to do it correctly.
References:
Chapter 3: Skill Level Tasks 15 April 2016 STP 8-68B13-SM-TG 3-377
GO NO GO
Required Related FM 6-22 None
Supervise Clinical Operations (Include Budget, Medical Equipment, and Supplies)
081-E91-0047
Conditions: You are a non-commissoned officer (NCO) assigned to a clinical unit (field or garrison). You are required to supervise clinical operations for the organization. You will need local standard operating procedures to complete this task.
Standards: Supervise the clinical operations of the unit.
Performance Steps:
1. Gather documents.
a. Budget documents.
(1) Past fiscal year budget documents.
(2) Current fiscal year budget documents.
b. Medical equipment hand receipts.
c. Supply documents.
2. Analyze documents.
a. Analyze budget documents to do the following:
(1) Identify changes.
(2) Identify shortages.
(3) Identify surplus.
b. Analyze medical equipment hand receipts to identify the following:
(1) Outdated medical equipment.
(2) Inbound medical equipment.
(3) New equipment purchases.
c. Analyze supply documents to identify the following:
(1) Medical supply shortages.
(2) Over stocked medical items.
3. Compile gathered information.
4.Discuss findings with clinic commander.
Evaluation Preparation: None
Performance Measures GO NO GO
1 Gathered documents.
2 Analyzed documents.
3 Compiled gathered information.
4 Discussed findings with clinic commander.
3-378
3: Skill
Chapter
Level Tasks
STP 8-68B13-SM-TG
April 2016
15
Evaluation Guidance: Score each Soldier according to the performance measures in the evaluation guide. Unless otherwise stated in the task summary, the Soldier must pass all performance measures to be scored GO. If the Soldier fails any step, show what was done wrong and how to do it correctly.
15 April 2016 STP 8-68B13-SM-TG 3-379
Chapter 3: Skill Level Tasks
References Required Related None None
Subject Area 16: Upper Extremity Casts
Apply a Long Arm Hanging Cast
081-68B-3201
Conditions: You are presented with a physician's written or verbal order to apply a long arm hanging cast (LAHC) to an orthopedic patient. The patient is sitting on an orthopedic examination bed and may be accompanied by a family member. Nursing personnel and physician are available. You will need the patient's medical record or Standard Form (SF) 513, Medical Record - Consultation Sheet, the local standard operating procedure (SOP), work cart/station, sink with faucet, roll of stockinette, webril rolls, plaster or fiberglass rolls, box of plaster reinforcement sheets, examination gloves, scissors, cast saw, cast spreader, eye protection, hearing protection, roll of adhesive tape, hospital pads (chux) or bed sheets, goniometer, bucket of water with plastic bag, box of alcohol pads or damp wash towel, 5 inch orthopaedic felt, 8 x 7 inch surgipads, traction cord, cast care booklet or equivalent, sling, and trash receptacle.
Standards: Apply the long arm hanging cast (LAHC) to the patient's injured arm from the distal palmar crease (DPC)/metacarpophalangeal head joints (MCPJs) to 2 - 2 1/2 inches distal to the axilla region. The cast immobilizes the wrist and elbow, with the wrist at 0 - 15 degrees of extension and the elbow at 90 degrees of flexion eliminates ulnar and radial deviation, pronation, and supination from the wrist/forearm; and allows full range of motion (ROM) of the thumb and fingers. The manufacturered loop assists in reduction of the fracture. The capillary refill returns within 1 - 3 seconds.

NOTE: This cast is used to limit mobility and provide continuous reduction of fractures. (See Figure 3-61.)
Performance Steps:
1. Review the order from the physician.
2. Gather the equipment and materials.
NOTE: The physician order, technician's preference, availability of supplies, and/or patient's extremity size will determine which casting material (fiberglass/ plaster) is used.
3-380 STP 8-68B13-SM-TG 15 April 2016
Chapter 3: Skill Level Tasks
Figure 3-56. Long arm hanging cast
a. Gather equipment.
(1) Goniometer
(2) Scissors.
(3) Utility cart
(4) Cast saw
(5) Cast spreader
(6) Eye protection
(7) Hearing protection
CAUTION: The temperature of the water must be tepid (70°- 80° F) to reduce further injury (possible burns) to the patient. The technician must change the water after each application, as the residue in the cast bucket will act as an accelerator causing the casting material to increase in heat emission.
(8) Bucket of tepid water with plastic bag.
b.Assemble materials.
(1) Roll of stockinette (1 inch and 2, 3 or 4 inch).
(2) W ebril rolls (2 & 3 inch).
(3) Plaster (3 & 4 inch) or fiberglass (2 or 3 inch & 4 inch) rolls.
4) Box of plaster reinforcement sheets (4 x 15 and 5 x 30).
(5) Examination gloves.
(6) Box of alcohol pads or damp wash towel.
(7) Hospital pads (chux) or bed sheets.
(8) Cast care booklet or equivalent
(9) Sling.
(10) Surgical tape (1 inch)
(11) Orthopaedic felt (5 inch) or surgipads (8 x 7 inch).
(12) Traction cord
c. Place the equipment and materials on the work cart/station.
3. Tell the patient your name and job title.
CAUTION: During cast application a chemical response (exothermic reaction) will occur between the water and the plaster (gypsum). This is a safe and common occurrence. The cast will initially become warm and cool down within 2-5 minutes. However, if it doesn't cool down or there is an increase of heat intensity during the cast application, the cast may need to be removed.
4. Explain the procedure to the patient.
5. Don safety equipment (patient and technician).
6. Inspect the patient's arms.
CAUTION: Always practice body substance isolation (BSI) prior to applying traction, splints, or casts to patients.
a. Place examination gloves on hands.
b. Place the patient sitting or supine on the examination bed.
c.Inspect both arms for any skin conditions (e.g., cuts, abrasions, lacerations, and skin rashes).
Chapter 3: Skill Level Tasks 15 April 2016 STP 8-68B13-SM-TG 3-381
NOTE: Inform the physician if skin conditions are present and follow the physician's instructions.
d. Examine both arms and wrists for jewelry and remove if found.
NOTE: All jewelry on the injured hand and wrist must be removed. Give the jewelry to a family member or secure it with the patient's belongings according to the local SOP.
7. Check the capillary refill of the patient's hands/fingers.
a. Squeeze the patient's fingers; nail beds will turn white.
CAUTION: If the capillary refill is delayed for more than 2 seconds, inform the physician and follow the physician's instructions.
b. Release the patient's fingers; nail beds will return pink.
8. Prepare the stockinette.
NOTE: The stockinette is a form of protection against the exothermic reaction caused by the casting materials. It is generally used for all casts except on patients who have had recent surgery, recently reduced fractures, or as directed by the physician.
a. Place a hospital pad or bed sheet on the patient's lap.
NOTE: All patients should be given a covering (e.g., chux, bed sheet) to reduce damaging their clothing during the casting process.
b. Place the work cart/station at the edge of the bed.
NOTE: Numerous props may be used (e.g. orthopedic bump, T stand, finger trap stand, nursing assistant). Technician preference will determine if a prop is used.
c Place the patient's uninjured elbow at a 90 degree angle.
d. Forearm stockinette.
(1) Measure from 2 inches distal to the MCPJs to the axilla region for the stockinette length.
(2) Pull down the stockinette from the stockinette container and cut the measured length.
e. Thumb stockinette.
(1) Measure from 1/2 inch distal to the tip of the thumb to the base of the wrist f or the stockinette length.
(2) Pull down the stockinette and cut the measured length.
(3) Cut a vertical slit to allow the stockinette to rest flat from the web spacing, between the thumb and the 2nd phalange, and the base of the wrist.
f. Roll the stockinette leaving a 1 - 2 inch cuff at the distal end and place on the work cart/station for later use.
9. Apply the stockinette to the patient's injured arm.
a. Forearm stockinette.
(1) Hold open the sides of the stockinette.
(2) Place the injured hand in the stockinette opening.
Chapter 3: Skill Level Tasks 3-382 STP 8-68B13-SM-TG 15 April 2016
(3) Roll the stockinette on the injured arm from 2 inches distal to the MCPJs to the axilla region.
NOTE: Rolling the stockinette on promotes a better fit.
(4) Pinch the stockinette at the base of the thumb and cubitum area and make a 1/2 inch cut at a 45 degree angle.
NOTE: An alternative and authorized method is to cut the stockinette prior to application.
(5) Place the thumb through the precut hole.
(6) Smooth out the stockinette.
b. Thumb stockinette.
(1) Roll the stockinette from 1/2 inch distal to the tip of the thumb to the base of the wrist.
(2) Smooth out the stockinette.
10. Set the patient's injured wrist at 0 - 15 degrees extension.
NOTE: All hand casts are applied absent of pronation, supination, radial, or ulnar deviation unless directed by the physician.
a. Position the patient's injured elbow at a 90 degree angle to the upper torso.
NOTE: Family member(s), nursing staff, an orthopedic technician, or finger traps can be used to assist in positioning the patient's arm.
b. Place the patient's index finger and thumb in opposition to one another.
NOTE: Placing the thumb and forefinger in opposition to one another assists the patient in maintaining the wrist in a neutral position. This is commonly referred to as the can of coke position.
c Place the stationary arm of the goniometer vertically, bisecting the ulnar.
d. Place the protractor of the goniometer on the ulnar styloid.
e.Place the moving arm of the goniometer vertically, bisecting the lateral side of the 5th metacarpal.
f. Position the wrist until the goniometer measures between 0 - 15 degrees of extension.
11. Set the injured elbow at 90 degrees flexion.
a. Place the stationary arm of the goniometer so that it bisects the middle of the humerus and deltoid muscle.
b. Place the protractor of the goniometer on the olecranon (elbow), forming a 90 degree angle.
c. Place the moving arm of the goniometer so that it bisects the middle of the forearm and the 2nd and 3rd phalanges.
d. Position the elbow until the goniometer measures 90 degrees of flexion.
CAUTION: Wrinkled padding can cause pressure sores which can lead to ulcers. If the cast padding is wrinkled, it must be removed and new padding applied.
Chapter 3: Skill Level Tasks 15 April 2016 STP 8-68B13-SM-TG 3-383
12. Apply the webril (cast padding) to the injured arm.
CAUTION: Keep the webril roll on the extremity as it is applied to reduce possible constrictive edema caused by applying the webril too tight.
a. Place the webril end on the ulnar styloid and wrap two rotations around the wrist.
NOTE: The webril application is started at the wrist to provide an anchor and extra padding to the ulnar styloid.
b. Continue wrapping through the palm ending 1/2 inch proximal to the distal edge of the stockinette, back up the forearm, figure eight around the elbow, and ending 1/2 inch distal to the proximal edge of the stockinette.
NOTE: The webril can be cut or torn (horizontally) when wrapping through the palm and elbow to provide a better fit. Technician preference will determine which technique to use.
c.Overlap the webril by 1/4 - 1/2 the previous wrap with each turn.
NOTE: The top of the webril should bisect the middle of the previous layer covering up the shallow line and present evenly applied padding.
13. Prepare the casting materials, as applicable.
CAUTION: It is mandatory to use gloves to prevent the technician from receiving chemical burns while applying a fiberglass cast.
a. Place the gloves on hands and open the fiberglass casting package.
NOTE: Open one fiberglass package at a time. As the fiberglass roll comes in contact with the air, the roll will start to cure (set).
b. Prepare the plaster reinforcement splint(s).
NOTE: The plaster reinforcement splint is used to strengthen and support the cast. Upper extremity fiberglass casts do not require a splint due to the strength of the fiberglass casting material.
(1) Prepare the splint for the volar aspect of the cast.
NOTE: The volar aspect of the arm is located on the palm side of the hand.
(a) Open the box of 4 x 15 reinforcement plaster sheets. Remove the sheets from the box and unwrap the package. Peel back the edges of five sheets and remove from the stack. Place the sheets on the work cart/station.
(b) Place the patient's uninjured hand in the supine position (palm up) and locate the DPC, thenar eminance, and the cubitum space.
NOTE: The DPC is furthest diagonal line on the volar aspect of the hand. The thenar muscle is at the base of the thumb on the volar aspect of the hand. The crease is noticeable when the
Chapter 3: Skill Level Tasks 3-384 STP 8-68B13-SM-TG 15 April 2016
thumb and 5th phalange (pinky finger) are brought together. The cubitum space is located at the bend of the arm.
(c) Remove one plaster sheet from the stack of five.
(d) Place the sheet next to the uninjured arm to obtain the sheet length, and the DPC and thenar muscle contours.
NOTE: To increase patient cleanliness, the sheet does not have to rest on the hand/forearm.
(e) Draw a diagonal line on the plaster sheet that matches with the DPC of the patient's hand.
NOTE: The diagonal cut facilitates full ROM of the fingers (extension and flexion).
(f) Draw a curved line (half moon shape) on the plaster sheet that matches with the outer border of the thenar muscle on the patient's hand.
NOTE: The half moon pattern enables the thenar muscle to be observable and the thumb to adduct to all fingers promoting full ROM.
(g) Place the measured sheet on the stack and cut the outlined patterns and excess length for all sheets. Place the stack on the work cart/station for later use.
(h) Discard excess material in the trash receptacle.
(2) Prepare the splint for the posterior aspect of the cast.
(a) Open the box of 5 x 30 plaster sheets. Remove the sheets from the box and unwrap the package. Locate edge of one stack and remove the stack from the package.
NOTE: The 5 x 30 plaster splints are usually stacked in increments of five from the manufacturer. If not prestacked, count out five layers.
(b) Position the patient's uninjured elbow at a 90 degree angle.
NOTE: Family members, nursing staff, orthopedic technician, or finger trap stand can be used to assist in positioning the patient's arm.
(c) Place the distal end of the plaster stack on the lateral aspect of the mid forearm and instruct the patient or assistant to hold the distal end. Simultaneously bring the proximal end 2 inches distal to the axilla or resting on the insertion of the deltoid muscle. Fold down the proximal end, cut off the excess, and place the stack on the work cart/station for later use.
c. Manufacture the plaster/fiberglass loop.
(1) Remove two 4 x 15 plaster sheets from the stack of plaster sheets and fold lengthwise.
(2) Hold both ends of the plaster sheet with your index fingers and thumbs, place in the bucket of tepid water, and remove when the bubbles subside.
(3) Place your index finger and thumb on either side and squeegee out the excess water.
(4) Place the sheet on a working surface, smooth out the sheet, and drape it over and extra roll of webril.
14. Apply the first plaster/fiberglass layer.
Chapter 3: Skill Level Tasks 15 April 2016 STP 8-68B13-SM-TG 3-385
NOTE: Examination gloves are recommended to protect the technician's hands as the resin in the plaster may cause the skin on the hands to dry up.
CAUTION: If the casting material is removed while bubbles are still present, dry spots will be visible during application. Dry spots cause integrity breakdown of the cast.
a. Place the plaster/fiberglass roll in a bucket of tepid water and remove when the bubbles cease to rise.
b. Squeeze the roll together (do not wring the roll).
NOTE: Gently squeeze the roll inward to evenly distribute the water and prevent telescoping of the roll during application.
c. Place the edge of the casting material on the ulnar styloid and wrap two rotations around the wrist to secure the edge.
NOTE: The cast is most susceptible to losing strength in the palm region. Therefore, a twisting or cut method is authorized. Technicians may have their own preference to these methods.
• “the twisting method.” The twisting method provides strength to the cast. As the roll is pushed through the palm, pinch the sides of the plaster roll together (not recommended for fiberglass) twist and evenly space the casting material on thewebril. Smooth out with volar side of fingers.
• “the cut method.” The cutting method provides cast cosmetics. As the roll is pushed through the palm, make a horizontal cut to the proximal edge of the plaster/fiberglass roll and smooth out with volar aspect of fingers or palm.
d. Continue wrapping through the palm ending 1/2 inch proximal to the distal edge of the webril, back up the forearm, figure eight around the elbow, and ending 1/2 inch distal to the proximal edge of the webril.
e.Overlap the plaster/fiberglass by 1/4 or 1/2 the previous wrap.
NOTE: The top of the plaster/fiberglass should bisect the middle of the previous layer and present an evenly applied cast. Depending on the size of the patient's forearm and biceps region, more than two rolls may be needed for the initial roll. Begin the extra roll where the previous roll left off.
15. Laminate the casting material.
CAUTION: To reduce cast indentations, which can cause pressure sores to the patient's skin under the cast, keep fingertips off the cast during application and molding process. If the patient feels pressure sores or hot spots developing under the cast, remove the cast immediately and start over with step 2.
a. Place palm of each hand on the cast.
b. Rub the cast material in the direction it was applied.
NOTE: Laminating the cast material fills in the pores, which assists in providing strength to the cast.
c. Continue rubbing the cast until the tone/texture changes.
Chapter 3: Skill Level Tasks 3-386 STP 8-68B13-SM-TG 15 April 2016
NOTE: The dull white color indicates the plaster is beginning to cure.
16. Apply the plaster reinforcement splint(s).
NOTE: If using fiberglass, skip and go to step 17.
a. Apply the splint to the volar aspect of cast.
(1) Place the splint in a bucket of tepid water, wait for the bubbles to subside, then remove the splint from the water.
(2) Squeeze the splint together to eliminate excess water.
(3) Place the reinforcement splint on the volar side of the cast in line with the DPC and the outer border of the thenar muscle.
(4) Laminate the splint to the cast.
(5) Maintain the patient's wrist between 0 - 15 degrees of extension.
NOTE: Place the patient's thumb and index finger in opposition to one another.
b. Apply the splint to the posterior aspect of the cast.
(1) Place the splint in a bucket of tepid water, wait for the bubbles to subside, then remove the splint from the water.
(2) Squeeze the splint together to eliminate excess water.
(3) Place the reinforcement splint centered and on the posterior side of the elbow extending from mid forearm to 1/2 inch distal to the webril edge.
(4) Laminate the splint to the cast.
(5) Maintain the patient's elbow at 90 degrees of flexion.
NOTE: Family member(s), nursing staff, an orthopedic technician, or a finger trap stand can be used to assist in positioning the patient's arm.
17. Apply the second plaster/fiberglass layer (repeat steps 14 - 15).
CAUTION: Excessive pressure may result in further patient injury. Talk to the patient while performing this procedure (e.g., How do you feel? Is the pressure too much?).
18. Mold the cast.
NOTE: All casts require molding. Molds are done simultaneously. Go back and forth between the molds as the cast cures.
a. Interosseous.
NOTE: The interosseous mold is used to prevent movement of the injured wrist in the cast and promote fracture healing.
(1) Place the heel of one hand on the volar aspect of the distal wrist.
(2) Place the heel of the second hand on the dorsal aspect of the distal wrist.
(3) Squeeze the heels of each hand together.
(4) Apply firm and gradual pressure beginning at the wrist and progress up the forearm while maintaining the patient's wrist in the correct position.
(5) Remove the hands from the cast when the contours of the wrist and forearm have been shaped and the cast is cured.
b. Bicipital.
Chapter 3: Skill Level Tasks 15 April 2016 STP 8-68B13-SM-TG 3-387
NOTE: The bicipital mold is used to prevent movement of the humerus in the cast and promote fracture healing.
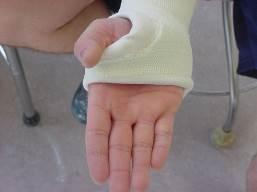
(1) Place the palm of one hand on the biceps muscle.
(2) Place the palm of the second hand on the triceps muscle.
(3) Press the palms together to conform the plaster/fiberglass to the upper arm.
(4) Remove the hands from the cast when the contours of the upper arm have been shaped and the cast is cured.
19. Trim the cast to meet the cast standards.
a. Verify the alignment of the wrist with a goniometer.
(1) Repeat steps 10c - e.
(2) Verify the wrist measures between 0 - 15 degrees of extension.
(3) Remove the cast and start over with step 2.
b. Verify the alignment of the elbow with a goniometer.
(1) Repeat steps 11a - c.
(2) Verify the elbow measures at 90 degrees of flexion.
(3) Remove the cast and start over with step 2.
c. Verify the cast dimensions.
(1) The distal edge of the cast on the volar side rests within 1/8 inch of the DPC. (See Figure 3-62.)
(2) The distal edge of the cast on the dorsal side rests within 1/2 inch of the base of the MCPJs. (See Figure 3-63.)
3-388 STP 8-68B13-SM-TG 15 April 2016
Chapter 3: Skill Level Tasks
Figure 3-57. Cast rests at the distal palmar crease
CAUTION: The finished edge of the cast should end proximal to the base of the thumb to avoid radial nerve impingement.

(3) The cast edge at the base of the thumb rests proximal to the snuffbox. (See Figure 3-64.)
(4) The proximal edge of the cast rests 2 - 2 1/2 inches distal to the axilla region. d.Verify the ROM of the phalanges and thumb.
NOTE: The patient should be able to freely extend and flex the fingers and touch the thumb to all fingers.
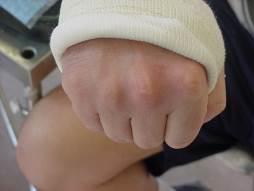
(1) Instruct the patient to extend and flex fingers.
(2) Instruct the patient to rotate thumb and touch all fingers to the thumb.
e.Trim back the cast material until the dimensions and ROM standards are met.
f. Trim the proximal and distal edges of the cast.
(1) Cut the outside edge of the cast padding.
(2) Pull down the webril and stockinette.
Chapter 3: Skill Level Tasks 15 April 2016 STP 8-68B13-SM-TG 3-389
Figure 3-58. Cast rests at the base of metacarpophalangeal joint
Figure 3-59. Thumb rests proximal to the snuff box
CAUTION: The finished edge of the cast should end priximal to the base of the thumb to avoid radial nerve impingement.
(3) Tape down the edges of the stockinette and webril, if necessary.
20. Apply the final plaster/fiberglass layer (repeat steps 14 - 15).
NOTE: The last roll in all casting applications is commonly referred to as the beautification roll or the money roll. Take pride in your work.
21. Place the plaster or fiberglass loop on the radial aspect of cast, or according to the physician's order.
22. Secure the loop.
a. Hold the plaster/fiberglass roll with one hand and grasp the edge of the plaster/fiberglass with the opposite fingers.
b. Pull the plaster/fiberglass roll taut and place the excess between the index and middle fingers.072
c. Place the plaster/fiberglass roll in a bucket of tepid water and remove when the bubbles cease to rise.
d. Squeeze the roll to eliminate excess water.
e. Apply the plaster/fiberglass roll twice around the loop and bring the roll through the loop ensuring to tie the edge down.
f. Using the same roll or a second 2 inch roll, complete the same steps for the opposite end of the loop.
23. Prepare the collar.
a. Pull the stockinette over the felt pad.
b. Cut a hole in both ends of the felt/stockinette.
c Cut a 6 foot length of traction cord.
d.Insert one end of the traction cord through the hole in the felt pad and thread it through the opposite end.
24. Apply the collar to the patient's neck.
a Place the padded collar centered and posterior to the patient's neck.
b.Insert one cord end through the loop.
c. Tie and tape the cord ends together.
NOTE: Ensure the knot is not tied over the 7th cervical vertebrae/bony protrusion of the neck.
d. Instruct the patient to let the cast hang.
25. Check the patient's capillary refill on the casted hand (repeat step 7).
26. Clean the plaster resin off the patient's skin using a damp wash towel or alcohol pads.
NOTE: Use alcohol pads or fresh water from the faucet and not from the casting bucket.
27. Give the patient verbal and written instructions on cast care.
Chapter 3: Skill Level Tasks 3-390 STP 8-68B13-SM-TG 15 April 2016
a. Provide the patient with a copy of the clinic hours and telephone number. Instruct the patient to call the cast clinic with any concerns or questions regarding their cast. For after duty hours concerns, instruct the patient to report to the emergency room.
b. Provide the patient with a cast care booklet or written instructions.
c.Instruct the patient to elevate the extremity above the heart, and extend, flex, and wiggle fingers (demonstrate for patient) to reduce swelling.
d. Instruct the patient on what not to do.
(1) Do not stick anything down the cast.
(2) Do not remove the cast.
(3) Do not alter the cast (e.g., writing on it, coloring).
28. Fit the sling to the patient, as required.
NOTE: Considerations for applying a sling include elderly patients, severity of fractures (e.g., Colles', Smith's, Bennett's), patient's comfort, and physician's or technician's preference.
29. Annotate the procedure applied to the patient in the medical record or SF 513.
a. Record the procedure applied and cast care instructions provided.
b. Sign your name.
30. Escort or direct the patient to the front desk to make a follow-up appointment.
Evaluation Preparation: You must evaluate the students on their performance of this task in a field condition related to the actual task.
Performance Measures
1 Reviewed the order from the physician.
2 Gathered the equipment and materials
3 Told the patient your name and job title.
4 Explained the procedure to the patient.
5 Donned safety equipment (patient and technician).
6 Inspected the patient's arms.
7 Checked the capillary refill of the patient's hands/fingers.
8 Prepared the stockinette.
9 Applied the stockinette to the patient's injured arm.
10. Set the patient's injured wrist at 0 - 15 degrees extension.
11. Set the injured elbow at 90 degrees flexion.
12. Applied the webril (cast padding) to the injured arm.
Chapter 3: Skill Level Tasks 15 April 2016 STP 8-68B13-SM-TG 3-391
GO NO GO
13 Prepared the casting materials, as applicable.
14 Applied the first plaster/fiberglass layer.
15 Laminated the casting material.
16. Applied the plaster reinforcement splint(s), if using plaster.
17. Applied the second plaster/fiberglass layer (repeat steps 14 - 15).
18. Molded the cast.
19. Trimmed the cast to meet the cast standards.
20. Applied the final plaster/fiberglass layer (repeat steps 14 - 15).
21 Placed the plaster or fiberglass loop loop on the radial aspect of cast or according to the physician's order.
22. Secured the loop.
23 Prepared the collar.
24 Applied the collar to the patient's neck.
25 Checked the patient's capillary refill on the casted hand. (Repeated step 6)
26 Cleaned the plaster resin off the patient's skin using a damp wash towel or alcohol pads.
27 Gave the patient verbal and written instructions on cast care.
28 Fit the sling to the patient, as required.
29 Annotated the procedure applied to the patient in the medical record or SF 513.
30. Escorted or directed the patient to the front desk to make a follow-up appointment.
Evaluation Guidance: Score each Soldier according to the performance measures in the evaluation guide. Unless otherwise stated in the task summary, the Soldier must pass all performance measures to be scored GO. If the Soldier fails any step, show what was done wrong and how to do it correctly.
Chapter 3: Skill Level Tasks 3-392 STP 8-68B13-SM-TG 15 April 2016
GO NO GO
Performance Measures
Chapter 3: Skill Level Tasks 15 April 2016 STP 8-68B13-SM-TG 3-393 References Required Related SF 513 None
Apply a Short Arm Radial Gutter Cast
081-68B-3200
Conditions: You are presented with physician's written or verbal orders to apply a short arm radial gutter cast to an orthopedic patient. The patient is sitting on an orthopedic examination bed and may be accompanied by a family member/chaperone. Nursing personnel and physician are available. You will need the patient's medical record or Standard Form (SF) 513, Medical Record - Consultation Sheet, the local standard operating procedures (SOP), work cart/station, plaster or fiberglas rolls, box of plaster reinforcement sheets, webril rolls, roll of stockinette, examination gloves, scissors, cast saw, cast spreader, eye protection, hearing protection, roll of adhesive tape, hospital pads (chux) or bed sheets, goniometer, bucket of tepid water with plastic bag, sling, cast care booklet or equivalent, box of alcohol pads or damp wash towel, sink with faucet, and trash receptacle.
Standards: Apply the short arm radial gutter cast to the patient's injured arm from 1/8 - 1/4 inch distal to the tips of the 2nd and 3rd phalanges, with the 2nd and 3rd metacarpal heads covered, to 1 - 1 1/2 inch distal to the cubitum space (bend of elbow). The cast immobilizes the wrist, with the wrist at 15 - 30 degrees of extension and the 2nd and 3rd phalanges at 70 - 90 degrees of flexion; eliminates rotation and overlapping of the 2nd and 3rd phalanges; eliminates ulnar and radial deviation, pronation, and supination; and allows full range of motion (ROM) of the elbow and uninjured phalanges. The capillary refill returns within 1 - 3 seconds. The short arm radial gutter cast is used to treat 2nd and 3rd metacarpal fractures.
Performance Steps:
1. Review the order from the physician.
2. Gather the equipment and materials.
NOTE: The physician's order, technician's preference, availability of supplies, and/or patient's extremity size determine which casting material (fiberglass/plaster) is used.
a. Gather equipment.
(1) Goniometer
(2) Scissors.
(3) Utility cart
(4) Cast saw
(5) Cast spreader
(6) Eye protection
(7) Hearing protection
CAUTION: The temperature of the water must be tepid (70° - 80° F) to reduce further injury (possible burns) to the patient. The technician must change the water after each cast application, as the residue in the cast bucket will act as an accelerator causing the casting material to increase in heat emission.
(8) Bucket of tepid water with plastic bag
b.Assemble materials.
(1) stockinette roll (1 inch and 2 or 3 inch)
(2) W ebril rolls (2 or 3 inch)
Chapter 3: Skill Level Tasks 3-394 STP 8-68B13-SM-TG 15 April 2016
(3) Plaster (3 or 4 inch) or fiberglass (2 or 3 inch) rolls
(4) Box of plaster reinforcement sheets (4 x 15 inch)
(5) Examination gloves
(6) Box of alcohol pads or damp wash towel
(7) Hospital pads (chux) or bed sheets
(8) Cast care booklet or equivalent
(9) Sling
(10) Adhesive tape (1 inch)
c. Place equipment and materials on the work cart/station.
3. Tell the patient your name and job title.
CAUTION: During cast application a chemical response (exothermic reaction) will occur between the water and the plaster (gypsum). This is a safe and common occurrence. The cast will initially become warm and cool down within 2-5 minutes. However, if it doesn't cool down or there is an increase of heat intensity during the cast application, the cast may need to be removed.
4. Explain the procedure to the patient.
5. Don safety equipment (patient and technician).
6. Inspect the patient's arms.
CAUTION: Always practice body substance isolation prior to applying traction, splints, or casts to patients
a. Place examination gloves on hands.
b. Place the patient sitting or supine on the examination bed.
c.Inspect both arms for any skin conditions (e.g., cuts, abrasions, lacerations, and skin rashes).
NOTE: Inform the physician if conditions are present and follow the physician's instructions.
d. Examine both arms and wrists for jewelry and remove if found.
NOTE: All jewelry on both hands and wrist must be removed. Give jewelry to family member or secure with patient's belongings in the non-commissioned officer in charge’s office.
7. Check the capillary refill of the patient's hands/fingers.
a. Squeeze patient's fingers; nail beds will turn white.
CAUTION: If capillary refill is delayed for more than 2 seconds, inform physician and follow physician's instructions.
b. Release patient's fingers; nail beds will return pink.
8. Prepare the stockinette.
Chapter 3: Skill Level Tasks 15 April 2016 STP 8-68B13-SM-TG 3-395
NOTE: The stockinette is a form of protection against the exothermic reaction caused by casting materials and generally used for all casts except on patients who have had recent surgery, recently reduced fractures, or as directed by the physician.
a. Place a hospital pad or bed sheet on the patient's lap.
NOTE: All patients should be given a covering (e.g., chux, bed sheet) to reduce damage to their clothing during the casting process.
b. Place the workcart/station at the edge of the bed.
NOTE: Numerous props may be used (e.g. orthopedic bump, T stand, finger trap stand, nursing assistant). Technician preference will determine if a prop is used.
c. Place the patient's uninjured elbow at a 45 degree angle to the upper torso.
d. Forearm stockinette.
(1) Measure from 1 - 1 1/2 inches distal to the distal interphalangeal joint (DIPJ) to the cubitum space (bend of elbow) for the stockinette length.
(2) Pull down the stockinette from the stockinette container and cut the measured length.
e. Phalange stockinette.
(1) Measure from 1/2 inch distal to the tips of the 2nd and 3rd phalanges to the base of the wrist for the stockinette length.
(2) Pull down the stockinette and cut the measured length.
(3) Cut a vertical slit to allow the stockinette to rest flat from the web spacing, between the 3rd and 4th phalanges, and the base of the wrist.
(4) Cut a vertical slit to allow the stockinette to rest flat from the web spacing, between the thumb and the 2nd phalange, and the base of the wrist.
f.Thumb stockinette.
(1) Measure from 1/2 inch distal to the tip of the thumb to the base of the wrist for the stockinette length.
(2) Pull down the stockinette and cut the measured length.
(3) Cut a vertical slit to allow the stockinette to rest flat from the web spacing, between the thumb and the 2nd phalange, and the base of the wrist.
g. Roll the stockinette leaving a 1 - 2 inch border at the distal end and place on the work cart/station for later use.
9. Place a webril strip between the 2nd and 3rd phalanges.
NOTE: The webril padding is placed between the phalanges to reduce maceration of the phalanges. The 2nd and 3rd phalanges can be taped together to reduce rotation of the fracture.
10. Apply the stockinette to the patient's injured arm and phalanges.
a. Forearm stockinette.
(1) Hold open the sides of the stockinette.
(2) Place the injured hand through the open end of the stockinette.
(3) Roll the stockinette on the injured arm from 1 - 1 1/2 inches distal to the distal interphalangeal joint (DIPJ) to the cubitum space (bend of elbow)
NOTE: Rolling the stockinette on promotes a better fit.
Chapter 3: Skill Level Tasks 3-396 STP 8-68B13-SM-TG 15 April 2016
(4) Pinch the stockinette at the base of the 2nd phalange and make a 1/2 inch cut at a 45 degree angle.
(5) Place the patient's 2nd and 3rd phalanges through the precut hole.
(6) Smooth out the stockinette.
b. 2nd and 3rd phalanges.
(1) Roll the stockinette from 1/2 inch distal to the tips of the 2nd and 3rd phalanges to the base of the wrist.
(2) Smooth out the stockinette.
c. Thumb stockinette.
(1) Roll the stockinette from 1/2 inch distal to the tip of the thumb to the base of the wrist.
(2) Smooth out the stockinette.
11. Set the patient's injured wrist at 15 - 30 degrees extension.
NOTE: All hand casts are applied absent of pronation, supination, and radial or ulnar deviation unless directed by physician.
a. Place the patient's index finger and thumb in opposition to one another.
NOTE: Placing the thumb and forefinger in opposition to one another. This position assists the patient in maintaining wrist in neutral position. This is commonly referred to as the “can of coke” position.
b. Place the stationary arm of the goniometer so that it bisects the forearm.
c. Place the protractor of the goniometer on the ulnar styloid.
d. Place the moving arm of the goniometer so that it bisects the lateral side of the 2nd phalange (index finger).
e.Position the wrist until the goniometer measures 15 -30 degrees of extension.
12. Set the patient's injured 2nd and 3rd phalanges at 70 - 90 degrees of flexion.
a. Place the 2nd and 3rd phalanges in the flexed position.
b. Place the stationary arm of the goniometer so that it bisects the radial aspect of the forearm.
c. Place the protractor of the goniometer on the ulnar styloid.
d. Place the moving arm of the goniometer so that it bisects the 2nd phalange (index finger).
e. Position the 2nd and 3rd phalanges until the goniometer measures 70 - 90 degrees of flexion.
CAUTION: Wrinkled padding can cause pressure sores which can lead to ulcers. If the cast padding is wrinkled, it must be removed and new padding applied.
13. Apply the webril (cast padding) to the injured phalanges, wrist, and forearm.
a. Place the edge of the webril on the ulnar styloid and wrap two rotations around the wrist.
NOTE: The webril application is started at the wrist to provide an anchor and extra padding to the ulnar styloid.
Chapter 3: Skill Level Tasks 15 April 2016 STP 8-68B13-SM-TG 3-397
b. Continue wrapping through the palm, around the 2nd and 3rd phalanges, back up the wrist covering the 2nd and 3rd metacarpal heads, and up the forearm ending 1/2 inch distal to the proximal edge of the stockinette.
c.Overlap the webril by 1/4 - 1/2 the previous wrap with each turn.
NOTE: The top of the webril should bisect the middle of the previous layer covering up the shallow line and present evenly applied padding.
14. Prepare the casting materials, as applicable.
CAUTION: It is mandatory to use gloves to prevent the technician from receiving chemical burns while applying a fiberglass cast.
a. Place the gloves on hands and open the fiberglass casting package.
NOTE: Open one fiberglass package at a time. As fiberglass roll comes in contact with the air, the roll will start to cure and harden.
b. Prepare the plaster reinforcement splint for the radial aspect of the cast.
(1) Open the box of 4 x 15 plaster reinforcement sheets. Remove the sheets from box and unwrap the package. Peel back the edges of five sheets and remove from the stack. Place the sheets on the work cart/station.
(2) Remove one plaster sheet from the stack of five.
(3) Instruct the patient to flex the uninjured 2nd and 3rd phalanges.
(4) Place the sheet next to the uninjured phalanges and arm to obtain the sheet length.
NOTE: To increase patient cleanliness the sheet does not have to rest on the hand/forearm.
(5) Place the measured sheet on the stack and cut the excess length for all sheets. Place the stack on the work cart/station for later use.
NOTE: Discard excess material in the trash receptacle.
(6) Discard excess material in the trash receptacle.
15. Apply the first plaster/fiberglass layer.
NOTE: Examination gloves are recommended when using plaster to protect the technician's hands as the resin in the plaster rolls may cause the skin on the hands to dry up.
CAUTION: If the casting material is removed while bubbles are still present, dry spots will be visible during application. Dry spots cause integrity breakdown of the cast.
a. Place the plaster or fiberglass roll in the bucket of tepid water and remove when the bubbles cease to rise.
b. Squeeze the roll together (do not wring the roll).
NOTE: Gently squeeze the roll inward to evenly distribute the water and prevent telescoping of the roll during application.
Chapter 3: Skill Level Tasks 3-398 STP 8-68B13-SM-TG 15 April 2016
c Place the edge of the casting material on the ulnar styloid and wrap two rotations around the wrist to secure the edge.
NOTE: The cast is most susceptible to losing strength in the palm region. Therefore, a twisting or cut method is authorized. The Twisting method. As the roll is pushed through the palm, pinch the sides of the plaster roll together (not recommended for fiberglass), twist, and evenly space the casting material on the webril. Smooth out with volar side of fingers. The twisting method provides strength to the cast. The Cut method. As the roll is pushed through the palm, make a horizontal cut to the proximal edge of the plaster/fiberglass roll and smooth out with volar aspect of fingers or palm. The cutting method provides cast cosmetics. Technicians may have their own preference to these methods.
d. Continue wrapping through the palm ending at the DPC, around the 2nd and 3rd phalanges, back up the wrist covering the 2nd and 3rd metacarpal heads, and up the forearm ending 1/2 inch distal to the proximal edge of the webril.
e. Overlap the plaster/fiberglass by 1/4 - 1/2 the previous wrap.
NOTE: The top of the plaster/fiberglass should bisect the middle of the previous layer and present an evenly applied cast.
16. Laminate the casting material.
CAUTION: To reduce cast indentations, which can cause a pressure sores to the patient's skin under the cast, keep fingertips off the cast during application and molding process. If the patient feels a pressure sores or hot spots developing under the cast, remove the cast immediately and start over with step 2.
a. Place the palm of each hand on the cast.
b. Rub the cast material in the direction it was applied.
NOTE: Laminating the cast material fills in the pores, which assists in providing strength to the cast.
c Continue rubbing the cast until the tone/texture changes.
NOTE: The dull white color indicates the plaster is beginning to cure.
17. Apply the reinforcement splint to the index and middle phalanges.
NOTE: If using fiberglass casting materials, go to step 18 (skip step 17).
a. Place the splint in the bucket of tepid water, wait for the bubbles to subside, and remove the splint from the water.
b. Squeeze the splint together to eliminate excess water.
CAUTION: Keep the plaster/fiberglass roll on the extremity as it is applied to reduce possible constrictive edema caused by applying the plaster/fiberglass too tight.
c. Place the reinforcement splint around the 2nd and 3rd phalanges.
d. Laminate the splint on the cast.
Chapter 3: Skill Level Tasks 15 April 2016 STP 8-68B13-SM-TG 3-399
e. Maintain the patient's wrist between 15 - 30 degrees of extension, and the 2nd and 3rd phalanges between 70 - 90 degrees of flexion.
18. Apply the second plaster/fiberglass layer (repeat steps 15 -16).
19. Mold the casting material.
NOTE: All casts require molding. Molds are done simultaneously. Go back and forth between the molds as the cast cures.
a. Interosseous mold.
NOTE: The interosseous mold is used to prevent movement of the wrist in the cast and promote fracture healing.
(1) Place the heel of one hand on the volar aspect of the distal wrist.
(2) Place the heel of the second hand on the dorsal aspect of the distal wrist.
(3) Squeeze the heels of the hands together.
(4) Apply firm and gradual pressure beginning at the wrist and progress up the forearm while maintaining the wrist in the correct position.
(5) Remove the heels of each hand from the cast when the contours of the wrist and forearm have been shaped and the cast is cured.
b.Phalange mold.
NOTE: The physician may assist in the molding of the phalanges.
(1) Place the heel of one hand on the ulnar aspect of the cast.
(2) Place the heel of the second hand on the dorsal aspect of the 2nd and 3rd phalanges.
(3) Apply firm and gradual pressure to fold down the 2nd and 3rd phalanges until 7090 degrees of flexion is met.
(4) Remove the heels of the hands from the cast when the contours of the phalanges have been shaped and the cast is cured.
20. Trim the cast to meet the cast standards.
a. Verify the alignment of the wrist with a goniometer.
(1) Repeat steps 11c - e.
(2) Verify the wrist measures between 15 - 30 degrees of extension.
(3) Remove the cast and start over with step 2.
b. Verify the alignment of the phalanges with a goniometer.
(1) Repeat steps 12b - d.
(2) Verify the 2nd and 3rd phalange measure between 70 - 90 of flexion.
(3) Remove the cast and start over with step 2.
c. Verify the cast dimensions.
(1) The cast edge rests within 1/8 inch of the distal palmar crease.
CAUTION: The finished edge of the cast should end proximal to the base of the thumb to avoid radial nerve impingemen.
(2) The cast edge rests proximal to the snuff box.
(3) The cast extends 1/8 - 1/4 inch distal to the tips of the 2nd and 3rd phalanges.
Chapter 3: Skill Level Tasks 3-400 STP 8-68B13-SM-TG 15 April 2016
(4) The 2nd and 3rd metacarpophalangeal joints (MCPJs) are covered.
(5) The cast edge should rest 1 - 1 1/2 inch distal to the cubital space.
d. Check the ROM of the elbow, uninjured phalanges and thumb.
(1) Instruct the patient to extend and flex the uninjured phalanges.
(2) Instruct the patient to rotate thumb and touch the uninjured phalanges to the thumb.
(3) Instruct the patient to extend and flex the elbow.
e.Trim back the cast material until the dimensions and ROM standards are met.
f. Trim the proximal and distal edges of the cast.
(1) Cut the outside edge of the cast padding.
(2) Pull down the webril and stockinette.
NOTE: The finished edge of the cast should end priximal to the base of the thumb to avoid radial nerve impingement.
(3) Tape down the edges of the stockinette and webril, if necessary.
21. Apply the final plaster layer (repeat steps 15 - 16).
22. Check the patient's capillary refill (repeat step 7).
23. Clean the plaster resin off the patient's skin using a damp wash towel or alcohol pads.
24. Give the patient verbal and written instructions on cast care.
a. Provide the patient with a copy of the clinic hours and telephone number. Instruct the patient to call the cast clinic with any concerns or questions regarding their cast. For after duty hours concerns, instruct the patient to report to the emergency room.
b. Provide the patient with a cast care booklet or written instructions.
c Instruct the patient to elevate the extremity above the heart, and extend, flex, and wiggle fingers (demonstrate for patient) to reduce swelling.
d. Instruct the patient on what not to do.
(1) Do not stick anything down the cast.
(2) Do not remove the cast.
(3) Do not alter the cast (e.g., writing on it, coloring).
25. Fit the sling to the patient, as required.
NOTE: Considerations for applying a sling include elderly patients, severity of fractures (e.g., Colles', Smith's, Bennett's), patient's comfort, and physician's or technician's preference.
26. Annotate the procedure applied to the patient in the medical record or SF 513.
a. Record the procedure applied and cast care instructions provided.
b. Sign your name.
27. Escort or direct the patient to the front desk to make a follow-up appointment.
Evaluation Preparation: You must evaluate the students on their performance of this task in a field condition related to the actual task.
Chapter 3: Skill Level Tasks 15 April 2016 STP 8-68B13-SM-TG 3-401
1 Reviewed the order from the physician.
2 Gathered the equipment and materials.
3. Told the patient your name and job title.
4. Explained the procedure to the patient.
5. Donned safety equipment (patient and technician).
6. Inspected the patient's arms.
7. Checked the capillary refill of the patient's hands/fingers.
8. Prepared the stockinette.
9 Placed a webril strip between the 2nd and 3rd phalanges.
10 Applied the stockinette to the patient's injured arm and phalanges.
11 Set the patient's injured wrist at 15 - 30 degrees extension.
12 Set the patient's injured 2nd and 3rd phalanges at 70 - 90 degrees of flexion.
13 Applied the webril (cast padding) to the injured phalanges, wrist, and forearm.
14 Prepared the casting materials, as applicable.
15 Applied the first plaster/fiberglass layer.
16 Laminated the casting material.
17 Applied the reinforcement splint to the index and middle phalanges, if using plaster.
18 Applied the second plaster/fiberglass layer (repeat steps 15 -16).
19 Molded the casting material.
20 Trimmed the cast to meet the cast standards.
21. Applied the final plaster layer (repeat steps 15 - 16).
22. Checked the patient's capillary refill (repeated step 7).
23. Cleaned the plaster resin off the patient's skin using a damp wash
3-402 STP 8-68B13-SM-TG 15 April 2016
Chapter 3: Skill Level Tasks
GO NO GO
Performance Measures
towel or alcohol pads.
24 Gave the patient verbal and written instructions on cast care.
25. Fit the sling to the patient, as required.
26. Annotated the procedure applied to the patient in the medical record or SF 513.
27. Escorted or directed the patient to the front desk to make a follow-up appointment.
Evaluation Guidance: Score each Soldier according to the performance measures in the evaluation guide. Unless otherwise stated in the task summary, the Soldier must pass all performance measures to be scored GO. If the Soldier fails any step, show what was done wrong and how to do it correctly.
References
Chapter 3: Skill Level Tasks 15 April 2016 STP 8-68B13-SM-TG 3-403
GO NO GO
Performance Measures
Required Related SF 513 None
This page intentionally left blank.
GLOSSARY Section I
Acronyms & Abbreviations
° C degrees Celsius
° F degrees Fahrenheit
1SG First Sergeant
AAR after action review
AC acromioclavicular
ADRP Army Doctrine Reference Publication
AED automated external defibrillator
AMEDD Army Medical Department
AMEDDC&S Army Medical Department Center and School
AN annually
ATTN attention
AVPU alert, verbal, pain, unresponsive
BSI body substance isolation
BVM bag-valve-mask
BW biweekly
CAR Central Army Registry
CATS Combined Arms Training System
CBRN chemical, biological, radiological, and nuclear
CBRNE chemical, biological, radiological, nuclear, and high-yield explosives
CMS circulation, motor and sensory
COA course of action
CONUSA continental United States Army
COPD chronic obstructive pulmonary disease
CPR cardiopulmonary resuscitation
CSM Command Support Major
CTC combat training center
DA Department of Army
DCAP-BTLS deformities, contusions, abrasions, punctures or penetration, burns, tenderness, lacerations, swelling
DD Department of Defense
15 April 2016 STP 8-68B13-SM-TG Glossary-1
DIPJ distal interphalangeal joint
DPC distal palmar crease
DSTS double sugar tong splint
FBAO foreign body airway obstruction
FM Field Manual
H2O water
HRCoE Health Readiness Center of Excellence.
IDP individual development plan
INST institutional
IV intravenous
JBSA Joint Base San Antonio
LAC long arm cast
LAHC long arm hanging cast
LLC long leg cast
LLCC long leg cylinder cast
lpm liters per minute
MACOM major command
MCPJ metacarpophalangeal joint
MDI metered dose inhaler
METL Mission Essential Task List
ml milliliter
mmHg millimeters of Mercury
MO monthly; medical officer
MOOTW military operations other than war
MOOP4 mission oriented protective posture
MOS military occupational specialty
MOSC military occupational specialty code
MTF medical treatment facility
MTP MOS Training Plan
MTPJ metatarsophalangeal joint
NCO non-commissioned officer
NCOIC non-commissioned officer in charge
NRB non-rebreather mask
NSAID nonsteroidal anti-inflammatory drugs
STP 8-68B13-SM-TG 15 April 2016
Glossary-2
O2 oxygen
OP operational
OPA oropharyngeal airway
OPQRST onset, provokes, quality, radiates, severity, time
OR operating room
P palpation
PCE process cycle efficency
PE physical examination
PLT process lead time
PMS pulse, motor function, and sensation
PPE personal protective equipment
psi pounds per square inch
RC Reserve Component
RICE rest, ice, compression, and elevation
ROM range of motion
SA semi-annually
SAC short arm cast
SAMPLE S-symptoms, A-allergies, M-medications, P-past medical history, L-last oral intake, E-events
S-D self-development
SIPOC supplier, input, process, output and customer
SF Standard Form
SLC short leg cast
SM Soldier's Manual
SM-TG Soldier's Manual and Trainer's Guide
SOP standard operating procedure
SPD Sterile Processing Department
SQL sigma quality level
STF sustainment training frequency
STP Soldier Training Publication
STS sugar tong splint
STSL sustainment training skill level
TADSS training aids, devices, simulators, and simulations
TCCC Tactical Combat Casualty Care
TG trainer's guide
15 April 2016 STP 8-68B13-SM-TG Glossary-3
TIMWOOD transportation, inventory, motion, wait, over processing, over production and defects
TL training location
TRADOC United States Army Training and Doctrine Command
TTP tactics, techniques and procedures
Section II
Terms
battle focus
A process to guide the planning, execution, and assessment of the organization's training program to ensure they train as they are going to fight.
collective training
Training, either in institutions or units, that prepares cohesive teams and units to accomplish their combined arms and service missions on the battlefield.
common task
A critical task that is performed by every Soldier in a specific skill level regardless of MOS.
individual training
Training which prepares the Soldier to perform specified duties or tasks related to the assigned duty position or subsequent duty positions and skill levels.
self-development
Self-development is a planned, progressive, and sequential program followed by leaders to enhance and sustain their military competencies. Self-development consists of individual study, research, professional reading, practice, and self -assessment.
unit training
Training (individual, collective, and joint or combined) conducted in a unit.
STP 8-68B13-SM-TG 15 April 2016
Glossary-4
REFERENCES
SECTION 1
New reference material is being published all the time. Present references, as listed below may become obsolete. To keep up-to-date, see DA Pam 25-30. Publications are available in electronic format from the sites listed below:
Army Publishing Directorate
Administrative Departmental Publications and Forms
(ARs, Cirs, Pams, OFs, SFs, DD & DA Forms)
Soldier’s Training Homepage – CAR Resources
Army Doctrinal and Training Publications
(FMs, PBs, TCs, STPs)
REQUIRED PUBLICATIONS
Required publications are sources that users must read in order to understand or to comply with this publication. Most Army publications are available online at http://www.apd.army.mil/. Most joint publications are available online at http://www.dtic.mil/doctrine/new_pubs/jointpub.htm,
Army Publications
ADRP 1-02 Terms and Military Symbols, 7 December 2015
ADRP 7-0 Training Units and Developing Leaders , 23 August 2012.
STP 21-1-SMCT Soldier’s Manual of Common Tasks Warrior Skills Level 1, 10 August 2015.
10 US CODE 47 UCMJ Uniform Code of Military Justice, §§ 801-946 of Title 10, U.S. Code.http://www.ucmj.us. Accessed on 16 March 2016
Joint Publications
JP 1-02 Department of Defense Dictionary of Military and Associated Terms, 8 November 2010.
SECTION 2
RELATED PUBLICATIONS
Related publications are sources of additional information. They are not required in order to understand this publication.
FM 6-22 Leader Development, 30 June 2015.
The Lean Six Sigma Pocket Toolbook: A Quick Reference Guide to Nearly 100 Tools for Improving Process Quality, Speed, and Complexity. George, Michael L, Dave Rowlands,
STP 8-68B13-SM-TG
References-1
April
15
2016
Mark Price, John Maxey, Paul Jaminet, Kimberly Watson-Hemphill, and Chuck Cox. New York: McGraw Hill Professional, 2011. ISBN: 0071441190.
Zimmer Traction Handbook: A Complete Reference Guide to the Basics of Traction. [Warsaw, Ind.]: Zimmer, 2000. OCLC: 54054686.
SECTION 3
PRESCRIBED FORMS
None.
SECTION 4
REFERENCED FORMS
Unless otherwise indicated, DA Forms are available on the Army Publishing Directorate (APD) Web site: www.apd.army.mil DD Forms are available at http://www.dtic.mil/whs/directives/forms Standard Forms (SF) and Optional Forms (OF) are available on the U.S. General Services Administration (GSA) web site (www.gsa.gov).
DA Form 2028
DA Form 3949
DA Form 4678
DD Form 1380
Recommended Changes to Publications and Blank Forms.
Controlled Substances Record
Therapeutic Documentation Card Plan (Medications)
Tactical Combat Casualty Care (TCCC) Card
SF 513 Medical Record - Consultation Sheet
SF 600 Medical Record - Chronological Record of Medical Care
SECTION 5
RECOMMENDED READINGS
Publications, Regulations, and Internet Sites
AR 25-1
AR 40-66
AR 40-68
AR 40-400
AR 340-21
AR 700-68
Information Management Army Information Technology, 25 June 2013.
Medical Record Administration and Health Care Documentation, 17 June 2008.
Clinical Quality Management, 26 February 2004.
Patient Administration, 8 July 2014.
The Army Privacy Program, 5 July 1985.
Storage and Handling of Liquefied and Gaseous Compresses Gasses and Their full and Empty Cylinders, 16 June 2000
References-2
STP 8-68B13-SM-TG
15 April 2016
Other Publications
A Manual of Orthopedic Terminology. Nelson, Fred R. T, and Carolyn T. Blauvelt. Philadelphia, PA: Mosby/Elsevier, 2007. ISBN: 9780323045032.
Adams's Outline of Fractures, Including Joint Injuries. Hamblen, David L, A H. R. W. Simpson, John C. Adams, and John C. Adams. Edinburgh: Churchill Livingstone Elsevier, 2007. ISBN: 9780443102974.
BLS for Healthcare Providers Instructor Manual. Hazinski, Mary F. BLS for Healthcare Providers: Instructor Manual. Dallas, Tex: American Heart Association, 2011. ISBN: 9781616690403.
BLS for Healthcare Providers Student Manual. Hazinski, Mary F. BLS for Healthcare Providers Dallas, Tex: American Heart Association, 2011. ISBN: 9781616690397.
Clinical Procedures in Emergency Medicine. Roberts, James R, and Jerris R. Hedges. Philadelphia, PA: Saunders/Elsevier, 2010. ISBN: 978-1416036234.
Emergency Care and Transportation of the Sick and Injured. Pollak, Andrew N, Benjamin Gulli, Les Chatelain, and Chris Stratford. Sudbury, Mass: Jones and Bartlett, 2005. ISBN: 0763744069.
EMT Complete: A Basic Worktext. Limmer, Daniel, Baudour C. Le, and Edward T. Dickinson. EMT Complete: A Basic Worktext. Upper Saddle River, N.J: Pearson Prentice Hall/Brady, 2007. ISBN: 9780131192652.
Handbook of Splinting and Casting. Thompson, Stephen R, and Dan A. Zlotolow. Philadelphia, PA: Elsevier/Mosby, 2012. ISBN: 9780323078023.
JP 4-02 Health Service Support, 26 July 2012.
Prehospital Trauma Life Support. St. Louis, MO: Mosby Jems/Elsevier, 2011. ISBN: 0323065030.
Practical Fracture Treatment. McRae, Ronald, and Max Esser. Edinburgh: Elsevier Churchill Livingstone, 2008. ISBN: 9780443068768.
Principles of Anatomy & Physiology. Tortora, Gerard J, and Bryan Derrickson. Hoboken, NJ: Wiley, 2012. ISBN: 9780470565100.
Surgical Technology: Principles and Practice. Fuller, Joanna R, and Julie Armistead. St. Louis, Mo: Elsevier Saunders, 2013. ISBN: 9781455725069.
Textbook of Basic Nursing 9th edition. Rosdahl, Caroline B, and Mary T. Kowalski. Philadelphia: Lippincott Williams & Wilkins, 2008. ISBN: 9780781765213.
The Merck Manual of Diagnosis and Therapy. Beers, Mark H. Whitehouse Station, N.J: Merck Research Laboratories, 2006. ISBN: 9780911910186.
References-3
15 April 2016 STP
8-68B13-SM-TG
This page intentionally left blank.
STP 8-68B13-SM-TG

15 April 2016
DISTRIBUTION:
Active Army, Army National Guard, and United States Army Reserve: Distributed in electronic media only (EMO).
By Order of the Secretary of the Army:
MARK A. MILLEY General, United States Army Chief of Staff
Official:
GERALD B. O’KEEFE Administrative Assistant to the Secretary of the Army 1609003
PIN: 106283-000

