


How to access bonus editorial features




Susan Chapman is a health, lifestyle and travel writer residing in the beautiful city of Stoney Creek, Ontario – part of the Greater Hamilton region. Hamilton is home to more than 100 waterfalls and has often been referred to as the Waterfall Capital of the World. Nearby Royal Botanical Gardens is less than 30 minutes from her front door. The colours, scents and blooms of their world-renowned lilac collection are stunning and a source of inspiration for her garden journals.
Her passion for gardening and transforming outdoor spaces began in 1988 when she and her husband purchased their first home. Newly married and with limited resources for an annual garden budget, she quickly realized the beauty and value in perennial gardens. With an eye for plants that could easily be divided, and some luck at end of season garden centre sales, their dirt-filled builder’s lot was transformed to a lush and colourful landscape that grew more bountiful over the years.
The knowledge she acquired at their first home was instrumental into kick-starting landscaping efforts when they moved to their second and current home in Stoney Creek. Taking into consideration slope, drainage, sun and shade, she was able to create gardens that complemented hardscapes while ensuring optimal rainfall absorption. Again, perennials were the foundation for the garden design.
As a natural community connector, Susan began sharing her garden divisions, advice and acquired knowledge with other gardeners – from first time growers to experienced gardeners who simply couldn’t refuse taking home one more plant (or two). You might know the type!
When not in the garden, Susan enjoyed a career of over 30 years in the financial industry and non-profit sector. The people she met, the stories shared and the life lessons learned were truly the most rewarding aspects of her profession. In her freelance role, she has written for corporate communications, medical blogs, arts reviews and community periodicals. She is currently researching and planting the seeds for a novel based on interesting true-to-life events. Her future plans include travel to new destinations while exploring the unique flora and fauna of other countries.
Ask what might be the most beautiful thing she has ever grown and she doesn’t hesitate in her answer. It is her family. She and her husband recently celebrated 35 years of marriage and have been blessed with two adult children who are now testing out their own green thumbs.
She encourages everyone to experience the wellness benefits of gardening. Explore local garden centres, connect with garden groups or online communities and watch your garden grow!

Follow us online https://www.localgardener.net
Facebook: @CanadasLocalGardener
Twitter: @CanadaGardener
Instagram: @local_gardener
Published by Pegasus Publications Inc.
President/Publisher
dorothy dobbie dorothy@pegasuspublications.net
Design Cottonwood Publishing services
Editor shauna dobbie shauna@pegasuspublications.net
Art Direction & Layout Karl Thomsen karl@pegasuspublications.net
General Manager Ian Leatt ian.leatt@pegasuspublications.net
Contributors susan Chapman, d orothy d obbie, shauna d obbie, d oug Lovestadt, sherrie Versluis.
Editorial Advisory Board
Greg auton, John Barrett, Todd Boland, darryl Cheng, Ben Cullen, Mario d oiron, Michel Gauthier, Larry Hodgson, Jan Pedersen, stephanie rose, Michael rosen, aldona s atterthwaite, and Trudy Watt.
Advertising Sales
1.888.680.2008
Subscriptions
Write, email or call Canada’s Local Gardener, 138 swan Lake Bay, Winnipeg, MB r 3T 4T8

Phone (204) 940-2700 Fax (204) 940-2727
Toll Free 1 (888) 680-2008 subscribe@localgardener.net
one year (four issues): $35.85
Two years (eight issues): $71.70
Three years (twelve issues): $107.55 single copy: $10.95; Beautiful Gardens: $14.95 150 years of Gardening in Canada copy: $12.95 Plus applicable taxes.
return undeliverable Canadian addresses to: Circulation department Pegasus Publications Inc. 138 swan Lake Bay, Winnipeg, MB r 3T 4T8
Canadian Publications mail product sales agreement #40027604
Issn 2563-6391
Canada’s LoC aL Gardener is published four times annually by Pegasus Publications Inc. It is regularly available to purchase at newsstands and retail locations throughout Canada or by subscription. Visa, MasterCard and american express accepted. Publisher buys all editorial rights and reserves the right to republish any material purchased. reproduction in whole or in part is prohibited without permission in writing from the publisher.
Copyright Pegasus Publications Inc.


 By shauna dobbie
Some people just don’t care for asparagus. If that’s you, read something else. If you love it as much as me, read on, and be prepared to … wait. When growing asparagus, patience is required. But the payoff is great.
Asparagus will take up quite a bit of room and it is perennial, so choose your site carefully. Choose a location in your garden that receives at least six to eight hours of direct sunlight daily. Ensure the soil is well-drained to prevent waterlogging, as asparagus does not tolerate excessive moisture.
Asparagus prefers fertile, welldrained soil. Amend the soil with organic matter such as compost or well-rotted manure to improve its nutrient content and drainage. It prefers a soil pH of 6.0 to 7.0; you may need to lime your soil in more acidic areas.
It is usually grown from crowns bare-root transplants, but you can
grow from seed if you prefer. Plant the crowns in early spring, as soon as the soil can be worked. Dig trenches that are about 12 to 18 inches deep and space the crowns about 12 to 18 inches apart, with rows spaced
about 3 to 5 feet apart.
To grow from seeds, you can start them 10 weeks ahead indoors or direct-sow in the garden. Plant one or two seeds per spot about ½-inch either in seed starting trays or 12 inches apart in a prepared bed. When they get to about 3 inches high, thin to one plant per position, if you planted two seeds. Plant seeds or seedlings in the garden after the last frost date.
Apply a layer of organic mulch, such as straw or wood chips, around the plants to help conserve soil moisture, suppress weed growth, and regulate soil temperature.
Asparagus requires regular watering, especially during dry periods. Provide consistent moisture, aiming for about 1 inch of water per week. Avoid over watering, as it can lead to root rot.
It is a heavy feeder. Before planting, incorporate a balanced organic fertilizer into the soil. In subsequent

1. Asparagus beetle: This is a common pest that feeds on the foliage of asparagus plants. Both the adult beetles and their larvae can cause damage by skeletonizing the leaves. Look for ¼- to 3/8- inch elongated black beetles with red or yellow markings. Hand-pick them.
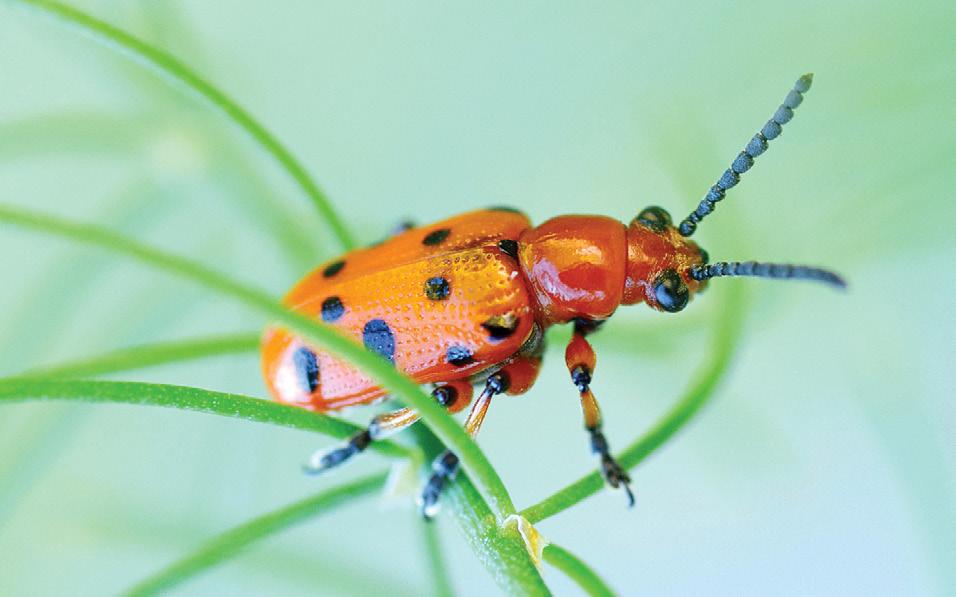
2. Spotted asparagus beetle: Like its cousin, the adult will skeletonize the plant. It is about ¼ inch long and is red with 12 black dots. The larvae feed only on the berries.
3. Cutworms: These caterpillars are known to feed on young asparagus shoots, causing them to wilt or die. Cutworms are nocturnal and typically hide in the soil during the day, so inspect the base of the plants for signs of damage. They feed at night and tend to hide just under the surface of the soil during the day. Hand-pick them.
4. Slugs and snails: These pests can chew on the foliage and leave slime trails on the plants. They are often found near the base of the asparagus stems or on the ground around the plants. Hand-picking is one solution; slug bait is another, but do you want to eat something that slug-bait has been around?

5. Aphids: These small, soft-bodied insects can cluster on the undersides of leaves and suck sap from the plant. Look for clusters of greyishgreen insects on the foliage. They can cause stunted growth and transmit diseases. Spray them off with the hose.

There are three major diseases that you could encounter:
Asparagus purple spot is most likely to occur during a cool, wet spring when your asparagus grows in sandy soil. Small reddish-purple spots will appear on the bottoms of new spears. You can still eat them, and cooking will make the spots disappear. Good cleanup in the fall is recommended.
Asparagus rust will show itself as pale spots that turn orange and then brown. You may not notice it until the spots are long, scabby lesions on the stems of the ferns. If you see this, destroy infected plant matter right away. Carefully cut and throw tops in the garbage. When you harvest, cut spears below the soil so that rust doesn’t infect the stubs.

Crown and root rot will become apparent in the ferns. They will turn yellow early and may wilt. Over time, your harvest will diminish. There are two fungi that
cause crown and root rot called fusarium and phytophthora. If the crown remains dry, it is fusarium and won’t be treatable with fungicides. If the crown is wet, it is phytophthora, so go ahead and try to treat it.
Keep your asparagus patch free of weeds, and feed and water sufficiently. Water through a soaker hose if possible.
Although it isn’t native to Canada, it has been widely dispersed throughout the country by birds, who eat the red berries and poop out the seeds elsewhere. Undisturbed, these seeds can grow to a fairly good crop.

Hunters of the stuff say that it tastes fresher than store-bought. It could be because you tend to eat it the same day you pick it, or it could be some older variety that isn’t available anymore.
You could come across a few spears at this time of year – and if you do, go ahead and grab them, but make a note of where you found them. You can return every couple of days to look for more. Then head out next spring to watch for them coming up.
There are a couple of other plants that look similar to asparagus, including the young stems of baptisia. It’s important not to get mixed up, because baptisia is poisonous. If you see a plant and
think it looks sort of like asparagus, don’t eat it.
The other plant that looks kind of similar is Japanese knotweed, but that is less important, because Japanese knotweed is edible. It even tastes similar to asparagus.
If you’d like to try wild asparagus, look for a crop in the country in the fall, when the tall ferns turn yellow and sometimes have red berries. (Don’t eat the berries; they’re poisonous.) Make a note of where it is and return next year at asparagus time.
years, apply a balanced fertilizer in early spring and top-dress with compost annually to provide ongoing nutrients.
Keep the asparagus bed free of weeds, as they can compete for nutrients and water. Mulching and regular cultivation can help control weeds, but be careful not to damage the shallow roots of the asparagus plants.

Now here is the part that requires patience. Asparagus plants should not be harvested in their first year. Allow the spears to grow and fern out to support root development. In the second year, you can harvest for a week or two, and in subsequent years, you can cut asparagus until the spears decrease to the diameter of a pencil. Harvest spears when they are 6 to 8 inches by cutting them slightly below ground level.
When you stop harvesting for the season, leave the small spears on the asparagus to grow into tall ferns, which you must leave on to gather strength from the sun for the next year.
For the winter, put extra mulch over the crowns to give them a bit of comfort in the freezing temperatures. I love the look of asparagus ferns waving in the breeze and they would be a beautiful addition to my winter garden, but they are one plant that should be cut down in the fall to protect against diseases from year to year. h
Now you can finally have all of the soothing benefits of a relaxing warm bath, or enjoy a convenient refreshing shower while seated or standing with Safe Step Walk-In Tub’s FREE Shower Package!
✓ First walk-in tub available with a customizable shower
✓ Fixed rainfall shower head is adjustable for your height and pivots to offer a seated shower option


✓ High-quality tub complete with a comprehensive lifetime warranty on the entire tub

✓ Top-of-the-line installation and service, all included at one low, affordable price


Now you can have the best of both worlds–there isn’t a better, more aff ordable walk-in tub!

The hoya plant can either be the most rewarding houseplant in your home or the most frustrating.

They do have attractive foliage that varies according to species, but it is about the waxy, star shaped, heavenly scented flowers. Five white or tinged-with-pink petals that look like they are made from porcelain surround red to purple glasslike coronas of each little flower. The are arranged in umbels that emerge from the tips of peduncles – spurs, in the case of hoya – that keep getting longer and producing new flowers each year. Flower colours and even petal shapes, vary according to variety – there is great diversity in the family.
Hoya can be pricey. I have seen Hoya compacta (the Hindu rope plant with its fascinating curly leaves and ball-shaped flowers) listed at $6,500. Even the popular Hoya carnosa can range from $180 to $300. But there are inexpensive options, too, to get the hoya fancier started. A young cutting can probably be had for about $7.
Some say the blossoms resemble those of the milkweed plant – not surprising since hoyas are one of the 500 species of Asclepias. Hoya originate in Asia and though their leaves are fat and waxy (one common name is wax plant, another is porcelain flower) they are not technically succulents. But they need to be treated as if they were because they hate to be overwatered.
What makes them frustrating? The ability to get some of them to come into bloom. They like bright light but not too bright or their leaves will scorch. I have had luck hanging them in a north window. If you must give them another exposure, be sure the light is bright and indirect. They should be treated roughly in winter, allowing the plant to dry out thoroughly before watering again. When you do water, let the water run out the
bottom of the pot. Standing in water is a sure killer, but they enjoy 40 percent humidity.
In summer, fertilize at half strength every time you water. Now keep the plants slightly moister. The roots are sensitive so look for a low salt index fertilizer – it’s complicated so ask your greenhouse. You can get an idea of what it is from the sidebar. Allow the plant to become somewhat root bound. It takes five to seven years to bring some hoya to bloom and after all that, not all varieties will bloom, so beware! One variety, Hoya kentiana
is particularly difficult to bring into bloom.
As for potting mixes, hoyas are epiphytic. Some people use a cactus mix or orchid mix and then amend it with bark or perlite. This lets in plenty of air which is the secret to keeping hoya happy.
Clay pots are best for that reason. They like to be slightly pot bound which will cause them to put more effort into blossoms than roots. Repot every second year in a just slightly larger container.
Hoya can be readily propagated from cuttings in water.
Hoya carnosa ‘Krimson Queen’

Foliage is edged in pink or white earning the plant the name ‘tricolour’. It can put out whole stems of bright pink or white leaves. Some leaves are pale green edged in darker green and some are dark green edged in cream. Likes high humidity, very bright but indirect light. Blossoms are pinker than others.

Hoya obovata
Rounded foliage is dark green and splashed with silver. Flowers are white with a translucent pink, five-petalled corona. Grows faster than some and gets flowers earlier. It is not as fussy about light, although still wants it bright or at least medium. No direct sunlight, dark draft corners or too much water. It has a chocolate scent.
Hoya australis
Comes from Australia and has been found in Indonesia. The spade-shaped, soft leaves are somewhat thinner than other hoya so it may need slightly more water. It still needs bright but not direct sunlight. It is a twiner growing upward around a support. The flower umbels are more open than other hoyas.
Hoya multiflora
Hoya multiflora or shooting star is a faster growing plant that has unusual blossoms. Each cluster will put out 20 to 50 flowers that emerge 1 to 2 inches from the mother stem, the peduncle, like shooting stars or little rockets. The leaves are thinner than many hoya so the plant should not be allowed to completely dry out but kept somewhat moist.
Hoya compacta
Also known as the Hindu rope plant Hoya compacta is remarkable for its lovely, curly leaves of medium green. They trail on long tendrils, putting out pink umbels along the way. This lovely plant looks good flowering or not, but it is in the high end of the price range. This one can hang in an east facing window getting a little morning sunlight, but not beyond 9:00 am.

The blossom clusters are white with glass-like corona of pink to purple. There is also a variegatedleafed plant. h

The fertilizer salt index is a measure of the potential for a fertilizer to cause salt injury to plants. It is calculated by comparing the salt concentration of a fertilizer with that of a standard solution of sodium chloride (table salt) with the same electrical conductivity.
Fertilizers that have a high salt index can cause damage to plants by increasing the soil’s salt concentration, which can interfere with the plant’s ability to take up water and nutrients. This can lead to stunted growth, reduced yields, and even plant death.
The salt index of a fertilizer is determined by a combination of factors, including the type and amount of salts in the fertilizer, the solubility of those salts, and the electrical conductivity of the fertilizer solution.
It’s important for farmers and gardeners to consider the salt index of fertilizers when choosing which products to use, especially in areas with low rainfall or high salinity in the soil. Using fertilizers with a lower salt index can help prevent salt damage to plants and maintain healthy growth.
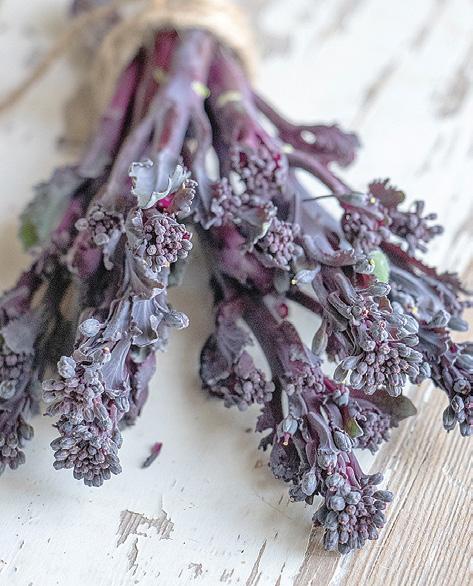
Bean ‘Dragon Tongue’ (Phaseolus vulgaris). A good looking bush bean in purple streaked with yellow. It’s been around for a while – long enough to be considered an heirloom. The purple colour disappears when cooked, but they’ll be fun to look at raw! Height 24 to 30 inches, spread 8 to 12 inches. Harvest in 60 days after direct sowing.

Broccoli ‘Purplelicious’ (Brassica oleracea). This is a tenderstem type, meaning that it grows with small heads on many tender, sweet stems. You get a central curd first, then a week later

you get side shoots, and two weeks after that, more side shoots. Harvest the first time and watch for more. You can grow them in a 6- to 8-inch pot or in the garden. Height of 18 to 24 inches, spread of 14 to 16 inches. Start to harvest in 50 days.
Celery ‘Merengo’ ( Apium graveolens). For all the gardeners who have trouble growing celery, here’s a new one to try. It is disease resistant and grows earlier with tall, dark green stalks and leafy tops. Height to 36 inches, spread to 10 inches.

Cayenne pepper ‘Wildcat’ (Capsicum annuum). These peppers grow extra-large, 8 to 12 inch fruits.
They are straighter than traditional cayennes and have a smoky flavour and a hint of sweetness, averaging 750 Scoville units. Height of 3 to 4 feet, spread of 2 to 3 feet.
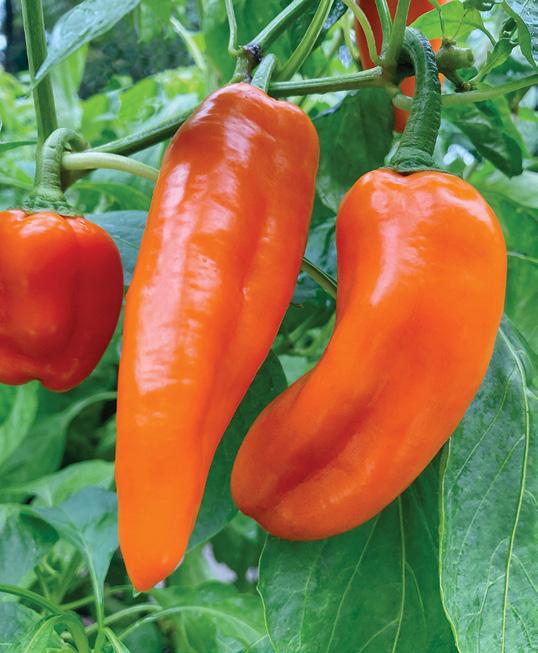

Pepper ‘Pepper Pots Sugar Kick’ (Capsicum annuum). A seedless pepper? That’s right. This mini is great for putting on a veggie platter whole, thanks to its crispy, sweet, seedlessness. Turns green at 54 days after planting and 20 days later, turns orange. Height 20 to 30 inches, spread 16 to 24 inches.
Squash ‘Sweet Jade’ (Cucurbita maxima). Each kabocha squash is the perfect size for one serving! Cut off

the tops and use them as edible soup bowls. Sweet and flavourful. Height 18 to 24 inches, spread 6 to 8 feet.
Watermelon ‘Rubyfirm’ (Citrullus lanatus). Grows to about the size of a cantaloupe and has minimal seeds. Sweet and crisp. The height is 12 to 18 inches, but the plant grows to 20 feet long.

‘Mochi’. Unusual cherry tomato that does not burst in your mouth when you bite into it, but has a gumdrop-like texture. Thin-skinned, glossy red. High resistance to leaf mould. Compact indeteminate. Grows to over 6 feet long.

‘Darinka’. Extra-early red bears 3 to 4 ounce fruits with great taste. High crack resistance and heavy yield-
ing determinate plant grows to 4 feet tall and 24 inches wide.
‘RuBee Dawn’. “A balance of sweet with a touch of tartness and a hint of floral overtone.” So says one description of this very-early red tomato grows 8- to 12-ounce fruit on a 3- to 4-foot plant. Disease resistant. Indeterminate but manageable.

‘Sun Dipper’. Small and shaped kind of like matryoshka dolls! It’s quite the sight on a veggie platter. Plant them a couple of feet apart. Height 5 to 6 feet.

Perennial edibles for Zone 6 and up Blackberry ‘Sweet Giant’ (Rubus). This thornless (!) blackberry has huge fruit that grow as big as the tip of your


thumb. Fruits on first- and secondyear canes for a long harvest. Gets to 4 to 6 feet tall and 3 to 4 feet wide.
Black raspberry ‘Niwot’ (Rubus occidentalis). Ever-bearing and earlyripening, this black raspberry is nonsuckering and good for storage or eating fresh. Height 5 to 6 feet, spread 3 to 4 feet.
Snapdragon ‘DoubleShot Orange Bicolour’. An AAS winner 2023. F1 hybrid, upright with open faced, ruffled, double flowers on tall upright strong stems. 18 to 20 inches tall. Contrast with trailing snapdragons that do well in hanging baskets. ‘Fruit Salad Mango’ is bronzy orange with yellow and pink throats. These do better in the heat than the others. A


short-lived perennial in some climates, snapdragon is grown as an annual.
Petunia ‘Evening Scentsation’. Not new, an AAS winner in 2017, this lovely blue petunia is worth another look … and smell. Its fragrance has notes of hyacinth, sweet honey and rose. As the name implies, the scent is stronger in the evening hours, though it can be experienced throughout the day as well. Lovely colour, nice mounding habit, 5 to 8 inches tall with a spread of 30 to 35 inches.

Celosia ‘Gekko Green’ and ‘Lizard leaf’ (Celosia argentia). This plant is all about its crumpled, shiny, foliage. ‘Gekko Green’ is
two-coloured: dark green and dark burgundy. ‘Lizard Leaf’ is simply a very dark burgundy. Introduced two years ago, it is now widely available. Loves hot sun. Grows 10 to 14 inches tall and wide. Performs very well in pots or as a border.

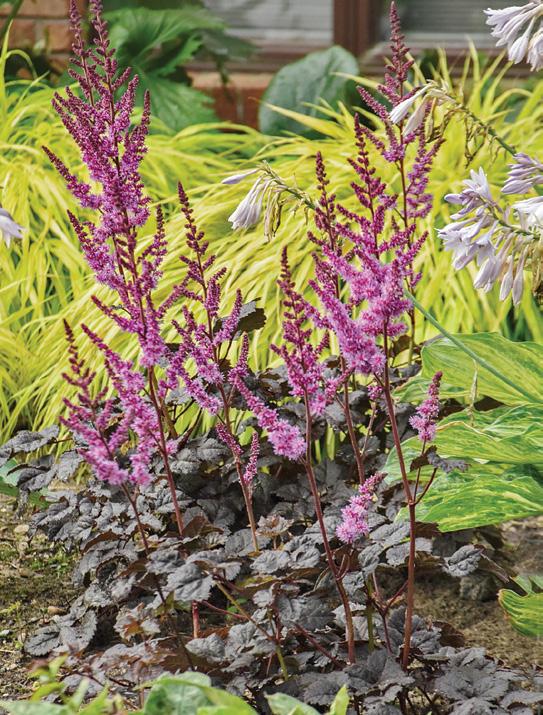

Astilbe ‘Dark Side of the Moon’ (Astilbe hybrid). An astilbe with leaves that open yellow with a dark margin, then turn completely chocolatey with time. Fuzzy lilac-coloured flowers. Likes sun or shade. Height 20 to 22 inches, spread 24 to 28 inches. Zone 4.
Daisy ‘Carpet Angel’ (Leucan-
themum). A groundcover Shasta daisy that doesn’t stop blooming all season long! An AAS winner, this little beauty is only 6 inches tall, but it sports 3-inch-wide flowers with a ‘Crazy Daisy’ appearance and an outer rim of drooping petals. Spread is up to 20 inches per plant and creates a carpet of white. Hardy from Zone 4.

Hosta ‘White Feather’ has striking white or cream leaves in springtime, fading to cream, lined with green in later months. Lavender flowers emerge from the 18- to 20-inch plant in summer. Give it full shade. Zone 3. ‘Siberian Tiger’ hosta is only 9 inches tall but its leaves light


up a dark corner. They feature long vertical stripes of creamy white and pea green. In bloom, their white or lavender flowers are attractive to bees. Zone 3.
Phlox ‘Crème de la Crème’. Any garden filled with phlox is a garden filled with late summer bloom. Not new, but not common, ‘Crème de la Crème’ has rosebud-like pink and white flowers in cone-shaped panicles. The individual florets open slowly to entice the bees – who love it. Sun to part shade, 24 to 36 inches, Zone 3.
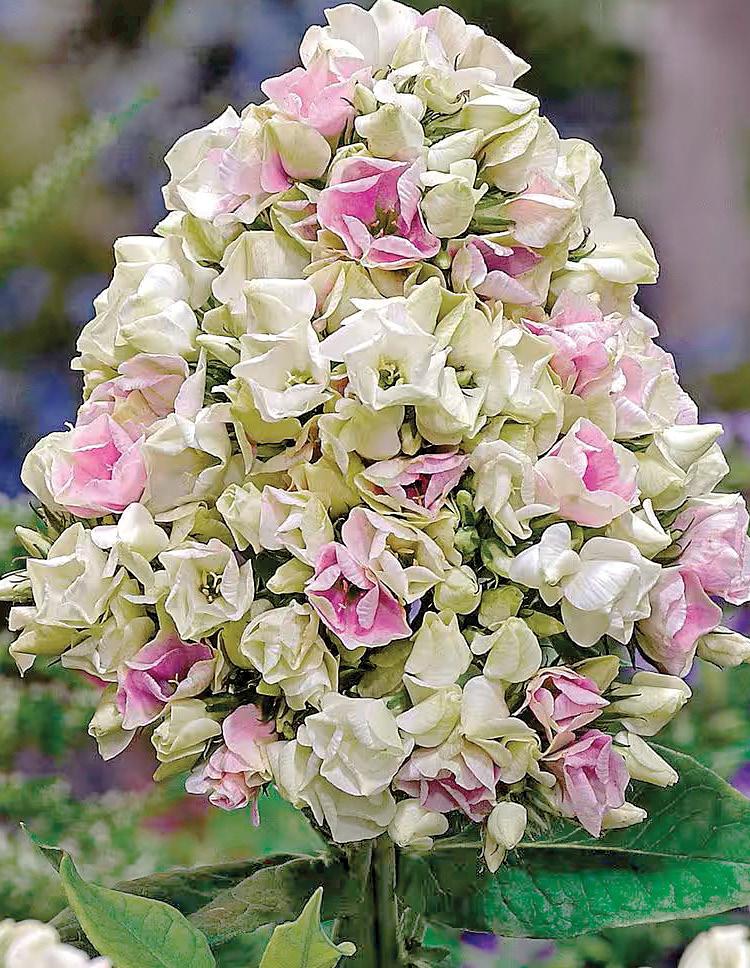
Sedum ‘Pinky’. Sedum is a wonderful, well-behaved groundcover and when the leaves have growing tips of creamy white and pink

in spring, it becomes even more attractive. Recently imported from Europe, this stonecrop sedum also gets starry pink clustered flowers. Very hardy, Zone 3.
Beebalm ‘Midnight Oil’ (Monarda bradburiana). Beebalm is beebalm until you see the flowers produced on this beauty. The bees must do a double take when it catches their attention! The plant is 2 feet tall with tubular, pink flowers spotted with purple. Foliage is a rich burgundy when young. Clump forming. A perfect plant for your pollinator garden and, best of all, deer resistant. USDA Zone 4.

Sweet flag ‘Ogon’ ( Acorus gramineus). Gorgeous variegated yellow and

green grass grows 6 to 14 inches high and spreads 10 to 12 inches. Hardy to Zone 5, but stick it in a container as a dazzling filler. Full sun or part shade.
Papyrus ‘Graceful Grasses
Queen Tut’ (Cyperus prolifer). A smaller version of ‘King Tut’, this water-lover will look fantastic at the edge of a pond or in a pot with drainage sunk into a pot without, filled with water. Height 18 to 24 inches, spread 12 to 18 inches.
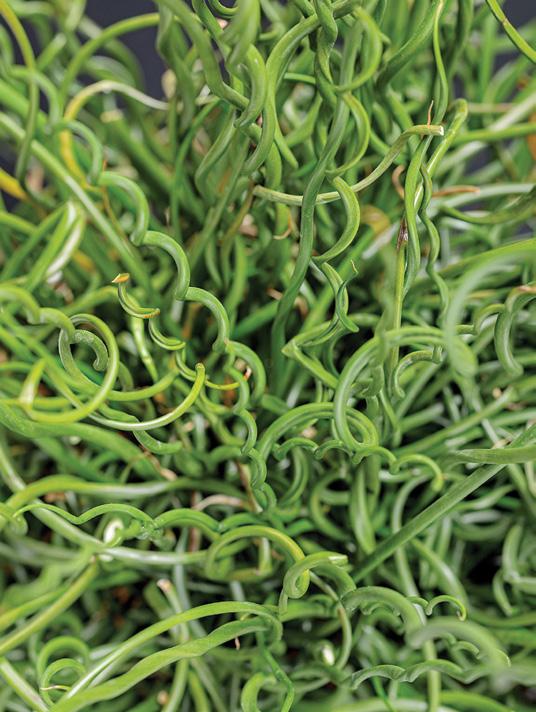
Corkscrew rush ‘Graceful Grasses Curly Wurly’ ( Juncus effusus). Not sure how new this one is, but it is certainly a delight. Proven Winners has put some marketing dazzle behind

it now. Long dark-green needle-like leaves curl around like a messy hairdo. Needs plenty of moisture, so grow it like ‘Queen Tut’. Achieves a height of 12 to 18 inches, spread of 16 to 20 inches. Listed as hardy to Zone 5.
Incarvilllea delavayii. A flowering fern, is often called garden gloxinia Orchid-like flowers emerge from the ferny, 18-inch plants that require a small measure of sun to bloom. A tender perennial, it can be grown in pots as an annual. Stunning exotic flowers grow on long stalks that reach 2 feet tall. Overwinter in bright light indoors or save the tubers in peat moss in a cool dark place.
Kangaroo paw ‘Celebrations

Mardi Gras’. A plant for collectors who love to grow stunningly unusual plants. I first saw this in an Edmon-

ton garden and I was fascinated with the furry buds of yellow and orange. Now there is one that grows about 16 inches tall with purple and blue flowers. It looks worth trying out. No, it is not hardy, but you can grow it in the hot sun and in a planter and take the roots indoors over winter.
Oxalis versicolor ‘Sorrel Candy Cane’. This bulbous charmer does not at all resemble traditional oxalis plants with their shamrock shaped leaves. Instead, the leaves on this plant are three slender slips that grow along the stem in sets that show off upright, bell-shaped flowers that unfurl like a rose in full sunlight but stay partially closed in duller light. The curving petals are edged in bright red, causing the flower to resemble a candy cane. This is a tender perennial. Grow them
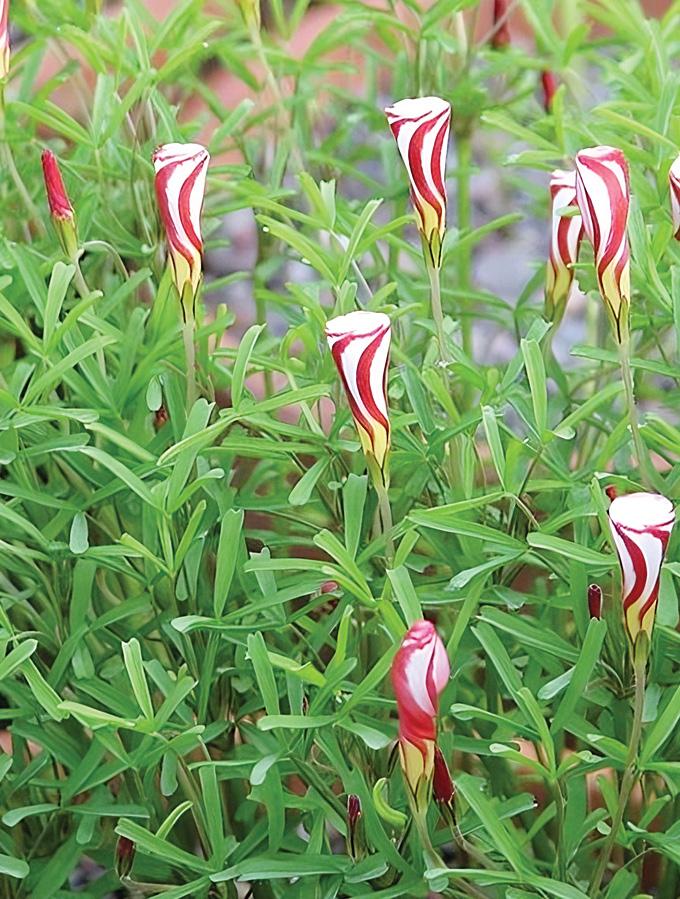
in pots and overwinter the bulbs indoors. Oxalis corymbosa aureo reticulata produces large traditional shamrock-shaped foliage with pretty pink flowers. However, the leaves are a patterned showcase of cream and green sure to grab attention. Also known as golden vein oxalis. Grow this pretty plant in a featured pot.

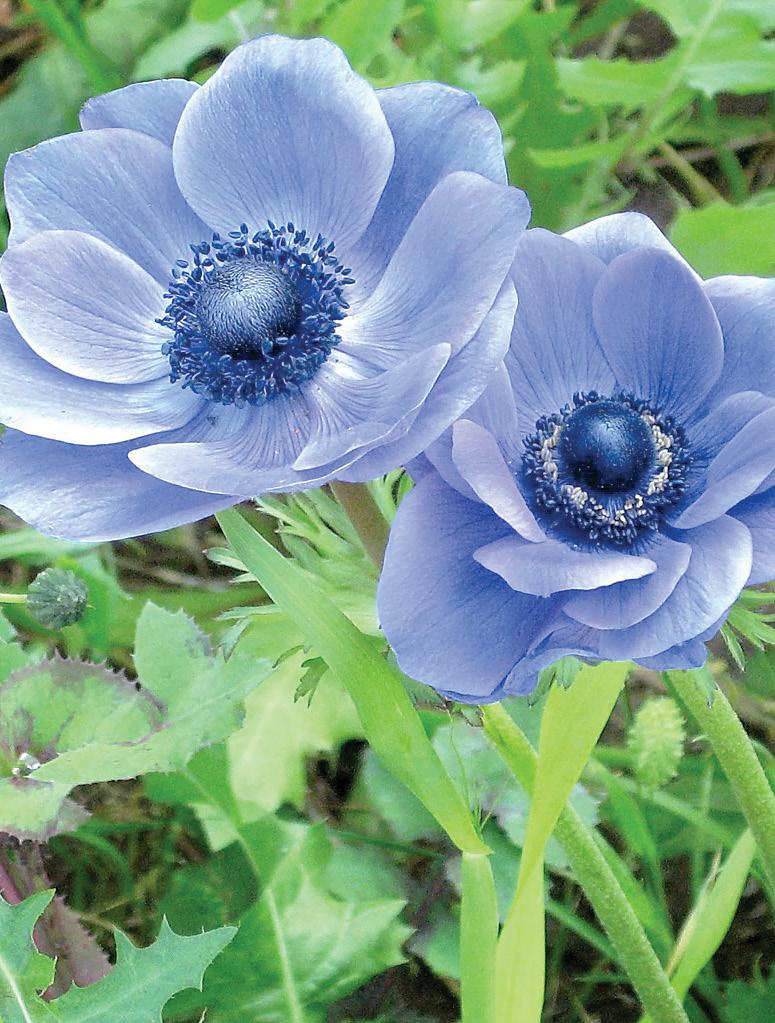
Anemone ‘Lord Lieutenant’ ( Anemone coranaria). This is a beautiful blue double anemone. It is recommended that you lift the bulbs in fall. It is grown from a corm, treat it as you would the gladiolas you love. Even though it is blue, it appreciates the sun. Prefers sandy, well drained soil. Grows 8 to 10 inches tall and will do well in a container. Blooms in spring.
Barberry ‘Sunjoy Orange Pillar’ (Berberis thunbergia). The neon orange foliage of this barberry is just… wow. Dramatic, vibrant and deer resistant. Height 36 to 48 inches, spread 18 to 36 inches. Zone 4.
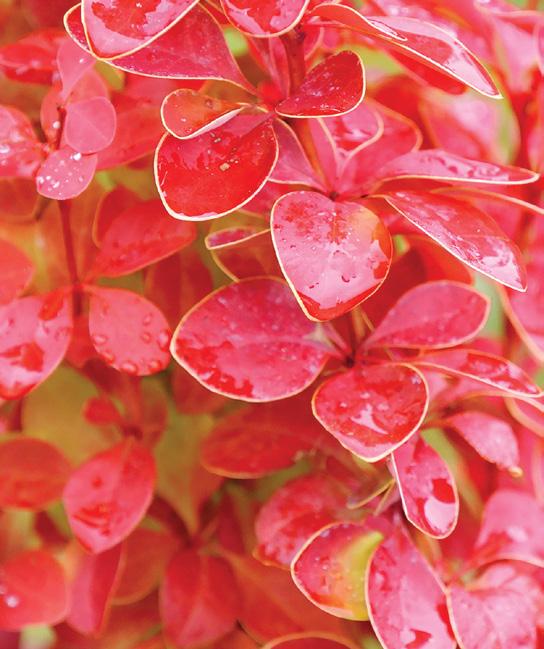
Dawn redwood ‘Soul Fire’ (Metasequoia glyptostroboides). A dawn redwood with ferny golden needles with a frosting of orange in springtime. The needles become chartreuse in summer and then turn bright orange in fall. It is happy in full sun or part shade, with a height of 15 to 18 feet and 14 to 15 feet wide. Zones 5.
Mock orange ‘Illuminati Sparks’ (Philadelphus). How can anyone not be intoxicated by the scent of mock orange in the springtime. But then the blooms fade and all you are left

with is a sort of nondescript shrub. Not anymore. ‘Illuminati Sparks’ has beautiful, variegated leaves of green and yellow with the colour lasting well into summer. Zones 4 to 7. Full sun.


Ironwood ‘Golden BellTower’ (Parrotia persica). A stunning new orange-golden tree that will grow 25 feet tall and just 10 to 12 feet wide. It stays somewhat columnar and has this beautiful fall foliage that will show off well against evergreens. It will take partial shade to full sun, and it is fine in USDA 4.
Hydrangea ‘Seaside Serenade Crystal Cove’. A lacecap which has frilly pink flowers edged in burgundy or purple depending on the acidity of the soil. More acid, darker blue to purple edges. Less acid and more alkaline, they are edged with brighter pink burgundy. A macrophylla, it likes

moist (not wet) soil. Grows from 3 to 4 feet tall. Part shade – some morning sun is best. One of the best new plants for 2023. Listed as hardy to USDA Zone 4.
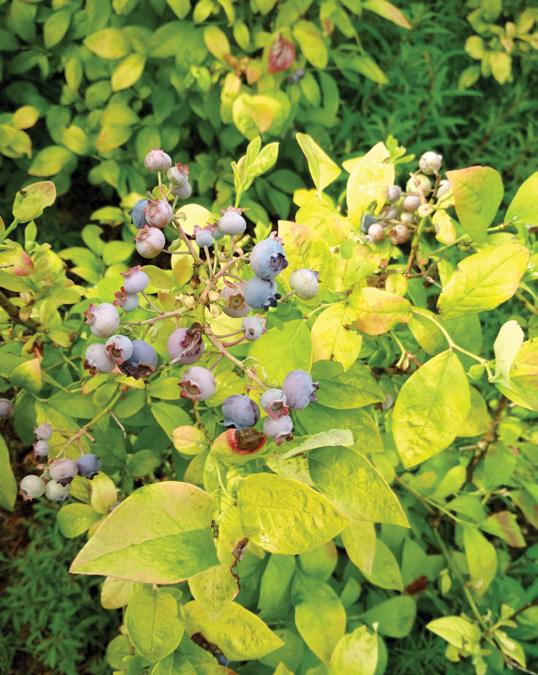
Highbush blueberry ‘Sky Dew Gold’ (Vaccinium corymbosum). The colour on this blueberry is just sublime, with bright gold leaves that take on tones of orange and red as the fall cools down the nights. Listed as an ornamental blueberry, so we’re not sure how it tastes. Height 24 to 48 inches, spread 36 to 48 inches, Zone 4.
Weigela ‘Vinho Verde’ (Weigela florida). This one is a beauty. The rosy coloured flowers of spring are lovely, but the variegated leaves are what sets this shrub apart. Lime green leaves with a very dark, almost black margin. Height 36 to 60 inches, spread 36 to 60 inches. Zone 5. h
Harvesting by the moon, also known as lunar gardening or moon gardening, is an age-old practice based on the belief that the phases of the moon can influence the growth and vitality of plants. While there is limited scientific evidence to support the effectiveness of lunar gardening, it remains a popular practice among some gardeners.
The lunar cycle consists of four main phases: new moon, waxing moon, full moon, and waning moon. Each phase is associated with different lunar energies that are believed to affect plant growth and development.
The new moon phase occurs when the moon is not visible in the sky. It is often associated with beginnings, renewal, and growth. Some lunar gardening practices suggest that this phase is suitable for planting seeds and promoting germination and strong root development.
The waxing moon phase is the period between the new moon and the full moon. It is believed to be a time of increasing energy and vitality. This phase is often associated with upward growth, making it favourable for planting above-ground crops and promoting leafy growth.

The full moon phase is when the moon appears as a complete circle in the sky. It is often associated with abundance, high energy, and heightened emotions. Some lunar gardening practices suggest that the full moon is a good time for harvesting crops, as it is believed to enhance flavour and nutritional content.
The waning moon phase is the period between the full moon and the next new moon. It is associated with decreasing energy and a time for reflection. This phase is often recommended for activities that focus on root development and below-ground growth, such as planting or harvesting root crops.
The association of specific energies with lunar phases varies across different cultures and traditions. Some lunar gardening practices also consider the zodiac signs that the moon passes through during each phase. The unique attributes associated with each zodiac sign may further influence gardening activities during specific lunar phases.
According to lunar gardening principles, certain types of plants are best sown or transplanted during specific lunar phases. For example, it is commonly suggested to plant above-ground crops (leafy greens, flowers) during the waxing moon, as it is believed to promote upward growth. On the other hand, root crops (potatoes, carrots) are recommended for the waning moon, as it is thought to enhance root development.
Similar to planting, lunar gardening advocates suggest that the moon's phases can influence the quality and storage life of harvested crops. Harvesting during certain moon phases is believed to enhance flavour, nutritional content, and shelf life. For example, some gardeners prefer to harvest fruits and vegetables during the waning moon, as it is thought to improve taste and longevity.
It's important to note that the scientific evidence supporting lunar gardening is limited, and the effects of lunar phases on plants remain largely speculative. Many factors, such as soil quality, climate, and proper gardening techniques, have a more significant impact on plant growth and productivity. Therefore, it's advisable to complement lunar gardening practices with evidencebased gardening practices, such as proper soil preparation, watering, fertilization, and pest management.
Ultimately, whether to incorporate lunar gardening into your gardening routine is a personal choice. Some people find it adds a sense of connection with nature and tradition, while others prefer to focus on scientifically proven gardening techniques. It can be an interesting experiment to observe and compare the results of lunar gardening practices in your own garden.
Gardening by the zodiac
Moon sign astrology in gardening is a belief system

that suggests the astrological sign that the moon is in at any given time can influence plant growth and gardening activities. It is based on the idea that the position of the moon in relation to the zodiac signs can affect the vitality and overall health of plants.
The zodiac is divided into 12 astrological signs, each associated with different elemental and energetic qualities. These signs are believed to have specific influences on plant growth and gardening practices. Moon sign astrology suggests that planting and harvesting activities can be aligned with specific astrological signs to enhance plant growth and outcomes. For example:


Earth signs (Taurus, Virgo, Capricorn): These signs are associated with stability, fertility, and root development. Planting or harvesting root crops, such as potatoes or carrots, during these signs is believed to promote healthy root growth.
Water signs (Cancer, Scorpio, Pisces): These signs are associated with moisture, nurturing, and flowering. Planting or harvesting flowers or plants that require abundant watering during these signs is thought to support lush growth.
Air signs (Gemini, Libra, Aquarius): These signs are associated with circulation, communication, and pollination. Planting or harvesting plants that rely on effective pollination, such as herbs or flowering vegetables, during these signs is believed to promote successful pollination and reproductive development.
Fire signs (Aries, Leo, Sagittarius): These signs are associated with energy, warmth, and fruiting. Planting or harvesting fruit-bearing crops, such as tomatoes or peppers, during these signs is thought to enhance fruit set and ripening. h
Living in Canada is a great thing for nature lovers. Almost everyone has at some point gone ‘to the lake’ to go swimming, fishing, or to just relax and de-stress. One of the trademarks of the experience is the haunting call of the common loon. The beautiful call of the loon is one of total serenity and peace. So iconic is the loon in Canada that the Canadian one-dollar coin, the Loonie, is named for the bird.
Fossil evidence shows loons have been around for about 50 million years although the common loon of today is thought to have evolved over 10 million years ago. The earliest species of loon were found in Scotland. Other loon fossils were discovered in France, Italy, Czechoslovakia, and in North America.
Many cultures have honoured the loon. Legends and beliefs abound in local folklore. Indigenous North Americans believed that the loon would guide the soul of the dead to a new world. The Inuit in Alaska held
elaborate burials for loons that included adorning the skull with ivory eyes. One legend says that loons have the ability to give sight to those who are blind by taking them to the bottom of the lake until vision is restored. It is said that the white banding around the neck of the loon is a white necklace of shells that was gift of gratitude from someone whose eyesight returned. Another Indigenous legend says the loon has magical powers and at the beginning of creation, the loon would dive down to the bottom of the lake floor and bring up mud for the Creator to make the earth.
Early Europeans arrived in North America and hunted loons to the point of major decline. Shooting loons was a big sport due to the challenge of trying to get a diving bird. Later, loons were considered competition to fisherman so many were culled.

As the Industrial Revolution began, humanity’s love and respect for the loon took a tragic turn. The loon was one of the first creatures to show
signs of the damage of acid rain and the loon was a poster picture for the effects of oil spills on birds. Fishing nets and lines along with lead weights caused many loons to suffer drowning and poisonings. Pesticides and chemicals are known to have damaging effects on loons and their food sources.
Common loons dive to amazing depths of 230 feet. They have a lifespan of 30 years and require a lake of at least 12 acres in size to nest. They are about 3 feet in length and weigh about 12 pounds. Loons do not start nesting until the age of six when, in late May, one to two eggs are laid. Both parents take part in the incubation, always staying close to the nest in case of a major disturbance. Eggs hatch in 29 days and the young will stay with their parents for the rest of the summer. The ‘yodel’ call of the loon announces territory, the ‘tremelo’ call is described as an alarm call, and the ‘wail’ call is a form of contact between a pair.
Thankfully, the loon population is considered stable today but is still closely monitored. Hunting loons is a thing of the past and some fishing regulations have changed to, hopefully, save them from harm. Still there are many environmental issues such as inconsistent lake levels affecting nesting success and oil spills that continue to hinder loon populations. You can help by becoming a member of Bird Studies Canada and taking part in the Canadian Lakes Loon Survey. The information you can provide is very helpful in finding out much needed information about the common loon population.
By just observing and report-

https://www.youtube.com/watch?v=qOeBczQ9Qw0


ing the behaviour of loons around your cottage you can be a part of important research. You can even be part of preserving some of the most beautiful, mystical music from a bird of many legends, an irreplaceable piece of Canadian lake landscapes, the common loon. h


Aphids are those little insects, about the size of a grain of rice, that line up along the new growth of your favourite plants. They are about ¼ inch long and have two short tubes on their back end. Called cornicles, there is controversy over whether these are used to exude honeydew or simply compounds such as pheromones. They use needle-like mouths to pierce the plant and suck out its juices. When enough attack, the infested part of the plant will die. Leaves may curl up or appear stunted. Left unchecked, aphids can take over certain species in your garden.
Aphids attack both woody and nonwoody plants, as any rose-grower knows. But aphids don’t stop at the shorter woody shrubs; they are partial to trees as well. In fact, when you park your car under a tree and come back
to find it all sticky, that isn’t because the tree had decided to leak sap – it’s because aphids in the tree have been excreting ‘honeydew’. This honeydew can encourage the growth of sooty mould, which if it lands on a plant and builds up, can interfere with photosynthesis by blocking sunlight.
Male aphids are produced in the late summer or fall. Aphids have a unique reproduction cycle: in the spring, overwintered eggs hatch females that can reproduce after about 10 days. They start bearing live young females parthenogenically: they do not need to mate. Those daughters are ready to reproduce in about 10 days, and so on and so on through the summer. Then, as the days get shorter, the light levels trigger aphids to produce males to mate with females, who will lay eggs to overwinter.
Typically, aphids are wingless. However, when populations get too big to be supported by plants in the immediate area, they will sprout wings to help them relocate. Aphids come in green, yellow, red, brown, pink and black, depending on the species and the type of plant they’re feeding from. Aphids do like tender young growth so an overfertilized plant can attract these pests. A couple of drops of soapy water in a spray bottle can also do them in.
Ants eat aphids very seldom –never say never – but in general, ants around aphids are acting more as dairy farmers than beef ranchers. Ants herd aphids for their honeydew, although in lean times, hungry ants will certainly eat aphids.
Aphids can be dislodged from plants with a hard stream of cold

water. Once down, few will have the energy to make it back up. If the aphids have ant friends, however, the ants may carry them back up to graze on the tenderest parts of that prized perennial. Be vigilant! They don’t like catnip, garlic, or chives.
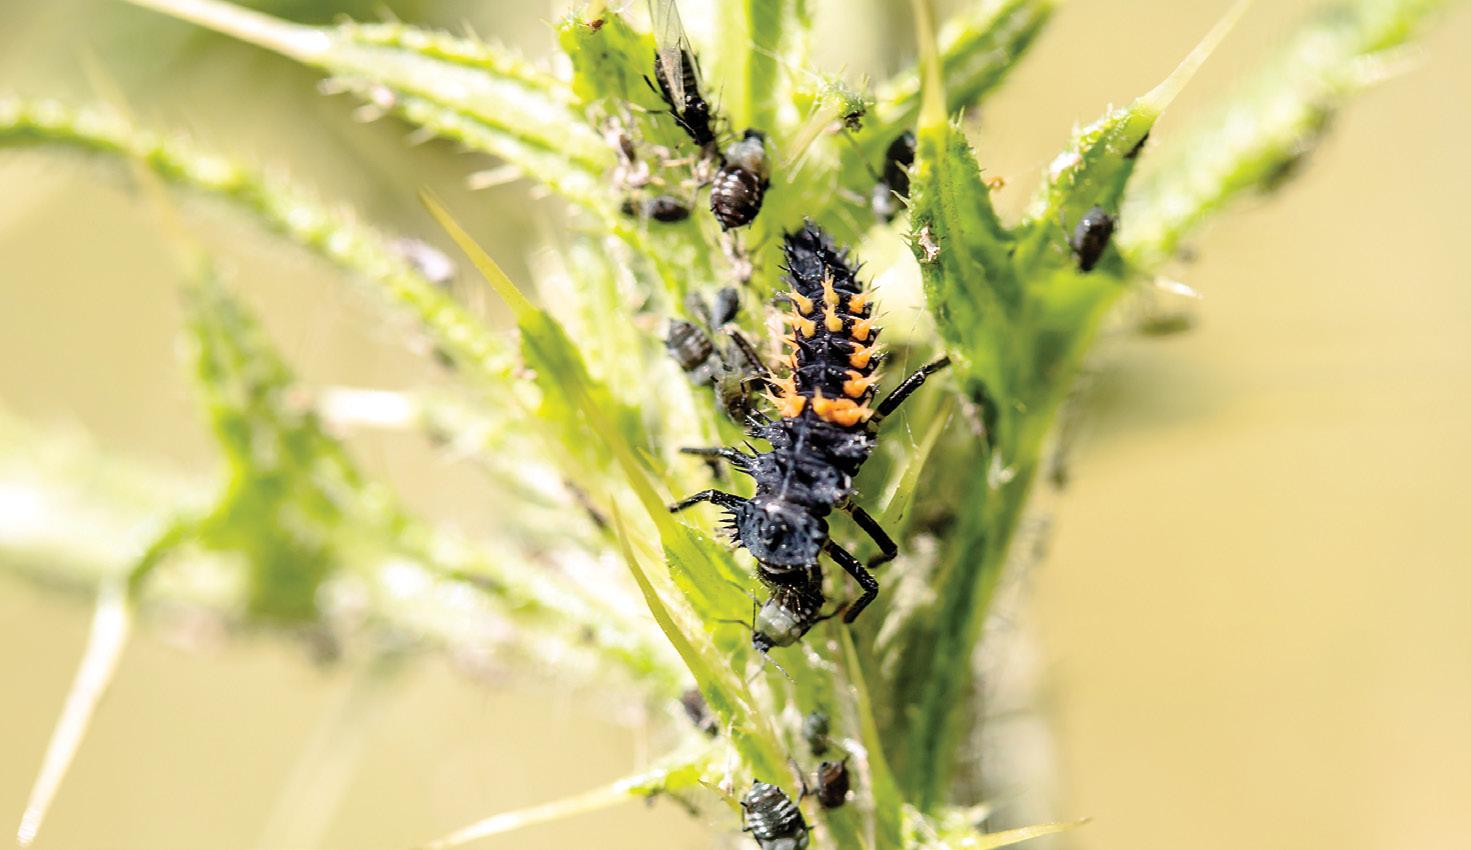
Ladybugs are aphid-eating machines. An adult ladybug can eat up to 1,000 aphids in a day; the juveniles can eat up to 500. Many gardeners who purchase ladybugs to battle aphid problems find the ladybugs just fly away when released. To help them stay, try releasing them at dusk; they use the sun to navigate, so they are more likely to stay put in the dark. Don’t remove spent plants in fall because these provide shelter for overwintering ladybugs. Lacewings and parasitic wasps also feed on aphids.
Most wine grapes in the world have North American roots because of aphids. Phylloxera is a native North American aphid that was inadvertently exported to Europe in the 1860s and destroyed 70 to 90 percent of European vineyards. Phylloxera, unlike our garden-variety aphids, attack grape vine roots. Native North American grape species are resistant
to phylloxera, but the European vinifera species roots quickly perished. Today, most vineyards use vinifera vines grafted on to North American rootstock. Stupid aphids!
Under ideal conditions, a single cabbage aphid can start a dynasty that will grow to 1,560,000,000,0
00,000,000,000,000 offspring in a single season. Seriously. This number is based on the idea that the first aphid would produce 50 offspring per week, each of whom would produce another 50 per week and so on. Thank goodness the ideal conditions are unlikely to occur! h
Thursdays at 7pm and Saturdays at 4:30

Cable Channel 3
prairiepublic.org
Release ladybugs at dusk. They use the sun to navigate, so they’re more likely to stay put in the dark.Ladybug larva eating aphids.
 By dorothy dobbie
It is our common belief that soil feeds plants and generously offers up everything our green friends need to nourish and replenish them. But that is not quite how it works according to the latest studies. It turns out that plants have to “train” the soil to meet their needs and they leave the space they occupied quite altered when they die.
Putting down roots in an alien patch of ground is not quite the easy task we imagined. It takes strength, resourcefulness and energy borrowed from the sun and translated into the work force behind the root system, the miners of the plant world. In the process of seeking out resources to sustain the life of the plant and allowing it to grow, plant roots modify soil physically, chemically, and biologically and, while doing so, they release complex chemical compounds that affect carbon storage while offering life to other organisms.
By now, everyone knows that healthy soil teems with life; that one teaspoonful can contain a billion microorganisms, all essential to the way our planet works. Gone are the days when it was considered
good practice to bake or chemically bomb soil to rid it of weed seeds, and in the doing, destroy critical soil life.
Furthermore, this soil life is in the business of transforming minerals and organics into forms of food that plants can use. The minerals come from the sand, silt and clay particles in the soil and the organics from former plant and animal life in a great recycling exercise. Plant-useable nitrogen, the stuff of life for plants, can also come from the air, produced by lightning. Delivered this way, nitrogen needs the chemical reaction provided by tiny single-celled organisms called prokaryotes. Prokaryotes are plentiful in leguminous roots and elsewhere in soil.
Recent studies indicate that overtreating the soil with the big three nutrients – nitrogen, phosphorus and potassium – is starving our population of micro nutrients: copper, zinc, boron, iron, manganese, molybdenum and nickel by blocking their absorption. A deficiency of micronutrients in the soil can affect the food we eat and result in a long list of physical
and mental problems in children including cognitive function, blindness and behavioural issues such as ADHD.
This is not meant to be a biology lesson, so suffice it to say that there are many agents at work in your garden to help keep plants healthy, and not all of what they need can be delivered by chemical preparations called fertilizers, although these are great boosters in the right circumstances.
Science is also re-examining its premises on how roots interreact. Traditional thinking assumed that it was all a matter of competition and that plant interactions were essentially negative.

New thinking, however, is learning that the interaction between roots is complex and much more sensitive than previously believed. One example is that roots are often attracted to one another, suggesting kinship recognition. This has been demonstrated by roots growing in the direction of another plant instead of a readily available nutrient pool nearby.
To quote one recent paper: “Recent developments in molecular and cellular biology, plant physiology and ecology suggest that plants are not only able to sense their abiotic environment but can also sense each other and communicate using a range of mechanisms. Plants can sense self/non-self as well as kin and can show swarming behaviour akin to animals.”
This is remarkable and it shows that we have barely scratched the surface when it comes to our understanding of what really happens down there, under the surface of the earth. All we really need to know is that creating the best environment, including air, water and minerals, and letting our plants do their thing has worked for us up until now.
But still, you can’t help but wonder, how much we yet have to learn about what else goes on down there. h
Plants require a range of essential nutrients for growth and development, including both macro- and micronutrients. All of them are found naturally in the ground, though not always in amounts that plants desire. Here is a comprehensive list of these nutrients, along with their functions:
1. Nitrogen (N): Required for the production of chlorophyll and other proteins, as well as overall plant growth and development. Sources include fertilizers, organic matter, and the atmosphere.
2. Phosphorus (P): Necessary for energy transfer within the plant and for the production of DNA and RNA.
3. Potassium (K): Essential for plant water regulation, as well as enzyme activation and protein synthesis.
4. Calcium (Ca): Required for cell wall structure and stability, as well as enzyme activation and nutrient uptake. Sources include lime and gypsum, as well as some fertilizers.
5. Magnesium (Mg): Essential for photosynthesis and the production of chlorophyll.
6. Sulfur (S): Required for protein synthesis and overall plant growth and development.
Micronutrients
1. Iron (Fe): Necessary for photosynthesis and chlorophyll synthesis. Sources include iron chelates and ferrous sulfate.
2. Manganese (Mn): Required for photosynthesis and enzyme activation. Sources include manganese sulfate and some fertilizers.
3. Zinc (Zn): Plays a role in enzyme activity and protein synthesis. Sources include zinc sulfate and some fertilizers.
4. Copper (Cu): Required for enzyme activity and photosynthesis. Sources include copper sulfate and some fertilizers.
5. Boron (B): Necessary for cell division and carbohydrate transport. Sources include borax and boric acid.
6. Molybdenum (Mo): Required for nitrogen fixation and the production of some enzymes. Sources include molybdenum sulfate and some fertilizers.
7. Chlorine (Cl): Plays a role in photosynthesis and water uptake. Sources include some fertilizers and irrigation water.
8. Nickel (Ni): Essential for plant growth and development, particularly in legumes. Sources include some fertilizers and soil organic matter. In addition to these essential nutrients, plants also require carbon (C), hydrogen (H), and oxygen (O) in large quantities, which are obtained from air and water.
Gone are the days when it was considered good practice to bake or chemically bomb soil to rid it of weed seeds, and in the doing, destroy critical soil life.We are slowly coming to understand the complex system that exists below the ground.
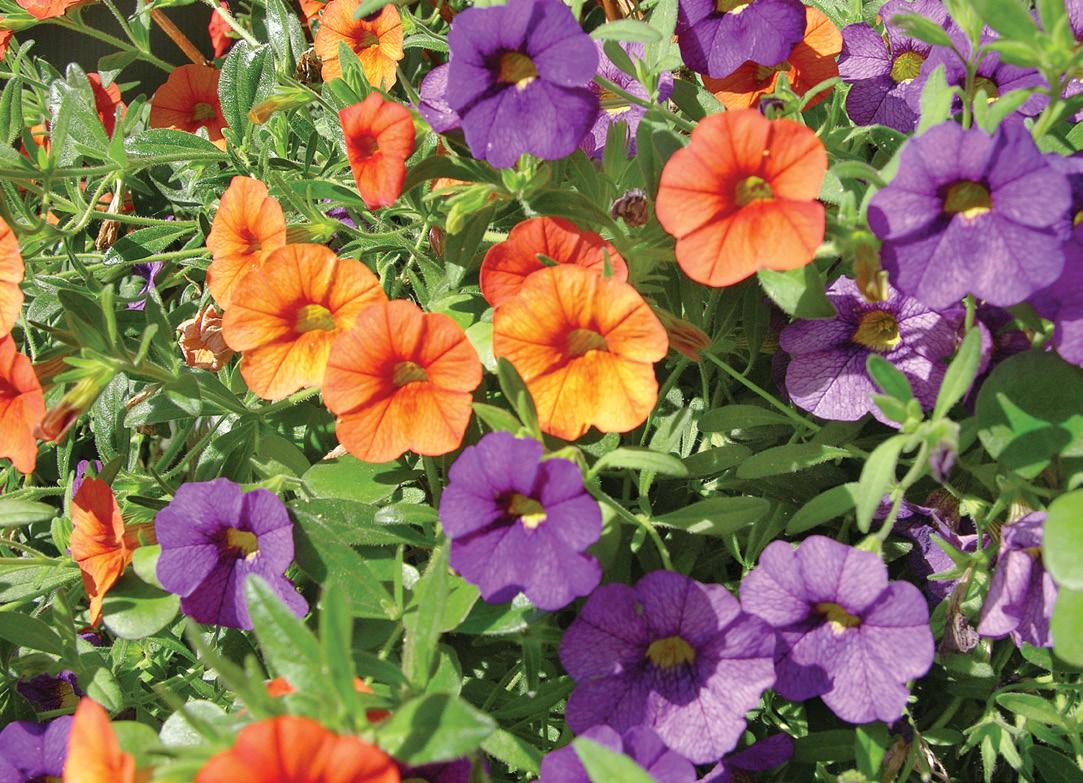
“Ican’t stand orange in the garden,” announced my artistic friend Barb back in 2015, and at one time I would have agreed with her. Then along came the orange petunia, so vibrant, so cheerful, so everything a petunia should be. They overwhelmed my garden baskets and pots that year, and their radiance even overcame her distaste for this colour. I couldn’t wait to plant them again the following year. But they began to disappear from garden centre shelves. A radio guest from the greenhouse world told me that orange petunias had been withdrawn from the market because they were dangerous, and this petunia could eradicate all the other hybrids because it was genetically modified!!
I mourned the loss of the lovely colour, but I tried to compensate with reddish orange geraniums and other annuals. Yet, they just were not the same as the brilliant orange petunia I had fallen for.
Then something strange happened. In 2021, orange petunias began to creep back onto garden shelves – not quite as vibrant but showing great promise. There wasn’t a lot of fanfare. In fact, nobody was saying anything.

I guess they were too embarrassed or maybe they were afraid of being sued. Because it was all a big mistake.
In 1987, Peter Meyer of the Max Planck Institute in Cologne added a transgene from the maize plant to a petunia genome. This transgene caused the plant to produce pelargonidin, the anthocyanidin that produces the orange colour in food or in artificial dyes. At that time, though, Europe was atwitter with all sorts of fears about genetic engineering. The term ‘transgenic’ basically became a synonym for toxic. The plant was never formally accepted.
Nevertheless, the German field study produced 30,000 of these petu-
By dorothy dobbienias and despite the popular fear, research was continued by a Dutch company that licensed the technology. In 1995, it produced a very stable and brilliant orange petunia. Seed from the altered plants made it to the American market and the plant was widely distributed over the coming years.
Then one day in 2015, a Finnish botanist, Teemu Teeri, was walking past the train station in Helsinki when
he noticed a pot of orange petunias. He had never seen this colour in petunias before and thought it strange. Wondering how they did this, he broke off a stem and took it home. His investigation confirmed that the plant was one of those evil, genetically modified ones from 1987. He raised the alarm and chaos ensued.
The Finnish Food Authority called for the destruction and removal of eight varieties of orange petunias.
The European Union demanded they be destroyed. Then Britain got into the act and finally, the United States Animal and Plant Health Inspection Service. The U.S. agency release directed breeders and sellers in the United States to “autoclave, bury, compost, incinerate, or use a landfill to dispose of the identified petunia varieties”.
Later called the “Petunia carnage of 2017”, 21 petunia varieties were recalled at great financial cost to growers and garden centres all across Europe and the United States.
Canada did not succumb to the petunia madness. As early as January 2018, the Canadian Food Inspection Agency issued a bulletin saying that Canada “regulates the product, not the process. If there is no scientific evidence or expectation of potential environmental impact, the plant is not considered to be a plant with a novel trait (PNT), and is treated like any other variety of that plant species.” It went on to state, “The CFIA has considered several sources of information and scientific rationales and has determined that these GE petunias pose no more risk to the environment
than conventional petunias.”
That made little difference to supply in Canada for the next few years, as most of the bedding plants we buy in this country are started by growers in the United States.

But now, since 2021, the rest of the world has caught up with us. Orange petunias are now known to be harm-
less. They do not cross breed with other petunias and the are not “sexually compatible with any wild plants.”
This year, 2023, should hopefully see a return to a solid supply of these beautiful flowers. Look for varieties such as African Sunset, Viva Orange, Electric Orange, Bonnie Orange and Cascadia Indian Summer. h
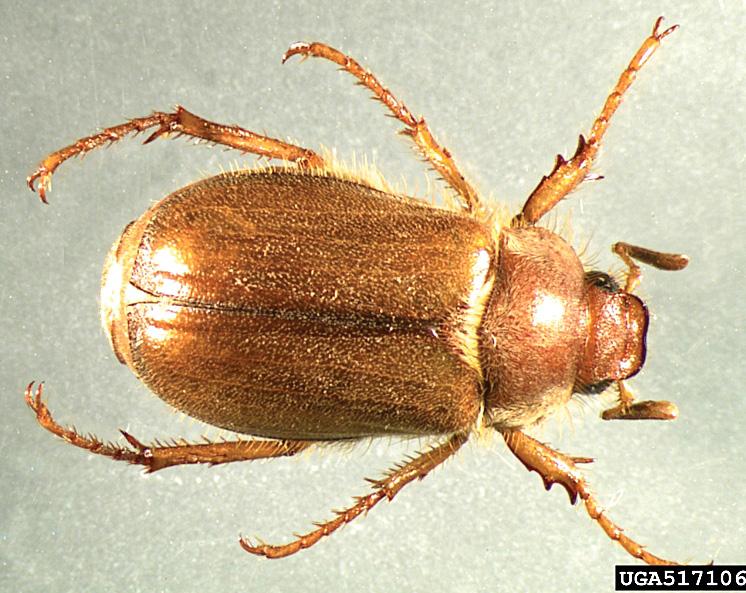
The surest sign your lawn is infested with grubs – the larvae of some beetles, like Japanese beetles, June beetles and the European chafer – is that raccoons or skunks will visit after dark and have a party digging up the sod to get at the worms.
Check the soil by digging up small sections of your lawn using a spade or trowel. Focus on areas where the grass appears to be damaged or brown patches are present.
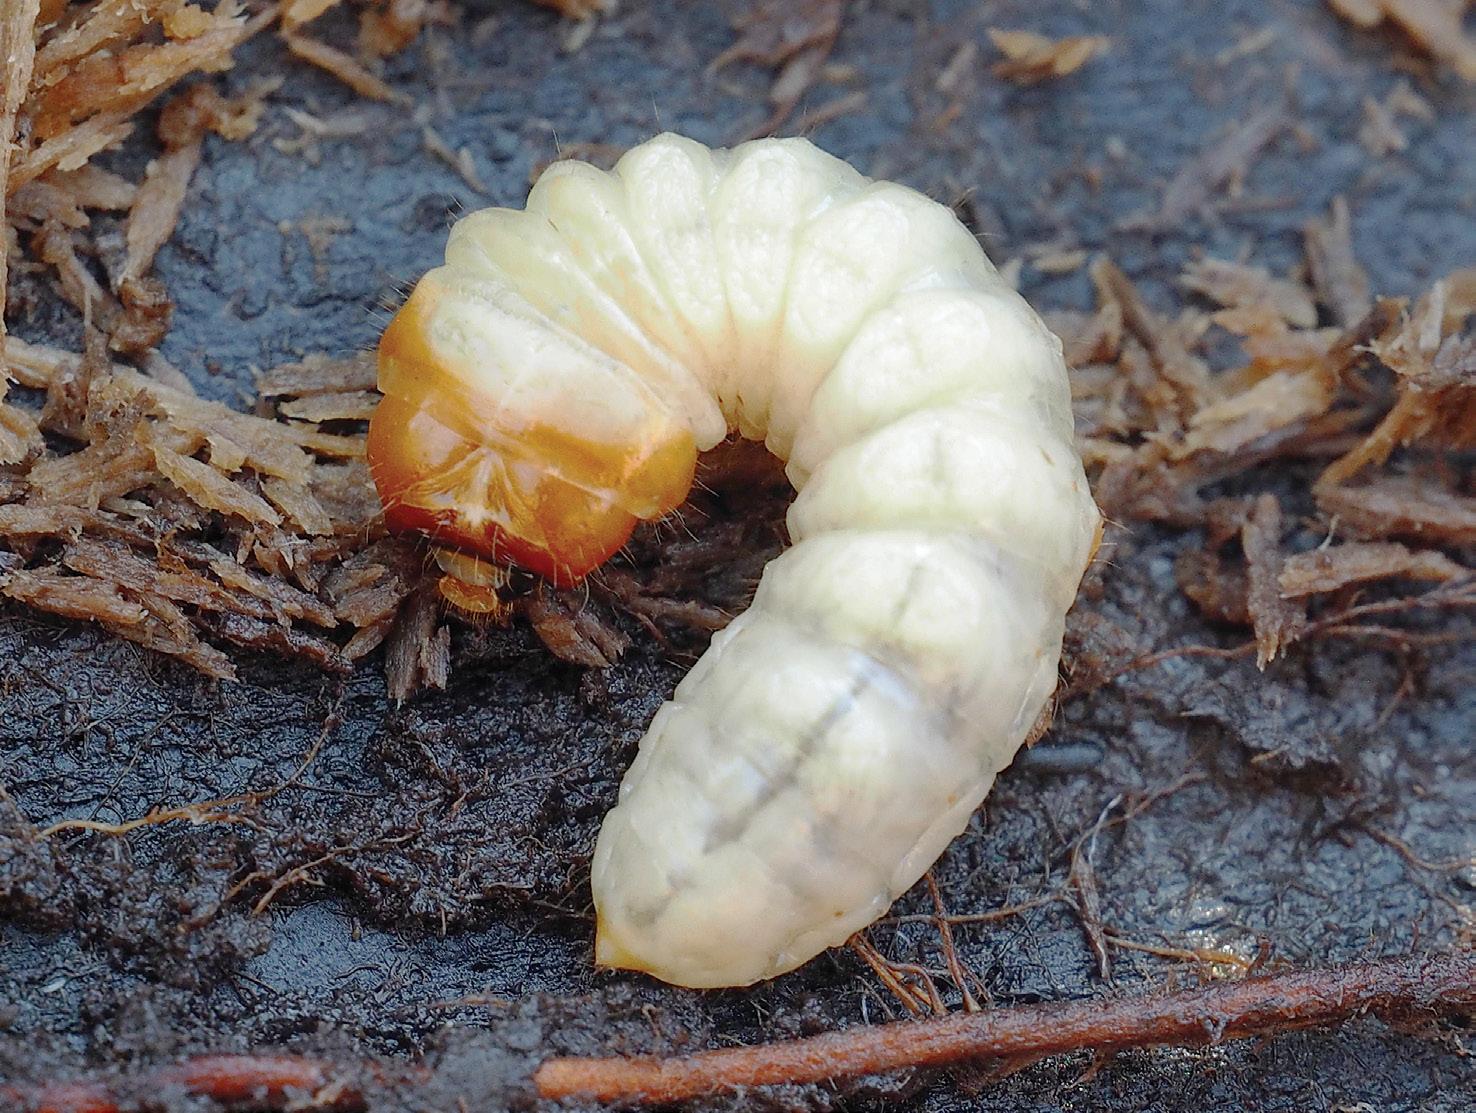
1. Look for C-shaped larvae. Grubs typically have a C-shaped body with a distinct head and several visible segments. They are usually white or cream-colored, with a darker head. You may find grubs varying in size from a few millimetres to a few centimetres, depending on their stage of development.
2. Check for root damage. Grubs feed on grassroots, causing damage
that can lead to brown patches or wilting grass. Gently pull on the grass in affected areas – if it lifts easily like a loose carpet, it may indicate grub activity.
3. Conduct a flotation test (optional). This method involves cutting out a section of turf and placing it in a bucket of water for a few minutes. If grubs are present, they will float to the surface, making them easier to spot.
If you discover grubs in your lawn, it's essential to assess the severity of the infestation. Occasional grubs may not cause significant harm, but if their population is high or you notice extensive damage, you’ll need to do something.
Beneficial nematodes: These microscopic organisms can be applied to the lawn and target grubs without harming beneficial insects.
You need to know what kind of grub you’re dealing with so that you can apply the nematodes at the right time. Consult with a lawn care specialist at a nursery and follow the instructions on the product for application.
Birds: Encourage bird activity in your yard by providing bird feeders, birdbaths, or nesting boxes. Birds, such as starlings or robins, feed on grubs and can help reduce their population.
Predatory insects: Some insects, like ground beetles or wasps, feed on grubs. Creating a diverse and balanced ecosystem in your garden can attract these beneficial insects.
Handpicking: During the summer, watch out for June beetles, Japanese beetles and chafers. If you have a lot, you may want to go on a
murderous splurge with gloves and a bucket of soapy water.
Lawn aeration: Aerating your lawn helps to break up compacted soil, making it less favourable for grubs. This can be done using a lawn aerator or by hiring a professional service.
Chemical treatments

Insecticides: There are various insecticides available specifically designed to target grubs. Consult with a lawn care company about having your grass treated. It's essential to note that using chemical treatments should be done judiciously, as they may also harm beneficial insects and disrupt the ecosystem. h


Phenology refers to the study of periodic plant and animal life cycle events and how they are influenced by seasonal and interannual variations in weather, climate, and other environmental factors. In the garden, phenology plays a crucial role in understanding the best time for planting, harvesting, pruning, and other gardening activities. But please note: phenological indicators are different in different places.
The study of phenology in the garden begins with an understanding of the factors that influence plant growth and development. These factors include temperature, precipitation, light, soil moisture, and nutrient availability. Different plants have different requirements for these factors, and they respond differently to changes in environmental conditions.
For example, the timing of seed germination is critical to the success of any garden. Seeds require specific environmental conditions to germinate, such as adequate soil moisture, warm temperatures, and sufficient light. The timing of planting seeds in the garden is essential to ensure that they germinate and grow successfully.
Another critical phenological event in the garden is flowering. The timing of flowering is influenced by many factors, including temperature, light, and soil moisture. Some plants require specific day lengths to flower, while others respond to changes in temperature or moisture. Understanding the flowering requirements of different plants can help gardeners select the best varieties for their garden and optimize their flowering schedule.
Harvesting is another critical phenological event in the garden. Knowing when to harvest fruits and vegetables is essential to ensure that they are at their peak flavour and nutritional content. For example, tomatoes are best harvested before they are fully ripe to prevent animals and insects from sampling, while green beans should be harvested before they become too mature.
Understanding the optimal time for harvesting different crops can help gardeners maximize their yield and minimize waste.
Phenology is also important for understanding pest and disease outbreaks in the garden. Many pests and diseases have specific life cycles that are influenced by environmental factors. For example, some insects only emerge at specific times of the year or when temperatures reach a certain threshold. Understanding the life cycle of pests and diseases can help gardeners anticipate and prevent outbreaks by taking appropriate measures such as timely spraying of organic insecticides or using natural pest predators.
Gardeners can use phenology to plan their garden-

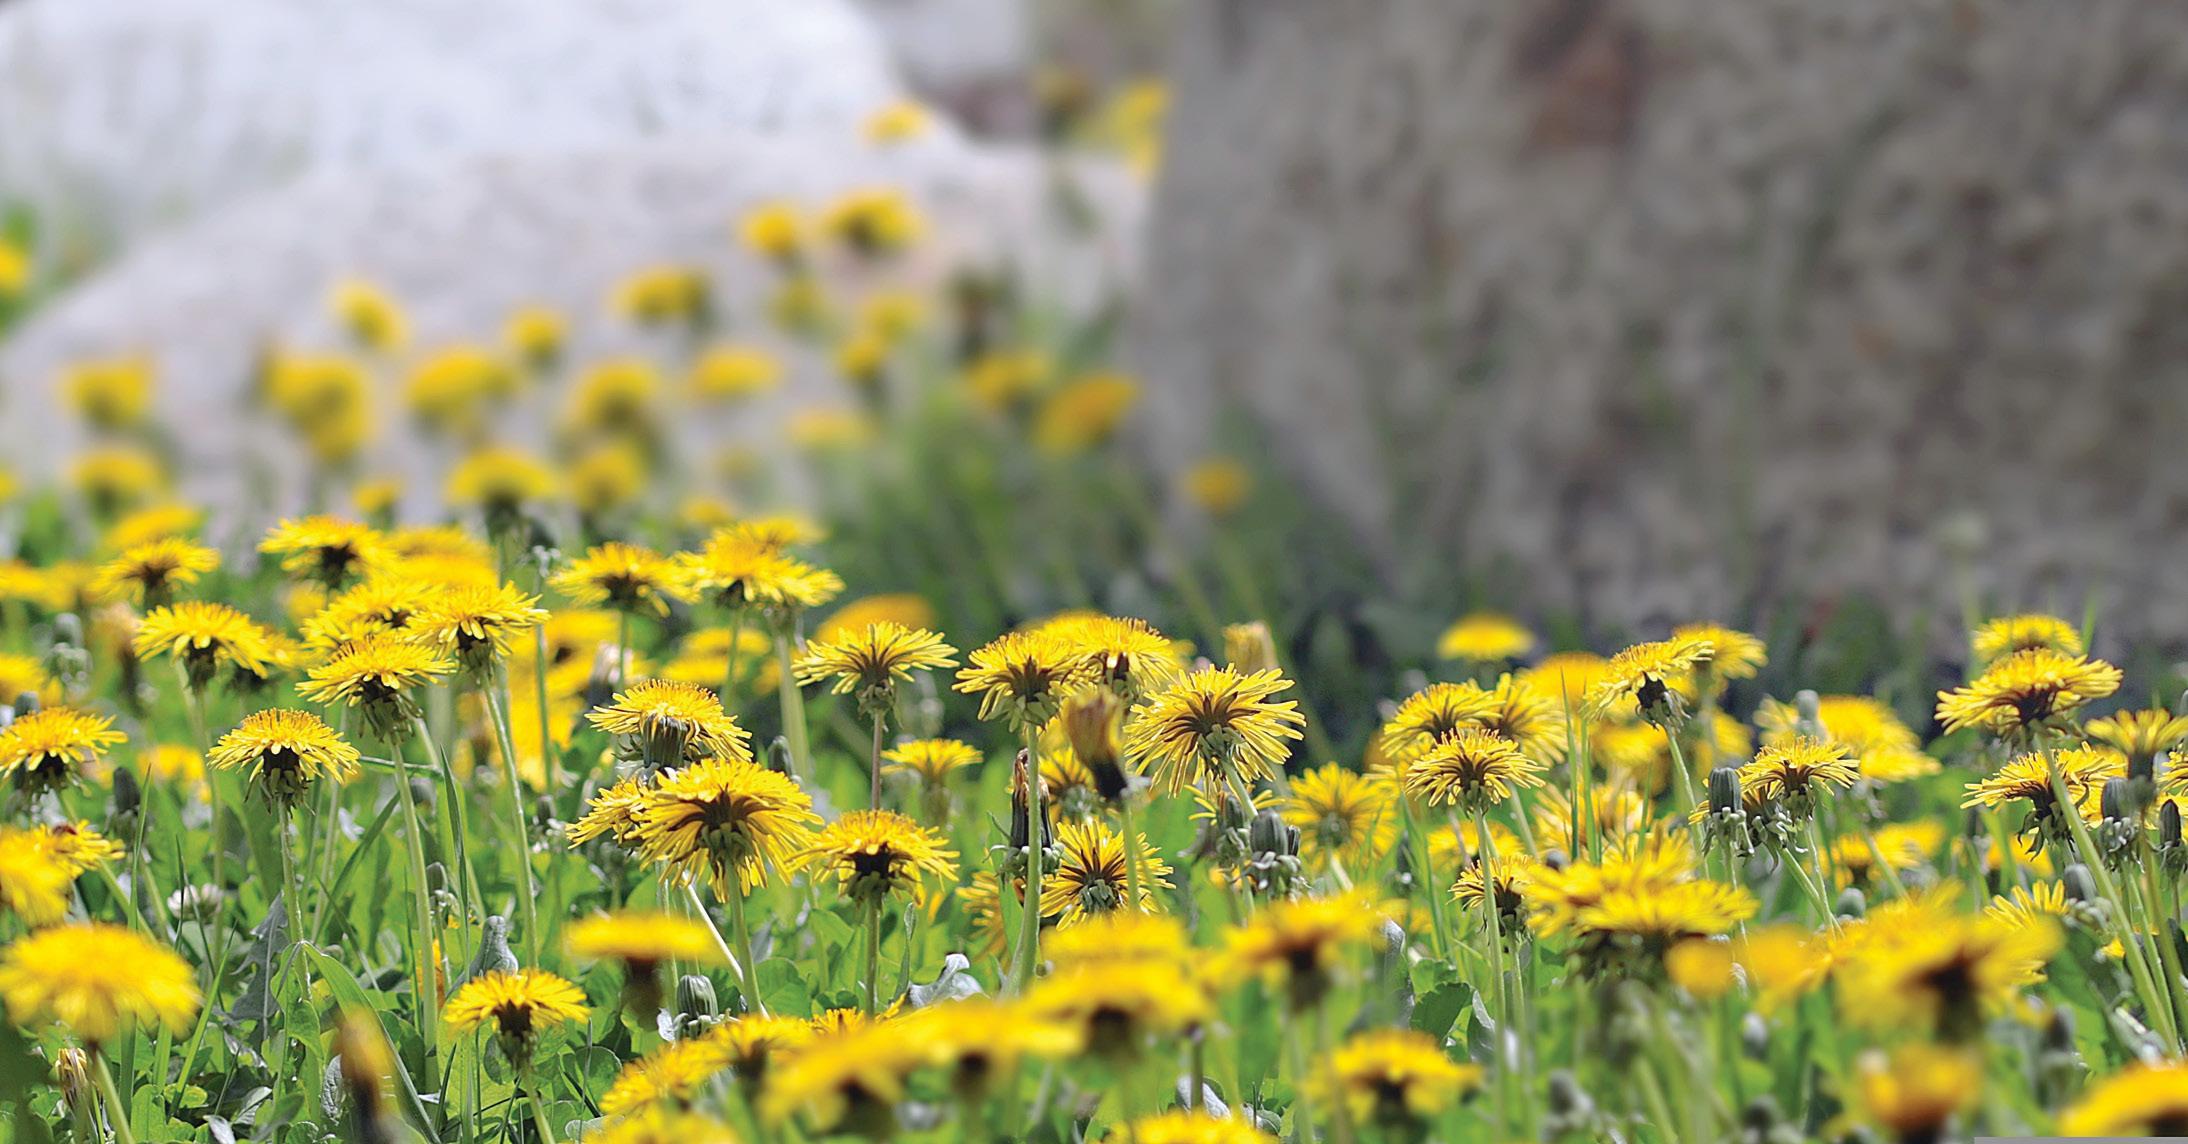
The timing of spring flowering shrub blossoms is seen by some as indicating optimal times for planting certain crops. ing activities and optimize their yields. By keeping track of phenological events in the garden, gardeners can make informed decisions about when to plant, harvest, prune, and perform other gardening tasks. They can also use this information to select the best plant varieties for their garden and to create optimal growing conditions for their plants.
One way to track phenological events in the garden is to keep a garden journal. In the journal, gardeners can record the dates of important events such as planting, germination, flowering, and harvesting. They can also note changes in environmental conditions such as temperature, precipitation, and light. This information can help gardeners identify patterns and make informed decisions about their gardening activities.
Another way to track phenology in the garden is to use phenology indicators. Phenology indicators are plants or animals that are sensitive to changes in environmental conditions and can be used to predict the timing of specific phenological events. For example, the appearance of certain flowers or the emergence of specific insect species can be used to predict the timing of other events in the garden. Gardeners can use phenology indicators to plan their gardening activities and optimize their yields.
Understanding the life cycles of plants and animals and how they are influenced by environmental factors can help gardeners optimize their yields, prevent pest and disease outbreaks, and make informed decisions about their gardening activities.
Examples of phenology telling you when to do something:
• Planting peas when forsythia flowers are in full bloom

• Planting potatoes when dandelions start to bloom in spring
• Transplanting seedlings when lilacs start to bloom in spring

• Harvesting rhubarb when the first dandelions appear in spring
• Planting carrots and other root vegetables when maple leaves are the size of a mouse's ear in spring
• Sowing beans and corn when oak leaves are the size of a squirrel's ear in late spring
• Planting tomatoes when daylilies start to bloom in late spring
• Planting fall bulbs when asters start to bloom in late summer
• Planting garlic when the leaves on deciduous trees start to fall in fall
• Planting spring bulbs when the first hard frost occurs in fall
• Planting strawberries when lilacs start to bloom in spring
• Planting lettuce when dandelions start to bloom in spring
• Harvesting asparagus when lilacs start to bloom in spring
• Harvesting peas when lilies start to bloom in early summer.
However:
There can be some exceptions to the examples above, as phenology can be influenced by various factors such as weather conditions, soil quality, and local climate variations. For instance:
• The blooming of crocuses can vary depending on the region of Canada, with some areas experiencing an earlier or later bloom time due to differences in temperature and precipitation.
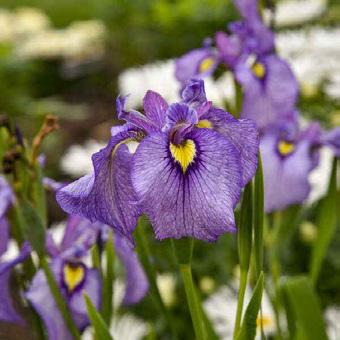
• Do you really know how big a mouse’s ear or a squirrel’s ear is?
• The timing of tree budding can also vary depending on the specific tree species and local environmental conditions, such as soil moisture and air temperature.
• The migration patterns of monarch butterflies and Canada geese can be affected by changes in climate, such as unseasonably warm or cold temperatures, which may cause these species to alter their traditional migration routes or timing.
• The emergence of honeybees can be influenced by the availability of nectar and pollen sources, which can vary depending on the local plant species and weather patterns.

• The blooming of certain flowers such as daffodils and tulips can be affected by the depth of planting and the quality of soil.

Therefore, while phenology can be a useful tool for guiding garden tasks, it is important to take into account the specific conditions of your garden and adjust accordingly. h


If you think oxygen therapy means slowing down, it’s time for a welcome breath of fresh air.

Introducing the Inogen One family of portable oxygen systems. With no need for bulky tanks, each concentrator is designed to keep you active via Inogen’s Intelligent Delivery Technology.® Hours of quiet and consistent oxygen flow on a long-lasting battery charge enabling freedom of movement, whether at home or on the road. Every Inogen One meets FAA requirements for travel ensuring the freedom to be you.

• No heavy oxygen tanks

• Ultra quiet operation
• Lightweight and easy to use
• Safe for car and air travel
• Full range of options and accessories
• FAA approved and clinically validated


You can tell someone who isn’t a gardener because they’ll comment on the pretty little pinkish white flowers growing on a vine somewhere… hopefully not your garden. The flowers they point out are bindweed, or Convovulus arvensis, a perennial that winds around plants in the garden and makes a nuisance of itself.
It is believed to be native to the Mediterranean region, though the exact origin of field bindweed is not precisely known. It has been distributed widely through human activities such as agriculture, trade, and transportation. It likely spread with early agricultural practices and the movement of crops and seeds across continents. The adaptable nature of field bindweed, along with its ability to reproduce through seeds and extensive rhizomes, has
allowed it to establish itself in diverse habitats and become a problematic weed in various ecosystems. It has been in North America since at least 1739, when it contaminated some crop seed. Characteristics of field bindweed
• Appearance: Field bindweed has slender, twining stems that can grow up to several feet long. The leaves are arrowhead-shaped and alternate along the stem. The flowers are funnelshaped, typically white or pink, and have five fused petals.
• Growth habit: It spreads through an extensive system of deep, spreading roots called rhizomes, as well as from seeds. The rhizomes enable it to resprout even if the top growth is removed.
• Invasive nature: Field bindweed

Field bindweed is known by several other common names in different regions. Some of the alternative names include:
1. Perennial morning glory or wild morning glory: Field bindweed is often referred to as perennial morning glory due to its resemblance to the ornamental morning glory plants (Ipomoea), which are also part
of the same family (Convolvulaceae).
2. Creeping Jenny: In some areas, field bindweed is called creeping Jenny, although this name is more commonly used for the groundcover plant Lysimachia nummularia
3. European bindweed: This name emphasizes its origin in Europe, where it is believed to have originated.
can quickly overtake garden beds and compete with desirable plants for resources such as water, nutrients, and sunlight. Its persistent growth habit makes it challenging to eradicate completely.
• Cultural control: Practices such as maintaining healthy soil, using mulch to suppress weed growth, and practicing proper irrigation and fertilization can help reduce bindweed's vigor.
• Hand pulling: Regularly pulling out the bindweed plants by hand, especially when they're young, can help prevent them from spreading further. However, be cautious not to break off the roots, as any remnants left in the soil can regrow.
• Smothering: Covering the affected area with a layer of thick, lightblocking material like cardboard or
4. Possession vine: In some regions, field bindweed has been called possession vine, possibly due to its ability to take over and “possess” areas where it grows.
5. Withy wind: The name was popular in England in the 18th and 19th centuries when the weed took hold in crops where willow was grown for making baskets.
multiple layers of newspaper, and then adding mulch on top, can help suppress the growth of bindweed.
• Herbicides: In severe infestations, selective herbicides labeled for bindweed control can be used. It's crucial to follow the instructions on the label carefully and apply the herbicide when the bindweed is actively growing.
• Vigilance and persistence: Managing bindweed requires consistent efforts over an extended period. It may take several years to significantly reduce its presence, as new plants can emerge from seeds or remaining roots.
• Sheep: In Minnesota, sheep can

BOB’S SUPERSTRONG GREENHOUSE PLASTICS. Pond liners, tarps. Resists Canadian thunderstorms, yellowing, cats, branches, punctures. Custom sizes. Samples. Box 1450-O-G, Altona, MB, R0G 0B0. Ph: 204-3275540 Fax: 204-327-5527, www.northerngreenhouse.com.
FLORABUNDA SEEDS
Saving the Seeds of Our Past Heirloom Flowers, Vegetables, Herbs Wildflower Mixes - Unusual Varieties
Non-GMO, Un-Treated Seeds www.florabundaseeds.com contact@florabundaseeds.com
(P) – 705-295-6440
P.O. Box 38, Keene, ON K0L 2G0 Free catalogue available upon request.
NOTTAWASAGA DAYLILIES –
Field grown daylily plants, over 500 varieties. Order now for May/June delivery. For pictures, catalogue and order form visit www.wilsondaylilies.com , or request catalogue by mail. Our farm, located near Creemore ON, is open for viewing, Friday through Monday from 10AM to 5PM from Canada Day (July 1) through Labour Day. Nottawasaga Daylilies, PO Box 2018, Creemore, ON L0M 1G0. Julie & Tom Wilson 705-466-2916.
To place a classified ad in Canada’s Local Gardener, call 1-888-680-2008 or email info@localgardener.net for rates and information.
Join the conversation with Canada’s Local Gardener online!
www.localgardener.net
Facebook: @CanadasLocalGardener
Instagram: @local_gardener
Twitter: @CanadaGardener
consistently eradicate bindweed from an infested pasture. This only works when the pasture is used to grow annual grains, though. (Source: Wikipedia says it comes from Zouhar, Kris (2004). "SPECIES: Convolvulus arvensis". Fire Effects Information System. U.S. Department of Agriculture, Forest Service, Rocky Mountain Research Station, Fire Sciences Laboratory. That link is now dead, but cool story, right?)
A little good in everything
• Ecological benefits: Field bindweed flowers provide nectar for bees and other pollinators, contributing to their forage sources. Additionally, its
extensive root system can help improve soil structure and prevent erosion.
• If you have enough of it, it will keep mice out of your garden. It contains pseudotropine, which is an alkaloid that is toxic to mice.
While field bindweed has some ecological benefits, its aggressive nature and potential harm to desired plants make it a challenging weed in gardens. By employing a combination of cultural practices, hand pulling, smothering, and, if necessary, herbicides, you can effectively manage and reduce the presence of field bindweed in your garden over time. h
Extending the growing season allows you to enjoy fresh produce and continue gardening activities beyond the typical growing period. Here are several strategies to help you extend your growing season.

Season extenders
Utilize season extension tools such as cold frames, row covers, cloches, and high tunnels. These structures provide additional protection from frost, wind, and cold temperatures, creating a microclimate that extends the growing season.

1. Cloches. Cloches are individual protective covers used for individual plants or small groups of plants. They are typically bell-shaped or domeshaped and made of glass, plastic, or other transparent materials. Cloches are placed directly over plants to create a mini-greenhouse effect, trapping heat and protecting plants from cold temperatures, frost, and wind. They are especially useful for tender seedlings, early transplants, or delicate plants that require extra protection during the early stages of growth.
2. Cold frames. A cold frame is a low, enclosed structure with a transparent lid, usually made of glass or
plastic, that is used to protect plants from cold temperatures, wind, and frost. It acts as a miniature greenhouse by capturing and retaining heat from sunlight. Cold frames are typically placed on the ground or over a raised bed and can be used to start seeds earlier in the season, harden off young plants, or grow cold-tolerant crops throughout the winter. The lid can be opened or propped up to regulate temperature and provide ventilation.
3. Row covers. Row covers, also known as floating row covers or frost blankets, are lightweight fabric sheets or nets that are draped over rows of plants. They provide a protective barrier against frost, insects, and wind while allowing sunlight, air, and water to pass through. Row covers are made from materials like spunbonded polypropylene or polyester and can be secured with stakes or clips. They are used primarily in vegetable gardens to extend the growing season in spring
and fall, and they can also be used to create a barrier against certain pests.
4. High tunnels. High tunnels, also known as hoop houses or polytunnels, are larger structures that resemble a greenhouse but have a simpler design and lower cost. They consist of a series of arched metal or PVC pipes covered with a layer of durable greenhouse plastic. High tunnels are typically unheated and rely on solar radiation for warmth. They create a protected growing environment that allows farmers and gardeners to extend the growing season, grow heat-loving crops, and provide shelter from adverse weather conditions such as wind, rain, or hail. High tunnels also offer some control over temperature, humidity, and pests.
To make the best use of these extenders, position them in a location that receives maximum sunlight exposure to capture the warmth through the day. Insulate a cold frame with double-glazed glass. And monitor the temperature inside the structure; that way you know when you need to open them up to provide some air or if you need to give extra insulation.

Begin your gardening season earlier by starting seeds indoors. This allows plants to establish and grow before being transplanted outdoors once the weather warms up. You can also extend the season by starting a second round of seeds indoors for a late-season harvest.
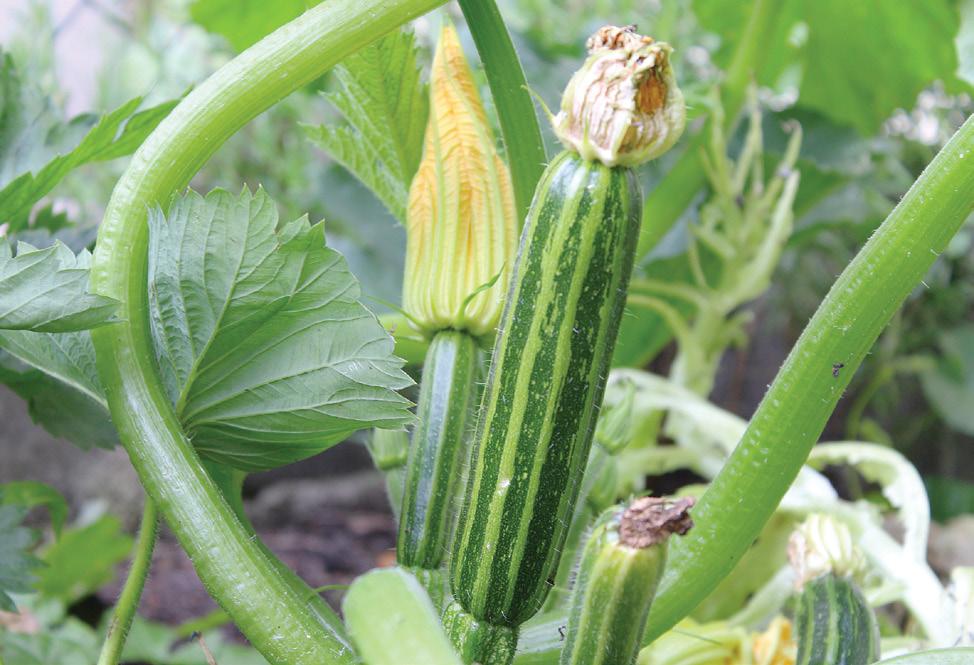

1. Tomatoes. Tomatoes require a longer growing season, so starting them indoors several weeks before the last frost date helps ensure a plentiful harvest.
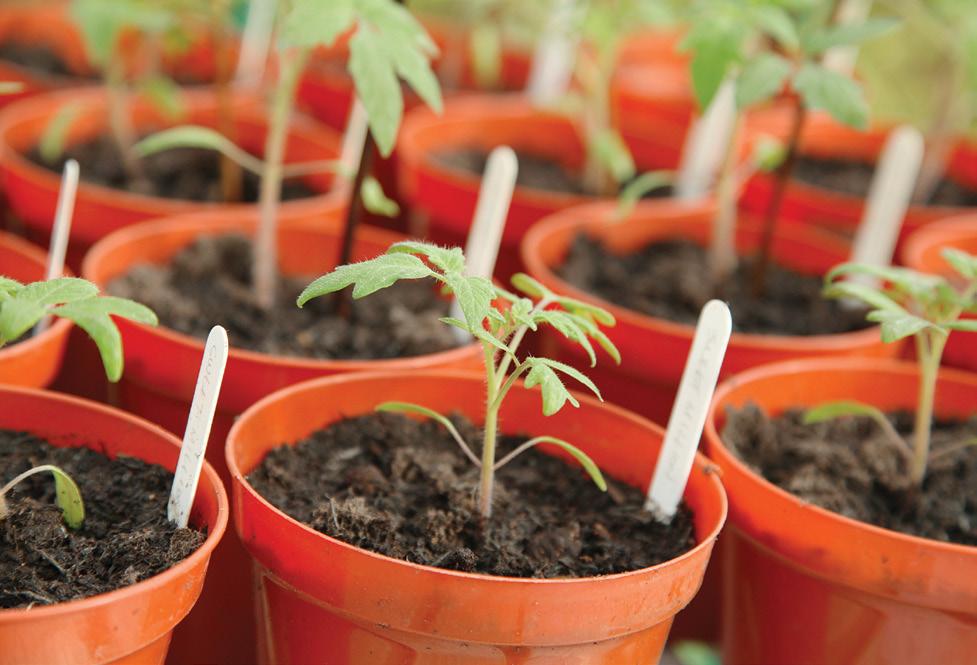
2. Peppers. Similar to tomatoes, peppers benefit from an early start to establish strong seedlings before transplanting.
3. Eggplants. Eggplants have a longer growing season and benefit from an early start indoors to produce mature fruits.
4. Broccoli. Broccoli plants are coldtolerant but can be started indoors to give them a head start. They take two or three months to get to harvest. If you have a long fall, start some in midsummer to plant out in August.
5. Cabbage. Cabbage can be started early indoors to extend the growing season and produce larger heads.
6. Cauliflower. Cauliflower plants benefit from an early start to ensure they mature before the onset of hot weather.
7. Cucumbers. These grow best in warm weather and, in the West, should be started indoors.

Some plants really prefer to be direct-sown in the garden, though. These are beans, corn, carrots, radishes, zucchini and sunflowers.
Choose cold-tolerant vegetable varieties that can withstand cooler temperatures. These include crops like kale, spinach, lettuce, radishes, carrots, and peas, which can thrive in spring and fall when temperatures are cooler.

Mulch
Apply a layer of organic mulch around plants to insulate the soil and regulate temperature. Mulch helps retain moisture, suppress weeds, and moderate soil temperature, which can protect plants from temperature fluctuations and extend the growing season.
Use organic mulching materials like straw, shredded bark, leaves. As these materials begin to decompose, they produce heat. It needs to be kept moist. When you lay it down, leave space around the plant stems to prevent moisture-related issues and encourage air circulation.
It is important to note that the insulating effect of mulch at the end of winter, without any other season extender, will act to keep your soil cold rather than warm.
Practice succession planting by sowing seeds or transplanting seedlings in intervals. As one crop reaches maturity or nears the end of its harvest, replace it with a new crop to continue production throughout the season.
1. Understanding your growing season. It's essential to determine the average first and last frost dates specific to your location. This information helps in planning the timing and intervals for succession planting.
2. Crop selection. Selecting the right crops for succession planting is crucial. Consider fast-maturing crops, cold-tolerant varieties, and those suitable for fall gardening. Choose crops that can be harvested at different stages, such as salad greens, radishes, beets, carrots, and bush beans, which can be harvested young for baby greens or matured for full-size produce.
3. Planning. Create a planting schedule based on your frost dates and the specific requirements of each crop. Divide the growing season
into distinct periods or stages and determine the appropriate intervals between plantings. Start with early spring crops, followed by summer crops, and then transition to fall and cool-season crops.
4. Continuous. Instead of sowing the entire crop at once, stagger plantings over a period of time. For example, if you want a steady supply of lettuce, sow a few seeds or transplant a few seedlings every week or every few weeks. This ensures a continuous harvest rather than having all the lettuce ready at once. Preserve
Finally, you can extend your access to homegrown produce by preserving the harvest. Methods such as canning, freezing, drying, or fermenting allow you to enjoy the flavours of your garden year-round. h
Enjoy
Simply download Canada’s Local Gardener app on your mobile device and you can access the digital editions of the magazine quickly and easily!


Read, relax, enjoy.

Sometimes, the garden gets to be a LOT of work. It’s a hobby, right? And a hobby should be a joy. But there are things you can do to make your hobby more joyful, less laborious. Here are some tips to help you create and maintain a low maintenance garden.
Ornamental gardens
• Plan your garden design. Start by planning the layout of your garden. Choose low-maintenance plants and materials that require minimal care. Opt for perennial plants that come back year after year and require less replanting. And don’t forget shrubs!
• Choose the right plants. Select plants that are native or well-adapted to your climate and soil conditions. These plants tend to be hardier and require less maintenance. Look for drought-tolerant varieties that need less watering.

• Mulch your garden beds. Apply a layer of organic mulch, such as wood chips or bark, to your garden beds. Mulching helps retain moisture in the soil, suppresses weed growth, and regulates soil temperature, reducing the need for watering and weeding.

• Install an automated irrigation system. Consider installing an automated irrigation system, such as drip irrigation or a sprinkler system with a timer. This will ensure that your plants receive consistent and efficient watering without you having to remember to do it manually.
• Minimize lawn areas. Lawns can be time-consuming to maintain, so consider reducing the size of your lawn or replacing it with low-maintenance alternatives. Plant ground covers, use gravel or mulch, or create paved areas or pathways. Mix clover and other plants in with your lawn to keep it walkable, green and less in need of a mow.
• Group plants with similar needs. Arrange your plants according to their water and sunlight requirements. This way, you can water and care for them more efficiently, and it will be easier to identify and address specific needs.
• Control weeds effectively. To minimize the growth of weeds, regularly remove them from your garden beds before they have a chance to
Raised beds growing leafy greens.


spread and take root. You can use mulch or ground covers to suppress weed growth.
• Prune and trim strategically. Regular pruning and trimming can help keep your plants in shape and prevent overgrowth. Focus on removing dead or diseased branches and maintaining the desired size and shape of the plants. However, choose plants that naturally grow in a compact form and require minimal pruning.
• Regularly monitor your garden. Keep an eye on your garden to identify and address any issues promptly. Look for signs of pests, diseases, or nutrient deficiencies. Regular maintenance and early intervention can prevent bigger problems down the line.
• Don’t sweat the small stuff. A few pests are not so bad for the garden; in fact, they invite predator pests to come live nearby. Ignore those aphids for a few days and you might be surprised to find a number of ladybugs (and their nymphs) making a meal of them.
Vegetable gardens
• Start with good soil. Prior to planting, enrich the soil with organic matter such as compost or well-rotted manure. This improves soil structure, nutrient content, and water retention, reducing the need for frequent fertilization and watering.
• Select low-maintenance veggies. Choose vegetable varieties that are known for their low-maintenance characteristics, disease resistance, and productivity. Lettuce and other greens, cherry tomatoes and bush cucumbers are a few. Squash, zucchini and cucumbers are relatively carefree, though they do require a trellis. Garlic is the ultimate plant-it-andforget-it edible.
• Mulch. Apply a layer of mulch around vegetable plants to suppress weeds, conserve soil moisture, and regulate soil temperature. Organic mulches, such as straw or wood chips, are effective in minimizing weed growth and reducing the need for frequent weeding.
• Water efficiently. Utilize efficient watering techniques to conserve water and reduce the time spent on watering. Water deeply and less frequently to encourage deep root growth and drought tolerance. Use drip irrigation or soaker hoses to deliver water directly to the plant
roots, minimizing water loss through evaporation and reducing the need for hand watering.
• Use raised beds or containers. Raised beds and containers offer several advantages, including better control over soil quality, improved drainage, and reduced weed competition. They also make it easier to reach and tend to the plants, reducing strain on your back and knees.
• Practice proper spacing. Follow recommended spacing guidelines when planting vegetables. Proper spacing ensures good air circulation, reduces the risk of diseases, and minimizes competition among plants. Crowded plants are more prone to pests and diseases.
• Natural pest control. As with ornamental gardening, encourage beneficial insects and birds to your garden by planting flowers, install-
ing bird feeders or birdhouses, and providing water sources. These natural predators can help control pests without the need for chemical interventions.

• Harvest and prune regularly. “What? You said low maintenance!” But a stitch in time saves nine. Harvest vegetables promptly when they are ready. Regular harvesting not only provides you with fresh produce but also encourages plants to produce more. Prune or remove any damaged or diseased plant parts to prevent the spread of diseases and maintain plant health.
• Rotate crops annually. Practice crop rotation by changing the location of vegetables each year. This helps prevent the build-up of pests and diseases, reducing the need for chemical controls and promoting healthier plants. h
During the winter months, Canadian gardeners get busy diving into seed catalogues, reviewing garden notes and preparing pots and trays for the start of indoor seedlings. Others may daydream of warmer days, trips to a local garden centre, and pops of glorious colour that surround us in the months to come. Many will also be new to gardening, eager to start or expand a planting area while silently praying they don’t kill the plants. These are all my people. In fact, getting to know gardeners from all walks of life may simply be one of the best things to come from my garden.
First, let me share that I am a huge fan of perennial plants. As the snow subsides and the days get longer, my perennials peek from the earth like happy little visitors returning from a long winter vacation. Daylilies, hosta, grasses and succulents dot the landscape with vibrant greens, hinting at beautiful blooms forthcoming. In a healthy garden, these beauties thrive and multiply.
My garden may not be overly large, but it is bountiful. I have been dividing my plants for years, sharing divisions
with friends and family. I suppose I am somewhat like the elderly neighbour who leaves bags of zucchini on your doorstep. In my case, my love language is perennials.
In 2013, one of these happy recipients asked how she could somehow repay me for my generosity. The thought hadn’t even crossed my mind; I didn’t want anything other than to find a new home for my plant babies.

My friend decided to make a charitable contribution to a non-profit in memory of my father who had passed away. The gesture was so moving that it sparked an idea. What if I shared my garden with the community and asked for nothing but a donation to a charity that was meaningful to our family? The amount need not be large and I certainly had enough pots. That way, gardeners could fill their landscapes for little cost while giving a boost to charities that support the communities where we live, work and play.
Social media was a fun and easy way to make a post about my offer. The response was instantaneous and I began booking times to visit my garden.
First there was an elementary school teacher who took enough tiny pots so that her class could make a living gift for Mother’s Day. With one visit, the plants found their way to over 20 new homes and a new generation of young gardeners. A landlord arrived and returned a second time, eager for more plants and gardening advice. His first gardening experience was intended to spruce up a space for an elderly tenant. The mere thought made my day.

Over the years I have met countless people in my garden. There have been experienced horticulturists, new gardeners looking for guidance and people who fall somewhere in between. Each shared personal stories and a deep appreciation for the opportunity to take plants home to their own private oasis while supporting a wonderful cause. Many have returned annually, bringing me up to date on their progress and life stories and sharing photos of how beautifully their gardens have grown.
While the coins in the donation bucket have funded charitable gifts for a number of organizations, it’s truly the relationships I have made during this initiative that have blossomed into something more meaningful than I could have imagined. From giving someone the confidence and knowledge to begin their own garden to knowing my perennials have brightened celebrations such as weddings, baby showers and birthdays, each interaction has been as special and unique as the people that graced my garden path.
Gardens engage us. They inspire us. At times, they may even intimidate us. They are also the perfect place to grow together as a community.
Take some time to evaluate your space and plan for your own burst of garden happiness. Should you happen to be near my home this growing season, feel free to drop by for a perennial or two. If you time it right, there may even be a zucchini waiting for you. h
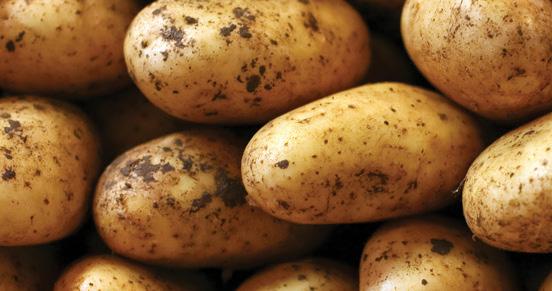

Susan Chapman is our featured contributor this issue. Read about her on page 4.


Would you like to have your story appear on these pages? See page 45 for details.

Want to see your garden featured in Canada’s Local Gardener?


Growers of flowers, vegetables, trees, shrubs, water gardens – we want to see what you’re doing!
And our very favourites, we’ll visit virtually this summer to feature your garden in our magazine and on our website.

Send us 3 to 5 pictures by email to
or by following the QR code below. We will respond to your email by the next business day. For the very best gardens, we will work with you to find a time for a virtual visit via Zoom call, when your garden is at its peak. To have your garden considered, you must have a mobile device. If your garden gets in the magazine, you will need to take pictures with the device and send them to us. Don’t worry, we’ll coach you through that.

What you do:
• Email us 3 to 5 pictures of your garden. What kind of pictures? Think of what you’d want to see when deciding whether or not to feature a garden. We’re looking for shots that tell us about the whole garden. We love macro photos and close-ups too, but give us a bit more to look at. Show us a grouping of flowers, shrubs or vegetables. Show us your garden from a second-story window. You get the idea.
• Tell us your name and where you live (city or town and province).
• Tell us when your garden looks its best.
What we do:
• Examine every email and every image you send and email you a response by the next business day.
• If your garden is ready to be featured, we’ll set up a virtual visit by Zoom call on your mobile device.
But I don’t have a mobile device or the ability to do a virtual visit! We understand. It is possible to write your own story or to have a friend write it for you, and to get images yourself or through a friend. Email us the story and pictures; if it’s right for the magazine, we’ll schedule an issue to publish it in.
Ken MacDonald’s Regina garden is not the acreage that he went to agriculture college in the Maritimes to manage, but it is just right for his city yard. It has plenty of room to handle what he likes to grow: heritage tomatoes. He is a realtor, facing the many stressors of a demanding career, so the garden is his happy place, as proclaimed by the sign on his garden shed wall.

He has enough room for his favourite plants thanks to an ingenious system for getting the most out of his crop of indeterminate tomatoes that other tomato gardeners will want to emulate. Not that it is a new technique – serious growers have been using it for years – but it is not something you see in every garden.
Ken uses a vertical system where the plants, (indeterminate tomatoes will grow and grow until frost stops them; he grows into late October), can climb rather than sprawl with a little help from the gardener.
He has created a permanent wooden frame consisting of four upright posts about 6 feet long and 4 feet wide and crossed by three wooden bars. These crossbars are set above a raised garden box, about 24 inches high and filled with 18 inches of soil. He plants out his babies in spring, attaching a string to the crossbars above, each one long enough to reach 6 to 8 inches from the ground. As the little toma-

toes grow, Ken introduces them to the support system and, as they get taller, he employs a series of plastic clips to keep them in place. When the fruit begins to get heavy, he has other hook-shaped attachments to keep the tomatoes from stripping away from the mother stem.
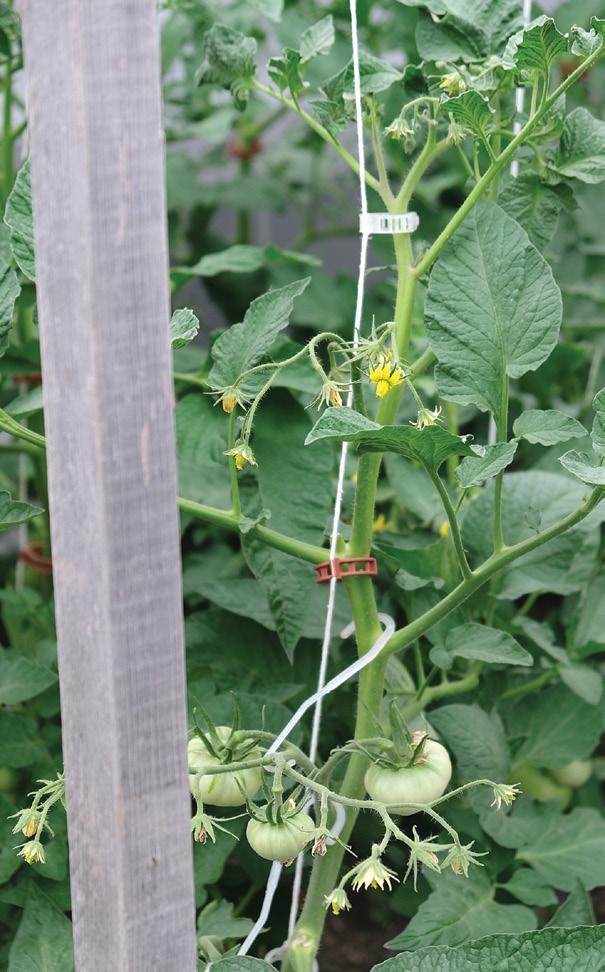
This method ensures that maximum light reaches the fruit which stays clean and fresh on the vine. Ken can refresh the soil as often as needed, the boxes provide warm soil and good drainage and allow Ken to water consistently with a half strength solution containing 15-3015 NPK fertilizer using a pump and siphon system. Consistent watering and the proper nutrients keep the tomatoes safe from blossom end rot. He boosts his tomatoes with occasional shots of Epsom salts, calcium and bone meal. Yet he cautions, “You don’t want to be too kind to them.”
Despite this caution, Ken is very kind to his crop, not just of tomatoes but of the other vegetables he likes to grow, all of them in raised beds. “The soil here is just gumbo,” he says. He grows romaine lettuce, spinach, beets (for their tops, not the root which you can buy anywhere, he says), green and yellow beans,

… and
carrots, and onions. And he makes sure they are protected from the vagaries of prairie weather and its late frosts, spring snowfalls, and pounding summer rains that can come with plant-destroying hail. He has assembled a collection of “frost” blankets and heavy mover’s blankets to warm the soil and protect his plants.

Ken grows a lot of tomatoes, but not just any old tomatoes. He loves the heritage varieties and carefully guards their pedigrees. “I have ‘Manitoba’ (named for the University of Manitoba), ‘Oxheart’ developed in 1925, ‘Scotia’ from the Kentville Experimental Farm in the Annapolis Valley in Nova Scotia, and one called ‘Quebec 2473’,” he says. The latter is an early, smaller globe tomato like ‘Scotia’.
Ken loves these tomatoes for their delicious flavours even though they are less disease resistant and perhaps don’t keep as well. He is always looking for places to find new varieties although currently he is sourcing seeds from West Coast Seeds, and Prairie Garden Seeds in Humboldt, Saskatchewan.
One year, he had 300 plants, which he starts for the Regina Horticulture Association plant sale. They love him for it and last year, they awarded him a lifetime membership.

Although not a fan of hybrids, Ken does grow cherry tomatoes in pots


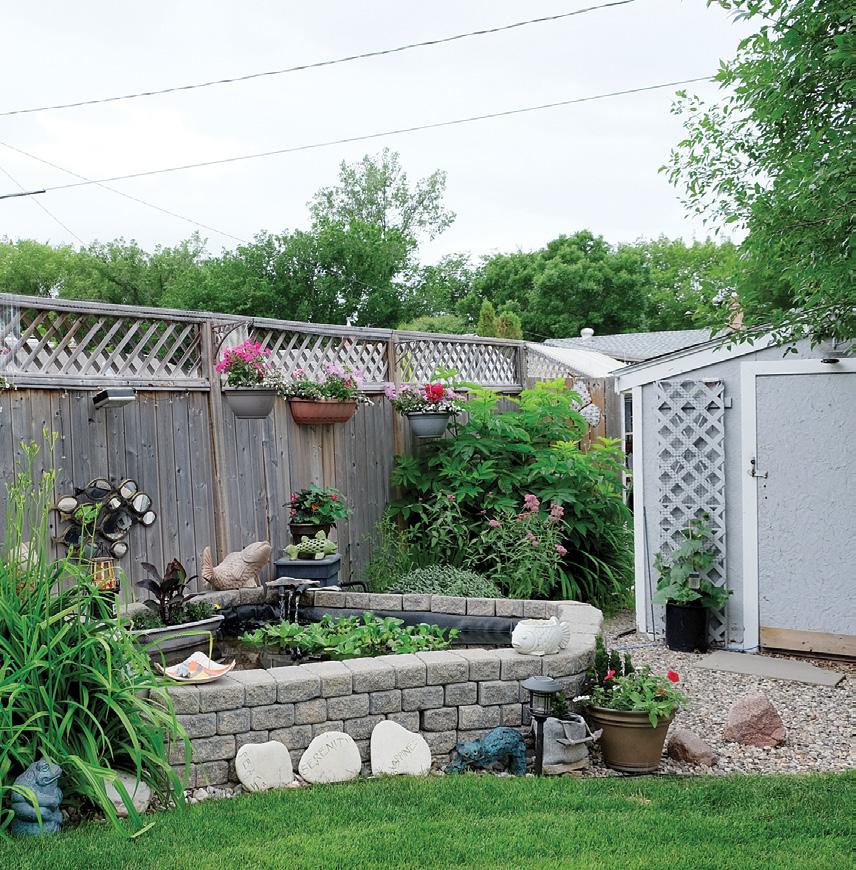


to ensure they have the room they need to be bushy, setting the pots near one of the many vertical climbing devices that decorate the walls and fences.
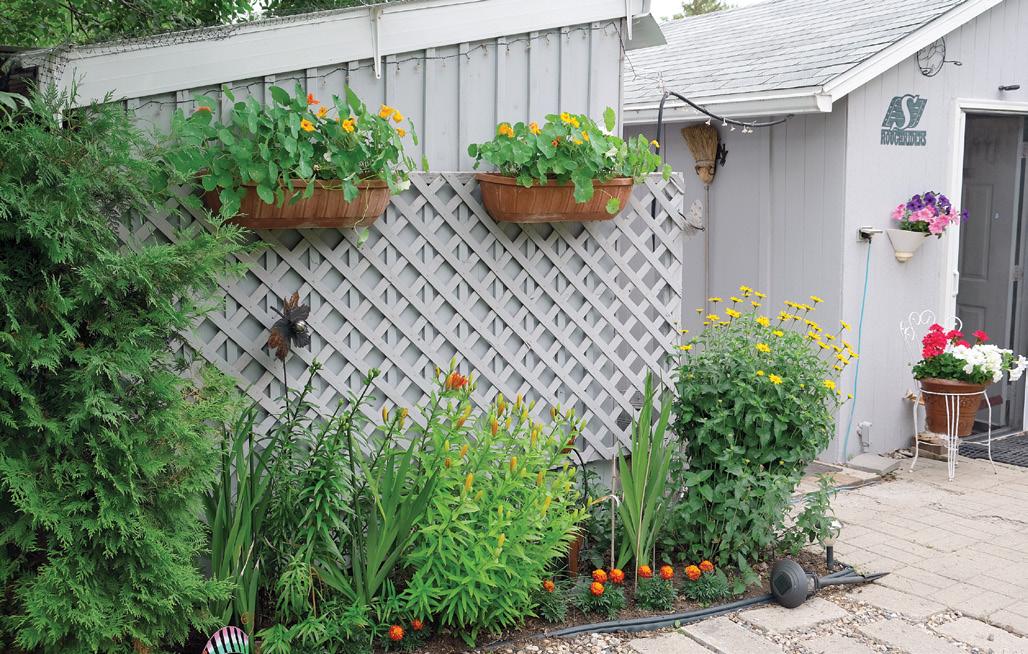
Just off the desk, handy to the kitchen, are a couple of planters filled with herbs and marigolds to keep the bugs away. Strawberries grow in another pot.
In a second little “room” at the back of the garden, on the alley side, Ken has additional raised beds where he grows more tomatoes and his other vegetables.
One bed is home to a healthy raspberry bush, which Ken says is a real beast that needs a lot of pruning to keep the suckers down. “It’s the kind you find out behind the barn in a manure pile on the farm,” he laughs. It attracts birds and wasps, and while he can cope with the birds with netting, the wasps are a different matter. It can only be hoped that they also pollinate his tomatoes and they do keep the insect populations down in a garden.
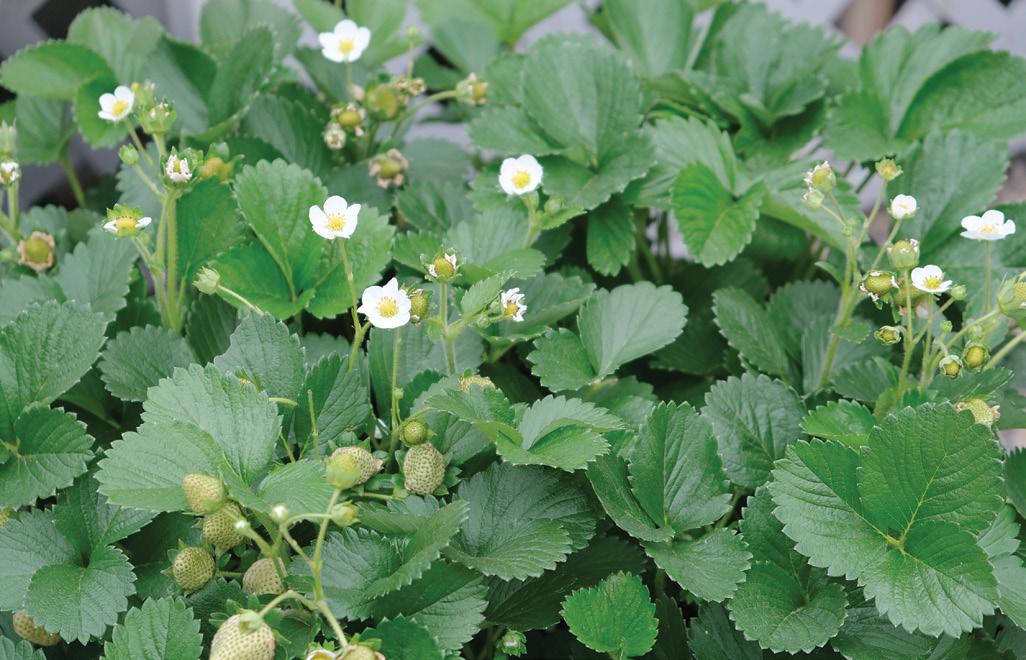
Sharing the bed with the raspberry is a single squash plant, daylilies and a rhubarb.
Back here is where Ken hides and cherishes his compost bin filled with the rich black humus that he uses to enrich the soil in his garden boxes.

Oh yes, there are flowers and ornamentals here and there. He has milkweed for monarchs, potentilla, mock sunflowers, daylilies, nasturtiums and other plants that attract bees and flower flies. One corner of his yard is devoted to a raised pond where he celebrates his roots in the Maritimes with an ornamental lighthouse, fish sculptures and other mementoes. That he plans to garden vertically in more places than just where his tomatoes grow is evident in the many trellises and climbing aids that decorate walls and fences.
The garden is also a place meant to be savored. Near his deck a pair of Adirondack chairs, painted bright yellow and lime green, rest invitingly, overlooking the yard, not far from his meticulously clean potting shed. Here, Ken and his wife can sit back in June and admire the beautiful silk lilac on the other side of the yard.
Knowing Ken, though, he will more likely be admiring the budding fruit on the nearest tomato plant. h


This is a guide for novice gardeners. It can’t answer all your questions, but it will help you get started. We have tried to identify some of the most common problems found in the garden.
Some of these “rules” have worked for me in Manitoba, but my daughter who learned to garden in Ontario argues in favour of other principles.
At any rate, you won’t go too far wrong by using these methods.
What should I fertilize? Fertilize your potted annuals once a week with a water-soluble (powdered) fertilizer at half strength or every two weeks at full strength (look for the directions on the package). Assuming your grower sold you a well-rooted plant, a balanced fertilizer product where all three numbers are the same will do just fine for most plants.
If your soil is good, it is not essential to fertilize perennials although they might appreciate the occasional topping up. If you do fertilize your perennials, stop the first week of August to give them time to begin shutting down for winter. Fertilizing at that time will keep them in a growth mode and unable to prepare their cells for the onslaught of frost to come.
However, just before freeze-up when the plant is dormant, give perennials a good watering and, if you like, you can throw down some slow-release fertilizer (the kind that comes in pellets) to get them going in spring.
Can I over fertilize? Yes. You can burn your plants with too much fertilizer. Follow the directions for strength – generally one tablespoon of fertilizer per gallon of water – and NEVER add fertilizer to a dry pot. If your container has dried out, water first, then wait awhile and water again with the fertilizer mixture. You can also promote excessive leafy growth by adding too much fertilizer. This can be done at the expense of flowers, especially among perennials but also for hardy annuals such as cosmos, and it can also attract those pesky aphids, which adore fresh green growth.
By dorothy dobbieHouseplants do well on a liquefied fertilizer that is added to the watering can.
What kind of soil should I use? If you are buying garden soil from a soil supplier, specify what you plan to use it for: a flower garden or a vegetable garden or for lawns. Most suppliers are knowledgeable and will send you an appropriate mix of topsoil, organics and sand or silt.
If you are the muscular type or on a tight budget and plan to dig your own garden, first check out the type of soil you have lurking beneath that grass. Is there much topsoil (8 inches or more)? Or is it just a thin layer overlaying heavy clay or sand? If it is clay based, you will need to add organic material – this could be something as simple as shredded newspaper, leaves, and grass clippings. Or you could add peat moss, but this needs to be renewed every year. Dig whichever organic material you choose into the
top 6 to 8 inches of soil. You can also add some perlite for additional drainage. If the soil is mainly sandy, organics are again very important to give the soil some substance.
What about potting soils? There are many potting mixes on the market, some of them fortified with fertilizer and water-retention gels or even mycorrhizae, a root friendly bacterium. They are all fine to use, but they can dry out and be hard to rehydrate. I mix mine with good old garden soil, which helps retain moisture and adds weight to the container.
There is nothing wrong with using garden soil alone, but you probably should also add some perlite or other drainage material in areas with claybased soil, to ensure that the pot doesn’t get compacted with dried out mud in mid summer. Adding organics, once again, is a very good idea.


Two parts peat to five parts soil would work. You may also want to include a handful of slow-release fertilizer to cut down on fertilizing for the first half of the summer.

What about mulching? Mulching is done for several reasons: to conserve water; to add organics to the soil; to suppress weeds; for cosmetic reasons to keep roots cool. In hot, dry weather mulch can help to conserve what moisture there is in the soil, but in a rainy season, it can contribute to fungal disease and soggy garden conditions. Use your innate good sense to determine when to add mulch and when to pull it away. Never mulch too thickly – 2 to 3 inches is enough. You don’t want to promote a home for voles. Never mulch too close to plant stems to prevent fungal disease and to keep critters away from the plant.
What kind of mulch should I use? After a year or two, depending on the type of mulch, organic mulches will break down and help to condition your soil. Rocks, which are attractive, can’t do this. Neither will suppress weeds completely. Cedar bark breaks down the most slowly. Chipped, dyed wood (probably from skids), breaks down quickly, within a couple of years.

Should I use landscape cloth? Landscape cloth will repress weeds for longer than mulch alone, but after a couple of years, soil will build up on top of the cloth and weeds will appear; however, they are easier to pull from this medium than from the ground. If you want to add perennials in the future, you will have to cut through the cloth to do this and you may also run into problems with perennials that outgrow the hole in the cloth that was originally provided for them and become choked.

Pruning
What is pruning? Pruning is the act of cutting away twigs or branches of a plant. Pruning is done to a) remove dead or diseased plant material; b) remove spent blooms and encourage new blooms; c) improve the form or shape of a plant; d) encourage growth in a different direction.
Why should I prune? In general, plants will not die if not pruned, but pruning can encourage new growth and help resist insect infestations and disease by cutting out dead material. For perennials and annuals, pruning and deadheading depends on the plant. Some perennials such as delphiniums can be encouraged to bloom a second


time by pruning or cutting back the plant after the first bloom.

The bloom time and blossom production of many annuals can be extended by both deadheading and pruning. Petunias, for example, can become leggy and spindly in mid summer. Severely cutting them back can encourage vigorous growth as the plant struggles to perpetuate itself by producing a new crop of seeds.
What about pruning shrubs and woody plants? Woody plants require careful consideration before pruning. If the plant produces flowers, you need to know if the blooms are produced on new wood or old to avoid losing a season’s blooms.
Pruning shrubs or trees means more than just giving the plant a haircut. Many woody plants benefit from thinning, which means cutting out heavy growth from the roots up for shrubs. Beginners should get more guidance before proceeding. Cutting out dead or diseased branches can be done at any time.

How should I prune? Don’t leave stubs. Always prune or deadhead back to the nearest node or the place where new growth would begin. If pruning a tree, look for the collar at the junction of the branch and the main stem and prune back to just outside the collar. If pruning out disease, sterilize pruners in 10 per cent bleach between each cut.

What trees can be pruned in summer? June is a good time to lightly prune evergreens, but other woody plants should be left until they are dormant.

What about deadheading? This is done to remove spent blossoms and to encourage continued flowering. Deadhead the whole flowerhead back the nearest node.
Can all plants be cut back severely and survive? No. Some will succumb to such treatment; others will thrive. Check first. Those trees and shrubs that thrive on pruning will benefit from such treatment because it will keep them forever young. Some of those that thrive include willows, poplars, Siberian elms, lilacs, and caragana.
1. How can I tell if it’s a weed? You can’t. Weeds are simply plants that you want to discourage. Some of us curse certain plants almost universally, but it wasn’t always that way. The dandelions that plague lawn growers today were once the pioneer pharmacopeia and even today we are learning that they may have virtues in healing cancers.
2. What can I do? Some plants are more successful than others and as a result can become invasive in our gardens. Pull them out if you don’t want them. Weeds are most vulnerable in early spring when their starch reserves are low and the ground is loose and friable. Pulling and cutting in spring can save many hours of labour in the summer.


3. But the weeds have invaded my lawn. . . This is a big problem. Depending on the weed and the depth of its root system, it may be solved by smothering the infected area with black plastic and when all the plant life is dead, reseeding or sodding the area with new grass. Simplest of all is getting a professional to help. Some professionals will get rid of weeds without using chemicals; ask around.
Something is eating my plant. What should I do? Many insects are transient. They eat a few leaves,
then either pupate or move on, so my first rule of thumb is “observe before acting”. Don’t disparage the ability of the plant to take care of its own ills. If it’s healthy and well nourished, a plant has many innate weapons at its disposal to deal with insects and other invasions.
The plant is losing the battle. What now? The second line of defense is your garden hose. Knock the pest off its pins with a sharp spray, being sure to hit the undersides of leaves where insects love to lay their eggs.
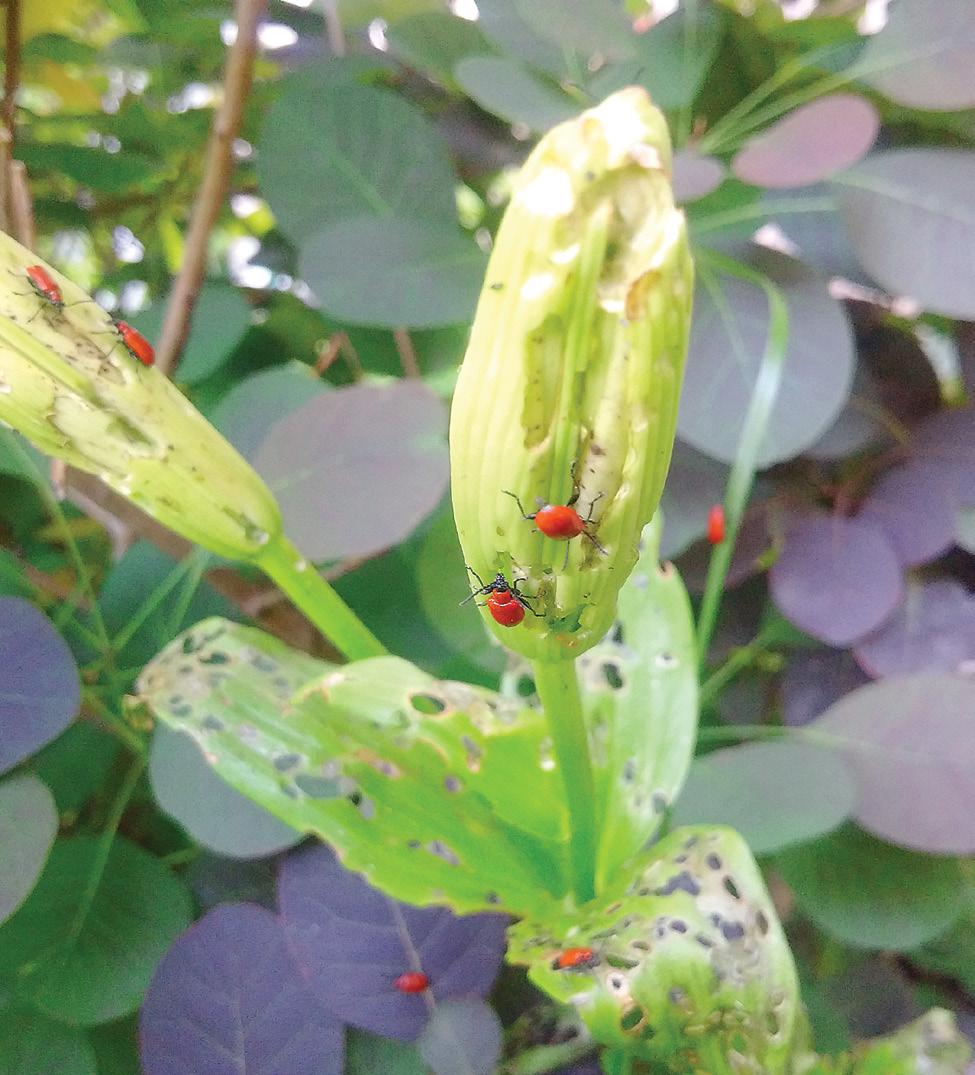
My plants are dying. Help! If the infestation gets too bad, try to identify the insect. Aphids are the most common pests. They suck the juices from the plant – you may see the leaves curl or find them covered in a sticky substance. Aphids come in many colours: red, brown, orange, green, black and they look like tiny grains of rice with legs (assuming you can see that well). Aphid treatments are generally the hose, but you can also spray them with Safer’s soap. Other insect invaders. There are far too many specific issues to deal with here, but here are a couple of hints. First, determine what part of the plant is being attacked. It’s more serious if it’s the root and you may need an insecticide powder to Red lily leaf beetle.

deal with invaders. Many insects are specialists, targeting just one plant or plant family. The red lily leaf beetle would be one of these. Hand-pick the bugs or spray their larvae or eggs with Sevin or neem oil. Some, like the delphinium worm, attack flowers. Cut the plant down to 6 inches and hope for a second flush of bloom later in the year. Cut the plant back to the ground in fall to avoid overwintering the insect.
Ants. They are generally only a nuisance by building small hills and do not harm your plants. Ignore them.
Yuck! My leaves are covered with white stuff. This is powdery mildew. It can be prevented by spraying susceptible plants (certain varieties of phlox, for example) with a concoction of a teaspoon of baking soda, a few drops of dish detergent in 4 cups of water. Spray weekly to prevent the problem getting worse. Clean up leaves in fall. But the best idea is to simply look for mildew-resistant plants.
The plant leaves are turning yellow with green veins. This is chlorosis and it is caused by the inability of the plant to access iron or certain other nutrients from the soil. You will notice this in both very wet and very dry years. Adding garden sulfur and chelated iron can help.
The leaves of my trees and shrubs are covered with bumps. This is probably a gall mite. While they can be unsightly, they won’t kill the plant. Ignore them. h
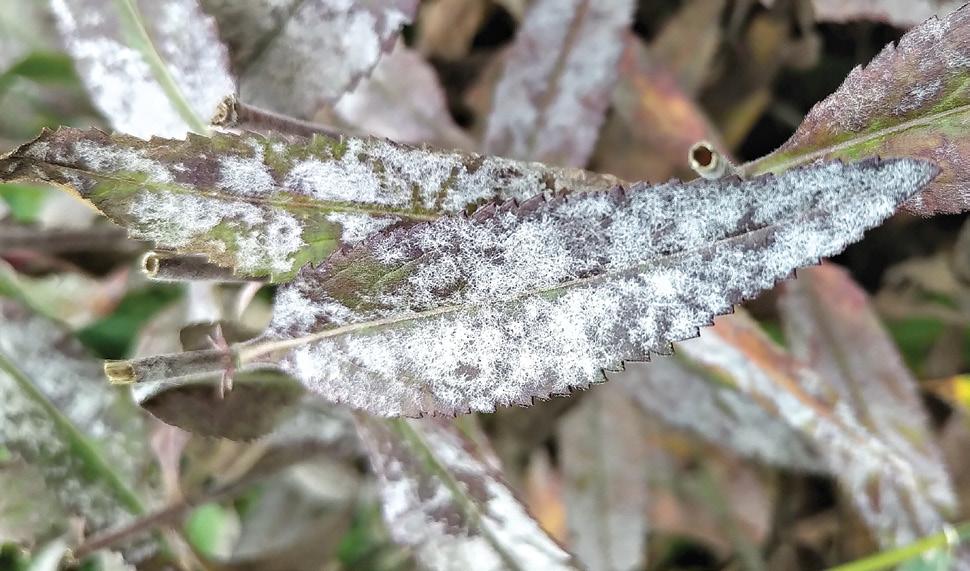


Canada’s Local Gardener editor Shauna Dobbie and her husband, David Johnson, moved to Winnipeg after 30 years in Toronto and other parts of the world. For the first time she has space to build a proper garden.


After a winter of dreaming and planning, I’ve started a kind of garden at my new old house. So far, it looks… like it needs time to grow.
I had grand visions of walkways and trellises until I looked at the price of these things. I’ve settled for roofing-shingle walkways, an inexpensive obelisk, an iron (yay!) kind of obelisk-trellis mix and a bunch of tomato cages.
I had seven yards of triple-mix delivered just in time for the brawn of my relationship, my husband David, to go away for two weeks to a conference. So, it was up to me. Alone. I spent two lonely weeks putting down newsprint, wetting it, putting down more newsprint, and hauling in so much triple-mix by garden cart. The upshot of this is that I am now so much stronger than I was two weeks ago.
I started seeds a few weeks ago. Okay, more than a few weeks ago. I got sucked in by all the people on Facebook starting tomatoes and peppers and who knows what else. Although I have been exhorting gardeners to wait until four weeks or six weeks before your last frost, I went ahead and set up a seed-starting shelving unit with grow-lights around April 1, which is, technically, only eight weeks and a bit before the last frost date of May 25 in Winnipeg.
I used three T5 LED light strips per shelf, so these guys had enough light. And I started tomatoes, a few small pumpkins, cucumbers and patty-pan squash (cucurbits).
Tomatoes should be started a maximum of six weeks before going into the garden because those started too early tend to get thin and leggy, looking for sunlight. My tomatoes grew reasonably big and strong in their eight weeks indoors. The cucurbits, though, should be started three or four weeks before they go out. Mine got big and strong, just like my tomatoes. But they also bloomed and threatened to take over my whole office. What’s more, it turns out that you probably shouldn’t plant cucurbits right away on your last frost date but wait a bit while the soil warms up.
I live and learn. Today, May 25, they are all outside, after some fighting with the tendrils wrapped around my wire shelving unit. Some of the plants are in the ground and some are in their Solo cups waiting for the weekend to be planted. And I try to figure out what to do with all the extras. Maybe borrow some old nursery pots from my mom and start giving them away? Because I can only plant a couple or a maximum of 6 of each thing in my garden, but I started as many as 24 of some of them. Why do seed packets have so many seeds!? Or, to be reasonable, why did I use all the seeds in each packet?
I’ve planted the asparagus crowns I ordered and noticed the other night, as I was watering, one thin spear coming out of the ground. A success! The potatoes planted nearby haven’t sent forth any shoots yet, but I am confident. Soon the sweet potato slips I bought will go into a big round nonwoven fabric container I put in front of my air conditioner, which blows out heat”. And I’ve planted two rhubarbs
plants, which look healthy so far. And two haskaps have been planted between windows of the neighbours’ house. I’ve been careful not to block the neighbours’ sun. In another spot, I’ve put in several strawberries.
As for seeds that get direct-sown, I haven’t even begun. I’ve cleared the Vegepod for lettuce and radishes, and eyed the garden for where to put carrot seeds. I guess I should give up on peas. They aren’t a long-lasting seed, but several Internet sites say they should keep for three years, so I’ll get on them next year. I have bean seeds, but I’m running out of steam and space. Maybe next weekend? Or next year?
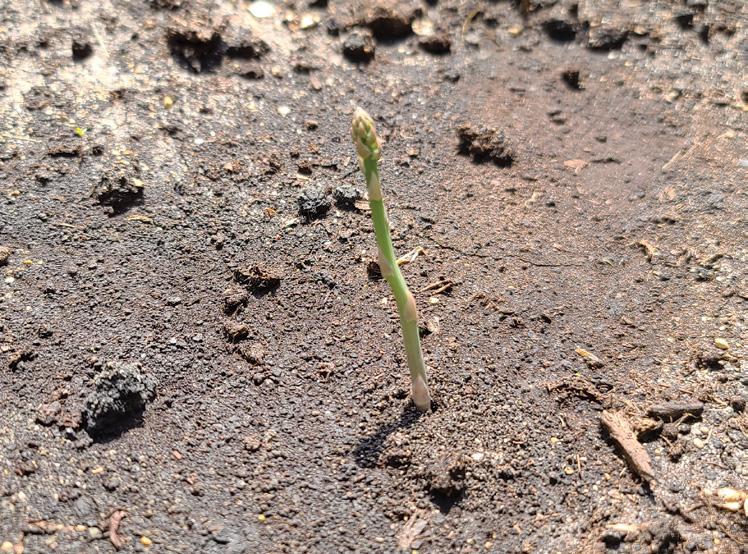
The area behind my back fence, which has some mid-sized trees or bushes struggling amongst thistles and volunteer tree saplings, was where I was going to put raspberries. It turns out that the planted trees already there are saskatoons! The area needs clearing of all the other stuff growing there,

but what a delight to discover berries there. Now I have to protect the trees from the hundreds of sparrows that call my yard home.
My front yard must wait this year. It was landscaped some time ago and today there are three teenaged trees and numerous shrubs. Along the side, there is a huge patch of irises, their roots all gnarled into one another. There are hostas and ferns in a couple of foundation beds on either side of the stairs. And the lawn is in desperate need of dethatching and overseeding. I’m thinking of clover and wild strawberries, both mowable, go grow along with the grass.
The front will be all about flowers. Shopping at the garden centres, I had to shield my eyes from the perennials and stick to things that could go in my vegetable patch. (Which does contain ornamentals, by the way.)
It’s kind of nice to have a multi-year plan for the garden! h


A great yard or garden begins with a great foundation. Reimer Soils has been providing the highest quality landscaping products for more than 40 years. With a complete range of top quality products and unmatched customer service, there is no reason to look any further than Reimer Soils for all your landscaping supply needs.
204•237•6668 reimersoils.ca


