




Dorothy Dobbie is a pivotal figure in Canadian media and the president of Pegasus Publications. She has contributed to every issue of Canada’s Local Gardener as a writer and photographer and has been a publisher for over 50 years.
Her passion for gardening began in earnest about 25 years ago after she finished one term as a Member of Parliament. Finding very little information on horticulture that was relevant to Manitoba, she decided to fill the gap with Manitoba Gardener, the forerunner to this magazine.

Today, Dorothy’s garden is a lovely blend of perennials, trees, and shrubs, made new every year with dozens of containers filled with annuals. Starting in spring, she goes shopping at greenhouses around Winnipeg and picks up anything that strikes her fancy.
Beyond her editorial work, Dorothy is known in Winnipeg from her long-standing radio show, “The Manitoba Gardener,” where her sonorant alto voice would greet listeners in all kinds of weather with, “Good morning, gardeners. It’s another beautiful day in Manitoba!”
Her dedication extends beyond publishing; Dorothy has volunteered on several boards as chair, including the Winnipeg Symphony Orchestra, Tree Canada, the International Peace Garden, and the Canadian Association of Former Parliamentarians. In 2022, her extensive contributions were honored with an appointment to the Order of Canada.
Dorothy is also the mother of Shauna Dobbie, the editor of Canada’s Local Gardener. x

Follow us online www.localgardener.net
Facebook: @CanadaLocalGardener
X: @CanadaGardener
Instagram: @local_gardener
Pinterest: @localgardenermag
YouTube: @LocalGardenerLiving
Published by Pegasus Publications Inc.
President dorothy dobbie dorothy@pegasuspublications.net
Editor & Publisher shauna dobbie shauna@pegasuspublications.net
Art Direction & Layout
Karl Thomsen karl@pegasuspublications.net
Contributors dorothy dobbie, shauna dobbie, nicky Fisher, Jocelyn Leblanc, Gail Murray, Tania scott and Geraldine Painter Thomas.
Editorial Advisory Board
Greg auton, John Barrett, Todd Boland, darryl Cheng, Ben Cullen, Mario doiron, Michel Gauthier, Mathieu Hodgson, Jan Pedersen, stephanie rose, Michael rosen, aldona s atterthwaite, and Trudy Watt.
P rint Advertising
Gord Gage • 204-940-2701 gord.gage@pegasuspublications.net
Digital Advertising Caroline Fu • 204-940-2704 caroline@pegasuspublications.net
Subscriptions
Write, email or call Canada’s Local Gardener P.O. Box 47040, RPO Marion Winnipeg, MB R2H 3G9 Phone: 204-940-2700
info@pegasuspublications.net
One year (four issues): $35.85
Two years (eight issues): $71.70
Three years (twelve issues): $107.55
Single copy: $12.95
Plus applicable taxes.
return undeliverable Canadian addresses to: Circulation department
Pegasus Publications Inc. PO Box 47040, RPO Marion Winnipeg, MB R2H 3G9
Canadian Publications mail product Sales agreement #40027604
ISSN 2563-6391
Canada’s LoCaL Gardener is published four times annually by Pegasus Publications Inc. It is regularly available to purchase at newsstands and retail locations throughout Canada or by subscription. Visa, MasterCard and american express accepted. Publisher buys all editorial rights and reserves the right to republish any material purchased. reproduction in whole or in part is prohibited without permission in writing from the publisher.
Copyright Pegasus Publications Inc.



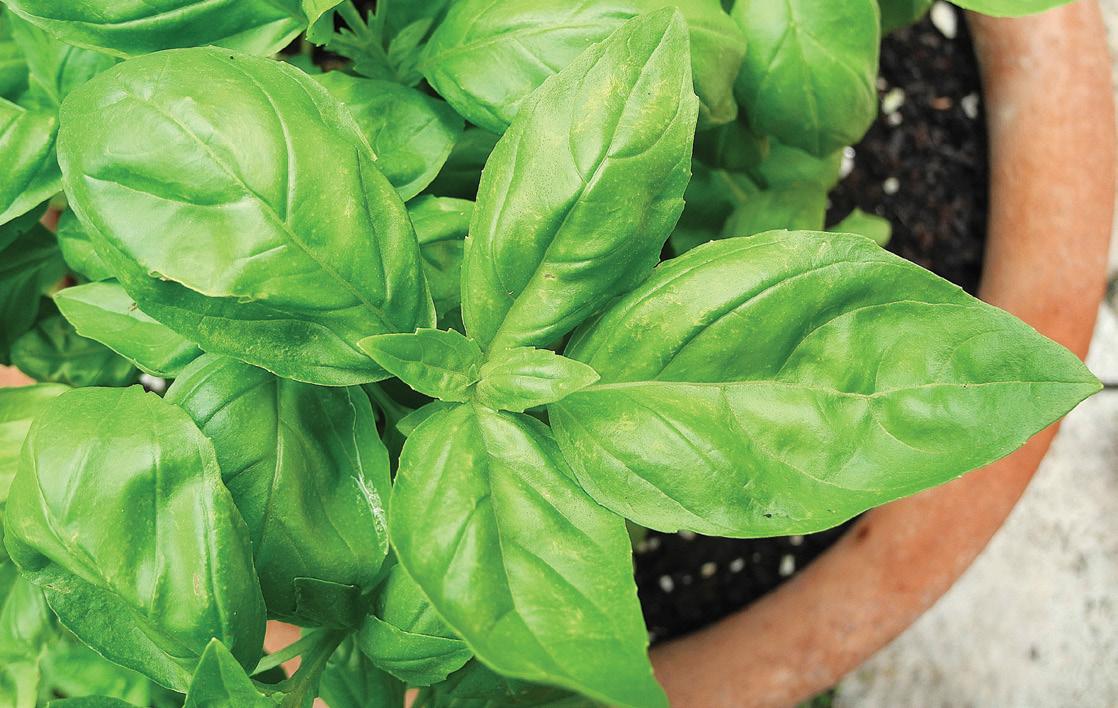
Lots of thought goes into the cover of Canada’s Local Gardener. There is the quality of the picture, but there’s also the way the picture looks with the title and the words (“slugs”) over it. For this issue, the clear winner was the basil that won the front page, taken by Shauna Dobbie. Not only is it kind of juicy looking, the flower bud is in just the right spot to focus the eye. It was pinched off shortly after the picture was taken, of course!
See “Herbs to grow indoors for winter” on page 38 for information on basil and other herbs.



story by shauna dobbie, image courtesy of Proven Winners (except where noted)
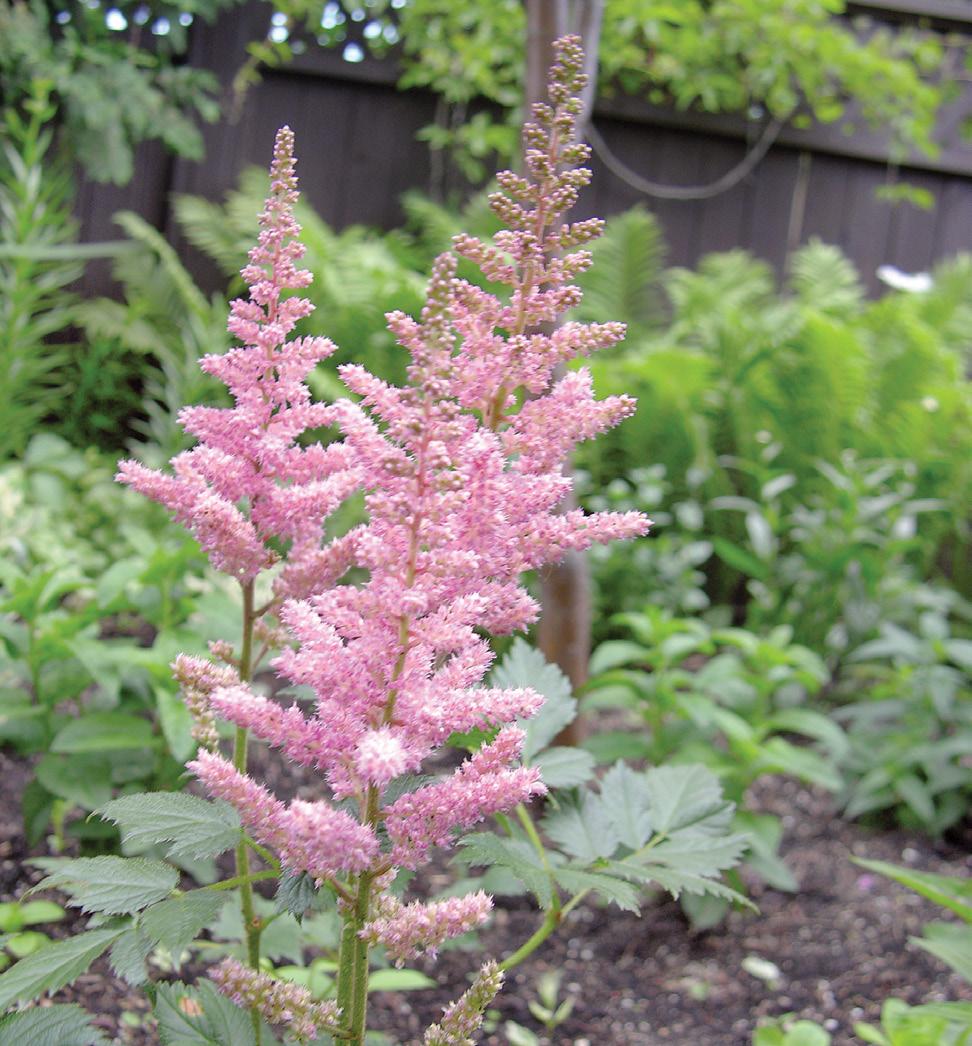
Astilbe, sometimes called false spirea, is a perennial favourite among gardeners looking to add a splash of colour and texture to shaded or partially shaded areas of their garden. With its feathery plumes and lush, fern-like foliage, astilbe creates a striking contrast against the greenery of a shaded landscape.
It is renowned for its delicate flowers that bloom from late spring to midsummer in shades of white, pink, red, and purple. These blooms rise above the plant's mound of glossy, divided leaves, creating an eye-catching display. Beyond its visual appeal, astilbe is also appreciated for its resilience and versatility. It thrives in zones 3 and up, making it suitable across Canada.
Planting and growing
Site. Astilbe prefers a location with partial to full shade, making it an ideal choice for gardens with dappled sunlight or areas shaded by trees and shrubs. While it can tolerate some morning sun, too much direct sunlight can scorch its delicate leaves.
Soil. This plant flourishes in welldrained, organically rich soil. To achieve the best results, amend your garden soil with compost or wellrotted manure before planting. Astilbe also prefers a slightly acidic to neutral pH, between 6.0 and 7.0.
Placement. Space astilbe plants about 12 to 18 inches apart to allow for adequate air circulation and room for growth. Plant them at the same depth they were in their nursery pots, ensuring the crown is just at or slightly below the soil surface.
Watering. Astilbe thrives in consistently moist soil. During the growing season, water regularly to keep the soil evenly moist but not waterlogged. Mulching around the plants can help retain moisture and keep the roots cool. If you live in a dry area and don’t like to water… look for a different plant.
Fertilizing. A balanced, slowrelease fertilizer applied in the spring can support robust growth and vibrant blooms. Alternatively, an application of
compost in the fall can provide nutrients as it decomposes over the winter.
Deadheading. While deadheading is not necessary for astilbe, removing spent flower spikes can help maintain a tidy appearance. If you like, in late fall, after the foliage has died back, cut the plants down to just above the ground. This helps reduce the risk of pests and diseases overwintering in the garden. Personally, I leave my dead plants through the winter.
Dividing. Astilbe benefits from division every three to four years to prevent overcrowding and to rejuvenate the plants. Early spring or fall is the best time to divide astilbe. Simply dig up the clump, separate the rhizomes, and replant them at the appropriate spacing.
Astilbe is generally pest-resistant, but it can occasionally fall prey to common garden pests such as slugs and snails. These can be managed with organic slug pellets or by setting up beer traps. Ensuring good air circulation around the plants can help prevent powdery mildew, a potential fungal issue in humid conditions.
It goes beautifully with other shadeloving plants such as hostas, ferns, and heucheras. It also pairs beautifully with spring bulbs like daffodils and tulips, which provide early-season colour before the astilbe comes into bloom. In a woodland garden setting, astilbe’s naturalistic appearance enhances the landscape’s serene and tranquil vibe.
Most of the astilbe that we plant originated in China, Japan and Korea; there are none native to Canada or the Western world. They are widely hybridized.
All of the plants below are hardy to zone 3.
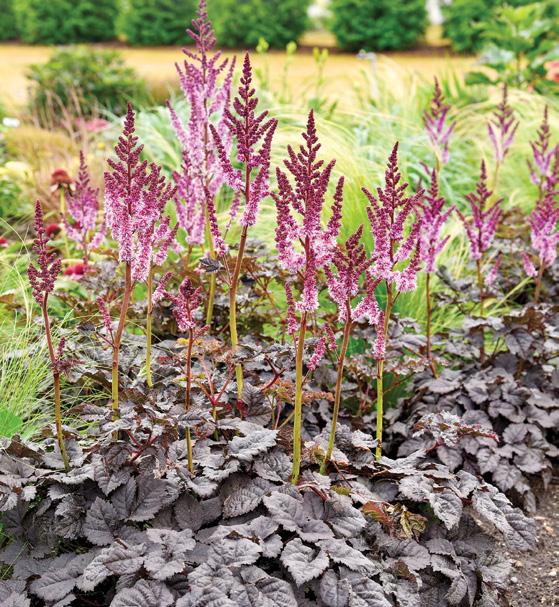
‘Dark Side of the Moon’. This is a real stunner with chocolatey coloured leaves and flowers that are purple in bud, opening up to a rosy hue. Gets to 24 or 28 inches in height.
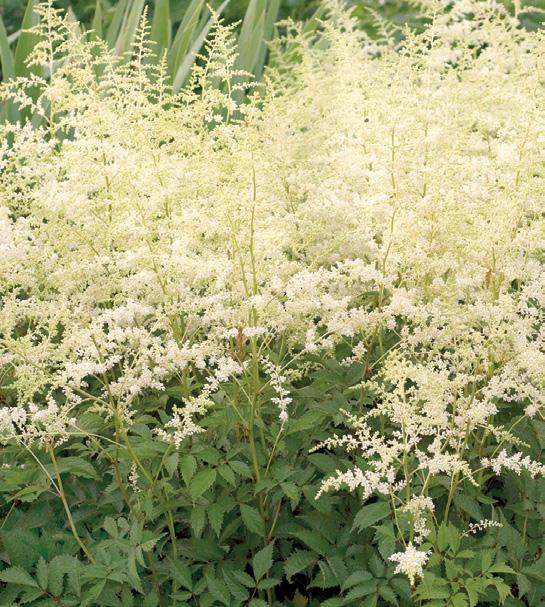
‘Bridal Veil’. Creamy white blooms with delicate spires of flowers. Tops out at 18 to 22 inches in height.
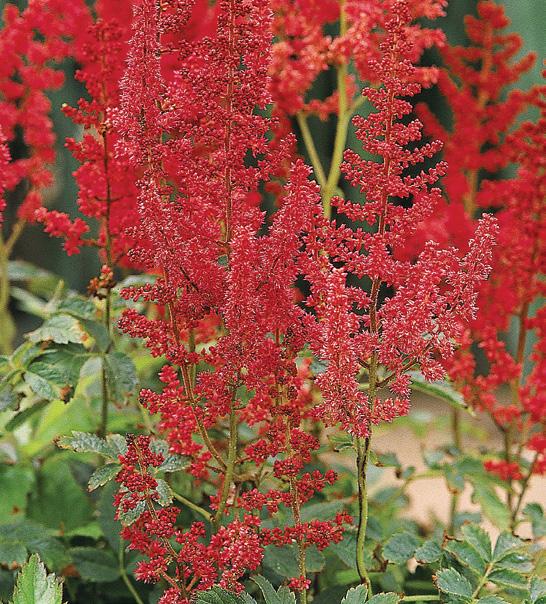
‘August Light’. Red flowers, growing to 15 to 24 inches.
‘Purple Candles’. Flowers start a deep violet and lighten to lavender as they open up. Height 18 to 24 inches.
‘Little Vision in Pink’. Very fuzzy flowers are pink. The plant is smallerstatured at 14 to 16 inches.
‘Vision in Red’. Buds are red turning to pink. Plants are 15 inches tall in bloom.
‘Delft Lace’. Buds are salmonpink, opening to apricot. Height 24 inches. x
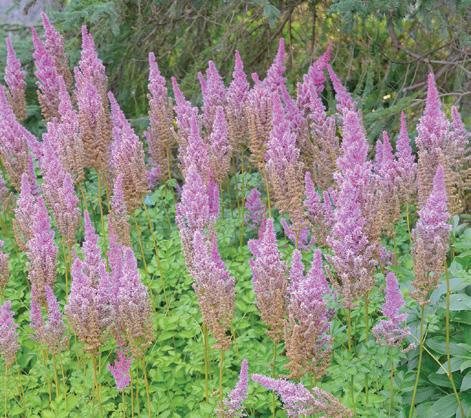
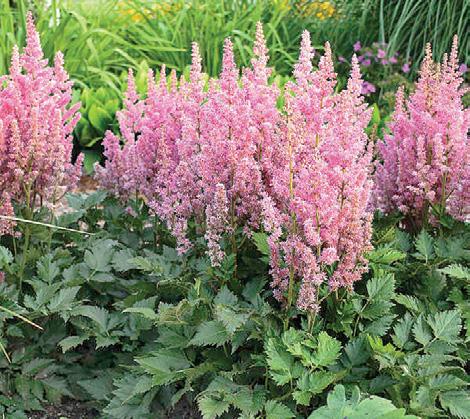
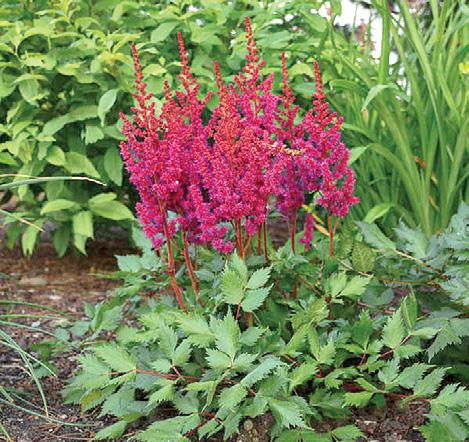
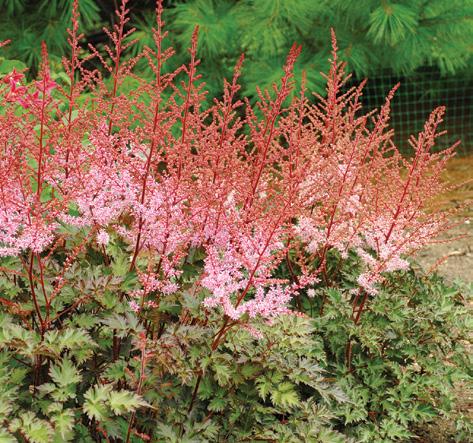
stilbe was first introduced to European gardens in the 19th century, but its journey there involves both exploration and the burgeoning interest in ornamental plants during that period.
Astilbe originates from the woodlands and mountain ravines of East Asia, primarily Japan, China, and Korea. In its native habitat, it is found growing along streams and in shaded mountain gorges, which explains its preference for moist soil and partial shade.
The first documented introduction of astilbe to Europe is attributed to the efforts of plant collectors and botanists who explored Asia during the 19th century. Among these, Robert Fortune, a Scottish botanist and plant hunter working for the Royal Horticultural Society, was instrumental. He traveled extensively through China and Japan, introducing numerous plants to Europe, including several species of astilbe.
Once introduced, the cultiva-
tion and hybridization of it took off, particularly in Germany. One of the most significant contributors to the development of astilbe hybrids was Georg Arends, a German nurseryman. Arends began breeding astilbes in the early 20th century, focusing on improving their floral characteristics, hardiness, and shade tolerance. The hybrids he developed, known as Astilbe × arendsii, remain some of the most popular and widely grown today.
By shauna dobbie
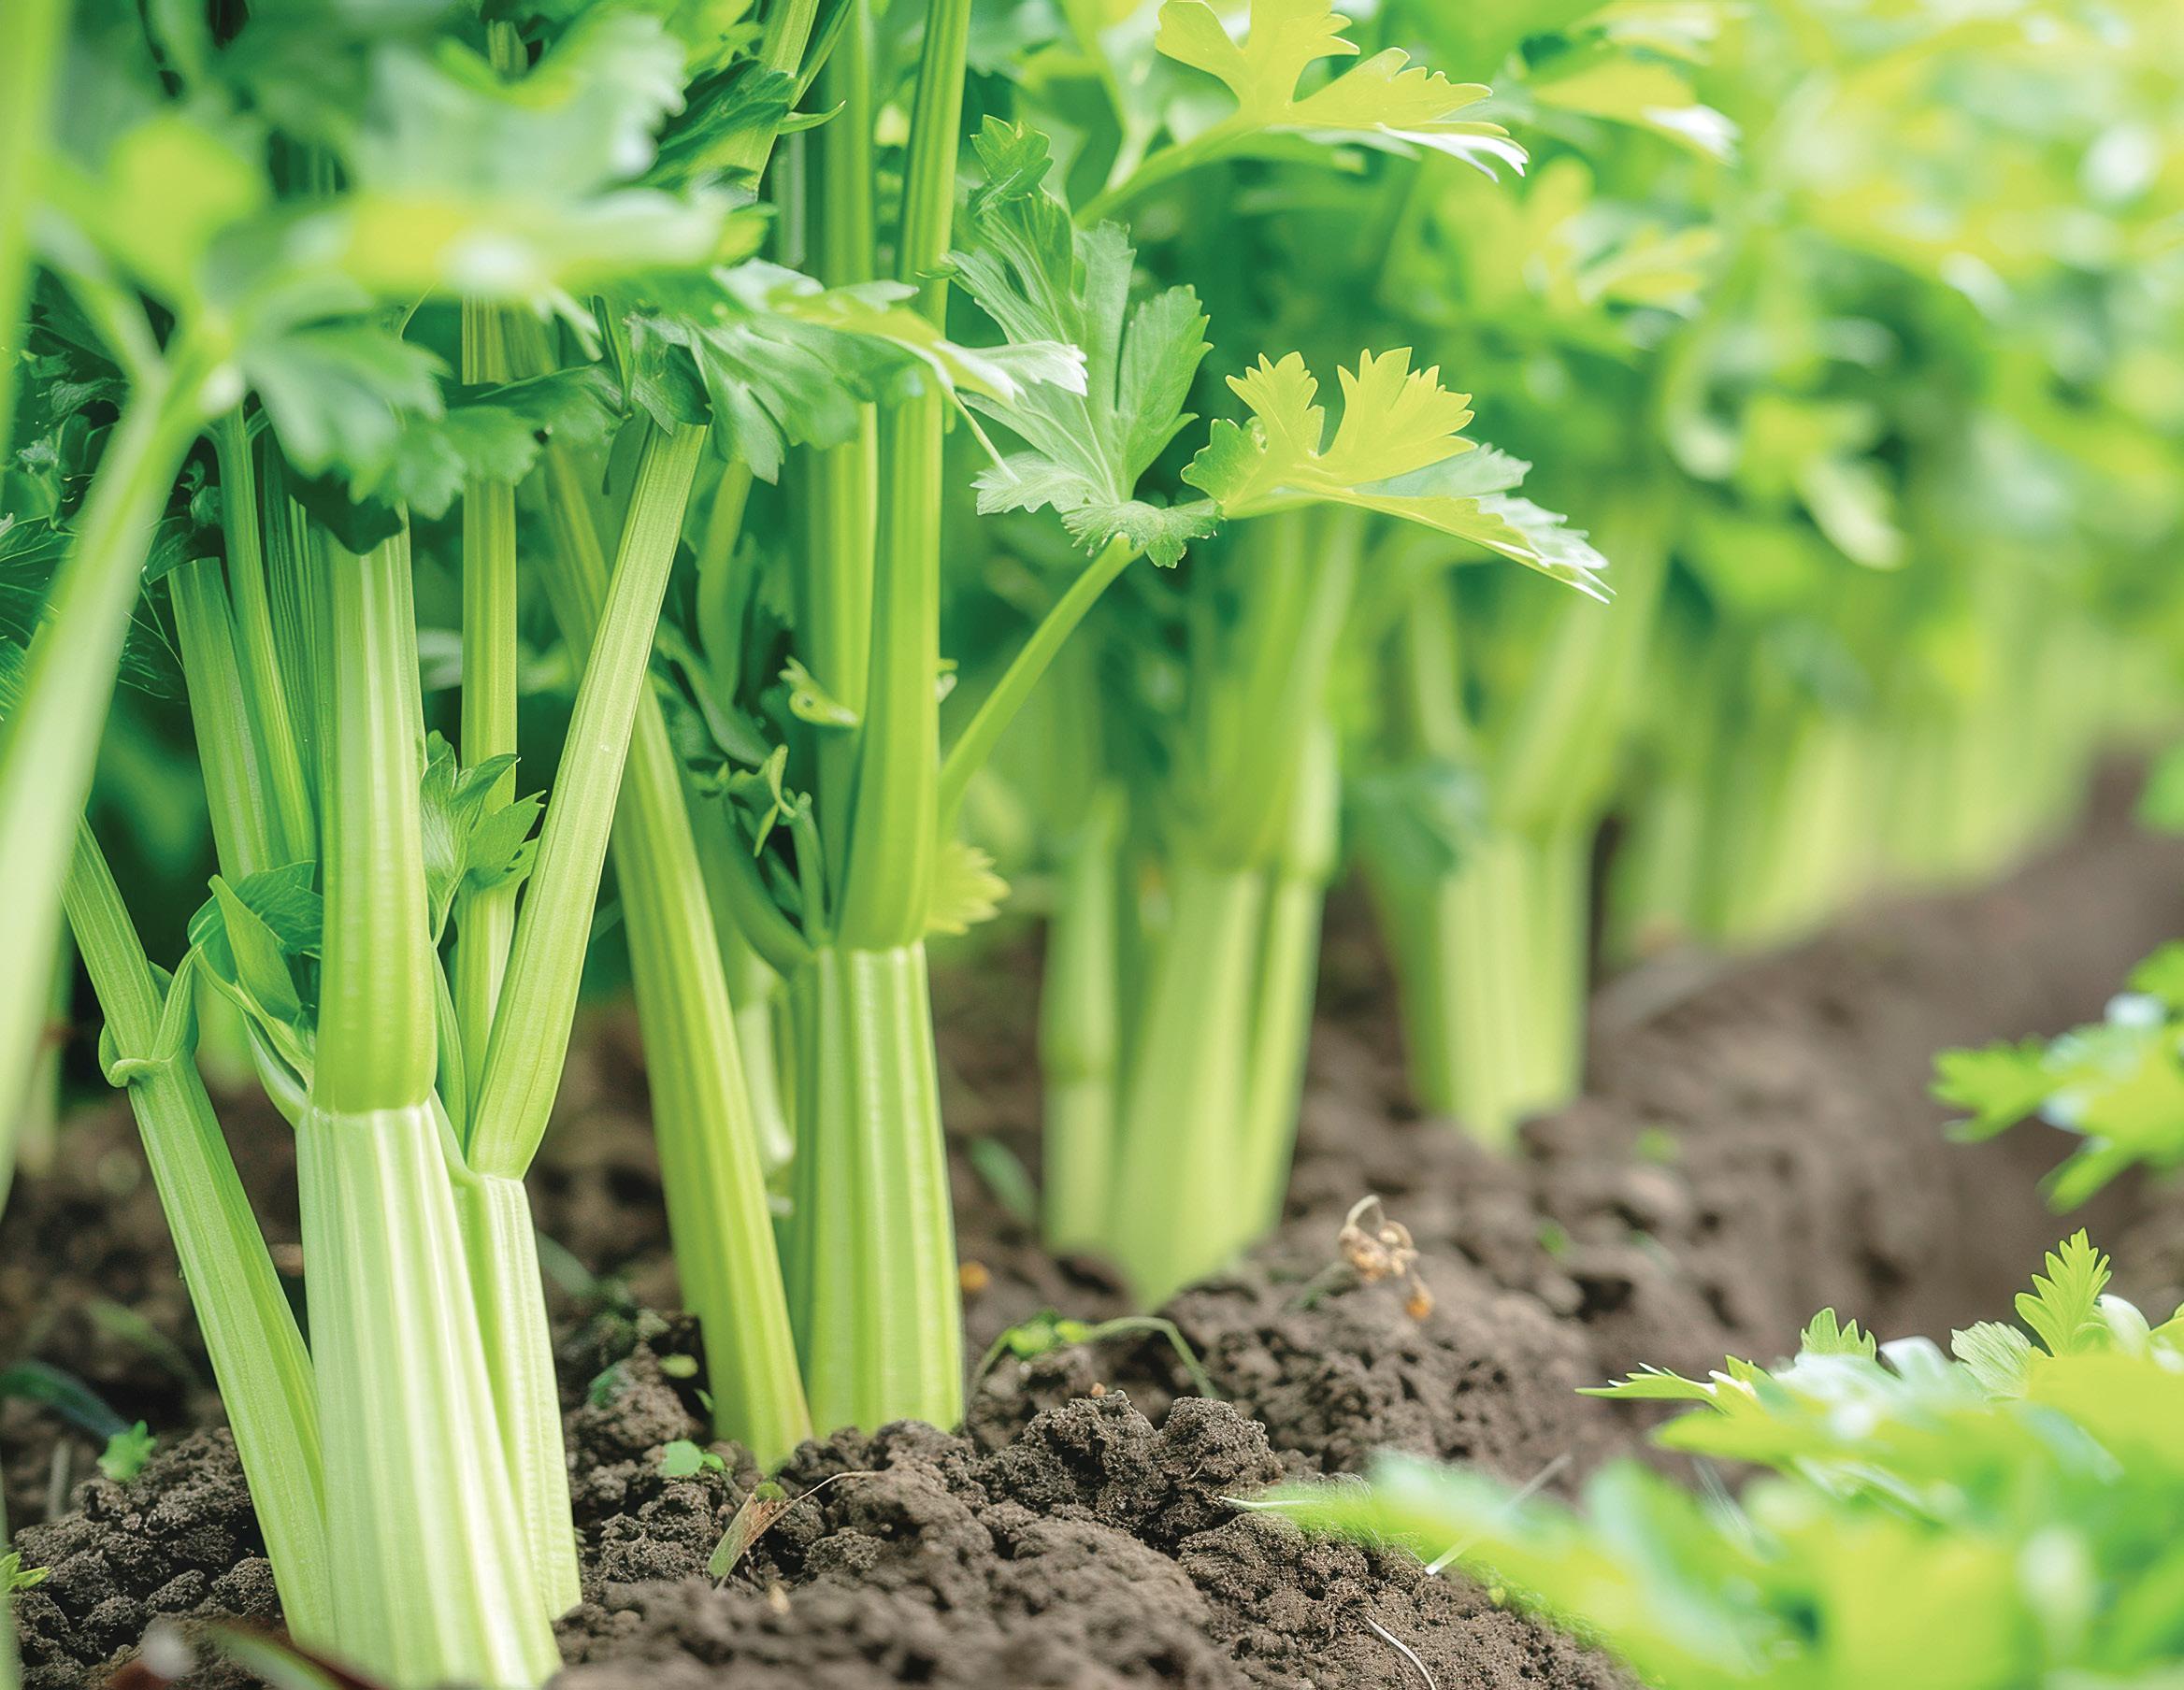
Growing celery can be a rewarding experience, but many gardeners find it challenging to achieve the crisp, flavourful stalks they desire. This cool-season crop requires specific conditions to thrive. If you've struggled with celery in the past, don't be discouraged. With the right knowledge and a bit of patience, you can grow healthy, vibrant celery in your own garden.
Celery ( Apium graveolens) thrives in a cool, moist environment with temperatures between 12 and 21 Celsius. Some types require a long growing season of around 130 to 140 days, but you can find faster-maturing cultivars that take around 80 days. Consider starting celery inside so that you can put it out during the cooler spring months.
Choose a location with rich, well-draining soil. Celery is a heavy feeder and requires soil rich in organic matter. Incorporate plenty of compost or well-rotted manure into the soil before planting to ensure it has the nutrients it needs.
Celery seeds are notorious for their slow and uneven germination, often taking 14 to 21 days to sprout. To improve germination rates, start seeds indoors 10 to 12 weeks before the last expected frost date. Sow seeds in a seed-starting mix, pressing them lightly into the surface without covering them completely, as they need light to germinate. Maintain consistent moisture by misting the soil surface and covering the seed trays with plastic to retain humidity. Place the trays in a bright location
with temperatures around 21 Celsius. Once seedlings appear, keep the soil evenly moist.
Transplanting and care
When seedlings are about 3 inches tall and have several true leaves, they are ready to be transplanted into the garden. Harden off the seedlings by gradually exposing them to outdoor conditions over a week. Plant them 8 to 10 inches apart in rows 24 to 30 inches apart to ensure adequate airflow and space for growth.
Celery requires consistent moisture to develop tender, flavourful stalks. Water regularly, aiming for 1 to 1.5 inches of water per week. Mulching around the plants helps retain soil moisture and suppress weeds. Fertilize with a balanced, water-soluble fertilizer every 3 to 4 weeks to support growth.
Celery can be susceptible to various pests, including aphids, slugs and snails. The celery leaf miner (Liriomyza trifolii) has been reported in Canada, but it is mercifully rare. Regularly inspect your plants for signs of damage or infestation.
For aphids, a strong spray of water can dislodge them from the plants, while organic insecticidal soap can control larger infestations. Slugs and snails can be managed by using beer traps or slug bait (look for one that uses iron phosphate to keep it safe for pets and kids) around your plants.
Harvesting
Celery is ready to harvest when the stalks are about 8 inches tall and have reached the desired thickness. You can harvest the outer stalks individually throughout the summer, allowing the inner stalks to continue growing, or cut the entire plant when you are done growing it. To harvest, use a sharp knife to cut the stalks at the base of the plant.
Old gardeners say that for the best flavour and
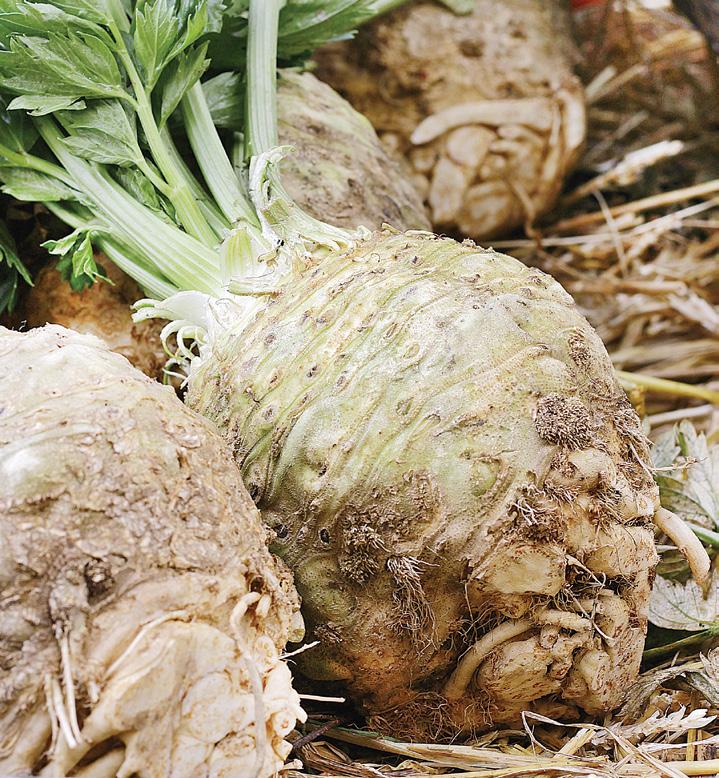
Celery and celeriac are two variations on one species. It’s like broccoli, cabbage, Brussels sprouts and more; they are all variations of Brassica oleracea.
The primary part used of celeriac ( Apium graveolens var. rapaceum; celery is Apium graveolens var. dulce) is the root, although the leaves and stems can also be used. The leaves and stems are smaller on celeriac than on celery, and the root is a big bulbous thing. It has a knobby, rough outer surface that is typically brown or beige. It looks like a big fat root bulb.
Celeriac has a taste similar to celery but is nuttier and slightly sweeter with earthy tones. It needs to be peeled before use and can be eaten raw or cooked. It is commonly used in Europe in dishes like soups and stews, or mashed like potatoes, or roasted. It’s also used raw in salads, often julienned or grated.
Aluminum foil. Wrap the whole celery stalk in aluminum foil and place it in the refrigerator’s crisper drawer. The foil allows the ethylene gas, which accelerates ripening, to escape, keeping the celery fresh for up to four weeks.
Water jar. Cut the base off the celery and stand the stalks upright in a container filled with a few inches of water. Cover the top loosely with a plastic bag and store it in the refrigerator. Change the water every couple of days.
Plastic bag and paper towel. Wrap the celery in a damp paper towel and then place it in a plastic bag. Store the bag in the crisper drawer of your refrigerator.
Plastic wrap. Nobody online says to do this, but I don’t know why. For years I’ve wrapped my grocery-store celery in plastic wrap and kept it in the fridge. It stays good for about three weeks. Freezing. For long-term storage, you can freeze celery, although it will become soft and is only suitable for cooked dishes afterward. Wash and chop the celery, blanch it in boiling water for three minutes, then cool it quickly in ice water. Drain and freeze it in airtight bags or containers.
texture, harvest celery in the morning when the plants are cool and full of moisture. Store harvested celery in the refrigerator, wrapped in aluminum foil. Growing celery requires patience and attention to detail, but the rewards of home-grown, crisp, and flavourful stalks are well worth the effort. x

By Tania scott
Edible flowers are a great way to boost your antioxidant intake.
Edible flowers are defined as harmless and non-toxic plant parts, which have health benefits when consumed as food. Although our perception of flowers is that they are more ornamental than edible, in recent years there has been a plethora of scientific papers demonstrating their nutraceutical, phytonutrient and health benefits. A 2023 article in the journal Food Reviews International explains the benefits of edible flowers:
Traditionally, edible flowers have been used in alternative medicine by several cultures around the world. Recently, they have gained in popularity as a new trend in worldwide gastronomy because they have been added as ingredients in food and beverages since they have impor-
tant organoleptic properties [aspects of food that act on our senses] and beneficial health effects. In fact, edible flower consumption has increased in the last years, and many works have demonstrated that they are essential sources of macronutrients, vitamins, and antioxidant compounds, which give benefits like prevention against illness associated with oxidative stress, some cardiovascular illness, and cancers, among others.
From a historical perspective, the consumption of flowers can be traced back thousands of years in Ancient Rome, Greece, Persia and Asia; and from diverse ethnographic records, such as among the Inuit of Alaska and Khoisan hunter-gatherers in Africa.
Health benefits
For the home gardener, edible ornamental flowers can be a great source
of antioxidants. In particular, many edible flowers are a rich source of the antioxidant anthocyanin. Anthocyanins are powerful flavonoids that help regulate cellular activity and have numerous biochemical and antioxidant effects.
Anthocyanins are also the blue, red, or purple pigments found in plants, especially flowers, fruits, and tubers. The word, anthocyanin, is from the Greek words anthos, meaning flower; and kyáneos, meaning blue. Researchers have found that anthocyanins have anti-inflammatory benefits and they are protective against diabetes, cancer and heart disease; and have antimicrobial and antibacterial properties.
Anthocyanin-rich edible flowers
When we consume anthocyanin-rich flowers we benefit from the support-


ive and protective features of this plant compound. In a 2022 issue of the journal Foods, a researcher writes: “The existing literature indicates that many ornamental plants growing in the immediate vicinity of humans can be an abundant source of anthocyanins.” And because edible flowers are very perishable and the concentration of phytonutrients in fresh flowers can significantly drop even after a few days of storage, it makes sense to grow your own flowers.
The home gardener who grows their own edible flowers can receive a real health boost. You can buy edible flowers as bedding plants at greenhouses but confirm with the operator that no pesticides have been used on the plants. If you are not sure, you can start flowers from seed, a budget-friendly way to include more flowers in your diet.
Here is a partial list of anthocyaninrich edible flowers. All of these flowers can be grown in your home garden, balcony or patio.
Butterfly pea (Clitoria ternatea). Vining plant that is little spicy. It colours food and is used in drinks, tea and cake. Grow indoors or as an
Antioxidants in our bodies protect our cells from getting damaged by harmful particles. These harmful particles, called free radicals, can come from things like sunlight, pollution, or just from our bodies doing everyday activities. Antioxidants help keep our cells healthy by stopping these particles before they can cause harm. You can find antioxidants in many fruits, vegetables, and other foods like flowers.
annual.
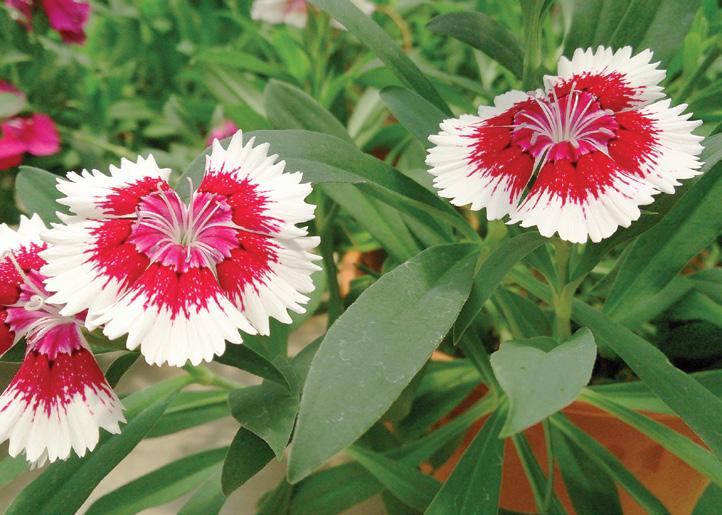
Chinese pinks (Dianthus chinensis). Sweet, low-growing plant used in tea and cake or as a decoction.
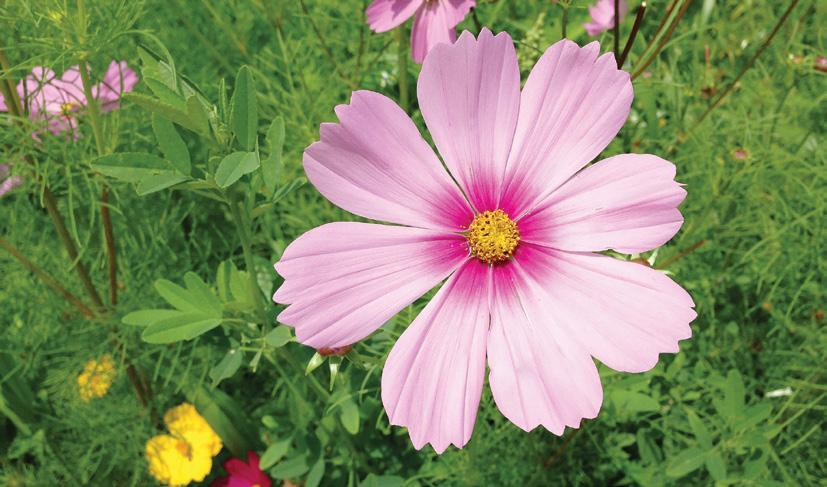
Cosmos (Cosmos bipinnatus). Tall growing, slightly bitter annual. Used in decoctions or tea.
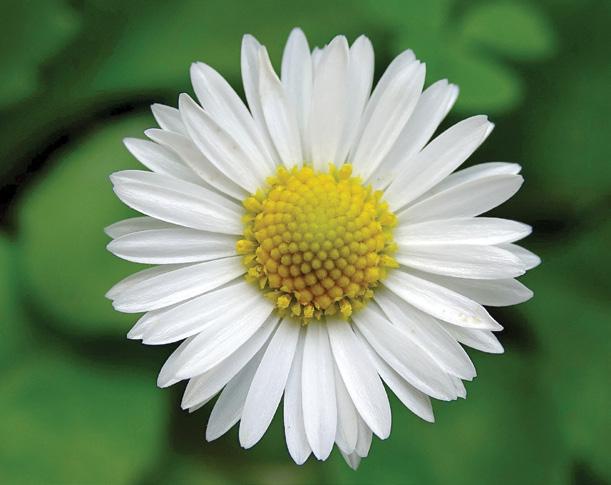
English daisy (Bellis perennis). This slightly spicy and bitter flower is used in salad, cake, porridge and as a decoction.
Geranium (Pelargonium x hortorum). The annual geranium has flavours of rose and mint. It is delicious in jam or ice cream, baked goods, flavouring honey or made into syrup.
Hibiscus (Hibiscus sabdariffa). Grow in pots or as an annual. It has a grassy taste, useful in drinks, jam, wine, ice cream, chocolates, pudding, cakes and as a flavouring agent.
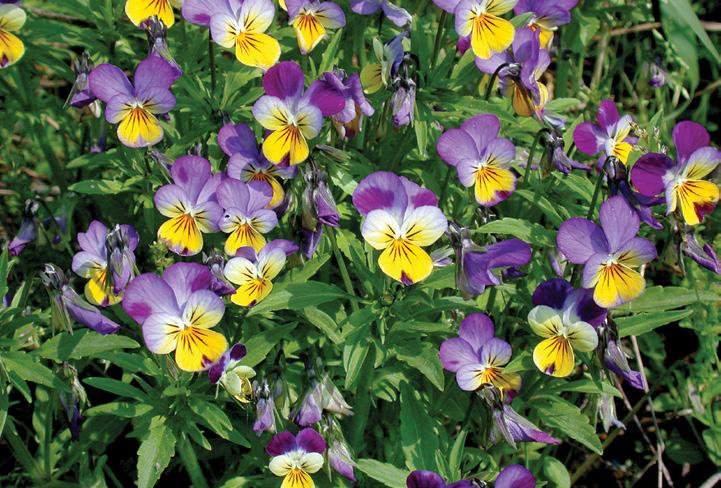
Johnny jump-up (Viola tricolor). A low-growing annual with a sweetish vanilla taste. Use it in salad, sauces, jelly, syrup, liquor, vinegar, honey, oil, candy, ice cubes, tea, beverages and desserts.
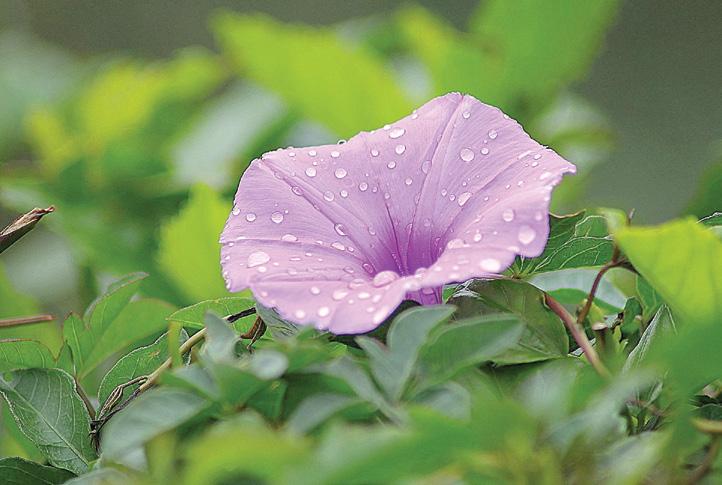
Morning glory (Ipomoea carica). An annual vine, it is slightly bitter and sour. The flowers go well in soup, cooked with beef, or as a decoction. The seeds, however, are a hallucinogenic drug that can be deadly. x •
Tania Scott is a seed saver and urban farmer. Tania and her family love growing things and have started the seed company Common Sense Seeds (www. commonsenseseeds.ca) in Calgary.

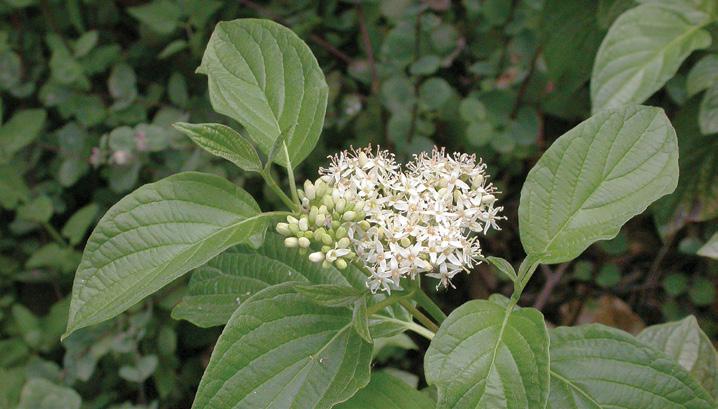
Dogwoods are among the most cherished trees and shrubs in Canadian gardens, admired for their stunning flowers, vibrant fall foliage, and hardy nature. There are 30 to 60 species in the world, almost half native to North America.
Here is a list of 10 of the best, one for each province. But don’t choose a dogwood just because it’s associated with your province here; if you can grow it and you like it, go for it!
British Columbia: Pacific dogwood. British Columbia’s mild, wet winters and warm summers make it an ideal environment for the Pacific dogwood (Cornus nuttallii). Native to the province, this variety thrives in coastal regions and upland areas. It features big white flowers in the spring and grows from 15 to 40 feet tall and is hardy to zone 7.
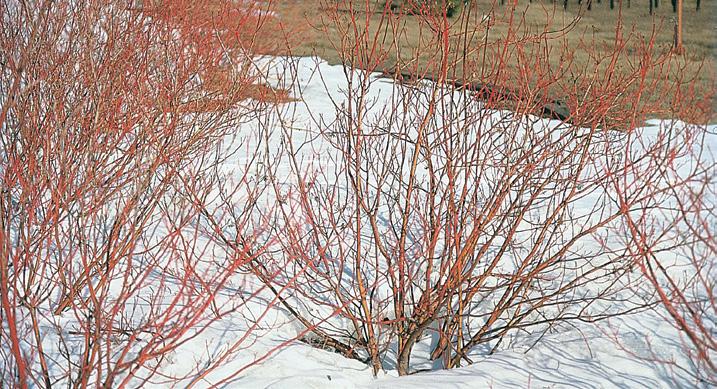
Alberta: Red osier dogwood. Alberta’s cold winters and dry summers demand resilient varieties. The red osier dogwood (Cornus sericea) is a top choice, known for its striking red stems that add winter interest. It is also native clear across the country. A common choice for gardens everywhere, it has sprays of tiny whiteish-green blooms in the spring that turn to white berries. Red osiers grow up to 9 feet high and are hardy to zone 2.
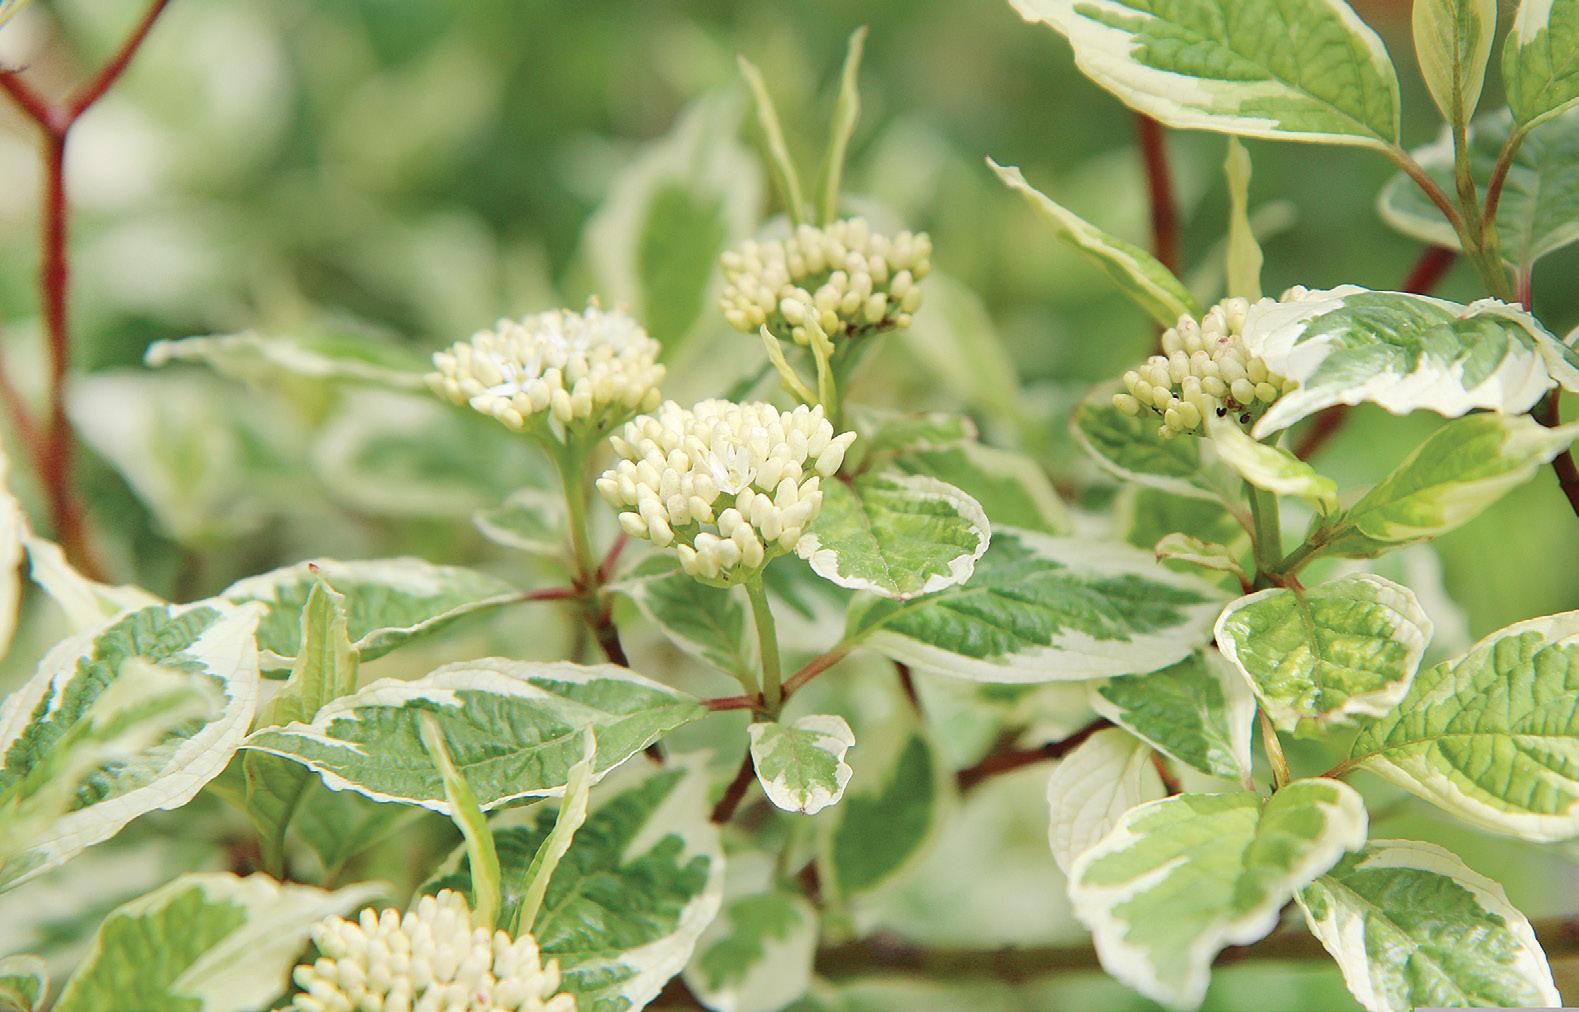
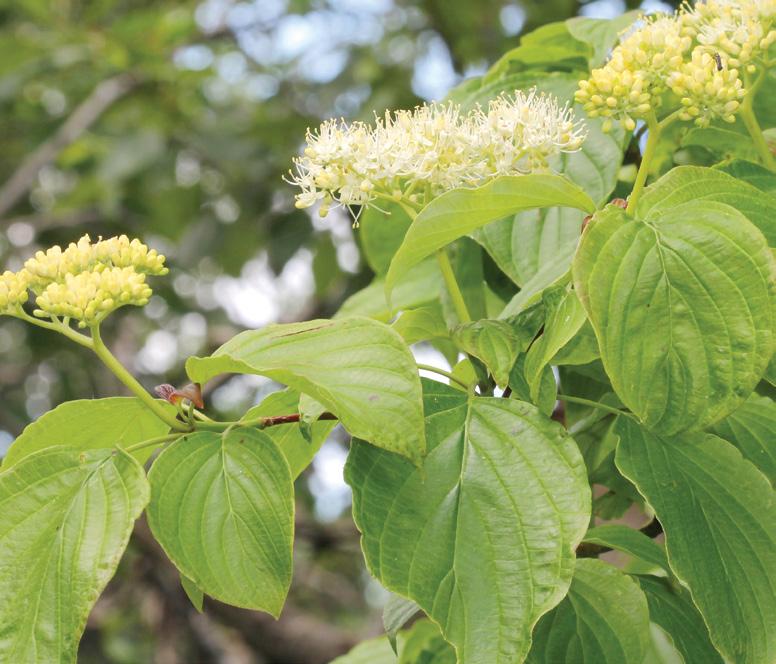
Saskatchewan: Tatarian dogwood. Saskatchewan’s extreme temperatures necessitate tough, adaptable plants. The Tatarian dogwood (Cornus alba) offers both durability and aesthetic appeal. The cultivar ‘Ivory Halo’, with its green leaves edged in white, is one of these. It gets as high as 10 feet and is hardy to zone 2.
Manitoba: Pagoda dogwood. Manitoba’s long, harsh winters and hot summers call for varieties that can withstand temperature fluctuations. The pagoda dogwood (Cornus alternifolia) is an excellent option, offering layered, horizontal branching and attractive blooms. It is native from Manitoba to Newfoundland. This tree can grow as high as 35 feet and is hardy to zone 3.
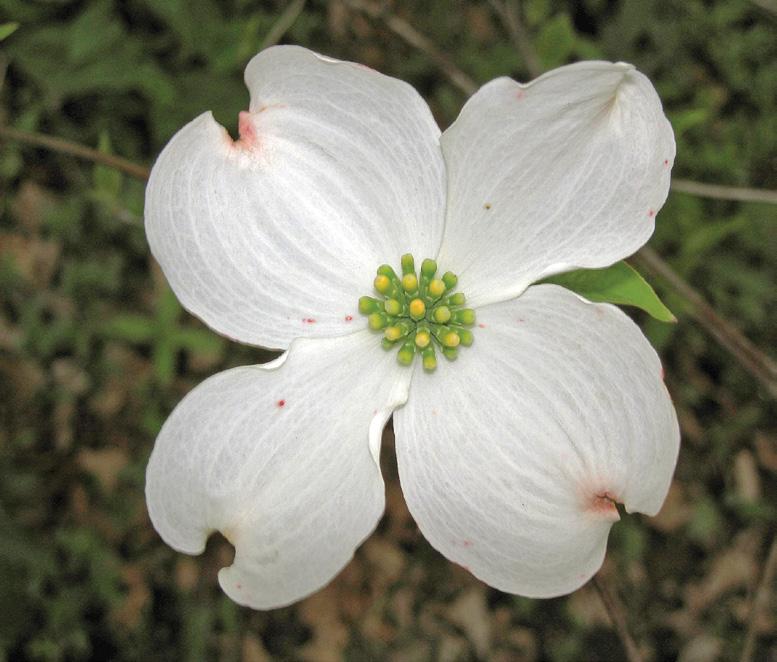
Ontario: Flowering dogwood. Ontario’s varied climate zones allow for a wide range of dogwoods. The flowering dogwood (Cornus florida) is a classic choice. It is native to the Carolinian forest, which extends into the southern bit of Ontario. The species has 3-inch blooms with four white bracts (technically, they are not petals), each tipped with a little nip. Cultivars come in tints of pink. In Canada, the tree gets up to 20 feet tall and is hardy to zone 5.
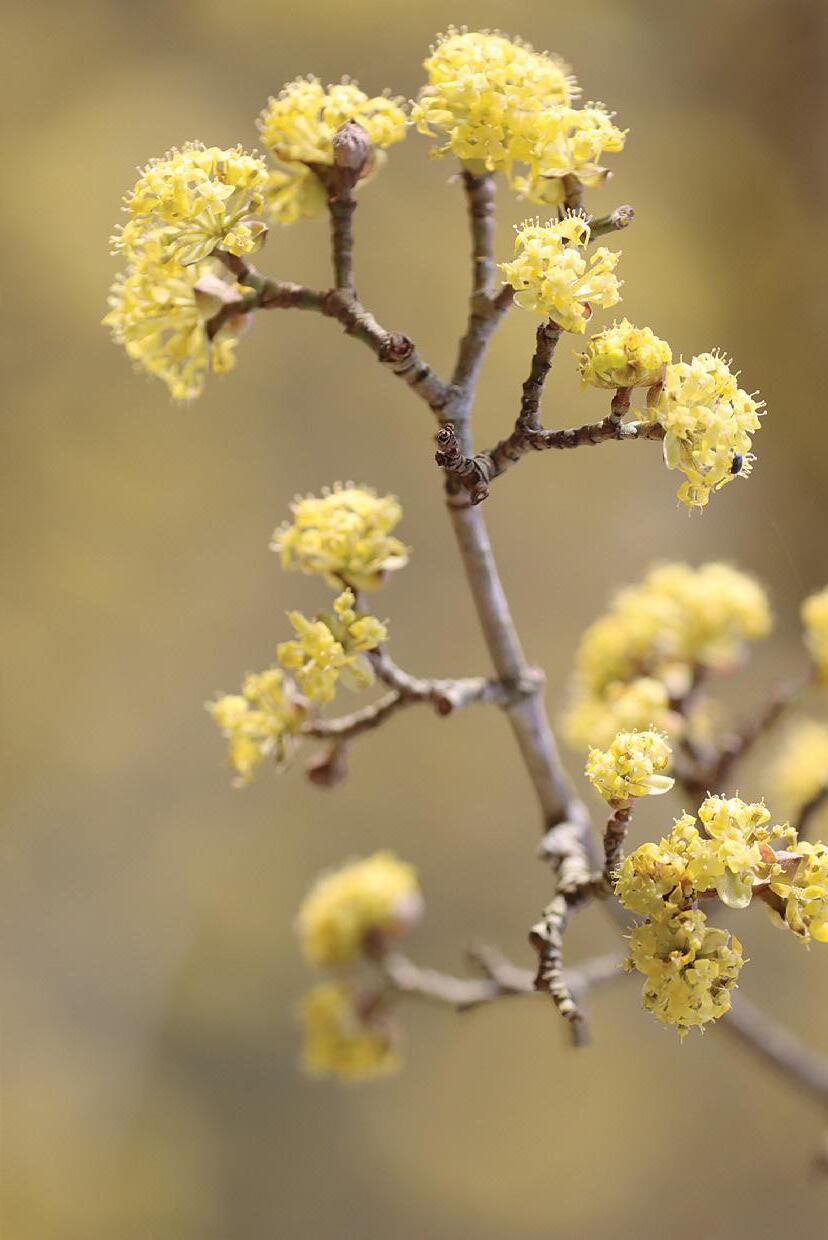
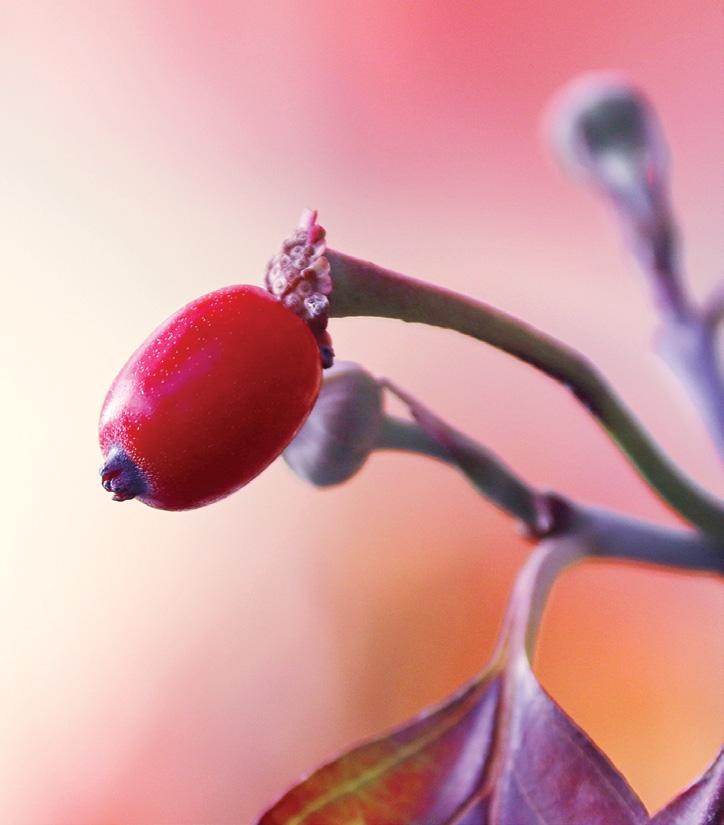
Quebec: Cornelian cherry. Cornelian cherries are another dogwood, C. mas, and one that is used as human food. With cheery yellow flowers in late winter or early spring before the leaves come out, it is a beauty. The flowers are followed by elongated red berries, ripening in late fall, which can be used for jams. Most online sources say that it’s hardy to zone 5, but Green Barn Farm in Notre Dame de I’lle Perrot, Quebec, swears that their cornelian cherries are hardy to -40° Celsius. Tree is about 8 feet high.
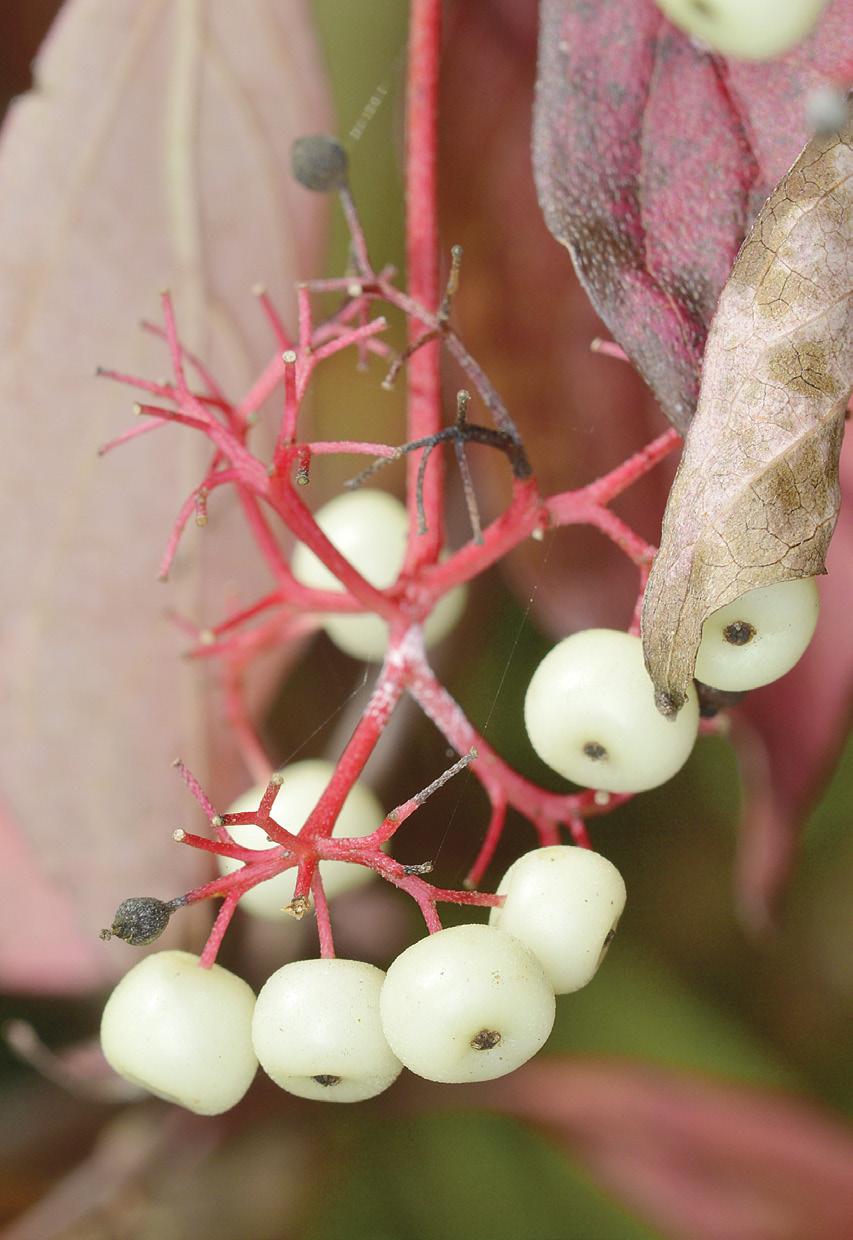
New Brunswick: Grey dogwood. New Brunswick’s maritime climate supports the growth of C. racemosa, appreciated for its adaptability and ornamental value. A native, it likes dry soil but is completely tolerant of the rain that the Maritimes get. Attractive panicles of cream flowers in spring turn to white berries that are gobbled up by birds. The foliage turns gorgeous purple-red in the fall, and once the berries and leaves are gone, the peduncles where the berries grew are red, adding winter colour. It is hardy to zone 4 and grows 10 to 15 feet tall.
Nova Scotia: Kousa dogwood. C. kousa is another dogwood with stunning flowers, although it isn’t native. It has been hybridized many times over, so it’s easy to find one that is suitable for your yard, with blooms from pink to white. It has an interesting berry in the fall: red, about an inch across, and looking like


something from Mars, full of bumps and divots. It is hardy to zone 5 and grows as high as 30 feet, depending on the cultivar.
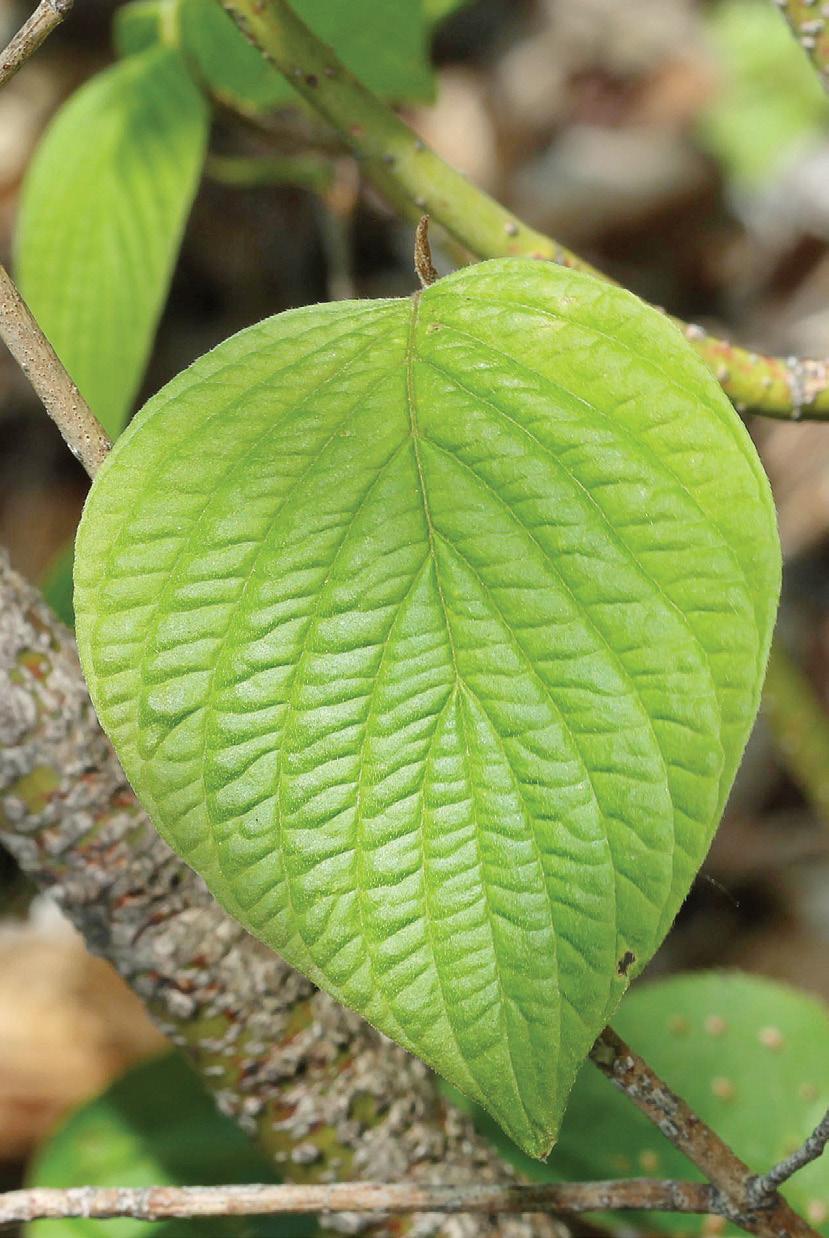
Prince Edward Island: Roundleaf dogwood. C. rugosa is a standard dogwood with rounder leaves than the others and the typical flat-topped panicles of creamy flowers shared with grey dogwood and the red osier. It is native to PEI and Eastern Canada, and it is well loved by the spring azure butterfly, for which it is a host plant. Birds love the whitish-blue berries too. It grows to 15 feet in height and is hardy to zone 3.
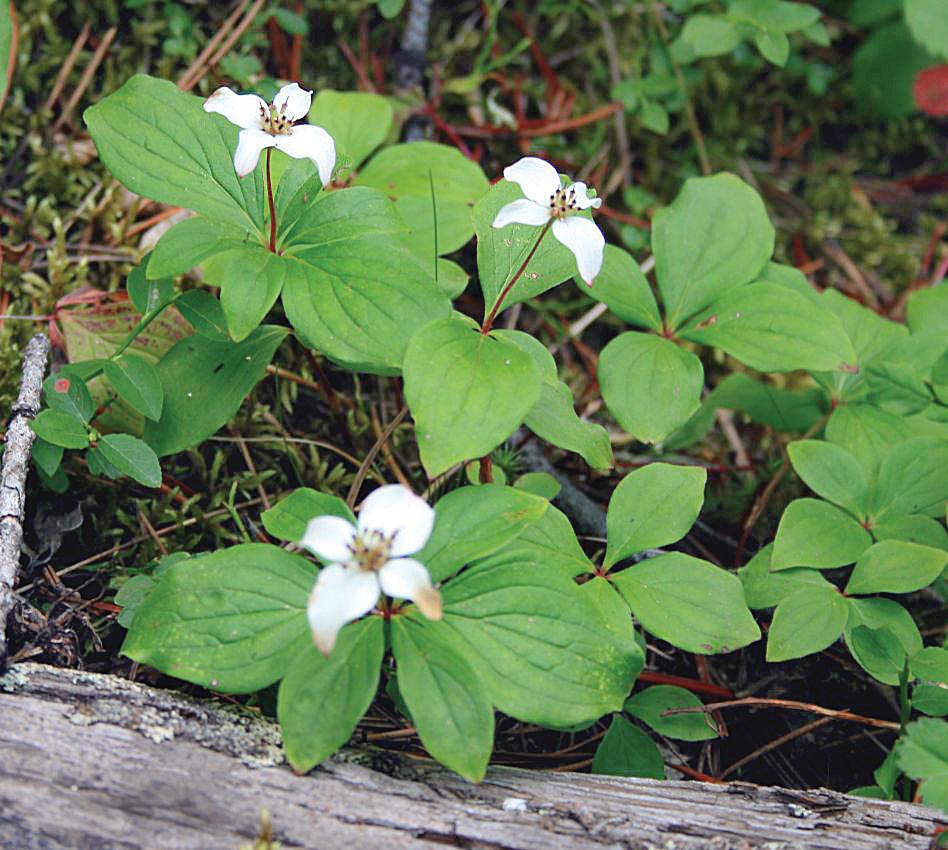
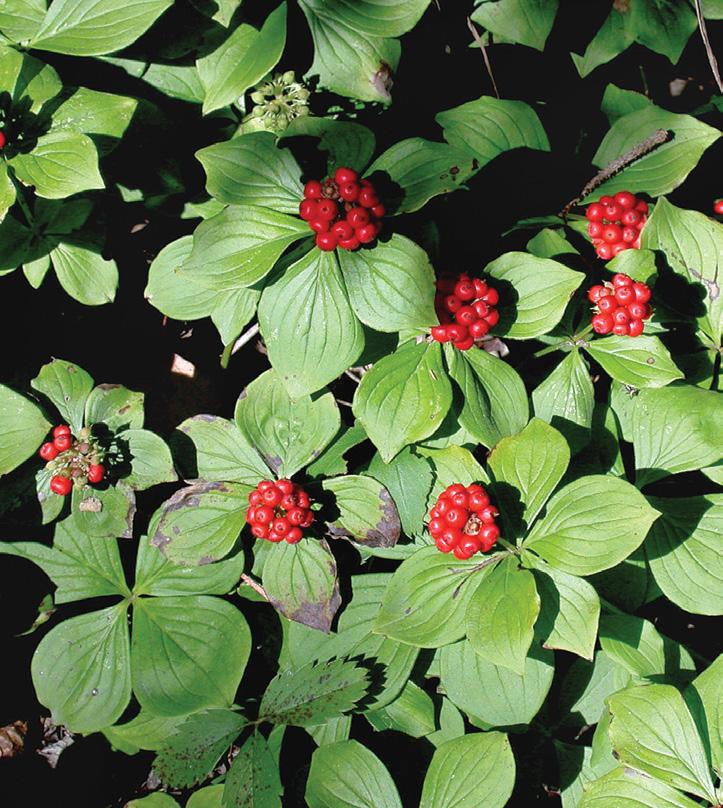
Newfoundland and Labrador: Bunchberry. Cornus canadensis is a subshrub that is herbaceous (aboveground parts die in winter) and grows to just 8 inches in height. The flower structures are beautiful big white ones, up to 1.5 inches across. The berries are red and hang in clusters. It is hardy to zone 2.
Caring for dogwoods
Soil. Most dogwoods prefer well-drained, slightly acidic soil rich in organic matter.
Watering. Consistent moisture is key, especially during dry spells and the establishment period.
Pruning. Prune in late winter to early spring to maintain shape and encourage new growth.
Mulching. Mulch around the base to conserve moisture, moderate soil temperature, and reduce weeds. x
By dorothy dobbie
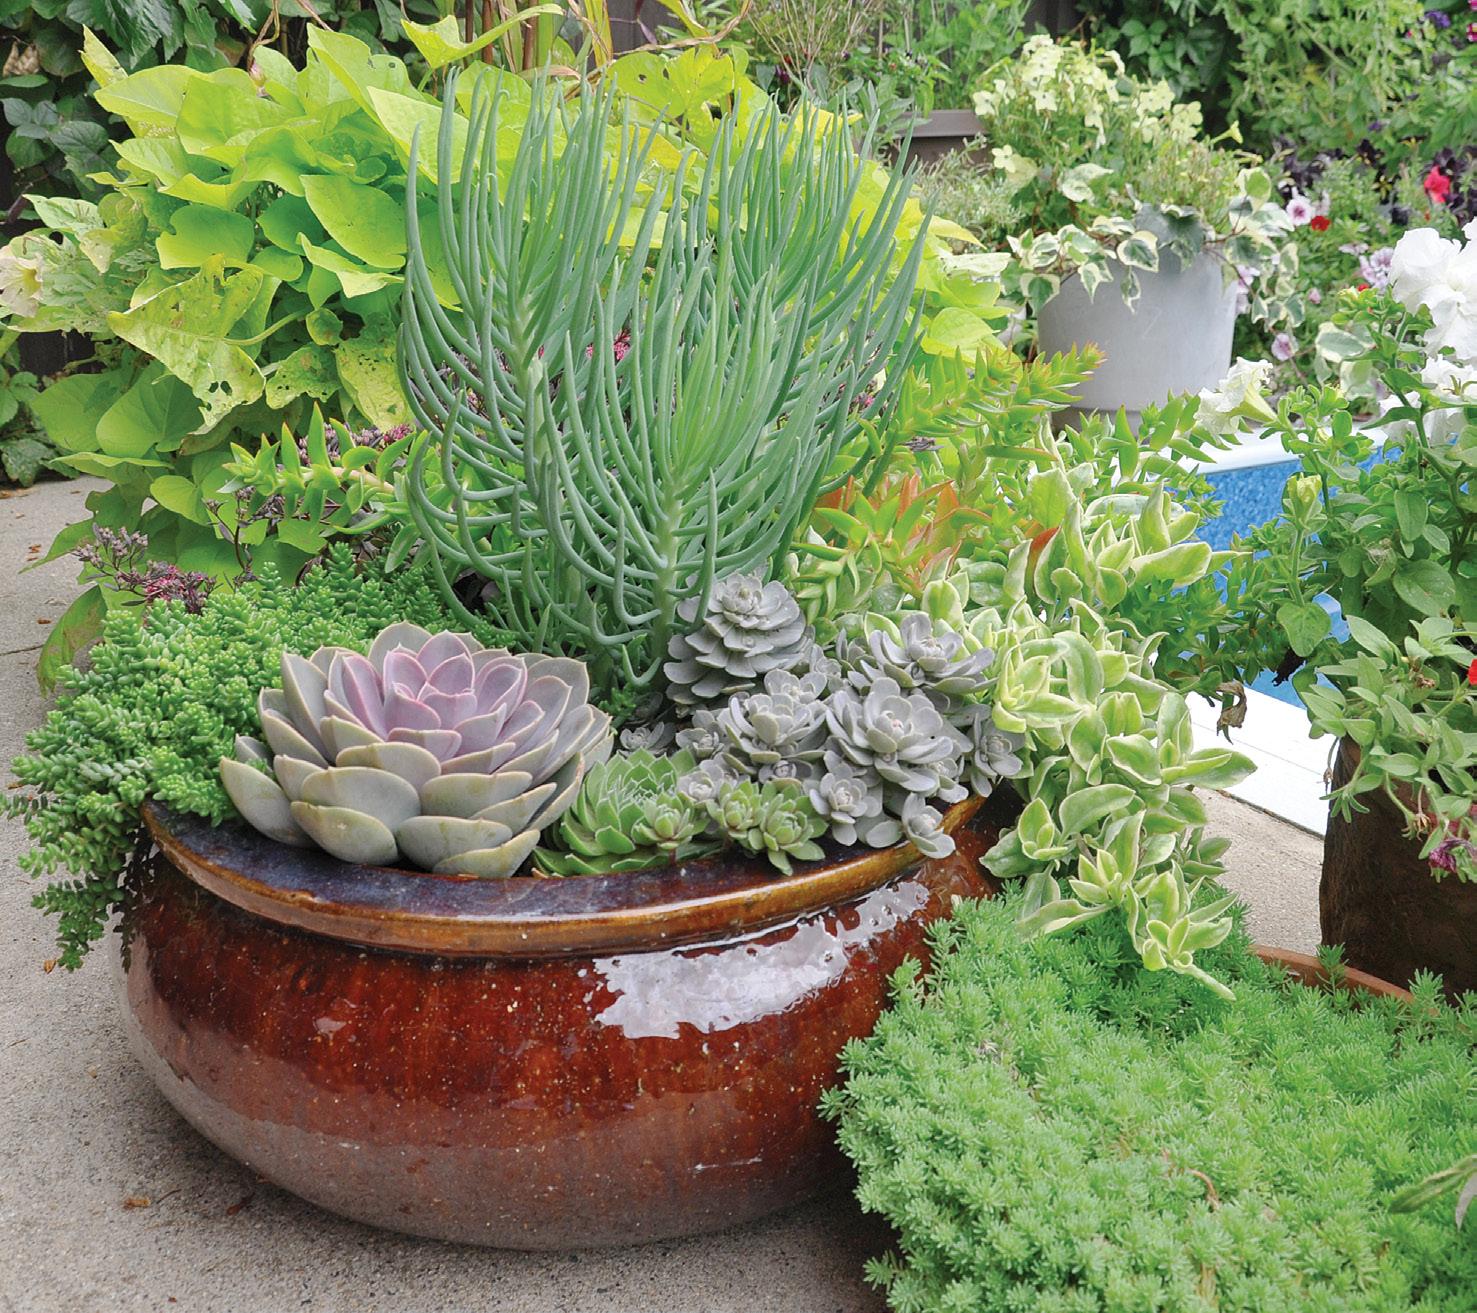
They are little water storehouses. In the desert, they have long been touted as the saviours of lost travelers. We are speaking of succulents, including cactus, which for some reason are often separated from their moisture-laden kin.
Not that all succulents belong to the same genus or even family. Cactus, for instance, are in their own family but they are still succulents.
What they all have in common is this ability to store water for use in times of drought. They can live on dew and even mist with their shallow roots ready to suck up every drop of moisture available. They store the moisture in stems, leaves and some roots. Certain succulents have no leaves – cactus for example – and are able to use their stems to photosynthesize. In this process, they open their stomata during the night to take in carbon dioxide and store it until the sun comes out. This is a process known as Crassulacean acid metabolism.
Succulent stems are thick and tough, covered in wax to help them store water. Because of this, you will often hear that succulents are easy-care plants. That has not been my experience. They are sensitive
to watering regimens.
To help avoid potential problems make sure your plant has ample drainage and that the soil is porous, allowing water to quickly drain through. Water less frequently but thoroughly when you do water, then let the soil dry out at least in the top inch or so. Think about what happens in their natural desert or rocky mountain slope habitat. It will be very dry, then a deluge will fall, heralding the growing season. If you can mimic what happens in the natural environment of your particular succulent, your watering routine will probably be successful.
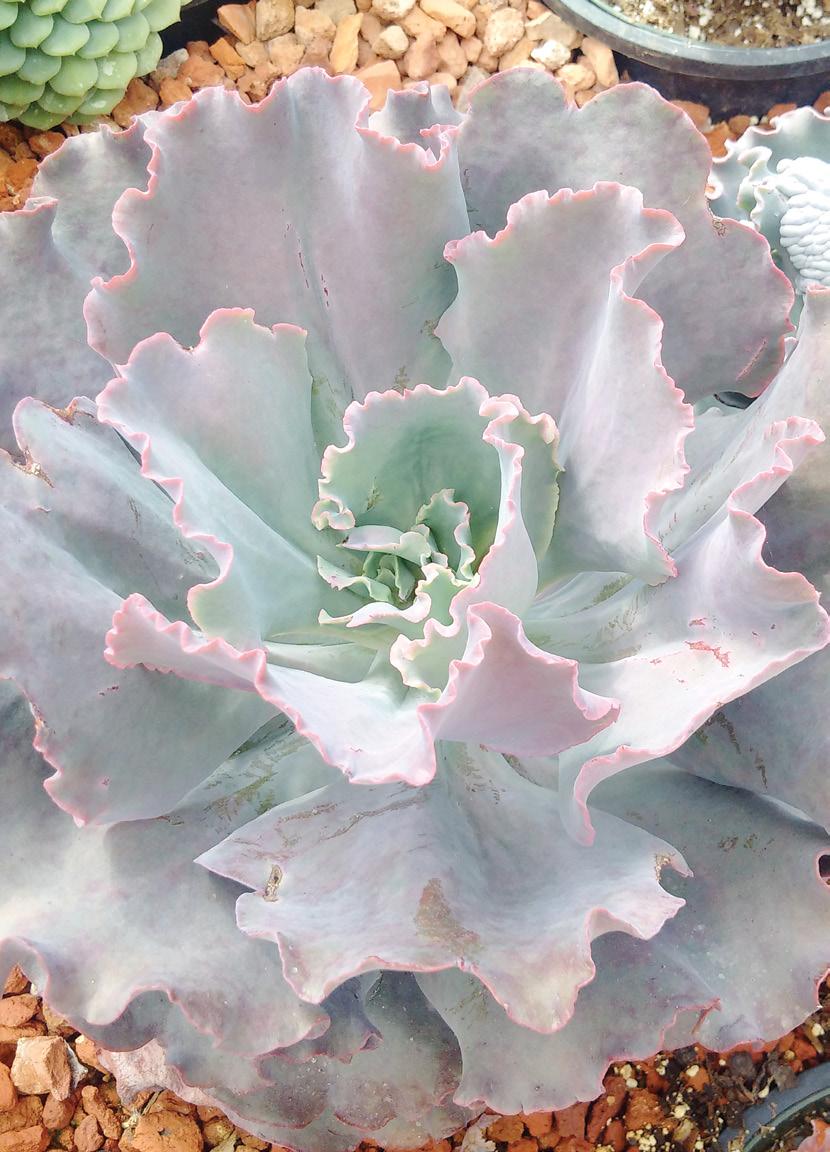
If the leaves turn yellow, it can be a sign of underwatering or overwatering. Be sure to check the soil. A sign of underwatering is that the leaves at the top become crinkled or shriveled. On the other hand, if the leaves become swollen, look puffy and feel mushy, you have given the plant too much water. There are thousands of succulents, and they are often sold unnamed. That being said, you are probably familiar with jade plants and Echeveria (also called hens and chicks, but not to be confused with Sempervivum which include the hardy hens and
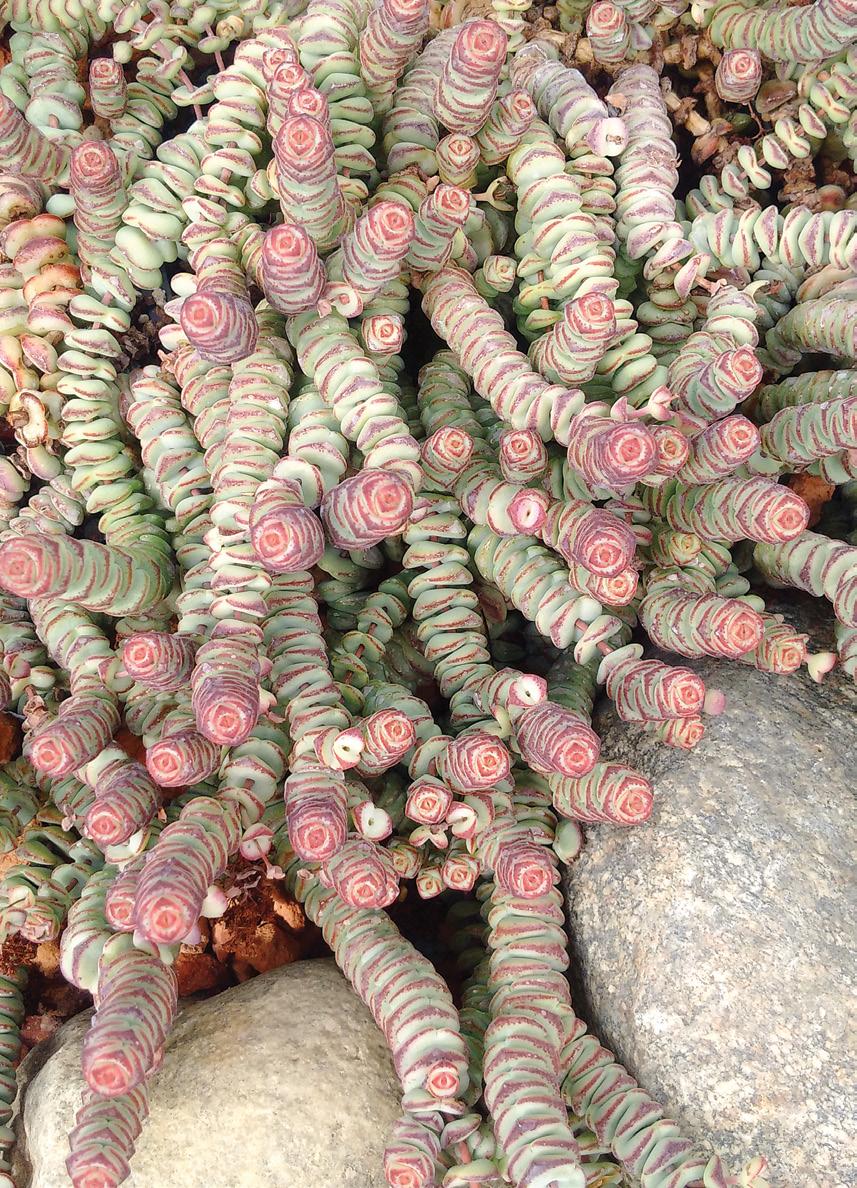
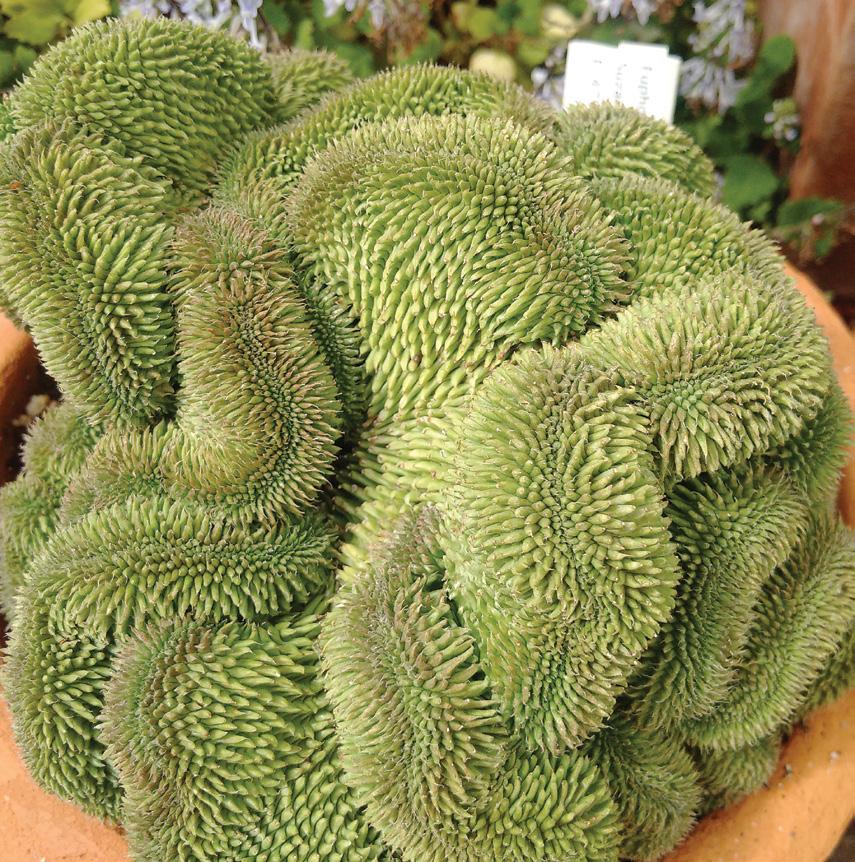
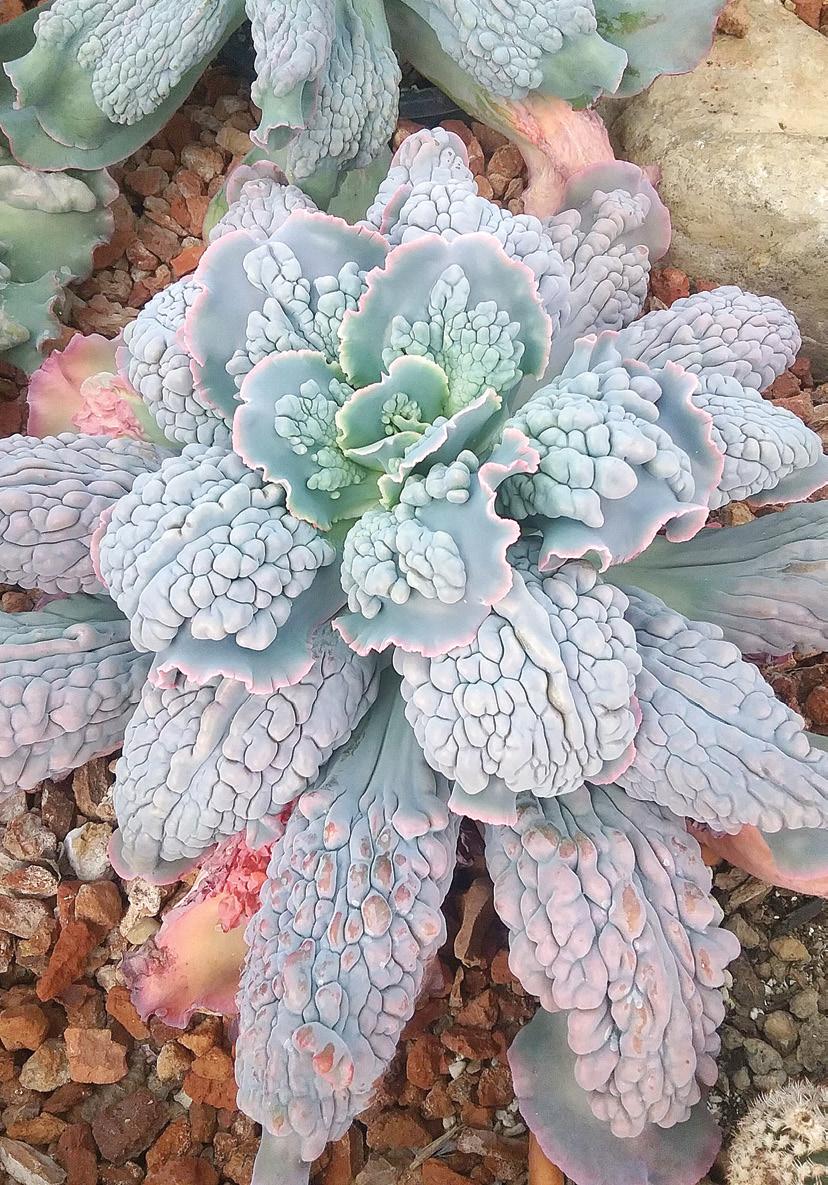

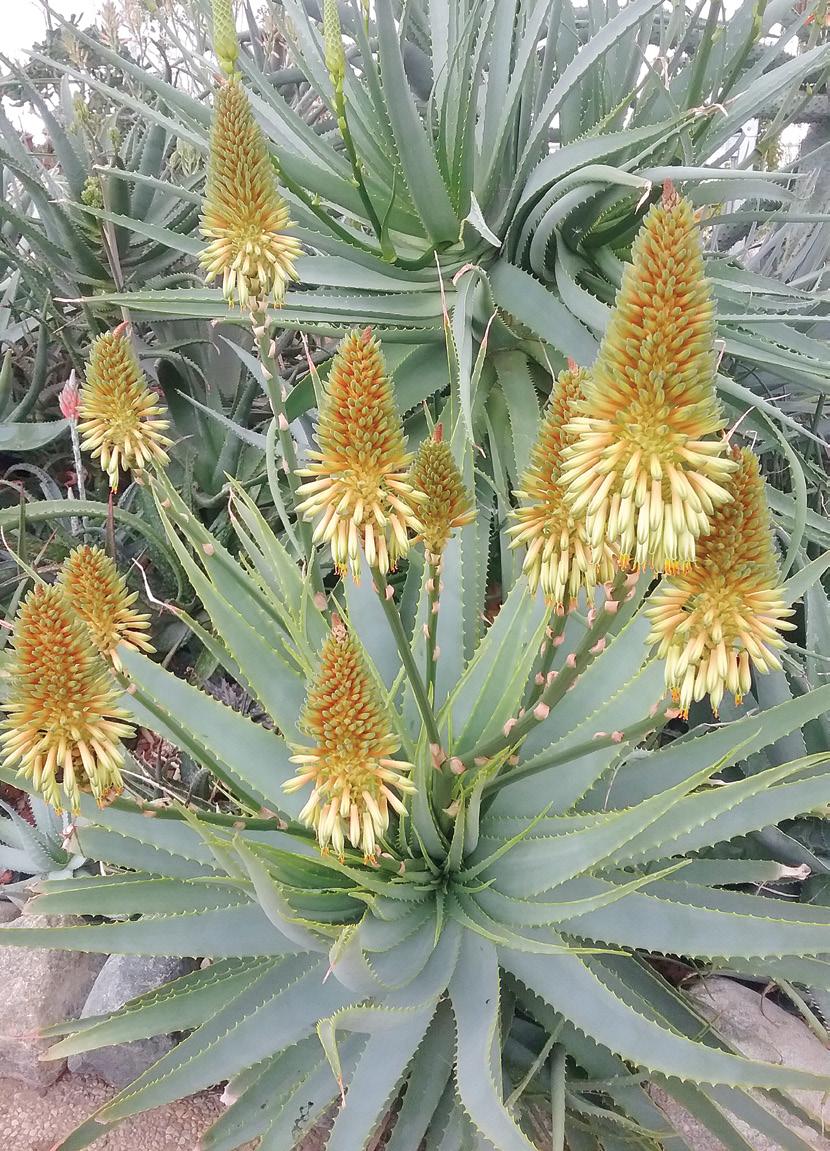

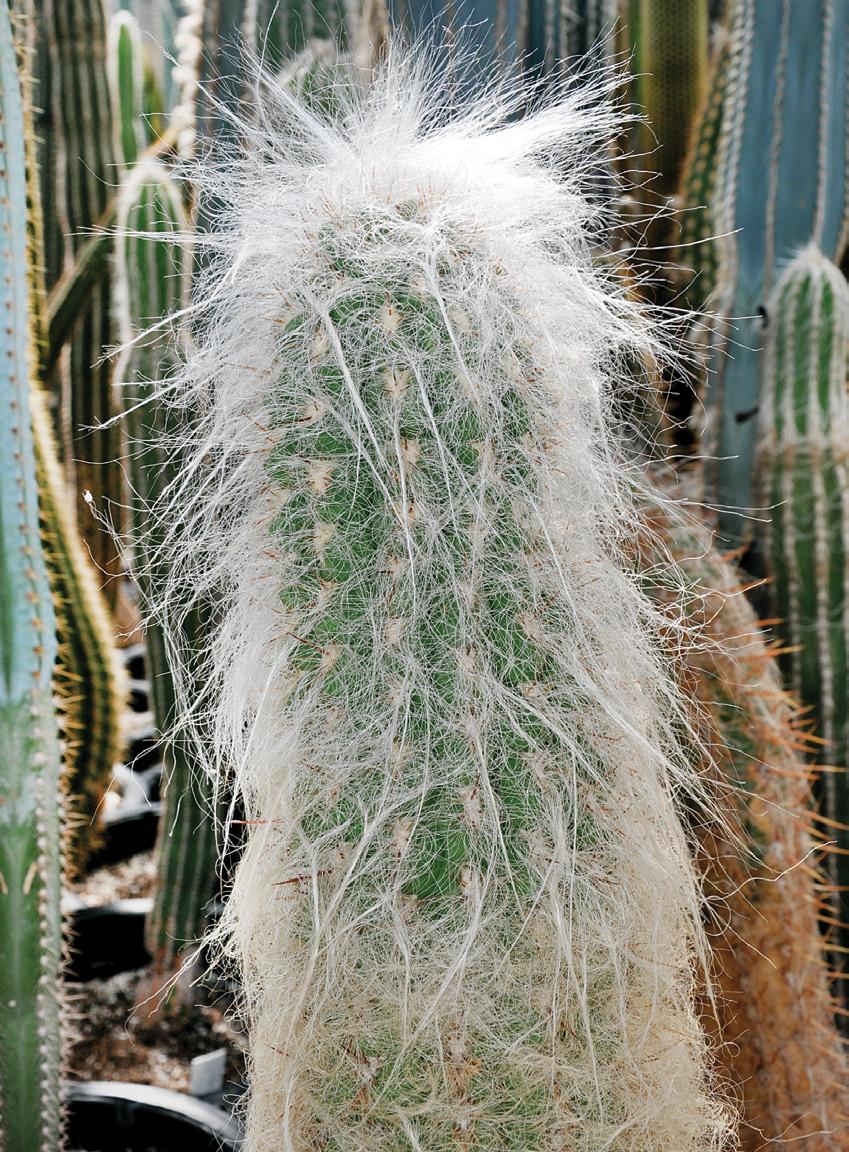
chicks we all know). You are probably also familiar with the rubbery leaves of peperomia, which is sometimes classed as a semi-succulent. Aloe vera will be on your list, and perhaps you will have heard of burro’s tail and kalanchoe. The well-loved and reliable snake plant is still another. My current favourite is lithops, the living stones, one of the fascinating exotics.
Some of these pants flower readily others are more reluctant. But when they do flower, it is worth the wait. The blooms are often fluorescently vibrant. They will have a better chance to bloom if you give them a summer holiday outside in the bright daylight. Most of these plants require lots of direct sunlight so be sure you have a south-facing window that gets sun for a good part of the day to keep them alive indoors
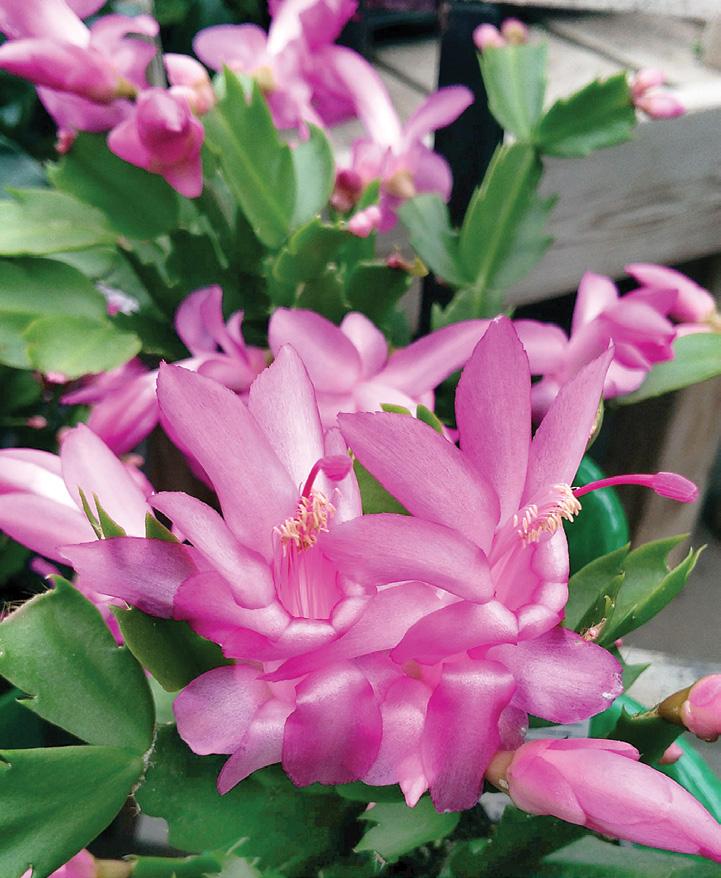
If you are new to succulents, your indoor collection might start with the more light-forgiving jade plant or a peperomia or the very shade-tolerant snake plant (also known as mother-in-law’s tongue). You may already have an old favourite in your home –Christmas cactus are also succulent and they are happy in a north facing window.
If you become fascinated with succulents, you will move on to the endless list of exotics and grow them outdoors for at least part of the year. Getting to know them reveals a whole world of wonder. x

You can propagate succulents from a single leaf, from a cutting of the stem or by removing offsets. For leaf propagation, choose a full healthy leaf and gently twist it off the plant. Get a clean break without leaving any leaf tissue behind. Allow the break to callus in a dry, shaded area for a couple of days. Then lay it on some well-draining succulent soil in bright light and mist it with water every few days. After a few weeks, roots and small new plants (pups) will start to form at the base of the leaf. For stem cuttings, choose a healthy stem around 3 to 5 inches long. Cut it, just above a leaf, with a clean knife or scissors. Let it callus for a few days, then insert the callused end into well-draining succulent soil. Water it lightly, keep it in a bright place, and in a few weeks it will start to grow. Alternatively, you could put callused leaves or stems into a jar of water and wait for roots. (This is trickier with leaves because you just want the bottom of the leaf submerged.) Change the water about once a week. When you have a nice bunch of roots, plant into succulent soil.
Offsets are the easiest way to get new plants from succulents. Look for small baby plants growing around the base of your parent plant. Gently remove them. The offsets may already have roots, in which case you can plant them into a new pot. If they don’t have roots, let them callus then plant them as with leaves or stems, above.
By shauna dobbie

The lily leaf beetle or LLB (Latin name: Lilioceris lilii) is a destructive pest that poses a significant threat to lily (in the Lilium genus) and fritillary (Fritillaria) plants. Native to Europe and Asia, this bright red beetle has become an invasive species in North America, causing extensive damage to both ornamental and wild lilies and fritillaries.
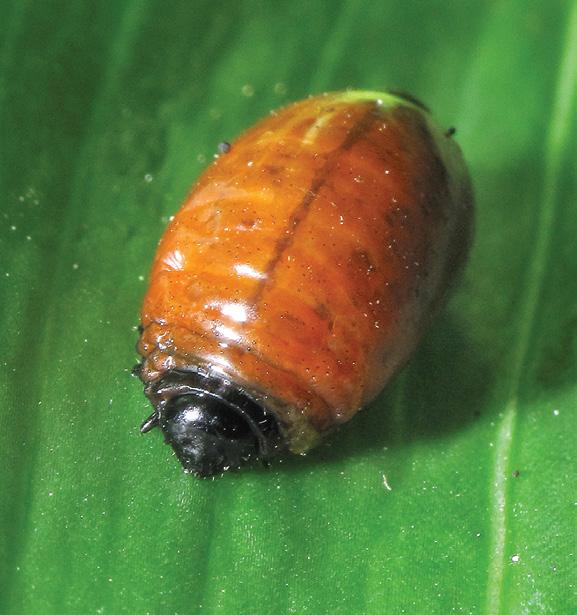
It is easily recognizable by its vibrant red colouration, measuring about 1/4 to 1/3 inch in length. Its life cycle begins in early spring when adults emerge from the soil and lay clusters of orange eggs on the undersides of the leaves they are going to devour. The larvae, which are orange with black heads, hatch within a week and begin feeding voraciously on the foliage. These larvae are not attractive; they often cover themselves in
Asiatic lily (Lilium asiatica)
Canada lily (Lilium canadense)
Checkerboard fritillary (Fritillaria meleagris)
Crown imperial (Fritillaria imperialis)
Easter lily (Lilium longiflorum)
Formosa lily (Lilium formosanum)
Oriental lily (Lilium orientalis)
Persian lily (Fritillaria persica)
Stargazer lily (Lilium ‘Stargazer’)
Tiger lily (Lilium superbum)
Turk’s cap lily (Lilium martagon)

Check out this video for two organic control methods for lily beetles.

https://www.youtube.com/watch?v=ZW0rCsc-1gI
their own excrement, creating a protective shield against predators.
You may wonder why the predators are concerned about the feces because birds and insects aren’t usually repelled by such things; that’s more of a human reaction. It’s suspected that the feces contain toxins from the plants the larvae have been eating
After a few weeks of feeding, they
drop to the soil to pupate, emerging as adults in late summer to continue the cycle.
The feeding activity of both adult beetles and larvae can decimate lily plants. They consume leaves, stems, buds, and flowers, leading to stunted growth, reduced flowering, and, in severe cases, plant death. This pest's presence has significantly impacted ornamental gardens and commercial lily production.
Eradication and control efforts
You can use a couple of techniques to get rid of LLB in your garden but they all have issues.
1. Manual removal. Examine your lilies and fritillaries for red beetles or larvae. If you find any, get to work. Pick off the beetles and larvae and dump them into a bucket of soapy water. The

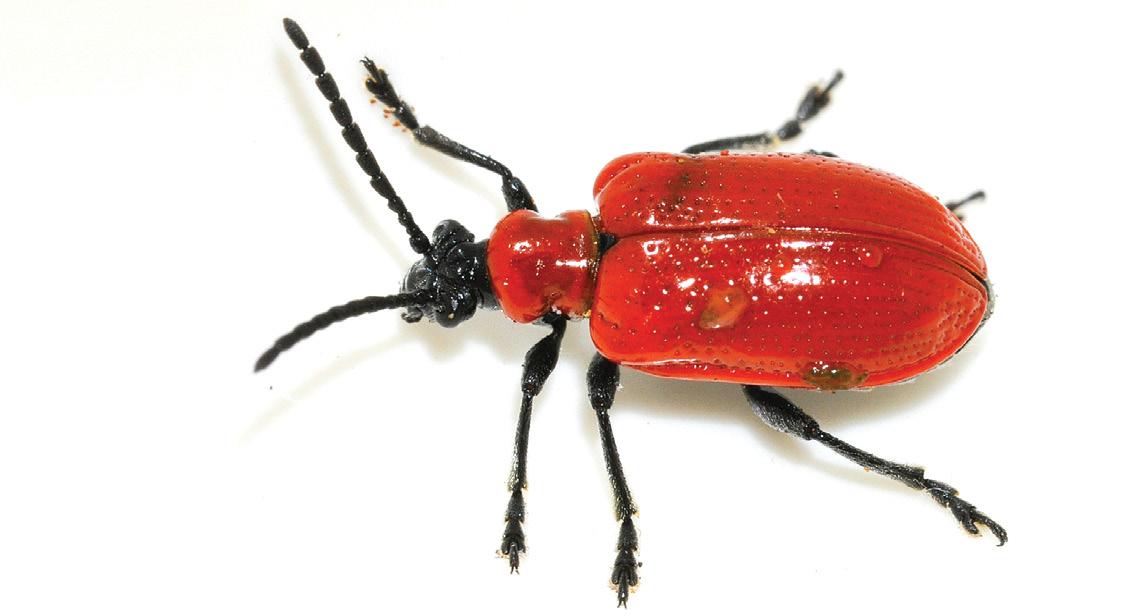
adults will typically jump off the plant and lay on their backs in the soil, where they are hard to see. This method is labour-intensive but effective in small gardens or for low-level infestations.
2. Chemical control. Products containing imidacloprid (a neonicotinoid) or neem oil (not approved for pesticide use in Canada) have shown efficacy. However, chemical treatments require careful application to avoid harming beneficial insects and the environment.
3. Cultural practices. Keeping a tidy garden can help reduce LLB infestations. This includes removing plant debris in the fall to eliminate overwintering sites. Many gardeners prefer to leave dead plants standing for winter interest and for the homes for beneficial insects. You can also loosen up the top couple of inches of soil around your lilies after the first few frosts of fall to capture some beetles.
BOB’S SUPERSTRONG GREENHOUSE POLY. 10 & 14 Mils. Pond liners. Resists hail, snows, winds, yellowing, cats, punctures. Long-lasting. Custom sizes. Free samples. Email: info@northerngreenhouse.com www.northerngreenhouse.com Ph: 204-327-5540 Fax: 204-327-5527 Box 1450 Altona, MB R0G 0B0
To place a classified ad in Canada’s Local Gardener, call 1-888-680-2008 or email info@localgardener.net for rates and information.
Biological controls are used on a wider scale through releasing the beetle’s natural enemies. Two parasitic wasps, Tetrastichus setifer and Lemophagus errabundus, specifically target LLB larvae. These wasps lay their eggs inside the larvae, eventually killing them.
Campaigns in Canada have been very successful at reducing LLBs. However, complete eradication remains challenging due to the beetle's ability to rapidly reproduce and disperse. Also, as the predators have been successful at reducing LLB, they have found themselves with nowhere to lay their eggs, so the predators’ population dwindled. That resulted in more beetles growing to adulthood. Populations of prey and predator have cycles like that. With more LLB, the predators will rebound. We should accept boom and bust years as part of a healthy environment. x
Some favourite garden ornamentals have “lily” in their common names, but they aren’t Lilium and aren’t affected by lily leaf beetle. These include:
African lily ( Agapanthus)
Calla lily (Zantedeschia)
Canna lily (Canna)
Cobra lily ( Arisaema)
Daylily (Hemerocallis)
Foxtail lily (Eremurus)
Lily of the valley (Convallaria)
Peace lily (Spathiphyllum)
Peruvian lily ( Alstroemeria)
Pineapple lily (Eucomis)
Toad lily (Tricyrtis)
Torch lily (Kniphofia)
Trout lily (Erythonium)
Water lily (Nymphaea)

Join the conversation with Canada’s Local Gardener online! www.localgardener.net
Facebook: @CanadaLocalGardener
Instagram: @local_gardener X: @CanadaGardener



By dorothy dobbie
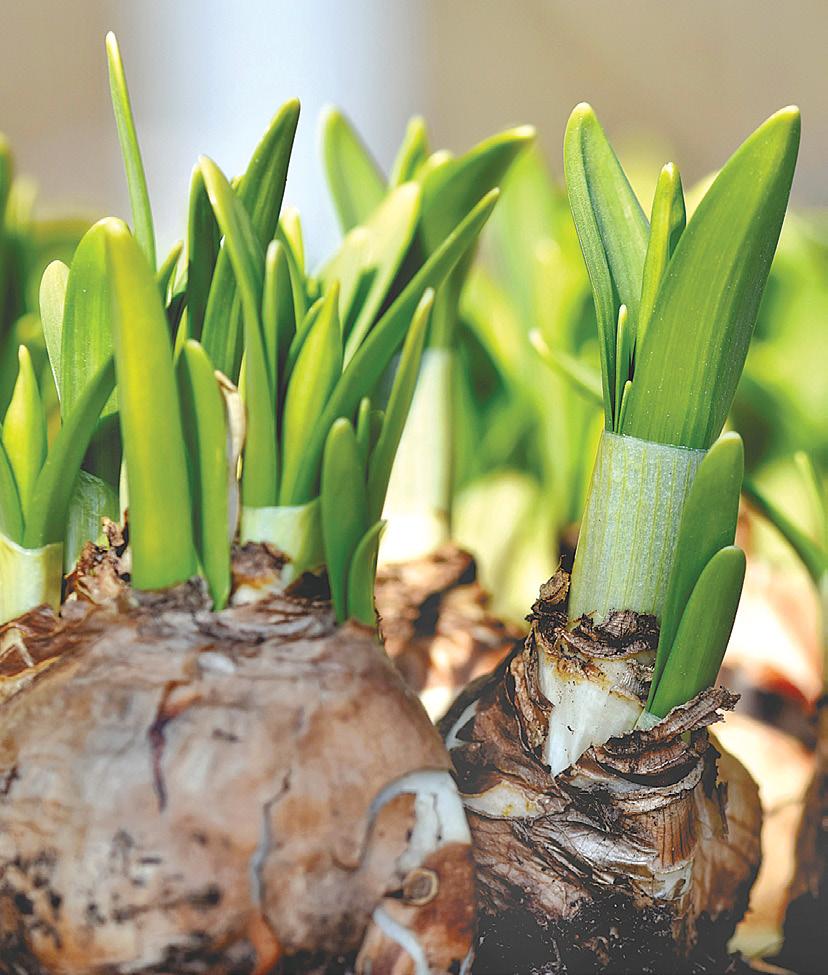
Some of the prettiest flowers grow from bulbs, corms, tubers and rhizomes, although we use the term bulb loosely to refer to all those storage systems.
Bulbs. Technically, bulbs (think onion) refer to plants such as tulips, hyacinth, allium and daffodils. These are typically bulb shaped, pointed on the top and flat on the bottom, the basal plate where the roots emerge.
There are two kinds of bulbs: those that bloom in spring (tulips, daffodils, squill, puschkinia, lilies, hyacinth, allium) that are planted in fall and can overwinter in most parts of Canada, and those that bloom in summer (gladiolas, some tender lilies, dahlia, agapanthus, amaryllis) that generally need to be planted in spring, then dug up and stored for the winter.
Bulbs propagate through several means. Flowers produce seeds which can be collected and planted but it can take years to get flowers. Some lilies form bulbils at leaf axils along the stem. Many produce
bulb offsets at the base of the mother bulb. Bulbs can be propagated by sectioning the bulb, slicing it vertically ensuring you have captured part of the basal plate and planting the cutting, and by more complicated means such as scaling and chipping.
Corms. A corm is a flatter version of a bulb and has a different anatomy consisting of solid material as opposed to the rings and layers of bulbs.
Neophyte gardeners may have trouble deciding which way is up on a corm and the answer is that there is a small growing tip on the centre on one side. This is the up side. The other side is flatter and may have vestiges of roots you can feel if not see.
Corms reproduce in several ways, some putting out tiny cormels around the corm roots that can be separated from the mother plant and propagated. This process may take several years to produce flowers. New corms, stacked above the old spent ones, are also generated by the plant.
When storing for winter, separate and discard the spent corm from the new one.

Corms can also be propagated by cutting them into sections, being careful to maintain part of the basal plate at the bottom, and planting the pieces, Corms include crocus, freesia, gladiolus, crocosmia and liatris. Of these, crocus and liatris are hardy and can be left in the ground, the others need to be stored in the same way as bulbs.
Tubers. Thinking tuber, think potato, that fleshy stem storage system having a whole world of nutrition for future growth. Tubers have no basal plate from which the roots grow but instead have a system of “eyes” which can send shoots up as new growth or down as roots.
Tubers can be sectioned and pieces grown into new plants as long as some eyes are included in the section.
In the flower world, tubers include peonies, tuberous begonias, cyclamen, and dahlias. Peonies, one of
Not all bulbous plants are hardy in Canadian conditions, and some must be brought indoors for the winter.
In general, they should be allowed to remain in the ground until the leaves die back, at which time they will have stopped regenerating the new flower requirements for the following season.
Most bulbs, once removed from the soil, should be allowed to dry

the most reliable of all hardy flowering plants in our country, can live up to 80 years.
Rhizomes. A rhizome is a thickened stem that runs underground sending up shoots and down roots similarly to tubers. Ginger, iris, alstroemeria, and daylilies are rhizomatous.
Rhizomes spread by growing horizontally under the soil. As they grow, they send out new shoots above ground and roots below ground at regular intervals. These new shoots can become independent plants if separated from the main rhizome. Rhizomes also grow new shoots from buds along their length, helping the plant spread and form large colonies.
Using a clean, sharp knife, cut the rhizome into sections. Each section should have at least one bud or eye and some roots attached. Allow the cut sections to dry for a day or two in a cool, dry place before planting them. x
out for two or three days before storing them in a cool, dark place. Trim the stems down two an inch or so above the bulb. Brush off the dirt (don’t wash) and set the bulbs on a mesh screen or something that will allow air to enter from all sides. Keep them out of frost but somewhere that will encourage drying.
They are best stored in a breathable container (mesh bags, card-
board, cloth, newspaper) with the bulbs protected from each other by sawdust, vermiculite, peat, sand, perlite, even shredded newspaper. The idea is to absorb excess moisture to avoid rot. Store the bulbs in a cool, dry place, preferably at a temperature between 7 and 15 Celsius.
Potted bulbs can be stored with the stems cut off without removal from the pots.
By shauna dobbie
When most gardeners think of flower bulbs, tulips, daffodils and hyacinths come to mind. While these classic favourites have their charm, there is a world of less-known flower bulbs that can add unique beauty and intrigue to your garden. And there are a few tender bulbs that require a bit more care but are well worth the effort.
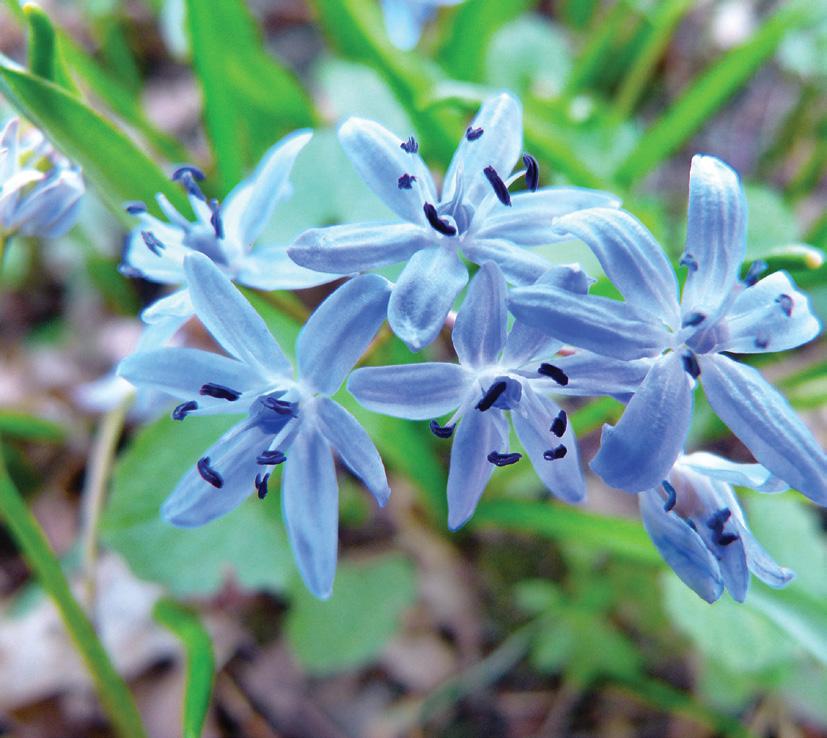
Siberian squill (Scilla siberica). Blooms in early spring. Hardy to zone 2. Siberian squill is one of the hardiest bulbs, capable of thriving in the coldest regions of Canada. Its vibrant blue, star-shaped flowers bloom in early spring, often pushing through the snow. These small but mighty bulbs are ideal for naturalizing in lawns, under trees, or in rock gardens. They prefer full sun to partial shade and well-drained soil. In some areas, this bulb is invasive.

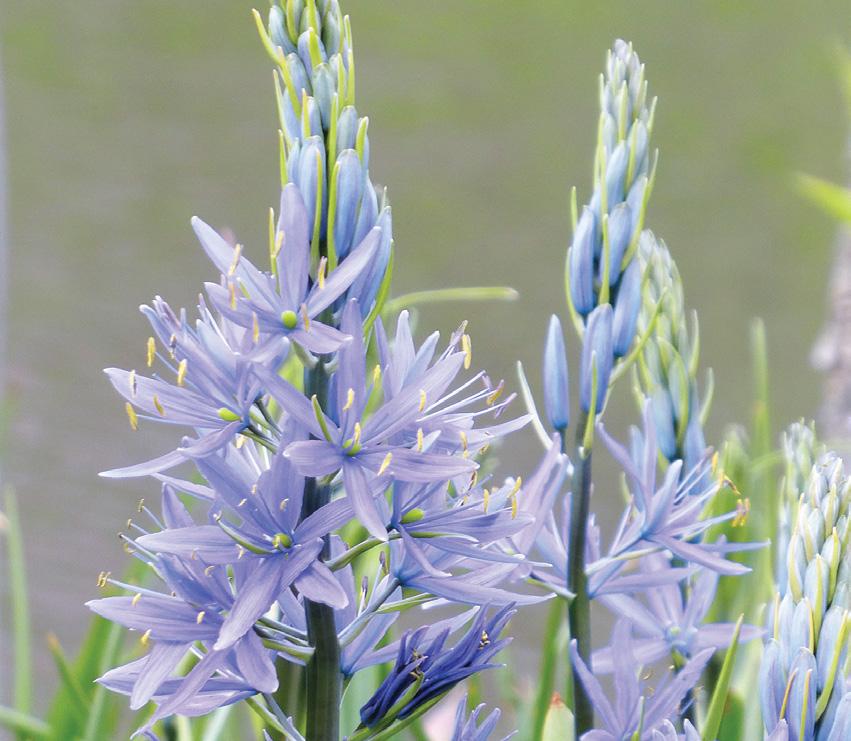
Quamash (Camassia). Blooms late spring to early summer. Hardy to zone 3. Camassia, also known as quamash, is a stunning bulbous plant native to North America. Its star-shaped, blue, purple or white flowers are borne on tall spikes and can create a striking display in the late spring garden. These hardy plants are perfect for naturalizing in meadows or along the edges of woodland gardens. They thrive in full sun to partial shade and prefer moist, well-drained soil.
Checkered lily (Fritillaria meleagris). Blooms mid to late spring. Hardy to zone 3. This flower is a unique and charming bulb with bell-shaped flowers that are checkered in shades of purple, pink, or white. The delicate-looking plants are surprisingly tough. They prefer moist, humus-rich soil and do well in both sunny and partially shaded spots. Plant them in groups for a spectacular display.
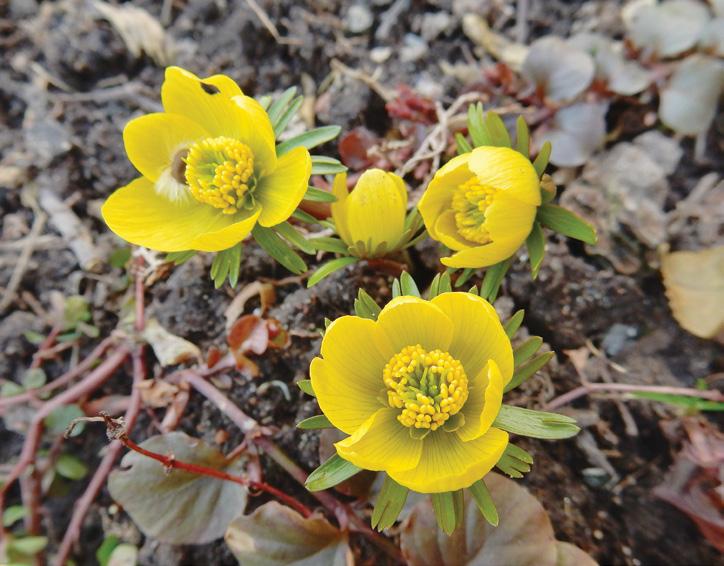
Winter aconite (Eranthis hyemalis). Blooms in very early spring. Hardy to zone 3. For gardeners looking to extend the blooming season, winter aconite is a must-try. One of the earliest bulbs to flower, its bright yellow, buttercup-like flowers can provide a welcome splash of colour in the late winter or early spring garden. Winter aconites are hardy and can tolerate cold, snowy winters. They thrive in partial shade and well-drained soil, making them ideal for planting under deciduous trees.
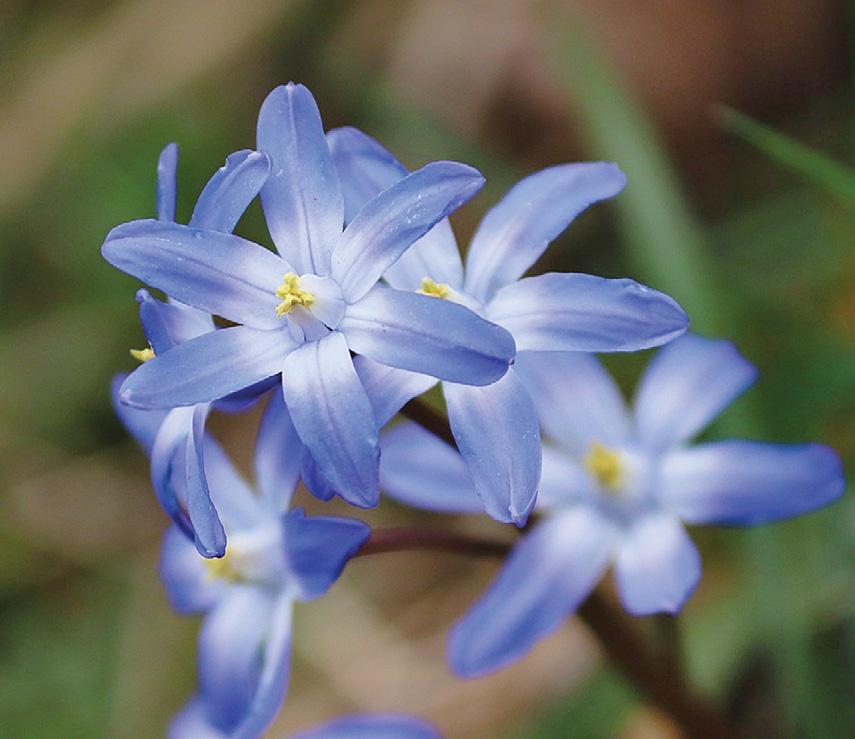
Glory-of-the-snow (Chionodoxa). Blooms in early spring. Hardy to zone 3. Glory-of-the-snow is a delightful bulb that produces clusters of star-shaped flowers in shades of blue, pink, or white. True to its name, it often blooms while there is still snow on the ground, bringing early colour to the garden. These bulbs are easy to grow and naturalize well, spreading over time to create carpets of spring colour. Plant them in full sun to partial shade in well-drained soil.
Summer snowflake (Leucojum aestivum). Blooms late spring to early summer. Hardy to zone 3. Despite its common name, the summer snowflake blooms in late spring, producing clusters of dainty, white, bellshaped flowers with green tips. These elegant bulbs are deer-resistant and thrive in both sun and partial shade. They prefer moist, well-drained soil and are excellent for planting in borders, under trees, or around ponds.
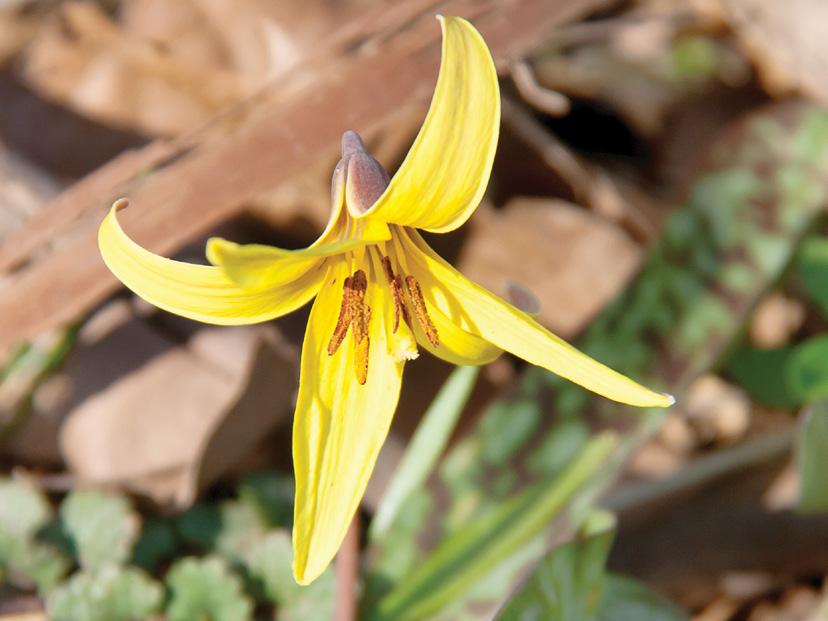
Dogtooth violet (Erythronium). Blooms in early to mid-spring. Hardy to zone 4. Dogtooth violets are charming woodland bulbs that produce nodding, lily-like flowers in shades of yellow, white, or pink. Their mottled, lance-shaped leaves add to their allure. These bulbs are perfect for naturalizing in shaded or partially shaded areas with well-drained, humus-rich soil. They bring a touch of wild beauty to the garden and are a favourite among pollinators.
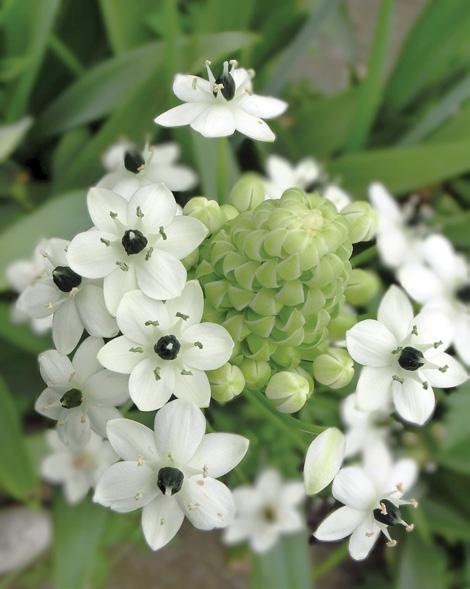
Star of Bethlehem (Ornithogalum). Blooms in spring. Hardy to zone 6. This plant features clusters of star-shaped flowers, usually white, although some species have yellow or orange blooms. It prefers full sun or well drained soil.


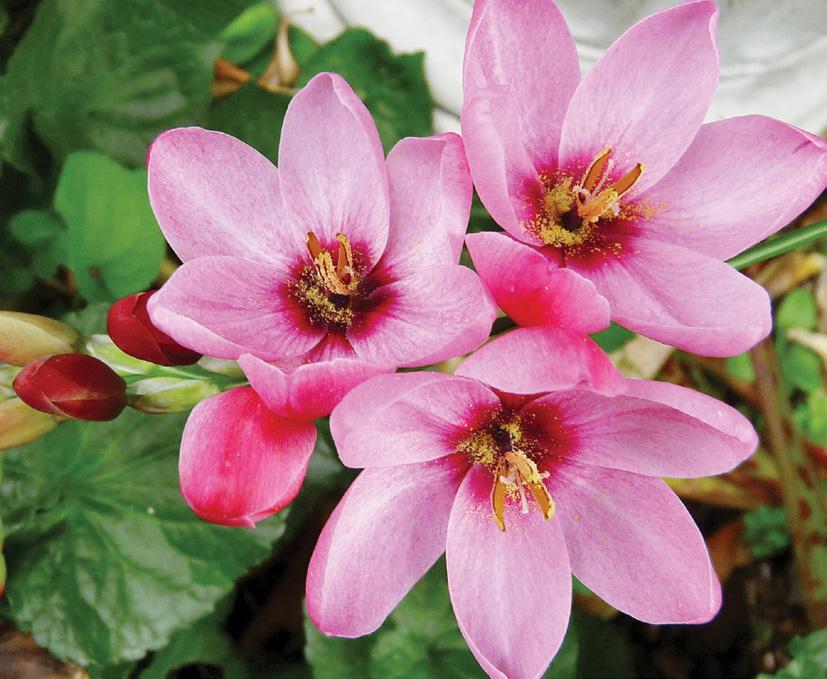

Corn lily (Ixia). Blooms in mid-summer. Hardy to zone 8. Corn lilies bear slender stems topped with star-shaped flowers in shades of pink, purple, red, or yellow. It will do best in a sunny spot with welldrained soil. It will take a couple of degrees of frost, but that is it. Anyone below zone 8 should lift them in the fall.
Tender bulbs
Dig these beauties up and store them in a cool (not freezing) dark place for winter.
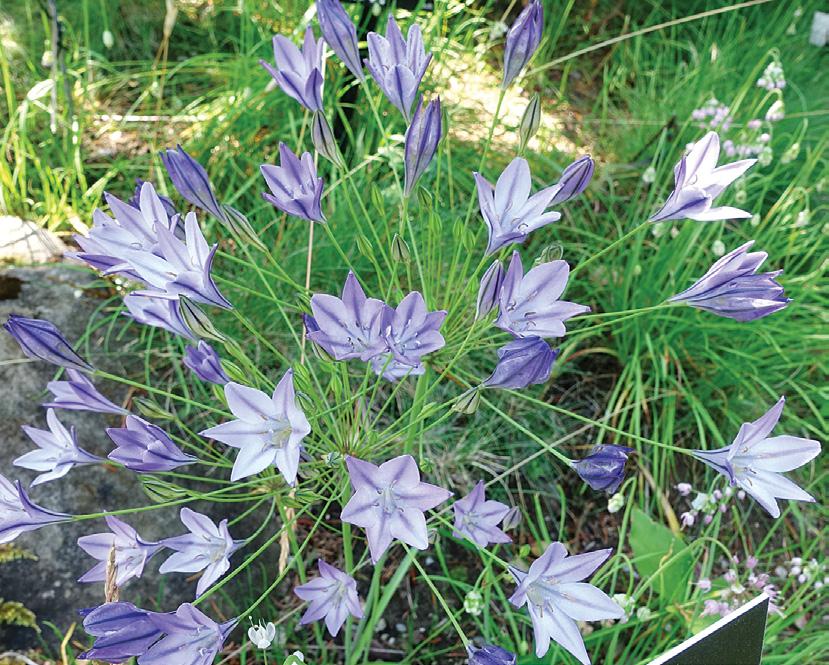
Brodiaea (Triteleia laxa). Blooms in late spring to early summer. Brodiaea produces clusters of funnelshaped flowers, usually in shades of blue, purple, or white. It prefers full sun to light shade and welldrained soil. Some species are hardy and can remain in the ground over winter in milder areas. If you can leave glads in the ground, try leaving brodiaea.
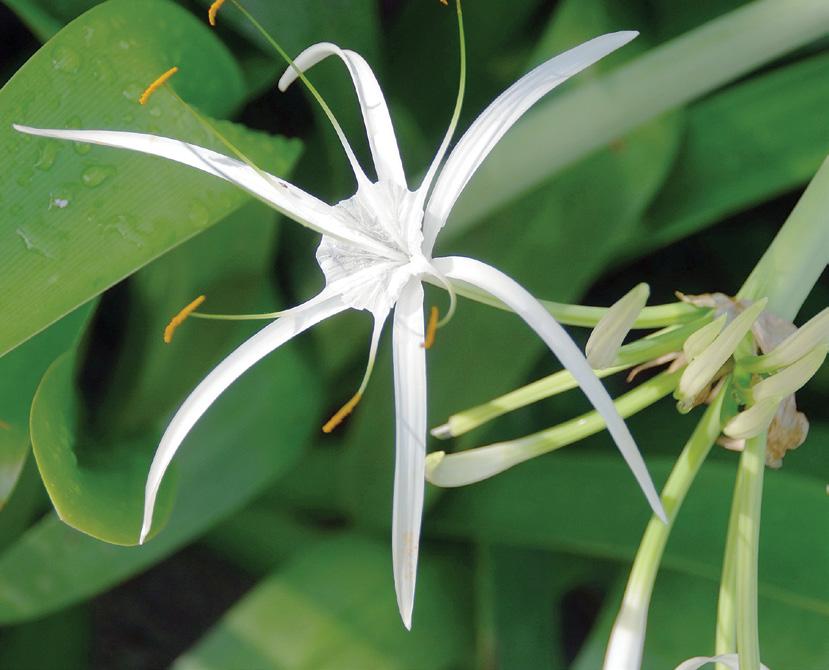
Spider lily (Hymenocallis). Blooms in mid-summer. These are known for the distinctive spider-like shape of their flowers, usually white and fragrant. They thrive in full sun to partial shade and moist, welldrained soil.
Pineapple lily (Eucomis). Blooms in summer. Characterized by rosettes of strappy leaves and a tall spike with a cluster of star-shaped flowers, in white, yellow, purple or pink. Above the flowers is a tuft of leaves, resembling a pineapple. Enjoys full sun or partial shade and likes rich, well-drained soil.

Peacock orchid ( Acidanthera murielae). Blooms in late summer. Featuring fragrant, star-shaped white flowers with a maroon center, arranged along a tall spike, this beauty prefers full sun and well-drained, fertile soil.
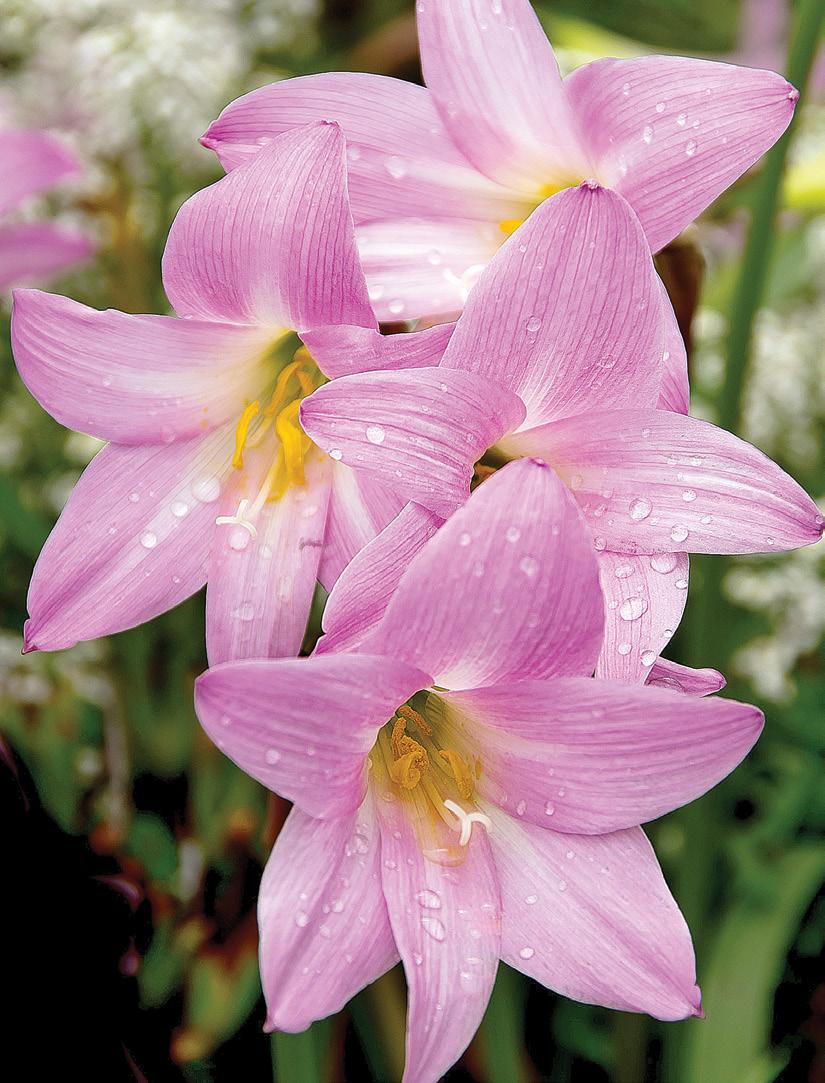
Rain lily (Zephyranthes). Blooms in mid to late summer through fall. These low-statured lovelies have lily-shaped flowers that come in white, pink or yellow. Each flower lasts just one day but the plant can produce many flowers through the season, especially after the rain.
Aztec lily (Sprekelia formosissima). Blooms in spring and fall. A showstopper in deep scarlet with narrow, recurving petals and long stamens tipped with yellow.


By shauna dobbie

You can grow two main types of vegetables from bulbous structures: members of the allium family and potatoes. In fact, when it comes to potatoes and garlic, you should grow them from bulbs to get the variety you want.
Garlic ( Allium sativum). Probably the most popular bulbous vegetable, garlic is planted using cloves, which are segments of the garlic bulb. Each clove can grow into a new, full garlic bulb.
You plant garlic in the autumn across Canada, just like tulips. It lives under the snow and in spring, it is
Soil preparation. Ensure that the soil is well-draining and rich in organic matter. Bulbs are prone to rot in poorly drained soils.
Planting depth and spacing. Follow specific guidelines for each type of bulb regarding how deep to plant them and how far apart. This information is typi-
cally provided on the packaging. If not, use the distances given on the next page.
Watering. While bulbs do not require as much water as seeds during germination, consistent moisture is important once growth begins. Avoid overwatering to prevent rot.
Fertilization. Apply a balanced fertilizer at planting and periodically throughout the growing season to support healthy growth.
Curing. All these plants must be cured after harvest in order to store them. If you don’t cure them, make sure to use them within a couple of weeks.
one of the first bits of green you’ll see poking above the soil. (Don’t worry if your garlic sends up shoots in the fall or during a warm spell in winter; it can handle it.) Plant cloves 3 to 6 inches apart.
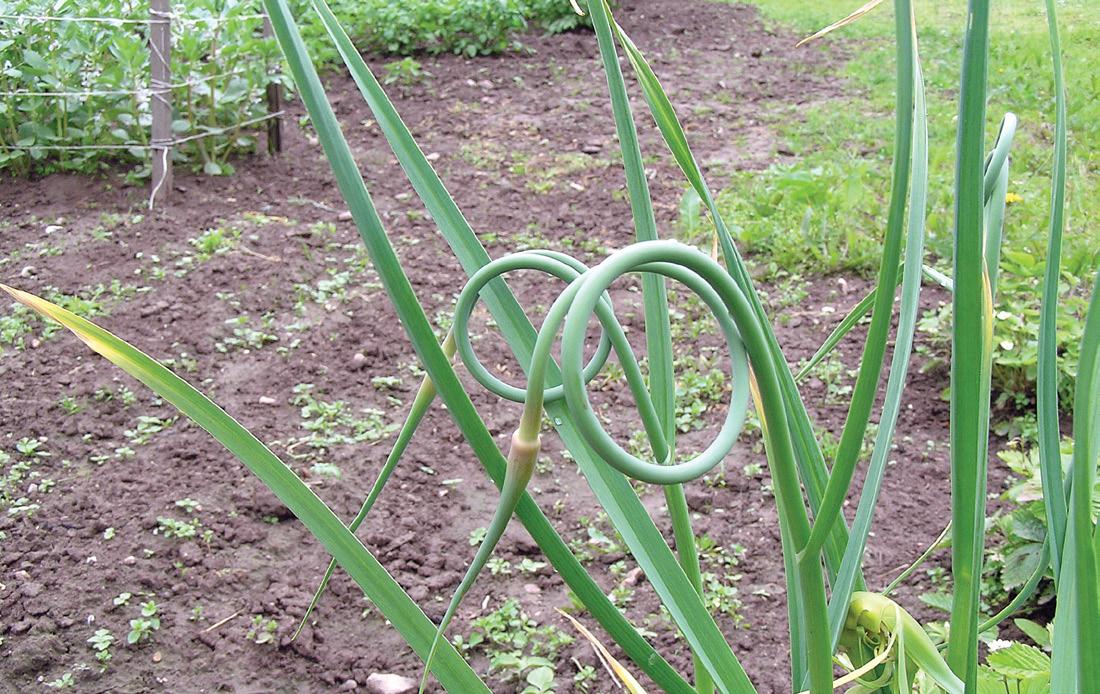
The garlic will grow a flower spike called a scape, which looks like a narrow kind of beak. The beak will curl around on itself, and when it has gone full circle, cut off the entire scape. You can use scapes for a fresh hit of garlic in the kitchen.
About a month later, watch for the lower leaves to turn yellow or brown. This signals that it is time to harvest, and it will happen sometime in the summer. If you wait too long to harvest garlic, the cloves will start to separate and it won’t store as long.
Dig them up by sinking a spade or fork well under the new bulb and lifting. Dry and cure them in a place with good air circulation, outside of direct sunlight, for two to three weeks. You’ll know they are cured when the outer part of bulb and neck are dry and papery. Then you can cut off the roots and the stems and store them in a cool, dry, dark place for several months.
Onions ( Allium cepa). You can grow onions from seed, starting them 6 to 8 weeks before the last frost, but they take around four months of cool weather to mature. Growing them from sets will go a lot faster.
Plant sets as soon as you can work the soil in the spring, 4 to 6 inches apart. They will be ready in the summer. You’ll know it’s harvest time when the greens flop down. You can harvest before the greens flop over but only for immediate use; immature onions will not store.
Loosen soil around onions and pull them up. Cure them in a single layer, outside of direct sunlight, in a place with good air circulation.
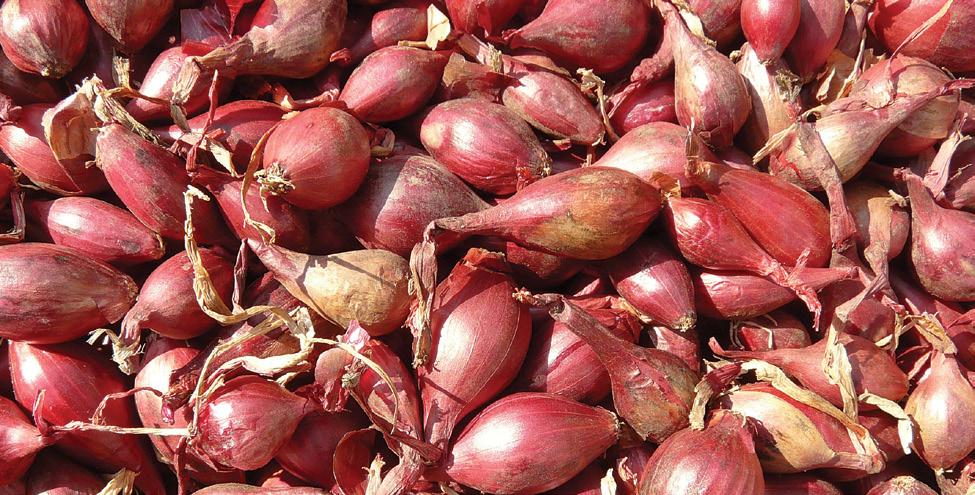
Shallots ( Allium cepa var. aggregatum). Closely related to onions, shallots are typically grown from bulbs, each of which can produce multiple offshoots during the growing season. That’s right: you plant one tiny shallot and dig up a bunch more. It’s like garlic, but not as fully contained in one tidy packet.
You can grow shallots from seeds but you’ll have to start them indoors and you get only three or four per seed. Planting sets, you can get as many as 12 per bulb.
Plant sets 4 to 8 inches apart. Harvest shallots as you do onions, when the greens start to wither and turn brown. Cure them as you do onions for storage.
Potatoes (Solanum tuberosum). While not true bulbs, potatoes are grown from tubers. Each piece of potato tuber, planted with eyes (buds), can sprout and form a new plant. Alternatively, you can use really small potatoes as seed potatoes.
Can you plant potatoes from seed? For sure, but you don’t know what you’re going to get. The offspring do not resemble the parents, and it takes two years to harvest, overwintering inside for the first year. There are a few places in Canada that sell potato seeds (as opposed to seed potatoes) for hobbyists. Metchosin Farms is one, Prairie Garden Seeds is another.
To grow from seed potatoes, plant them as soon as the soil can be worked, about 6 inches deep and 10 to 18 inches apart. Watch them through the growing season; if any potato tubers start to show, cover them with soil immediately.
Potato plants will bloom. You can leave the flowers or remove them. Two weeks after they bloom, you can harvest for new potatoes.
Keep the potatoes in the ground longer for storing them. Wait until the tops die back. A week or so later, dig them up (carefully) and cure them in a dark, dry place, in a single layer, for about two weeks.
People talk about hilling potatoes as a way to grow more potatoes. Those potato boxes, where you add 6 inches of soil every couple of weeks? You don’t get any more potatoes than you would with not adding soil. A possible benefit is the added nutrients that come with the addition of soil and compost. x

By Geraldine Painter Thomas

Tulipomania refers to a period during the Dutch Golden Age when the prices of tulip bulbs reached extraordinarily high levels and then dramatically collapsed. This phenomenon, often cited as the first recorded speculative bubble, took place primarily in the Netherlands between 1634 and 1637. It provides a fascinating case study of market psychology, the nature of speculative bubbles, and the interplay between economic, social, and cultural factors.
In the early 17th century, the Netherlands was a flourishing center of trade, finance, and art. The Dutch
Republic had established itself as a global trading power, with its merchant fleets dominating seas and its banks pioneering modern financial instruments. Amidst this backdrop of prosperity and innovation, tulips, introduced from the Ottoman Empire, captured the Dutch imagination with their vibrant colours and intricate patterns.
Tulips, especially those with unique and striking colour variations known as “broken” tulips, became highly coveted by the Dutch elite. As demand grew, so did the prices. Tulip bulbs became a status symbol, and
people from all walks of life began to invest in them, hoping to turn a profit.
By 1634, speculation in tulip bulbs had reached fever pitch. People were trading not just existing bulbs but also futures contracts – agreements to purchase bulbs at a later date for a fixed price. This financial innovation allowed even those without significant capital to participate in the market, further fueling the frenzy. Prices soared, with some rare bulbs selling for the equivalent of several years’ worth of a skilled craftsman's wages.

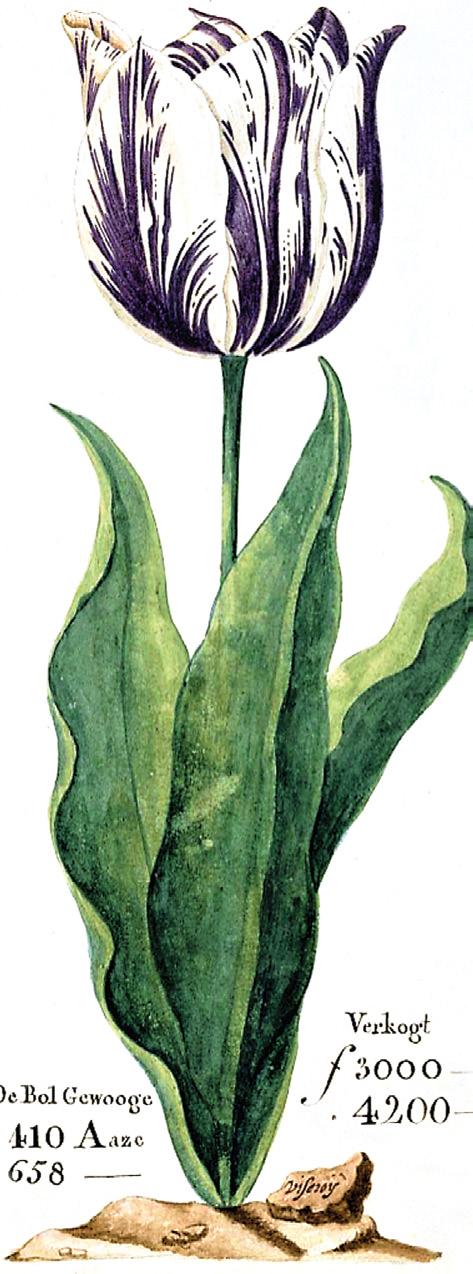
The peak of Tulipomania is often pinpointed in the winter of 16361637. At this time, stories circulated of individual bulbs being exchanged for vast sums of money, goods, and even land.
However, the bubble burst in February 1637. The market for tulips suddenly and inexplicably collapsed. Buyers defaulted on contracts, and prices plummeted. The once highly sought-after bulbs could not find buyers at a fraction of their peak prices. This sudden crash left many investors, especially those who had borrowed money to speculate, in financial ruin.
The aftermath of Tulipomania saw a series of legal and economic repercussions. Courts were inundated with disputes over unfulfilled contracts. The Dutch government attempted to stabilize the market by mandating that contracts be settled for a small frac-
tion of their face value, but confidence in the market had been irreparably damaged.
Tulipomania has since become a symbol of the folly of speculative bubbles and the dangers of irrational exuberance in financial markets. While some historians argue that the impact of the tulip crash was exaggerated in contemporary accounts, its place in economic history remains significant.
The cultural impact of Tulipomania is profound. It has been the subject of numerous books, plays, and artworks, symbolizing the intersection of beauty, desire, and financial speculation. Economically, it has served as a cautionary tale for future generations of investors, illustrating the volatility that can arise from speculative trading and the psychological forces that drive market behaviour. x
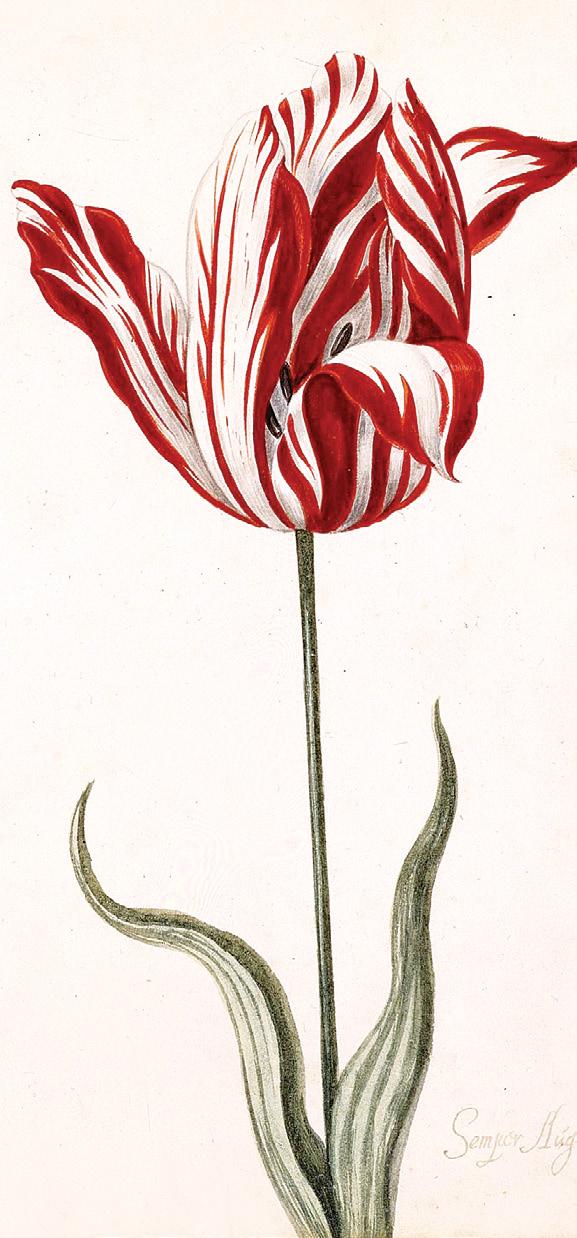
‘Semper Augustus’, which means “always majestic”, was an epoch-toppling tulip featuring white petals adorned with bold, crimson streaks and flames. This remarkable coloration was a result of a mosaic virus that caused the striking patterns on the petals, a phenomenon known as “breaking.”
The virus, while making the tulips more visually appealing, also renders them sterile, which contributed to their rarity and high value. Tulip sterility means that the flower does not make viable seeds, but it can still be increased through bulb division.
At the height of Tulipomania, 10,000 guilders was offered for a single bulb of ‘Semper Augustus’, a sum that could buy a grand house along one of Amsterdam’s most desirable canals. The potential seller refused the offer.
By shauna dobbie
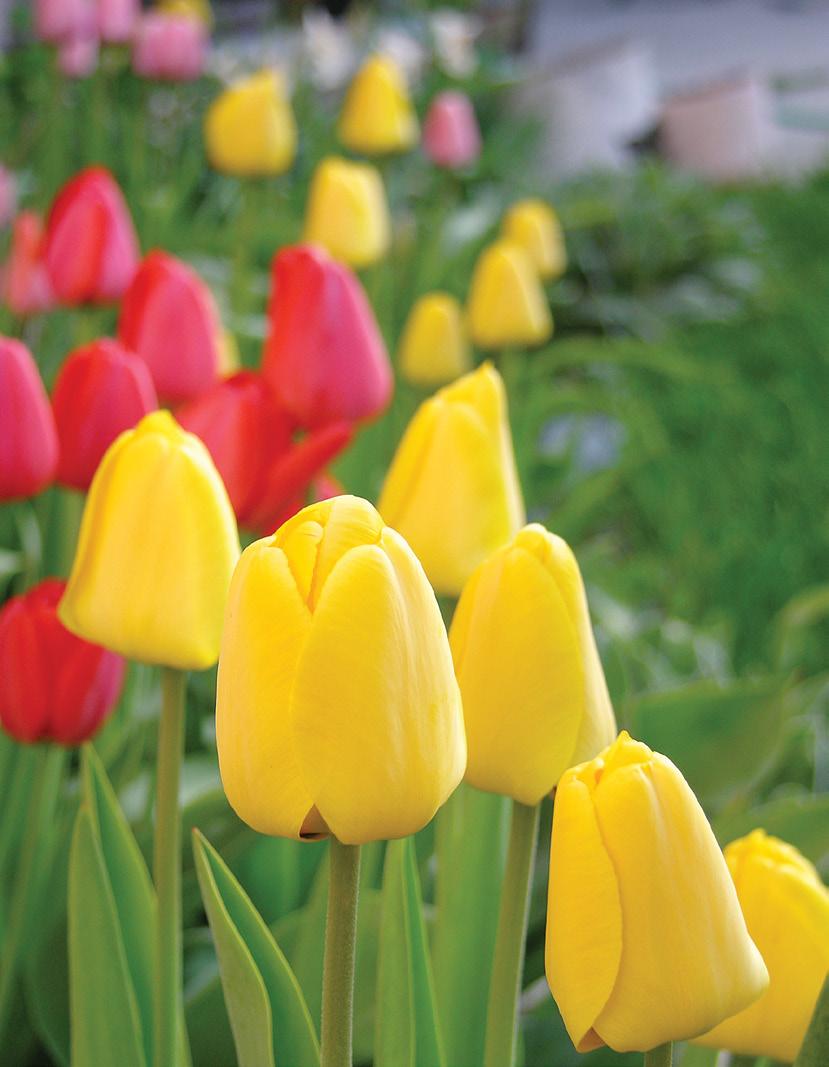
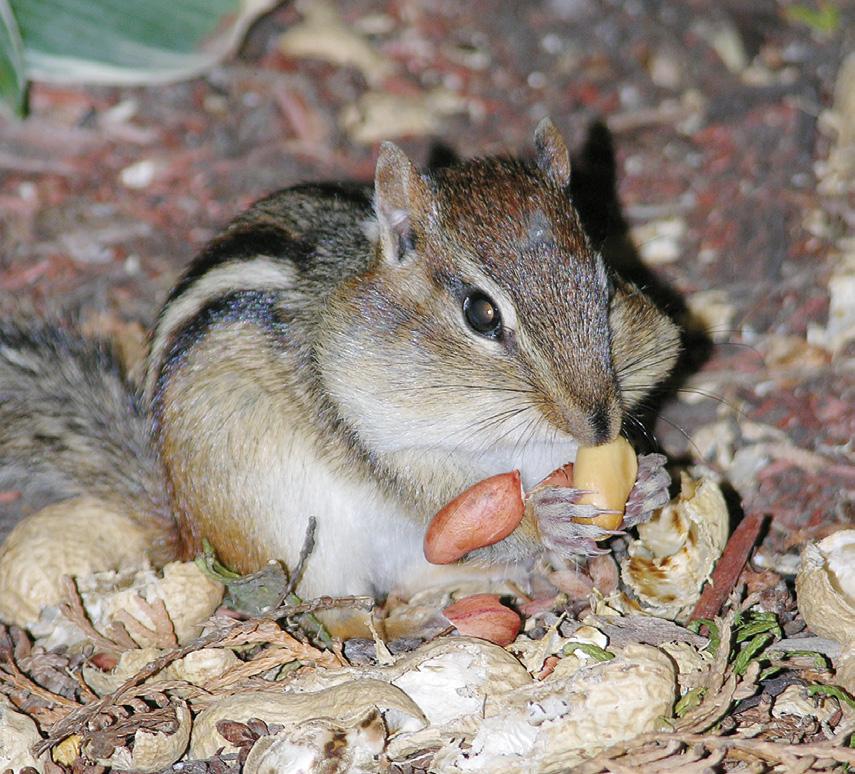
Squirrels, raccoons, chipmunks, moles and voles are known for digging up and eating tulip bulbs and crocus corms. They will go after other bulbs too, as long as they are not poisonous to them.
That is what makes alliums and daffodils so attractive. No mammals can eat them! They also don’t care for fritillaria, glory of the snow, hyacinth and muscari. You can try planting your tulips and crocuses interspersed with these disliked bulbs.
Use chicken wire cages or use earth staples to put chicken wire on top of bulbs when you plant them. For moles in particular, which tunnel underground, you’ll
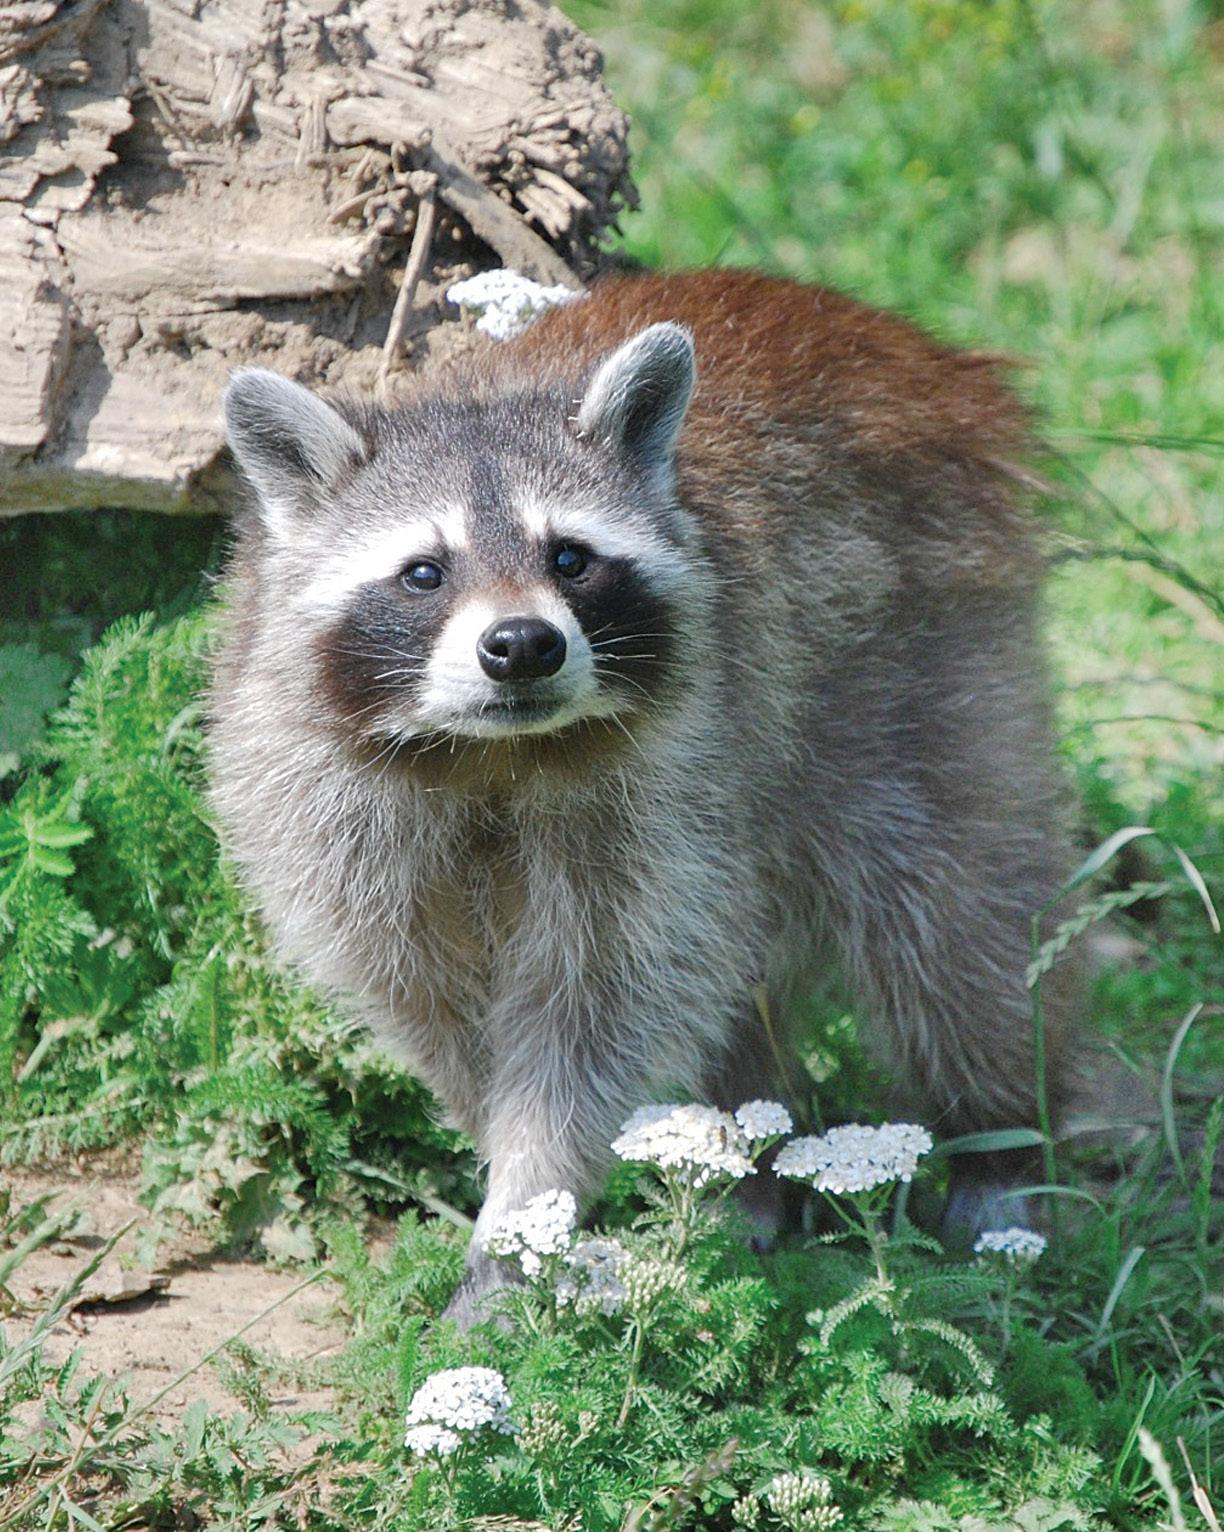
need cages to protect the bulbs.
The plants can grow through the chicken wire but the critters cannot get to the bulbs. For bulbs that will increase over time this could be a problem, though.
Some gardeners swear by planting clippings of hair or predator urine near the bulbs. There is no great evidence to support this to date. Also, adding blood meal to your planting hole may be good for the bulbs, but does little to scare away rodents, some of which are omnivorous.
You can try sharp gravel or crushed seashells over your bulb planting holes to deter critters. One year I stuck upside down nails
around my freshly planted area. Did it work? I cannot say for sure, but the bulbs did grow. Make sure you remove the nails when the sprouts come up; otherwise, the next time you see them those shiny nails will be dirty and rusty and hopefully not sticking into your hand.
You can try chemical sprays like Bobbex or Critter Ridder. Both contain things animals don’t like to come into contact with but that won’t kill them, so it’s safe for pets. You can also make your own spray out of things like garlic, red pepper, hot sauce and eggs. Look online to get the ratios correct. You will need to re-spray the repellent periodically. Alternatively, you could feed the


https://www.simplelifeandhome.com/388/home-life/ pest-control/natural-deer-and-rabbit-repellant/
animals to keep them away from your bulbs.
A container of peanuts is easier for squirrels to get to than your buried bulbs. The Whitehouse in Washington, DC, started this trick 25 years ago and found that it worked. No word on how much you’ll spend on peanuts, though, or what kind of food you should put out for the moles. x


As the days start to hint at the approach of autumn, gardeners across the nation can rely on a variety of late-summer annuals to keep their gardens vibrant and colourful. These plants, perfect for the transitional period, not only add beauty but also extend the blooming season well into the cooler months. Here, we explore some of the best late-summer annuals for gardens.
For sun
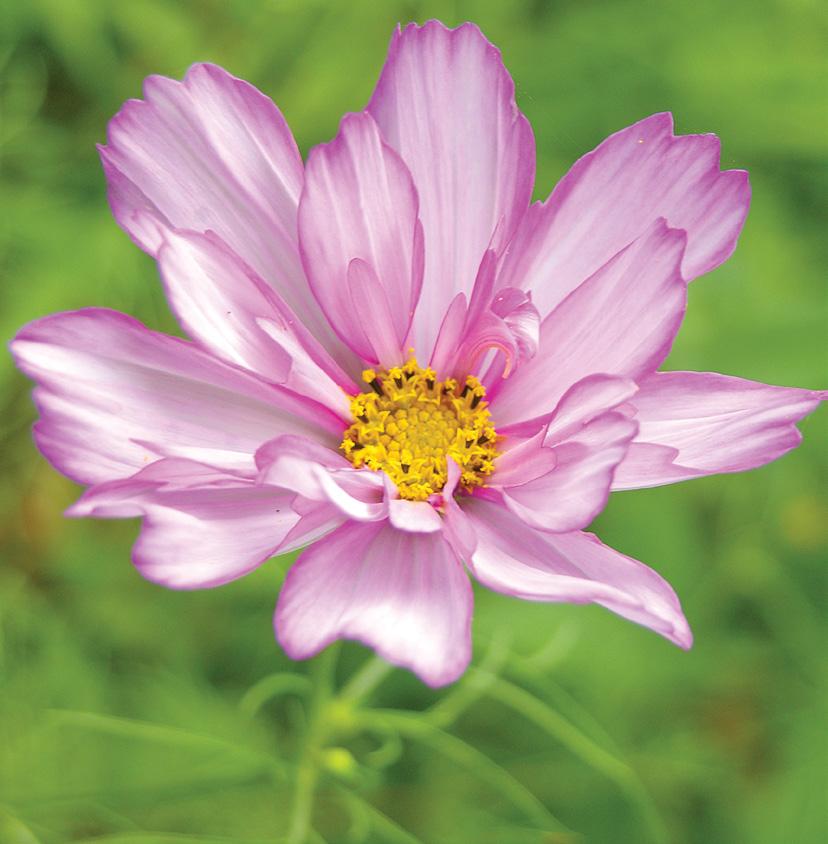
Cosmos. Cosmos are a gardener’s delight, blooming generously from mid-summer until the first hard frost. Their daisy-like flowers come in shades of pink and white, adding a playful contrast to their ferny greenery of late summer. Cosmos prefer full sun but are adaptable and will thrive in most soil types as long as they are welldrained. Their tall, slender stems make them excellent for cutting gardens.
Zinnias. Zinnias are one of the most colourful and versatile late-summer annuals. They can range from bright single-colour blooms to multicoloured patterns, with varieties such as 'Queen Red Lime' offering a stunning display of lime green edges that transition to a
deep rose center. Zinnias are heat tolerant and prefer full sun. Regular deadheading will encourage more blooms and extend their display.
Marigolds. Known for their pungent aroma and vibrant colours, marigolds (Tagetes) are a staple in the late summer garden. They are particularly useful in vegetable gardens, as they are reputed to deter pests with their strong scent. Marigolds flourish in full sun and welldrained soil, and they come in a range of sizes and colours, from the small and delicate 'Signet' marigold to the larger African marigold varieties.
Sunflowers. Sunflowers are the quintessential late-summer plant, towering and turning their faces to follow the sun across the sky. From traditional tall varieties to newer dwarf types that are perfect for smaller spaces, sunflowers are a bold choice that can define a garden. They are easy to grow from seed and thrive in areas with full sun exposure.
Celosia. Celosia offers an unusual texture with its velvet-like blooms in fiery shades of red, orange, and yellow. There are two main types: the plume type, which produces soft, feather-like
flowers, and the crested type, which forms fascinating, brain-like structures. Celosia loves heat and sunlight, making it an excellent choice for late summer when other plants might start to fade.
For shade
Impatiens. Impatiens are classic shade garden flowers, known for their vibrant colours and continuous blooms from early summer until the first frost. They come in a wide range of colours, including pink, red, coral, white, and violet. Impatiens are perfect for adding a splash of colour to dark corners of the garden.
Begonias. Begonias are versatile and can thrive in both sun and shade, making them ideal for gardeners who have mixed lighting conditions. The fibrous and wax begonias are particularly well-suited for shade. They offer lush green foliage and flowers in hues of red, pink, or white. Their ability to bloom under canopy cover makes them a superb choice for late summer colour. Coleus. While not known for its flowers, coleus is celebrated for its stunning foliage, which comes in a variety of colours and patterns. Coleus can thrive in shade or partial sun, and
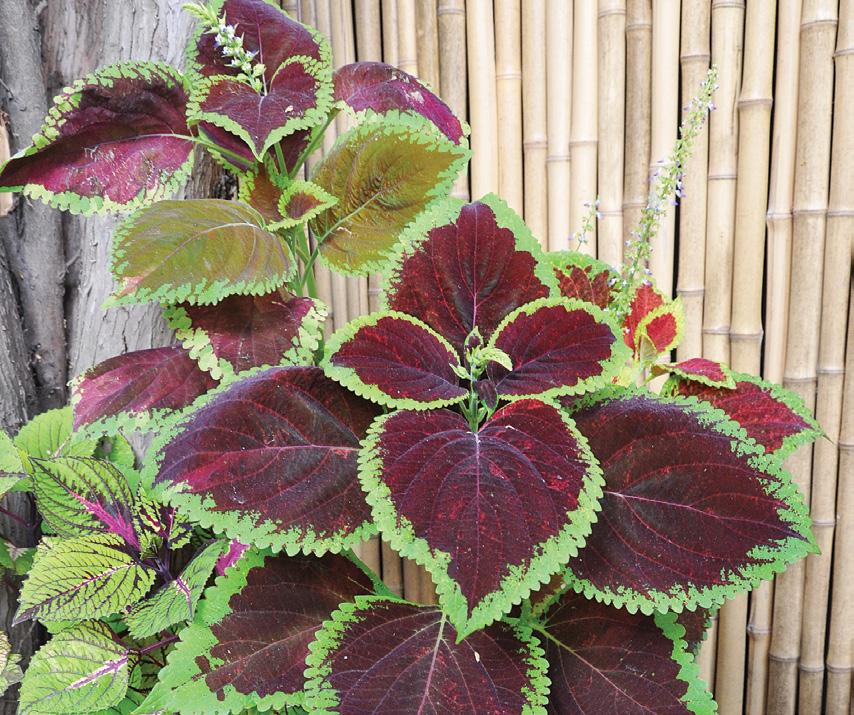
its leaves can provide visual interest and contrast against flowering plants. Their fast growth and easy care make them a favourite among shade gardeners.
Browallia. Browallia is a lesserknown annual that performs well in shade. It produces star-shaped blue or violet flowers that can add a touch of rarity to your shade garden. Browallia continues to bloom from

late spring through the first frost, making it a durable and attractive option.
Torenia. Also known as wishbone flower, Torenia is a robust shadeloving plant that blooms profusely even without much light. It produces trumpet-shaped flowers in shades of blue, pink, purple, and white, which are excellent for hanging baskets and

containers in shaded areas.
Lobelia. Lobelia offers delicate flowers in deep blues, purples, reds, and whites. Although some varieties prefer cooler temperatures, others are bred to withstand both sun and shade, providing flexibility in planting. Lobelia is ideal for edges, hanging baskets, or as a filler in mixed containers. x
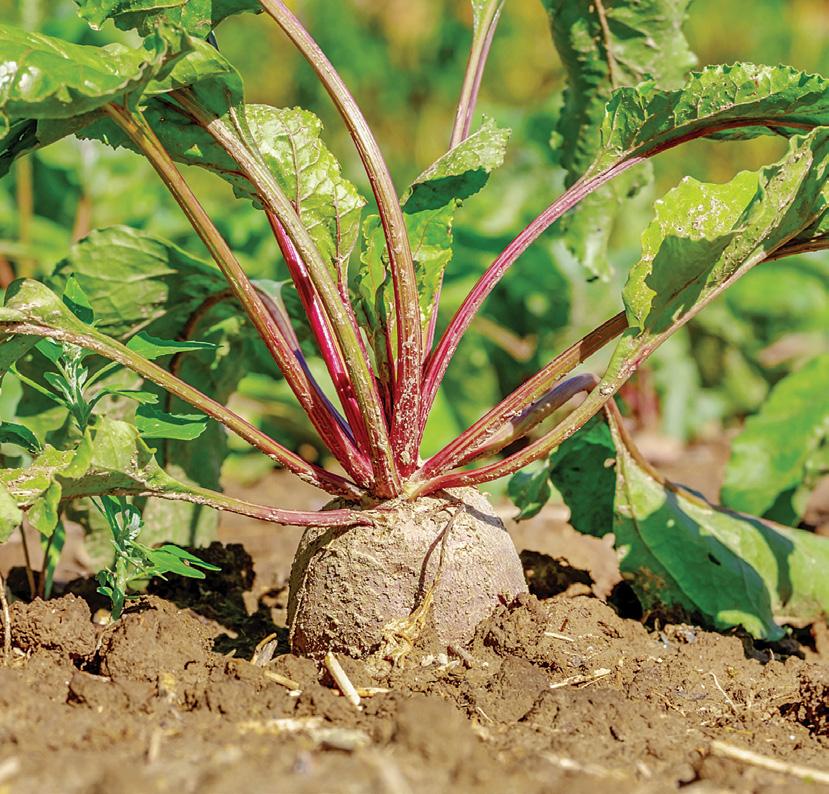
Gardening enthusiasts often assume that growing vegetables requires full sunlight, but many vegetables thrive in partial or full shade. If you have a garden space with limited sun exposure, don't despair. Here are twenty of the best vegetables to grow in shade, ensuring you can enjoy a bountiful harvest even in less sunny areas of your garden.
Arugula. Arugula, known for its peppery flavour, thrives in partial shade and cooler temperatures. It only needs two or three hours of sun per day. It's a fast-growing leafy green that adds a zesty kick to salads and sandwiches. ‘Astro’ is a milder tasting version; ‘Wasabi’ is super spicy. Look for ‘Red Dragon’ for a really pretty leaf with red veining.
Beets. Beets are root vegetables that grow well in partial shade. Both the roots and leaves are edible and packed with nutrients. You’ll get smaller beetroot in three to four hours of shade, but you will still get them. ‘Detroit Dark Red’ and ‘Golden’ are excellent varieties for shaded gardens.
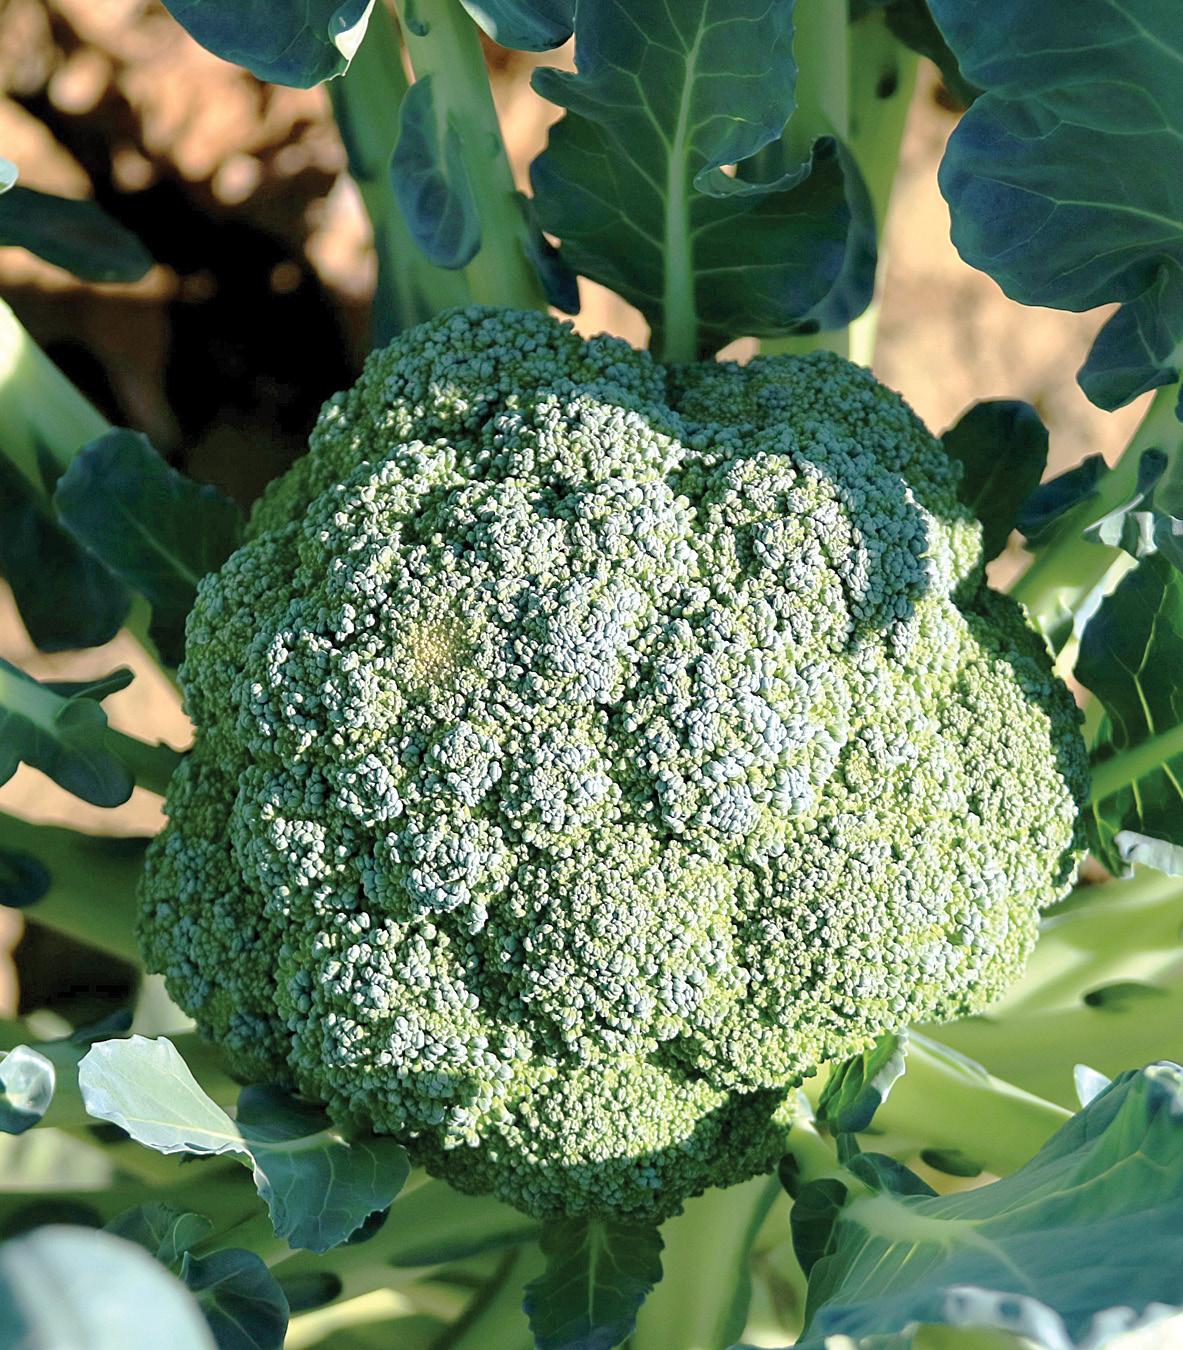
Bok choy. Bok choy thrives in cooler, shadier areas, preferring them to full sun in a hot area. It grows quickly and produces tender, crisp leaves and stems. Try varieties like ‘Jade Pagoda’ and ‘Two Seasons’. Broccoli. Broccoli is a cool-season vegetable that grows well in partial shade, just five to six hours per day. It produces nutrient-rich florets that can be harvested over several weeks. ‘Di Cicco’ and ‘Waltham’ are excellent varieties for shaded gardens. Green onions. Green onions, or scallions, are easy to grow in partial shade. They require minimal space and can be harvested continuously. 'White Lisbon' and ‘Kincho’ are reliable varieties.
Kale. Kale is a hardy green that tolerates shade and cold weather, needing as little as four hours of sun per day. Its robust leaves are packed with nutrients and can be harvested continuously. Varieties like ‘Black Magic’ and ‘Winterbor’ are excellent.
Leaf lettuce. Leaf lettuce is a versatile vegetable that thrives in partially shaded areas. It grows quickly and provides a continuous harvest of tender leaves perfect for salads and sandwiches. Varieties like ‘Buttercrunch’ and ‘Oakleaf’ are particularly shade tolerant. We’ve heard reports of leaf lettuce growing with just two hours of sunlight, so give it a try.
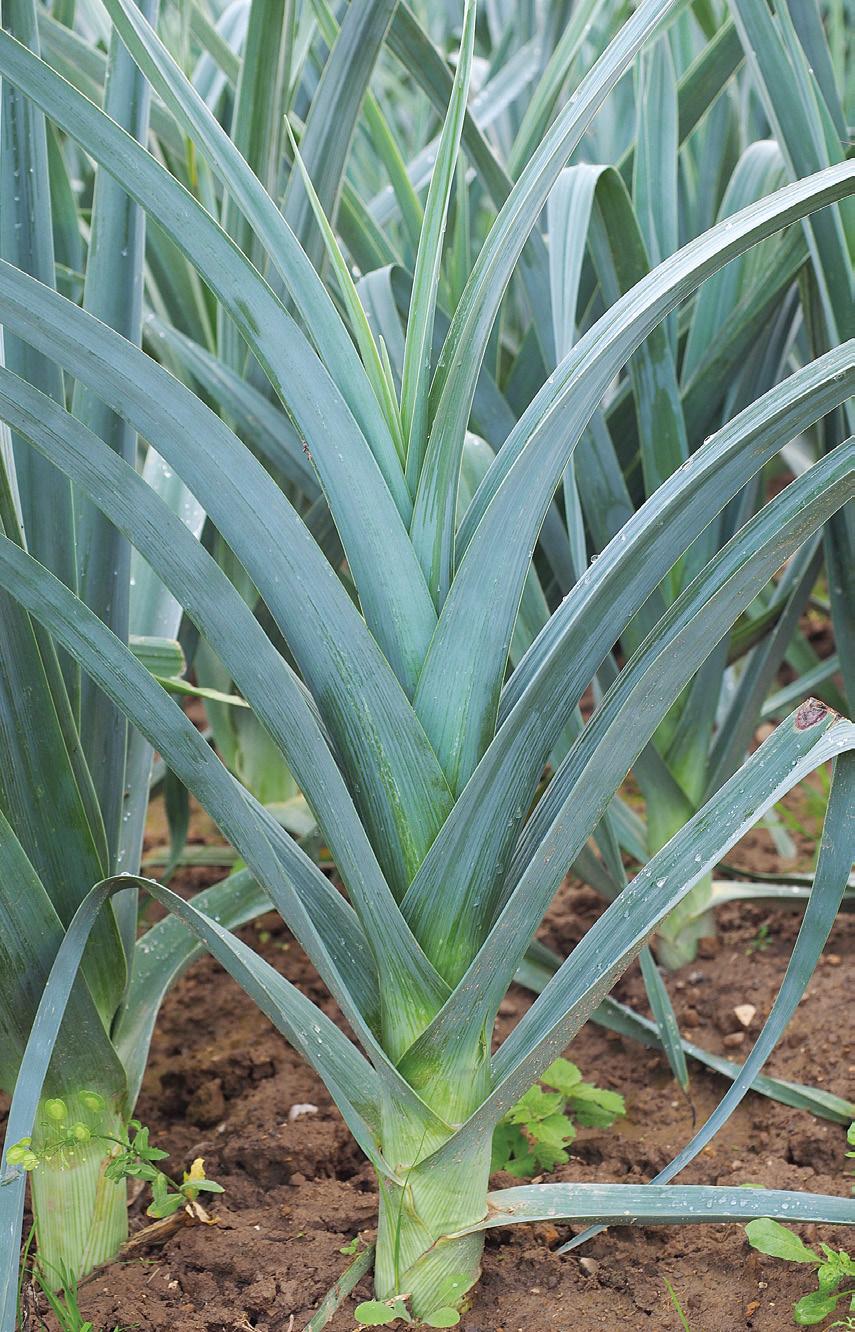
Leeks. Leeks are hardy vegetables that tolerate partial shade. They require a long growing season and benefit from consistent moisture. They do best in morning sun with afternoon shade.
Mizuna. Mizuna is a Japanese leafy green with a mild, peppery flavor. It grows well in partial shade and cooler temperatures. Cut the whole plant at soil level mid-season to see it regrow.
Parsnips. Parsnips can grow with as little as four hours of sunlight daily, but they require a long growing season of at least 110 days. Look for a fast-growing variety like ‘Hollow Crown’ if you are growing them in shade.
Radishes. Radishes are quick-growing root vegetables that tolerate partial shade. They are perfect for small spaces and can be harvested in as little as 30 days. ‘Cherry Belle’ and ‘Easter Egg’ are popular varieties.
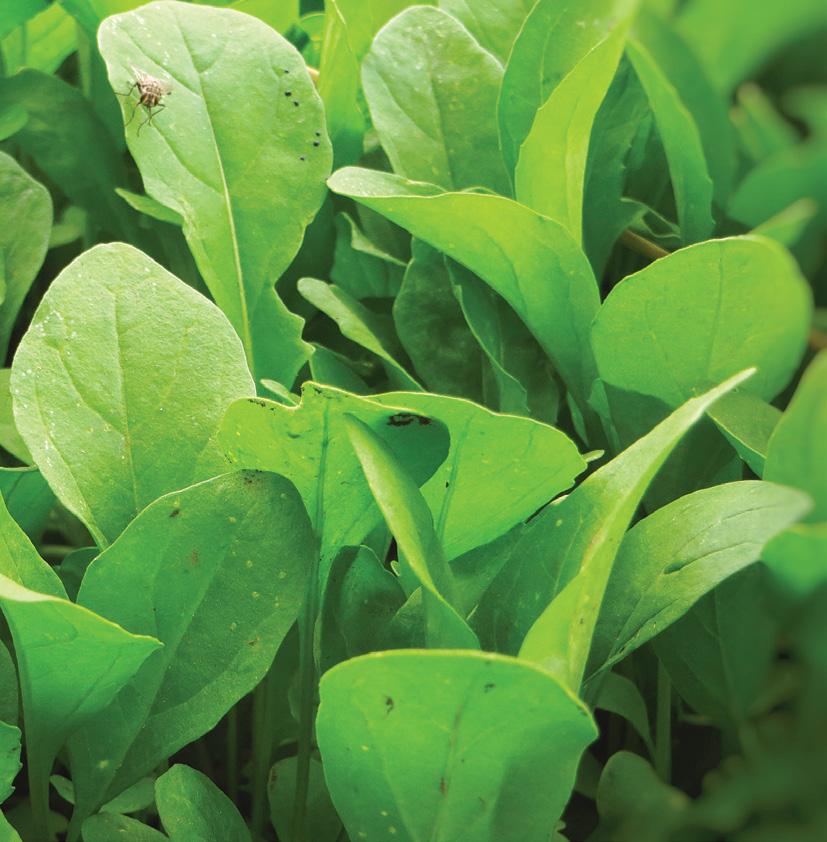
Spinach. Spinach is a nutrient-dense leafy green that grows well in partial shade. It prefers cooler temperatures and can be harvested multiple times during its growing season. Varieties like ‘Bloomsdale’ and ‘Winter Giant’ are excellent choices.
Swiss chard. Swiss chard is a colourful and nutritious green that grows well in partial shade, with at least four hours of sun per day. Its vibrant stems and dark green leaves are both edible and add visual interest to your garden. ‘Bright Lights’ and ‘Fordhook Giant’ are popular varieties. x

By shauna dobbie
As the temperatures drop and the gardening season comes to a close, many gardeners face the dilemma of what to do with their beloved herbs. Having herbs indoors for winter is a great way to enjoy fresh flavours year-round, but it comes with its own set of challenges.
You can make things a bit easier on yourself by starting fresh with all your herbs. Take cuttings from your
outdoor garden and pot them up for inside. Herbs that have been growing outside will resent losing their extra sunlight hours and moist outdoor air. If they start inside, though, they will be accustomed to the limitations. You won’t have the same long, gangly stems if you start new herbs.
Most herbs require at least six hours of sunlight per day. This means they will need to go into your sunniest spot
inside. Alternatively, you can use grow lights.
For additional humidity, keep a mister close to your herbs and keep all your herbs together. A humidity tray –a tray filled with pebbles and water, on which your potted plant sits – does a little to raise moisture in the area, but it won’t do the whole job.
Taking cuttings
Snip off about 2 inches of a healthy
stem. Remove all but the top leaves. Put it in a glass of water. Top up the water regularly and change it completely about once per week. In a few weeks, there will be a good number of roots at the bottom of the cuttings, which means you can plant them into a container with some potting soil.
Starting from seeds
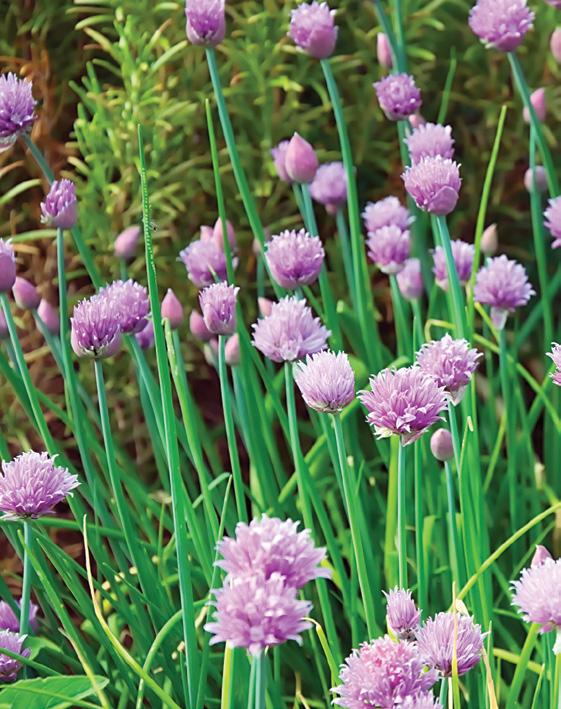
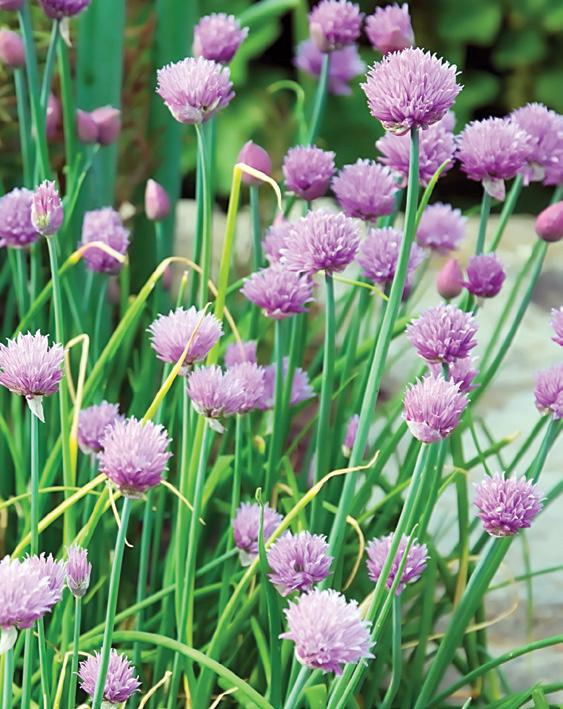
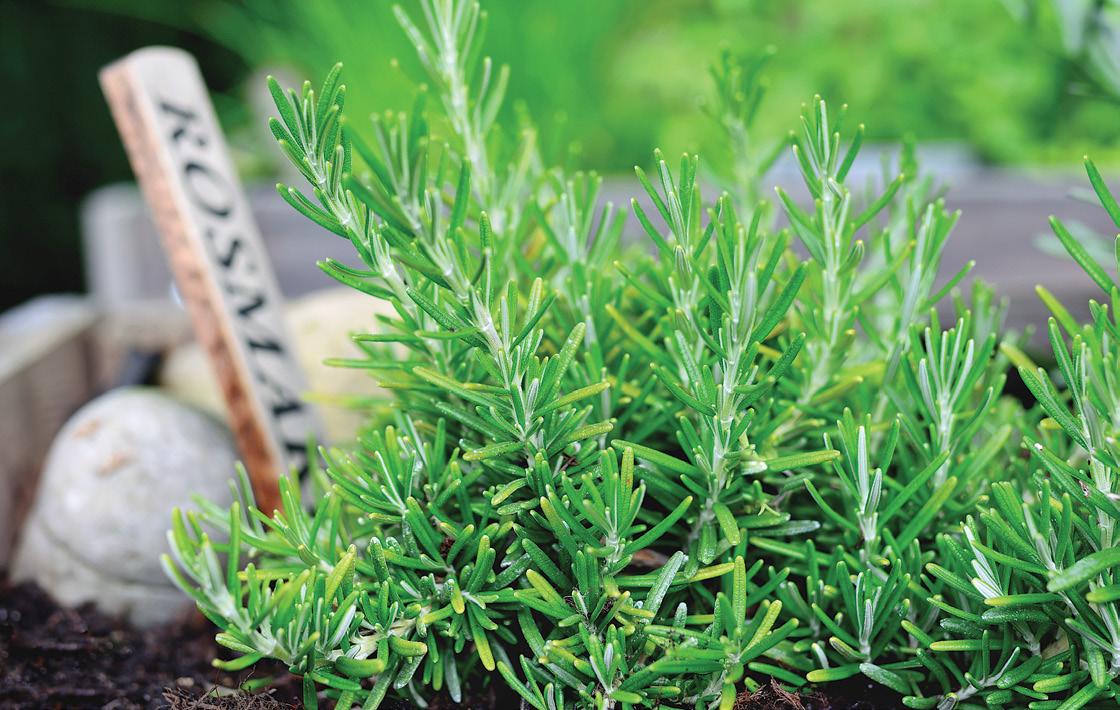
Chives cannot be grown from cuttings. Fortunately, they are easy to grow from seeds.
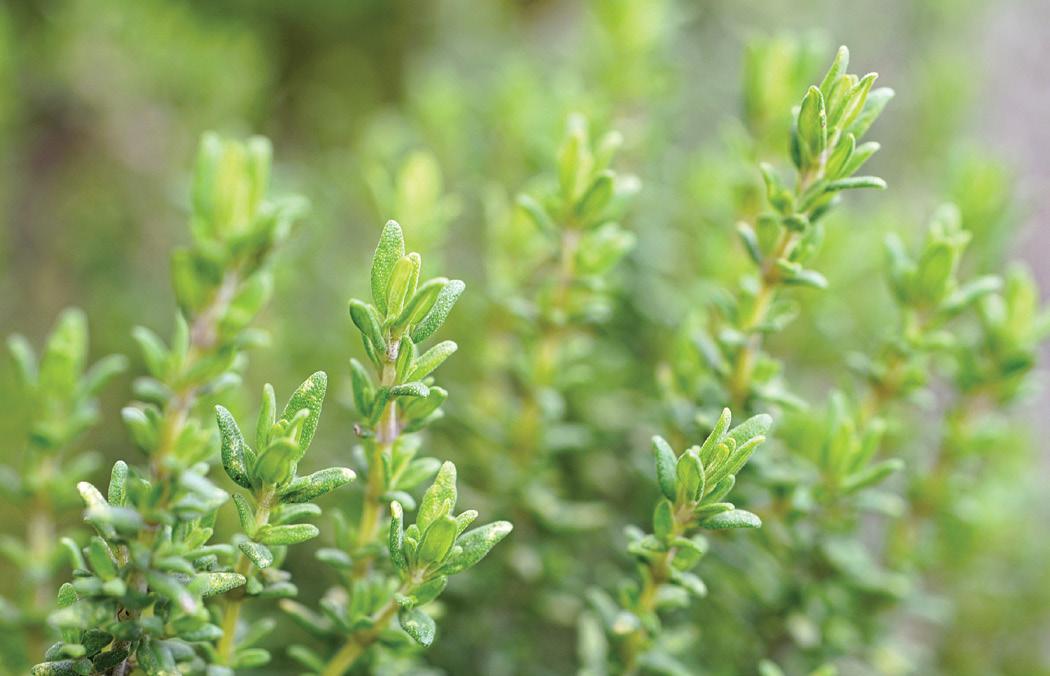
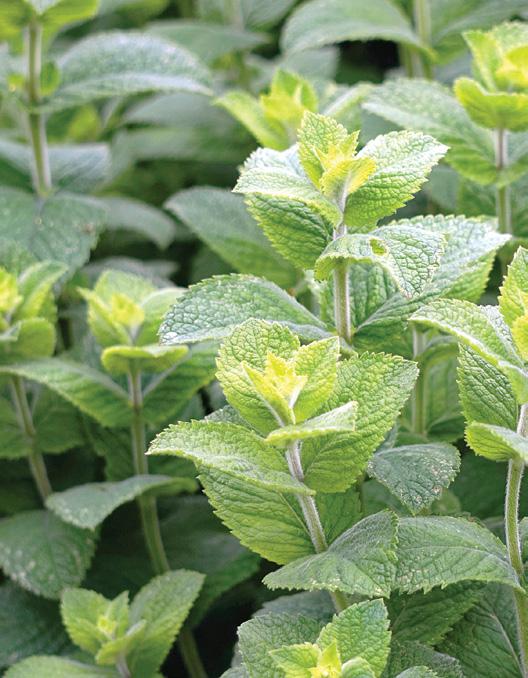
Other herbs that grow quickly from seeds are basil and mint. Rosemary, thyme and parsley will take considerably longer; grow these from cuttings.
Special considerations
Basil. Watch out for aphids and
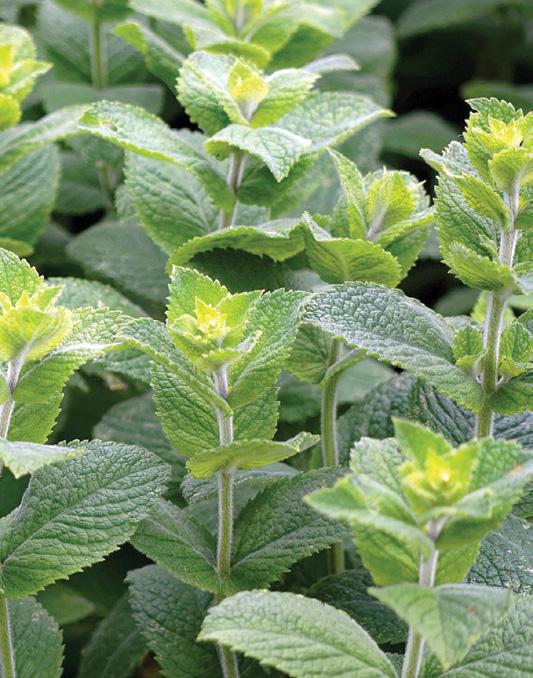
whiteflies, which can be more prevalent indoors.
Rosemary. Sudden temperature changes can stress rosemary. Keep it away from drafts and heating vents. Overwatering can be a problem. Ensure the soil is well-draining and only water when the top inch of soil is dry.
Thyme. Thyme prefers to dry out slightly between waterings. Overwatering can lead to root rot. Good air circulation is crucial to prevent fungal diseases. Avoid placing thyme in cramped or poorly ventilated areas.
Mint. Susceptible to spider mites and aphids. Regular inspection and cleaning are essential.
Parsley. Needs consistent moisture but avoid waterlogged soil. Parsley
prefers cooler temperatures.
Oregano. Oregano can tolerate cooler indoor temperatures but should be protected from drafts and sudden temperature shifts.
The end for indoor herbs
If you are wildly successful at growing herbs indoors, congratulations! If you have only a little success, that is okay too. Some herbs, including cilantro, chervil, dill and summer savory, are annuals and are expected to die.
Celebrate the time you have with herbs indoors and enjoy the fresh taste they give you. If they die, whether perennial or annual, just start some new ones. By keeping the light levels high and the watering on point, your next try could be the one that gives you success. x

By dorothy dobbie
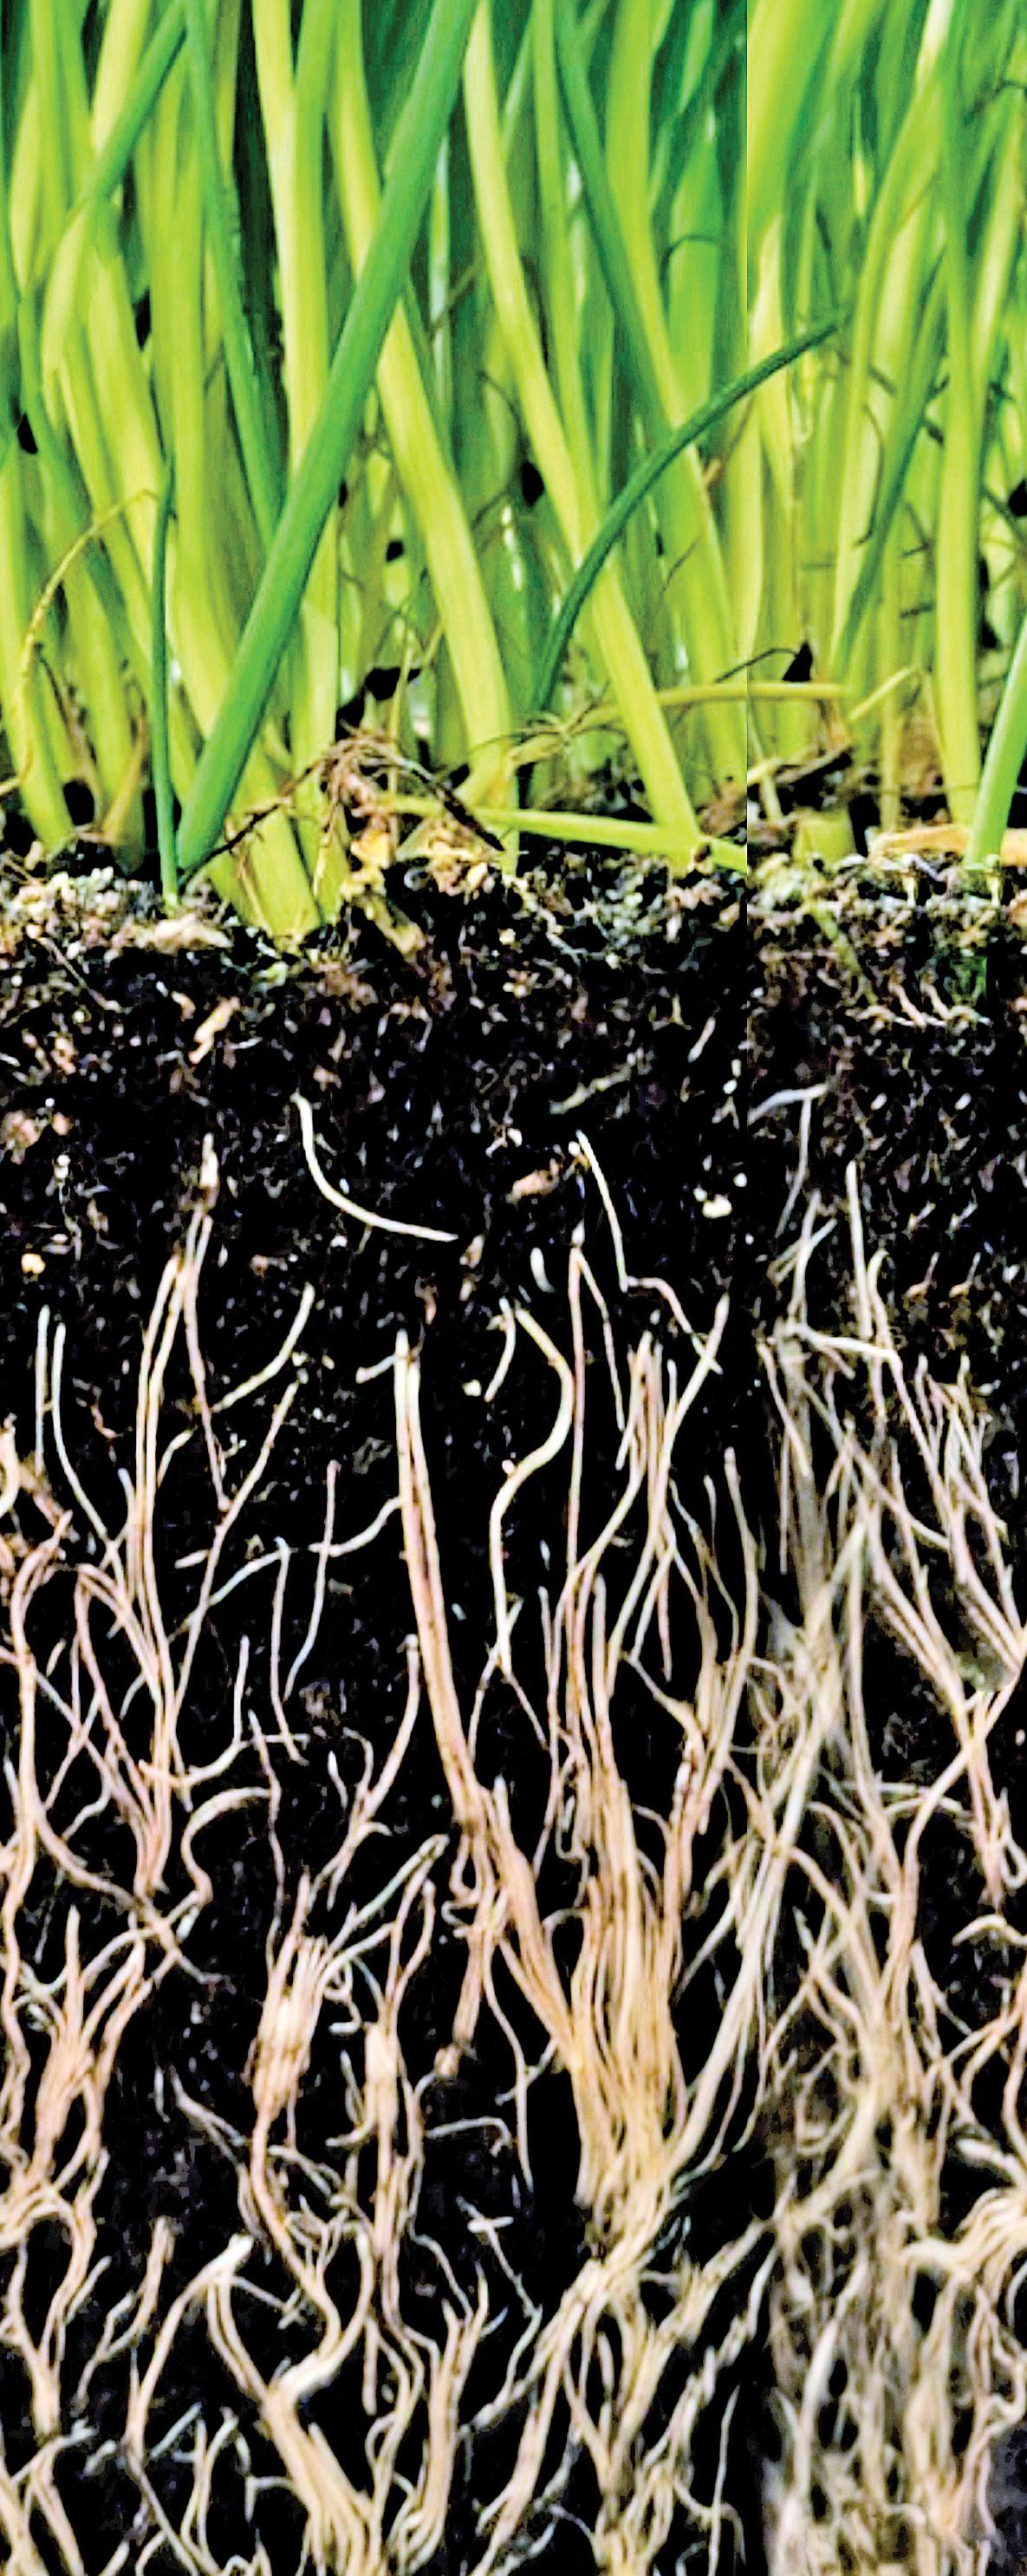
We are trained to turn our eyes to the skies, but so much is happening below us. We tend to forget that our birthplace is earth and that there are worlds within worlds beneath our feet. As gardeners, we live with this reality without really understanding it. We tuck plants and seeds into the warm earth hoping for the best without appreciating the magic that is about to take place when all we see at the end is the beauty presented to the upward world thanks to what happens in the dark of the deep.
Down there is where it all happens, where life takes hold, not alone and in isolation, but in the company of billions of friends and enemies, workers and collaborators, exploiters, and willing slaves.
When you poke that trowel into the earth, you upset millions – no, billions – of lives of the fungus and bacteria, viruses, nematodes, protozoa, and archaea as well as a host of animals such as ants, earthworms, mites, snails, springtails, tardigrades and more. They all have a job to do but, while you have just invaded their homes, what you bring will sustain them and their ancestors for many lifetimes, because what you have delivered in the seed or seedling you are about to plant is the vector for all new life – the ability to harvest the energy of the sun.
Some of this energy, through the process of photosynthesis, is in the form of carbon compounds already stored in the seed you present, or it has been manifested in the plant you are introducing. The sugars or carbons thus produced are neatly packaged, ready to be used by these hungry soil communities, each of which helps through symbiotic relationships to release the power of life contained in the object you have just introduced.
As roots grow, helped by some bacteria and certain fungi, they release some of their carbon compounds as simple sugars, which, as the sugars ooze from the membranes of the meandering root to ease the root’s way through the soil, attract more bacteria and fungus that feed on the sugars. In return, these microbes deliver soluble phosphorus or release nitrogen and nutrients the plant can use. This activity takes place in the rhizosphere, the immediate and intimate vicinity of the plant’s roots where the billions of microbes usually found in the soil are multiplied by many times. They congregate here to source water and carbon.
Most soil is a treasure trove of bacteria cells starving for water and carbon. When water is introduced, these populations can double in 15 minutes to a half an hour, promoting life-sustaining activity around the roots of a plant and in turn encouraging its health and growth. In the same soil are billions and billions of dead cells, a kind of natural fertilizer, that provide more nourishment.
Certain types of mycorrhizal fungi colonize the plant’s roots and make the carbons inside available to the rhizosphere. Fungi have the ability to break down or decompose the tough lignin cells of trees and the cellulose of other plants, releasing stored carbon.


When you plant a seed, you initate the process of harvesting the energy of the sun which helps to feed the
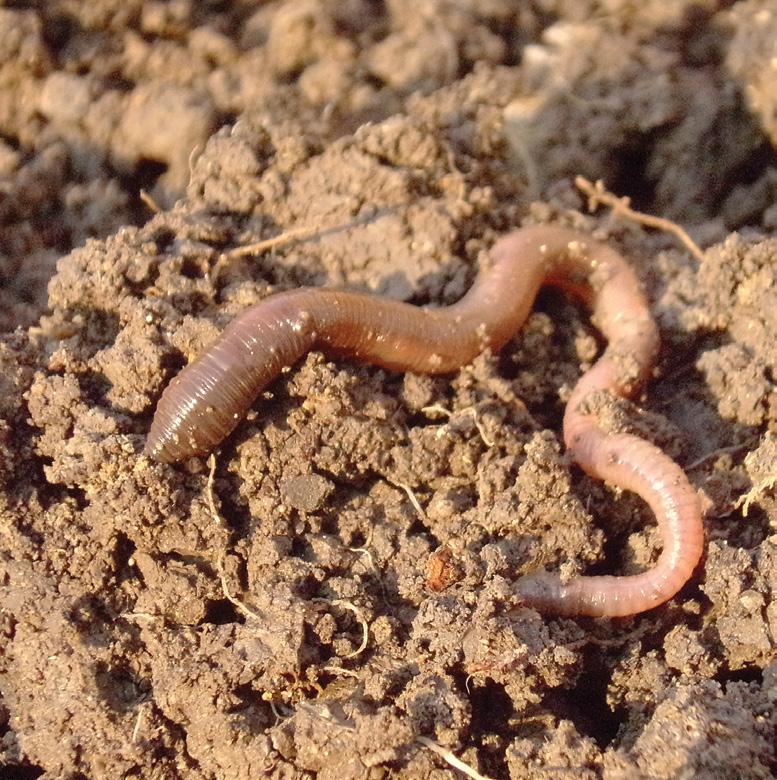
Earthworms help to encourage the process of organic decomposition and help to add back nitrogen, phosphorous and beneficial bacteria to the soil.
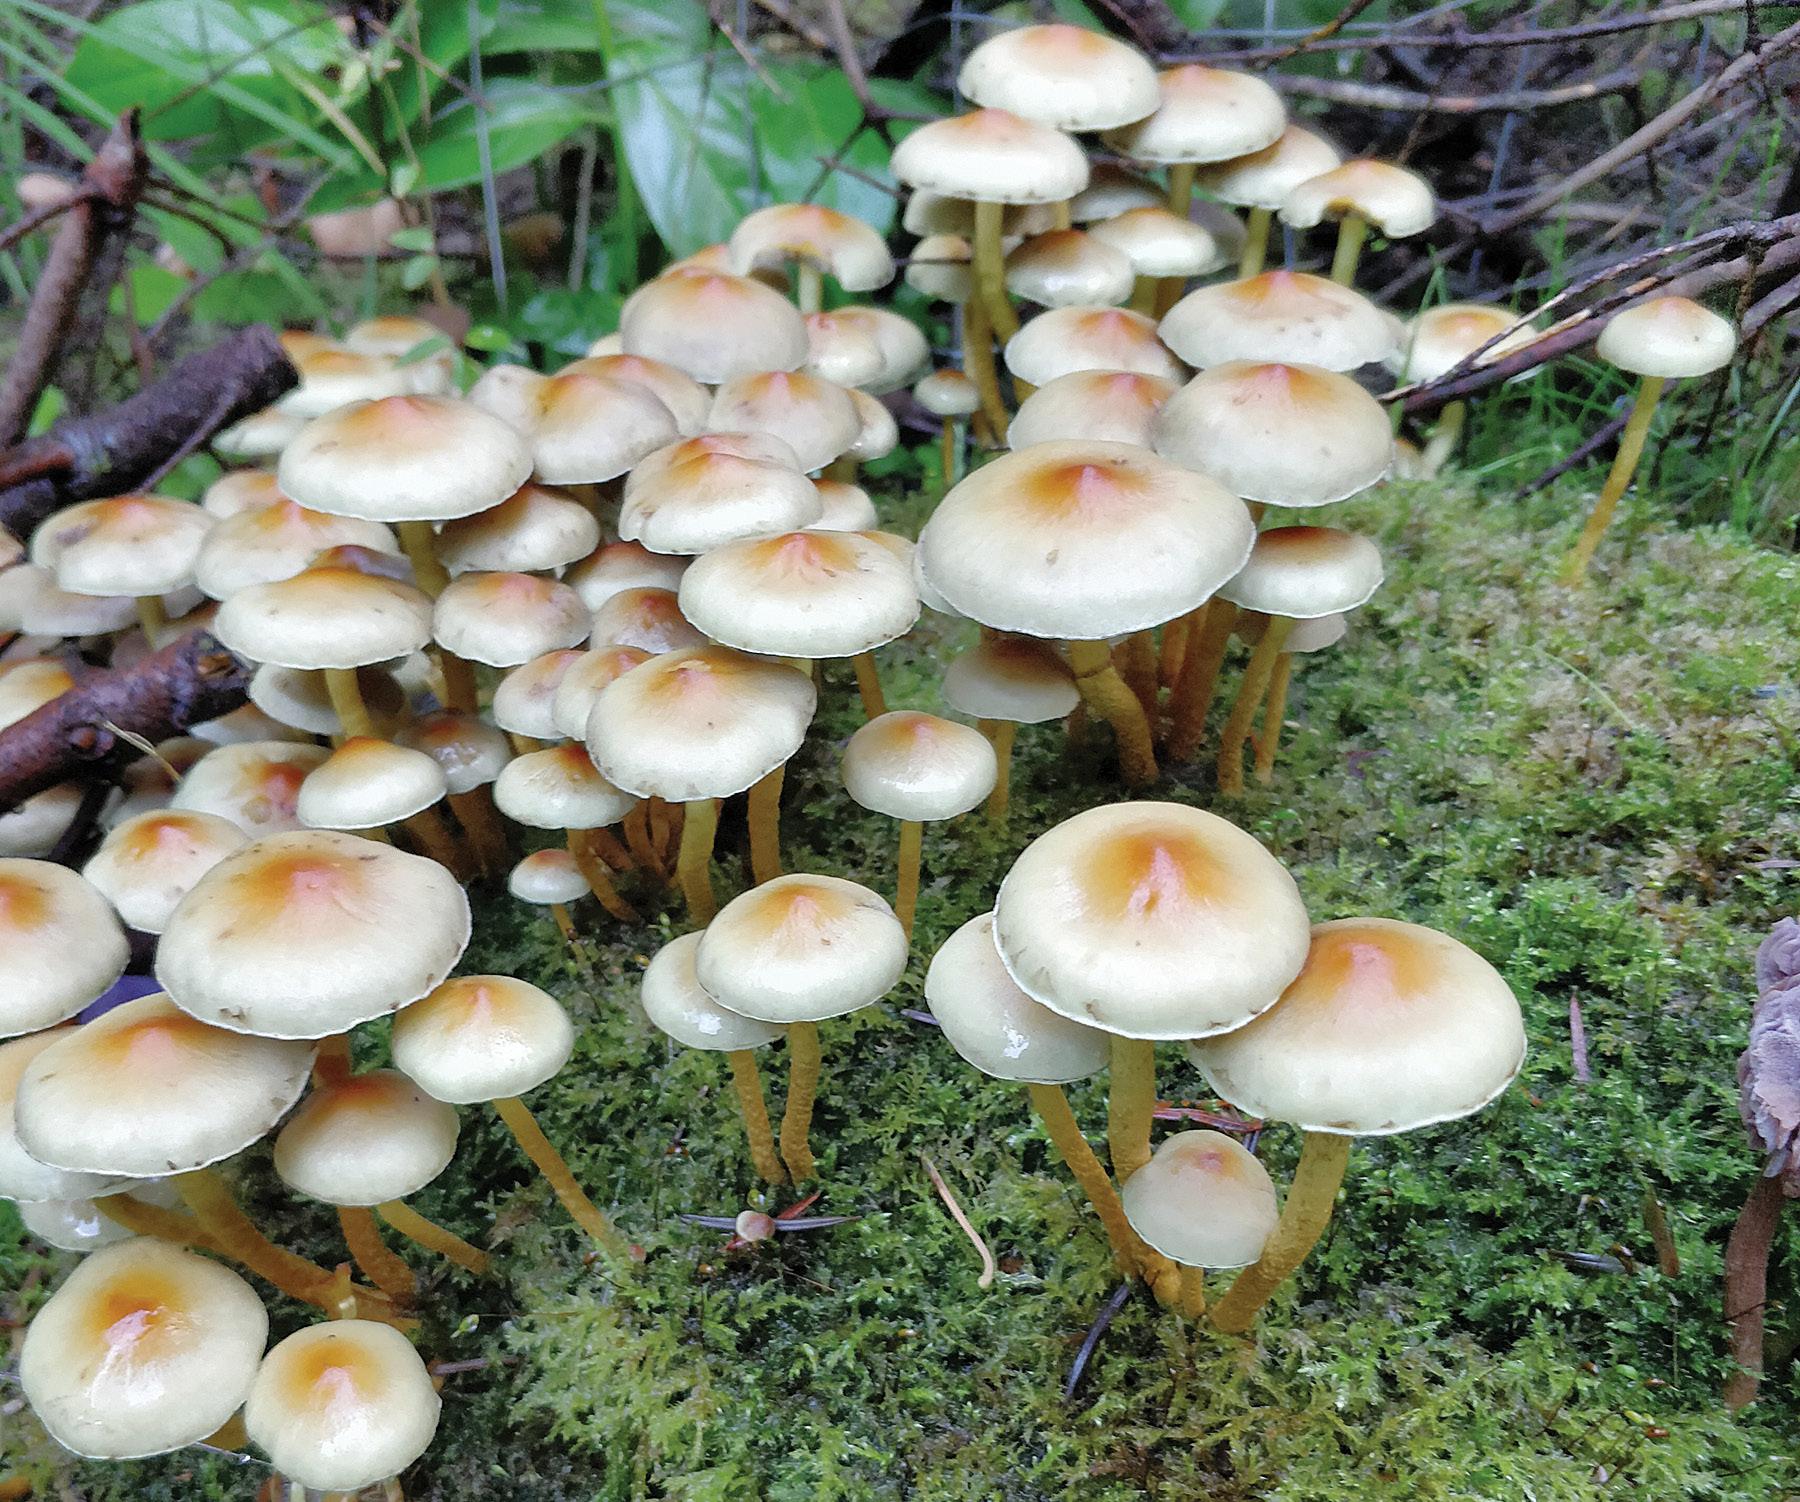


They help to create conditions in a root’s system that allows for the “oozing” of sugars creating a kind of mucilage that eases the root’s way through the soil.
In return, the fungi supply the plant with water and phosphorus from the soil.
Meanwhile, rhizobacteria or friendly bacteria are at work providing enzymes to release phosphorus and, for leguminous plants, releasing nitrogen inside a nodule constructed to protect an oxygen-destructive enzyme which is used to release the nitrogen to the plant.
Some plant-friendly bacteria also help to ward off infection by plant-unfriendly bacteria and fungi by producing natural antibiotics and antifungals. Why add organic material to soil?
Organic materials improve the structure of soils making the soil both more permeable for roots yet able to retain water and allow oxygen to penetrate. At the same time, the soil microbes feed on the organic material, breaking it down and releasing carbon dioxide, energy, water, plant nutrients and resynthesized organic carbon compounds. Ultimately, as the organic material is being processed, it produces humus, a complex substance that contains nitrogen, phosphorus, sulfur, calcium, magnesium, and potassium.
How do soil animals help?
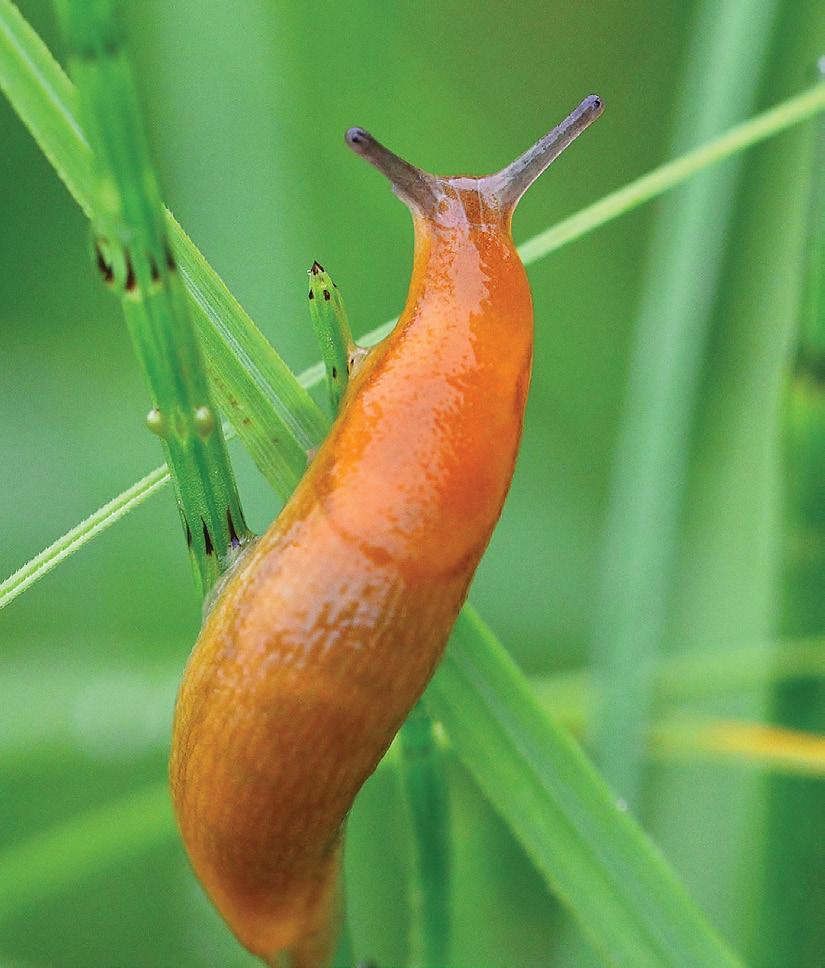
There are so many complex interactions, but two stand out. Soil animals such as worms and ants and slugs and mites process nutrients through their digestive systems, feeding on microbes and increasing organic decomposition. They also create avenues for the penetration of air and water.
Worms are very helpful. Worm castings are filled with nitrogen, phosphorus and beneficial bacteria that help plants grow along with a wide range of hormone-like compounds that affect plant growth. This is just a brief introduction to what goes on down there in the birthplace of plants. There is so much yet to learn about the complex relationships that govern life in and on earth and scientists are making new discoveries every day.
Meanwhile, we gardeners are eternally inspired with awe and wonder at the miracles of the natural world. Be kind to it. x


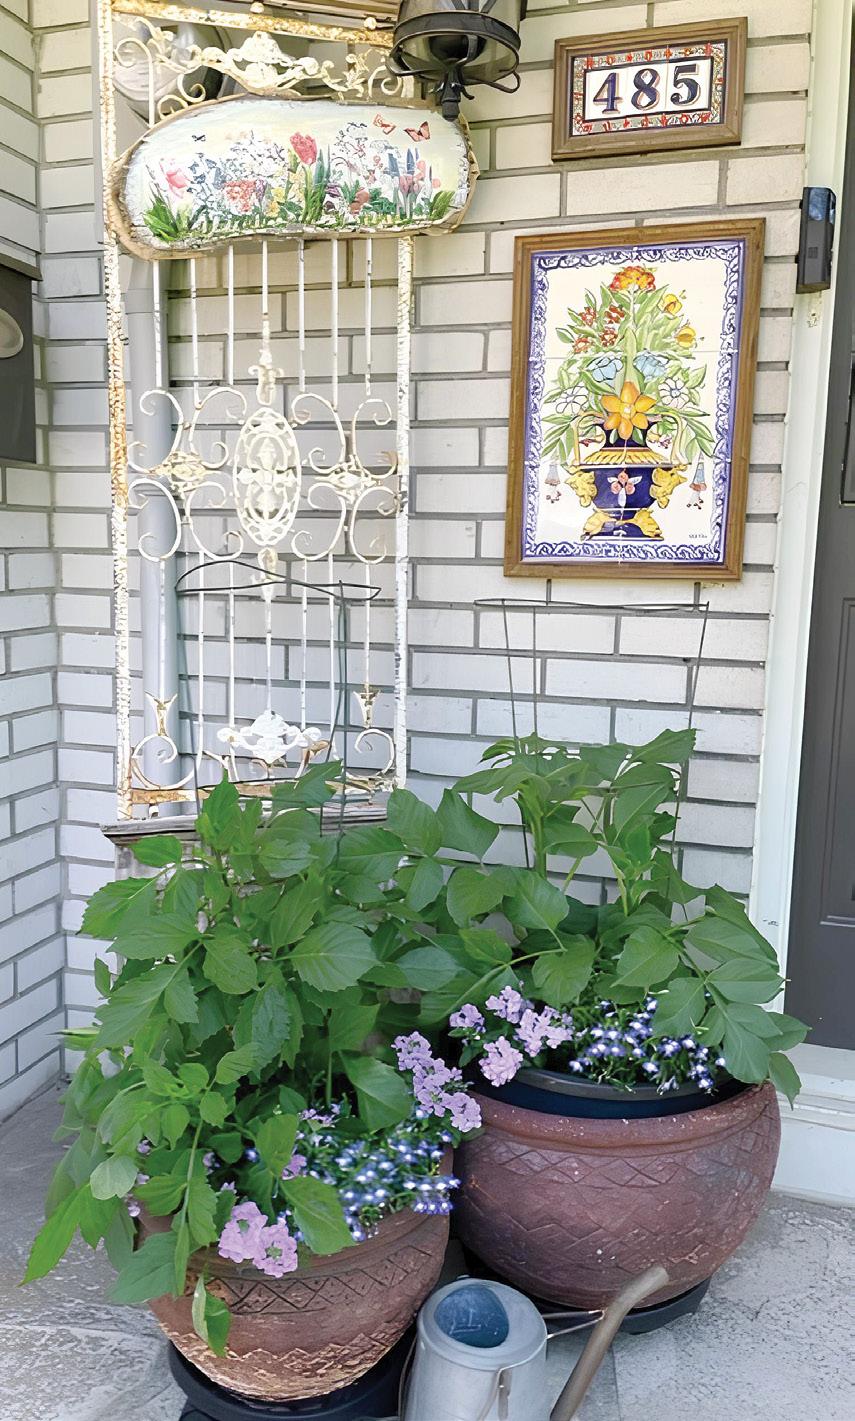
Jill snape oshawa, ontario
story and photos by Gail m. murray
The lamppost with luscious purple clematis welcoming guests to Jill’s front garden reminds me of another lamppost in C.S. Lewis’ land of Narnia. This is a magical place. The purple clematis merely hints at the glorious discoveries to ensue.
In summer 2014, Jill arrived with a moving van for furniture and large truck for her plants. She promptly began digging up the lawn. Her house is on top of a hill with a deck leading out from her patio doors down steep stone steps to her captivating back garden in the valley. Arbors, tall plants and a charming gazebo, where daughter Charlotte spoke her vows, provide striking visual interest. In the center, a circular perennial border garden takes
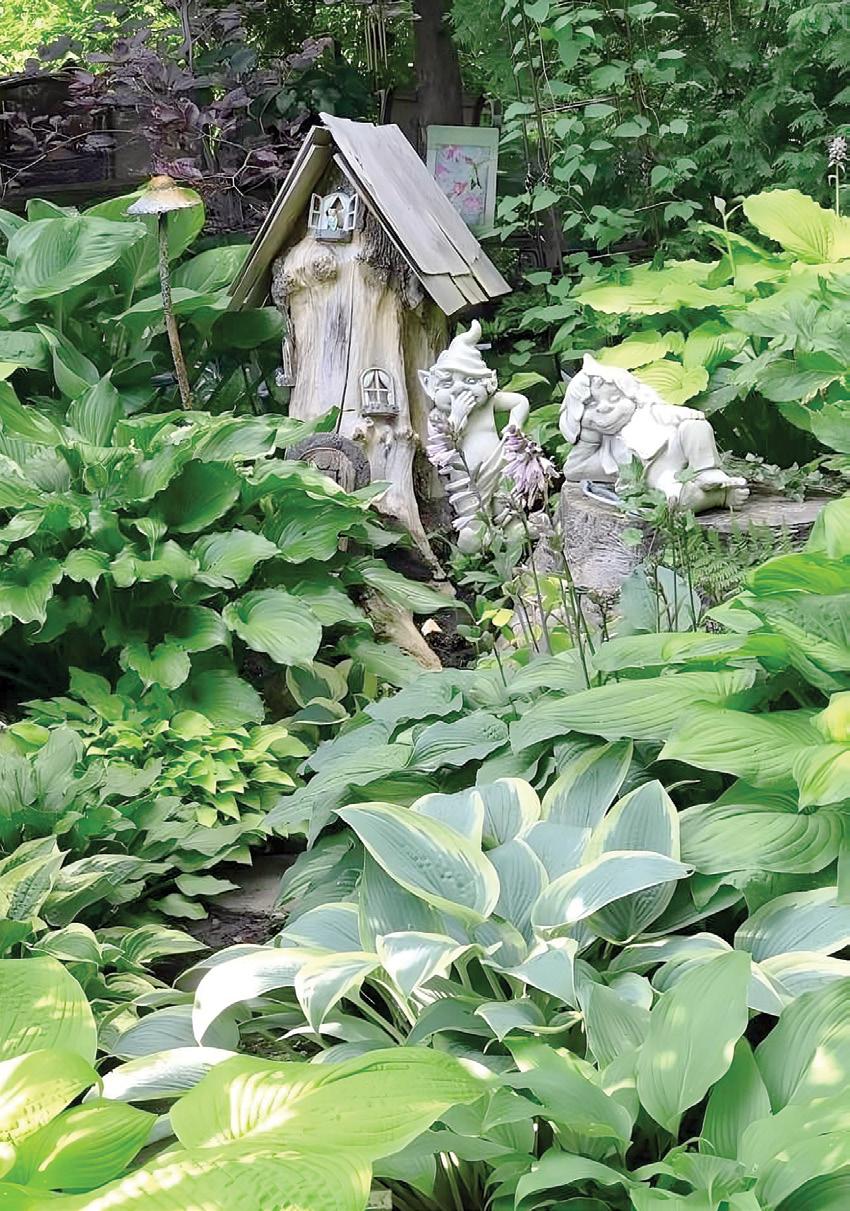

There is a bench here, should you like a rest or read by the water before entering the woodland.
pride of place with meandering paths around it. There are side gardens to admire. Continue walking under mature shade trees underplanted with over 300 voluptuous hostas adding depth and texture.
There are garden rooms and seating areas ranging from white wrought iron café chairs to a wooden swing to Muskoka chairs. Cross the bridge
over the natural stream shored up by a rockery and more hosta. There is a bench here, should you like a rest or read by the water before entering the woodland. Soon you arrive at the vegetable patch, large wooden compost bins and an area of dwarf evergreens.
Ever the gifted gardener, Jill has selected native and exotic plants for


Check out this video to see more of Jill’s garden courtesy of the Oshawa Garden Club.

https://www.youtube.com/watch?v=ZiqPt7G4ifY
continuous bloom. Thanks to Merle Cole of the Oshawa Garden Club, where our hostess is a member, you can visit this gem of a garden online. What a respite to partake of the soft pastel palette of spring blooms: blush magnolia, blue iris and muscari, yellow daffodils and woodland trilliums set to fluid melodies.
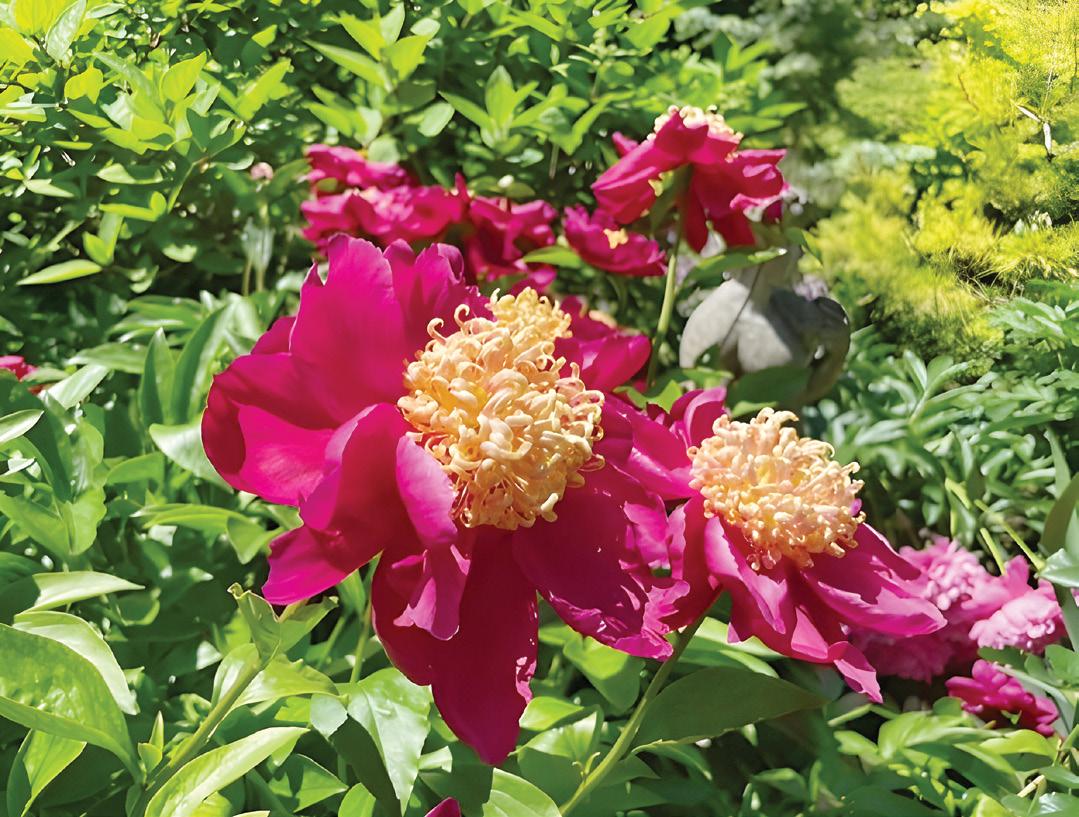
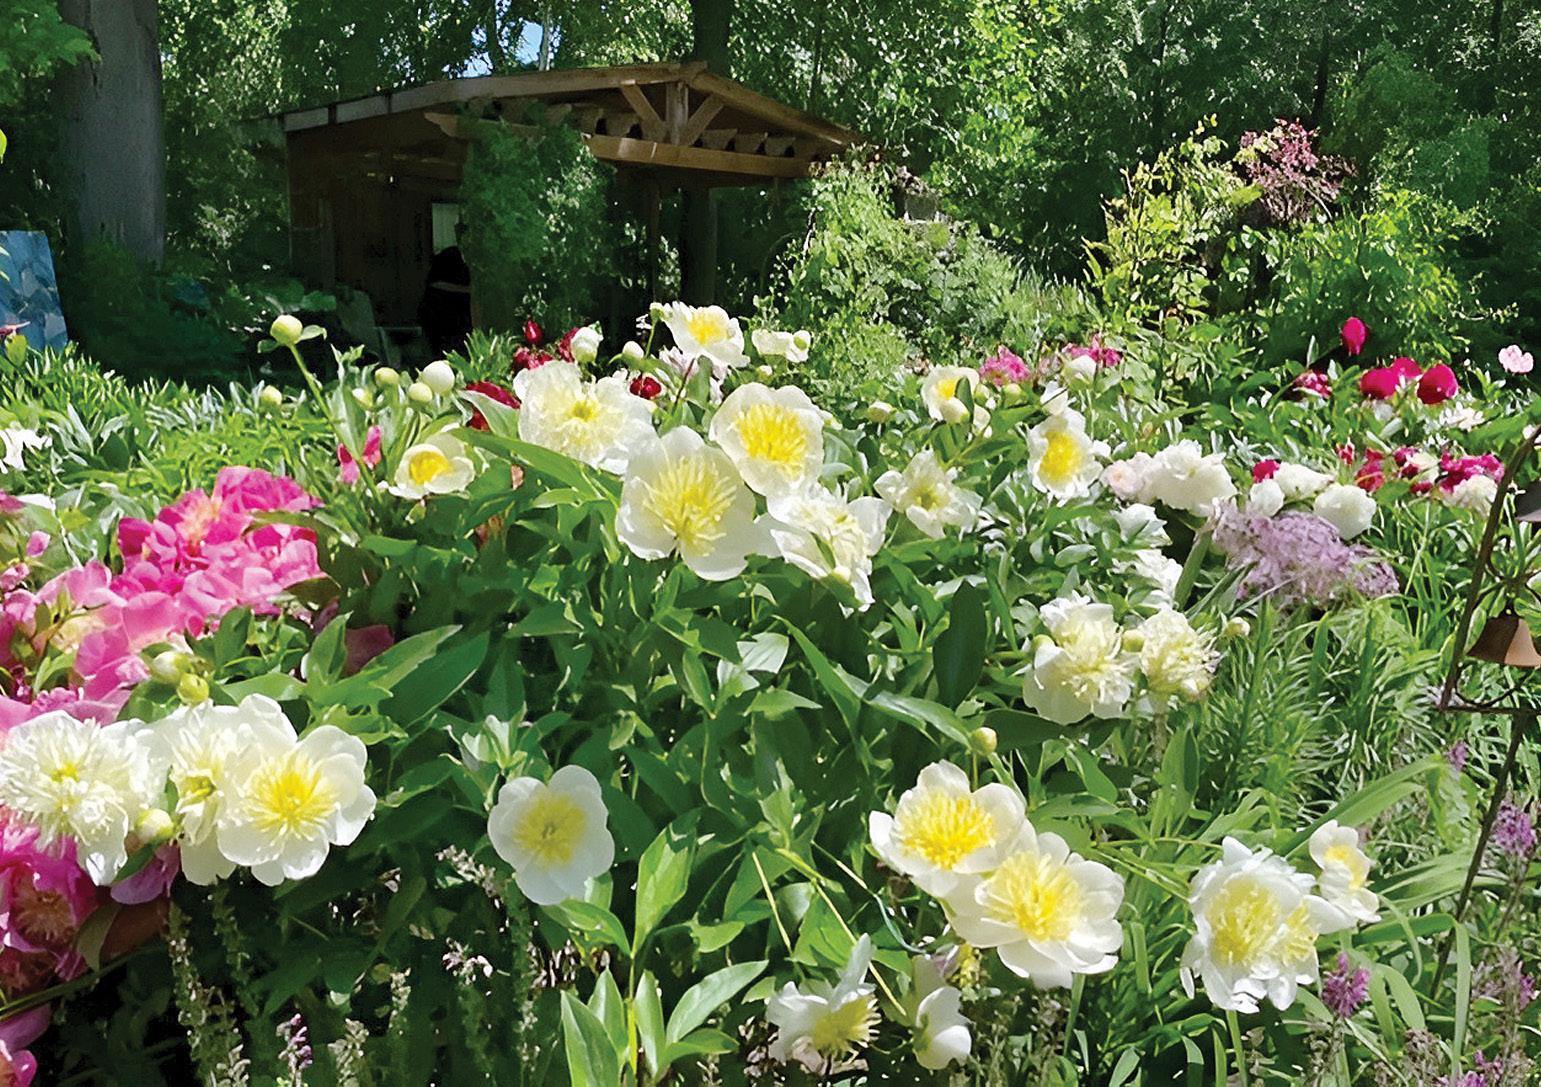
Jill lives in central Oshawa about ten minutes from the Oshawa Valley Botanical Gardens celebrated for its June peony festival. This is my favourite time to marvel at my friend and former teaching colleague’s garden. Merle thought so too and produced another YouTube video just to highlight the peonies. Her central garden is a showpiece as brilliant pinks, and fuchsia peonies vie for attention with deep cerulean blue delphiniums.
Jill’s garden was featured in the local event Artists in the Garden Tour in 2016 and more recently in 2022.
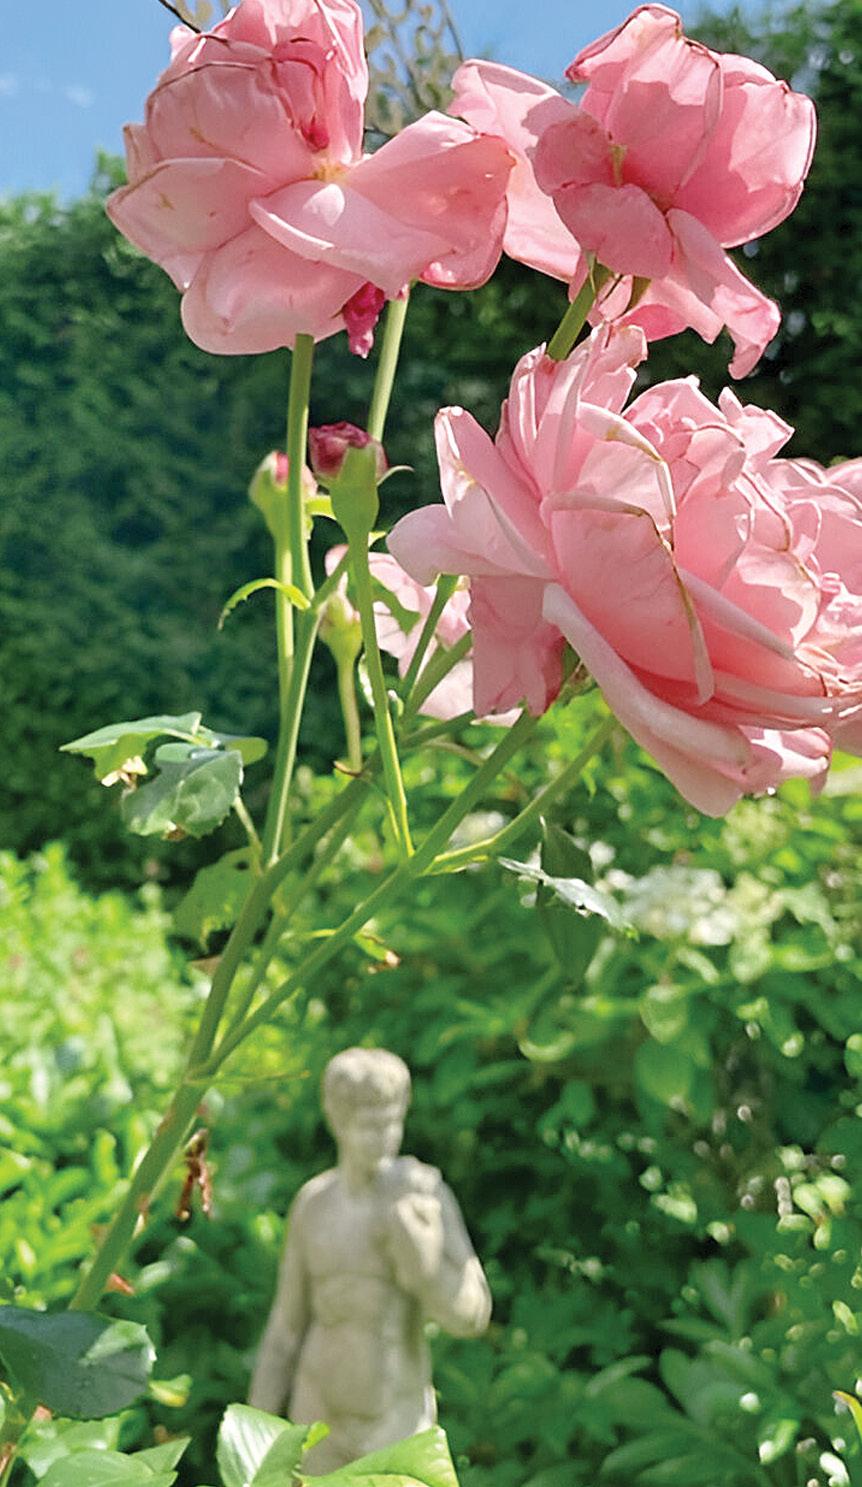
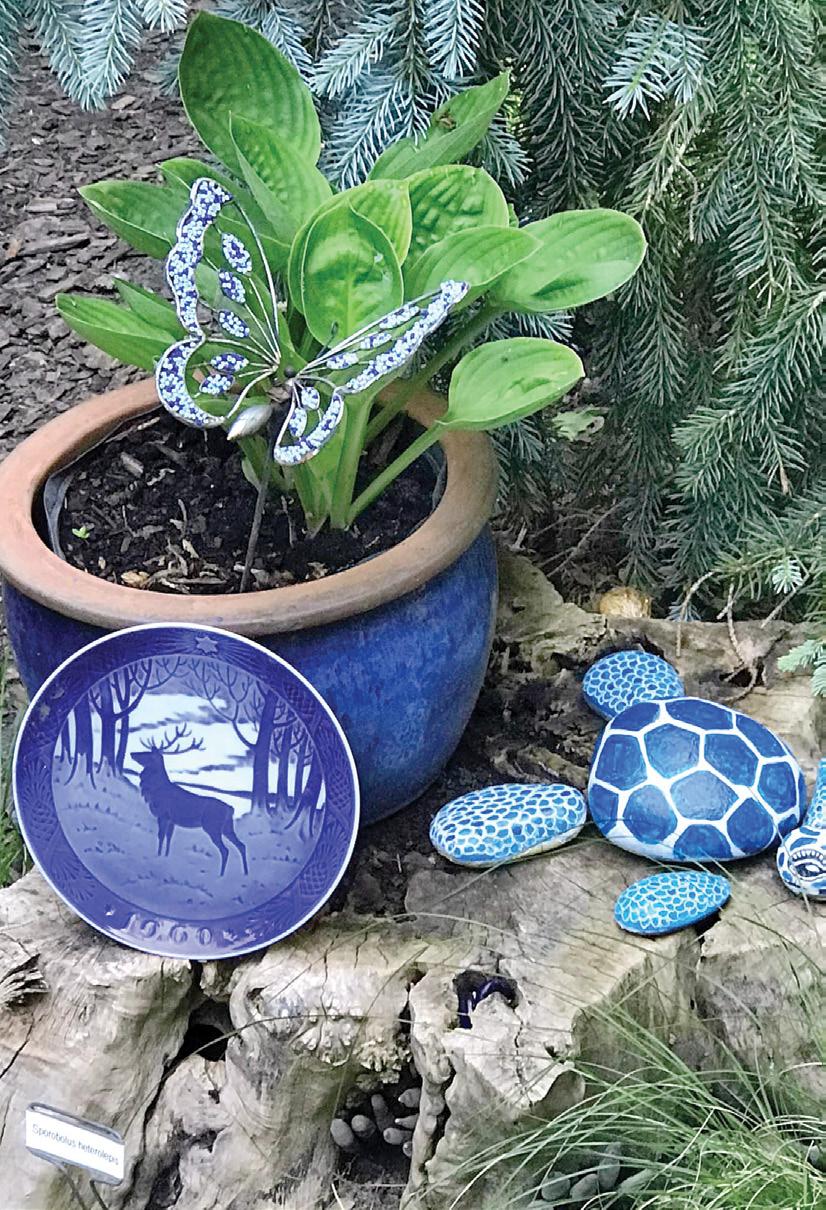
No wonder, with the varied plantings, beguiling garden sheds with their own window boxes, and delightful whimsy of garden art – a gaggle of stone geese, scary carved wooden trolls, ornamental bird houses, sparkling glass and ceramic flowers. I came to appreciate statuary while strolling Renaissance gardens in France and Italy; given the size of her property and exquisite taste, Roman statues are at home here.
My most recent experience in high summer found a habitat alive with pollinators fluttering about deep pink coneflowers, quaint daisies, fiery orange daylilies and regal hydrangea. Although a hot, humid day, the rush of the waterfalls into the pond, guarded by two iron herons, helped dispel the heat.
With her keen interest in the natural world, it’s no wonder that Jill is health-conscious, practicing yoga and reiki. Her creative flair extends to winter projects as well – sewing and quilting. We are indeed fortunate this gracious hostess enjoys sharing her enchanting garden. x


Joanne Perrault and Jocelyn leblanc
st. Claude, Quebec story and photos by Jocelyn leblanc
le Jardin sur la Butte
We purchased this one acre of land, located at the top of a high hill where the view is incredible, at the beginning of 2013. In the year preceding our acquisition, this land was taken care of by a farmer, and he had sown corn. When we arrived, it was an acre of completely bare land. No tree, no bush, no flower, not even a blade of grass. Come fall, the house was habitable, and we wanted to immediately start planting greenery around it. It must be said that at the start of this project my wife Joanne did not have much interest in it. So, since I really like watching birds and I was the only one to decide on the choice of plants, I bought all kinds of varieties of trees and shrubs that would produce food for them and become their shelter.
Even before the birds showed up, I was impressed by the beauty of these plants, the flowers in spring and the fruits that ripen throughout the summer, so I added a few more for aesthetics. After about four years of working and deciding everything on my own, Joanne decided to come and join me in my passion. What interests

I was impressed by the beauty of these plants, the flowers in spring and the fruits that ripen throughout the summer.
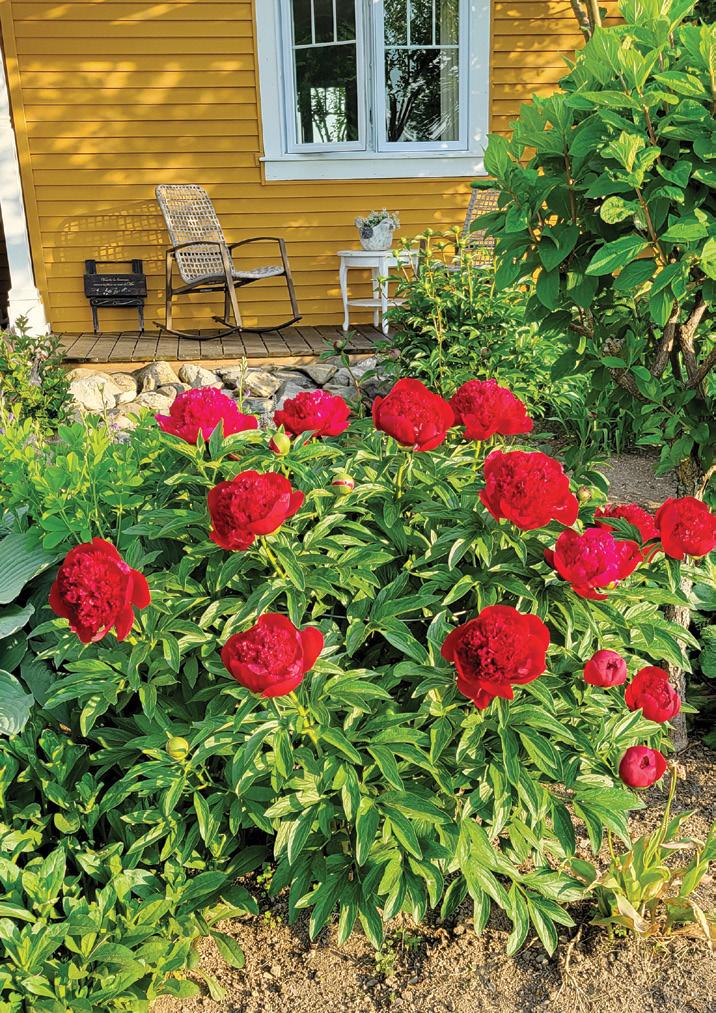
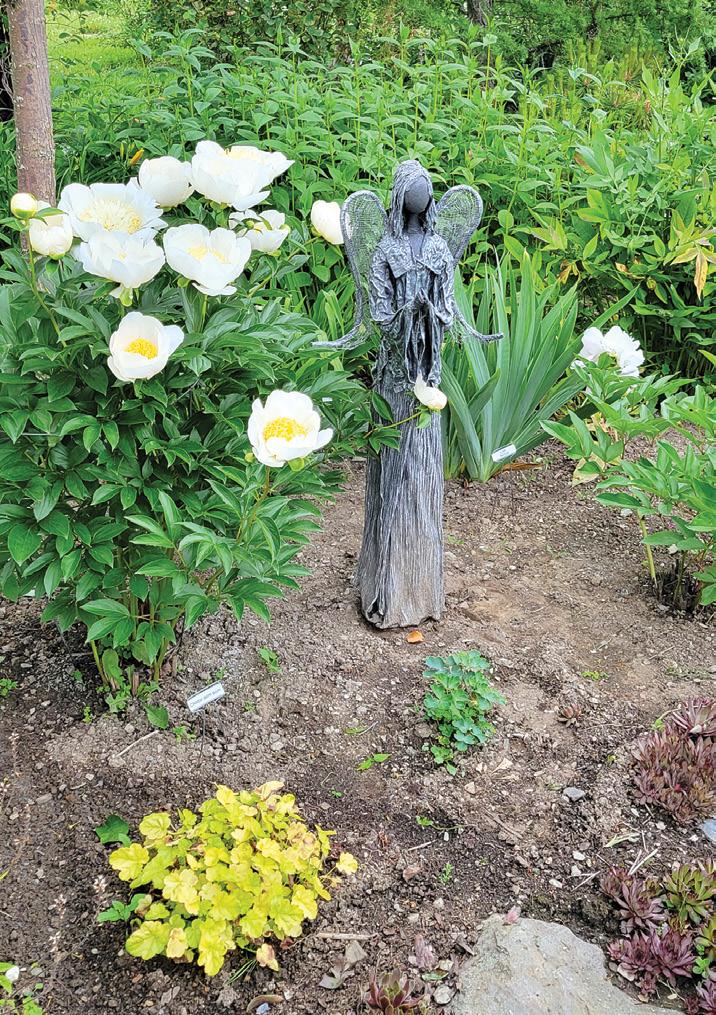



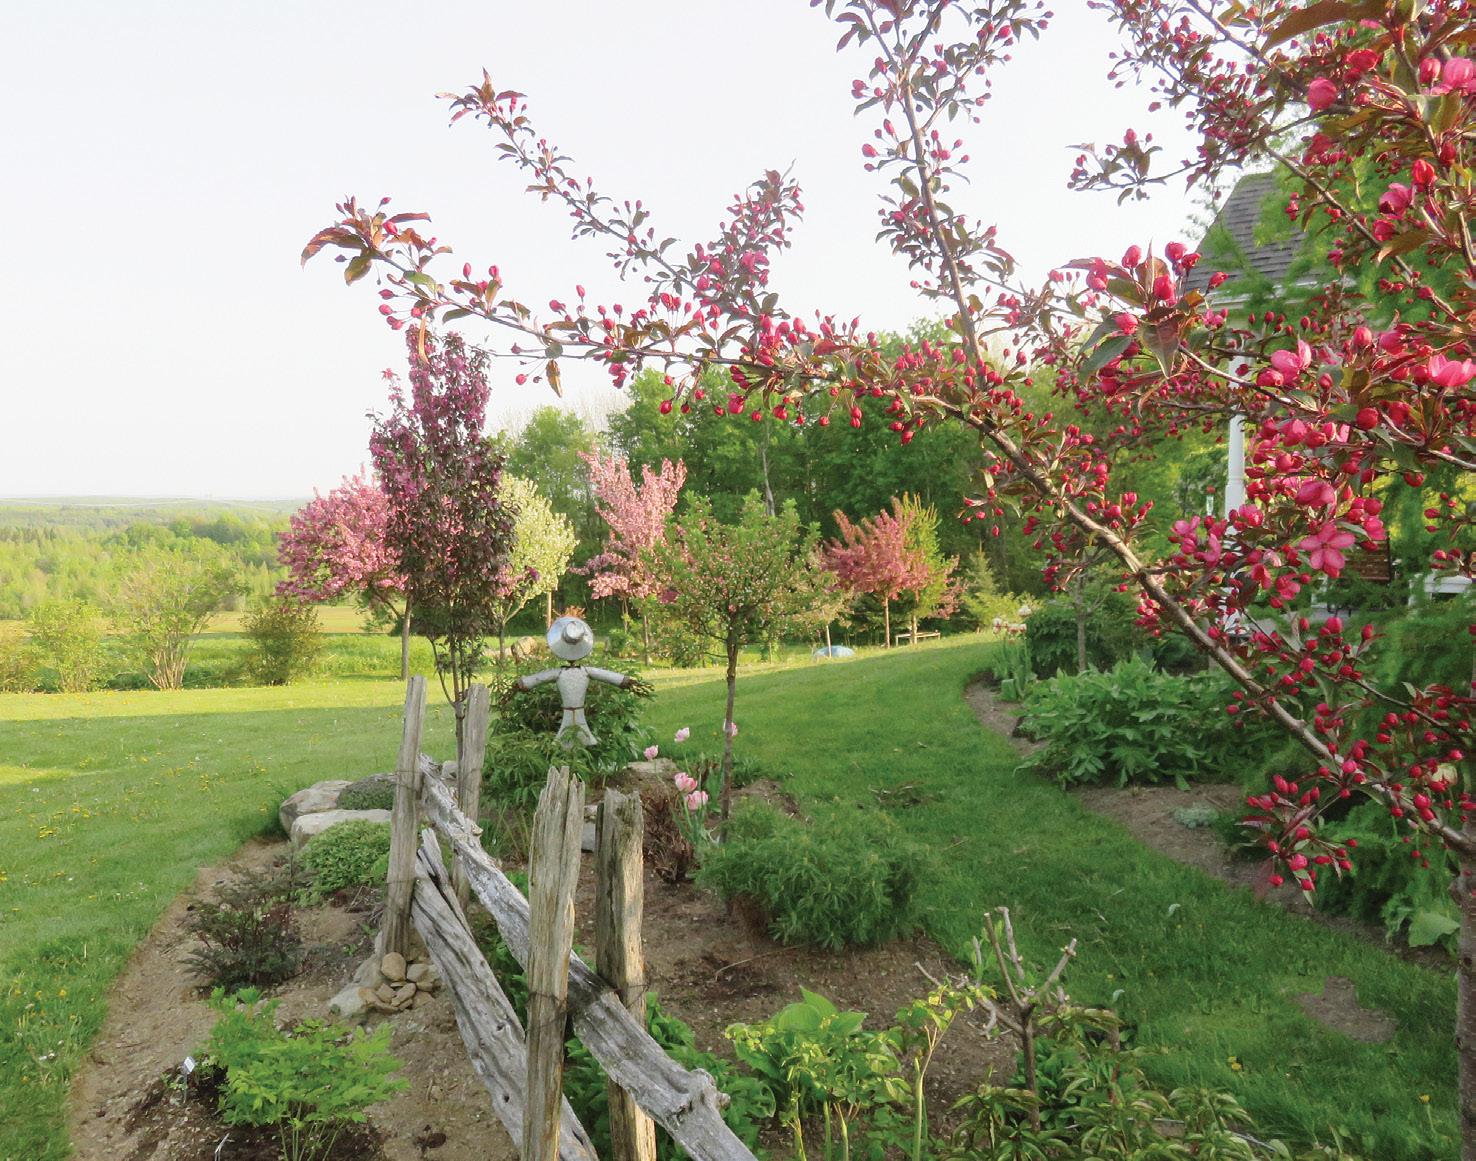
her most is the arrangement of colours and shapes. She considerably beautifies our garden thanks to her artistic talents.
We have pleasure finding trees to represent each of our children, grandchildren, and great-grandchildren. We did the same thing when my younger sister died a few years ago and we will do it again this summer for my younger brother who left last winter. We also find it amusing to give names or themes to our new flower beds.
Gardening becomes so much fun and when we walk through our garden, we not only see its great beauty, but we also relive hundreds of wonderful memories. While our trees are growing, we continue to plant tons of perennials in flower beds that are popping up all around the house. We are embarking on construction projects of different structures: stairs, stone support walls, patios, benches, ponds and so forth. We are adding garden figures, nesting boxes for birds, works of art, birdbaths and even some wooden sculptures that I made myself.
Every time there is an opportunity to visit the nurseries around us, we go there together, Joanne and me, to look for original and rare plants and any other treasures hidden there. When we return home, we take inventory of our finds and decide together where to plant them in our garden.
We also have a lot of fun every year around the vegetable garden. I started to become interested in it by reading articles and books that talk about permaculture. Even though I don’t intend to do it completely, for person-

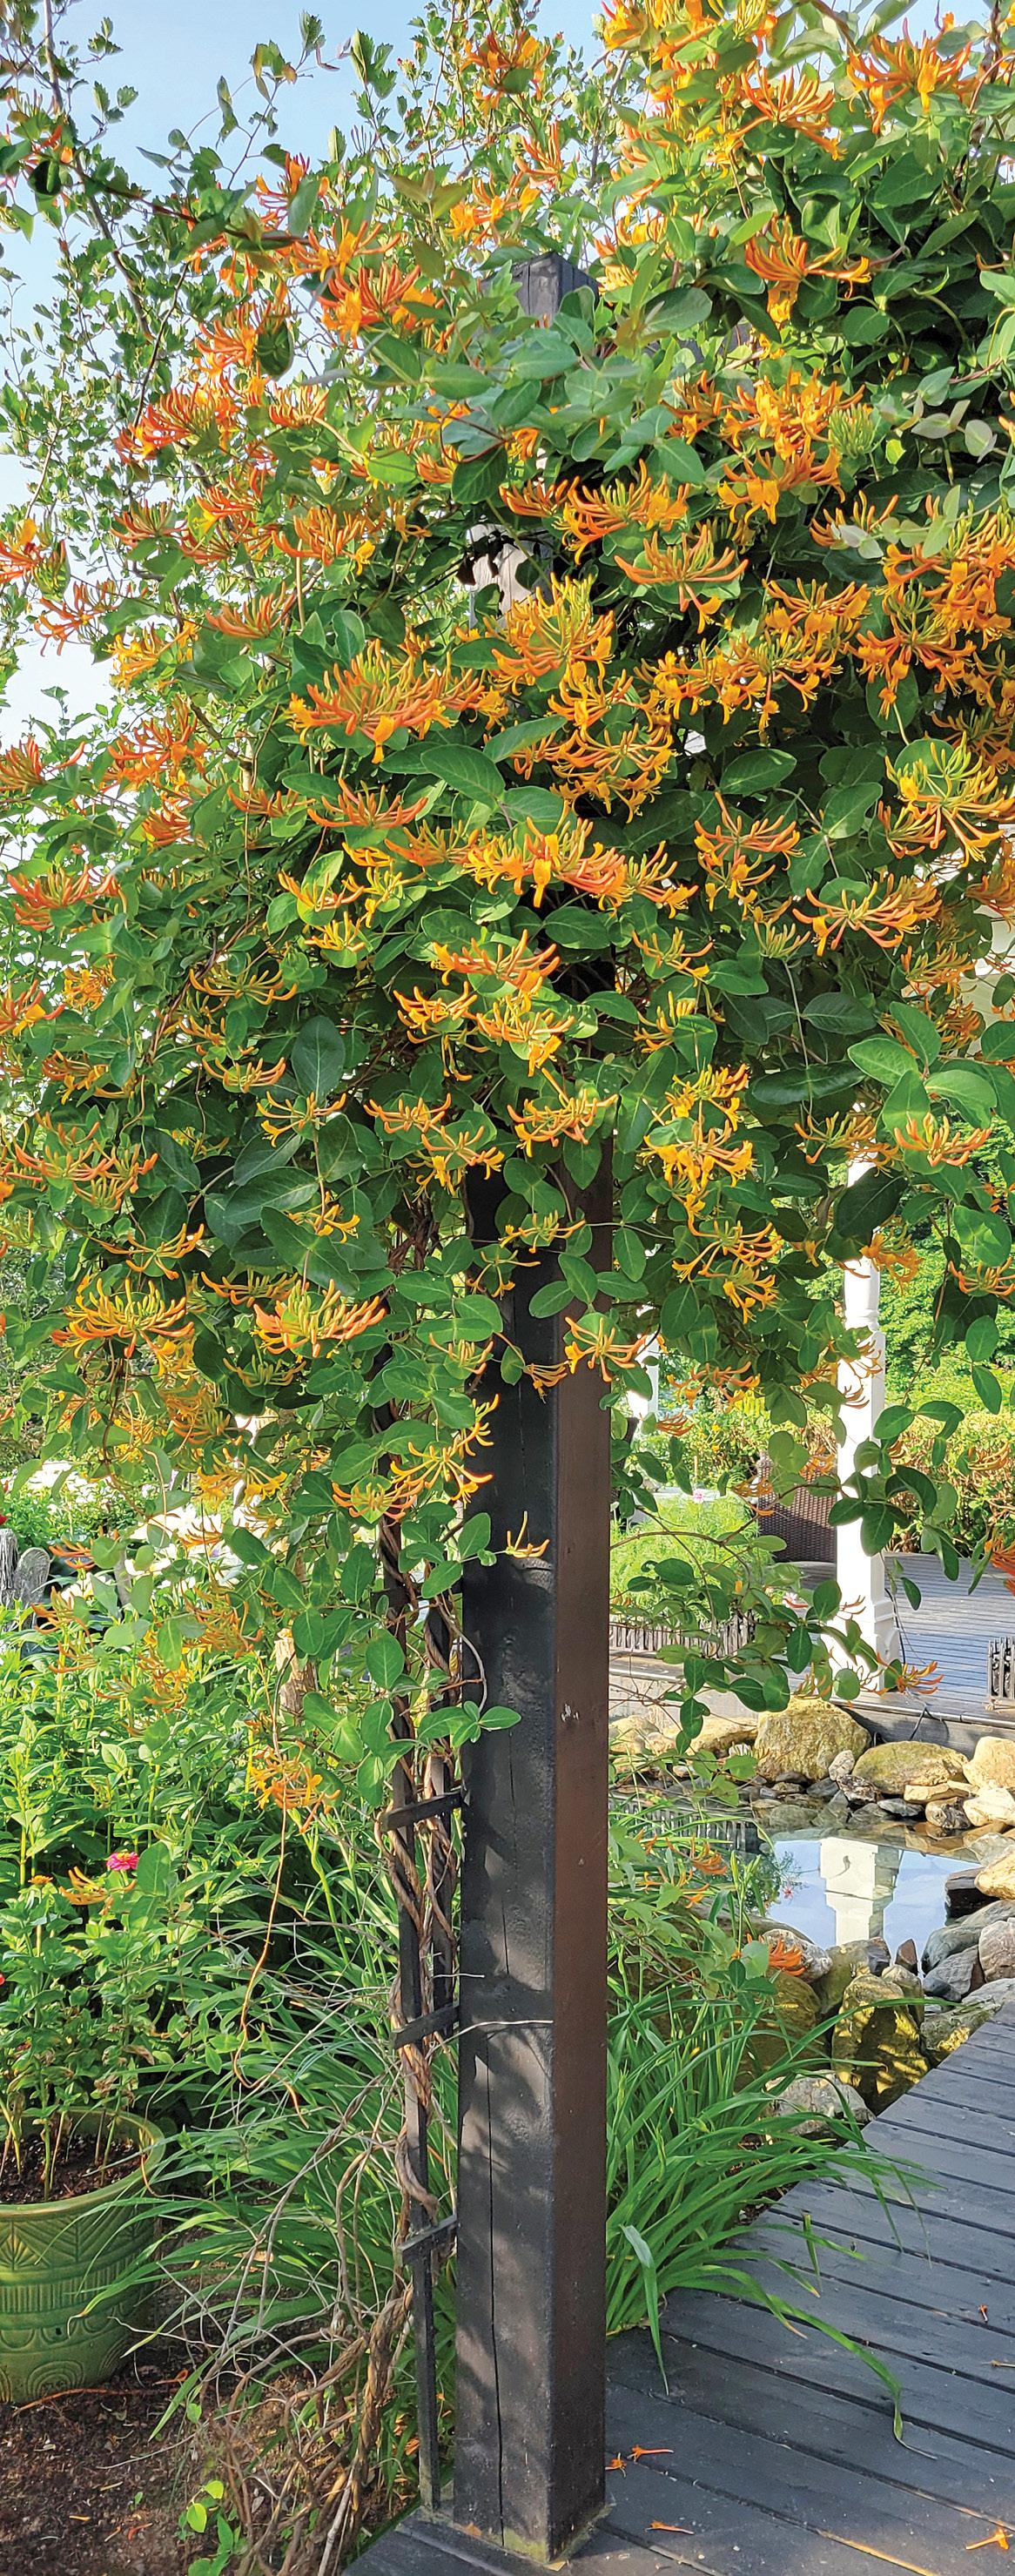
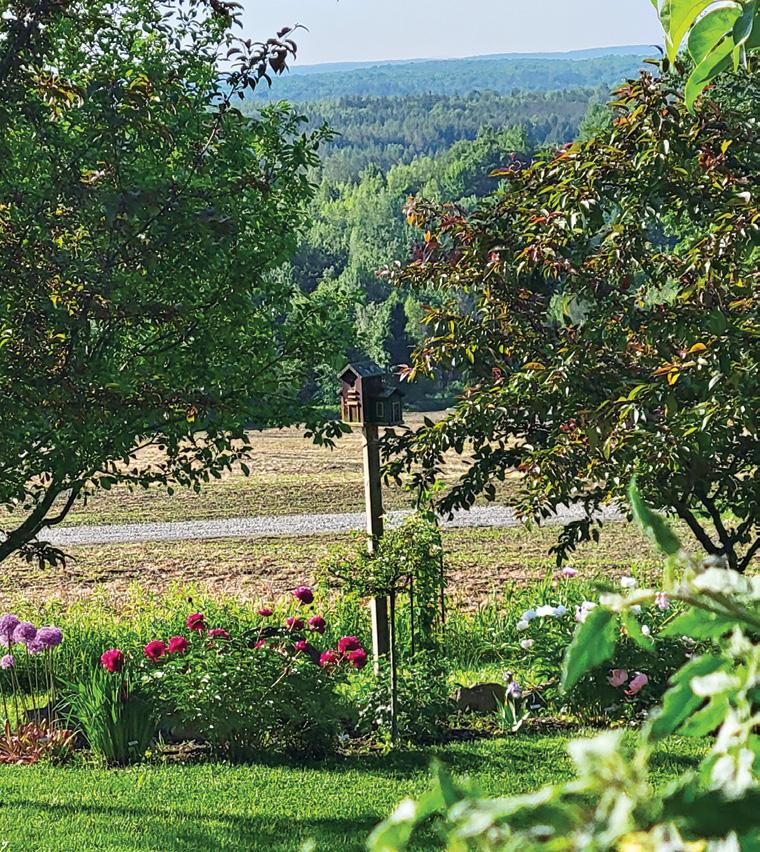
al reasons, I think it makes a lot of sense to do a little something when it comes to our food. In addition to the vegetable garden, we cultivate several types of nourishing trees or shrubs: apples, pears, plums, blueberries, blackcurrants, gooseberries and more.
We are certainly not finished planting new things here. We continue our visits to nurseries and we are members of several horticultural associations in which there are a lot of exchanges that take place between participants.
But the more plants there are, the more work there is for maintenance. We therefore believe that it will be necessary to cut in certain places now, due to lack of time. What I mean is that the dream is not over but that we will have to adjust, find a balance between improvements (research and purchases of new plants, construction of new structures for example) and the maintenance: management of diseases, pests, mandatory movement of plants which no longer have enough space, or which would prefer more sun or more shade, wetter or drier soil.
We continue our learning each year through reading books or specialty magazines, conferences given by horticultural associations, videos on the internet, visits to other gardens and questions to the horticulturists who work in nurseries. We are currently experiencing many enriching discoveries such as indoor seedlings, cuttings, winter outdoor seedlings, defense against diseases and unwanted insects. We also are continually looking for plants that bloom very early in the spring or very late in the fall to extend the gardening season.
There are still many projects on the table, and I am convinced that we will carry out several of them. In the meantime, the hours spent in the garden are moments of pure happiness. Whether for maintenance, beautification or simply to rest, have a meal or a cinque-a-sept get together as a couple or with family, friends, or other gardeners. A garden, in addition to being a good idea for the planet, for its environmental contribution, is a constant improvement of our own quality of life. x
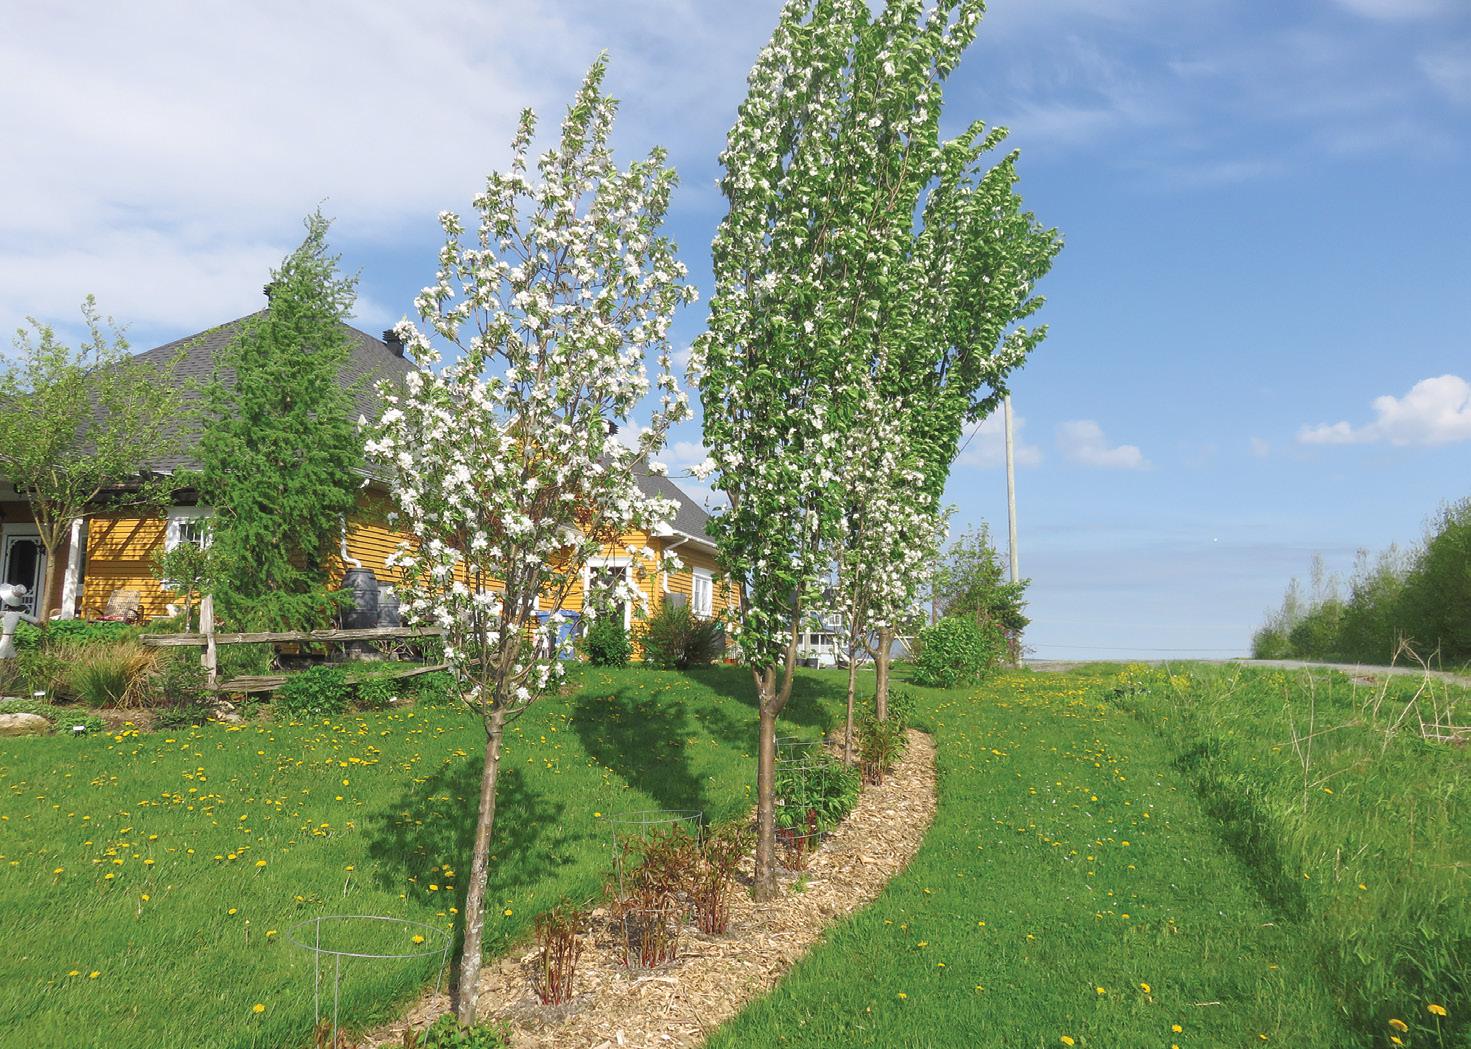

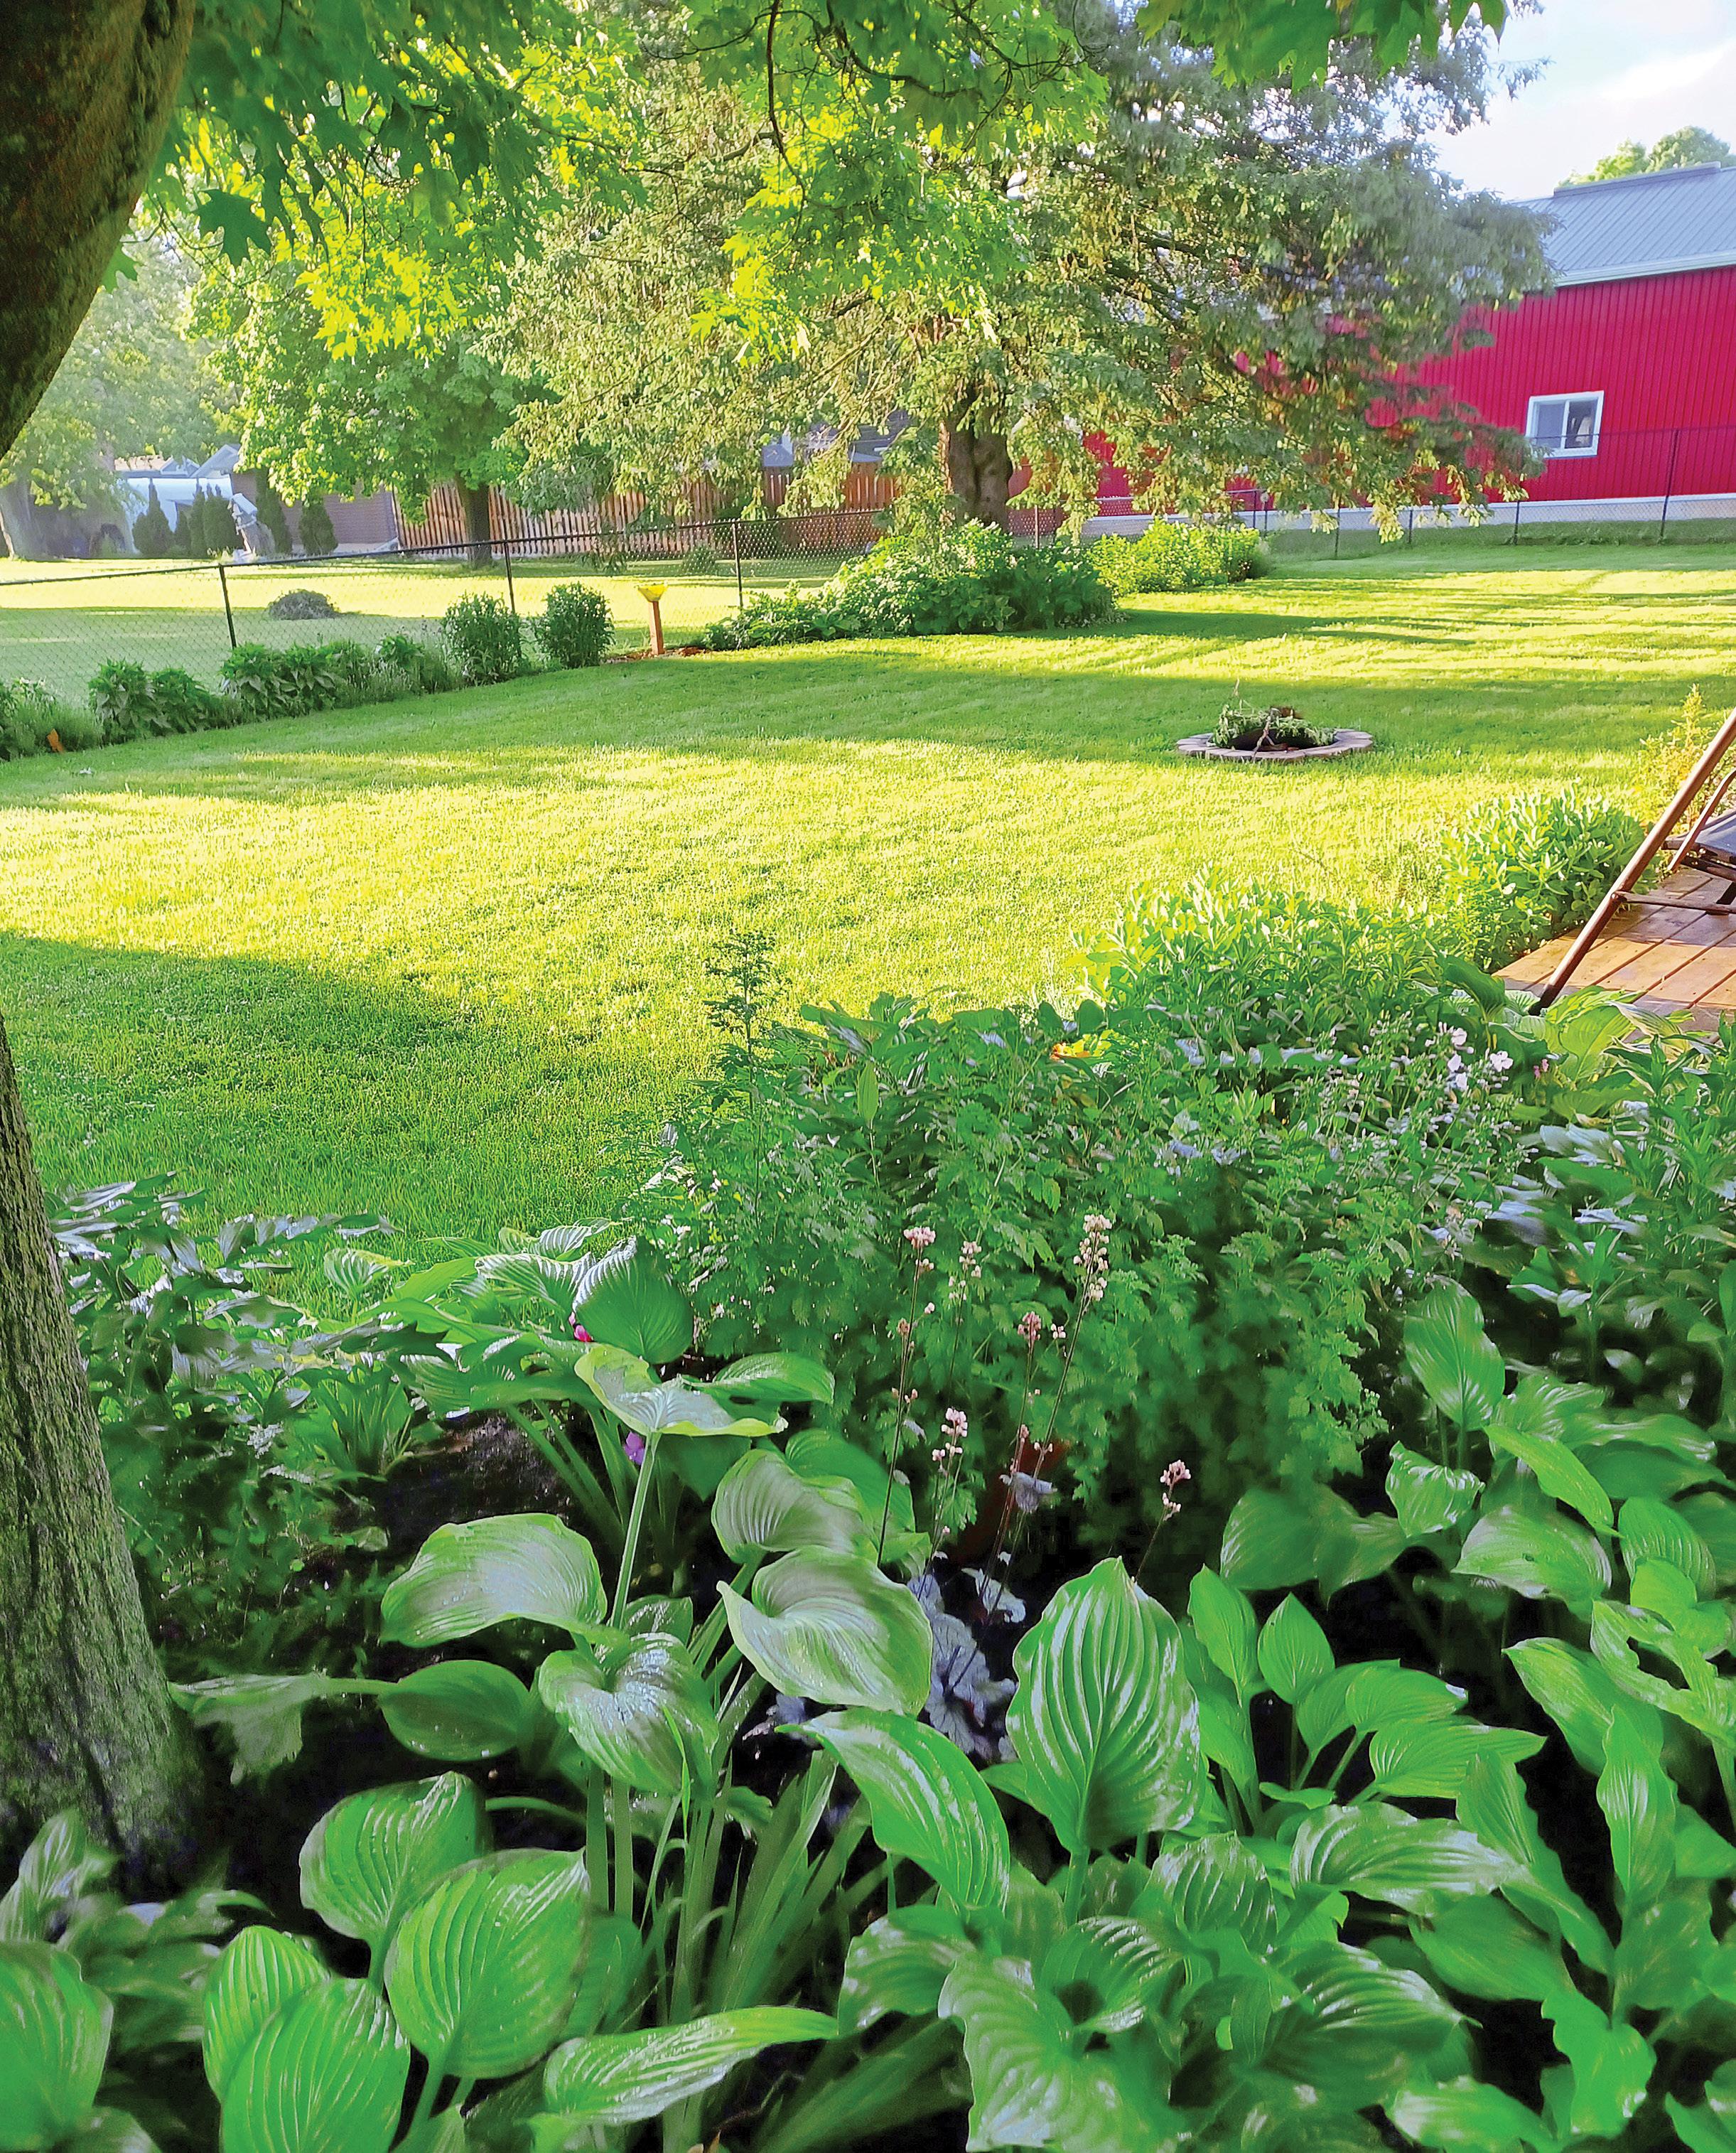
idyllic overview.


story and photos by nicky Fisher
Ihad a very happy childhood. My family and myself were always going on adventures, whether it be traipsing through the woods at our cottage in the middle of Georgian Bay or traveling to different countries all over the world.
Nothing has happened to me that I know of that would give me the levels of anxiety that I have had throughout my life. I always feel anxious and have feelings of panic inside my chest, and I simply don't know where it comes from. It could just be a part of my DNA.
I have always loved nature, flowers and mostly animals. I am a complete empath when it comes to the absolute
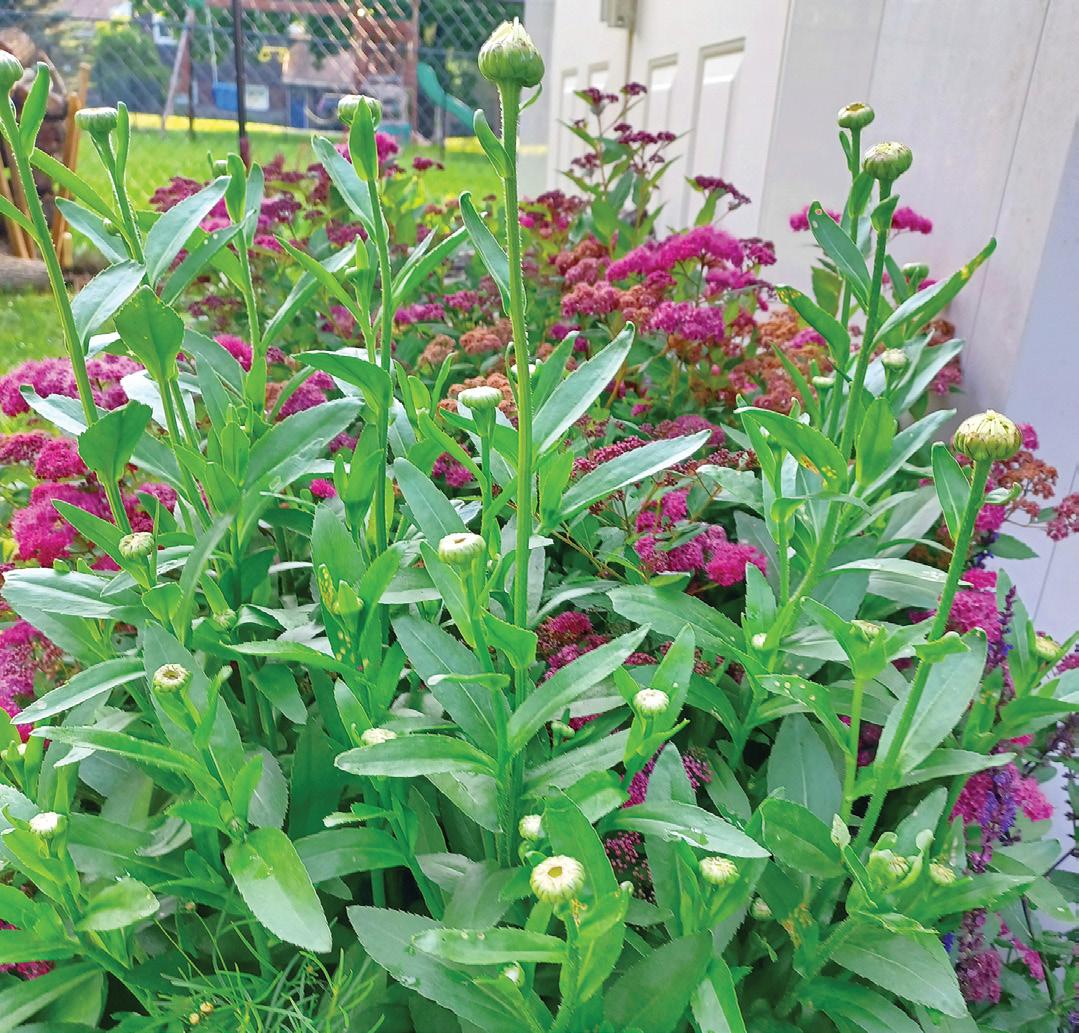

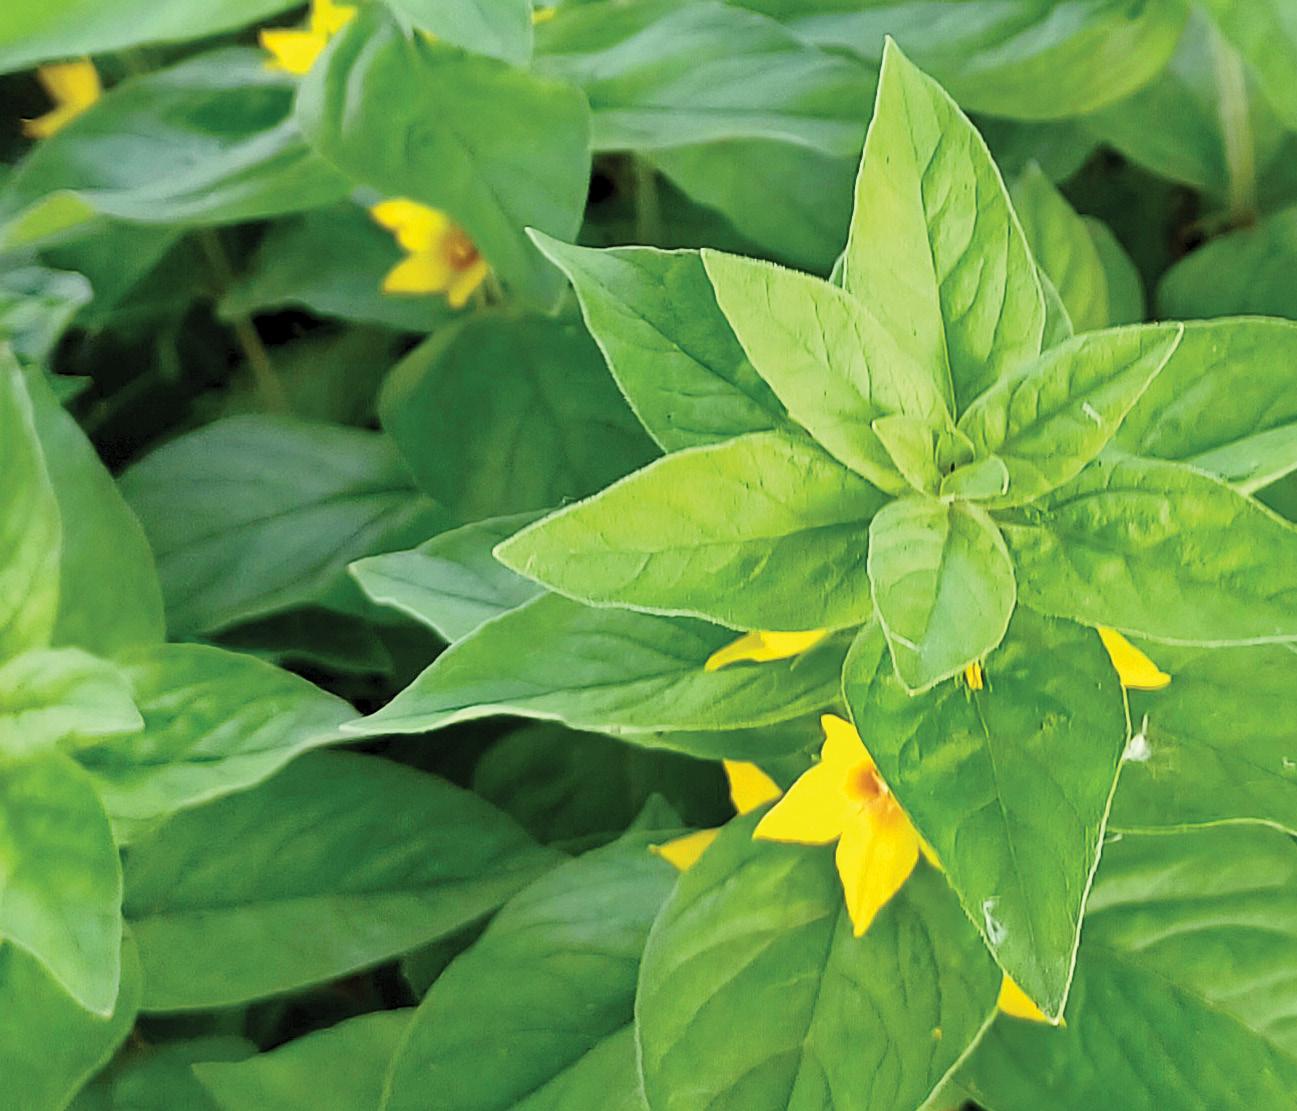
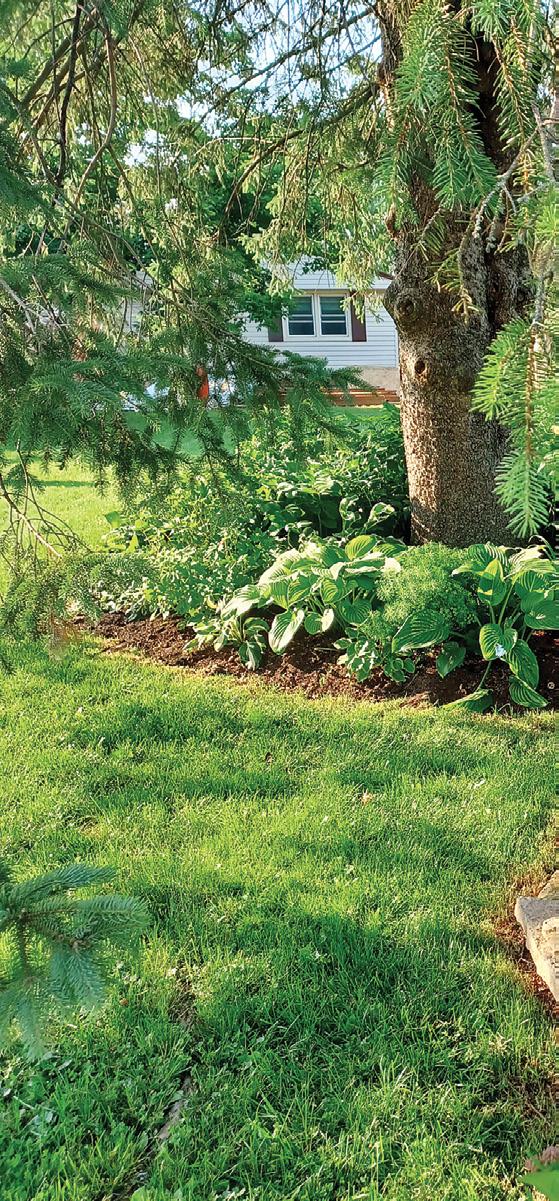
innocence of animals. I really feel it in my soul. It is at times debilitating for me.
The compassion and the empathy and the love for wildlife is strong within me. This has also been my downfall mentally as I worry a lot about animals and nature. In order to feel like I was helping in some way there have been numerous fundraisers and garage sales and helping people to purchase food for their animals. I've always had a compulsion to create habitat for bees and butterflies and birds which has led me to my obsession with gardening.
Gardening has become my outlet for my mental health.
It allows me to grow things that will feed habitat. It forces me to get much needed exercise. It makes me feel at peace and relaxed. I believe that it has helped me tremendously. My head feels better when I’m gardening as well as my soul. I actually find that I breathe deeper and calmer.
When I am outside or looking out my windows and I see all of the bees and the butterflies and the chipmunks

the butterflies.

Gardening has become my outlet for my mental health.

Peaceful serenity with many spots to sit and enjoy the view.
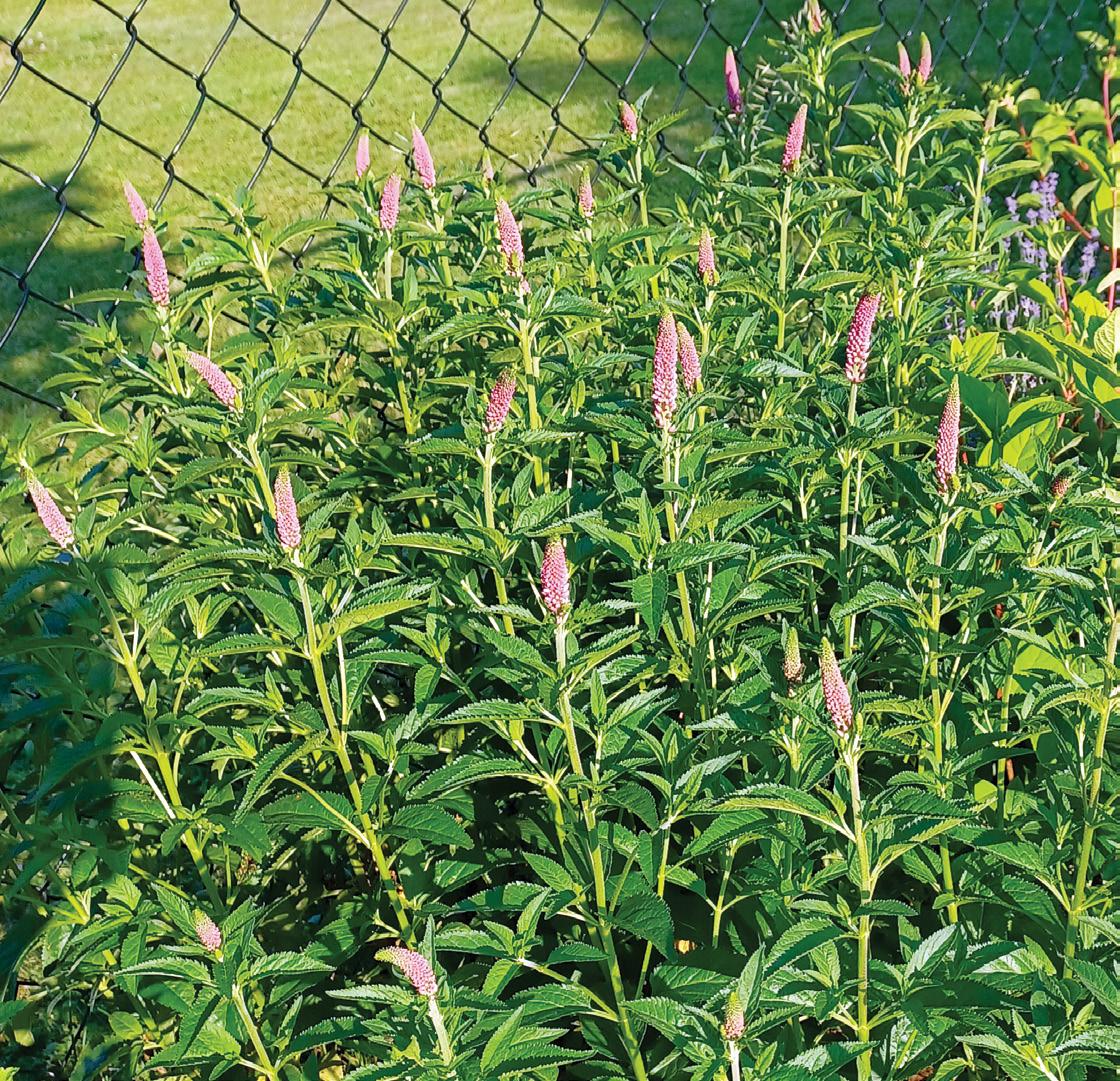

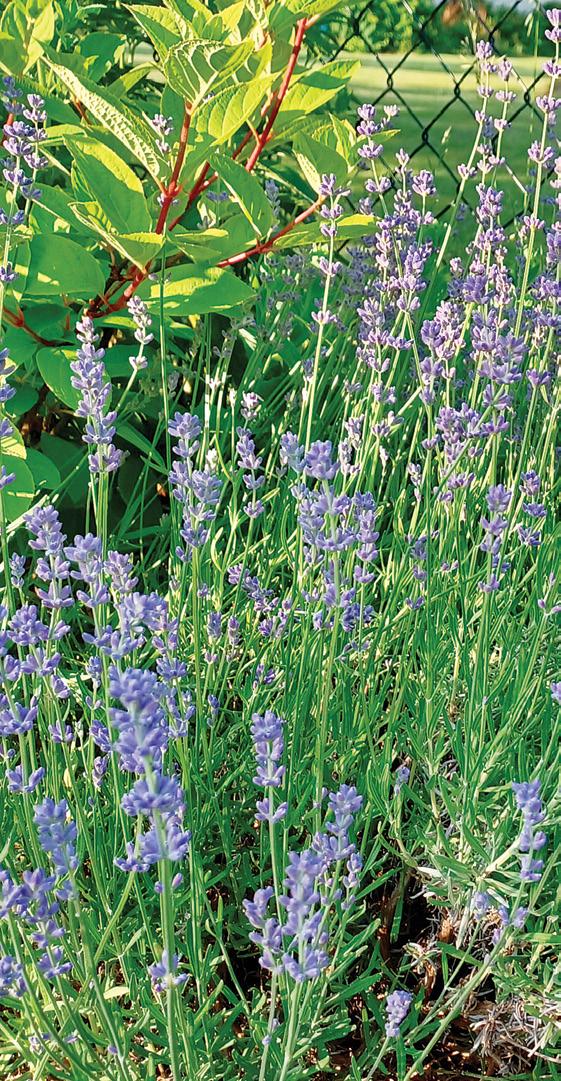
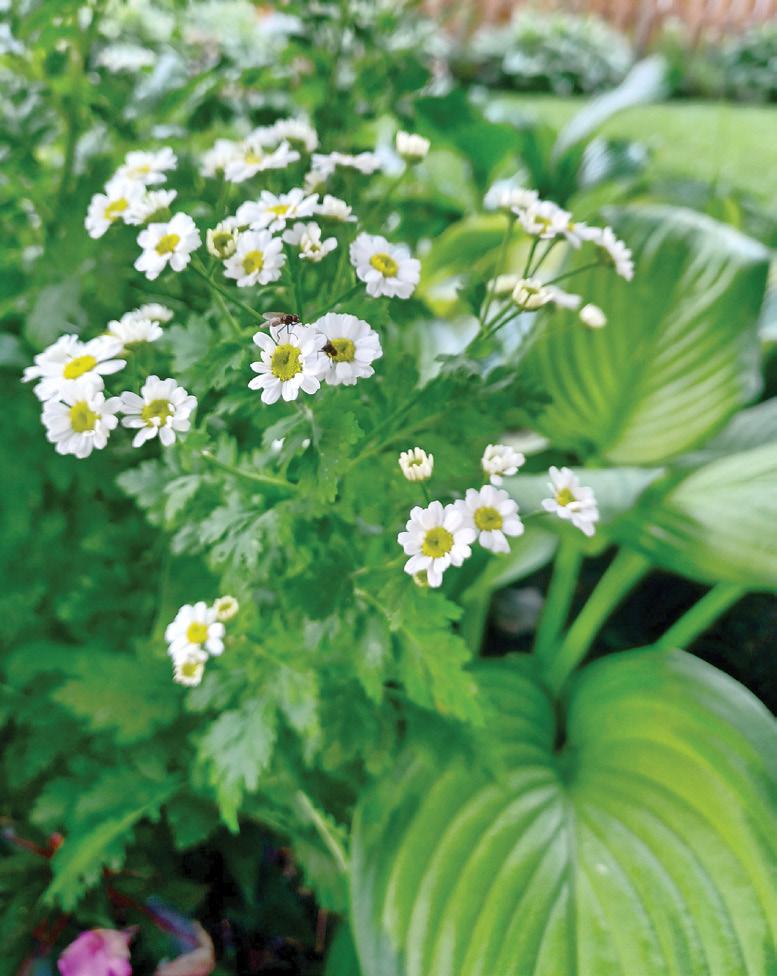

and squirrels and birds and rabbits eating the food that I am providing and using the habitat to survive, it brings me much happiness and peace and that is all from gardening.
Taking a dull, dusty, dry backyard and creating this habitat has definitely been equal to putting me on an antidepressant every day, I am sure. I feel as though anyone that has the desire, not only people with mental health issues... if they had the opportunity to get out there and get their hands in the garden and learn which plants feed which animals and how much water each plant needs and shade or sunshine each plant needs to survive... it could help. It sure has helped me! I feel so blessed that I have the opportunity to have a home where I can build this beautiful habitat for animals.
My advice would be for anyone who wants to get into gardening but does not necessarily have the land or the money to do so, look into your local community and see if there is a shared gardening zone. Do you have a porch or a balcony where you could plant a few perennials to feed the bees and butterflies? What about joining gardening sites through social media? It is a wonderful community. x
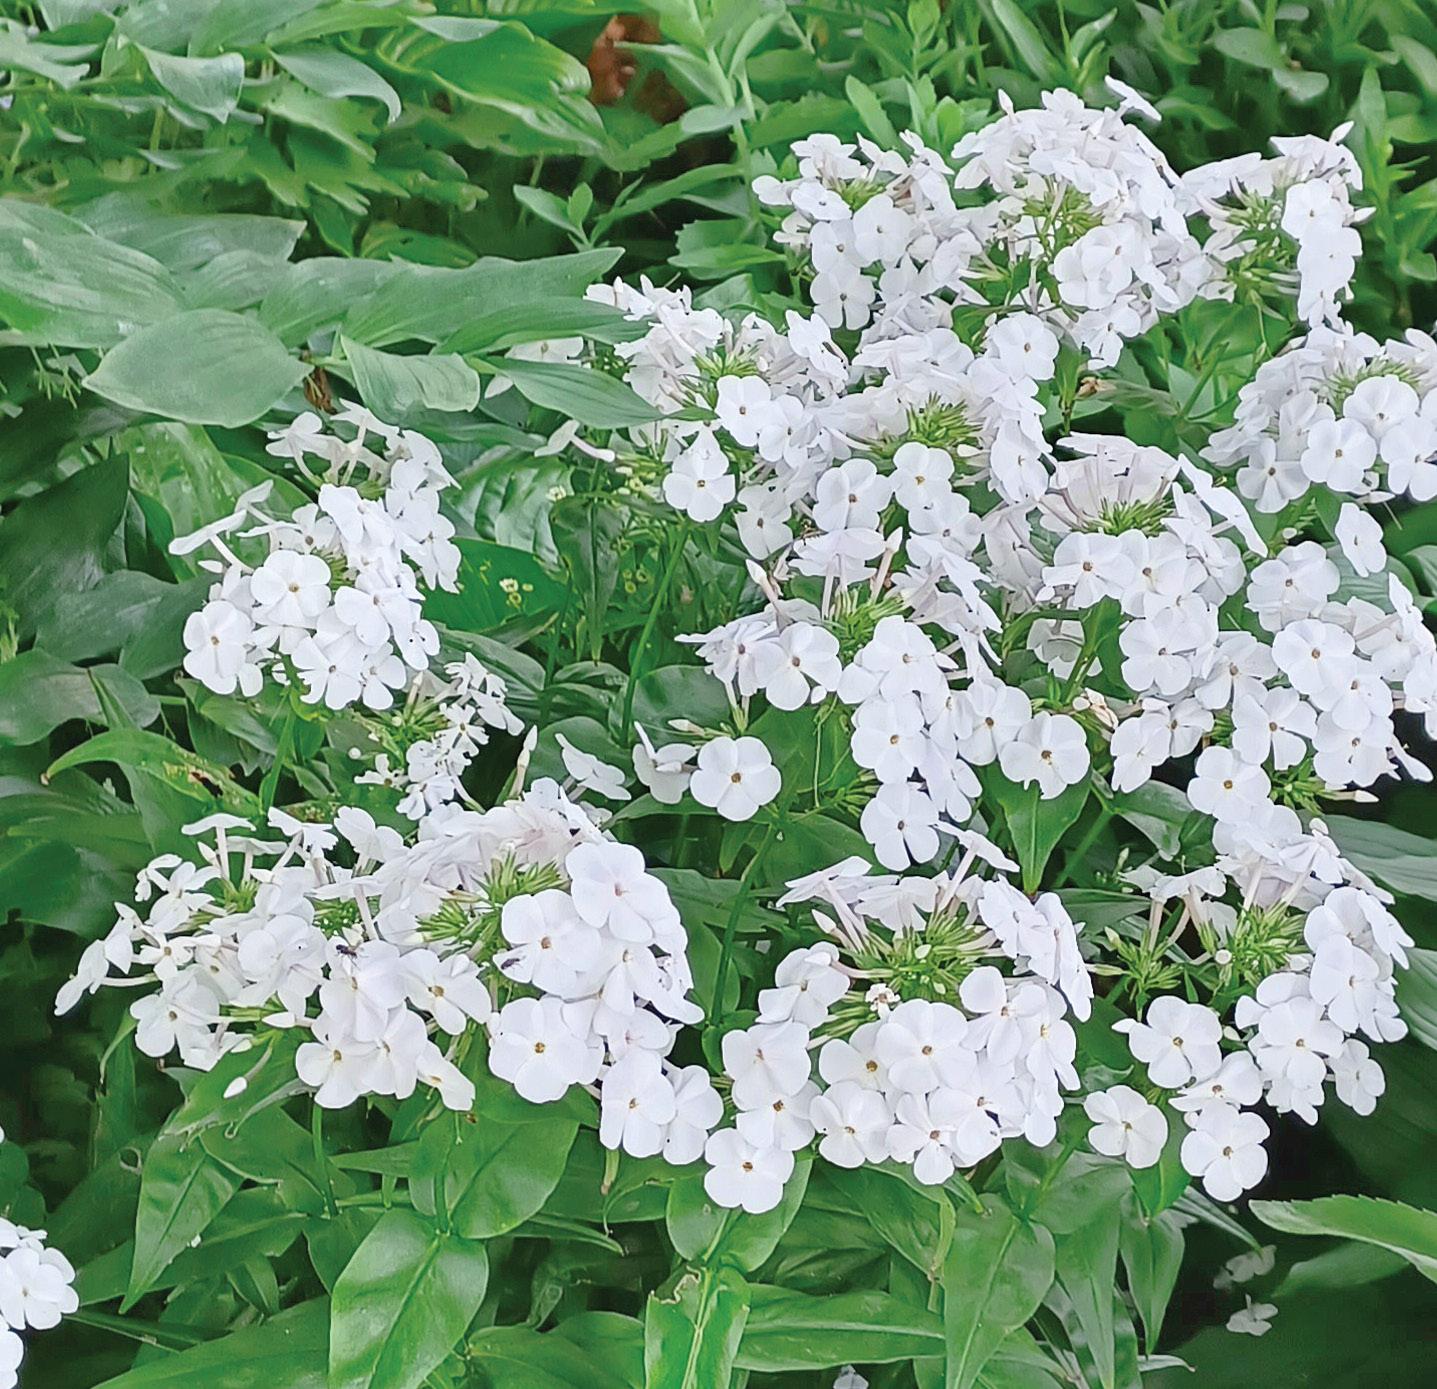
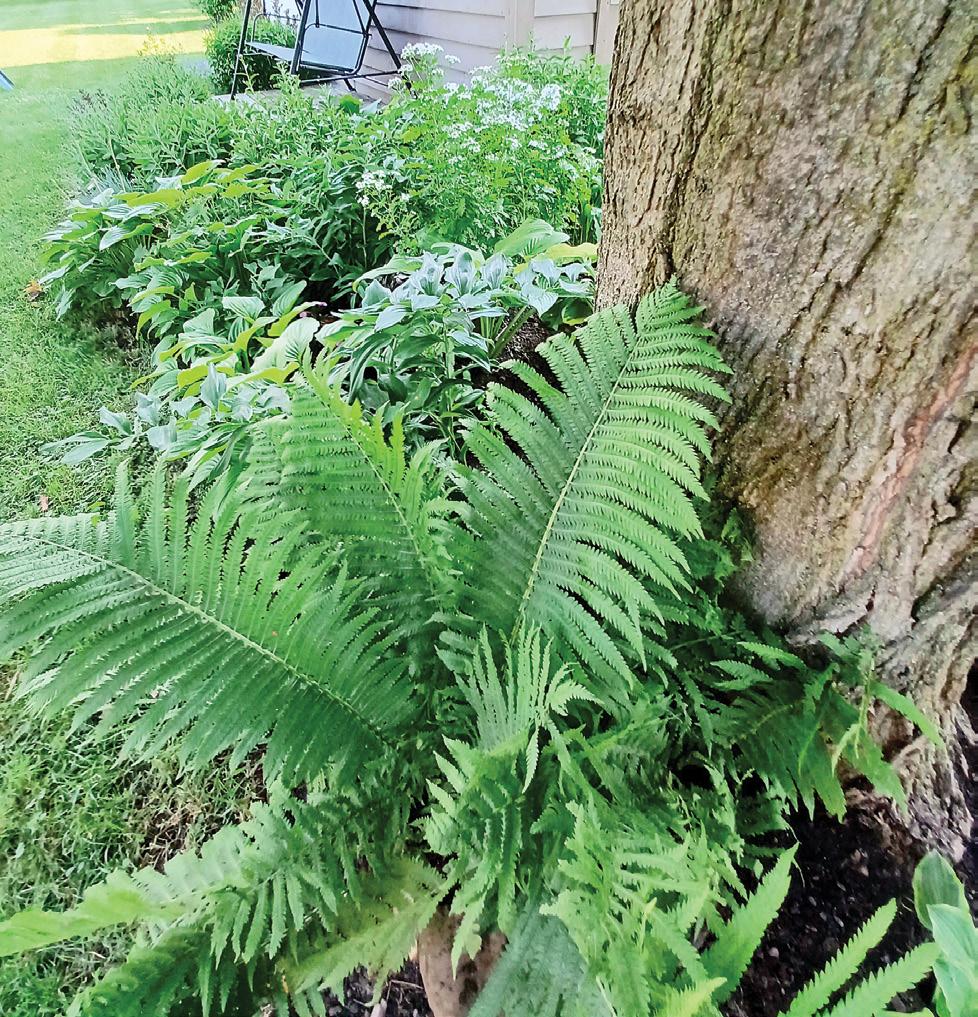
By shauna dobbie


There is no truly easy way to build a new garden. It cannot be done without breaking a sweat.
For the “shady” side of our front yard, I hauled most of three yards of 5-way mix on my own. The Reimer’s Soil delivery truck deposited it on the boulevard in front of the house, so it wasn’t very far this time. (Last year, when I built the vegetable garden in the back, it was from the parking area behind the gate, a little further. Every step counts.)
Some of the muscles I built up building last year’s garden have stayed, so I got most of the job finished before husband David got back from out of town. Then it was up to him to bring in the gravel for the walkways.
I had bought quite a few plants on a couple garden centre trips with my mom while David was away. Astilbe, hostas, creeping thyme and ligularia, all good for partial shade. After putting them in, I was shocked to see how much more space they seem to take up in a garden cart than in my actual garden. I thought I had so much! But I needed more plants.
I’ve been interested in the flora of my childhood lately, in the wilderness on Lake Manitoba where we went camping every summer. One plant I always loved was harebells and guess what? They are native to Manitoba! I figured they would be another “invasive” wildflower, given their popularity in Scotland. Turns out that they are native all over the northern western world, and I managed to source some from a Manitoba nursery called Prairie Originals, where I got most of the plants for the rest of the shady garden.
I also got some blue-eyed grass, pearly everlasting, crowfoot violets and Canada anemone. They don’t bring back childhood memories, but they are lovely. Other plants I do remember from camping trips are prairie lilies, wild roses and yellow toadflax. Poison ivy is another, but I’m not interested in planting that.
I got a few prairie lilies at the nurs-
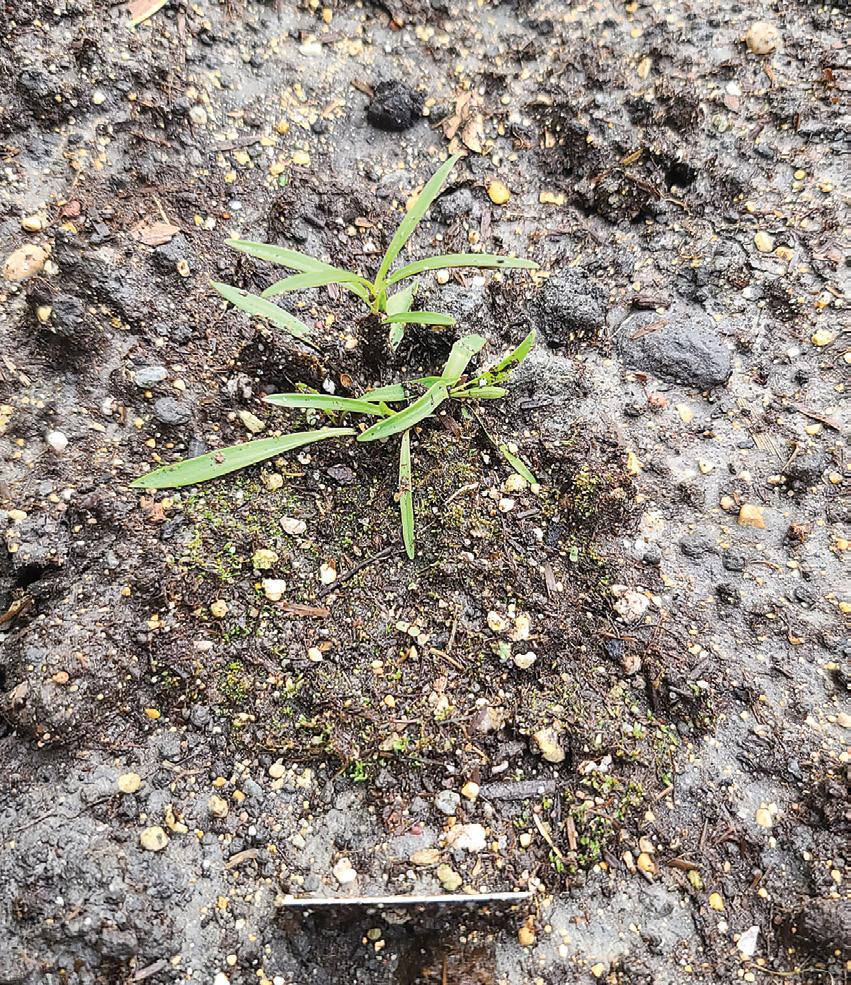

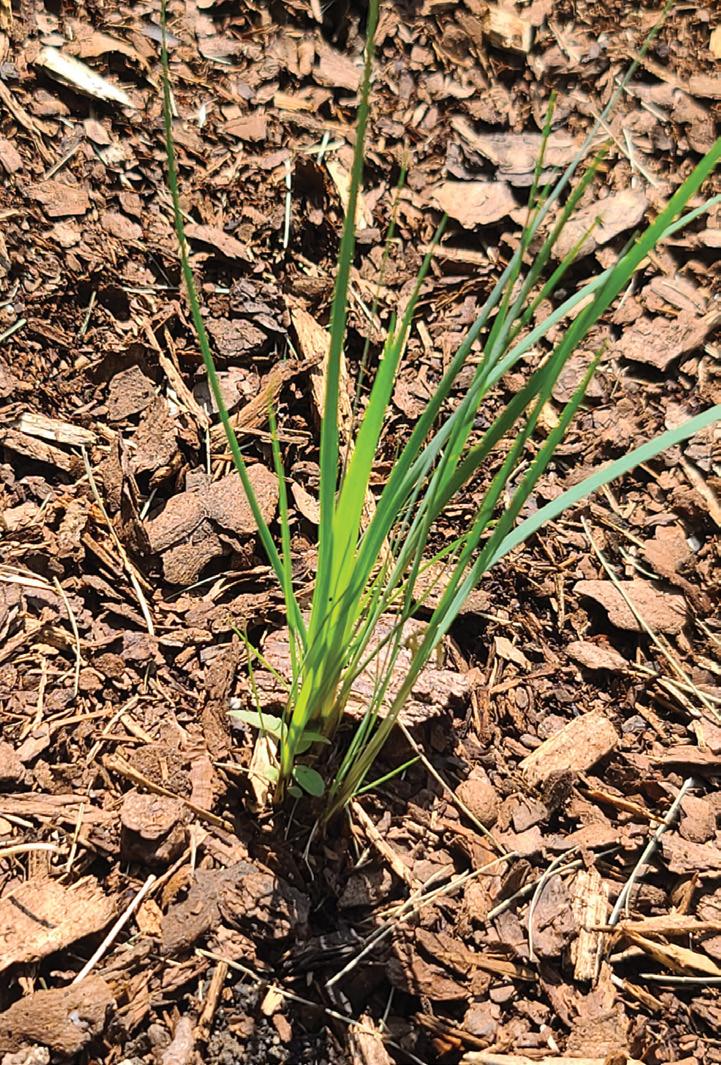
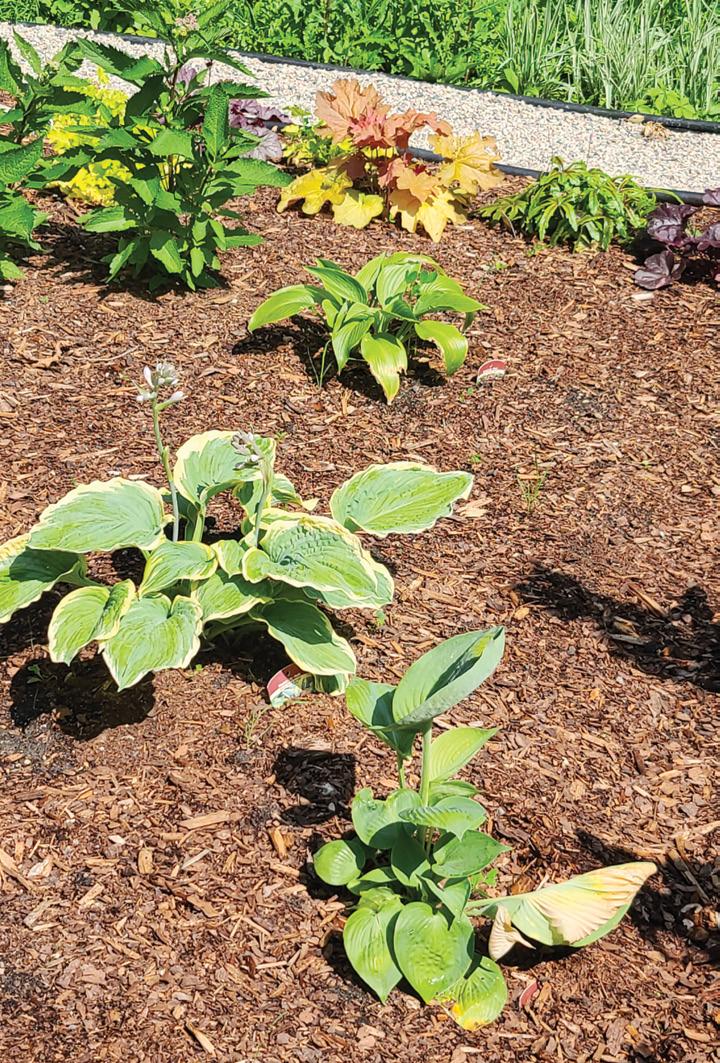
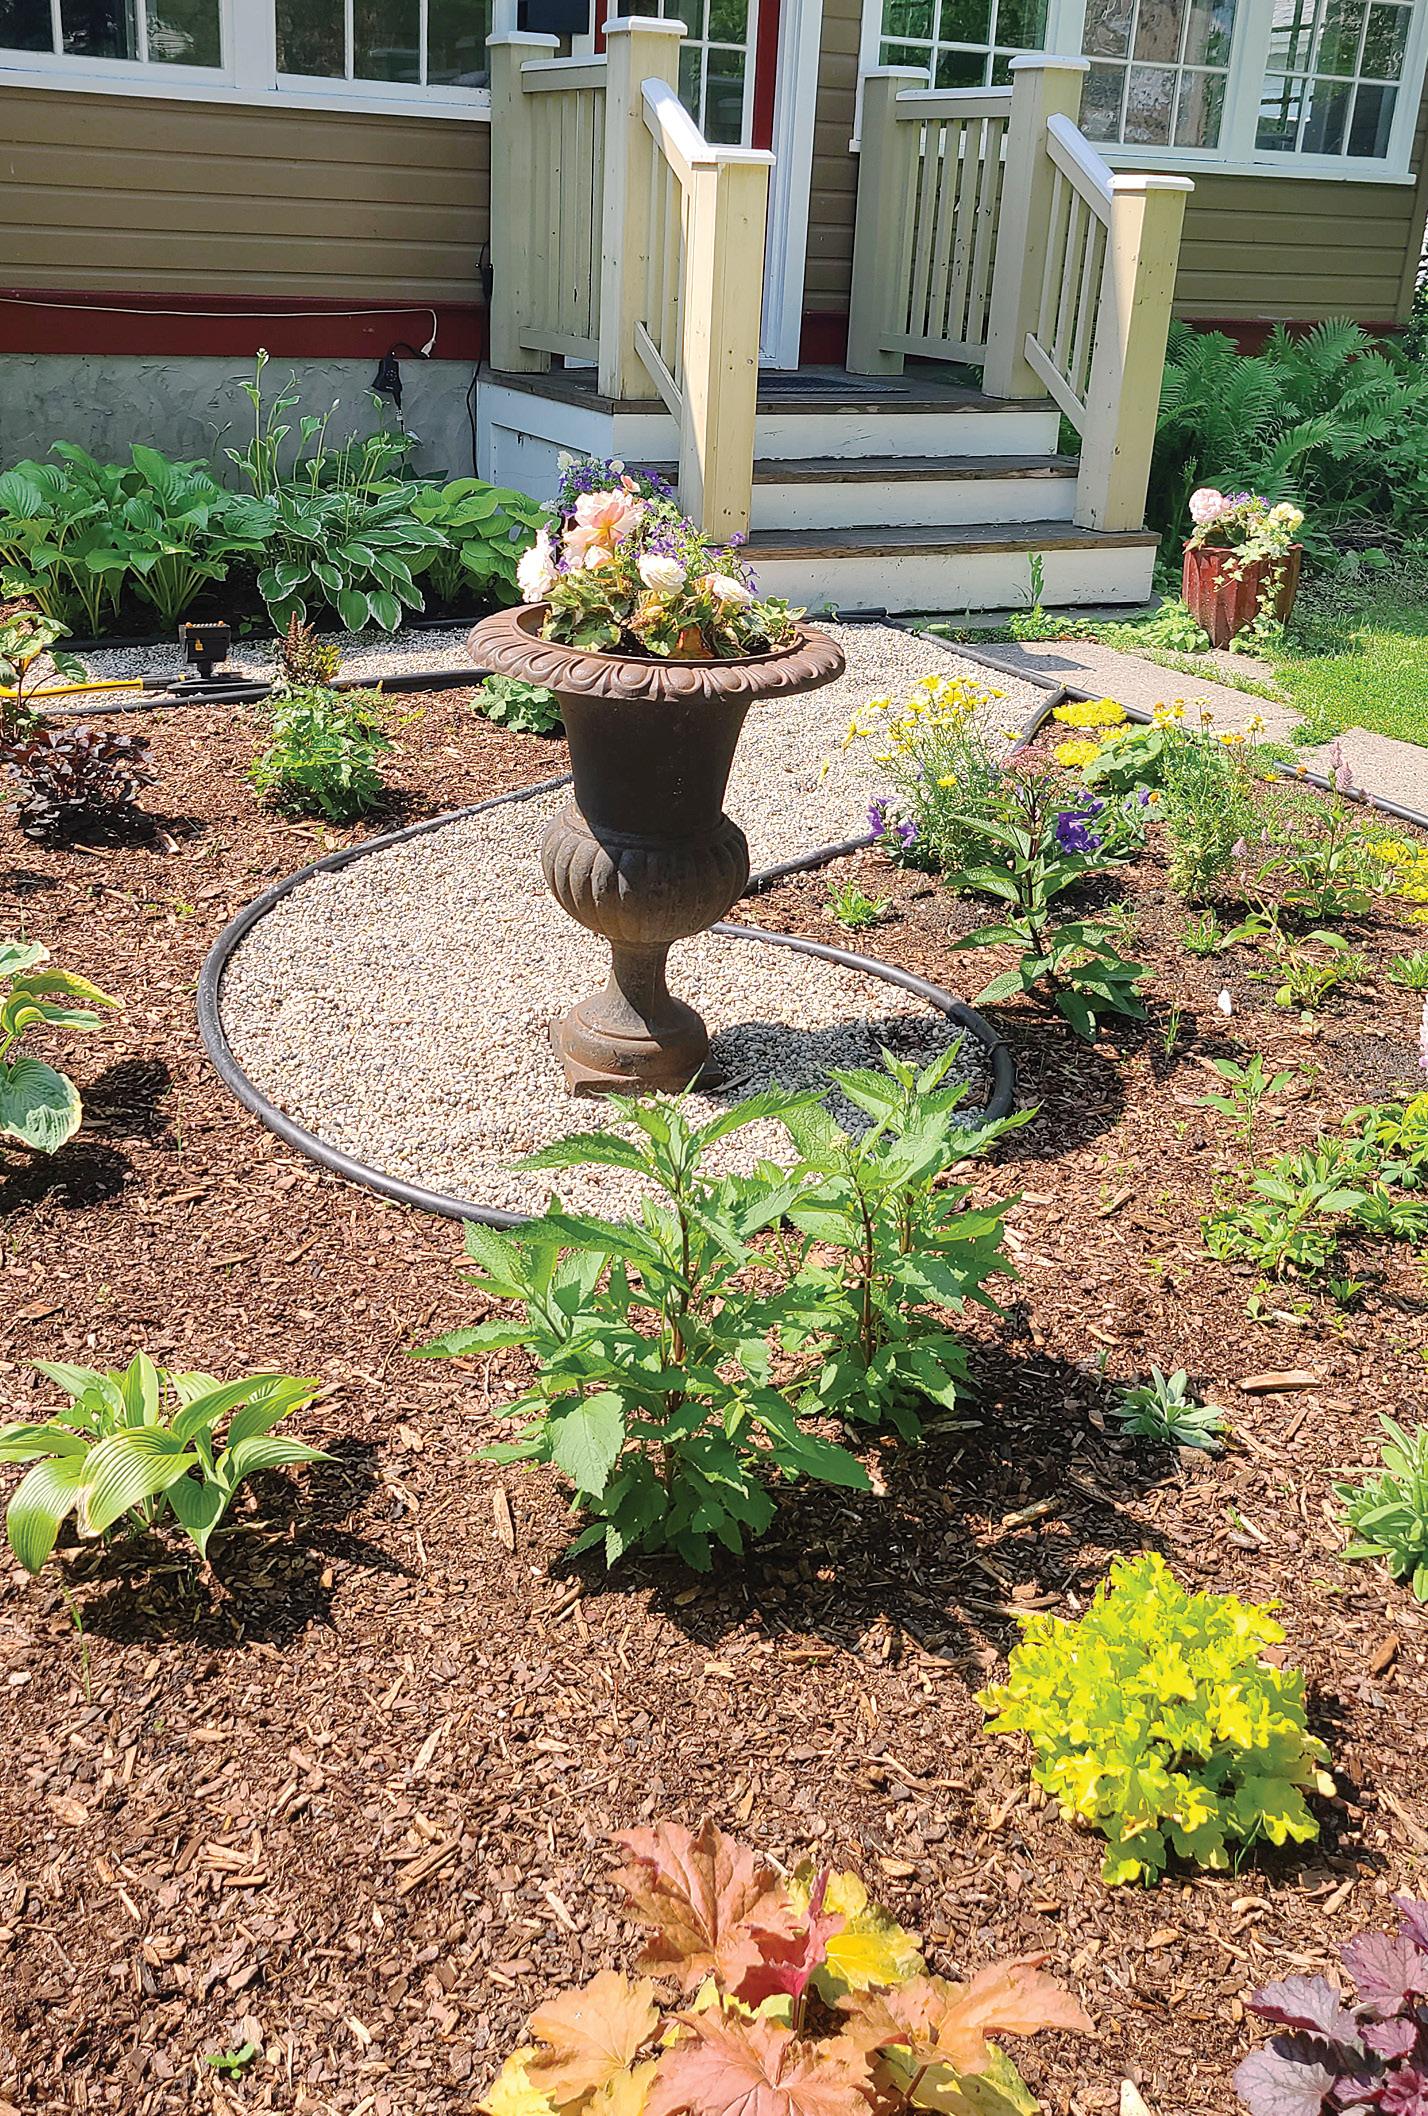
Overview of the project.
ery. Wild toadflax is not native, which doesn’t necessarily bother me so much, but it isn’t available at a native plant nursery. And wild roses (Rosa acicularis, which is native to Manitoba) are something I’m more inclined to put into an already established garden, to avoid their thorns while on my hands and knees so much.
Some of the plants I bought were pretty tiny plugs, in long, narrow containers that could also be used for holding pencils, it seems. The plants in them should take two or three years to amount to anything, but I think I may have put mulch over them, unin-
tentionally, and snuffed them out.
I would have loved to put in threeflowered avens and purple prairie clover and pussy toes, but they are all full-sun plants, and I was working on a shade garden.
Well, I thought I was working on a shade garden.
Last summer, when I mowed the lawn on the same side of the yard, the grass would barely grow because of the shade. When we used a sod-cutter to remove the lawn this spring, it didn’t come up in strips but in pieces. The grass just wasn’t very thick under a big old oak and a tall lilac hedge,
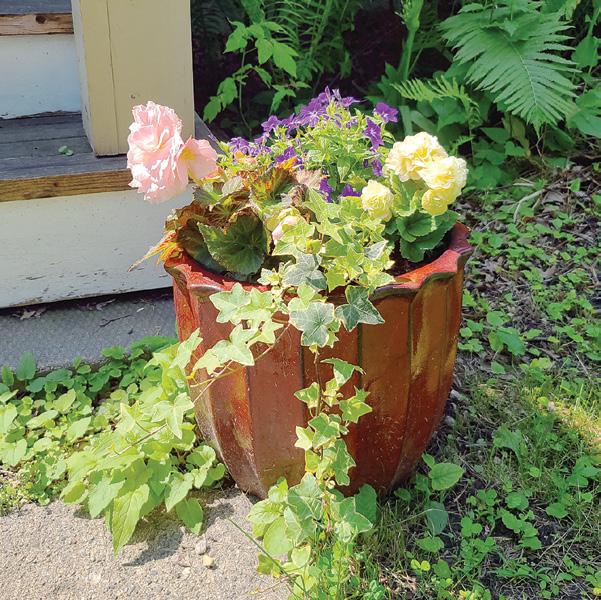
both at the edge of our neighbours’ yard.
The old oak was hollow and in decline, so the neighbours had it taken out last fall. And the lilacs, which bloomed gloriously this spring (well, they put forth a few blooms, much better than last year), were cut back to a couple of feet high at the beginning of June.
My shade garden is not in very much shade now. The hostas are struggling and the astilbes are not sure they like this new home I’ve put them into. I’m not sure the ligularias will appreciate hours of sun. The containers on either side of the front steps and in the centre of the garden, for which I searched different nurseries, seeking the particular varieties of shade-loving annuals recommended by the Proven Winners container recipe “Citrus Sorbet”, are looking a little cooked. I’m kind of worried.
Meanwhile, in the back of the yard where the vegetable garden is, the houses cast shade for some of the day. It gets six hours of sunlight, but I’m not sure it gets the eight or ten hours that the north side of the house gets!
Last year’s gardening endeavours were pretty private. Our back yard is surrounded by a 6-foot fence. This year, many, many people have seen me heaving soil, weeding and planting tiny plants. Some stop for a chat. Not many people in our neighbourhood dig up a quarter of their front yard and put in a big garden, so it has raised some interest.
Which means, any humiliation I experience from this project will be entirely public.
I have not mentioned to them that I edit a gardening magazine. Grow, garden, grow! x

Garden: Exploring the Horticultural World is a beautiful new book of older things published last year by Phaidon in the United Kingdom. The book tells the history of gardening through paintings, prints and photographs. Here is one of the entries:
Casey Boyden’s Japanese Tea Garden (2007) made from Lego. 26 x 45 x 30 cm / 10 ¼ x 17 ¾ x 11 ¾ in.
Founded in 1932 by Danish carpenter Ole Kirk Kristiansen, LEGO – an abbreviation of the Danish leg godt, meaning ‘play well’ – began as a wooden toy company. Its now iconic plastic bricks were introduced in 1958 and became an instant classic, their versatility and broad appeal quickly conquering the hearts of children and adults alike. Beginning in the 1960s and ’70s, LEGO targeted mature consumers with a series of model sets that came with building instructions. This

more sophisticated line of products became a classic that still fascinates today. Japanese Tea Garden is a prototype designed by MOC (My Own Creation) LEGO enthusiast Casey Boyden (b. 1998), encouraged by LEGO’s standing invitation to creators from around the world to reinvent and combine existing model sets to produce entirely new designs. This
detailed model is loosely inspired by the Japanese tea garden in San Francisco at Golden Gate Park, California. Built in 1894, as part of the California Midwinter International Exposition, the garden is the oldest of its kind in the United States. Central to the garden is the tea house, a roofed open structure in which tea ceremonies are performed. In plastic bricks, this LEGO model reproduces the features of a Japanese garden, such as the niwaki trees perched on the edge of the pond, a typical soribashi half-moon bridge, and some lotuses in bloom. On one side, it offers a section view that makes visible and emphasizes the presence of tree roots, while an underwater view of the pond features a quintessential golden koi carp. x • • •
Excerpted from Garden: Exploring the Horticultural World © 2023 by Phaidon Editors. Reproduced by permission of Phaidon. All rights reserved.
What are the symptoms?
• A severe case of West Nile virus (WNV) can be life-threatening and may result in long-term disability.
• Some people develop an illness with symptoms such as fever, rash, headache, fatigue and body aches.
• Most people infected with WNV have no symptoms and do not become ill.
Who is at risk?
• Everyone is at risk of coming into contact with the virus.
• Severe illness most often occurs among older adults or people with chronic health conditions or weakened immune systems. However, severe illness has occurred in all age groups.
When is the risk highest?
• The risk of WNV infection is highest during late June, July, August and early September.
• The risk varies from year to year based on temperature, precipitation, mosquito population and other factors.
How do I protect against WNV?
• Reduce the time you spend outside between dusk and dawn.
• Apply an appropriate mosquito repellent.
• Wear light-coloured, loose-fitting clothing with long sleeves and pant legs.
• Get rid of standing water around your home.
• Make sure your door and window screens fit tightly and are free of holes.

For more information, visit our website at manitoba.ca/health/wnv. For questions about WNV health concerns, contact your doctor or call Health Links – Info Santé at 204-788-8200 (in Winnipeg); toll-free 1-888-315-9257.