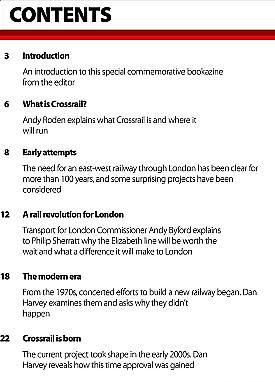
Newsletter of the PORT ELIZABETH MODEL RAILROAD CLUB Every gauge welcome! SEPTEMBER 2022 IN THIS ISSUE: Calendar Committee Protecting Decoders from Track Shorts From the Chairman Trackside News Model Water on your Layout Easy Christmas Layout Dwarvin Fibre Lighting Making Trees 3D SolidWorks 3D Model Assembly Market Place New in PEMRC Library Blunami SoundTraxx Wireless Layout Visit Henk Grootendorst G-Scale Gallery
PEMRC Layout Visit PEMRC Meetings/Workshops PEMLS Event
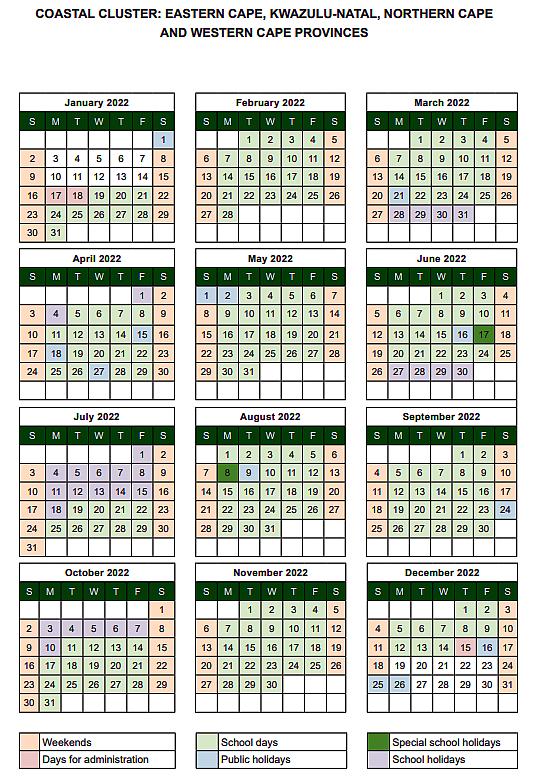

PEMRC CALENDAR COMMITTEE 2022: Date Time Detail Sun4 2022Sep 9 - 13 PEMLS Public running day P E Model Locomotive Society Londt Park, Sunridge Park Sat10 2022Sep 9:00 PEMRC visit at: Mike Parsons, 18 Mowbray St Newton Park Sat17 2022Sep 15:00 PEMRC layout visit at: JP Kruger, 6 Corrice Road, Charlo Sat24 2022Sep 9:00 Workshop at Mike van Zyl 13 Lionel Rd, Walmer Downs Sun2 2022Oct 9 - 13 PEMLS Public running day P E Model Locomotive Society Londt Park, Sunridge Park Sat8 2022Oct 9:00 PEMRC visit at: Mike Parsons, 18 Mowbray St Newton Park Sat15 2022Oct tba PEMRC layout visit at: tba Sat29 2022Oct 9:00 Workshop at Mike van Zyl 13 Lionel Rd, Walmer Downs Sun2 2022Nov 9 - 13 PEMLS Public running day P E Model Locomotive Society Londt Park, Sunridge Park Sat12 2022Nov 9:00 PEMRC visit at: Mike Parsons, 18 Mowbray St Newton Park Sat19 2022Nov tba PEMRC layout visit at: tba Chairman: Mike Smout ma.smout@mweb.co.za 082 801 1347 Treasurer: Attie Terblanche terblalc@telkomsa.net 082 532 3670 Clubhouse: JP Kruger juanpierrekruger@gmail.com 082 321 2233 Editor: Roel van Oudheusden pemrailroadclub@gmail.com 082 739 7679 Workshop’ & Shop: Mike van Zyl carpencab@gmail.com 073 374 3280 Layout visits: Graham Chapman chapman22@telkomsa.net 072 103 4625 Library: Pierre van Loggerenberg pierrevanloggerenberg3@gmail.com 084 802 3831 Subscriptions for 2022 are R500 p.a. for full membership and R100 p.a. for Country members EFT is preferred, but the Treasurer may accept cash. Bank account: FNB Walmer Park, branch code 211417, Account no. 62386122057
Model Railroad Hobbyist - April 2022
ROY DAVIS FINDS A METHOD TO AVOID LOSING A DECODER IN A DCC MISHAP
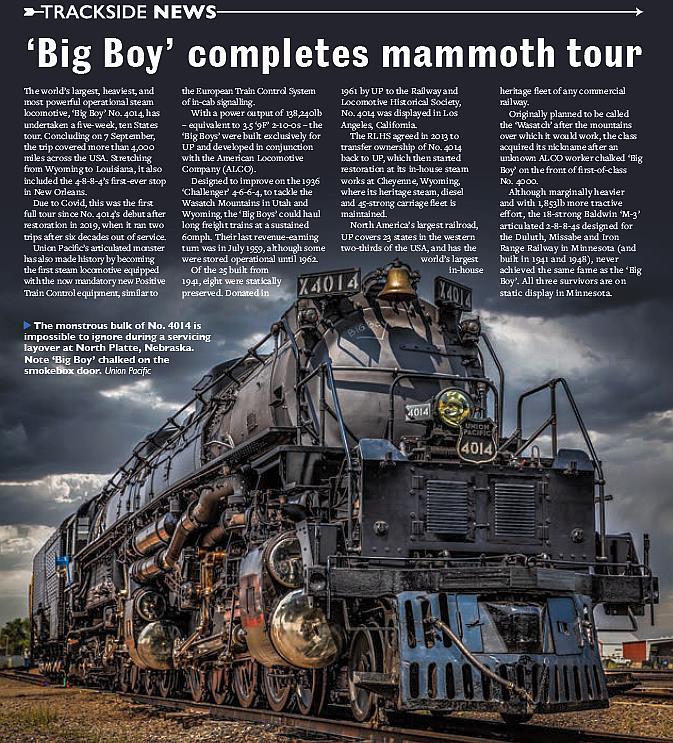
At the La Mesa Club’s exhibit of the Tehachapi Pass in the San Diego Model Railroad Museum, we run our trains hard! We run them continuously five hours per day, four days a week down from six days in nonpandemic times. We like to put on a good show for the paying visitors. Our exhibit is not the usual flat, circular run. It is an 1800-foot run end-to-end, with a 12-foot climb and descent on the way, on which locomotives haul prototypical length trains of up to 100 cars. That is a lot of wear and tear on model trains designed for occasional use on an easy home layout. We recently staged a 36 hour Timetable & Train Order session over a three day weekend. Seven locomotives failed, five of which suffered decoder failures. We have long suffered random decoder failures, but five in one weekend spurred me to investigate this a bit more. Of the five decoder failures, three were permanently damaged and needed replacement. The other two survived but lost their programming. We needed to reprogram them before they would work again. Most decoder failures are traceable to a locomotive involved in a short circuit on the tracks. These shorts often result from the locomotive derailing or running afoul of a switch lined against it. The tribal lore is that the short causes a voltage spike on the track that leads to decoder failure. In fact, the two decoders that physically survived had transient voltage suppressor (TVS) diodes across the track inputs to the decoders, and the decoders that burned did not. TVS diodes protect a circuit by limiting
PROTECTING DECODERS FROM TRACK SHORTS
2. The beginning of the short is about 40% of the way across the oscilloscope screen. The track voltage (blue) dropped to near zero almost instantly, with only the switching noise of the NCE’s internal power regulator remaining as narrow spikes. Though they will be the subject of a future clean up effort, they are not decoder killers.
the voltage to a pre set level. If the voltage surges, the TVS can absorb a large amount of excess energy to protect the circuit beyond.
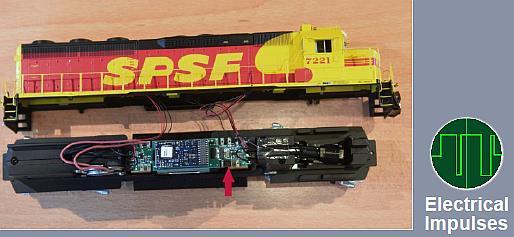
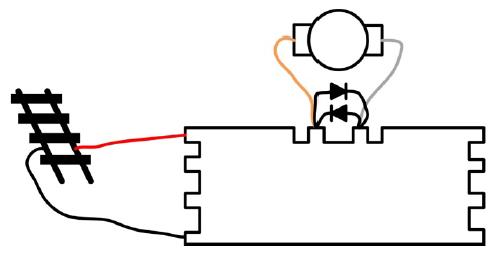
Many digital devices rely on TVS protection, and every computer USB port uses a TVS device to protect circuits. Clearly, the TVS was helping to preserve some of our locomotive decoders, but not enough to preserve their programming. I had to dig deeper to find out what we were missing. I thought about the source of the voltage spike when the track is shorted. Such spikes are usually the result of a magnetic field quickly collapsing. The common assumption that track inductance causes this inductance did not make sense to me as an electrical engineer. There is not enough inductance in the rails and associated wiring to damage much. However, the motor, a hunk of iron and coiled copper, has plenty of potential inductance. The motor s magnetic field could store a lot of energy. There is only one way to find out where the culprit was, and that is to set up a test! I used an NCE DA-SR decoder as the test subject, a model that has some history of failure on our layout. I used a long coil of red and black wire between the booster and the decoder to simulate the track and its inductance. I set the throttle at step 14 for the test. I monitored the track DCC signals with an oscilloscope. Since I suspected the motor to be the bad guy, I connected a second oscilloscope probe to the grey and orange motor wires. I set the oscilloscope to give me voltage readings for the beginning of a short [1]. 1. This is a simplified diagram of the test configuration I used. I have overlaid the diagram with oscilloscope trace readings for the DCC signal in blue (right) and for the motor in yellow (top) that denote the patterns of normal operation. I intermittently touched a short piece of wire to the track terminals to create a short, removing it again before the booster circuit breaker could kick in. The short piece of wire got even shorter from all the arcs and sparks during the tests. I felt badly for abusing the booster and the decoder in all this, but somebody had to do it. Within about 10 milliseconds of the short s beginning, or 1/100 of a second, the DCC signal dropped to almost zero volts. Switching noise from the NCE booster s internal voltage regulator left a pattern of thin spikes, indicating it was running on a light load, but they were not big enough to be a potential decoder killer. [2]
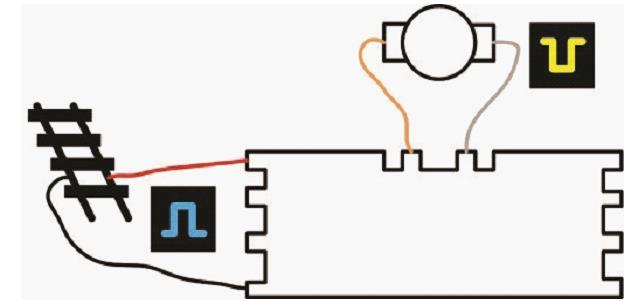
I ran this test many times with very similar results. I was surprised it did not destroy the decoder, though this may have been because the motor was not under load. I am sure that the voltage spike on a train pulling hard uphill would have been worse than my free wheeling motor in my test setup.
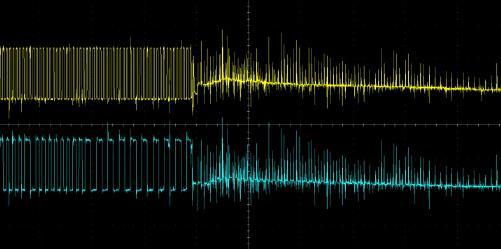
I repeated the test many times, looking at the beginning of the short. I never saw much of concern, so the problem must have been elsewhere. I changed the oscilloscope settings to trigger on the release of the short, and there it was! The track voltage on the blue oscilloscope trace went from near zero to a normal DCC signal without a voltage spike. By contrast, the motor output of the decoder bobbled around for about four milliseconds before giving a voltage spike of at least 35 volts on a circuit that should run around 12 14 volts.[3]
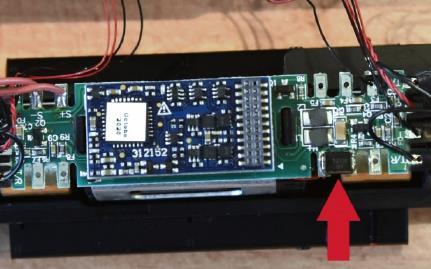
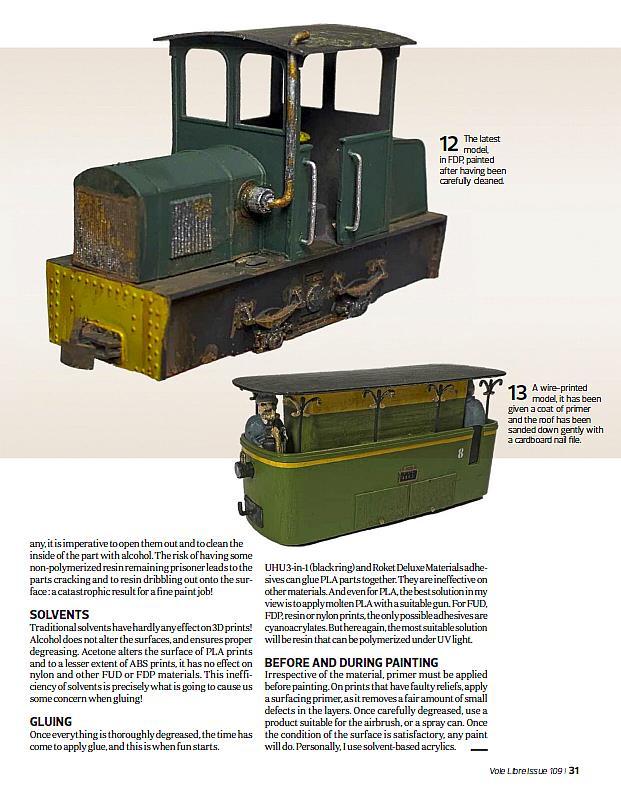
4. This diagram shows a TVS device connected across the motor terminals of the decoder. This one part contains two TVS diodes wired in what’s called a “back to back” configuration. I used part SMBJ16CA 13 F from Diodes Incorporated. The part is readily available from electronics parts distributors like Digi Key. It is a surface mount device with no leads, but the spacing is just right to sit across the motor terminals of most board replacement decoders. [5] .
A TVS installed across the motor output of the decoder seemed like the right thing to try. Since this back to back configuration is so often used, a single TVS device is available, called a bidirectional TVS, that boils the solution down to just one thing to solder onto the decoder terminals [4].
5. This is a TVS diode part from Diodes Inc. part SMBJ16CA 13 F.
3. The release of the track short is about 85% of the way across the oscilloscope screen. Whereas the track voltage resumes its normal DCC pattern almost instantly without spiking, the motor voltage spikes to at least 35 volts.
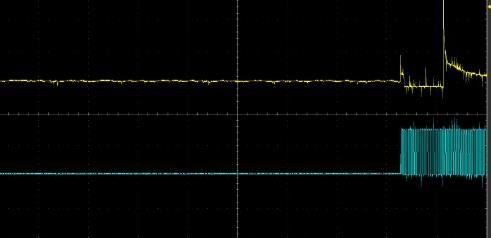

6. This is an oscilloscope reading of the short release (about 10% across the screen) with the TVS diode in place over the motor terminals. Both the DCC track signal (blue) and the motor voltage (yellow) registered a smooth recovery.
We run our track voltage at around 13Volts, so the SMBJ16CA 13 F, designed for circuits up to16 volts, is a good choice. You want the TVS to be rated at least a few volts above your maximum track voltage so it only clamps on large voltage spikes.
I repeated the test many times with the TVS on the motor terminals of the decoder. As expected, the DCC signal recovered smoothly and quickly from the short just as before. With the TVS in place over the motor terminals, the motor voltage also smoothly recovered to normal levels, without bobbling, and without the spikes we observed previously [6].
Soldering both terminals of the TVS to the decoder’s motor terminals first, then soldering the motor leads, one at a time to the terminals helps keep the TVS in place. Some TVS parts are available with leads that are easier to connect to decoders with free-hanging wires instead of terminals.
The next step was to install TVS devices on the motor terminals of many of our locomotives and run the heck out of them for a while. So far, we have field tested a handful of locomotives with TVS devices, including purposely running them into shorts. The test results point to a much happier outcome.
ROY DAVIS Roy is very recently retired from a career with a major producer of cell phone chips. That involved many trips around the world, solving noise problems, and just plain making things work. He is now the chief signal maintainer for the Tehachapi Pass exhibit, by the La Mesa Club at the San Diego Model Railroad Museum. His grandfather was an engineer on the PRR. That led to a Lionel layout in the basement when he was too young to appreciate it. Roy s senior project in electrical engineering school was the hardware interface between a $50,000 minicomputer and a train layout that could automatically run a dozen HO trains at once. He got the bug again a few years ago when an out of town friend wanted to visit the model train museum. Now he spends more time under the layout fixing, and installing electronics, than running trains. The master controller for the La Mesa exhibit is now far more powerful than that minicomputer, and cost $19.95."
New episodes uploaded for Season 6 of The World’s Most Scenic Journeys: Ep 6: Africa; 7: Denver; 8: France and 9: Spain


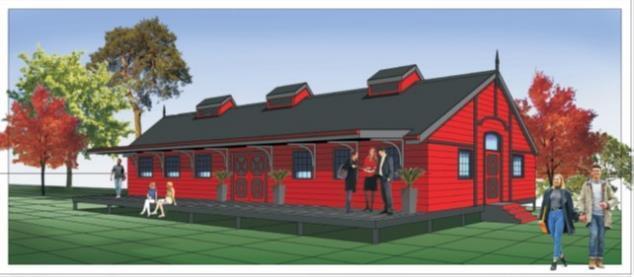
As noted earlier, the plans are OK but progress is being held up by the need for the PEMLS to sign a new lease on the Londt Park site. Apparently a letter was sent to the PEMLS on 25 October 2017. A new lease has to be advertised for possible objections, and assuming there are none then a 5 year lease with an option to renew for a further 5 years may be signed. Further all costs to be covered by the PEMLS.
I have been in contact with Alan Todkill (Chairman) and Wim Meyer of the PEMLS who is dealing with the matter. Wim is kindly keeping me informed of progress
From the Chairman
Given the further delays I am actively seeking temporary accommodation where we can set up the layout and meet on Saturdays to run trains.
Mike Smout Dream trains No shipping costs for combined orders of R2000 or more. Shop online and fill your cart, even if less than R2000, then contact PEMRC Mike van Zyl, to combine your order with fellow club members and all will save.
The key issue is of course progress, or lack of progress, with the Clubhouse.
Please would everyone who reads this help in the search for suitable premises which we can afford.


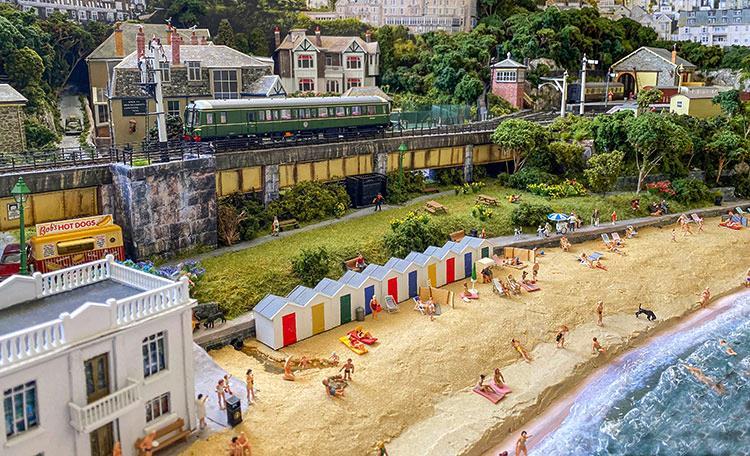
Coastal inspiration 'St. Ives'
Modelling water in its many forms on a layout is a popular choice for many builders. Though not the easiest to model, water effects can be satisfying, with the potential for cameo opportunities and scenic details. Here are five layout examples that offer different approaches and detail.
LOOKING TO MODEL WATER ON YOUR NEXT LAYOUT PROJECT?
Whether it's a tranquil river, canal or bustling dock, here are track plans that work, to provide the inspiration you need.


Modelling dockside 'Boston Frodsham' Inspired by an article in BRM's sister title, Traction magazine, Mike Knowles sourced ideas for this dock layout from opposite sides of the country. The P4 gauge layout is set around 1975-1985 and is part-based on the swing bridge at the entrance to Boston Docks and the wharf at Frodsham in Cheshire.
Paul Fabricius downloaded AnyRail track planning software and began designing a fantasy layout incorporating every kit he fancied, in a fantasy space. As reality took over, two insights from BRM contributors stuck with him: don’t be afraid to build a real location, and to place the railway in the landscape. With this in mind, he committed to creating St. Ives in his spare bedroom. The sea presented a challenge, and drone photographs provided a solution. He chose a photograph with a nice wave pattern, looking directly down on the shore. Having manipulated the image in Photoshop, it was printed on A3 gloss photographic papers and stuck to the baseboard. The waves were made by thinly squeezing on builders' clear mastic, guided by the waves in the photograph underneath, teased into wave shapes with a coffee stirrer, and then painted with Woodland Scenics' White Water Highlight.


One of the main features is the swing bridge, which is a shortened version of the prototype to fit the available space and is made using modified Wills Vari Girder sections to give the sloping/curved ends.
Something that generates lots of queries at shows is the wet mud in the harbour. I was trying to avoid modelling water as boats rarely seem to sit well in it and I had two board joints to cross as well. It occurred to Peter, while on holiday in Cornwall, that Cornish harbours are more often than not just wet mud at low tide, so he gave this a try, not least because he felt it would be something not often seen on other layouts. The contours were built up with DIY wall tile adhesive, then given a coat of a brown gritty scenic paint and odd rocks (broken pieces of filler), seaweed (various scatters), sand and some debris added, all done with reference to photographs of real harbours at low tide. Finally, several coats of Deluxe Materials Solid Water,
After a few practice pieces, Mike ended up with the following method to create the water effect; paint the board tops a suitable mucky greeny brown, cover with two or three coats of PVA (test first to make sure it dries clear), and then form the ripples using Deluxe Materials Making Waves, applied with a fine brush held almost parallel to the surface and dragged backwards to extrude the ripples. Finally, finish with further coats of PVA and gloss varnish.
Quayside 'Harlyn Pier' The setting for Peter Beckley's Harlyn Pier is an imaginary extension from the Padstow branch, serving a ferry terminal on a quayside. The quayside setting gives a good excuse for short sidings and a cramped track layout, while still looking believable.


a two part resin product, were poured and/or painted on to build up pools in some places and the effect of wet sand and mud in others.
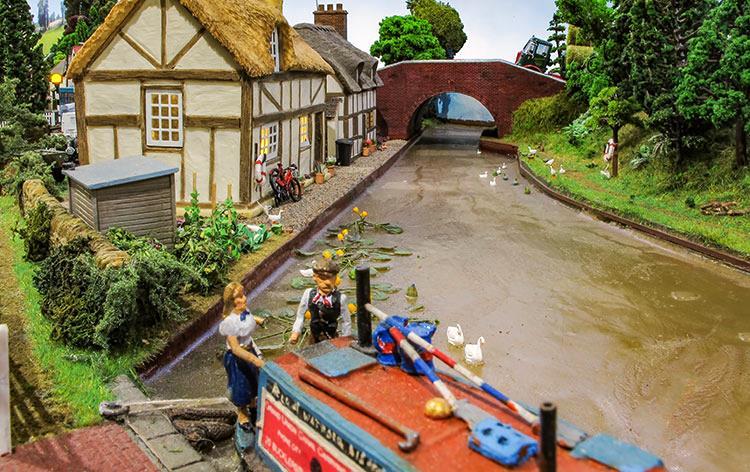
The main challenge with this layout was creating the water effect in the canal. Keith wanted to use pouring resin, but narrowboats don't sit level, so he had to wait until he went into dry dock to paint the hull in 2019. It didn’t quite go to plan as the lock sprang a leak during pouring, and his wife desperately tried to stop the leak with gaffer tape while Keith kept on pouring. Eventually, the leak sealed. However, Keith would always recommend doing water effects by layering, rather than in one go.
Canal life 'Hadarford' Life on a narrowboat can yield a unique set of challenges when constructing a layout, as Keith Lodge discovered, with his narrow gauge venture.
The most prominent scene is the canal with its canal wharf, the lock with a loaded working pair of narrowboats in it, the lock cottage, the two canal bridges and towpaths. The canal scene is based on the part of the Grand Union Canal that was the Grand Junction Canal from London.
The layout is fictitious, although based upon Keith’s knowledge of canals and railways. There are five main areas the castle ruins, Hadarford Farm, the station, the canal wharf and the village.

Peaceful valley setting 'Middleton Dale'
David Wright employed his refined professional model making techniques to this latest model railway, inspired by the landscape of his home county. One of the biggest tasks was to form the river course, which turned at almost a right angle to continue under the viaduct to the front of the low fixed baseboard. The river banks were built up using the old type of insulation board. When broken on the facing edge, it gives a good impression of the land worn away by the river. This was glued down after gluing the river bed first, which included the forming of the weir and the two low waterfalls. To form the river bed, David used fine sand and grit. This was glued to the surface. Next, the river bed had to be painted to replicate the depth, before layers of gloss picture varnish were brushed on, giving a clear surface to the river. Where the water was disturbed by falling over the weir, and

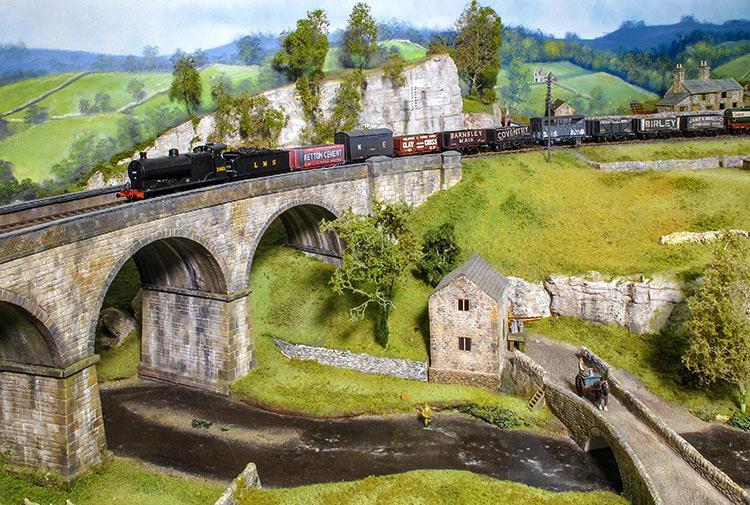
around the pebble island, white water would be produced. To replicate this on the model, David used white oil paint. If this is applied just before the last coat of varnish has dried, it should react and feather out giving a very good impression of this action.
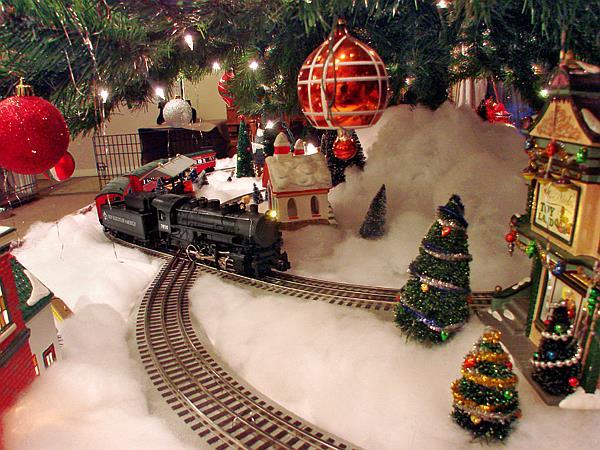
An ‘easy’ Christmas layout:


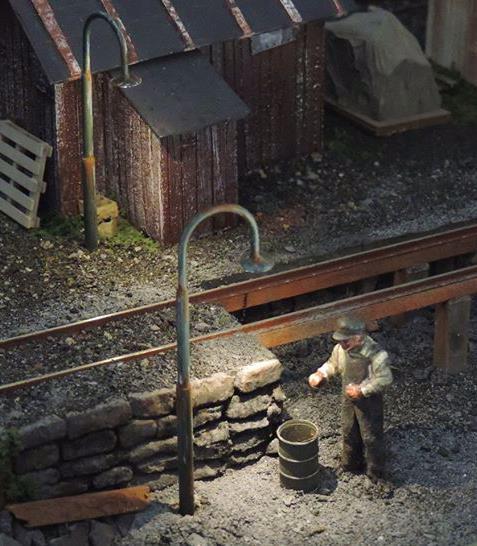
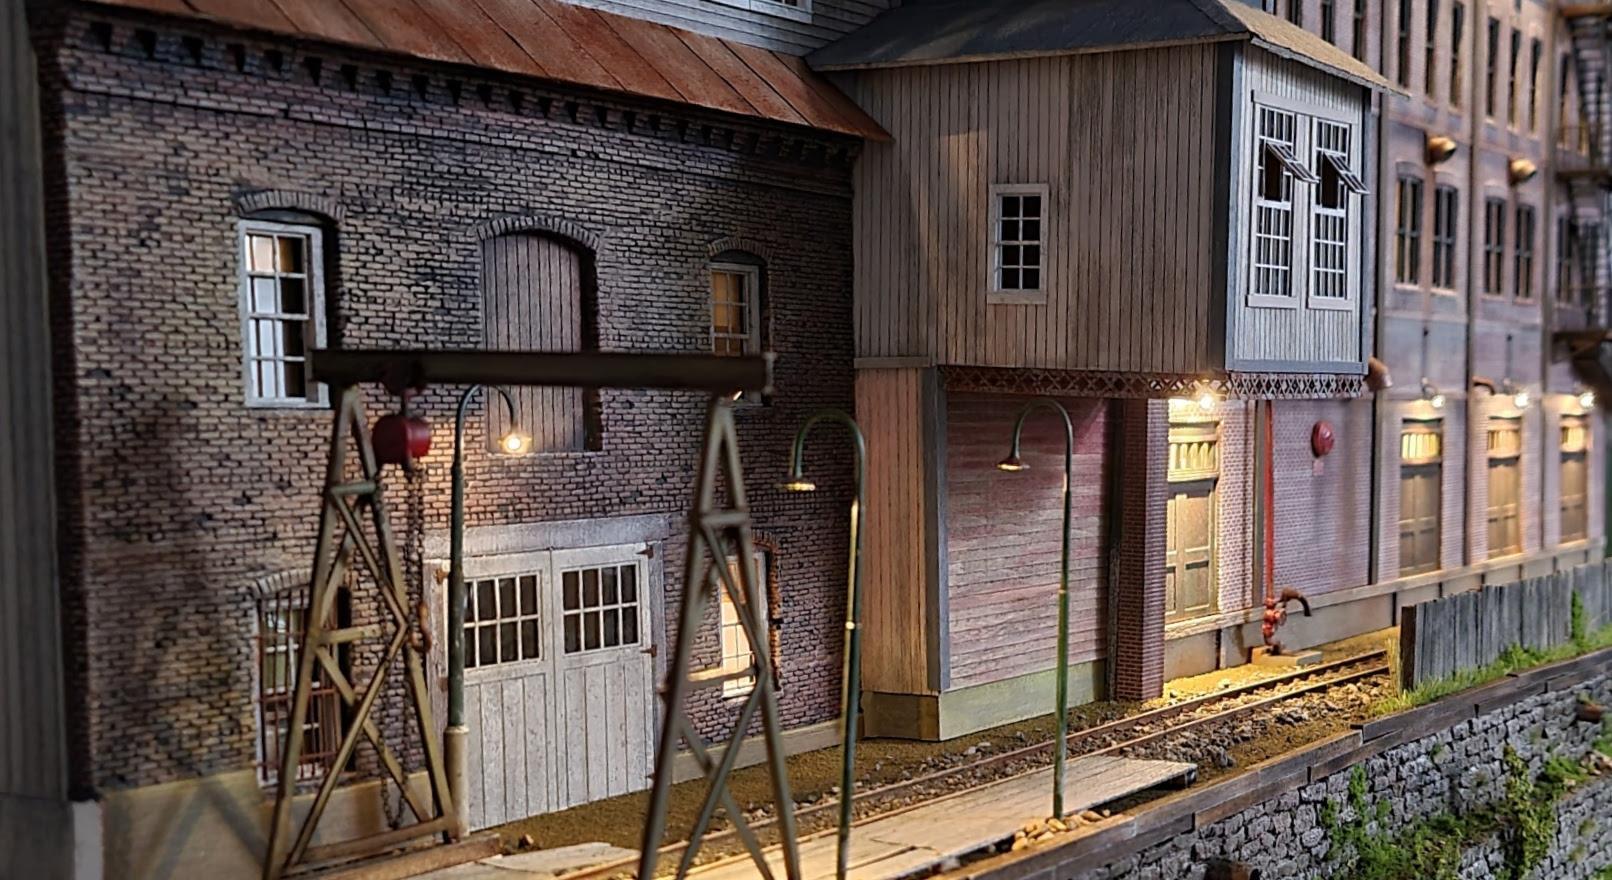
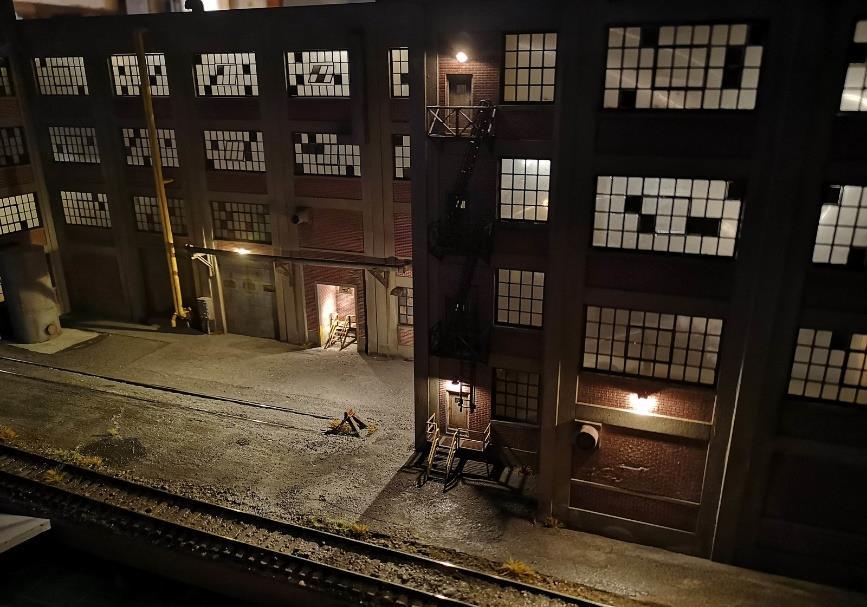
DWARVIN FIBRE LIGHTING Dwarvin's YouTube Channel
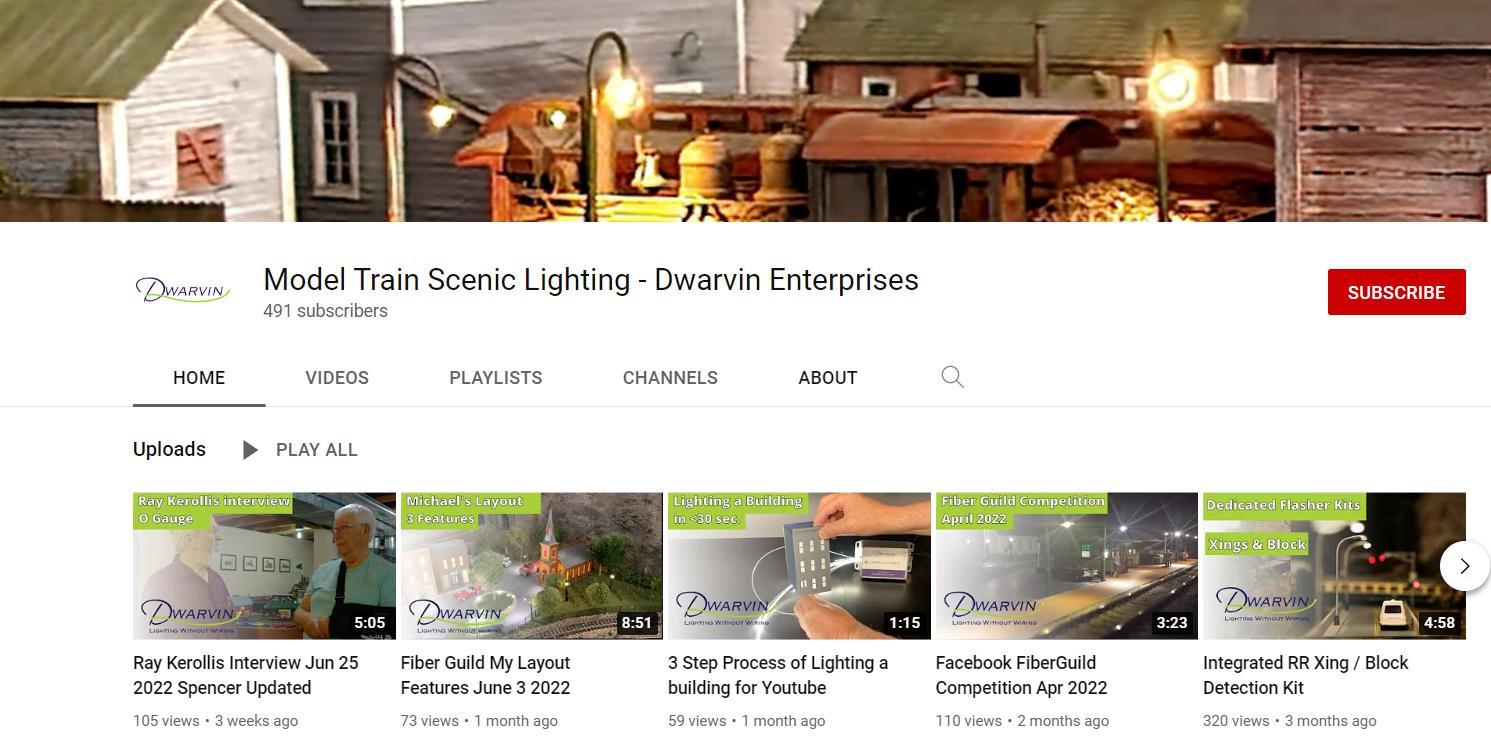

MODEL YOU NEED TO KNOW
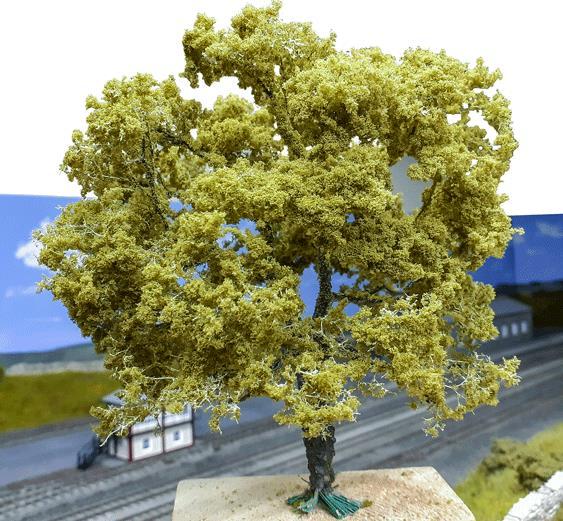
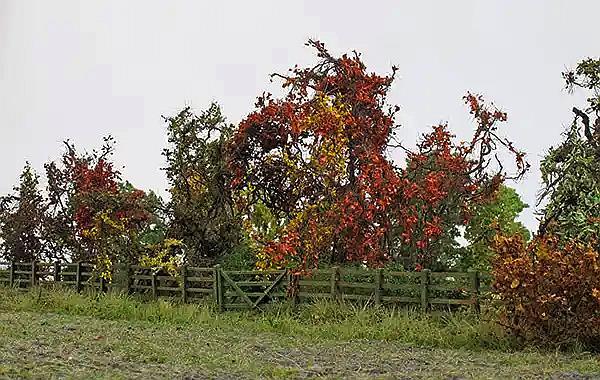
Improving ready-to-plant model trees Model trees from the packet can look too uniform in shape and are characterless. Here are some tips to make them look more authentic.
Ready-made trees come in many shapes and sizes, not dissimilar to trees in the natural world, making modelling a scene easier. From conifers and oak trees to deciduous trees, weeping willows and pine trees, most common species are covered, you can even buy snow covered trees. Many 'off the shelf' trees from manufacturers can often be improved with a little modification to look more realistic.
TREES: ALL
It's rare to see a model railway without trees, especially if you’re modelling a UK location. Here's our beginner's guide to get the most out of these scenic additions. It’s a bare landscape without trees and unrealistic, too, especially if you’re modelling British countryside. Things don’t look so quaint or picture perfect either. Trees add height to a layout, and are great for hiding imperfections, or disguising joins in the Rebackscene.adymade models of trees have come a long way in the last decade many now look much better from the box. There are a growing number of model tree manufacturers, with larger suppliers like Faller, Gaugemaster, Heki, Hornby Skalescenics and Woodland Scenics retailing bumper bags. These usually represent good value.


Paint the trunks with grey and brown matt acrylics – there are many shades in the trunks of trees, so use several colours, plus add a spatter of yellow and green tones to depict moss and lichen. The trunks of trees are also often greener than we think, so add this using an airbrush or weathering powders.
https://youtu.be/kbiMqL8MdHQ
It is easy to think that all trees are the same, but that's a gross simplification. However, to avoid complexity, we can take shortcuts. For example, when modelling the canopy of leaves, if there are a group of trees together, it is enough to simply vary the height and colour of the trees without having to worry about what they are. Give more attention to trees at the front of the layout and signature species that help define the area that you're modelling. How to add trees to your model railway Here is a useful video explaining the planting of trees on a layout: Phil Parker shows how to quickly, and securely, plant tress on your layout.
Some bundles of trees tend to be the same height and the trunks can sometimes be too wide for the height. Cut the base off with side cutters and whittle the trunk to a taper for easy planting.
Which trees do I add to a model railway and how many do I need? When it comes to model trees for your layout, the possibilities are endless, an apple orchard? A majestic oak in a field? An ornate cherry tree in a front garden?
The boles of smaller plastic trees are too shiny and don’t look realistic. Use a rough file to mark the surface with score marks to form a textured and matt surface. Use the end of the file to gouge out furrows at the base of the tree to match the roots.
Snip roots off with side cutters and, using a rough square file, create fissures into the boles. Don’t remove too many roots, or the tree won't stand without additional support. Use a stout pair of scissors or side cutters to attack the foliage to add variety. You could add scenic glue and reapply the off cuts to other areas of the tree to help break up the uniform appearance, too.
The first step is to look around for inspiration. If your model railway is based on a location, look at photographs for the height and spread of trees, especially if you are depicting a certain period in Seasonalitytime. also needs to be considered, some trees look different in autumn versus spring.

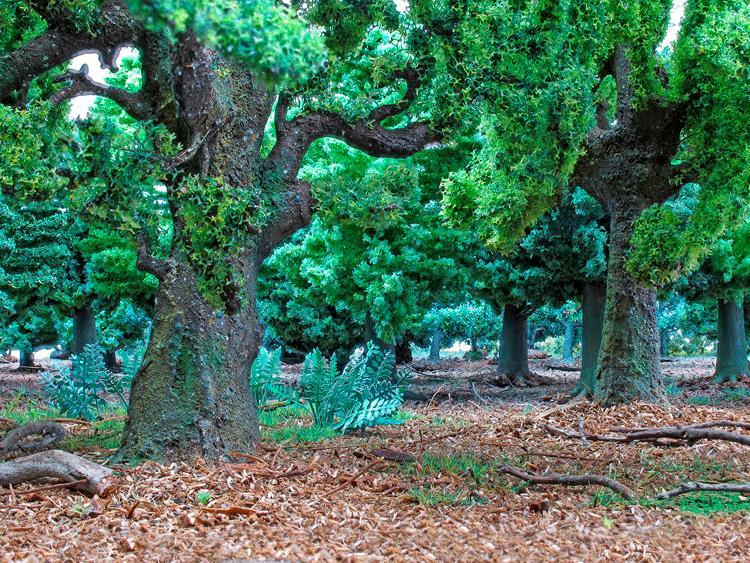
Wood and forest floors
If you’re modelling a solo tree, adding scatter material or static grass is usually enough to give a ‘bedded in’ look. If you’ve modelled a copse, or wood, the area surrounding the roots will need more work to model leaves or pine needles, berries/fruits/nuts and branches in various stages of decomposition.
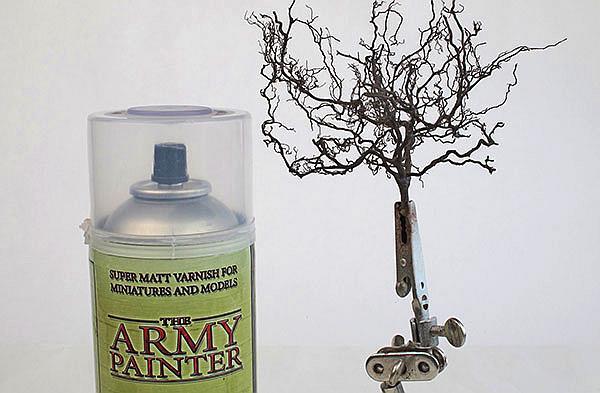
A variety of scatter materials are available from suppliers, which will help. Making model trees Many modellers make their own trees for realism. The usual method of construction is to use many strands of wire, twisting one end together to create a trunk. Then it is a case of twisting and separating wires to create the desired effect.
There are several methods at this point, some use artificial hair to replicate branches, others use seafoam or other natural materials, while others opt for ready made foliage or even sponges. Scatter material is usually applied last to add density and further variety and Torealism.make
the trunks and branches authentic, applying PVA and sawdust is a method we have used before, followed by painting a variety of greys and browns as detailed for the ready to plant trees. Again, a variety of methods can be used for the larger trunks, some use latex rubber, others old wooden paint brushes.

I'll share how you can work with natural materials to shorten the time to build realistic trees, and I'll give more information on how they look depending upon placement and season. After all, trees grow in a variety of locations and are affected by their environment.
How to differentmodeltrees
Related: Read our guide on how to model a deciduous tree here for tips, plus there's a wealth of advice and different approaches available to view on RMweb.
Tired of your trees looking similar, or worse, like lollipops? Make your layout's foliage spectacular with these transformational tree techniques, as demonstrated by Michael Russell. There are very good books available to modellers that show how to model trees, but the methods shown tend to be laborious. Most of us don’t have time to fill a landscape with trees of high quality and many lack the desire to do so, having other modelling tasks that are of a greater priority and interest. Most modelled trees appear too ‘rigid’. They need to be modelled in a looser, freer way. Natural materials can help us achieve this. Although there is a certain amount of chance involved with the natural materials we find, it is what we do with them that's important. We don’t need to use exotic materials, either there's plenty of material in our ‘green and pleasant land’.
Looking to model seasons? See the guides below (click on the embedded hyperlink) to help you capture the look. How to create a spring scene How to model winter How to model an autumn scene How to create summer scenery

foliage (GM150, GM151 or GM152)
Noch Laub sets (07167 and 07168), Noch (07101) Wildgrass beige, Noch (23102) Embankment Vegetation
Shopping GaugemasterList
Hornby Lichen (R7194), Humbrol acrylics (26, 27, 86, 90, 33, 110 and 30) www.hornby.com
2. Break off as much dirt as you can from the roots, then clean them in water gently with a brush. For really small pieces, agitate the roots in the water and swill the water around.
ExpoMilliputwww.gaugemasterretail.comwww.hattons.co.ukSuperglueAcceleratorSpray,
Layering Spray or tree and bush foliage spray www.wwscenics.com
1. Obtain some roots from around a tree or hardwood bush or shrub. A neighbour had dug this bush up, which provided me with material. You are looking for the small fibrous roots. Cut them off with secateurs.
3. When dry, place the roots in a hot oven for 10 minutes, or in a microwave for 30 seconds. This will kill any wildlife or spores in the material. Leave it to cool and sort into sizes.


2. Chop small pieces of left over root to use as branches. Add PVA glue to the tree pieces and sprinkle the root pieces on. Allow to dry.
Mixed trees in a copse
3. To bulk out the branches and form twigs, brush on PVA glue, then sprinkle with static grass. Any colour will do, though I tend to use the straw-coloured shades. 6mm long grass works well.
1. Sort out lanky and leggy pieces of root. Cut to the approximate height for the scale you're modelling. Trim branches to shape and save the trimmings. Multi stemmed pieces are great for variety.
5. To model leaves, brush on PVA glue and sprinkle coarse or fine turf of your desired colour across the top. For variety, and to differentiate between species and individual trees, use a few shades of scatter.
4. Spray new branches and twigs with paint to blend them into the main body of the tree. It doesn’t have to be a perfect match, so long as it is close. Acrylic paint is ideal for this task.
6. I chose to model autumn at the point where some of the leaves have fallen, but not all, using a variety of colours. Some leaves turn brown, others bright colours. I used the Noch leaf foliage autumn set.


4. Larger spots of glue can show up against the dark of the branches. By viewing the tree from all angles you can correct this by mixing acrylic to the same colour and blending it in carefully using a small paintbrush.
3. It can take a while to build up a good canopy. Use an ‘extra hand’ tool to help you hold the tree still as you work. Place branches into empty gaps where the tree has grown to maximise light.
2. Add branches by dipping the end in cyanoacrylate glue and, while holding them in place, spraying with an activator for a quick bond. Wear a face mask and ensure good ventilation.
5. The glue will dry to a gloss finish. You can correct this with a spray of matt varnish.
To read more about how to: Make an old tree Evergreens Young trees Trees among cattle Custom trees click here:
Free-standing centrepiece tree
1. Find a piece of material that is a good starting point for a large tree. You want a good sized bole and main limbs. Also, ensure you find a piece where the main branches taper to fine points, like the real thing.


“The world’s best design tools are now available for everyone pursuing their hobbies and personal projects. Start designing your dream project today, from anywhere, on any device, using cloud connected and browser based design tools. Plus, you can connect with your fellow makers in online communities, and be an active part of the global maker movement.”
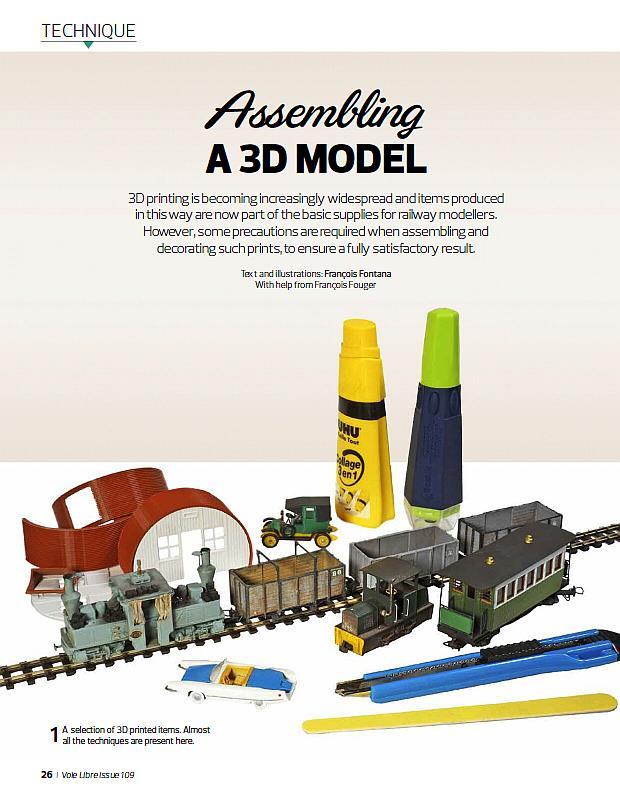
Property of Dassault Systèmes, Solidworks is one of the leading softwares, if not the leader, on the market of parametric CAD for industry. Over the past 15 years, a policy of widely distributing this product to the educational community means that many a railway modeller have cut their 3D teeth on this software. The only drawback, and not a small one, was the several thousand euros that had to be spent to obtain a private licence, a cost well beyond our budgets... Dassault therefore decided to broaden its offer towards the general public by offering a «makers» version of Solidworks at a price equivalent to that of a standard office suite. For private use, a licence costs $9.99 per month or $99 for a year. It also allows you to sell your productions within a limit of $2000 worth of profit per year.
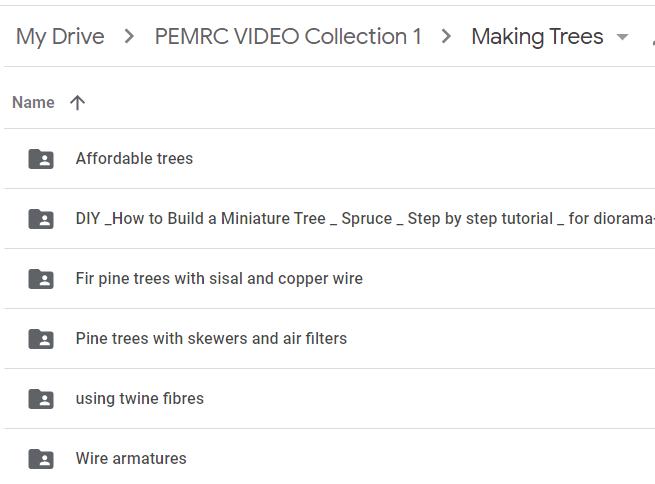
There are also several ‘How to videos’ to be found in our video library here: 3DEXPERIENCE SOLIDWORKS for Makers SOLIDWORKS BECOMES AFFORDABLE!


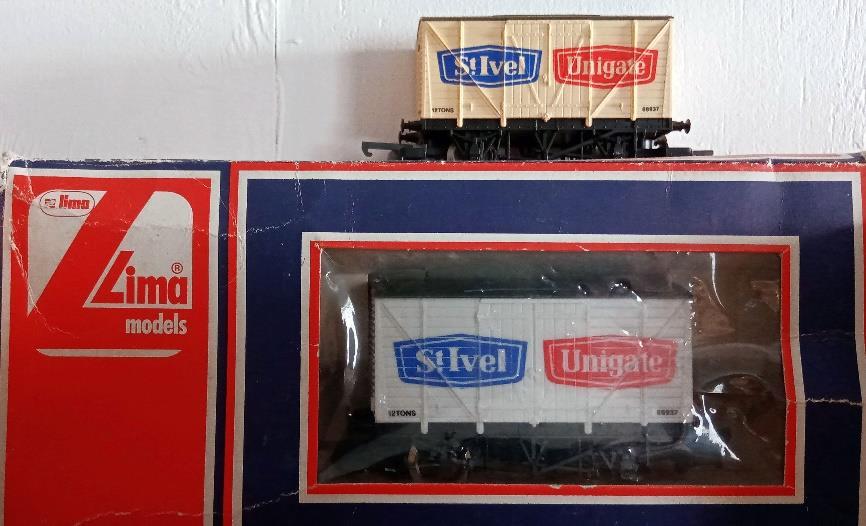
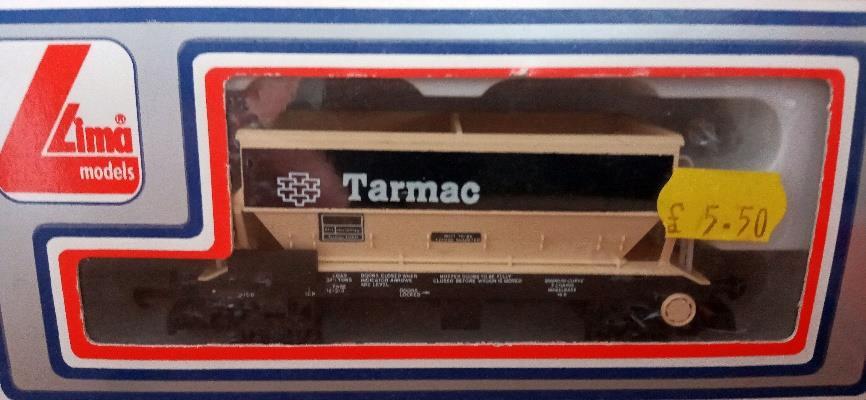
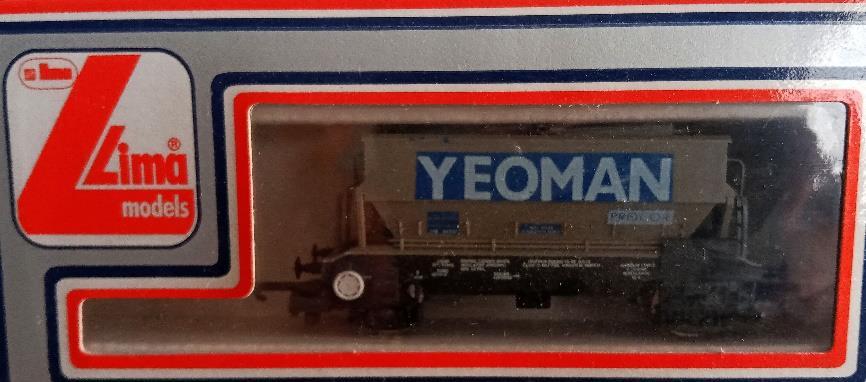
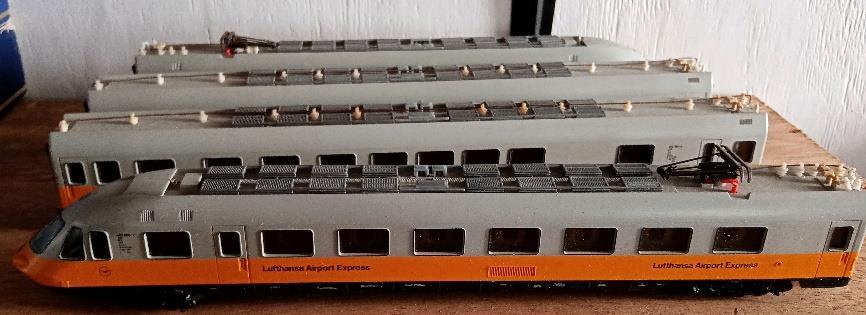
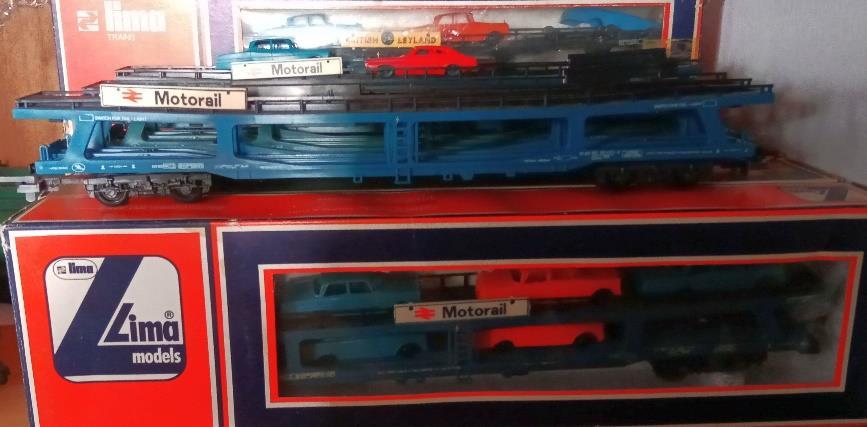
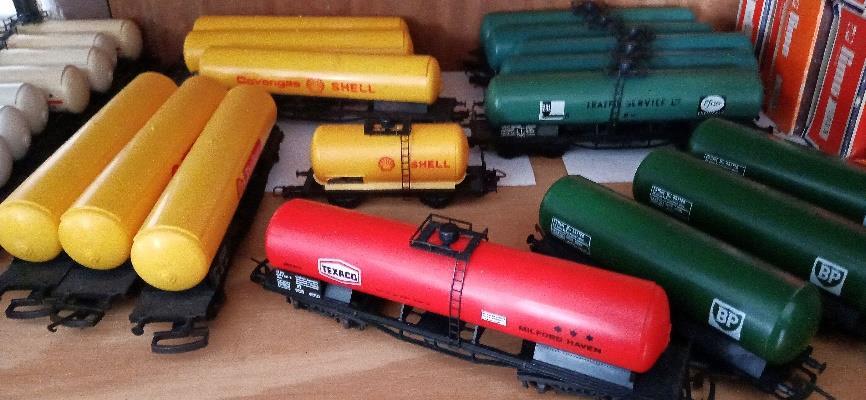
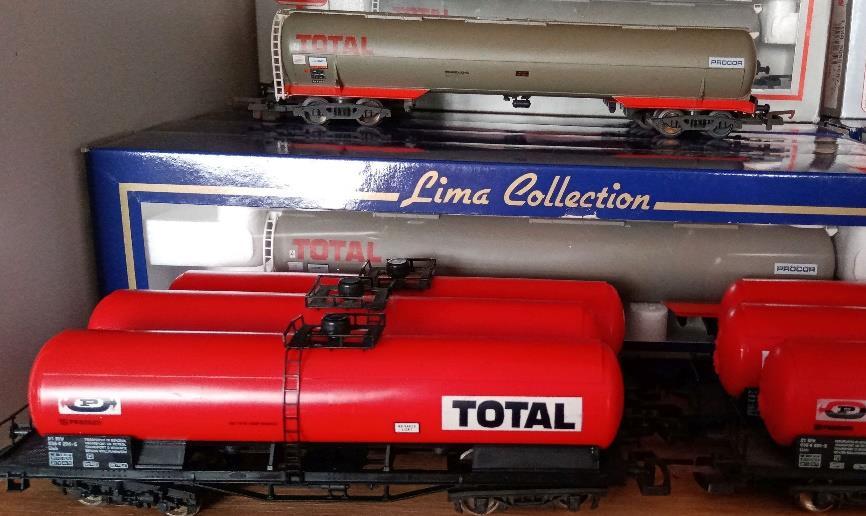
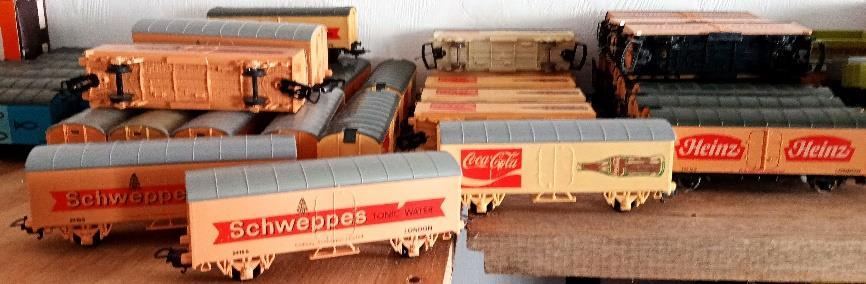
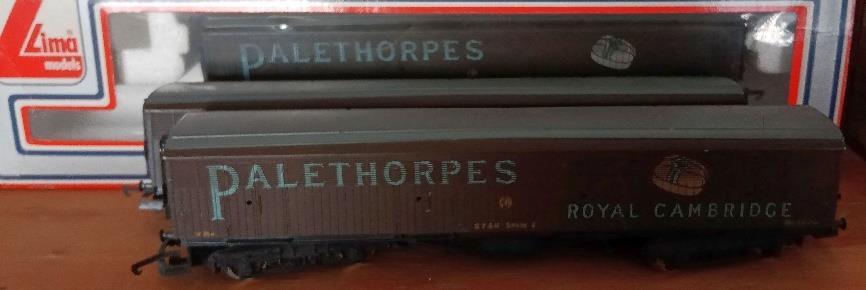
MARKET PLACE Contact Roel for any of the following LIMA Rolling stock; Detailed Adverts on Gumtree here


NEW in the PEMRC DIGITAL LIBRARY:


THE INDUSTRY’S FAVORITE DECODER GOES WIRELESS! SoundTraxx continues its legacy of designing revolutionary products with the new Blunami wireless decoder. This Tsunami2 based sound decoder can operate in DC, DCC or wireless mode with the easy-to-use Blunami mobile app (iOS version 8+ only available free in the app store). With Blunami: connect wirelessly to your model, control your train with a simple touch of a drop-down or slider and enjoy a CV-free experience while using the app! Learn More Mini World Models Shop online and use this special coupon to claim your unique PEMRC member


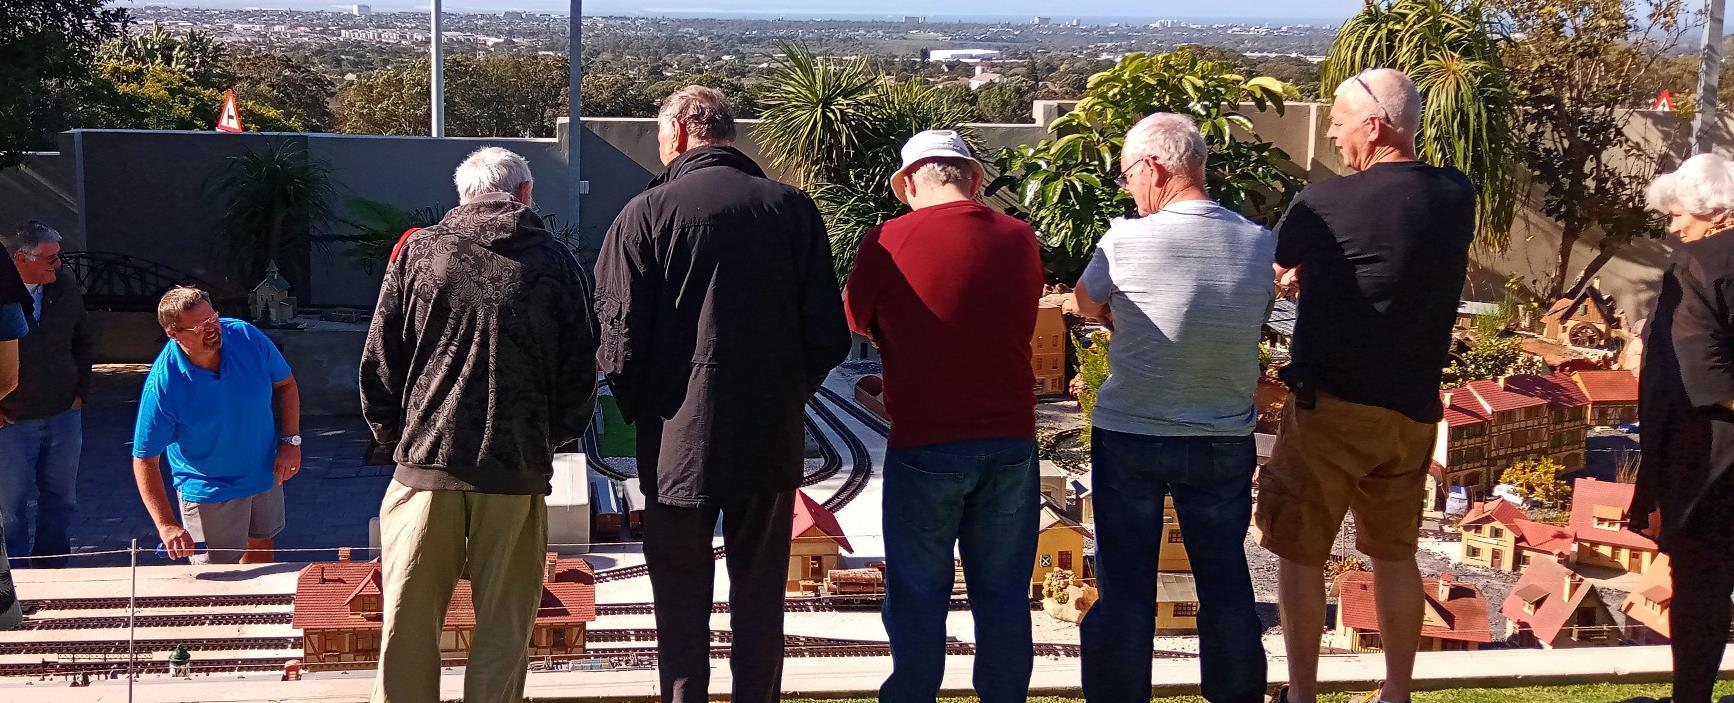
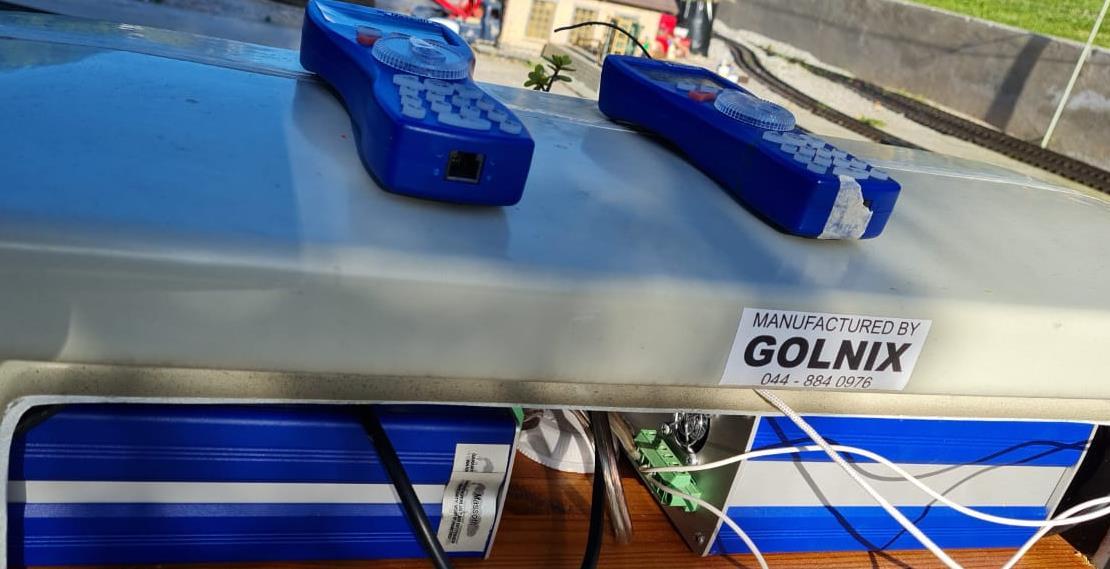
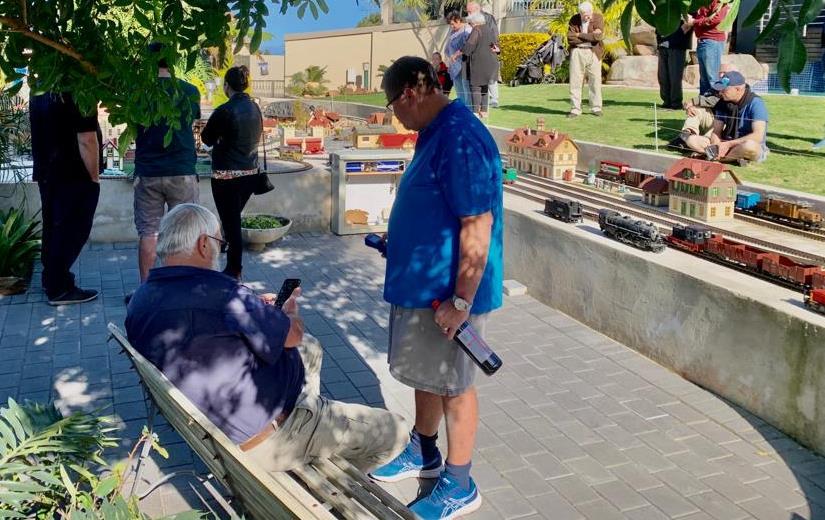
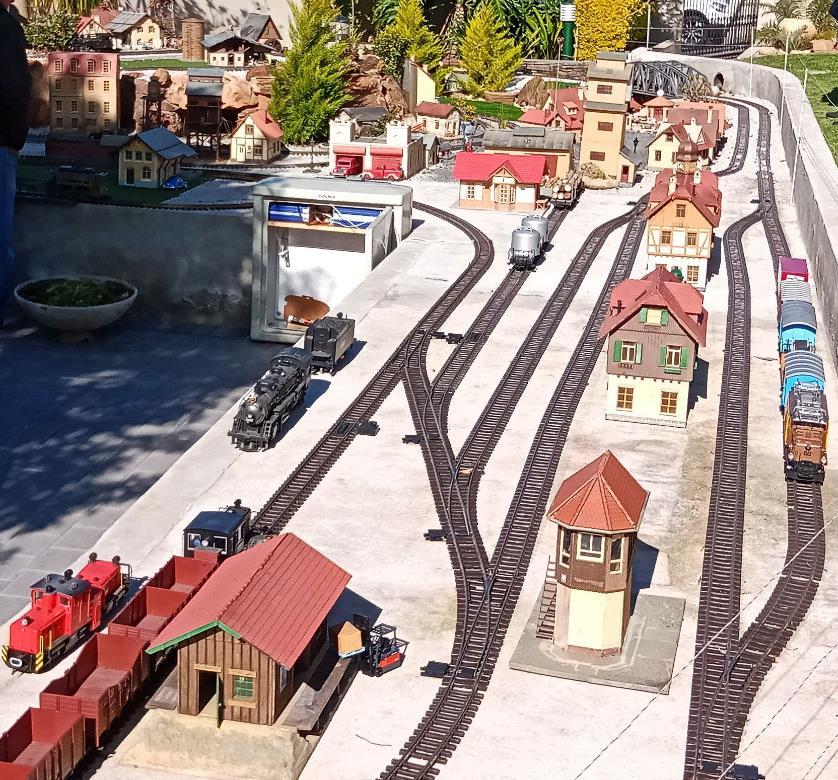
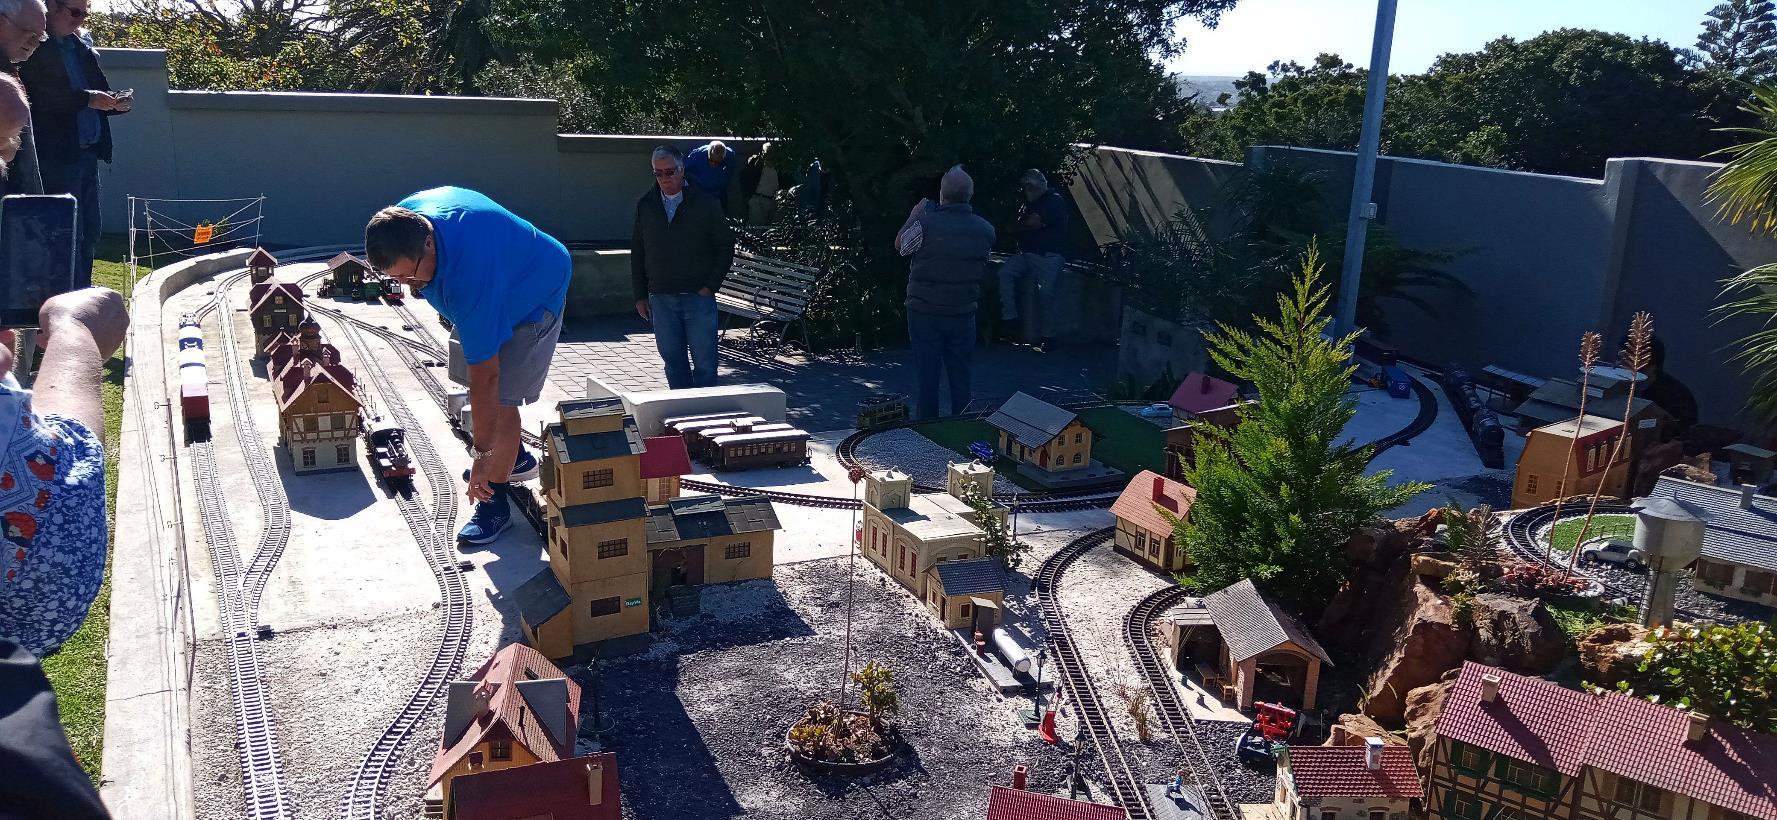
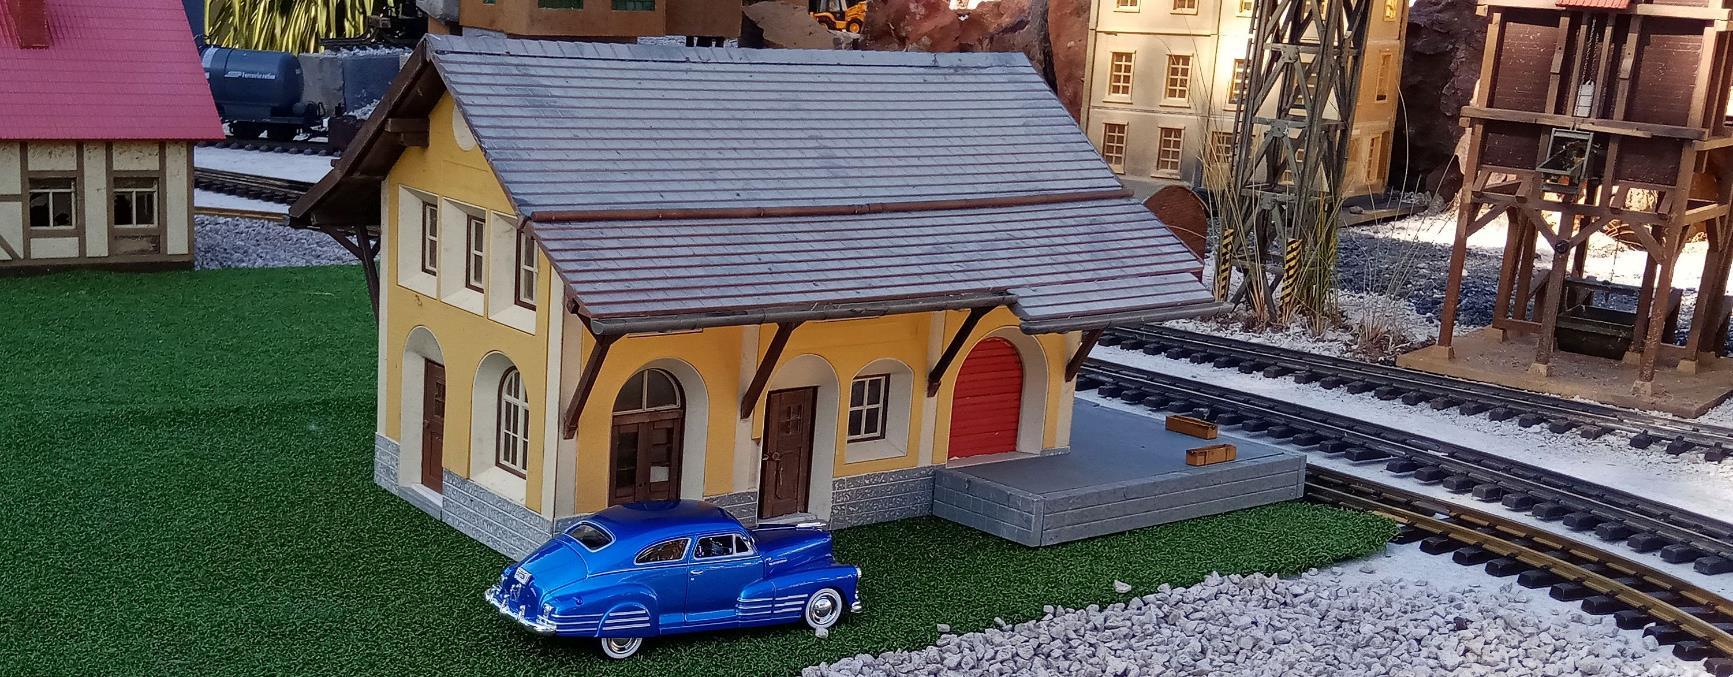
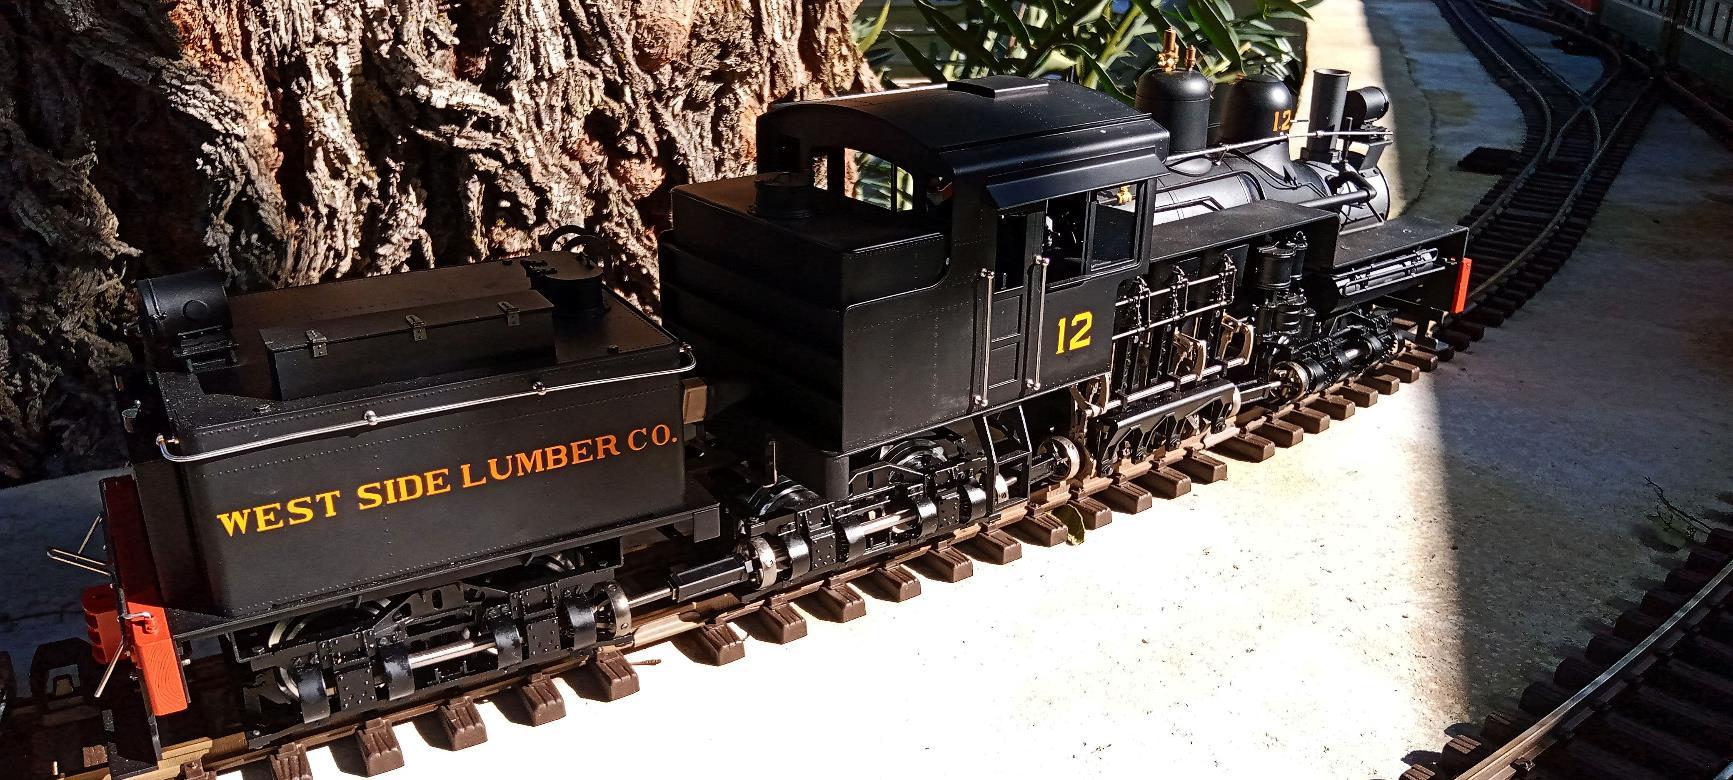
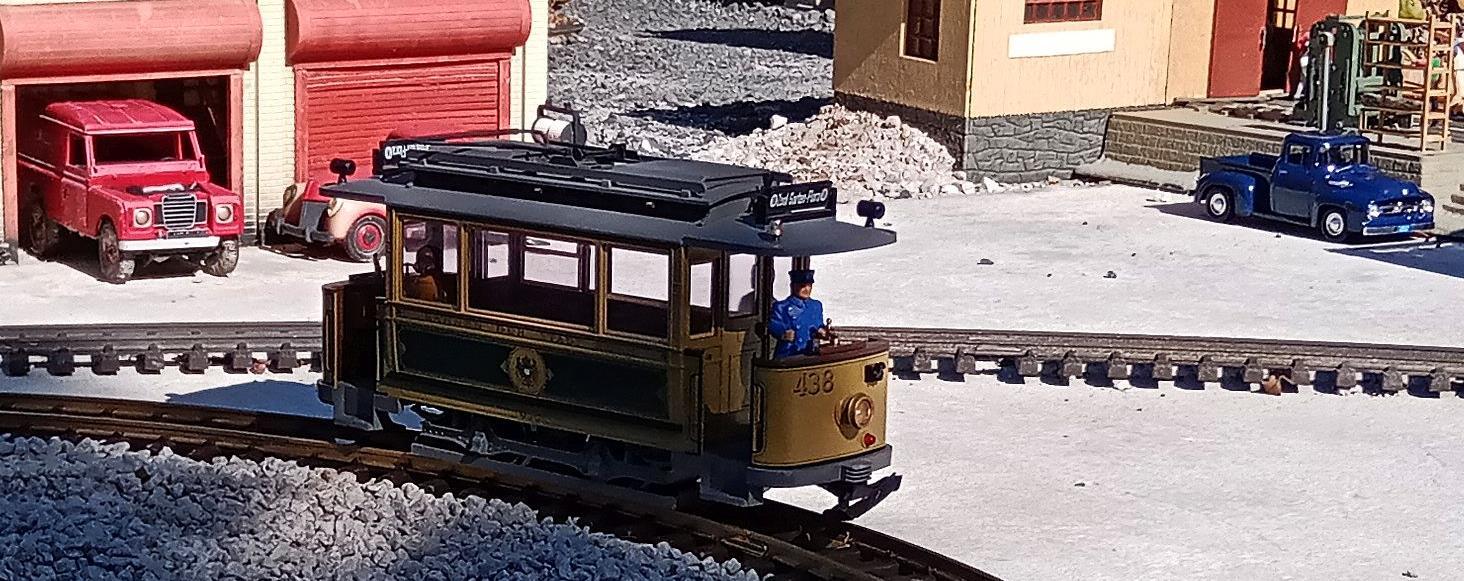
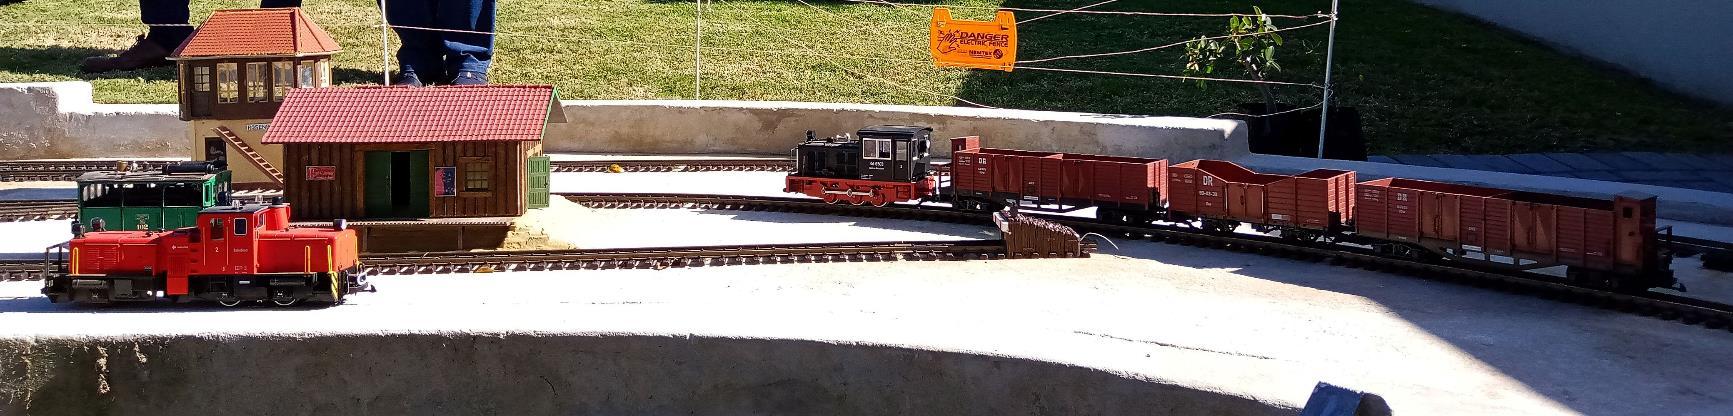
LAYOUT VISIT – HENK GROOTENDORST’s GARDEN LAYOUT Thank you Henk for your hospitality and the Club’s first visit to a local G scale 1:32 Garden Layout The event was well supported after it had to be postponed by a week due to inclement weather. We estimate the layout to be about 20 x 6 meters! It is powered by a 24 Volt DC Massoth digital system. Most rolling stock and track is from LGB


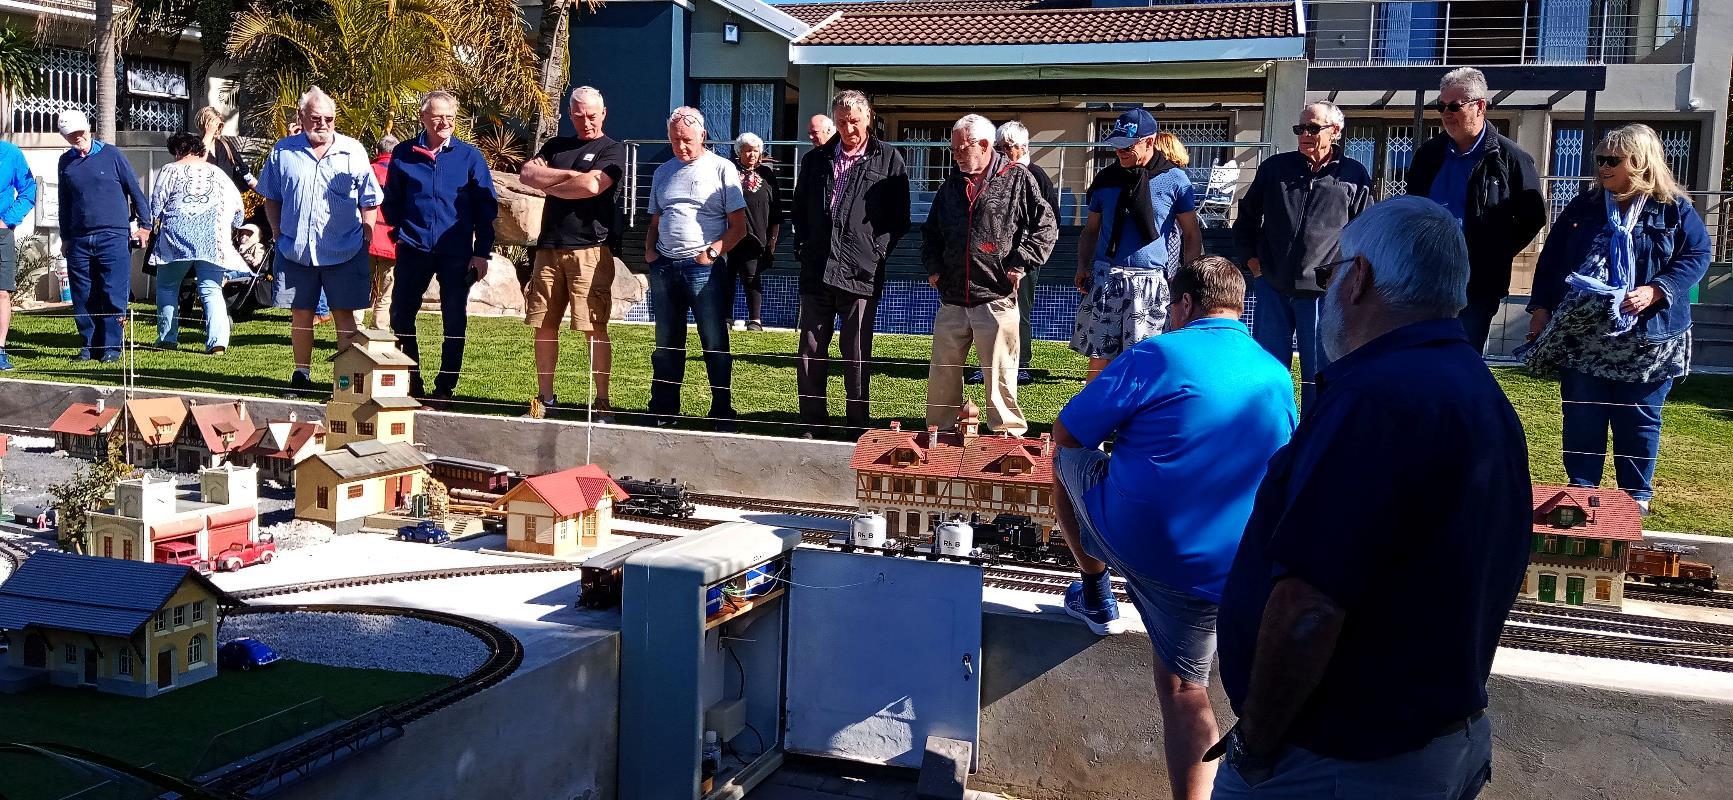
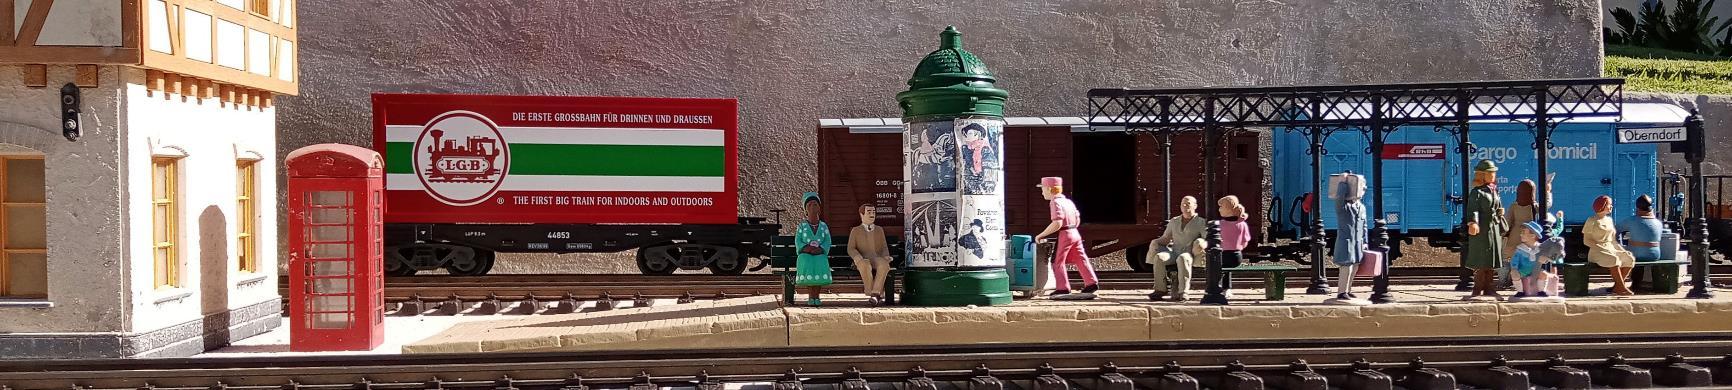
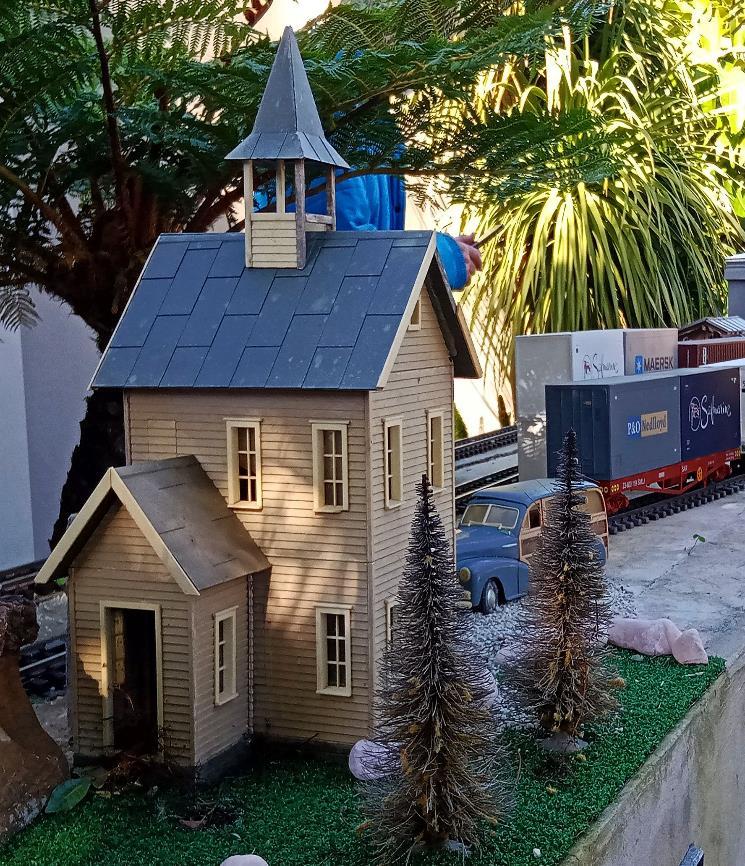
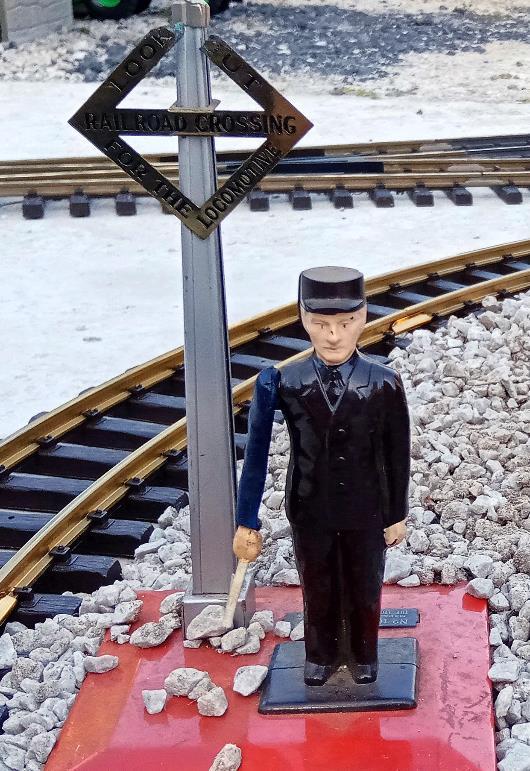
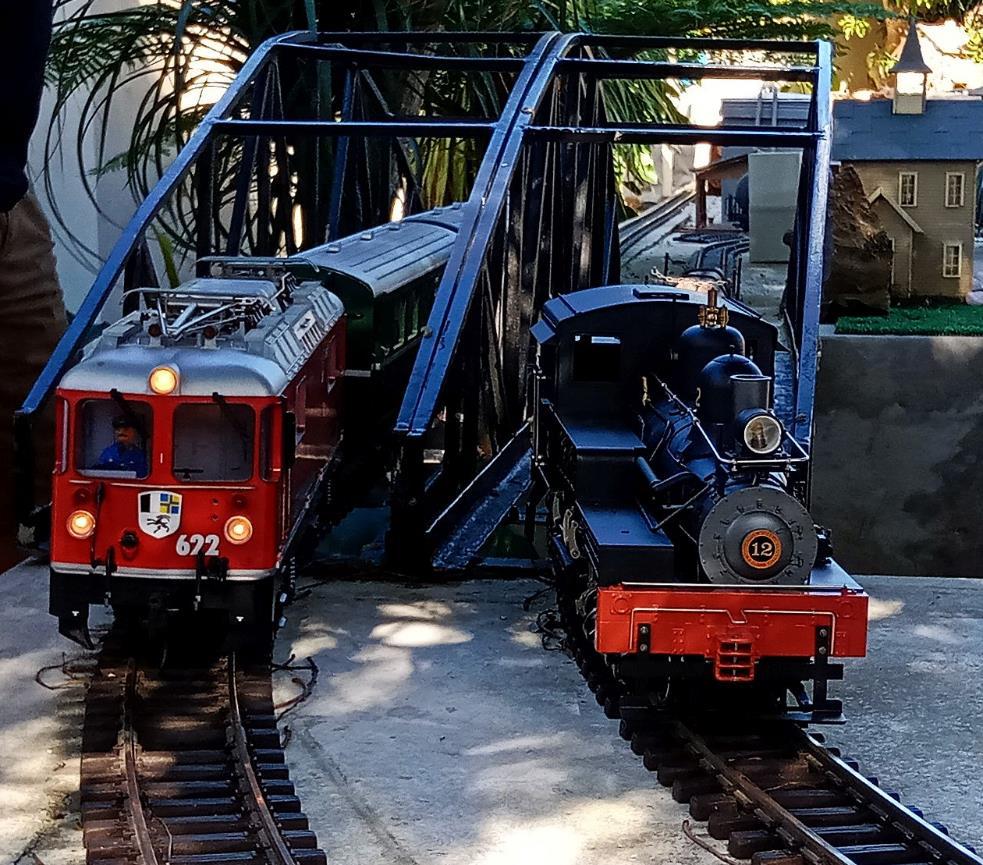
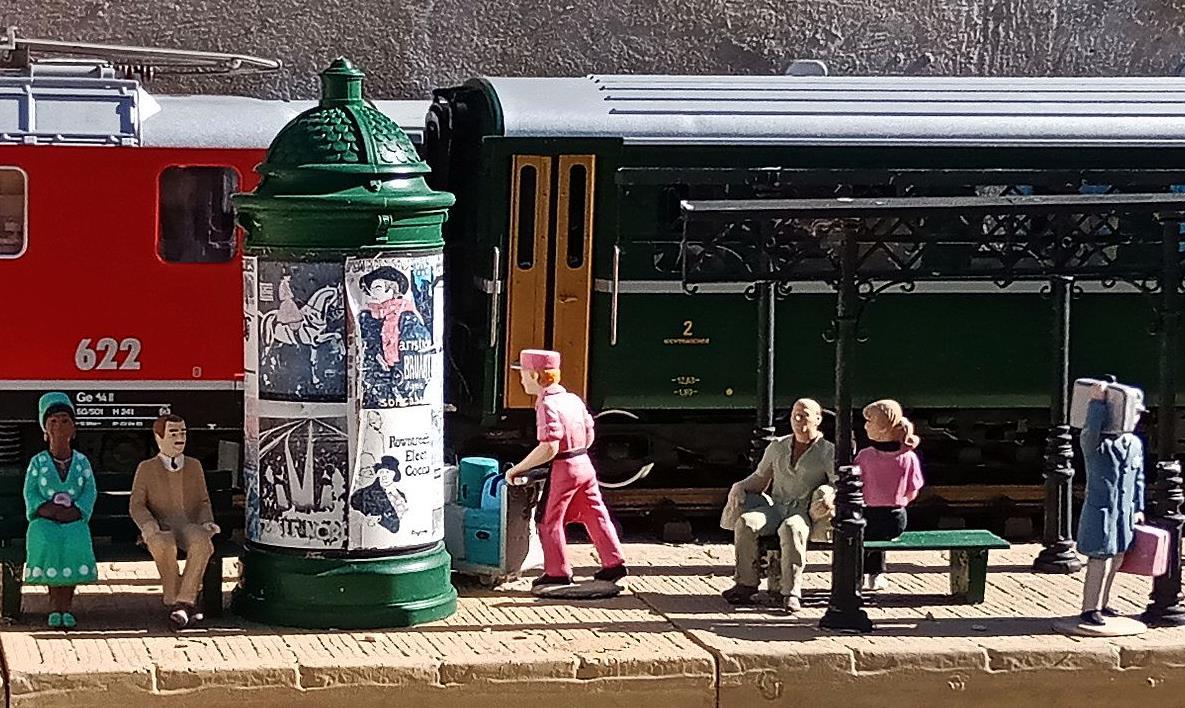


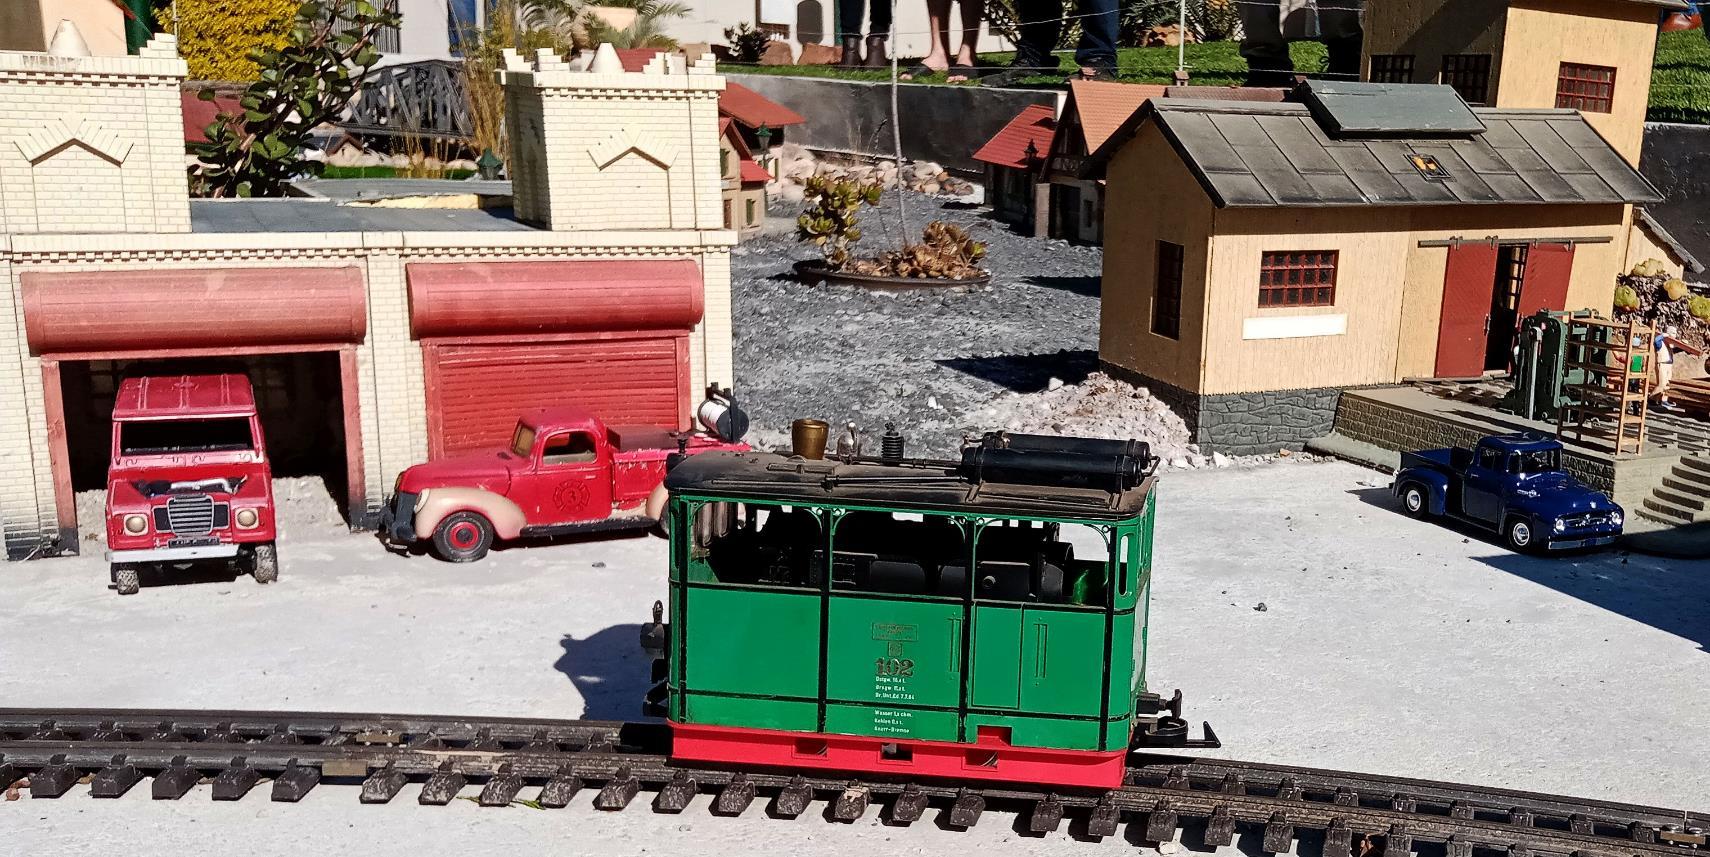


GALLERY