12 minute read
Benefits of Counter Drying


AFTER THE BATH
Benefits of Counter Drying
Advertisement
Thousands of groomers have never worked in a grooming business furnished with drying counters. Instead pets are dried on grooming tables, in tubs or cage-dried. We know from decades of hands-on experience that hand -drying on drying counters was the best experience for us.
As grooming business owners we served over 400,000 pets and their owners. Some say quantity means no quality. We hand-dried over 400,000 pets, every pet we ever groomed. They were never left alone in a cage to dry. How is that worthy of negative groomcourse. ing-related colloquialisms? It isn’t of There’s nothing wrong with drying pets on tables, or in cages or tubs. However, we know counter drying outperforms other methods with advantages in addition to hand-drying. It may cost more to hand dry every pet but we were never known for charging high prices. Counter drying cut the cost of the luxury of hand-drying because it is faster and easier for most pet bathers. Taking care of our bathers was an important business goal and many stayed with us as employees for eight or more years.
Drying counters defined the perimeter our Contain-Abate-Prevent (C.A.P.) ob
of our bathing department supporting eGroomer Journal
jectives. Here are the key benefits of Copyright © 2011 Find A Groomer Inc. All rights reserved 55 (Continued on page 56)
FASTER DRYER TIMES
Assume you have a dog on a drying counter along a wall of your bathing department. Face the counter and wall. The pet is between you and the wall, and positioned parallel lengthwise with the wall. Some of the heated or room temperature air blown onto the dog spreads around and past the dog and bounces back off the wall. The coat facing the wall is simultaneously drying at a slower pace.
BOUNCE EFFECT
We found the bounce effect so pronounced we kept spray bottles of water handy for stretch-drying pets. By the time groomers finish the front side with stretch drying, some areas of the back side may be curled and almost dry. Quick sprays of water wetting the curled spots solved the problems. This minor problem is testimony to how fast counter drying works.
CONTAINMENT & ABATEMENT WORKS walls prevent these problems from spreading throughout the grooming environment where it is not desired or useful for any reason.
TABLE DRYING CONSEQUENCES
Drying on a grooming table is counterproductive to C.A.P. goals to contain, abate and prevent. In fact, drying on grooming tables in open areas is one the worst environmental quality practices for professional grooming environments. It’s not wrong for pets.
When you dry in the open on a grooming table there is no containment. Blown air, heat and humidity travel across the pet and across the room. Groomers working on any adjacent tables may receive blasts of air and noise. Groomers trying to “stay in zone” concentrating on the art of finish grooming get plenty distracted. Why do stylists have to overlook and have their zone challenged by noisy equipment including dryers, nozzles and vacuums? Resolving these issues creates natural productivity, and less stress. Counter drying within a bathing departBlown air sends big and little hairs out ment enables the building design to into the open adding to cleaning duties noticeably contain and abate noise, in all departments. Some groomers flip 56 Copyright © 2013 Find A Groomer Inc. All rights reserved moving air, heat and humidity. The Subscribe www.egroomer.com (Continued on page 57)
the drying nozzle around, up, down, here, there, left and right and heat and humidity are being shot everywhere. Dirt, dust and dander already at rest on objects, furniture and fixtures become airborne again and sail throughout the business. If you have a retail area, you are forever dusting. Dryer and nozzle noise fans out 360 degrees too. Overall, C.A.P. directives fail when drying on tables in traditionally designed shops. PREVENTION IMPROVEMENTS Prevention safety improves with counter drying. A dog securely looped to a fixed position on a walled drying counter has more security, and security makes for calmer pets. It’s easier to dry a pet that feels protected. The groomer stands on one side of the dog and the opposite side is a wall. Some pets love to rest against it. The wall reduces visual pet distraction. It prevents looped pets from moving sideways. Fortunately the pet retains forward vision, the most important direction if they are to feel comfortable and less restrained. Counter drying done properly by pet bathers supports pet satisfac
Pets on open grooming tables receive 360 degrees of distraction. Information comes at them from all sides. They can more readily struggle away from groomers even when looped to a grooming arm. Pet positioning becomes more of a task when compared to counter drying. Missing counter
walls are like third arms helping groomers to keep pets positioned comfortably.
In summary, what are the advantages of drying pets on grooming tables? Absolutely none. It’s not wrong. It’s simply without advantages. Counter drying done correctly successfully allows pets to dry faster with hands-on attention, contain noise, heat and humidity and loose dirt, dander and haircoat. What more can a professional ask for? Well, how about a lot of extra storage space without taking up more floor space?
TIPS FOR CONSTRUCTION
Construction. Drying counters may be mounted on walls leaving open space below them. There’s no problem with that design. However the empty space below the counter could be used for significant storage, and additional tion with the grooming experience. counter support. Construct storage eGroomer Journal Copyright © 2011 Find A Groomer Inc. All rights reserved 57 (Continued on page 59)


cabinets and secure them to the walls of the bathing department as indicated on your floor plan. Build countertops secured to top of the storage cabinets and the result is a very stable drying counter solution with plenty of storage. Some of our floor plans incorporate more than 100 cubic foot of storage under drying counters. What does that mean? You need less square footage and that lowers rent.
COUNTERTOPS
They should extend about six inches forward from the front face of the cabinets. This air space is also leg space for pet bathers sitting on stools while they dry pets. It also allows some room for dryer stand bases and rollers.
Don’t use cabinet hardware that sticks out from the face of the cabinets, such as handles and knobs. Bathers could bruise their knees on them, and cords can catch on them. Instead use hardware that is flush with the surface of the cabinets.
Raise the cabinets on feet creating some air space between the bottom of the cabinets and the floor. Bathing departments are wet areas der cabinets with solid bottoms resting on floors. Seeping water can rot wood and harbor sanitation problems.
PET POSITIONING SAFETY
Secure very strong eyelets into the studs of the counter wall. Strong but comfortable grooming loops should be able to attach to the eyelets.
Never allow pets of different families to commingle on drying counters. Space pets on your drying counters so they cannot touch one another. Then attach their grooming loops maintaining the separation. The pets are now safe at all times from touching or harming one another.
Pets should never be left unattended on grooming tables, and the same is true for drying counters.
Grooming loops attached to a counter wall should never be relied upon when a bather needs to temporarily step away. Instead, bathers should place pets in temporary holding cages within the bathing department the same as groomers in other departments.
Until next time, Stephen GroomingBusinessinaBox.com


This is my Shih Tzu client, “Curt.” He is a personal favorite to groom. He has a beautiful coat. His head has nice straight hair and that’s why I chose this head style for him. Over the years I discovered styling heads and tails is the greatest challenge for many groomers.. First, I trim the hair under the eyes with my “Detailer” thinning shear in order to leave the area looking natural, and not shaved. When a dog has a very deep stop, the area between the eyes at the top of the muzzle, stretch the skin on the forehead back to help clean out the stop. I scissor a visor from the outside corner of the left eye to the outside corner of the right eye with my curved shears.
Using a ½” snap-on comb over a 15 blade I set the top of the head from the visor to the back of the skull over the occiput, the bone at the back of the skull. With the same snap-on comb I continue to set the length over the ears. eGroomer Journal Copyright © 2011 Find A Groomer Inc. All rights reserved 61 continued on next page


I lightly run the snap-on comb over the ears to blend into the ear hair. I do not take the snap-on comb against the grain or come from the occiput to the visor, otherwise the top of the head will be too short. I set the length of the top of the head with the snap-on comb and use a long comb to lift the coat. Tip the ends with “Shaper” thinning shears to eliminate any uneven coat. The softened head looks very natural.
I continue to lift the coat over the ears with the comb and tip the ends with my thinning shears. When using this technique the head will be very well blended without scissor lines. Blend the back skull into the neck hair with thinning shears. I want this area to be very well blended into the 4F neck/body work. It should flow from the back of the head to the neck without any visible difference in length.


Setting the chin line on Curt can be tricky. First, I set the length of the chin with my straight shears. You don’t want to leave too much length under the chin. I prefer to leave it about 1 ½”. Next I scissor the ears and side of the chin. I treat ears as part of the chin, not separate. I start at the back of the ear a bit higher and swoop down to meet the line that I set in front of the chin. This gives a really nice look and transitions the back of the ear nicely into the chin.
With this much straight coat it is very easy to see scissor lines. I go over the entire chin line to the back of the ear with my “Shapers.” I lightly thin the edge of my scissor work to rough the edges of the coat. This eliminates any choppiness you may encounter.


This is a little Yorkie mix of mine. My client with two Yorkies recently adopted him. This was his first haircut by me.
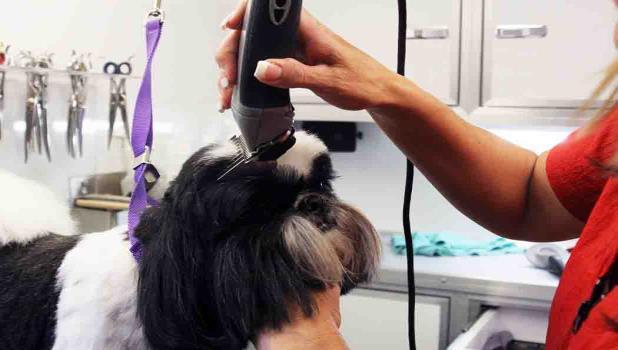
Using a 1/2 inch snap-on comb I set the top of his head. I clip from the front of the head towards the back.


Using the same snap-on comb I set the coat over his ears.
I then trim the hair from outside corner of the left eye to the outside corner of the right eye creating a visor.


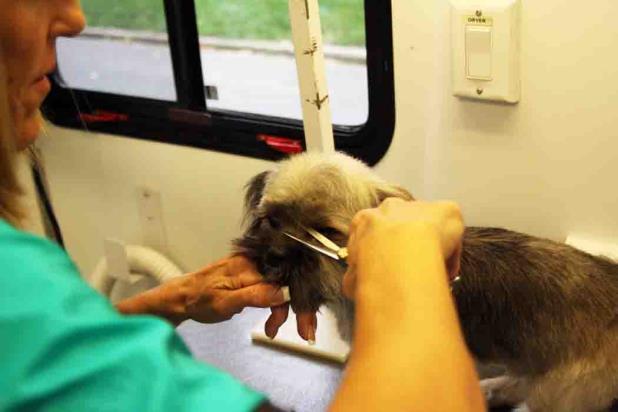
The visor is almost done. I set the bottom of the chin being careful not to leave too much length.
Because this is a little dog with a petite head I only leave about 3/4” to 1 inch under the chin.


Holding the ear up and out of the way with my left hand I scissor under the chin all the way under the ear.
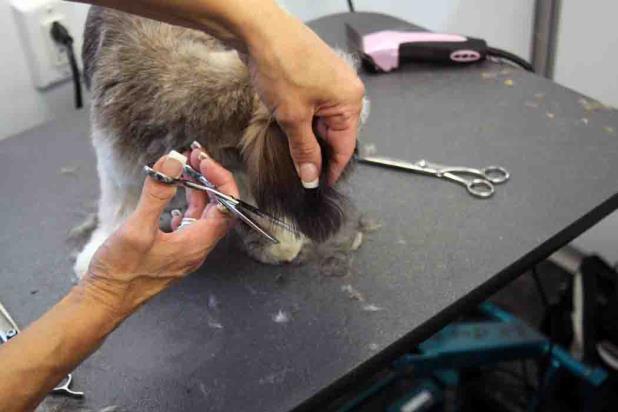
Now that I have the top of the head and chin set, I scissor the cheeks. I comb up the coat from the chin line to the top of the head.

By doing this I can see the coat that needs to come off. By setting the top of the head and chin first you are creating two points. Now you can remove the coat between the two points with thinning shears. The result is a well-blended cheek.
Using my “Detailer” thinning shears I neaten the hair under his eyes and in the stop area.

Trim the ears from the back of the ear down toward the front of the ear. You want to trim the ear shorter in the back. The owner requested not to cut the black tips off his ears so they don't’ appear as short as I would have liked. And the finished product. ▀ eGroomer Journal Copyright © 2011 Find A Groomer Inc. All rights reserved