
13 minute read
SUNNY DAYS
from Vbbnbhnnbh
A tired-looking bungalow is given a fun-loving touch, resulting in a home that boasts creative colour and easy flow for a young family
R
Advertisement
CHRISTMAS TIME
A 6.6ft Douglas fir tree from The Christmas Store stands in the lounge. It’s bedecked with some of the family’s favourite decorations, such as the felt animals from Citta. The felt Sleepy Santa, Hanging Reindeer with Green Scarf, Hanging Fawn and White Christmas Bauble are from Father Rabbit. The small Santa hats and paper honeycomb decorations are from Shut The Front Door. The wrapping paper and ribbon are from Ribbon & Blues.

Problems & solutions
321
HOUSE WASN’T USER-FRIENDLY Ben and Emma consulted with interior design company Ash Road who were put in charge of the renovations.
INTERRUPTED FLOW
The kitchen and dining area was redefined after removing the kitchen island and a large bulkhead.
DARK BATHROOM
A partition wall was removed and a skylight added to allow more light to stream into the small space.
Meet & greet Emma Collie (a nurse before she had Lexie and has been a full-time mother since), partner Ben Ryan, (content director), Lexie, four, and Evie, two.
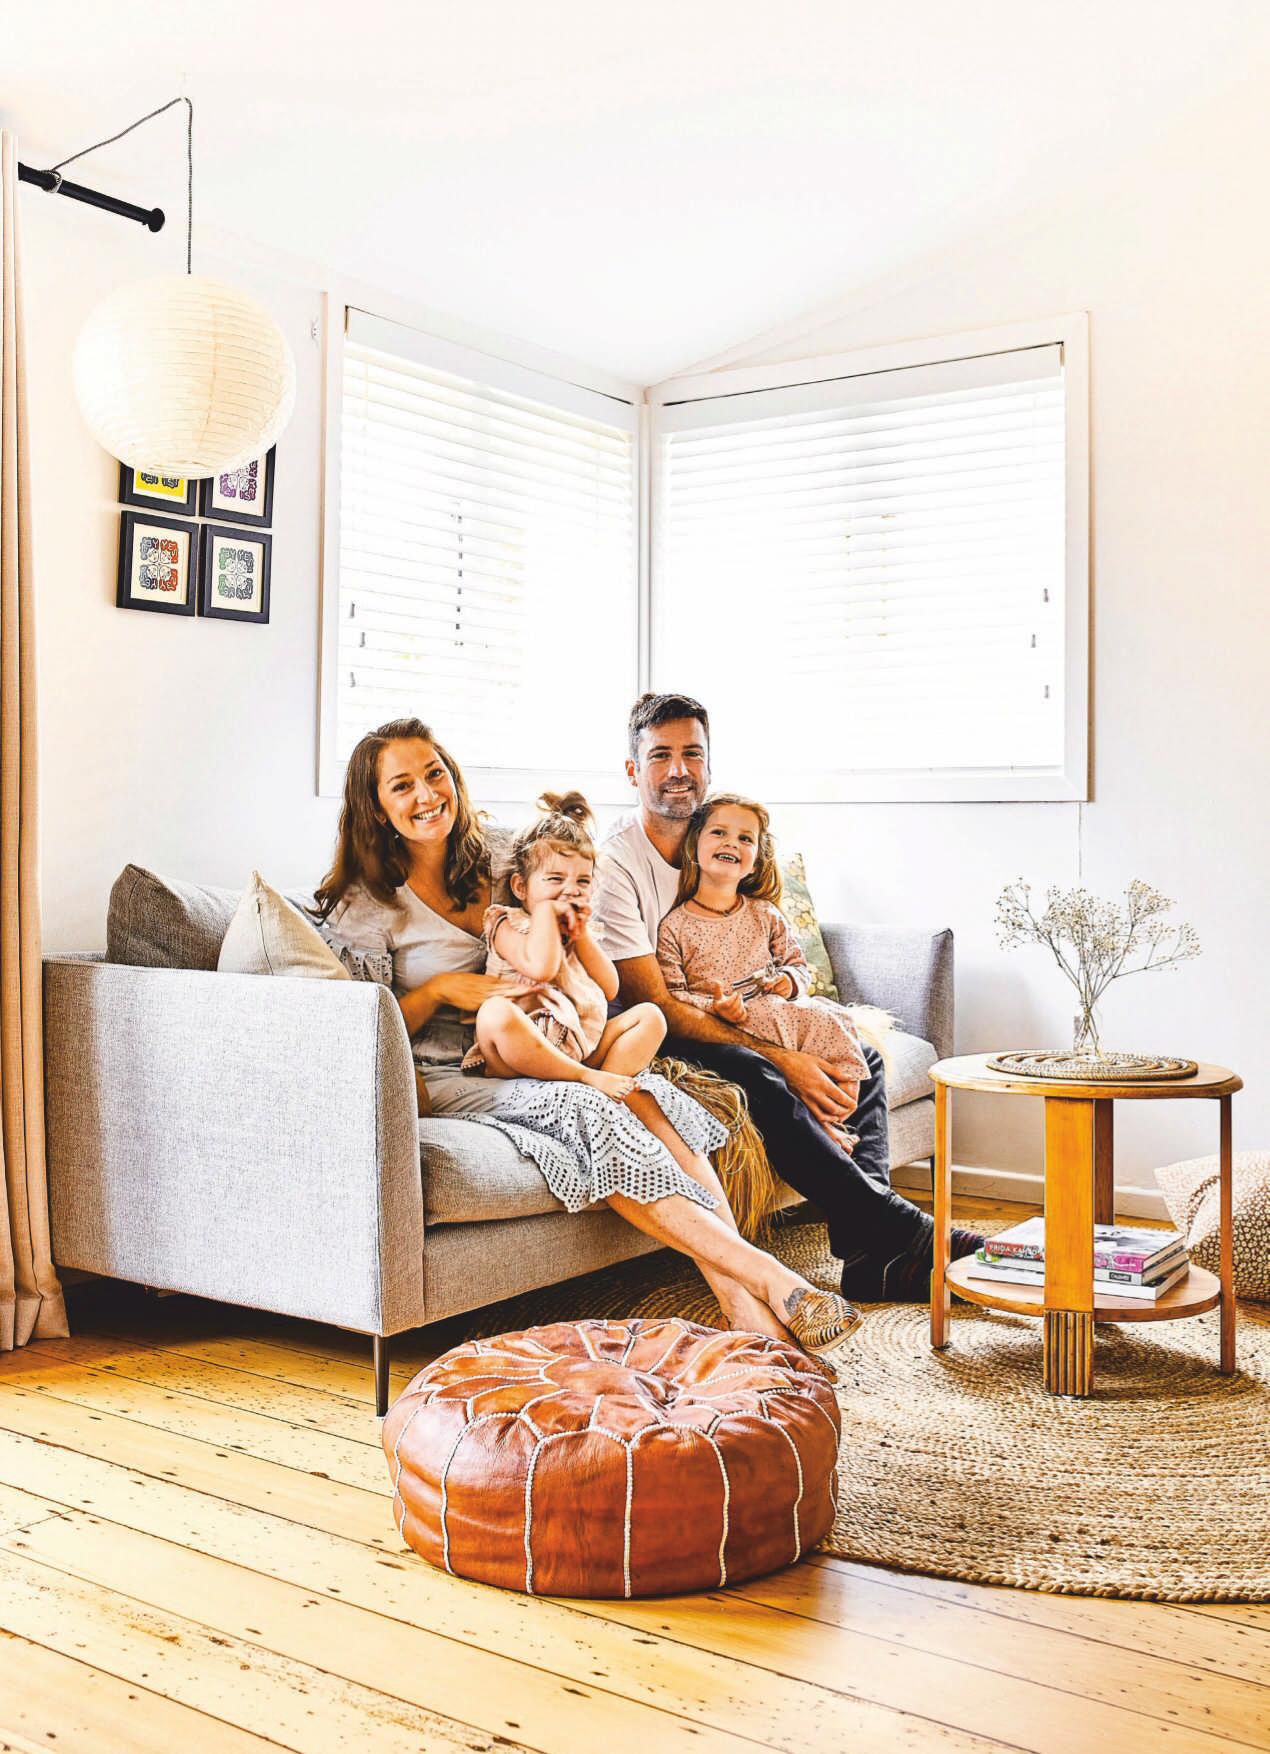
Ready to upscale If there’s one thing about renovating, it’s that – if done right – a little can go a long way to creating a functional home that is pleasing to the eye. When Emma Collie and Ben Ryan gave their 1920s bungalow a makeover, the structural changes were few, but the impact was big. This was all thanks to efficient spatial amendments and the addition of colour.
The couple’s house story starts in 2019, when they were renting the upstairs level of a home in Grey Lynn, Auckland. A friendship formed with their neighbour Natalie van Peer, who lived downstairs with her family. Natalie co-owns interior design studio Ash Road with her friend Katie Salter. Emma and Ben had a toddler, Lexie and a baby, Evie, at the time. It wasn’t long before they were ready to buy a larger home in the area.
A three-bedroom bungalow came up for sale on a leafy tree-lined street nearby. “It was pretty rundown,” says Emma. “but I could visualise our family being there. Beautiful sunlight flowed into the living area and it had the potential to be lovely and cosy.” Ever-so savvy about creating an enduring home, Natalie and Katie were approached by the couple for guidance.
When Emma and Ben viewed the open home with Natalie and Katie, they saw its potential. It was liveable and there was even a studio out the back in which Ben could work from home. “We could see that it had plenty of character,” says Katie. “But also, Emma and Ben have two little girls so the home needed to be more user-friendly, notably the bathroom and kitchen.”
2What next? After taking ownership, Ben and Emma got planning, renting until the renovation was complete, and Natalie and Katie were asked to take charge of the revamp. “With it being our first house, it took us a while to get our head around buying a place that needed work,” Emma says. “But Natalie and Katie helped us see that it was still worth buying. We went through the builder’s report with them, and they guided us through all the nitty gritty.”
Both parties independently compiled reference images of potential interior styles, and upon their next meeting they found they had found the same pictures. “The interior concept came together seamlessly,” says Natalie.
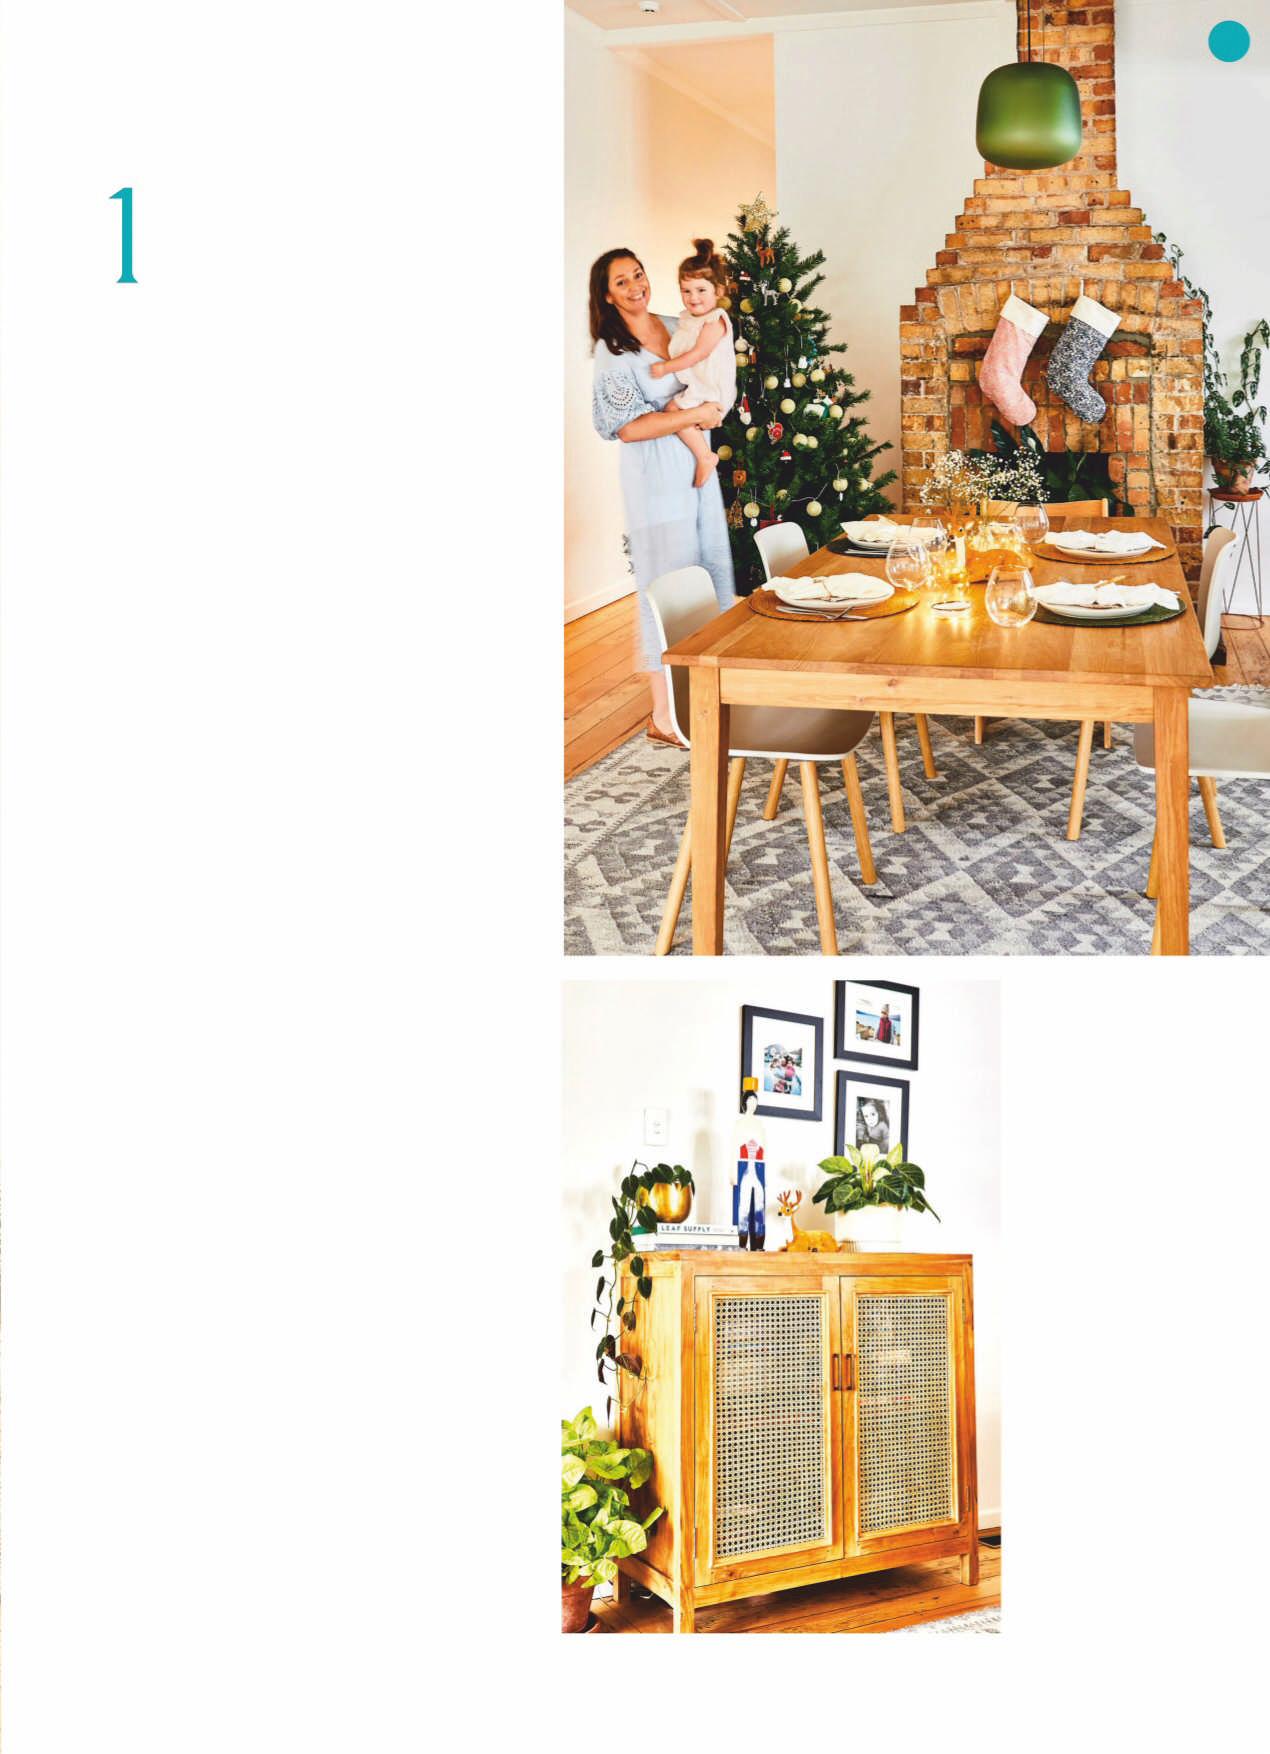
3Free-flowing space In the kitchen, an oversized island bench impeded flow and a large bulkhead closed off the kitchen/dining space from the living area. Both obstructions were removed to redefine the area.
The three bedrooms needed no major work, with
R
LIVING AND DINING
ROOM Opening up the space between the kitchen, dining and living areas made the house feel more spacious. The rimu floors were sanded to give a lighter tone and the builders created extra storage behind a bespoke door (pg 81).
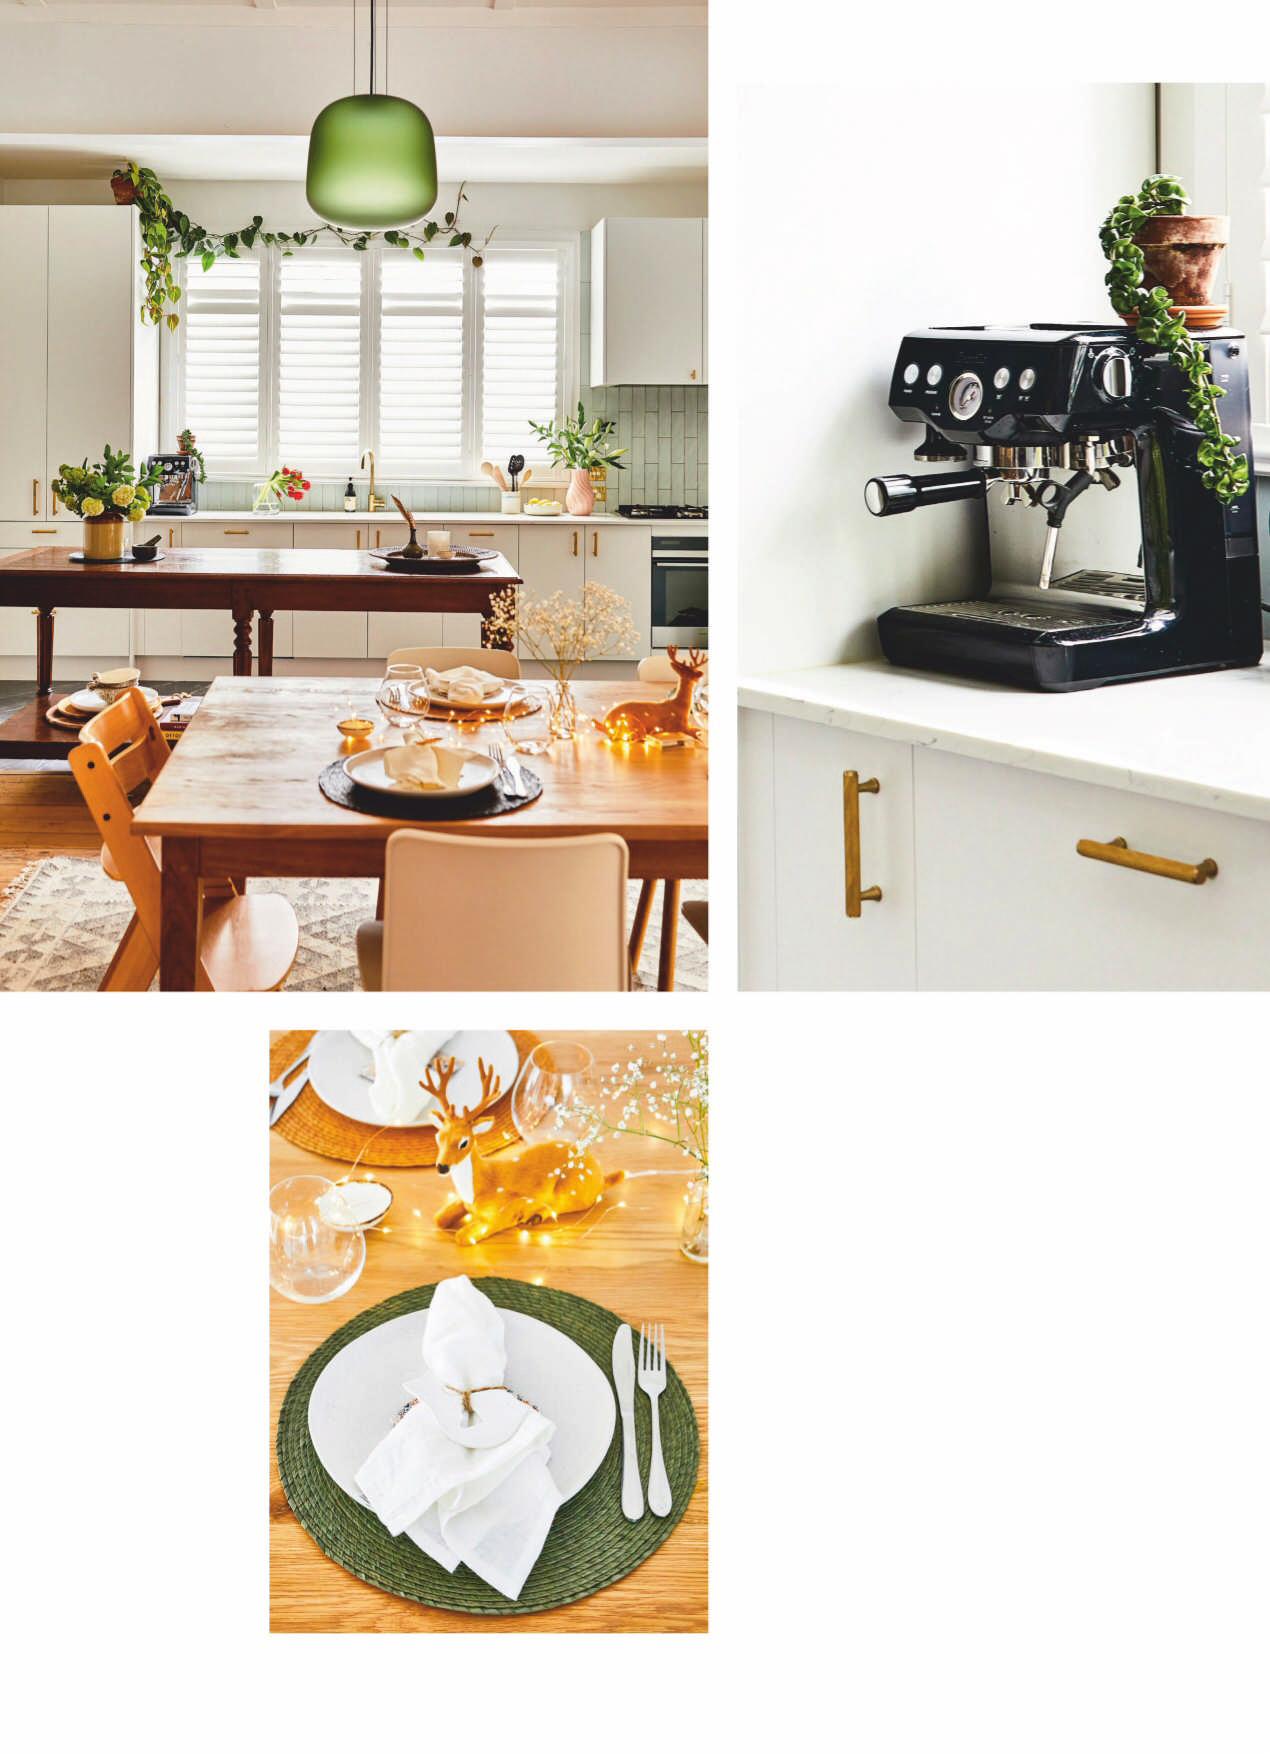
KITCHEN A vintage French draper’s table from Vitrine also doubles as a kitchen island in the area that is Emma’s favourite place in the house. “Mornings are always nice with the sun beaming through the kitchen shutters.” the only issue a door that led from the main bedroom to the kitchen, which Emma and Ben closed off.
Off the lounge the laundry, separate toilet and bathroom can be found. The toilet space was originally tiny, making it difficult to access and hard to close the door once inside. Natalie and Katie removed a cupboard and flipped the layout, moving the cistern behind the wall, to fit everything in comfortably.
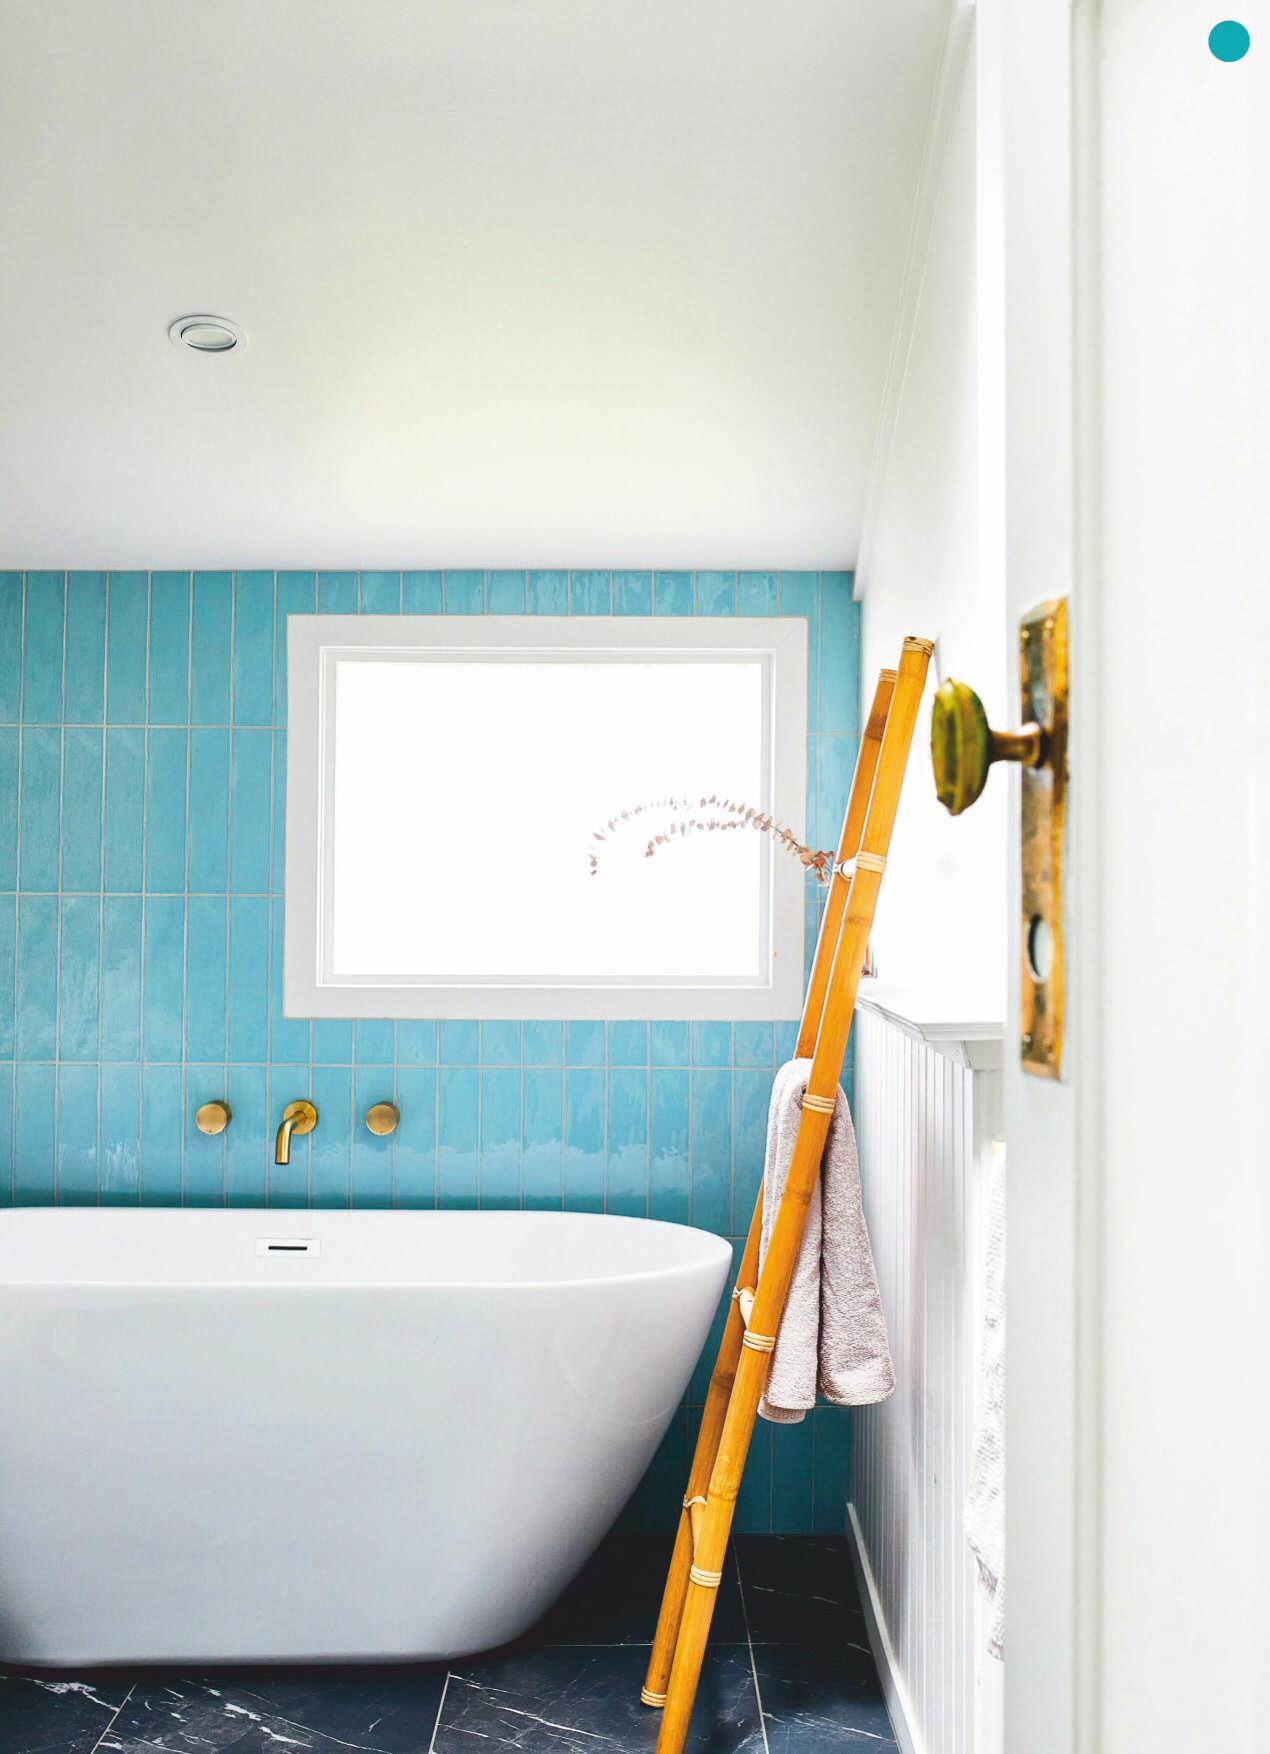
With the aim of improving flow and natural light in the bathroom, a partition wall came down and a skylight was put in place.
“In the scheme of renovating, it was pretty quick!” says Natalie. “We ripped through the design sign-off over about a fortnight. No consent was required, and the building, tiling, painting and floor-sanding was done in about five weeks.”
4Magic touches A statement vintage draper’s table in the kitchen doubles as storage (with its low shelf) and a kitchen island. White window shutters that let the light dapple in and white cabinetry with brass handles are both anchored by marble floor tiles.
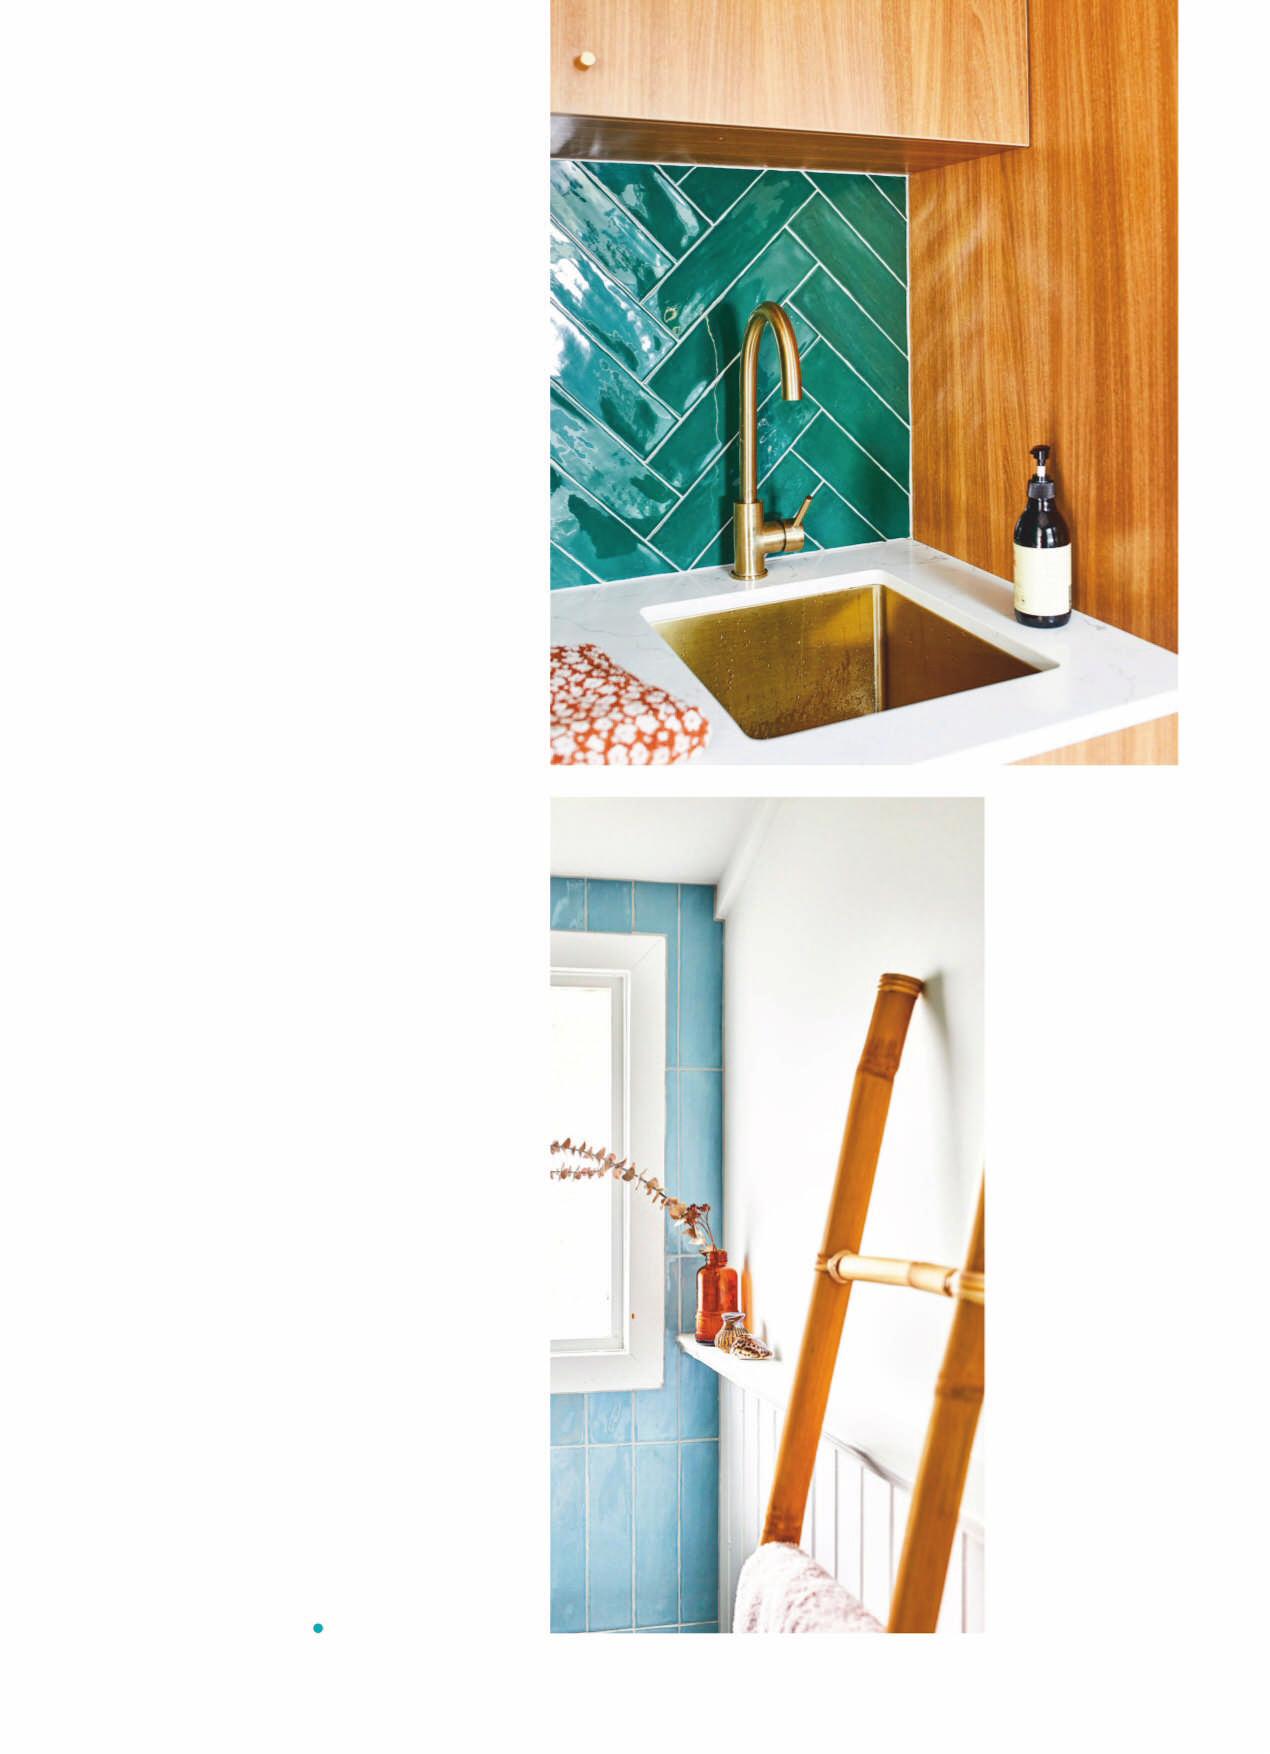
A statement brass sink and tap balance the laundry
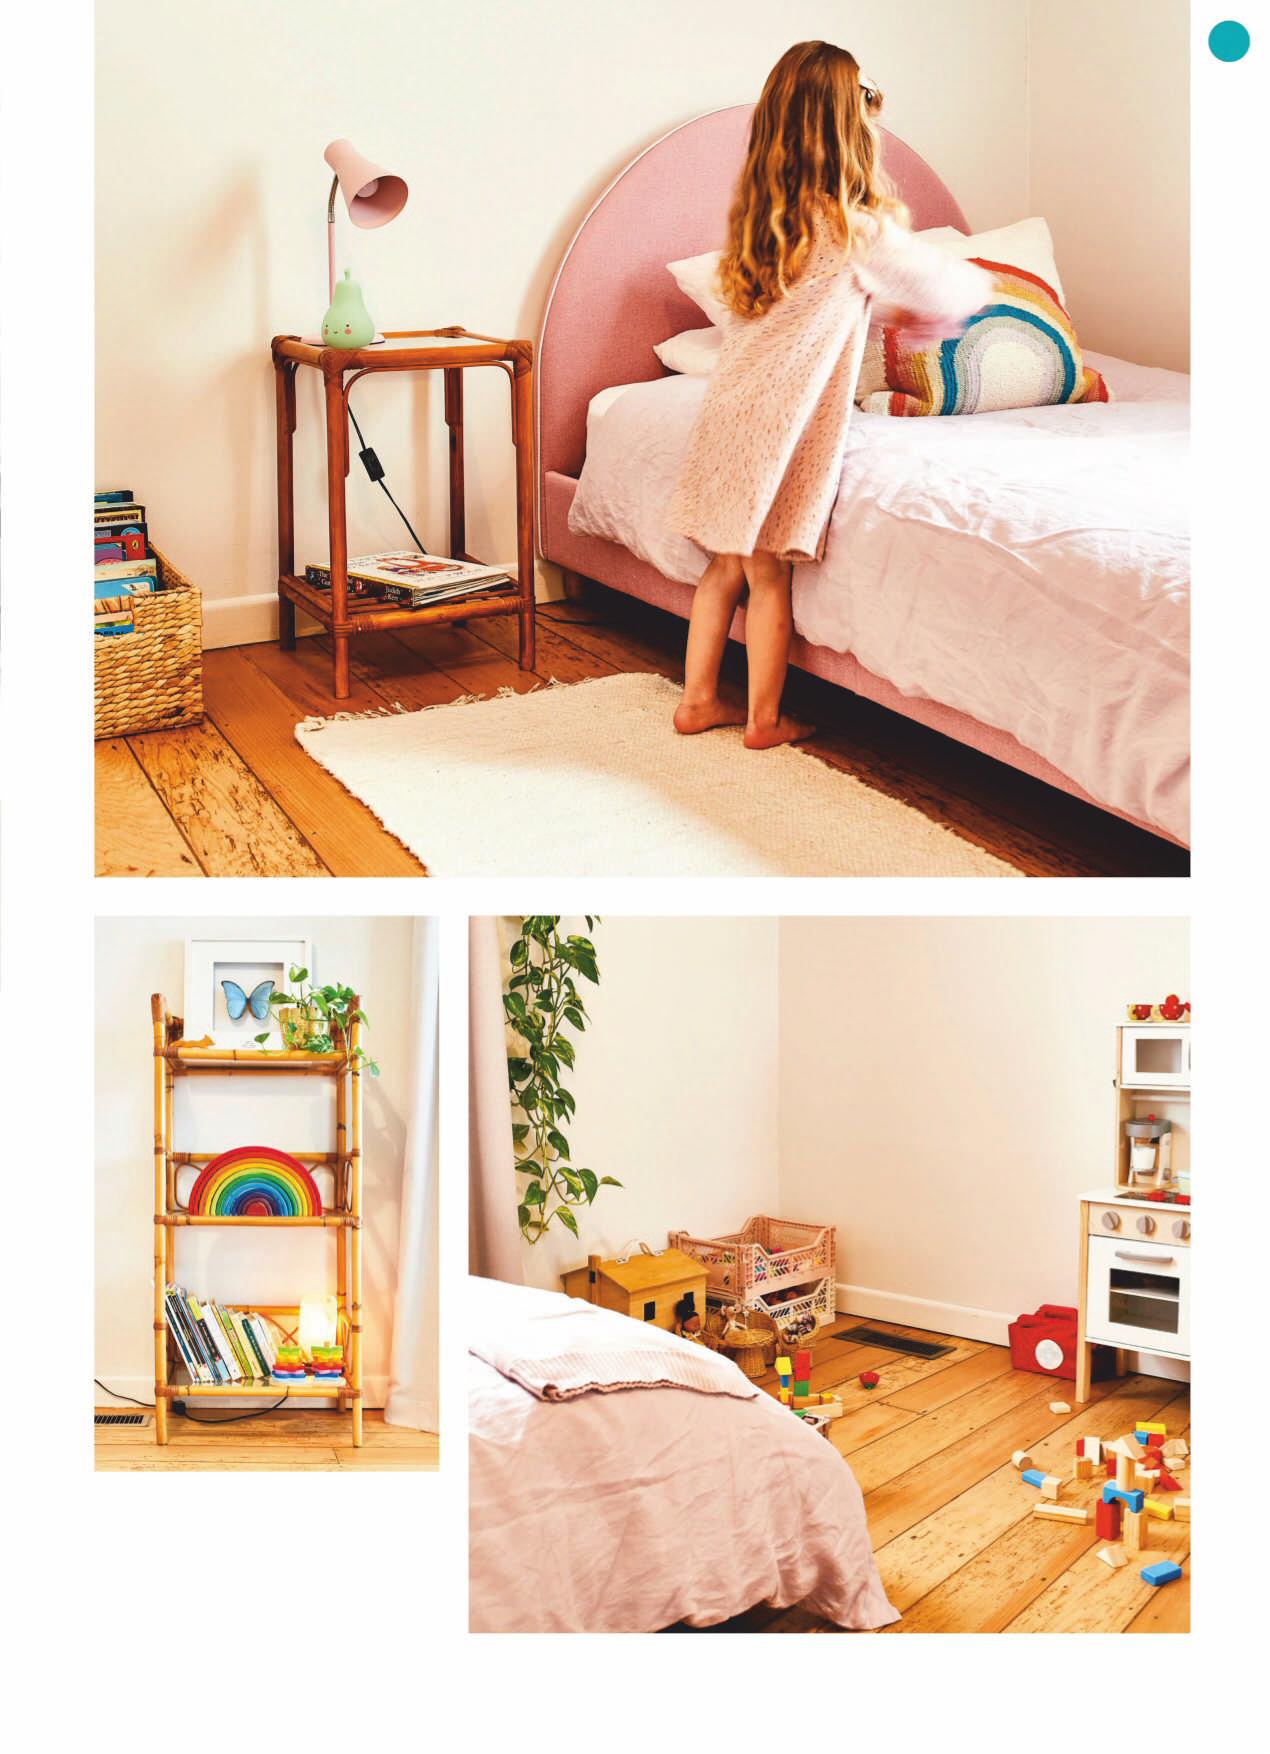
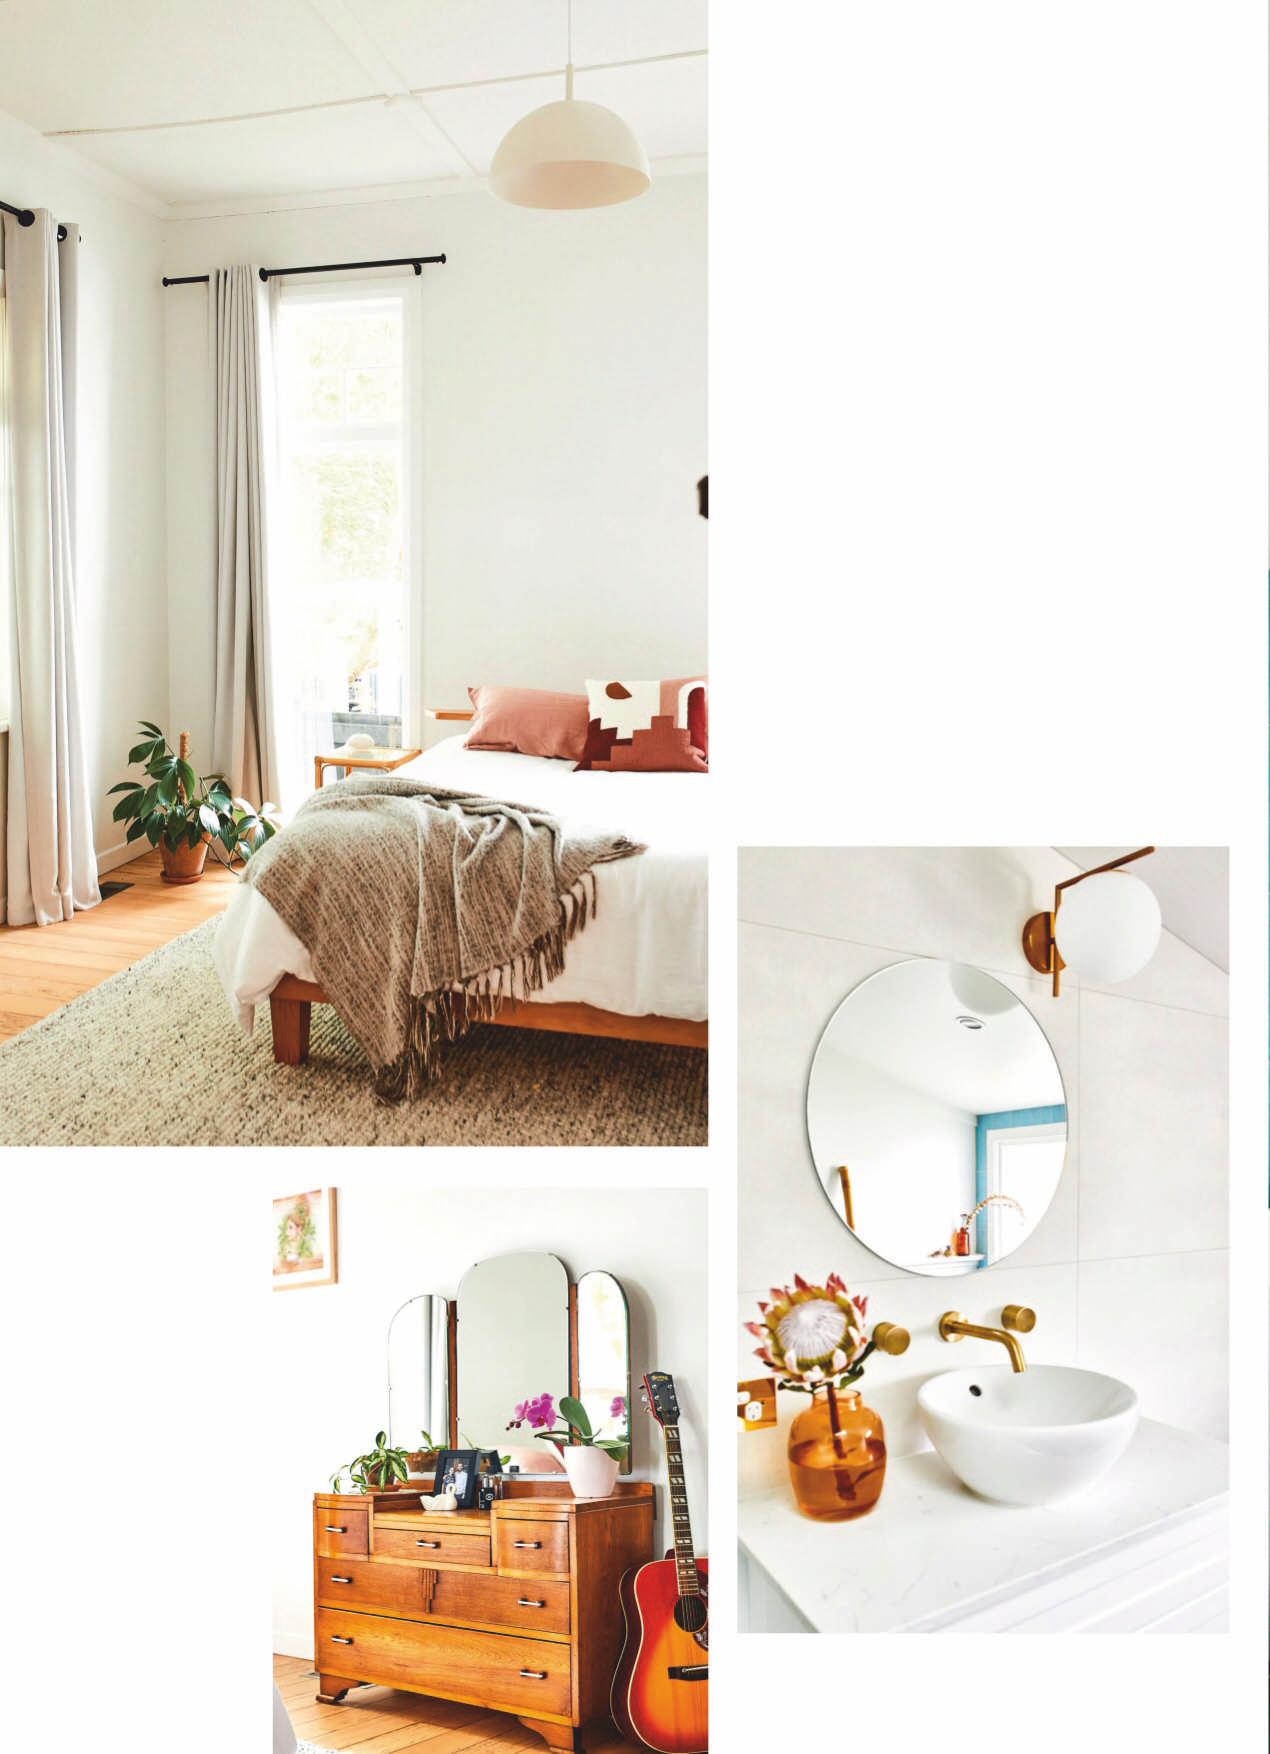
LEXIE’S BEDROOM Few changes were made to the bedrooms, apart from the removal of old carpet. Pretty bed linen and decor accents give personality to the room.
R
MAIN BEDROOM AND
BATHROOM Emma and Ben’s bedroom has been kept classic and simple, with a vintage dressing table adding a touch of yesteryear to the 1920s home. Cost savings were made in the opened-up bathroom, with both the vanity and the bath purchased from Trade Depot. palette, echoing the brass fittings in the kitchen and in the bathroom.
The rimu hardwood floors were sanded (stained carpet in one of the bedrooms was removed), throughout the home and given a lighter tone.
Natalie and Katie had a strong opinion of the bathroom before it was done, which they wanted to feel calm and relaxing. “That side of the house has an interesting soft light, so we were largely guided by that,” says Natalie.
5Step outside With doors to the back yard visible from the home’s entrance, the sense of space is enhanced. The lounge opens out on to a sunny deck from these doors, which steps down to the lawn near the studio. The outdoor space for barbecues and games with the kids completes this family home. For first-home buyers, the couple have done well with the help of Natalie and Katie. “As we have never lived in the house prior to the renovation, we only know how much we love it now,” says Emma. “By opening up the space between the kitchen, dining and living, this made a huge improvement to the overall feel. We love how light and open it is. We’ve been here a year now and it has exceeded our expectations. I wouldn’t change anything.”
R
6Colour my world Colourful accents that were subtle but vibrant would make the heart sing were a priority. “The goal was for a light interior with understated colour,” says Emma. While the couple will eventually paint the exterior, build a new deck and add skylights at a later date, they decided to focus on the interior.
A fresh coat of white paint had already been applied to the whole interior by the previous owners. The main bedroom and the girls’ bedrooms were left untouched except for pretty bed linen and colourful decor accents.
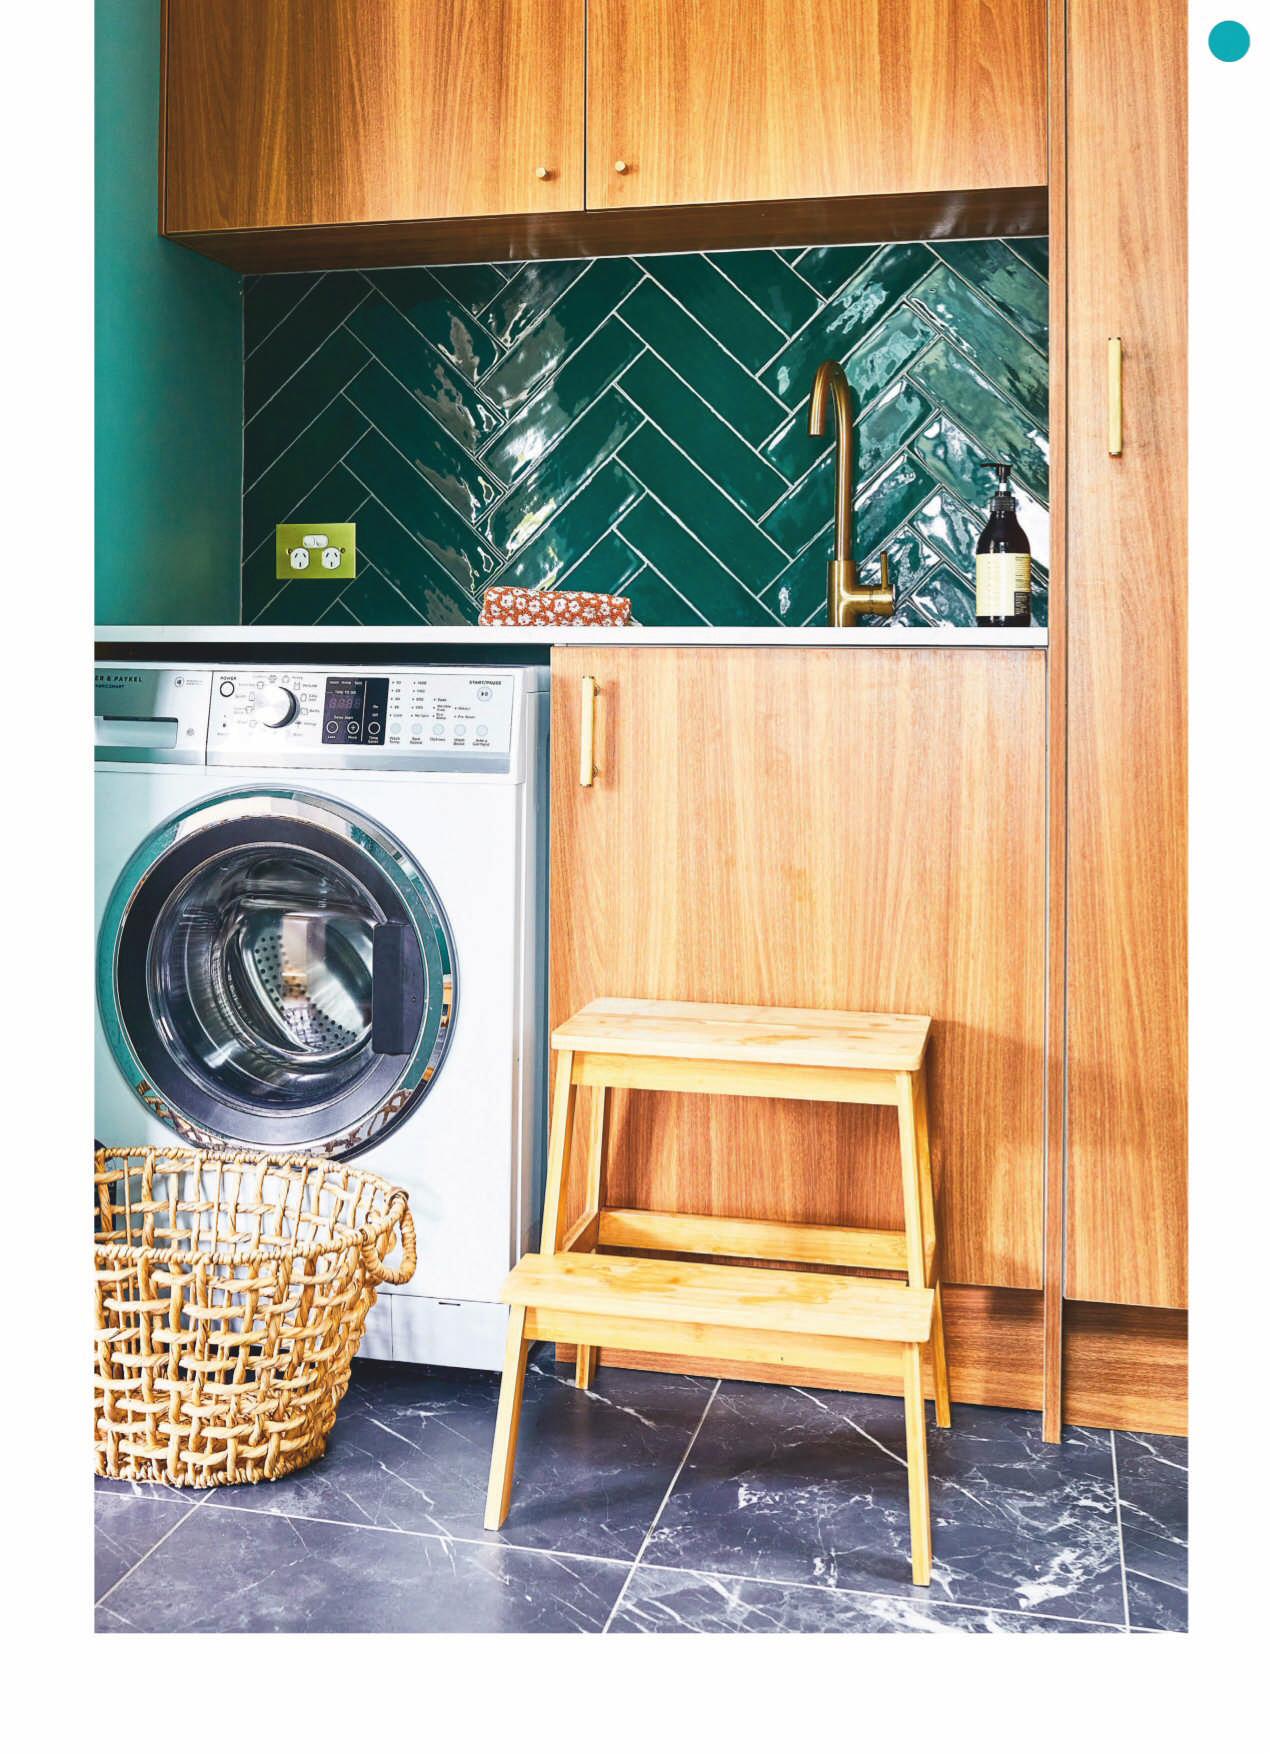
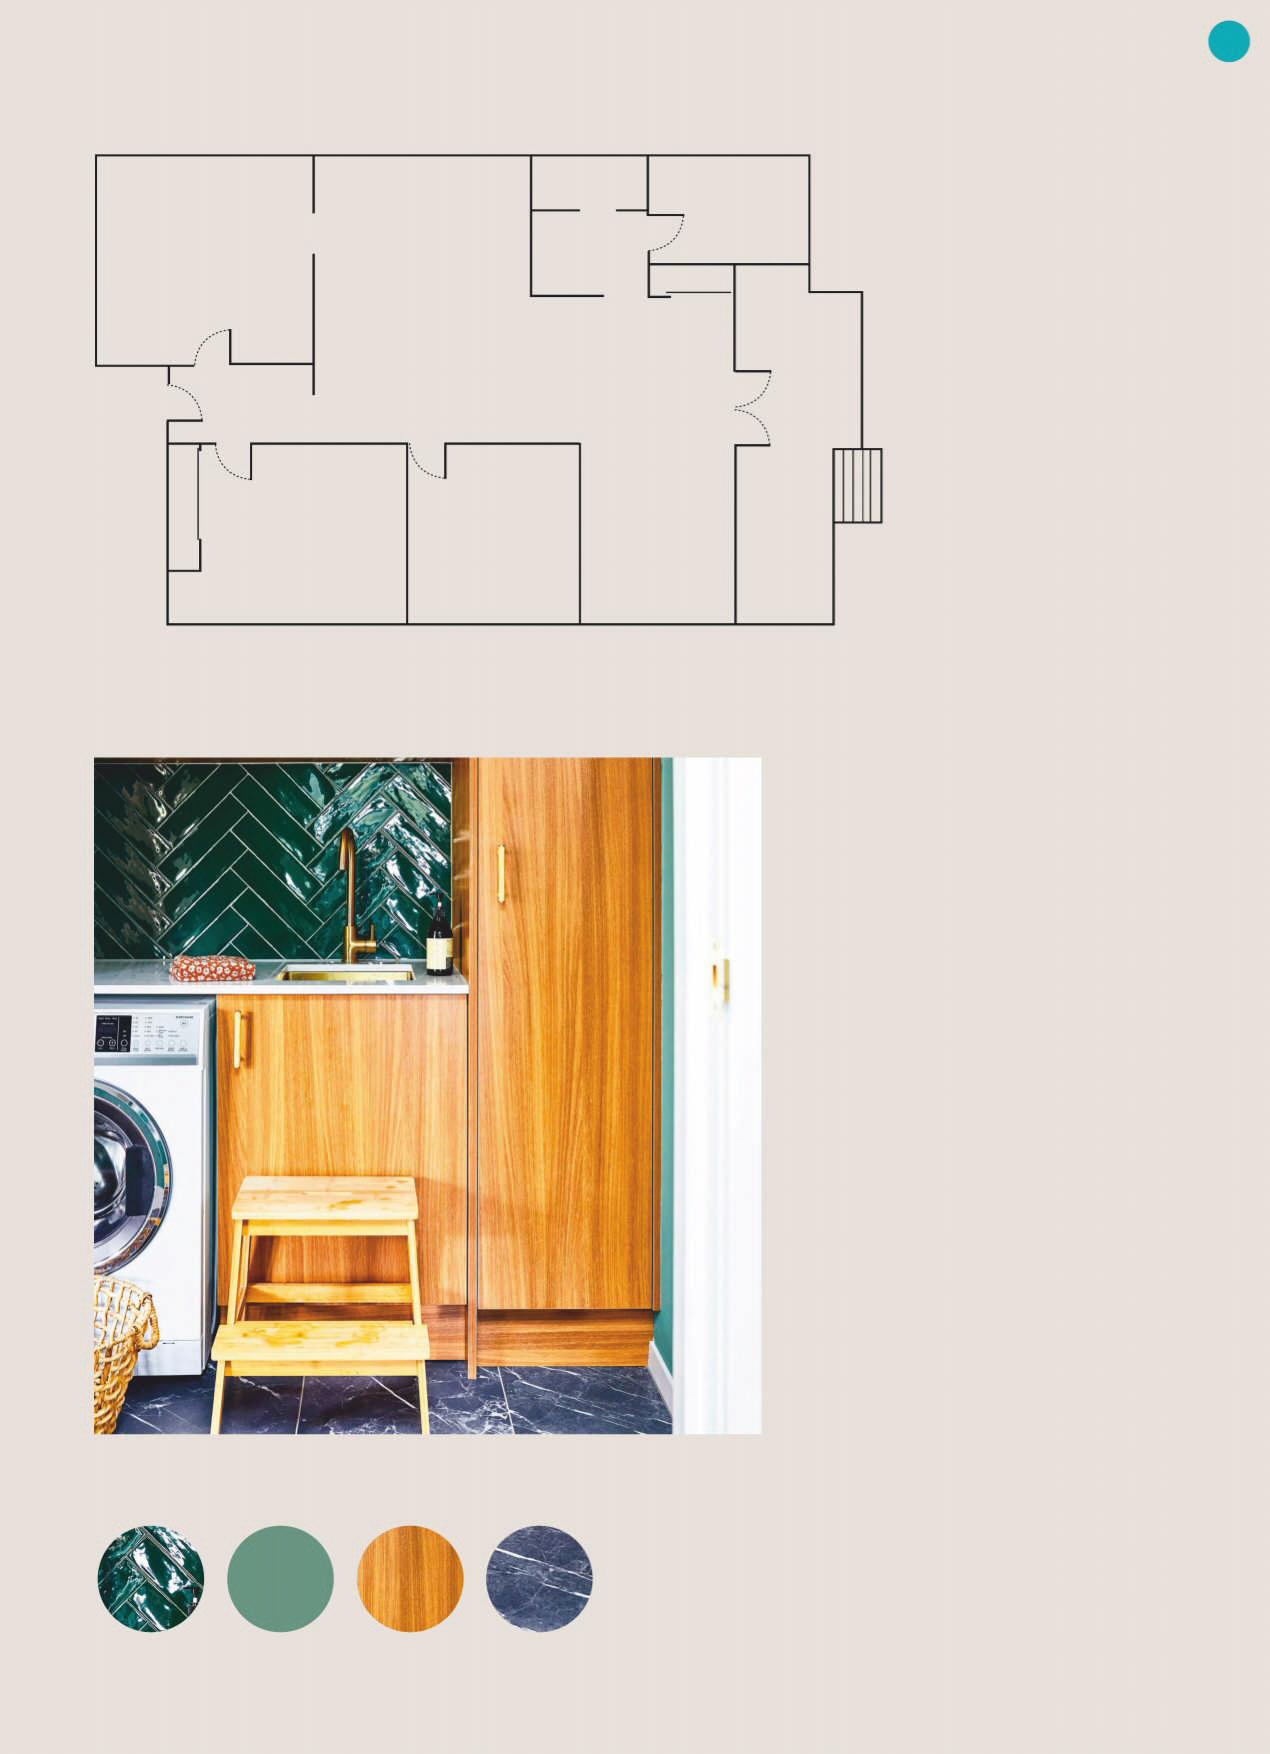
In the laundry, the main issue was the absence of natural light, given that it was wedged in between the toilet and bathroom. The answer: bring in colour. “We both love colour,” Katie says. “It was amazing to have a client who was up for letting us run with this one.” The bland laundry was given an uplifting treatment. “Someone had done what most people do and brightened it up with white paint,” Katie says. “But we embraced the darkness, using green wall paint, dark green tiles and tall timber cabinetry.”
“Moody and rich in colour was our inspiration,” Katie says. “Often laundry cabinetry is white and stark, so we selected timber cabinetry from the get go to encourage us to move in a bolder direction. The marbled floor tile was already locked in, so instead of picking a white wall colour, we worked through some options of blues and greens that would feel earthy and warm against the brass and timber. Many test patches on the wall later, and we had our colour.”
7Try, try again A sure-fire way to transform any kitchen, coloured wall tiles were installed to update the space with a statement surface. One set of tiles were up, but Emma felt they didn’t work. Once removed, a second attempt was made with a different style that Emma says are perfect. The kitchen is her favourite place in the home. “Mornings are always nice with the sun beaming through the kitchen shutters, the girls are happy at the table and it feels like home.”
The toilet presented itself as a place to have fun with wallpaper and green wall paint. A more serene impact was the result of the bathroom revamp. Here a feature wall of pale blue tiles helps create a place of tranquillity, despite it being in a busy household.
Using variations of the same blue/green colour family in these rooms in tiles of the same style bring cohesion to the different rooms.
8Storage saviours Natalie and Katie worked on adding extra storage. In the living area, the builders created bespoke cane doors with brass hardware to give the family places to not only tuck things away, but are also a feature of the space.
LAUNDRY Ash Road went for a “dark and moody” theme for the area wedged between the toilet and the bathroom. “We embraced the darkness, using green wall paint, dark green tiles and tall timber cabinetry,” says Katie.
R
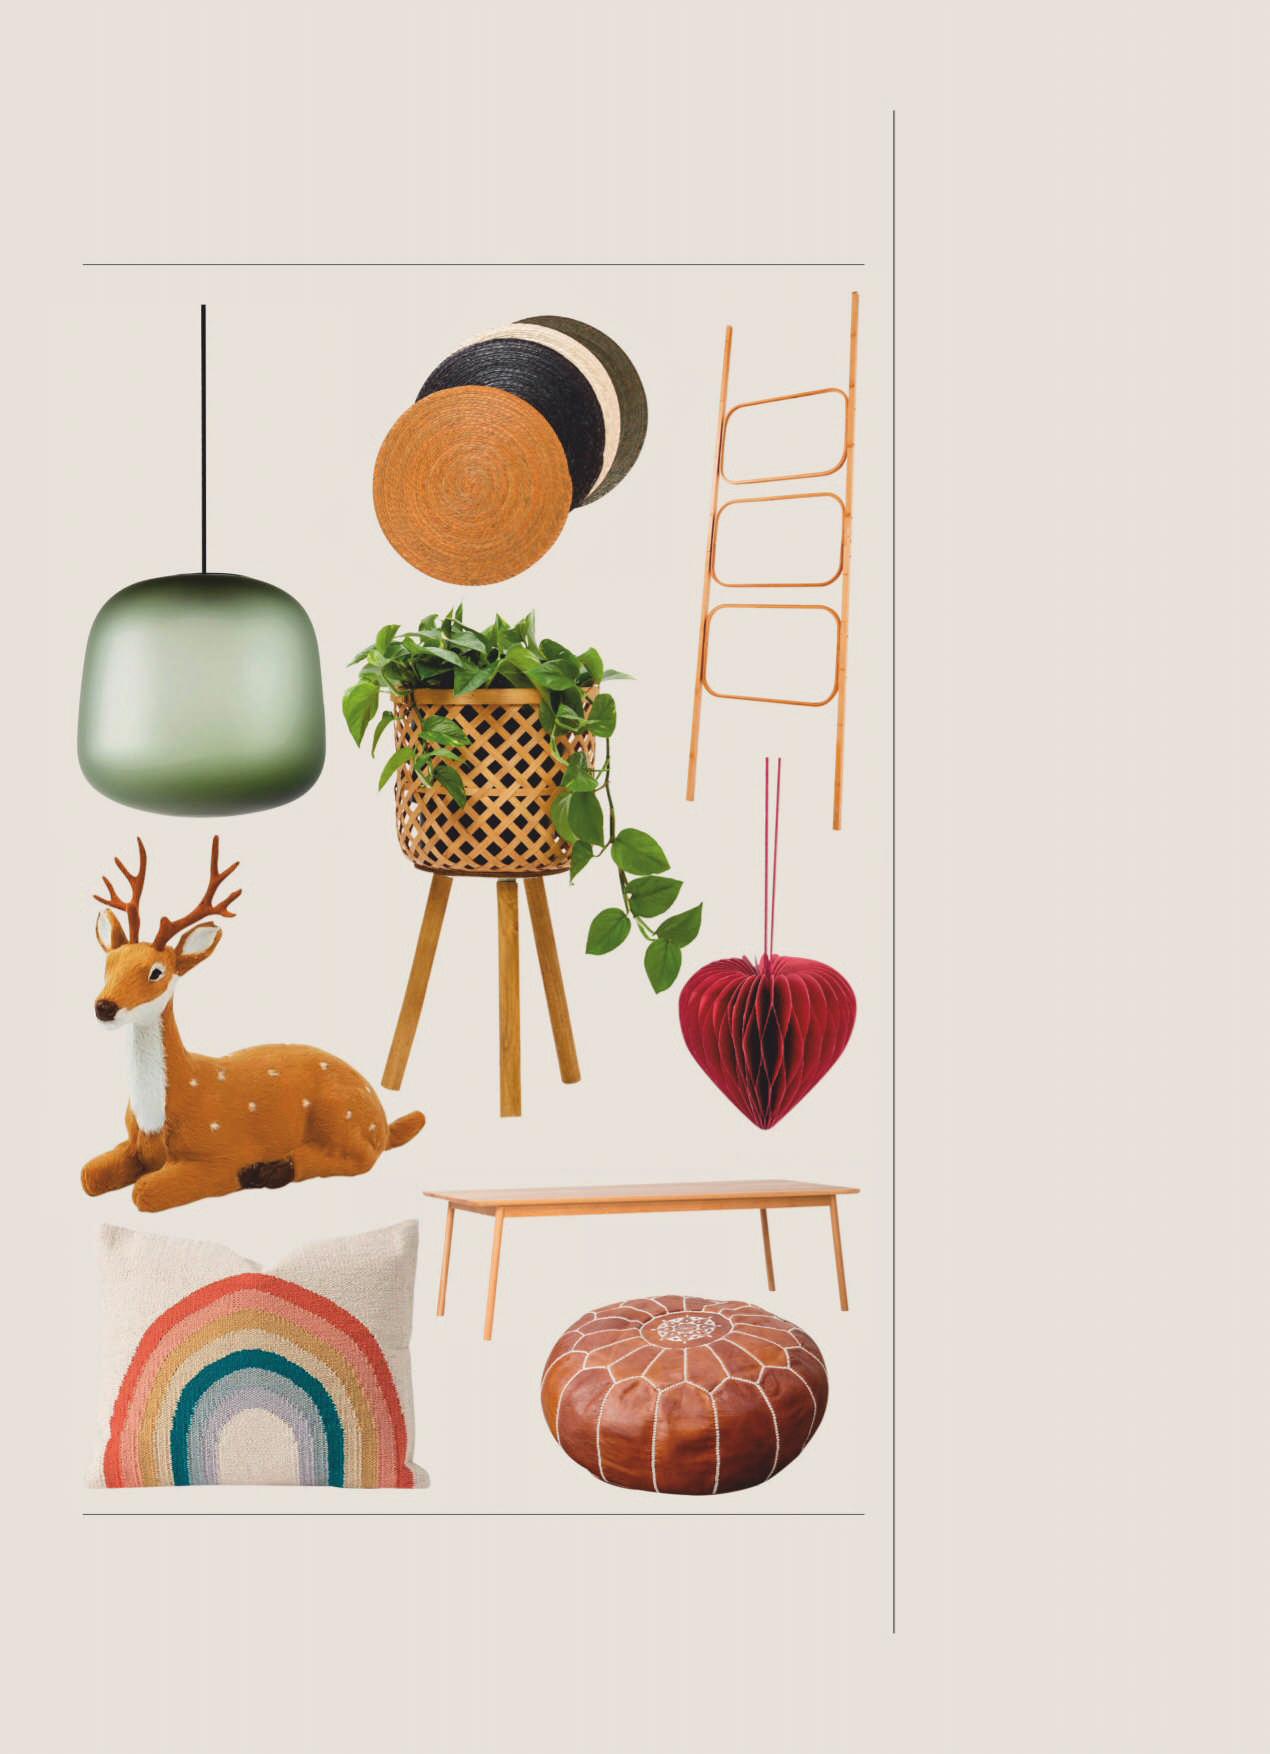
SHOP THEIR STYLE Modern light fi ttings, relaxed furnishings and fresh white walls combine with a bold laundry to give a 1920s bungalow new life
2 3
6 4
7 5
8
9
1 AB pendant light, $540, from Citta. 2 Makaua placemat, $59.60 (set of 4), from Citta. 3 Bamboo towel ladder, $27, from Kmart. 4 Bamboo pot holder, $22, from Kmart. 5 Paper honeycomb decoration in jester red, $6, from Shut The Front Door. 6 Sitting reindeer in natural, $39.99, from Shut The Front Door. 7 Radial dining table, $2890, from Citta. 8 Rainbow hand-loomed cushion cover, around $62, from The Woodsfolk. 9 Moroccan pouf, $25, from Two Foxes. Honesty box Best lessons learned? A house built in the 1920s moves a lot over time, which means nothing is straight and everything takes longer to do than you think. Any renovation or DIY disasters? Not exactly a disaster, but the bath didn’t fit through the bathroom door. A bit of quick thinking and the door frame was removed. The bath is now sitting happy. What’s the one thing you would change about your home if you could? To put skylights in the living room to let more light in. What’s the most memorable experience you’ve had in your home? As it was our first house, move-in day was pretty memorable. We felt very lucky to call it home.
Budget What areas of your renovation did you save on? We were pretty consistent throughout, we did cut costs on a few things like the bathroom vanity. We initially wanted an upcycled/antique wooden piece but went for a more basic one in the end from Trade Depot, as with the bath. We didn’t end up going with underfloor heating, which was initially in the budget and saved us quite a bit. What areas did you splurge on? At the other end, we spent a bit more to remove a couple of half walls that came down from the ceiling to open up the space more. We also spent extra on restoring all the wooden floors. Our biggest splurge was the French draper’s table from Vitrine, we use this as our kitchen island.
Contacts Builders Troy, Bex and Tom from QBS Ltd, qbsconstruction.co.nz Electrician Glen from GPJ Electrical Ltd, 021 555 107 Painter William from W&W Trading Ltd, 021 023 09780 Tiler Simon from Ideal Interior Ltd, 021 795 688 Flooring Richard from Universal Flooring Ltd, 0274 955 159 Handyman Dylan from Hewitt Property Services Ltd, 021 261 8838
Floor plan
1 3
2
KEY
1 Bedroom 2 Entry 3 Kitchen 4 Dining
1
5 Living 6 Laundry 7 Toilet 8 Bathroom 9 Deck
4
1 7
6 8
5 9
Finishes
1 2 3 4
1 Harmony Jade Gloss tiles from Tile Warehouse 2 Dulux Heaphy Track 3 Timber cabinets 4 Euromarmo Pietra Grey Honed tiles from Tile Warehouse Top tips Ash Road Interior designers Natalie and Kate have five things to consider. 1. Bold, brave colour choices will pay off in spades. A practical step for people to take is to use Instagram or Pinterest to find references for where colour has been used. Having these tangible examples front of mind can be a good starting point. Even a small touch of colour (for example, behind a bed in a main bedroom or in a powder room) can really lift the feel of a home. 2. Pay attention to the era of the home. Older homes give you a breadth of design leniency that you wouldn’t have with homes that aren’t ‘character’. Both modern and traditional materials can work. Even with a modern makeover, you want nods to the character of the home with use of more traditional materials like brass that feel in keeping with the era of the home. Aside from materials, you need a good building team who have experience with older homes. Walls are never square, floors are never level – and it takes some serious skill and patience to do a great job. 3. Choose materials that respond to the space. For the laundry, we wanted a space that felt a bit luxe and lovely to be in, so we embraced the darkness of the room. In contrast, the bathroom needed to feel calm and relaxing. We wanted light to flood into the room, so a skylight was added. The blue feature wall tiles and brass accents were the real standouts, so we wanted them to be the focal points, adding calm and soft materials, and colour in and around them. 4. Work to the size of the space. There’s nothing worse than cramming things in to tick a box. For example, if you don’t have room for a double basin, don’t do it. Give each zone within the house some breathing room 5. Choose one feature (or two at the most) that you really want to sing and let them be the real hero. Everything else should work in harmony, but not overpower them.


