SOIL HEALTH
WORKBOOK
Management For Producers and Technical Service Providers in the Dryland Intermountain West
Fundamentals, Principles, and
2
Workbook developed by
Dedicated to Ken Scheffe

Eva Stricker, PhD, and Linden Schneider, MS
Based on presentations by
New Mexico Cooperative Extension Service, led by John Idowu, PhD
Contributors
John Idowu, PhD, Robert Flynn, PhD, Rajan Ghimire, PhD Extension Plant Sciences, New Mexico State University
Kevin Branum, MS EAS-Enchanted Agromanagement Solutions, LLC
Jim Armendariz, Steve Kadas, Dan Bloedel Natural Resources Conservation Service New Mexico
Mary Lucero, PhD End-O-Fite Enterprises, LLC
Christina Allday-Bondy, MPAF NM Healthy Soils Working Group
Ken Scheffe, MS, Linda Scheffe, PhD New Mexico Association of Conservation Districts
Acknowledgments
Document was reviewed by Lucas Chavez, Esquibel Brothers Ranch. Extension presentation assistant was Mohammed Omer, Assistant Research Scientist, Extension Plant Sciences, NMSU. Isabelle Jenniches assisted with obtaining funding.
Funding support provided by USDA NRCS Conservation Innovation Grants
New Mexico Department of Agriculture’s Healthy Soil Program
Thornburg Foundation
Turner Foundation
Layout and design
www.nicktramontina.com
Cover
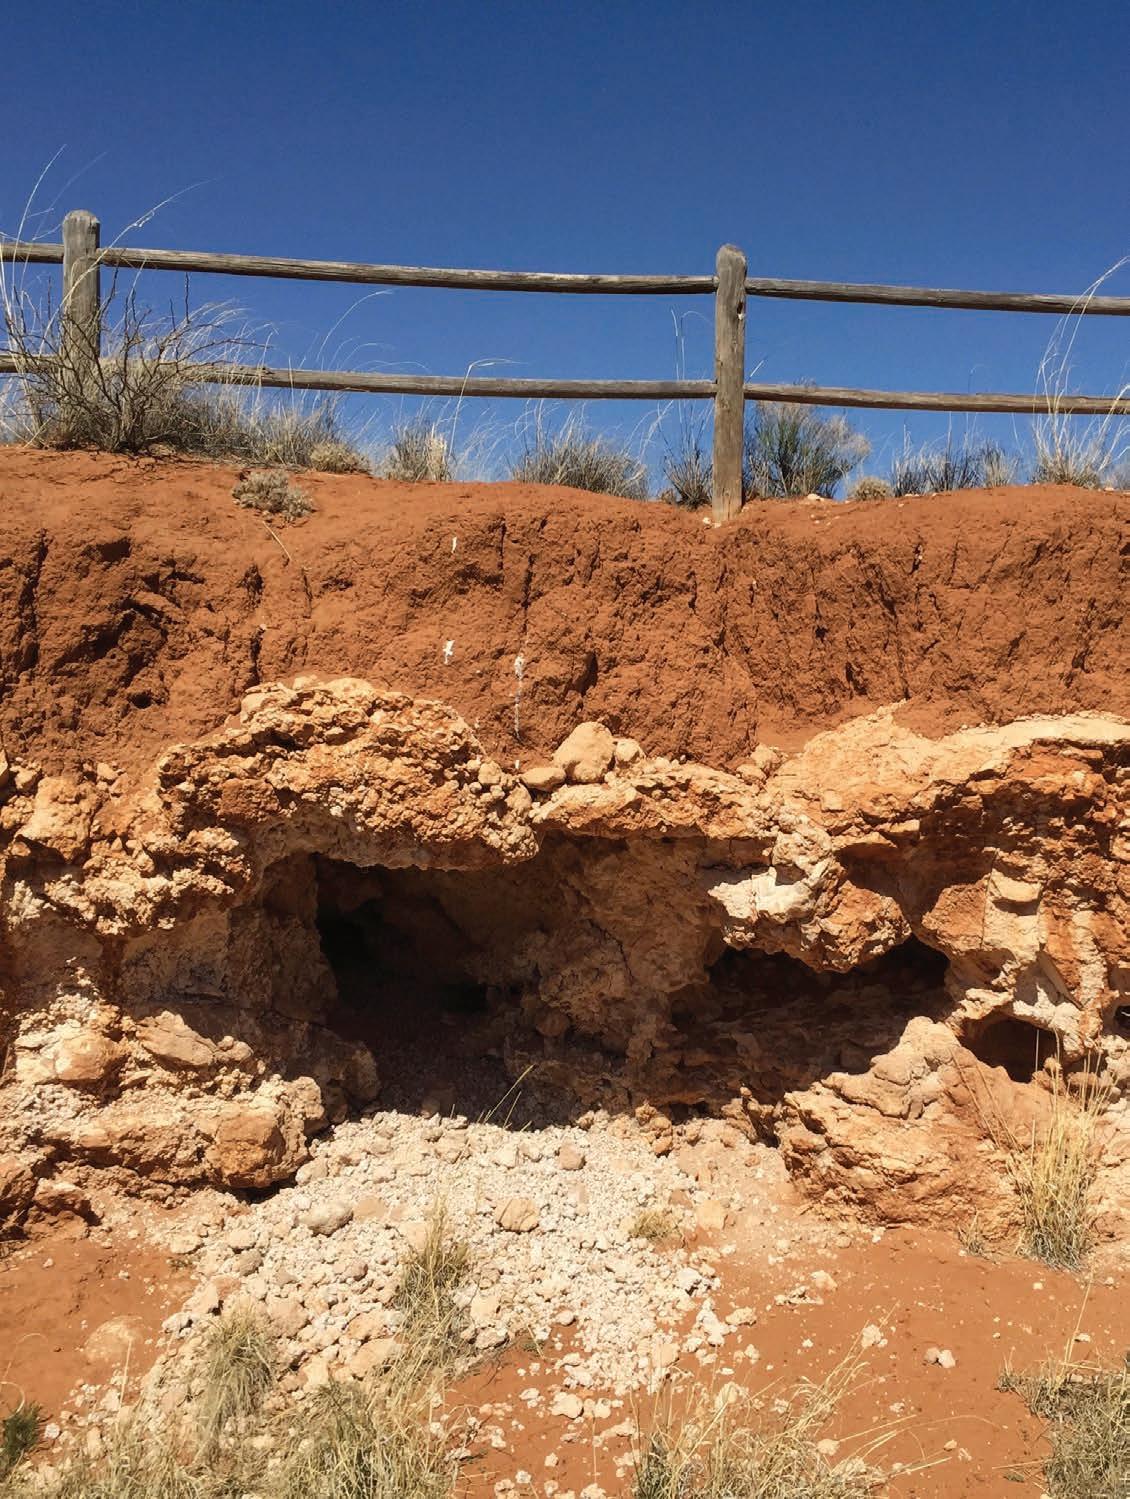
Soil profile at the Jornada Long Term Ecological Research Site, Las Cruces, New Mexico, by Eva Stricker, Quivira Coalition, 2017
First edition 2021 Text
This work is licensed under the Creative Commons Attribution 4.0 International License.
To view a copy of this license, visit creativecommons.org/licenses/by/4.0
or send a letter to:
Creative Commons PO Box 1866 Mountain View, CA 94042
Photography
Photos in this publication are not included in this Creative Commons license and require permission to be used or reproduced in any way. Each organization or business should be contacted for permission to use these images.
All other photos are copyright © Quivira Coalition 2020
We have done our best to attribute material correctly and check facts but we may have missed things. We urge you to reach out with corrections, and we will update as quickly as possible.
3
We thank you for your dedication to soil health and we miss you.
2.
Table of Contents
Introduction
Soil Fundamentals 11
2.1 Physical Characteristics
11
Soil Forming Factors and the Soil Profile 12
Activity – Where Is the Soil? 14
Components of a Soil 15
Mineral Component 16 Activity – How to Measure the Soil Texture 18 Activity – Soil Texture Classification 22
Soil Organic Matter Component 24 Soil Air Component 26
Soil Structure 26 Activity – Water Stable Aggregate Test (Slake Test) 28 Activity – Bulk Density 31
Soil Water Component 35 Activity - Water Infiltration 36
2.2 Chemical Characteristics
41
Water 42 Soil pH 43 Activity – Fizz Test 44 Nutrients 45 Carbon and Nutrients 48 C:N Ratio 49 Salinity and Sodicity 50
2.3 Biological Characteristics
51
Plants and Carbon 52 Activity – Clip Plots 54
4
1.
6 Purpose of This Workbook 7 Thinking About Soil 8
Activity – Surface Cover 58
Microbes 60
Activity – Functional Groups of Microbes 62 Soil Respiration . . . . . . . . . . . . . . . . . . . . . . . . . . . 63
Invertebrates 64
Vertebrates 66
Soil Health 71
Healthy Soil Principles 72
Soil Monitoring and Evaluation
Plan Your Monitoring and Sampling 78
Three Principles for Soil Sample Selection 81
When to Sample Your Soils 81
to Sample
Activity – Using the USDA NRCS Web Soil Survey 86
What to Sample in Addition to Soil 88
How to Sample for Lab Tests 90
What Tests to Do in the Field and in the Lab . . . . . . . . . . . 92
5
2.4 Healthy Soil Principles 70
3. Basic
. . . . . 77
Where
. . . . . . . . . . . . . . . . . . . . . . . . . . 82
4. Soil Management Considerations 95 Tillage Management 96 Cover Crops 99 Crop Rotation, Including Livestock Integration 100 Organic Amendments 102 Irrigation management 105 Grazing Management 107 Index of Discussions 112 Answers to Activities and Discussions 113 Teaching Methods 115 References 129
1. Introduction
This workbook was made in response to listening sessions conducted in 2019/2020 about barriers to adopting agricultural management that would improve soil health in New Mexico. A paradox emerged: people reported not having enough information about soil health to make management changes, and people reported that they were overwhelmed by the amount of information available and could not sift through it all to make good decisions for their own farm or ranch. This workbook is our attempt to address that paradox - we have focused only on dryland soils so that the information is regionally relevant with less extraneous information/photos/considerations from other parts of the country. Additionally, we have worked with a broad group of agency and non-profit collaborators to make sure that the information is consistent from people who are working in the region to support soil health. At the same time, we consider both crop and rangeland systems and what can be beneficial for both.
Our goal is to raise awareness of soil health and support management that will increase the resilience and productivity of working lands. We want to bring whole systems thinking to the spatial (from clay particles to acres) and temporal (from seconds to centuries) scales that interact to form and transform soil ecosystems. We encourage readers of this workbook to observe how parts of the soil ecosystem respond to management and how others are generally
unchanging within the human timescale. We will explore the exciting challenge of working within constraints imposed by soil ecosystems to support resilient and productive working landscapes throughout the Intermountain West. We denote our particular focus on New Mexico and Colorado with this icon, but the information will be relevant for similar soil types and climates.
Because soil is such a dynamic system, holistic understanding of physical, chemical, biological, and management interactions are crucial, and the same concepts arise over and over again in different parts of this workbook. For example, how much organic matter is present affects how water moves through soil; feeds back on by soil microbial activity; and can be affected by management.
Soil contains organic materials Soil contains minerals –solid particles

Soil contains living organisms
Soil is medium for plant growth
6
Purpose of This Workbook
For producers
We provide background information on physical, chemical, and biological characteristics of soils as well as activities to try for monitoring and how different management activities fit into healthy soil principles. We encourage you to reach out to the extension programs at your local universities, Natural Resources Conservation Service, and local conservation districts to help determine the techniques that may be best suited to your goals. And finally, we encourage you to speak to your social and professional networks to learn from and share your knowledge with others.
This workbook is a living document. Please make it your own!
• Write in it.
• Get it dirty.
• Keep it in your truck.
• Use it as a reference for tools to understand and monitor soils.
• Use it to support your teaching techniques.
• Copy forms and quizzes to use in monitoring and teaching.
• And, if you get it too dirty, coffee stained, muddy, wet, or otherwise wrecked, print copies of all or part of it for free: quiviracoalition.org/techguides
For trainers and outreach educators
This workbook aims to establish consistent baseline information and vocabulary that will allow trainers and outreach educators to reduce confusion for the producers that we work with across the state. This workbook is intended as a teaching tool (with activities and discussions to do in person), but also someone could download it and read through it on their own. The soil fundamentals section will root the reader in the physical, chemical, and biological characteristics of soils. The soil health principles will help you discuss and evaluate management practices with producers. We also provide new ways to teach and engage diverse audiences in active learning when discussing soils. The in-field activities are meant as stepping stones for someone who has never thought about monitoring and evaluating their soil. Monitoring is an activity that can happen before producers make changes that require specialized equipment/expertise/or are more costly. This book is designed to help producers develop the habit of consistent monitoring on their operation. This way, when a technical service provider recommends something like “You should send this sample out to a lab instead of doing a ribbon test,” it will just be a minor adjustment to adapt.
7 Purpose of This Workbook
Thinking About Soil
Soil has been defined as
— Brady & Weil, 2010
8
“The collection of natural bodies occupying parts of the Earth’s surface that is capable of supporting plant growth and that has the properties resulting from the integrated effects of climate and living organisms acting upon parent material [bedrock], as conditioned by topography, over periods of time.”
Hours Minutes Months Years Decades Centuries Inches Yards Feet Acres Miles One microbe needs a fraction of an inch for its body It takes 50 acres to feed a cow calf pair for 12 months Average ranch sizes New Mexico 2.8 sq mi Colorado 1.5 sq mi
grow and reproduce every 10 to 15 minutes Plant growth is seasonal
high
the
and low in
Natural processes can take 5
to
Days
Microbes
-
in
summer months
winter
centuries
form one inch of topsoil
Inherent characteristics
Some characteristics of soil are inherent. For example soil texture is inherent because it is derived from the bedrock of a particular location. In the same sense, a soil’s bedrock is also inherent to the local geology. Soil pH, its acidity or alkalinity, is another characteristic that is largely inherent because it is difficult to change on the scale of a ranch or farm and over a season or even a decade. Soil order is also an inherent property: you can’t change an aridisol to a mollisol (see page 84) no matter how much you irrigate or add compost. Inherent characteristics are not changeable on human time scales, and thus management approaches that work with these characteristics, rather than attempt to change them, will be more likely to succeed.
Dynamic characteristics
Other characteristics are dynamic. For example, soil organic matter content can depend a great deal on management activities. It is important to note that the magnitude of response of a particular soil’s dynamic characteristics is dependent on its inherent characteristics. Past management activities may have led to soil degradation, and the choices that are made about current and future management will have an impact also. Given the current state of the soil and the goals and constraints of an operation, one set of management decisions may lead to further degradation, where another will lead toward soil health.
Soil Health
Soil health is the capacity of a soil to function effectively and provide ecosystem services on a sustainable basis. Soil management should meet the needs of the present without compromising the ability of future generations to meet their own needs from that soil (Ghimire et al., 2018). Sustainable agriculture supports the well-being of farming communities by improving soil health and crop production with minimal negative impacts to the environment.
Criteria for determining if a management strategy addresses soil health include:
• Meets economic goals of producers
• Maintains environmental quality
• Strengthens social wellbeing
• Adapts over time to climate change and variability
• Optimizes crop/livestock production and quality
9 Thinking About Soil
What Do We Expect from Soil?
In general, we rely on soils to:
• Modify Earth’s atmosphere by emitting and absorbing gases
• Absorb, hold, release, alter, and purify most of the water in terrestrial systems
• Act as a living filter to clean water before it moves into an aquifer
• Process recycled nutrients, including carbon, so that living things can use them repeatedly
• Serve as media for growth of all kinds of plants
• Provide habitat for animals that live in the soil
• Serve as engineering media for construction of foundations, roadbeds, dams, and buildings
There are no “good soils,” there are no “bad soils.” There are, however, uses for which some soils are well suited and uses for which the same soil is severely limiting. Or stated differently, some uses will demand significant inputs and management (and money) to sustain. For example, very gravelly sandy soils may be severely limiting for the production of corn, but are well suited as source of material for building roadbeds. Clayey soils with high shrink-swell clay minerals are poorly suited standard house foundations, but likely well suited to growing pasture grasses.
Discussion – Soils and you
1. Which of these expectations are most important for your operation?
2. What other expectations can you think of?
3. Which of these expectations are you interested in changing or promoting?
4. How will you prioritize what activities to do?
10 1. Introduction
2. Soil Fundamentals
2.1 Physical Characteristics
Soil physical characteristics often dictate the success or failure of an agricultural project. If you do not work within the physical characteristics of the soil, you will find yourself fighting an uphill battle. Management practices can help improve desirable soil physical characteristics, such as robust soil structure and ideal bulk densities, but they can also have negative impacts on a soil’s profile, such as creating a restrictive layer that prevents water movement. Lastly, management practices are unable to change inherent physical characteristics, such as texture; it is always necessary to work with rather than against inherent characteristics to ensure soil health improvements and the success of agricultural operations.
Learning Outcomes
After completing this section you will be able to:
• Distinguish which soil characteristics can and cannot change, based on management of a given area within a given amount of time
• Describe the processes by which soil is formed and lost
•
Describe how soil texture, structure, and bulk density affect soil functions
• Determine texture by settlement and by the feel method
Soil physical characteristics are often likened to the building materials of a house, which are put together to form its walls and rooms, and overall architectural structure. Analogously, soil physical characteristics form “soil architecture.”
— Brady & Weil, 2010
Soil texture and structure together give soil its ability to convey water and air, hold soil nutrients, and provide the space in which soil chemistry and soil biology occur.
• Determine soil bulk density

• Compare water stable aggregates from different soil types and management regimes
• Describe what impacts soil organic matter has on soil structure
• Describe how water is held and flows within a soil and with respect to plant availability
11
Soil Forming Factors and the Soil Profile


Five soil forming factors:


Soils are formed through the weathering of bedrock, which occurs via 1) climate (principally temperature and precipitation) and 2) the activity of living organisms, and it is affected by 3) the length of time that weathering has occurred. Soils develop differently given 4) topography (for example top of a ridge, on a slope, or at the bottom of a drainage) and 5) the original composition of the bedrock. Soil is a balance of material accumulated, transformed, and removed over space and time.
Glossary

Bedrock
the solid rock formed by earth processes that underlies the soil. Soil is formed when weathering breaks down the solid bedrock. Bedrock is often referred to as the soil “parent material.”
A hypothetical soil profile is shown on the right. You may see these visibly different layers in croplands, but we don’t commonly see a cross section like this on the rangelands of New Mexico and Colorado, where we are more likely to see an arid soil profile, like the one shown on the far right. Soils in this region are often shallower, due to water-limited soil formation, and will have no O horizon and a smaller A horizon due to water-limited plant growth and reduced accumulation of dead plant matter on the surface. It is useful to understand the soil profile of a ranch or farm to understand what can be expected from the architecture and behavior of its soil under management practices. (For information on ways that management affects the soil profile, see Soil Management Considerations, page 95)
12 2. Soil Fundamentals
Hypothetical Soil Profile Transformations
Climate Organisms
Topography Time Bedrock Outputs
Inputs
Organic
O• Considered separate from the mineral soil, as it is made up of plant and animal matter, called collectively organic matter, accumulated from the surface
• Organic material deeper in the O horizon will be progressively more decomposed
• Considered the top layer of the mineral soil, formed from weathering of the bedrock
Surface
A• Often darker in color due to the presence of organic matter that has been deposited from above
• Can have a coarse texture due to water displacement of finer materials to the horizons below
Subsoil
• Anchor for plant roots, especially for deep-rooted/tap-rooted plants and crops
B• Zone of accumulation of nutrients and finer particles from the above horizons
• Layer where calcium carbonate can accumulate, potentially forming a restrictive layer
C• Mixture of soil and bedrock, which maintains some of the structural features of the bedrock
Substratum
Bedrock
• Zone of active soil formation where the bedrock is being weathered

• The rock from which the soil continues to form as the effect of the five soil forming factors
• This is the source of many of the inherent physical and chemical characteristics of the soil
13 2.1 Physical Characteristics
R
A
C
R
Arid Soil Profile
Surface B Subsoil
Substratum
Bedrock Horizons
Photo: USDA NRCS
Discussion – How long does it take to lose or gain 1 inch of soil?
Think about what you know about historical or current instances of soil loss from agriculture. What was the time scale over which that occurred? What events lead to faster or slower loss?
Think about the five soil forming factors. In arid and semiarid climates of New Mexico and Colorado, what are the limitations to soil formation?
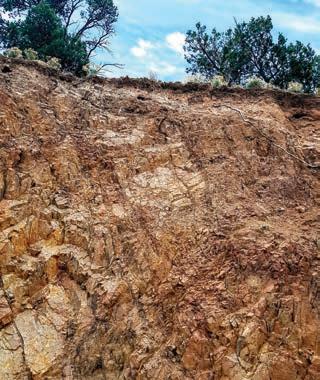
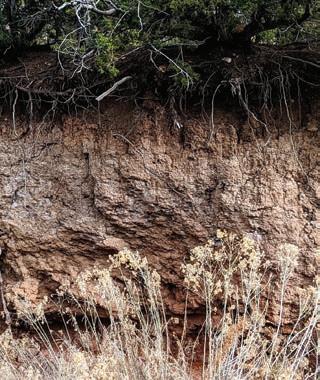
Activity – Where Is the Soil?
In the following images, draw lines to indicate what appears to be the boundary between soil and bedrock.

14 2. Soil Fundamentals
________________________________________________________________
Restrictive layers
Within a soil profile, one can encounter a restrictive layer that impedes movement of water and air or root growth. Restrictive layers formed by vehicle and agricultural machinery are further discussed with regard to compaction (page 34).
of calcium and magnesium, like chalk. It is commonly formed in arid environments due to high evaporation and/or plant water demand. This high water demand removes water from the soil and leaves behind carbonates that act like cement, partially restricting water, air, and root growth. Caliche also affects soil chemistry, elevating the pH and altering nutrient availability. Oxygen, Carbon dioxide, Nitrogen gas Water with dissolved nutrients, salts, and minerals
Components of a Soil Sand, Silt, and Clay Dead and living organisms and their metabolic byproducts
Components of a Soil 45% Mineral 45% Mineral
In the rest of Section 2.1, we will discuss the components of a soil (think of the boards, nails, and paint that are the building materials of a house) and how they fit together and affect function (think of how metal and wood combined make a door hinge, allowing the door to open and close). We start with the mineral component, organic matter component, and air component because those characteristics together affect the structure of a dry soil. We then address the soil water component because a soil’s structure affects how water moves through it.
15 2.1 Physical Characteristics
In New Mexico restrictive layers are most commonly bedrock, due to the shallow nature of our soils, or caliche. Caliche is a whitish soil layer of cemented carbonates 25% Air 25% Water 5% Organic Matter
Mineral Component
Soil texture refers only to the mineral portion of the soil; that is, to the soil derived from the bedrock, not to the organic matter that is deposited from surface vegetation. Soil texture is inherent—not subject to change in the field; you cannot manage a ranch or farm for soil texture. However, understanding soil texture is critical for predicting soil behavior under different management practices. We introduce a few ways that a soil class that is mostly sand, mostly silt, or mostly clay affects water and nutrients, and we expand on these concepts in the section on soil structure (page 26) and in chapter 2.2, on soil chemical characteristics (page 41).
Glossary
Soil texture
the relative proportion of sand, silt, and clay particles in a soil
Clay < 0.002 mm
Fine silt 0.02 - 0.002 mm
Coarse silt 0.05 - 0.02 mm
Very fine sand 0.1 - 0.05 mm
Fine sand 0.25 - 0.1 mm
Medium sand 0.5 - 0.25 mm
Coarse sand 1 - 0.5 mm
Very coarse sand 2 - 1 mm
16 2. Soil Fundamentals
Sand particles
• Mostly quartz minerals.
• Nutrients are not held tightly to the surfaces of sand particles, thus sandy soils hold fewer nutrients for plants than soils composed of smaller particles.
Silt particles
• Quartz minerals are often dominant, but unlike sand particles, silt particles are too small to be seen without a microscope.
Clay particles
• Shaped like flat plates or tiny flakes that are layered.
• Collectively have a large surface area: the surface area of one spoonful of clay is equivalent to the surface area of a football field.
• Unlike sand and silt, clay particles are not just smaller particles of bedrock. Clays are individual new minerals that result from the weathering and recrystallization of minerals and bedrock forming an entirely new crystalline plate-like particle. The clay particles in soils may have formed in place in the soil, or they may have been emplaced with other sediments eroded from other soils.
17 2.1 Physical Characteristics
Activity – How to Measure the Soil Texture
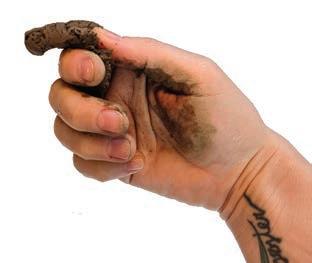
The best way to measure soil texture is to send a sample to a lab for measurement of % sand, % silt, and % clay to provide a precise textural class. This kind of analysis is often costly, simply because it takes the lab technician a lot of time to do, but there are two ways to get initial observations or estimates of soil texture on your own. Remember, once you measure soil texture you will likely never have to do it again, unless you have severe wind or water erosion.
Soil Texture Ribbon Technique

Supplies
• Water for wetting soil
• Small shovel or other tool to collect your soil sample
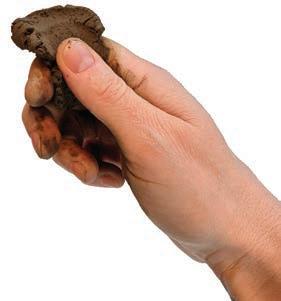

Instructions
1. Refer to NRCS Texture by Feel Diagram for instructions and texture determination (on next page).
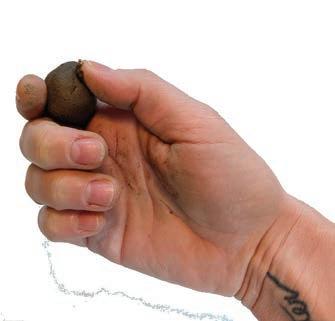
2. It is always good to try a few different times to get used to the technique. In particular, pay attention to how much the quantity of water you add affects the soil texture you determine. Notice how the pressure you use between the thumb and forefinger affects the ribbon formation. Try with a few different soils to get an idea of how different soils feel when forming a ribbon.
3. This is how you will want to form your ribbon
Interpretation
What texture did you determine?
18 2. Soil Fundamentals
__________________________________________
NRCS texture by feel diagram
Modified from S.J. Thien. 1979. A flow diagram for teaching texture by feel analysis
Journal of Agronomic Education. Issue 8, pp 54-55. Activity continued
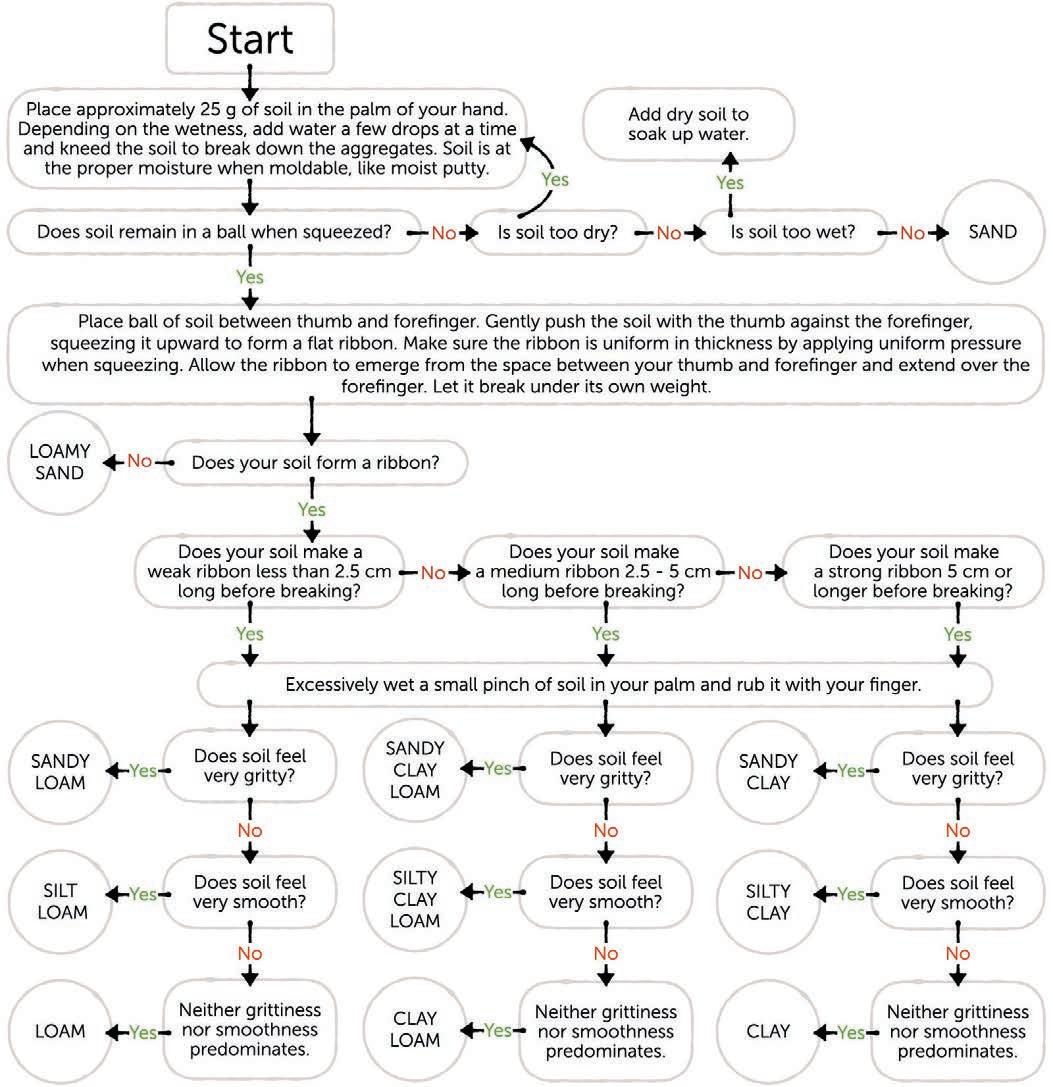
19 2.1 Physical Characteristics
on next page
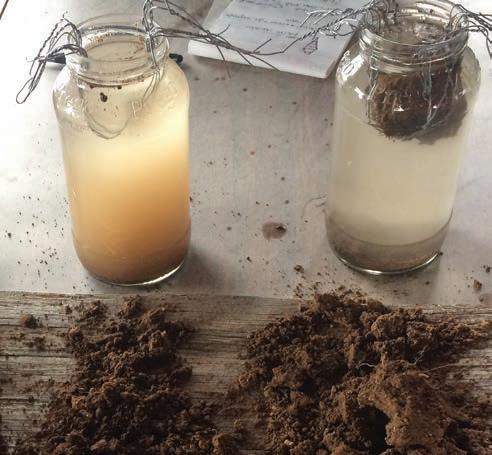
Settlement Technique
Supplies
• Glass or clear plastic jar with a lid
• Water
• Small shovel or other tool to dig up your sample
Instructions
1. Pour a hefty scoop of soil into a clear plastic jar.
2. Fill the jar with water. Put the lid on and shake well. Let it sit.
3. Check the jar every several hours and then over the next few days.
Interpretation
• The many kinds of soil particles swirl in the water when you shake the jar. They eventually settle according to their size and weight.

• Larger, heavier particles settle first (pebbles and sand).
• Smaller, lighter particles settle last (fine silt).
• Clay particles will not settle, and this will cause the water to remain cloudy.
• Sticks and bits of leaf matter float.
Record your observations and the relative amounts of material settling, remaining suspended in the water, and floating.
20 2. Soil Fundamentals
________________________________________________________________ ________________________________________________________________
Glossary
Soil texture class
Soil texture class is a soil science classification. Soils are grouped into classifications based on the percentages of sand, silt, and clay in the soil.
Soil texture class
Some different combinations of soil particle distributions will have similar properties and can be grouped together.
Soil texture classes are related to the degree of a soil’s:
• Susceptibility to erosion
• Aeration
• Water flow in and out
• Water holding capacity
• Nutrient availability
• Potential/suitability for crops
For example, generally sandy soils promote free water drainage and entry of air, and thus they are prone to drought. Silty soils allow for drainage, but not as fast as drainage through sand particles. Due to the abundance of smaller silt particles, silty soils often decrease the pore space of the soil, causing drainage and aeration issues. Soils high in clay have further effects on water and nutrients. Clay particles hold water tightly on their surface, as well as between layers, and not all of the water that they hold is available to plants. Clay particles are also responsible for nutrient and water holding, due to large surface area and surface area reactivity. They can attract and hold minerals such as calcium, magnesium, potassium, ammonium, sodium, copper, aluminum, and hydrogen.
Note: Many of these properties are also affected by the soil’s organic matter component, which is discussed on page 24. Organic matter is different from the mineral component, although organic matter and mineral particles can be mixed together, depending on where they are in the soil profile.
Instead of testing for the exact proportion of silt, sand, and clay in every field or pasture, we can get a lot of information by knowing which class the soil is in, and this is information that you will find on soil maps (see Chapter 3, “Where to Sample” on page 82).
21 2.1 Physical Characteristics
Activity – Soil Texture Classification

What is the soil texture class that has:
60% sand, 0% silt, 40% clay? __________________________________________________________________ 10% sand, 50% silt, 40% clay? __________________________________________________________________
22 2. Soil Fundamentals
Source: Natural Resources Conservation Service
Discussion – Soil texture class
In New Mexico and Colorado we have all soil texture classes, from sandy desert grasslands to silty soils along river floodplains to clayey soils on the Great Plains that have developed in deeprooted grasslands from shale and siltstone bedrock. Of the three types of mineral soil particles, clay particles take the most weathering to develop, and so in general, due to the limited amount of weathering that occurs in semi-arid climates, clays are the least dominant particle in soils found in this region.
23 2.1 Physical Characteristics
Why is it useful to know what soil texture class you have?
Soil Organic Matter Component
Glossary
Soil organic matter
(SOM, sometimes called just organic matter or OM) is biological material from plants and animals at various stages of decomposition, the cells and tissues of soil organisms, and substances produced by soil organisms.
Soil organic matter is composed of the elements that make up the bodies of plant, animal, and soil organisms—largely carbon, oxygen, hydrogen, and nitrogen. You may recognize that these four elements can be found in the atmosphere as gases (carbon dioxide, oxygen, and nitrogen) or vapor (water). Photosynthesis, precipitation, and nitrogen fixation bring these elements from the atmosphere into the tissues of plants, animals, and soil organisms. These elements become soil organic matter through the process of decomposition and reassimilation by soil organisms, both large and small (see “Biological characteristics” on page 51).
Because the largest quantity of soil organic matter initially comes from plants, in arid and semi-arid regions with water limited plant growth, there is limited soil organic matter in soils, often less than 2%.
The amount of soil organic matter can change over human-relevant time scales, based on management practices, but increases in soil organic matter levels are constrained by environmental factors such as temperature and water availability. Remember that if you are drastically altering the amount of organic matter in your soils, you are changing the soil ecosystem. Addition of soil organic matter does not benefit all soil organisms and plants equally — it is important to remember that when you add soil organic matter you are changing the physical characteristics of a soil as well as the chemical characteristics — specifically the nutrients, favoring growth of some species over others. For example, some noxious weeds benefit from increased organic material or available nutrients, as they may be better adapted to a nutrient rich environment.
24 2. Soil Fundamentals
Discussion – What is organic matter?
Evaluate items in the following list as soil organic matter. Circle those you think of as soil organic matter, draw a square around those that might become organic matter, and cross out those you think are probably not.
Compost added to the soil surface
Fertilizer like ammonium nitrate
Living microbes on a soil surface particle
A cow patty on the soil surface
Agricultural lime
Mulch added to the soil surface
Grass blades in an ant mound
Dung that a dung beetle has brought down to the A horizon
Urine from a horse
Worm castings in the soil
A rabbit carcass
Oak leaves Humus
Decomposing root fragments in the soil
An ant
What were the criteria you used for including or excluding items in the soil organic matter classification?
25 2.1 Physical Characteristics
________________________________________________________________
Soil Air Component
Soil air is an important component of a soil’s physical system because soil organisms and plant roots need air to live. Broadly, soil air is similar to the well-mixed air in the atmosphere. Earth’s atmosphere comprises approximately 78% nitrogen, 21% oxygen, and <1% carbon dioxide, hydrogen, neon, and other gases such as methane and water vapor. Root cells, microbes, and larger animals breathe in oxygen and breathe out carbon dioxide, just like you and I. Thus in soil, the amount of oxygen can be slightly lower, and carbon dioxide can be slightly higher than the well-mixed atmospheric air because air in soil does not mix rapidly with air in the atmosphere.
Soil Structure
Glossary Soil structure
the arrangement of soil particles (sand, silt, and clay) and organic matter into aggregates of different shapes and sizes.
Soil structure affects how the soil responds to changing conditions. By understanding soil structure you can start to understand:
• The susceptibility of a soil to erosion by water and wind • Pore size distribution (water movement and retention) • Drought tolerance of soils • Soil aeration • Soil water holding capacity
Root growth and proliferation
26 2. Soil Fundamentals
z 1 cm Macroaggregate Microaggregate Roots Fungal hyphae Root hairs Fungal spore Fungal hyphae Water retention pore Microbial debris Silt Clay 1mm Microaggregate 0.01 mm Primary Particles
•
Soil structure is affected by soil texture and organic matter as well as by land use and management practices
Note that soil structure is different from soil texture, which is generally not affected by land use and practices
Aggregates
Sand, silt, and clay can be bound together to form larger aggregates, which have many benefits:
• Promote water and air movement deep into the soil profile
• Effectively hold water against evaporation
• Provide sites for carbon sequestration
• Provide sites for nutrient storage and cycling
• Provide sites of very high microbial activity
Aggregate stability
Glossary Aggregate stability
the ability of soil aggregates to withstand changing soil conditions.
Aggregate stability is a dynamic and important soil property. It is affected by physical, chemical, and biological processes.
Clays play the largest role in the physicalchemical process of aggregate stabilization. The interaction of clays with calcium, iron, aluminum, and sodium can either increase or decrease aggregation (see Salinity and Sodicity page 50).
Biological processes and compounds increase soil aggregation and stability. These include the movement of soil organisms, organic matter, and compounds produced by roots, fungi, and microorganisms (bacteria and archaea).
Aggregate stability has been shown to be generally low across much of New Mexico and Colorado rangelands, based on data from the 2015 NRCS Rangeland Resource Assessment. It is important to note that there are a diversity of soil orders in New Mexico and Colorado, and we would not expect these diverse orders to show the same degree of aggregate stability (for more on soil orders, see “Where to Sample,” page 82).
27 2.1 Physical Characteristics
Activity – Water Stable Aggregate Test (Slake Test)
Supplies
• Clear plastic or glass jar(s) filled with irrigation water
• Wire mesh (hardware cloth) or window screen formed into a basket to suspend from the rim of the jar, with its bottom about 2 inches into the water
• A small shovel or other tool for collecting your sample
Instructions
1. Collect several soil clods or aggregates and air dry them for at least 1 week. Depending on initial moisture and soil texture, drying may take up to 1 month. You may want to collect clods or aggregates from various soil types or soils under differing management regimes to compare them.
2. Set up jars with your irrigation water. Note that the use of irrigation water differs from the NRCS protocol, which calls for distilled water. Using irrigation water will give a better idea of how the soil will behave when irrigated. If you don’t have irrigation water available, distilled water is fine. Be sure to record what kind of water you have used.
3. Place one or more soil clods or aggregates into the wire basket in each of your jars. Make sure they are fully submerged.
4. Observe the soil clods or aggregates over the next five mnutes - what percent of the clod remains intact?
What did you observe?
Interpretation
What was the topography like from where you collected the sample? What was the soil depth? What was the vegetation in that area? What has the management been in that area?
These are just some examples of things to think about, observe, and compare. Based on what you know about your property, can you come up with some of your own?
28 2. Soil Fundamentals
________________________________________________________________
Pore Space
Glossary Pore space
part of the soil that is either air or water.
Pore space is affected by the amount of clay and organic matter a soil contains, which are key in aggregating solid soil particles and thus making space for air or water. There are two types of pore space in soils, and every soil likely has a mix of both.
Macropores
are generally greater than 0.08 mm in diameter. They are related to increasing soil organic matter and aggregation, as well as to the activity of soil organisms and roots. They can also form between sand grains, which gives sandy soil its well-drained and aerated property.
• Increasing macropores leads to increased water and air movement.
Micropores
are generally less than 0.08 mm in diameter. They are largely formed in clayey soils and are characterized by slow air and water movement.
• Micropores are usually filled with water, but this water is not available to plants because it is held too tightly.
• They are too small to allow much air movement.
When thinking about pore space, it is important to consider not only the total collective amount of pore space throughout a soil, but also the size of individual pore spaces. Keep in mind the different behaviors of water and air in macropores compared with their behaviors in micropores.
Discussion – Pore size distribution
What management activities might cause a relative decrease in macropores and a relative increase in micropores?
29 2.1 Physical Characteristics
Bulk density
Bulk density is an important characteristic to consider when gauging the ease or difficulty with which water will flow through the soil or plant roots will grow into the soil.
The volume of the cube shown here includes pore space and solids (mineral and organic matter components). The mass of the soil solids and air would be used to calculate the soil mass.

Bulk density is affected by:
Glossary
Bulk density
describes the dry mass of both solids and pores (everything but the water) in a given volume of soil. It is often expressed in grams per centimeter cubed (g/cm3).
• Texture (proportions of sand, silt, and clay particles)
• Structure (aggregation and pore space)
• Depth in the soil profile
• Management
30 2. Soil Fundamentals
Activity – Bulk Density
Supplies
• Piece of pipe roughly 3 inches long, with a uniform diameter
• A mallet or mini sledge hammer
• A 2 inch x 4 inch piece of sturdy board
• A shovel or trowel for digging out the pipe
• A ziplock plastic bag to put your sample in
• A scale (A kitchen scale will do.)
• Optional: Pruners to remove vegetation from the soil surface
Instructions
Volume of the pipe = volume of the soil you sampled Measure the height and inside diameter of the pipe. By calculating the volume of your pipe, you will know exactly the volume of the soil sample you are about to collect. With this in mind, aim to collect an amount of soil that exactly fills the pipe.
Pipe length (inches)
Pipe diameter (inches) ÷ 2
Length
Pipe volume in inches3 x x x 3.14 = Pipe diameter (inches) ÷ 2
Pipe volume in inches3 x x x 3.14 = ________ in ________ in ________ in
You will need to convert inches3 to centimeters3:
Pipe volume in inches3 x 16.39 = x 16.39 = ________ cm3 ________ in3
Pipe volume in centimeters3
Diameter Pipe Activity continued on next page
31 2.1 Physical Characteristics
Weight of dry soil sample
1. Find your location and trim the vegetation to expose the soil surface.
2. Place the pipe on the ground. Place the wood on top of the pipe. Use the mini sledge hammer to pound the pipe into the soil until it is flush with the soil surface or even a bit below. You want the pipe to be completely full of soil.
3. Dig out the pipe using the shovel or towel. Be careful not to disturb the soil in the pipe. Dig under the pipe and take out some of the soil beneath it.
4. Trim the top and bottom of the soil sample such that it is flush with the top and bottom of the pipe.
5. Push the sample out into a plastic bag. Make sure that you get all of the sample into the plastic bag.
6. Leave the plastic bag open and put it in a safe place to dry.
7. Once the soil is dry, weigh the sample.
by 28.35.
32 2. Soil
Fundamentals
Weight of soil sample in grams Volume of pipe in centimeters3 = ÷ Bulk density
sample in grams = __________ g ÷ = ________ g/cm3 __________ g __________ cm3 Calculate bulk density
Weight of soil
Calculations You will want to measure the weight of your sample in grams. If your scale does not measure grams you can convert ounces to grams by multiplying
Interpretation
Combining the soil texture you determined or had reported from a lab (page 90) with the bulk density you determined using the pipe sample, you will be able to determine whether or not the bulk density of your soil is restrictive to root growth.
Bulk densities that restrict root growth
Sands, loamy sands, sandy loams, loams > 1.80
Silts, sandy clay loams, clay loams > 1.75
Silt loams, silty clay loams > 1.65
Sandy clays, silty clays, clay loams > 1.58
Clays > 1.47
(g/cm3)
33 2.1 Physical Characteristics
Compaction
Glossary Compaction
the term for limited soil pore space caused when soil aggregates are pushed together or degraded.
Compaction restricts the movement of water and air so there is both reduced water infiltration and reduced drainage. In a compact soil, pores between soil particles are generally micropores; roots will not grow well and water is held tightly. As a consequence, there is generally a less healthy soil microbiome.
In New Mexico and Colorado, compaction can be an issue for wet soils rich in clay. Dry sandy soils are not as vulnerable to compaction, based on their moisture and texture. Good soil structure (aggregation) and vegetation cover can also help prevent compaction. In this context, soils in New Mexico and Colorado are vulnerable to compaction, as some lack good aggregation due to naturally low organic matter and clay content, and to sparse vegetation cover.
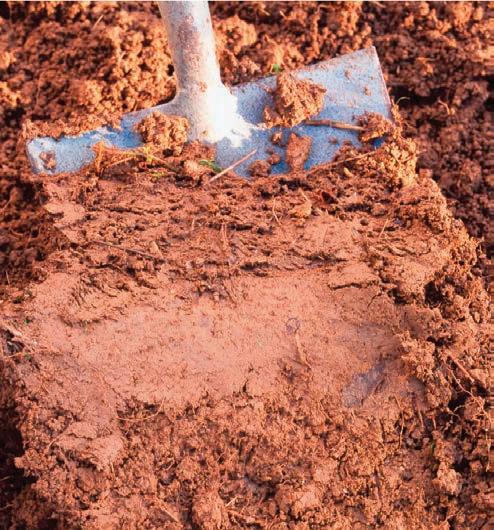
Either a penetrometer or a shovel can be used to identify a compacted soil layer. It is important to conduct a penetrometer test when the soil is at field capacity (see page 38), as the reading on the penetrometer increases as the soil dries. You can also gauge compaction by knowing your soil texture, bulk density, and infiltration rate. A compacted soil layer will have few or no roots and will often appear smooth and shiny when cut through.
34 2. Soil Fundamentals
Soil Water Component
How does water enter soil?
Water enters a soil through its pore spaces, and thus knowing the bulk density and condition of pore space is essential to understanding how water gets into a given soil. This is a matter of concern for ranchers and farmers because how quickly or slowly water enters the soils they steward determines levels of runoff, and controlling runoff is a way to mitigate drought and prevent erosion.
In New Mexico and Colorado the majority of our rain events occur in the summer and are characterized by high intensity precipitation—lots of rain and/or hail in a short amount of time. For producers this makes it important that water enters the soil quickly, so that it will be available to plants rather than lost to runoff.
Glossary Infiltration rate
the rate at which water enters the pore spaces in a given area of soil, often measured in inches of water per hour.
In compacted soils, the infiltration is limited, as the size and number of pores is limited. Water instead flows off the surface of the soil, carrying soil particles and organic matter away and thus resulting in erosion. Soil compaction can occur through the action of animals, vehicles, and human foot traffic. Soil can be compacted on the surface, and this can be evident through the formation of surface physical crust, or it can be compacted below the surface. Subsoil compaction is common in agricultural soils and is sometimes called “plow pan,” referring to the effects of agricultural machinery. Water may infiltrate the surface of these soils but will not move throughout the soil profile. Then, once the surface layer is saturated, water will run off.
On ranches and farms in New Mexico and Colorado, compaction is common along access roads. This has led to surface runoff and erosion problems that can become quite severe. Hydrologist Bill Zeedyk offers ideas for effectively addressing access road soil compaction in his technical manual,”A Good Road Lies Easy on the Land,” and some of his approaches to restoration and erosion control are included in the Quivira Coalition’s “Erosion Control Field Guide.”
35 2.1 Physical Characteristics
Activity - Water Infiltration
Supplies
• A metal ring 6 inches in diameter by 5 inches in height (called an “infiltration ring”). Contact your local soil water conservation district office/NRCS/Extension service; their staff will likely have one that they can lend you or bring on a site visit.
• Pruners or knife to clear soil surface of vegetation
• Rubber mallet or mini sledge hammer
• A 2 inch x 4 inch piece of sturdy board
• Plastic wrap or plastic bag
• Timer or stopwatch
• 15 oz (444 mL) of water x 2 (total 30 oz of water). (Either tap or irrigation water will work fine. This amount will fill the infiltration ring to the height of 1 inch above soil surface.)
Instructions
1. Draw a line on the infiltration ring to indicate a depth of three inches.
2. Clear the sampling area of plant material and any debris. If the site is covered with vegetation, trim it as close to the soil surface as possible. Don’t pull it out!
3. Install the infiltration ring by covering it with the piece of board and pounding it in evenly with the mallet to the line you drew at 3 inches. Two inches of the ring will remain above the soil surface.
4. With the ring in place, use your finger to gently firm the soil surface only around the inside edges of the ring to prevent extra seepage. Minimize disturbance to the rest of the soil surface inside the ring.
5. Line the soil surface inside the ring with a sheet of plastic wrap or the plastic bag to completely cover the soil and ring. This prevents disturbance to the soil surface when pouring in the water.

6. Pour the 15 oz (444 mL) of water into the ring lined with plastic wrap.
7. Remove the plastic wrap by gently pulling it out, leaving the water in the ring as shown above.
8. Note the time. Record the amount of time (in minutes) it takes for the water to infiltrate the soil. Stop timing when the surface is just glistening. If the soil surface is uneven inside the ring, count the time until half of the surface is no longer under water and is just glistening.
36 2. Soil Fundamentals
Number of minutes 9. Record the 10. Repeat infiltration test in the same ring, with a second 15 oz (444 mL) of water.
11. Record the elapsed for the second infiltration measurement
Calculations
Number of minutes
Note: If soil moisture is at or near field capacity, you can end the test after step 8. The moisture content of the soil will affect the rate of infiltration; therefore, two infiltration tests (see step 9 and 10) are usually performed if soil is dry. The first inch of water wets the soil, and the second inch gives the estimate of the infiltration rate of the soil.
1. Calculate the fraction of an hour it took for 1 inch of water to infiltrate into damp soil: 2. Calculate the infiltration rate:
Interpretation
Using the chart, how would you interpret the infiltration rate of your soil? What physical characteristics do you think are responsible for the infiltration rate you determined?
Fraction of an hour ________ in/hr 1 inch ÷
37 2.1 Physical Characteristics
Number of minutes ÷ 60 = Fraction of an hour ÷ 60 = __________ min Infiltration rate 1 inch ÷ = = Infiltration rate (inches/hour) Infiltration class > 6 Rapid 0.2 to 6 Moderate 0.0015 to 0.2 Slow less than 0.0015 Impermeable
How does water move through soil?
Water enters and flows through a soil’s pore space. Macropores are large enough for plant roots to penetrate, and therefore the water in them is available to plants. Plants suck water from soil space through their roots and into their stems and leaves, and the water then returns to the atmosphere as water vapor. Water in macropores is also susceptible to leaching through the downward force of gravity. As a soil dries, water is held tightly in micropores, where it is not available to plants because even fine root hairs are too large to penetrate tiny micropores.
We can follow the changing conditions in soils as they lose water. It is especially important to note that plants are like Goldilocks in the story of the three bears—too much water in the soil is not suitable for them; too little is not suitable for them; but the middle amount is just right.
Glossary Saturation
occurs when all of a soil’s pore space is filled with water; a saturated soil contains no air.
Glossary Field capacity
full saturation of the soil, minus water lost to free drainage by gravity.
Glossary
Permanent wilting point
the condition in which there is still water in the soil but it is held so tightly to soil physical components (especially small particles like clay) that plants are not able to extract it fast enough to meet their needs.
38 2. Soil Fundamentals
Saturation
We start with a saturated soil, for example after a heavy rain or an irrigation event.
At saturation, root function is limited because there is no oxygen available in the soil to help power their cellular activities (for more on this see “Biological characteristics,” page 51).
Note: The soil structure is weakest at the point of saturation, and so this is not a good time to run machinery over it.
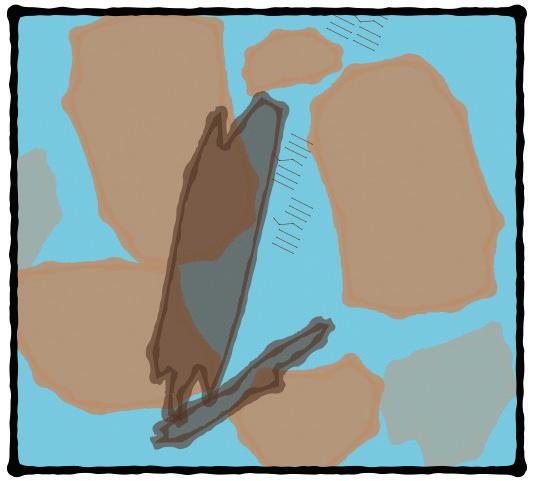
Field capacity
As time goes on, water drains due to gravity and soil reaches field capacity.
At field capacity, the soil’s largest pore spaces will be filled with air.
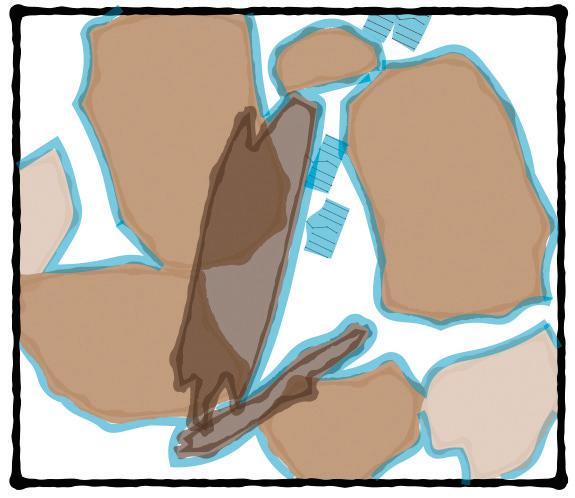
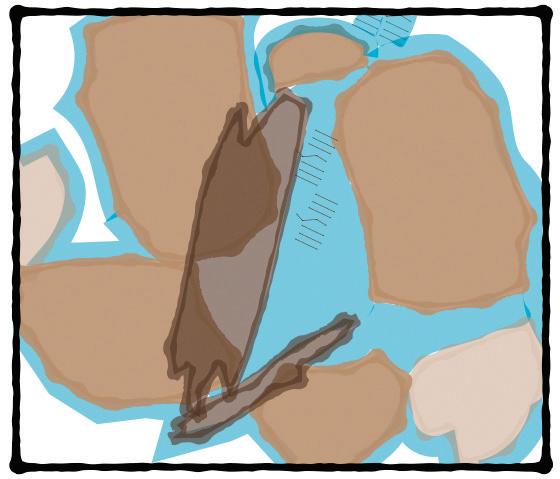
Sandy soils reach field capacity about two days after a major rainfall or irrigation event, but soils with more clay take much longer to reach field capacity.
Permanent wilting point
As the soil continues to dry due to evaporation and drainage, it will reach the permanent wilting point.
In conditions of true permanent wilting point, a plant will not recover.
39 2.1 Physical Characteristics
Water holding capacity
Glossary Water holding capacity
the amount of water that is in the soil between field capacity and the permanent wilting point.
The amount of water that is available to plants is also related to water holding capacity, which in turn is related to soil texture.
The same processes of draining and drying out occur in all soil types but can take different amounts of time. Think of a water droplet moving from the top to the bottom of each panel in the pore space figure (page 30) and how much longer and more tortuous one soil would be compared to the other. Different soils hold different amounts of water and therefore have different water holding capacities.
Texture class
Water holding capacity (inches of water per foot depth)
Coarse sand 0.25 to 0.75
Soil water behavior
Drains very quickly
Loamy Sand 1.1 to 1.2 Drains moderately quickly
Silt Loam 2 to 2.5
MOST available to plants
Held moderately tightly Clay 1.2 to 1.5 Held very tightly
Silty Clay 1.5 to 1.7
Note: For a given soil texture class, compaction and salt accumulation will further reduce water holding capacity.
Organic matter can directly and indirectly increase water holding capacity. Organic matter holds more water than a similar volume of mineral soil, but can hold it more tightly (like clay). Organic matter also improves soil structure, which in turn can affect water holding capacity by increasing the size of pore spaces.
40 2. Soil Fundamentals
2.2 Chemical Characteristics
Chemical characteristics include the ways that different compounds in the soil react with each other and cycle in and out of the system. For example, you will learn that pH can affect how easily a plant can access some kinds of nutrients and thus be either wellfertilized or deficient. Different conditions can lead either to compounds dissolving in water and washing away or to their accumulating as solids in the soil, for example as a salt crust.
Chemical characteristics are tightly related to the activity of living organisms. The building blocks of life are primarily the elements carbon, nitrogen, oxygen, hydrogen, sulfur and phosphorus. In cells, these compounds form molecules of proteins (structure and metabolism), carbohydrates (structure and energy), fats (energy and signaling), and nucleic acids (genetic information). When combined to form living organisms, chemicals become biological. Microbial activity is essential for breaking down and processing raw or decomposing materials into forms usable by other life forms, which we will discuss further in the biological characteristics section (page 51). Understanding the availability of the different chemical elements and compounds in soil is essential to understanding soil productivity.
Learning Outcomes
After completing this section you will be able to:
• Describe where soil pH comes from and how it affects soils in New Mexico and Colorado
• Describe the nutrients essential for a productive soil
• Discuss how soil pH interacts with nutrient availability
• Understand the C:N (carbon to nitrogen) ratio and what it means for soil productivity
• Describe where salts in soils come from and the difference between salinity and sodicity
41 2.2 Chemical Characteristics
How does water enter soil?
Water influences every aspect of soil— physical, chemical, and biological—because of its unique chemical properties. From the initial stage of soil formation to transporting soil nutrients after a rain event to providing the habitat for soil microbial communities and water for plant growth, water is essential to understanding soils and soil health. Water behaves in a unique way when interacting with soil aggregates, which gives soil water some special properties that are important to consider when managing a ranch or farm.
One major property of water is that a lot of compounds dissolve in it and so can be transported through soil. For example, dry inorganic fertilizer is not accessible to the roots of plants until it dissolves in water and moves down to the soil’s rooting zone.
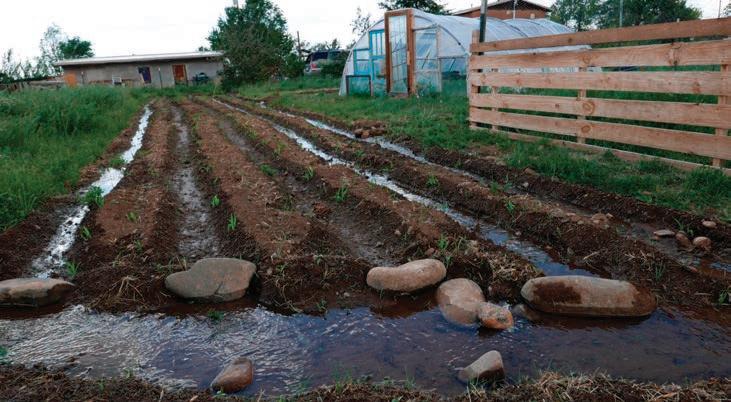
Additionally most of the microscopic life in soils is active in water films that form on soil aggregates. All processing of organic matter and other soil minerals and nutrients
Water
depends on the presence of water. In semiarid New Mexico and Colorado, where rainfall is seasonal and dry spells are intense, these processes are also seasonal (for more on this, see the chapter on biological characteristics, page 51).
The source of irrigation water and how it gets to a property can determine what minerals come with it. If it flows in open dirt ditches, it will pick up minerals on its way to your property, and these could be concentrated by evaporation. Groundwater, on the other hand, can pick up minerals from the bedrock surrounding it and can be quite rich in sodium, calcium, iron, or sulfur. When these mineral-rich waters are used to irrigate crops or pasture, there may be impacts on soil structure and plant health. This is why it is important to evaluate irrigation waters as part of soil testing (which will be covered in the section on monitoring and evaluation, page 78).
42 2. Soil Fundamentals
Photo: Miguel Santistevan
Soil pH
Soil pH is an inherent property, resulting from formation by the weathering of the bedrock— especially weathering from water. Bulk soil pH tends to be difficult to change, which is a good thing for the most part because drastic changes in pH affect the chemical properties of the soil environment, including nutrient availability and suitability for plant growth. This resistance to change in soil pH is called “buffering capacity.”
Soil pH can affect nutrient availability in soil. It is measured on a scale from 1-14.
Lemon Vinegar Water Baking Soda
Neutral
Acidic Basic
Many of the soils in New Mexico and Colorado have high pH, due to minimal or no weathering of the bedrock by water. The presence of calcium carbonate (CaCO3) or lime is largely responsible for buffering the pH of these soils in NM and CO.
43 2.2 Chemical Characteristics
0 1 2 3 4 5 6 7 8 9 10 11 12 13 14
Activity – Fizz Test
Supplies
• Dry soil sample • Vinegar
Instruction
1. Pour some vinegar onto your dry soil sample.
Observations
Does the soil fizz with tiny bubbles?
Interpretation
Soil with a pH above 7 (i.e. alkaline soil) will react with vinegar (an acid), causing it to fizz.
High soil pH (alkalinity):
Limits the availability of • Phosphorus (P) • Iron (Fe) • Manganese (Mn) • Boron (B) • Copper (Cu) • Zinc (Zn)
Increases the availability of • Calcium (Ca) • Magnesium (Mg) • Molybdenum (Mo)
Has no direct effect on • Nitrogen (N) • Potassium (K) • Sulfur (S)
Note: pH can affect the availability of nitrogen, potassium, and sulfur through interactions with biology, such as favoring nitrogen fixing plants or not.
44 2. Soil Fundamentals
Soil ecosystems are the driving source of transformation, transportation, and renewal of the supplies of nutrients available to plants. It is important to remember that nutrient movement through a soil ecosystem is very complex and that where a nutrient is in the system (soil aggregate or particle, air or water, available or held tightly) dictates its availability for plant and organism uptake and use. We will look at soil nutrients through the lens of requirements for plant growth, and categorize them according to plant needs.
Primary
are the nutrients needed by plants in relatively large amounts.
needed by plants in substantial amounts, but much less than the primary nutrients.
45 2.2 Chemical Characteristics
Nutrient classification
Secondary nutrients are
Micronutrients are
plant growth and development. N Nitrogen K Potassium P Phosphorus Mg Magnesium Ca Calcium S Sulphur Mn Manganese Ni Nickel Fe Iron Cu Copper Mo Molybdenum Zn Zinc B Boron Cl Chlorine Primary Nutrients Secondary Nutrients Micronutrients K Potassium Mg Magnesium Ca Calcium S Sulphur Ni Nickel Cu Copper Mo Molybdenum Zn Zinc Nutrients Secondary Nutrients Micronutrients N Nitrogen K Potassium P Phosphorus Mg Magnesium Ca Calcium S Sulphur Mn Manganese Ni Nickel Fe Iron Cu Copper Mo Molybdenum Zn Zinc B Boron Cl Chlorine Primary Nutrients Secondary Nutrients Micronutrients N Nitrogen K Potassium P Phosphorus Mg Magnesium Ca Calcium S Sulphur Mn Manganese Ni Nickel Fe Iron Cu Copper Mo Molybdenum Zn Zinc B Boron Cl Chlorine Primary Nutrients Secondary Nutrients Micronutrients Mg Magnesium Ca Calcium S Sulphur Cu Copper Mo Molybdenum Zn Zinc Secondary Nutrients Mg Magnesium Ca Calcium S Sulphur Cu Copper Mo Molybdenum Zn Zinc Secondary Nutrients
Nutrients
nutrients
needed by plants in small quantities, but they play a large role in
Nitrogen is used in cells to build proteins, DNA, and chlorophyll. Nitrogen exists in abundance in the atmosphere, but not in a form usable by plants. Special nitrogen-fixing soil bacteria exist that are often associated with legumes (beans and peas). These bacteria can convert atmospheric nitrogen into a form that can be used by plants and other soil microorganisms. Nitrogen can also be added to soils in inorganic forms, such as urea, ammonia, and nitrate. Organic amendments, such as manure and compost, are good ways to add nitrogen to soil. Soil microbes may compete with plants for the nitrogen in the soil, for example if a carbon-rich amendment such as sawdust is added to the soil.
Phosphorus is used in cells as a component of DNA and membranes, and for energy storage.
Potassium is essential for the chemical reactions that keep plants and microorganisms alive; specifically, it activates enzymes (proteins that are responsible for life’s chemical reactions). It is also a large component of the liquid in cells, and thus it interacts with changes in water availability, helping both plants and microorganisms deal with environmental stressors.
Calcium is a major component of cell walls and is therefore needed in large quantities in the growing parts of plants—roots and shoot tips, fruits, and unfolding leaves and petals.
Magnesium is a major component of the chlorophyll molecule and thus essential for photosynthesis. It is also involved in the making of oils and proteins, and in enzyme activation.
Sulfur is a component of DNA, proteins, vitamins, and oils.
Iron is needed for enzymes that aid in making nitrogen available in a usable form for plants, and in chlorophyll formation.
46 2. Soil Fundamentals
P
N
K Ca Mg S Fe
Nutrient availability
Not all soil nutrients are available to plants. Some are so strongly held to clay or organic matter particles that plants can not take them up. Others are in chemical forms that some organisms cannot process.
Soil pH is often the chief factor in determining nutrient availability. The optimal pH for all soil nutrient availability is between 6.5 and 7.5, in which condition most soil nutrients will be available for crop uptake. Below pH 6.5 or above pH 7.5, certain elements will become less available, even if they are present in the soil. Soil fertilizers need to be applied to some soils to compensate for lower availability of a nutrient due to pH.
Deficiencies
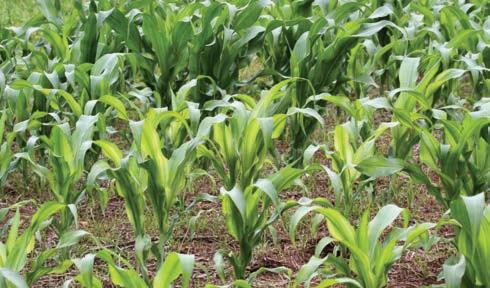
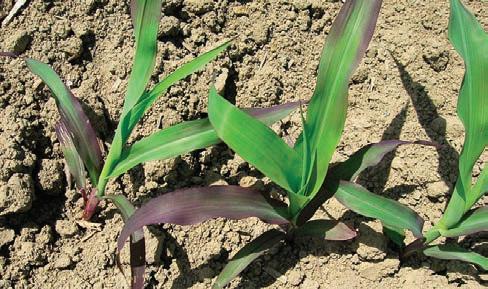
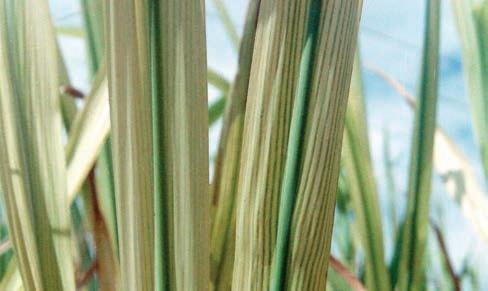
Plants will not perform as well when some nutrients are deficient, but it is not always easy to tell from a plant’s appearance what the underlying deficiency is; a soil test can help confirm or rule out some possibilities. For example, phosphorus deficiency is common and occurs for two reasons: phosphorus occurs at low concentrations naturally in soils
and phosphorus that is in soil or that is added to soil is or becomes unavailable to plants. Plants may exhibit the same or similar symptoms of deficiency for lack of more than one nutrient. For this reason, further testing may be needed to exactly ascertain a deficiency or combination of deficiencies.

47 2.2 Chemical Characteristics
Zinc deficiency in corn Iron deficiency in sugarcane Manganese deficiency in rose
Phosphorus deficiency in corn
Discussion – Plants, pH, and nutrient deficiency
You notice that your plants lacks vigor. You have had your soil tested for nitrogen and there is no deficiency. You also measured your soil pH and found it to be 8. What are some possible causes for the general lack of vigor?
Carbon and Nutrients
Discussion – Why do we think of carbon differently than other chemical soil components?
Let’s think holistically about soil as a system rather than as “just dirt.” Why is carbon or soil carbon not discussed above with other soil nutrients? Why isn’t it considered a nutrient when there is so much attention paid to the amount of carbon or organic matter in soils?
48 2. Soil Fundamentals
________________________________________________________________ ________________________________________________________________
C:N Ratio
When describing organic matter, we use what is called the carbon-to-nitrogen ratio, or the C:N ratio. Carbon is used to build the bodies of soil organisms, and nitrogen is used in proteins and enzymes responsible for the metabolism of soil organisms. If we were to take a soil bacterium, grind up its tissue, and then measure its carbon and nitrogen content, we would get an idea of how much carbon relative to how much nitrogen we would need in the soil to grow that bacterium. This is why we use the C:N ratio to understand the quality of the organic matter for growth of soil organisms.
All organisms typically need more carbon than nitrogen. However, with a high C:N ratio (greater than 24:1) there is not enough nitrogen for soil microbes to support their metabolism. Although there may be enough carbon to grow their bodies, they will be unable to carry out the reactions needed for growth. They will use the nitrogen already in the soil, which can result in limiting the amount of nitrogen available to plants. This will also lead to more organic matter loss.
When the C:N ratio is low, organisms will free up the excess nitrogen in the organic matter and release it into the soil in a readily available form, where it can be used by plants. This excess nitrogen may also become a problem if it is leached out of the soil and carried by runoff into waterways, causing contamination.
Sometimes we also see mention of the C:P (phosphorus) and the C:N:P:S (phosphorus and sulfur) ratios. These are conceptually the same as C:N. Different plants and microbes have different requirements for these nutrients, relative to their carbon needs.
Dryland soils tend to be low in both C and N as plant growth is limited by water, and the C:N ratio can vary, depending on land use history and vegetation type present. It is important to remember that the carbon in soil comes largely from plant material, either from growing or from organic mulch, but that nitrogen available for use by plants mostly comes from soil microorganisms or human inputs. All this is to say that both of these elements are essential for soil health, but routes for entering the soil ecosystem are very different.
Note: Looking at nutrient cycling provides us with a way to understand how soils are connected in space to other ecosystems and the atmosphere and in time through nutrient availability and depletion dynamics.
49 2.2 Chemical Characteristics
Salinity and Sodicity
Salts—including chlorides, nitrates, carbonates, sulfates, and sodium, potassium, calcium, and magnesium—most often come from the bedrock. When there is insufficient weathering from water to flush them from the upper soil horizons, they remain in the soil.
Salts can also be transported to soil through irrigation water or some composted manures. As water flows through irrigation ditches, especially unlined dirt canals, it can pick up salts from soils and deposit them on the field where it is used for irrigation. Overtime, these salts accumulate in the soil when evaporation occurs faster than precipitation. Evaporation increases with the replacement of native, deep-rooted, perennial plant communities with annual crop species, as well as with soil surface exposure.
Glossary Salinity
the measure of salts in soil. Salinity can be measured in soil and irrigation water using a test called electrical conductivity.
Excessive salts in soils can also make it harder for roots to take up salty water in the soil and can result in drought-like symptoms in plants, even following a recent rain or irrigation event Excessive amounts of sodium can deteriorate soil structure due to aggregate breakdown. As described above in the sections on pore space and compaction, loss of aggregates can cause poor water infiltration. These changes make plant growth difficult and may drastically affect crop yield.
In New Mexico and Colorado, considerable areas experience salinity and sodicity concerns for soils. These concerns can be addressed through management of irrigation, drainage, and plant selection, but remediation can take considerable time, especially under prolonged drought conditions.
Glossary Sodicity
the accumulation of sodium salt relative to other types of salts, especially calcium. Sodicity is measured with the sodium absorption ratio (SAR), based on the relative amounts of sodium compared to calcium and magnesium. SAR can be determined for soil and also for irrigation water. In sodic soils the SAR will be greater than 13. In saline soils it will be below 13, and the concentration of salts will be sufficient to impair productivity.
50 2. Soil Fundamentals
2.3 Biological Characteristics
Almost all of life’s energy ultimately comes from the sun through photosynthesis that occurs in plant leaves. That means that aboveground and belowground processes are inherently connected. The soil food web is critical for sustaining biological activity, diversity, and productivity. The interactions among plants, microbes, and animals are key to functions such as regulating the flow of water and storing and cycling nutrients and other soil components. In this unit, we discuss the life forms that make up soil ecosystems and their beneficial, predatory, and competitive interactions—holding in mind that there is great variation in soil biological characteristics in space and over time.
Learning Outcomes
After completing this section you will be able to:

• Describe how plants cycle carbon, including feeding the soil food web
• Describe the key roles that microbes play in facilitating soil processes
• Describe some roles invertebrates and vertebrates play in the soil food web and in other soil functions
Arrows point in the directions that energy and nutrients are moving. For example, livestock eat plants; manure becomes organic matter.
51 2.3 Biological Characteristics
Biological Soil Crusts Organic Matter
Fungi Bacteria and Archaea Microarthropods Nematodes Earthworms Termites and Ants Dung Beetles Livestock
and Burrowing Animals
Plants
Plants and Carbon
Glossary Photosynthesis
the reaction in green plants that converts solar energy (light) to chemical energy.
Fueled by sunlight and drawing carbon dioxide (CO2 ) from the atmosphere, plant leaves make sugars (carbohydrates) that store this converted solar energy. A byproduct of photosynthesis is oxygen, which is released back into the atmosphere. The manufacture, storage, and use of carbohydrates is essential to plant growth, maintenance, and reproduction. Through the process of photosynthesis, carbohydrates are formed in the cells of leaves and stems during daylight hours of the growing season.
Glossary Respiration
produces energy that cells can use, by taking in oxygen, breaking apart (burning) carbohydrates, and releasing carbon dioxide.
It is important to remember that plants also respire. In addition to drawing carbon dioxide from the atmosphere in the process of photosynthesis, plants release carbon dioxide as they burn stored carbohydrates to fuel maintenance, growth, and reproduction. And because burning always requires oxygen, plants must consume oxygen, just as animals do. Aboveground parts of plants can access oxygen from the air, but roots
belowground also need oxygen for their cells. For this reason, soils need to be moist but not saturated to allow for oxygen to flow through pore space to the roots.
Plant biomass
The aboveground biomass of a plant, literally the weight of all its leaves and stems, is largely determined by how much carbon it takes in through photosynthesis and the amount of carbon it respires. At any given moment in a plant’s life, total biomass may be less than the total produced because insects and other animals, parasites, and disease consume plant tissues.
Some organisms (for example cows, grasshoppers) use the carbohydrates and other compounds from living plants to drive their own activities. Some microbes use root exudates, which are carbohydrates released from living plants, either actively or due to roots breaking. (These exudates are sometimes called “liquid carbon.”)
Other organisms use carbohydrates and other compounds from dead plants to drive their activities. This is a part of the process of decomposition, which also includes breaking down the bodies of other dead organisms or their waste (manure).
In turn, plants rely on other organisms to help them gain nutrients or defend them from parasites or grazers. And, of course, some plants rely on animals for pollination, which rarely occurs in soil and so is not a feature of soil biology that needs consideration here.
52 2. Soil Fundamentals

53 2.3 Biological Characteristics Oxygen Carbon dioxide Oxygen Carbon dioxide Oxygen Carbon dioxide Oxygen Carbon dioxide
Carbon dioxide & Water Carbohydrates & Oxygen
Respiration
Light Energy
Photosynthesis
Activity – Clip Plots
Clip plots can help you understand how much biomass is present in a particular area. Before you get started on this activity, consider the following questions, based on your interests and concerns, and jot down some notes.
• What should be the total area of your sample?
Supplies
• A 1 square meter quadrat or a hula hoop (that is, something to denote an area of known size that you can lay on the ground)
• Clippers for clipping vegetation
• How will you decide where to sample? (See “Soil monitoring” on page 78, for more guidance.)
• Will plants be clipped and separated by species, functional group (cool season grass vs. annual forb), or other characteristic(s)?
• Paper bags for collecting clipped vegetation. Remember to label the bags with enough information to identify the sample, for example, initials of the person doing the clipping, the date, and information about the location of the site.
• Scale
Instruction
1. Place your quadrat in a location where you would like to know the quantity of plant biomass per area.
____________________________________________________________
• Will total biomass be collected, or will you separate green/active components from standing litter?
• When will you be sampling and how will this affect the amount of biomass you will collect?
2. With a pair of clippers, remove all of the vegetation within the quadrat to ground level, and place it in a paper bag.
3. Clip enough quadrats to capture the variation in biomass across the landscape of interest. The more variation there is, the more plots will need to be clipped.
4. Dry each bag of vegetation.
5. Remove vegetation from each bag and weigh it separately.
54 2. Soil Fundamentals
____________________________________________________________
Calculations
Extrapolate from your plots to a larger area by converting the mass per quadrat to pounds per acre.
For a square
Area of quadrat x = ________ in ________ in2 ________ in x Diameter ÷ 2
x Width Length Area of quadrat in inches squared =
For a circle
Area of quadrat in inches squared Diameter ÷ 2 x 3.14 = ________ in2 x x 3.14 = ________ in ________ in
Total biomass per quadrat
Add up all plant biomass weights in pounds and divide by the total number of quadrats ÷ Number of quadrats
Sum of all the plant biomass weights = ÷ ________ lbs ________ lbs = ÷
Average lbs of biomass per quadrat
Average lbs of biomass per quadrat
Average biomass per quadrat in lbs per inches squared = Area of quadrat in inches squared ÷ ________ lbs ________ lbs/in2 = ________ in2
Scale up from the quadrats to lbs per acre x 6273000 =
Average biomass per quadrat in lbs per inches squared lbs per acre x 6273000 = ________ lbs/in2 ________ lbs/acre
Interpretation
These calculated values may not mean much on their own, but observing how they change across space or time can be a valuable tool. You can use the values to, for example, plan grazing or respond to changing conditions.
55 2.3 Biological Characteristics
Exclosure
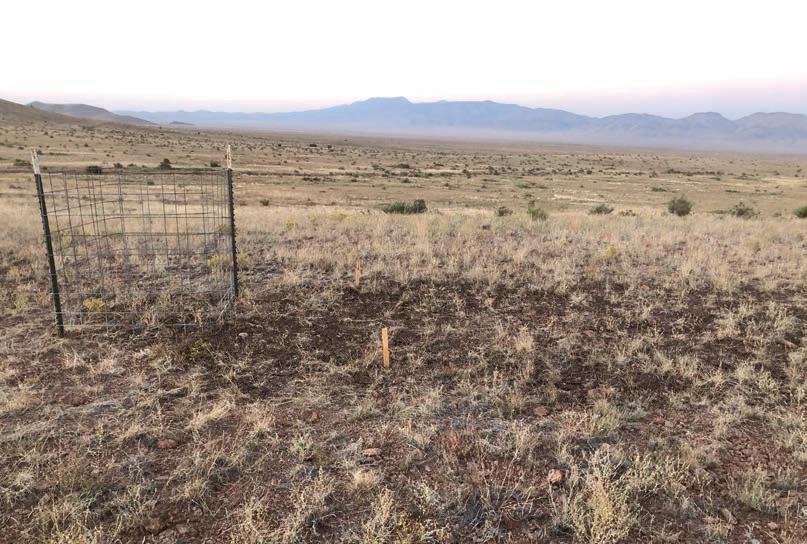
If you are especially curious about what may be eating your vegetation, you could establish small enclosures to exclude particular animals. For example, with posts and cattle fence, you can exclude cattle and then know how different the plant biomass is with cattle (outside of the fencing) and without cattle (inside the fencing). Excluding rabbits and other small mammals is much more difficult but can be done with different fencing types and set-ups.
56 2. Soil
Fundamentals
A small enclosure to exclude animals is called an exclosure
What else photosynthesizes?
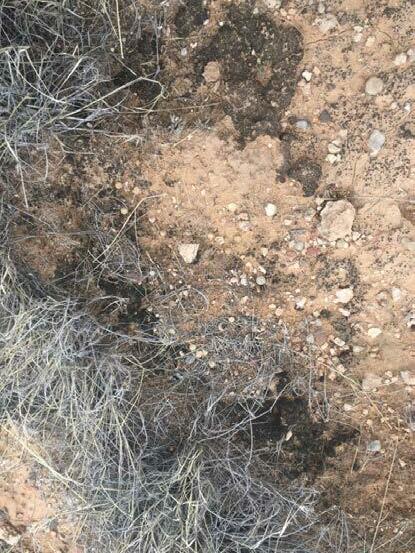
Other multicellular photosynthetic organisms on the soil surface might include:
• Mosses: small plant-like organisms
• Lichens: a symbiotic relationship between a fungus and a photosynthetic microbe
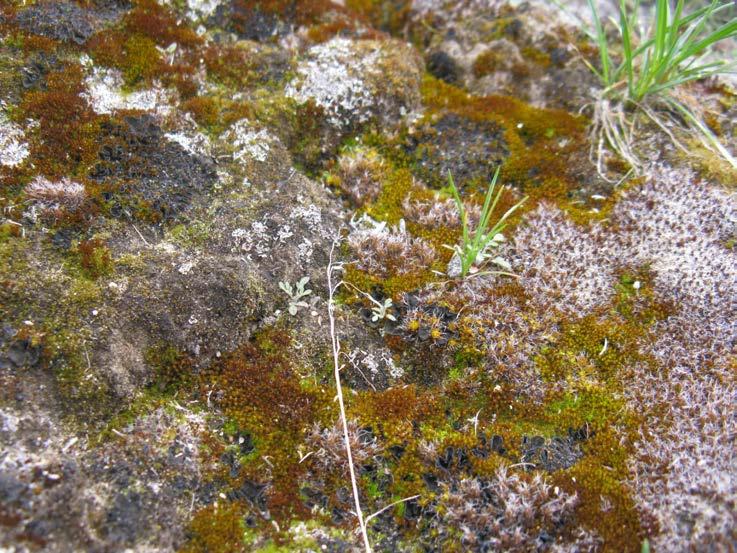
• Cyanobacteria: photosynthetic bacteria that can be single-celled or can aggregate to form strands or globs
When mosses, lichens, or photosynthetic bacteria are on the surface, they are called biological soil crusts or cryptogamic/ cryptobiotic crusts (shown in the pictures). These are not the same as physical crusts, which form by raindrop impact or salt formation.

57 2.3 Biological Characteristics
Moss-dominated biological soil crust
Lichen-dominated biological soil crust
Activity – Surface Cover
Understanding the different types of plants and other organic materials on the soil surface is valuable for understanding soil health. For example, plant biodiversity and amount of bare ground vs. litter are important to monitor through time when comparing different management strategies.
Supplies
• Measuring tape
• Temporary stake or sturdy stick to anchor your tape measure at your starting point
• Pin-flag or small dowel
• Pencil or pen and paper to record your observations
Instruction
1. Pick a random starting location where you will secure your tape measure to the stake (for example, toss a stone behind you and see where it lands).
2. To decide what direction to run your tape measure, pick a direction that runs along a slope OR if there is not a discernible slope, run your tape measure north from the starting point. Note: if you think you may want to monitor this same area again, permanently mark both ends of the tape measure with sturdy stakes.
3. Run the tape measure out 25 feet. This is your transect.
4. Set up your paper as a data sheet. Don’t forget to write the date and your name as the recorder!
There are lots of ways to collect data depending on what you care about, the time you have, and your training:
• Option 1: If you are a botanist, record the plants to species.
• Option 2: If you care about annual vs. perennial, forb vs. grass vs. shrub, write down those categories.
• Option 3: Record bare ground, dead plant material, live plant material, and dung.
58 2. Soil Fundamentals
5. Starting at the beginning of your tape measure, drop your pin every 3 inches and record what is on the ground surface using a tally mark in each of the category boxes on your data sheet. This should give you about 100 total data points.
Note: There are many ways to gather more/different data from this activity, but for now, focus only on the surface cover.
6. See the example data sheet below for the calculations. Tally the total for each category, divide by the total number of points in each area, and multiply by 100 to get the percentages.
Our sample data sheet is based on Option 2 in the instructions above. All three options work the same way. Make tally marks, total them, calculate the percentages.
Date: 5/9/21 Recorder: Jill Location: East Field
59 2.3 Biological Characteristics
Transect Bare ground Annual forb Perennial grass Annual
Perennial
Perennial
Total 1 |||| |||| |||| |||| ||| |||| |||| |||| |||| |||| |||| |||| |||| ||| |||| |||| |||| | |||| |||| |||| |||| | 103 Calculate: 23 /
x
Species / Groups:
grass
shrub
forb
103
100 = 22% 15 / 103 x 100 = 15% 20 / 103 x 100 = 19% 8 / 103 x 100 = 8% 16 / 103 x 100 = 16% 21 / 103 x 100 = 20% 100%
A spoonful of soil harbors billions of bacterial cells, millions of fungal cells, and other organisms such as tardegrades and nematodes.
Microbes
Under the microscope: Bacteria

Bacteria and archaea appear as symmetrical specks, less than 5 micrometers, or 0.000195 inches, long
These were the first life forms, and they are present today in incredible diversity.
What do microbes do?
Microbes cycle nutrients, including chemicals in soil bedrock and plant tissues, which often makes these nutrients available for use by other organisms. Microbes may also be used directly as food by other organisms. Indirectly, many fungi and bacteria excrete enzymes (similar to those in animal digestive systems) into the soil. These enzymes break down
organic materials and the smaller compounds that can be used by other organisms or plant roots. Microbes’ growth and activity can also break apart rocks, starting the process of soil creation.
Because microbes are so much smaller than plant roots, they can grow into soil
60 2. Soil Fundamentals
Fungi
Soil fungi may appear as large spores, often dark brown, or as long strands called hyphae.
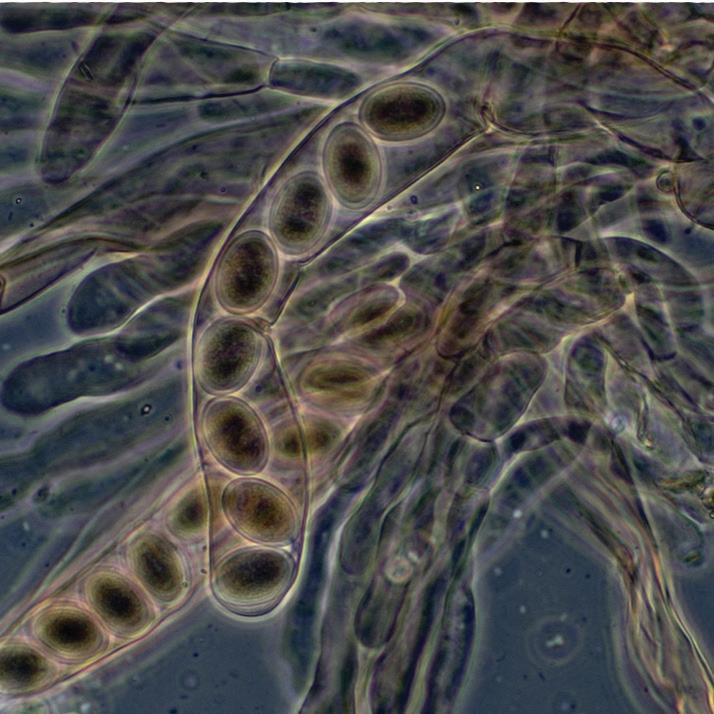
Not all fungi form mushrooms! In fact, mushroom-forming fungi are more rare in dryland environments than fungi that do not form mushrooms.
micropores that are too small for roots. There they can make nutrients bound to soil particles available to plants, or help bind nutrients to minerals. Microbes that grow on plant roots or leaves without harming the plant can repel pests and diseases. Some microbes can consume and process wastes, including synthetic chemicals, making them
non-toxic. Others, especially long strands of fungi, can transport and store water and soil nutrients. And microbes produce and emit a huge array of chemicals that can be used as signals between different microbes and also some that mitigate plant and animal growth and development.
We will identify other functions in the following activity.
61 2.3 Biological Characteristics
Activity – Functional Groups of Microbes Free-living
There are a lot of names derived from Greek and Latin in the following lists of microbe types. Don’t let them hang you up. Pay attention instead to what these organisms do and why they are important for understanding soil health.
1. Put a circle around groups that are important in the nitrogen cycle.
2. Put a square around groups that are important in secondary or micronutrients important to plants.
3. Underline groups that are important in carbon cycling (photosynthesis and decomposition).
Note: some groups may have more than one function and some may not have a direct connection.
Plant-associated
• Rhizobia – bacteria that live inside roots, in specialized structures called nodules; some draw nitrogen from the air and fix it in soil in forms usable by plants.
• Mycorrhizae – root-associated fungi that often play roles in plant uptake of water and nutrients (for example, phosphorus).
Note: There tend to be more microorganisms in areas of soil where roots are living than in areas without living roots.
• Photosynthetic
•
bacteria
Free-living nitrogen fixers – bacteria in the soil that can fix nitrogen.
• Denitrifying bacteria – soil bacteria that convert solid nitrogen forms into nitrogen gas.
• Extremophiles – organisms able to live in extreme environments, such as hot springs, areas of highly saline water or soil, and areas of extreme cold.
• Anaerobic organisms – rely on chemicals other than oxygen for their metabolism; they are important in cycling nitrogen, sulfur, iron, and manganese.
• Saprotrophic microbes – consume dead plant material above and belowground.
• Predators – eat living organisms.
• Scavengers – eat dead organisms.
Other
• Parasites – live on other living organisms and harm them by consuming their tissues.
• Disease-causing organisms – viruses, bacteria, and other microbes that may cause disease to plants or other organisms.
62 2. Soil Fundamentals
Soil Respiration

When we want to assess biological activity in a soil, a good measure is the respiration rate or the rate at which the soil emits carbon dioxide. Most of the organisms discussed above have metabolisms just like those that live aboveground, breathing or otherwise consuming oxygen and producing carbon dioxide. Respiration allows us to gauge how active the soil ecosystem is, even though we cannot observe this activity directly because so many soil organisms are too small to see without a microscope.
Soil respiration describes the rate at which soil organisms are consuming soil organic matter. Respiration rates that are high indicate that soil organisms are active and either soil organic matter is being converted to more stable compounds (for example humus) or that carbon is lost into atmosphere as carbon dioxide, depending on plant little input quality and soil management. During respiration, soil organisms free up nutrients, such as nitrogen and phosphorus that are bound in organic matter, and make them available to other organisms. A low respiration rate indicates lack of biological activity in the soil ecosystem.
Soil respiration rates vary dramatically with a soil’s moisture content, and thus we can expect seasonal and daily variability and variability between areas with different climates. As most microbial activity in the soil occurs around or in water, respiration increases with moisture, but only up to the amount of water that limits air movement through soil pores. Soil respiration also generally increases with higher temperatures.
There are several methods for measuring respiration rate, including commercially available kits with chemicals that change color to indicate the amount of carbon dioxide that is produced over time in an enclosed space like a jar.
63 2.3 Biological Characteristics
Oxygen Carbon dioxide
Oxygen Carbon dioxide
Invertebrates
Glossary Nematodes
microscopic, worm-like organisms that feed on plants and other soil organisms.

Some activities of nematodes in soil are:


• Predation of pests such as cutworms
• Consumption of fungi or bacteria
• Grazing on plant roots
• Parasitizing plant roots
• Spreading diseases between plants
Glossary Microarthropods

small insects, many of which are important in the decomposition process.
Some examples of microarthropods are springtails and mites.
Some activities of microarthropods in soil are:
• Predation of pests such as cutworms
• Consumption of fungi and bacteria
•
Grazing on plant roots
•
As microarthropods feed, they can free up nutrients for plants to use
•
Parasitizing plant roots
•
Spreading diseases between plants
•
Chewing plant tissues into small pieces and moving them around
64 2. Soil Fundamentals
Ants and termites
Harvester ants, common in arid and semiarid grasslands, can influence pH, nitrogen, phosphorus, potassium, the presence and proliferation of mycorrhizae, bulk density, and soil moisture (Snyder et al., 2002).
At the Jornada Basin Long Term Ecological Research Station, termites have been shown to increase water infiltration through their nest building activities (Elkins et al., 1986). Additionally, as termite numbers and activity increases, organic matter is consumed and removed from the soil surface and root zone (Nash & Whitford, 1995). They also affect the soil profile through physical mixing by bringing material from the lower soil horizons up to the surface.
Earthworms
Earthworms feed on dead and decomposing organic material and microbes, and drag them from the soil surface to deeper layers. In relocating organic matter, they remove this top layer from the soil. It has been found that earthworms actually deplete the O horizon of organic matter (Brady & Weil, 2010), which can have substantial effects on the soil ecosystem. Earthworms burrow through the soil, creating macropores, and as they eat, they excrete both digested organic matter and soil mineral particles, which can increase aggregate stability. These casts are high in organic matter as well as bacteria and available plant nutrients.
What should we expect with earthworms in semi-arid soils? Earthworms prefer cool, moist well-aerated soils, with ample supplies of organic matter on the surface. Soils of this type are not typical in New Mexico or Colorado. Earthworms are also very sensitive to salinity, which is a common issue in dryland soils.
Dung beetles
In the short grass prairie, which was once dominated by the American bison, dung beetles serve an important role in decomposing and transporting dung to lower soil layers. This action also serves to increase soil nitrogen, water infiltration, and dispersal of the seeds in dung (Barber et al., 2019). Dung beetles use both cattle and bison dung, but with the removal of the bison from their historical range, which included nearly all of what is now New Mexico and Colorado, dung beetle populations have been highly disturbed. Both native and invasive dung beetle species can be found in both states.
Discussion –
What do earthworms do?
What soil physical characteristics might earthworms affect by their activities? What chemical characteristics? What biological characteristics?
65 2.3 Biological Characteristics
Vertebrates
Glossary Bioturbation
the action of burrowing creatures as they excavate tunnels and living areas in soil, mixing soil layers
Burrowing creatures
The semi-arid Southwest is habitat for ground squirrels, gophers, prairie dogs, and moles, all of which live in soil. Through their burrowing activities, these animals mix soil horizons and redistribute seeds and plant parts throughout the soil. This mixing is on a scale that impacts soil, but not in a detrimental way. Rather it introduces some diversity into the physical, chemical, and biological aspects of the soil ecosystem.
Livestock
Different livestock species have a variety of different eating and movement abilities and preferences, and therefore they have a variety of interactions with soil ecosystems. For example, when grazing is static the weight of larger animals can cause soil compaction. Livestock can affect chemical and biological characteristics by introducing nutrients and microbes through their dung and urine that can help feed soil food webs, although unless grazing management is employed, this effect is highly localized and often concentrated in areas around water or shade. By trampling the soil surface, they can deposit litter that protects and feeds soil.
The ways in which livestock eat affect the biological characteristics of soil by impacting plant communities in a variety of ways. Stocking rate and climate will affect how livestock affect soils. Here we provide a brief overview of ways the main livestock animals get their food and the effects they may have on soils, noting that different varieties (breeds) of each may have very different behaviors, which can cause their impacts to vary.
66 2. Soil Fundamentals
Cattle
The anatomy of cows’ mouths and teeth don’t allow them to get closer than two inches to the soil. When eating a plant, they place it between their upper palate and lower jaw, pulling with their tongue to rip it from its roots. Cows tend to graze for no more than eight hours a day, and they tend to avoid grazing near their own dung. The pulling motion of their bites and their heavier bodies can have negative impacts on plant communities and soil structure, especially under wet soil conditions. It is important to optimize grazing, which we will discuss further in the grazing management section on page 107
Sheep
The structure of sheeps’ mouths allows them to bite much closer to the ground than cattle, and they can be more selective about what they eat. Because sheep can take much more of the plant, they can damage plant communities quite severely. But they are much lighter than cattle and horses, so they are less likely to cause soil compaction.
Goats
Goats are similar to sheep but have more mobile lips and tongues, which allows them to be even more selective when grabbing forage. They prefer woodier plants and new leaves on shrubs, which can be detrimental to shrub success.
Horses
Horses have teeth structured for biting and are able to nimbly cut forage close to the ground, rather than rip it as cattle do. They are large, heavy animals, and therefore like cattle they have negative impacts on soil structure. And like sheep, their grazing can have negative impacts on plant communities.
67 2.3 Biological Characteristics
Trampling
The following series of questions are useful for considering the impact of trampling on soil ecosystems.
1. What animals (species and breeds) are trampling?
2. How long are they on the soil? What season?
3. How many of them?
4. With what frequency do the animals revisit the area?
5. What types of soil are they trampling?
6. In which seasons are they visiting?
7. What is the land management history of the area?
Overall, grazing management impacts vary hugely, depending on management strategies and environments. For example, moving heavy livestock across a clay soil when it’s wet will inevitably cause it to be badly disrupted, whereas moving livestock across wet sandy soil will be much less disruptive.
68 2. Soil Fundamentals
Discussion – Impacts of soil organic matter on soils
Let’s connect and review some of the physical, chemical, and biological soil concepts covered so far.
The amount of organic matter in a soil is often less than 5%, but soil organic matter has a great effect on soil physical structure, chemistry, and biology. In the list below, please indicate which physical characteristics increase and which decrease as organic matter increases.
Physical
Aggregation
Pore space Water infiltration Moisture retention Aeration Erodibility
Biological
• Provides food for soil organisms large and small
69 2.3 Biological Characteristics
______________________________
Chemical • Contains and stores nutrients especially nitrogen, phosphorus, and sulfur in a slow release state • Stabilizes macronutrients and micronutrients • Buffers pH changes
2.4 Healthy Soil Principles
Healthy soil principles are the key to successful land stewardship. Understanding them enables stewards to consider how different practices and management plans are likely to promote or degrade soil health and thus to make better management decisions. The soil health principles that we present below are based on those included the 2019 New Mexico Healthy Soils Act and very close to the NRCS Soil Health Principles.
Learning Outcomes
After completing this section you will be able to:
• State the healthy soil principles and relate them to the physical, chemical, and biological characteristics of soils.
• Evaluate different management activities within the context of stewarding healthy soils.
Discussion – Soil covers
What soil covers do you or your neighbors use? What are your soil-cover strategies?
70 2. Soil Fundamentals
______________________________
______________________________
Soil Health
Managing for soil health brings together knowledge of the soils’ interrelated physical, chemical, and biological characteristics with planning and practices designed to restore and contribute to the long-term functioning of robust soil ecosystems. The healthy soil principles that guide this effort address the following soil functions, among others.
Physical
• Physical support for plants • Aeration •
Soil water storage and movement • Resistance to soil erosion
Chemical
Nutrient storage and release
Carbon storage
Salinity levels Biological
Root proliferation
Organism movement and connectivity
Pest suppression
Nitrogen mineralization
Organic matter decomposition
Remember that inherent properties will affect the functions observed and observable in your soils. For example, climate and soil texture are not something that you’ll be able to change and can affect many of those functions.
It is important to keep in mind that soil physical, chemical, and biological characteristics in different locations are distinctive and thus good management goals and management plans are specific to unique locations. For this reason, use of the healthy soil principles to guide the development of soil and management goals for a particular ranch, farm, orchard, garden, or park will be highly specific, as well. For example, in New Mexico’s native desert grasslands, soils are not completely covered with plants, and this is beneficial to some wildlife species that may be present on a given property. Some insect species depend on exposed soils to get nutrients and have evolved to be camouflaged on the bare soil surface. And, biological soil crusts are not plants, but they can protect soils from erosion. Variations like these make it clear that the healthy soil principles must always be followed with great sensitivity to local characteristics and conditions.
71 2.4 Healthy Soil Principles
•
•
•
•
•
•
•
•
Healthy Soil Principles
1. Keep soil covered/maximize cover
Minimize soil disturbance and external inputs
Maximize biodiversity
Maintain a living root
Integrate animals into land management, including grazing animals, birds, and beneficial invertebrates
Note: You may encounter the four NRCS principles, which combine maximizing biodiversity with integrating animals into land management.
Keep soil covered/maximize cover 1
Cover can refer to living plants or organisms, dead plant matter/litter, or other organic mulches (grass clippings, wood chips, hay, compost, etc.).
Soil cover can provide the following benefits to soil ecosystems:
• Cool soils by reducing sun exposure
• Keep soils moist by reducing evaporation and increasing infiltration
• Hold soils in place by reducing water erosion from high intensity rainfall and wind erosion
• Keeps soils aerated by shielding from compaction
• Provide organic material that feeds soil organisms
• In cropland, reduce weeds and undesirable invasions by native and non-native plants
Some examples of NRCS Conservation Practices (Code) related to this principle: (327) Conservation cover (328) Conservation Crop Rotation (340) Cover crop (512) Forage and biomass planting (528) Prescribed grazing (329) No till and (345) Reduced till (484) Mulching (808) Soil carbon amendment (334) Controlled traffic
72 2. Soil Fundamentals
2.
3.
4.
5.
Minimize soil disturbance and external inputs 2
Causes of disturbance
• Physical: tillage and compaction, root plowing or other brush removal with heavy equipment
• Chemical: many fertilizers and pesticides, herbicides, salty irrigation water
• Biological: over- and under-grazed grasslands
Consequences of disturbance
• Loss of soil structure
• Bare soil, because it can be subject to erosion
• Woody plant encroachment
3
Maximize biodiversity
Some examples of NRCS Conservation Practices (Code) related to this principle: (329) No till and (345) Reduced till (327) Conservation cover (590) Nutrient management (595) Integrated pest management (528) Prescribed grazing Maximizing biodiversity includes both aboveground and belowground biodiversity: microbes, plants, earthworms, insects, and other animals. Note that when biodiversity is maximized above ground, it is also maximized below ground.
For example:
• Multi-species cover crop or wellmaintained range with cool-season and warm-season grasses promoting diverse native species
• Diverse pollinator strips
• Agroforestry
Some examples of NRCS Conservation Practices (Code) related to this principle: (327) Conservation cover (528) Prescribed grazing (328) Conservation Crop Rotation (340) Cover crop (512) Forage and biomass planting
73 2.4 Healthy Soil Principles
Maintain
Roots can break up compacted soils and allow better infiltration. Plants provide carbon to the soil through their roots, which feeds soil microbes and helps build soil organic matter. Root and microbial activities cycle nutrients and improve soil structure by supporting aggregate formation, which in turn reduces wind and water erosion.
a living root
Some examples of NRCS Conservation Practices (Code) related to this principle: (328) Conservation Crop Rotation (340) Cover crop (512) Forage and biomass planting (528) Prescribed grazing (329) No till and (345) Reduced till (484) Mulching (808) Soil carbon amendment (334) Controlled traffic
Integrate animals into land management
When it comes to soil health on rangelands, grazing management is essential. It isn’t possible to achieve any of the goals described by the other soil health principles, if grazing isn’t managed (see page 107).
Livestock manure, urine, saliva, hair, and skin introduce and distribute microbes. Trampling by grazing animals can incorporate microbes and organic biomass from the soil surface to the subsurface, which can in turn accelerate nutrient and organic matter cycling. The physical breakdown of organic matter residues by trampling accelerates organic matter decomposition.
An example of NRCS Conservation Practices (Code) related to this principle: (528) Prescribed grazing
74 2. Soil Fundamentals
4
5
Discussion – Working with the healthy soil principles
First, evaluate which fundamental physical, chemical, or biological characteristic(s) is (are) affected. Then, evaluate which soil health principle or principles apply to the situation.
1. Tillage
Characteristic(s) Principle(s)
2. Fertilization
Characteristic(s) Principle(s) 3. Monocropping
Characteristic(s) Principle(s)
(synthetic fertilizers rarely contain balanced blends of all plant nutrients) 4. Irrigation/poor water quality
Characteristic(s) Principle(s)
75 2.4 Healthy Soil Principles
_________________________
_________________________
_________________________
_________________________
Characteristic(s) Principle(s)
5. Use of synthetic chemicals (for example insecticides, herbicides, fungicides, other “-cides,” synthetic nitrates, urea, fumigants, and some organically approved chemicals, such as Oxidate) 6. Mixed species cover crops
Characteristic(s) Principle(s) _________________________
7. Native plants, heirloom plants 8. Soil organic matter between 3% and 5% 9. Biofertilizers and composts
Characteristic(s) Principle(s)
Characteristic(s) Principle(s)
Characteristic(s) Principle(s)
76
2. Soil Fundamentals
_________________________
_________________________ _________________________
3. Basic Soil Monitoring and Evaluation
Soils are tested and monitored for a variety of reasons and to answer specific questions. Tests can help identify and assess soil constraints, for example the soil texture and pH, which can not easily be changed. Tests can also be used to identify changes due to management decisions over the short- or long-term. Ask yourself: What functions are you interested in: Water storage/movement?
Carbon storage/cycling? Nutrient cycling? Erosion resistance? Disease and pest suppression?
Soil tests can be qualitative or quantitative. You gain considerable insight into your soil by digging a hole and looking at the soil’s color, looking for signs of life, smelling the smells, and feeling the texture and moisture. These are qualitative assessments.
Quantitative tests include, for example, lab tests for nutrient availability, assays of microbial abundance and activity level, and weighing the amount of biomass in a clip plot. Both qualitative and quantitative tests are useful and important, but sampling design plays an enormous role in how useful the information will be for answering your questions.
Different agencies and granting entities, and emerging carbon and ecosystem service markets, will require slightly different soil analyses. Treat the protocols and suggestions in this workbook as a jumping-off point, but certainly follow whatever directions are needed for the specific case.
Learning Outcomes
After completing this section you will be able to:
• Evaluate goals of sampling to decide the spatial/temporal extent of sampling/observing
• Evaluate goals of sampling to decide on soil, water, and biological lab tests
• Know where to find soil classifications using the USDA Web Soil Survey
• Identify considerations for how to sample soils, water, and biological material to send for lab testing with consistency

77
Plan Your Monitoring and Sampling
Key questions to ensure that you get credible data:
• Why are you sampling? What question(s) are you trying to answer?
• Where and when are you sampling?
• What are you sampling? What sampling protocol will you use? Do you have trained field staff/appropriate sampling equipment? What lab/facilities can provide soil processing?
• Do you have funding for sampling and processing?
• Are you comparing information through time or across space to understand how characteristics are or are not changing?
Discussion – Sampling considerations
1. Evaluate the following potential sampling strategies for their usefulness for assessing a field’s nutrient availability.
A. Sampling one shovelful from the surface in the center of the field
B. Sampling three shovelfuls from the surface, all close to the center of the field
C. Sampling three shovelfuls from the surface, at different locations around the field
D. Sampling three shovelfuls from the surface and three from a set subsurface depth, all close to the center of the field
E. Sampling three shovelfuls from the surface and three from a single subsurface depth at different locations around the field
F. Sampling six shovelfuls from the surface and six from a single subsurface depth at different locations around the field
G. Sampling from different depths, but basing the samples on the soil’s O, A, B horizon (see soil forming factors and the soil profile section on page 12)
78 3. Basic Soil Monitoring and Evaluation
2. Evaluate the costs associated with sampling strategies A-G in terms of time and resources.
3. What other considerations would affect how you decided to sample? This might include things like the size of the field, management history, etc.
____________________________________________________________
4. What would you consider changing about your sampling if you found an area with visually different plant productivity or a visible accumulation of salts? Would you sample these areas separately or include them as part of your overall sampling of the field?
5. Next, let’s say you collected your first sample(s) from a field in the middle of the summer. You want to see how nutrient availability changes after you implement a new management practice in this field.
Evaluate the following potential sampling strategies for their usefulness for assessing changes in nutrient availability.
H. Sample weekly for one year following implementation of the practice
I. Sample monthly for one year following implementation of the practice
J. Sample once in the winter following implementation of the practice
K. Sample once in the summer following implementation of the practice
79
3. Basic Soil Monitoring and Evaluation
6. Next, evaluate the costs associated with sampling strategies H-K in terms of time and resources.
7. Evaluate strategies A-G and H-K for the following scenarios:
• You are a producer who has received grant money. The funder requires a quantitative evaluation and provides additional financial support for the analyses.
• You are a producer who is trying to decide whether or not to continue a new management activity for a second year.
8. Finally, let’s say that you want to know the soil texture in the field. Given what you know about the inherent vs. dynamic characteristics of soils, what might you change about where and when you sample?
Interpretation
This exercise was designed to show that there are many possibilities for sampling, with costs and benefits. It is important to evaluate what the goals of sampling are so that you gain maximum information at a cost you are willing to incur.
80 3. Basic Soil
Monitoring and Evaluation
____________________________________________________________ ____________________________________________________________
Three Principles for Soil Sample Collection
Consistency
Collecting each sample/ observation in a uniform manner across sites and across time improves the quality of the results.
Organization
Having a uniform manner of collecting, labeling, and handling samples/ recording observations can prevent errors and make the information usable for evaluation.
Simplicity
It is likely that the simplest procedure (given the goals and constraints) will be most effective.
Ackerson, 2018
When to Sample Your Soils
Before-and-after snapshots can help you evaluate specific activities. For example, if you wanted to know how your crops change the nutrient availability of your field or the effects of cover cropping, you would sample before and after your major growing season.
You may want to use the results of your sampling to decide what activity to do. For example, it is also a good idea to sample prior to applying fertilizer so that you can know what nutrients to apply. Nutrient recommendations (pounds per acre) can be estimated for specific crops based on results before planting or at the start of the season for perennial crops.
Be consistent over time if you want to compare from year to year; some properties (such as nutrient availability) can shift seasonally even without additional management activities.
Be sure to record the date of your sample and why you wanted to sample, so that you can consider this in your decision making once you have all the information.
81 3. Basic Soil Monitoring and Evaluation
Where to Sample
Identify what soil orders to expect
Soils you might encounter in New Mexico and Colorado vary in their physical, chemical, and biological characteristics but are classified in broad categories called orders and then further subdivided into more specific groups.
It is more important that you pay attention to whether soils in an area are in different orders than memorize all of the characteristics of each order. We introduce these concepts here to make you aware of the soil orders common to your area, and we encourage you to learn more about them and what they mean for the characteristics of your soils.
The soil order that you are working with on your ranch, farm, orchard or garden is useful to know because it will give you a starting point to set your expectations, a general
overview of what soils might look like in a place. Some things a soil order might help you understand is what type, if any, profile to expect, what pH to expect, or what kind of plant community grows or could grow there.
Different soils form because the soil forming factors occur to differing degrees during the soil formation process (see page 12). The broad categories can be further subdivided and categorized, and thus you will always see additional technical terms on soil maps. These broad geographic trends will not apply to all fields, pastures, or topographic features within the area that is mapped as a given category, but they are a good starting point.
In the agricultural regions of New Mexico and Colorado, we generally encounter five soil orders
Entisols recently formed soils
Inceptisols starting to have a B horizon
Aridisols formed under dry conditions
82 3. Basic Soil Monitoring and Evaluation
Least Weathered Most Weathered
Mollisols dark from organic matter accumulation Alfisols clay accumulation
Discussion – Soil orders of New Mexico and Colorado
What do you notice about this strange looking map? What are some general patterns or trends you observe in the locations of the different colors (which depict different soil orders)? Think about the five soil-forming factors (climate, time, topography, bedrock, and organisms) in the context of what you know about the areas on this map.
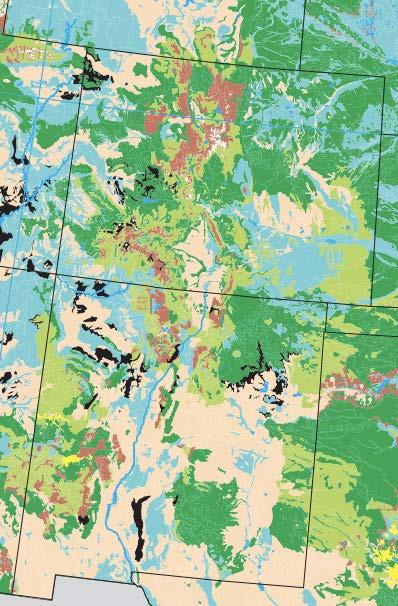
83 3. Basic Soil Monitoring and Evaluation
Entisol Inceptisol Aridisol Mollisol Alfisol Water Rock Outcrop Entisols Inceptisols Aridisols Mollisols Alfisols Rock Outcrop Water
Adapted from: Dominant Soil Orders. 1998. USDA NRCS, Lincoln, Nebraska
Entisols
Entisols have formed very recently in geologic time and are the most common soil type in the world. If you have these types of soil on your ranch or farm you should not expect to see much soil profile development, possibly only one or two horizons. These soils can form in a river valley that has experienced recent sediment deposition from a flood, or they could form on rocky slopes or moving sand. Entisols recently formed on river sediment can be very fertile, in contrast to those formed on rocky slopes or shifting sands, which are usually not very fertile. River valley entisols are significant areas of food production world wide.
In New Mexico and Colorado, entisols are present because the parent material is young as well as the limited time exposed to the soil forming factors. Entisols form primarily on higher sloping areas where soil particles erode and move out before developing sufficiently for another soil order. You may also encounter them along flood plains of the Rio Grande or other larger rivers, for example, where sediments have been deposited very recently. Entisols generally occur in patches around both states, with highest concentration in northwestern New Mexico and the western and eastern plains of Colorado (not in the Rockies).
Inceptisols
These soils are one next step further along the weathering process from entisols. You can expect to see a bit more profile development, but still very far from the hypothetical profile shown on page 12
In New Mexico and Colorado, inceptisols are concentrated in mountainous regions, such as ranges of the Gila, Sangre de Cristo, Jemez, San Juan, and Rocky mountains. You would likely not encounter them in cropland, but might well find them on a ranch or leased grazing land in a national forest.
Aridisols
Aridisols are soils that form in arid climates. The natural vegetation found on these soils is scattered, which means that the influence of organic matter deposited by plants is also scattered. Some areas have none; some have a lot, for example, immediately under a bunch of grama grass or creosote shrub. The soil horizon closest to the surface is characteristically light in color (don’t expect an O horizon here). These soils generally have a high pH, and caliche layers are common. Also, they contain a lot of salts, simply because there has not been sufficient moisture during soil development to wash salts away. For this reason, salinity and sodicity are often an issue.
Aridisols are the most common soil order in New Mexico. In Colorado, they are distributed sparsely throughout the state, with the largest patches in the east. As we know, both New Mexico and Colorado can be very windy, and precipitation is often intense. When sparse vegetation is removed from aridisols (due to overgrazing or compaction, etc.), soil loss can become a very serious issue.
84 3. Basic Soil Monitoring and Evaluation
Mollisols
The defining characteristic of a mollisol is that it has formed under grassland vegetation. The soils often have a thick, organic-rich surface horizon, and thus a dark O horizon. Because of their high organic matter content, their structures are good, with high aggregate stability, and they show high productivity.
Mollisols are found in the western-most extent of the Great Plains, in eastern New Mexico and Colorado. In New Mexico the largest patches are found between Almagordo and Roswell and east of the Sangre de Cristos in the north, and they are distributed throughout Colorado. In some areas, where mollisols were cultivated and tilled and then subjected to extreme erosion by the storms of the Dust Bowl in the 1930s, they are still recovering.
Alfisols
Alfisols form under forested vegetation.
In New Mexico and Colorado they are found in mountainous areas similar to those where inceptisols are found, but alfisols cover larger areas. They have experienced more weathering than any of the other soil types we described, and therefore you would expect to see more horizon development. There is often a good amount of clay present in alfisols and like mollisols they are very fertile and good for cultivation. In the Southwest they are generally found at higher elevations, where cold and snow may pose a challenge to agriculture.
Discussion – Soil orders and healthy soil principles
Let’s say you determined that you have an aridisol on your ranch and that you have no water for irrigation. How would you pursue the five healthy soil principles? Think about which physical, chemical, and biological characteristics you could change and which you couldn’t. What would soil health look like to you on a landscape where soil was mostly aridisol?
85 3. Basic Soil Monitoring and Evaluation
Activity – Using the USDA NRCS Web Soil Survey
The Web Soil Survey is maintained by NRCS and provides an excellent free tool for finding information on soils anywhere in the United States. You can select an area on a map, and the site will provide the different types of soil and their properties.
Watch a video tutorial or follow along with a current tutorial provided by NRCS from their landing page: websoilsurvey.nrcs.usda.gov
Define your area of interest.
The map starts as an overview of the entire United States. You will need to zoom into the region of your ranch or farm.
The easiest way to do this is to enter an address in the appropriate tool bar.
You can also enter the latitude and longitude coordinates. Find these by using Google Maps to search for your address. You will get a long URL, from which you can cut your coordinates to paste into the Web Soil Survey.
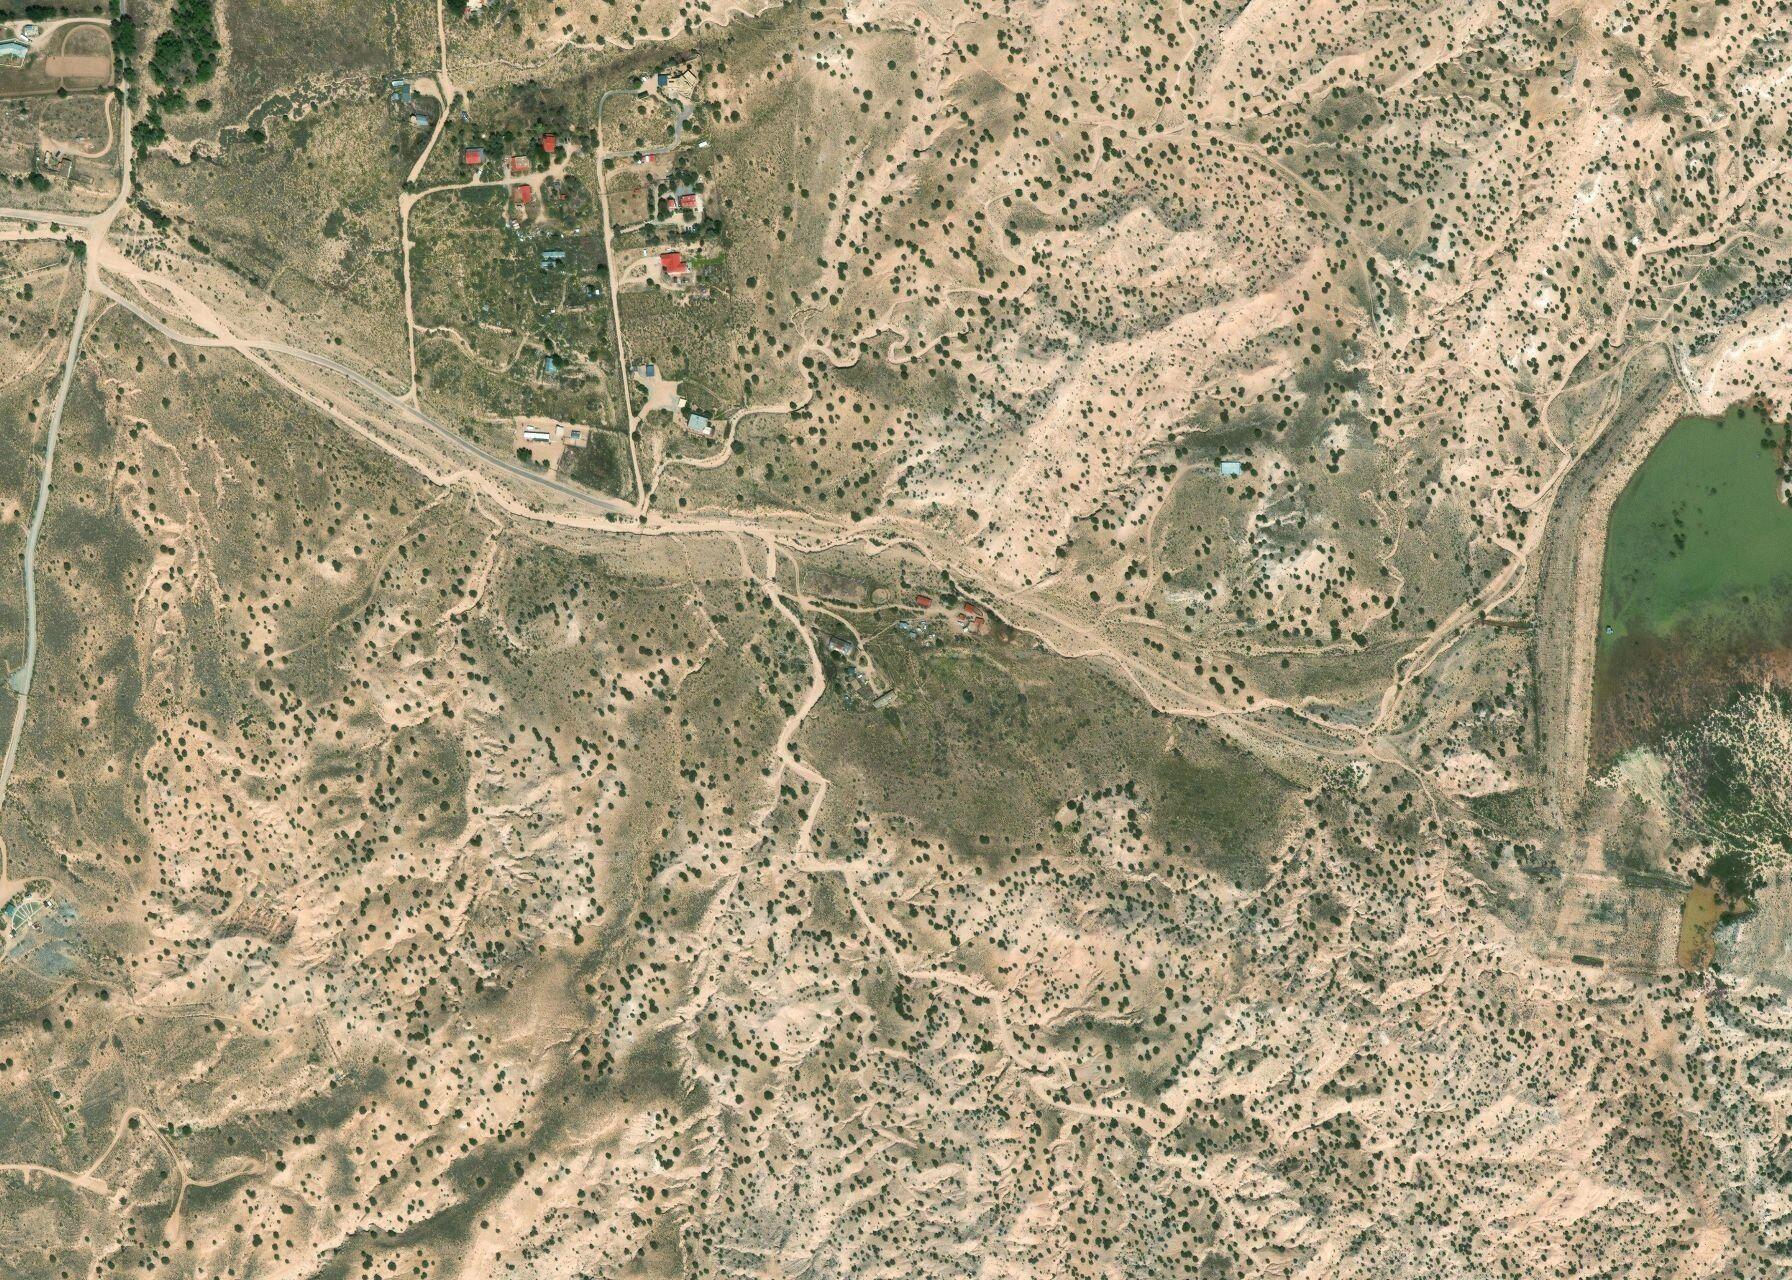
Once you have zoomed into your ranch or farm you will need to tell the Web Soil Survey what area of interest (AOI) you would like the soils data to reflect. To do this you can draw a rectangle or polygon on the map.
4. Once you have drawn your AOI you can begin to look at the soil map and soils data explorer for your ranch or farm, or download a free report.
86 3. Basic Soil Monitoring and Evaluation
Web Soil Survey National Cooperative Soil Survey
Page
398140039815003981600398170039818003981900398200039821003982200 410400 410500 410600 410700 410800 410900 411000 411100 411200 411300 410400 410500 410600 410700 410800 410900 411000 411100 411200 411300 35°
1'' W 35° 58' 21'' N 105° 59' 1'' W Edge tics: UTM Zone 13N WGS84 1200 1800 Feet sheet. Map Unit Legend Map Unit Symbol Map Unit Name Acres in AOI Percent of AOI 104
108
116
120
123
127
Fe County Area, New Mexico
7/9/2020
1 of 3
58' 51'' N 105° 59'
Chupe-Riverwash complex, 1 to 3 percent slopes, flooded 14.8 14.3%
Zia fine sandy loam, 0 to 2 percent slopes 10.2 9.8%
Arents-Urban land-Orthents complex, 1 to 60 percent slopes 0.9 0.9%
Quarteles-Rock outcrop complex, 25 to 90 percent slopes 3.7 3.6%
Koshare very fine sandy loam, 2 to 8 percent slopes 25.1 24.2%
Ojito-Koshare-Quarteles complex, 5 to 50 percent slopes 49.2 47.3% Totals for Area of Interest 103.9 100.0% Soil Map—Santa
Tedford Farm
Supplies: • Computer with internet access
Sample depth
Within a given area, you will have to decide what depths to sample. Again, your decisions will relate to your goals. Whatever depth you choose, be sure to write down to the depth which you sampled and why so that you can be consistent when sampling again in the future and better able to interpret your findings.
Some questions to work through when making your decision:
1. Which horizons are important?
2. What is the management history of your site? How might it affect the different soil depths?
3. What are the rooting depths of the plants at this site?
4. Are you looking for deep compaction?
5. Do you have an orchard or vineyard? Spatial variation in the lateral direction can be very high in orchards.
6. Do you use irrigation? If so, you may have salinity accumulation in different locations.
• Flood – Salt can vary from the head to the foot of the field.
• Micro sprinklers – Salts accumulate at the extremities, especially if not overlapped.
• Furrow irrigation – Salts accumulate on ridges due to evaporation.
Note: Never include salt crusts in a soil sample; instead, sample the salt crusts separately if needed.
7. If you don’t have an explicit reason for sampling a given depth, it is common to sample 0-6 inches and 6-12 inches. Emerging carbon markets may require deeper sampling, and it will be essential to follow their specific protocols.
87
3. Basic Soil Monitoring and Evaluation
What to Sample in Addition to Soil
Water
It is important to sample your irrigation water. When irrigating with either surface or groundwater, you are often adding minerals. Both water and the minerals it contains interact with soils in ways that can change their physical properties. Something to consider when testing water is how its contents might change as the season progresses. Much of the water available in New Mexico and Colorado is fed by snow melt which contains different concentrations of minerals as the season progresses from spring to fall.
Amendments
Organic matter is usually added to soil in the form of compost or manure. If you have had a soil test done and are adding organic matter to address a specific nutrient deficiency you will need to know the nutrient profile of the organic matter to determine how much to add to address any plant nutrient deficiencies. The seller from which you purchase compost should make a nutrient profile analysis available to you. If you are producing compost or manure on your ranch or farm, you will want to get it analyzed before applying it to your soil. Considerations for sampling amendments to send to the lab are similar to those for soil.
Plants
You may want to send plants to a lab to get a chemical analysis to determine nutrient content or to evaluate a crop for disease. Just as there are particular considerations for soil sampling, there are considerations for plant sampling as well.
88 3. Basic Soil Monitoring and Evaluation
Photos
Taking photos can be extremely helpful to understanding what has changed aboveground. As we’ve mentioned before, aboveground conditions reflect belowground processes, so keeping track of what the ground and vegetation looks like is a good starting point. Photos are also a great way to share with others.
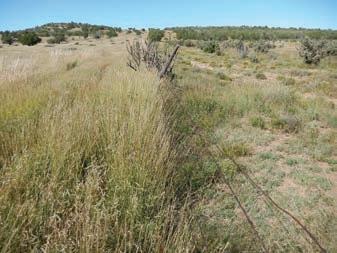
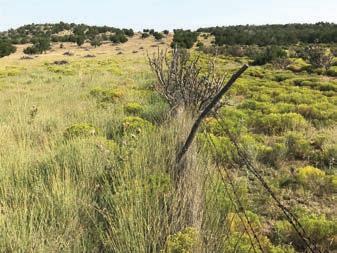
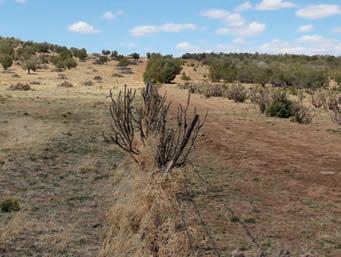
As we know, depending on the photo angle, season, time of day, weather conditions, and other factors, the same area can look completely different from one time to the next, so as with all other aspects of monitoring and evaluation, mindful intention and consistency are critical.
2013 2017 2014
Also, sketches or diagrams can be very helpful for reminding you of past activities and observations! Try it out in the space below!
89 3. Basic Soil Monitoring and Evaluation
Photos: Nancy Ranney
How to Sample for Lab Tests
Soil or amendments
Best practices for collecting the samples:
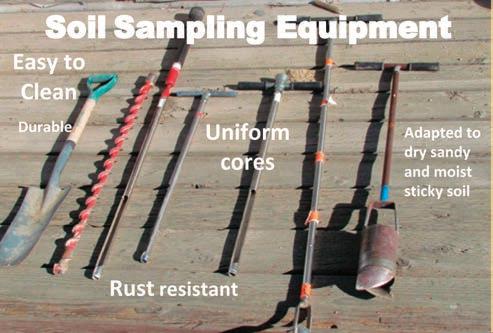
• Use clean equipment
• No rusty or galvanized containers
• No rusty shovels or probes
• Use a clean tarp or bucket for temporarily storing the collected soil
If you are investigating biological properties, such as the microbial community, you may need to be much more careful with sterilizing (10% bleach solution/bleach wipes) all equipment between multiple samples. You will also need to make sure the sample containers are new and not contaminated with other biological materials. The lab or researcher will tell you what needs to be done to prevent contamination between samples.
Note: consider if you would like to collect extra soil and save it in case the soil is lost or some other error occurs. You will not receive the soils back from a lab because they are used up in the testing.
Storing the samples once collected
• Keep samples out of direct sunlight, particularly during hot conditions, because heat can affect some nutrient availability measurements.
• When using plastic bags to contain soil or compost, transport them in a cooler with ice packs. Keep bags in a cardboard box inside the cooler to protect them from ripping, which leads to contamination.
• Generally, air drying soil samples prior to shipping or storage at low temperatures is a reasonable procedure to limit change in your samples. However, be sure to ask the lab how to store a soil sample for the longer term for a given desired test. For example, freezing is a good way to store soil for some tests, but storing at room temperature after drying is a good way to store soil for other tests.
Depending on how the lab would like you to package and store your samples, you may want bags or containers that are:
• Breathable
• Clean
• Non-metal
90 3. Basic Soil Monitoring and Evaluation
Water
• Labs will need specific amounts of water for testing. It is important to confirm the amount needed with the lab you are sending it to. A good rule of thumb is one cup.
• Sample containers should be plastic with good, leak-proof caps. Be sure caps are screwed on tightly. Do not use glass containers!
• Containers should be clean and then rinsed three times with the water you are sampling before taking the final sample.
• Containers should be filled as completely as possible.
• Label containers with a permanent marker. If a container cannot be marked directly, place a piece of masking tape on the bottle and mark it.
• Keep the sample cool, preferably in a refrigerator. Do not freeze!
• If you are mailing samples, refrigerate them prior to sending. Pack them securely with newspapers or Styrofoam (be sure caps are tight) in a sturdy box. Label the box, KEEP FROM HEAT, on all sides.
Plants
• Test what you are interested in — if animals eat the whole plant, sample the whole plant; if they eat just the leaves or fruit or seeds, sample the leaves, fruit, or seeds.
• Pick the green or ripe tissues, not the yellow or gray dying or dead leaves or dried out fruit.
• Find out how much material is needed for the test you want to do.
• Collect from multiple areas or sources and mix the samples well to submit an aggregated sample.
• For some tests: don’t let the sample become overheated or dry out; Place it in a sealable bag and keep it cool between collecting and shipping. However, you don’t want mold to grow in your bag. Make sure to plan for quick shipping and processing. For other tests, air drying in a paper bag is adequate. Again, check with the lab for instructions.
General guidelines for shipping samples
When shipping samples to a lab it is best to do so at the beginning of the week, so that they are received, opened, and processed or properly stored before the weekend. You will need to make sure that your samples are clearly labeled with unique identifiers so that when you get your data back you can make sense of it.
• Always include a paper information sheet with the sample. Put the sheet in a plastic bag to prevent it from getting wet or dirty from a leaky sample container.
• This sheet should contain any relevant information about the samples, as well as your contact information.
91 3. Basic Soil Monitoring and Evaluation
What Tests to Do in the Field and in the Lab
In-field tests and assessments
When you go out to the field with digging equipment to take samples, you should also examine the soil for evidence of conditions which affect soil health and functions. That is, look at the aggregates; look for compaction, evidence of erosion, evidence of biota (worms and channels, fungi), accumulation of salts (salt crystals); look at the soil color and the thickness of the A horizon, etc.
We discussed and provided instructions for many tests and assessments in soil fundamentals activities. You can use any of these or variations on these protocols to gain information about your soil physical, chemical, and biological characteristics.
In-field assessment worksheets
These assessment worksheets are examples of what technical service providers may use as part of their planning and evaluation processes. Note that there is variation in the specific assessment of soil health, as this focus has emerged more recently. Also note that for best results these guides should be used with experienced personnel.

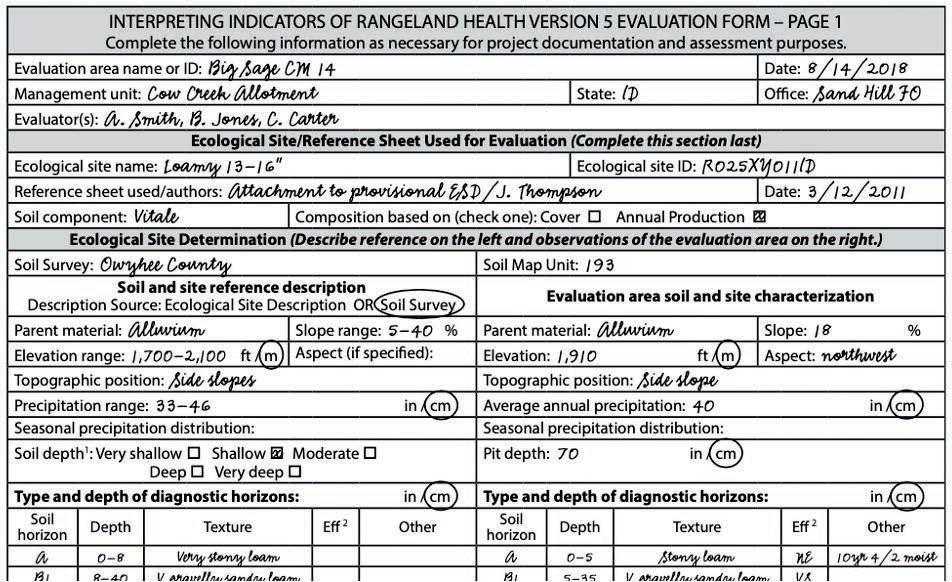
Excerpt from Pellant, M., P.L. Shaver, D.A. Pyke, J.E. Herrick, N. Lepak, G. Riegel, E. Kachergis, B.A. Newingham, D. Toledo, and F.E. Busby. 2020. Interpreting Indicators of Rangeland Health, Version 5. Tech Ref 1734-6. U.S. Department of the Interior, Bureau of Land Management, National Operations Center, Denver, CO.
Excerpt from In-Field Soil Health Assessment Worksheet in the New Mexico Field Office Technical Guide, Section I, Agronomy, Agro80.
92 3. Basic Soil Monitoring and Evaluation
Lab tests
For more detailed information on soil health, send soil samples to a lab. New Mexico State University has done extensive research on effective soil indicators across different land management scenarios to find the most appropriate indicators for soil health in New Mexico. Criteria to evaluate these indicators included results of multivariate statistics, discussion with experts, precision of measurement method to get repeatable results, relevance to important functional soil processes, ease and cost of sampling and analysis.
Other soil health indicators to consider
Physical properties
Mean weight diameter of dry aggregates (mm), Dry aggregates less than 0.25mm (%), Sand/Silt/Clay (%), Available water capacity (cm3/cm3 soil), wet aggregate stability, bulk density (mg/m3), penetration resistance (psi), pore size distribution, water infiltration rate.
Chemical properties
pH, Electrical conductivity (EC; dS/m), Sodium adsorption ratio (SAR; Saturated pasted for EC and SAR is highligh recommended), Nitrate (mg/Kg soil), Ca/Mg/Na/Zn/Mn/Fe/Cu, cation exchange capacity, Toxins/Pollutants.
Biological properties
Phospholipid fatty acid test, N mineralization rate, decomposition rate, respiration rate, earthworm counts.
Best soil health indicators for arid systems
Characteristic: Physical Chemical Biological
Dry aggregates > 2mm (%)
Electrical conductivity Soil organic matter
Clay content (%) Phosphorus content (mg/Kg soil)
Available water capacity
Wet aggregate stability
Potassium content (mg/Kg soil)
Active carbon (Permanganate oxidizable carbon; “POXC”)
93
3. Basic Soil Monitoring and Evaluation
94
4. Soil Management Considerations

New Mexico and Colorado are characterized by ecological, social, and economic diversity. For example, we are subject to extremes in weather (such as floods and droughts). We have a mixture of land and water ownership and usage, which in some cases can require thinking of management at a much larger scale than a single field or pasture. We are largely rural states, with a few large urban centers, and we are making efforts to bridge the urban-rural communications divide.
Different topics of land management will be of interest in different regions and times. We have highlighted a handful of common management considerations and provide links to some others. We encourage you to think of the Healthy Soil Principles as you read about each one. And of course, you will be the expert on what will fit in with the land you steward.
Before you begin any management practice or plan, you may want to start by asking, “What are my objectives for this farm or ranch?” Most often, it is to produce a crop or raise livestock to be sold to make a living for oneself and one’s family. However, there may also be other motivators — environmental or ecological consciousness, wildlife and fish habitat, passing operation to next generation — to enact practices to assure sustainable management for multiple uses and generations.
Next, it’s a good idea to have a goal in mind and to base your activity on the desired outcome. For example, ask yourself, How am I going to do this activity? When will it start and end? How will I evaluate my process and outcomes? For technical service providers and trainers in conversation with ranchers and farmers about prescriptive recommendations, keeping goals in mind can lead to deeper understanding of why shifting approaches is important and ways changes can be undertaken.
Learning Outcomes
After completing this section you will be able to
• Conduct conversations focused on outcomes rather than problems and the appropriate management options for the given ranch or farm
• Explore multiple ways for reaching desired soil health outcomes
• Use tools to understand how changes in soil management can lead to changes in soil health
95
Tillage Management
What is tillage?
Glossary Tillage
the use of mechanical tools to loosen soil and/ or break compaction for the purpose of seed emergence and crop growth and development.
Fields may be tilled before seeding (seedbed preparation), during planting, after planting (cultivation and incorporation, weed removal, mixing in soil amendments, breaking disease and pest cycles), or after harvest (managing crop residue). But every engagement of tillage tools breaks up soil, exposes soil organic matter to oxidation and loss, and disrupts the soil food web.
Characteristics of conventional tillage Often the desired outcome of conventional tillage is a “clean field.”
• Plowing – cutting, lifting, turning over, and partly pulverizing soil
• Disking – breaking up ground to make soil aggregates smaller and finer
• Ripping – breaking up deep, compacted soil layers to encourage root growth and facilitate water movement
• Cultivation – uprooting weeds between rows of growing vegetation
However, there are detrimental effects to soil associated with conventional tillage practices.
Physical/Chemical
• Loss of soil structure, porosity, and organic matter
• Compaction (formation of plow pans), poor drainage, reduced water-holding capacity during droughts
•
Increased soil erosion and pesticide runoff
• Surface crusting (soil dries out quickly forming an impenetrable crust)
Biological
•
Loss of beneficial soil organisms
• Reduced root growth
•
Increased microbial respiration leading to loss of soil organic matter
96 4. Soil Management Considerations
Reduced tillage or conservation tillage
Reduced tillage, often called “conservation tillage,” is any method that involves fewer passes than conventional tillage. The previous crop residue or cover crop is often left on the soil surface for soil protection.
Goals of reduced tillage
Physical/Chemical
Operational
Note: several of these benefits can also result in reduced carbon emissions from both soil and equipment.
Problems of reduced tillage
Equipment needed
• Investment in new equipment may require significant capital outlay.
Residue management
• Heavy residue can interfere with planting and seedling establishment.
• In some cases heavy residue can harbor diseases and pests.
Weed control
• Weed control has been reported as being problematic under reduced tillage systems.
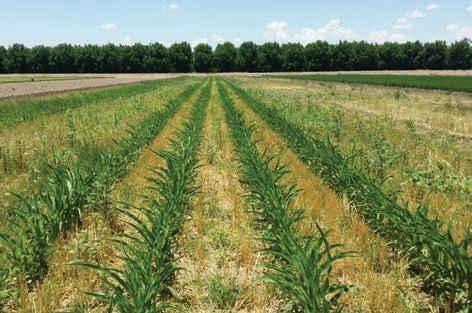
•
In long-term reduced tillage systems, the weed spectrum may change from annuals to perennials.
97 4.
Soil Management Considerations
•
•
•
•
•
• Reduce compaction • Increase aggregate stability • Conserve moisture
Reduce erosion
Conserve organic matter Biological
Maintain yields
Improve microbial habitat
Minimize weed germination
•
• Reduce fuel use
Reduce farm traffic
Photo: John Idowu
Types of Reduced Tillage
Strip tillage
A smooth, narrow seedbed is prepared through the undisturbed surface residue between strips. The preparation can be combined with a deep vertical component to loosen the compacted layer. The cover crop must be dead before preparing the seedbed.
Ridge tillage
The crop is grown on top of permanent ridges. The ridges can be replanted for many seasons before they need to be reconstructed. A residue cutter is used to slice up the dead cover crop and a rotary hoe to loosen the top inch of soil; 30% of residue remains on the surface after the tillage event.
Mulch tillage
A single pass with a tandem disk, followed by a field or row cultivator, leaving 30% of the residue remaining on the surface.
Other processes
Mowing – 50-60% of standing live/dead plant biomass is cut and left lying as surface residue. Standing live plants are left alive to continue growing.
Roller Crimping – 100% of standing live/dead plants are cut, chopped, and incorporated into surface residue. Standing live plants are killed.
No-till
The main characteristics of a no-till system are that the soil remains undisturbed and the surface remains covered at a minimum of 50%, allowing the build-up of organic matter from dead crops. Keeping organic matter in place provides support for the soil ecosystem, structurally via roots and by feeding the soil food web. Plant residues also protects the soil surface against erosion and crusting. No-till requires that seeds be sown into previous crop stubble, and thus it is better to seed crops with a no-till planter. Planters have double-disk openers and closing wheels to create and close the seed furrow in a thick cover crop residue or stubble.
Discussion – Healthy Soil Principles and Tillage
What healthy soil principles apply to reduced tillage? For example, “Cover the soil: surface residue left on site can minimize crusting and drying out soil.”
98 4.
Soil Management Considerations
Cover Crops
Cover cropping is in line with the Healthy Soil Principles and can be an effective management strategy. Cover crops are plants that can provide soil protection between the principal crop growing season, or in row crops or orchards they can be grown year-round. The many benefits of cover cropping include:
Physical/Chemical
• Minimize compaction
• Reduce erosion from wind and water
• Improve soil moisture
• Provide nutrition to cash crop
• Reduce water quality degradation that is caused by using excessive inorganic nutrient additions
Biological
• Introduce diversity to the system
• Maintain or increase organic matter content
• Suppress excessive weeds and break pest cycles
Cover crop residues have numerous competing uses, such as removal for animal feed or for biofuel or onsite or other industrial production; or return to soil as an amendment.
Issues to consider when cover cropping in water-limited environments:
• What is the cover crop’s water requirement?
• What is its drought tolerance?
• When is irrigation water available? (Many irrigation waters are only available when snow melt or monsoon rains feed them, usually April through October, and this may determine the best time for planting a particular cover crop.)
• What are the cover crop’s germination and growing temperature requirements?
• Is the cover crop easy to manage? Will it die easily when sprayed or plowed down? (Watch out for any tendency of the crop to become weedy!)
• How much residue will this crop produce? (Is there the possibility of harvesting 70% and leaving 30% as residue?)
99 4. Soil Management Considerations
Crop Rotation, Including Livestock Integration
Crop rotation is repeated cultivation of crops in the same piece of land in a certain sequence. Crop rotation should meet the rancher or farmer’s needs (for example, the balance of crop and forage needed by a farm or the preference for high market value/profitability). If crops are only grown once a year and the land is fallow the rest of the year:
• Land stays idle for a long time without any productive use.
• Soil can be eroded by both wind and water.
• Soil organic matter and soil nutrients are not replenished and can become depleted during the fallow period.
• Soil life becomes inactive or may die from overheating, desiccation, or starvation.
• Soil organisms become inactive due to lack of water, decreased organic matter inputs, and large temperature fluctuation.
Examples of crop rotation
• Corn – Sorghum
• Wheat – Sorghum – Fallow
• Wheat – Cover crops
• Sorghum – Cover crops
Benefits of crop rotation are largely derived from covering soil and providing a diversity of active root life in the soil year-round (maintain a living root). Some of the benefits include:
• Improved soil structure, water infiltration, and erosion control
• Varying root depths, which draw nutrients throughout the entire soil profile
• Improved yields and retained soil nutrients
• Diversified root and crop residue, promoting microbial growth
• With reduced tillage, increased fungal proliferation and thereby increased soil organic matter
• Pest control, helping to reduce weeds, insects, and diseases
100 4. Soil Management Considerations
Principles of crop rotation
1. Rotate legume with non-legume crops.
• Cereal crops, such as wheat, corn, and sorghum, need a lot of nitrogen. Legumes fix nitrogen and thus supplement nitrogen for the following cereal crop.
2. Rotate exhaustive crops with less exhaustive crops.
• Crops that need a lot of nutrients, such as corn and wheat, are called “exhaustive crops” because cultivating them continuously depletes soil fertility or soil nutrient status.
• Crops that can grow well even without a lot of nutrients are less exhaustive, for example legumes and brassicas (mustards, radish).
• Cultivation of exhaustive crops in rotation with less exhaustive crops helps restore soil fertility and thus to sustain crop production.
3. Rotate fibrous root crops with tap-root crops for best nutrient utilization.
Deep rooted
• Alfalfa
• Sunflower
• Safflower
Medium rooted
• Barley
• Wheat • Canola • Corn
• Sorghum
Shallow rooted
• Pea
• Lentil • Guar • Tepary beans
4. For erodible areas, crops useful for stabilizing soils should be considered, for example barley, cereal rye, sorghum-sudan, and cowpea.
5. Under dryland and limited water conditions, select drought resistant crops, such as guar, lentils, or tepary beans.
6. Crop rotations should be adapted to local soil and environmental conditions.
7. Crops should be evaluated for high market value and profitability.
101 4.
Soil Management Considerations
Importance of livestock in crop rotation
• Addition of livestock can provide for more efficient utilization of farm resources. For example, in winter graze the standing crop or cover crop residue; in the rest of the year, graze in native pasture.
• Livestock consumption and digestion of weeds and weed seeds helps to control weeds and/ or decrease the need for synthetic pesticides.
• Livestock manure and urine can reduce the amount of chemical fertilizer needed to replenish soil nutrients.
• Grazing at appropriate levels in appropriate intervals improves soil organic matter and microbial growth, and supports crop productivity.
Organic Amendments
Manure
Glossary
Soil amendment
the addition of an organic or inorganic material to a soil in order to improve its physical, chemical, and/or biological characteristics.
Organic soil amendments include materials of plant or animal origin, such as manure, compost, biochar, and plant waste materials. When considering amendments, it is very important to take into account the scale of spatial change you want to produce and how long you want to preserve that change. It is also important to understand that a native soil’s inherent characteristics will influence how a particular amendment contributes to soil health and plant success.
Manure application can enhance soil organic carbon and increase nitrogen and phosphorus availability. When you add manure you need to consider its nutrient content and what type of bedding it has been mixed with, if any. If you are not the one producing the manure, you will want to inquire whether the rancher or farmer is treating animals with medicine or pesticides, as these will be present in the manure. Also, manure from grazed animals contains both weed seeds and pathogens, which can be harmful when consumed by humans. Aerobic composting or aging manure controls most weed seeds and pathogens.
Bale grazing
Bale grazing is simply setting out bales and letting livestock graze from them. Livestock add manure to the area and break up some of the bale by stomping, and this increases cover of bare soil and adds organic material. Bale grazing can be expensive because to increase
102 4.
Soil Management Considerations
organic matter in the soil, 20-50% of the bale should be left on the ground. Best practice is to ensure that the source bales are weed-free.
Compost
Compost addition improves soil aggregation, building soil capacity to hold more air, moisture, and nutrients, and reducing the potential for erosion. Compost contains all essential plant nutrients and releases them slowly—over months or years, unlike synthetic fertilizers. Finally, compost brings diverse life to soil, including bacteria, fungi, insects, and worms
Compost application to rangeland
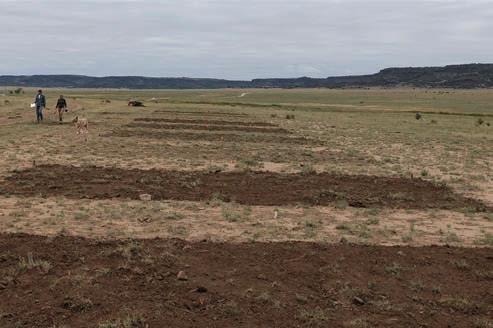
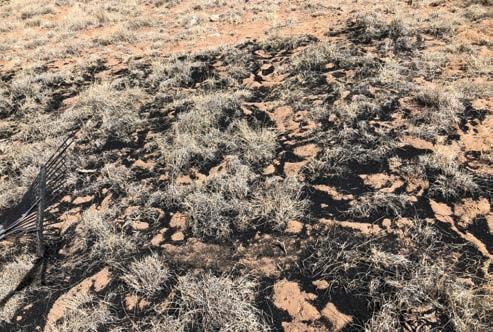
Usually amendments are used in farm settings, but over the past decade researchers have been exploring application of compost to rangeland, as a way to potentially increase forage production, soil carbon storage, and water retention. Several researchers and organizations are currently studying how compost applications can affect forage production and soil health in arid and semi-arid rangelands in the Southwest.
Note: A high rate of manure and compost application can cause salt accumulation and therefore negative effects on crop production.
Biochar
Glossary Biochar
black carbon or charcoal, obtained from the carbonization of biomass though pyrolysis. Pyrolysis is a thermochemical process in which biomass is heated in the absence of oxygen, resulting in char that is primarily stabilized carbon. In contrast, traditional charcoal production captures none of the energy or the pollutants released when biomass is burned, which causes significant waste and pollution.
The quality and characteristics of biochar depend on the substrate pyrolyzed and the conditions of pyrolysis—temperature and duration (slow or fast). Biomass composition and conditions of pyrolysis also drive the quantity of secondary products produced. Secondary byproducts are mostly Syngas (gases) and bio-oil (liquids), which can be used as sources of energy (for example, they can be burned to warm poultry houses in winter). Research is underway on best practices for use of biochar, but a study on pinto beans suggested that 5 tons/acre increased nutrient availability and water holding capacity (see references Keller, 2019).
103 4.
Soil Management Considerations
Benefits of organic amendments
• Help to build up the soil organic matter
• Provide nutrients for soil fertility improvement
• Increase soil microbial abundance and diversity
• Help to recycle waste, as in the case of manure or compost
Some physical characteristics that may be affected
• Aggregate stability
• Pore space
• Water infiltration
• Water retention
• Drainage
Some chemical characteristics that may be affected
• Nutrient availability
• Salinity
Some biological characteristics that may be affected
• Microbial diversity
• Plant diversity
Differences in decomposition rate are related to the ratio of carbon to nitrogen
C:N Ratio Example Material
Slower relative decomposition rate, less available nitrogen
Ideal -
Faster relative decomposition rate, more available nitrogen
700:1 Wood chips 500:1 Sawdust/pellets 170:1 Paper 130:1 Straw from wheat 100:1 Bark 80:1 Straw from oats 60:1 Corn stalks 50:1 Peanut hulls 30:1 Compost 25:1 Legume grass hay 19:1 Grass clippings 15:1 Poultry house litter 8:1 Fresh cattle manure 6:1
Fresh swine or poultry manure
104 4. Soil Management
Considerations
Irrigation Management
In arid and semi-arid environments, when considering soil health, particular attention should be paid to irrigation water.
Is irrigation water available?
For most waters in New Mexico and Colorado, there is a complicated water rights adjudication process, governed by the state engineers’ offices. It is important to know whether you are allowed to irrigate your property, and if so, with what water. Even if you have a well on your property, you may not be allowed to use it for irrigation. Or you may be allowed to irrigate only a particular part of your property. Many considerations for the water and land must be taken into account before you irrigate, and in most cases there is a local governing body for your particular area. For more information, contact the New Mexico Office of the State Engineer, Water Rights Division, or the Colorado State Engineer’s Office, Division of Water Resources.
When, how much, and how does water availability relate to seasonal rainfall patterns?
• Answers to all of these questions may depend on the water source, and it can vary drastically from year to year.
• Water may also be restricted in availability during an irrigation season. You must plan around the days of the week or month that you have access to your allotted water.
What is the quality of the irrigation water?
• See the discussion of water testing on page 90
How do I get water and what are my responsibilities for water infrastructure?
• Local governing bodies of a particular ditch or acequia system or an irrigation district manage water delivery, but often you are responsible for maintaining some portion of the water delivery infrastructure.
Now that I have the water rights and the water on my property, what is the best way to irrigate with it considering my water delivery system and soil type?
• When thinking about soil type consider your soil’s:
- Infiltration rate
- Water holding capacity
- Soil profile
What crops or forage can be grown with the quantity of water you will have on the soils you have?
• See the discussion of crops starting on page 99.
105 4. Soil Management Considerations
Benefits of irrigation management include:
• Conservation of scarce water resources
• Reduction of labor associated with irrigating
• Improved soil health as the result of
- Reduced erosion
- Increased forage production and organic matter input
- Managed sodicity
- Reduced nutrient leaching
- Increased aeration
• Protection of aquatic habitats on and off your ranch or farm
Managing for saline/sodic soils
Soils that are both saline and sodic are the hardest to manage. By definition, these soils have an electrical conductivity above 4 mmhos/cm and a Sodium Adsorption Ratio greater than 13. These soils must first be managed as sodic soils. Application of calcium to disperse the sodium followed by leaching to remove salts is critical. High electrical conductivity water is beneficial to sodic soils for leaching purposes but is not beneficial for crop production. The soil must be irrigated after the application of calcium to remove the sodium that has been displaced by the calcium. Water is applied to leach the sodium to below the root zone of the plant, and water must therefore be free to drain or leach below the root zone. Evaluate soil drainage before beginning reclamation.
106
4. Soil Management Considerations
Grazing Management
The life cycle of grass
Summer: Plants photosynthesize during the growing season and build up a reserve of carbohydrates (often stored below ground in roots and other storage tissues, such as rhizomes). As leaf area continues to expand during the growing season, reserves are gradually built up until flowering and seed formation draw them down temporarily.
Fall/Winter: Plants go into the fall with high levels of stored carbohydrates. Reserves are gradually used in the winter to maintain dormant cells and tissues.
Spring: When temperatures warm up, there is little or no green leaf area to produce energy directly. More stored carbohydrate is used to initiate and expand new leaf area. As a result, reserves drop dramatically in the spring until the plant has produced enough leaf area to meet growth demands.
Grazing and root growth
Grazing strategies that provide for intervals of non-use or rest to allow leaf regrowth and carbohydrate build-up are more desirable than continuous grazing. Generally, pastures are grazed during periods of active growth (late spring and summer) to optimize livestock performance. Although grazing may reduce carbohydrate reserves, the impact is shortlived if grazing is not severe or continuous.
A grass plant that is severely grazed or frequently regrazed without adequate rest periods for energy storage, root growth, and bud formation, will die.
• Grazing up to half the blades or leaves does not affect root growth, but beyond that the root growth may be stopped.
• At 80% leaf removal, root growth stops completely for as long as two weeks.
• At 90% leaf removal, root growth stops completely for more than two weeks.
If a plant goes into the winter with a short supply of stored energy in its roots, it may not make it through the winter or wake up in the spring.
Grazing and biodiversity
You can maximize biodiversity by including warm season grasses as well as cool season grasses, annual grasses, annual forbs, perennial forbs, etc., in your pastures and on your ranges. The more species diversity you have, the more live roots will thrive in your soil throughout the year. You will also have green forage for a longer period of time.
When you lose a species, such as a cool season grass, it will take longer to get active roots in the ground when the growing season starts. It will also take longer to get green forage above the surface, affecting the productivity of your land.
107 4. Soil Management Considerations
Grazing management aligned with natural cycles of forage can improve the plant root structure (depth) and function. Plants with deep roots are best prepared to survive drought. Proper grazing management determines the harvest of vegetation using grazing and/or browsing animals in a manner that allows for sustained forage production by keeping plants at a higher quality and more productive vegetative state. This can be accomplished many ways — one size doesn’t fit all!
Spring
Grazing systems
Decreasing carbohydrates in roots and rhizomes
Increasing carbohydrates in roots and rhizomes
Increasing carbohydrates in roots and rhizomes
Summer Fall Winter
Decreasing carbohydrates in roots and rhizomes
1. Continuous – Grazing is considered continuous when livestock are left to graze one area for a long period of time.
2. Simple Rotational – A system with more than one pasture qualifies as rotational. A simple system consists of a few pastures through which livestock are rotated to give the forage in each some rest between grazing events.
3. Intensive Rotational – Intensive grazing is a system in which livestock graze on small areas of pasture, or in paddocks, for very short periods of time, rotating frequently from one to another to maximize periods of forage regrowth.
Note: The most important difference in these systems is the amount of time per rotation that plants are exposed to grazing animals.
108 4. Soil Management Considerations
Advantages
Continuous Simple Rotational Intensive Rotational
• Startup costs are low
• Requires less management
• Higher forage quality and yields
• Gives pastures time to regrow
• Can lengthen growing season
• Better distribution of manure
Disadvantages
• Lower forage quality and yields
• Fewer animals/year supported
• Resulting areas of bare soil
• Uneven manure distribution
• Weed problems
• Alternative feed required
• Higher long term costs
• Less forage production than in intensive system
• Alternative feed may be required
• Higher costs for fence and water
• Maximizes forage production
• Higher stocking rates
• Most even distribution of manure
• Weed and brush control
• Little additional feed required
• Careful monitoring of forage supply required
• Higher initial costs (fencing, water)
• More intensive management required
Discussion – Rotational grazing
What are some ways other than fencing that you can use to move animals around on the land? What are the relative costs in terms of time and money for these different strategies?
• Bale grazing
• Temporary/new water source
• Herders • Other?
____________________________________________________________
109 4. Soil Management Considerations
Things to consider when choosing/designing a grazing system
1. What are my production goals?
• Maximize profits
• Reduce feed inputs
• Reduce erosion
• Improve soil health
2. How much land is available for grazing?
• Are there lease lands available?
• Can I graze an annual crop such as winter wheat?
3. How productive are my lands?
• Are my lands producing to their full potential?
• What soil types do I have?
• What kinds of forages does my land produce?
• Are the forages productive/nutritious?
4. How much forage will my herd consume in a day and in a year?
• If you plan to graze more than the land can sustain, you should further calculate how much additional feed you will need to provide
5. What are the existing water and fencing structures?
• How much more fencing and water will I need to be successful?
• Is it possible to employ herders to move the animals?
110 4.
Soil Management Considerations
Discussion – Holistic considerations for management
How can you holistically address common management considerations?
•
“If I change my tillage practice, I’ll need to buy all new machinery!” What could you do before buying new equipment to improve your ultimate experience? For example, you might speak with those who have already used no-till equipment, and you could buy used equipment or build your own. What other approaches are you thinking about?
•
“If I don’t use herbicide regularly, the weeds will take over!” What could you do to manage weeds? For example, inventory the different weeds you see each year and their growth behavior to address them appropriately before they become overly problematic.
• Are there other issues that seem challenging to you?
111 4. Soil Management Considerations
Index of Discussions
1. Introduction
Discussion – Soils and you 10
2.1 Physical characteristics
Discussion – How long does it take to lose or gain 1 inch of soil? 14
Discussion – Soil texture class . . . . . . . . . . . . . . . . . . . . . . . . . . . . . . . . . . . . . . 23
Discussion – What is organic matter? 25
Discussion – Pore size distribution 29
2.2 Chemical characteristics
Discussion – Plants, pH, and nutrient deficiency 48
Discussion – Why do we think of carbon differently than other chemical soil components? 48
2.3 Biological characteristics
Discussion – What do earthworms do? 65
Discussion – Impacts of soil organic matter on soils 69
2.4 Healthy soil principles
Discussion – Soil covers 70
Discussion – Working with the healthy soil principles 75
3. Basic soil monitoring and evaluation
Discussion – Sampling considerations 79
Discussion – Soil orders of New Mexico and Colorado 83
Discussion – Soil orders and healthy soil principles 85
4. Soil management considerations

Discussion – Healthy soil principles and tillage . . . . . . . . . . . . . . . . . . . . . . . . . . . 98
Discussion – Rotational grazing 109
Discussion – Holistic considerations for management 111
112
Answers to Activities and Discussions
Soil texture classification (page 22)
• 60% sand, 0% silt, 40% clay? Sandy Clay
• 10% sand, 50% silt, 40% clay? On the border between silty clay and silty clay loam

What is organic matter? (page 25)
The only things on the list that are not or will not become soil organic matter are lime and inorganic fertilizer. All others will slowly decompose and either become part of the soil carbon or the carbon will be respired and returned to the atmosphere.
Impacts of
organic matter on soils (page
113
soil
69) • Increases aggregation • Increases pore space • Increases water infiltration • Increases moisture retention • Increases aeration • Decreases erodibility
114
Teaching Methods
If we want people to change their behavior around soil health, we must be effective communicators. Whether you’re working with producers one-on-one or running workshops with dozens of people, there are some evidence-based techniques that can enhance participants’ learning. The key is moving from a teacher-focused mindset to a learner-focused mindset.

Learning Outcomes
After completing this section you will be able to
• Evaluate whether a learning outcome is SMART or not
• Describe how learning is built on a scaffold of existing knowledge and new information and what activities facilitate learning
• Discuss why evaluations are important to learning and teaching
• Use a checklist to consider what is needed for an event that you facilitate/teach
Discussion – Favorite teacher
Think of a teacher that you really liked. What did they do that helped you to learn?
115 Teaching Methods
This chapter is based on UNM’s STEM Gateway redesign curriculum. Smith, Gary and Audriana Stark. “STEM Gateway Course Redesign Teaching Professional Development: Resources for Teaching and Learning.” (2016). https://digitalrepository.unm.edu/stem_gateway/1
Effective Teaching
Effective teaching integrates activities that are formed around these questions:
1. What should they learn? (Outcomes)
2. How should they learn it? (Instruction)
3. How will we know that they learn it? (Assessment)
Discussion – Motivation to learn
1. What motivates people to learn?
2. What motivates people to change their behavior?
3. Consider how the paired questions — “What is the barrier to this new activity?” and “What will I gain by this new activity?” — may affect an individual or group making a decision.
116 Teaching Methods
____________________________________________________________ ____________________________________________________________
What Should They Learn? Developing Learning Outcomes
What are we asking of learners?
This diagram below illustrates a helpful framework for deciding what you want participants to be able to do after a session or workshop.
In some cases, the teacher/facilitator may hope that students will be able to learn new key vocabulary (remember), while in other cases, the teacher/facilitator will hope that students may be able to generate a new work (for example be able to write a proposal for a soil health grant). The key is to think critically about what is realistic given the time, audience, and other context.
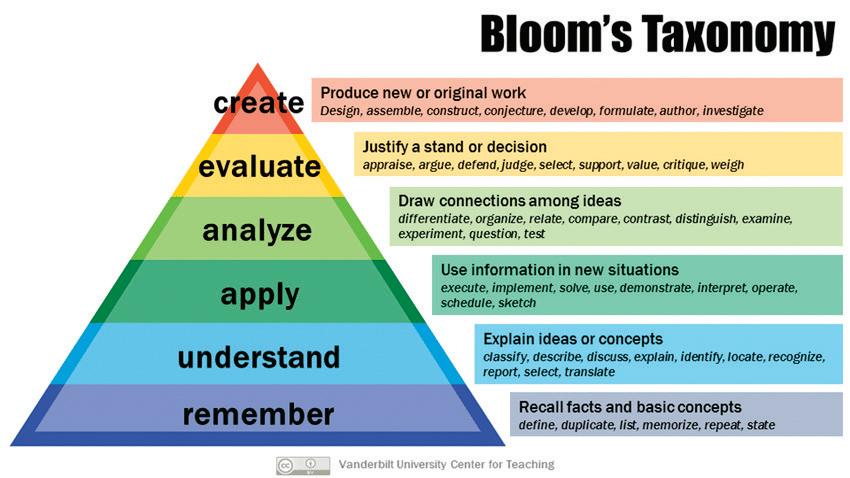
117 Teaching Methods
Anderson, Lorin W.; Krathwohl, David R., eds. (2001). A taxonomy for learning, teaching, and assessing: A revision of Bloom’s taxonomy of educational objectives. New York: Longman. ISBN 978-0-8013-1903-7.
Discussion – Levels of educational objectives
1. Think of formal or informal educational experiences you’ve had in the past. What level of Bloom’s Taxonomy were you engaged in? What information do you remember from experiences that addressed different levels of Bloom’s taxonomy?
2. Look back at some of the learning outcomes throughout this workbook. Which level(s) of Bloom’s Taxonomy have we been addressing?
3. Can participants do a higher level activity if they are not able to do a more foundational level activity (from Bloom’s Taxonomy)?
118 Teaching Methods
Learning objectives should be SMART
A learning objective is a statement that captures precisely what knowledge and skills participants should be able to show after participating.
• One common misconception is that an objective is what the teacher or facilitator will do, for example “My plan is to talk about…” Notice that the focus is on me, the facilitator instead of the learners.
Objectives are important for setting expectations and matching content to them. For example, if you want the participants to be able to show someone else how to do a soil fizz test as one of your outcomes, but then in your agenda, you don’t give them time to try it on their own or ask questions about it, you may not be setting them up for success. If you include the objectives in advertising material, students will know what to expect from the course and what is expected of them and may choose to participate if the objectives match their individual goals. Thoughtfully crafted objectives can allow for consistent evaluation of teacher, participant, and curriculum effectiveness (see Assessment, page 124).
• Specific
• Measurable
• Attainable by target participants within scheduled time and specified conditions
• Relevant and results-oriented
• Targeted to the learner and the desired level of learning
Discussion – Levels of educational objectives
Briefly discuss how the following draft objectives fulfill or do not fulfill the “SMART” criteria.
1. Learning Objective: How water is held and flows within the soil
S: M: A: R: T:
119 Teaching Methods
2. Learning Objective: Recognize key indicators of a healthy microbial system
S: M: A: R: T: S: M: A: R: T:
3. Learning Objective: After completing this session of the workshop, course attendees will be able to define SMART learning outcomes for a future workshop that they facilitate.
How Should They Learn it? Instruction
How do people learn? A brief answer is that learning “causes changes in the brain.” This is not an easy effect to bring about. A brain wants to conserve energy, and it prioritizes use of pathways that it has already established. Also, knowledge is associative, linked to prior experience and misconceptions. Thus, it is important to understand what learners know already and to build upon those mental scaffolds to make new connections in their brains.
This background information enables us to rank activities that may make the brain work harder or less hard and how these differences might affect learning.
• Passive (for example watching a webinar)
• Active (for example copying notes from a slide, highlighting text in a book)
• Constructive (for example comparing and contrasting, solving novel problems)
• Interactive (for example discussing with peers, drawing diagrams with a partner)
120 Teaching Methods
__________________________________________________________
__________________________________________________________
Activity: Active Learning Demonstration
Instructions
1. Divide the group in half
2. Ask one group to write down everything that they remember about a topic that was discussed about an hour earlier, without looking at any notes. Ask the second group to remember and think about the topic, without looking at notes and without writing. After about two minutes, ask them to stop writing and move on to something else.
3. After another few hours, a day, or a week has passed, ask both groups write down everything they remember about the original topic, without looking at any notes. After about two minutes of writing, ask each person to count the number of words that they have written. Have members of the first group, who wrote in the first part of the exercise, compare their numbers with those in the second group, who didn’t write the first time around.
Hypothesis
The average number of words written in Part 2 will be higher in the group who wrote about the topic in Part 1 than in the group who only thought about the topic in Part 1.
Interpretation
Did your groups’ data match the hypothesis? Are you surprised? What else is interesting about this exercise?
121 Teaching Methods
________________________________________________________________
Inquiry-based learning
Inquiry-based learning focuses on crafting questions that encourage participants to connect new information to existing knowledge. It broadly follows the steps in the scientific method:
1. Gathering initial information and finding a question about that information
2. Forming a hypothesis
3. Exploring the idea (experiment, observation, reasoning, modeling, etc.)
4. Evaluating the hypothesis in light of the exploration and generating new questions
5. Repeating the cycle starting with new questions
An example of inquiry-based facilitation would be bringing participants to a fence line and asking, “What do you notice about the different sides of the fence?”
• They may first note more grasses on one side, or bare ground on the other. This is a form of gathering initial information (1).
The next question could be, “Based on what you know about this environment, why do you think this is different?”
• Participants may begin to speculate about land management history. This is forming a hypothesis (2).
The next question might be, “How can we explore the idea?”
• Participants can suggest any manner of things — asking the landowner, searching records, testing the soil, etc. This is gathering information (3).
The next questions could be, “Given what we learned, what do you conclude about why there are differences on each side of the fence?” and “What impacts do you think that this management has on soil health?” This is evaluating (4) and creating new questions (5).
Contrast the time and amount of mental energy, speaking, and brainstorming that occurs with the inquiry based method compared to a facilitator taking participants to a fence line and saying, “on this side of the fence, there is intensive rotational grazing, and on that side of the fence is continuous grazing.” While the end point may be the same, the latter method did not connect the new information with existing information and was passive, both of which have been shown to lead to poorer learning outcomes than active learning activities.
122 Teaching Methods
Tip #1
Using open ended questions is a good way to encourage discussion and thinking. It takes intention and practice to be able to form open ended questions, so here are some suggestions.
Questions phrased as, “Is this happening?” or “Which is better?” often lead to answers that are closed: Yes/No, Either this or that
Instead, consider prompts such as:
What do you notice about…?
What do you already know about…?
How does it relate to…?
How could you learn more about…?
Which is better and why?
Do you agree or disagree, and what did you consider to reach that decision?
For example Instead of asking, “Are there noxious weeds in this field?” which prompts a yes/no answer, you could phrase a question as “What do you notice about weeds in this field?” This prompts more contextual considerations. Notice that the process will be slower than one generated by a yes/no answer, and that’s ok. We want to give the brain time to tackle the information and build new pathways.
Tip #2
To give quieter participants a chance to have their voices heard, a useful technique is the Write-Pair-Share exercise.
Write
Ask an open-ended question and give participants about a minute to write something down. This time allows people time to craft a response so that they are not having to think on their feet.
Pair
Ask participants to find one or two others to share their answers with and have a brief discussion. Share
Ask each group to share the main points that they discussed with the full group.
Note: this method is active and participatory, and it can take less than 5 minutes!
123 Teaching Methods
Discussion – Which parts of this workbook make your brain work harder?
How will we know that they learn it? Assessment
Assessment includes lots of familiar tools, perhaps with some unpleasant associations:
• Quizzes • Tests
•
Essays
But generally, unpleasant associations are linked to values placed on performance (for example grades). Aside from fear of failing, doing assessment activities is not usually unpleasant in itself. From an educational standpoint, there is a HUGE benefit because these active, inquiry-based activities promote metacognition.
• What do I know and what do I not know?
Assessment also helps teachers and facilitators evaluate sessions and workshops to know what is working and what is not working.
Glossary Metacognition
awareness of or insight into one’s own ways of thinking.
Discussion –Metacognition
Why is it important to promote a learner’s metacognition? ______________________________
When I was a graduate student, I spent a semester redesigning a few undergraduate biology lab activities. With the teaching team, we conducted surveys of a class before we changed the activities and then with a second class that had the new activities. Unfortunately, our changes didn’t make a difference in how many students learned the desired concept. So we edited the activity each semester until we began to see the improvements that we desired.
—Eva Stricker
124 Teaching Methods
Evaluation does not need to be formal to be effective and has overlap with the active techniques discussed previously. Here are examples to gauge what is being learned.
Tip #1
Ask teams to draw a diagram or label a drawing.
Tip #2
Give participants index cards with different colors or letters, and then ask them a multiple choice question and have them hold up the card to vote.
For example: Which of the following is not a part of the mineral component of soil?
• Blue: Sand
• Green: Loam
Tip #3
If you are teaching someone to do or make something, evaluation is relatively easy - did they do or make it?
For more formal evaluation, if you ask the same 3 to 5 multiple choice or true/false questions before and after an event, you can quickly and effectively assess the change in responses. The best case scenario is that everyone performs better on the assessment after the workshop than they did before. If many people perform worse, then you know that something about the workshop confused them and you’ll need to do some major revision!
Additionally, you can ask students to report what they learned or what they plan to do using either open-ended questions or agreement scales
• What do you plan to do on your operation as a result of what you learned today?
• How likely are you to recommend this workshop to a friend?
1 (not likely) to 5 (extremely likely)
Discussion – Learner-centered facilitation planning
Pick a soil management or soil monitoring technique that you might use on a site visit or in a future workshop. Think about the three questions for guiding interactions with a producer (learner) interested in this new technique.
1. What should they learn (outcomes)? Think SMART!
2. How should they learn it (instruction)? Think Active!
3. How will we know that they learn it (assessment)? Think metacognition!
125 Teaching Methods
____________________________________________________________
How to Plan an On-Ranch/Farm Workshop
Here’s a checklist in the rough order that you should think of things in. Check them off as you go!
□ Determine where the workshop will be held (based on need, interest, resource issues and opportunities).
□ Determine the learning outcomes based on who the trainees will be, their background, their purpose in participating in the workshop and refine instruction to be relevant to the specific group.
Questions asked during workshop registration
1. Think about land that you have lived or worked on or otherwise come to know. What aspects of your experience relate to healthy soils? What is the context (ecological, economic, and social) of those experiences?
2. What are your expectations for this workshop?
3. What are your individual goals related to soil health?
4. What are some key questions that you have about soil health?
5. What concerns do you have about adopting soil health practices?
6. How would you describe your operation? Ranch or farm? Irrigated or Nonirrigated? Owned or leased?
□
Determine what facilities (lodging, food, classroom) will be needed and where for trainees and trainers.
□
Do an initial assessment of the location’s agricultural and resource setting.
• What agricultural systems are there (cropland, grazing, irrigated, specific crops)?
• What are the resource conditions, including soils, climate, growing season, accessibility, etc. (problems, opportunities, conditions, unique features)?
□ Make some initial contacts with potential sponsors of the workshop (classroom and field). Meet with local collaborators and discuss plans and thoughts on what outcomes are desired.
□
Set up a site visit for the workshop several weeks in advance.
□ Modify and adapt training materials and discussion to address the agricultural systems and resource setting.
126 Teaching Methods
□ Perform site visit and plan how it will work best (what, where, when, how).
□ Get the word out to recruit participants. Include workshop outcomes and logistics, including agenda, location, dates, times, and contact information for questions in promotional materials and announcements. If applicable, provide pre-workshop reading or video materials.
□ Arrange for support and accessibility services and facilities such as food and water, restrooms, shade/shelter, parking, transportation, safety/first aid, and translation/interpretation.
□ Discuss with the host rancher/farmer their goals, objectives, and resource needs, and conduct preliminary resource inventory. Conduct assessments of soil health conditions in the field (i.e. do a dry run of all the tests you intend to demonstrate during the workshop and record results and observations). You may think of a project or resource that would be of benefit to the host as well as educational for the group, such as cleaning an irrigation ditch or pruning an orchard.
□ Arrange for tools to be used by participants to be on site (digging tools, soil health bucket, etc.).
□ Develop additional exhibits and demonstrations (posters, flip charts, infiltration demonstration trailer, etc.).
□ Make arrangements and schedule activities with other instructors and support folks. Include rancher’s/farmer’s experiences and discussion.
Materials and considerations for outdoor learning
Overall keep in mind that things will get wet, dirty, and blow away. There are no flat surfaces to write on and folks likely won’t have paper and pens with them. Screens will be difficult to see.
• Flip charts (no powerpoint)
• Printed map of the property and/or region (Google maps satellite view or Web Soil Survey map)
• Plastic sleeves for handouts that will be reused (you can write on them with a dry-erase marker) and bind them together with a key ring
• Binders, clipboards, or rocks so papers don’t blow away
• Pens, pencils, and paper for your participants
• Rocks to hold down any papers that might blow away
• A table can be helpful
• A small dry erase board or chalkboard for drawing diagrams
• If it is hot and there is not tree cover, you may need a large tent that won’t blow away
127 Teaching Methods
128
References
Ackerson, J. (2018). Soil Sampling Guidelines. Purdue University Extension, 6.

Anderson, L. W., & Krathwohl, D. R. (Eds.). (2001). A taxonomy for learning, teaching, and assessing: A revision of Bloom’s taxonomy of educational objectives. Longman.
Barber, N. A., Hosler, S. C., Whiston, P., & Jones, H. P. (2019). Initial Responses of Dung Beetle Communities to Bison Reintroduction in Restored and Remnant Tallgrass Prairie. Natural Areas Journal, 39(4), 420–428. https://doi.org/10.3375/043.039.0405
Brady, N. C., & Weil, R. R. (2010). Elements of the Nature and Properties of Soils (3rd ed.). Pearson Education, Inc.
Dominant Soil Orders. (1998). [Map]. USDA NRCS.
Elkins, N. Z., Sabol, G. V., Ward, T. J., & Whitford, W. G. (1986). The influence of subterranean termites on the hydrological characteristics of a Chihuahuan desert ecosystem. Oecologia, 68(4), 521–528. https://doi.org/10.1007/BF00378766
Ghimire, R., Ghimire, B., Mesbah, A. O., Idowu, O. J., O’Neill, M. K., Angadi, S. V., & Shukla, M. K. (2018). Current status, opportunities, and challenges of cover cropping for sustainable dryland farming in the Southern Great Plains. Journal of Crop Improvement, 32(4), 579–598. https://doi.org/10.1080/15427528.2018.1471432
Healthy Soil Act, 204, New Mexico, First Session 2019.
Keller, L. (2019). Biochar Impact on Crops and Soils in Irrigated Arid Agroecosystems [Thesis, New Mexico State University]. https://search.proquest.com/openview/54f8af583d0c1791dd2eeedd7a4d255b/1?pq-origsite =gscholar&cbl=18750&diss=y
129
Mount, D. (n.d.). Winter Feeding Without The Overhead Reduces Machinery Costs, Labor. University of Wyoming Extension.
Nash, M. H., & Whitford, W. G. (1995). Subterranean termites: Regulators of soil organic matter in the Chihuahuan Desert. Biology and Fertility of Soils, 19(1), 15–18. https://doi.org/10.1007/BF00336340
Natural Resource Inventory 2014 Rangeland Health. (2014). USDA NRCS. https://www.nrcs.usda. gov/wps/portal/nrcs/detail/national/technical/nra/nri/results/?cid=stelprdb1253544
New Mexico Field Office Technical Guide: In-Field Soil Health Assessment Worksheet. (2019). NM NRCS.
Pellant, M., Shaver, P. L., Pyke, D. A., Herrick, J. E., Lepak, N., Riegel, G., Kachergis, E., Newingham, B. A., Toldeo, D., & Busby, F. E. (2020). Interpreting Indicators of Rangeland Health (Tech Ref 1734-6 Version 5). US Department of the Interior, Bureau of Land Management, National Operations Center.
Smith, G., & Stark, A. (2016). STEM Gateway Course Redesign Teaching Professional Development: Resources for Teaching and Learning https://digitalrepository.unm.edu/cgi/viewcontent.cgi?article=1000&context=stem_gateway
Snyder, S. R., Crist, T. O., & Friese, C. F. (2002). Variability in soil chemistry and arbuscular mycorrhizal fungi in harvester ant nests: The influence of topography, grazing and region. Biology and Fertility of Soils, 35(6), 406–413. https://doi.org/10.1007/s00374-002-0487-z
Soil Bulk Density / Moisture / Aeration – Soil Quality Kit. (n.d.). USDA NRCS.
Soil Quality Test Kit Guide. (1999). USDA NRCS. https://efotg.sc.egov.usda.gov/references/public/WI/Soil_Quality_Test_Kit_Guide.pdf
Sponholtz, C., & Anderson, A. (2013). Erosion Control Field Guide. Quivira Coalition.
Thien, S. J. (1979). A flow diagram for teaching texture by feel analysis. Journal of Agronomic Education, 8, 54–55.
Zeedyke, B. (2004). A Good Road Lies Easy On The Land – Water Harvesting From Low-Standard Rural Roads. Quivira Coalition.
130
The Quivira Coalition fosters resilience on arid working lands. To create a culture of land stewardship that integrates ecological, economic, and social health, we work in coalition with ranchers, landowners and land stewards, public agencies, conservationists, educators, students, and the general public. We believe this culture is rooted in three areas of practice: education, innovation, and collaboration at the radical center, a way of working together that champions coalition building and results over compromise.
At the foundation of all of Quivira’s work is the concept that effective and adaptive stewardship of working lands is one of the most powerful and immediately viable paths to remedy the imminent impacts of climate change.
Our efforts are dedicated to communities and working lands in arid regions of the western United States and to connecting these to landbased communities around the world.
www.quiviracoalition.org

Quivira Coalition
1413 Second Street, Suite 1 Santa Fe, New Mexico 87505 505-820-2544 www.quiviracoalition.org
1 2 3 4 5 6 7 8 9 10


