
 THE MAGAZINE OF THE ROYAL PHOTOGRAPHIC SOCIETY DIGITAL IMAGING GROUP
Number 95 2022 Issue 4 DIGIT

THE MAGAZINE OF THE ROYAL PHOTOGRAPHIC SOCIETY DIGITAL IMAGING GROUP
Details of all Digital Imaging events are available on its website at bit.ly/RPSDIEventsListingOnline


Rex Waygood (Co-chair) digchair@rps.org
Deborah Loth (Co-chair) digchair2@rps.org
Trevor Pogson LRPS (Treasurer) digtreasurer@rps.org
Melanie Chalk ARPS (Centres / DI News) digworkshops@rps.org
Dennis Knowles (Accolade Editor) digaccolade@rps.org
Ken Ness ARPS (Web and social media) digweb2@rps.org
Jean Robson ARPS (Membership) digmem@rps.org

Neill Taylor LRPS (Online Events) digevents@rps.org
Ian Thompson ARPS (Competitions) digcompsec@rps.org
Janet Haines ARPS (Co-chair) digchair3@rps.org
Jocelyn Edwards LRPS (Secretary) digsecretary@rps.org
Gary Beaton (DIGIT Editor) digiteditor@rps.org
Holly Stranks FRPS (Accolade) hollystranks@gmail.com
Marilyn Taylor (Print Exhibition Coordinator) mltaylor@gmx.co.uk
Sue Vaines LRPS (Web Creative Director) svaines@hotmail.co.uk
Lois Wakeman LRPS (Web Editor) digweb@rps.org
Southern Dr Barry Senior Hon FRPS 01425 471489 digsouthern@rps.org
South East Melanie Chalk ARPS 07768 265897 digse@rps.org
Yorkshire and North East Susan Gibson LRPS digyorkshirerps@gmail.com Cover
It’s a terrible cliché, to start the New Year with a review of the year just gone by. But I cannot help but reflect on the way 2022 has revealed just how much RPS Digital Imaging has evolved through the pandemic years.
We entered the pandemic in the spring of 2020 with about 1500 members. As a Special Interest Group we published a quarterly magazine (DIGIT), a biannual digital publication celebrating members’ distinctions (Accolade) and a digital monthly newsletter (DI News); we ran two externally judged ‘competitions’ - a print exhibition selection and a projected image competition - each with a printed catalogue and a friendly monthly competition amongst members; and we supported seven regional UK Centres, each run by a team of its own volunteers, which staged workshops and meetings with speakers.
What we lost during the pandemic was most of the regional UK Centres, but we gained about 300 more members with a programme of excellent online ‘Big DIG’ events and dozens if not hundreds of online workshops. Our publications continued, and we conducted our print exhibition selection and projected image competition via Zoom, where everyone who wanted to, could observe the process. We became very online-oriented with much more to offer RPS members and non-RPS photographers throughout not only the whole UK, but also the whole world. This has been accomplished with a small team no larger than the one we started with in 2020.
As pandemic restrictions were lifted in the spring of 2022 things did not revert to ‘normal’. We have a 50:50 divide between those members who cannot wait to come out for meetings, and those who prefer to stay in. By and large, there are not enough people who want to come out to cover the cost of hiring a venue and a
When Gary and I put together the DIGIT content we try really hard to get a good mix of inspirational work across a variety of genres. Articles to motivate or even some that might make you think differently about your own work, or tempt you out of your comfort zone to try something different. The camera itself is not important, although this issue we have given you an article on using the smart phone, from Glyn Edmunds. Let’s face it, the majority of us walk around with these powerful little cameras in our pockets and rarely consider using them for ‘real’ photography. So, we are missing a trick and should give them more consideration.
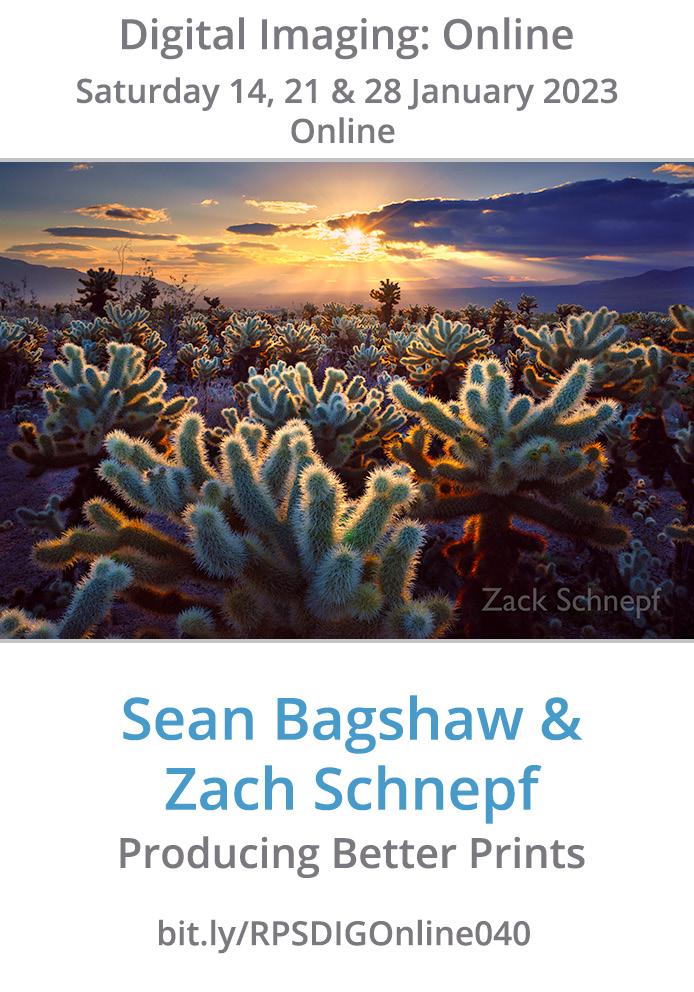
Once you have read the item from Jonathan Vaines, it might also tempt you to join one of his DI workshops about the Nik Collection that we run (full information on the DI web page/workshops). Or be so excited
speaker for a meeting. And like the other volunteerled groups in the RPS, the SIGs and the Regions, we are finding it more and more difficult to recruit good volunteers to keep the show on the road. Whatever 2023 may hold, we intend to try to continue providing good value for all RPS members, wherever they may be.
Then, in the early summer, the RPS began to roll out a new CRM - a Customer Relationship Management system - with disastrous consequences. From May to November we could not get a list of our members, or know who our new members might be. (So apologies to any reading this now who joined DI during that time.) The new system for handling events did not work properly, causing immense frustration and waste of time. Even now it is far from what it ought to be, though some of the worst problems have had patches if not fixes.
Perhaps because of the immense member unhappiness caused by this botched software upgrade, the RPS seems to have focussed a bit more on its membership and has launched an encouraging initiative, a new RPS Summer Exhibition for 2023. Until now member groups have not been allowed to use the exhibition space at RPS Paintworks in Bristol, but this exhibition promises to include members’ work across all levels, from FRPS holders to those without a Distinction at all. It is intended to be a celebration of members’ work, not a competition. Entries are now open to all RPS members worldwide. Don’t miss the opportunity to exhibit your photography in this group show at RPS Gallery, Bristol in July 2023. Find out more and enter at rps.org/SE and use the code DISE680 for a 10% discount. Entry closes 8 January 2023.
Hope to see you and your work in Bristol next summer. In the meantime, best wishes for the New Year!
about Simon Ciappara’s Liminality series to want to order one on his hand made books, on his own hand made papers, that we will be featuring in the DI News in January.
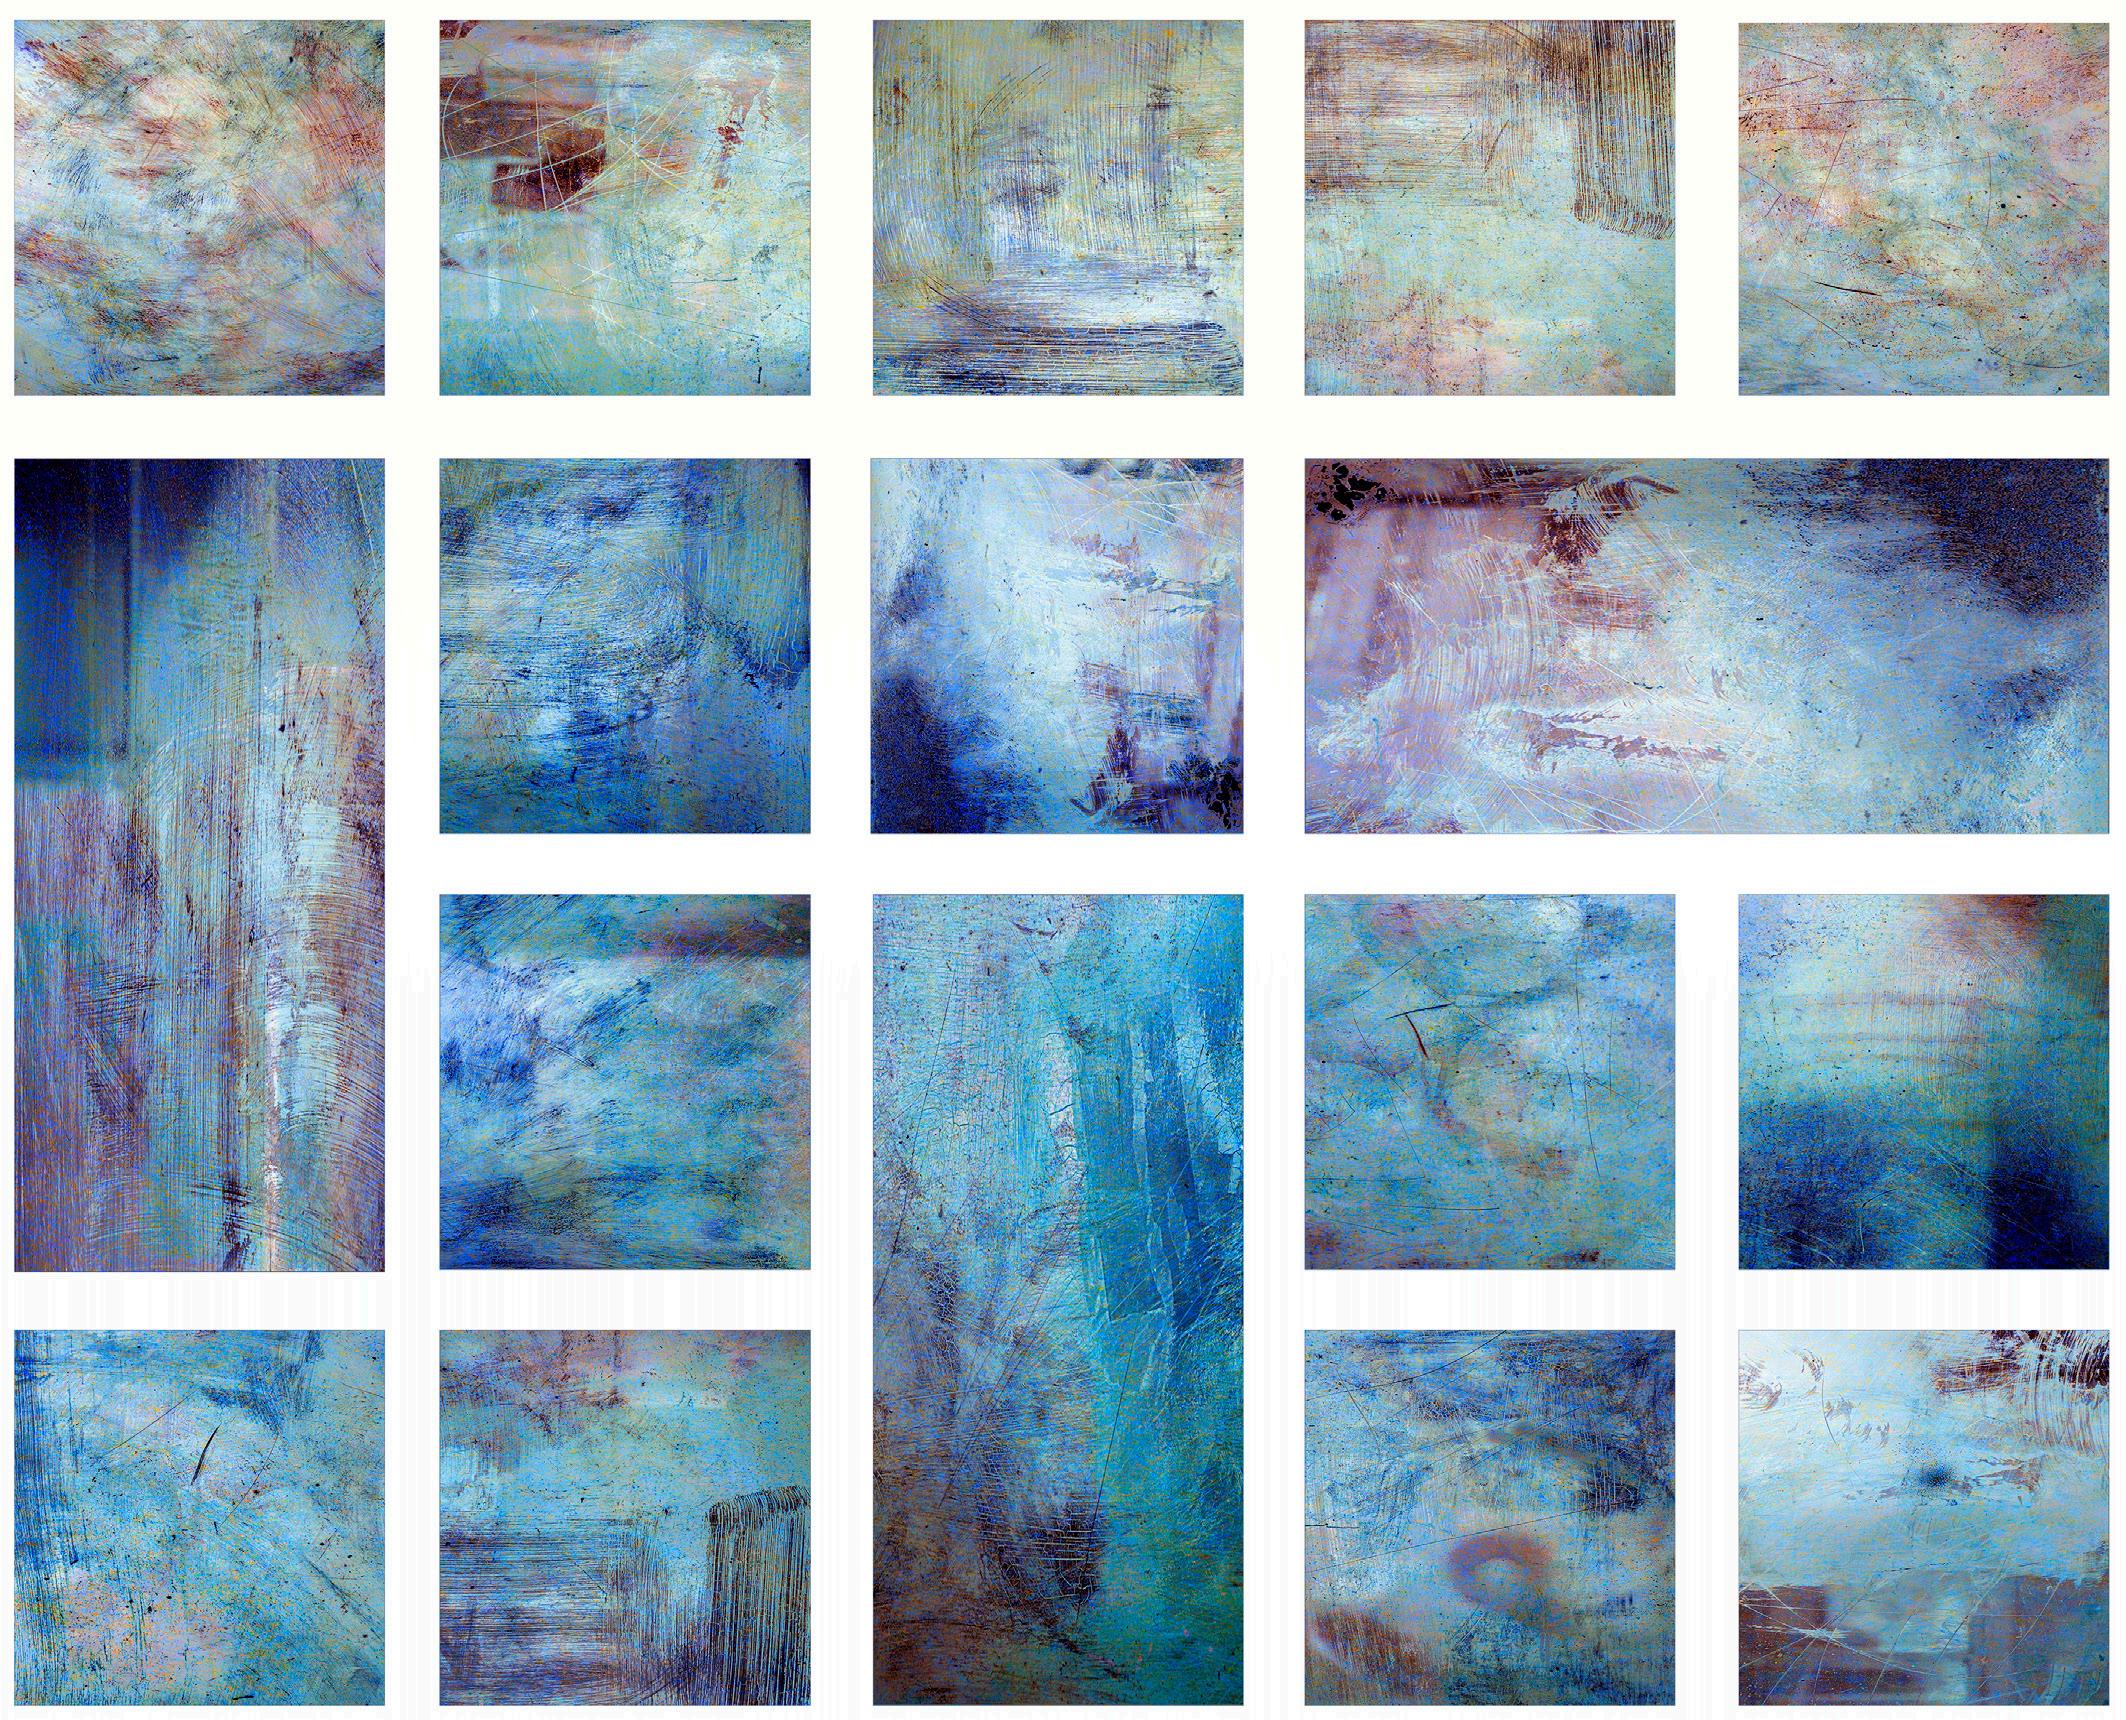
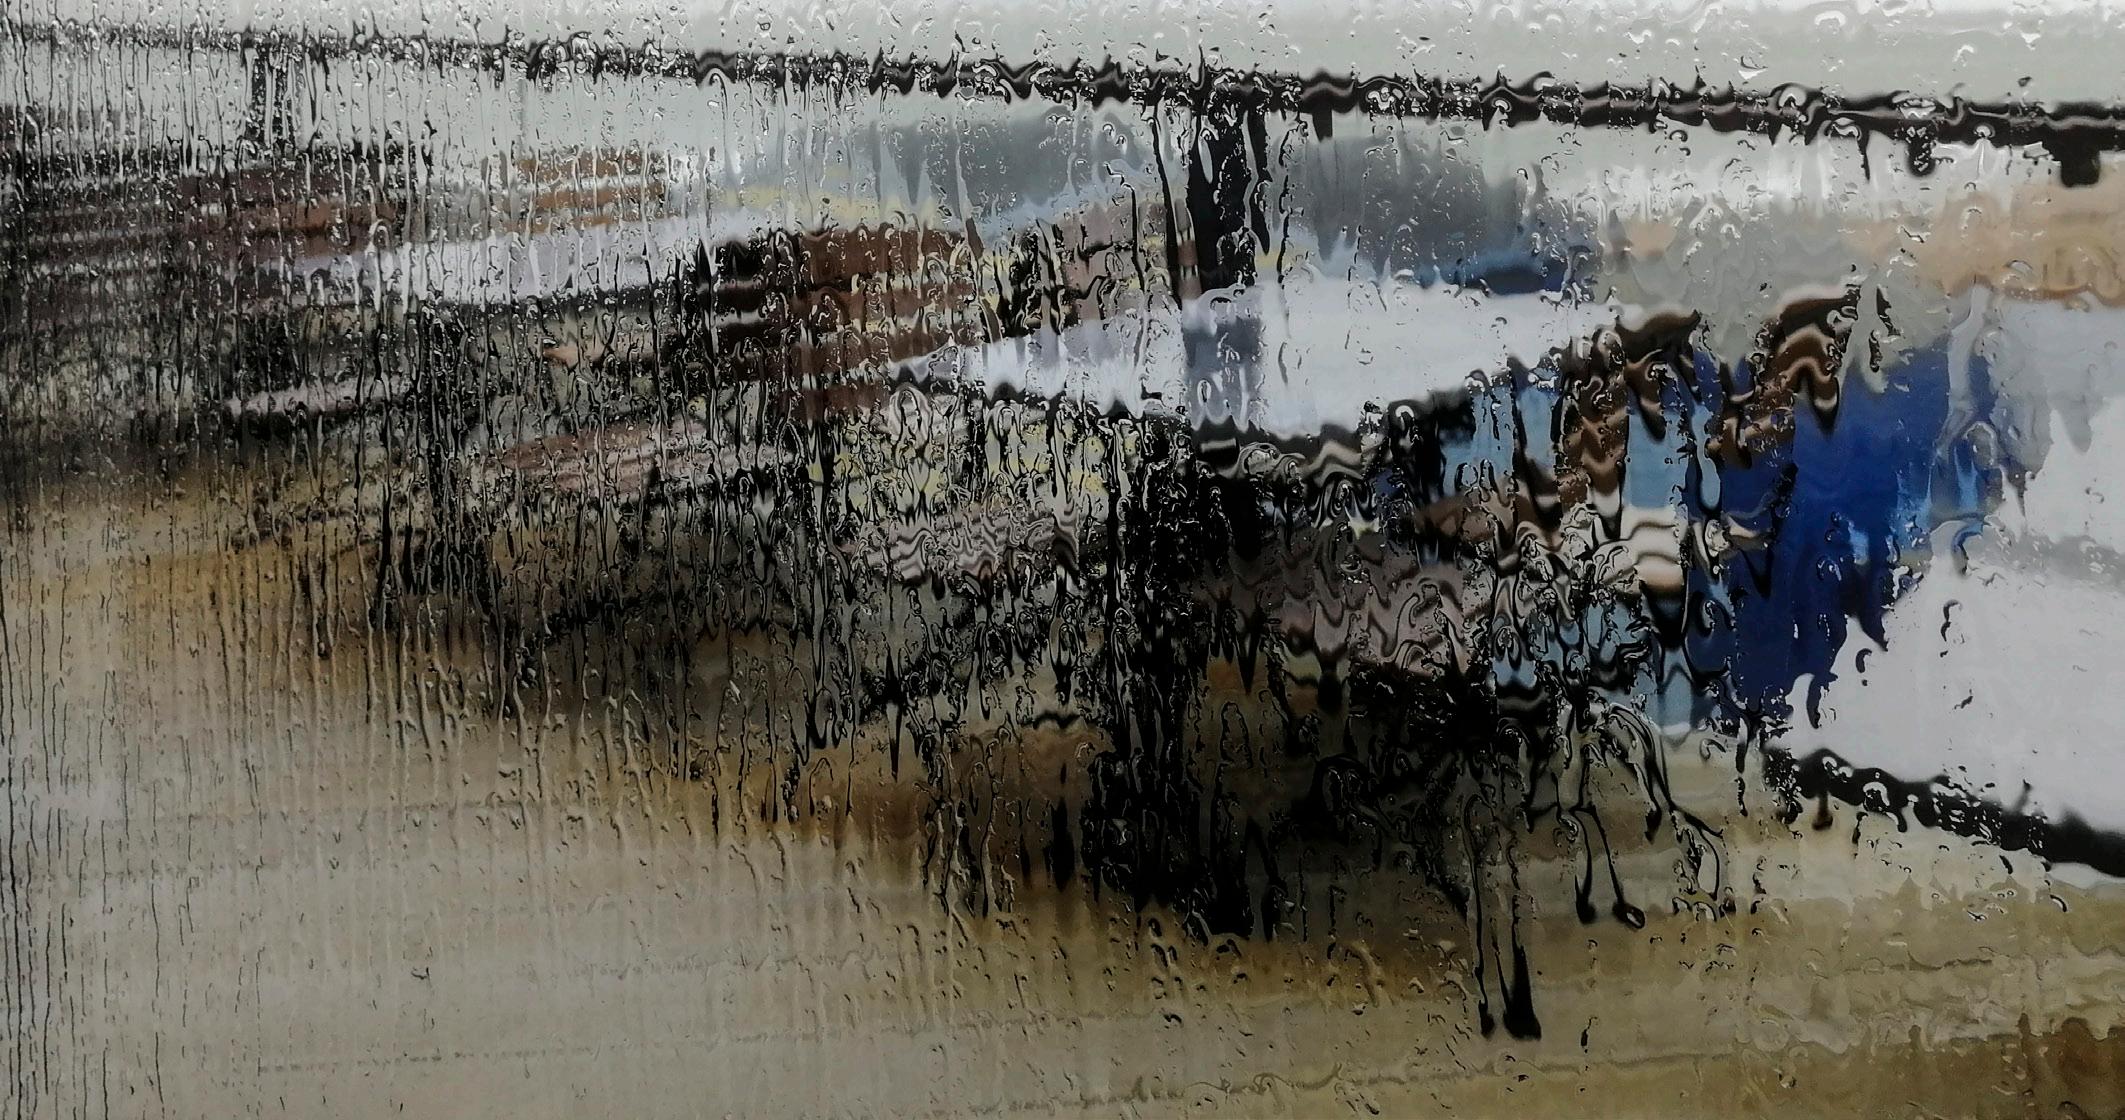
The abstract images that Sue Brown shows us in her article really challenges us to look for these small features and to then consider how to represent them for maxim impact.

Whether it is using the latest technology, as with Tony Healy’s AI article, or producing amazing fanciful images as demonstrated by Roger Newark, Neil Milne or Peter Mann we hope that you will find something that is of particular interest to you.
However if you feel there is a genre or technique that you would particularly like us to cover then do get in touch and let us know, as we always aim to deliver the most interesting DIGIT we can for DI members.

Throughout my working years in management buzz words like Mission, Leadership and Strategy were always in the air. Reality was more Margin, Cost Control and
Profit with a key drive towards Dividend and ultimately Share Price. Away from the blurb no business will work without motivation. It does not come from policy or process, it
has to be cultivated, nurtured and developed. But what is motivation when it comes to your photography. The basic ingredient to produce
motivation is a motive. This is a first hurdle failure for many photographers. It is imperative that you have a goal to initiate motivation. Sure, this could be auto generated by taking a day out, knowing you and your camera will come home with a bunch of outstanding, award winning images that somehow just jumped on to your memory card. Often this is not the scenario and many people say, ‘I do not know what to photograph’ or ‘I have already photographed everything here’. My method is two pronged. I set a goal and then an end game. The final physical stage
in my photography is when the printer releases the paper and it drops on to the out tray, so that is where I start, visualising the image weeks or months before that day.
The first step must be to have an idea. This is where I spend most of my time, not with a camera, but thinking about it. I travel through life looking at objects, how the light changes appearances, subtle differences in colour. I consider the adjustments that my vision makes, adjusting exposure, depth of field and consider what a snapshot, a frozen frame of time, would
look like. I thumb magazines and observe art. All this input helps fuel a creative way of thinking. Ideas do not need to be grand; they can be as simple as making images of autumn colour and an idea such as this can then be repeated year on year. You can have adaptations, allow influences in from other ideas you have. This all allows the idea to evolve and can form the core of one’s creativity.
Much of my image making involves the exploitation of the camera’s capability. I make use of large apertures, wide angle lenses,
extended shutter speeds and the ability to ‘not wind on the digital film’. Knowing your camera is crucial to gaining control of your image, but don’t feel you need the latest gear, my infrared is a mid 2006 and boasts 8 megapixels on a full frame. Once I have a visual of my print embedded in my head it kick-starts my motivation. I don’t over plan my photography which may sound odd against what I have just said, but I spend my camera time immersed in my idea and I have learnt to take my time. I allow myself to explore and understand my environment, wandering around absorbing my
surroundings considering the light and how it may change. If the idea is to capture the miniature rivers formed by a receding tide, you need to allow for time to find them and then select the better ones. Pedestrian traffic is destructive so being there soon after the tide has departed is essential. Then there is the quality of light, the wider environment, these elements must be dealt with whilst on site.
Much of what I produce is abstract or observational, so I frequently experiment with techniques before I commit to an image. Once I am
happy to progress then I work swiftly, and I will shoot a number of images with one subject. I work towards producing a set of images or a panel from that subject. I may elect to reconsider the outcome and reshoot creating a similar set with a different feel. I rarely take trips with other photographers, other than my wife, as my approach means I move at a snail’s pace. I once found a delightful mid 17th century water fountain; my fellow photographer took a handful of shots to record it and as was ready to move on within a minute. I took an hour before I had a couple of
sets in the camera that I thought would make pleasing prints.
Working in sets is a good motivator for me but I need more. At the core of what drives me is the Project. A project is often not born in my mind it just comes along. One can last less than an hour and some can live for years. Projects can be allowed to have breaks too especially if another starts to consume your time. I am enjoying my Perspex Project at the moment. It came about when I observed a man trying to peer through a scratched pane in a shelter to see if the approaching bus was his. I studied the condition of the material and found the scratches fascinating. I processed a set of twelve images to make a small panel and the project was born. I then use my time at home to think how I could do this differently. I may experiment with
processing before taking the next set as ideas evolve, and I find I need to capture more. I have a motive and I become itchy to go and find some more Perspex. At this point I have a better idea of what I want to achieve, in fact I find myself almost writing a statement of intent in my head to shoot against. The work will certainly not be the same as my first set but an extension, a development from the initial shoot.
I allow projects to move freely, not only does the subject, place and light change but I change too. My Perspex project will become a collection of sets of images.
I have already touched on sets but why shoot the subject several times and put them together in a panel? I do this as I find my type of images often present better in multiples. In nonrepresentational photography it is another layer in
the creation of abstract however, it also has another benefit. Knowing I need to process several images to work as a cohesive body of work drives me to take care at the time of capture, ensuring the frames are as balanced as possible. We all know it is hard work to process two images to make them a pair but consider ten, fifteen or more that all have different light and exposure; it soon becomes a write-off set. Most photographers prefer time with the camera over the processing element and time spent honing camera craft skills is time well spent, whatever your preferred genre.
Once my sets of images and collections are created, and I have achieved my goal, what do I do with them? I need an outlet, an end game. This I found to be a conundrum puzzling many photographers. Some use their
images to enter competitions or gain distinctions but not all images will fit this format. I began touring the Camera Club circuit with my non-Camera Club images to find there is a world full of people out there that enjoy and appreciate images as art. I now teach people processing methods as a direct result of this contact and sell my images. My work would not score well at a competition, but it may be cherished framed and hanging in someone’s downstairs loo.
The primary function of a camera is to make an accurate recording of what it views at the time the shutter is released. This accounts for the majority of images ever caught. The ultimate record shots must be those taken by Nature Photographers, reproducing nature correctly with every pixel, an outstanding skill. I feel at a polar opposite to this. I immerse myself in the idea and often develop a story behind the image. I am not trying to capture reality but to express emotion and feeling into the final image. I hope my images are unique and I feel a sense of ownership with each and every one. Maybe I am no longer a photographer as I now only use my camera as a tool to paint my art l
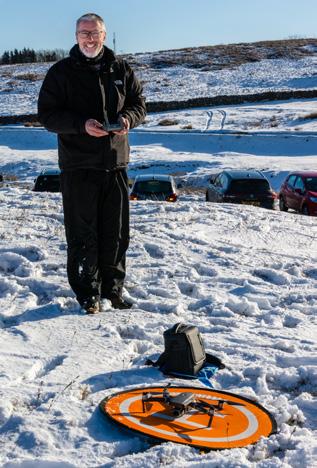
Drones offer photographers a new perspective that was rarely available just a few years ago. Sean Goodhart takes advantage of the opportunities on offer and shares some tips on achieving stunning aerial shots.
Drones offer the opportunity to get a different view of something that might have been photographed many times already. Landscapes are an obvious choice, but the drone is a useful tool in your bag for many kinds of photographs. The drone offers
• a different perspective, • access, and
• a taller tripod.
Let’s look at a few examples. Figure 1 shows a line of trees along a local road at sunset - with the height offered by the drone allowing us to see their beautiful long shadows and emphasising the ridge and furrow marks in the field.
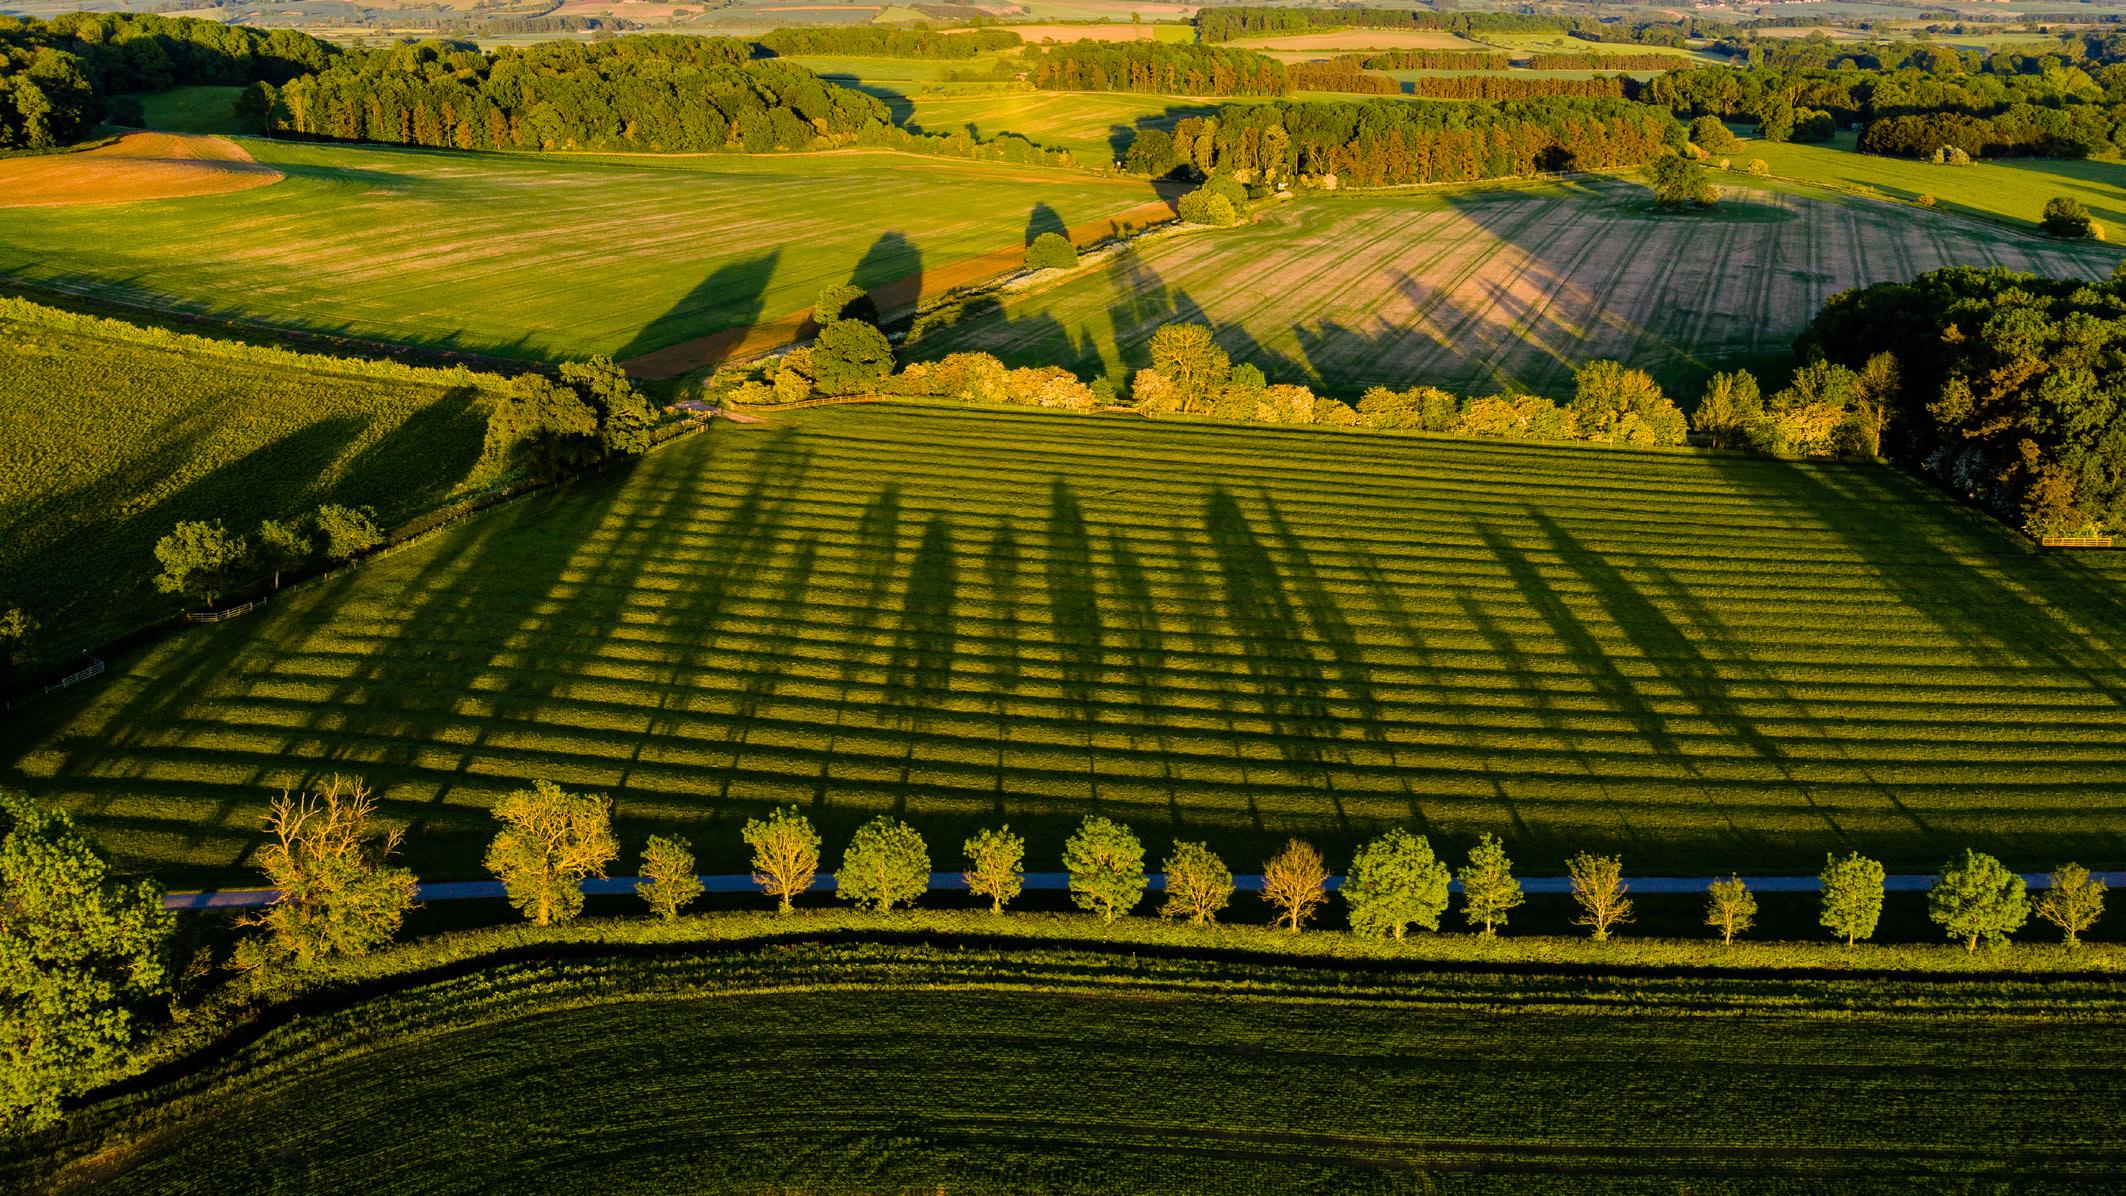
Figure 2 shows Chesterton Windmill near Leamington Spa, a very well photographed spot which I have captured on a summer evening; the drone’s viewpoint can be unique
- top down is something we rarely see (but of course is becoming commonplace on the many image sharing platforms).
Raw DNG files output from both the DJI drones and are full of detail to develop using post-processing software. The Hasselblad branded camera on the Mavic 2 Pro makes 20 megapixel images whilst the Mini 2 provides just 12 megapixel images which feels very limiting at first.
When shooting landscape images we can dramatically increase the quality by shooting multiple exposures and creating HDR images. It works for other image styles but the key is to limit movement and avoid ghosting
when the images are blended. The Mavic 2 Pro shoots up to five images in an exposure bracketing ‘burst’, the Mini 2 shoots just three. I use Adobe Lightroom to merge my HDR shots.
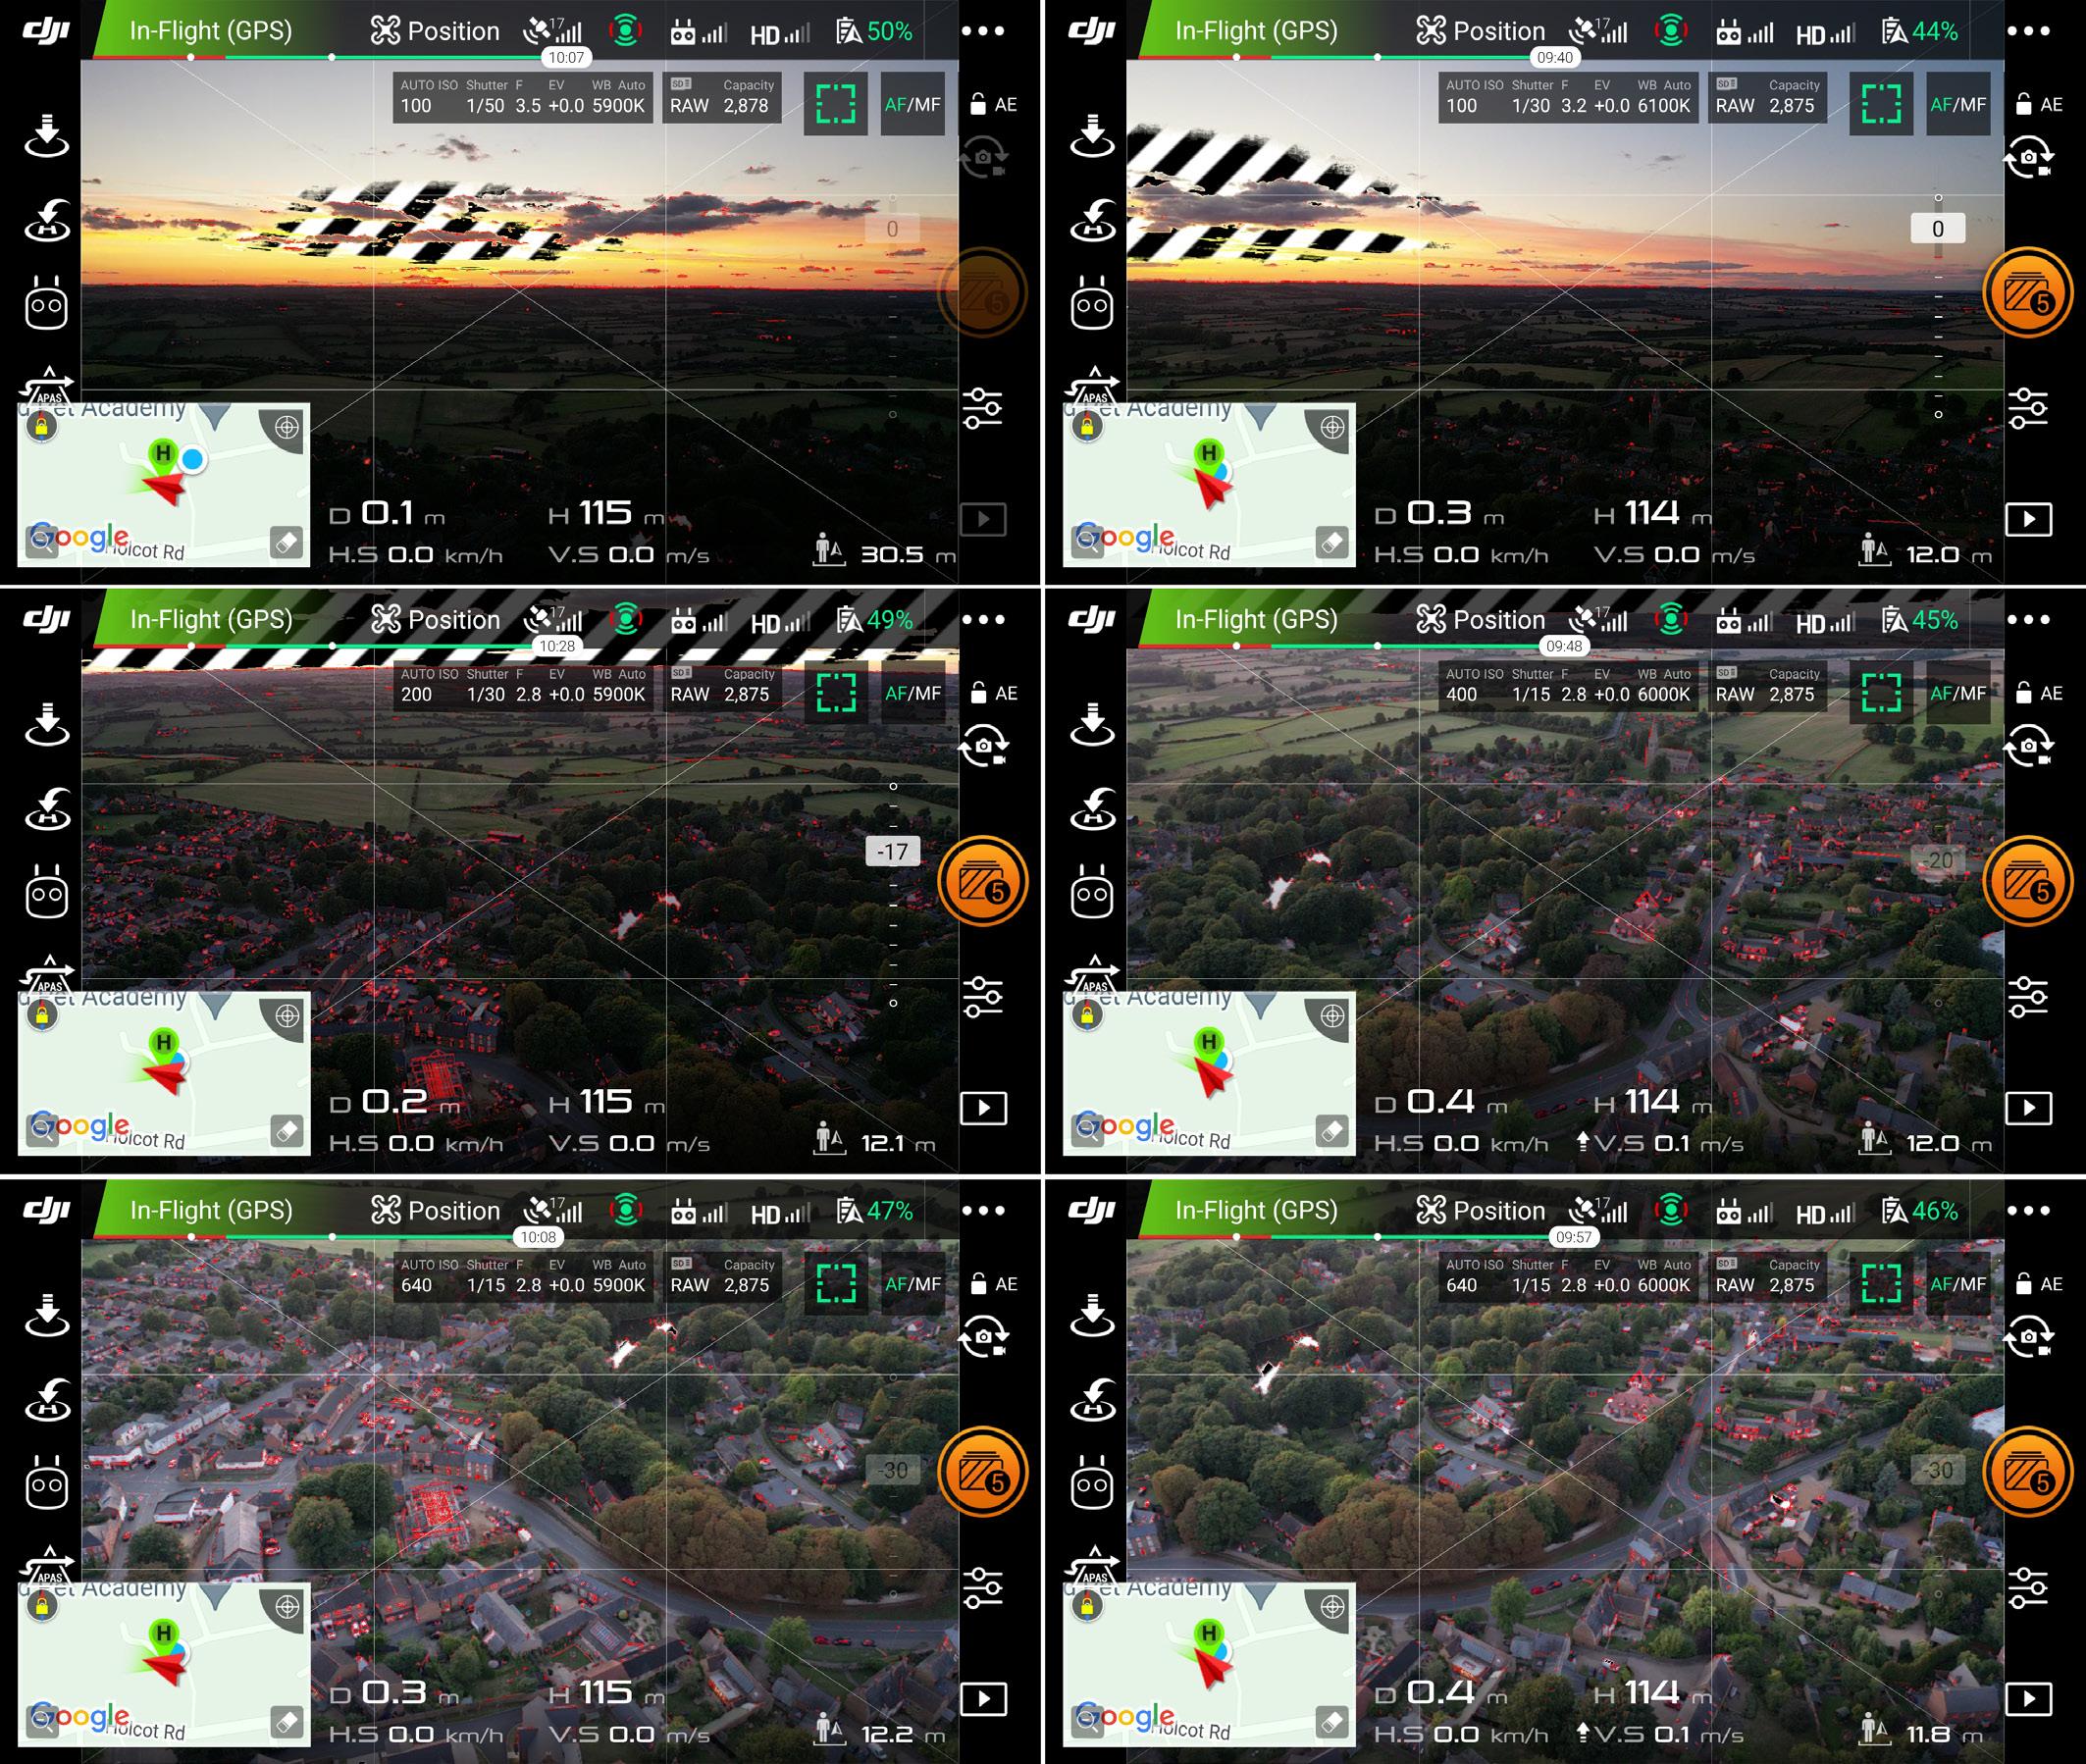
Figure 3 is an example where I have increased the image quality by using HDR on the Mini 2, but also increased the field of view by merging multiple images. The Mini 2 has a trick its big brother cannot do - it can point its camera up as well as down - so is able to capture more of the sky. This ‘big sky event’ is 8 HDR images merged together in a panorama using Lightroom. To make panoramic images with my drones I visualise a grid over the scene then, with the drone in a fixed position move the camera in stripes. Figure 4 shows the idea; first point the camera at the top left of
the scene and shoot the first HDR, next move the camera angle down (typically 15-20° at a time) and shoot the next image, continuing until you’ve got the bottom of the desired scene. Next rotate the drone a little (typically I leave at least 30% overlap so the photo merge software can do a good job) and take the next stripe, moving from bottom to top in similar angle
steps. For wider images I’ll do three or four stripes, ending up with between 36 to 72 DNG files to merge - yielding massive detailed image files when merged.
Some folk recommend putting the camera in manual exposure mode to ensure all images are similarly exposed. Some also recommend using ND filters. With the HDR
technique and with the capabilities in Lightroom I’ve found it’s simpler to just leave the drone cameras in auto exposure mode. Allowing the camera to work in auto allows me to just think about framing the image and monitoring the drone for safety - you’re not supposed to take your eyes off it whilst it’s flying! Figure 4 shows how the auto exposure captures the sky and ground with
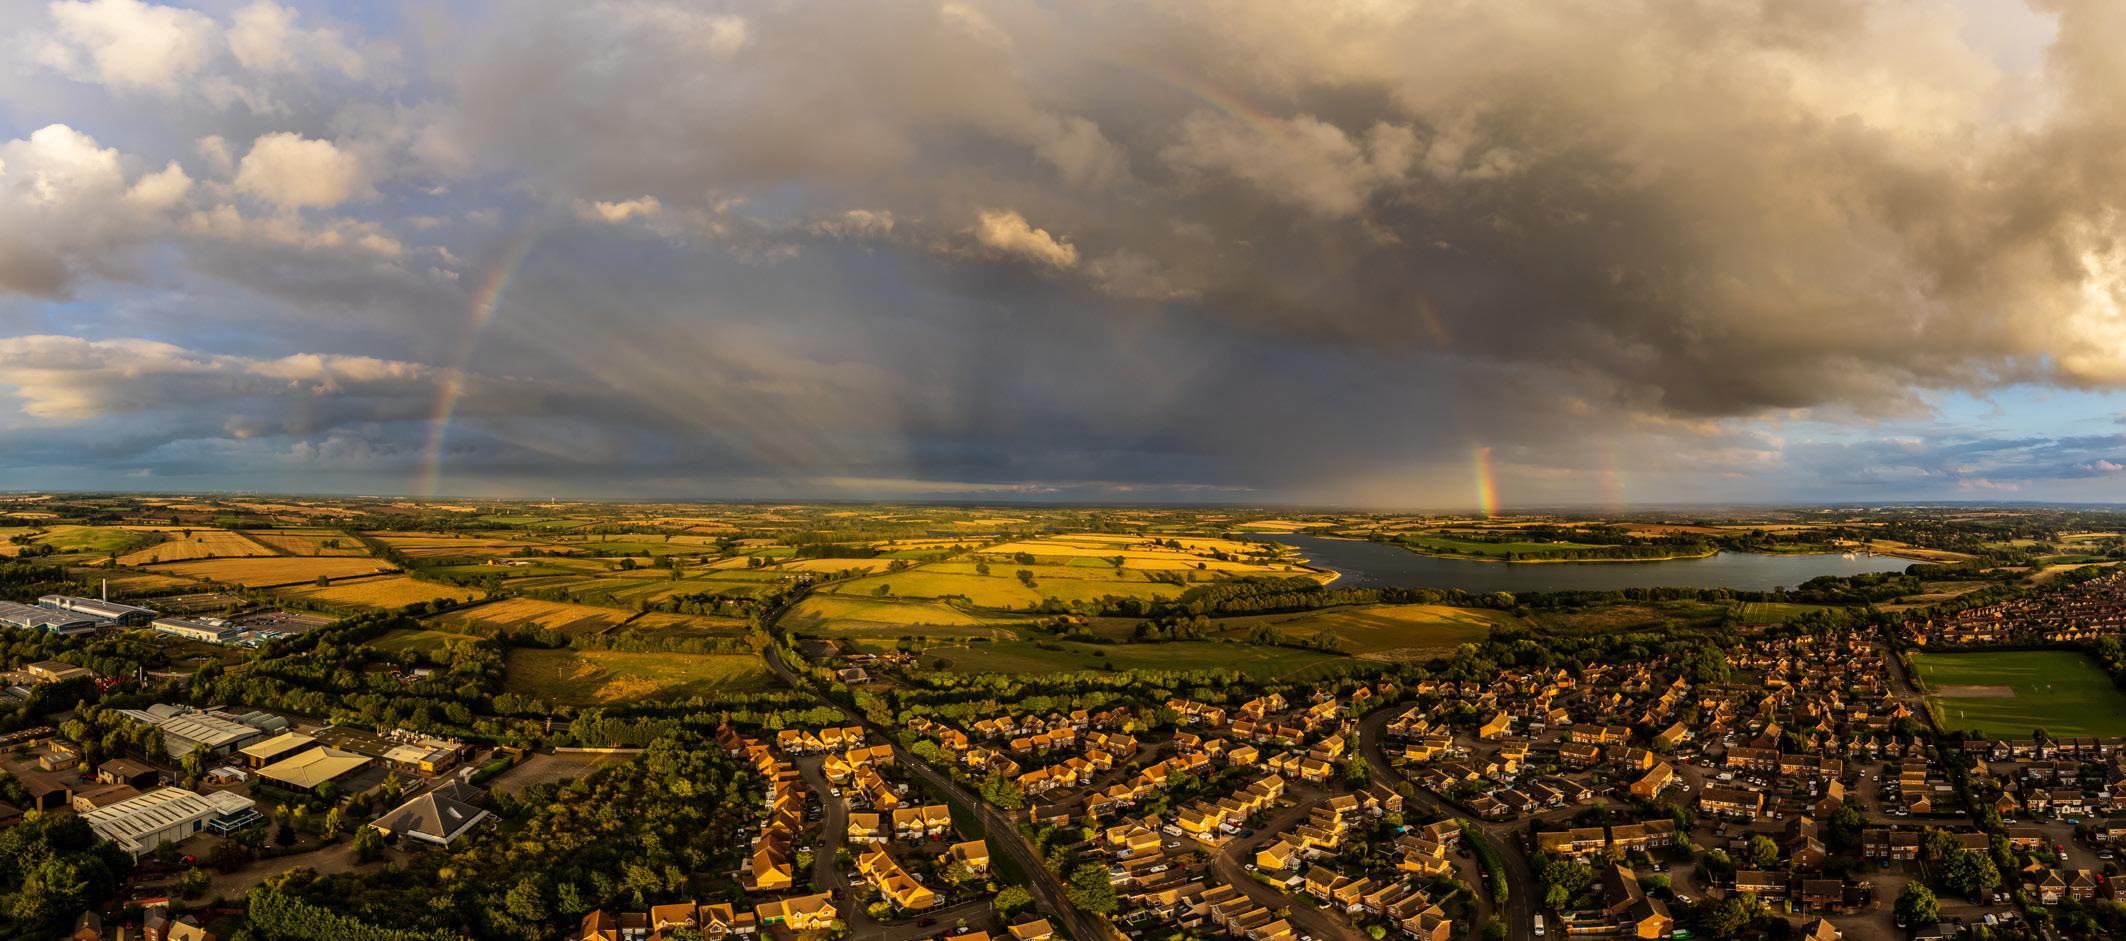
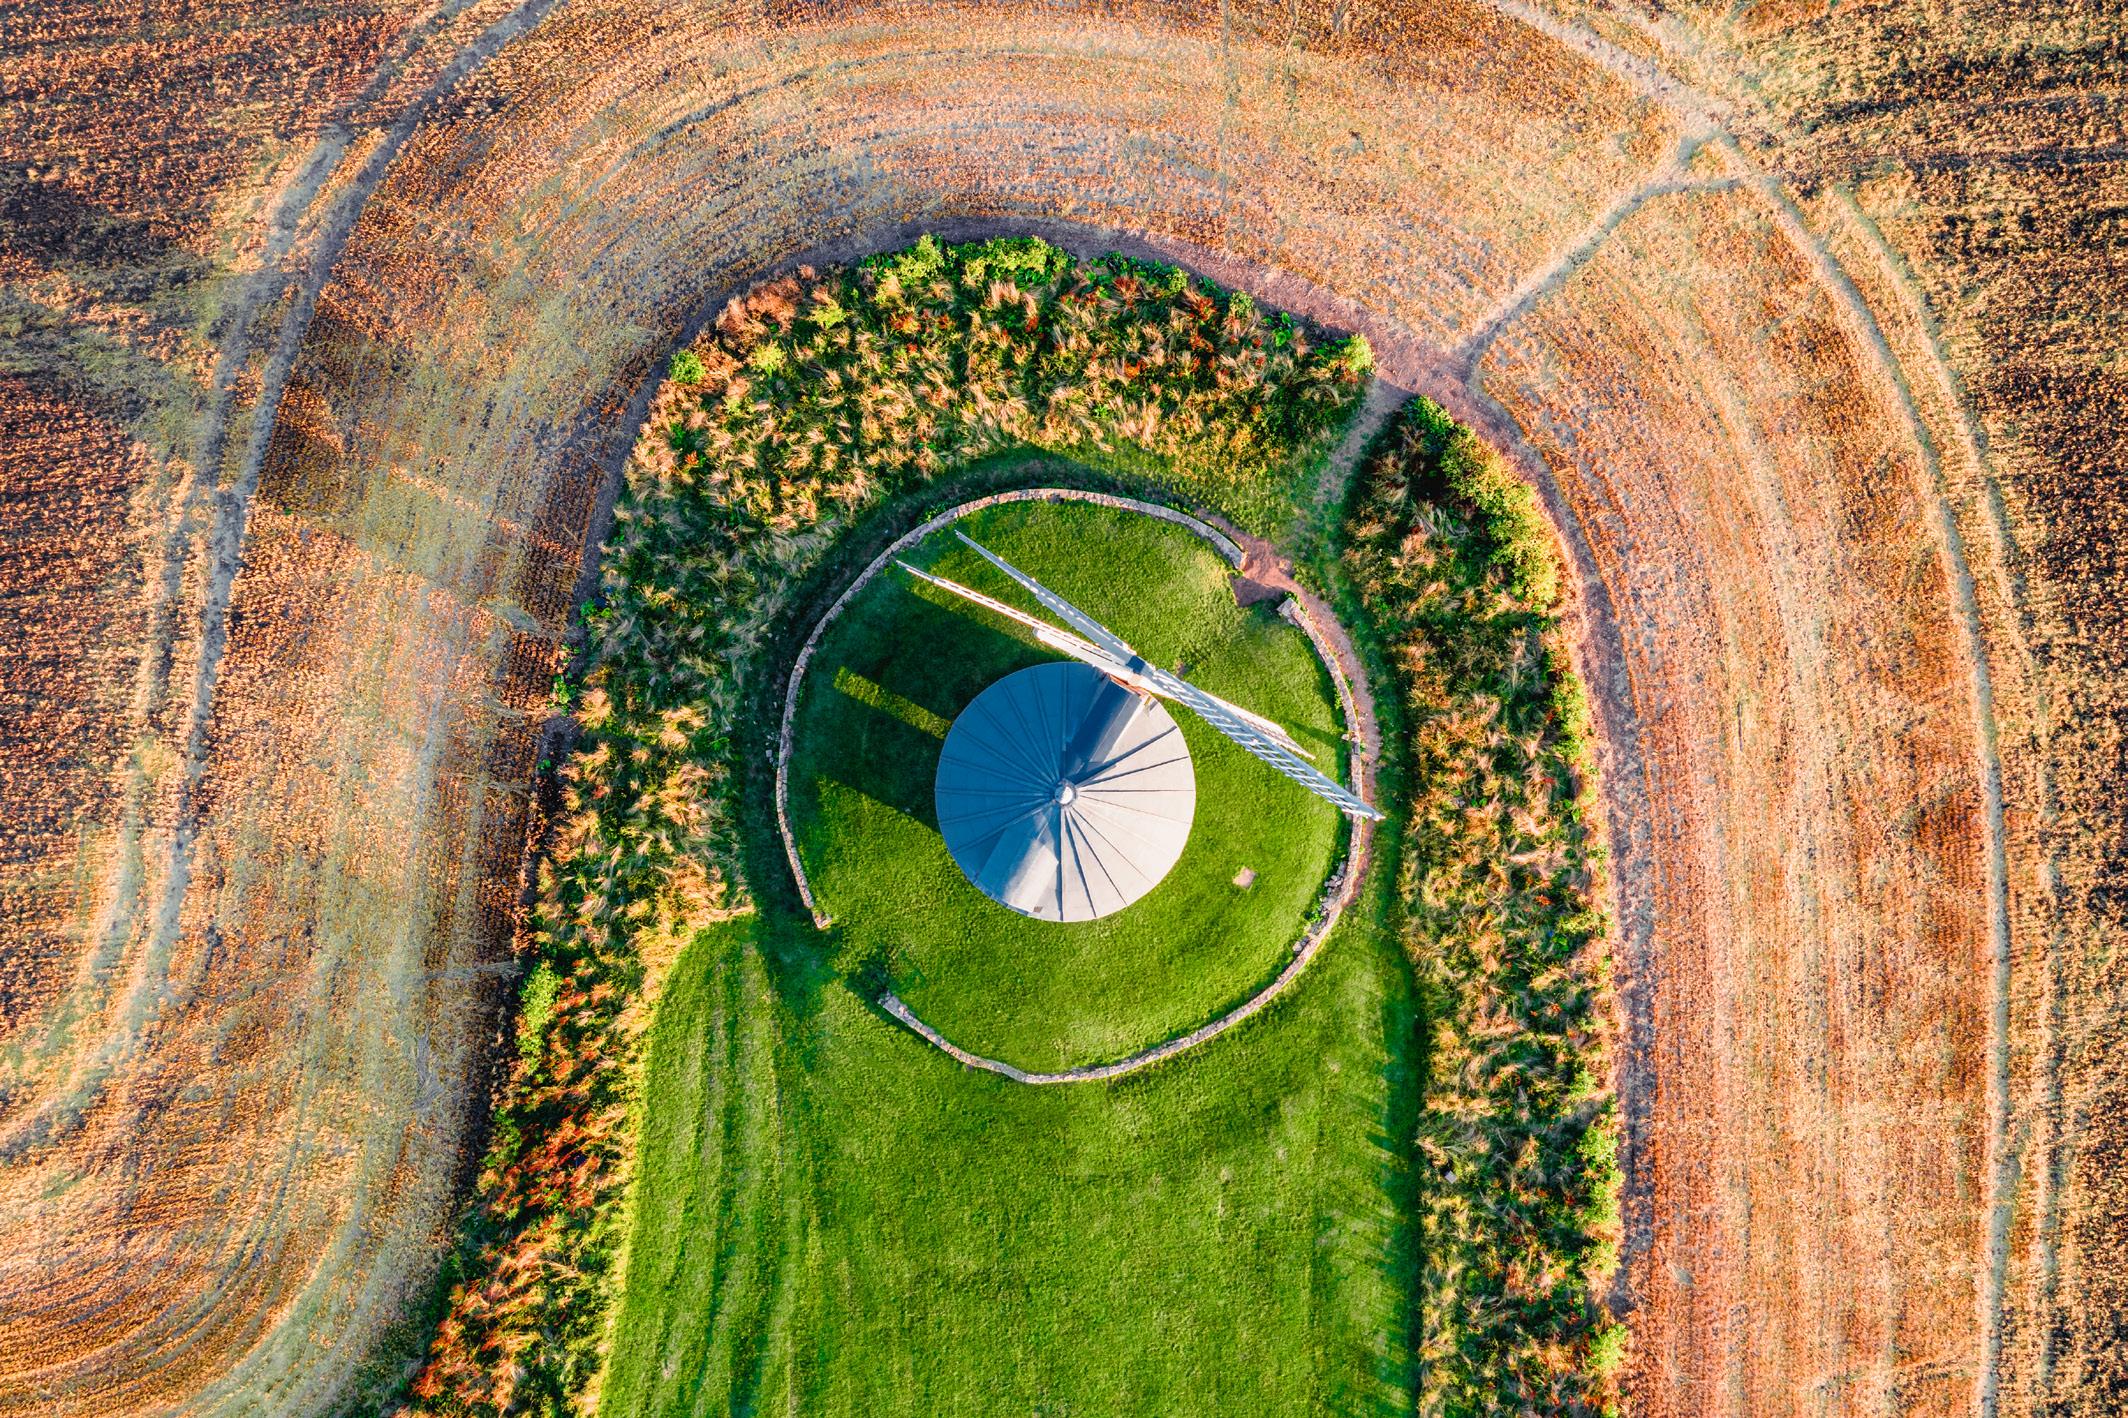
Figure 4 - Using
images very different settings for ISO, shutter speed and aperture but the magic in Lightroom happily sorts everything out.
Once the DNG files are recovered from the drone the job of preparing the image starts. Lightroom has an ‘HDR panorama’ facility (see figure 5) which purports to do the whole job in one click…my experience is that this normally fails. My method is to first group the images for HDR processing. I find using the Auto-Stack by Capture Time with an interval of 3 seconds normally works well to create my groups. Next, select all the stacks and press CTRL-H to start the merge to HDR images. Doing this on the first stack of images results in the dialogue illustrated in figure 6; select options here for example auto-align, autosettings and de-ghosting. Selecting
all subsequent stacks (at the same time) and pressing CTRL-H applies the same settings to all stacks.
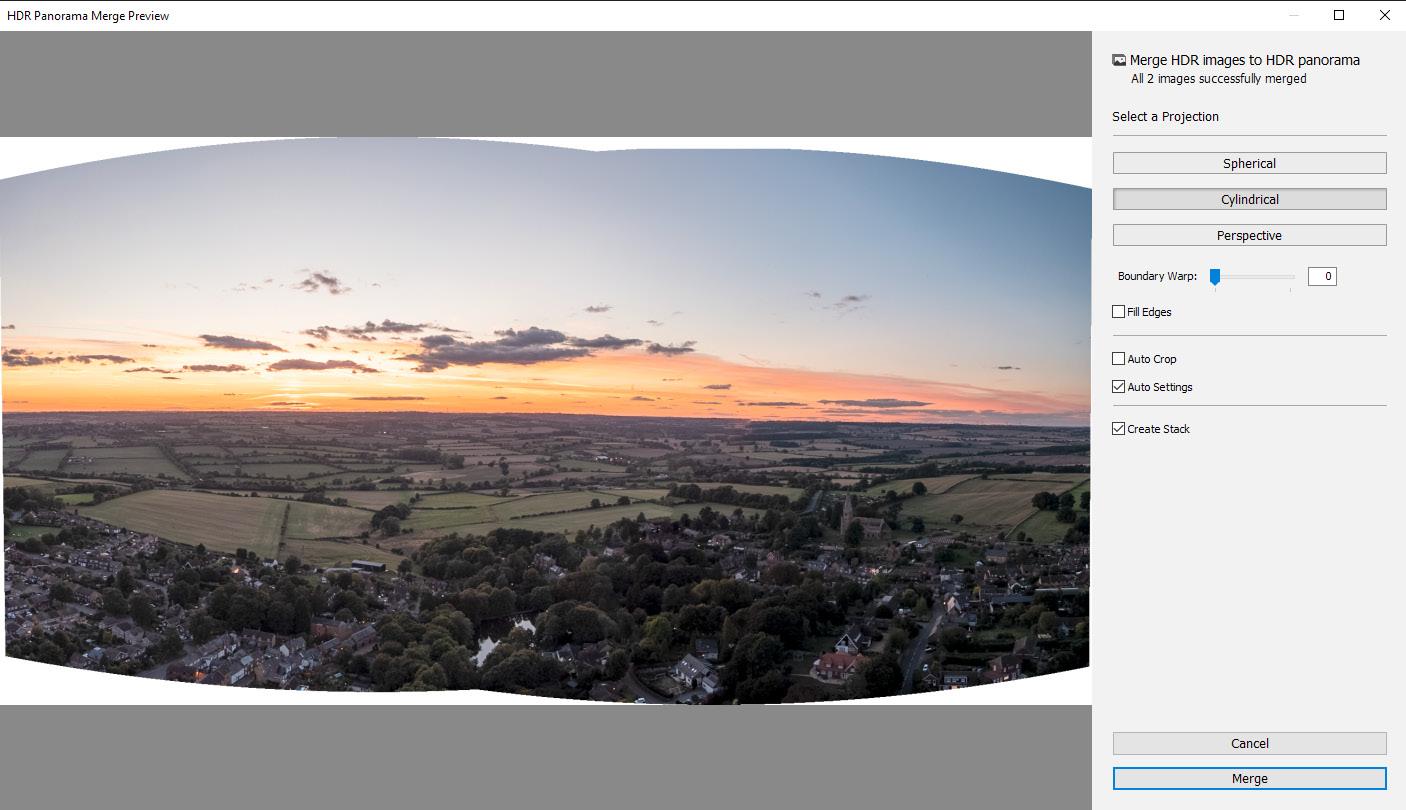
I then select all the new DNG files from the HDR process and press CTRL-M to merge to panorama. The dialogue in Figure 7 shows the options; I find that if I’ve got extreme angles in the files (a wider scene) then we need to use the Spherical projection, but most are Cylindrical. The Boundary Warp slider allows one to fill some of the gaps at the edges, I normally find myself using 20-40. The ‘fill edges’ option is a big help with skies but not so useful with the ground.
After the HDR and the panorama merge we then process the image in the normal way - crop as desired then, because we have a big DNG file, use all your digital magic
powers to get an image cooked to your taste. I typically let Lightroom automatically balance the image exposure then with the masking tools I separately process the sky and ground for exposure and contrast as necessary.
We all know that panoramas don’t have to be horizontal. A vertical panorama from a drone’s perspective can be extreme. I quickly realised this and have made a number of ‘impossible perspective’ images. By starting with the camera pointing at the ground it’s possible to shoot a series of images moving up in steps until the camera is pointing at the horizon then use a cylindrical projection for the merge. The
resulting merged image has a field of view of 90 degrees and will be something you can never really see - even when taking a balloon ride. Human eyes have a peripheral field of view of around 130°, but only around 60° in the central vision where we perceive detail.


My first example is figure 8, featuring the longest, steepest staircase flight of locks in Britain on the Leicester line of the Grand Union canal at Foxton. Starting above the top lock we can look down all the locks to the canal basin at the bottom where the canal branches for the Market Harborough arm. I took the shots at around 6:30 on an August Sunday morning to avoid getting any people walking through while making the panorama.
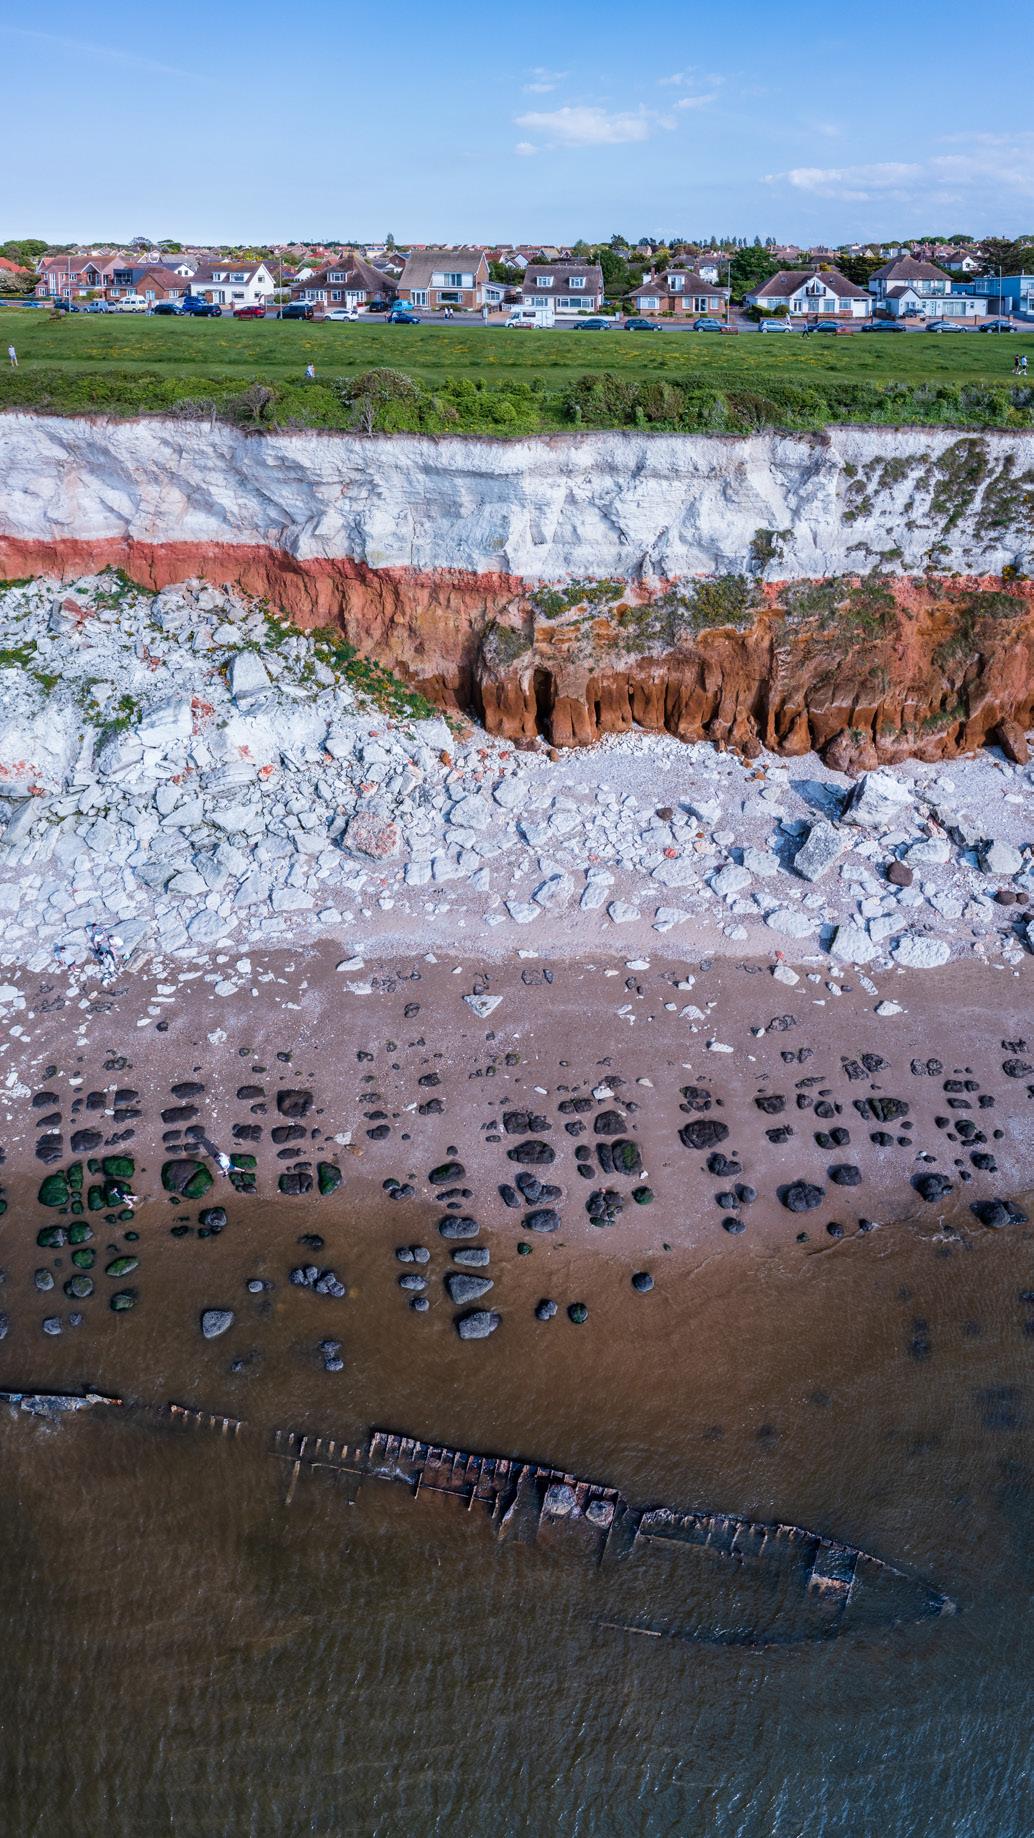
The second example, in figure 9, features the wreck of The Sheraton at Hunstanton. Here people are avoided by shooting when the tide is just covering the wreck. The perspective here showing the wreck and the cliffs is quite unique. We can see this ‘single stripe’ image has a problem - it’s cropped tight on the left, too close to the wreck. I now make these images by making two or more vertical sweeps with the camera - moving the drone left or right between each stripe to keep the merge simple using cylindrical projection.
In the UK we have a drone code that must be followed: https:// register-drones.caa.co.uk/dronecode. This covers pretty much everything you need to know. The
key principle of the drone rules in the UK is to protect ‘uninvolved people’, those who are not with you and taking part in the drone photoshoot. If you intend to fly close to uninvolved people you will
need an additional qualification known as the ‘A2 certificate of competence’ (I have this).
When flying in built up areas I’m using the Mini 2. I think drones with mass less than 250 grammes are best options for most people who’ll be interested in drone photography. Personally, I’m wondering whether Santa Claus will bring me a DJI Mini 3 Pro with its 1/1.3” 48 megapixel camera this December!
Sean joined the RPS in 2013, achieving his Licentiate in 2016 and Associate in 2018. In addition to Digital Imaging he is a member of the Landscape Group and the Contemporary Group, of which he is the Webmaster. His first drone was the DJI Mavic 2 Pro. This has a Hasselblad branded camera offering manual control of aperture, shutter speed, ISO and focus of its 28mm lens - plus a relatively large 1” sensor with 20 megapixels. The second was the DJI Mini 2. Much cheaper and a simple camera offering only shutter speed and ISO control, but with a mass of only 249g this drone does not have the limitations imposed on heavier equipment. It’s tiny 1/2.3” sensor, 12 megapixels and fixed focus 24mm lens might seem restrictive, but as he has explained, he has found techniques to squeeze out great detailed large images. Why does he have two drones you might ask? In January 2021 the UK rules for flying drones (and model aircraft) changed, limiting where larger drones can fly.

Many photographers have a bag of equipment, sometimes built up over many years, and will select the ideal kit for a particular shot. For Glyn Edmunds, his mobile phone has given him a renewed passion for his photography. He shares his images captured with a simple tool that many of us have in our pockets.
I want to start with a thank you to a couple of people. Firstly, to Dr. Anne Sutcliffe FRPS, a dear friend, who alerted me to the possibilities of smart phones back in 2014. It’s a steep learning curve for a darkroom and slide shooter who hates computers. Four phones later I am using the amazing Huawei P30Pro. Maximum aperture of f/0.95, a macro function, night mode and three lenses which Leica had a hand in developing.
Secondly, I must thank my partner and wife of 36 years, Jean Brooks EFIAP/b. Jean is the technical member of our family, so I am indebted to her for most things technical, image appreciation, printing, and managing digital files
and me.
I was late to the digital party - I used to say, ‘Digital is just a phase, it will soon pass’! After a while even I did not believe that. I recall that our founder, the late, great, Barrie Thomas FRPS did not anticipate that the RPS Digital Imaging Group would have a long life. If only he could see us now…
I celebrated the late Queen’s 90th birthday by purchasing a Fuji X-T1 with a 16-55mm f/2.8 lens from a trade show in Southampton. That was an introduction, but realistically it only comes out for the occasional fungi shoot in the New Forest or some fine art classic nude photography in the landscape.
My Huawei is my constant companion. Phone photography has so many advantages, in my case these can be quantified as follows:
• the equipment is lightweight and inconspicuous,
• I have all the lenses I need in a tiny package,
• some in-phone processing with a bit of help from Snapseedand the images are ready to be uploaded to Instagram, Facebook, and the Chichester Camera Club Facebook page
• minimal post processing, resizing and the files are fine for the international circuit, and
• last, but by no means least, I am enjoying my photography more than ever before during
my 35 years involved in club photography.
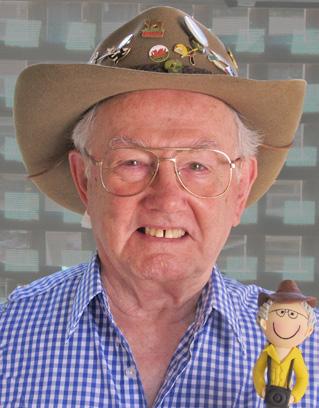
I never cease to be amazed at how many image capture situations are literally only possible with a phone. The majority of my day to day capture relates to ‘street’. Any time, anywhere. Should Joe Public spot you, the initial assumption is that you are taking a ‘selfie’. Jean has strict instructions to shoot me
- not with a camera - the day I take one. ‘Self portraits’ yes, often as a silhouette with my trademark hat.
On many occasions my subjects almost literally fall over me or apologise for walking through my frame, not realising that they are the missing link I have been waiting for to complete my composition.
I think it was Gary Player after winning a golf tournament in
South Africa in 1962. A journalist suggested that he might have just had a ‘lucky weekend’. His response was along the lines of, “It’s funny, but the more I practice the luckier I get”.
I can relate to that, whilst I don’t really believe in mind control over people, the number of occasions where I have prepared my backdrop and am just thinking. ‘I need a u

person, cyclist in a red jacket, a couple of colour (see Black Lives Matter). Then they arrive on cue.
An expert, well another dear friend of several decades, Leigh Preston FRPS, says, “if you call yourself a photographer you need to practise the craft every day”. Not only is Leigh correct, but I am simply staggered by how much my ‘seeing’ has improved. Images leap out at me.

After 31 years ‘treading the boards’, giving talks and assessing the work of other photographers I have called a halt to the club world.
However, I have been on the PAGB Judges’ list since 2000 and still get asked to act as a Selector for Federation, National and International Exhibitions, often in tandem with Jean. Highlights to date include Edinburgh, Johannesburg and Phoenix, Arizona international salons.
So, if you only use your own smart phones for contactless payments and paying for your car parking, may I suggest that you give their image making potential a try. Modern phones have sensors as good or better than DSLRs of not that many years ago, and with reasonable care the resulting file can be used to make an A3 print
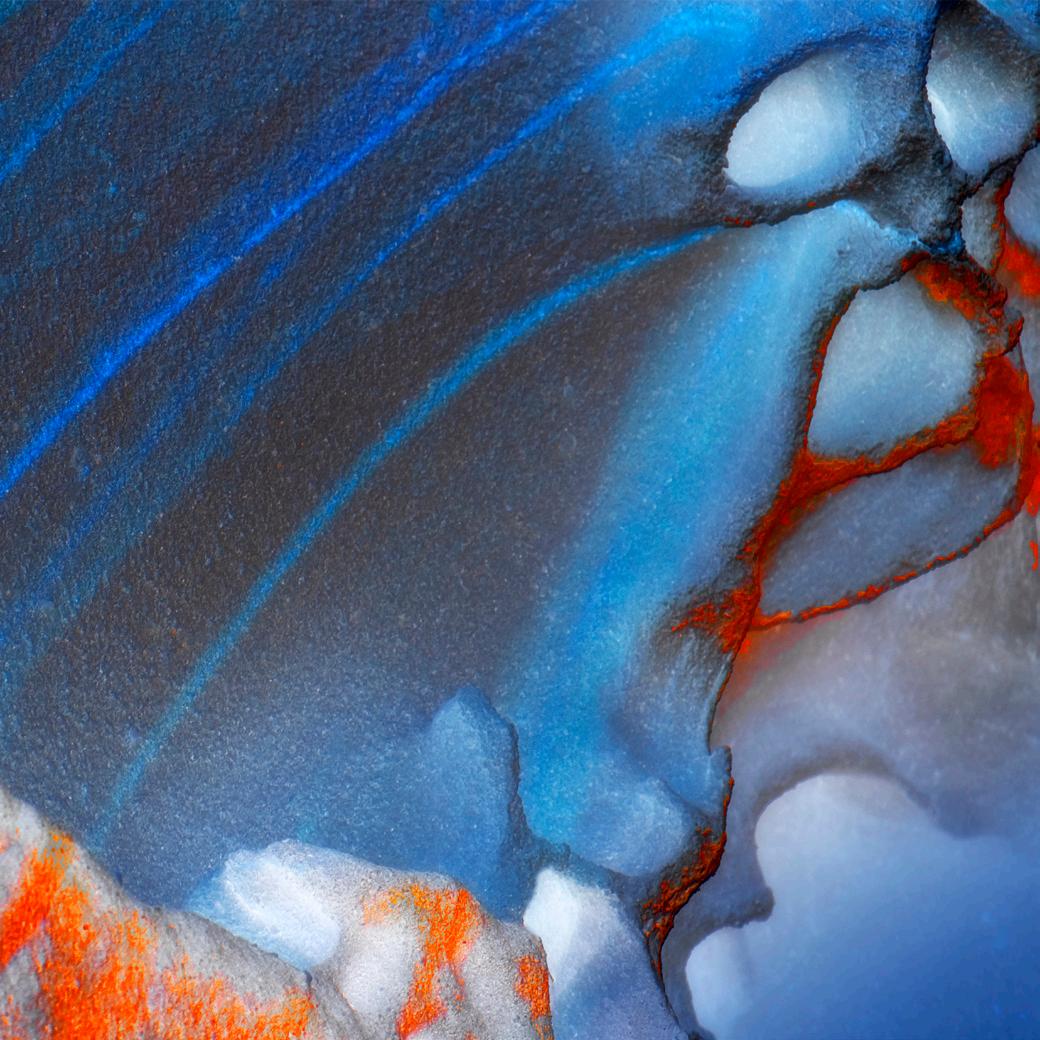
Liminality is a state of transition between one stage and the next.
My series of prints Liminality and Leporello books were conceived as I watched a rainbow spectrum playing across our sitting room wall. The fractured light created by a
hanging crystal in the front porch.
This is not a frequent event as the alignment of sun and crystal is as haphazard as our winter weather.
Photographing this phantom of light was a wait and click game
over a few weeks last December. Eventually I had eight or nine usable images.
This was a serendipitous number as visible light is arguably made up of eight colours and music is visualised in octaves.


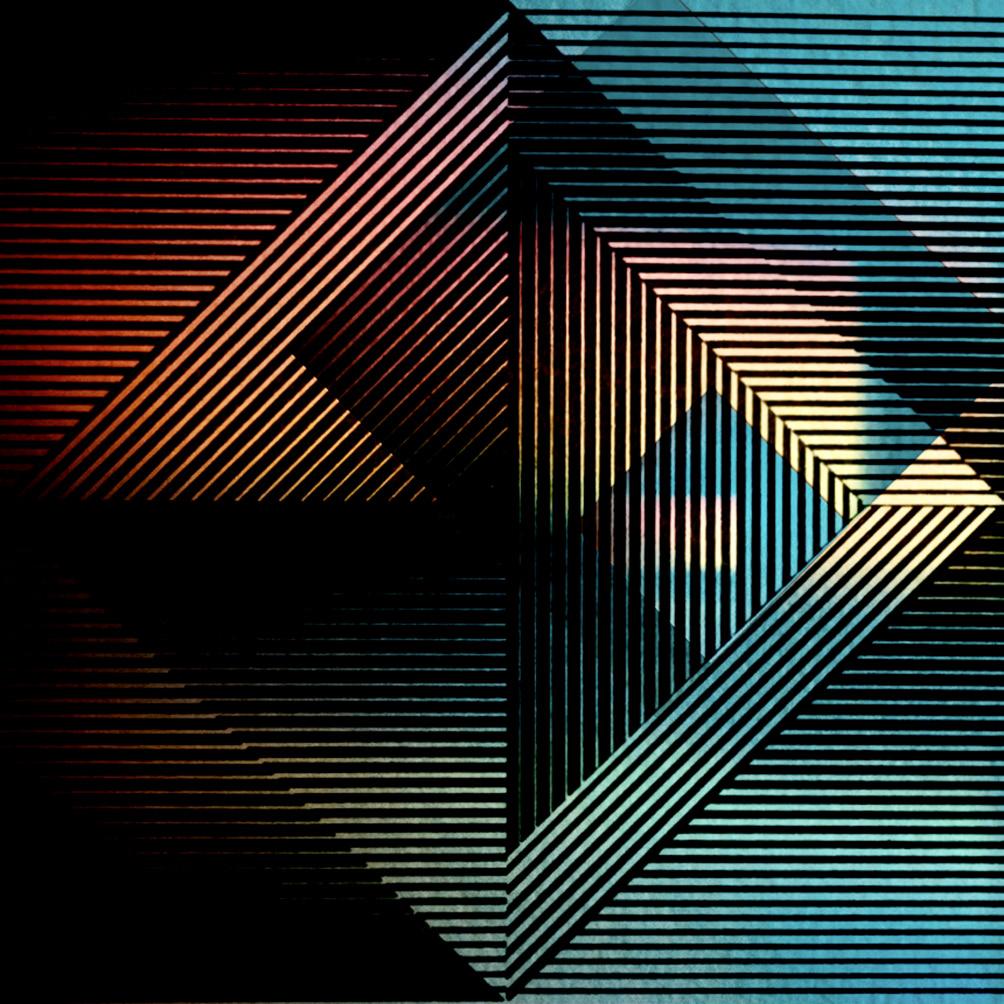
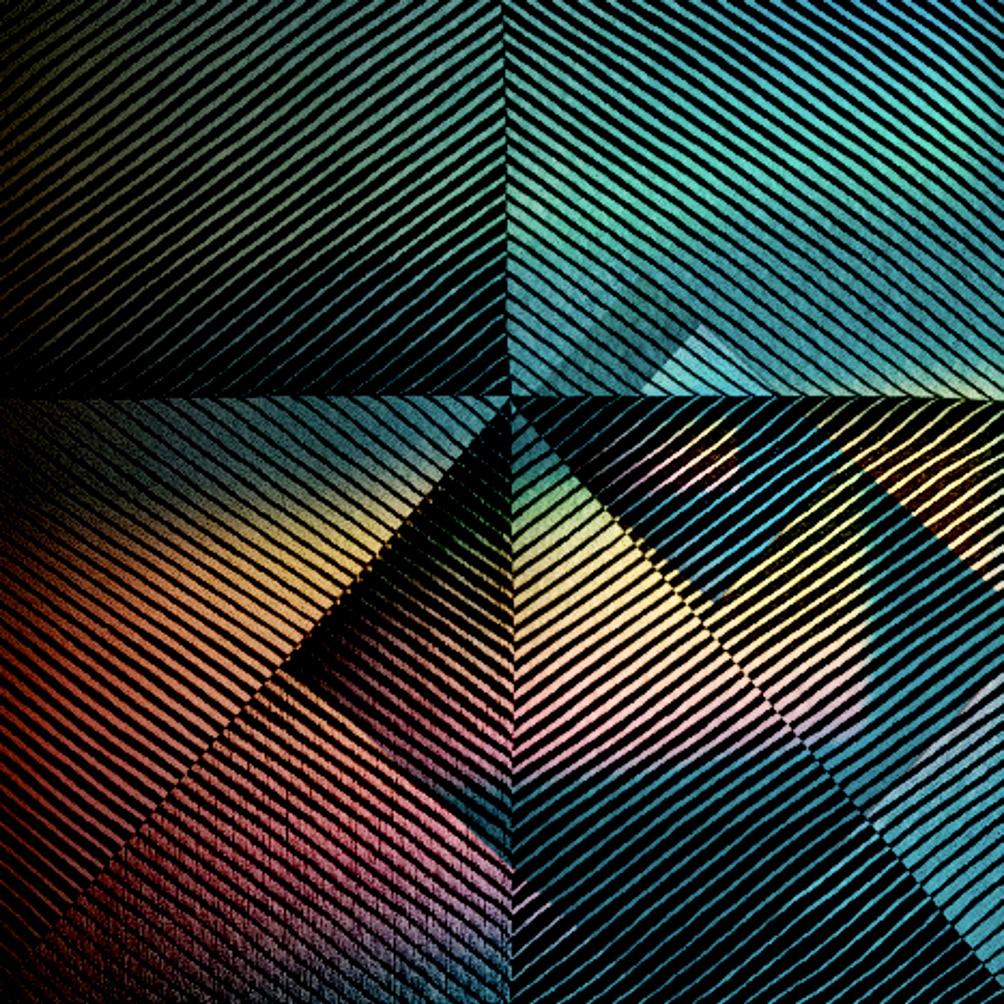
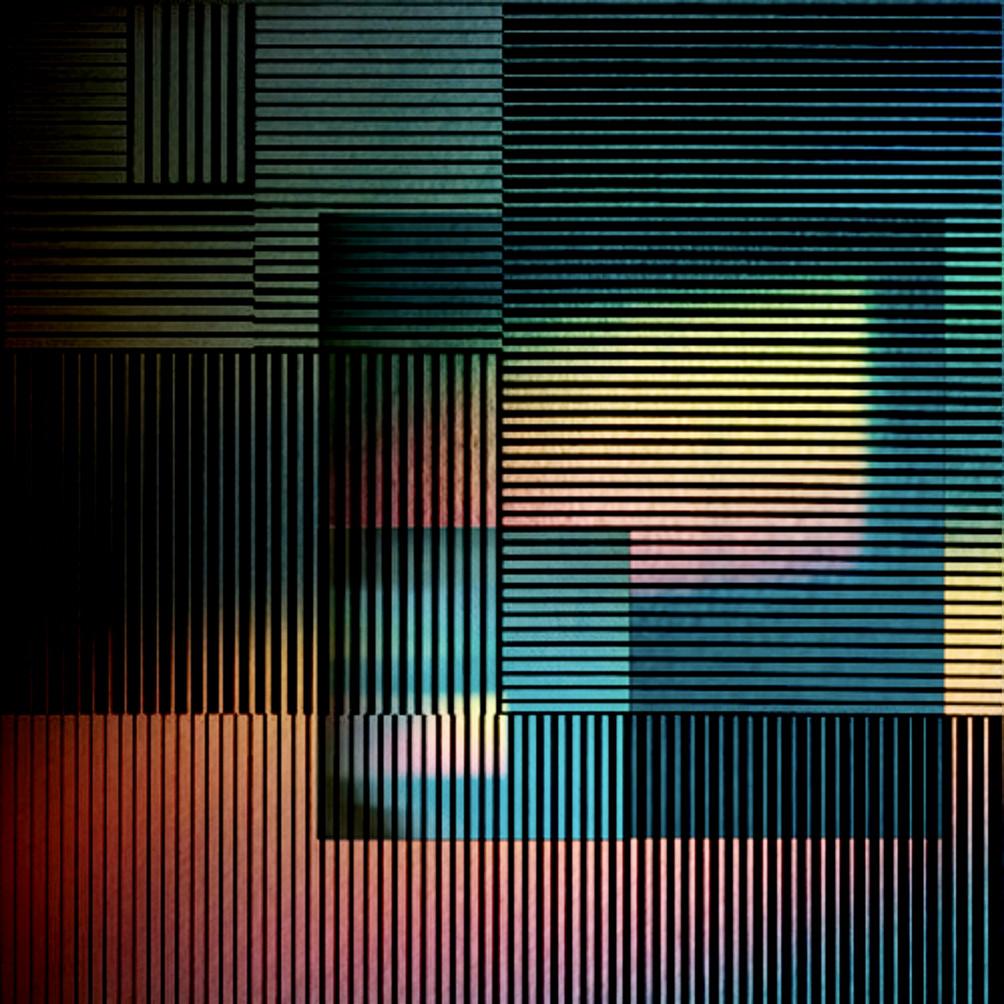
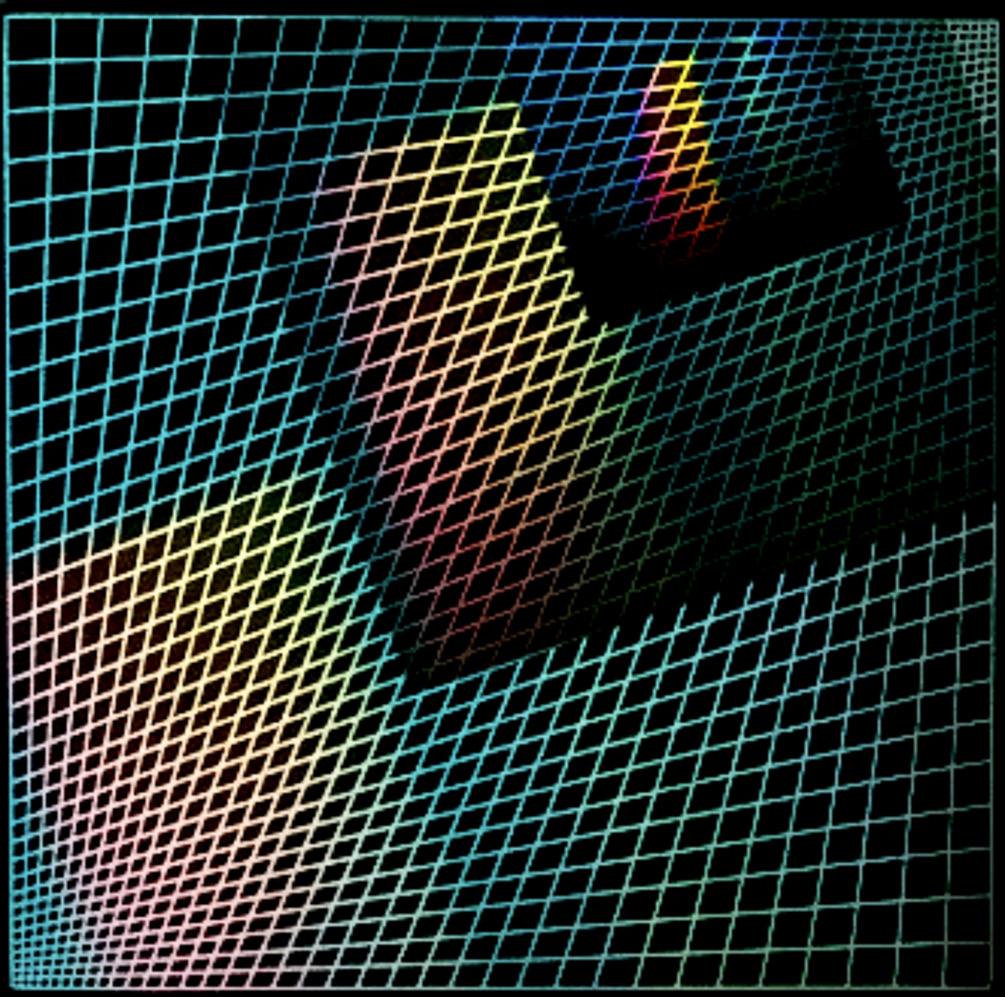
Both sound and light can be measured as frequencies. The ‘pure’ sound and ‘pure’ colours have intervals between them and are not conceived as continuous transitions, therefore there are intervals or in my imagination ‘liminal’ spaces.

I often play with words, (in my head), that sound similar and the amusing notion of frequency and frequentness led me down another ‘rabbit hole’. There was born the notion of ‘absence’ between that which is frequent as opposed to continuous.
This parallel notion of sound and light captured my imagination and grew into a wish to express my
vision as a series of images that sat together in a visual harmony.
Light and the absence of light occupied my thoughts and how to create a visual flow just using presence and absence… abstracted.
The depiction of fractured light, rhythm, harmony and tone occupied my ‘liminal’ pre-sleep thoughts for many months.
All colour is made up of fractured white light and its absence can be depicted as ‘black’ so the visualisation of the liminal spaces took root in my mind’s eye.
My next conundrum was how to
shape rhythm and flow using just black, how and how much?
I don’t recall the exact ‘lightbulb’ moment except to say I saw someone dragging their finger along a piano keyboard, the flow of black and white keys triggered something as the notes filled the air. Then began vast amounts of experimentation with black shapes, size, angles and frequency (that word again). Huge amounts of fun ensued combining spectra, black shapes, and rhythms. At that stage I felt I was missing something… temperature. Looking back at the original photos I instantly saw warm and cool and there was a sharp
depiction of both, dividing the pictures neatly into two halves.
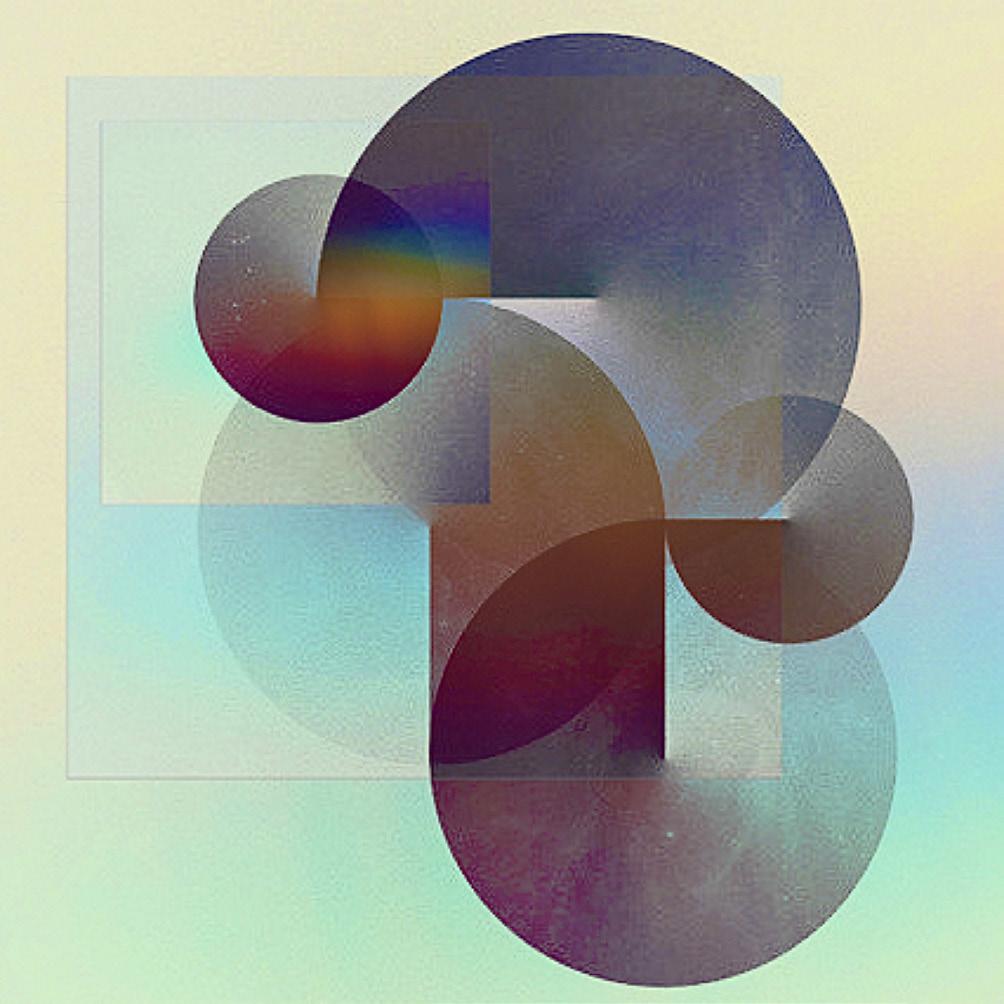
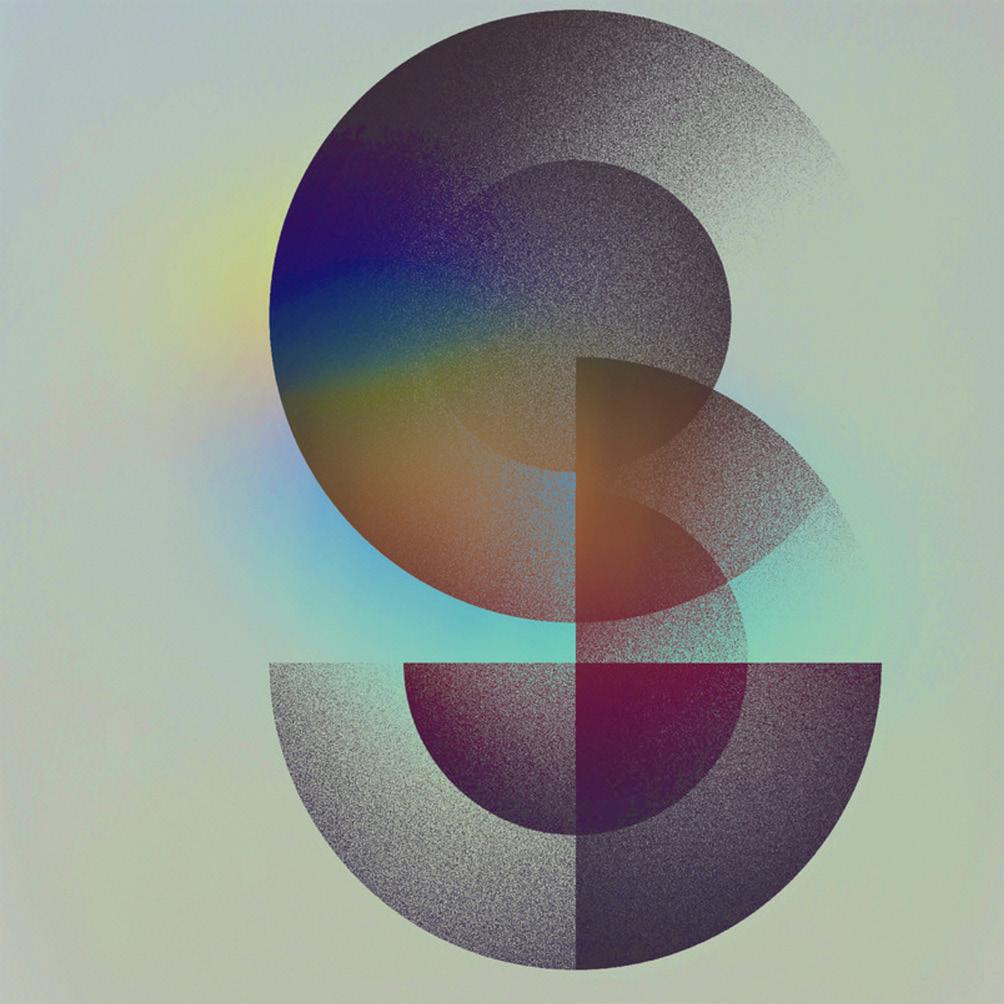
To create tonal depth within the spectra I experimented and created many layers of differing sizes and intensities until the composites pleased my eye.
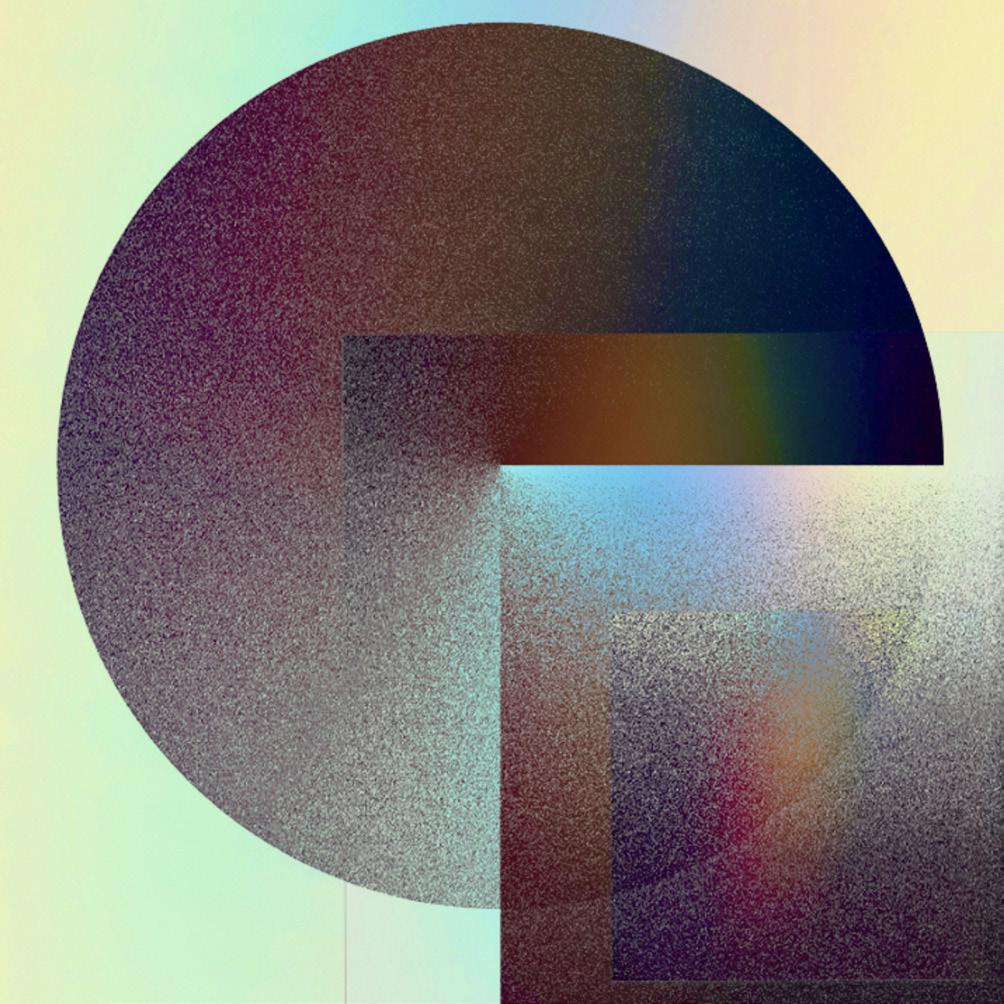

There was a moment that just how to depict my vision came to my consciousness and the realisation of the first one took less than half an hour one Sunday morning (before coffee)!
The complete series took a little longer to finish but as soon as it was the discovery and idea were manifest. The journey from my conception to the perception of the
viewer complete.
There are those amongst you who will take issue with the pseudoscience of light and sound that I’ve tried to voice here. But this is about sharing my idea, visualisation and thought process with you, not a dogma, not a certainty, but an idea brought into being and shared with those who want to participate

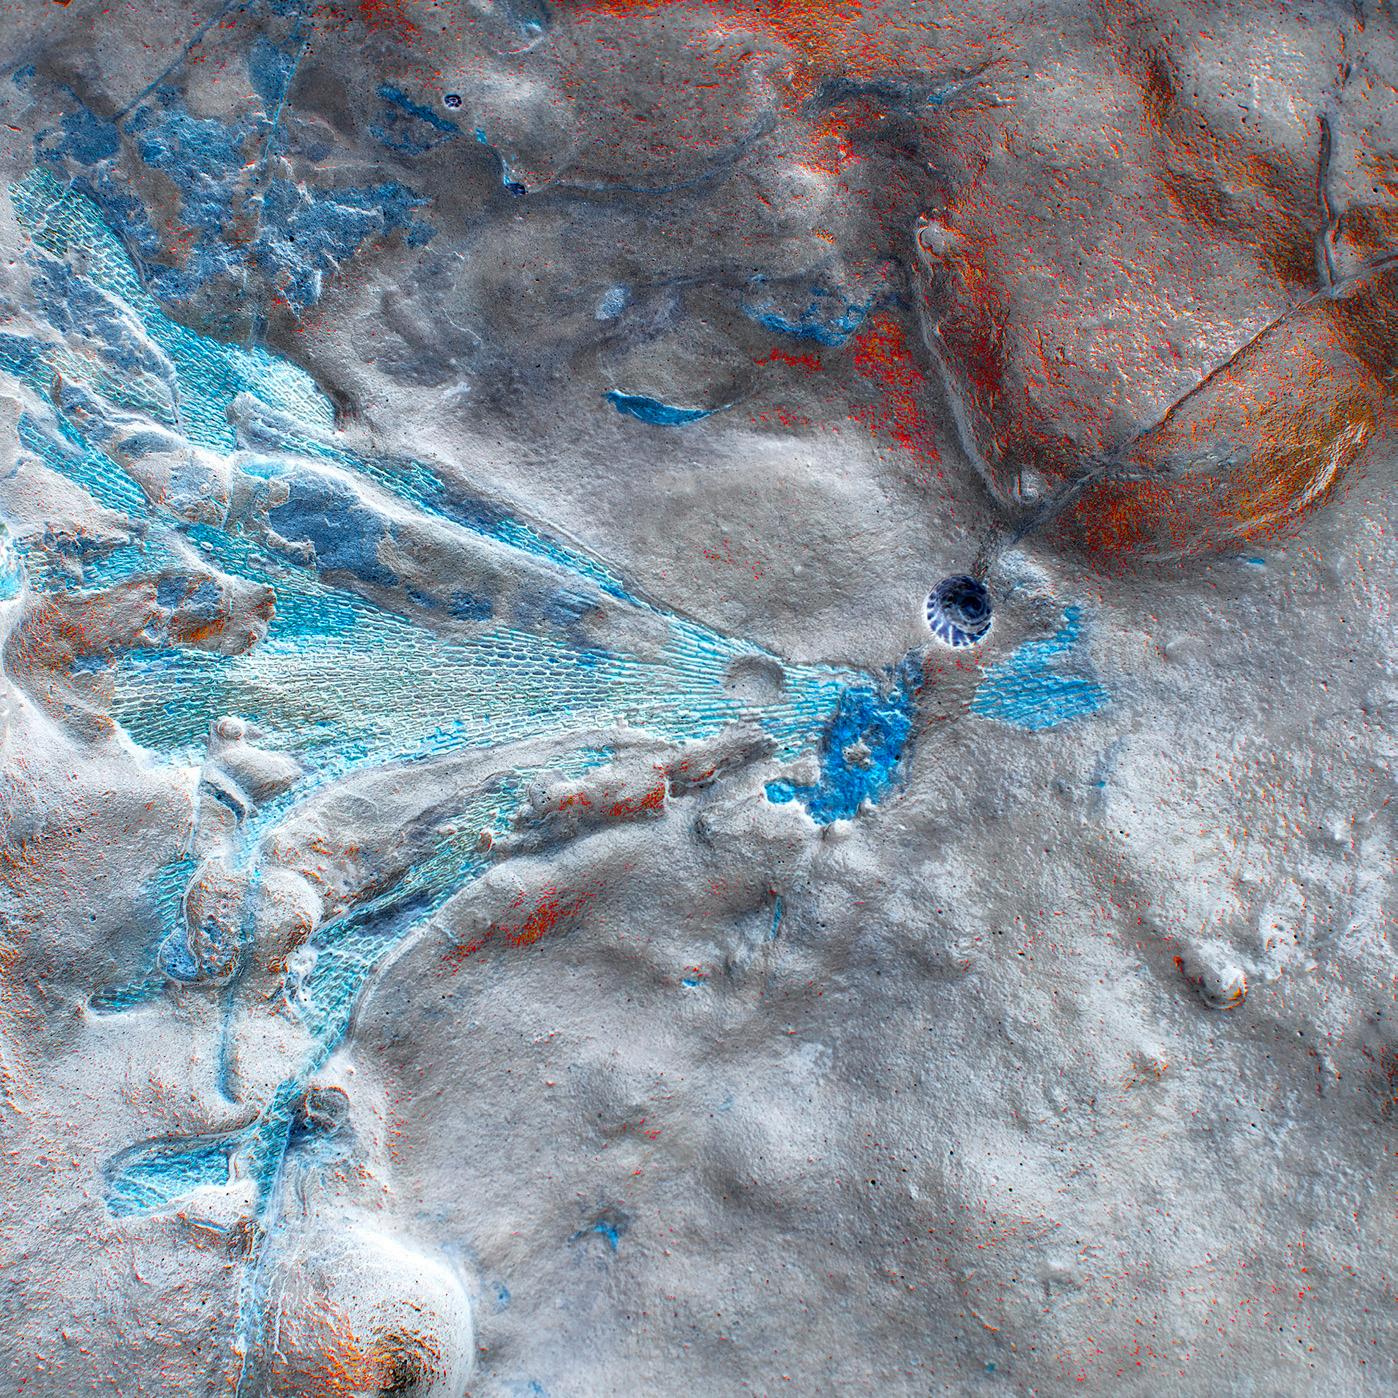
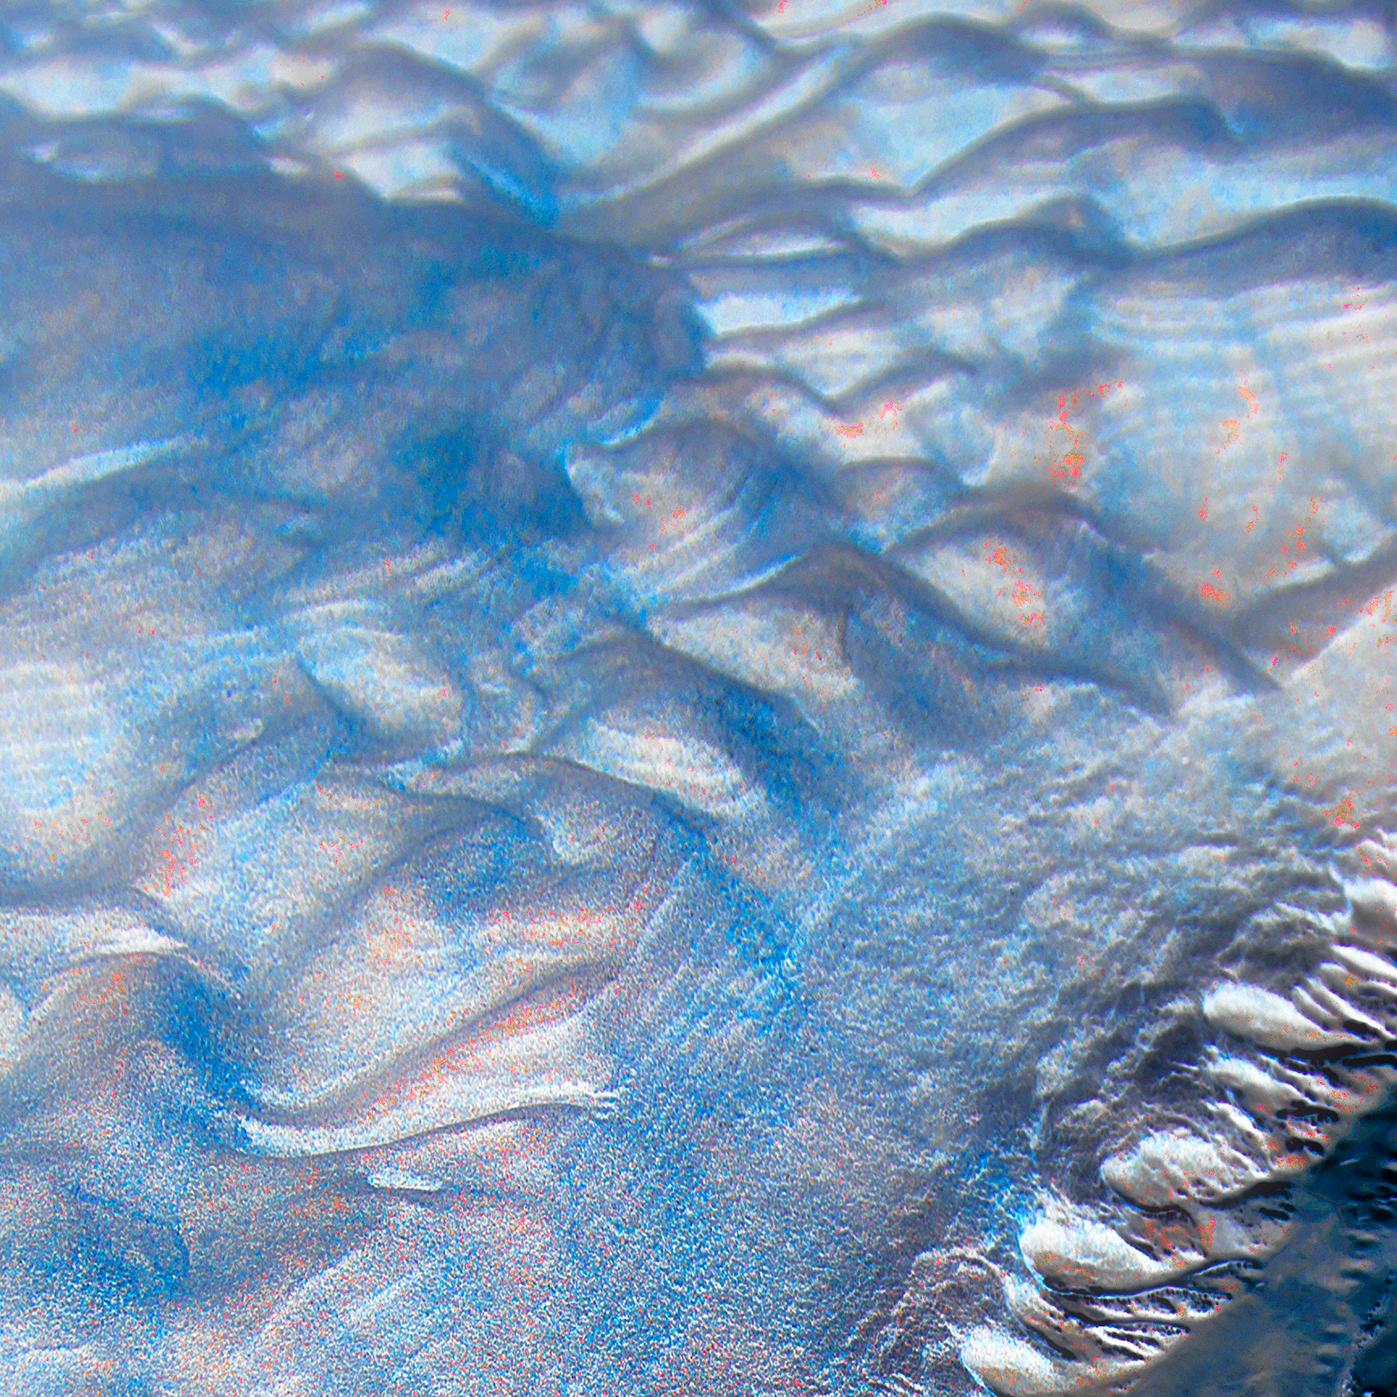
Mention landscape photography and it may evoke thoughts of green, rolling hills and blue skies. But landscape photographer Sue Brown shows that there is beauty in the small details that we might take for granted.
As a landscape photographer it is always a challenge to try and portray images in an imaginative way. There are so many so called ‘honey pot‘ locations that are photographed to excess and yet we
are still drawn to visit them.
Personally I am inspired at coastal locations; rocks, sand and sea, all continually changing as weather, tides and light intensity alters shape and form. Then the considerations
of exposure and shutter speeds, tools uniquely available to the photographer have to be intentional to achieve objectives.
On a visit to Northumberland I could not resist a visit to
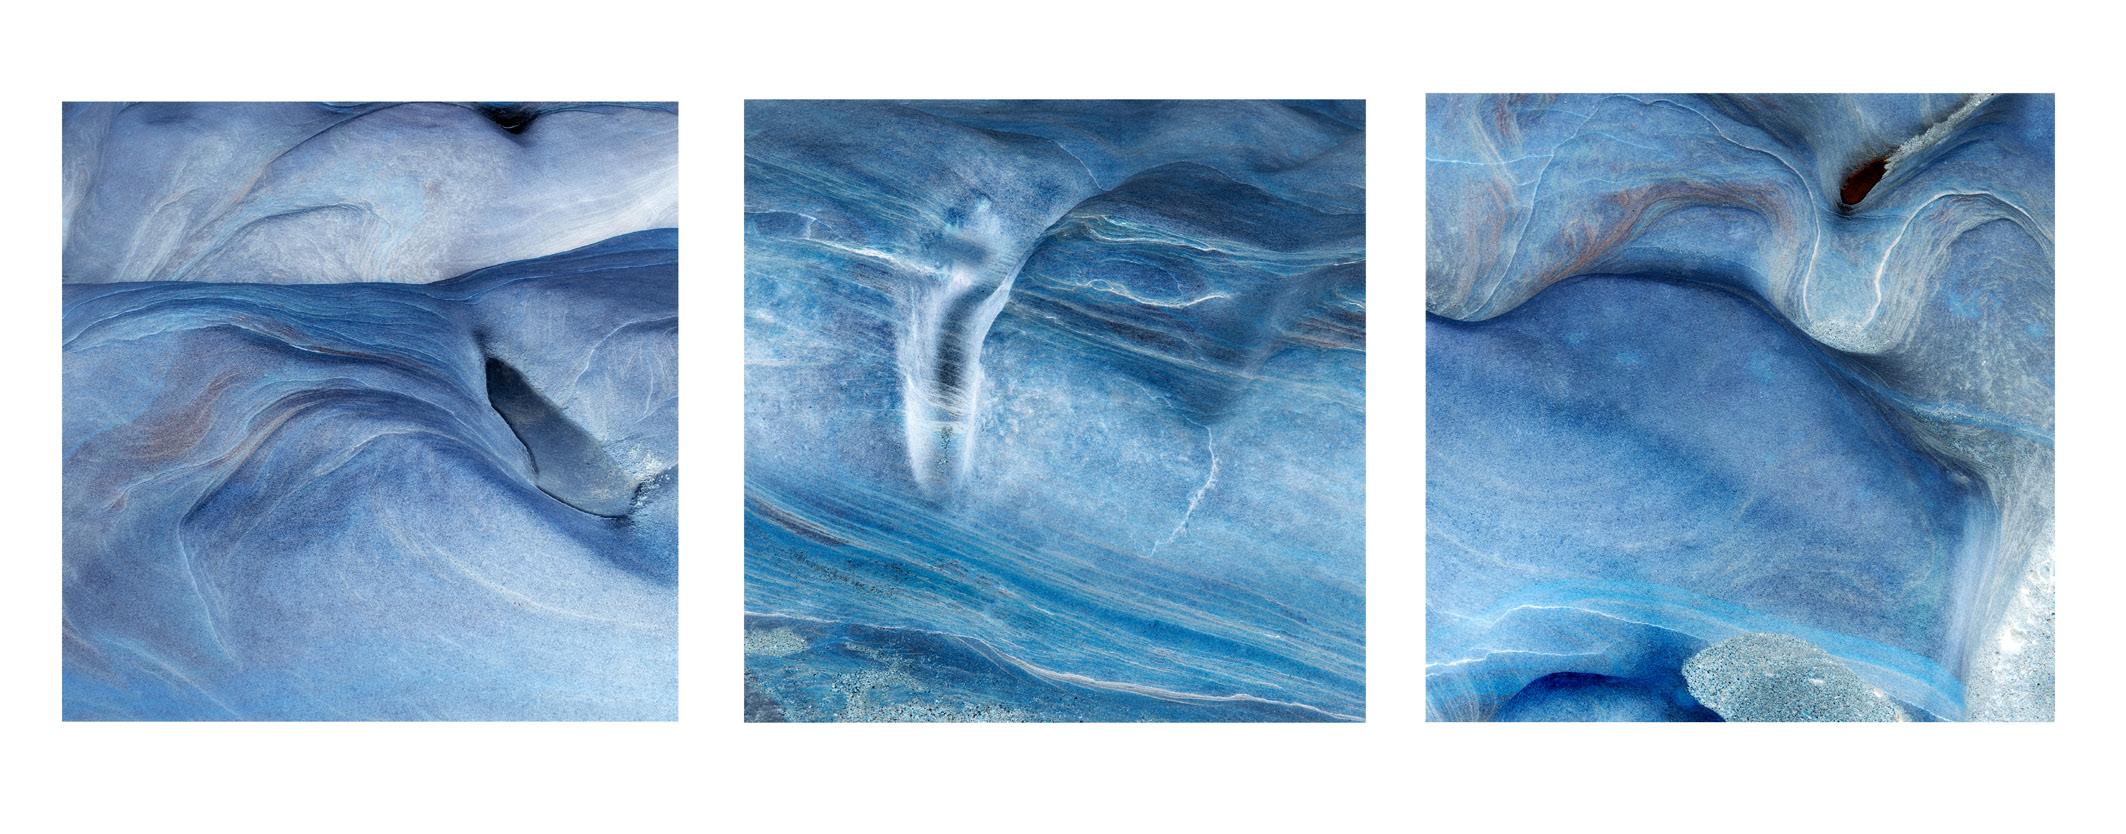
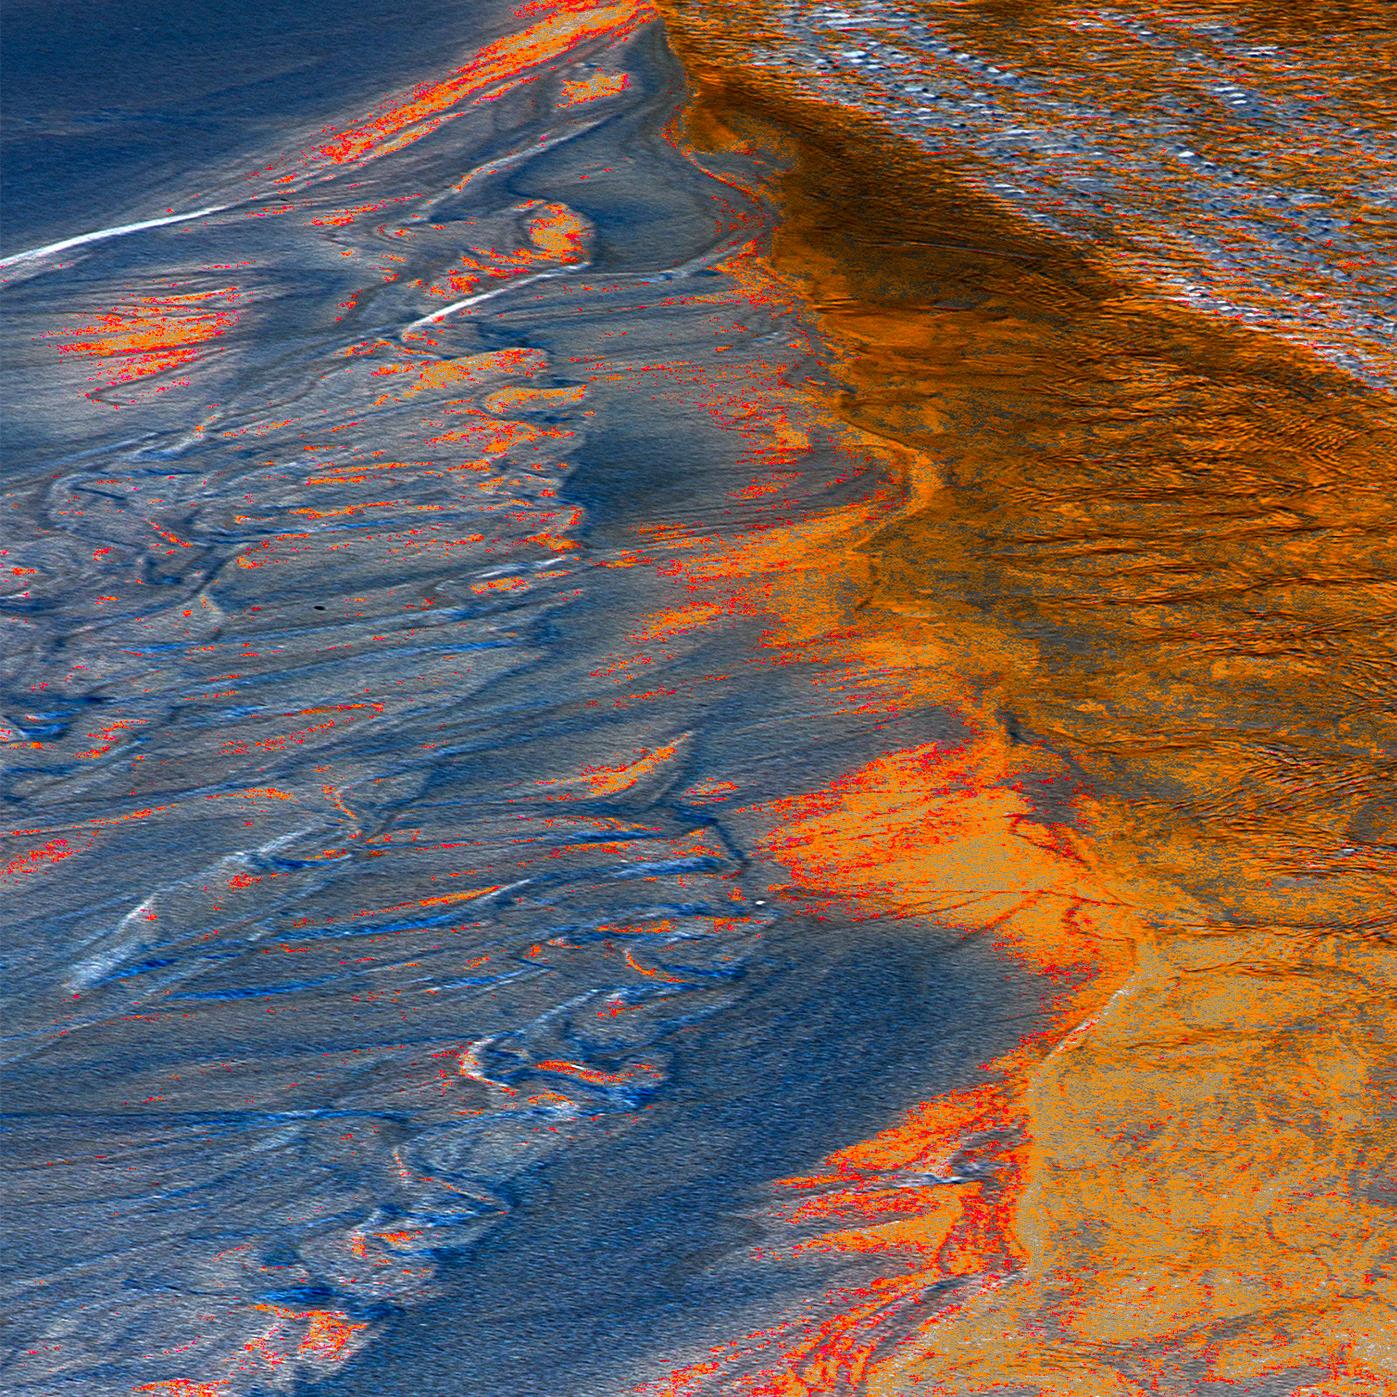
Spittal Beach, a location well photographed because of the sensuous shapes of the sandstone formations, invisible at high tide and after storms when they are often covered in sand; I was lucky to arrive at low tide and to see quite a few rocks exposed. I spent an hour with my camera looking for good angles but the last thing I wanted was to come home with a visual cliché, I had some serious thinking to do.
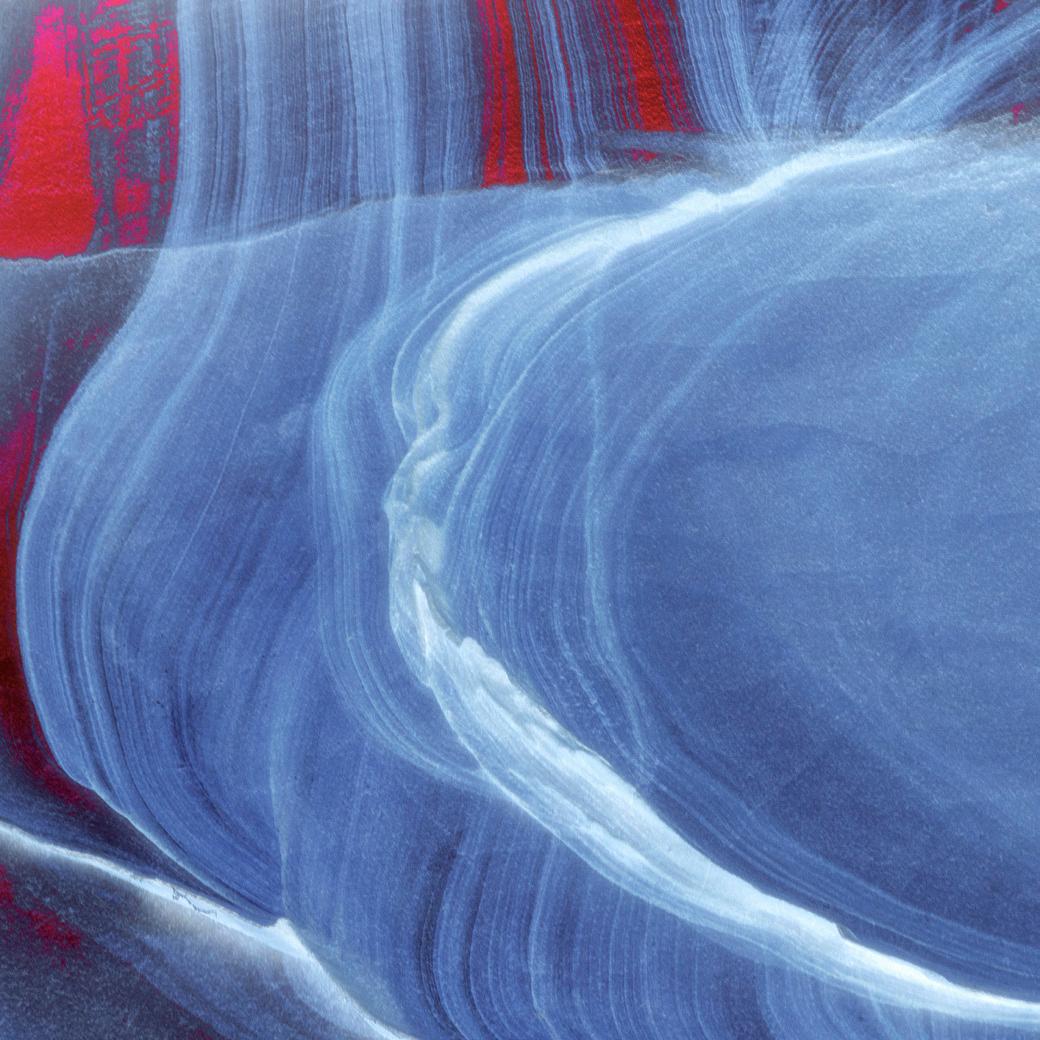
When I got home and started processing the images I recalled a landscape I had taken some time previously where the colours of the land were similar to those of the sandstone at Spittal. I had found by inverting the colours to the opposite side of the colour spectrum lovely blues and cyans were produced (see page 23) so I started by trying this method. The result was that stones became almost more sensuous with the abstraction by emphasising different elements. Inevitably some worked better than others.
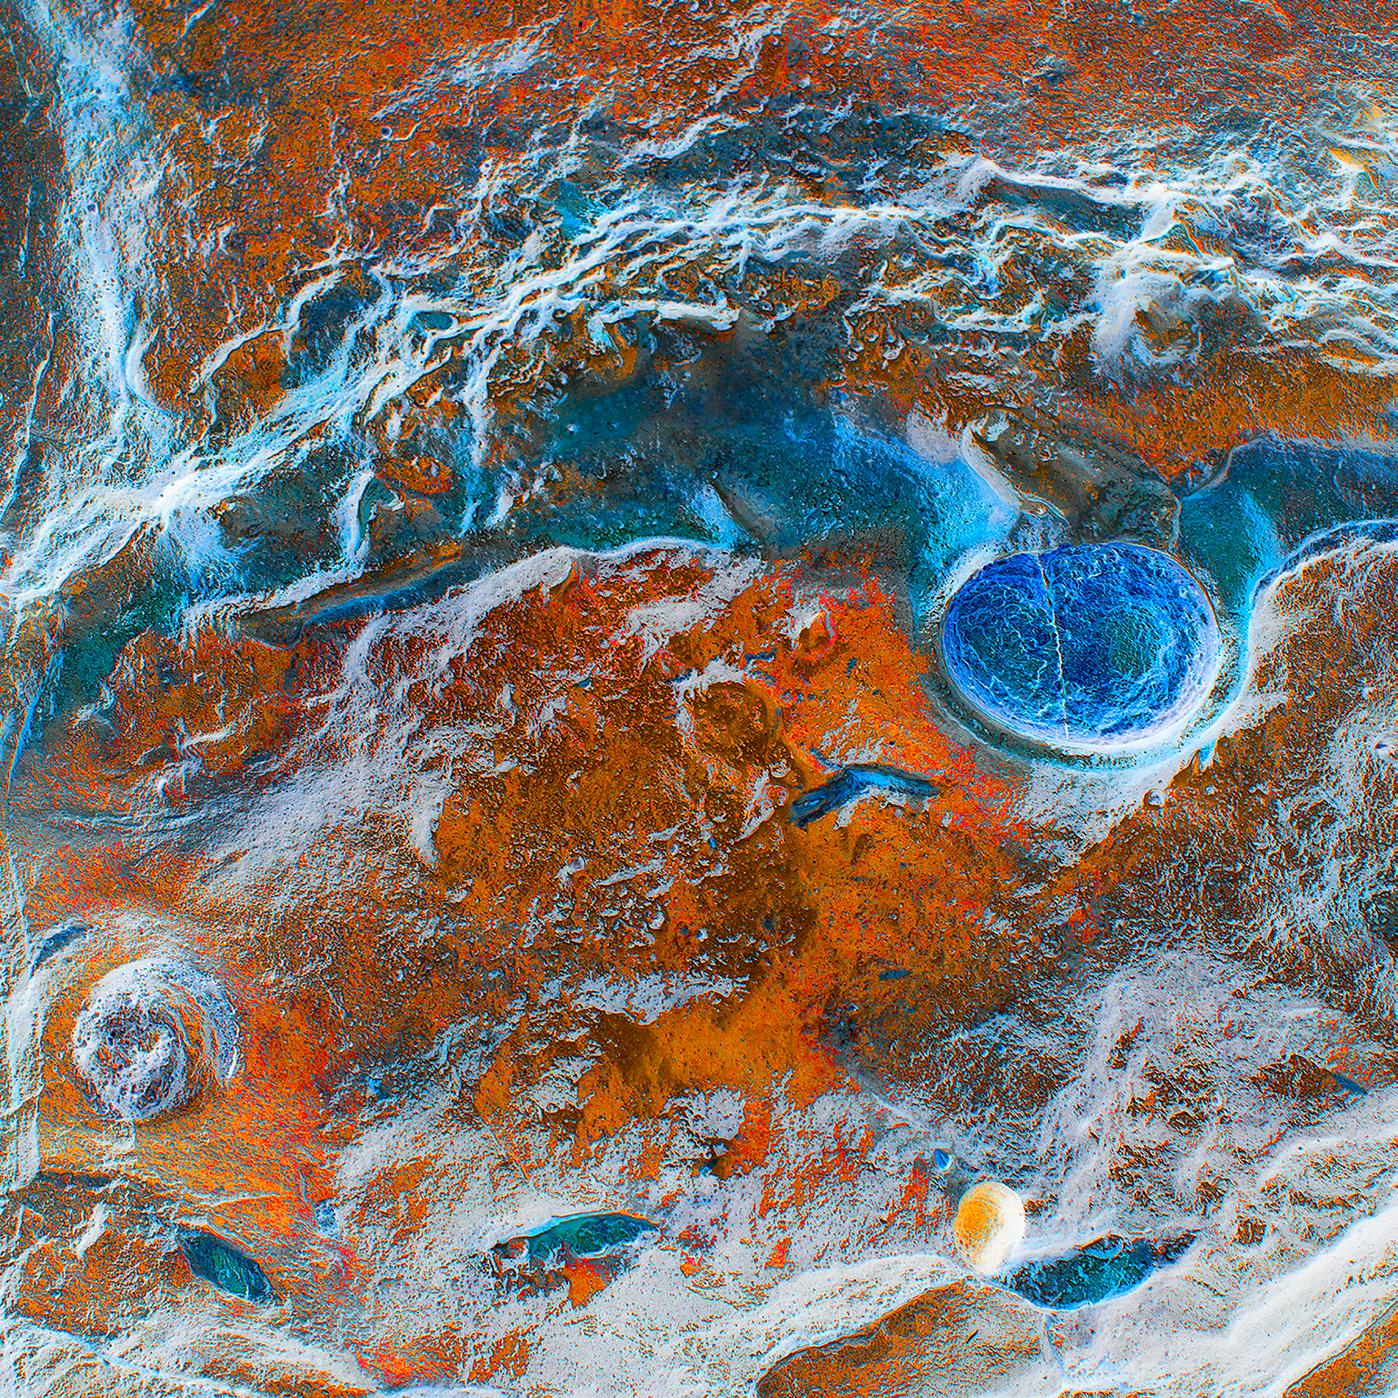
The next year I went to Australia and whilst in Sydney I walked from Bondi Beach to Coogee on the Coast Path, a stunning walk with lovely wind blown sculpted sandstone cliffs. It was very hot, reaching 42°C at one stage and I was wilting but managed to capture a few images. (see left, top)
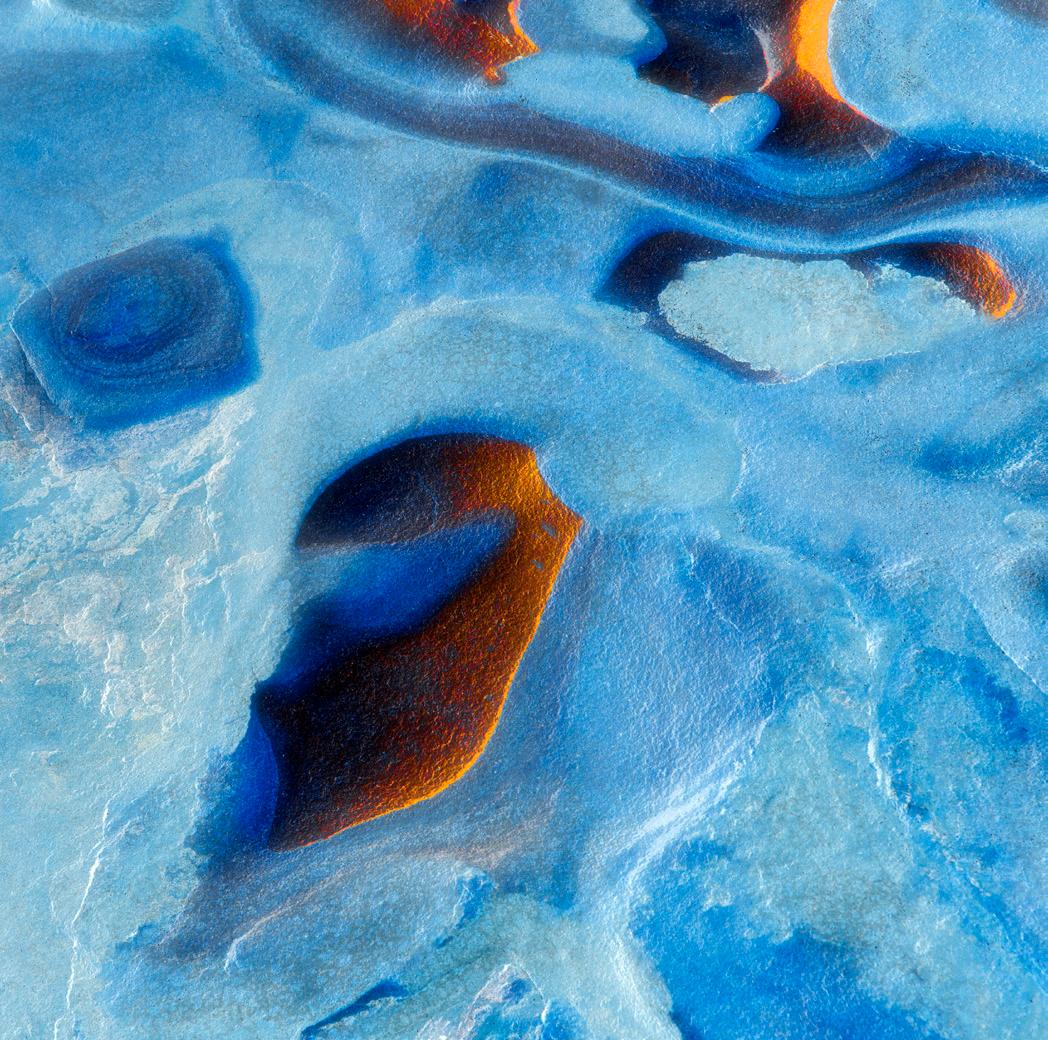
The next locality to visit was Ulladulla on the south coast of NSW where there is a well known fossil shelf. Fossils seemed difficult to locate at first as colours were dull with little contrast, almost camouflaged. Once my eyes were trained to observing them it was apparent they were commonplace. Walking on the rocks was hot and impossible without footwear; it was equally as hot on the lovely sandy beaches surrounding this beautiful area with seas delightfully warm. I had to wait impatiently until I got home to process the work. Again I tried the inversions, the fossil details became more distinct, sand patterns also looked different to the point of abstraction. I now had
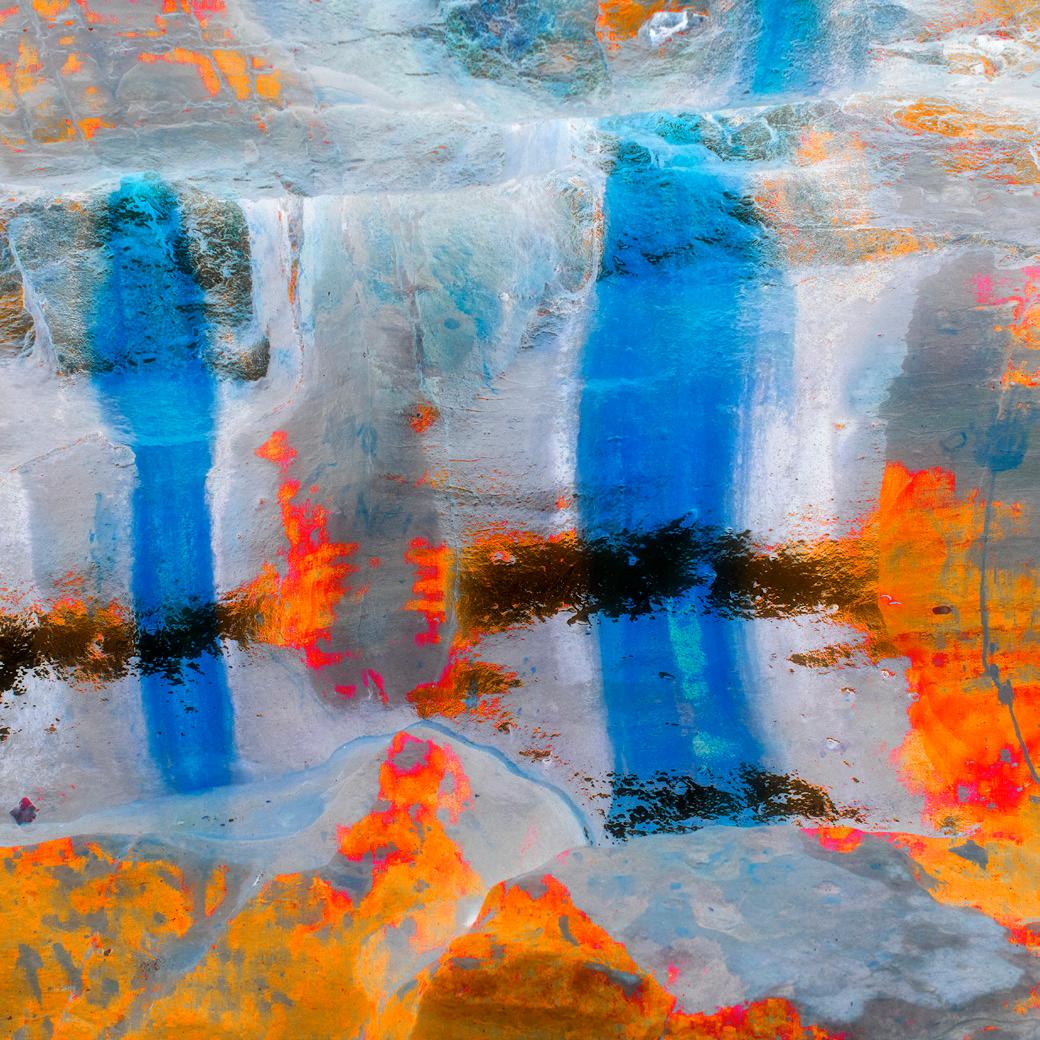
a dilemma. I was intrigued that the inversions abstracted the image purely by change of colour, but to blue which of course is associated with cold. I needed to have some way of expressing heat. I selected one image in Photoshop, and increased the ‘invisible’ red, to my delight and surprise, some, but not all of the images had very warm and even hot colours emerging. Eureka! - a new series of work was possibly unfolding; ‘Climate Change’.
Climate change is very serious and concerns me. Working on abstract images that are almost threatening with the warm colours appealed to me, I hope they may make viewers think of what we are all doing to our world. The storms, floods, hurricanes are all proof of the devastation surrounding us and it is undoubtedly getting hotter. The area at Ulladulla where I photographed the fossils was surrounded by beaches and woodlands with hundreds of kangaroos and koala bears, which were sadly all burnt to a cinder in the forest fires that hit the area not long after we left. Having seen the beauty and then watching the bush fires on the news destroying it was truly heartbreaking. The local people had to take to the sea to be rescued by boats. It seemed fitting to have images that I felt were appealing to the eye, but once the viewer understands why I processed them in such a way, I hope they communicate a strong message, particularly given the tragic fate that befell parts of New South Wales shortly after taking them, almost a prophesy l
susanbrownphotography.co.uk

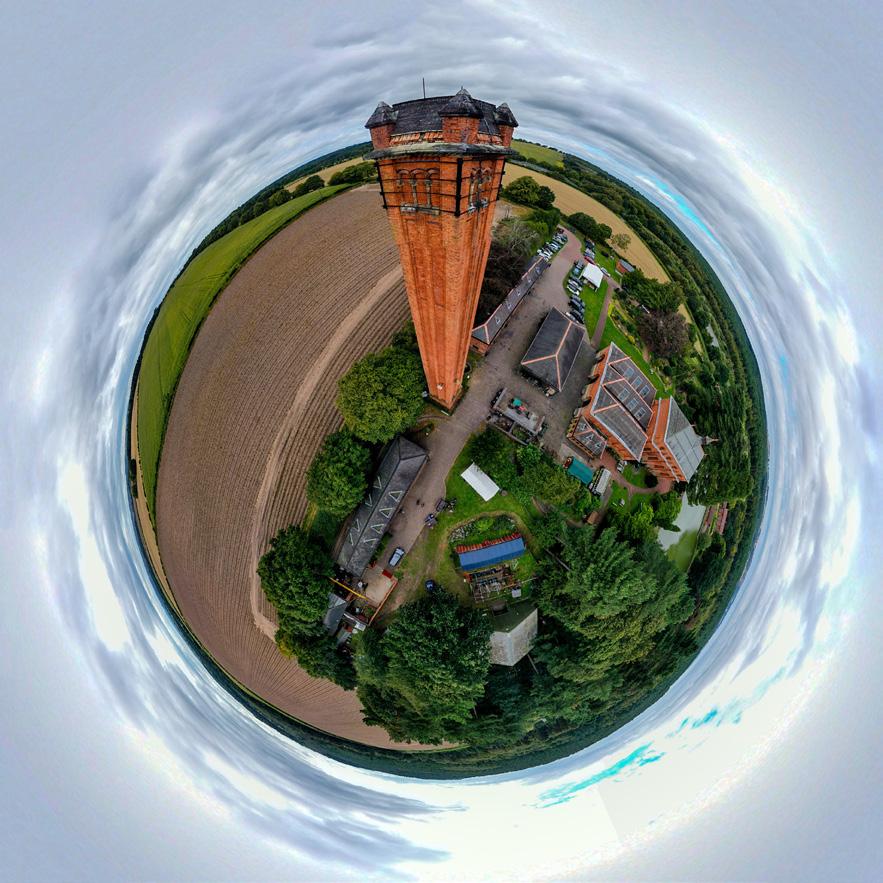
In November 2018 I bought myself a drone (Mavic 2 Pro, with a Hasselblad camera) as an extension to my stills photography. I found that the built-in drone software could produce, with minimal effort, ‘tiny planet images’ (figure 1), which put me in mind of the Dutch artist Escher, with his mind confusing drawings. Thinking along these lines I then decided to produce my own ‘square world’ image (figure
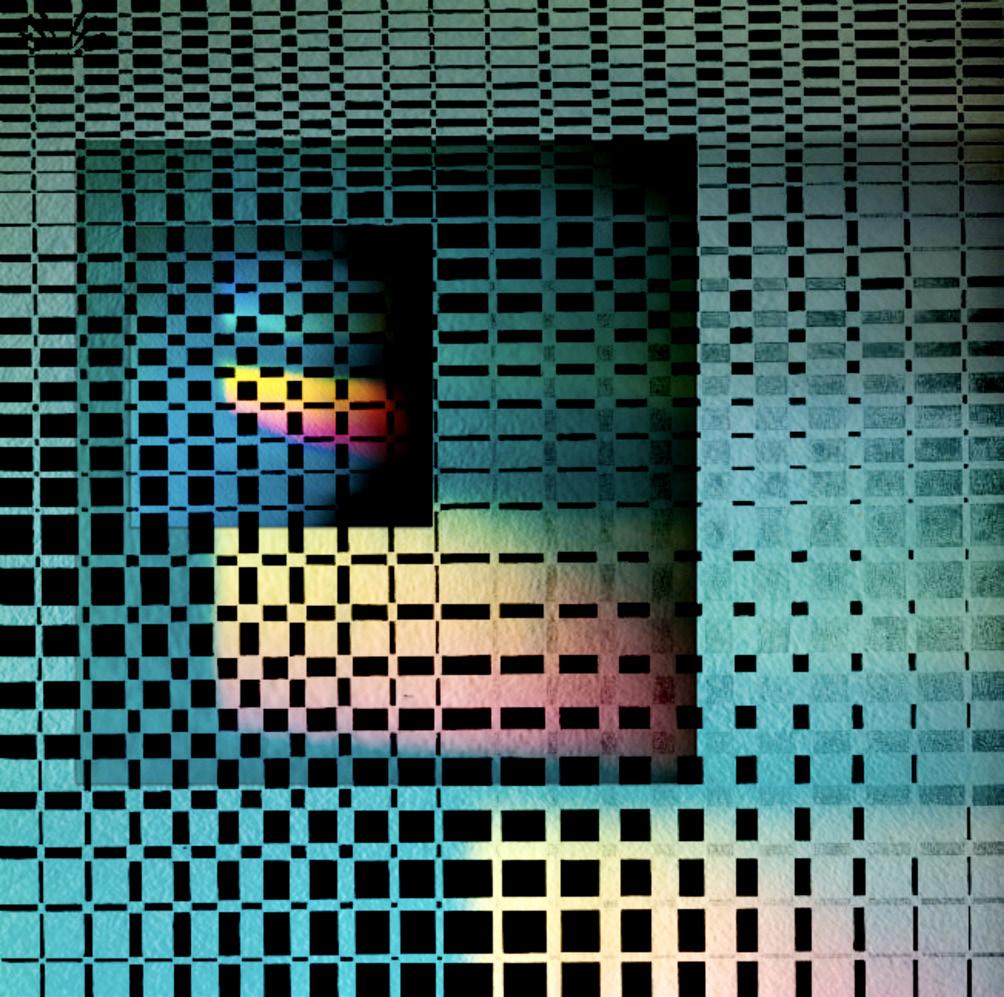
2), after making a drone flight over the Cambridgeshire Fens where I live. This in turn led to me making The Void, utilising a photo taken on a flight above Grafham Water reservoir and capturing the draw off tower (figure 3).
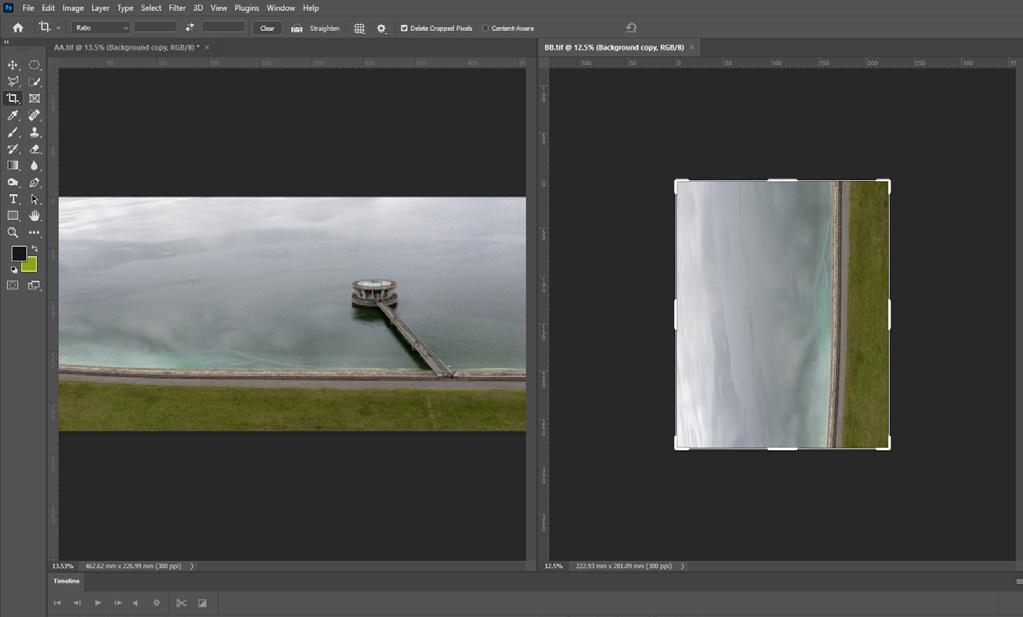
Once opened in Photoshop I cropped and turned the image through 90 degrees anticlockwise and, after saving it, stacked it, at
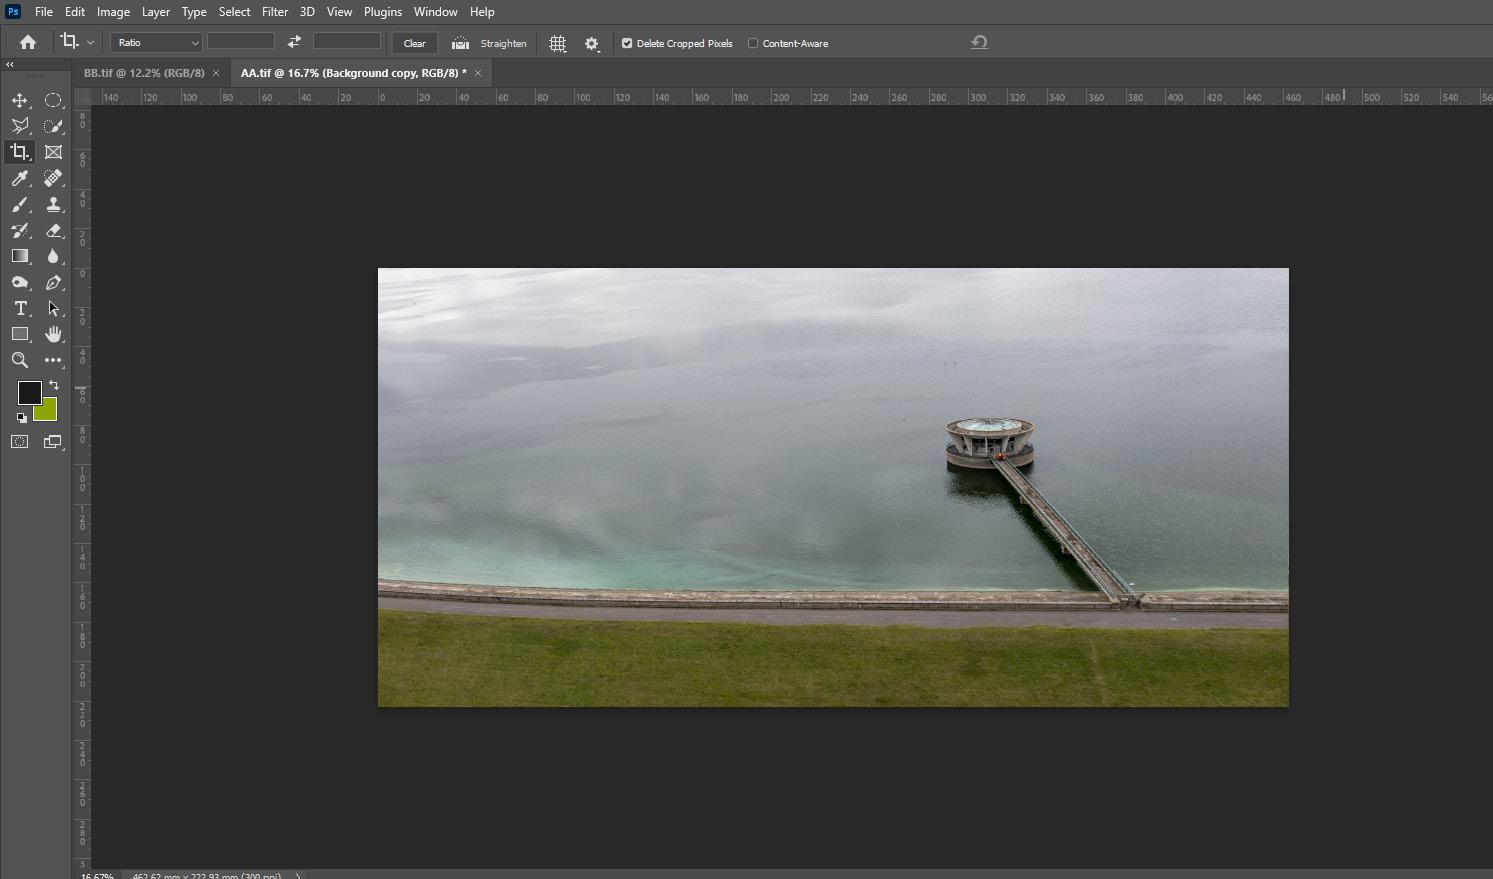
50% opacity, above the original image, carefully positioning the layer so that the two edges of the reservoir intersected at right angles. I made a selection to protect the part of the image I wished to retain and erased the remainder (figure 5). I cropped the result as I wanted it and created a new blank layer onto which I dropped the image (figure 6). Creating the left-hand portion of the ‘chasm’ was simply by cropping
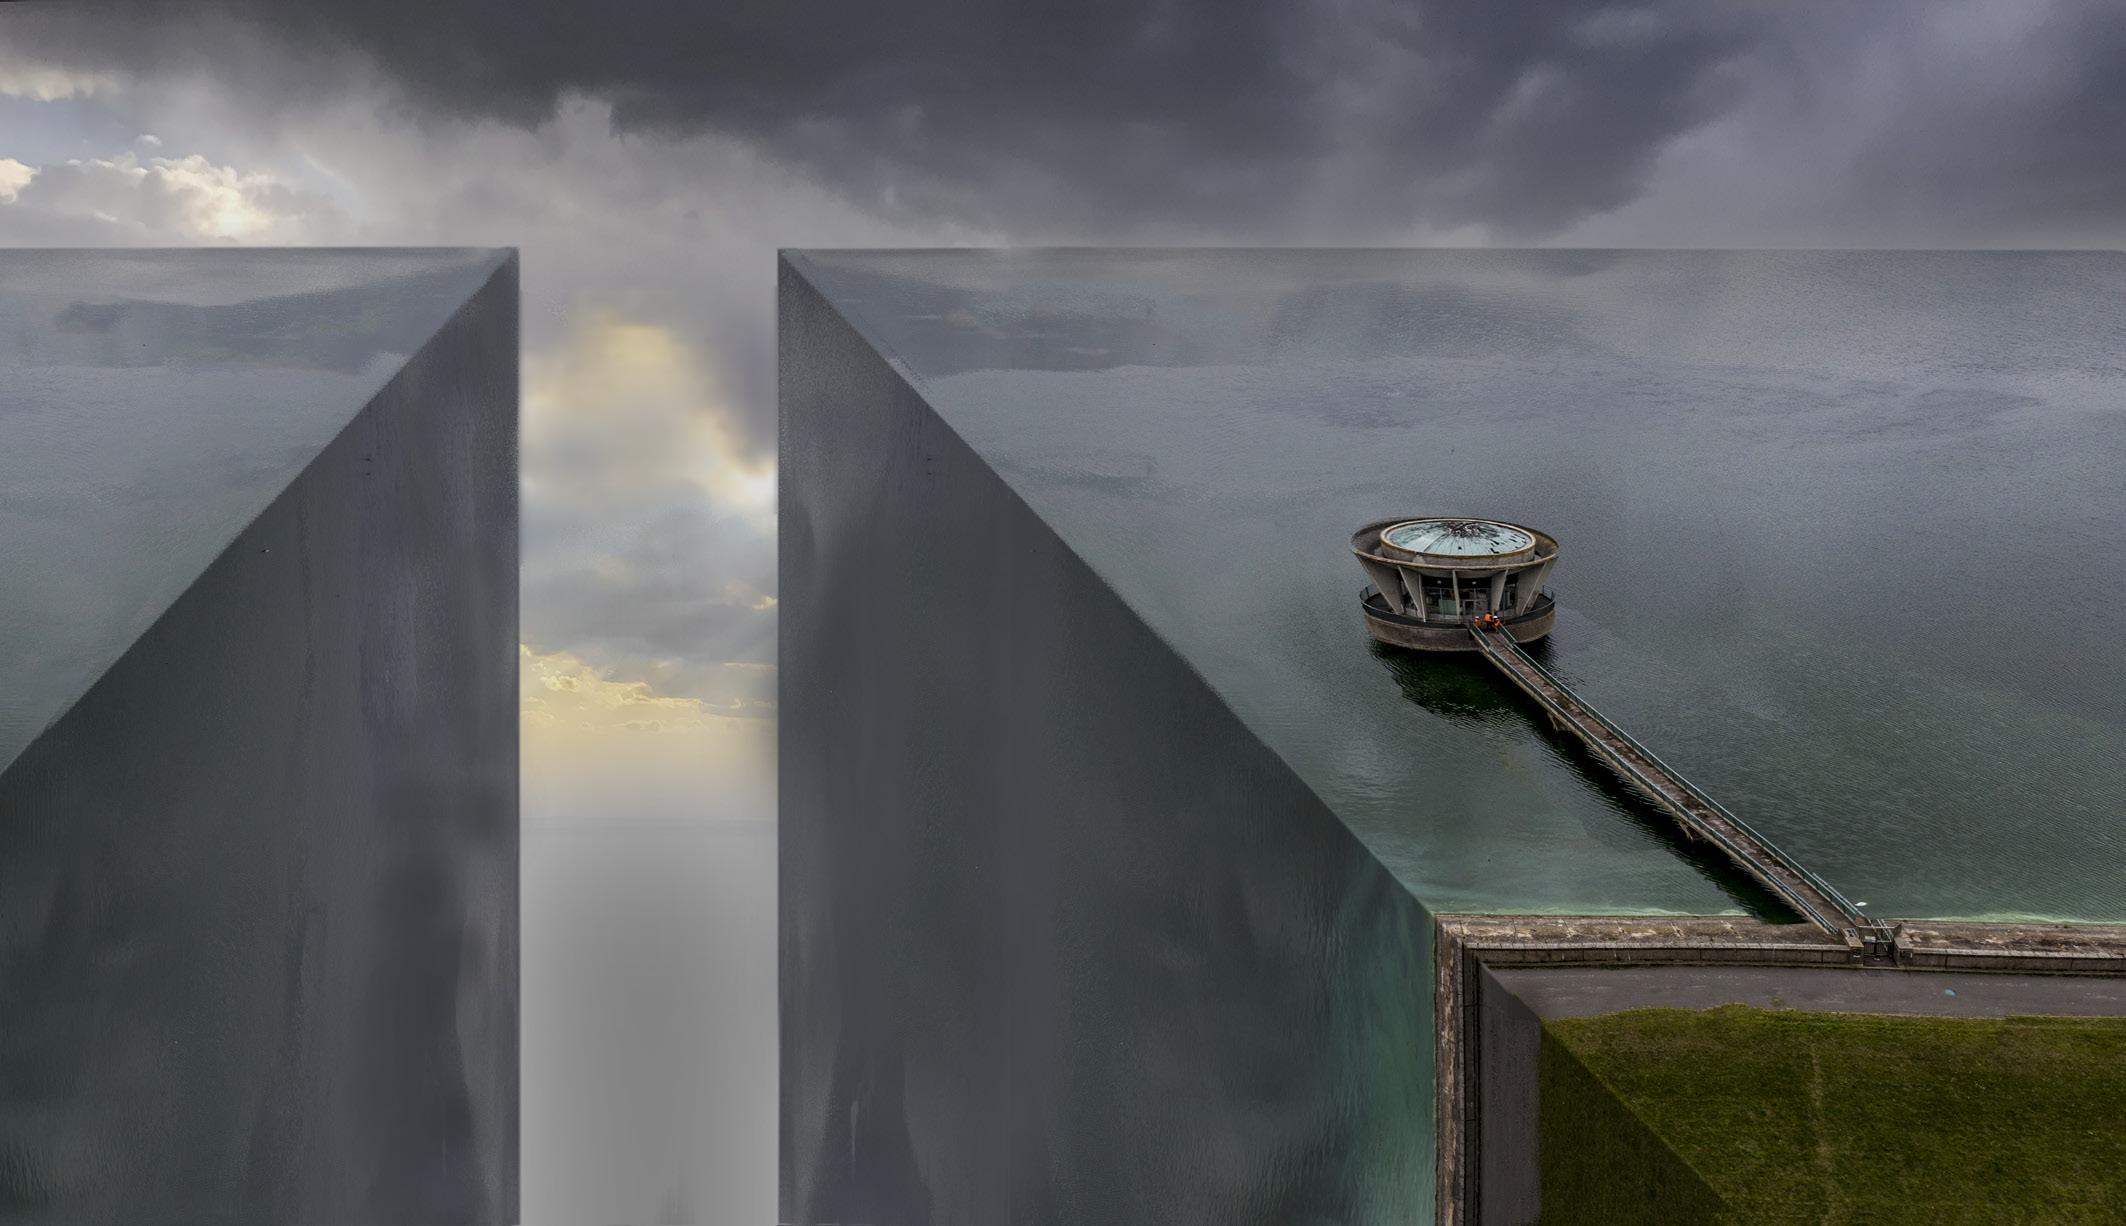
and flipping horizontally the main image. It was important to darken the two vertical surfaces to give a sense of depth. The ominous cloud background was from my own sky collection that I have put together. The tiny orange clad figures
standing on the draw-off tower do give a sense of scale, although I hadn’t spotted them when I flew the drone.
I am no Photoshop expert, and I am sure there are other and better ways of producing the same result.
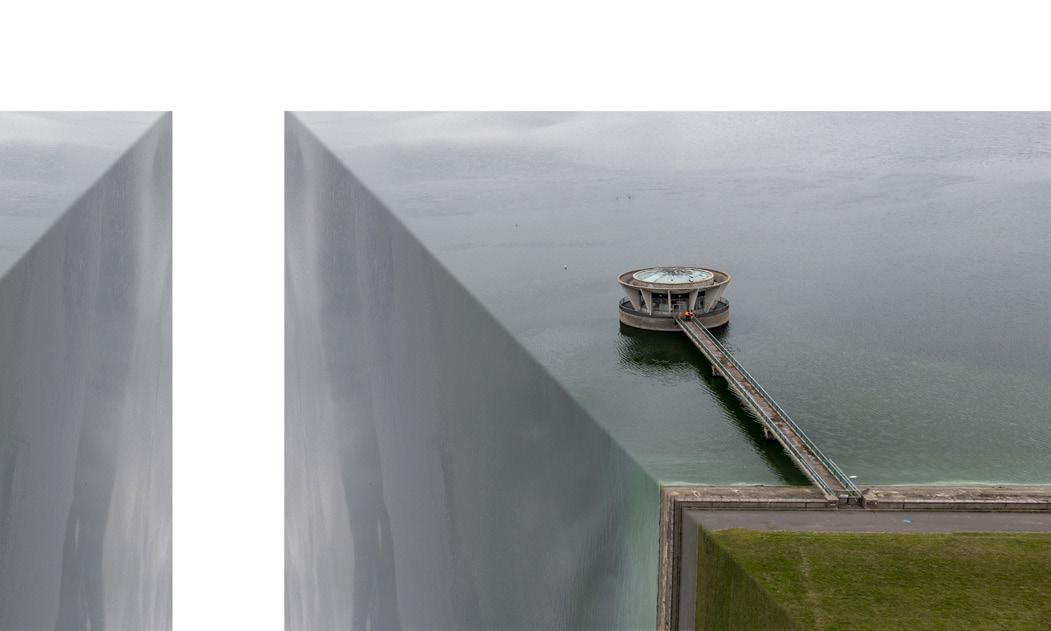
The Void has done quite well for me in some national and international exhibitions, but on home territory, in creative club competitions, some judges have failed to grasp what they are looking at, other than it’s not a bird on a stick! l
Tony Healy tries out some of the latest photo processing software and finds that it can breathe new life into old photographs.
Back in 2009 I wrote an article for DIGIT 44, about a new software application called Topaz, which was a replacement for one called Buzz that had been discontinued. As we all know once a company gets your email address, they have it forever. The creator of Topaz was actually Topaz Labs, and over the years they have kept me informed of their new software. Recently, they have moved into making use of artificial intelligence, and now have software named Gigapixel AI, Sharpen AI, Denoise AI and Video Enhance AI
Gigapixel was initially promoted as a faux extension to your longest lens. When you took a telephoto shot, you would get as close as you could, to your subject. Using Gigapixel on the digital image meant you could increase the pixel count of the image by 6 times or more, thus being able to enlarge the image, to get a closer look at the subject. Of the new series, the ones that interest me most, are Gigapixel and Sharpen I have been researching the Healy family for some 40 years. The
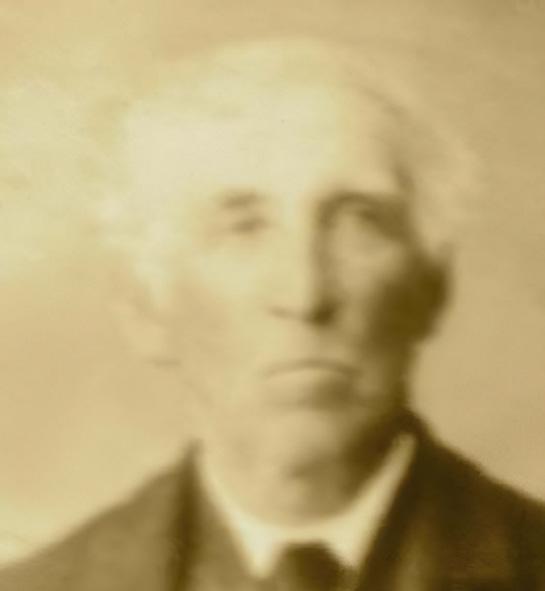
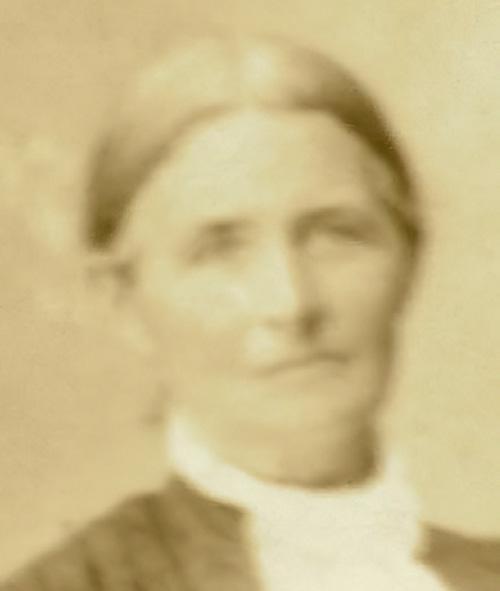
genealogical software I use allows a photo of the person to be added to their family details. When family contacts I made asked if I would like a photograph of a family member, as with any participant in Who Do You Think You Are, I would jump at the opportunity and always said, ‘Yes’.
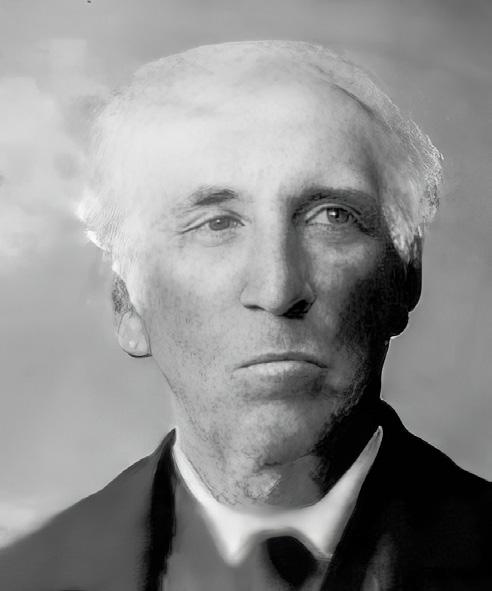
Over the years I have accumulated a large number of good, bad and indifferent photographs, which ranged from some being taken in 1867 to those on smart phones. Prints containing many people at family events meant that sometimes I would get a couple of complete families on one photograph. Scanning and enlarging the print, I could extract a head and shoulders of each person, but not everyone was in focus. I used Gigapixel to enlarge the extract, and Sharpen to try and make it look better. This was not as successful as I would have liked. My feeling is that Sharpen works better on straight lines and curves than the shapes that make up a human face.
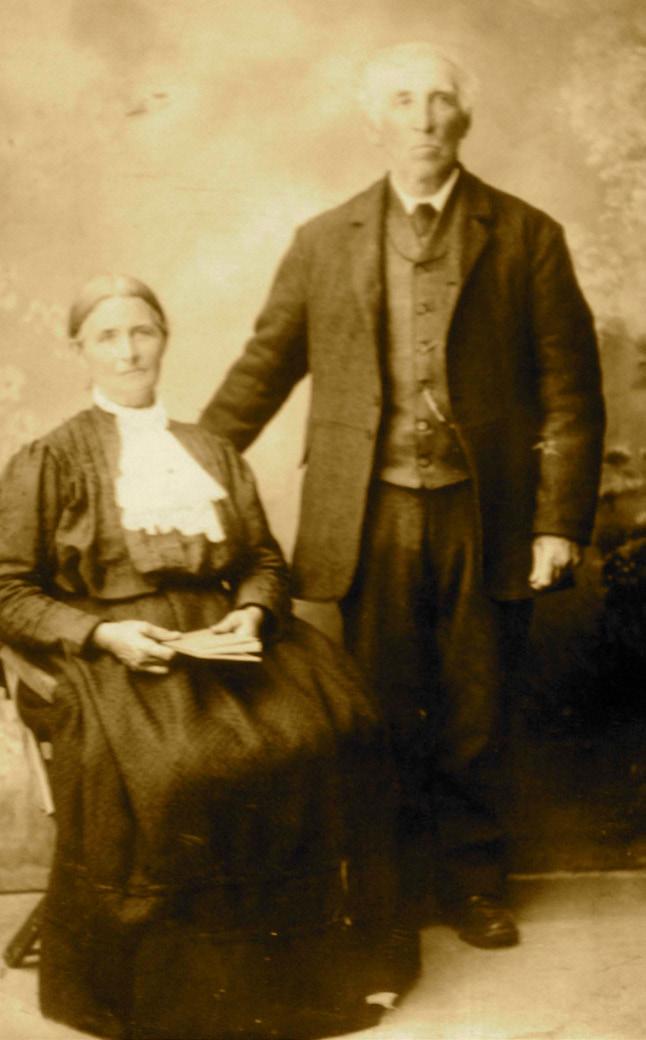
Topaz Labs recently informed me
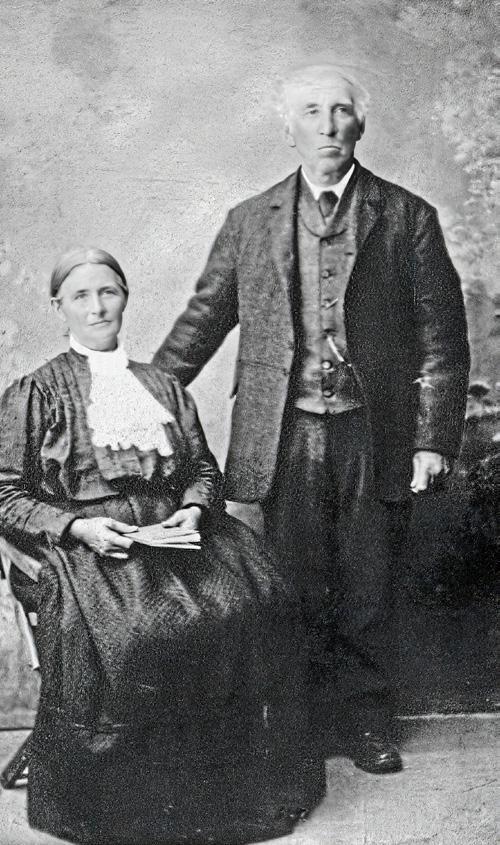
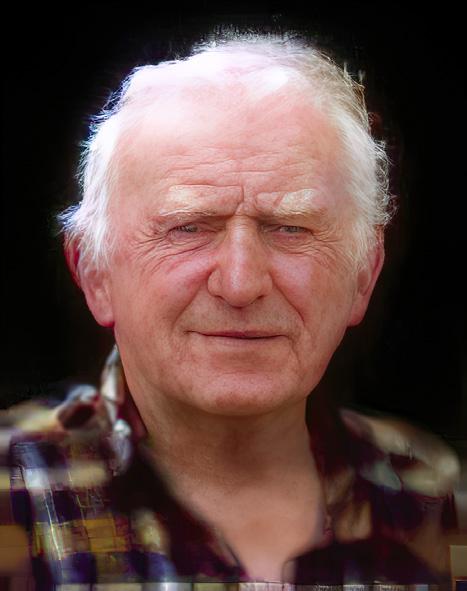
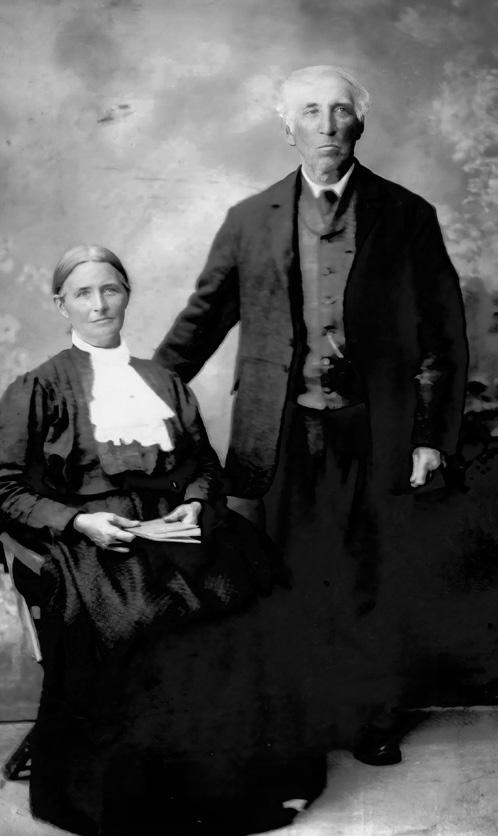
that Gigapixel AI 6.1 had a face recovery feature, which I felt could solve my problem. I tried a free test and was sold on it. To indicate how well it performs, I will use the two images below.
Both images were run through Gigapixel 6.1 to obtain head images large enough to crop from the image. Unfortunately, what was seen in the originals as acceptable was far from that when enlarged and cropped. The cropped faces from the original images are shown at the top of the next page.
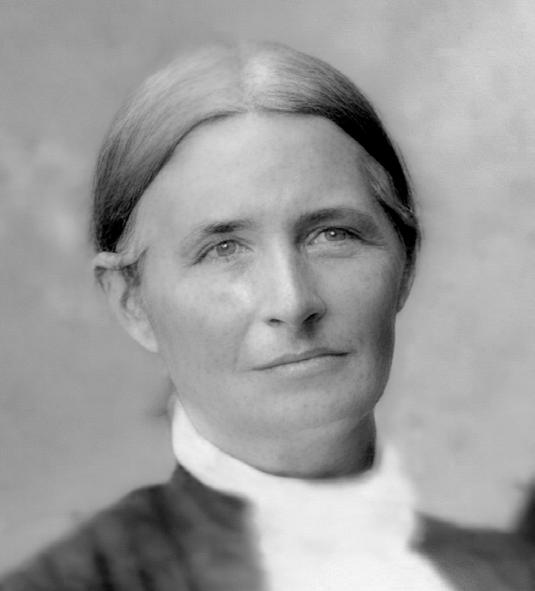
Working with these four images in Gigapixel 6.1, which contains the face recovery algorithm, improved the facial features. The results are shown at the bottom of the next page.
While the Gigapixel 6.1 result is great for faces, it doesn’t provide the same result for the rest of the figure, and this is where Sharpen AI comes in.
Normally, I would not be concerned about the rest of the person’s body, but in the case of the older family
image, their clothing is relevant to this period of time. I then took steps to get as detailed an image as I could to begin using Sharpen These steps can be done in both the original faded image, as well as the black and white versions I have used. In order to get as much detail as I could from the original, I opened the Channels panel in Photoshop, and selected Split Channels from the pull down menu. I was then able to examine which of the channels provided the best result. If necessary, I could then use other Photoshop features to enhance the results. I then discarded the unwanted channels, and from the Image>Mode menu, selected the RGB Color option, in case I wanted to add colour to the image at a later date. In my case, how well the Sharpen works on the image depends on what detail is available to be sharpened from the original image.
Sharpen has a feature which allows you to be selective in which part of the image is sharpened. Using the older original image as an example I put it through Gigapixel 6.1, to obtain recovered faces. Not wishing to alter the result while using Sharpen, I made use of the selective sharpening feature in the application.
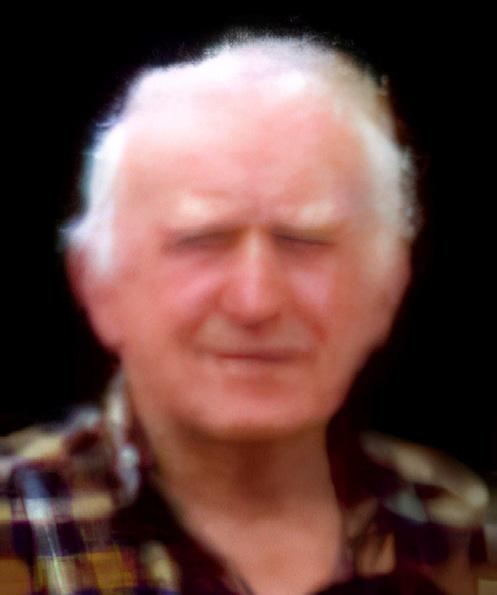
With the whole image in Sharpen, I used the Brush feature to cover the faces, from the Gigapixel application. Then in Sharpen, I selected Invert, so that all parts of the image except the faces were sharpened.
The final two images (see right) show what a difference detail can make to sharpening. The pixel information, used as a base for the upper image, shows that Sharpen has tended to fill in the missing information with black. However, in the lower image, with a better starting image, detail was gained in the texture of the dress, but it also brought with it other problems from the original image’s deterioration over the years. How acceptable this image is depends on how people feel about the difference of the ‘then and now’ results. To gain perfection in both is a future set of problems to overcome
Since Tony worked on his family’s photographs Topaz has realeased a product, named Photo AI, which improves the results and automates many of the actions described in this article.
I really enjoy processing. It’s a bit nerdy but I’m always content sitting at my Mac following my imagination. For this image, which I call Milne the Merciless, I had a pretty good idea of what I wanted to achieve. Some readers will remember the character Ming the Merciless from the 1980s Flash Gordon movie, played by Max von Sydow. The other influence was the opening credits of the early 1960s Dr. Who TV programme and for you real anoraks,
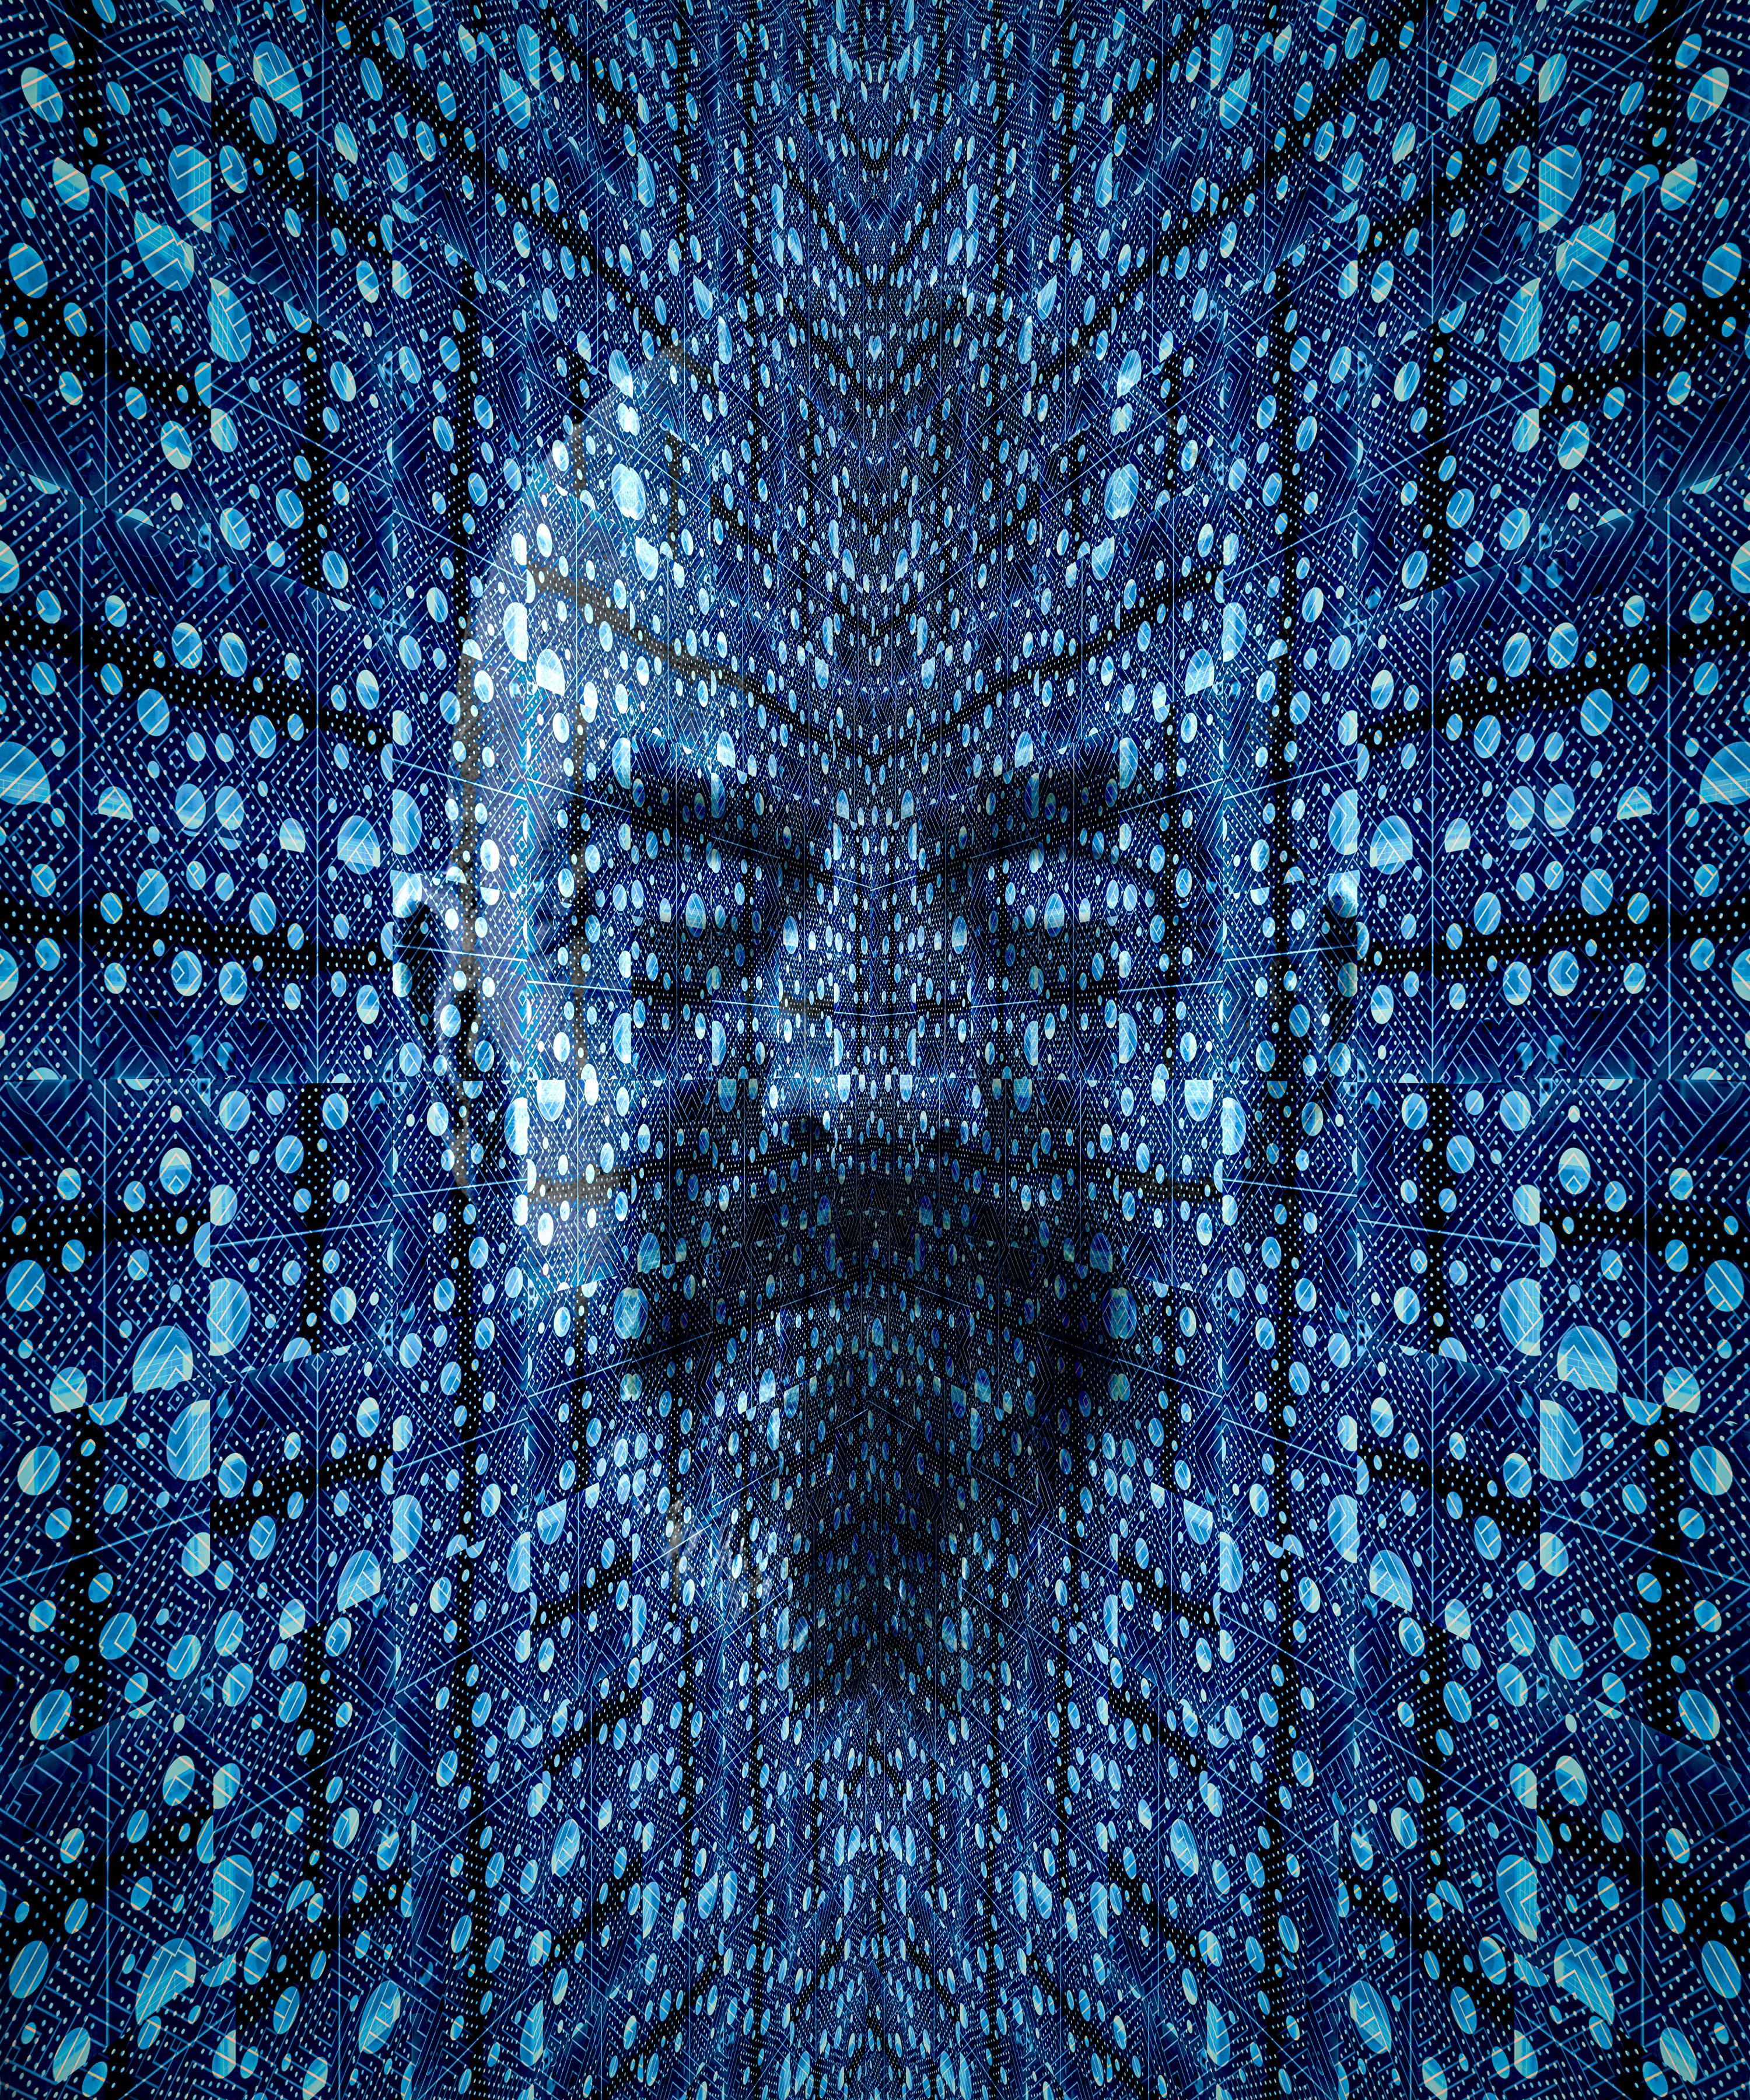
the villain Kane from the Command and Conquer PC games.
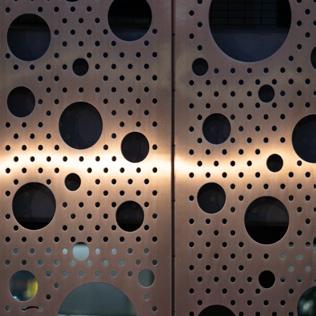
I took a photograph of the outside of a multi-storey car park in Glasgow which has metallic sides with various sized holes across its face. When I saw it on my Mac I thought there was potential so after editing a section of it into a square image I took it over to Photoshop.
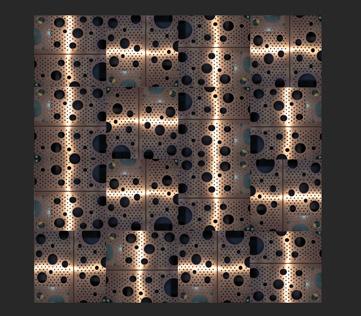
First step was to CTRL-J the image to make a copy, then I increased the canvas size to allow for making multiple copies of the image which I move around and rotate to vary the pattern. I ended up with the larger square shown here which is basically 16 copies of the original.

At this stage the image size is pretty large and starts to test the processing power of my Mac so I flatten the image occasionally which also makes the process more manageable. I’m sure some more experienced folks could show me a much more efficient way of doing this but this works for me.
I thought an additional pattern would add to the image so I blended in an art deco pattern from Envato elements.
From here it was a matter of adjusting hue, saturation and levels to produce the look I wanted.
To create the impression of depth, of the receding sides of the ‘walls’, I made another copy of the image and used the edit transform perspective tool to create the angles I needed. Once I was happy with that I simply made another copy of that image, flipped it horizontally and moved the copy across the canvas until the two sides met in the middle.
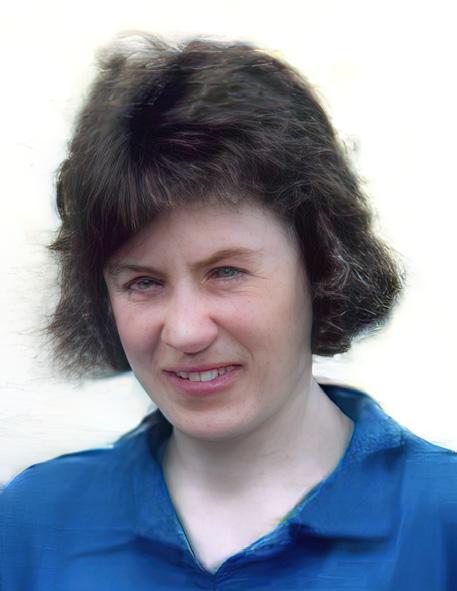
The last part of the process used my face (sorry) which I laid over the top of the ‘room’ on a separate layer. I placed a mask over my image and brushed out everything except my head. A change of blend mode and some tweaking of the opacity and I thought I was there.
Something just felt like it could be better and after some thought I brushed out my eyes which I think makes the whole image more sinister.
Some last tweaking of sharpness and tone in Lightroom and voilà, another selfie that my wife rolls her eyes at
l
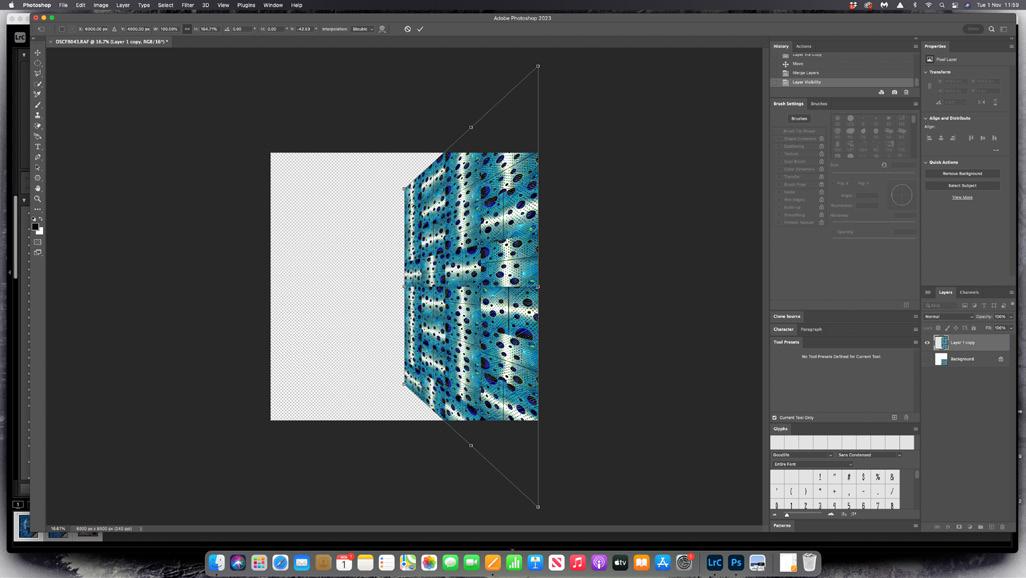
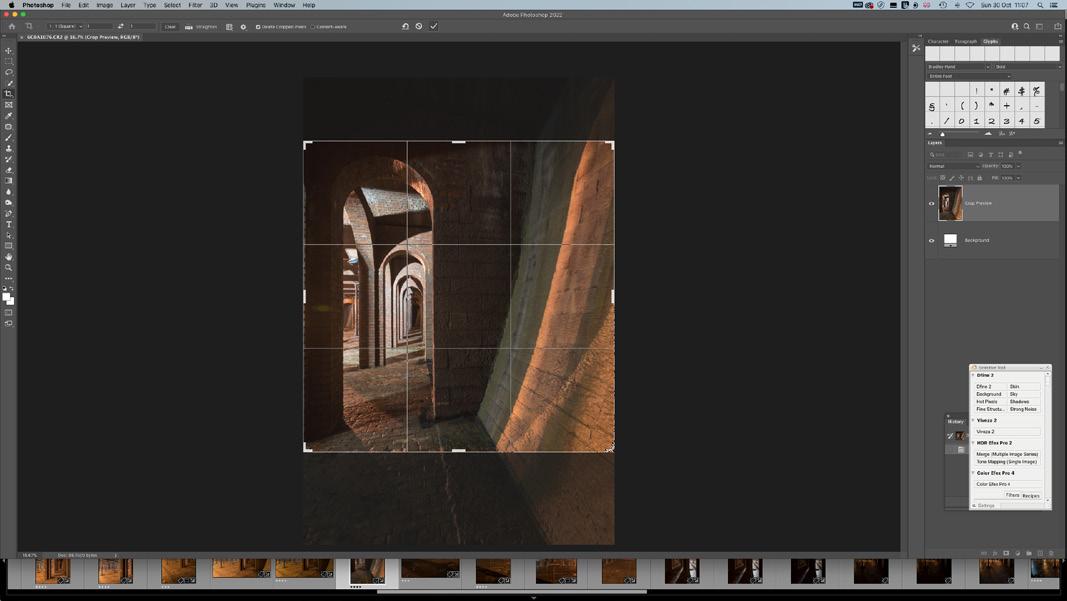
Where is the Exit is one of 21 images produced for my Fellowship panel submission in the Contemporary section which, I am pleased to say, was successful. The idea for my panel gradually developed during the pandemic lockdown and depicts my exaggerated reactions to the restrictions of self-isolation. Each image shows an imagined room in my head which relates to an emotion such as fear, uncertainty, confusion etc. To form these rooms I created a box structure in Photoshop using photographs from different architectural locations. I took the original photo for this image in a Victorian reservoir in Toxteth, Liverpool. I chose a square format for the presentation - I felt it gave the best box ‘appearance’. Other formats are possible.
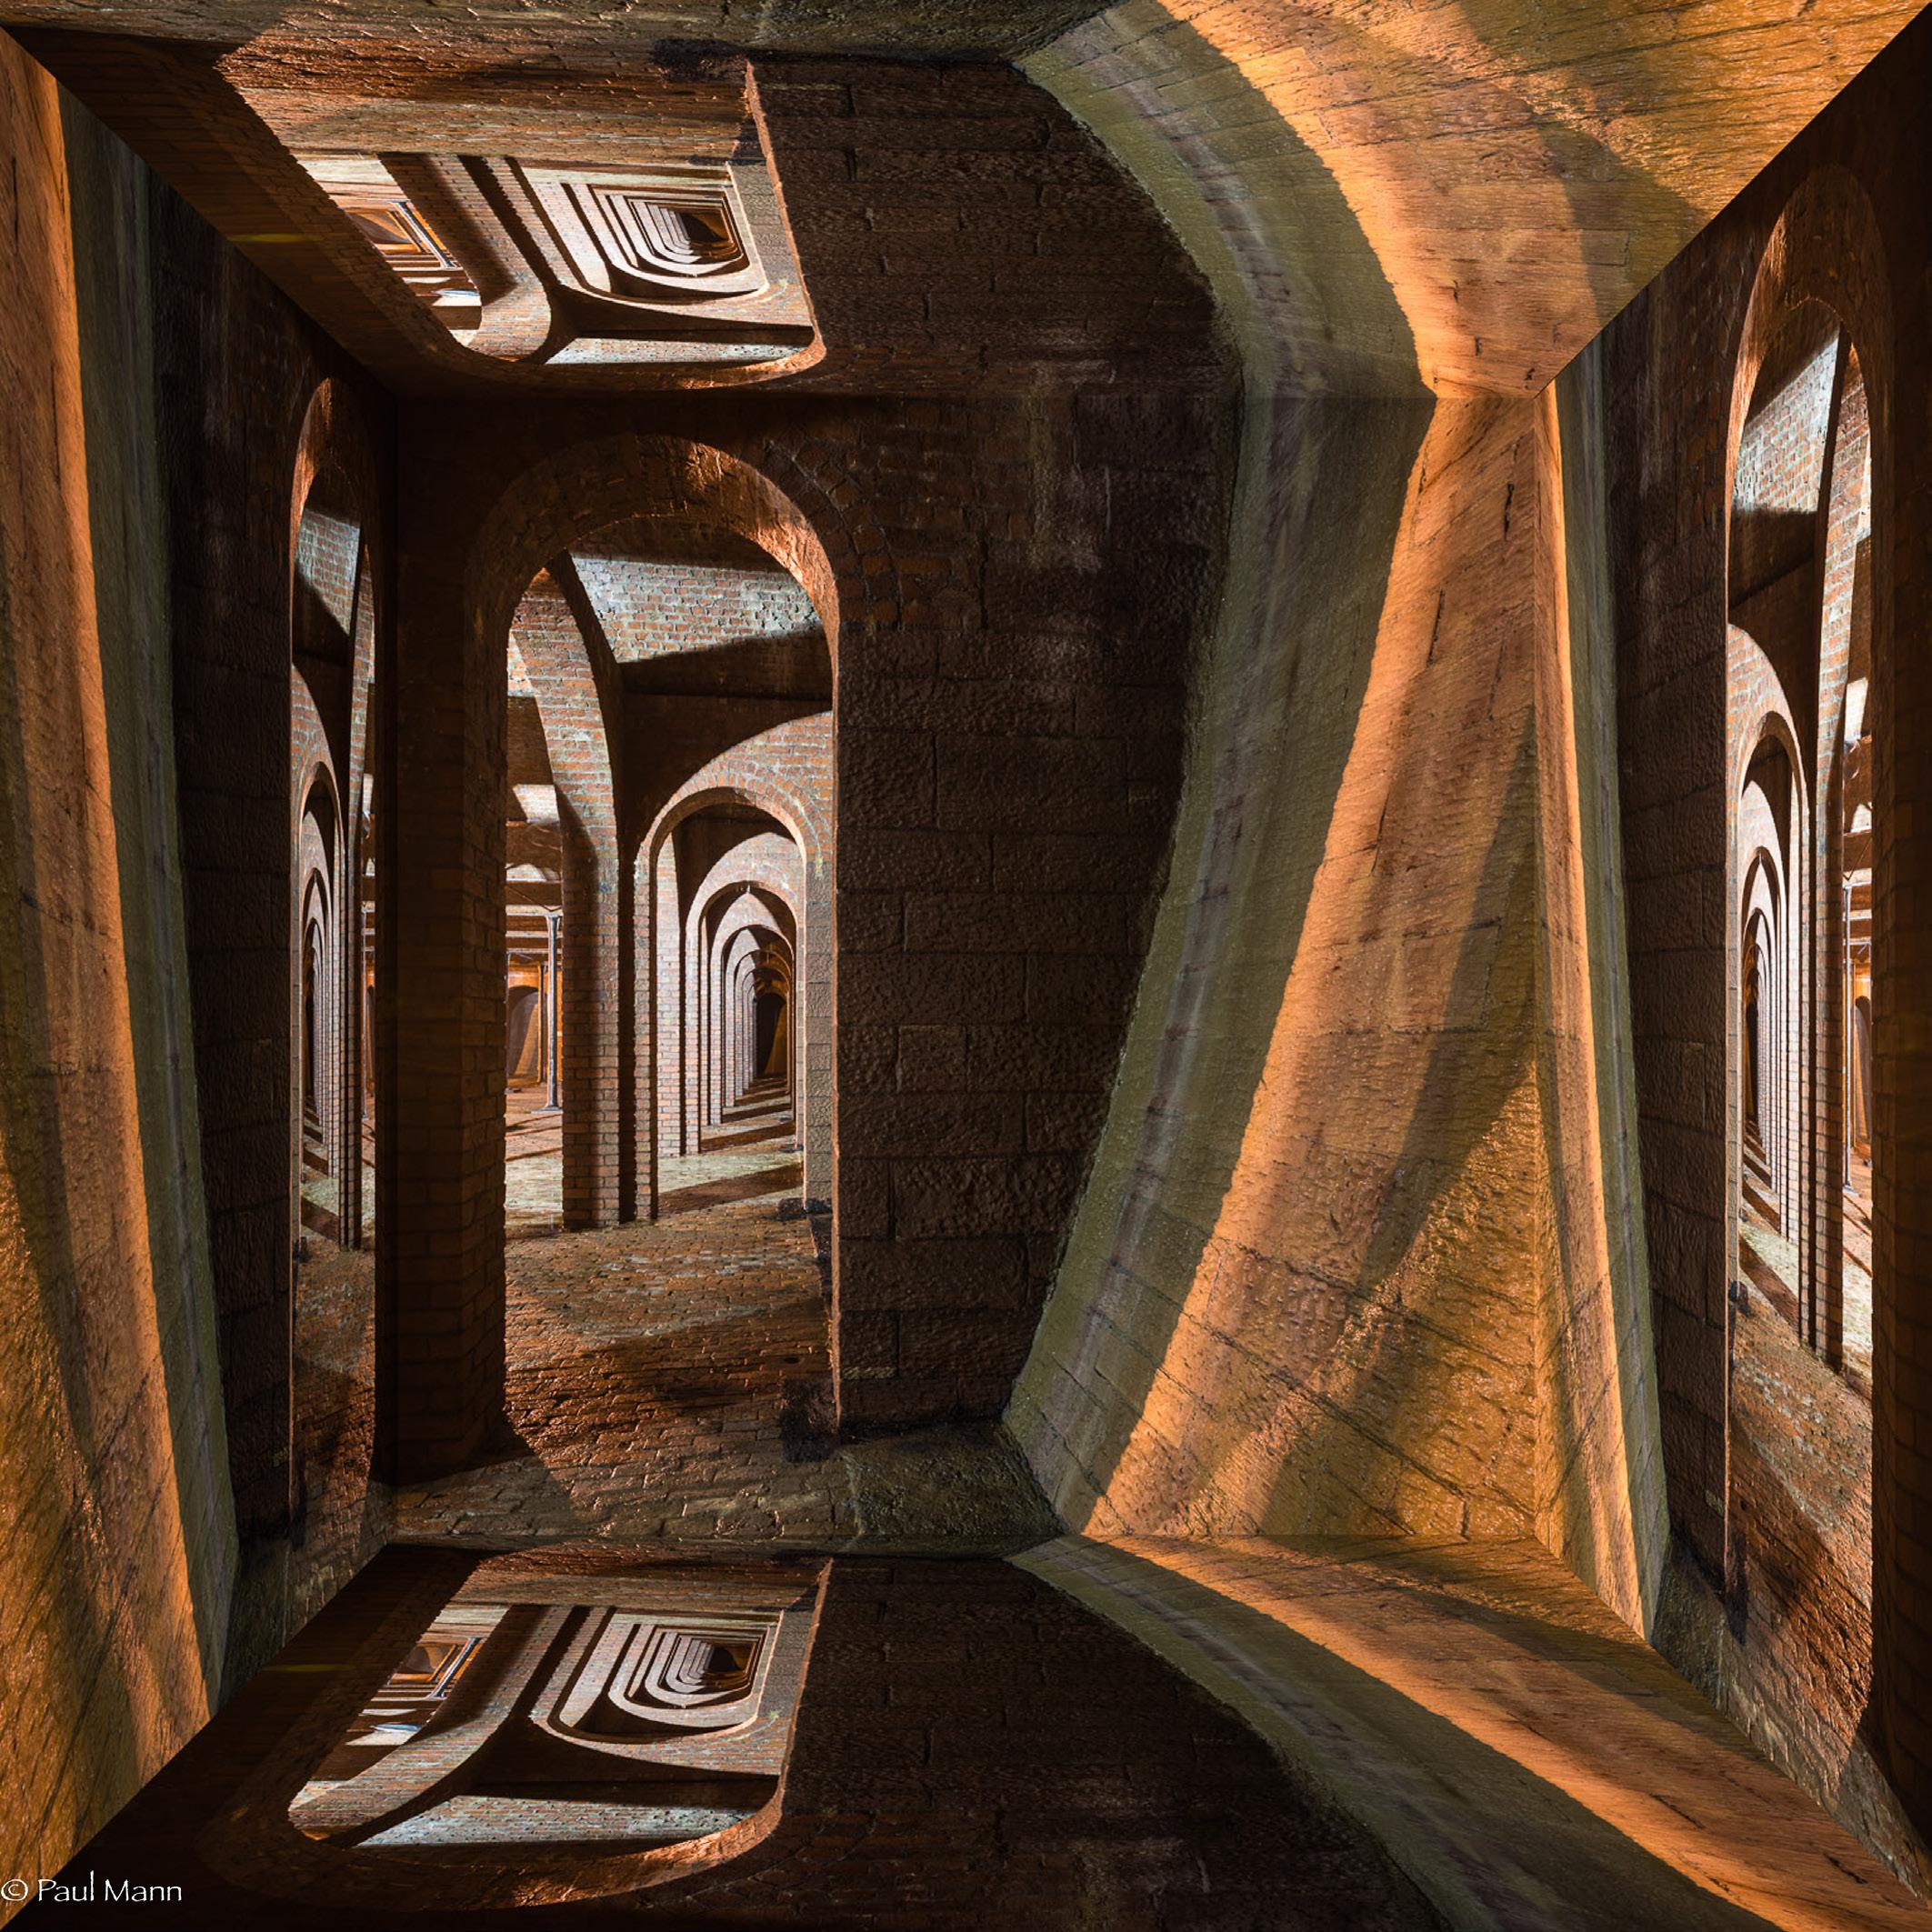
A square portion was selected from the original picture to use as the main base from which the other four planes would be generated. This is probably the most difficult part of the process, particularly if a theme is being envisaged. The outcome can be uncertain; there were many rejects before the right picture, with the desired feeling, emerged.
The process started in Lightroom where small corrections were made to the basic settings, and unwanted small features or blemishes removed.
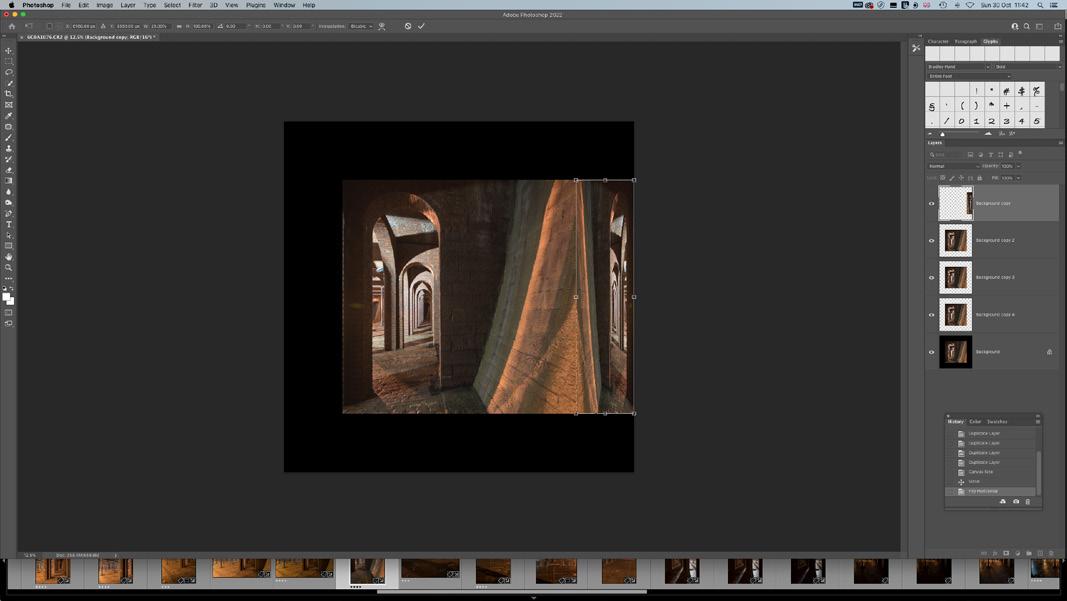
The image was then transferred into Photoshop and the following sequence of actions applied:
1. Select the preferred square area using the crop tool.
2. Make four copies of the selection.
3. Increase the canvas size. Image / change Pixels to %/ change from 100 to 150%.
4. Select a copy layer and use the move tool to drag a copy image to the side. Then go to Edit / transform/ flip horizontal.
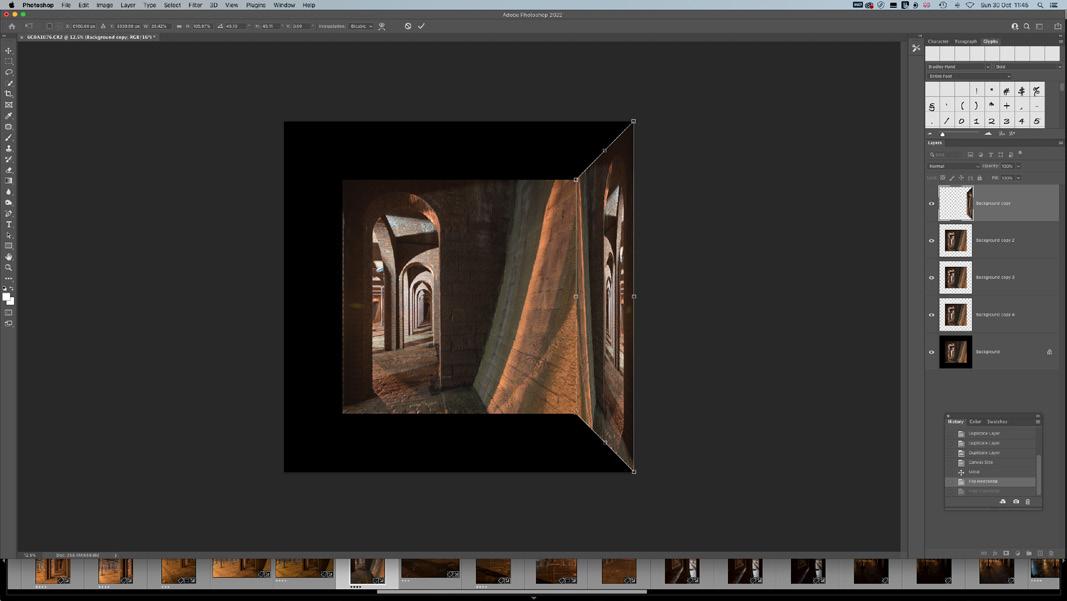
5. Go to Edit/free transform and squish the copy image back into the box.
6. Go to Edit/ transform/ perspective and drag the copy out at 45° enter 45 (or -45) in the H or V box at the top to ensure accuracy.
7. Repeat 4,5 and 6 for the opposite side.
8. Repeat 4,5 and 6 for the top and bottom planes but use flip vertically in action 4.
9. To emphasise the perspective effect, decide which faces should be dark or light then go to Image/ adjust/ brightness and contrast. Select the desired side layer and use the sliders create a contrast.
10. Repeat for each side or base and top of the box.
When the box is complete, carefully check the junctions where each side joins as a gap can occur (showing as a white line). To correct any misalignments select the layer containing the plane and use the keyboard arrow keys to move the plane into place.
Used in the right context, a box can be very effective in giving a convincing 3D image.
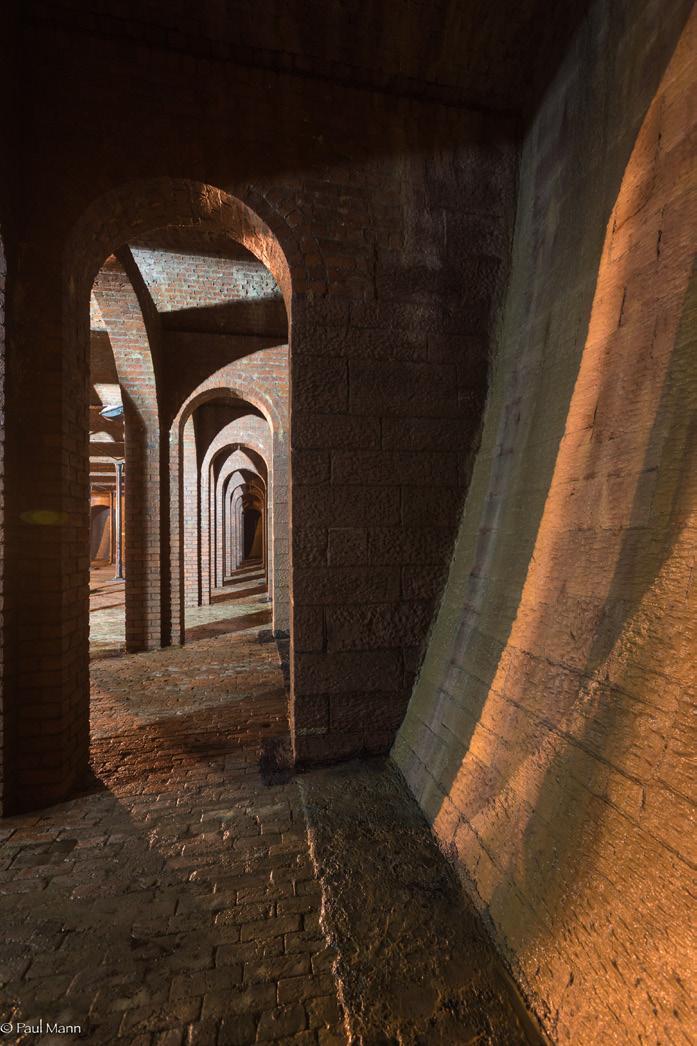
For my Fellowship panel, my intention was to give the viewer the emotional impact of being trapped within my rooms
l
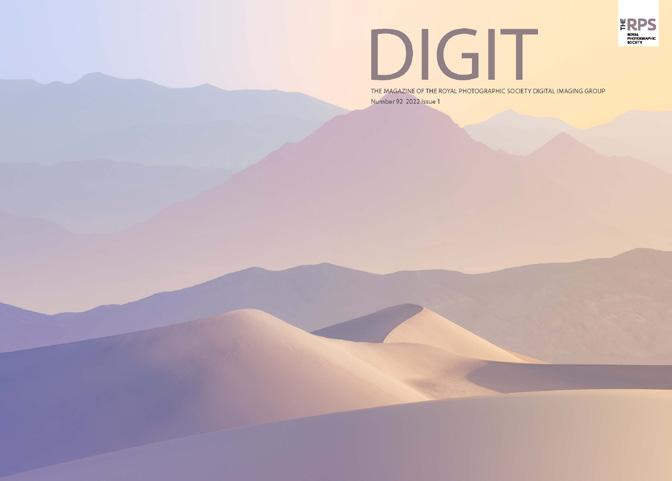
DIGIT 92 2022 Issue 1

All previous issues are available from the DIGIT Archive at rps.org/di/digit-archive/.
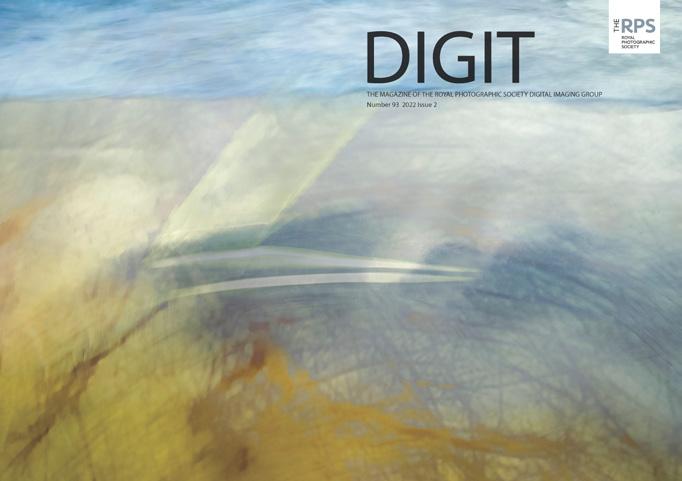
DIGIT 93 2022 Issue 2
DIGIT 94 2022 Issue 3
2 Group Events 3 Contacts 4 Editorial 5 Synesthesia, Poetry and Photography
Jerad Armijo 11 Handmade Photo Books: The Perefct Way to Display Alex Hare 14 Creative Flower Projects Celia Henderson 19 Curating and Exhibiting Photographs
Andy Golding 23 How Does My Mind Work: The Droste Effect Mike Martin 29 Learn and Develop Together, Having Fun Avijit Datta 31 DIGIT Challenge: Have a Drink On Me Barry Badcock 33 DIGIT Challenge: Rebuilding a Building José Closs 35 In previous Issues
Group events
Contents
From the Chair
Editorial
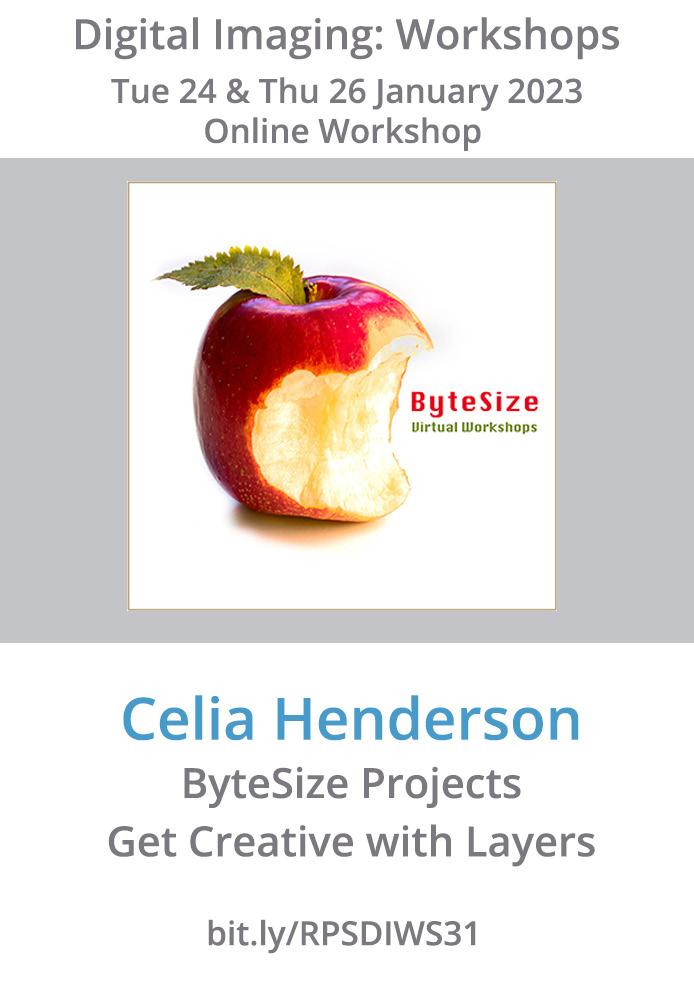
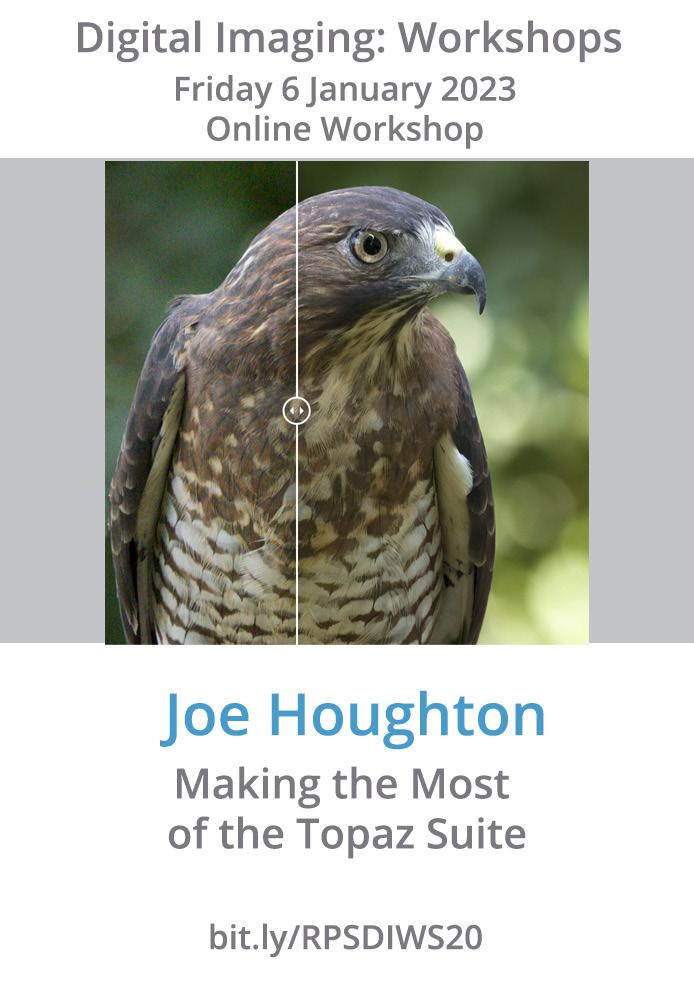
When the soul is at play Annemarie Hoogwoud 11 Is there art in the selfie? Chris Hilton LRPS 15 Clinical precision Professor Afzal Ansary ASIS FRPS 20 Critiquing critiques: Some thoughts on giving and receiving feedback Brooks Jensen 24 Panels and process - not just for distinctions…. Joe Houghton 31 Affinity vs. Photoshop Celia Henderson LRPS 35 DIGIT Challenge: Double smoke Claude Trew LRPS 37 DIGIT Challenge: Hardware city Eddie Lord 39 In previous issues
2 Group Events 3 Contacts 4 From the Chair 4 Editorial 5 Flower bathing Jocelyn Horsfall ARPS 10 That barn at Sixpenny Handley - The evolution of a photo Meyrick Griffith-Jones 15 eCircles - what are they and why should you care? Jean Robson
19 iPhone sketching Paul Sanders
21 What photographers can do to support environmental initiatives Nigella Hillgarth

25 The other world of infrared photography Tony Sweet
31 DIGIT Challenge: Temptation John Cuthbert ARPS 33 DIGIT Challenge: Romanesco Broccoli Steve Varman LRPS 35 In Previous Issues
All entrants must submit three images and are guaranteed to have a print accepted in the 2023 exhibition Free to enter and open to DI members only For full information, rules and previous results visit www.rps.org/di/print-exhibition.

Results to be announced and selected images reviewed at the DI AGM on 26 February 2023

Open for online submission
1 Jan 2023
Online submission closes 23 Jan 2023
Prints due with Exhibition Secretary 31 Jan 2023
Selection week beginning 6 Feb 2023
We hope you will join us and submit three of your prints.
