Homeowner Orientation Tour
Approximately 1-2 weeks prior to closing, you (or your designate) and your eQ Homes Customer Concierge will conduct your Homeowner Orientation. We will provide you with information about your home, supply warranties and operating instructions not already included in the Homeowner Manual. In some cases, such as with your furnace, the information is attached to the appropriate appliance. Store this material in a safe location for future reference.
You will also receive an Orientation Package. Among other things, the package contains important documents including your Certificate of Completion and Possession (CCP) and the Tarion Homeowner Information Package. The Certificate contains information regarding the enrollment number of the home, the address of the home, the homeowner’s name, and the date of possession/occupancy.
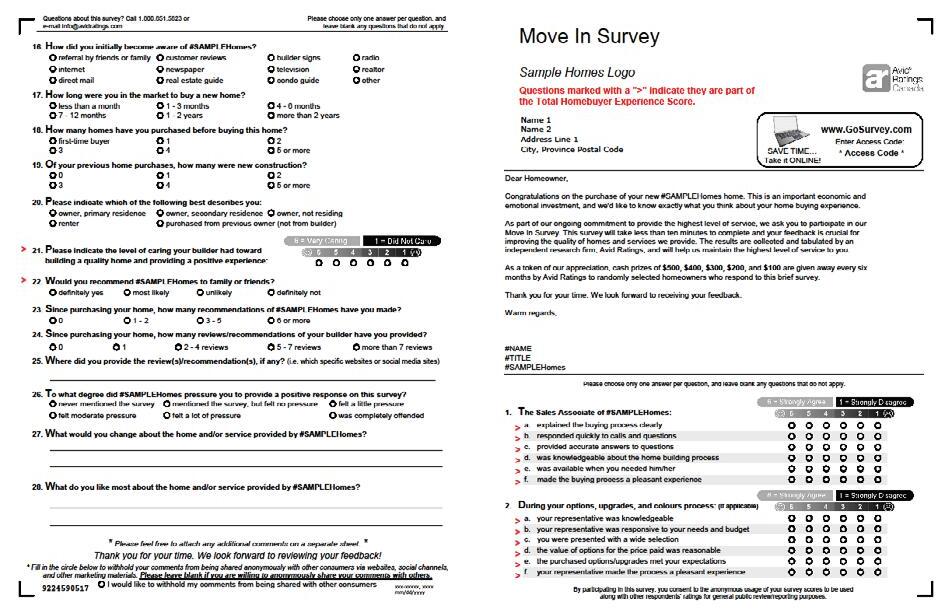
Tarion PDI (Pre-Delivery Inspection) Checklist
To help you prepare for your Orientation Tour, we have provided a copy of the Tarion PDI. Although some items may not be relevant to your specific home, it can serve as a good guide.
PRE-DELIVERY INSPECTION CHECKLIST
KITCHENS, BATHROOMS, & LAUNDRY
KITCHEN
• Test lights to ensure they work properly.
• Test the GFCI outlet (near the sink) to ensure it works properly
• Check that all options and upgrades have been installed and are complete
tiles, etc. (See Floors, Walls and Other Interior Items)
COUNTERTOPS
• Check the countertop for scratches, chips, or other damage
TARION TIP: Keep in mind that if you selected a natural stone for your counter tops, such as granite natural imperfections like surface
• Check the backsplash for scratches, chips, or other damage
CABINETS AND DRAWERS
• Check the cabinets to make sure they are properly aligned
• Check cabinets and drawers for damages or imperfections
TARION TIP: Keep in mind th at if
• Check that cabinet doors and drawers open and close properly
SINK
• Test the faucet / Test the hot water
TARION TIP: Note that hot water may not be instantaneous
• Fill the sink with water and check that it drains properly
• Look under the sink for evidence of leaking, such as water stains
• Check under the sink to make sure that the dishwasher is connected
APPLIANCES
• Check major built-in appliances for surface damage such as s cratches and dents
• Test the range hood fan and light
• Ask your builder for any user guides and warranty information
BATHROOM
• Test the lights, including the GFCI outlet near the sink
TARION TIP: A ground fault interrupter (or GFCI) circuit near water sources protect you from electrical shock.
• Turn on the bathroom fan to make sure it work s
damaged tiles
• Check mirrors for scratches, chips, or other damage
• Check that cabinet doors and drawers open and close properly
TOILET
• Check the toilet for scratches, chips, or other damage
• Make sure the toilet bowl is secure
• Make
• Check water leaks
SINK
• Check the sink for scratches, chips or other damage
• Check caulking at the countertop backsplash
• Test the faucet | Test hot water

TARION TIP: Note that hot water may not be instantaneous
• Test the stopper. Fill the sink with water and check that it drains properly
• Look under the sink for evidence of leaking such as water stains
SHOWER/TUB
• Examine the caulking around the tub and shower enclosures
• Test the shower head and drain
• Check tub for scratches, chips or other damage
• If you have a shower door, check that it opens and closes properly
• Check tiles for damages
LAUNDRY ROOM
• Make sure that the dryer is venting outside
• Ensure that water hook ups are connected to the correct hot and cold inlet
• Test the lights and the GFCI outlet near the sink
• Check appliances for surface damage such as scratches and dents
• Ask your builder for any user guides and warranty information.
QUESTIONS? ASK US! TARION.COM
1-877-982-7466
Positive Version Reverse Version
FLOORS
GENERAL
• Inspe
HARDWOOD
hear a minimum squeaking and notice a minimum amount of spring when
TARION TIP: Given the nature of some unevenness.
• Check for scratches, gouges or other damage
TARION TIP: Natural wood may contain variations in the grain or colour
CARPET
• Examine seams in carpets (and vinyl) to ensure they are tight and there are no gaps.
TARION TIP: Depending on the type of carpet selected, seams may be tight and secure, but still be visible.
• Examine carpeting for stains or shade variations
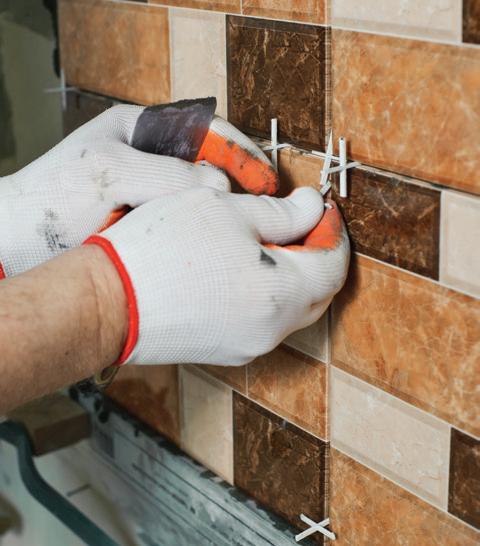
CERAMIC
• Inspect ceramic tile surfaces for cracks, chips or gouges
• Check joints between ceramic tiles for alignment and proper grouting
PRE-DELIVERY INSPECTION CHECKLIST
FLOORS, WALLS AND OTHER INTERIOR ITEMS
WALLS
• Inspect the uneven paint coverage
TARION TIP:
lighting conditions. Finish should be inspected under normal lighting and viewing conditions
• M dents and gouges
• Make sure that trim (including baseboards and door and window casings) is properly aligned, secure, painted/stained, and free from surface defects
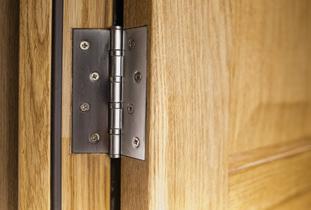
DOORS
• and close properly properly
• Check that the exterior doors have been sealed with weather-stripping
• If applicable, check that the exterior door leading to the garage is equipped with an and seal on its own. Check seal around door to ensure it is tight.
• Make sure that closet doors are secure and that they open and close easily
damage, such as scratches, dents, or cracks and surrounding frame
TARION TIP: Ensure that there is a visible gap between the bottom of the
WINDOWS
• Check windows to ensure they open, close and lock properly
• Check that window panes are free from scratches, cracks, or other damage

• Check that there is no moisture between window panes
• Make sure that all appropriate screens are for tears or holes
STAIRS
• Check handrails on stairs to ensu re they are securely fastened and are free from rough edges, chips, or other damage
• Check
TARION TIP Keep in mind that if
CLOSETS
• If your builder is providing shelves and/ or rods in your closets, check that they have been installed
QUESTIONS? ASK US! TARION.COM 1-877-982-7466
of driveways, patios and walkways.
Tarion Tip: If you are unable to inspect your home’s exterior due to weather conditions, make note of it on the Pre-Delivery Inspection Form.

EXTERIOR CLADDING
BRICK
• Check for cracked or damaged bricks
• Check that weep holes are clear
TARION TIP: Weep holes are small openings that allow water to drain generally located at the bottom of the brick and above windows and doors.
STUCCO
• Check that stucco is free from cracks or other damage
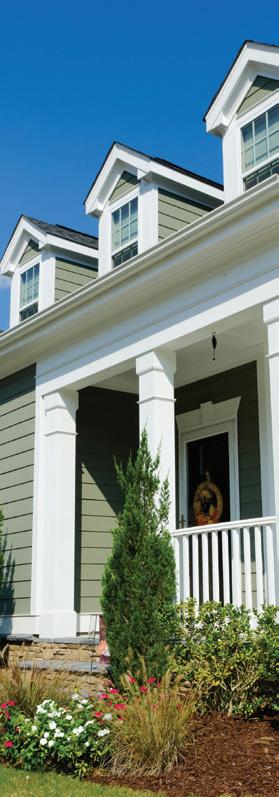
VINYL/ALUMINUM/ WOOD SIDING
• Check that siding appears secure
• Check that siding is not bowed or wavy
PRE-DELIVERY INSPECTION CHECKLIST
EXTERIOR TRIM
• Check that exterior trim has been completed, properly painted (if required), and free from damage
CAULKING
• Make sure all caulking has been completed around all windows, doors, and exterior openings
GRADING
• Check that the grading slopes away from the house
TARION TIP: Some lots require swales to help collect and divert surface water.
TARION TIP: approved by the municipality and cannot be altered by the homeow ner.
• If applicable, check that basement windows below grade have window we lls
SOD
TARION TIP: Once you have taken ownership of your new home, it is your responsibility to maintain the sod. Make sure you understand how to care for it
QUESTIONS? ASK US! TARION.COM 1-877-982-7466
EXTERIOR
Positive Version Reverse Version
Your home includes heating, ventilation, electrical and plumbing systems. Your builder should provide you with any operating manuals that relate to your home’s systems. Learning from your builder how these systems operate is one
will assist you in talking to your builder about these systems.
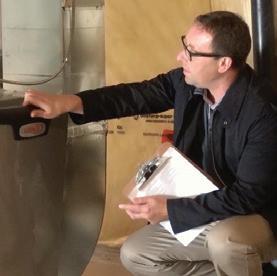
HEATING
• Check the condition of the furnace and hot water heater. Ensure both are functioning
how to care for them
• Review the operation of your heating and cooling system, and how the programmable thermostat functions the furnace
for fuel supplies and understand how to operate them
• Be sure to understand the maintenance schedule needed to keep this equipment in top performance
PRE-DELIVERY INSPECTION CHECKLIST
OPERATING SYSTEMS
AIR CONDITIONING
• If your builder is providing a central air conditioner, check that it has been installed and is functioning.
TARION TIP: Air conditioning systems cannot be operated when outside temperatures are below a certain level. Your builder should be able to provide you with this information.

MECHANICAL VENTILATION
• Make sure that you understand how to achieve proper ventilation in order to avoid condensation problems
TARION TIP: Condensation problems that result from improper maintenance are not covered by th e new home warranty.
• If applicable, locate the principal fan switch and ensure that it functions
• If your home is equipped with a Heat Recovery Ventilator (HRV), have your builder instruct you on its proper use and maintenance
TARION TIP: A hydrometer is a device that measures the humidity levels in your home. Ask your builder to recommend the humidity levels so you can ensure your house stays at a level to protect your investment.
QUESTIONS? ASK US! TARION.COM 1-877-982-7466
Positive Version Reverse Version
How to Take Care of Your eQ Home
Many of your responsibilities as an owner and eQ Homes’ responsibilities under the terms of warranty are discussed in this section. Begin now to become familiar with the home maintenance you should provide and the warranty service commitment to you. You will also receive monthly maintenance reminders through your eQ Homeowner Portal.
Exterior Maintenance
Final Grading
Your lot’s grading plan was provided to you at the time of purchase. The grading of your lot was designed as part of the overall stormwater plan for your community and should not be altered drastically. Any identified drainage swales serve an important function for the overall stormwater management system of your community and they should remain clear and unobscructed. They are designed to hold stormwater in the event of a large rainfall, which will release slowly after a large rain event.
Parking Garage/Driveway
Parking surfaces are normally paved to standard widths as illustrated on the site plan. The granular base may be greater in width than the finished asphalt surface. Where heaving or settlement results in depressions exceeding 150mm (6”) in depth, they will be repaired by patching or padding. Where necessary, such repair will be performed one time during the first year period after paving is completed subject to seasonal conditions.
Damage resulting from movement of municipal services or other utilities is not warrantable.
Driveway cracks exceeding 6mm (1/4”) will be repaired as above, one time. Note that minor cracks are common in residential asphalt driveways, particularly near surface edges.
Indentations and uneven surfaces are common and considered to be normal. In some conditions, ground frost penetration may move asphalt areas and alter surface drainage patterns. This may result in depressions, which may be permanent or temporary, reverting to original grades in warm weather periods.
Other characteristics of residential asphalt may include tire marks, surface stone flaking, checking and cracking at edges caused by expansion / contraction periods. Such conditions are not warrantable.
With reasonable care, residential grade asphalt should last several years. Although sometimes granular in appearance, the asphalt is specifically design-mixed to achieve the smoothest possible finish. The smooth finish sometimes results in softer surfaces than in commercial and industrial applications.

Asphalt will require periodic maintenance and care to prolong performance and appearance. Although not normally necessary, re-sealing may help protect the finish. It should be noted that chemical residue common to some sealant materials may react unfavourably with floor finishes and may result in discolouration after exposure to such residue.
The most common sources of asphalt damage are from bicycle kickstands and spillage of petroleum-based products. During warm weather, asphalt is more likely to sustain damage from pointed pressure sources.
Pathways/Patios
Many homes include concrete paver walks, and some may include concrete paver patios. Variations in temperature and precipitation may result in the appearance of cracks in concrete material. Ground frost penetration may result in movement and alteration to surface drainage patterns. Sometimes blocks may return to their original positions in warmer weather. Often the movements can cause depressions and uneven surfaces. These conditions are not warrantable and should be corrected by the homeowner to reduce the risk of damage resulting from altered drainage patterns. Avoid using chemical de-icing compounds or cooking salt, which can damage the surface of concrete paving units.
Positive Version Reverse Version
Concrete Foundations
Concrete used in foundation walls may show minor surface cracking. Cracks may appear at the concrete curing stage where moisture evaporates and the loss of volume results in material shrinkage cracks. Minor surface cracking may also occur from expansion/contraction of material caused by extreme temperature variance. Generally, this type of cracking is considered normal and should have no detrimental affect on performance of the foundation.
Where cracks result in water leakage into the building within the first 2 years of the warranty period, the builder will repair them.
Exterior grading adjacent to the building should promote surface water drainage away from the building. Where grades have been altered and contribute to moisture penetration into the building, repair costs shall be the homeowner’s responsibility.
Masonry Brickwork
Mortar joints between bricks are designed to shed water away (out of the joints). The mortar joints are not waterproof.
Usually, the bottom joint below the lowest course of brickwork includes small openings in the mortar. These openings are commonly referred to as “Weep Holes”, and are designed to allow moisture, which may have become trapped in the space behind the brick to drain away. Weep holes should be kept clear and free to promote unobstructed drainage of the brickwork cavity. When adding planting beds or other features adjacent to the building, ensure they are well below the level of masonry and that grading slopes are maintained to promote drainage away from the building.
Structural Steel
Steel posts and beams (sometimes wood) are essential structural components designed to help support specified loads for the building structure. They should not be altered, adjusted, removed or cut in any way without consulting with a professional structural engineer. Alteration may affect performance and safety of structural assemblies.
Steel angles, which support brickwork over window and door openings, are also be structural components.
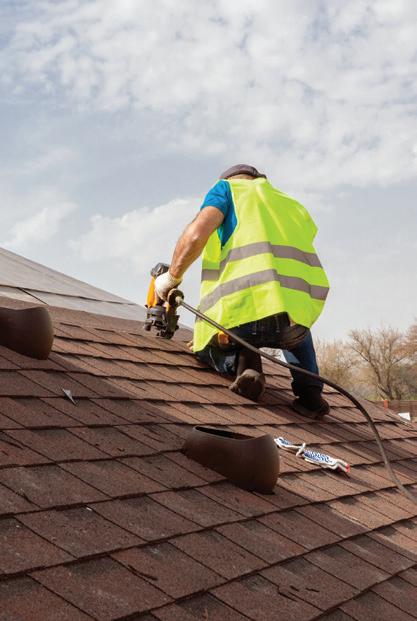
Roofing
Depending on lighting conditions, variation or puckering may be observed at the roof level when viewed from certain angles. Usually this appearance may be the result of roof sheathing and/or fastenings experiencing temperature or humidity variation.
Variation in colour of roof shingle material is not uncommon and not considered to be a defect.
Annual inspection of caulking at and around vent assemblies, skylights, flashings and connections should be done to confirm caulking remains continuous, impermeable and free of cracks. Damaged caulking areas should be resealed.
Ice Damming
Ice damming conditions usually develop as follows:
• In winter periods, snow may accumulate on areas of the roof and depending on snowfall, wind and temperature, accumulation may reach significant depths.
• Accumulated snow may melt from exposure to sunlight.
• When temperatures fall below freezing, moisture from melted snow will freeze, first over colder soffit areas.
• Frozen moisture may then develop into ice ridges at these locations.
• When the melting cycle begins again, runoff moisture may be prevented from draining off the roof by the ice ridge (ice dam).
• When this occurs and no other outlet is available, moisture will accumulate and begin travel backwards up the roof slope and under the edge of roof shingles.
• Under excessive conditions, moisture may travel far enough to enter past the roofing shingles and seep through the substrate into the attic space.
• Moisture may eventually soak insulation, pond onto the vapour barrier, travel laterally to a lower level and enter interior spaces through fastening perforations or lighting fixtures. At this point, insulation and gypsum board systems may have already sustained significant damage.
More serious damage may occur to building components, finishes and furnishings where the ice damming condition remains.
The homeowner is responsible for care and maintenance issues including prevention and correction of ice damming conditions.
The most effective method of avoiding ice damming is to visually check roof snow accumulation at and after snowfall and wind-driven snow periods. Wind-driven snow can result in deep drifting near the eaves.
Positive Version Reverse Version
Make arrangements to remove snow accumulation from the roof. Where ice dams have already formed, make arrangements to have them carefully removed and restore normal drainage patterns.
CAUTION:
Climbing onto sloped ice-covered roofs is extremely hazardous and not recommended. Removing ice from asphalt shingles should be done with care to ensure they remain undamaged. Cold roof shingles become brittle and easily damaged. Roofing manufacturers do not recommend ice removal using heat applications. It may be best to consult with a qualified roof clearing specialist for removing roof snow or ice dams. Damage resulting from ice damming is not a warrantable item.
Additional information is in the publication called What Every Home Buyer Should Know from Tarion. A copy of the publication is provided by Tarion to all new home purchasers.
Attic Ventilation
Attic ventilation is designed to move air through attic spaces to the exterior in order to avoid extreme temperature variation between attic and outdoor air and to help control moisture levels.
The attic ventilation system uses a combination of soffit perforations and roof or gable vents to promote air circulation. Soffit and vent openings should remain free of obstructions to function properly.
During winter in severe storm conditions, wind may force snow to blow through vent openings into the attic space. Accumulated snow should be carefully removed before it melts and causes moisture damage. Damage resulting from melting snow is not a warrantable item.
Hardware mechanisms on operable window sashes are usually designed to promote positive locking of the sash to the frame in the closed position.
The insulation system is usually composed of glass fibre or composite material specifically designed for application to wall, floor and ceiling cavities of the building envelope to promote temperature control within habitable spaces of the building. In some buildings, forming systems with insulation may be used to control acoustics between adjacent dwellings within a building. Air and vapour barriers and sealants are also considered part of the insulation system.
Unless somehow damaged, e.g., water damage, most insulation should retain its thermal resistance qualities for many years.
Often, attic/ceiling insulation is applied in loose form, blown into spaces mechanically. Sometimes batt insulation is also used depending on ceiling slope conditions.
Where loose material is used, it should be checked periodically to confirm the layer remains uniform and continuous in thickness. Check after windy periods. In some wind conditions loose insulation can be blown and result in spaces with reduced thickness causing greater heat loss in those areas. If this occurs, the material should be carefully redistributed to uniform thickness.
Air leakage into the building may occur under certain wind and pressure conditions. Where this appears excessive, report it to the builder in writing during the first year of the warranty period.
CAUTION:
Climbing to and through attic spaces is extremely hazardous. The spaces in the attic between structural members are not designed to support the weight of a person. Applying pressure to these spaces may result in serious damage or injury.
Where redistributing attic insulation, ensure the material remains loose and uncompressed. Compressed insulation results in greatly diminished thermal resistance. Consider consulting with a qualified insulation specialist where attic space work is required.
Eavestroughing and Downspouts
(Owner Installed)
Where eavestrough systems are installed on the building, water discharge locations should be checked periodically to ensure surface grade drainage patterns have not been altered by water erosion. Water discharge should be directed away from the building and onto a hard surface. Sometimes placement of erosion control pads at discharge locations may help reduce the risk of erosion and grade settlement.
Eavestroughing systems should be kept free of debris, leaves and other material, which may result in reduced water flow. During winter, ensure water does not become trapped and freeze. This could contribute to ice damming.
Positive Version Reverse Version
Siding
Siding systems, whether made of metal, vinyl, wood or composite materials, may be affected from the drying and shrinkage period. Where this occurs, gaps or bulges may be observed at joints and connections.
Expansion and contraction of siding material may also contribute to gaps and bulges. Where separations and bulges become excessive, the builder will repair them when reported in writing during the first 2 years of the warranty period.
Vinyl and metal siding require minimum care other than periodic washing with mild nonabrasive detergent. Colour will fade in time from exposure to elements. Discolouration may occur where exposed to sprinkler or garden watering.
Although durable, metal siding may become permanently dented from impacts of small objects. Vinyl siding resists denting but may become brittle in extreme cold and may be shattered by impacts.
Vinyl siding can be distorted with extreme heat. Keep barbecues away from vinyl siding. Keep barbecues well away from buildings and porches to reduce the risk of fire.
Locations should be checked periodically to ensure surface grade drainage patterns have not been altered by water erosion. Water discharge should be directed away from the building and onto a hard surface. Sometimes placement of erosion control pads at discharge locations may help reduce the risk of erosion and grade settlement.
Exterior Caulking
Exterior caulking forms part of the building envelope that helps reduce air and moisture leakage into the building.
Depending on building design and material specifications, caulking is generally applied to seal intersections between exterior finish materials, around windows, doors, and mechanical and electrical projections.
Note that certain types of manufactured window frames are designed to interlock with siding material in a way that seals the connection and may not require additional sealant. Caulking should remain firm but reasonably pliable to accommodate minor movement of the building structure. Where caulking material dries out, develops cracks or separates from surfaces, it should be removed and replaced with good quality sealant. Most builders use a multicomponent type sealant, which should remain effective for several years under normal conditions.
Windows
Most builders use one or more of the following window types In new residential construction.
1. Wood frames and sashes
2. Wood frames and sashes, clad with vinyl, metal or coatings
3. Extruded PVC frames and sashes
4. Extruded frames with wood and/or clad sashes
Maintenance
The exteriors of windows with exposed wood or coatings require periodic painting to protect the material. Clad or extruded components require minimum maintenance other than regular cleaning.
Sealed Glazing
Most recent window products are resistant to air and moisture penetration when properly adjusted. Most window sashes are glazed with insulating sealed glazing systems and are normally warranted by the manufacturer against failure for at least 4 years. After the first year, labour is not usually covered. Seal failure is often indicated by condensation between sealed glazing units.
Drafts
Although window systems are weather resistant, they may at times allow air leakage during extreme cold and wind conditions resulting in drafts. Drafts may occur even when there is no wind where extreme cold temperatures cause convection currents within the building with warm air rising and cooler air descending.
Condensation
Where condensation and frost is observed on window glazing, adjust the interior humidity levels as necessary and keep drapes open to promote airflow over glazing.
Hardware
Hardware mechanisms on operable window sashes are usually designed to promote positive locking of the sash to the frame in the closed position.
Landscaping
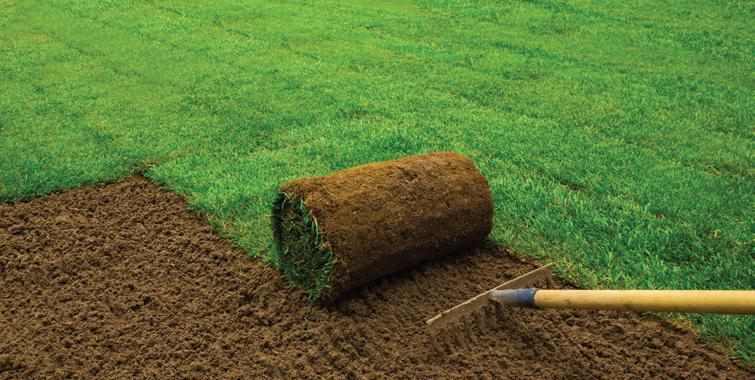
Caring For Your New Lawn
The exterior landscaping of your house is seasonal and can only begin when the weather allows. If you move into your home in the late fall or winter, we will endeavor to begin topsoil and sod placement, as the weather allows, by June of the following year. The best “cuts” of sod come in late spring so we ask for your patience - we may wait a few weeks to ensure the best product for your new lawn.
eQ Homes lays down high-quality sod (i.e. grass) on your lot, but that is only the first step. After that, it is up to you to establish a luxurious green lawn on your property. Regular care and maintenance are essential, especially during the first 4 to 6 weeks after planting when watering during dry days is a must.
Positive Version Reverse Version
To give your new lawn its best chance just follow these tips:
Watering Tips:
• To gauge watering, simply place an empty can about 6’ away from sprinkler. When there is an inch of water in the can, it is time to move the sprinkler to the next area.
• Reflected heat along buildings dries sod quickly; be sure to water accordingly.
• Avoid watering in hot sun – it is better to wait until the early evening or early morning.
• If daytime temperatures are above 25ºc, the sod should be watered every day.
• Check wind pattern to be sure desired area is, in fact, being watered.
Mowing Tips:
• Your new sod generally needs mowing 2-3 weeks after installation. Take care not to cut it too short, as that increases the risk of your lawn burning.
• The basic mowing rule is never remove more than 1/3 of the leaf blade during a single mowing.
• Set your mower at a cutting height of approximately 3 1⁄2”
• For best appearance be sure to keep your mower blades sharp.
Traffic Caution:
• Use your new sodded lawn sparingly until good root establishment has taken place, approximately 2-3 weeks.
• Avoid concentrated play activities, dog traffic or similar rough usage until 4 weeks have passed.
• After one growing season, we recommend that you have your lawn “rolled” to even out any lumpy sections that may have developed.
Sod
WEEK 2
WEEK 3
Watering Calendar DAY 1 DAY 2 DAY 3 DAY 4 DAY 5 DAY 6 DAY 7
WEEK 1
Trees and Shrubs
When planted in Spring, trees are warranted for a period of 90 days. When planted in Autumn, they are warranted to the start of the next growth season. Plant material shall not be warranted where maintenance has been neglected.
Trees planted by the builder are good quality nursery material, which require protection, care and maintenance to promote healthy growth. Ensure tree planting pits are thoroughly watered at least weekly during Spring and Summer to provide sufficient moisture and nutrients to root systems.
Tree planting pits are dish-shaped soil areas located at the tree base. Ensure these areas remain cultivated and free of weeds. To promote air transfer to root systems, cultivate the pit at a radius of 3’ to 4’ to a depth of 4” to 6”. Maintain the dish shape of the pit for at least the first 2 years to act as a watering reservoir. Avoid raising soil levels to tree trunk levels, which could result in damage to the tree. Provide regular applications of fertilizer. Where necessary, apply insect control. Check with a local Garden Centre for information about insect control products and application.
Interior Finishes
Carpentry
Floor System Squeaks
Although the floor system was constructed with either kiln-dried lumber and/or an engineered system, floor squeaks may appear at times throughout the adjustment period and sometimes beyond. The humidity level at which you maintain your home can have an effect on floor squeaking.
Even kiln-dried lumber retains a certain percentage of moisture when the building is constructed. As moisture content is reduced through the drying period, some shrinkage occurs and may result in squeaks to some areas of the floor assembly. Floor squeaks are relatively common to all forms of wood frame construction in this climate region and are not considered to be a defect.
The builder will repair excessive floor squeaking one time where reported prior to the one year inspection where located below a carpeted area.
Floor squeaks under hard surface floor finishes will not be repaired by the builder unless the area is easily accessible from an unfinished basement ceiling.
The squeaks may appear and subside on their own over time. Squeak-free floor systems are not possible to guarantee with conventional wood frame residential construction.
Positive Version Reverse Version
Uneven Floors
In addition to floor squeaking, uneven floors may develop as a result of the drying period. Floor system humps (crowning) or depressions from twisting joists are not unusual. A slope of 1/4” in 8’ is considered acceptable. Where slopes substantially exceed this range, report the condition in writing to the builder within the first year of the warranty period.
Interior Doors
Door assemblies usually contain wood or composite wood material and may be affected by temperature and moisture variation resulting in tight or loose fitting doors within the frames.
Avoid attempts at adjusting doors during the adjustment (drying) period. Do not plane door edges. This may void manufacturers’ warranty provisions. Often, doors tend to realign themselves after the initial adjustment period. However, if the condition is excessive and persists, report it to the builder in writing within the first year of the warranty period.
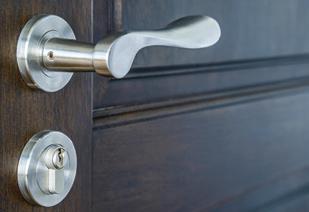
Hardware
Many hardware products are finished with a plating process. Over time and use, the plating will eventually become worn. Wearing should appear minimal with normal use during the first year.
Lubrication of door lock and handle mechanisms should be done at 6 month intervals using a powdered graphite type lubricant. Avoid using oil-based lubricants. With normal use and maintenance, hardware should last several years.
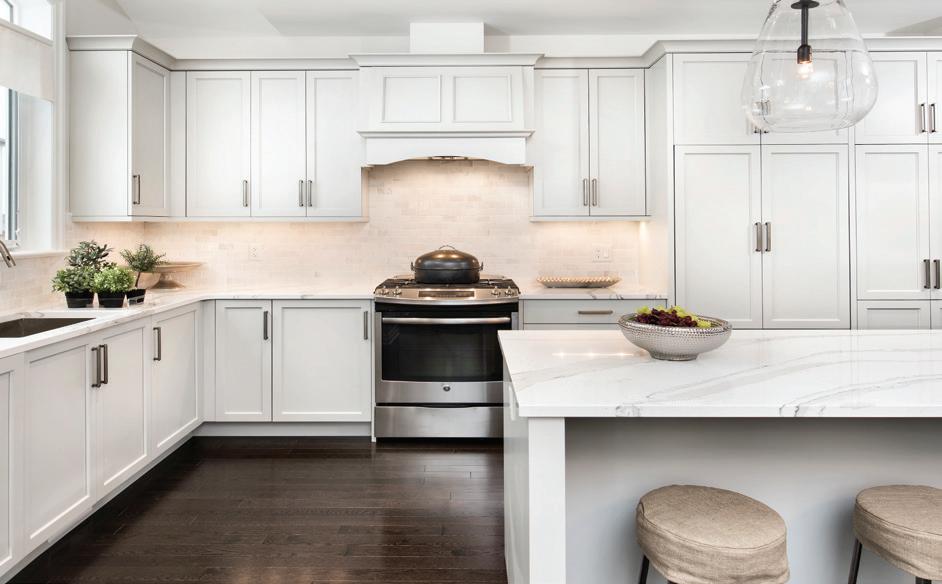
Cabinetry Care & Cleaning Procedures
Wood & MDF Cabinetry
Wood doors are designed for interior residential use in a climate controlled environment. Colour, grain characteristics, density and porosity variations occur in all genuine hardwood products.
Cabinet Exteriors
Regular cleaning of wood doors should be done with a clean, damp cloth and dried immediately with a soft cloth. A mildly damp microfiber cloth works best for cleaning your cabinetry.
Soaps & Detergents
• Do not use detergents, strong soaps, abrasives, or self-polishing waxes on your cabinets. Avoid using soaps and detergents which may contain remnants of these cleaners as they may leave streaks and shiny spots in the finish.
Moisture
• Excess moisture is the worst enemy of any finish. Dry off any water immediately with a dry, soft, cloth. Avoid exposure of doors and drawers to high heat. Avoid water splashing against and settling against the bottom of toe kicks, panels and gables as it will cause the particle core material to swell. This is not covered by warranty.
Positive Version Reverse Version
Humidity
• Indoor relative humidity should be between 30% and 50%. As with any wood product, when humidity is too low, cracking and splitting may occur.
Cabinet Interiors
Regular cleaning of cabinet interiors should be done with a clean, damp cloth and dried immediately with a dry, soft cloth.
Thermo-Foil Cabinets
Regular cleaning of thermo foil doors should be done with a mild soap and water solution and dried immediately with a dry, soft cloth.
Heat
• Exposure of thermo foil doors to heat will result in de-lamination of peeling of the foil. Damage caused by exposure to heat in excess of 80ºC (185ºF) is not covered under warranty and replacement of the doors or drawer fronts will be at the expense of the customer.
Small Appliances
• Kettles, toasters and toaster ovens cannot be placed under cabinetry. Prolonged exposure will cause de-lamination of the thermo foil doors.
Dishwashers
• Allow dishwasher to dry the dishes using the dry cycle. The common practice of opening the dishwasher to allow steam to escape forces steam onto neighboring doors and drawer fronts. Damage caused in this fashion is not covered under warranty and replacement of the doors and drawer fronts will be at the expense of the customer.
Countertop Care & Cleaning Procedures
Laminate Countertops

For daily cleaning of laminate countertops simply wipe with a slightly damp soapy cloth and immediately wipe off any remaining residue. For stubborn stains cautiously use a non-abrasive liquid cleaner.
Seams & Joints
• Avoid any moisture on countertop seems and joints. At installation the exposed particle core at the mitres and joints will be siliconed to protect it. However, water in seams and joints will cause the core substrate to swell and this damage is not warranted by the DCC.
Direct Heat
• Do not place heated cooking ware directly on laminate surfaces. Protective pads are always recommended.
Cutting
• Always use a cutting board for food preparation. Never cut directly on surface of countertop.
Stone Countertops
Although a highly durable product, granite may be damaged if misused. The following instructions will help maintain and prevent damage to your countertop. Preserving the beauty of your granite is simple and will allow you to enjoy the luxury of its presence for years to come.
Positive Version Reverse Version
There is not a warranty on the stone itself, it is a natural product and sometimes will contain fissures and small cracks that do not affect the integrity of the stone. Defects in workmanship are covered for a period of 2 years.
To remove watermarks, simply wipe with a liquid soap and damp cloth. Do not use any abrasive cleaners or harsh chemicals for day to day care.
Scratches & Stains
• Minor scratches and stains are easily removed with a mild abrasive such as automotive polishing compound, or baking soda. If you experience any deep scratches or chips, please contact our local distributor for professional assistance.
Direct Heat
• Granite will withstand heat well but certain stones may be susceptible to thermal shock and cracking if high heat is suddenly applied to an area. It is important to note that granite is a poor conductor of heat. This means that an area introduced to heat will hold its temperature long after removal of heated cookware, creating a potential for burns. Protective pads are recommended.
Cutting
• We recommend you do not cut on your granite surface as it can scratch. It is always advisable to use a cutting board.
PLEASE NOTE: Applying extra weight to your granite top is not recommended. Standing on the surface in order to reach higher placed objects,or leaning on areas that have been cut out for sinks, cooktops etc., may result in cracking.
Quartz Countertops
Although a highly-durable manufactured product, quartz may be damaged if misused. The following instructions will help maintain and prevent damage to your countertop. Preserving the beauty of your quartz top is simple and will allow you to enjoy the luxury of its presence for years to come.
There is a 10-year warranty on the stone itself. It is a manufactured product typically made up of 93% quartz and 7% resin. Defects in workmanship are covered for a period of 2 years.
To remove watermarks, simply wipe with a liquid soap and damp cloth. Do not use any abrasive cleaners or harsh chemicals for day to day care.
Scratches & Stains
• Minor scratches and stains are easily removed with a mild abrasive such as automotive polishing compound, or baking soda. If you experience any deep scratches or chips, please contact our local distributor for professional assistance.
Direct Heat Direct HeatHeat
• Granite will withstand heat well but certain stones may be susceptible to thermal shock and cracking if high heat is suddenly applied to an area. It is important to note that granite is a poor conductor of heat. This means that an area introduced to heat will hold its temperature long after removal of heated cookware, creating a potential for burns. Protective pads are recommended.
Cutting
• We recommend you do not cut on your granite surface as it can scratch. It is always advisable to use a cutting board.
PLEASE NOTE: Applying extra weight to your granite top is not recommended. Standing on the surface in order to reach higher placed objects, or leaning on areas that have been cut out for sinks, cooktops, etc., may result in cracking. If any deep scratches or chips are spotted, please contact our local distributor for professional assistance.
Corian Countertops
Soapy water or ammonia-base cleaners will remove most dirt and grime. Avoid exposing Corian surface to strong chemicals such as paint remover and oven cleaner. If contact of such chemicals occurs, rinse away quickly with water.
Scratches & Stains
• Most marks and scratches including scorches and burns are easily buffed out. Please contact your local Corian distributor or visit them at corian. com for more information.
Direct Heat Heat
• A protective pad is always recommended for exposure to hot items.
Cutting
• Do not cut directly on Corian countertop as it will scratch.
Butcher Block
To ensure functional use and longevity of your solid wood butcher block, the following care should be taken.
• Wash with lukewarm water and immediately wipe dry
• Apply a fresh coat of mineral oil, or Beeswax meant for butcher block tops monthly, or as needed
• Do not place hot items on surface
• Do not allow water spills to rest on surface for a period of time
• Cutting on the top will mark the surface.
Positive Version Reverse Version
Painting
Interior walls, ceilings, trim and doors are usually coated with site-applied paints and finishes to normal residential standards.
Unless painted, railings, mantles, hardwood flooring and other wood elements are coated with site and/or shop applied natural wood finishes to enhance natural characteristics of wood products.
Except for recorded deficiencies observed at the time of possession, most builders will not provide further painting or coating.
After the building has been occupied, re-painting and touch-up work may not match original work in colour, texture or sheen.
Many homes are constructed with low maintenance exteriors including factoryfinished window exteriors. Depending on building design, other exterior building components may still require periodic repainting to avoid material damage.
Carpet Maintenance & Cleaning
Where carpeting is specified, the builder normally provides a carpeting system consisting of a prepared subfloor, under-pad, fastening and carpet finish. Seams may be observed in most new carpet installations, but should become less obvious over time with normal use and cleaning.
Under certain conditions, carpet may tend to buckle or lift in areas. This is considered normal and may be the result of traffic patterns or variation in humidity levels.
Some of the following information was obtained from printed material and publications distributed by the Canadian Carpet Institute.
Carpet Characteristics
According to most manufacturers, characteristics of newly installed carpet may include some or all of the following:
• SHEDDING occurs when loose fibres are removed by vacuuming. This is considered normal and subsides over time.
• SPROUTING is an industry term to describe when small tufts of cut pile carpet extend beyond the surface. It can easily be removed by clipping the extended yarns with scissors. Avoid pulling the yarns.
• PULLED YARN may occur occasionally along walls or at seams.
• DEPRESSIONS may be formed by heavy objects pressing down on the face fibre and may be removed by gently rubbing the affected area with the edge of a coin or lifting upwards on the tufts while using a steam iron. Avoid touching or close contact between the iron and the carpet.
• PILE CRUSHING OR MATTING may be caused by heavy traffic or excessive soiling and can be reduced by using the beater bar vacuum attachment. Use of small rugs and rearranging furniture regularly can help reduce this condition.
• PILE REVERSAL (shading, watermarking or pooling) sometimes occurs in dense cut pile carpets such as velvets and plushes. This visual effect is caused by the tips of the tufts reflecting light differently than the sides of the tufts. It is considered an aesthetic design quality and is not regarded as a defect.
Vacuuming
Carpet may be subjected to more abuse than most home furnishings, and different carpet qualities will perform differently. The way it is vacuumed and the vacuum cleaner condition can also affect performance.
To prolong appearance and performance, carpet requires regular frequent vacuuming with a good quality vacuum cleaner equipped with an efficient dust retaining system. In heavy traffic areas, it is recommended to vacuum 3 to 4 times weekly.
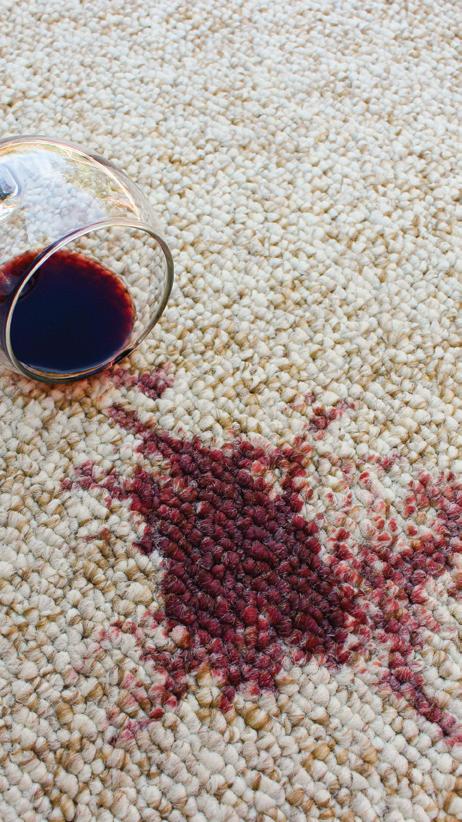
Dealing With Spills
Many carpet products are treated with stain-resistant finishes, and many food and beverage spills can be cleaned without leaving permanent stains. However, note that stain-resistant does not mean stain-proof. The longer stains or spills remain on carpet, the more difficult it may be to remove.
Permanent stains or colour loss may occur as a result of contact with certain household products. Some products, such as beverages, food and medicine may contain dyes similar to those used in carpet. Some may alter carpet colour gradually, such as some acne medicines, while others may dye carpet fibres quickly, such as bleaches, strippers and hair products.
Permanent stains may occur as a result of contact with insect control products, pesticides, disinfectants, iodine, mustard, oven cleaner and plant food products. Because these stains cannot be removed, avoid contacting carpet with these products.
Emergency Stain Removal
Flooring industry publications often recommend the following for emergency stain removal: Never scrub. Always blot. Don’t rub vigorously.
Act quickly when anything is dropped or spilled. Remove spots before they dry.
Pretest any spot removal agent in an inconspicuous area to confirm it will not damage carpet or its dyes.
Blot liquids with a clean, white absorbent cloth or paper towel. For semisolids, scoop up with a rounded spoon. For solids, break up and vacuum out as much as possible.
Positive Version Reverse Version
Apply a small amount of the appropriate cleaning solution to the cloth. Work it gently. Do not scrub. Work from the edges of the spot to the centre. Blot thoroughly. Repeat until spot is removed.
Follow the steps on the Carpet Spot Removal Chart (after this section). After each application, absorb as much as possible before proceeding with the next step.
Repeat with clean water, and blot again to remove any remaining cleaner residue. To ensure the cleaned area has been neutralized of cleaning residue, dampen with white vinegar.
Absorb remaining moisture with layers of white paper towels, weighted down with a nonstaining glass or ceramic object.
When dry, vacuum or brush the pile to restore the texture. Contact a carpet cleaning specialist if the spot is not completely removed.
Following is a carpet spot removal KEY which suggests cleaning methods to be used in conjunction with the CHART on the following page.
Carpet Spot Removal Key Chart
1 2 3 4 5 6 7 8
Dry Cleaning Fluid: a nonflammable spot removal liquid available in many grocery and hardware stores.
Nail Polish Remover: Amyl Acetate often has a banana fragrance. Do not use if it contains acetone.
Detergent Solution: Mix 2 cups cold water and 1/8 teaspoon with mild liquid detergent (no lanolin, non-bleach).
Warm Water: Lukewarm tap water.
Vinegar Solution: One part WHITE vinegar to one part water.
Ammonia Solution: One tablespoon household ammonia to one cup water.
Spot Removal Kit: Available from retail carpet stores or carpet cleaning specialists.
Call a Carpet Specialist: For additional suggestions, special cleaning chemicals, or the ability to patch the area.
Use the above Carpet Spot Removal Chart with the KEY on the opposite page. Find the spot source on the left side and the suggested method on the right side. Try the first method suggested, then the second, and third, etc., until the spot is successfully removed.
* PLEASE NOTE: Some spills may contain chemicals that can discolour or even damage carpet fibre or dye. If there is doubt about what caused a spill or how to remove it, contact a carpet cleaning specialist.
Positive Version Reverse Version
Dye
Food
Fungicide, Insecticide, Pesticide
Furniture polish from water base
Furniture Polish from solvent base
Furniture Stain
Acid 6, 4 ,8 Acne Medication 1, 3, 6, 5, 4, 8 Alcohol Beverage 3, 6, 5, 4 Ammonia 5, 4 Bleach 3, 4, 8 Blood 3, 6, 4, 7 Candle Wax 1, 6
Chalk
Cement/Glue
Charcoal Chewing Gum Coffee Cosmetics
Cleaner
Crayon Drain / Toilet
Ink Iodine
Medicine
Nail Polish Oil Paint Plant Food Rust Shoe Polish Soft Drinks Soot Tar Toothpaste Urine Vomit 2, 1, 3, 6, 5, 7 3, 4 3, 4 1 3, 5, 4, 7, 8 2, 1, 3, 6, 5, 4, 7, 8 1, 3, 4 4, 3 ,5 1, 3, 6, 5, 7, 8 3, 6, 5, 4, 7, 8 1, 3, 6, 5, 4, 8 3, 6, 5, 4, 7, 8 2, 1, 3, 6, 5, 4, 7 2, 1, 3, 6, 5, 4, 7, 8 3, 4 1, 3, 4, 7, 8 2, I, 3, 6, 5,4, 7, 8 1, 3, 5, 4, 7, 8 2, 1, 3, 6, 5, 4, 7, 8 2, 1, 3, 6, 5, 4, 7, 8 3, 6, 5, 4, 7, 8 2, 1, 3, 7, 8 1, 3, 6, 4, 8 2, 1, 3, 7, 8 3, 6, 5, 4, 7, 8 5, 3, 4, 7,8 2, 1, 3, 6, 4, 7, 8 3, 6, 5, 4, 7, 8 1, 3, 4, 8 1, 7, 8 3 3, 5, 7, 8 3, 6, 5, 4, 7, 8
Graphite Grease
Lipstick
Merthiolate
SPOT METHOD/KEY
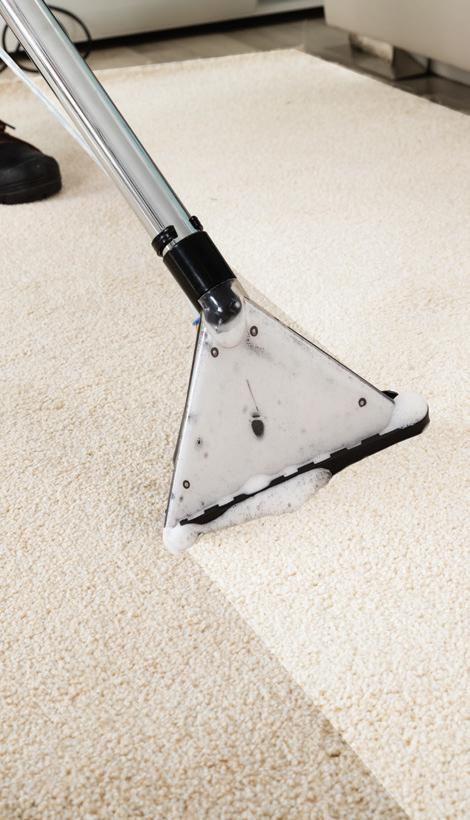
Carpet Long Term Care
While regular vacuuming is essential, consider deep cleaning carpet at 12 to 18 month intervals by a carpet cleaning specialist. If the choice is to personally clean the carpet, review the manufacturer’s recommendations so that the method used does not invalidate the warranty.
Wet Method
(Either A Shampoo Cleaning Or Hot Water Extraction Method)
It is very important to avoid over wetting the carpet. Under-cushion should remain dry. Over wetting can result in wicking of staining materials from the backing and even promote growth of mould and mildew on the backing or cushion.
It is necessary to remove furniture or place plastic or aluminum foil under and around furniture legs to reduce the risk of rust or stains.
When carpet is rinsed, the rinse water should contain a good quality all-fibre rinse neutralizing agent.
For hot water extraction, room temperature should be maintained at normal levels. Increasing temperature can increase humidity and prolong the drying period. Allow carpet to dry thoroughly before walking on it. The use of fans, ventilation and open windows should help speed the drying period. Carpet should be dried within 12 to 24 hours to reduce the risk of mould and mildew growth.
Shampoo cleaning should be either rinsed with hot water extraction or thoroughly vacuumed to remove residue.
Dry Method
(Either Absorbent Compound, Absorbent Pad Or Dry Foam Method)
These methods are minimum moisture systems that may be applicable for certain types of floor covering, and where high humidity makes it difficult to remove a wet cleaning solution.
Professional Cleaning (To Help Save Time And Energy)
Inquire at a carpet retailer if they can recommend a cleaning specialist or a certified professional cleaner with references. If necessary, contact the Institute of Cleaning and Restoration Certification at 1-800-835-4624 to obtain names of member firms in your area.
IMPORTANT: Ensure rooms are well ventilated with fresh air during and after the cleaning process. With all methods, it is essential to fully extract soil, moisture and cleaning agents from carpet after each deep cleaning procedure.
Positive Version Reverse Version
Indoor Air Quality Consumer Information
Since many in this region spend much time indoors in energy-efficient buildings, sufficient fresh air ventilation is necessary to help maintain indoor air quality. Various materials, finishes, furnishings, renovating and cleaning agents may affect indoor air quality.
New carpet contains chemicals that may give off a mild scent. These chemicals normally dissipate rapidly.
Ventilation
Ventilation for 48 to 72 hours is suggested when carpets and other interior renovating materials are installed, cleaned or removed.
Installation Guidelines
• Vacuum old carpet before removal.
• Vacuum floor after carpet and pad has been removed.
• Always ventilate with fresh air during all phases of installation and for 72 hours after.
• Where adhesives are used, request those which have low chemical emissions.
• Follow the manufacturers’ detailed installation guidelines.
Sensitive Individuals
Those who are allergy-prone or sensitive to odours or chemicals should consider avoiding the area or leaving the premises when these materials are being installed or removed.
For further information about indoor air quality, contact a carpet retailer.
Ceramic Tile
Ceramic tile in wall or floor applications are relatively easy to clean. They can be wiped with a damp cloth or washed with soapy water and rinsed. Avoid applying excessive water to grout joints since they can break down and become loose.
Ceramics are brittle and can be easily broken or cracked by impact from hard objects. Record any damaged tile at the pre-occupancy inspection.
Where ceramics require replacement, only those tiles which are damaged will be replaced with the understanding that colour matching to existing tiles may not be possible. Your builder will not remove and replace entire areas due to colour variation. Avoid cleaning ceramics with harsh or abrasive cleaning products.
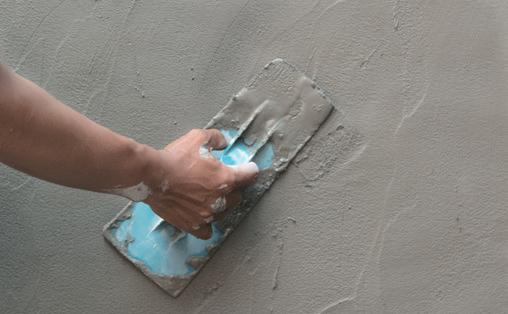
Where sealants (caulking) separate or require replacement, first remove the old material, clean and dry the surfaces, then apply new sealant continuously to ensure against moisture penetration.
Natural Stone and Quartz
Marble is natural stone polished to a high lustre. It is normal to observe veins, small cracks and colour variations as characteristics of natural products. Agglomerated marble is a similar material which has been manufactured from natural stone and which tends to display a reduced amount of veins, cracking and colour variation.
As with ceramics, marble is very brittle and may by easily damaged by impact from hard objects.
Marble products can be cleaned as ceramics. The polished surface of marble is easily damaged. Never use cleaning compounds or products which contain acid such as lemon or vinegar. Scratches can be masked with the use of glass wax or liquid car polish.
Marble can appear cold to touch even at warm air temperatures and is a normal characteristic of stone and ceramic products. When used as floor finishes, marble can be extremely slippery when wet.
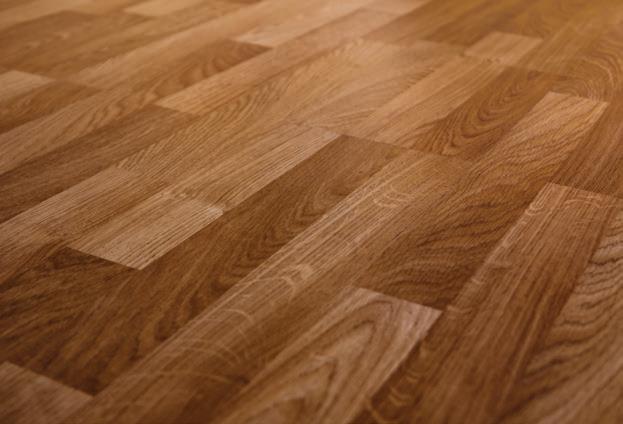
Hardwood Flooring
Hardwood flooring is usually made from kiln-dried hardwood species trees. The flooring can be either site finished or factory finished.
As with all wood products, hardwood may be affected by humidity levels. Where drying occurs such as near heating grilles, wood may shrink and expose gaps between the boards. Extended exposure to direct sunlight will result in fading, discolouration and early drying of the wood.
Regular cleaning of hardwood floors is recommended. Sweep daily with a soft broom or mop to prevent accumulation of grit which can scratch and dull the surface finish.
Please refer to the manufacturer’s care and maintenance brochure provided to you at the Homeowner’s Orientation.
Positive Version Reverse Version
Mechanical Plumbing
Plumbing systems require care and maintenance to ensure they continue to function properly for long periods. In serviced subdivisions, plumbing systems generally consist of the following:
• Pressurized water delivery and distribution in the form of copper or composite material piping from the water meter to the plumbing controls and fixtures.
• Sanitary drainage and venting system to drain waste water from fixtures and exhaust odours. This is usually in the form of composite plastic piping.
• Water heating system to provide domestic hot water to specified fixtures such as sinks, baths, showers and washing appliances through part of the pressurized water distribution system. Water heating usually includes a hot water storage tank with a heat source.
• Controls in the form of faucets and valves to control water flow, temperature mix and standing levels at the fixtures. They may also include specialty connection equipment for specified appliances.
• Fixtures such as sinks, basins, bathtubs, toilets and other equipment as may be specified.
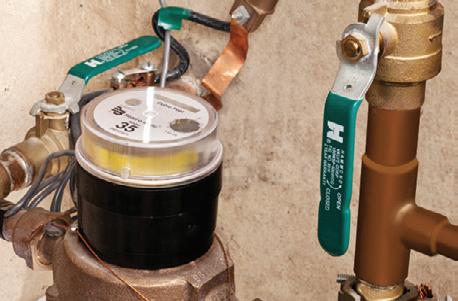
Main Shutoff Valve
The main shutoff valve for pressurized water service to distribution system is usually located next to the hot water tank.
It is recommended to become familiar with the location and operation of this valve in the event of a pressurized water leak. If a leak occurs, close the shutoff valve and arrange for emergency plumbing service without delay to avoid serious damage.
Toilet Backup
During the first 2 week period of occupancy, if a toilet should become blocked, contact the builder’s service department for inspection and clearing where necessary. Where inspection or clearing reveals an obstruction other than construction debris, the service call costs will be charged to the homeowner.
Water Heater
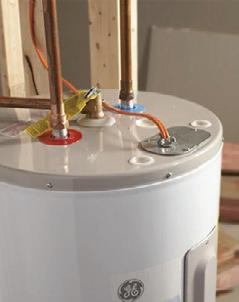
The water heater is fuelled by natural gas and rented from the local natural gas authority. Contact the appropriate authority (Energy Ottawa) directly for service issues. Maintain normal heat settings for domestic use.
Plumbing Vents (Vent Stacks)
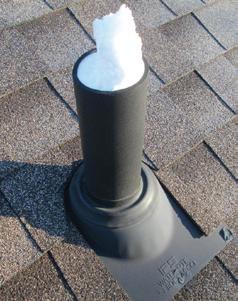
Plumbing vents provide ventilation to the plumbing drainage system to help exhaust sewage-type gas odours. They normally outlet through the roof with composite plastic piping. Where sewage odours are observed, it may be the result of blockage in the vent. Blockage could occur in winter from excessive snow, ice and drifting. Blockages should be removed to restore ventilation. Refer to Ice Damming elsewhere in this manual.
Plumbing Fixtures
Plumbing fixture surfaces should be cleaned regularly with mild non-abrasive cleaners using generous amounts of water. Abrasive cleaners and soap pads may scratch and dull the finishes and cause them to become porous. Steel pads and harsh cleaners may cause permanent damage. Avoid scraping with hard or metal objects. Even stainless steel sinks can be scratched and damaged. Avoid impacts from hard objects which can result in scratches, dents and chips to the finish. Avoid stepping into a bath or shower with footwear which might have grit particles that will scratch surfaces.
Positive Version Reverse Version
Avoid using fixtures as reservoirs to mix harsh chemical compounds. Photographic and developing solutions may cause permanent staining. Avoid disposal of grease, fat or petroleum-based products into fixtures or into the drainage system which might result in blockage or damage.
Periodically clean out the water filled traps attached to most plumbing fixtures to ensure they remain free of accumulations and obstructions.
Controls (Faucets)
Faucets are usually finished in a high lustre chrome material which can be wiped as necessary with a soft damp cloth. Use only warm water to remove dry water spots. Avoid using cleaners which are abrasive or harsh chemicals that can damage the finish. Avoid using alcohol-based or other organic-based solvents. Wax polish may be applied to surfaces periodically to facilitate regular cleaning.
Basins and bathtubs are often equipped with pop-up type drain stoppers which should be removed regularly to clear accumulations and obstructions. The clearing will promote free flow of drainage and effective operation of the stopper mechanism.
Aerators and filters in faucets and shower heads require regular removal, inspection and cleaning to clear particle accumulations which might restrict proper water flow.

Water connections, controls and drainage systems for optional and after- market equipment such as ice makers or humidifiers should also be inspected and maintained in accordance with the manufacturers’ instructions.
Heating and Ventilation
Natural Gas System
Heating and ventilation systems require care and maintenance to ensure they function safely and dependably for long periods.
For areas serviced by natural gas, heating and ventilation systems generally consist of the following components:
• Natural gas piping to deliver fuel from the gas provider’s metering system to the furnace and other appliances where applicable.
• Furnace appliance to provide warm air to the distribution system.
• Ductwork to provide distribution of warm air to specified locations in the building. There is also a secondary distribution system to return cool air to the furnace for circulation purposes.
• Grilles and diffusers to assist in control of direction and flow of air at the outlets.
• Controls in the form of thermostats, switches, etc. to help control temperatures and humidity levels.
• Gas venting to exhaust products of combustion to outside the building.
• Air intake to provide fresh outside air to the furnace for combustion purposes.
• HRV (Heat Recovery Ventilator): this is optional with some systems and helps to control indoor air quality and humidity.
• Air exhaust: ventilation to exhaust air to outside the building to help control odours and humidity levels from kitchens and bathrooms.
• Air conditioning: This is usually optional equipment designed to help provide cooled dry air to the building during a hot summer, using the heat distribution system and controls.
Generally, heating and ventilation systems are designed to rated capacities specific to the home plan layout.
It is important to become familiar with the systems’ controls and maintenance to promote operation at the highest efficiency and comfort levels. The systems require adjustments after occupancy and to account for changes in weather conditions and life style. All filtration systems require cleaning and replacement frequently where air handling fans are used for heating, ventilation or cooling.
Positive Version Reverse Version
Heat
All heating systems require balancing of the air distribution system throughout the building spaces. Balancing should be done by the building occupant to suit individual requirements and conditions for rooms and spaces. For example: In 2-storey homes, the most common heating complaint is that spaces on the second floor do not appear to reach specified temperatures by the time the furnace has completed its cycle. The thermostat is usually located at the ground floor. Ground floor spaces may reach specified temperatures sooner than second floor spaces where the distribution system is not properly balanced for air flow. Also, normal ground floor activities such as cooking or operating a fireplace can result in earlier heating of these spaces.
Since the thermostat is at the ground floor, it will register that specified temperature has been reached and shut off the furnace even though the second floor may be much cooler.
To help reduce temperature variation between the first and second floor, the ductwork dampers and diffusers require adjustment. In this case the objective is to restrict air flow to the warmer first floor spaces so that more time passes prior to reaching the specified temperature and to increase air flow to the cooler second floor spaces to help reach the specified temperature prior to the end of the cycle.
To adjust the damper, first remove the floor grille. Carefully reach in to locate the small handle which controls the damper (usually called the “key”). Turn the key to adjust as necessary. When the key is resting in line with the ductwork, it is in the fully open position. When it is turned 90 degrees, it is in the fully closed position. Fully closed should restrict air flow. Most floor grilles also have some degree of flow control which can be adjusted in conjunction with the damper key adjustment.
The balancing procedure applies to any space which may require adjustment. Where cooling systems are used, balancing will likely be required for hot weather periods. Ensure grilles and diffusers remain free of obstructions such as furnishings and window coverings which might affect air flow and performance.
Humidity Control
Depending on lifestyle, individual preferences or other conditions, it may be necessary to implement humidity control measures to help adjust air moisture levels within the building spaces.
Condensation on window glazing during winter is not uncommon. However excessive condensation that results in moisture accumulation can cause damage to finishes and building assemblies. To avoid damage, humidity levels should be reduced.
Newly constructed homes may continue to have higher humidity levels during the first year where the drying period of new materials contributes moisture to the indoor air. New homes are equipped with some form of ventilation system to help protect the building from moisture damage. It is recommended to become familiar with the ventilation system controls and maintenance requirements.
Where applicable, switches for the main ventilation and circulation fans are normally located near the thermostat control. Most new homes also include fans in bathrooms and kitchens to help control humidity and odours. It is recommended to run the fans during and sometime after moisture producing activities.
Check exhaust and intake assemblies at the building exterior to ensure they remain unobstructed. Clean grilles and filtration systems. Where applicable, clean or replace duct-mounted filters. Where the system includes an HRV, clean and replace the filters as required by the manufacturer’s instructions. Some exhaust fans may require cleaning and lubrication. Check the fan’s instructions and safely disconnect the fan’s power source prior to starting maintenance. Regularly scrub kitchen exhaust grease filters with hot soapy water.
Humidity Control Suggestions
The following is a list of suggestions from various heating and ventilation industry sources to help control indoor humidity levels.
1. The purchase and proper use of a hygrometer (an instrument capable of measuring relative air humidity) may be useful to help determine air moisture levels.
2. In Winter, maintain indoor relative humidity between 30% and 50% measured inside the most used bedroom at an exterior wall. In Summer, maintain between 30% and 70% measured in basement spaces.
3. To avoid window condensation, maintain humidity levels lower than those specified above.
4. Keep fabrics, window coverings, clothes in closets and stored materials away from exterior walls.
5. In basement spaces where reduction of moisture levels is more difficult, consider using a good quality dehumidifier during heavier moisture periods.
6. During hot muggy summer periods, consider using air conditioning to help reduce moisture levels.
7. Maintain coils for humidifiers, dehumidifiers and air conditioners cleanly scrubbed and use safe fungicides such as baking soda.
Positive Version Reverse Version
8. Avoid venting clothes dryers into interior building spaces. Dryers exhaust excessive moisture, chemicals and minute dust particles too small to be handled by common filtration systems.
9. Remove spills and dry floors quickly to avoid additional moisture load to ventilation systems.
10. During hot muggy Summer weather, regulate the amount of hot humid outside air introduced to basement spaces.
11. Where necessary, operate kitchen and bathroom fans to exhaust humid air.
12. Keep interior surfaces clean and dry.
13. Where surfaces or materials develop mold, remove mold and mildew quickly with washing soda and vinegar for mild conditions or with chlorine bleach for severe conditions.
14. Avoid reducing ventilation to reduce energy consumption.
Venting Systems
Chimneys and venting systems are designed to exhaust products of combustion to the outside of the building. Exhaust gases are considered hazardous. Chimneys and vents must be kept free of obstructions.
Where high-efficiency furnaces are specified, some design applications locate exhaust vents at exterior walls of the building. Check Winter snow accumulations to ensure chimneys and vents remain clear.
Air Conditioning / Cooling System
Air conditioning systems are usually optional equipment and utilize the same air distribution system and controls as the heating system.
The cooling mode may require balancing and adjustments to the distribution of air flow to help reduce temperature variations between spaces in the building. Refer to BALANCING under the heating section of this manual.
During hot muggy Summer weather, use window coverings to help block direct sunlight from entering the room spaces. This should help the system cool and balance temperatures. Reduce heat and humidity producing activities such as cooking, showers and laundry. Review the manufacturer’s operation and maintenance manual.
Fireplace
Natural Gas Fireplace
The natural gas fireplace is considered a gas appliance. Consult the manufacturer’s operation and maintenance manual for safe and efficient operation of the fireplace
Electrical Electrical System Circuit Breaker
The circuit breaker panel is usually located on a basement wall. It contains circuit breakers with switches for electrical circuits throughout the building.
It is recommended that the legend printed on the panel be filled in to identify which outlets are protected by which circuit numbers. Circuit breakers are intended to be left in the ON position for normal working circuits. Under certain conditions breakers disengage to the OFF position which discontinues power to that circuit. To restore power to the circuit, return the breaker to the ON position.
Where breakers have been disengaged automatically, they are commonly referred to as tripped breakers. Tripped breakers may simply be a sign of an appliance overload. However, breakers which are tripped repeatedly may be the result of a more serious condition or defective appliance which might cause damage or fire. Have the problem checked by a qualified electrical specialist.
Where an appliance or outlet does not appear to have power, confirm the applicable breaker is ON. Electric kitchen ranges and some other appliances often contain their own electrical fuses which should be checked to ensure they are operational. Check the appliance manufacturer’s operation manual for further information.
Ground Fault Circuit Interrupter (GFCI) or (GFI)
Specific circuits may be equipped with GFI to reduce the risk of electrical shock caused by a ground fault in electrical tools and appliances. The GFI receptacle is intended to protect exterior and bathroom outlets. The exterior GFI receptacle is usually located either at the circuit panel or at one of the exterior outlets. Normally the GFI receptacle has 2 buttons at the centre of the outlet. One is black and the other is red. Black is for TEST and red is for RESET. GFIs should be tested monthly to confirm they are working properly.
Positive Version Reverse Version
Electrical Safety
Avoid handling electrical equipment or cords with wet hands or around moisture. Repair or replace damaged fixtures, fittings or cords. When planning changes, alteration or expansion to the electrical system, use the services of a qualified electrical specialist to ensure the work is completed for safe efficient operation.
Lighting
Light bulb replacement for all lighting fixtures is the homeowner’s responsibility. For enclosed lighting fixtures, avoid using light bulbs greater than 60 watts capacity.
Most lighting fixtures have a notice indicating the type and capacity of bulb the fixture is designed to accept. Replace bulbs with the types specified. Some exterior fixtures are designed to switch on automatically by a light-sensitive photo electric switch. The sensor is in a receptacle located somewhere on the building exterior. For lawn lamps, the sensor may be located on the fixture or the support post. Sometimes photo electric switching is a municipal requirement of the sub- division agreement.
Smoke & Carbon Monoxide Detection Alarms
Smoke detectors require very little maintenance. They should be tested regularly in accordance with the manufacturer’s instructions. Smoke alarms should be cleaned regularly with a vacuum to ensure intake openings remain free of dust or other obstructions.
Smoke alarms are hardwired to the building’s electrical power system with battery backup. You should replace the batteries within the first 6 months of moving into your home.
How To Change Smoke Detector and CO2 Detector Batteries
Changing Smoke Detector Batteries:
1. Remove the smoke detector from the ceiling.
2. Disconnect the clip from the back of the smoke detector.
3. Open up the battery clip and replace the batteries. Leave the clip open.
4. Press the TEST button.
5. Insert the battery clip – the smoke detector should beep once. If it fails to beep, open the battery clip and repeat steps 1-5.
6. If there is still no beep, check that the batteries are installed correctly with the + and – symbols on the correct side. Check that the metal tabs that hold the battery are not bent or damaged.
7. Once the smoke detector beeps, reinsert the clip into the back of the unit and reinstall it onto the ceiling.
8. The LED light should glow a constant green and should not be flashing.
Changing CO2 Detector Batteries:
1. Remove the CO2 detector from the ceiling.
2. Disconnect the clip from the back of the CO2 detector.
3. Remove the 9V battery and replace it with a new one. Leave the clip open.
4. Press the TEST button.
5. Insert the battery clip.
6. Reinsert the clip into the back of the unit and reinstall it onto the ceiling.
7. The LED light should glow a constant green and should not be flashing.
For more information on fire safety, please visit the City of Ottawa’s website: https:// ottawa.ca/en/residents/emergency-services/ottawa-fire-services/fire-safetyinformation
Appliances
Where the builder provides domestic appliances, the homeowner assumes responsibility for connections to mechanical and electrical systems. Consult the manufacturers’ installation, operation and maintenance instructions prior to installing and operating appliances. Record warranty registration with the applicable manufacturers. Where appliance service is required, contact the manufacturers’ local service agents.
Central Vacuum System Rough-In
Where the building includes central vacuum rough-in, it means that a number of inlets has been provided to certain finished spaces. The number of inlets varies with the type and size of floorplan. The inlets are normally connected to a partial distribution system which is terminated in an unfinished base-ment space for future connection and completion of the system.
Positive Version Reverse Version
Hardwood Care Tips
Installation Recommendations & Warranty
Please read this guide in detail and follow installation instructions provided. It is important to understand that the recommended care and maintenance procedures must be followed or your warranty can be void.
Care and Cleaning
Your pre-finished Appalachian Flooring Ltd. Hardwood Floor is easy to clean and maintain. We recommend that you regularly sweep, dry-mop and vacuum your floor with a soft brush attachment to avoid the accumulation of grit and dust on the surface.
Humidity
As wood is a natural fibre, changes in the level of humidity of the room, in which you have installed your hardwood floor, will cause it to shrink or expand. The humidity level must be kept at a normalized level (between 30% and 50%). This can be easily accomplished through the use of an appropriate ventilation and humidification system or dehumidification system. Most regions of Canada will need a humidifier in the winter months.
Sunlight
The colour of your hardwood floor will mature with time and exposure to sunlight. This will cause it to change colour. Any area rug, which blocks out light, should therefore be shifted on a regular basis to keep the colour of your floor more uniform.
Liquids And Spills
All liquids and spills should be wiped off as soon as possible in order to prevent any possible damage. Ensure that a dry paper towel or terrycloth is used after clean up to ensure no liquid remains. You may consider using area rugs to protect susceptible areas (around kitchen sink, at exterior entrances etc.). If a spill occurs please remember to check under the mat to ensure that no water is trapped and that there is no moisture touching the floor. Do not wet mop your floor. Standing water can harm or warp your floor.
Protection
Abrasive dirt such as sand, street dirt and cat litter can damage any hardwood floor regardless of the strength of the finish. Regularly sweep and vacuum with a soft brush attachment do not use a vacuum with a beater bar as found in most upright models.
In addition, you can help protect your floor by using entrance mats and area rugs in high-risk areas such at entrances and doorways. When cleaning, remember to clean under the edges of rugs as it is a common place for trapped debris. Shake mats regularly to ensure there is no trapped debris. For rug pads choose 100% non-solvent based rubber, an untreated natural fibre such as wool or jute, or 1/4” chopped urethane. Do not use sticky or tacky backers. The plasticizers they use can attack and discolour finish. These same plasticizers may also be present in the backers of some rugs. In kitchens, use area rugs in high spill locations and at work stations. Cotton is generally the best fabric since it easily washed, do not use rug backers in a kitchen area.
Check all items that come in contact with the floor. Not only should felt pads be placed under the legs of the furniture standing on your floor but the felt pads should be cleaned regularly and checked for wear every 6 months in order to reduce the risk of damaging your floor. Wearing high heels should be avoided on your hardwood floor. The tremendous pressure exerted by the tip can dent and scratch the surface. Moving furniture across a floor can scratch and damage the flooring. If you must move heavy pieces of furniture (refrigerator, piano, love seat, etc.) never slide them directly on the flooring. Instead, place a piece of carpet face down between the furniture legs and the flooring and pull on the carpet to move the furniture. By doing so, you will prevent damage to your flooring.
Chairs with rollers should have wide rollers installed and a protective pad placed beneath large enough to cover the area on which it will be used. The area covered by the pad must be cleaned on a regular basis. Children’s toys should be checked as a source for dents and scratches. Pets with sharp nails can certainly cause scratches as well as a source of water spots on floors. Please keep their nails trimmed.
Choice of Cleaners and Applicators
Although many hardwood flooring cleaners are advertised as suitable for pre-finished flooring the results can be extremely damaging to the finish or leave your flooring looking hazy. An easy way to test you cleaner is to try it on a mirror or glass to see if a residue is left.
Positive Version Reverse Version
Issues With Some Cleaners
Ammonia
Vinegar
Liquid Polishes
Household Dust Treatment
Is too harsh and can discolour wood
Is an acid than can etch the finish and create dulling
Have a wax type material which shines and leaves a contaminating film on the floor
Have strong detergents and may harm the finish and leave a residue or contaminating film behind
Household Cleaners
Any product that instructions say mop and bucket
Have strong detergents and may harm the finish and leave a residue or contaminating film behind
Introduce water to the flooring which can be catastrophic to the flooring
Steam Cleaners
This is currently the most damaging product on the market to clean your flooring with. The introduction of heat and steam can not only crack flooring but the introduction of water is very damaging to the finish
A product with a combination reservoir spray and mop
Introduces liquid directly to the flooring and can remain in the microbevel and cause damage if the spray is not fine enough
The recommended method of cleaning is a combination of Sweeping & Vacuuming and the use of the Appalachian Flooring multi-surface floor cleaner sprayed on a microfiber dry mop.
Positive Version Reverse Version