Mathematics Teacher's Guide B K


Karren Schultz-Ferrell is a former elementary classroom teacher with teaching experiences ranging from 2-year-olds through Grade 5. Before retiring, she was an Elementary Integrated Instructional Specialist in Montgomery County Public Schools, MD, collaboratively aligning and writing the district’s mathematics curriculum with the Common Core State Standards in Kindergarten through Grade 5.
Karren is a mathematics consultant as well as co-author of Math Misconceptions, PreK-Grade 5: From Misunderstanding to Deep Understanding and Heinemann’s Math Process Standards series, Introduction to Reasoning and Proof (Grades PreK-2, Grades 3-5, and Grades 6-8).
She became involved in the PR1ME Kindergarten Math programme writing because she loves a challenge….and teaching math to young children! Karren is also part of the Problem Solving Programme authoring team.
Shara Sights Hammet has vast experience working in public, private and charter schools across the USA delivering professional development for superintendents, curriculum directors, principals, teachers and parents. Because of her work in such settings, potential schools and districts interested in Singapore content and pedagogy respect her direction and suggestions for their students and teachers.
Shara’s previous roles include Director of Singapore Math Professional Development, Product Manager of Math and Science Professional Development, Professional Development Trainer, contributing author, and classroom teacher.
Shara has traveled to Singapore to create a series of quality professional development services for schools and districts adopting Singapore Math in the United States. Shara led the initiative to create a Professional Development Model that focuses on improving teacher effectiveness and student performance through the use of Singapore Math.
Recently, Shara was Lower School Math Coach of Isidore Newman School in New Orleans, Louisiana where she worked with teachers and administration to build consistency in best practices in mathematics instruction, oversaw the implementation of Singapore math curriculum, and led professional development on key topics and trends. Shara is currently Lower School Division Head at Academy of the Sacred Heart, New Orleans, Louisiana. In addition, Shara serves in a consultancy and authoring role for Scholastic International, offering expertise on Singapore Math implementation in US classrooms.
Duriya Aziz S W PhD
Though a language specialist by training, math education found her and Dr Aziz has spent almost 20 years developing curriculum programs based on Singapore math pedagogical principles and practices for more than 20 countries, in different languages, and worked with ministries, schools and teachers on the implementation of these programs — particularly in the US, Australia, New Zealand, India, Latin America, and parts of Asia. In Singapore, she has worked on Ministry-led and developed projects for practically all subjects in the curriculum since the 1990s — in various capacities as editor, project director, and author. Dr Aziz has led the development of practically all the Singapore mathematics programs currently in use in the US. She has spent nearly twenty years working with teachers and districts in the implementation of the programs around the world, and observing the dynamic interplay between the Singapore mathematics pedagogy and the cultural and social contexts in which it has to operate. She is passionate about teachers’ continued professional learning and development and has led many seminars and workshops on diverse topics. Duriya’s focus has been on the development and implementation of programs that incorporate global best practices while remaining culturally and contextually appropriate, to drive sustainable change at a systemic level including development of teacher competence, knowledge, and independence.


Scholastic Mathematics K is an innovative world-class mathematics program focused on the development of early numeracy and problem-solving skills, based on the effective teaching and learning practices of the global top-performers in Mathematics – Singapore, Republic of Korea and Hong Kong. The approach and instructional design are proven to be effective in developing conceptual mastery and procedural fluency, and are crafted to enable the teacher to continually evaluate learning and identify areas for remediation, if needed.
The content in Scholastic Mathematics K is presented under four strands of mathematics: Numbers and Operations, Measurement, Geometry and Data Analysis. There are two Teacher’s Guides, A and B, and accompanying Student Books, which are used consecutively. The Teacher’s Guide provides detailed lesson plans and embedded professional development to enhance teachers’ pedagogical knowledge, teaching and assessment. In addition, 20 Big Books and Readers, with accompanying Problem Solving Teacher’s Guide, have been developed to give teachers and students the opportunity to apply concepts learned to age-appropriate reallife scenarios, developing a problem-solving mindset.
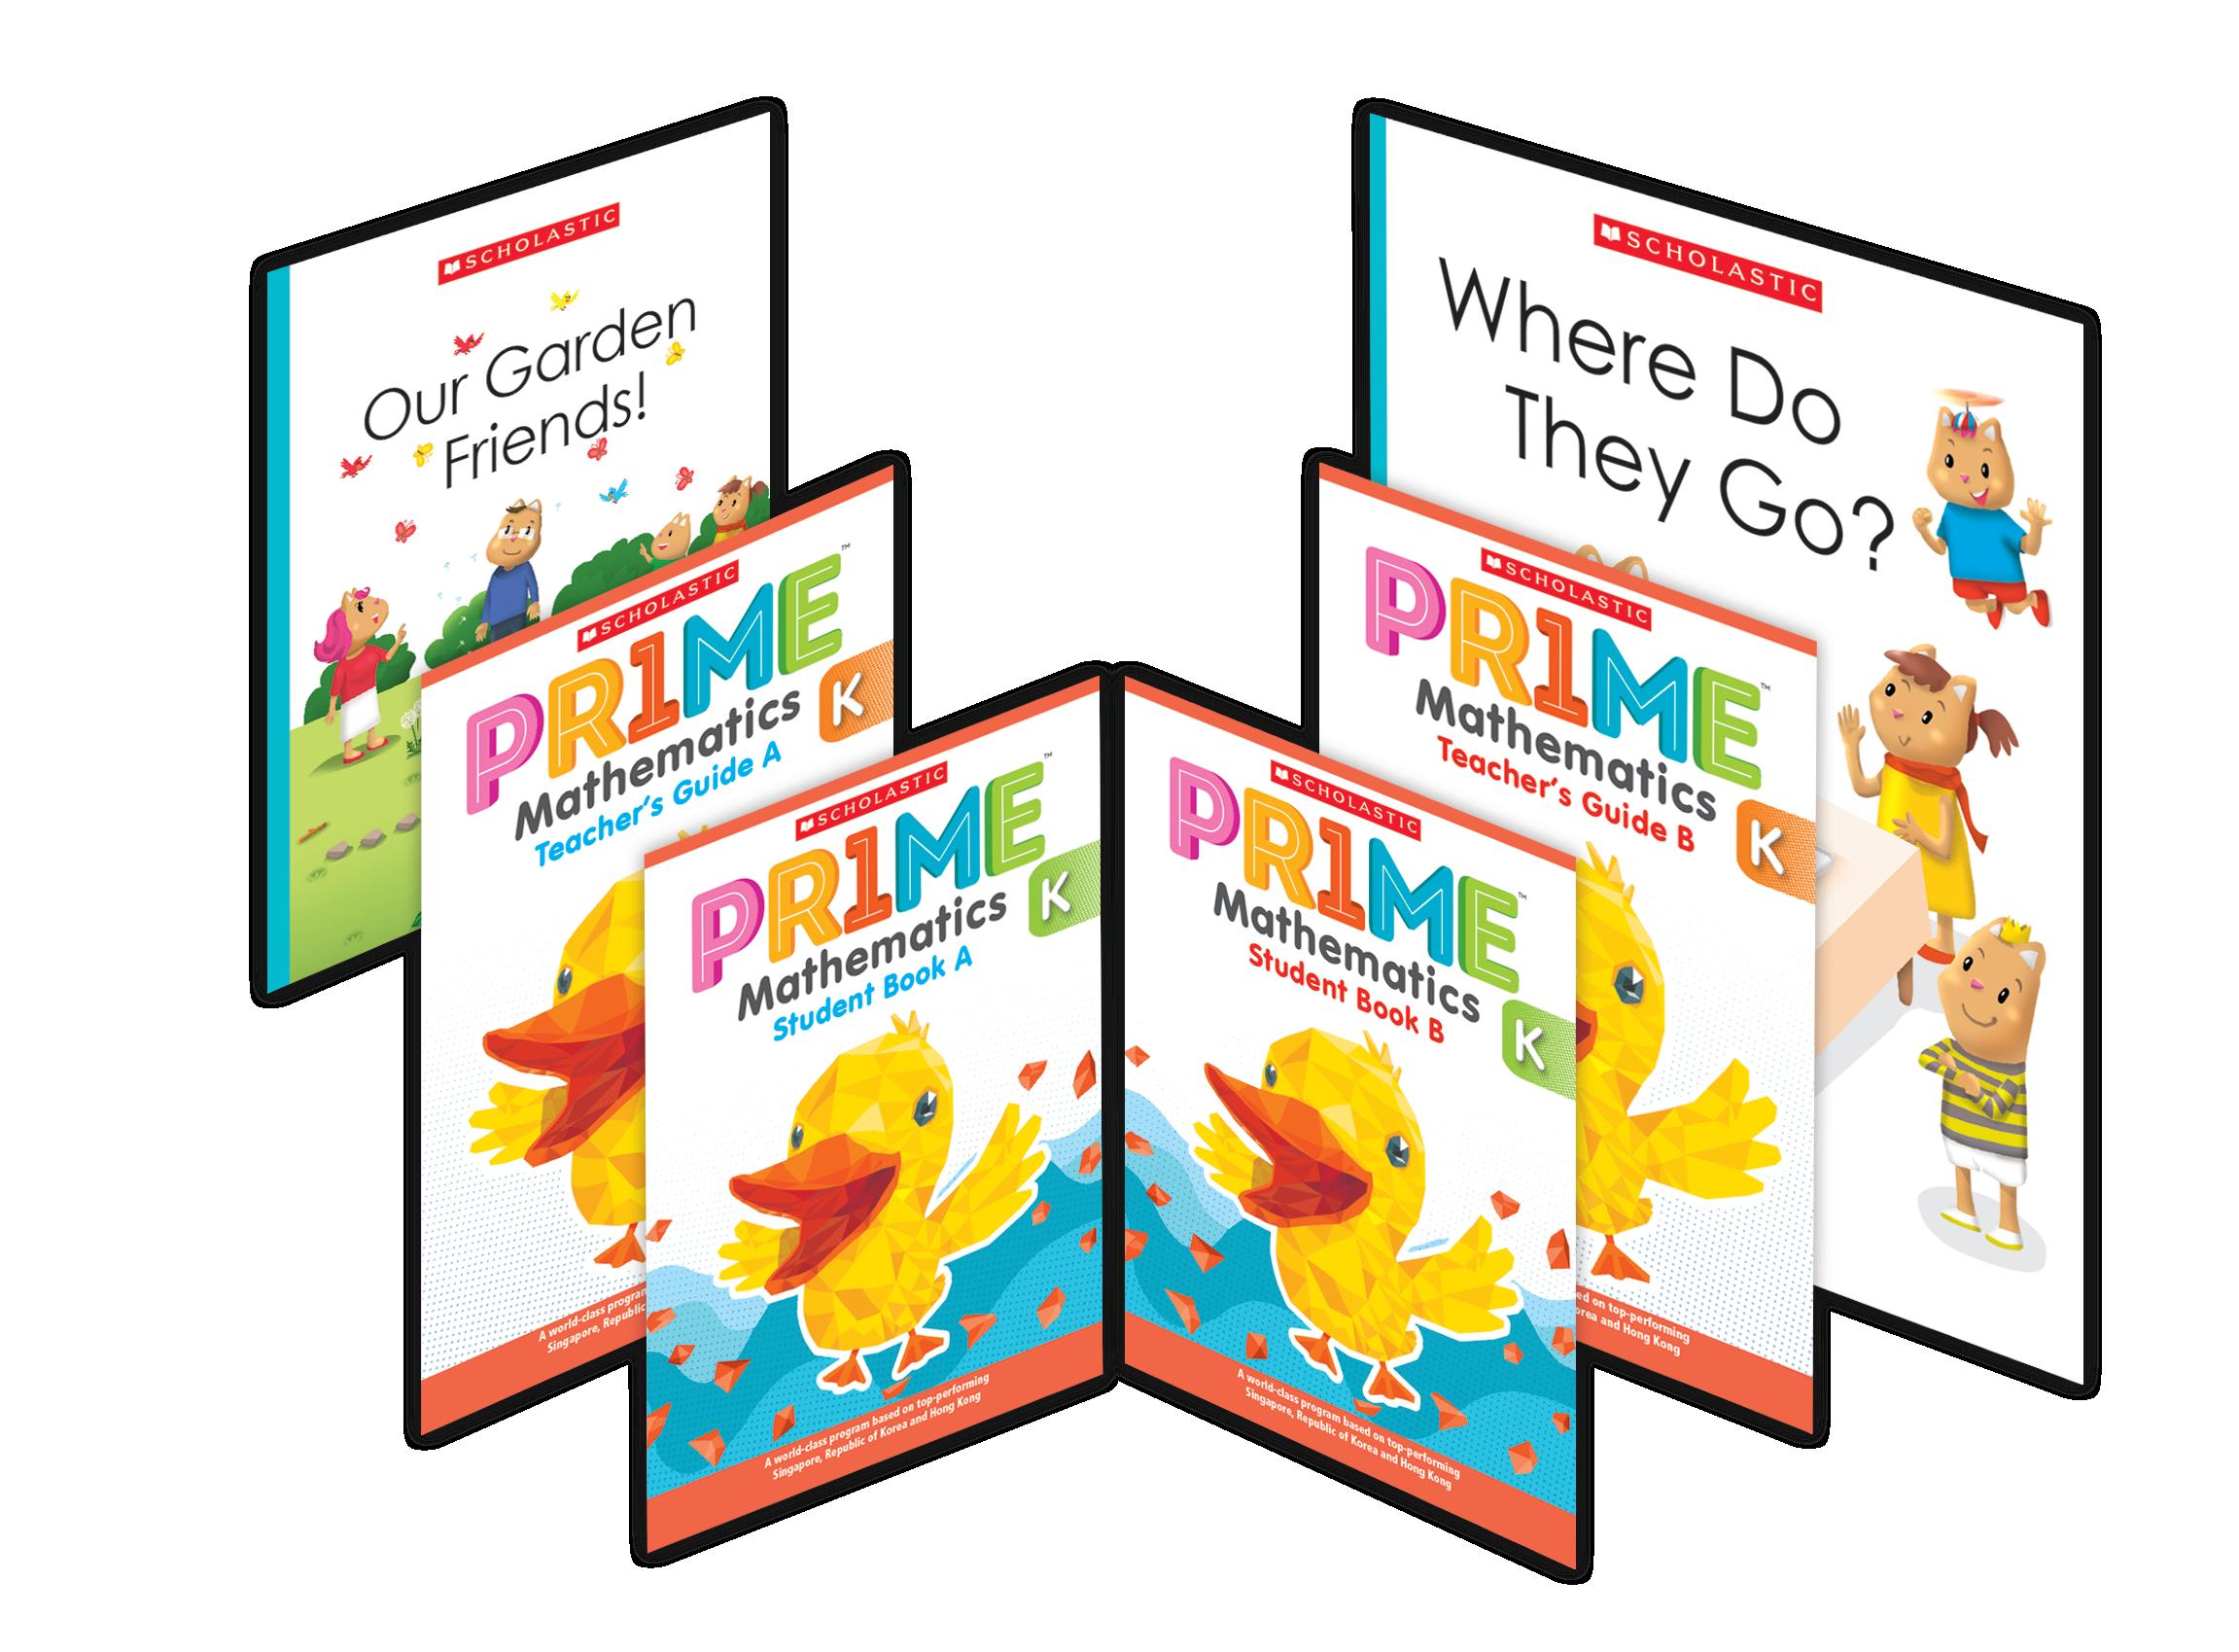


Scholastic Mathematics K is designed on a pedagogical model that ensures teaching and learning are effective, measurable and diagnostic.
Each day’s teaching comprises four parts: Daily Warm-Up, Recall Prior Knowledge/ Quick Recall, Learn and Do and Daily Wrap-Up
Chapter Workout
Each Chapter ends with a Chapter Workout and Learning Center Activities that consolidate the concepts covered in the chapter.
The Problem Solving Big Books and Readers are intended to be used for a lesson after the Chapter Workout and Learning Center Activities, so students can see how the concepts they have learned can be applied in engaging characterled contexts.


Scholastic Mathematics K Teacher’s Guides are designed to help you, the teacher, implement the program easily and effectively.
• Plan effectively with an overview of concepts and skills taught in each lesson, details of each day’s objectives and the materials and resources required, as well as detailed guidance for every day’s lesson.
• Deliver high quality lessons with the help of detailed lesson plans that explain the pedagogy and methodology for teaching each concept, thus deepening your conceptual understanding and equipping you to deliver lessons with confidence.
• Identify remediation needs via ongoing formative assessment during class activities and individual practice work. Reteach suggestions are included to help ensure all students achieve mastery.
This Teacher’s Guide includes
• Developmental Continuum showing how students progress from Kindergarten to Grades 1 and 2.
• detailed Scheme of Work
• scripted Lesson Plans
• answers for all tasks
• photocopiables for class activities
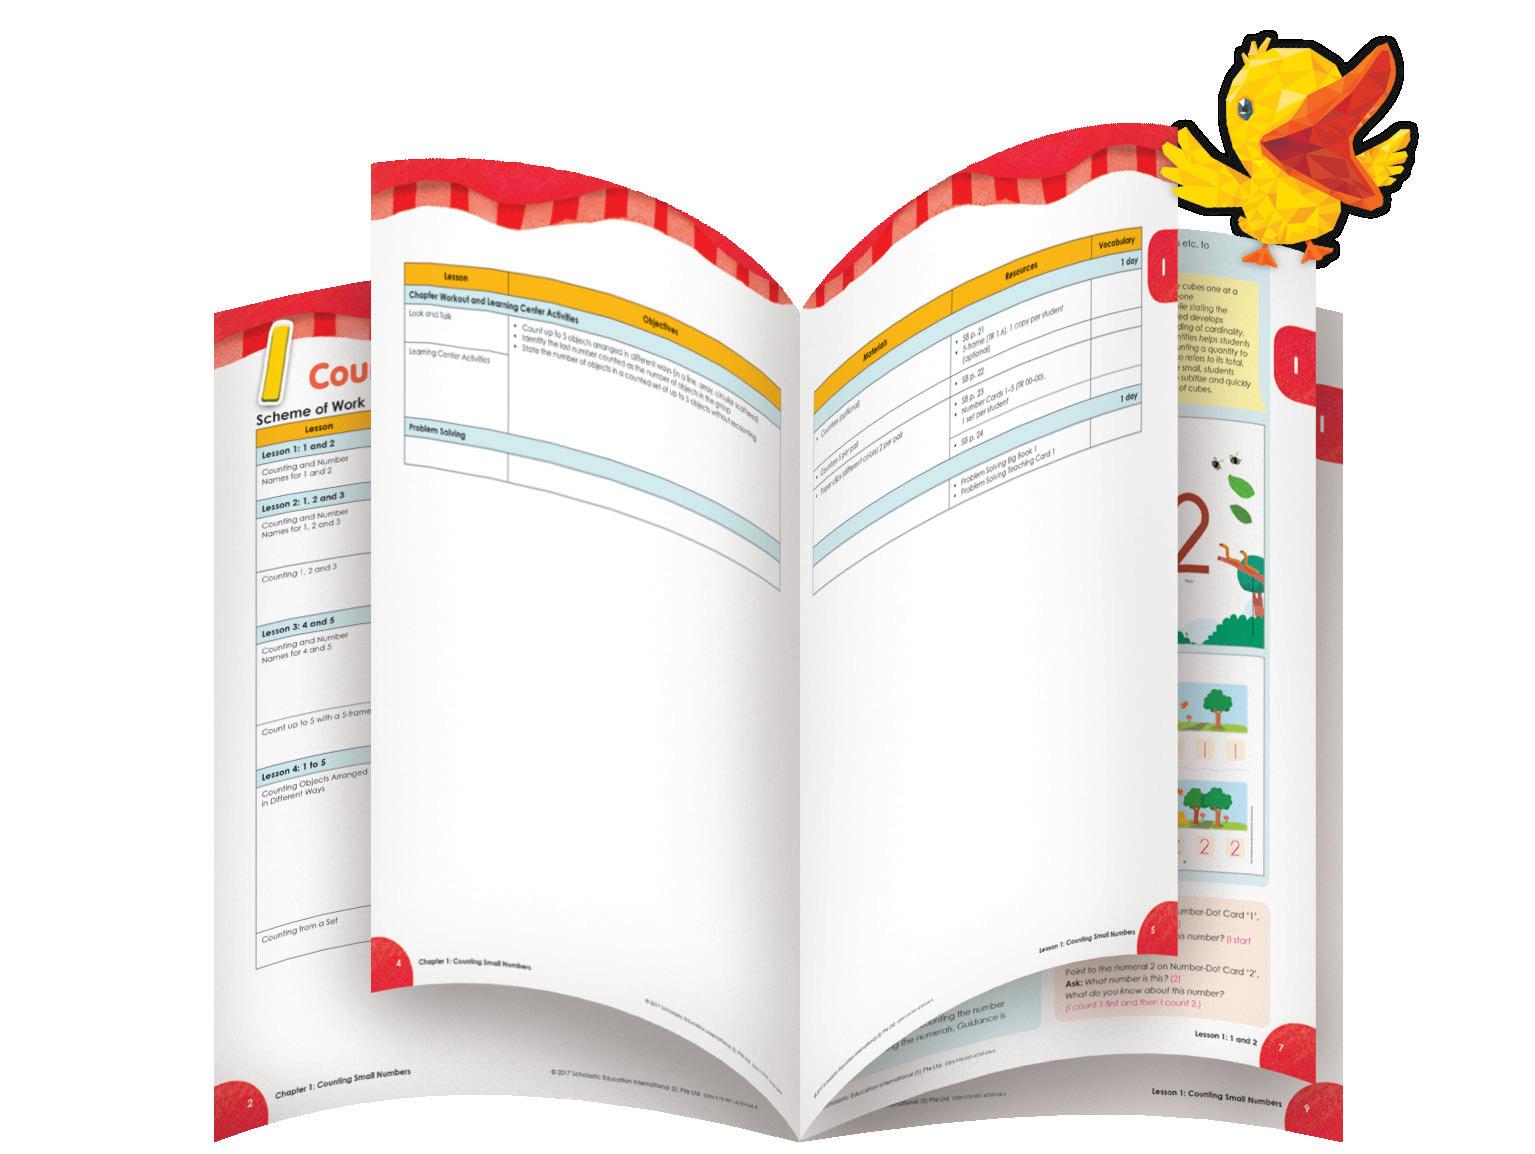



The Developmental Continuum appears at the beginning of the Teacher’s Guide. It offers the overall plan for learning outcomes from Kindergarten up to Grade 2. Teachers can refer to this to understand how the Kindergarten chapters provide the foundation for 1-6.


Strands are color coded to help teachers relate different topics.
Numbers and Operations Measurement Geometry Data Analysis
The Scheme of Work at the start of each chapter is designed to assist in planning the curriculum for the entire year and to prepare for teaching individual chapters.
Each day’s teaching represents 1 hour of instruction. Recommended pacing for each unit helps you manage your time effectively. Teachers can adjust the pacing based on their school calendar and the pace of individual classes.
The objectives list states what will be taught in each unit.

Materials shows what teachers will need to teach each lesson in the unit.
Resources refers teachers to the pages students will use in their Student Books as well as teaching resources found in the Teacher’s Guide.


Each chapter begins with an Introduction which identifies the key mathematical ideas of the chapter, outlining what students will learn as they work through the chapter and how this lays the foundation for future mathematical concepts.


Each day’s teaching starts with a quick five minute routine designed to build mathematical fluency and confidence. Routines include:
• Rote Counting: includes counting from a given number other than 1, a foundational concept for counting on, and grows in difficulty throughout the school year.
• Data Collection: reinforces mathematics vocabulary, builds number sense and reinforces number concepts.
• Subitizing: strengthens students’ abilities to develop mental images of numbers which helps build fluency and strengthen their understanding of the part-whole concept.
• Comparison Jar: reinforces the comparison of two or three numerals to determine the numeral that is greatest or least and encourages use of objects and number tapes to support students’ thinking and reasoning.
• Number Jar: supports students’ abilities to make predictions and discuss results and begins to develop students’ understanding for magnitude of number.
Recall Prior Knowledge and Quick Recall require students to remember prerequisite knowledge. Each task is carefully crafted to check for readiness to learn new knowledge before new concepts are introduced. Teacher’s Guide


Recall Prior Knowledge recaps teaching done in an earlier chapter in the program.
Quick Recall reminds students of concepts covered in the previous day’s lesson and assesses their readiness to move on.


Each chapter is taught over several lessons, with each lesson focusing on a concept or part of it. Some lessons may be taught in a single day, while others are broken down into several days’ instruction. Each day’s teaching follows a two-part structure of concept introduction in Let’s Learn and guided practice and formative assessment in Let’s Do
Concepts in Let’s Learn are taught using the three-stage Concrete-Pictorial-Abstract approach to develop deep conceptual understanding. Clear instructions are provided for directing students’ learning through each stage.
Teacher’s Guide
Purposeful questions are suggested in the Teacher’s Guide, and students are engaged in communicating, explaining and reflecting on their answers.


Icons indicate the stages of the gradual release of responsibility model of instruction.
: whole class
: small group
: pair work
: independent work
New concepts are frequently introduced with a hands-on activity. This is the concrete stage of the learning journey. Students work in groups or in pairs to participate in concrete mathematical experiences. The teacher guides enquiry – leading students to explore, investigate and find answers on their own.


In the pictorial stage, students are guided to understand mathematical ideas presented visually via the Student Book. This middle stage is a crucial link between the concrete experience and the abstract representation and serves to build a solid foundation.
Once conceptual understanding is developed, progress to the abstract stage where the concept or skill is represented using numbers and mathematical symbols.


Let’s Do reinforces students’ learning and builds mastery through guided, systematically-varied and child-friendly tasks. Tasks are crafted to allow for valuable and immediate feedback on whether students have progressed through the three-stage approach and mastered the concept or if re-teaching is required.
After a concept is taught in Let’s Learn, assign Let’s Do tasks for students to complete individually. Discuss students’ responses and remediate if necessary. The objective of each Let’s Do task is clearly stated, enabling teachers to check students’ understanding. Answers are provided for all tasks.
Reteach provides task-specific remediation to address gaps in understanding.


The Daily Wrap-Up helps students realize how much learning has taken place and solidify learning for future lessons. This is a crucial step to help students remember and apply the information they have learned.
The Chapter Workout and Learning Center Activities provide a one hour lesson at the end of each chapter and serve to consolidate concepts learned in the chapter. Teachers are provided with questions to guide the lesson and to encourage learners to talk about the concepts behind the Chapter Workout and assess understanding.
Each Chapter Workout consists of a picture for class discussion which is followed by three learning center tasks.
Activity 1 is a Think, turn and talk activity, intended to promote pair discussion, challenge common misconceptions and strengthen mathematical thinking.
Activity 2 is a game, providing a motivating context for students to practice what they have learnt and Activity 3 is an individual activity, ideal for formative assessment.

Guide


The Big Books and accompanying materials are designed to be used for a one-hour lesson after completing each chapter. More details are provided in the Problem Solving Teacher’s Guide.


Whole Numbers / Place Value
Rote count within 100 by 1s and 10s.
Read and write 0 to 10 - the numeral and the corresponding number word.
Identify the last number counted as the number of objects in the group.
Count on and backwards within 10.
Count groups of up to 20 objects in different arrangements.
Compare the number of objects in two groups.
Compare and order numbers within 20.
Understand that the number that comes next is 1 more.
Break apart 4 to 10 objects into two parts.
Count within 100.
Read and write a number from 0 to 100 — the numeral and the corresponding number word.
Count on and backwards within 100.
Use number notation and place values (tens, ones).
Estimate the number of objects in a group of fewer than 100 objects.
Compare the number of objects in two or more groups.
Compare and order numbers within 100.
Find the number which is 1 or 10 more than (or less than) a given number within 100.
Make a number story to illustrate a number bond for 5 to 10.
Make 4 to 10 with two parts. Write a number bond for 5 to 10.
Write a number bond for 4 to 10.
Use ordinal numbers 1st to 10th to indicate position.
Estimate the number of objects in a group of fewer than 10 objects.
Subitize up to 6 objects. Compose and decompose numbers from 10 to 19 as 10 ones and some more ones.
Name a position using an ordinal number from 1st to 10th and position words.
Count within 1000.
Read and write a number from 0 to 1000 — the numeral and the corresponding number word.
Use number notation and place values (hundreds, tens, ones).
Compare and order numbers within 1000.
Use the symbols ‘>’ and ‘<’ for comparison of numbers.
Find the number which is 1, 10 or 100 more than (or less than) a given number within 1000.
Addition / Subtraction
Add or subtract within 10. Use picture cutouts (or other manipulatives) to illustrate the meanings of addition and subtraction.
Add or subtract within 1000.


Year/Grade K
Year/Grade 1
Addition / Subtraction (continued) Act out addition and subtraction stories to illustrate the meanings of addition and subtraction.
Make addition or subtraction stories with the given illustrations.
Count all to add two quantities within 10.
Illustrate addition and subtraction stories and problems with number bonds.
Use drawings to represent addition and subtraction stories.
Make a number story for a given addition or subtraction sentence.
Write a number sentence for a given situation involving addition or subtraction.
Observe the identity and commutative properties of addition.
Observe the answer when 0 is subtracted from a number.
Write a family of four addition and subtraction facts for a given number bond.
Write addition and subtraction facts within 5.
Identify a doubles fact.
Count on to add or count backwards to subtract within 10.
Write a number sentence for an addition or subtraction problem.
Add or subtract within 100.
Solve a 1-step word problem involving addition or subtraction of numbers within 20.
Mentally add:
- two or three 1-digit whole numbers
- a 1-digit whole number to a 2-digit whole number
- tens to a 2-digit whole number
Mentally subtract: - a 1-digit whole number from another 1-digit whole number
- a 1-digit whole number from a 2-digit whole number


Year/Grade 2
Use a part-whole bar model or a comparison bar model to represent an addition or subtraction situation.
Solve up to 2-step word problems involving addition and subtraction.
Find the missing part in an addition sentence.
Find the missing part or whole in a subtraction sentence.
Mentally add: - a 1-digit whole number to a 2-digit whole number with regrouping
- two 2-digit whole numbers without regrouping
- ones, tens or hundreds to a 3-digit whole number
- 98 or 99 to a number up to 3 digits
Mentally subtract: - a 1-digit whole number from a 2-digit whole number with regrouping - a 2-digit whole number from another 2-digit whole number without regrouping
- ones, tens or hundreds from a 3-digit whole number
- 98 or 99 to a 3-digit whole number
- tens from a 2-digit whole number


Year/Grade K
Year/Grade 1
Multiplication / Division
Year/Grade 2
Recognize equal groups and find the total number in the groups by repeated addition.
Use mathematical language such as ‘4 threes’ and ‘2 groups of 5’ to describe equal groups.
Use manipulatives to illustrate the meaning of multiplication and the sharing and grouping concepts of division.
Make a number story for a given multiplication sentence.
Write a number sentence for a given situation involving multiplication or division.
Work out a multiplication fact within 40 by repeated addition.
Solve a 1-step picture problem involving multiplication or division.
Write a family of four multiplication facts and division facts.
Count by twos, threes, fours, fives and tens.
Write an addition double as a multiplication fact.
Observe the commutative and distributive properties of multiplication.
Build up the multiplication tables of 2, 3, 4, 5 and 10 and commit the multiplication facts to memory.
Use a related multiplication fact to divide.
Multiply or divide numbers within the multiplication tables of 2, 3, 4, 5 and 10.
Use a part-whole bar model to represent a multiplication or division situation.
Solve a 1-step word problem involving multiplication or division using the multiplication tables of 2, 3, 4, 5 and 10.


Year/Grade K
Year/Grade 1
Fractions / Concepts
Recognize and name one half of a whole which is divided into 2 equal parts.
Recognize and name one quarter of a whole which is divided into 4 equal parts.
Length
Describe an object using ‘long’, ‘tall’ and ‘short’.
Compare the lengths of two or more objects.
Compare up to 3 objects. Arrange objects in order according to their lengths.
Measure using up to 10 nonstandard units.
Estimate and measure the length of an object in nonstandard units.
Year/Grade 2
Recognize and name a unit fraction up to 1 12
Recognize and name a fraction of a whole which is divided into equal parts.
Find the fraction that must be added to a given fraction to make a whole.
Compare and order unit fractions.


Mass Describe an object using ‘heavy’ and ‘light’.
Compare the masses of two objects.
Compare up to 3 objects. Compare and order the masses of three objects.
Explore mass by hefting. Estimate and measure the mass of an object in nonstandard units.
Measure with a pan balance using up to 10 nonstandard units.
Explore estimation.
Understand a big object is not necessarily heavier than a smaller one.
Size Describe an object using ‘big’ and ‘small’.
Compare up to 3 objects.
Understand the need for standardized units of measure of length.
Understand that a meter is greater than a centimeter.
Estimate and measure length in meters or centimeters.
Compare lengths in meters or centimeters.
Choose an appropriate unit of measure when measuring lengths.
Measure the length of a line segment in centimeters.
Draw a line segment of a given length.
Solve up to 2-step word problems involving length.
Understand the need for standardized units of measure of mass.
Measure mass in kilograms or grams.
Compare masses in kilograms or grams.
Solve up to 2-step word problems involving mass.


Year/Grade K
Volume Compare the volume of liquids in 2 identical containers.
Time: Calendar
Name the days of the week in sequence.
Link specific days to familiar events.
Name the months of the year in sequence.
Link familiar events to months.
Count the days in a month.
Sequence events in order of ‘morning’, ‘afternoon’ and ‘night’.
Measure and compare short periods of time in informal ways and using ‘longer ‘, ‘shorter’, ‘faster’ and ‘slower’.
Time: Clock
Money
Recognize and name the one-cent, five-cent, tencent, twenty-cent and fifthcent coins.
Count and tell the amount of money up to twentycents in one-cent coins.
Compare two amounts of money between one and ten cents.
Add or subtracts amounts of money: - in one-cents up to 10 cents and represent the result with drawings.
Year/Grade 1
Year/Grade 2
Read a calendar. Know the number of days in a month and in a year.
Name the days of the week. Understand the relationship between 1 hour, 1 day, 1 week, 1 month and 1 year.
Name the months of the year.
Read and write a date.
Tell time to the hour and half hour.
Relate time to events of a day.
Sequence events according to the time of the day.
Describe estimated time relative to the hour and half past the hour.
Compare durations using ‘longer’ or ‘shorter’.
Recognize and name the five-cent, ten-cent, fifty-cent and onedollar coins.
Recognize and name the five-dollar, ten-dollar and fifty-dollar notes.
Count and tell the amount of money in: - a set of coins up to $1 - a set of notes up to $100
Tell and write time to 5 minutes.
Use a.m. and p.m. in telling time.
Relate time to events of a day.
Find the duration of a time interval.
Develop a sense of the duration of daily activities.
Solve word problems involving time.
Count and tell the amount of money in a set of notes and coins.
Read and write an amount of money in decimal notation.
Change dollars and cents to cents, and vice versa.
Exchange money. Compare amounts of money in dollars and cents.


Year/Grade K
Money (continued)
Year/Grade 1
Count and tell the amount of money in a set of notes and coins.
Make up an amount of money using a set of notes and coins.
Compare amounts of money in dollars or cents.
Add or subtract amounts of money: - in cents up to $1 - in dollars up to $100
Plane Shapes
Recognize and name five basic plane shapes: circle, triangle, rectangle, square and hexagon.
Count the sides and corners of a shape.
Build awareness of attributes: shape, size, and color.
Sort and group (and re-sort) according to attributes: shape, size and color.
Describe the location of plane shapes using positional and directional words.
Identify plane shapes on real-world objects.
Use plane shapes to create a new shape, and items commonly found in the environment.
Solid Shapes
Recognize and name basic solid shapes: sphere, cylinder, cone and cube.
Describe the attributes of solid shapes: slide, stack and roll.


Year/Grade 2
Exchange money.
Give change for a purchase paid with $1.
Solve a 1-step word problem involving money.
Recognize and name the four basic plane shapes: circle, triangle, rectangle and square.
Describe an object by its shape.
Count the sides and corners of a shape.
Classify a plane shape according to each of these attributes: shape, size and color.
Continue a pattern of plane shapes according to one or two of these attributes: shape, size and color.
Fit suitable pieces together to make a plane shape.
Identify a semicircle and a quarter circle.
Identify and name basic shapes that make up a new shape.
Fit cutouts of shapes together to make a new shape.
Copy a figure on a dot grid or square grid.
Continue a pattern of plane shapes according to one or two of these attributes: shape, size, color and orientation.
Recognize and name a cube, cuboid, cone, cylinder and sphere.
Classify solid shapes according to each of these attributes: shape, size and color.
Identify the flat and curved surfaces of a solid object in the shape of a cube, cuboid, cone, cylinder or sphere.
Identify the faces, edges and vertices of a solid object in the shape of a cube, cuboid, cone, cylinder or sphere.


Year/Grade K
Solid Shapes (continued)
Identify real-world objects as solids.
Describe the location of solid shapes using positional and directional words.
Identify plane shapes on solid shapes.
Use solids to build and compare two structures.
Patterns Identify visual patterns in the environment.
Describe, copy and extend AB, ABC and AAB shape, sound and action patterns.
Transfer patterns to a different format.
Line Segments
Tally Charts
Year/Grade 1
Identify a solid shape that can slide, stack or roll.
Describe the relative position of a solid shape using position words.
Continue a pattern of solid shapes according to one or two of these attributes: shape, size and color.
Year/Grade 2
Use solid shapes to form different solid figures.
Continue a pattern of solid shapes according to one or two of these attributes: shape, size, color and orientation.
Graphs
Sort and group up to 10 objects by color or pattern.
Participate in a class survey to collect data.
Sort and count data to create a 3-column or 3-row picture graph of up to 10 objects per category.
Visually compare data.
Classify objects or people by a predetermined standard and count the numbers in each category.
Make and read a tally chart.
Make a simple picture graph using one-to-one representation.
Read and interpret a picture graph.
Identify a line segment and a curve.
Use a tally chart to gather data and represent data in a picture graph.
Use a tally chart to gather data and represent data in a picture graph.
Make a picture graph with scale.
Read and interpret a picture graph with scale.
Solve problems using data presented in a picture graph.


Lesson 1: Flat Shapes
Naming Flat Shapes

• Name basic plane shapes: circle, square, rectangle, triangle
• Describe plane shapes as ‘flat’
Lesson 2: Comparing Flat Shapes
Comparing Flat Shapes
• Analyze and compare plane shapes and explain how they are similar or different using informal language
• Explain the difference between a square and a rectangle; acknowledge and explain how a square is a special rectangle
• Introduce hexagon
Lesson 3: Sorting
Shapes – Same and Different
• Build awareness of attributes: color, shape and size
• Match objects and pictures based on attributes in one-to-one correspondence (objectobject, object-picture, picture-picture)
Sorting into Groups by Shape
• Sort and group up to 10 objects by color, shape and size
Sorting in Different Ways
• Sort and group objects by 2 attributes: color, shape or size
More Sorting and Re-sorting
• Sort and re-sort shapes and explain the rule for each sort


• Bags of attribute blocks in various colors and sizes (set of a circle, triangle, rectangle and square), 1 bag per student
• Chart paper
• Drawing paper, 1 sheet per student
• Sets of attribute blocks (circle, triangle, square, rectangle and hexagon), 1 set per student
• Large construction paper shapes: square, rectangle, circle, triangle, hexagon
• SB pp. 1–6
Total Duration: 10 days (1 day = 1 hour)
1 day
• shape • curved
• straight
• circle
• triangle • square
rectangle
• side • corner
• SB pp. 7–9
• Sets of attribute blocks (circle, triangle, rectangle and square), 1 set per student
• Ruler
• 1 set of attribute blocks of various colors, shapes and sizes
• 1 set of attribute blocks of various colors, shapes and sizes
• Bag of attribute blocks (4 large yellow squares and 5 small yellow squares), 1 bag
• Bags of pattern blocks (mixed numbers of triangles and squares), 1 bag per pair
• 1 set of small and big books
• Containers of attribute blocks (without hexagons), 1 container per table
• Chart paper
• Bag of attribute blocks, 1 bag for whole group activity
• Label: BLUE and TRIANGLES
• Label: RED and CIRCLES
• Geobands, 1 per student
• Geoboards, 1 per student
• Bags of 10 attribute blocks (different colors, shapes and sizes), 1 bag per pair
• Construction paper, 2 large sheets
• SB p. 10
• 5-Dot Cards (TR 12.7)
• SB p. 11
• 3-Dot Cards (TR 12.5)
• 4-Dot Cards (TR 12.6)
• 5-Dot Cards (TR 12.7)
• Copies of Cloud Worksheets (TR 10.1), 2 copies per pair
• SB pp. 12–13
• Copies of Cloud Worksheets (TR 10.1), 2 copies per pair
• SB p. 14
• 3-Dot Cards (TR 12.5)
• 4-Dot Cards (TR 12.6)
• 5-Dot Cards (TR 12.7)
• Copies of Cloud Worksheets (TR 10.1), 2 copies per pair
1 day
• shape • curved
• straight • circle
triangle
square
rectangle
hexagon
side
corner
same/ alike • different
4 days
• color • shape
• size • match
• same/ alike
• different
• color
• shape
• size
• match
• same/ alike
• different
• color
• shape
• size
• same/ alike
• different
• sort
• rule
• more
• fewer
• sort
• rule
• sides
• corners


Lesson 4: Positional and Directional Words
Positional and Directional Words
Where is the Shape?
Find the Shape
• Describe the location of plane shapes in the classroom using positional and directional words
Finding Flat Shapes on Real-World Objects
• Identify plane shapes on real-world objects
Chapter Workout and Learning Center Activities
Chapter Workout
• Name basic plane shapes: circle, square, rectangle, triangle, hexagon
• Describe plane shapes as ‘flat’
• Build awareness of attributes: color, shape, size, use/function
• Sort and group up to 10 objects by color, shape or size
• Sort and re-sort shapes and explain the rule for each sort
• Analyze and compare plane shapes and explain how the shapes are similar or different using informal language
• Explain the difference between a square and a rectangle; acknowledge and explain how a square is a special rectangle
• Match objects and pictures based on attributes in one-to-one correspondence (object-object, object-picture)
• Describe the location of plane shapes using positional and directional words, such as, above, below, in, on, over, under, top, bottom, beside, in front of, behind, next to, near, far, forwards, towards and backwards
• Identify plane shapes on real-world objects


• Cardboard sheet
• 4 pieces of paper
• 1 set of attribute blocks (triangle, square, rectangle and circle)
• 4 large envelopes
• SB pp. 15–18
• 3-Dot Cards (TR 12.5)
• 4-Dot Cards (TR 12.6)
• 5-Dot Cards (TR 12.7)
• Shape Finders (TR 10.2–10.3), 1 per student
• Sets of solid real-world objects with flat faces (e.g. soup can, cereal box, number cube, hexagonal container, ball, kite), 1 item per pair
• Magnifying glasses (optional), 1 per pair
• Sheets of Paper, sheets per student
• Pencils
• SB p. 19
• Shape Finders (TR 10.2–10.3), 1 per student
1 day
• above
• below • in
on • over • under • top
• bottom • beside
in front of
behind • next to • near
far • forwards

backwards • towards
1 day
• above
below
in
• on
• over • under
top
bottom
beside • in front of • behind
next to • near
far
• forwards
• backwards
• towards
1 day
• Sets of attribute blocks (a rectangle and a square, same size or color), 1 set per pair
• Sets of attribute blocks, 1 set per pair
• Chart paper
• SB p. 20
• SB p. 21
• SB p. 22
• SB p. 23
• Problem Solving Big Book 10 and Reader 10
• Problem Solving Teacher's Guide
1 day


Lesson 1: Flat Shapes
Lesson 2: Comparing Flat Shapes
Lesson 3: Sorting
Lesson 4: Positional and Directional Words
Lesson 5: Flat Shapes on Real-World Objects
Objectives:
• Name basic plane shapes: circle, square, rectangle, triangle
• Describe plane shapes as ‘flat’
Materials:
• Bags of attribute blocks in various colors and sizes (set of a circle, triangle, rectangle and square), 1 bag per student
• Chart paper
• Drawing paper, 1 sheet per student
Resources:
• SB pp. 1–6
Vocabulary:
• shape
• curved
• straight
• circle
• triangle • square • rectangle • side • corner
Students explore ‘flat’ shapes in hands-on activities, describe and compare their attributes, and identify shapes on real-world objects. They begin to develop geometric generalizations, such as, a triangle is always a triangle because it has 3 sides and 3 corners no matter its orientation or type, and that a square is a special rectangle. Students’ use of positional and directional words to describe the location of objects or people helps them make sense of their environment. These words will be revisited in Chapters 15 and 16.
Objective: Rote count backwards together from 15 to 0
When students say 0, have them snap their fingers or clap. Then, have them rote count backwards from a number other than 15 (e.g. 8, 11, 13) and snap their fingers or clap each time they reach 0.
Let’s Remember SB p. 1
Tasks 1 and 2 revisit number concepts of counting, cardinality, conservation, ‘greater than’ and ‘equal to’. Although basic shapes have not been formally introduced yet, this is an opportunity to find out what students already know about them.
Ask: Which set has a greater number of shapes in it?


Have students share their predictions (without counting) and explain their thinking. Students may predict that Set B has more shapes because the shapes take up more space. As students share predictions and count the sets, reinforce cardinality by asking “How many?” after each count is complete.
Ask: What did you find out about the number of shapes in each set?
(E.g. They both have 12. The shapes are arranged in different ways, but there are still 12 shapes in both sets./Both the sets are the same number.)

Let’s Learn SB pp. 2–5
Distribute a bag of attribute blocks to each student and have them place the blocks in a line in front of them.
Draw a straight line and a curved line on chart paper or on the whiteboard. Point to the curved line.
Ask: What do you notice about this line?
If students use informal language to describe a curved line (e.g. bendy), validate their use of this language and introduce the vocabulary of ‘curved’ line. Point to the straight line and have students describe what they notice about it. Introduce the vocabulary of a ‘straight’ line if necessary.
Draw a few more examples of straight lines and curved lines in different orientations and lengths to ensure students’ understanding. Review ‘longer’ and ‘shorter’.
Hold up a triangle attribute block.
Ask: What shape do you think this is? (a triangle) What do you notice about a triangle? (E.g. It has 3 sides. The sides don’t bend. They are straight. There are 3 pointy things on it.) Have students find their triangle attribute blocks.
If students describe a corner as ‘pointy’ etc., introduce the vocabulary of ‘corner’ – this is where 2 sides meet or touch. Have students run their fingers along 2 sides until they meet at 1 of the corners of their triangle.
Have students refer to SB p 2.
Ask: How are these shapes alike or the same? (E.g. They all have 3 sides/3 straight sides/3 corners.)
Say: You are right. They all have 3 straight sides and 3 corners. This means all of these shapes are triangles.
Ask: How are these triangles different? (E.g. different sizes, different colors, sides are longer on some triangles)
Hold up a circle attribute block.
Ask: What shape is this? Can you find a circle attribute block in your bag? What do you notice about a circle? (E.g. It’s like a flat pancake! It’s one big curvy line. There are no straight lines.)


NOTE: Begin a list of geometric vocabulary on chart paper. Write ‘triangle’. Have a student trace around the triangle attribute block near the word triangle. Write several words to describe the triangle’s attributes: 3 sides, straight sides, 3 corners. Have other students illustrate the attributes, e.g. have a student draw a straight line above the word ‘straight’ and another student draw a ‘corner’ above the word corner. Repeat this for the other shapes.
As students participate in more hands-on activities throughout the chapter, add more examples of different types of triangles, in varying orientations and sizes, as well as squares, rectangles and circles.
Explain that a circle is a curved shape. A circle has no straight sides because it is made by drawing a curved line.
Have students refer to SB. p 3.
Ask: How are these shapes alike or the same? (E.g. They are all circles/have a curved side/have no corners.) How are they different? (E.g. different sizes, different colors) Even though they are different sizes and colors, are they all circles? (yes)
Ask: Which shape is a square?
Ask: What do you notice about a square? (E.g. It’s got straight sides. It has 4 sides. Every side looks like it is the same.)
Hold up a large square attribute block.
Say: You said this is a square. Hold one corner of the square pointing down.


Ask: What shape is it now? Explain what you think. (E.g. It looks like a diamond but it is not. It’s still the same shape you said. It’s a square, but you’re holding it another way. It still has 4 sides. The sides are still the same length.)
NOTE: When a square is turned on a point, students often think it is a diamond, which is not a mathematical term for a geometric shape. Reinforce that a square is a square no matter how it is positioned. For the vocabulary description, explain that a square is a shape with 4 sides that are the same length.
Have students refer to SB p. 4.
Ask: How are these shapes alike or the same? (E.g. They all have 4 sides. All the sides are straight. All the sides are the same. They are all squares.) How are they different? (E.g. Some squares are turned in different ways. There are big and small squares. They are different colors.)
Ask: Which shape is a rectangle?
Ask: What do you notice about a rectangle? (E.g. It has 4 sides too. All the sides are straight like a square. The sides are not all the same in length, some are shorter.)
NOTE: Avoid describing a rectangle as always having 2 short sides and 2 long sides. This definition later creates confusion for students when they learn that a square is a special rectangle. For the vocabulary description, explain that a rectangle is a shape with 4 sides.
Have students refer to SB p. 5.
Ask: How are these shapes alike or the same? (E.g. They all have 4 sides. All the sides are straight. They have short and long sides.) How are they different? (E.g. They are turned in different ways. Some are big and they are different colors.)
Say: All of the shapes you just described are called ‘flat’ shapes. Give out drawing paper and have students trace around each shape. When completed, explain to students that the shapes they have drawn are called flat shapes because they are flat on the paper (informal definition). Point to the shapes drawn on the vocabulary list to show that these shapes are also flat shapes. Record the title Flat Shapes for the vocabulary list.


Let’s Do SB p. 6
Explain Task 1 to students. They are to find, color and count the number of each shape.


Reteach
Go through the name of each shape and its corresponding attribute block. Have students repeat after you. Then, have students point to each attribute block and recall the shape’s name.
Have each student bring an attribute block to a central area. Explain that a clue will be given to describe a shape. Students will hold up their block if it matches the clue.
Say: Shape 1 is curved.
Ask: What shape is it? (circle) Some of you are holding up circles that are different colors. Are all the shapes still circles? Some of the circles are different sizes. Are they still circles?
Say: There are 3 corners on Shape 2.
Ask: What shape is it? (triangle) How many sides are on a triangle? Turn your triangle upside down. Is it still a triangle? Turn it sideways. Is it still a triangle? I see some of the triangles are different colors or sizes. Are they still triangles?
Repeat the clues with squares and rectangles.
NOTE: Asking these questions helps students understand that size, color and orientation are not defining attributes of a shape. The defining attribute in this lesson is the number of sides on each shape.

Objectives:
• Analyze and compare plane shapes and explain how they are similar or different using informal language
• Explain the difference between a square and a rectangle; acknowledge and explain how a square is a special rectangle
• Introduce hexagon
Materials:
• Sets of attribute blocks (circle, triangle, square, rectangle and hexagon), 1 set per student
• Large construction paper shapes: square, rectangle, circle, triangle, hexagon
Resources:
• SB pp. 7–9
Vocabulary:
• shape
• curved
• straight
• circle
• triangle
• square
• rectangle
• hexagon
• side
• corner
• same/alike
• different
Objective: Rote count together from 1 to 31
Have students count several times from a given number other than 1 (e.g. 9, 15, 20). Upon reaching 31 each time, have everyone stomp a foot.
Review the Let’s Learn on SB pp. 2–5 from the previous lesson to recall the shapes and their names.
NOTE: Students often develop the misconception that a square is not a rectangle before they enter school. This lesson focuses on how to support students in beginning to understand that a square is a special rectangle.
Give each student a set of attribute blocks
Hold up the paper rectangle and have students also hold up a rectangle block.
Say: Put your finger on one of the rectangle’s straight sides. Let’s count the sides together. Move your finger to each side as you count. How many sides are on a rectangle? (4)
Point to a corner.
Say: Put your finger on this corner of your rectangle. Check that students have done this correctly. Remind students that when 2 sides touch, they make a corner. Demonstrate this.
Say: Put your finger on one of the corners of your rectangle. Let’s count the corners together.
Ask: How many corners? (4)
Hold up the paper square.
Say: Here is another rectangle. (Students are likely to look puzzled!) Hold up the rectangle in your other hand.
Ask: Are the 2 shapes the same or different? (different) How are the shapes different? (E.g. color, size, sides look different)
Say: Let’s count the straight sides on this shape (square) together. Put your finger on each side as we count. Let’s count the corners Put your finger on each corner as we count.
Ask: Are both of these shapes flat shapes? If students state that a square is not a rectangle, guide them to understand the similarities between a square and a rectangle.
Ask: How are a square and a rectangle alike? (E.g. They both have 4 sides. Both have 4 straight sides and 4 corners.)
Say: You are right. This shape is called a square, but it’s like a rectangle because it has the same number of sides and corners as a rectangle. A square is called a special rectangle because its 4 sides are the same length or equal.
NOTE: If it is difficult for students to understand that a square is a special rectangle, an analogy might help to clarify. Show students a picture of several types of flowers. Explain to students that the flowers are like the different rectangles. Point to a particular flower and explain the flower is a special kind of flower (e.g. a daisy). Say, “This flower is called a daisy. All of these are flowers, but this flower is a special flower called a daisy.”

Hold up the paper circle and have students also hold up their circles.
Ask: Can we count the sides on this circle? Why or why not? (E.g. There are no sides on a circle. It is a curved shape because nothing is straight on it.)
Say: You are right!
Hold up the paper triangle and have students hold up their triangles.
Ask: What do you notice about this shape? (E.g. It is a triangle. It has 3 straight sides.) Have students count the sides and corners on their triangle.

Introduce a hexagon. Write the word on the board. Hold up the paper hexagon and have students find the block that looks like it.
Ask: What do you notice about this shape? (E.g. It has more sides. There are 6 sides and 6 corners.) Tell students that it is called a hexagon.
Hold up the paper triangle and rectangle.

NOTE: The focus of this lesson is to compare the different defining attributes of each shape, rather than size and color, which are non-defining. The attribute of thickness is not emphasized.


Ask: How are these shapes the same? (E.g. They have straight sides.) How are they different? (E.g. The triangle has 3 sides and the rectangle has 4 sides.) Repeat with other combinations of 2 shapes.
Let’s Learn SB p. 7
Go through the example as a class. Lead students to understand that the black line represents a side and the 2 lines that touch represent a corner.
Let’s Do SB pp. 7–9
Explain Task 1 to students. They are to count the number of sides and corners in each shape.
For Task 2, students compare the number of sides and corners of the pairs of shapes. They tick the box if the number is the same or cross the box if it is different.
For Task 3, students color all the rectangles yellow and then circle the rectangles that are squares. This task reinforces that a square is a special type of rectangle.
Reteach
For Task 1, have students mark each side and corner as they count to help them keep track of what they have/have not counted. For Task 2, have students count and record the number of sides and corners of each shape on the page before comparing. For Task 3, remind students to color all the rectangles yellow.

Hold up the paper rectangle and square
Ask: Today we learned that a square is a special rectangle. How would you explain this to a friend in another class? Talk with a partner to decide how you would explain it. Provide time for students to share their explanations.
Ask: How is a square like a rectangle? (Both have 4 sides and 4 corners, all sides are straight.)
Ask: What makes a square a special rectangle? (Its sides are all the same or of equal length.)

Objectives:
• Build awareness of attributes: color, shape and size
• Match objects and pictures based on attributes in oneto-one correspondence (object-object, objectpicture, picture-picture)
Materials:
• Sets of attribute blocks (circle, triangle, rectangle and square), 1 set per student
• Ruler
• 1 set of attribute blocks of various colors, shapes and sizes
Resources:
• SB p. 10
• 5-Dot Cards (TR 12.7)
Vocabulary:
• color
• shape
• size
• match
• same/alike
• different
Objective: Subitize up to 5 objects
The number of dots on 5-Dot Cards (TR XX) is more difficult to subitize. Show each new dot arrangement for 3 seconds, then show the dot arrangement for another 3 seconds. Have students tell how many dots they see and how the dots are arranged. Do this for each new Dot Card you introduce. Mix up the cards with the other 5-Dot Cards.
Distribute a set of attribute blocks to each student. Review shapes by calling out the name of the shape, and having students find and hold up the correct shape. Recall ‘straight’ and ‘curved’ lines by having student volunteers draw each on the board. Provide a ruler as necessary.
Same
Show students 2 triangle attribute blocks that are the same color but different sizes, e.g. a large blue triangle and a small blue triangle.
Ask: What can you say about the 2 triangles? If students do not use the language of ‘same’ and ‘different’, model this language by restating what they notice. (E.g. Student: They are both triangles. Teacher: Yes, the triangles are alike because they are the same shape.)
Ask: What is different about the 2 triangles? (They are different sizes.) Show 2 squares that are the same size but different colors, e.g. a large blue square and a large red square.
Ask: What is the same about these 2 shapes? (They both have 4 sides. They are the same shape. They are squares. They are the same size.)
Ask: What is different? (their color)
Show students a row of 4 attribute blocks in the following order: two large blue rectangles, followed by a large blue triangle and finally another large blue rectangle.
Ask: What shapes are in the row of blocks? (rectangles and a triangle)
Ask: Which shape is different from the others? Explain your thinking (E.g. the triangle because it is a different shape)
Show students several more rows of attribute blocks and vary the difference by either color or size, e.g. for size, arrange a large red square, a small red square and 2 more large red squares. Ensure that in each line of attribute blocks, the difference is only one attribute (color, shape or size).
Arrange 3 large yellow circles in a line. Show students 2 other circles, a large yellow circle and a large blue circle.
Ask: Which circle is the same as the other circles? (big yellow circle)
Give students time to talk with a partner to process this question. Ask students to explain their thinking.

Arrange 3 small red squares in a line. Show students 2 other squares, a large red square and a small red square.
Ask: Which square is different and does not match the other squares? (big red square) Explain your thinking.
Let’s Learn SB p. 10
Have students look at SB p. 10
Ask: How are these shapes alike? (same shape – square, same size) How is 1 shape different? (one square is a different color, green)
Say: The green square is different. The other squares are blue.
Let’s Do SB p. 10
Explain Task 1 to students. They are to circle the shape that is different from the other shapes.


Reteach
Ask how the shapes are alike and then, ask how they are different. For Task 1 (a), prompt students to look at the shapes, and count the sides and corners.
Show students the following attribute blocks: circle, square, triangle, rectangle and hexagon.
Ask: Which shape is your favorite? Provide several minutes for students to share and explain why a shape is their favorite.

Objective:
• Sort and group up to 10 objects by color, shape or size
Materials:
• 1 set of attribute blocks of various colors, shapes and sizes
• Bag of attribute blocks (4 large yellow squares and 5 small yellow squares), 1 bag
• Bags of pattern blocks (mixed numbers of triangles and squares), 1 bag per pair
Resources:
• SB p. 11
• 3-Dot Cards (TR 12.5)
• 4-Dot Cards (TR 12.6)
• 5-Dot Cards (TR 12.7)
• Copies of Cloud Worksheets (TR 10.1), 2 copies per pair
Vocabulary:
• color
• shape
• size
• match
• same/alike
• different
Objective: Subitize up to 5 objects
Mix the 3-, 4- and 5-Dot Cards (TR 12.5–12.7) and show each card, one at a time, for 3 seconds.
Ask: How many dots did you see and how were the dots arranged? Did anyone see the dots in a different way? Show the remaining Dot Cards and repeat the questions.
Show students 2 attribute blocks, e.g. a large red square and a large red triangle .
Ask: What is the same about these shapes? (color, size)
Ask: What is different? (shape, one is a square and the other is a triangle)
Show students 2 more attribute blocks, e.g. a large blue circle and a small blue circle.
Ask: What is the same about these shapes? (shape, color)
Ask: What is different? (size, one circle is big and the other is small)
NOTE: Ask students to explain their thinking about how the blocks are the same or different, which promotes math talk and helps students think analytically about the attributes of the shapes (color, shape and size).
First, model how to sort using the yellow square attribute blocks and 2 Cloud Worksheets (TR 10.1). Show students the squares.
Ask: What do you notice about these blocks? (all squares) What do you know about squares? (have 4 sides/sides are straight/sides are all the same length)
Ask: How can we sort these blocks into two groups or into the two clouds? Have students think first and then, talk with a partner about this question. (big squares in a cloud and small squares in the other cloud)
Say: Now let’s count the large yellow squares in this group. Point to each square as students count together. Ask the “How many?” question when students are done. Repeat with the small yellow squares in the other group.
Say: When we put the squares into two groups, we sort the squares by size. The big yellow squares are in this group and the small yellow squares are in the other group.
Ask: Which group has more squares in it? How do you know?
Ask: Which group has fewer squares in it or not as many blocks? Explain how you know.
NOTE: When students discuss how they sorted, it provides an opportunity for them to also discuss how many shapes are in each group. It is an excellent way to integrate and reinforce number concepts with geometry. They will also count the number of attribute blocks in each group and compare their quantities (using the vocabulary of ‘more’, ‘fewer’ and ‘equal to’, which was introduced in Chapter 8: Counting Higher).

Distribute a bag of pattern blocks and 2 Cloud Worksheets to each pair. Differentiate the number of triangles and squares in each bag to align to students' levels of understanding, e.g. 6 triangles and 9 squares in one bag, 8 triangles and 4 squares in another etc. Provide time for students to share what they notice about the blocks.
Say: Work with your partner and sort the shapes into the two clouds. When you are done, think about how you sorted and count the number of pattern blocks in each group.
Ask: How are your shapes different? (E.g. different shapes – triangles and squares)
Ask: Tell me about the shapes you have in each group. (E.g. We have triangles in this group. Squares are in the other group.)
Ask: How have we sorted the shapes into groups? (E.g. by shape – triangles in one group, squares in the other) Have students determine which group has more. Prompt them to line up the shapes in each group with another for one-to-one correspondence. Have students share and check their answers. Remind them to use the comparison vocabulary of ‘equal to’, ‘more’ and ‘fewer’.
Time permitting, have pairs switch bags, so they can practice counting and comparing new quantities.
Explain Task 2 to students. They are to sort the shapes into two groups (by shape – squares and hexagons) by circling one group with a blue pencil and another group with red. All the shapes should be sorted into one of two groups. This task assesses their ability to sort by shape and also their understanding that the orientation of a shape does not change its quality or attributes.


Ask students to name the shapes they see (squares and hexagons).
Ask: Can we sort the shapes into a group of squares and a group of hexagons? (yes) Discuss with students why they cannot sort the shapes by color or size.
Ask: How did you sort today? (by shape and size)
Have students think about this question first. Provide several minutes for students to share what they are thinking.
Ask: Is there another way to sort? (by color) If students cannot remember, have them turn to SB p. 9.
Ask: How do we know when a shape is a triangle? (E.g. If it has 3 sides, it is a triangle.)
Repeat with circle, square, rectangle and hexagon.

Objective:
• Sort and group objects by 2 attributes: color, shape or size
Materials:
• 1 set of small and big books
• Containers of attribute blocks (without hexagons), 1 container per table
• Chart paper
• Bag of attribute blocks, 1 bag for whole group activity
• Label: BLUE and TRIANGLES
• Label: RED and CIRCLES
Resources:
• SB pp. 12–13
• Copies of Cloud Worksheets (TR 10.1), 2 copies per pair
Vocabulary:
• color
• shape
• size
• same/alike
• different
• sort
• rule
• more
• fewer
Objective: Rote count together from 1 to 31
Have students count several times from a given number other than 1 (e.g. 8, 13, 19). Upon reaching 31, have everyone wink their eyes. Have students rote count backwards from 15 to 0 and then, have them rote count backwards from a number other than 15 (e.g. 12, 10).
Gather a few big and small books from the classroom library.
Ask:
• What is the same about these? (E.g. They are all books.)
• What is different about these? (E.g. Some books are big and some are small.)
• How can we sort the books into two groups? (E.g. We can sort them by size, big and small.)
Have students sort the books into two groups and count the number of books in each group.
Ask: Which group has a greater number of books in it, the group with big books or the group with small books? Explain how you know.
NOTE: Attribute blocks are usually in 3 colors: red, yellow, blue; 5 shapes: triangles, squares, circles, rectangles, hexagons; 2 sizes: big and small, and two thicknesses: thick and thin. In this lesson, the focus is on the 3 colors, 4 shapes (hexagons excluded) and sizes big and small.
Sorting In Different Ways
Place a container of attribute blocks at each table. Provide several minutes for students to explore the blocks.
Ask: What can you say about the shapes at your table? Record students’ observations on chart paper Prepare a bag of attribute blocks. Include a mix of big and small blue triangles and red circles. Also include other shapes in different sizes and colors. Have students sit in a circle around the bag of attribute blocks and 2 Cloud Worksheets (TR 10.1). Each cloud should have one label. Draw large and small blue triangles on the label for blue triangles, and large and small red circles on the label for red circles.
Say: We are going to sort these blocks using 2 rules. A rule tells us how blocks are the same or alike in a group. The blocks in this cloud will be blue. The blocks will also be triangles. The blocks in this cloud will be red and also circles. Have students take turns choosing a block from the bag and work together with classmates to decide which cloud the block should be placed in. Guide students by revisiting the 2 rules/labels often.
Ask: Is it blue? Is it a triangle? Can you put a large blue triangle in this cloud? Why or why not? How about a small blue triangle? (yes) Why can a small blue triangle go in this cloud? (E.g. It is blue and a triangle.) There will be some blocks left over that do not fit either of the sorting rules. Ask: Where do we put these blocks? (E.g. The blue square can’t go in this cloud because a square is not the same as a triangle.) Explain that it is fine to have blocks left over that do not match the sorting rules.

Have students compare the number of blocks in each group. When a student says there are more blocks in a group, ask him/her how he/she can prove it. (E.g. count the blocks) Reinforce the vocabulary of ‘more’, ‘fewer’ and ‘equal to’.
Let’s Do SB pp. 12–13
For Task 3, the shapes have been sorted, but students have to cross out the shape that does not belong. Have students explain the rules for their answers. (size and shape: big triangles/small squares)
Explain Task 4 to students. They are to sort shapes to the correct group by identifying the shape and circling it the correct color. This task assesses their ability to sort by 2 attributes, size and color. Remind students that not all the shapes can be sorted into the two groups.
Reteach


Review the vocabulary of colors, and the names of shapes and size to ensure students understand the words and pictures and can sort accordingly.
Explain to pairs they are to use big and yellow attribute blocks to create a picture or design. Provide 5 minutes for students to work together. Have students walk around the classroom to view each pair’s picture or design. Have pairs describe their picture or design.

Objective:
• Sort and re-sort shapes and explain the rule for each sort
Materials:
• Geobands, 1 per student
• Geoboards, 1 per student
• Bags of 10 attribute blocks (different colors, shapes and sizes), 1 bag per pair
• Construction paper, 2 large sheets
Resources:
• SB p. 14
• 3-Dot Cards (TR 12.5)
• 4-Dot Cards (TR 12.6)
• 5-Dot Cards (TR 12.7)
• Copies of Cloud Worksheets (TR 10.1), 2 copies per pair
Vocabulary:
• sort
• rule
• sides
• corners
Objective: Subitize up to 5 objects
Mix the 3-, 4- and 5-Dot Cards (TR 12.5–12.7) and show each card, one at a time, for 3 seconds.
Ask: How many dots did you see and how were the dots arranged? Did anyone see the dots in a different way? Show the remaining Dot Cards and repeat the questions.
NOTE: When time allows, record students’ descriptions of how they saw the dots. Draw and record numbers beneath each set of dots, e.g. 5 dots arranged as they are often seen on a domino may be recorded as 2 on top, 1 in the middle and 2 at the bottom. This becomes a visual representation of the part/whole concept and decomposition of a number.
Ask students to use a geoband to make a square or a triangle on their geoboard. Have them bring the geoboard shape to a central area.
Say: Name the shape you made.
Ask: How can you describe the shape you made?
It is likely their squares (or triangles) will look different from one another, e.g. one student might make a large square while another student makes a small square. Students can reinforce they are both squares because they have 4 sides that are the same length and 4 corners. Students may make shapes in different orientations (on its base or on a corner). Turn the geoboards, so students see the shapes in different orientations. Reinforce the shape’s defining attributes (sides and corners).
More Sorting and Re-sorting
Explain that students will work together to sort attribute blocks. Have students sit in a circle. Empty a bag of attribute blocks between two sheets of construction paper
Ask: How can we sort these shapes into two groups?
Provide students time to think before they share ideas with the whole class. Then, sort the shapes on to each construction paper based on students’ suggestions. (E.g. put circles in one group and all the other shapes in the other group) Have students explain their sorting ideas. (E.g. We can put circles in this group because they have no straight sides. These shapes are in this group because they have straight sides.)
Give each pair a bag of attribute blocks and 2 previously used sheets of Cloud Worksheets (TR 10.1). Have students take blocks out of their bags and place the blocks in front of themselves.
Say: Think of a way or a rule to sort the shapes into two groups. Remember, a rule tells us how to sort or how the shapes are placed in groups. The shapes in each group are alike or the same in some way.
Ask students questions while they are sorting.
Ask:
• How could you sort the shapes into two groups?

• How are all the shapes in this group alike?
• How are all the shapes in the other group alike?
• How are the two groups of shapes different from one another?
• What rule did you think about to sort the shapes?
When pairs have completed a sort, explain they will walk around the classroom to view how their friends sorted their blocks. Have students predict the rules for the different sorts rather than each pair telling how they sorted the two groups.
Ask: What was your friends’ rule for sorting these two groups?
If students have difficulty in naming a rule for the sort of a set of shapes, ask the pair who originally sorted the blocks to add several more blocks that follow their rule.
Ask: _______ and _______ added another shape to this group. Why did they place this shape in the group?
How are the shapes in the group alike? How are the shapes in the other group different? What do you think their rule is?
Say: Sort your attribute blocks again using a different rule. Think about the types of shapes as well as the number of sides and corners on the different shapes to help you think of another way to sort.
Provide time for pairs to re-sort.
Observe:
• Do students use defining attributes to sort, such as number of sides or corners?
• Do students use non-defining attributes to sort, such as color or size?
• Do they use geometric vocabulary to describe their shapes in each group?
• Can students explain their rule/s for sorting?
Let’s Do SB p. 14
Explain Task 5 to students. They are to determine how the fish were sorted into the two tanks. (left tank: rectangles/4 sides/4 corners, right tank: shapes that are not rectangles/do not have 4 corners and 4 sides) Then, for Task (a), students help Helicopter put the triangle fish into the correct tank. For Task (b), students help Belle re-sort the fish. (by size)


Reteach
Review the defining attributes of the shapes in each tank and record them on chart paper. This helps students to see the similarities and differences within and between the two groups.
Present shape riddles for students to solve.
• Riddle 1: This shape has 4 sides. This shape has 4 corners. This shape is a special rectangle. What shape is it?
• Riddle 2: This shape is round. This shape is curvy. What shape is it?
• Riddle 3: This shape has straight sides. This shape has corners. This shape has 6 sides. What shape is it?
Create additional riddles for a triangle and a rectangle.


Objective:
• Describe the location of plane shapes in the classroom using positional and directional words
Materials:
• Cardboard sheet
• 4 pieces of paper
• 1 set of attribute blocks (triangle, square, rectangle and circle)
• 4 large envelopes
Resources:
• SB pp. 15–18
• 3-Dot Cards (TR 12.5)
• 4-Dot Cards (TR 12.6)
• 5 Dot Cards (TR 12.7)
• Shape Finders (TR 10.2–10.3), 1 per student
Vocabulary:
• above
• below
• in
• on
• over
• under
• top
• bottom
• beside
• in front of
• behind
• next to
• near
• far
• forwards
• backwards
• towards
Objective: Subitize up to 5 objects
Mix the 3-, 4- and 5-Dot Cards (TR 12.5–12.7) and show each card, one at a time, for 3 seconds.
Ask: How many dots did you see and how were the dots arranged? Did anyone see the dots in a different way?
Show the remaining Dot Cards and repeat the questions.
Have students turn to SB p. 13 and talk about how the shapes in the left fish tank are the same and how they are different. Repeat for the right tank.
Positional and Directional Words
Let’s Learn SB pp. 15–17
Have students turn the pages and look at the pictures. Teach the words. Make sentences about the shapes like the following.
Say:
• The circle is near Belle.
• The circle is far from Bob. Reinforce the meaning of each word with an example sentence related to the position of something in the classroom, e.g. I am ‘near’ the table. I am ‘far’ from the door. Have student volunteers make up sentences too.
For (f), teach that another word for ‘next to’ is ‘beside’.
Model the meaning of ‘forwards’, ‘backwards’ and ‘towards’. Have a student volunteer model each word.
Where is the Shape?
Prior to the lesson, prepare the Shape Finders (TR 10.2–10.3). These should be pasted on cardboard and cut out. Write 1 clue on each piece of paper that describes where each shape is located in the classroom. Place one attribute block in each envelope. Place clues 2–5 in the envelopes. Clue 1 is to be read by the teacher at the beginning of class. Create clues like the following.






• Clue 1: Look near the sink. Next to the soap is another clue!
• Clue 2: Walk towards the cupboard door. Under the bottom of the door is another clue!
• Clue 3: Keep looking! Look above the wastepaper basket. On the wall is another clue.
• Clue 4: Getting closer! Find the bookself with a bucket of pattern blocks on it. Below the bucket pattern blocks is a clue in a book!
• Clue 5: The mystery is one clue away! Look behind the chart! The mystery is solved! Suggested clues can be modified according to what is in the classroom and where it is located.
Explain to students that shapes are hidden in the classroom and directions will be given to help them find the hidden shapes.
Optional: As you read each clue, have students keep their Student Books open to pp.15–17 to refer to the positional and directional words before looking for each envelope.
As each clue is read, have students discuss where the envelope is as a group, before a pair looks for it and brings it back to the group. You may also model the meaning of the words to reinforce understanding, e.g. model the meaning of ‘near’ and ‘next to’ by asking a student to stand beside you.
Say: is standing near me. She/he is also standing next to me. Another word that means ‘next to’ is the word ‘beside’.
Model ‘towards’, ‘under’ and ‘bottom’ by walking towards a shelf and looking at the bottom and under it.
Model ‘above’ and ‘on’ by asking students to raise their hands above their heads and having them place a finger on their noses.



Give out Shape Finders to each table. Have each student choose one. Show students how to look through the middle of a Shape Finder like a magnifying glass.
Say: Look for a flat shape that is like the shape on your Shape Finder. Tell us where you found this flat shape in the classroom.
Have students search for the shape on their Shape Finder (e.g. A student with a rectangle on his/her Shape Finder might recognize a rectangle on top of the bookshelf. A student with a circle Shape Finder might locate a circle over the Number Tape).
NOTE: A hexagon is not included as it can be difficult to find on real-world objects.
Ask: What did you find with your Shape Finder? Where can we find your shape in the classroom? Please give us directions.
After students describe where their shape is located, have other students find it in the classroom based on the positional and directional words used by the student.
Explain Task 1 to students. They are to circle/draw the correct shape according to the directions given. Review the names of the items on the shelf, e.g. plates, jar, loaf of bread, box of cereal.
• Circle the triangle in the box.
• Circle the rectangle in front of the cereal box.
• Circle the circle above the cookie jar.
• Circle the triangle near Belle. It is the biggest triangle.
• Circle the hexagon above the square and circle.
• Circle the square behind the jar.
• Draw a small special type of rectangle under the shelf.
Review the names of the items and shapes on the shelf systematically to ensure students’ understanding.
• Teach words in pairs of opposites (e.g. far/near).
• Play games incorporating a favorite classroom toy/ object, giving out commands about where to place the item.


Have students stand in a circle and act out positional and directional words.
• Shake the hand of the person next to you.
• Touch the bottom of your jeans (or dress).
• Put your hands under your knees (if they are sitting).
• Walk two steps towards the center of the circle.

Objective:
• Identify plane shapes on real-world objects
Materials:
• Set of solid real-world objects with flat faces (e.g. soup can, cereal box, number cube, hexagonal container, ball, kite), 1 item per pair
• Magnifying glasses (optional), 1 per pair
• Sheets of paper, several sheets per student
• Pencils
Resources:
• SB p. 19
• Shape Finders (TR 10.2–10.3), 1 per student
Vocabulary:
• above
• below
• in
• on
• over
• under
• top
• bottom
• beside
• in front of
• behind
• next to
• near
• far
• forwards
• backwards
• towards
Objective: Rote count together from 1 to 31
Have students stand up and count several times from a given number other than 1 (e.g. 8, 13, 19). Upon reaching 31, have everyone jump up in the air. Have students rote count backwards from 15 to 0 and then, have them rote count backwards from a number other than 15 (e.g. 12, 10).
Review positional and directional words by giving commands to students. Have students stand in an open space in the classroom where they have space to move around freely.
Say:
• Walk towards me.
• Walk backwards towards the .
• Stand next to a friend.
• Stand in front of your table.
• Put your hands on your head.
Point to the classroom door.
Ask: The front of the door has a flat shape on it. What shape is it? (rectangle) Open the door and show the edge of the door.
Ask: What flat shape is on this part of the door? (rectangle) Show the other side of the door and repeat.
Say: The door is not flat but parts of the door are made up of flat shapes. Give each pair 1 solid real-world object. Explain that pairs will examine the object to locate a flat shape on it. You can give them magnifying glasses to examine objects in a fun and motivating way.
Give pairs a minute to examine the object. Have pairs switch objects with other pairs several times, so that students have opportunities to find flat shapes on different real-world objects. Give students paper and pencils to trace around objects to explore what flat shapes they can see.
Ask: What flat shapes did you and your partner find on one of the objects you examined?
Provide several minutes for students to name a flat shape from any of the objects they examined.
Distribute Shape Finders (TR 10.2–10.3) to each table and have each student choose one. Explain to students they will go on a walk around the school (inside or outside) and search for more flat shapes on objects.
Say: Look for a flat shape on an object that is like the shape on your Shape Finder.
Students will share where they found flat shapes on real-world objects during the Wrap-Up.

Let’s Do SB p. 19
Explain Task 1 to students. They are to match the flat shapes they see on the objects to the correct shape. Note that some objects may have more than one shape in them, but students should match the main flat shape they see.
Lesson 5 Flat Shapes on Real-World Objects





Reteach
Provide students with access to all the real-world objects for concrete reference. You may also wish to show students photographs of the objects on the page to help them visualize the flat shapes on the objects.
Ask: What flat shape did you find with your Shape Finder? Where can we find your shape in the school (or outside of the school)? Support students in using positional and directional vocabulary to describe their shape’s location.

Objectives:
• Name basic plane shapes: circle, square, rectangle, triangle, hexagon
• Describe plane shapes as ‘flat’
• Build awareness of attributes: color, shape, size, use/function
• Sort and group up to 10 objects by color, shape or size
• Sort and re-sort shapes and explain the rule for each sort
• Analyze and compare plane shapes and explain how the shapes are similar or different using informal language
Resources:
• SB p. 20
Have students look at the picture on SB p. 20.
Ask students questions to encourage discussion.
Ask:
• What is this a picture of? (a ferris wheel, trees, a house, a hot-air balloon, Bob, shapes)
• What time of the day is it? (nighttime) Why do you think it’s nighttime? (The sky is dark./The moon is out.)
Choose students to take turns to point to and name shapes, describing them by their color.
Ask:

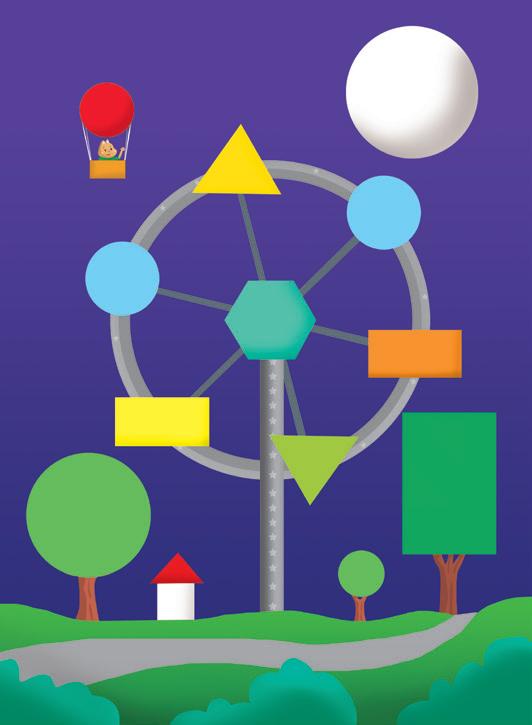
• What shapes do you see? What color are they? (green circles, red triangle, yellow rectangle etc.)
• How many shapes are there? (15)
• How many circles are there? ? (6)
• How many squares are there? (1)
• How many rectangles are there? (5)
• How many triangles are there? (3)
• How many hexagons are there? (1)
Say: Let’s sort the shapes by size.
Ask: How many shapes are big? (3) What are the big shapes called? (circle, rectangle) How many shapes are small? (5) What are the small shapes called? (triangle, square, rectangle, circle, hexagon)
Ask: How else can we sort the shapes? (by color)
Say: Let’s sort the shapes by color.
Ask:
• What colors are the shapes? (green, red, orange, white, blue, yellow)
• How many green shapes are there? (5)
Repeat the questioning with the other colors. (orange = 2, white = 2, blue = 2, yellow = 2, red = 2)
Point to the 2 blue circles at the top of the ferris wheel.
Ask: What can you say about these 2 circles? (They are the same shape, color and size.)
Point to the 2 triangles on the ferris wheel.
Ask: What can you say about these 2 shapes? How are they alike? (They are the same shape and size.) How are they different? (They are different colors. They are arranged differently.)
Have students talk about different pairs or groups of shapes, and explain how they are different and how they are alike.

Objectives:
• Explain the difference between a square and a rectangle; acknowledge and explain how a square is a special rectangle
• Analyze and compare plane shapes and explain how the shapes are similar or different using informal language
Materials:
• Sets of attribute blocks (a rectangle and a square, same size or color), 1 set per pair
Resources:
• SB p. 21
Have students turn to SB p 21. Ask students to first say what they notice about the shapes (E.g. A group of rectangles is in the box. There are 4 more shapes outside the box: triangle, hexagon, circle and square.) Have students describe each shape, including the rectangles, by identifying the number of sides, points/corners and whether the sides are straight or curved.

Explain that Belle and King are talking about whether another shape can be sorted with the rectangles. Students are to follow along as you read the speech bubbles. Have them THINK first about who is correct and why they think this. Then, have students TURN & TALK to a partner to discuss their thinking.
Say: You talked with your partner about which cat is right. What do you think? (E.g. We think the square can go in the rectangle group. It looks a little like the rectangles.)
Give each pair a rectangle and a square attribute block
Say: TURN & TALK with your partner again to think of a way to prove why the square can go in the rectangle group. You may compare the rectangle and square blocks as you talk with your partner.
Say: Explain why you and your partner think the square can go with the rectangles. (E.g. A square and a rectangle are alike because they both have 4 sides and 4 corners. A square’s sides are all the same length. Even if the square looks different than the rectangles in this group, we think the square belongs with the rectangles. A square is like a rectangle’s sister.) Provide time for more pairs to explain their thinking. (E.g. A circle can’t go with the rectangles because it has no straight sides. A hexagon does not belong with the rectangles because it has more sides than a rectangle. A triangle does not have enough sides to go with the rectangles. That leaves the square. It has 4 sides and 4 corners, and the sides are straight, just like a rectangle.)

Objectives:
• Match objects and pictures based on attributes in oneto-one correspondence (object-object, objectpicture)
• Analyze and compare plane shapes and explain how the shapes are similar or different using informal language
Materials:
• Sets of attribute blocks, 1 set per pair
Resources:
• SB p. 22
Have students turn to SB p. 22. Give out the attribute blocks to each pair. Explain how to complete the activity.
• Partners take turns to do the activity.
• In the first row, Partner A places an attribute block (small blue hexagon) over the outline of the blue hexagon to show that this shape is different from the other shapes in the first box. Partner A explains that this shape is different by color.

• Partner B identifies the two shapes that are alike in the first row and places the appropriate attribute blocks over their outlines. Partner B explains what is the same about these shapes. (both shapes are red hexagons)
• Partners continue to switch roles as they complete the remaining rows of shapes. In row 2, shapes are different by type of shape. (2 squares and 1 rectangle) In row 3, shapes are different by size. (2 small triangles and 1 big triangle)
Objectives:
• Name basic plane shapes: circle, square, rectangle, triangle, hexagon
• Describe the location of plane shapes using positional and directional words, such as, above, below, in, on, over, under, top, bottom, beside, in front of, behind, next to, near, far, forwards towards and backwards
• Identify plane shapes on real-world objects
Materials:
• Chart paper
Resources:
• SB p. 23
Explain to students they are to find and count the shapes. Then, they are to circle the correct word that tells where an object is located in the picture.
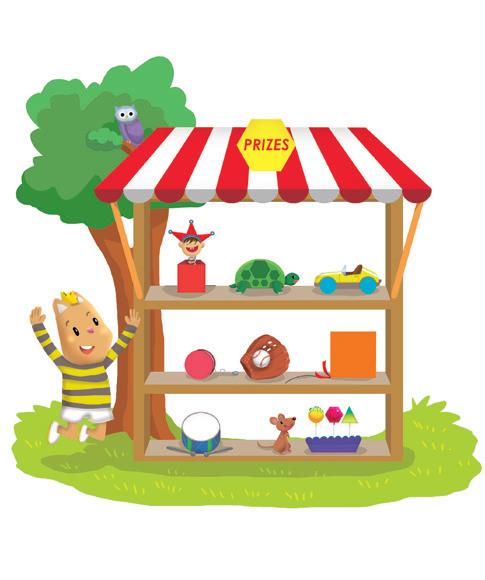


Have students discuss what they have learned in the chapter. Ask:
• What are some things you have learned about flat shapes? (Answers will vary.)
• What do you know about a triangle? (E.g. Triangles have 3 sides and 3 corners. A triangle’s sides are straight.) Do triangles all look the same? Explain your thinking. (E.g. A triangle can have sides that are all the same, but some triangles have 2 long sides and 1 short side. You can turn a triangle in different ways and it’s still a triangle. There are different sizes of triangles too.)
• What makes a square a special rectangle? (E.g. A square has 4 straight sides and 4 corners like a rectangle. A square’s sides are all the same length; that makes it special.)
Say: Talk with a partner about why these shapes are called flat shapes. Point to a circle, square, rectangle, triangle and hexagon drawn on chart paper. Provide time for students to share their reasoning with the class. Have students identify each shape and its attributes, such as, number of sides and corners, straight or curved sides.
• How is a hexagon different from a circle? (E.g. A hexagon has more sides. It has 6 sides and a circle has no sides. A hexagon has straight sides and a circle has curves.) How are hexagons and circles alike? (E.g. Both are flat shapes!)
• How does knowing words like ‘above’ or ‘below’ help you? (E.g. ‘Above’ and ‘below’ help me find things. I can use words like these to tell my sister where I put her book.)
Problem Solving (1 day)
Please refer to the Problem Solving Resources for teaching notes and materials.

Cut out this section






Cut out this section
Cut out this section




Cut out this section Triangle


A world-class program based on top-performing Singapore, Republic of Korea and Hong Kong



Welcome to Scholastic Mathematics K.
Scholastic Mathematics K is the foundation level of TM Mathematics, an innovative world-class mathematics program based on the effective teaching and learning practices of the global top-performers in Mathematics – Singapore, Republic of Korea and Hong Kong. K is focused on the development of early numeracy and problem-solving skills and supports the learning of all students at the highest possible level to build in students a strong foundation of meaningful learning with a problem-solving mindset. The content in Scholastic Mathematics K is presented under four strands of mathematics: Numbers and Operations, Measurement, Geometry and Data Analysis. There are two Student Books, A and B, which are used consecutively.
The instructional design of K integrates children’s learning, classroom practice, and teachers’ own requirements of content and pedagogical knowledge in a coherent, focused, and rigorous program. Each chapter in the program comprises concept lessons designed to provide enjoyable and effective learning experiences in readiness, engagement and mastery of mathematical concepts, skills and knowledge at an appropriate level.
The Teacher’s Guide provides a comprehensive plan for each lesson which begins with a daily warm-up followed by a lesson that introduces new concepts using engaging hands-on activities and ends with a wrap-up activity. The Student Book is designed for each child to work in when directed by the teacher and comprises four parts: Let’s Remember, Let’s Learn, Let’s Do and Chapter Workout and Activities.
Let’s Remember appears at the start of each chapter and provides an opportunity for systematic recall and assessment of prior knowledge in preparation for new learning.

Each Let’s Remember activity is carefully crafted to check for readiness to learn new concepts.


Each chapter comprises several lessons with each focusing on a concept. In each lesson Let’s Learn introduces the concept using the concrete-pictorial-abstract approach to develop deep conceptual understanding.


Concepts are taught with a hands-on activity. This is the concrete stage of the learning journey. Students work in groups or in pairs to participate in concrete mathematical experiences. The teacher guides enquiry – leading students to explore, investigate and find answers on their own.
In the pictorial stage, students are guided to understand mathematical ideas presented visually via the Student Book. This middle stage is a crucial link between the concrete experience and the abstract representation and serves to build a solid foundation.
The concept or skill is finally represented at the abstract level using numbers and mathematical symbols.
After a concept has been taught Let’s Do provides guided practice and immediate formative assessment.


Systematic variation of tasks reinforces students’ understanding and enables teachers to check learning and identify remediation needs.
The Chapter Workout and Activities serve to consolidate learning through discussions, games and individual activities.




Teachers guide a class discussion around the Big Picture to consolidate the concepts and skills taught in the chapter.
Activity 1 is a Think, Turn and Talk activity, intended to promote pair discussion, challenge common misconceptions and strengthen mathematical thinking.
Activity 2 is a game, providing a motivating context for students to practice what they have learned.
Activity 3 is an individual activity, ideal for formative assessment.


1. Count.
2. Count. Which set has more?


Look and say.


. Color and count.





1. Count and write.

3. Color the rectangles . Circle the squares.


1. Circle.


. Sort.
Circle the big and blue shapes.
Cross the small and green shapes.


fish sorted?
(a) Where should Helicopter put the fish?

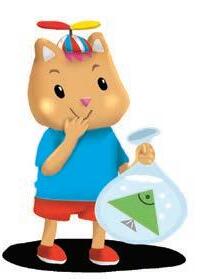
(b) Re-sort.
