


If the earth were only a metre in diameter, floating a few metres above a field somewhere, people would come from everywhere to see it. People would walk around it, marvelling at its big pools, the bumps on it, and the holes in it. They would also be amazed at the very thin layer of gas surrounding it and the water suspended in the gas. The people would marvel at all the creatures walking around the surface of the ball, and the creatures in the water. The people would declare it sacred because it was the only one,and they would protect it, so that it would not be hurt. The ball would be the greatest wonder known, and the people would come and pray to it, to be healed, togain knowledge, to know the beauty and to wonder how it could be. People would love it, and defend it with their lives because they would somehow know that their lives, their own r oundness, could be nothing without it.

More than 3 people are born every second.
Humans have grown to be the dominant species, forcing nature into retreat everywhere.
The world population increases by over 300,000 people per day.
Deforestation - Deserts spread at 16,000 hectares a day.
5 liters of safe clean water is required per person per day.
Forests are disappearing at a rate of 30,000 hectares per day.
500,000 plastic items are dumped into the sea every day.
It takes about 450,000 liters of water to make a car, 160,000 liters to make four tyres, 1000 liters to make a liter of petrol, 700 liters to make a single newspaper, and 300 liters to make a single canned drink.
Every form of life and resource is unique, warranting respect regardless of its present worth to man.
United Nations: World Charter for Nature
Humans activity has significantly altered our planet, especially in recent centuries. Technological, medical and scientific advancements have led to a dramatic increase in the global population. With this growth and improved living standards, we have heavily relied on fossil fuels for energy, heating our homes and manufacturing goods.
Presently, human actions are significantly impacting the planet's sustainability. Our increasing CO2 emissions are altering weather patterns and elevating world's temperature, resulting in the melting of polar ice caps. These climate shifts affects crop growing conditions, prompting pollinators like birds and bees to migrate to cooler regions. Consequently, sea levels rise and there is a surge in severe weather occurances globally.
To sustain mankind and the planet, a collective shift in behaviour is required from everyone. This is not an easy thing to do. We are used to traveling in cars, turning on switches, living in warm comfortable homes, using plastic and disposal productsbut these practices are unsustainable. Change will be challenging, yet it starts with small, simple steps.
Our mission is to embark on this journey and become stewards of the planet. Each individual has a role to play, and by joining forces, we can bring about meaningful change and safeguard our Earth. Begin by small simple actions, think before you act, be an example to others. Environmental protection means, reductions in waste, protection of habitats, planting of trees and keeping waterways clean. Our use of fossil fuels needs to be reduced - this is an action for families and communities. Nationally, our government needs to prioritise renewable energy, encourage our use of electric cars and ensure the protection of water sources and endangered species.
This workshop will explore our use of energy, how it is produced and how we can harness it sustainably for the benefit of our communities. By understanding the interconnetedness of life on Earth and the value of energy, we will discover ways to utilise it more efficiently and minimize waste.
The workshop will excite you about new possibilities and challenges and we hope that this will lead to local actions in your communities. The future of the planet is a shared responsibility and each of us has a role to play in collective efforts to preserve it for generations to come.


Wear the badge


Life on earth is controlled by a number of natural cycles.
The water cycle, is the continuous movement of water on, above and below the surface of the Earth.
The evaporative phase of the cycle purifies water which then replenishes the land with freshwater.
The water cycle is also essential for the maintenance of most life and ecosystems on the planet.
Our weather is determined by the rotation of our planet, solar energy, water cycles, winds, and the varying temperatures over land and sea.
The carbon cycle keeps in check the storage of carbon from decaying matter and the carbon amounts in our atmosphere. All of these interacting natural cycles work together in a delicate balance. However, mankind have now impacted on this balance by its use of stored carbon deposits (coal, peat,oil) resulting in global warming.
This impact has now tipped the balance on all living things on our planet.
The challenge now is for mankind to stop its destructive living behaviour and work to reverse its negative impact on the earth thereby restoring the planets delicate life supporting balance.


Photosynthesis is vitally important for the sustainability of life on our planet. Through this process plant life recycle the quality of our air by drawing in carbon dioxide and releasing oxygen. The sun’s energy also produces sugars that provide energy plants to grow, These same sugars are absorbed by animals who eat them and

the soil as they decompose. Mankind is also a consumer of these sugars in the food we eatvegetables nuts, meat, and fruit.
The cycle of life chart illustrates how every species relies on each other to survive. If one element is removed then it impacts on other species in the chain and ultimately mankind.


Is a greenhouse gas that traps heat/energy which changes our climate and weather. CO2 enters the atmosphere through the burning of fossil fuels (like coal, oil & gas) which we use for electricity, manufacturing, heating our homes, and powering our cars, planes, and trains for transportation.

Electricity is created by a number of methods, power plants using fossil fuels to create steam to turn turbines; hydro electric power stations using the force of water; solar and wind turbines feeding into the grid. Nuclear power plants in the UK and Europe also feed into the Irish power system.
Electricity that is created using fossil fuels create CO2 emissions that are affecting the planet and causing the greenhouse effect that is heating up our planet. The big challenge is to reduce our need for the fossil fueled plants and increase our use of renewable sources - solar, wind, wave, hydro.
Reduce fossil fuel powered electricity production.
Increase our use of alternative and renewable power sources.
Reduce demand on the power system by actions to conserve electrical use.
Insulate your home to reduce heating and power consumption.
Use renewable energy methods in our home to reduce electricity demand.

Don’t block radiators 20. Don’t dry washing on radiators – it blocks the
21. Switch to energy saving light bulbs 22. Have a bake day so not switching oven on for just one thing 23. Turn oven off 10 minutes before food done.
Bleed radiators
Unplug unconnected chargers
Unplug

Electricity is generated by passing/turning a magnet through a coil of copper wire. The magnetic force that exists between the north and south poles of the magnet passes through the copper wire and creates a current of electricity. This simple generator helps to explain and explore the basic principles of electromagnetic properties and how generators and motors work.
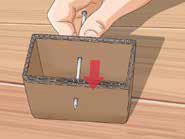
Place nail through the center of the frame

Wind 61 meters of copper wire around cardboard frame
- leaving at least 30-40 cm for connections

Acknowledgment to www. wikihow.com and www.howtoons.com


Glue magnets to nail
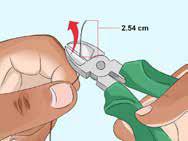

Check for free movement


Figure 1: Cut the top of the drinks can as shown.
Figure 2: Cut the sides of the of the drinks can as shown to create blades.
In this task we will create a simple wind generator and attach it to a small LED light thereby creating a simple lighting circuit.
There are a number of steps in this task - have a look at the illustrations above, they show the sequence for the creation of the windmill blades.
Start by cutting the drink can as shown in Fig.1 - do not cut the top off the can. Next cut down the sides of the can six equal blades. Fold each blade flat to create a windmill shape.

Figure 3: Angling the blades.
Each blade can now be twisted to create an angle that will be able to capture the wind. You will need to experiment with the twist and the angle when it is connected to the generator to get the windmill to work better and provide the best turning power to the generator.
In the end of the can a small hole is drilled to enable the windmill to be connected to the generator spindlemake sure the connection nut is tight.
The generator is self wired and two wires will be coming from the generator. These wires can be connected to a lighting circuit so it can provide power to the light.
Figure 4: Assembly the windmill.
Place the generator on the small pole so the windmill can move freely.
The pole is fixed to the model base.
Make the small model house and fix it to the base.
Place your light inside the house - let your windmill turn and turn on the switch. Your house should now be lit.


Gears are toothed wheels and axles that can come in a variety of sizes with straight, curved or beveled teeth. Gears transfer power from one shaft to another. As the gears move they can change the direction of rotation and the speed of movement.
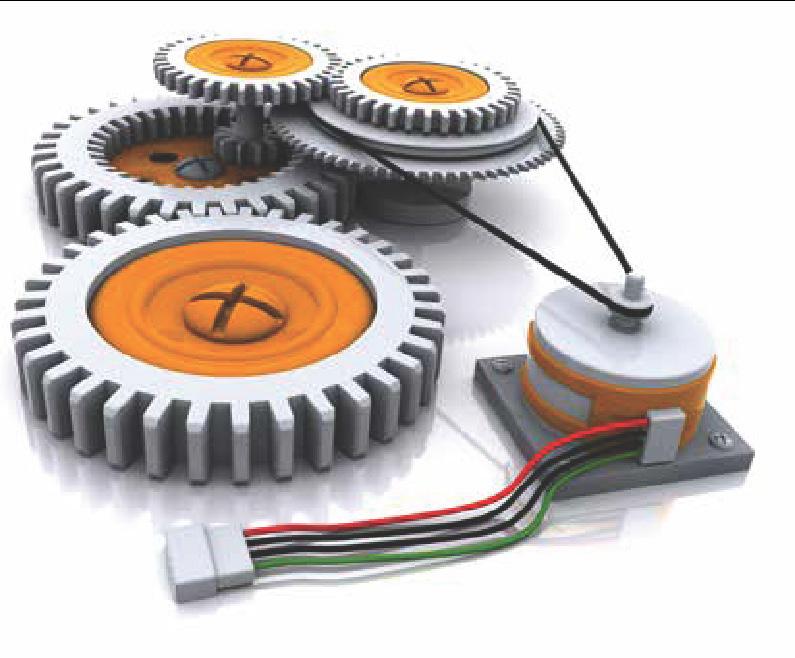


This is the most common type of gear. It is used to transfer power and increase speed from one gear to another. They are commonly used in watches and toys.
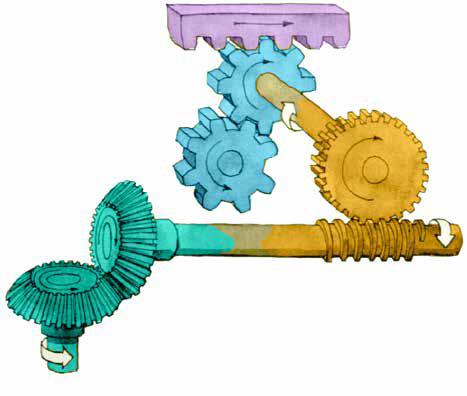
When the pinion gear moves the rack moves in a straight line. Commonly used in the steering column of a car.

The gearing system on a bicycle uses spur gears of various sizes to transfer the power generated by the turning of the pedals, to speed up and down, the turning of the rear wheel. A chain is used as the method of connecting the gears. A dérailleur mechanism is used to lift and place the chain on the correct gear cog and is controlled by a wire lever.
Two conical wheels gears intersect at an angle and transfer power from one direction to another

This gear combines a worm screw and a worm wheel. This gear assembly is used to change the angle of the force that is applied. The worm gear can be seen in action on a guitar it is used for tightening the strings.

A simple belt system consists of a wheel, axle, and a pulley.


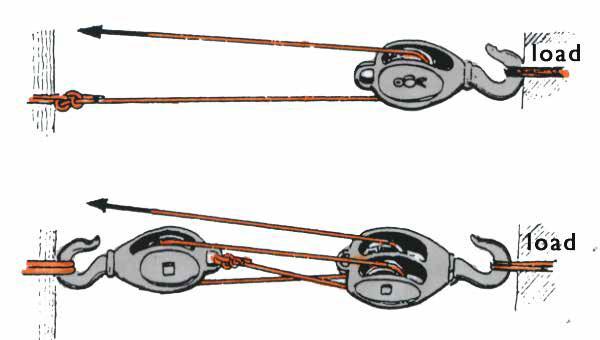
A pulley block is a grooved wheel combined with a rope that allows you to raise, lower or move a load. Pulleys blocks can a number of wheels. A simple pulley system is fixed the pulley does not move but the load is lifted by pulling the rope. The power of the pulley system is increased by the addition of more loops via double pulleys and combinations of single and double pulleys. This system is called a block and tackle pulley.

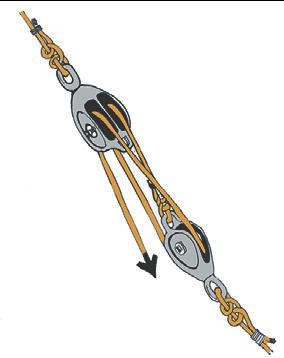
How to reeve a simple single and double pulley system


Reeving the pulley system starts by fixing the rope to the load pulley eye.

Different pulley combinations allow you to increase your load lifting and pulling capacity.
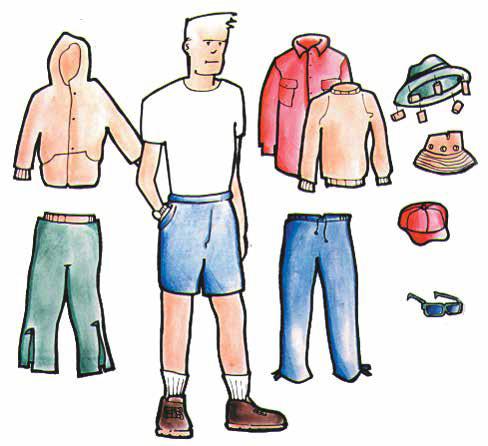


We control the heat of our bodies by using clothes to regulate heat so we can be comfortable. In our homes we use heating systems, windows and doors to again control the comfort levels so we can live comfortably. Our bodies therefore are similar to our homes.
The layer system uses a mixture of lightweight, multi fabric clothing and external wind and water proof clothing to protect our bodies and enable us to regulate perspiration, warmth and cold.
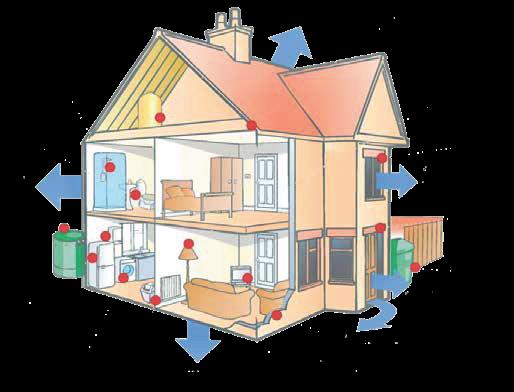
In our homes we use insulation to wrap the house thus trapping the heat and prevent cold from entering our homes.
Heat is expensive to produce and the structure or fabric of the house can enable this precious heat resource to escape.

Windows,doors and the lack of insulation in walls, floors and ceilings enable this to happen.
You will notice from the information on the opposite page how a house without high insulation values can cost a family a lot of yearly expense (a house with a G BER rating), whereas a house with a high insulation value (A rating) is considerably cheaper on the family budget.
The challenge therefore is to upgrade the insulation values in our homes and save our families a fortune and protect the environment from increased emissions and waste of resources.




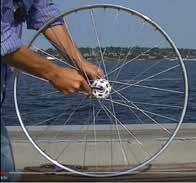
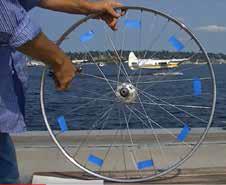

Using duct tape or shrink wrap plastic create the blades as shown.


Insert a bolt through the axle hole and lock in place then fix a drill chuck to complete the windmill element.

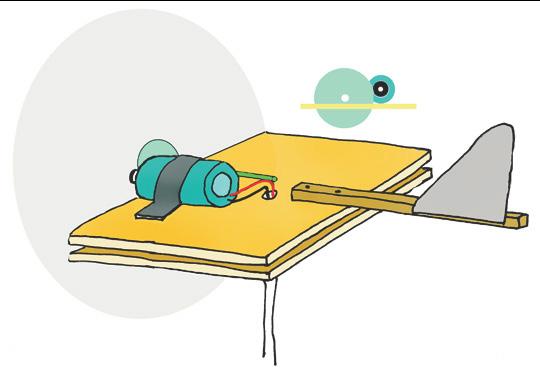


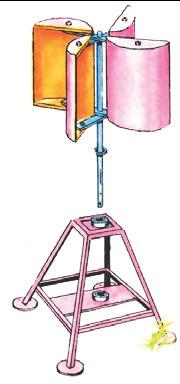
Wind turbines can also be created on a vertical axis. There are three main design types and the Savonius Rotor offered the best option to create a workable DIY generator. The aim of the device is to turn a rotor which in turn turns the gears and ultimately the generator motor. The key design feature of the rotor mechanism is the creation of the curves surfaces - that will catch the wind and turn the device. A barrel or bucket can be used to provide ready made curved surfaces. In the device shown a barrel is used and cut in such a way as to provide the wind vanes.
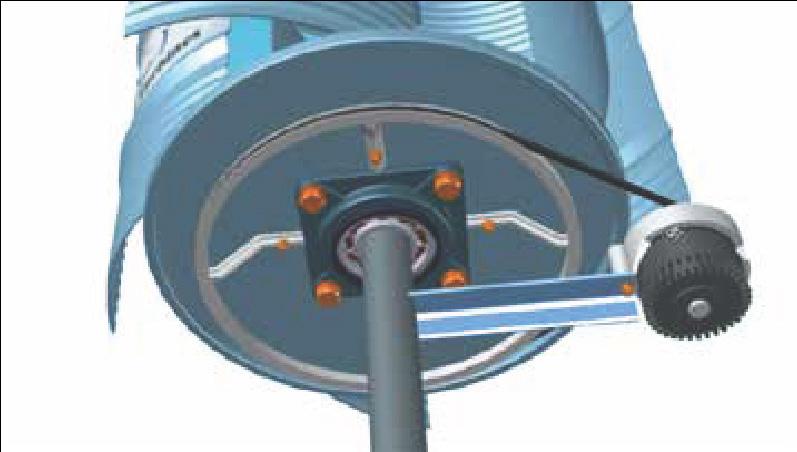
At the bottom of the barrel a big pulley wheel is attached and this drives a pulley to the generator motor.

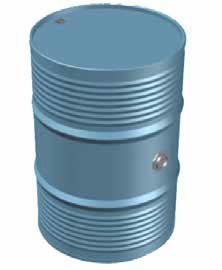
Start with a clean plastic barrel

This is what the barrel will look like when work is complete - it will have five wind vanes and attachments for the central rotor pole


The barrel is divided into five panels - you will need a protractor to get the right spacing of the panels - 360 degrees dived by 5 = 72 degrees.
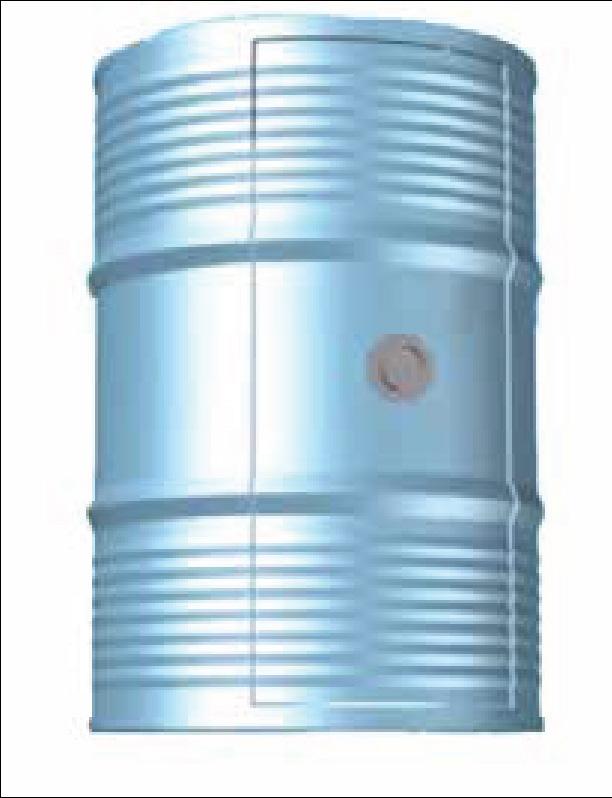
Small gap left - not cut through at top and bottom of panel. Each panel will be cut below the top and bottom rims of the barrel and a gap provided top and bottom of each panel that is not cut through.
Cutting the panels requires care and attention to avoid accidents. Take your time and be careful of tools and sharp edges.


A small bracket is drilled into place at the top and bottom of each vane securing them into their new positions.
Each panel is carefully turned inwards and outwards to create the vanes. This action will turn the plastic or metal that was not cut through. Be careful as this is the weakest point of the device until it is secured in place.
Two holes are drilled into the barrel at the top and bottom for the rotor arm/pole. A large pulley wheel ( from a washing machine) is attached to the bottom of the barrel.
A pulley from the large wheel is attached to the generator and the device is ready to go.


Water wheels have been used for centuries to harness the power of flowing and falling water. Traditionally, water power was used for turning large stone grinding stones to to crush grain, to create flour, and powering irrigation systems. In the industrial age the wheels were used to power large machines such as weaving machines saw mills,forges and water pumps.
A hydro electric plant uses the same method of water power to turn generators to generate electricity. Electricity can be generated by renewable or non-renewable resources. As we move towards renewable electricity we will start to see less pollution and cleaner air which supports SDG 7 Affordable and Clean Energy.
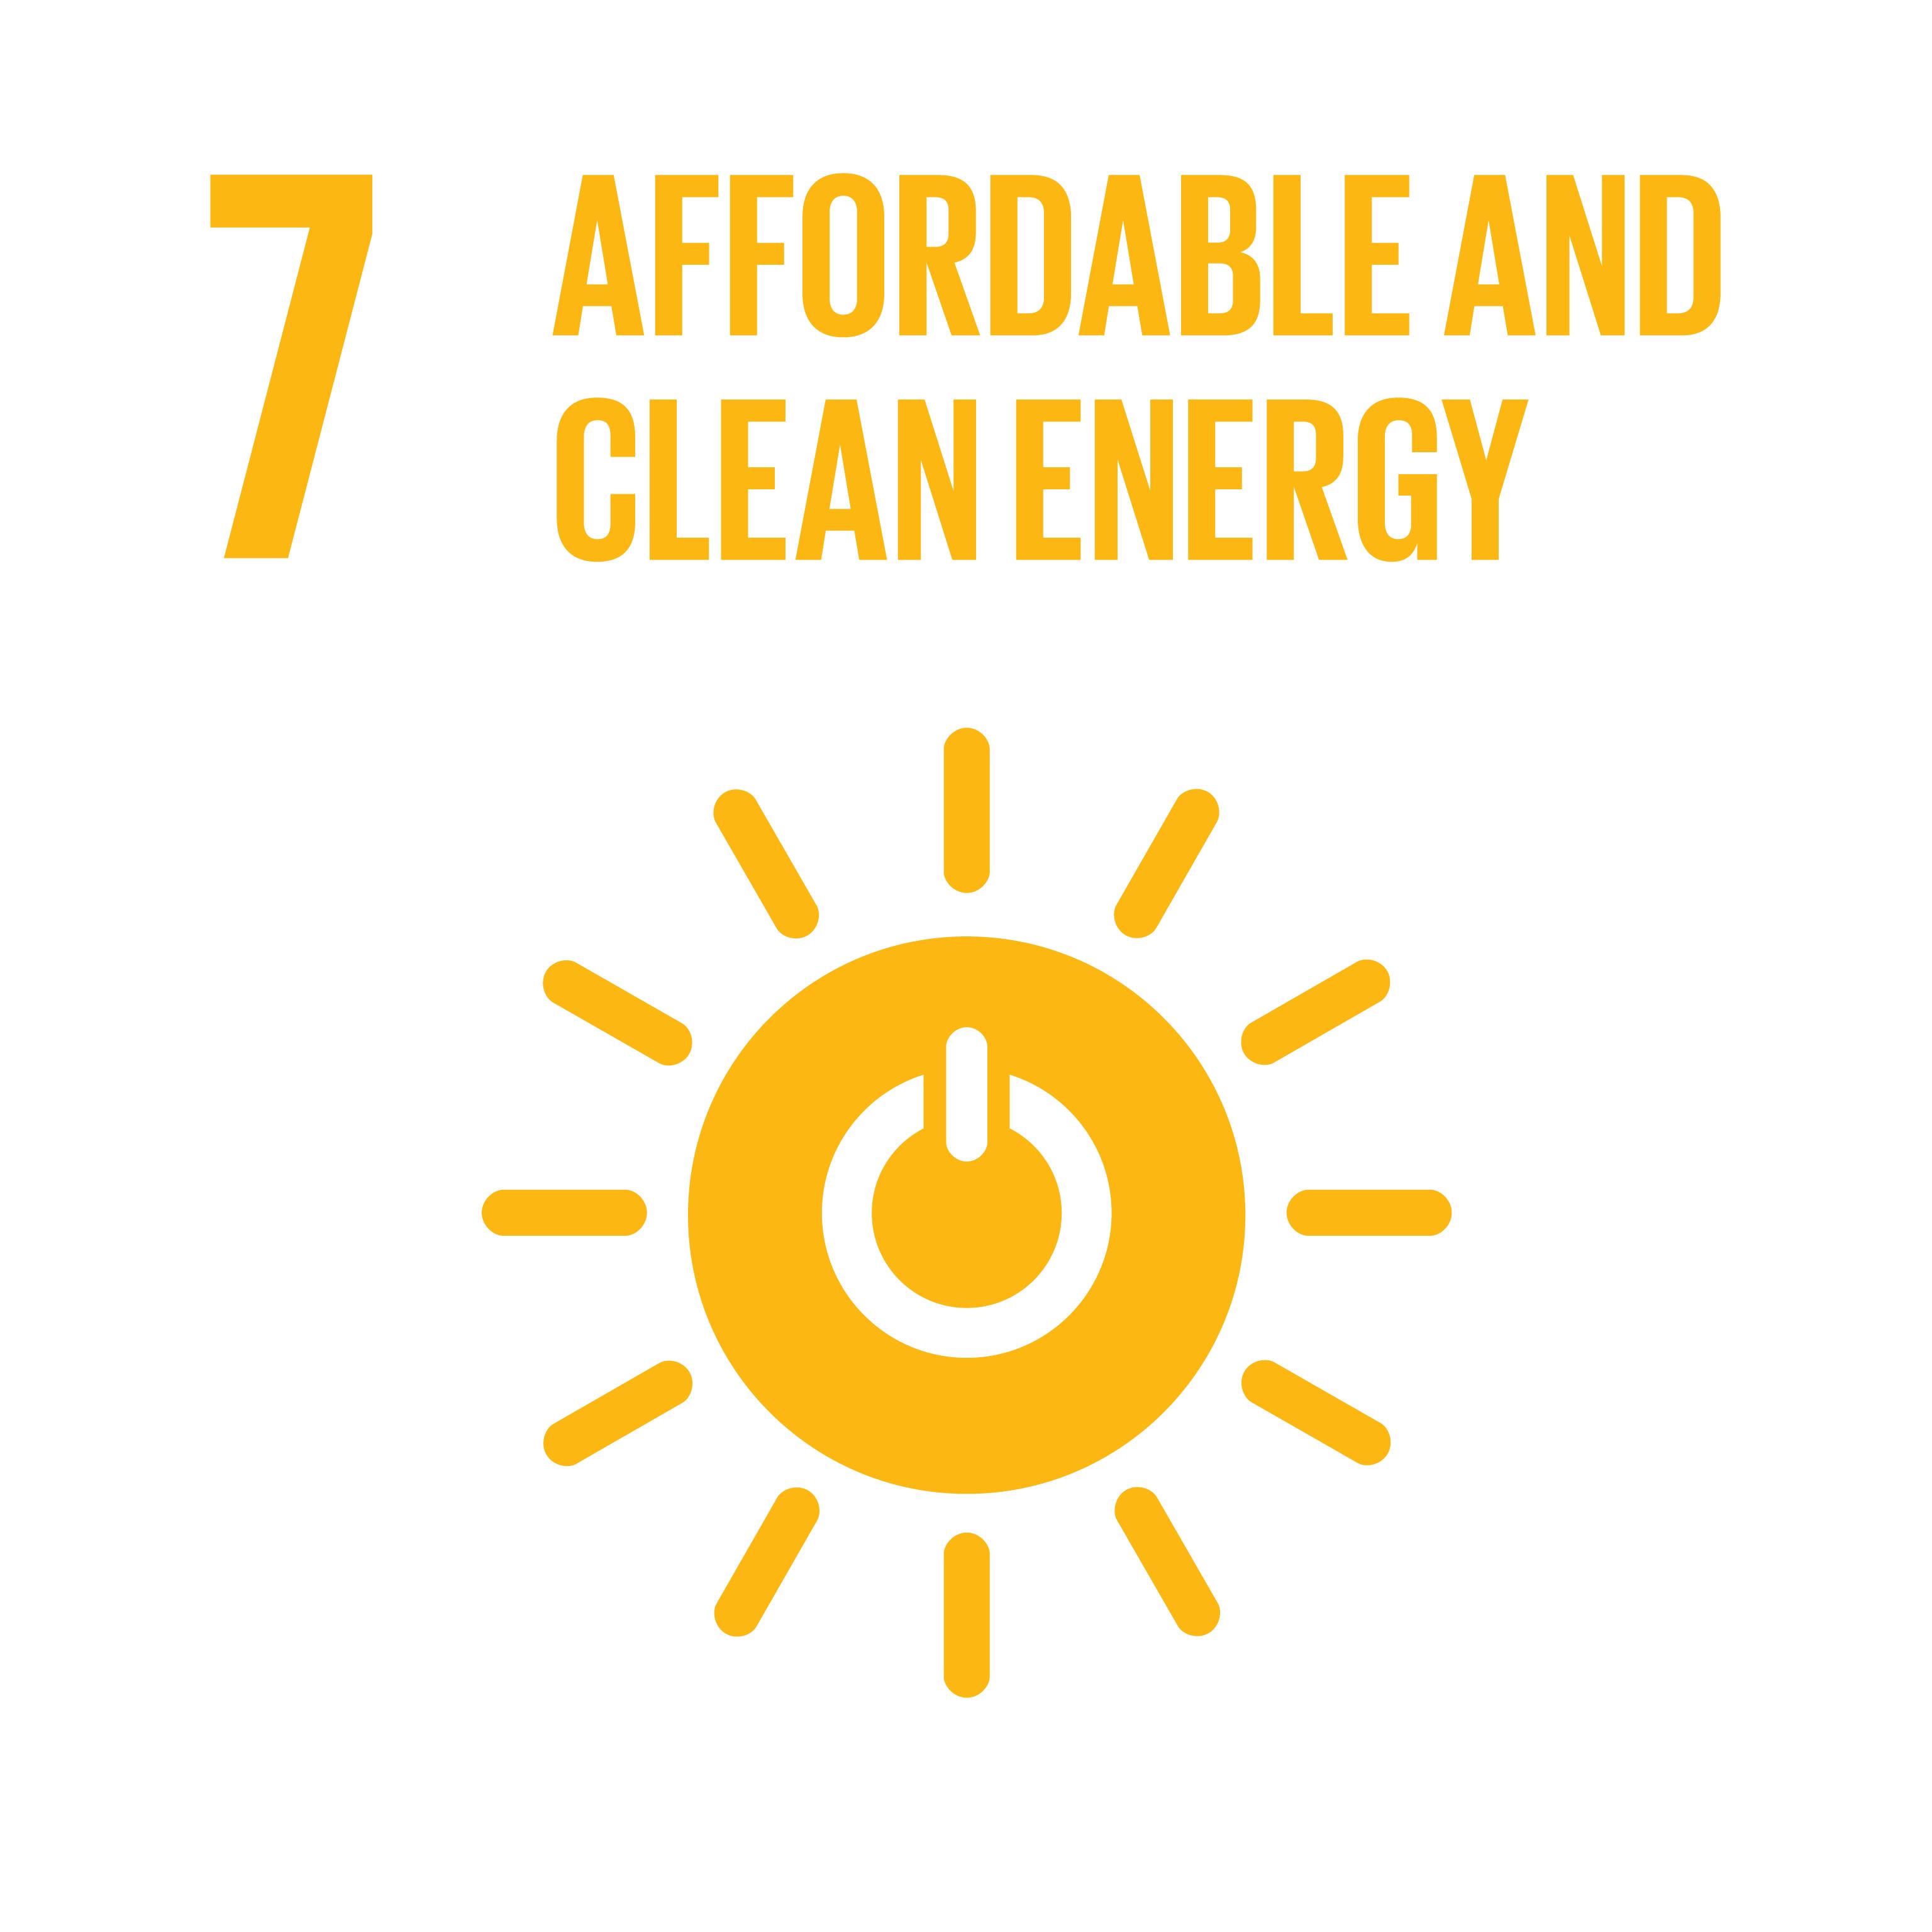

The basic principle of how a water wheel works is to channel the water of a stream or river so as to increase the speed and volume of water towards the water wheel. The wheel has a series of boxes or collectors that fill with water and create a constant movement in the wheel. It is this turning action that is used to power machines and generators.
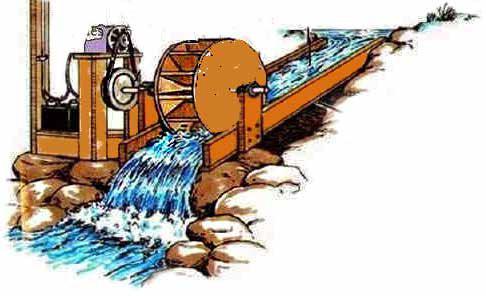
The wheel can be placed into the flowing water in a number of ways to turn the wheel.

Using the direct flow of a river or stream. Speed is determined by the flow rate of the stream or river.
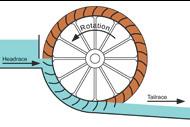
Increasing the flow of water by using a enclosed canal that forces water onto the wheel and increases it turning speed.
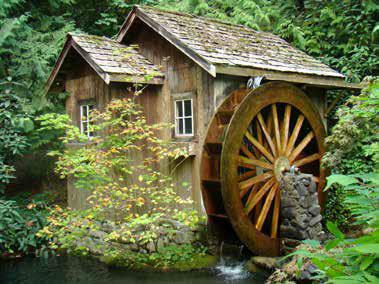
A series of gear mechanisms are then used to in-crease the turning speed and transfer energy to other tools and machines.

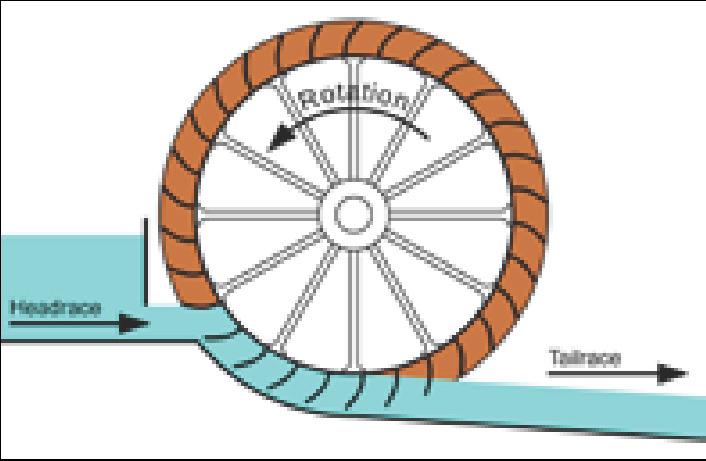
The position of the water channel increases the speed and efficiency of the power transfer to the wheel.


Victorian Grinding Mill with elaborate gear mechanisms doing many jobs through transfer belts and cog gears.
Using the flow or water and the force of gravity maximizes the transfer of energy from water flow to the wheel
A suitable location is found on a water source and a small dam is created to ensure a constant flow of water into the water shoot.

The water shoot and frame are positioned in the river so as to maximise the speed of the turning wheel

The Water Wheel generator is comprised of a frame, the wheel, a water shoot, a gearing device and a generator.
The generator is then attached to the wheel via a pulley and gearing mechanism to increase the speed of the generator rotor.


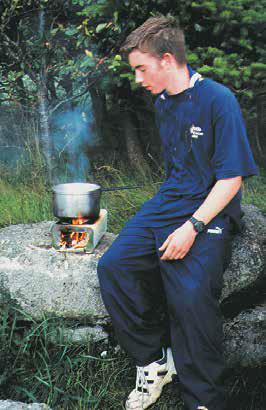
Mound fires can be constructed on many durable surfaces without destroying the earth beneath it. A covering made of a fire blanket or heavy duty tin foil is placed on the surface. Then a mound of clay is placed on top on which the fire is built. Ideally, when travelling on the trail or in a backwoods situation you will bring with you in your kit a trowel, some heavy duty tinfoil or flame proof cloth and a few small plastic bags. The fire is easy to construct - first choose a location, what you are looking for is a durable or scrub surface free of vegetation. The sandy or pebble banks beside a river are ideal.
Collect the clay, sand for the mound in the plastic bags and build a mound at least 150 mm high. The thick layer of clay will insulate from the heat of the fire. The tin foil or cloth gives extra protect both to the direct heat and from sparks and stray embers that might fall to the ground.
The size of the mound circle should be wide enough to allow for cooking utensils and the spread of coals from the fire.
When you no longer have a need for the fire, the clay and embers can be returned to the source and spread around so that no trace exists of your presence


There are three parts of the triangle of fire; fuel, heat and air. In order to light, a fire must have all three elements.
It needs fuel to survive, like we need food. It builds up heat gradually, from your match, to tinder, twigs and bigger fuel. Finally, like us, fire needs to breath!
When you want to extinguish the fire, simply remove one or more of the parts of the triangle; keep unused fuel out of the fire, cool the fire down with water or snow, or smother it with water or clay.
The stones and logs surrounding your fire need to be spaced to allow air to be drawn into the fire base.
Start building your fire by first placing your tinder on the ground in a light pile. Light your match and let your flame catch hold on the matchstick.
Then place it carefully under the tinder and hold it there until the tinder lights. As the fire burns, place light tinder and twigs on top of the flame, taking care not to kill the flame as you do so. As fire flares up create a pyramid of timber over the fire.
Once this timber has taken hold, introduce heavier logs onto your fire.
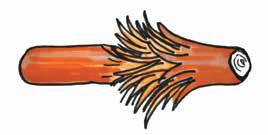
A fuzz stick is an excellent way to create dry tinder. You need a sharp knife and a dry - dead wood - stick. Carve the stick into a fuzz as shown. Create long curly shavings if you wish, and collect these to add to your tinder pile. A number of fuzz sticks will be required to light your fire.

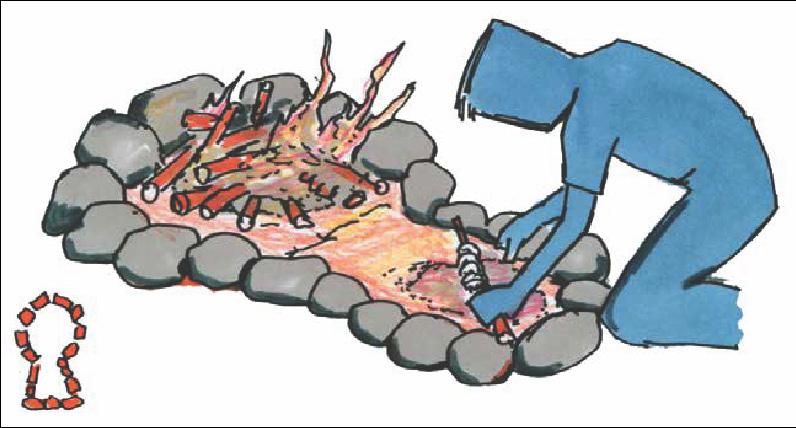
Backwoods cooking is done using hot embers rather than flame heat. Embers are raked from the main fire to a side area for ease of cooking. Clear a suitable area by lifting sods or building on gravel or on bare earth.


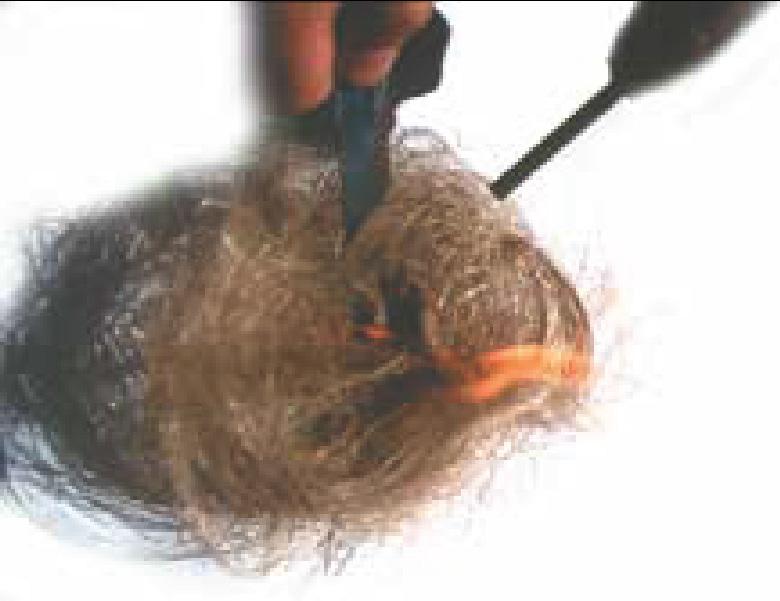
Tinder is light dry materials that ignites quickly. They are essential to lighting a fire quickly and successfully, using only one match and no paper or firelighters.
The simplest of tinder is fluff from pullovers and fleeces. You can also use frizzed up sisal or dry moss. Another good tinder is paper thin bark strips. By far the best natural tinder is dry curly timber shavings created by carving a dry stick. These shavings must be from a dry deadwood stick rather than a green sapling. If you cannot find a dry stick carve off the wet bark; usually the timber is dry underneath. Remember your Leace No Trace principles to ensure mininmal disturbance to the natural environment.


Line the inside of a large box with tin foil. Set up the oven structure with drinks can and wire rack. Heat up coals on another fire then place hot coals on tinfoil under the rack. Place the box over the oven structure and leave a small gap under edge of box to allow air in. The average temperature of an individual coal is 20 degrees. Place inside the box the number of coals required to create the temperature as stated in recipe.

Drink can weighted by a stone inside
Place box over the rack and coals and place a small stone at the edge of the box to allow air flow to keep coals alight.

Cut opening for pots
Lid opening of the tin is used as a chimney

Cut hole in base to act as fire feeder
Tin raised above ground on small rocks to protect grass
Simple fuel efficient stoves can be made easily using old drums and tins. These stoves require only a small amount of fuel because of the efficient way the fuel is burned. The container channels the heat generated to the pot rather than being lost to the surrounding air.
Many designs are possible and two are illustrated, a 5 Litre tin and a larger barrel stove. Tins should be thoroughly cleaned before use.

Air holes along side of tin

Create a Zeer fridge or charcoal fridge on camp or in your garden to cool drinks and preserve food.
To create a zeer pot fridge you need two terracotta pot (unglazed) - one pot bigger than the other. Some putty to seal the holes in the pots. Sand and a teacloth.
Firstly, seal the holes in the end of the pots.
Place some sand in the bottom of the big pot so that when the second pot is placed inside it is level with the top of the bigger pot.
Pour in the rest of the sand between the two pots and level it off just below the top of the rims.
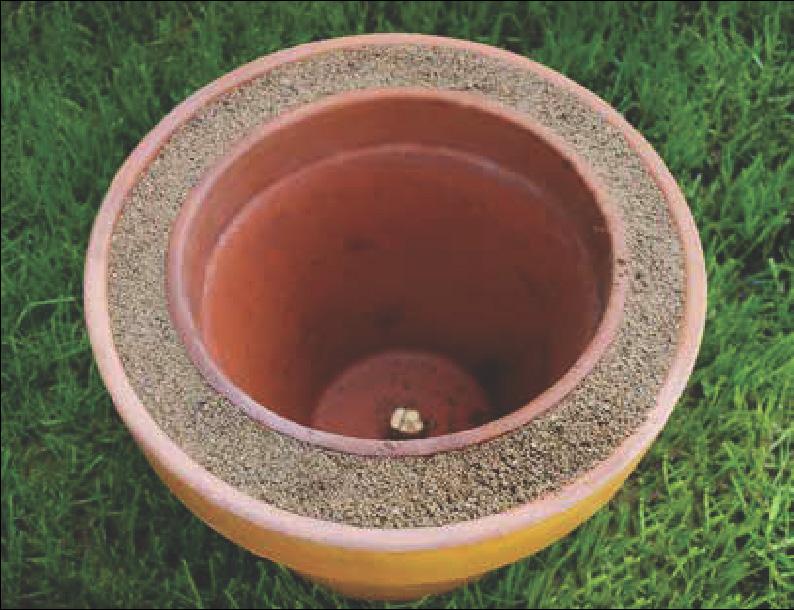
Pour cold water over the sand. Do this until the sand is completely soaked and unable to take any more water. As you pour, do so gradually in order to give the water time to soak into the terracotta.
Wet the teacloth and place it over the pots, so as to ‘seal’ the opening.
Your zeer pot fridge is ready!

The Zeer pot works through the evaporation and conductive process. As the outer face of the terracotta pot heats up and evaporation takes place it also draws any heat from inside the sand and the inner pot space. This cools down the space inside the inner pot and creates the temperature difference. Water needs to be constantly dripped onto the covering cloth and the sand to maintain the process of evaporation.

The evaporation and conductive process is key to how heat pumps and air conditioning system work
Water soaked cloth


Container to hold water


Chicken wire to hold charcoal in place around the container
This is a practical way of keeping things from melting used by many households in the last century before fridges became a common sight in our homes.
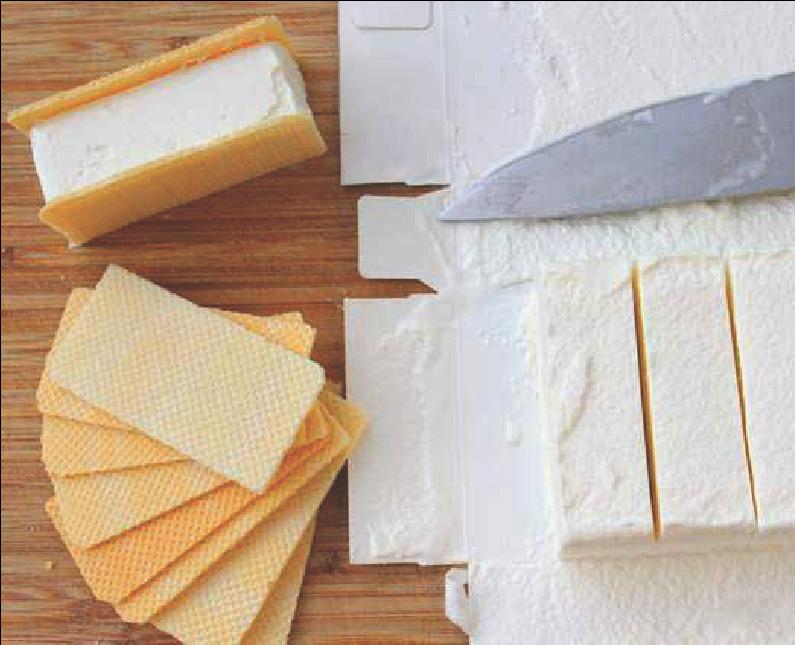
The block of ice cream was a solid block as it was taken from the fridge. The first concern was to get it home as quickly as possible as the melting process would begin once it was out of the fridge.
On arrival in the house a newspaper was soaked in cold water, removing any excess water. The block of ice cream was then wrapped tightly in the newspaper covering all edges and was then placed on a window sill.
The evaporation process begins and it prevents further melting of the ice cream. This process will not freeze a block of ice cream but it will slow down the melting process - long enough for the family to have dinner and ready for dessert.
Metal drum/container

The charcoal fridge works in the same way as the Zeer pot fridge but in this case charcoal is the key component used to create the evaporation process.
The fridge is created around a container - it can be metal or it can be made of clay or terracotta. The container is wrapped in charcoal, that is held in place using chicken wire.
A small container is placed on top of the fridge container in which water is placed.
Into the water container a wet cloth is placed and through a wicking action, it keeps the charcoal wet so that the evaporation process can begin.
it is important in all evaporation type fridges that the evaporation surfaces are kept wet/damp.
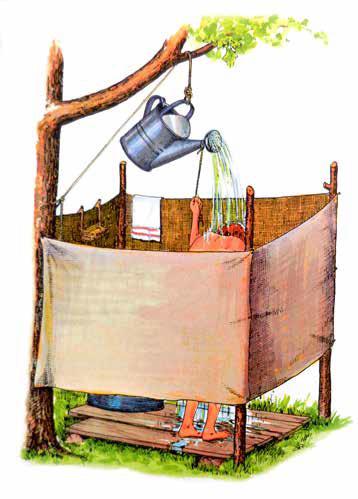
Traditional Camp shower using a water container to provide a ‘cold shower’

A swimming pool shower used the black plastic pipe as a heat conductor. The pipe has a capacity of 10 lts which will heat up using solar energy and provide a number of short showers before it needs to ‘recharge’ itself from the heat of the sun.
Try out a solar shower


Modern camp shower uses a solar shower bag to heat the water by exposure to the sun. The bag is black is this is a good colour for absorbing light and heat - white is a reflective colour. The shower tent has a vent at the top to allow water in and ventilate the shower space.
Water is an excellent conductor of heat - it heats up quickly and releases its stored heat slowly. Solar energy is captured by solar panels which can be used to heat water or to generate electricity by using photo-voltaic tubes.
Natural convention currents create a water cycle. Cold water, when heated, rises which displaces the cold water at the top and causes a movement within the body of the containing tank. You can observe this movement in hot water cylinders and heating radiators. Once the process begins you will notice the top of the tank heats up first and then the warmed water drifts down to the bottom.
Solar panels use solar heat to heat the water in specially designed vacuum tubes. These tubes trap all available energy and heat the water that passes through them. The heated water is stored in a tank that is then plumbed into your internal heating system and water taps. This water can then be heated by topping up the heat using boilers which reduces your heating bills. However, often the water heated by solar energy is hot enough so it does not require additional heating.


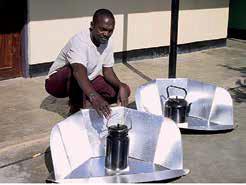
The solar cooker is a light weight, low budget and environmentally friendly alternative to the heavy cookers we find in our kitchens. To make one all you need is a piece of heavy cardboard, some aluminum foil, an oven cooking bag and a black pot.
This resourceful solar cooker is used in many countries where resources are limited. They are easy and cost effective to make and reuse many materials!
Make one and try it out!!!





Reviewing in is a simple 4-stage process. After each activity there is a short informal review. Basically the leader of the team asks the participants what they thought of the activity.
The four key areas of the review process are: Facts
Findings Future (actions)
The first item FACTS – this relates to all the basic facts of the cycle – it was good, we made a mess of the cooking, we learned six new skills, the weather was wet etc.
FEELINGs – this relates in the main to the personal experience of each of the participants. How they felt about the challenge, how did they get on with other people, and what did they learn about themselves during the programme cycle.
FINDINGs – what did team and individuals find out about the planet, themselves and others.
Lastly, FUTURE – what did we learn from this programme that we can carry forward into actions in the future. This in essence is the ‘learning by doing’ process and key component of the Scout Method.


Saving the planet and achieving a sustainable environment for the future will not happen by itself. It will rely on everyone to play their part by changing behaviors and attitudes coupled with direct actions within our families and communities.
Everyone can do the small simple actions like turning off lights, turning down the heating and be careful of our use of energy. In our families we can increase the amount of insulation in our homes and use alternative technologies such as solar panels, and heat pumps.
Nationally, we can increase our use of natural renewable energies such as wind and solar power supporting SDG 7 and SDG 12.
In Scouting we have a programme called ‘Better World’ in which we encourage Scouts to take action in their community to create a better world. These actions can relate to peace,environment, social issues or any identified issue within a community that they can provide an action to solve.
You can acheive the SDG Wheel pin for completing a Better World project. Explore your community, identify issues, challenges and opportunities and mobilise to action through local service projects. Visit www.betterworld.ie for more details.


