Marketing Studio MANUAL

Marketing Studio MANUAL

Dashboard Overview
Folders & Favorites
Navigating Categories
Creating a Design Easy Auto-Fill Templates
Property Promotion Testimonials
Exporting & Printing Support
The Semonin Marketing Studio is accesible through a convenient Single Sign-On feature through your Reliance Network Account.
1. Login to the HUB
2. Click the Reliance Network button and login to your account
3. Click Resources in the top navigation menu
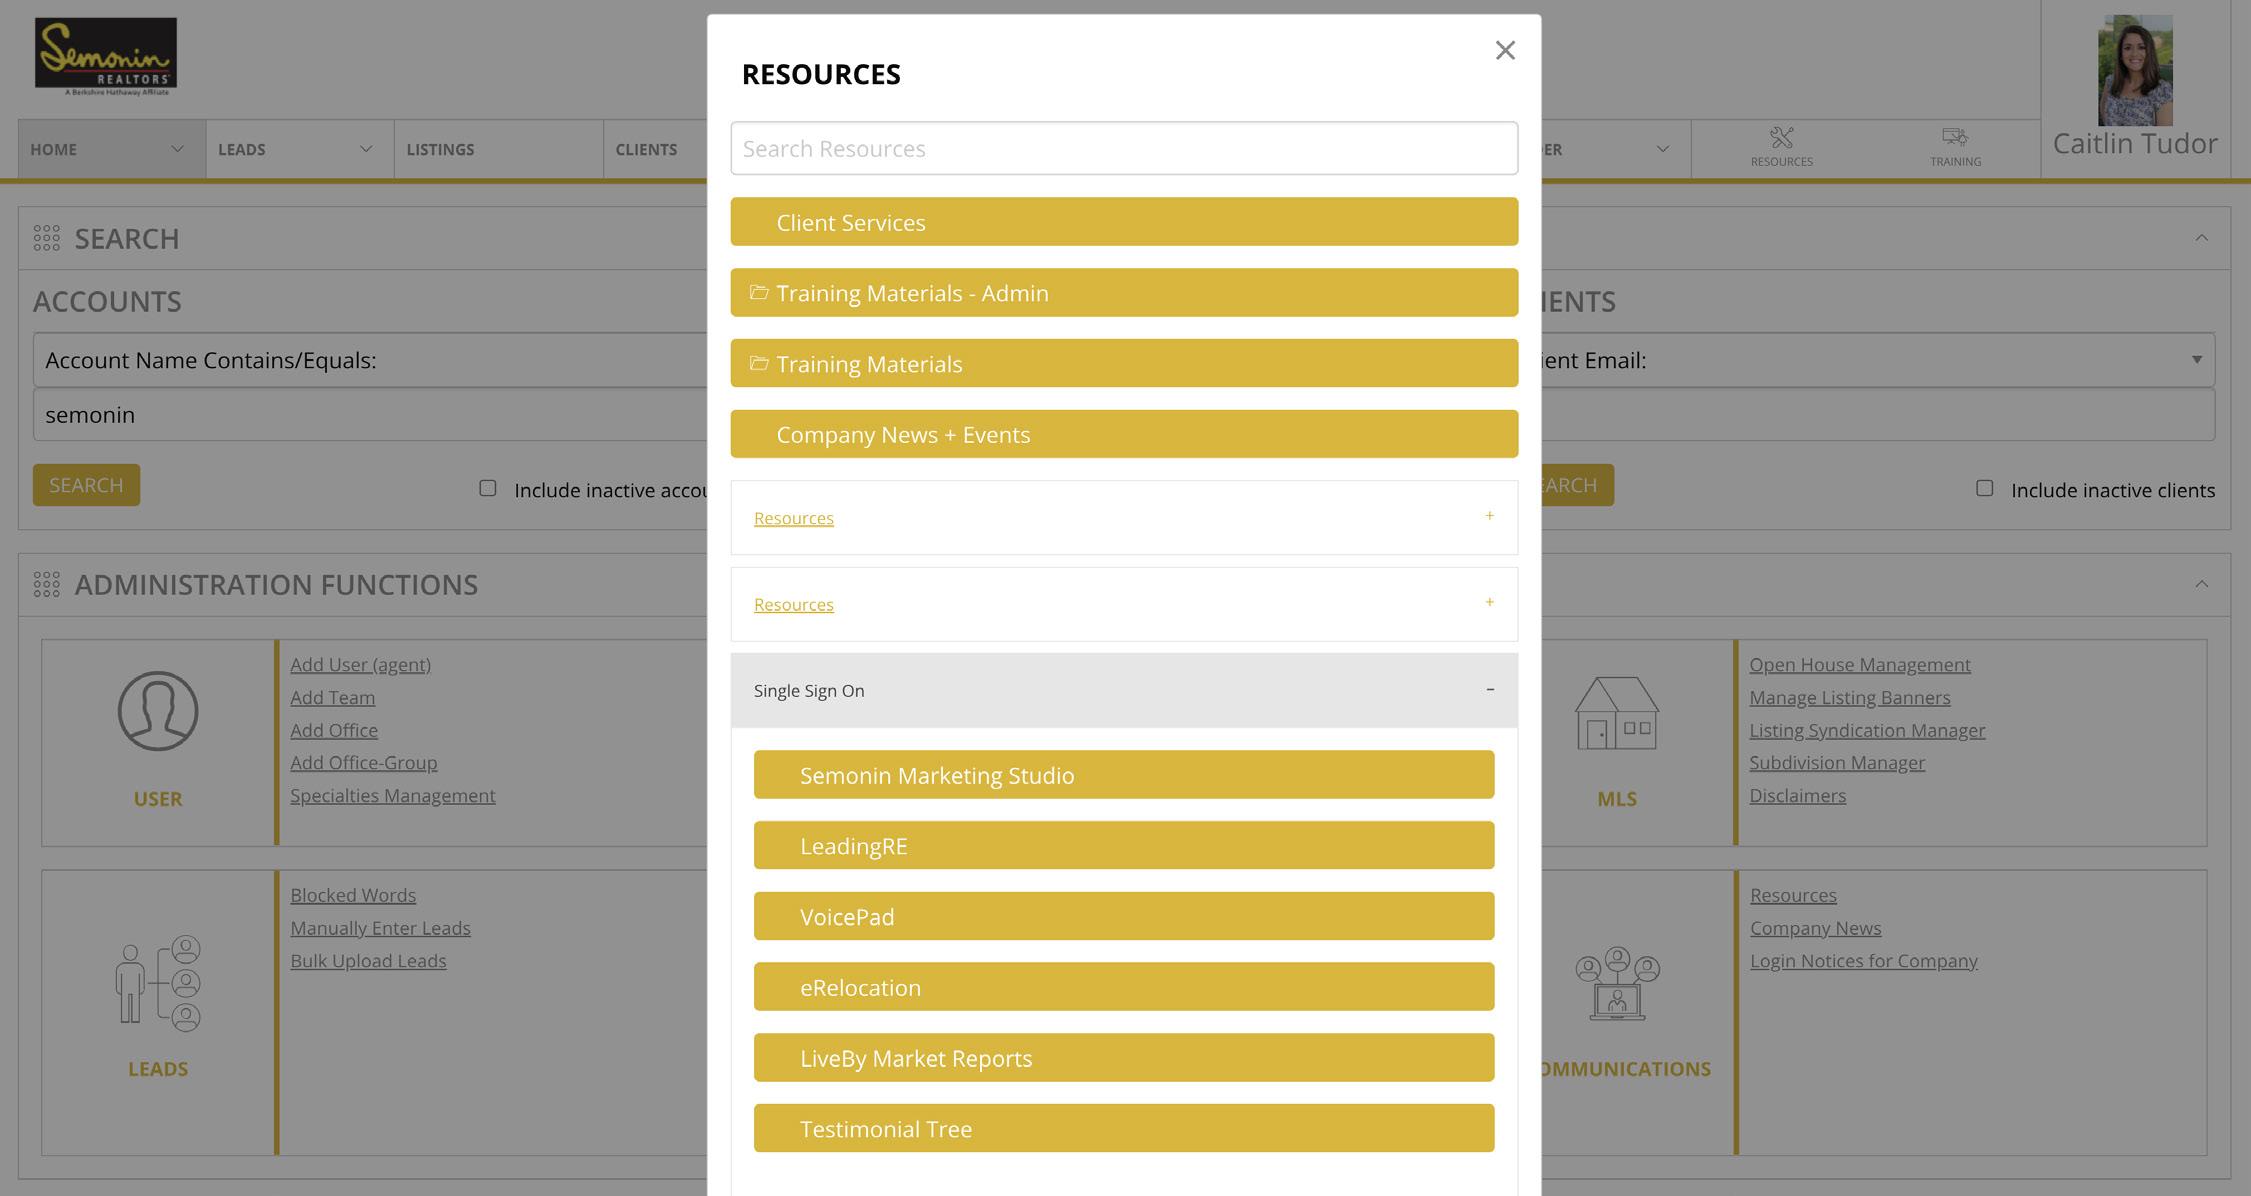
4. Click Single Sign-On
5. Click Semonin Marketing Studio
This will conveniently log you into your Semonin Marketing Studio account without having to remember another user name and password. This will also allow the system to automatically feed in your profile information (photo, contact information, etc) from your Reliance account.
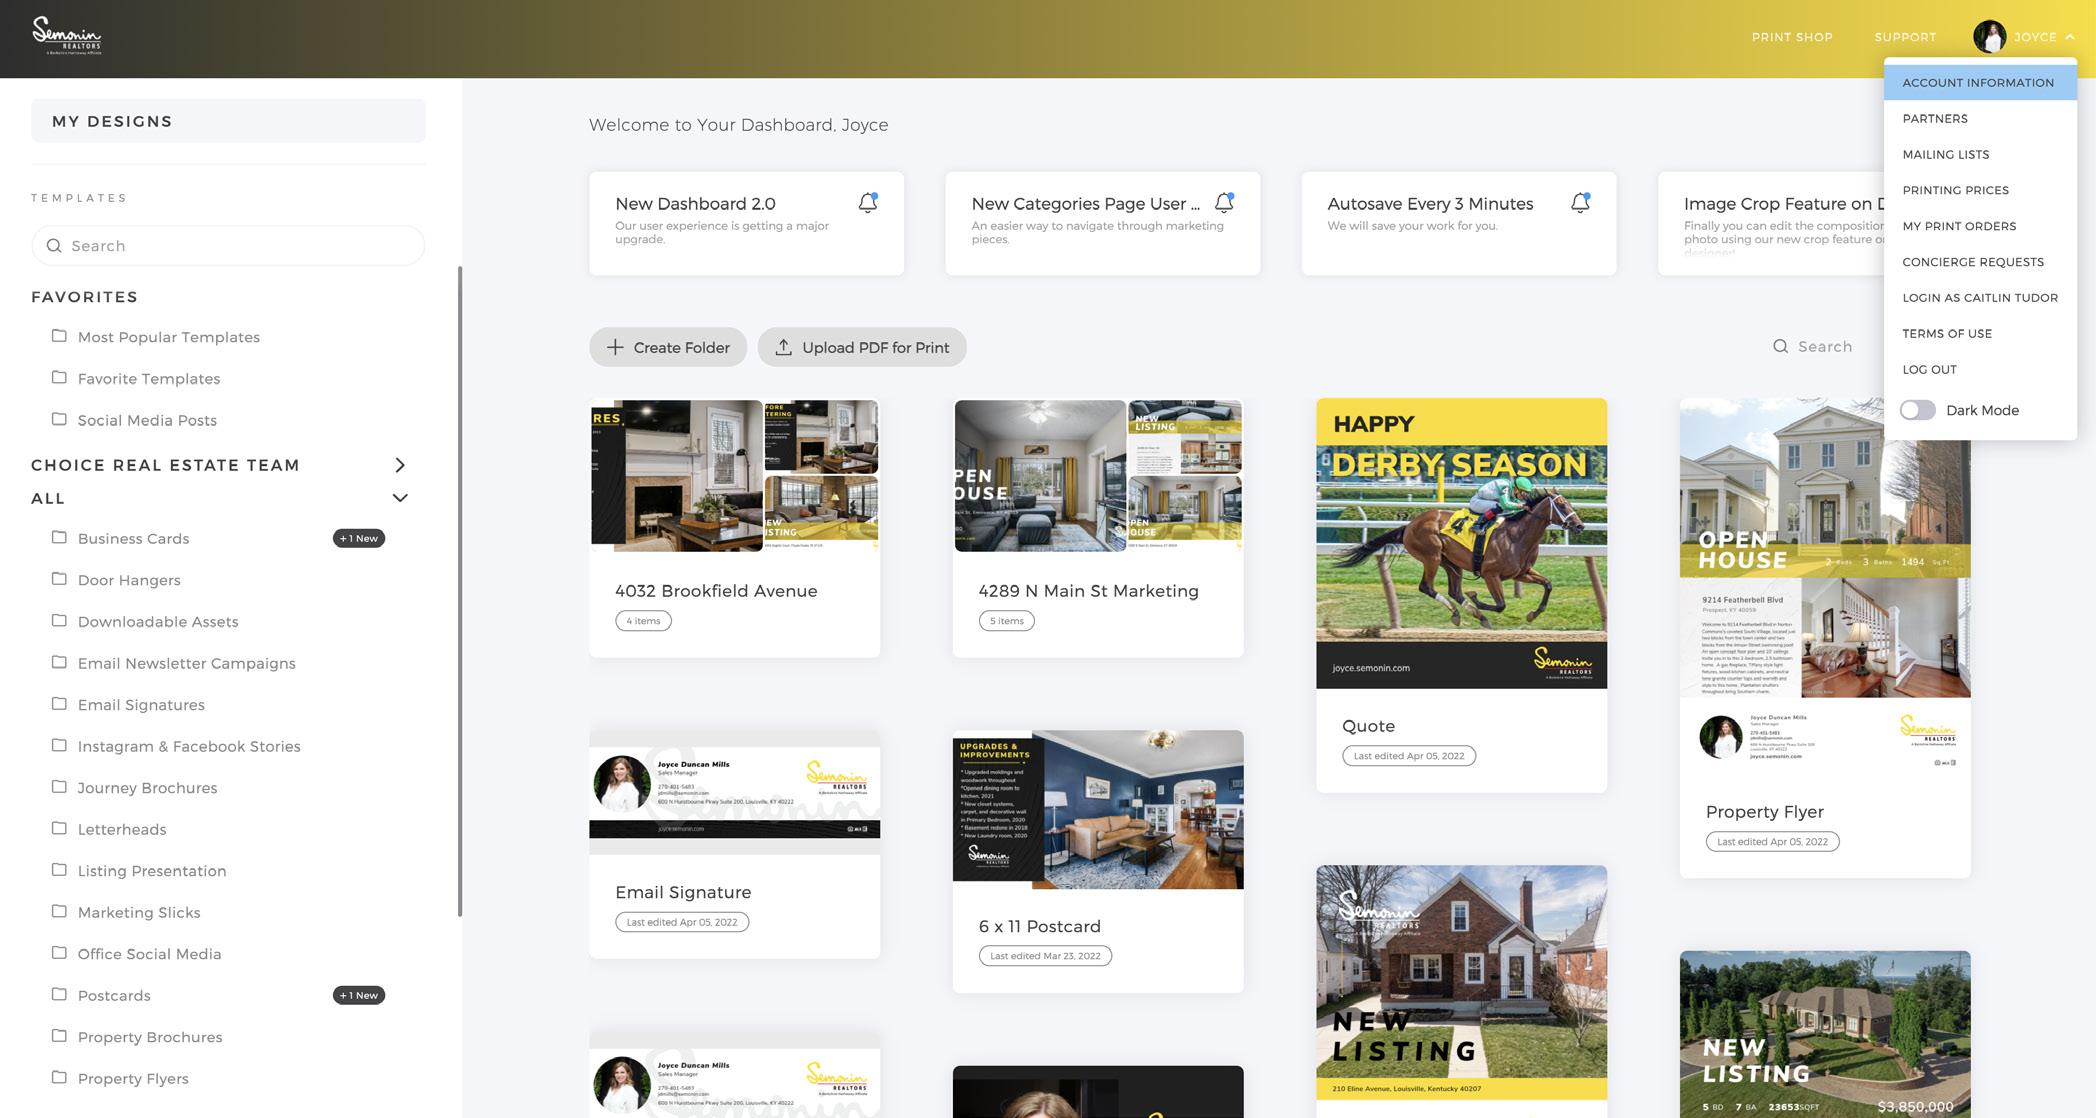
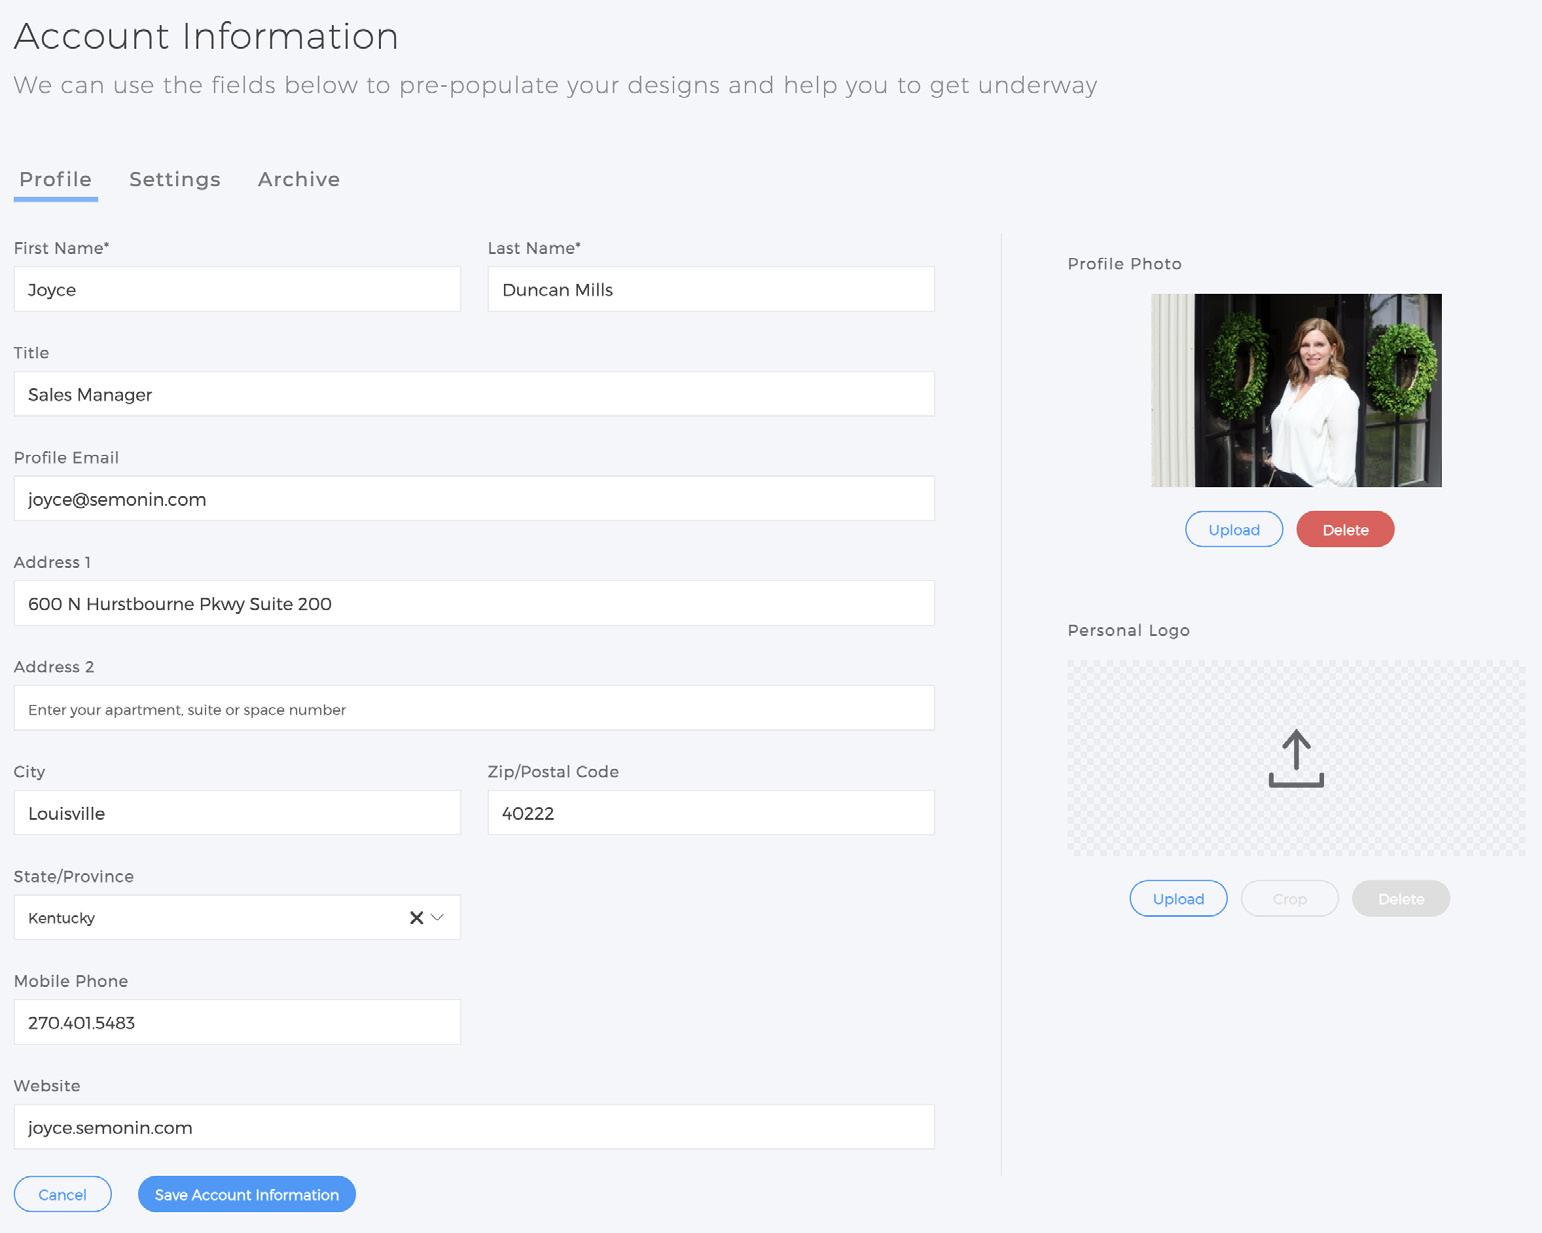
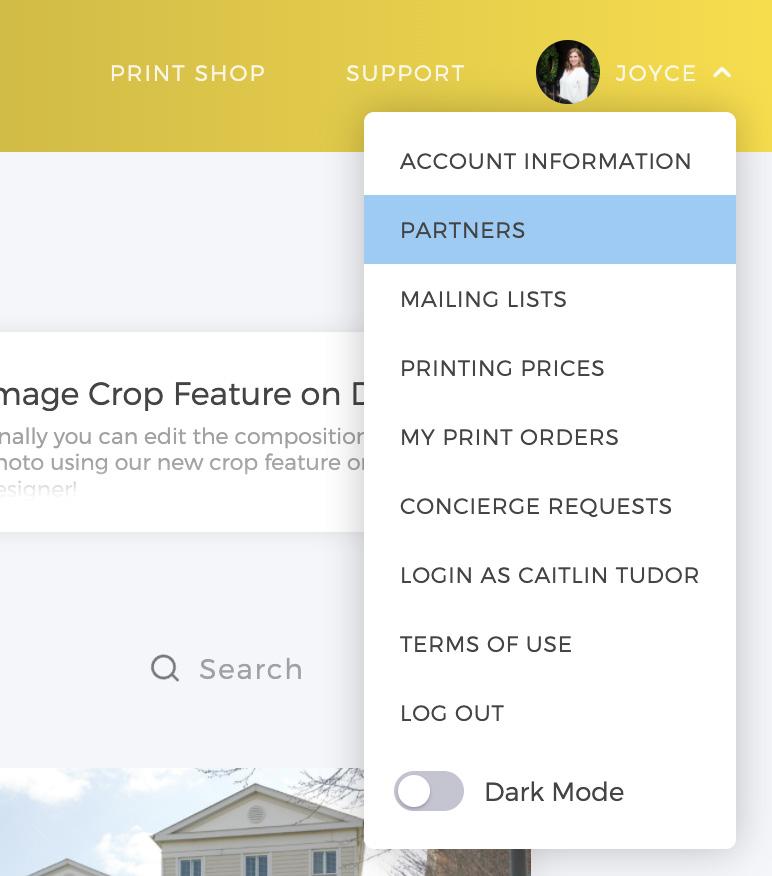
The marketing resources in the Semonin Marketing Studio are all designed to autofill with your own branding by pulling the information in your account profile. Keeping your profile information up to date is important to take advantage of this technology. Access your account information by clicking on your name in the top right-hand corner as circled below.
Most of this information should feed in from your Reliance account, but if you wish to make changes, this is where you can upload a headshot, a team logo, and enter your contact information. Be sure your profile is complete and correct.
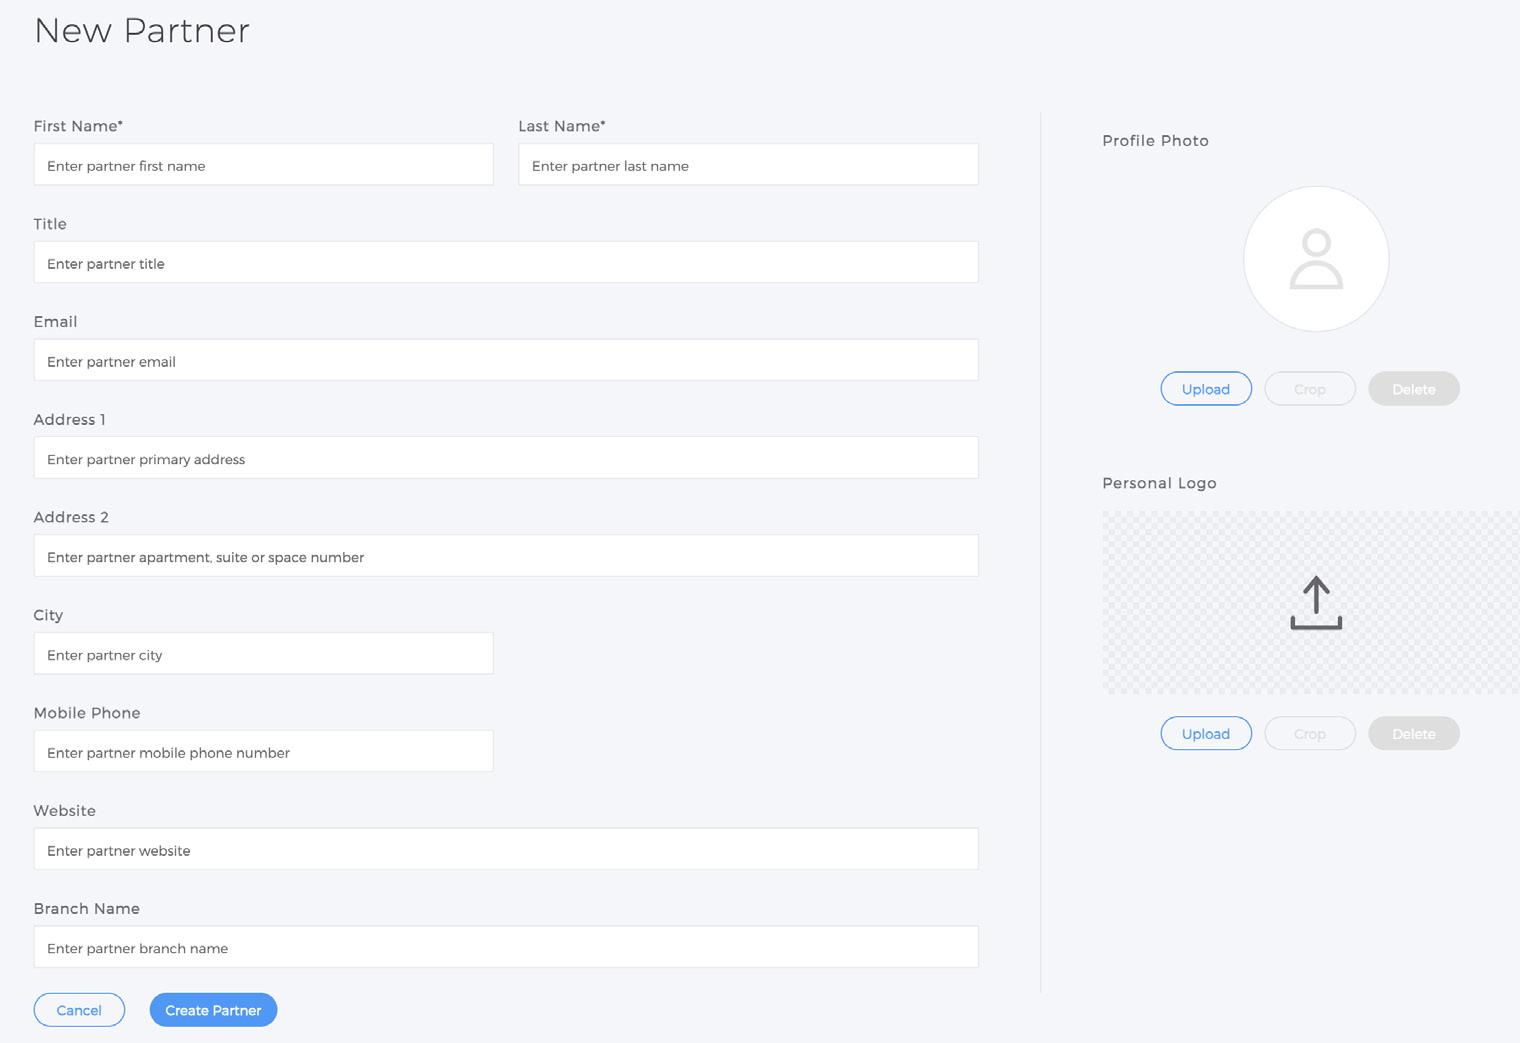
If you often co-brand with another agent, loan officer, or other industry partner, add them to your Partners list to conveniently include them on co-branded marketing templates.
1. Under your Profile picture, click on Parters (circled below).
2. Click
3. Fill our their information and upload their photo
4. Click
You can add as many partners to your profile as you wish!


This Semonin logo will always take you back to this main dashboard view.
Search Bar: Conveniently search for templates through a keyword. (ex. search “Curb Appeal” to find the Curb Appeal KIT Card)
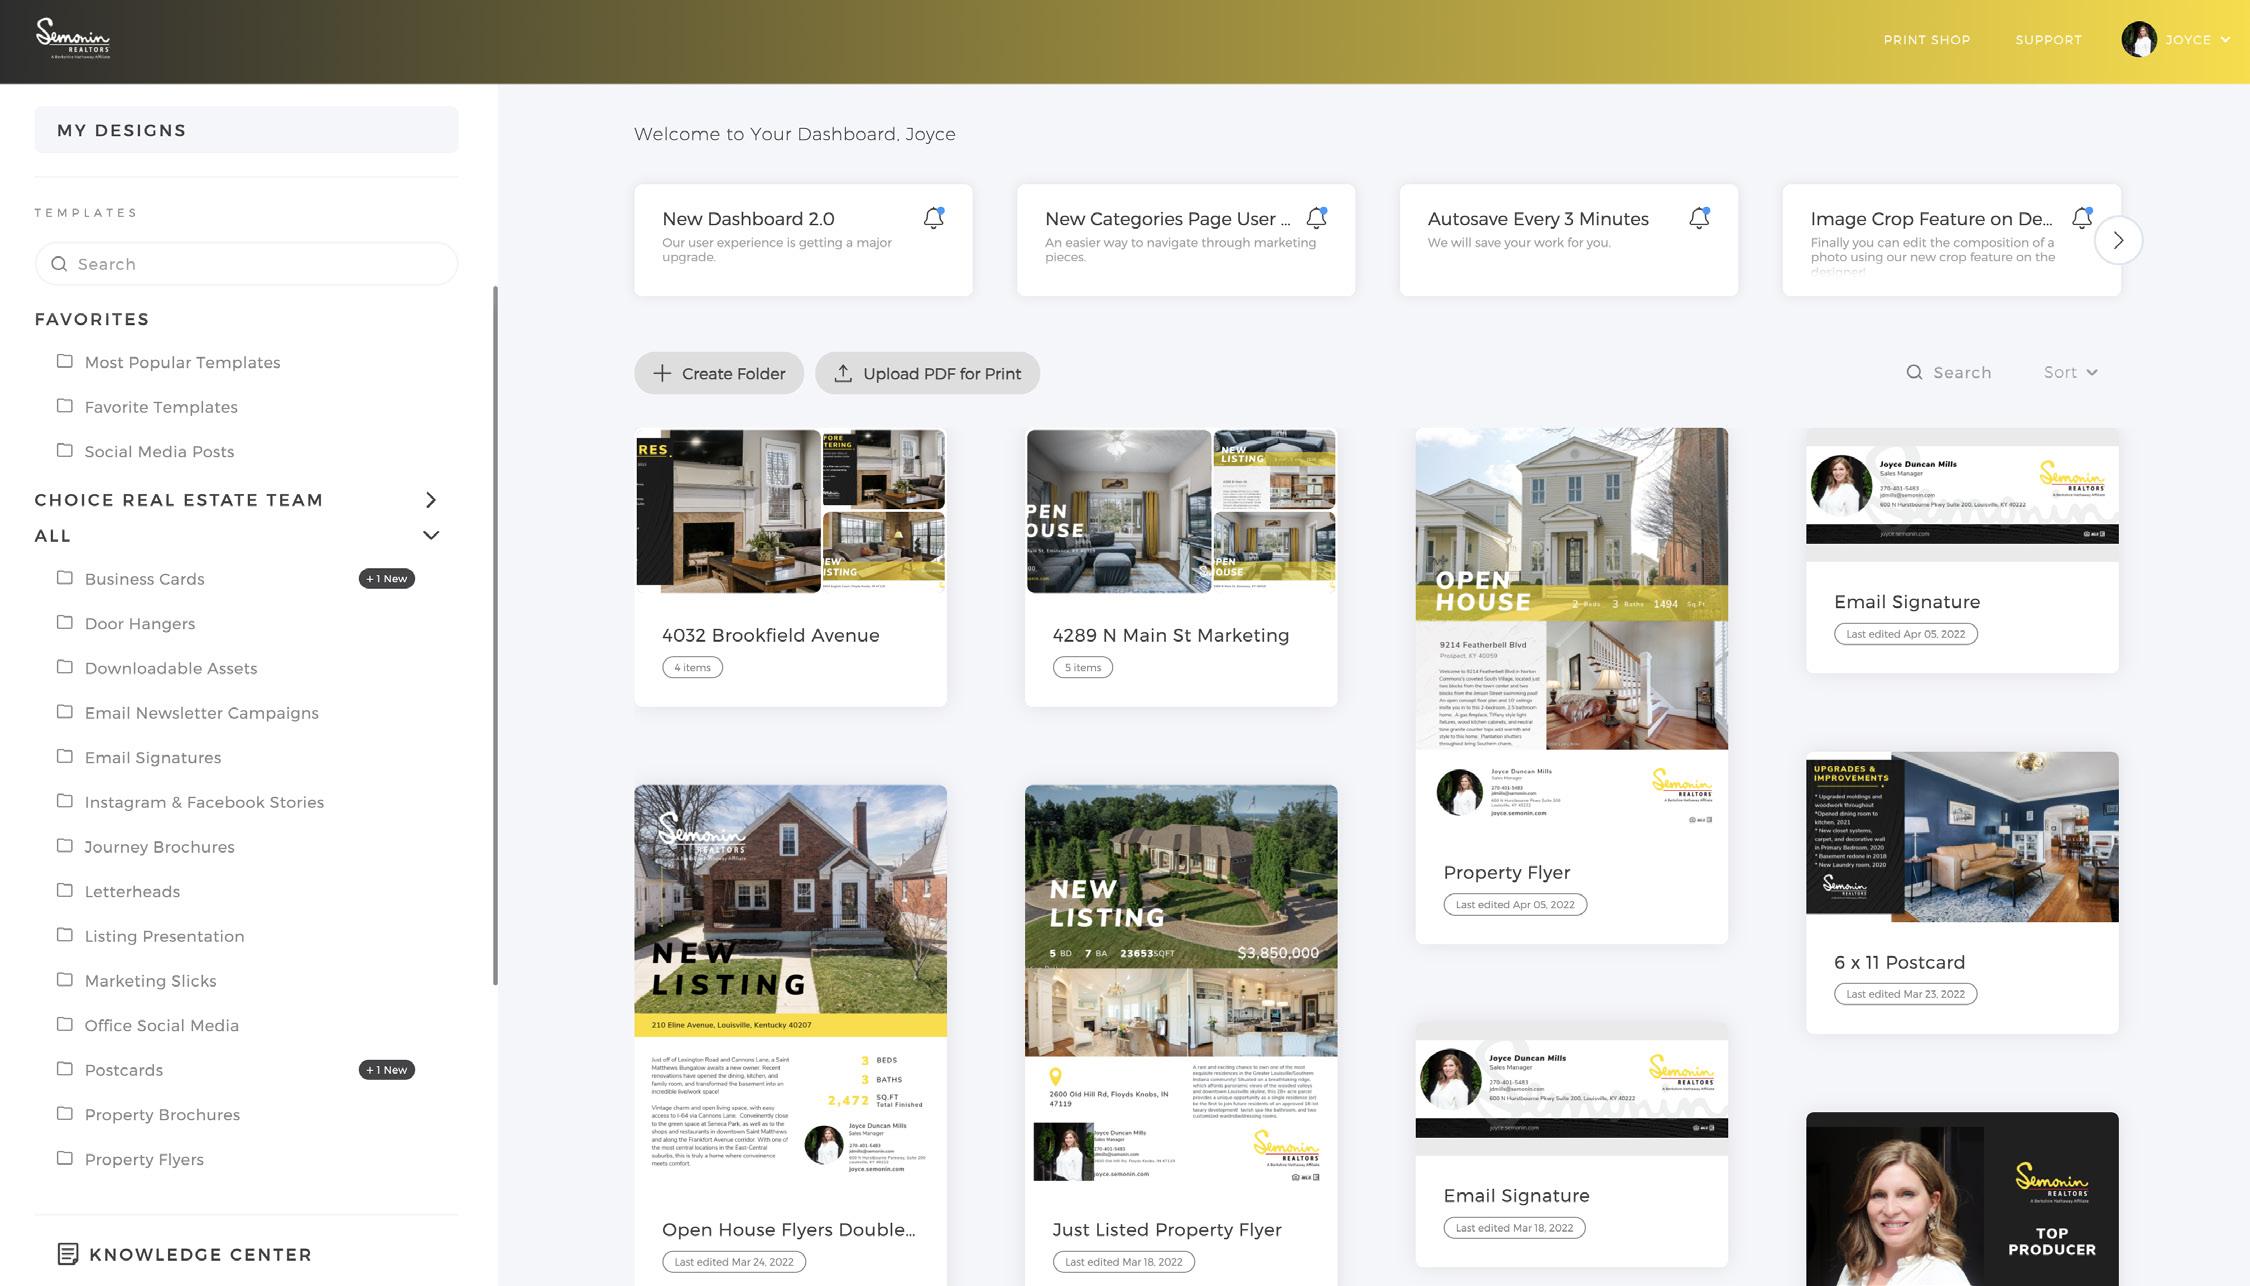
Design Categories: Designs are categorized into folders. Certain folders also have subfolders that will expand when clicked on. (ex. click on “Postcards” category to find the subcategory of the “KIT Cards”)
Knowledge Center: A library of video tutorials on how to use the Studio.
Announcements: Any recent platform upgrade or feature annoucements can be found in this section.
Your Designs: Any design you’ve created and saved will appear in chronological order in this section. This section can also be organized with folders like shown in the orange box.
The more you use the Semonin Marketing Studio, the more designs you will have saved in the body (yellow box on the previous page) of your dashboard. Folders and Favorites are features that can be utlized to stay organized!
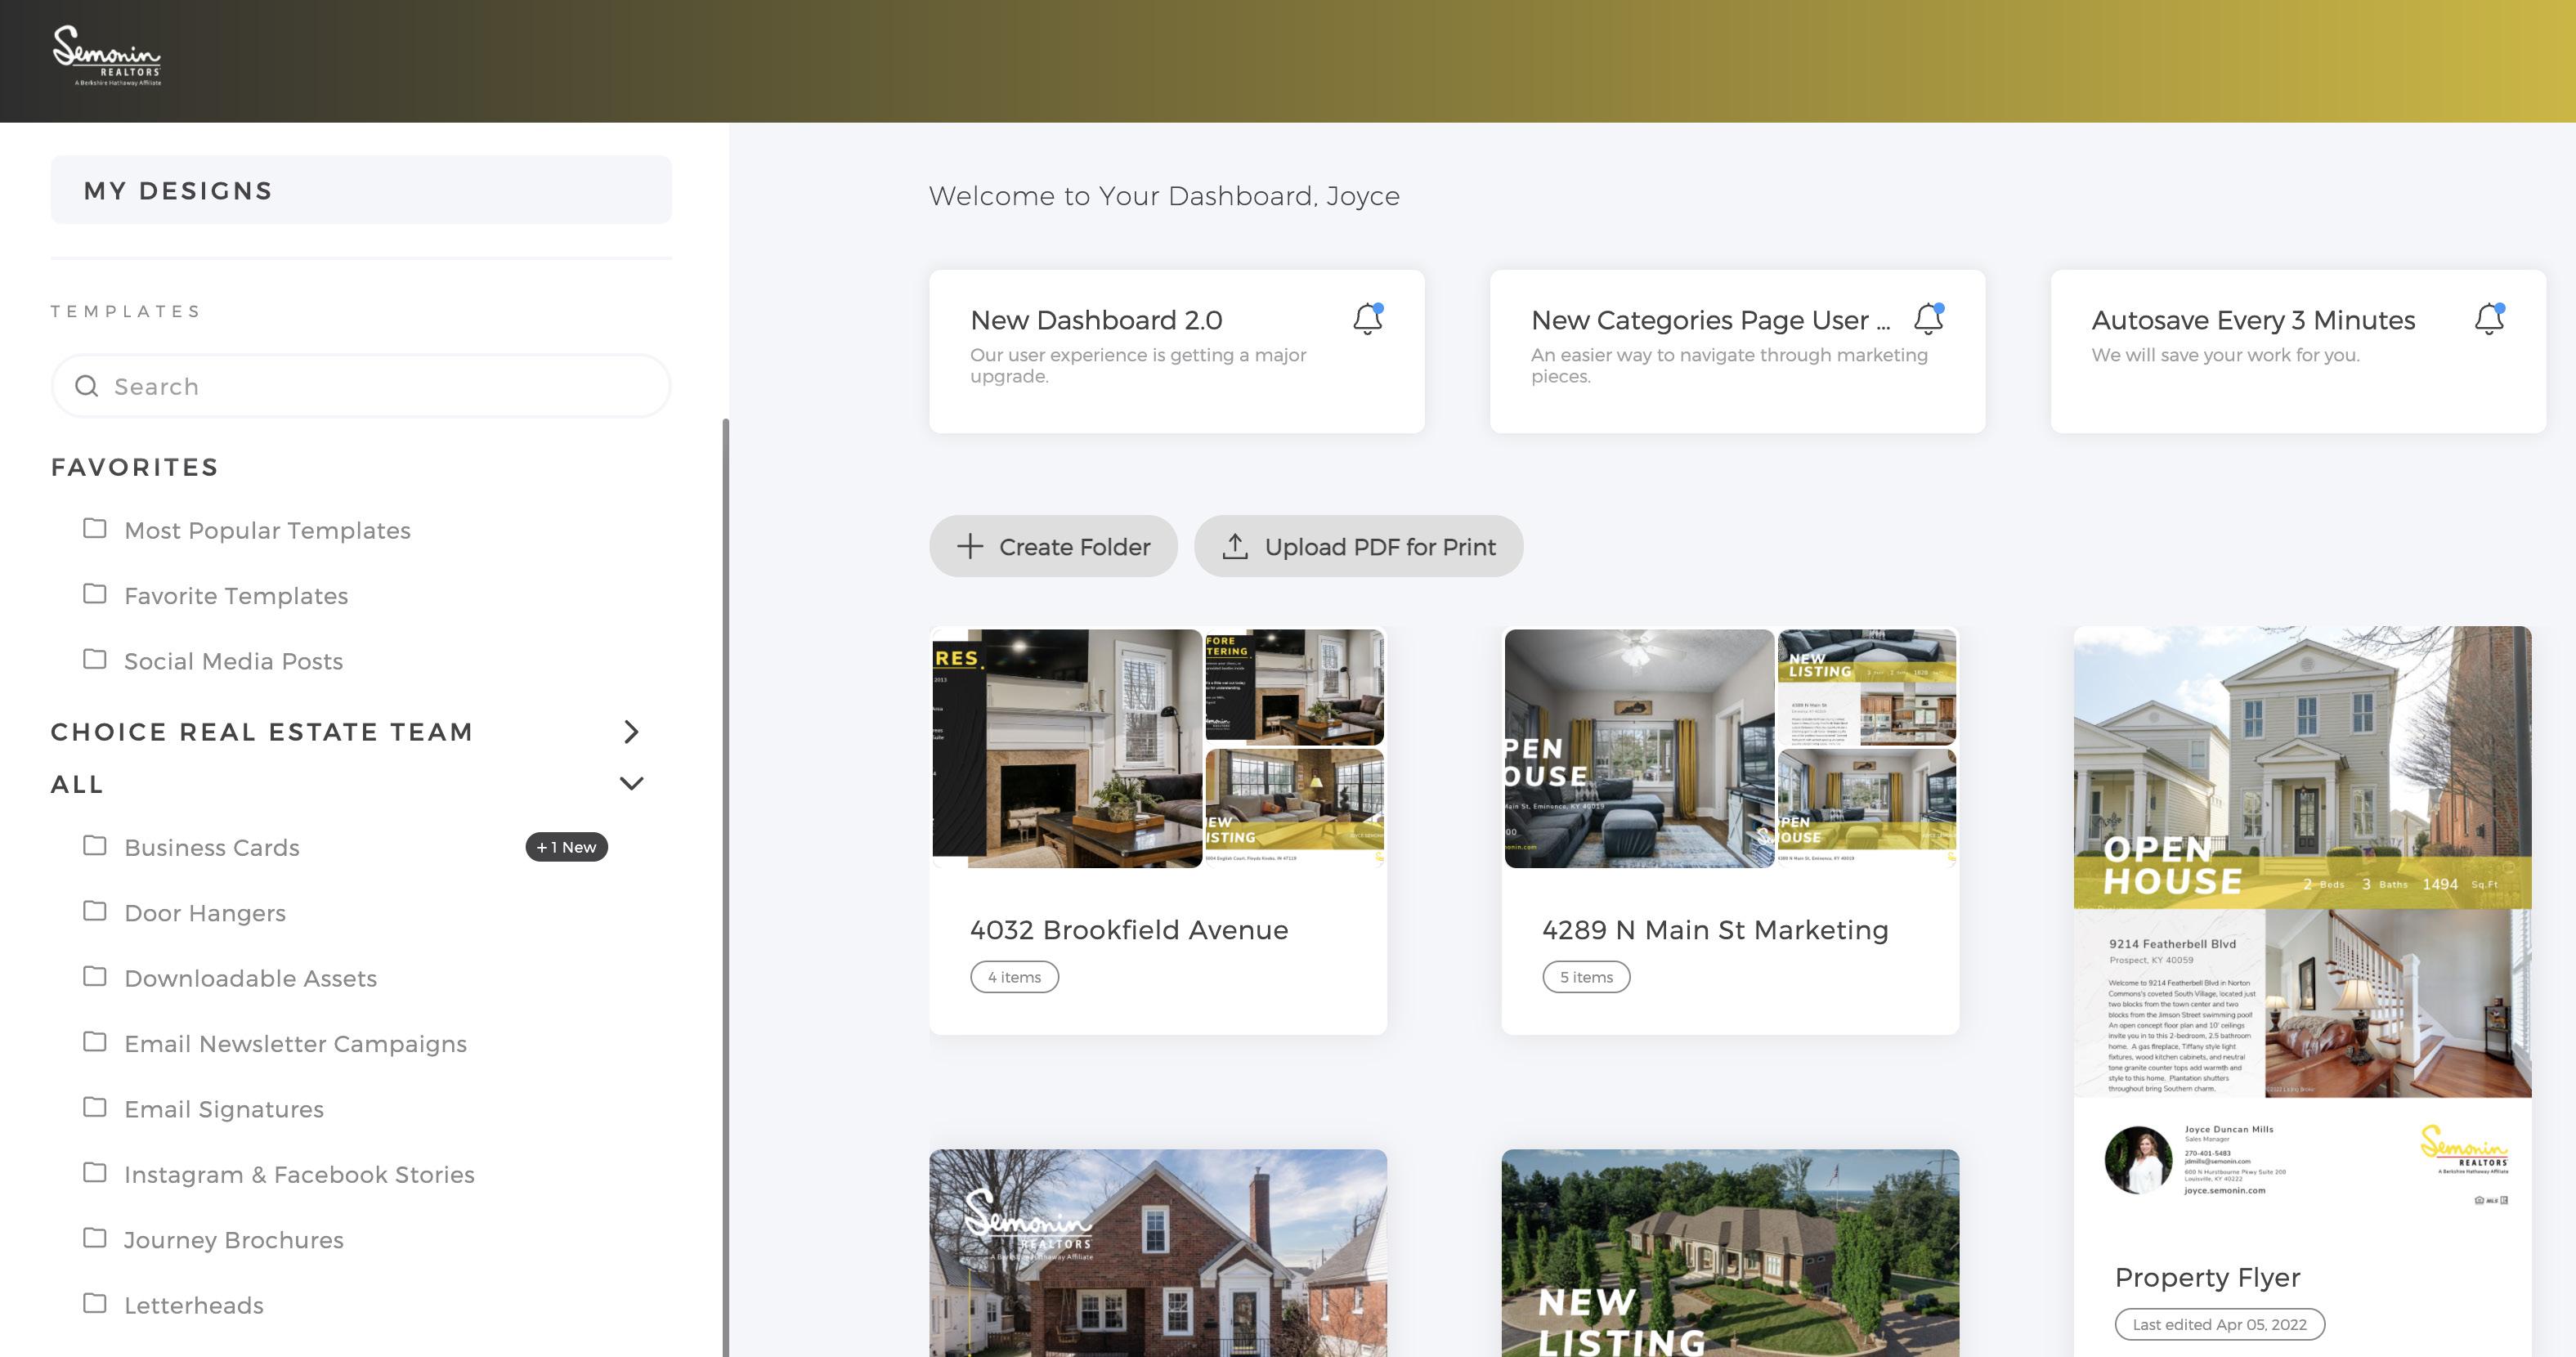
Folders will always be saved at the top of your Dashboard
Click the “Create Folder” button, give it a title, and simply drag and drop designs from your dashboard into the appropriate folder.

Since new templates are constantly being added to the Semonin Marketing Studio, the Favorites, feature is also a great way to same time. Simply hover over any design and click the heart icon. This will save that template in a “Favorite Templates” folder within the Design Categories menu (highlighted above).
Designs are organized into categories & some subcategories, which include the following:
Business Cards
Door Hangers
Downloadable Assets (logos)
Email Newsletter Campaigns
Email Signatures
Instagram & Facebook Stories
Journey Brochuers (Buyer/Seller Journeys)
Letterheads
Listing Presentation
Marketing Slicks - Awards - Buyer
- For Sale By Owner (FSBO)
- Market Activity
- Open House - Seller
Office Social Media
Postcards
- KIT Cards
Property Brochures (folded & multi-page)
Property Flyers (8.5”x11)
Recruiting Packet
Resumes
Sign In Sheets (for Open Houses)
Social Media Banners
Social Media Posts - Facebook - LinkedIn
Social Media Posts - Download Now
- General RE + Branding
- Holidays - Listings
- Recognition - Testimonials
Creating a Design Easy Auto-Fill Templates (ex: Business Cards, Email Signatures, KIT Cards, and Marketing Slicks)
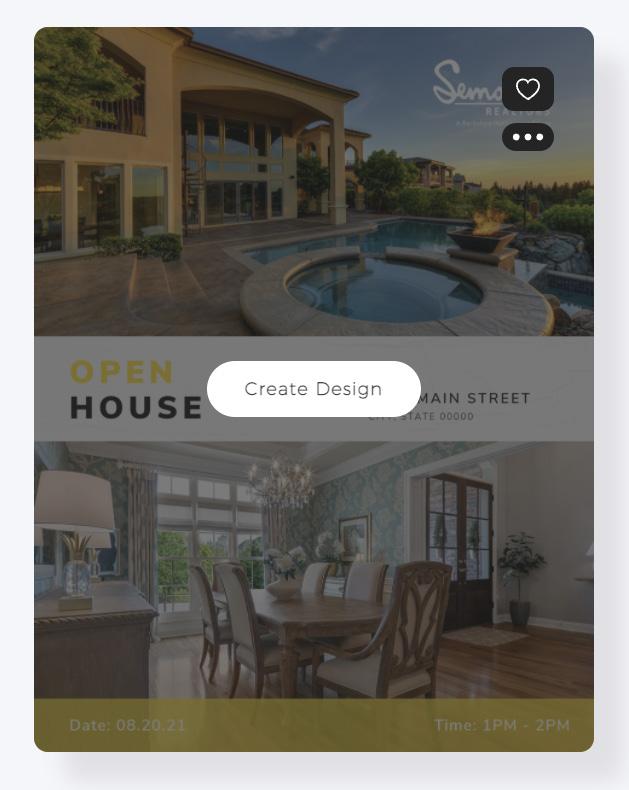
The Semonin Marketing Studio’s design editor is strategically built for usability, ease, and quickness. Most design templates are ready to go in a few quick clicks, while others offer the opportunity to customize with more time and effort.
Business Cards, Email Signatures, KIT Cards, and Marketing Slicks are great templates to exemplify how quickly and easily a design can be completed.
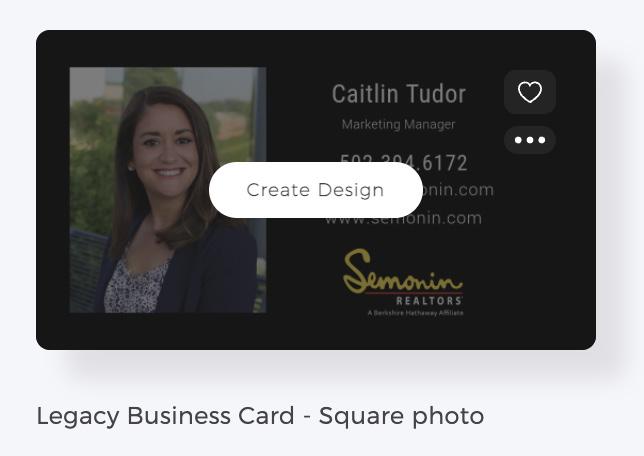
1. Hover over the design you want and click Create Design
2. Click Create Design to advance to the Design Editor
3. All fields should auto-populate from your Profile (photo, name, title, contact information & office address). You can edit any of these text fields if you need to.
If all information is accurate and formatted correctly, your design is complete and ready to be exported or ordered for print (see Exporting options on page XX)!
(ex: Flyers, Postcards, Brochures)
The Semonin Marketing Studio includes MLS Integration which conveniently pulls in property information for all ACTIVE and PENDING Semonin listings from GLAR, HKAR, and SIRA MLSs.
1. Hover over the design you want and click Create Design. If it is a property promotion template, you will first be taken to a property search page before you can enter the Design Editor.

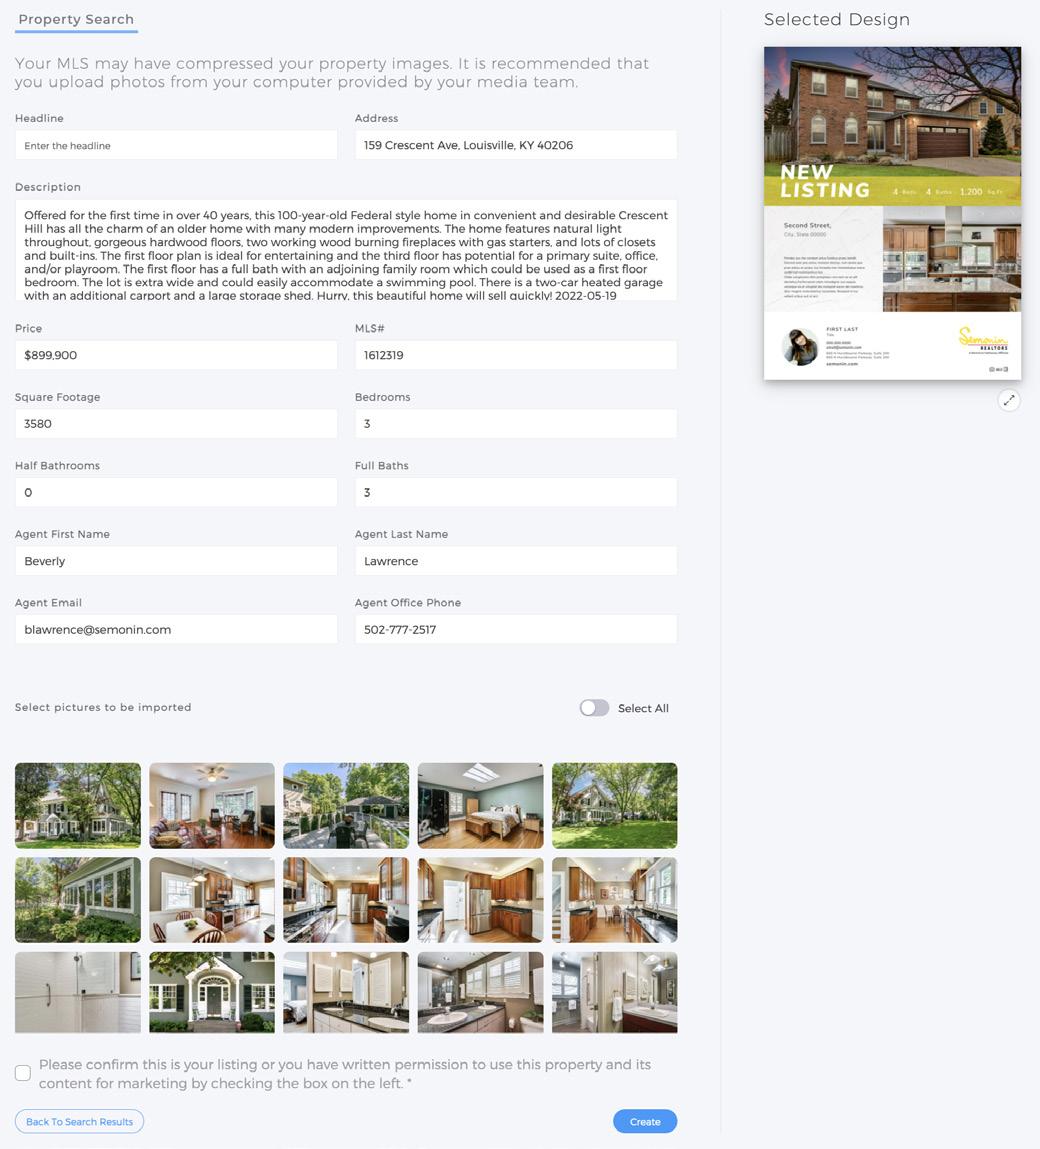
2. Type in the property address in the search bar and click it from the dropdown below. If it does not appear in the dropdown, the address was either typed incorrectly, is not an active or pending Semonin listing, or has not synced with the system yet (check back in the next hour).
3. Once you click the address from the dropdown, MLS information will automatically pull in. You can change any remarks you want on this page, or proceed as is. Select the photos you would like to use on the template and click
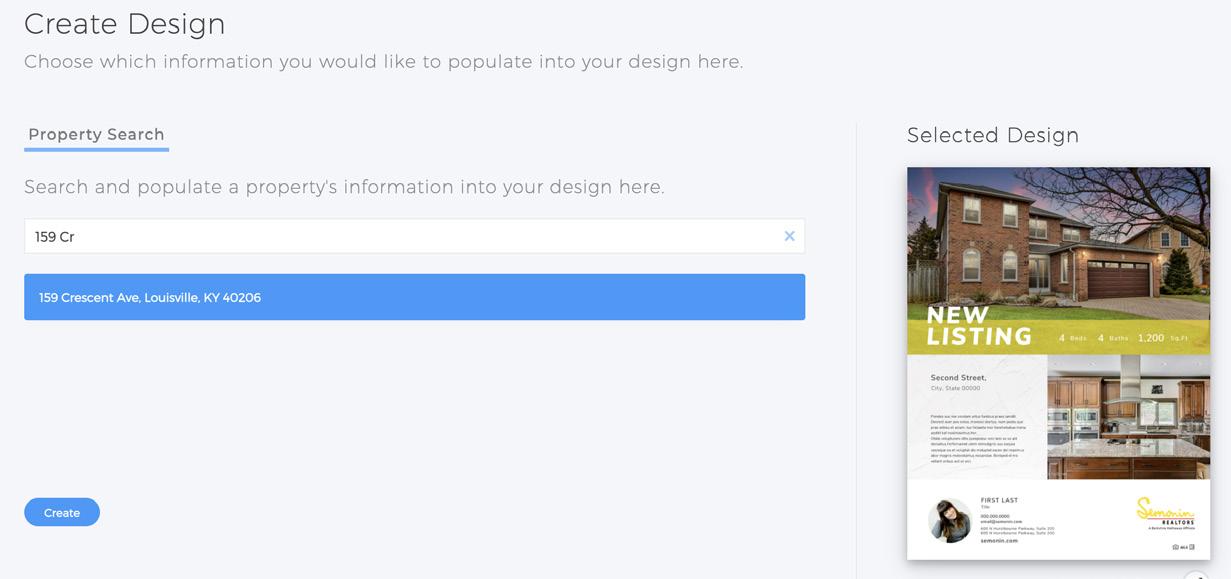
The Semonin Marketing Studio includes Testimonial Tree Integration which conveniently pulls in your returned testimonials from past closings to utilize on marketing pieces like bio pages, resumes, and social media posts.
1. Navigate to the Social Media category and click on the Testimonials subcategory. These templates are designed specifically to work with the Testimonial Tree integration. Choose the template you like and click Create Design.
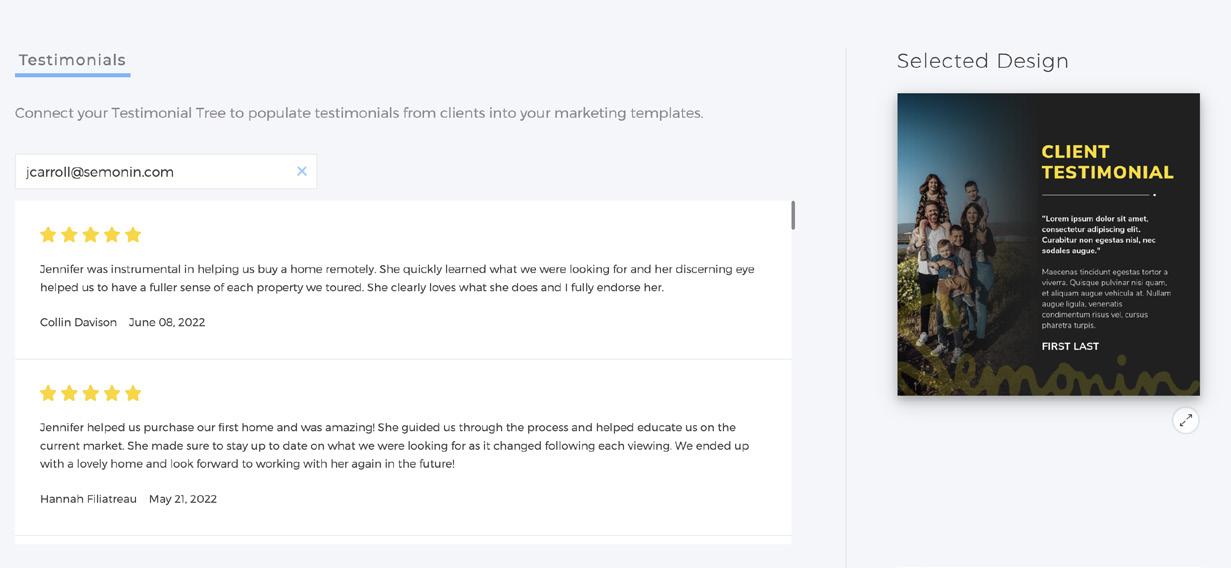
2. Your testimonials should automatically load in the feed. Scroll through and click on the one you want to use and click
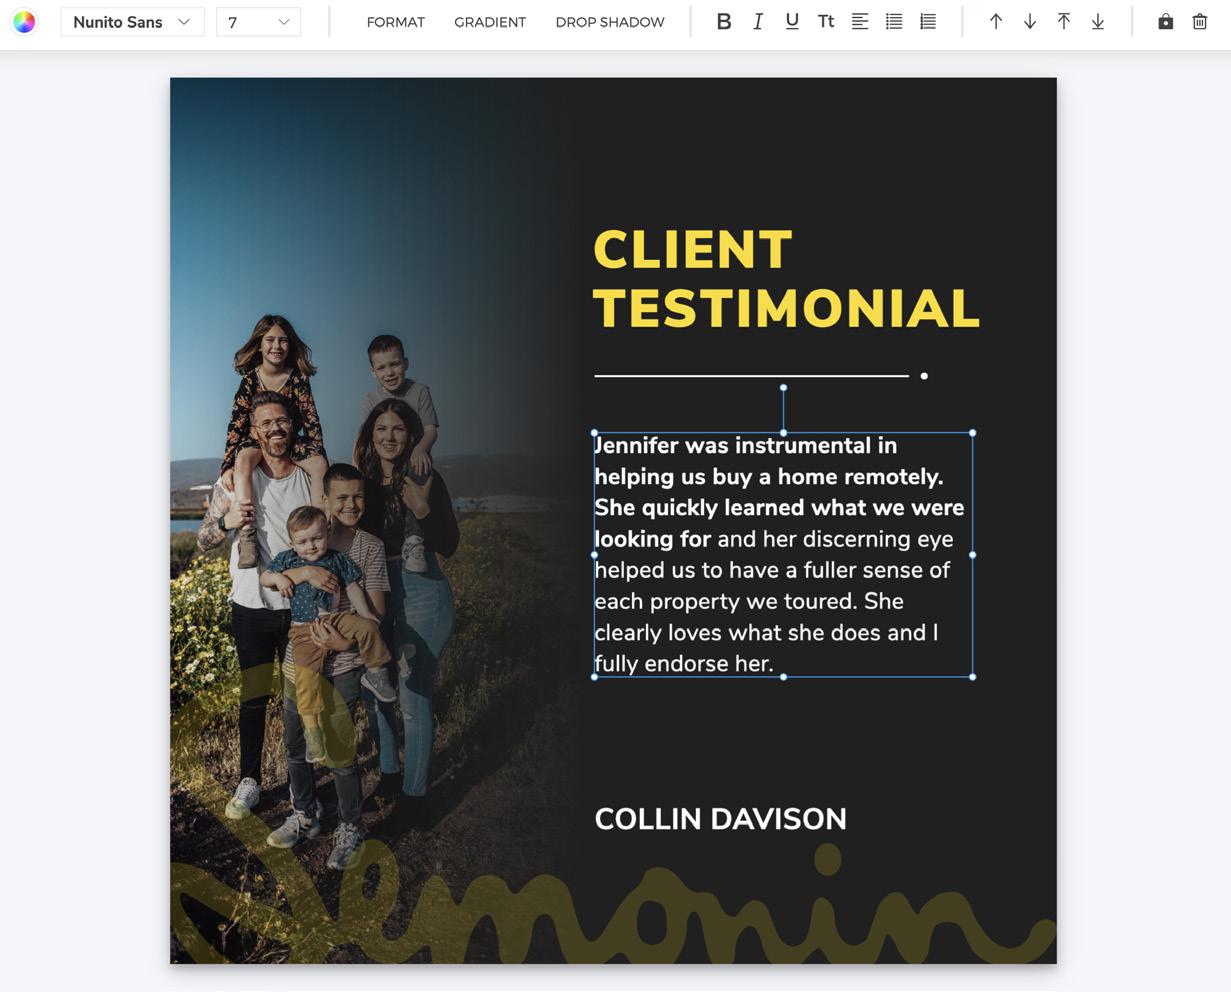
3. Once the design editor opens you’ll see your chosen testimonial has populated in the main text box. You have the ability to the edit any text and font size so that it all fits within the template by clicking on the text box and using the toolbar above. Some templates will also allow you to replace the image that shows by clicking on the “Images” tab in the left-hand menu.
Use this toolbar to edit any text seen on the template.
1. Within the Design Editor, you’ll use the left-hand vertical toolbox to replace and add elements to your design (images/text/shapes).
2. When adding an image you have three options:
1. Upload your own images saved on your computer.
2. Search for images in this copyright free library by typing in key words to describe what you are looking for.
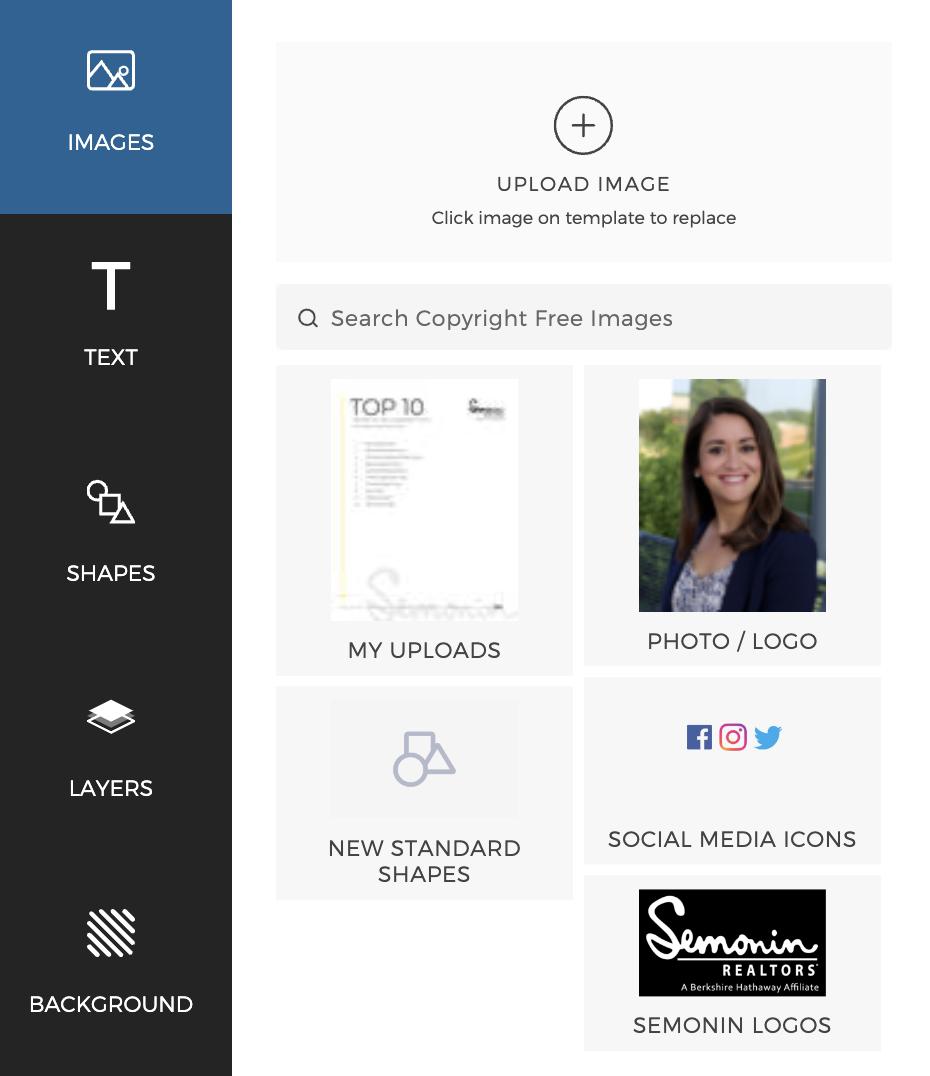
3. Choose from previously added images.
3. Drag and drag your image onto the image within the template. This should replace it.
4. If you are wanting to add a new image field, simply click on the image you want and it will add a new layer to your design which you can then move around and resize as desired.

Once you are finished with a design, you have three options that can be found in the top navigation bar: Print, Download, & Share.
The Print option will walk you through an online checkout that is integrated with Semonin’s in-house print shop. Simply choose your office location, paper stock, and quanity and checkout! All charges will be applied to your monthly agent statement.
*NOTE: If you want a different quanity that what is shown on the Online Checkout, please use the Download or Share option to send to printshop@semonin.com and order a custom quantity.
The Download option can be used to download a certain file format.
Print pieces: Choose the PDF Print file format
Digital pieces (email signatures, social media posts, etc.): Choose the PNG or JPG file format
The Share option is convenient when you want to send the design via e-mail, with a client or another user of the Semonin Marketing Studio (your admin or the print shop, for example).
The Semonin Marketing Studio is conveniently built with support and resources when you need to troubleshoot or learn more.
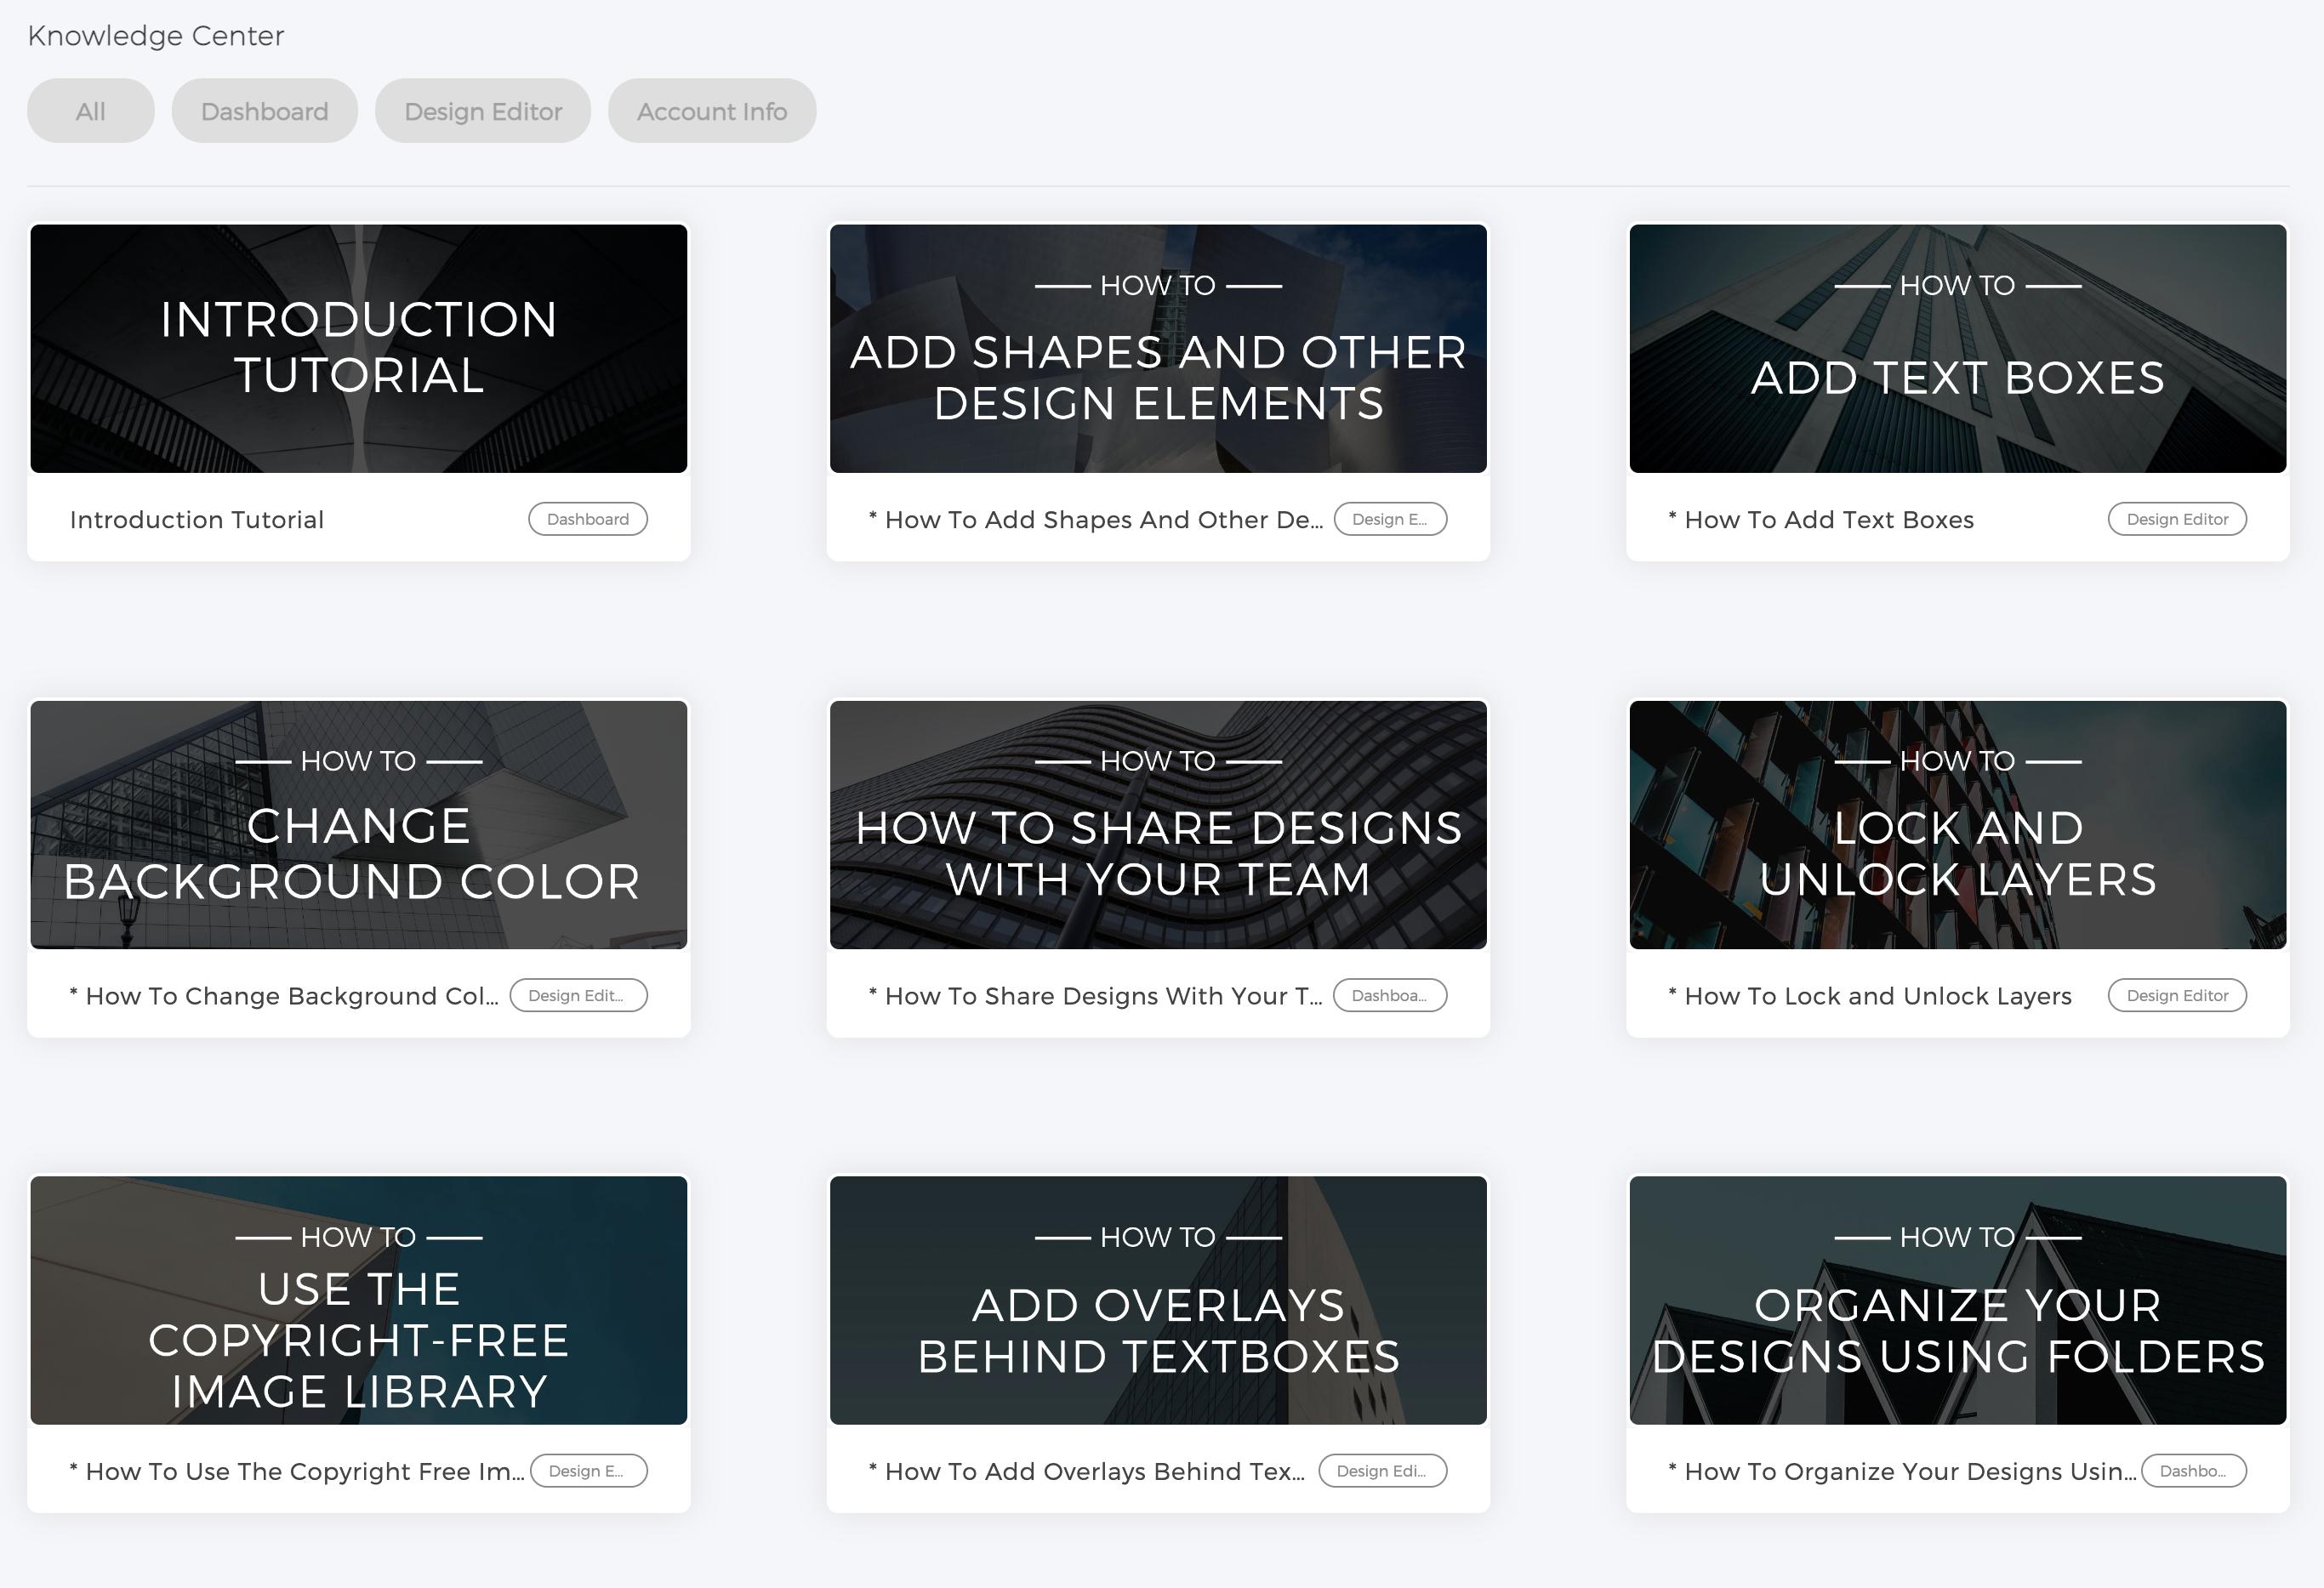
The KNOWLEDGE CENTER is a library of quick how-to videos to answer any question you might have when it comes to how to do something in the Marketing Studio. This should be your first go-to when looking to learn more.
More SUPPORT You’ll also notice the Support button in the top navigation menu. Here you will find links to e-mail the Print Shop for printing questions/issues, or general support for design help or troubleshooting.
