7 minute read
Project News


Last month Gary Addison kindly provided an overview of his Zenair 601 HDS project, and it was striking just how basic the level of prefabrication existed in what was essentially a 1980s kit, self-made ribs, hand drawn plans and so on. By contrast, this month Mike Shewan shares his experience of the Zenair CH 650B. From his description, this kit is a step change in the level of prefabrication. Everything pre-formed, no hand cutting of components from raw sheet, and parts pre-drilled. Also, with nothing to fly while his 650 was under construction, Mike outlines how his flying group purchased a used CH 601 HD to keep them in the air.
Now, it may be me, but I’m sure I’ve had the conversation many times with other builders: “…if I built one again I’d do ‘so and so’ differently”. Mike and his father must have been in the enviable position of all that accumulated knowledge of what they’d do differently to their 601 so that they’d get the 650 ‘just right’ first time!
There are plenty of 601s in the UK and they are excellent aircraft with a fantastic panoramic view, and the type has progressed through a number of variations culminating in the XL. Incidentally, the Sportcruiser shares a large degree of commonality with the XL as well. The 650 is the next logical iteration from the XL. I note from the official Zenair website a claim that the cockpit of the 650 is bigger and has more headroom than its predecessors – and looking at a couple of videos, there certainly is a good gap between the pilots head and the top of the canopy.
I recall flying in a few early 601s and my headset occasionally tapping on the canopy, so I’m sure that the extra height and width is a welcome improvement to type. A quick check on G-INFO suggests just three 650s on the register. Mike informed me that his Mike Sierra (nice) is the first of the UK type to fly. I’m sure we’ll see a steady number of 650s being built, please do take a look at his project update below.
To get in touch with Project News, and tell your story, report a milestone or just to send a picture, email: projectnews@laa.uk.com Please share your story!
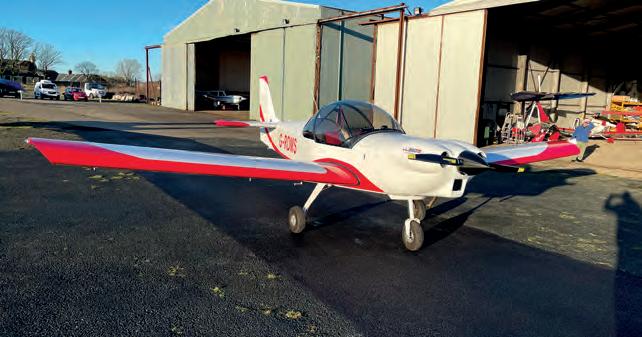
G-RDMS (LAA 375-15262) Zenair CH 650B
By Mike Shewan
It started back in 2016 when my brother, who at the time was in the process of gaining his PPL, purchased the barely started 650 empennage kit. He completed that over a period of about a year, he then purchased the wing kit from the UK Zenair agent Metal Seagulls and made a start to that.
As an 80th birthday surprise the family planned to organise a trip to Oshkosh for my father – my brother and I went with him and, during the trip, we visited many of the kit manufacturers, which really inspired me to build an aeroplane one day.
We knew that the 650 build would take my brother a good while, as he was working a rotation in the North Sea at the time, so we decided to buy an aircraft between the three of us until the 650 was completed. We ended up purchasing a 601 HD. By that time my brother had already gained his PPL and my father, also a long-time microlight pilot, was always a keen co-pilot.
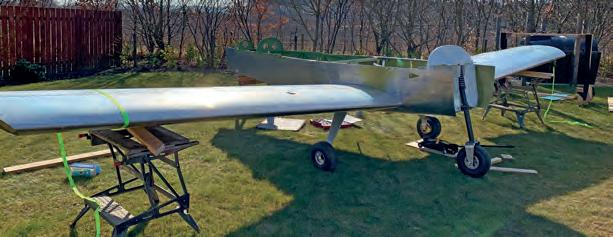
Unfortunately, in March of 2020 tragedy struck the family. My brother passed away very suddenly, which was right at the start of the pandemic, so everything stopped at enjoying some winter sunshine. the project as a memorial to my brother, and in July of 2020 we moved the part-completed wing to my premises, which has a large double garage.
When we first looked at the plans and all the parts in the box it was daunting to say the least. My father had been helping my brother with the build and we both had experience of building Radio controlled aircraft in the past, so we had a general idea of ‘what goes where’. Apart from that, I had no prior experience of building aircraft.
We spent many hours just looking at the plans and the build manual before we even lifted a drill! I also joined the Zenair ‘builders’ page, which has loads of good information. There is no shortage of opinions, as in most forums, but you can certainly avoid ‘issues’ before they develop just by reading other builders’ experiences. I purchased the video build manual from HomebuiltHELP, an American company that basically videos the build of a specific type and provides a running commentary. This proved invaluable, explaining processes in the build manual that are sometimes not so clear to novice builders.
Just like building a house, the foundation is the most important part, if that is wrong then the whole thing will be wrong. Building a flat, level and sturdy workbench is an absolute must… then the fun begins!
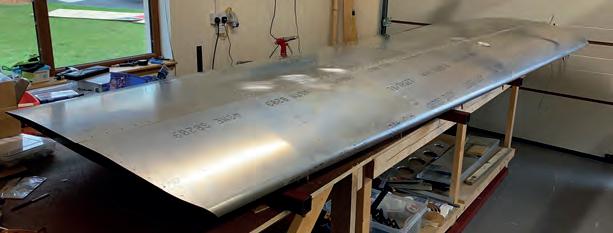
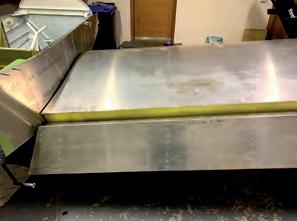
The Zenair kit is generally pretty good, there are many preformed parts, wing spars, wing ribs, pre-bent and shaped parts and pre-drilled skins, which are a godsend.
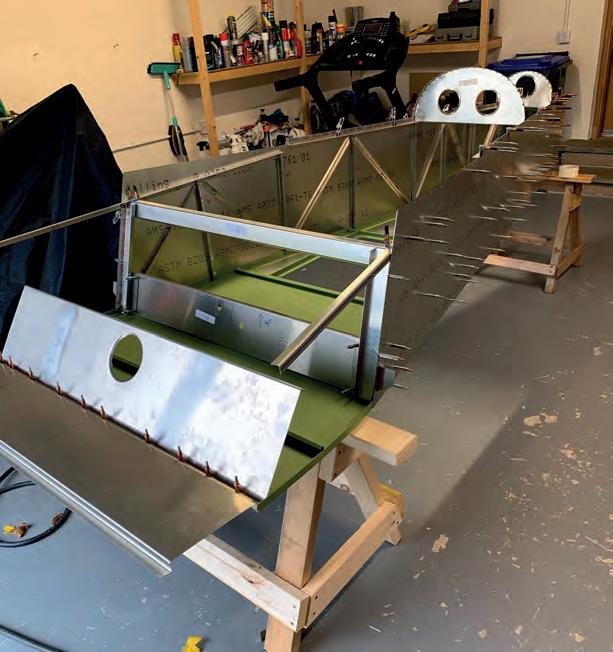
However, pretty much everything else is either angled aluminium or flat sheet. When you build an aluminium aircraft you almost have to ‘build it twice’. Everything is pre-punched and is assembled with clecos, first in a dry run to confirm alignment, then once you’re confident everything is just so, the holes are drilled out to final size. You then dismantle the whole structure and deburr all the holes. At this stage you need to think about corrosion proofing before you put it all back together for the final time and rivet. This is where a lot of time is spent, cleaning, degreasing and then corrosion proofing, which is worth it, especially as our airfield is only a few miles from the coast.
Once the wings were completed that gave us some confidence, so the fuselage kit was next.
This had been ordered a while back from Metal Seagulls. Jonathan and Patricia Porter who run the business, based in Haverfordwest, have been brilliant all through the build. Not only did they supply the kit and engine, but the technical support has been first class. Anytime of the day or weekends, holidays etc, they are generally available, so a big thanks to them!
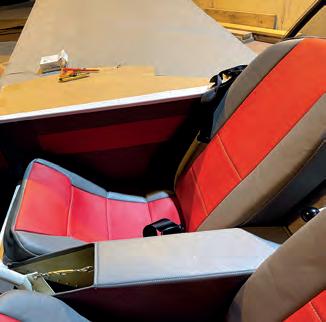
Another big box contained the fuselage and finishing kits, similar to the wings with a lot of preformed parts and pre-drilled skins etc. With our newly gained skills, it seemed to be a little easier this time. However, a lot of thought goes into what power plant, avionics and fuel system you are going to install before starting to cut and drill holes. Keeping everything straight and plumb is also challenging, so measure three times and cut / drill once! If you can do that then things generally fit together pretty well without too much fettling.

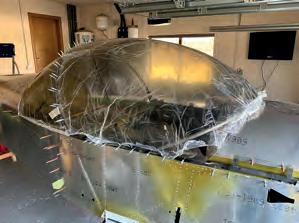
The bubble canopy is a great feature on the Zenair 600 series, however, it comes from the factory in one big piece, and on the 650 there are rear and forward sections, so cutting the expensive canopy is a delicate operation, measure five times, cut once! Make sure you do it on a warm day and use Plexiglass specific bits to drill out the attachment holes.
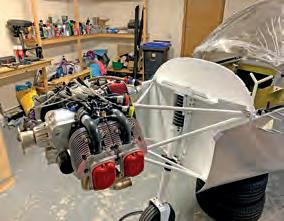
We ended up choosing the UL Power 350i engine to power the project, this is a fuel-injected full FADEC unit, no carb heat, no mixture control, just push to go and pull to stop! The installed weight is probably around the same as a Rotax 912 100hp unit, however the 350i has an additional 18hp on top, no gearbox and no water cooling piping or radiators, and the UL Power engine is a wet sump, so no additional oil lines to worry about.
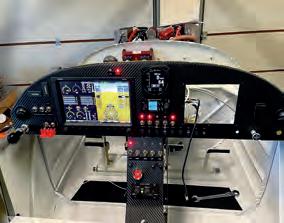
Dynon Skyview was the EFIS of choice, with an MGL backup ASI and ALT. As with many other parts of the build, a detailed plan of what you want is a must before you start, then you need to figure out how to connect it all together with appropriate safety factors built into the system, circuit breaker rating, wire sizing were things I had to learn – but there is plenty of documentation out there to explain that. I spent many hours going through the UL Power and Dynon installation manuals, which I are excellent, but I do have an electrical background which might have made that a little easier.
Fresh from the paint shop and to the airfield hangar for final assembly, and we were on the home straight! I am lucky to live only five miles from the airfield, but even that short distance makes progress slower without the ability to ‘nip out’ to the garage and knock off a few tasks all adding time to a build. But we were ‘90% complete and so just 90% still to go’, as they say, but a good feeling all the same.
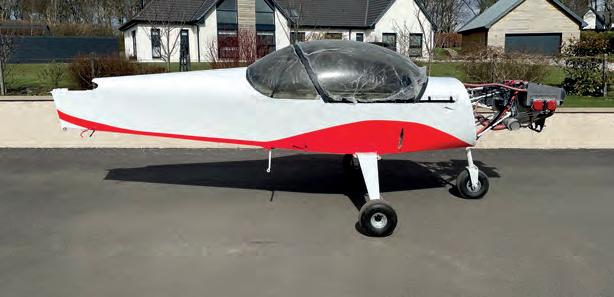
With the finish line in sight, we spent most evenings in the summer getting everything rigged, engine run, calibrations and adjustments. We eventually got there and with the final weighing and inspection completed, we received the Certificate of Clearance.
We did quite a few fast taxi runs, just making sure everything was tracking as it should and that the engine was performing as expected – and nothing fell off!

Finally, test flight day arrived, a couple of fast taxis, then go for it! Mike Sierra flew beautifully right off the bat, a small amount of up trim in the straight and level condition and it was hands off flying almost immediately. Number one cylinder ran a little cooler than the rest (to be expected), but a little aluminium tape baffle on the cooling fins fixed that. Now to get the five hours flight testing done, I am looking forward to that and being able to get back in the air.
Overall this has been a most satisfying experience for us, sometimes in the mid-winter in a cold garage you think ‘…this will never be finished’, but take a few days off then come back to it and all of a sudden you have an aircraft in front of you. Then all that head scratching and self-doubt fades into distant memory.
We dedicate this build to my brother Derek, where it all started. I know he would be proud of how it has turned out… blue skies brother!


