
17 minute read
PROJECT NEWS


Projects which inspire others to build their own aircraft Compiled by Mike Slaughter
Project News
Abig thank you to all those who have contributed to Project News and made it so very varied and this month with some super projects. Whether your creation has flown, or is just part way through, please do share your experience with your fellow members. Every build is different when it comes to skills, experience, opportunities and courage, so don’t imagine that nobody wants to see your finished or part-completed project, get in touch and share!
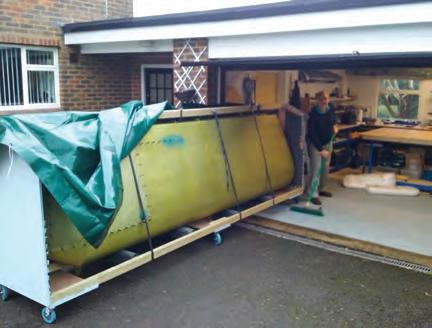
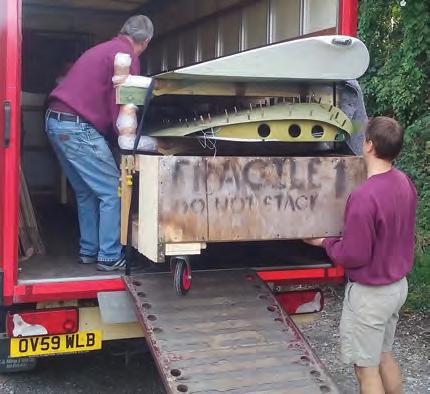
We have another instalment from Andy Best this month regarding his one-off own design project, Blue Two. For those not familiar with the project, over the last few years, Andy has provided updates as he reaches milestones during the design and build of his composite microlight design. Here he reports how the forming of a bubble canopy has been particularly taxing. Nigel Smith details the second ‘completion’ of his Murphy Elite. Initially finished and test flown some nine years ago as a taildragger, it has now been mated to the floats it was always intended to have. The Elite is an enhancement of what was probably Darryl Murphy’s most successful design, the Rebel. I have no recollection of a floatplane appearing in Project News , ever! I am sure there has been, but before my time. If you’re lucky enough to live in or near Scotland’s natural wild beauty, I can’t imagine anything better than being able to explore it in your own floatplane. Nigel has kindly given us a little peep into where amateur aircraft construction meets boat building. Tony Roddam’s Zenith CH-750 is an attractive part-built project, in real terms he still has a way to go, but to the neighbours’ eyes it will be an aeroplane that occupies his garage. As he has had to move and store the project, he has come up with a fantastic idea! Most kits come in a large crate, so he has used this to create a building platform, not unique, but large trolley wheels allow the construction platform to be moved outdoors on a nice day, which is very useful. The final bit of genius is that the crate can still largely be used as a crate; he can turn it into a ‘cowboy waggon’ for outdoor storage, with a large tarpaulin and water pipe hoops, adored by allotment holders for creating growing tunnels. An excellent idea for building and storing in confined spaces, worth emulating, I think! To get in touch with Project News, and tell your story, report a milestone or just to send a picture, email: projectnews@laaarchive.org.uk. Please share your story!
Blue Two (LAA 388-15251) A carbon composite two-seat original design By Andy Best
Iknow that fortunately, most of the Project News stories are of success and of great works done, but it may be of interest to some readers, of my failure to mould a Perspex canopy for Blue Two.
A good friend of mine found a local business specialising in powder coating, and they have a large oven which is capable of reaching 200°C. Great stuff, all I need to do is heat the polyacrylic sheet (Perspex) until it is soft and pliable, bring it out of the oven and drape it over my canopy mould. Using a 2mm thick sheet we brought it hot from the oven, in a really floppy state, and draped it over the mould. The centre section formed alright but before we could sort out the waves at either end, the sheet started to harden, and that was that. In a slightly desperate state of mind, it was decided that if we loaded both the mould and the sheet into the oven at the same time, then the ends might form by themselves, under gravity. Looking back, this was rather a naive approach, as two things happened. One was that the sheet did not form itself to the shape of the mould but remained resolutely wavy, and two was that the mould, made from foam, glass fibre and epoxy resin, just started to melt – unsurprising when you think about it. So, I retreated, and after much labour, cutting, sanding, filling and more sanding, managed to produce another mould but this time in MDF which I hoped would withstand the 170°C required to soften the polyacrylic sheet. This time the sheet was laid over
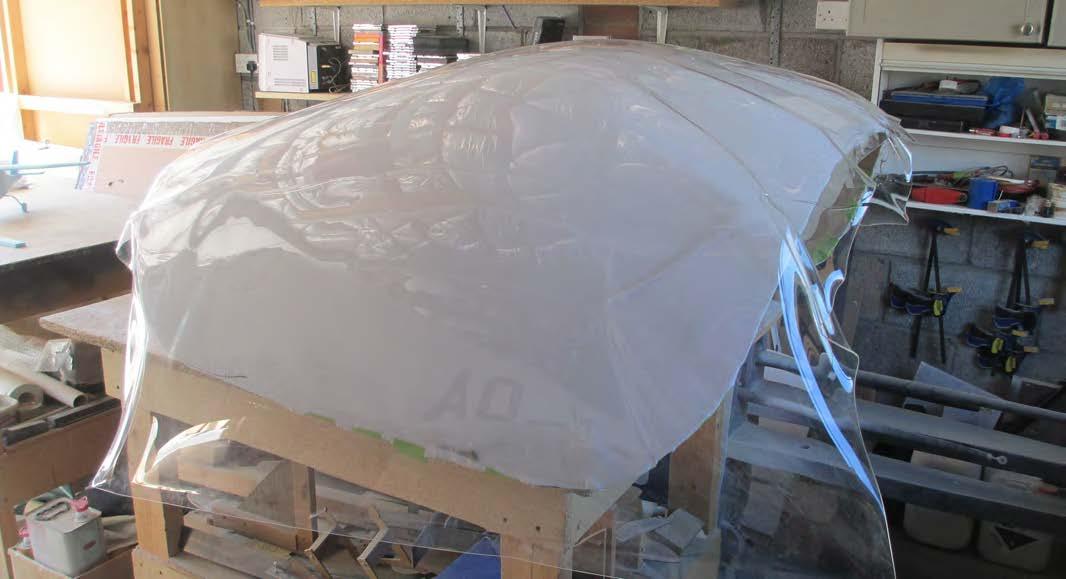
the new mould and weighted down with some 100 x 80 timber clamped on each side of the sheet. This assembly was pushed into the oven on a metal framed trolley. Great so far, let’s see what happens. Well, what happened was pretty much the same as had happened before, the sheet formed around the centre section of the mould OK, but at the ends, where the double curvature was, I was left with folds of excess material. Using a gloved hand to try and Above This is the second attempt at forming the canopy, better… but not really a success. Photo: Andy Best. stretch the sheet to remove the folds started to improve things but it proved impossible to get rid of the folds. It seemed like a massive force would be required to do this. The result is as you can see in the photograph – not great. Ah well, as they say, you can’t win them all but I’m sure someone must know how all this is done, if only I could find them. Any help, contacts or opinions from the membership would be most welcome.
G-ONIG (PFA 232-14042) Murphy Elite
By Nigel Smith
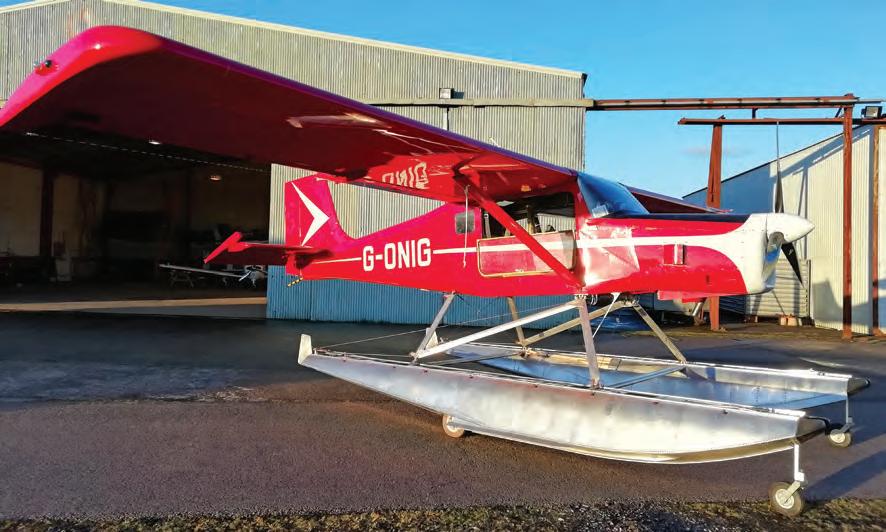
Meet G-ONIG, my Murphy Elite, which started life as a kit project in 2003 and, with the help of my son and engineering friends at work, I now consider complete, with the installation of the
Murphy 1800 amphibious floats that were planned from the start. The build began in a shed behind our house, and as each part outgrew the workbench it was hung on the wall awaiting the next stage. As I knew G-ONIG would spend much of its time on or around water, all parts were sprayed with Metaflex and all rivets dipped before being pulled. JC5 was used on all surface joints. The Elite is assembled with Avex pop rivets and can be built on a simple flat bench, without the need for jigs to be assembled beforehand. When the fuselage was ready to leave the workshop, we removed the end of the shed and rolled it out under a tent we’d built to keep it dry. As soon as the wings were finished it outgrew the garden, so we moved to the local airport for final assembly, and flight testing as a taildragger started in 2012. Since then, it’s flown around 250 hours, and during that time the floats were being assembled in the shed and were finally ready to fit to the aeroplane in August last year. G-ONIG is powered by a Wilksch WAM120 turbo and supercharged two-stroke diesel engine burning around 16 litres per hour of Jet A-1. An MTV6 seaplane prop gives a really smooth-running engine and it happily purrs along at around 83kt as a taildragger, and while that is not particularly fast, the scenery in Scotland is far too beautiful to rush. It finally rolled out again, ready to splash in, in November last year and I’m now awaiting the paperwork to allow G-ONIG back in the air to commence flight and water handling tests. The floats are all aluminium (6061-T6 like the airframe) and were available from Murphy in Vancouver as either straight (no wheels) or amphibious, and as a kit, partial or fully assembled. As my previous efforts with a shrinker/stretcher had left something to be desired, I chose the partial option, as forming the lower skins is quite a skill. There are eight watertight compartments in each float, giving a displacement of 1,800lb per side. Each compartment has an access hatch and a bilge pump-out point to remove any water prior to flight. The hull is sealed during assembly with Proseal, Sikaflex or PRC, as available. Gear retraction and extension is achieved by a hydraulic hand pump in the cabin, the
nosewheels are fully castering, so land steering is by differential braking and suspension in the main gear is through a sandwich of rubber doughnuts on each leg. Cables link the air rudder to the two water rudders, one on each float, they are each fitted with a sacrificial zinc anode to reduce float corrosion. Another cable to the cabin raises them when not needed. There’s a paddle fastened to the left float in case you find yourself ‘up the Swanny’. The floats are rigged to the aircraft to give between 3-3.5° between float decks and chord line. Operation on salt water brings extra corrosion risks to floats and airframe so a good wash down with fresh water after each sea trip is highly recommended. In Scotland at the moment, there are several Cessnas operating on floats, including a 172 offering seaplane training. There’s also a couple of places elsewhere in the UK offering a chance to splash around in an aeroplane so do get in touch with your local school if you fancy a go yourself – it’s addictive. You’ll need to sit a CAA Seamanship exam within a year of doing your training. I used to work in Labrador with a Turbo Beaver and since then I’ve dreamed of owning my own floatplane. Building G-ONIG has been a real adventure, and the colour scheme is a copy of the Beavers and Otters from that time. Planning and thinking time during the build meant it took somewhat longer than anticipated, but it has ended up just the way I wanted it so I’m glad it wasn’t rushed. I’d like to thank everyone who’s helped me along the way, but mainly my wife and son ‘Barney’, and colleagues from bmi engineering who taught me how to do it ‘right’ when I started the project. Plus, the staff at Derby Airfield and Paul Jones who did the initial test flying, Wayne O’Shea in Ontario for everything Murphy, and everyone at Peterhead Longside where it now lives waiting to explore the Highlands of Scotland.
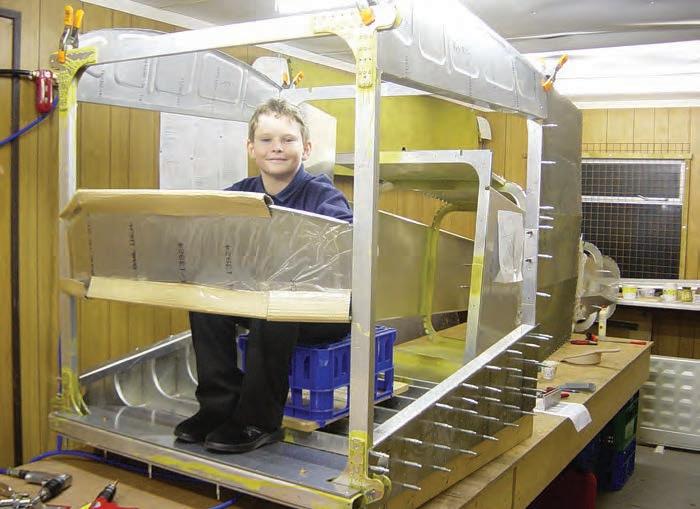
Right Nigel’s son Aaron aged 11, helping out right at the start of the project. A ‘big boy’ now, Aaron flies a B737. Nigel Smith
Below March 2011 and this project really is outgrowing all of the available space – time for a move.
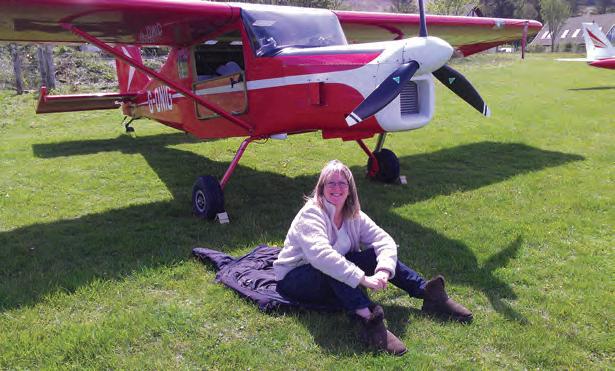

Above left Wife Jacquie enjoying the sun on an early trip to Glenforsa.
Above Early constructional shot of a float and a serious investment in Clecos.
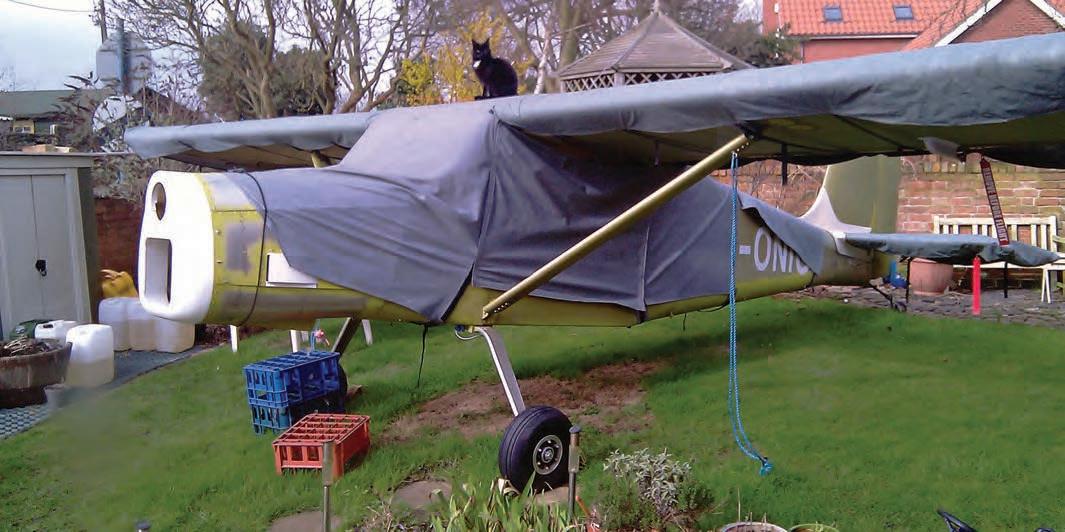
Left Transformed, the taildragger becomes a floatplane.
Zenith CH-750 (LAA 381-15297)
By Tony Roddam
Project Wing and a Prayer kicked off in late 2014, with the order of the wings, tailfeathers and slats of a Zenith CH750 STOL – I had big dreams but a small bank account, so have had to order and build the US kit in instalments over the years, which has not between without its challenges in a post-Brexit world. A mere six years later I’m definitely turning final, or at least on the downwind leg, with the fuselage ready for final assembly, some parts actually finished in proper paint, and most of the components needed for completion in various boxes in the workshop. Except for the engine and instruments that is, but you can’t have everything… and if you anticipated every issue and planned for every contingency, you definitely wouldn’t build a kit aeroplane. Sometimes you just have to step off that ledge and hope it works out – so that’s what I did. In fact, a lot happened in those six years I hadn’t foreseen – for instance, marriage was an unexpected delight, but I could have done without acrimonious redundancy, two business failures, and illness – all of which got in the way of real life, aka building an aeroplane. I’m sure most builders have similar stories and I suspect, like me, their aeroplane builds have kept them sane and motivated. I love building the Zenith – the kit has proven straightforward to assemble, even if the learning curve has been near vertical for this PR manager. I am no media luvvie though – I can build an IKEA wardrobe, which must qualify me for Mensa. I am reasonably practical, enjoy learning new skills and like puzzling out the various bits of the build. Handy, as a house move and getting married meant I’ve had to build two workshops, and I still can’t believe how much woodwork is involved in building an all-metal aeroplane. Progress has been steady, fun and without drama. Wings, slats and tailfeathers are all complete and went together well, with a bit of forward thinking, some cunning jigs, and patience. Fuselage front and rear
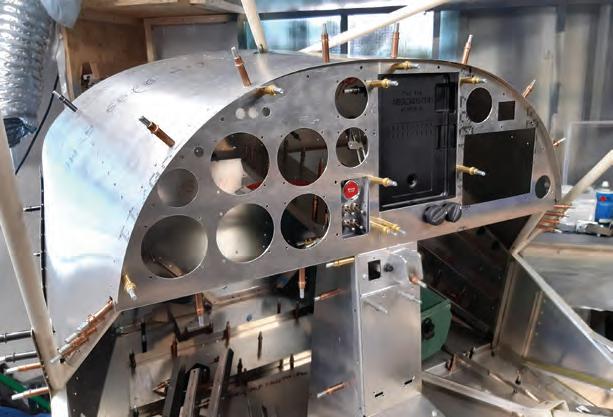
are now fixed together – which went surprisingly well – all the right holes lined up nicely, and the whole thing fitted easily to the Tonka Toy maingear. This beast is very robust. The Zenith airframe is a straightforward build and the instructions are decent, but you are left well alone when it comes to the systems, as much depends on your engine choice. I’ve spent the last few weeks puzzling out the fuselage electrics, wiring, and brake and fuel lines. In the end I used conduit and ran shielded multi-core Tefzel wire pretty much everywhere, with Molex connectors on anything I think might need replacing at some point. I was surprised how much wiring I needed. I’ve opted for a marinestandard blade fuse system rather than circuit breakers and fitted as many lights and beacons as possible – I have a healthy regard for conspicuity. It took some doing, but I managed to keep fuel and electrics as separate as possible – electrics down the Below Instrument panel with iPad mount and recessed engine control switches, and centre console, which houses the blade fuses under a hinged panel. Photo: Tony Roddam passenger side, fuel and brake lines down the centre, pitot lines and aerial on the pilot side. The Andair fuel pump, gascolator and return line are all accessible through a hatch, and one of my build rules has been to make everything simple-ish to replace if (when?) it goes wrong.
One thing I found very helpful was creating electric systems and fuel ‘manuals’ in Powerpoint. These really helped me get my head around electrical systems in particular – that aspect had seemed a bit overwhelming at first. In fact, overcoming trepidation is a big part of aeroplane building. Things in the instructions that once scared me witless (tap a hole, bend a fuel pipe, do something twiddly with wire?) I now take them mostly in my stride. I’ve even started to enjoy spray painting, encouraged by my Inspector Simon Goozee to give it a go. He said, “It’s your aeroplane, you should try to do everything on it.” He’s right – it’s very rewarding, even
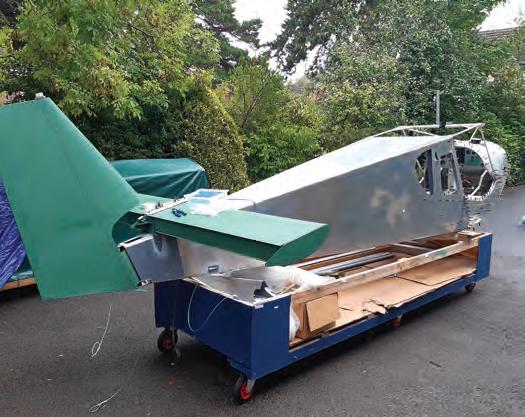
Above Fuselage on trolley for fitting stabiliser and rudder, with a vertical sighting bar on the cockpit crossmember. All square! Photo: Tony Roddam
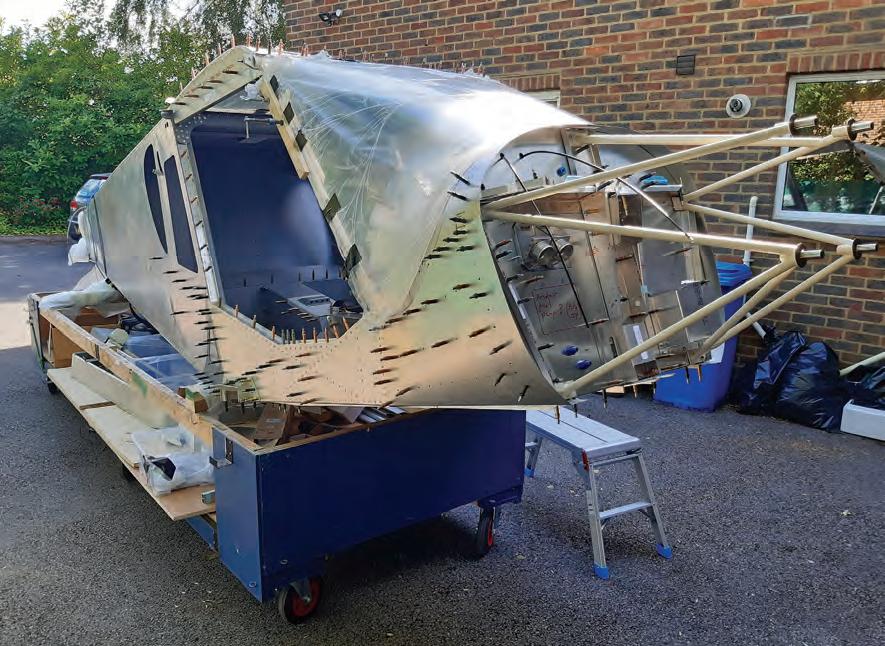
Left View of cleco-ed fuselage and engine mount on wheeled crate for fitting of windscreen – the only poor-quality part in an otherwise excellent kit. It took a lot of nervy fettling with a heat gun, softwood pieces and oscillating saw on three days of hot weather to get a reasonable fit. Photo: Tony Roddam
if the results are a bit erratic. I’ve used a fair bit of paint stripper… Why the CH750 STOL? Even its most ardent devotees would admit it has a face only a mother could love, but I like the idea of driving a ‘Land Rover of the Skies’ and love the thought of strip flying. It also means every ding or ‘good enough’ bit that would utterly destroy a sleek Van’s RV-7’s credibility at the LAA Rally, will merely add to its agricultural off-road charm. That’s my excuse and I’m sticking to it. The CH750 ticks a lot of boxes – I’m a big chap, and it has a very roomy and airy cabin. It’s all metal, built like a brick doodah, and can carry two propersized people with full fuel and a spare pair of pants. I like its quirkiness. It has mad slats, the tailplane is mounted upside down, and much of its design seems to have been nicked from the Fieseler Storch, one of my favourite aircraft. Crucially, Zenith has a very good social media/ forum network from which I’ve learnt a lot and even proudly contributed some technical tips. I got brave and submitted three Mods to LAA Engineering to improve the fuel sender position, add wing access hatches, and fit better sliding seat mechanisms. I’ve enjoyed designing and redesigning the cockpit layout – the panel is on its fourth incarnation, I think. A mix of steam and digital gauges – I like round things with needles on them – and an iPad with SkyDemon to help find the way. Support from Jonathan Porter at Metal Seagulls is excellent, and entertaining. He and his wife Patricia have made several useful innovations for the aeroplane, the biggest of which being the header tank for the injected FADEC ULPower engine that will eventually haul project Wing and a Prayer (I married a vicar) into the skies. “When will that be?” people always ask, after “Have you lost your mind?”, of course. When it’s ready and I run out of bits to fix to it. Until that moment I will continue to plod along and appreciate each little step forwards. Right My father sweeping the workshop after we wheeled out the purpose-built wing support trolley. Storage space is a permanent challenge. Photo: Tony Roddam
Middle right Tight squeeze! The assembled fuselage just fits diagonally across the double garage. I created an internal spray room in the garage from wooden battens and heavy polythene, which can be extended into the driveway for a full size spray booth. Really helps keep the place warm in winter too. Photo: Tony Roddam
Bottom right The crate on wheels, great for building on, becomes a cowboy waggon for moving house and storage. Photo: Tony Roddam

New Projects
If your aircraft has been featured in the New Projects list, please let Project News know of your progress at: projectnews@laa-archive.org.uk
n Van’s RV-14 (LAA 393-15765) 28/4/2021 Mr N Shorter, Winser Cottage, Kingsford Street, Mersham, Kent, TN25 6PE
Cleared To Fly
If your aircraft has featured recently in the magazine and has subsequently completed its maiden flight, Project News would like to hear from you at: projectnews@laa-archive.org.uk
n G-CLCL Van's RV-7 (LAA 323-15313) 30/4/2021 Mr Robert Powell, Yearling, Green Lane, Pangbourne, Reading, RG8 7BG n G-DAZW Zenair CH 750 Cruzer (LAA 381A-15597) 13/4/2021 n Europa (LAA 247-15761) 7/4/2021 Capt. D Shipley, Cortijo Roan, Rambla Grande 126, Huercal Overa, AlmerÃa, 04600, Spain n Van’s RV-14 (LAA 393-15764) 16/4/2021 Name & Address held by LAA Engineering n Aeroprakt A32 Vixxen (LAA 411-15762) 15/4/2021 Name & Address held by LAA Engineering n Van’s RV-8 (LAA 303-15763) 15/4/2021 Name & Address held by LAA Engineering n Denney Kitfox MK 7 Supersport (LAA 172D-15760) 6/4/2021 Name & Address held by LAA Engineering
Mr Darren Weston, Springbank, 27 Lakeland Crescent, Leeds, LS17 7PS n G-OGAL Van'’s RV-14 (LAA 393-15492) 19/4/2021 Ms Monica Wyer, 116 Milton Road, London, W7 1LE n G-RVJS Van’s RV-8 (s/n 82237) 15/4/2021 Mr James Stringer, 1 Knoll View, Standon Green End, High Cross, Ware SG11 1BS n G-CLNI DHC-1 Chipmunk 22A (s/n C1/0617) 28/4/2021 Name & Address held by LAA Engineering n G-DGON Taylor JT.2 Titch (PFA 060-3233) 20/4/2021 Name & Address held by LAA Engineering n G-IDID Bulldog Series 120 Model 121 (s/n BH120/348) 29/4/2021 Name & Address held by LAA Engineering n G-MRKM Carbon Cub EX-2 (s/n CCK-18651023) 27/4/2021 Name & Address held by LAA Engineering


