10 minute read
Wise up to woodworking


Dudley Pattison shares the secrets of building with wood, in
My father was a carpenter, as was my elder brother, so it was natural for me to follow in their footsteps, enter the family business and become a carpenter. Like my brother, I was also an aeromodeller and fascinated by aircraft. Put these two things together and it was obvious what I would end up doing.
Unlike other aircraft building materials, wood is a friendly material, and unless you ingest large amounts of sawdust it is unlikely to harm you. It possesses a good strength to weight ratio, and crucially, it is easy to cut and shape. All these things make me a big fan of wood.
Perhaps the only disadvantage is that some say a wooden aeroplane cannot be stored outside. That is true, but then I don’t think any aircraft should be left to fend against the elements!
So, to show you just what I think you’re missing, this is the first part of a series of ‘how-to articles’ about working with wood to build an aeroplane.
Over the following months I will cover adhesives, the wood itself, measuring, cutting, drilling, sanding, clamping, stapling, making a wing rib, fitting gusset blocks, manufacturing laminated components, scarfing, fitting a D box skin and the internal treatment of the airframe.
The very first thing to say is do not build a particular aircraft because you like it, only build it if you want to build it, and I mean really want to. It is a large amount of work which, if you are not fully committed to, will wear you down. Also, do not think that you will be getting a cheap aeroplane. It is quite possible to spend as much building an aeroplane as it costs to purchase a second-hand one, assuming one exists. What I can promise you though, is that you’ll have a brand-new aeroplane where every piece is known to you, as well as a priceless sense of satisfaction.
Next is, where do you build it? I admire builders who toil away in a tin shed, on a windy cold airfield, miles from home. I know I could not do that, and my enthusiasm would very soon take a tumble. I am lucky to have a workshop within my house (the only room with aircon), which on the house plans was described as a playroom.
And indeed it is… I just didn’t say ‘what’ I played at.
As things progress you may need to break the project down into bite-sized pieces.
When I built my Isaacs Fury, which took 16 years to complete as I was working at the time, I got to a stage of brain overload. I would walk into the workshop after having some time away from it, and look around and see all the jobs that needed further work, even after completing the basic airframe parts. The undercarriage needed fairings behind the tubes, the top wing centre section needed the plywood skinning completed, the tailplane needed the strut brackets fitting and so on. On more than one occasion I just walked out and went off to the local pub.
Then I got some good advice, from a magazine article I believe. It said to ‘break the project down into sections and concentrate just on one section’. I think of an aircraft project as an inverted triangle. You start by building something small, like the rudder, and that becomes the bottom point of the triangle. Then you might build the fin and the elevators, they sit on top of the rudder to each side of it. Next, the tailplane and wings make the third line up of the triangle.
By the time the structure is nearing completion with maybe the engine in, and the electrics started, the top row of the triangle could have 30 items across it. I don’t know about you, but my brain struggles with so many tasks on the go…
Back to the Fury, which was at this sort of stage. The next time I walked into the workshop I only looked at anything that was behind the leading edge of the tailplane. By applying myself to this rear area, the rudder and elevators were hinged, the tailplane struts were finished and the tailwheel added. Apart from covering, I could call that section finished. Next area of concentration was the rear fuselage, then the lower wings, followed by the upper wings. The system really did work. The turnover in the local pub dropped significantly… What’s equally important, is that no matter how things are going, you should try to do something towards your build each day. Even if it’s to tidy up, or sort materials for future steps, it keeps your mind ‘tuned in’.
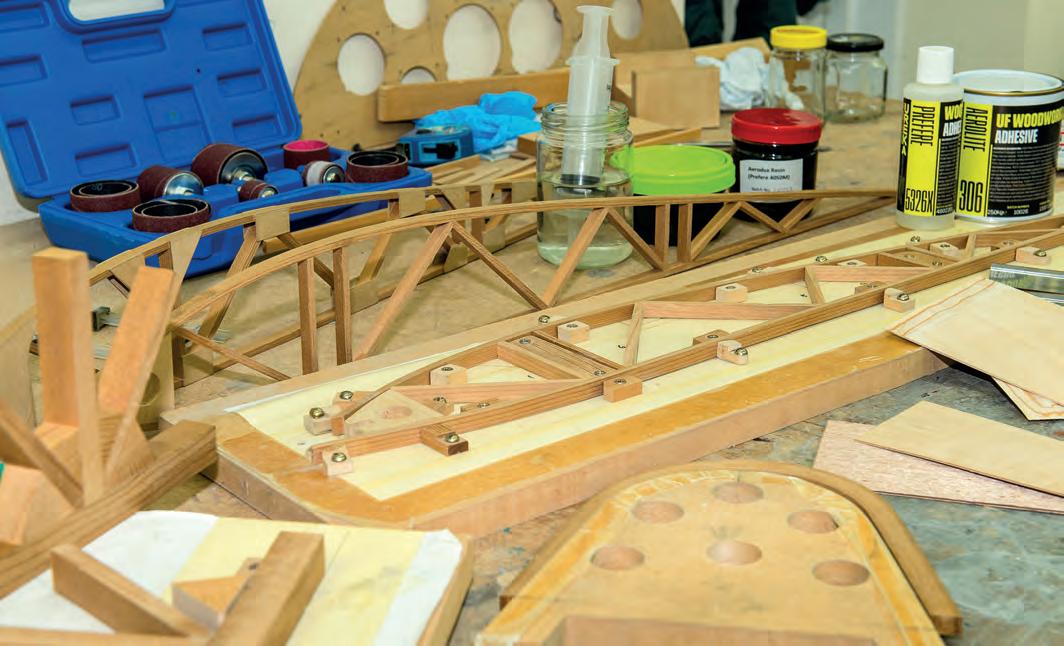
Wood and adhesives
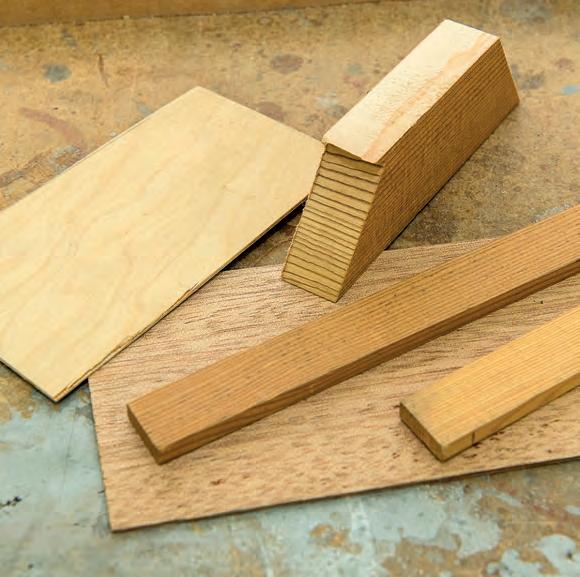
Wood There are two main types of wood used for aircraft construction. Sitka spruce and Douglas fir.
Sitka spruce is lighter than fir but not as strong. If you are building from a plan, or a kit, the decision of what you will use will have been made by the designer. At this point I can do nothing better than point you to LAA Engineering
Technical Leaflet TL 1.14, Aircraft Wood Information. Among other information this leaflet shows that the maximum grain slope is 1:15 for spruce and 1:20 for fir. This means that, assuming the grain is parallel to the edge on one face to the edge on the other face, it is allowed to move toward one edge by a maximum of 1 inch in 15 inches for spruce, and 20 inches for fir. It also gives the minimum annular rings per inch as six for spruce and eight for fir. Annular rings are easily seen on the cut ends of timber lengths. these are maximum permitted grain run-outs and minimum permitted grain count figures, if I were selecting timber for a main spar, or longeron, I would want the timber to be well inside both of those parameters.
Again, two main types of plywood are used. One is Finnish birch, the other is Okoume.
Finnish birch was always called GL1, GL2 and GL3, where GL1 is the best aircraft quality, GL2 contains some defects and GL3 is low quality, and not suitable to be used in aircraft. GL2 can be used where specified on the drawing for less-critical parts, or used in lieu of GL1 if the parts of the sheet containing any defects are cut out – but watch out for defects in the internal plies (typically, voids between adjoining pieces) that may be hard to see. Not many could be bothered with that and there were no price advantages.
When I was running the Swindon Aircraft Timber Company I agreed with LAA Engineering to have Finnish birch plywood tested in this country to move it away from Germanischer Lloyd, which was charging a ridiculous amount for the service. So GL1 and GL2 became SATCo grade A and B.
The plywood is made to a very high standard, with only the smallest of knots allowable in the veneers and certainly no core gaps. It is only supplied in two sheet sizes 48ins (1,220mm) square and 50ins (1,270mm) square. The dense surface allows an easily achieved varnish finish in, say, a cockpit.
Okoume, I believe, is in the gaboon family and is lighter, but weaker, than birch ply of the same thickness. Okoume is typically used where high panel stiffness is desirable, using thicker sheet thicknesses than would be needed in birch but, thanks to its lesser density, without any weight penalty. Robin Aircraft use okoume extensively and the fuselage sides are quite rigid, far more so than a birch ply of the same strength. It is a more ‘open’ grain than birch.
Adhesives
There are two main types of adhesives for aircraft structures. Aerolite 306, and Prefere 4050. Both are two-part glues, supplied with their own liquid hardeners – the hardener for Prefere 5050 glue being Prefere 5750. Most people still call the Prefere adhesive Aerodux, as that was what it was called for years.
These days there are epoxies that can be used, but as someone who became sensitised to epoxy after being up to my armpits while building microlights in the 1980s, I much prefer Aerolite and Prefere.
Aerolite was developed in WWII to build the world’s first stealth bomber, the DH Mosquito. It is an excellent glue, but it does have one failing. A couple of squadrons of Mossies were sent out to Australia after the war, and from there went on to Malaysia I believe. They started breaking up. It was found that Aerolite will not stand periods of a temperature higher than 35C. Believe me, you will not have this problem in the UK. Wooden aircraft should not be stored in high temperature conditions whatever type of glue has been used, because of the risk of the wood shrinking and cracking. For the same reason we avoid painting a wooden aircraft dark colours, wherever we can
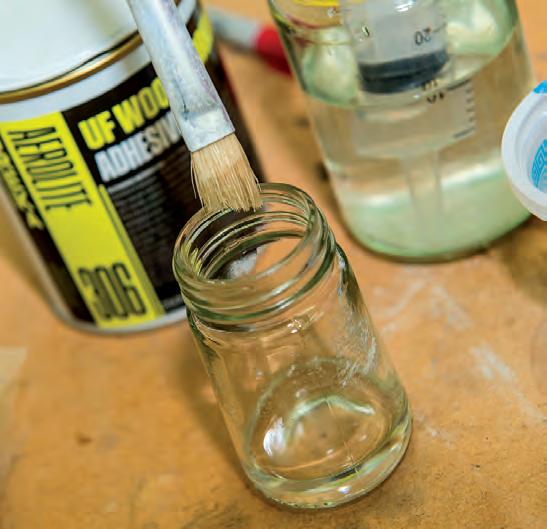
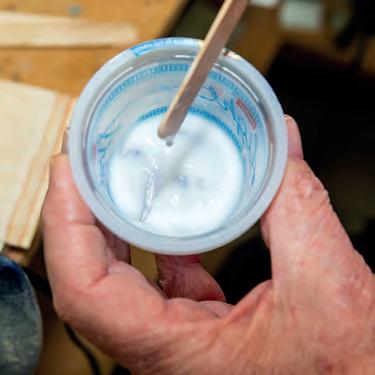
Aerolite is a two-pack adhesive, but not in the normal sense. The base glue is a white powder that is mixed with water to a thin cream consistency. This can be kept in the workshop for many days, even longer in a refrigerator, just like cyanoacrylate. It is only activated when it comes in contact with Prefere 5326X, which contains formic acid and is thinner than water. The base glue is applied to one component and the activator is lightly brushed onto the other, the two components are lightly clamped together, excess glue is easily removed with a small piece of timber sharpened like a chisel. But be cautious. The setting action is quite rapid, do not disturb the components after they have been together for a short time. The final set is relatively quick but always best to leave until the next day. The finished job can be very clean, so much so that I am told that some LAA Inspectors will not allow their builders to use Aerolite because they can’t see whether or not the glue is present along the whole length of the joint. I haven’t actually met one yet and can only assume that the glue is not readily seen, unlike Aerodux.

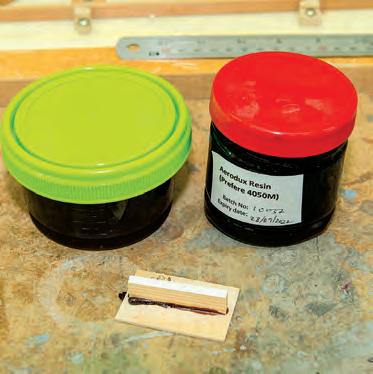
Prefere resin and hardener are mixed in equal parts, by volume or by weight, as the SG of both is so close.
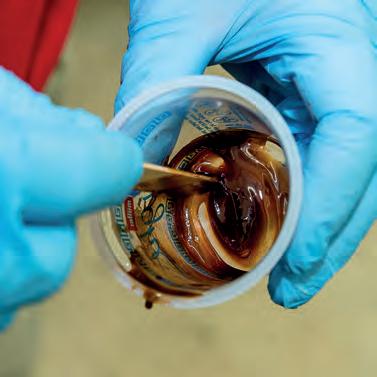

Unusually it is the resin 4050M that dictates the speed of cure. The M stands for Medium, meaning medium speed, 4050S is also available. 4050F used to be on sale but I don’t think it is any more. Overall, Prefere is quite a bit slower than Aerolite. It is like epoxy in that, once mixed you must use it. This leads to quite a high wastage factor as, in making sure you have enough, the tendency is to mix too much. If you don’t mix enough, in your haste to mix some more to finish the job, you will mix too much a second time around.
The mixed adhesive is applied to both components, usually with a brush, and the components brought together and lightly clamped. The adhesive that squeezes out of the joint will stain brown / red any timber that it touches, and it is very difficult to make a neat job. With this glue, your Inspector will definitely be able to see where you have been! In removing the excess glue, you will probably spread the stain further, but you don’t want your aeroplane to carry unnecessary weight for the rest of its life. A glue fillet between components adds little, if any, strength to a joint. Clean-up is easy, using water to wash tools and brushes.


Both of these adhesives have a ‘use by’ date so be careful how much you buy at a time. Aerolite is available as a small repair pack of 250gm and 1kg of powder and 1 litre activator. Aerodux (Prefere) is available in a 250gm twin pack and 1kg of each.
Glue failure
Prior to about 1960, many wooden aircraft were produced using casein glue, which is made from dairy produce. Unfortunately, it had a tendency to fail, especially if it got damp. If you are looking to purchase an older aircraft, maybe for renovation, smell the inside of the wings and the rear fuselage if possible. If you think there’s an odour of sour milk, then best to leave it alone. You may also notice a black line of mould along the glue lines.
Check pieces
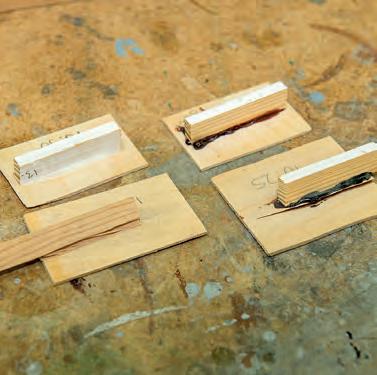
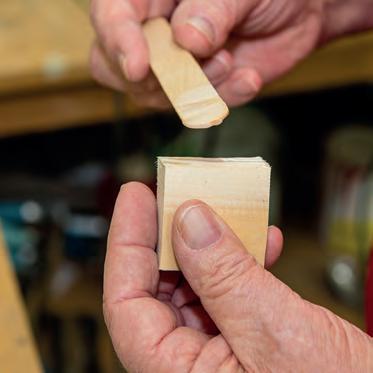
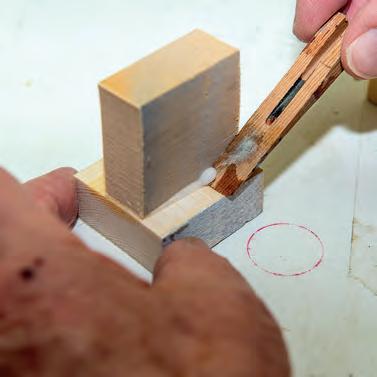
Whatever adhesive you do decide to use, you should always make a small test piece for each batch of glue mixed. Put a date on the piece and keep a record of which components were joined using this batch. Your Inspector will want to break the test pieces at some time in the future. When he breaks them, he will hopefully see the wood, or plywood outer veneer break and not the glue line. If the glue breaks, then further investigation will be required. One other important thing – if you glue a piece of spruce or fir to plywood you must ensure the plywood has been lightly, sanded, especially if it is Finnish birch, and thesurface dusted off before gluing. Failing to do this can seriously compromise the joint strength and longevity, as the manufacturing process for the plywood leaves traces of a release agent on the surface.
Overall, I much prefer Aerolite. A decent-sized batch of base glue can be mixed and used a little at a time, and it is cleaner. On the two biplanes that I built, I wanted to final finish inside the cockpit with clear varnish, and Aerolite allows you to do this. The one area that Aerodux excels in is laminating. Take a look at a wooden propeller and the chances are that you’ll spot a reddish-brown glue line between the laminations. Also, Aerodux does not shrink as Aerolite does. It took me many years to wake up to this fact. The wing tip bows of my Z1R Flitzer were made to suit a 36ins chord wing. When cured they would have nicely suited a 35½ins chord wing. I made a spacer that pushed them out to 36½ins, soaked them in the bath for a day, allowed them to dry completely, and upon removal of the spacers they popped back to 36ins. Phew!
If you embark on a wooden project, hit a stumbling block, and think that I may be able to help you, then please do email me at dudleypattison@gmail.com ■


