8 minute read
Engineering Matters


Static build-up – Avionics
With the advent of 8.33 MHz VHF com has come an increase in reports of ‘static interference’ in many aircraft types and makes and models of radio.
Inspector Toby Willcox of Targett Aviation, fixed a persistent in-flight radio noise by earthing a Jabiru J430’s metal struts and Teleflex cables, which in turn earthed the control column, rudder pedals, steering rods and nose leg.
Toby’s thinking is that it seems to have been generating electrical noise which seemed to get worse as the flight persisted (as if building up a static charge). It had been noticeable that the noise was not engine rpm related.
Avionics guru (and Van’s RV-12 owner), Harry Lees, commented, “Bonding certainly helps with static issues, even if it exists primarily for lightning protection – I’ve seen several airline radar scanners seized following lightning strikes, where the bearings have been welded solid, so it shows there’s no good bond path through a moving bearing! I’ve also come across similar static problems on radios on PA28s and TB20s with un-bonded flying controls or undercarriage doors and this has allowed static build-up. Normal airframe bonding between all major components should be better than 50 milli-Ohms to battery ground and for avionics items, even lower at 2.5 milli-Ohms.”
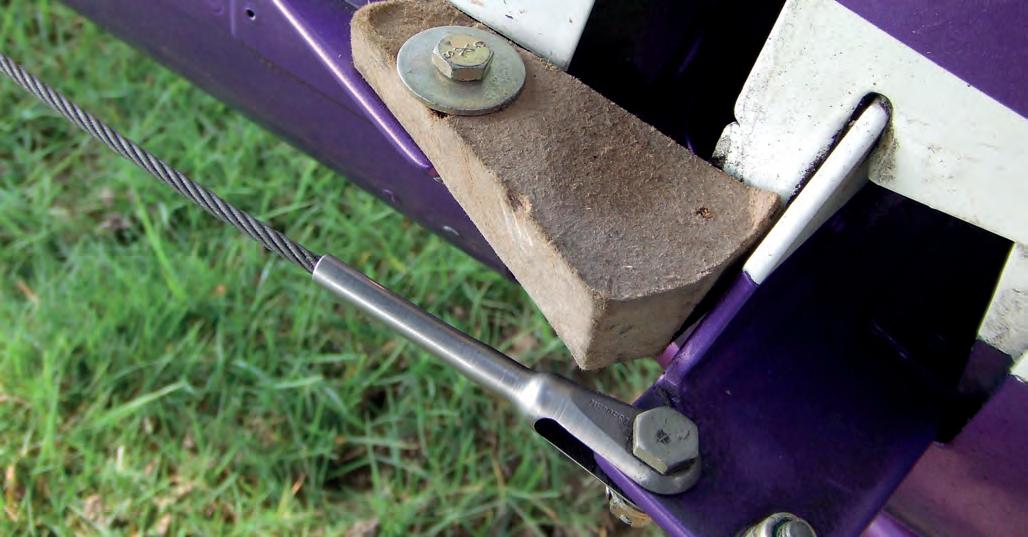
Above Small hole above the rudder horn seems like a likely access point for a small redent on this RV-6 (wood block is a temporary control lock).
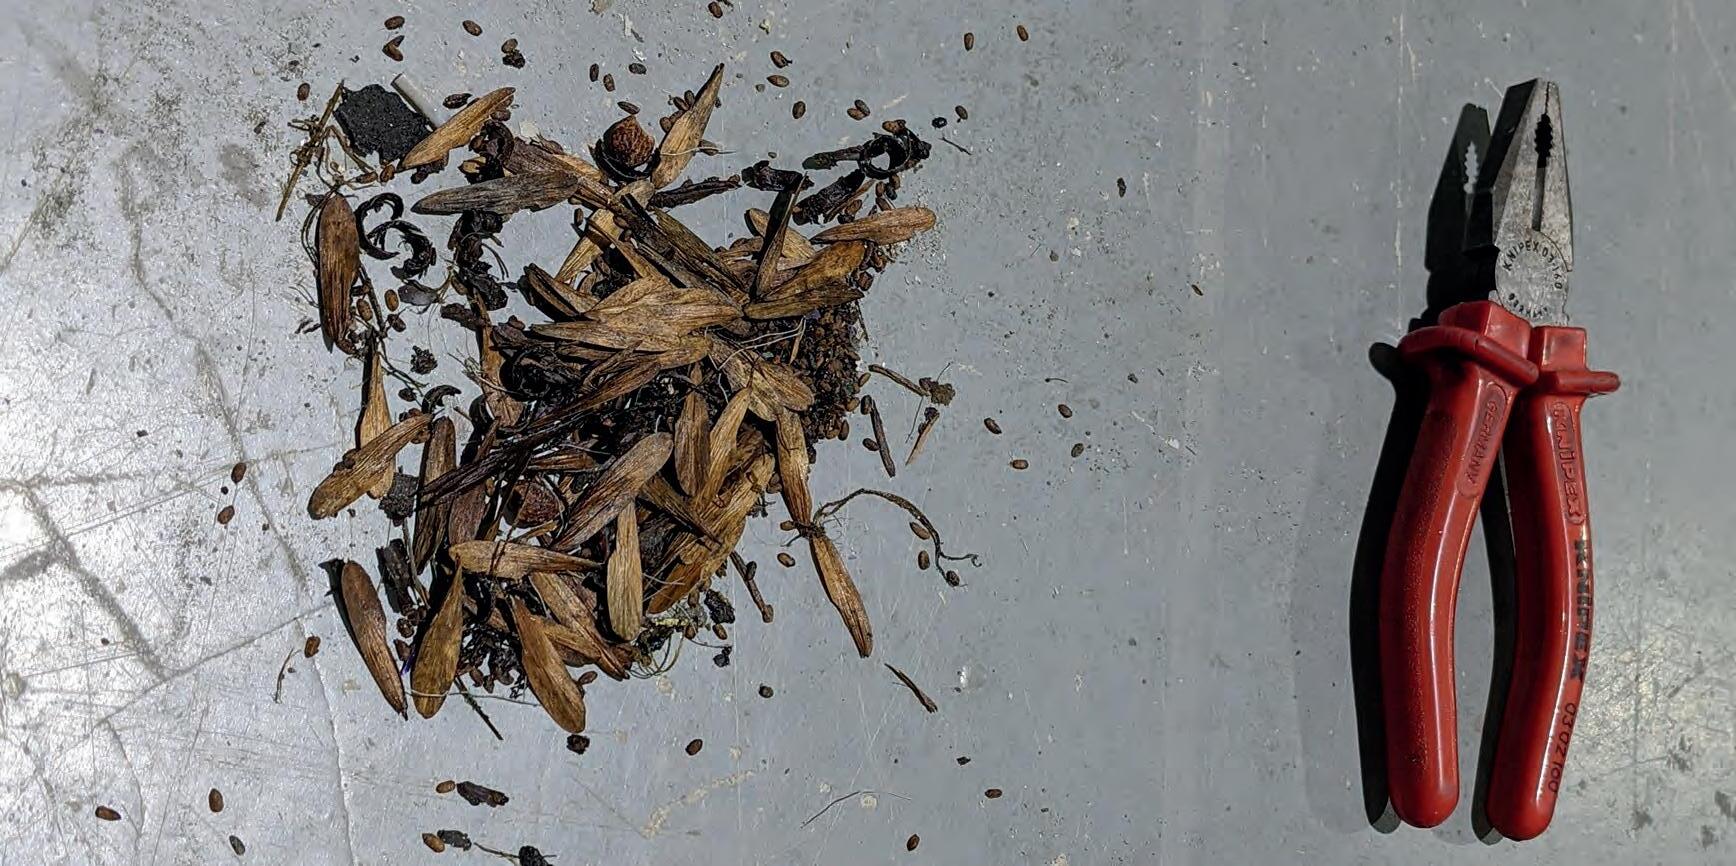
Right Material removed from the inside of the RV-6 rudder bottom fairing (with a pair of pliers as scale).
Aircraft used as food storage units…
Most owners are well aware of the risks of nesting birds and wildlife, especially at this time of year. Normally, birds decide engine cowlings provide a safe haven for nesting and mice seem to enjoy chewing their way through seat cushions, seat belts and wiring.
When RV-6 owner, Pete Pengilly, took the rudder off for maintenance purposes, he was surprised to find that the bottom rudder fairing had been used as a safe place to store food by something busily saving for winter.
Presumably, the animal had climbed the tailwheel spring and then up the steering chains to access the rudder fairing around the lower hinge. The seeds were sitting right in the aft end of the fairing and not in a place that was at all easy to inspect, while the rudder was installed.
Ballistic parachute recovery systems and G-INFO
Although the CAA and G-INFO do not always get the best response from aircraft owners, there is a lot of useful information to be gleaned from the entries, from checking facts as part of a pre-purchase survey, to needing addresses for Christmas cards – all you need to remember is the registration.
Now there is a new addition to the information posted – it will show if an aircraft is fitted with a ballistic parachute recovery system (BPRS).
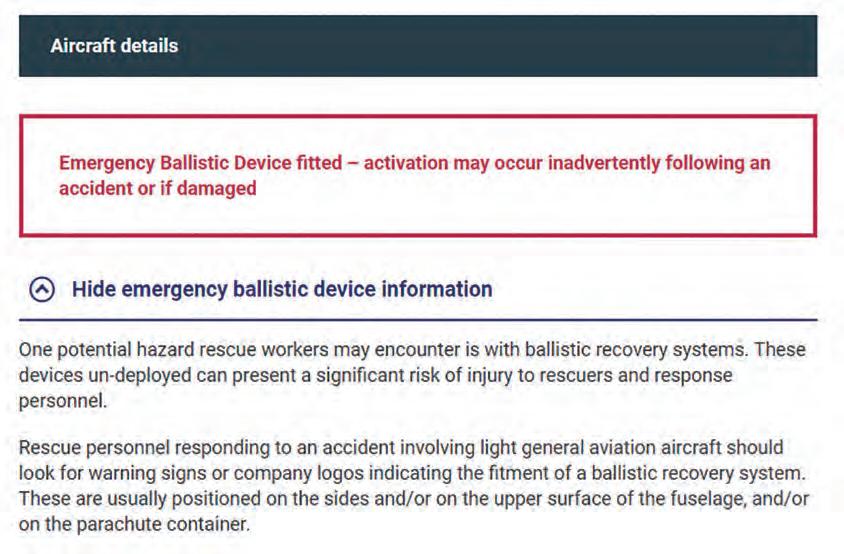


Primarily, this has been done as an aid to the emergency services in the event of an incident.


LAA Engineering has provided the CAA with a list of LAAadministered aircraft fitted with a BPRS and, if all goes to plan, G-INFO will be updated shortly. If you have such a system installed in your aircraft, it might be worth checking in a month or so that your aircraft’s entry in G-INFO has the BPRS warning in the Aircraft Details section.
Over-use of ACF-50 and smoking rivets
A couple of Inspectors have recently reported the sight of ‘smoking’ rivets on aircraft that they had inspected. Both had their suspicions that corrosion inhibitors may have caused or exacerbated the issue. Smoking rivets is a term given when a black residue appears around rivets. Sometimes, this can be caused by a lubricant flowing down from a flying control hinge and sitting around a rivet head attracting dust and grime.
The one to be concerned about is when it is due to the fretting of airframe skins, frames, ribs etc, when a rivet has worked loose. This may be because of age or some other mechanism but it can also be caused by the rivet being unwittingly lubricated by the excessive application of a corrosion inhibitor such as Corrosion X, ACF-50 and the like.
In my pre-LAA days, we routinely applied corrosion inhibitors to the aircraft we maintained but found that smoking (‘lubricated’) rivets could be an issue if the inhibitor was refreshed annually. It is best to inhibit aluminium airframes only every second or third year and to mist the internal structure rather than flood it.
If an aircraft has yet to be painted, then do not inhibit the airframe (if you do, you risk incurring the painter’s wrath) and even after painting, hold off for a few months to allow the paint to properly cure.
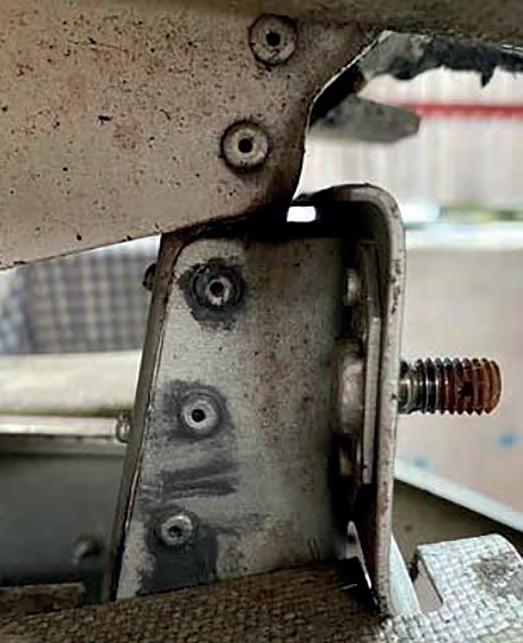
Right Evidence of smoking rivets found on the tailplane attachment brackets of an EV97 EuroStar.
Vacuum pump drive failure

Engine driven vacuum pumps may be becoming a bit more of a rarity in the LAA fleet these days with the advent of ‘glass’ EFIS systems, especially in the more modern amateur-built fleet but still exist in many of the ex-certified aircraft.
Most GA vacuum pumps are of the ‘dry’ type and are somewhat delicate flowers by their design with a carbon rotor fitted with sliding carbon vanes. The vanes ‘trail’ or ‘sweep’ as they rotate which is good when the engine (and pump) turns in its normal direction of rotation but not so great when the engine is turned over backwards – either deliberately or during a ‘kick back’ on start-up. Something to consider when turning an engine over backwards by hand as some favour when checking for hydraulic locks to avoid engaging the magneto impulse couplings.
To prevent damaging anything too (more!) expensive, the coupling between the pump and the engine accessory drive is designed to fail first. On many of the standard vacuum pumps, you can just see the driveshaft and when turning the propeller by hand (normal rules of safety apply…), you should be able to see the shaft rotating.
Inspector Nick Stone spotted on a Bulldog, which he had in for maintenance, that the vacuum pump drive shaft was not turning and on removing the pump, found that the shaft had sheared.
The composite drive shaft can be replaced easily but by and large, it has failed as a result of the rotor seizing. Although repair kits are available for most dry vacuum pumps, it is not a simple task to do and, by and large, you are better off buying a replacement overhauled pump, ready to install. Vacuum pumps are designed with pretty close tolerances and if you get the rebuild wrong, they can have an extremely short working life.
That said, even the new and overhauled pumps can fail far earlier than they should. As the pumps are sucking, they are prone to contamination from the rest of the system upstream – something to consider when replacing a failed pump, so do look at the internal condition of the inlet hose.
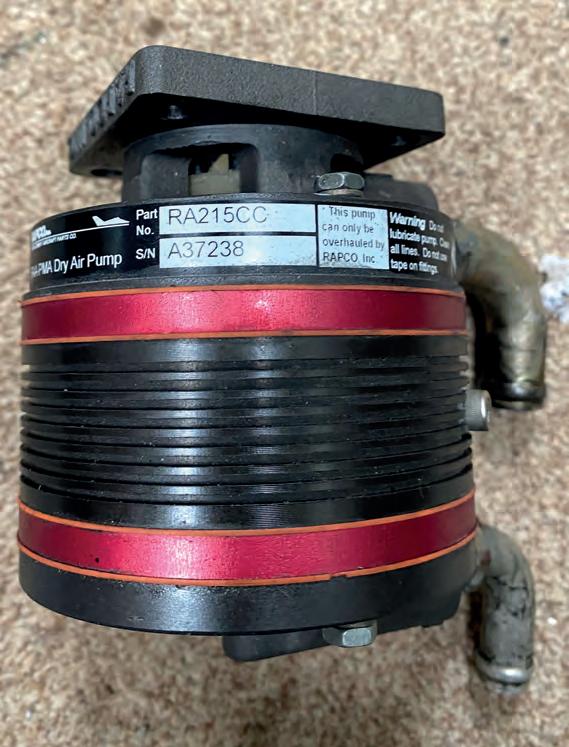
The pad on the Bulldog pump in question looks wet, which may be a sign that the vacuum pad driveshaft seal is past its prime. This seal can be replaced relatively easily by removing the vacuum pump adapter pad. Some later vacuum pumps have an oil ‘diverter’ groove cut into the mounting face to allow any oil getting past the driveshaft seal to pass out of the pump, without contaminating its internals. Without this feature, the oil can get flung about by the open driveshaft, so if that area of the engine bay is misted in oil, the vacuum pump seal is a good place to start, when investigating the cause.
Some designs of vacuum pumps incorporate a wear indicator port at the rear so that the wear rate of the blades can be monitored. When installing the hose fittings in a vacuum pump, proceed with caution: they are tapered threads and often have to be installed with a particular orientation and if you over tighten them, they can damage the pump casing. One further thought – as the core and blades of a vacuum pump are made of carbon, they do not like getting contaminated by oil or solvents and as they wear, produce carbon dust that acts like a lubricant but can turn to a sludge when wet.
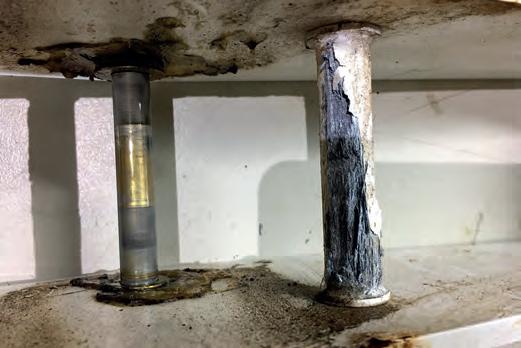
Corrosion
Many people look on modern factory-built gyros as being ‘new’ machines and, in comparison to many aircraft in the LAA fleet they are. But that does not mean that they have not started suffering from corrosion. Obviously, a lot is down to the type of material used, the protection afforded to the component, and the conditions in which they live and operate.
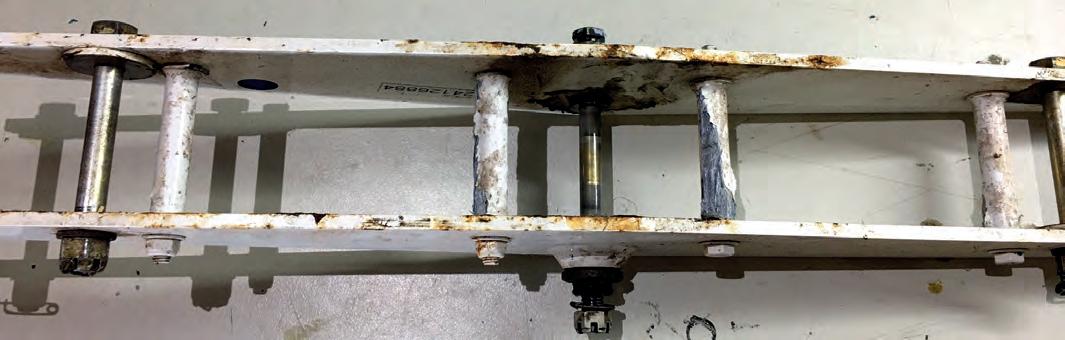
Inspector Kai Barnett reported that a Magni was recently trailered to a maintenance facility and observed that, apart from the rotor blades not being removed in the correct manner for the journey, the hub bar spacers were suffering from severe exfoliation corrosion. Kai says that the spacers would be visible on a pre-flight inspection. Furthermore, Kai is of the opinion that if flown in the condition found, the spacers could fail leading to flex or a loss of torsion in the assembly, which might lead to interesting blade flight characteristics.
Incidentally, the blades had been extracted with the hub bar left in place, rather than the whole assembly being lifted off and then separated from the blades, as detailed in the relevant manuals.
LAA Engineering housekeeping
Avionics Installations Please remember that the LAA/MOD 7 avionics installation approval form must be accompanied with an LAA/FT-Avionics flight test schedule. Both forms can be downloaded from the ‘Forms, Checklists & Worksheets’ section of the LAA website ‘Data Library’.
LAA Engineering charges
LAA Project Registration
Kit Built Aircraft £300
Plans Built Aircraft £50
Initial Permit issue
Up to 450kg £450
451-999kg £550
1,000kg and above £650
Permit Revalidation
(can now be paid online via LAA Shop)
Up to 450kg £170
451-999kg £220
1,000kg and above £260
Factory-built gyroplanes* (all weights) £275
*Gyros note: if the last Renewal wasn’t administered by the LAA, an extra fee of £125 applies
Modification application
Prototype modification minimum £60
Repeat modification minimum £30
Transfer
Mods and repairs Once an aircraft has undergone modifications or repairs that require involvement by LAA Engineering, it must not be flown until authorisation has been received from LAA Engineering in the form of a Certificate of Clearance or Permit Flight Release Certificate. Remember that a Certificate of Clearance requires signing by the Inspector, owner and pilot before flying. ■
LAA Fleet Summary
New Projects Registered in 2022: 18
Permit to Fly First Issues in 2022: 10
(from C of A to Permit or CAA Permit to LAA Permit)
Up to 450kg £150
451 to 999kg £250
1,000kg and above £350
Four-seat aircraft
Manufacturer’s/agent’s type acceptance fee £2,000
Project registration royalty £50
Category change
Group A to microlight £150
Microlight to Group A £150
Change of G-Registration fee
Issue of Permit documents following G-Reg change £55
Replacement Documents
Lost, stolen etc (fee is per document)£20
PLEASE NOTE: When you’re submitting documents using an A4-sized envelope, a first-class stamp is insufficient postage.
Permit to Fly Revalidations - 2022: 377
Recent Alerts & AILs (check the LAA website for further details)
Zivko Aeronautics Inc. Edge 360, Edge 540 and
Laser Z200: Aileron Centre Hinge Attachment
CAA MPD: 2022-001
LAA Alert: A-001-2022
MT-03, MTOsport, MTOsport 2017, Calidus and Cavalon: Rotor Blade Inspection/Replacement/
Life-Limitation
CAA MPD: 2002-002
LAA Alert: A-002-2022
TLAC Escapade and Sherwood Scout: Seat locking and Secondary Seat Restraint
CAA MPD: 2022-004-E
LAA TSB: TSB-001-2022
Europa: Door Latch System Stop
CAA MPD: 2022-003
LAA AIL: MOD/247/012
LAA Alert: LAA/AWA/21/08
Adjustable Seats in General Aviation Aircraft
CAA Safety Notice SN-2022/001: Security and locking of adjustable seats


