7 minute read
Top notch drill tips…


When it comes to drilling holes, there’s more to it than just putting the right size bit in a drill. There’s a wide array of tools available to you, including the pillar drill, the cordless drill and the 90° drill. Drill bits aren’t one size fits all either, and include centre drill and long series, stepped hole cutters, flat bits, hole saws, trepanners and drill guide blocks. Also note that if you need a ¼in hole, you do not start by using a ¼in drill. I would normally start with 1/8in, go to 3/16in and then to ¼in.
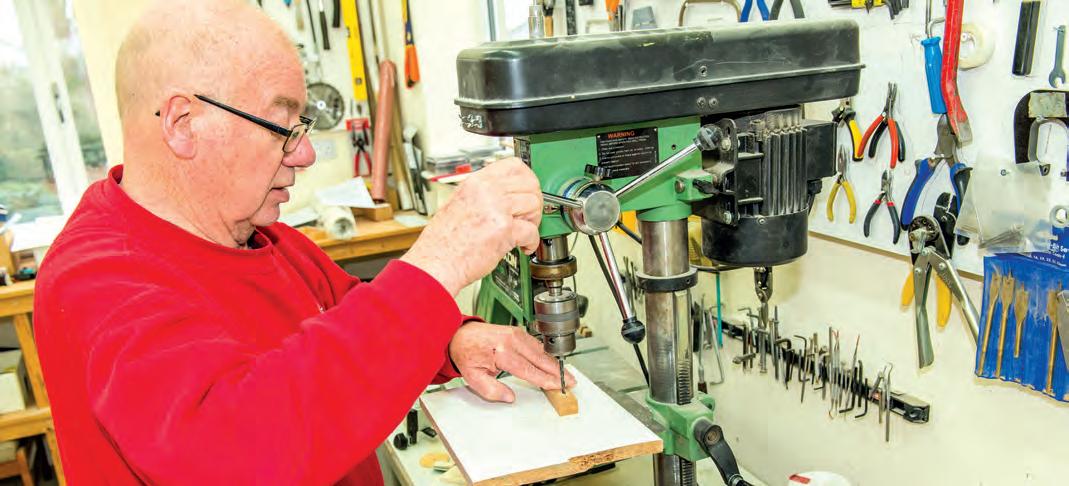
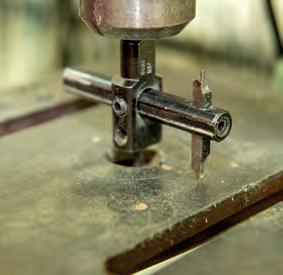
Pillar drill
You will need a pillar drill with a 3/8in capacity chuck minimum. Nearly all are multi-speed and it is worth looking into how long it takes to change the speed of the drill – they vary in complexity. The change of speeds needed between drilling timber (reasonably high) and metals (quite slow) is often necessary, and a pain, if it’s a protracted operation. The quill travel (the quill is the hollow shaft that surrounds the spindle. The spindle is the rotating shaft that the chuck is mounted on) is worth consideration also. My pillar drill has many combinations of belt positions giving a huge choice of speeds, but I just about only use one, two up from the bottom, and one two down from the top. The quill travel is around 2 ½in which is a disadvantage at times, but rarely.
The table can be quickly raised or lowered to suit the thickness of what is about to be drilled by unclamping, winding up or down, and re-clamping to the pillar. This is another tool that often sports a further adjustment you will rarely, or never use – the dreaded tilting table. Just make sure that even though the indicator may say it is at zero, it actually is!
Burst through
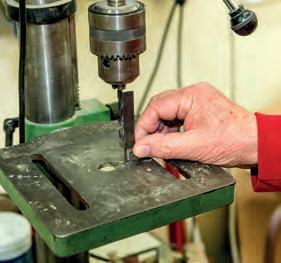
Whenever drilling through timber, always try and have a firm surface to rest the workpiece on. Something like a piece of melamine worktop material is ideal.
This is used so that when your drill passes through the far side of the component, it does so cleanly and does not ‘burst’ the surface. Of course, there is a limit as to how many times the same piece of melamine can be used as the surface disappears into holes…
If you are working away from the pillar drill, say on the side of the fuselage. Hold a block of hardwood or similar, on the inside of the fuselage.
If you are worried about missing the block and hitting your fingers, then it may be best to get someone else to hold it!
Cordless drill
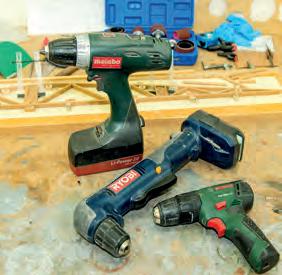
What can I say about a cordless drill? There are so many available now that the choice is huge. My favourite unit is a small Bosch, although it has the disadvantage of a built-in battery, so when that is depleted it cannot be used until re-charged. The reason I like it though is because it is light. That’s a real benefit when you are stretching across a wing or fuselage, using it at arm’s length. It’s also a huge advantage, when space is tight, to have a small form-factor, or short, drill. My most expensive drill is also the most powerful and came with two batteries, a very fast charger and a built-in LED light system to show how much battery capacity is left. It is very good, but it is heavy for repeated use.
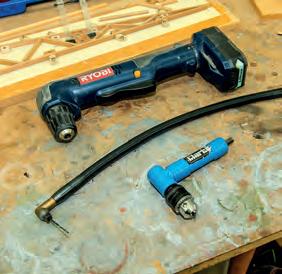
90° angle drill
When building an aircraft you will be amazed at how many times you have to get into very awkward places, with little spare space, and then have to drill holes. A 90° drill is useful as it is short. Small 90° adaptors are also available that fit a regular drill, and a much cheaper alternative to a 90° drill. They clamp into the chuck of a standard drill and have bevelled gears that turn the drive through 90°. The whole assembly can be quite unwieldy though!
Home-made short drills
Also useful are old drill chucks. By fitting a drill or a screwdriver bit in them, they are turned into a very short hand drill or screwdriver.
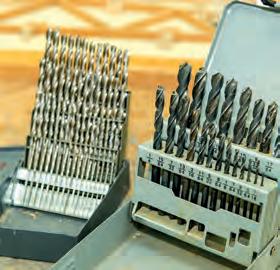
Drill bits
Your kit, or plans, will either show imperial hardware, AN, or the almost unobtainable now AGS, or metric. You therefore only need a set of imperial drills, or metric drills. The range of the sizes will also be limited. The KFA Safari which I’ve just finished, only required 4,5,6 and 8mm drills and 8 and 12mm hand reamers. The RV-7A before that had a similarly short list of imperial size requirements. However, it is nice to have a more full set of drills, as often holes are bored undersize with drill changes to get to the required size. Buy the best quality drills you can!
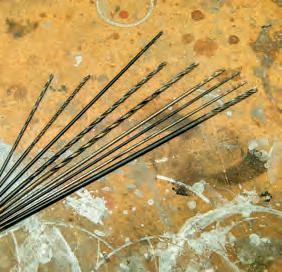
Long series
Long series drills can also be very useful. These can often be found at 6in and 12in lengths. They will often allow you to get to places otherwise inaccessible!
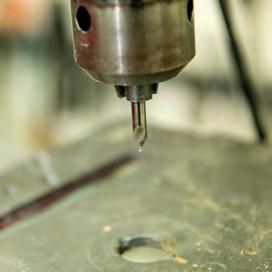
Centre drill
A particular favourite of mine is the centre drill. I usually use a 3/16in one. Normally used by a lathe operator in the tailstock to start a hole in the component held in the chuck, a centre drill has a very stiff body that supports a short, small drill end. If the operator had used a normal small drill in the tailstock, the tip would have skidded away and broken the drill.
I use one to start my holes accurately. A hole usually starts life as a vertical and horizontal pencil line forming a cross. If the marked component will fit on the pillar drill table, the job is more easily and more accurately accomplished than working freehand. With the pencil cross positioned under the drill tip, lower the drill to just touch the surface. Raise the drill and you will see where you touch by the absence of graphite (assuming you were somewhere close…). If not spot on, adjust the component position as required and try again. Eventually you will get it right (honestly), and the drill can be plunged a little deeper to form a good start to the proposed hole. Change the centre drill for an appropriately sized drill bit and drill through.

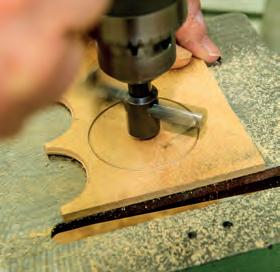
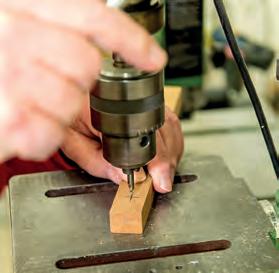
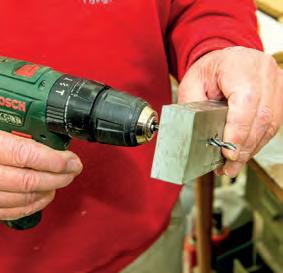
Drill guide block
Let’s assume the pencil cross is somewhere on the side of the fuselage and so the hole has to be started freehand, else you would need an enormous pillar drill to get a fuselage on it. With the centre drill bit in a drill touch the centre of the cross with the tip of the drill and depress the trigger for a second. Remove the drill and check your efforts, if central then carry on, but if, say, the hole start is at ‘7 o’clock’ to the cross, put the tip of the drill bit in the started hole and aim it at ‘1 o’clock’. Drill a short distance at that and bring the drill back to square off the job before stopping it. It should only take one or two quick bursts like this to achieve central positioning.
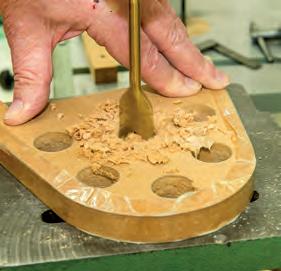
Next, load your drill guide block onto a pilot drill, position the drill tip in the started hole, press the drill guide block hard to the surface and drill through.
My drill guide block, which is drilled to take 1/8in, 3/16in and 1/4in drill bits, as seen in the photo, suffers from being a tad heavy. As the tool will likely be used a few times, it would have been more sensible to use a piece of oak, or similar hard wood, for its manufacture.
Spade bits
Spade bits have little, or no, use for the structure of an aircraft but are very useful when making a form tool for laminating. They will quickly give you a large hole in a piece of MDF, for example, for clamping the laminations in place. To avoid a massive amount of burst through, when drilling the first face, only drill far enough to allow the guide point to pass through the MDF. Then turn the MDF over and put the guide point in the small hole and continue through to complete the hole.
Hole saw
Hole saws come in all shapes and sizes, and although I have two sets, they are rarely used. This is because the size of the hole is limited to the size of the saws you have, and the finish of the hole achieved is not spectacular.
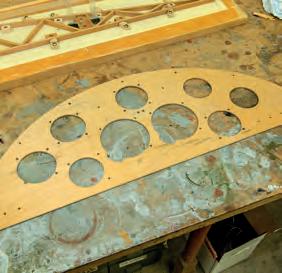
Trepanner
By far the best way to cut a clean hole, in thick or thin, plywood is to trepan it. The beauty of a trepanner is that it is adjustable to make whatever size you want within its maximum and minimum capability. They come in a range of sizes, mine being toward the smaller end of the range. It was supplied with a short length of 3/16in square tool steel, which is ground to a point for cutting. The outer face has to be backed off to avoid it scuffing the edge of the cut. I have one end of the cutter ground to suit making a clean hole, and the other end ground to suit making a clean washer. Yes, some designs call up for plywood washers, although not many it’s fair to say. I use it on aluminium as well, lubricated by paraffin or just water, when cutting holes for my own instrument panels. Whether you are using it on plywood or aluminium, the rules are the same. Use a slow rotational speed and a slow feed rate. Cut to somewhere near half thickness then turn the material over and cut through from the second side. Patience is required for aluminium along with many applications of lubricant. Always secure the workpiece well.
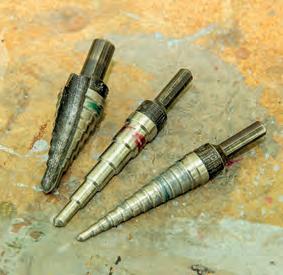
Stepped hole cutters
This is a tool that was really made for making clean holes in thin metal sheets. If you build an RV, a selection is essential to have in your toolbox. It will also bore a reasonably clean hole in plywood as well. If you are able to place the item to be bored on the pillar drill, with a melamine or similar backing, it will make a nice clean hole. ■