2 minute read
1.0 Introduction

from Design by Robots

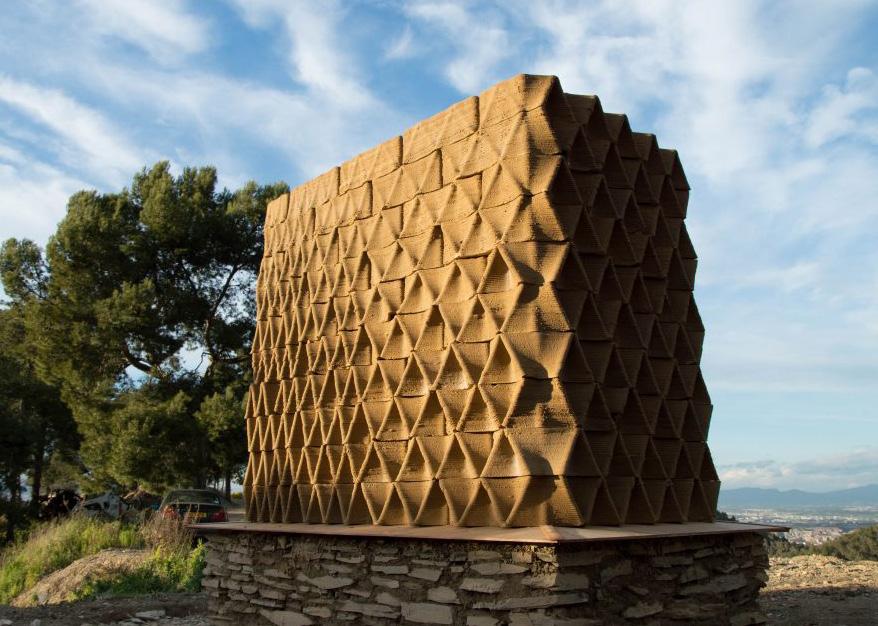
(1)Fabrication Lab The Experimental Design Lab is an investigation into material and process driven design. It suggests an alternative, “bottom-up” approach to the conceptual process where playful experimentation with materials and hacking of both traditional craft methodologies and contemporary digital fabrication equipment leads ultimately to the design of a functional item of furniture. Risk is encouraged, and hard-earned failure is rewarded in parallel to successes. Physical experimentation lies at the core of the ExLaB pedagogy. Designers are encouraged to get out of sketchbooks and get their hands dirty. The process becomes as important as the final outcome and provides a glimpse of the breakthroughs, the heartbreaks, the red herrings and the intense amount of labor that goes into the ExLaB process.
FabLab Access
Advertisement
Students will have access to operate and/or supervise machinery in the FabLab if appropriate safety inductions have been completed.
There are 3 levels of safety induction in the FabLab. (Visit Training Centre Website for more info)
lv 01 - General FabLab Safety Induction
General introduction to workshop safety principles and procedures assessed via online multiple choice assessment. Assessment must be completed to gain access to any space in Fabrication Workshop.
lv 02 - Machine Workshop Safety induction
In person familiarization and introduction to the machine workshop and technical staff. An induction session will be arranged for all ExLaB students during class time. This must be completed for students to gain access to any equipment beyond G12, the Forbo Model Making Space.
lv 03 - Specific Machine training and certification
In person training on specific workshop machinery. Refresher is training required each semester. If students wish to use any machinery in the Machine Workshop this certification must be completed.


(3)

(4) (5)


(6)

(7)
(1) Fix the nozzle with the auger inside and tighten it with steel clip, (2) Apply silicon gel on the rim, (3) Installing the clay tube, (4) Putting the metal ring through the four steel supports, (5) Apply silicon gel on the rim of the top, (6) Fixing the top inside the top mouth of tube through the four steel rods (7) Tightening the screws using spanner.
SETTING UP THE ROBOT
The main switch and the robotic monitor is to be turned on. The scripts to be printed can then be loaded in the computer.
Note that all the parts should be thoroughly cleaned before and after the use.
It is very important to purge the clay tube before printing so as to prevent air bubbles from disrupting the printing.