Dear friends,
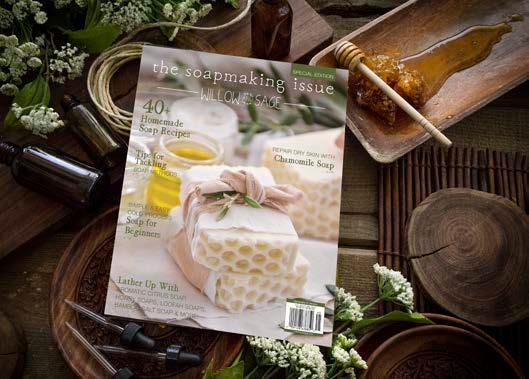
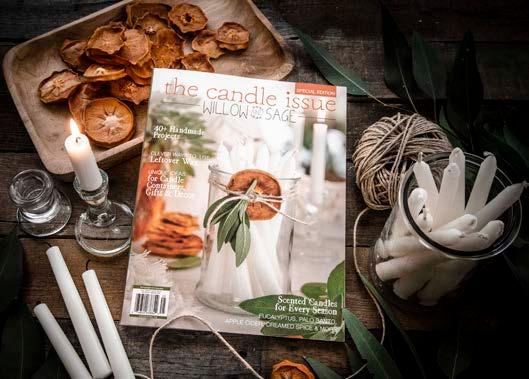
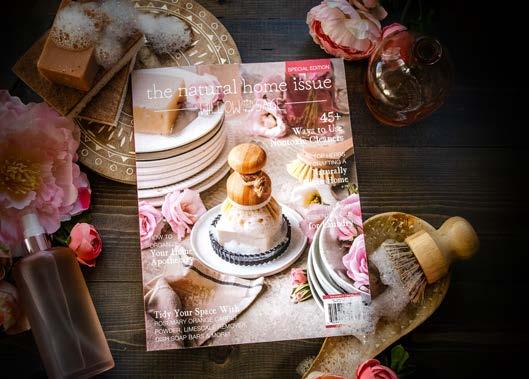
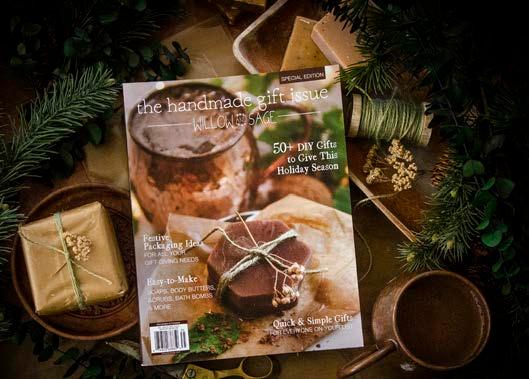
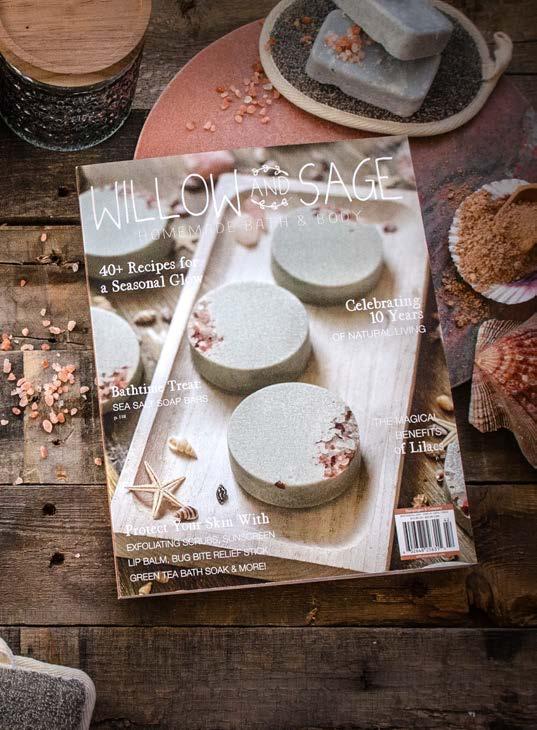
If this is your first time hearing about Willow and Sage, allow me to formally introduce you. In a nutshell, this quarterly publication is a centralized hub for all that is homemade bath and body — but it’s also so much more than that.
Since we introduced the premier issue of Willow and Sage, we have aimed to focus on more than making recipes — it’s also about inspiring ideas on how to give said recipes away as gifts and the good that can come of it. It’s about the extra special touch that comes from personally packaging the product, as well as infusing the slow-living mentality into your daily routine.
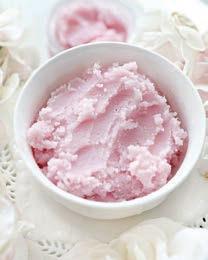
Today, there’s much talk of self-care and setting aside personal time amidst a hectic schedule. If we’re not careful, a dangerous amount of guilt can come along with allowing time for self-care. There’s the laundry and grocery shopping that needs to be done, and that friend you haven’t checked in with for a few days. Here at Willow and Sage, we want to remind you to take care of yourself without feeling an ounce of guilt. And we hope, in turn, you gift a jar of sugar scrub to your friend who’s in need of a little “me time.” As cliché as it sounds, it’s the gift that truly keeps on giving — physically, emotionally, and mentally.
Our team works alongside the homemade bath and body community to provide the latest tools and resources for living an all-natural lifestyle. This community has encouraged us and further sparked our enthusiasm for at-home skincare and beauty products, all while revealing a world of new materials and creativity. During this short timeframe, we have grown to love the recipes and projects featured almost as much as the brilliant contributors who make them. On a personal level, I am inspired each time I flip through the pages that are jam-packed with recipes for lotions, bath bombs, lip balms, and so much more.
Each issue is filled with unique recipes, uses, and packaging ideas to spur your creativity. We highlight chemical-free makeup, luxurious body butters, sugar scrubs, revitalizing face masks, bath salts, and more. Within these pages, we offer instructions on using essential oils in your everyday life, infusing DIY into your lifestyle, and learning important ingredient benefits. With eye-catching infographics, photography, and layout designs, we welcome you, dear reader, into our family and hope you stay awhile.
As you learn more about Willow and Sage, I encourage you to discover what ingredients and methods work best for you. If you’re interested in a recipe but don’t like the scents or carrier oil used, feel free to customize them to your liking. Willow and Sage is here to help you begin and thrive throughout your homemade bath and body journey.
Until next time,
 Danielle Williams Assistant Senior Managing Editor willowandsage@stampington.com

3 willowandsage.com | WilloW and Sage i
4 i WilloW and Sage | willowandsage.com
5 willowandsage.com | WilloW and Sage i
By kaT e B ello
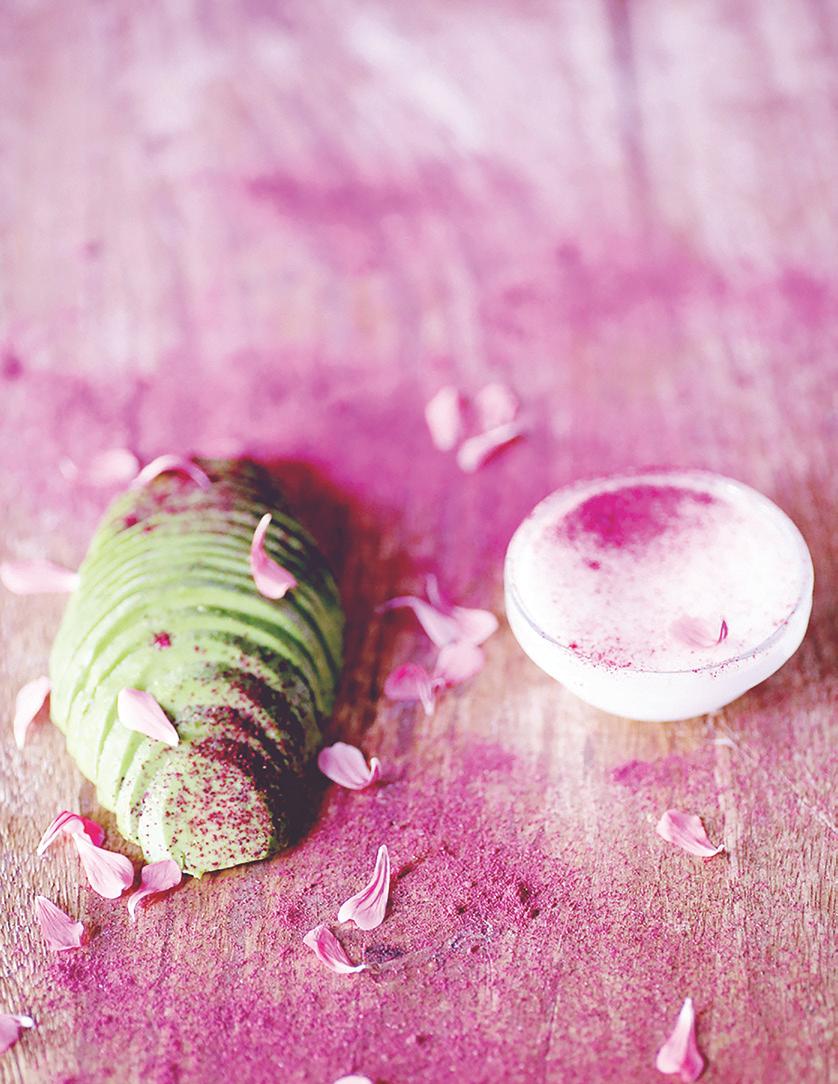
Between hot yoga, the beach, and saltwater, my hair takes a beating during the summer months. This year my ends were especially dried out and needed some extra moisturizing, so I whipped up this very simple hair mask over the weekend and let my hair soak for about 30 minutes. Afterward, my ends didn’t seem so parched and they felt much softer!
I like pairing coconut oil with avocado because I have fine hair. I get the moisturizing benefits of the coconut oil without my hair being totally weighed down by it. When I’ve just used coconut oil by itself as a deep conditioner, I’ve had to wash my hair multiple times to get rid of that oily look. This time with the addition of the avocado oil, I did my normal wash and my hair didn’t come out oily, just soft and silky!

1 / 2 avocado
3 TB. coconut oil
Bowl/Food processor/Blender
Mix the ingredients in a bowl or blend them in a food processor or blender. Hop into the shower to quickly wet your hair and then gently towel-dry so your hair is still damp when you apply the mask. Flip your hair over to apply. It’s best to separate your hair into sections depending on how long and thick it is. Coat each section of your hair thoroughly down to the tips, and let soak for about 30 minutes or so. Rinse out and then wash your hair as normal.
• This mask can get messy, so it’s best to apply it over a tile floor or towel so it’s easy to clean up. I also wear a towel around your shoulders so it doesn’t get on your clothes.
• I recommend washing your hair twice, just to make sure there isn’t an oily residue left over.
Kate Bello is the founder of the DIY skincare brand saltandritual.com, where she teaches members how to become naturally gorgeous babes. Follow her on Instagram (@saltandritual) to see her latest beauty collections.
6 i WilloW and Sage | willowandsage.com

7 willowandsage.com | WilloW and Sage i
8 WilloW and Sage | willowandsage.com
By DeDe Ba I ley
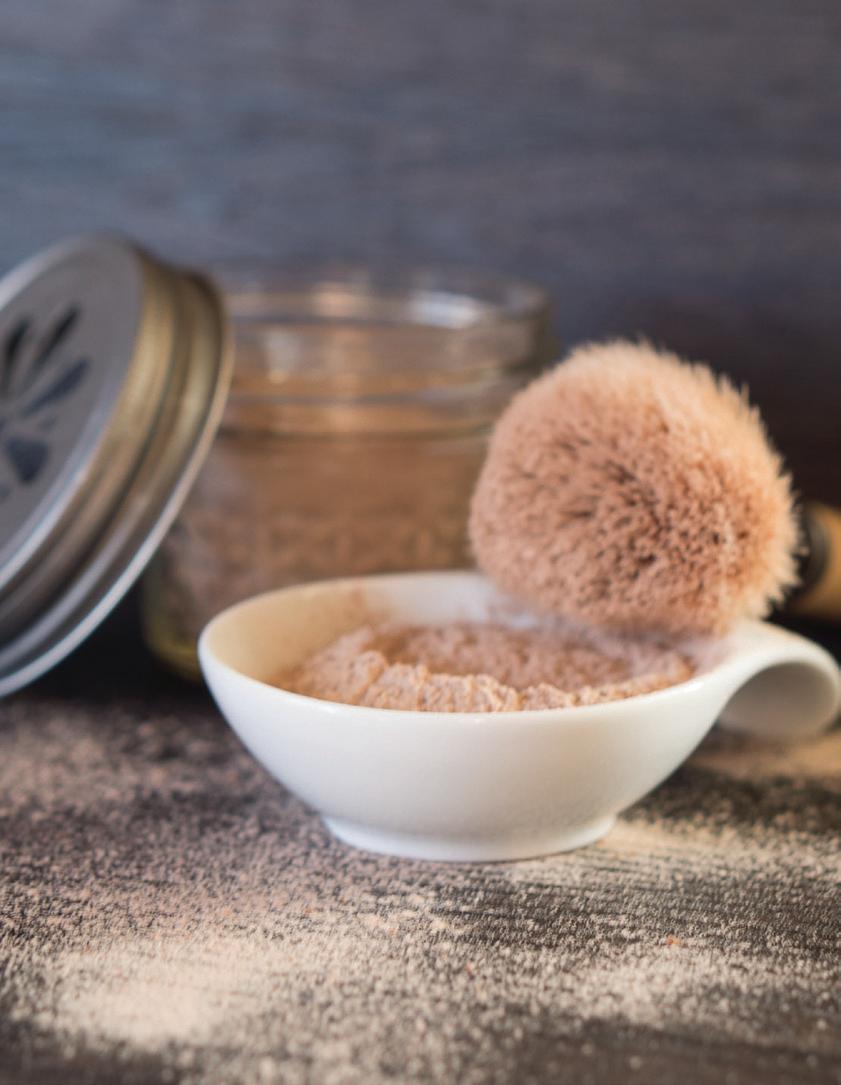
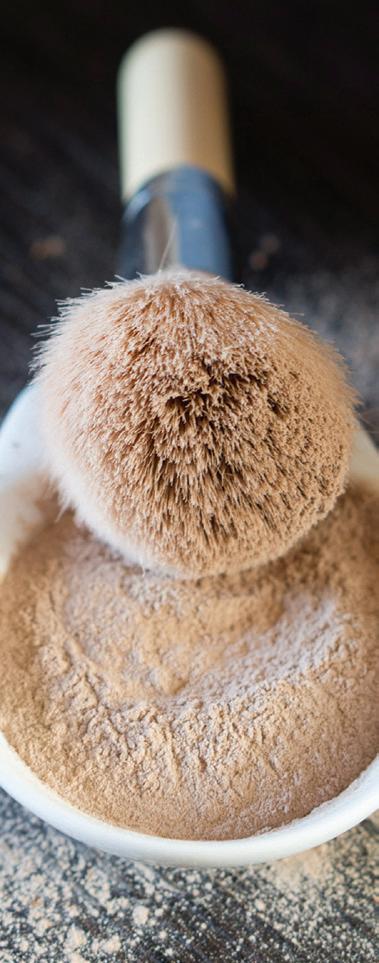
This homemade dry shampoo is inspired by the expensive dry shampoos on the market. I wanted a less-expensive option and I also wanted my dry shampoo to blend and match my hair color, unlike white dry shampoos or baby powder. The base is made of two absorbing powders and the cocoa is used for the colorant. Feel free to add as much or little cocoa as needed to find the perfect match to your hair color.
3 TB. arrowroot powder
3 tsp. bentonite clay powder
3 TB. cocoa powder
Add the arrowroot powder, bentonite clay, and first scoop of cocoa powder to a medium dish, and thoroughly mix until you have a consistent color. Follow with more cocoa powder as needed. Make sure to fully stir in all of the cocoa powder before adding more so you can check the consistency of the color. If you add a little too much, not to worry, you can simply add in more arrowroot powder and/or bentonite clay.
DeDe Bailey is passionate about anything handmade. You can find her online at designeddecor.com


9 willowandsage.com | WilloW and Sage i
10 i WilloW and Sage | willowandsage.com
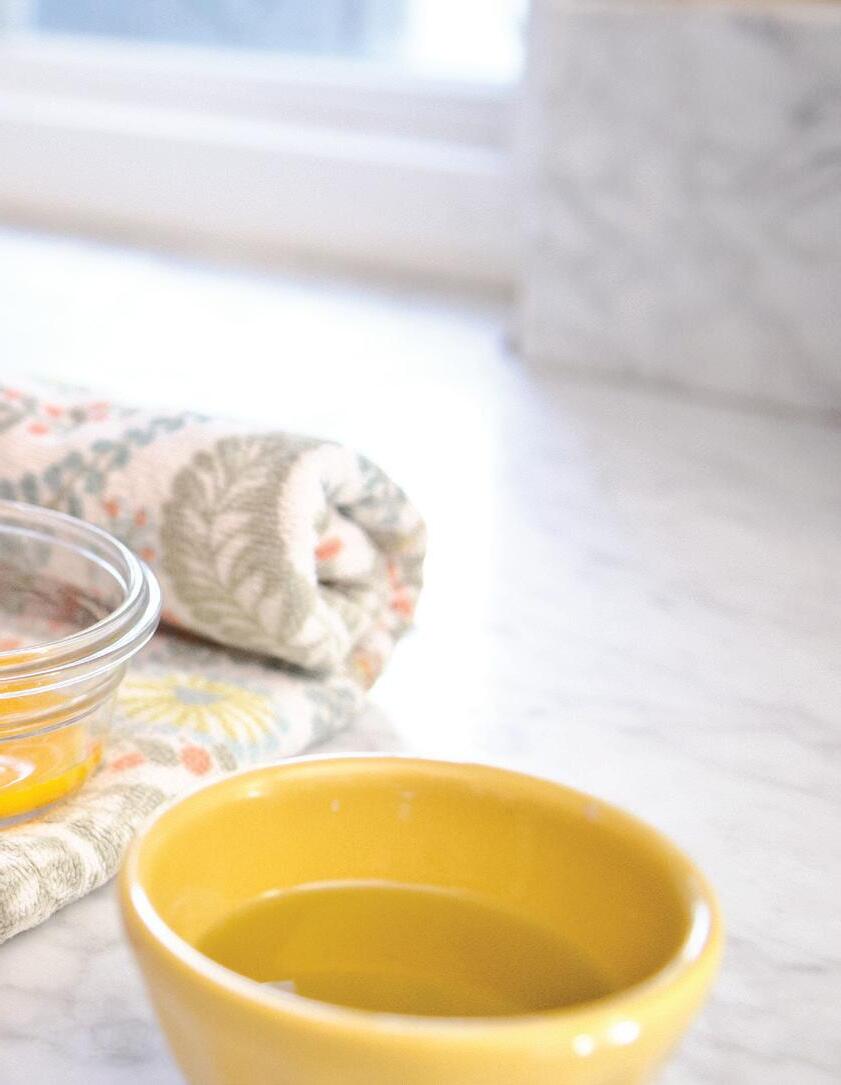
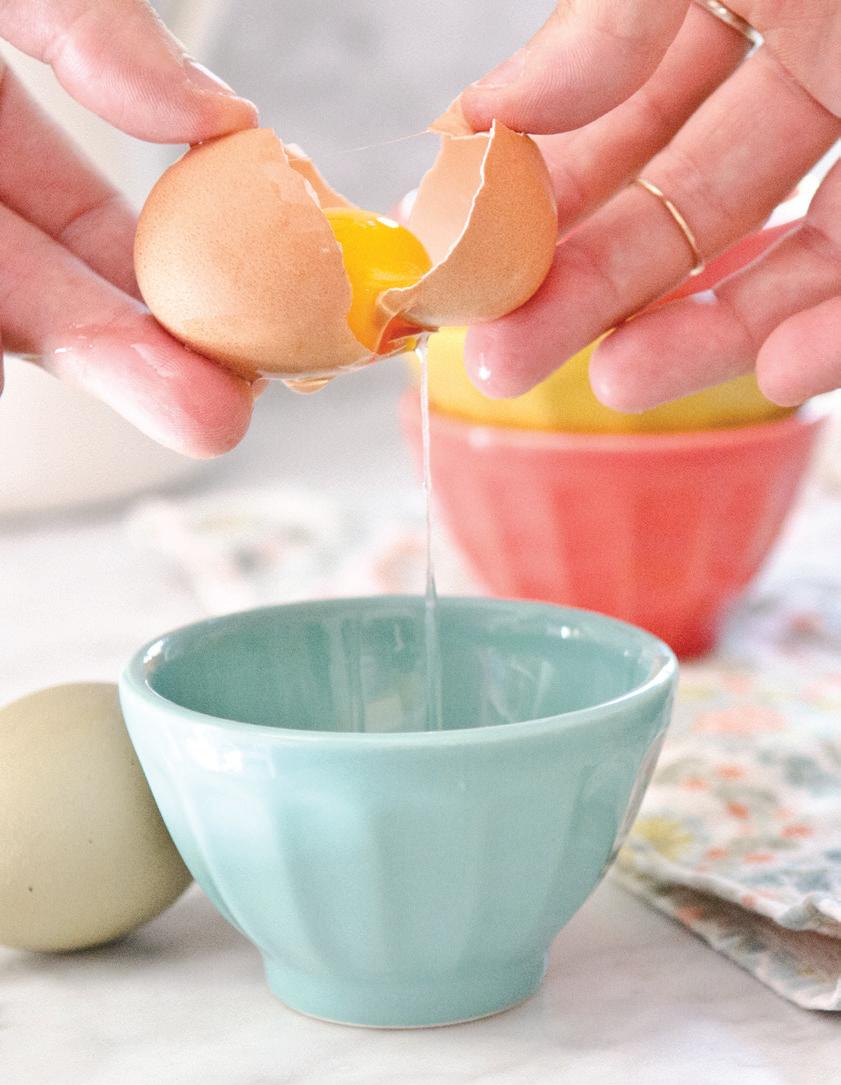
There’s a reason why they call eggs “incredible.” The many vitamins and nutrients you can absorb when eating them are great, and the decent amount of protein can also benefit your hair when used externally as a hair mask — think bouncy and moisturized locks with lots of shine. The amino acids in the yolk are similar to keratin, another protein that is essential in the creation and strengthening of hair. Especially when combined with a moisturizing oil (olive, almond, coconut) and a bit of honey (a natural humectant), egg can work wonders on brittle or oily hair that is in need of some attention. Transform your tresses on a whim or make an evening of it — just grab these items from your pantry and read on for our sure-fire recipe.
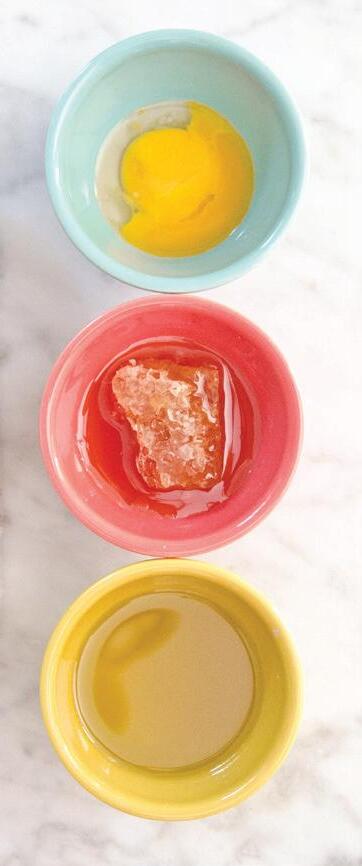
1 egg
2 TB. olive oil
2 TB. honey Bowl Fork
Shower cap (optional)
Crack an egg into the bowl. Add in olive oil and honey, and mix all ingredients together until combined. Gently massage the mask into your hair and scalp, and let it sit for 20 minutes (cover your hair with a shower cap if desired). Rinse the mask out and shampoo your hair. Be sure to take the proper precautions when handling raw eggs; disinfect anything the mask touches, including all utensils, bowls, and even your shower or sink.

y When rinsing out the mask, make sure to use lukewarm water. The eggs might start to cook if the water is too hot!
11 willowandsage.com | WilloW and Sage i



Our Subscribers Get Perks Free Shipping Up to $20 off the Cover Price VIP Treatment Never Miss an Issue Subscribe at willowandsage.com or by calling 1-877-782-6737 (U.S.) 1-949-380-7318 (International) SUBSCRIBE TODAY
14 i WilloW and Sage | willowandsage.com

15 willowandsage.com | WilloW and Sage i
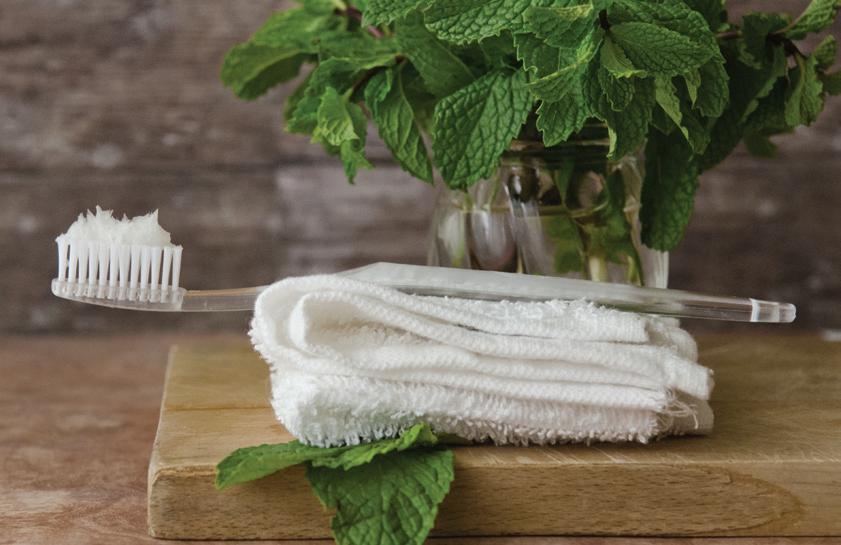
It’s understandable why some people are wary of trying homemade toothpaste. Oral hygiene is so important, and teeth/gums can be so sensitive, so it’s logical to think you need all of those unpronounceable ingredients in your toothpaste of choice. A toothpaste that doesn’t work is far riskier than a body butter that didn’t leave your skin as moisturized as desired.
That said, many homemade toothpastes perform just as well as the tubes you buy at the store. Even better, they are free of chemicals that you might want to think twice about putting in your mouth. And though science doesn’t currently back claims that certain ingredients found in most store-bought toothpastes can be harmful for human consumption, it’s still important to be aware of the concerns.
Give this recipe a try — if you don’t like it, it will have only cost you some pocket change, since most of the supplies are already in your pantry.

16 WilloW and Sage | willowandsage.com
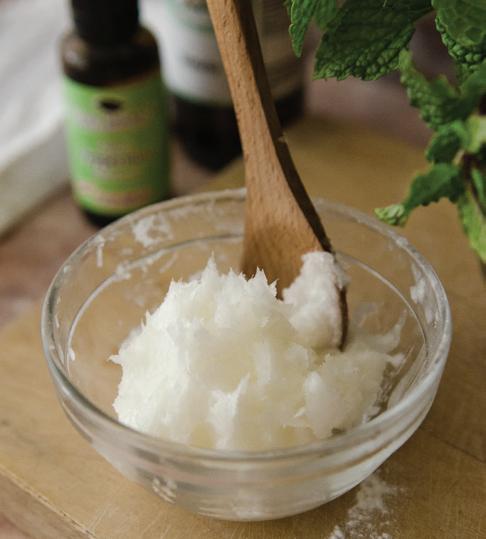

4 TB. coconut oil
2 TB. baking soda
15 drops peppermint essential oil
Stevia (to taste)
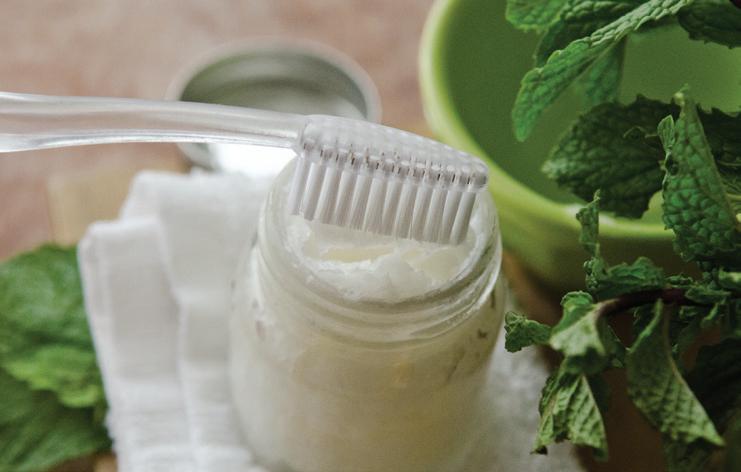
Combine all ingredients in a bowl and stir thoroughly. Transfer mixture to an airtight container. To use, dip a small spoon or popsicle stick into the toothpaste and place on your toothbrush.
17 willowandsage.com | WilloW and Sage i
by Lisa Fy Fe
When I was pregnant with my son, I became hyperaware of everything that I was putting in my body and on my body. At that time, I decided to clean up all of the products I was using on my skin by replacing them with organic, natural products that I made myself from simple ingredients. Not only was this better on my wallet, but I have also experienced better results, and I feel good knowing exactly what I am putting on my skin.
I started to learn about the beautiful, healing properties of essential oils and now use them daily for a variety of purposes. This skin serum was added to my arsenal of facial products to help keep my skin looking youthful since I am now in my 40s, but it is a lovely serum for any age. The soothing oils in this concoction are incredibly healing. They help prevent signs of aging, and they hydrate, soften, and keep skin glowing on a daily basis. Enjoy!
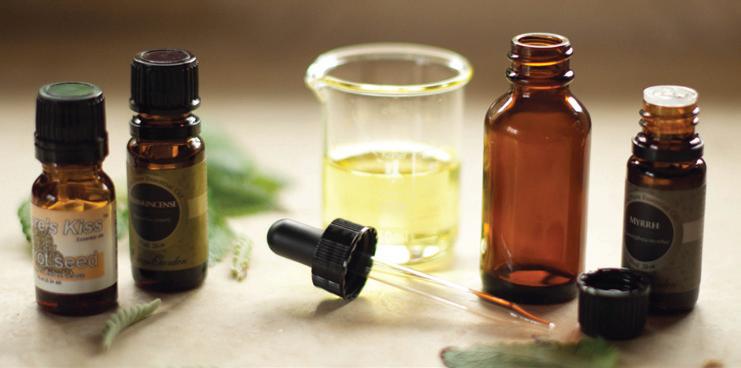
2 TB. sweet almond oil
2 TB. meadowfoam seed essential oil
2 drops carrot seed oil

5 drops lavender essential oil
5 drops rose hip oil
5 drops frankincense essential oil
18 i WilloW and Sage | willowandsage.com
e Mix all of the oils together and store in a dark bottle. Use a small amount each night after washing your face. The serum should be used on clean skin. It is very potent, so only a few drops are needed to work well.
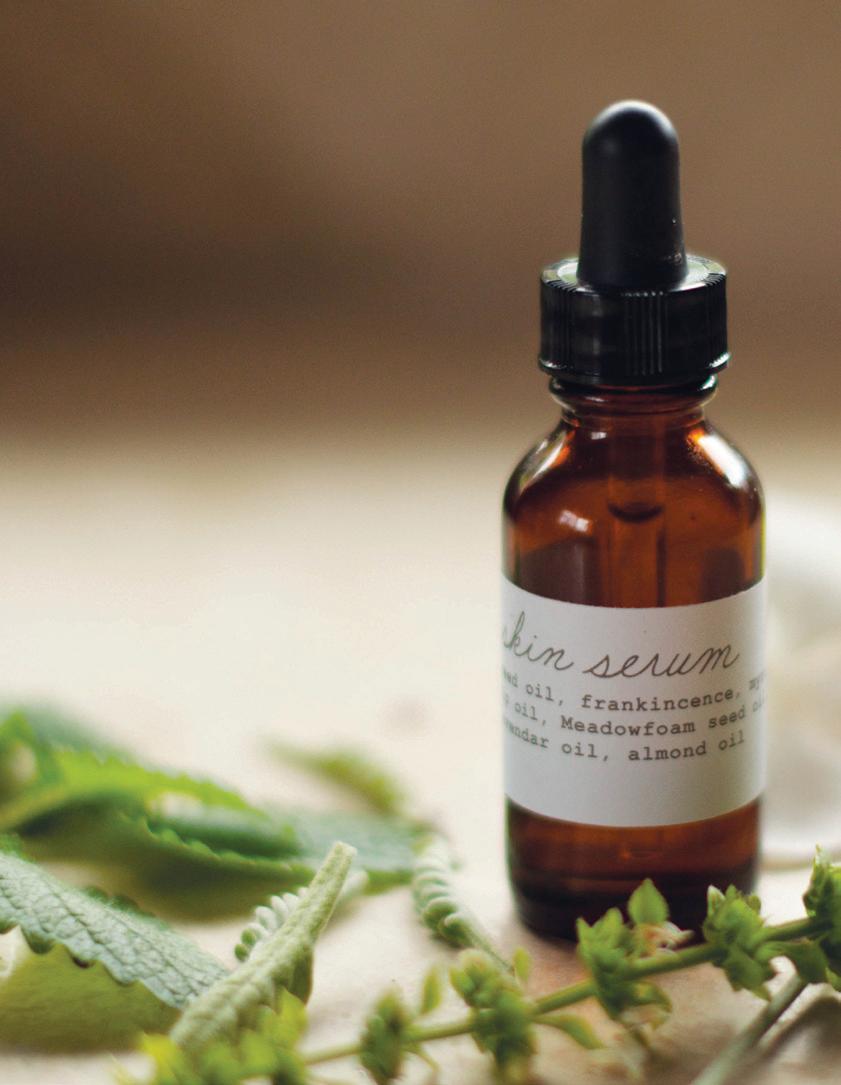
y Sweet Almond Oil: Good all-around carrier oil for normal skin
y Meadowfoam Seed Oil: Very moisturizing oil for skin softening
y Carrot Seed Oil: Antioxidant-rich, helps protect skin from wrinkles, stimulates cell growth
y Lavender Oil: Relaxing, fragrant oil, antiseptic, antifungal, healing, moisturizing
y Rose Hip Oil: Treats fine lines and wrinkles, reduces appearance of scars and spots, hydrates skin
y Frankincense Oil: Skin regenerating, diminishes scars and spots, moisturizing
To learn more about Lisa Fyfe, visit her blog at littlemonsterbaby.com
19 willowandsage.com | WilloW and Sage i
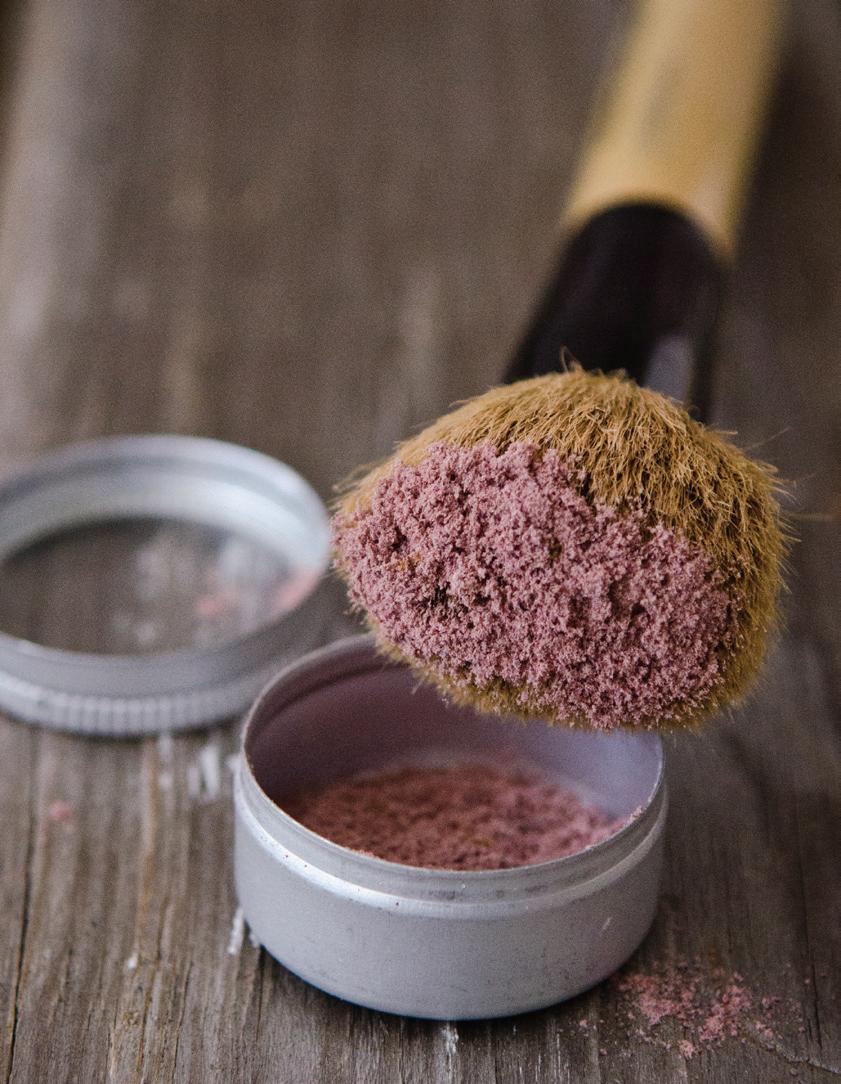
The idea of making your own makeup can seem intimidating. Surely the process must be complicated and time-consuming, right? That’s not so, and this blush recipe is a great recipe to try if you’ve been wanting to make homemade versions of the products you use on your face every day. It requires just a few ingredients and takes just a few minutes to make. What makes this recipe so great is that you can easily customize the shade exactly to your liking.
This recipe uses DIY beetroot powder, but if you don’t have a dehydrator or an oven that functions well at low temperatures, you can purchase some online or at many natural food stores.
20 WilloW and Sage | willowandsage.com
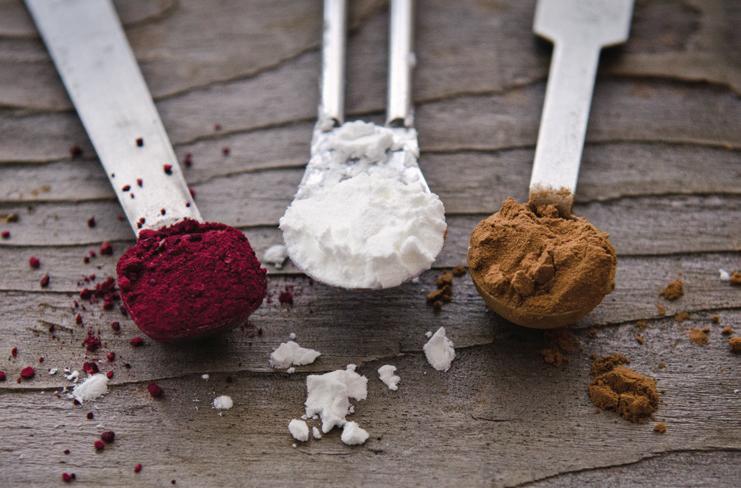

1 TB. cornstarch
1 TB. beetroot powder
Cocoa powder (optional)
Bowl: small
Container w/ lid
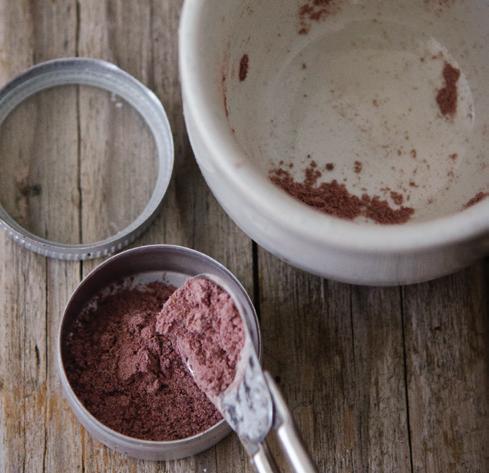
Begin by mixing together cornstarch and beetroot powder. Test this shade on your skin to see if it is to your liking. You can always add a little extra beetroot powder or cornstarch to adjust the color. You can also add cocoa powder to make a darker hue. Play around with the amount of each ingredient until the desired shade is reached. Place in a container with a lid. T
21 willowandsage.com | WilloW and Sage i
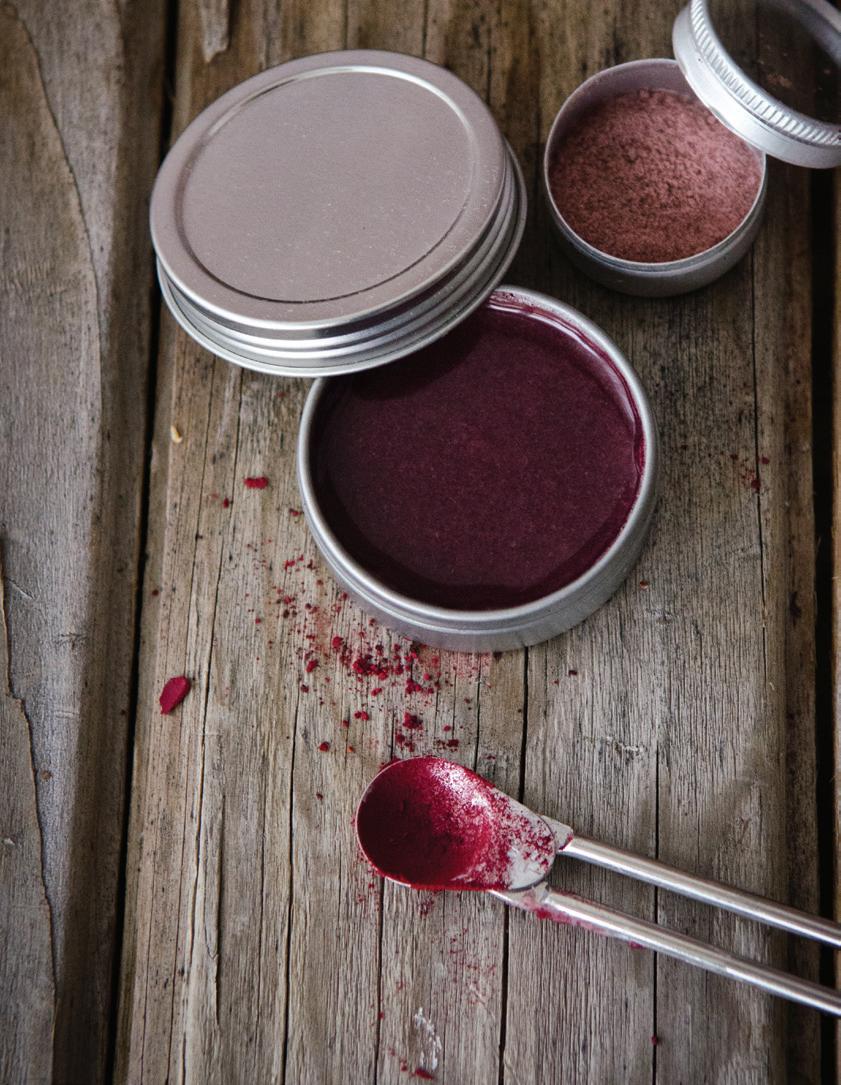
If you’ve made up a batch of colorless lip balm and have since decided you want to add a little color to them, it’s easy! If they’re in tins, you can actually re-melt the balm right inside the container (place it on a hotplate on its lowest setting), add a tablespoon of beetroot powder to it, and stir.
22 WilloW and Sage | willowandsage.com
The Power of

I recently received a sample of expensive maracuja oil in a makeup subscription box. It was from a well-known all-natural cosmetics company, so I was excited to try it. I loved it, but when I looked up the price I knew I couldn’t purchase the full-size version. Luckily, you can find generic versions of it in natural food stores. h ere’s a little more information about my new favorite oil.
Maracuja oil is derived from passionfruit. It is harvested only once a year by women in the Amazon, which makes this oil a little more expensive than others.
Great for Dry Skin
This oil is light and easily absorbed by the skin to moisturize and soften it. Before trying it out on your skin, test a small area to see if there is a reaction. If there is no reaction, you can rub a few drops directly into the skin.
t reat S i tchy Skin
Just a few drops applied to the affected area will ease itching sensations.
Work S a S a c uticle o il rub a bit of oil into your cuticles to keep them soft. even small amounts of maracuja oil can be considered toxic, so it should never be injested.
23 willowandsage.com | WilloW and Sage i

24 WilloW and Sage | willowandsage.com
By de B or A h h ArJu
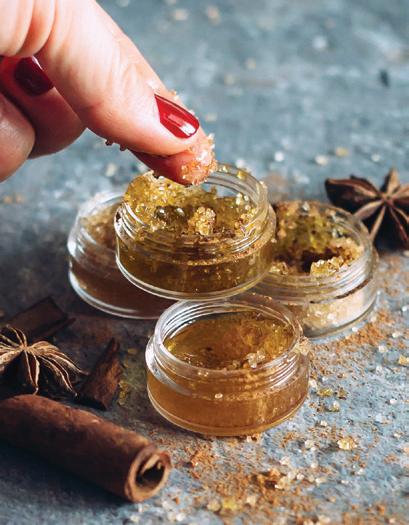
The transition from summer to fall, is a great time to reevaluate our skincare routines and add exfoliation to prevent dry, chapped lips. As temperatures drop, indoor heaters turn up and the result is less moisture in the air. This leads to dry lips that peel, crack, and turn red. These fall lip scrubs can help exfoliate those dead skin cells, leaving lips soft and fresh.
CInn AM on L IP SCruB
2 TB. brown sugar
1 / 2 TB. olive oil
1 / 2 TB. raw honey
1 / 2 tsp. ground cinnamon
Bowl: small
Airtight container
PuMPkIn L IP e xfo LIAnT
2 TB. coconut oil
1 TB. honey
1 TB. brown sugar
1 tsp. pumpkin pie spice
Bowl: small
Airtight container
VAnILLA & h oney L IP SCruB
1 TB. brown sugar
1 squeeze raw honey
1 drop vanilla extract
Bowl: small
Airtight container
Combine the ingredients in a small bowl. Apply to lips with fingertips and gently rub back and forth to remove dry, dead skin. Remove with warm water and a washcloth. Store in an airtight container for later use. These recipes make more than you need for a single use, so keep the extra in a cool, dry spot.
• u se these lip scrubs two or three times a week and follow with a rich lip balm.
• w hen stored in a cool, dry place, they’ll last for one to two months.
Deborah harju is a contributor for hello Glow, an online resource for wellness and natural living. Get more of her Diy beauty and skincare tips at helloglow.co.

25 willowandsage.com | WilloW and
i
Photography by ana Marie Stanciu.
Sage
26 i WilloW and Sage | willowandsage.com

 By kA rI Pe T er S
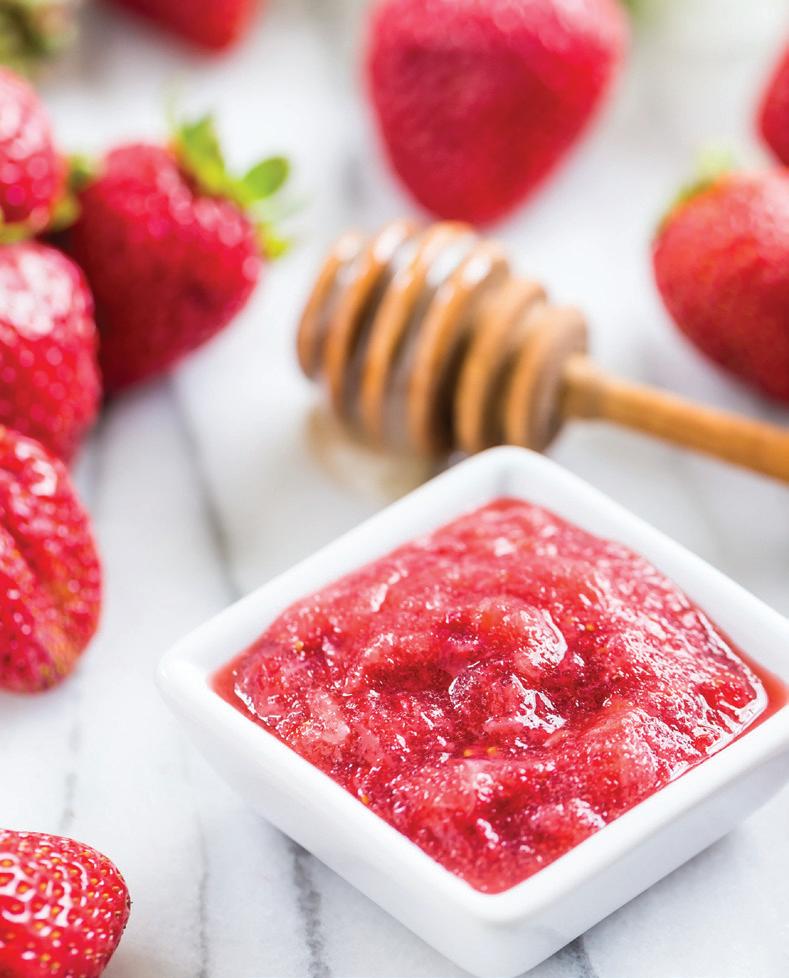
Strawberries contain multiple acids that help to get rid of dead skin cells and also tighten your pores. The honey in this facial mask is antibacterial, cleansing, and helps your skin stay properly moisturized. If that wasn’t enough already, there’s a little gelatin in there that helps to tighten your skin as well. This mask is perfect for sensitive skin, providing an even skin tone and a smooth feel.
y iel DS 1–2 face MaSkS
1 small fresh strawberry fork
1 tsp. honey
1 / 4 tsp. gelatin
Thoroughly mash the strawberry with a fork before stirring in the honey and gelatin. Let the mask sit for about 10 minutes to thicken. Apply the mask to your face. Depending on the size of the strawberry, you may have extra that can be refrigerated and used again the next day. Let the mask dry on your face until it becomes slightly itchy, about 10 minutes. Rinse the mask off and pat your face dry. Proceed with your usual skincare routine.
kari Peters lives in kalispell, Montana. to learn more, please visit getinspiredeveryday.com you can also follow her on facebook (gi365) and instagram (@get.inspired.everyday).
27 willowandsage.com | WilloW and Sage i
28 WilloW and Sage | willowandsage.com
by Kari Peters
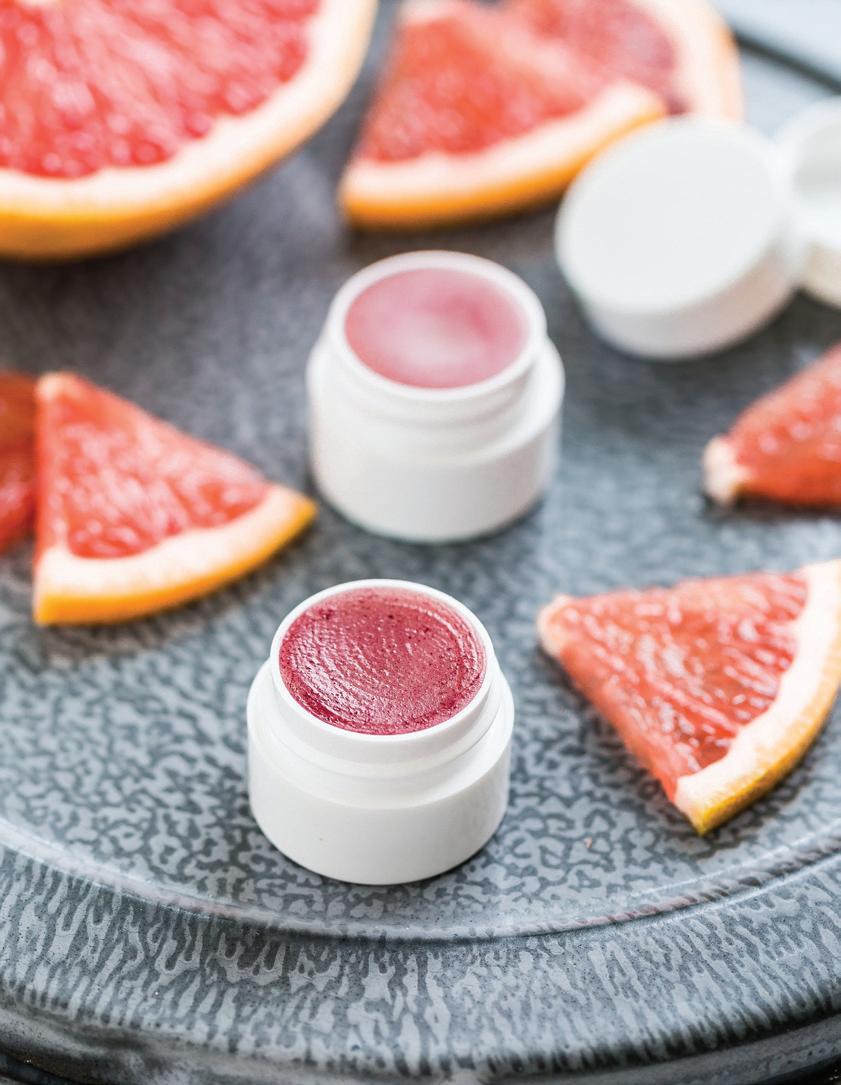
I love all things grapefruit — the taste, the smell, everything! Lip balms are easy to make at home, and even a small batch like this one will yield enough lip balm for months to come. I like to use a combination of oils in my balms because I feel like it does a better job at conditioning the lips. Coconut oil provides an immediate softening, shea butter adds some longlasting protection with its waxy consistency, and castor oil gives you superior softening and a beautiful gloss. An added bonus is that this lip balm is lightly tinted to give your lips even more glow!
Pot: small
1 TB. + 1 tsp. grated beeswax, packed, 4 g
1 TB. shea butter
2 TB. coconut oil
1 TB. castor oil
¼–½ tsp. grapefruit essential oil
Powdered beet root/1 tsp. or less fresh beet juice
6–8 lip balm containers
In a small pot, heat the beeswax, shea butter, coconut oil, and castor oil together over low heat until the beeswax is completely melted. Remove the pan from the heat and add in the essential oil. To add color to the lip balm, slowly mix in the powdered beet root or fresh beet juice a little bit at a time until the desired shade is reached. Pour the liquid into clean lip balm containers of your choice. Store for up to four months.
Kari Peters lives in Kalispell, Montana. To learn more, please visit getinspiredeveryday.com . You can also follow her on Facebook (gi365) and Instagram (@get.inspired.everyday).

29 willowandsage.com | WilloW and Sage i
30 i WilloW and Sage | willowandsage.com
by Deborah h arju
Our eyes are one of the first places where we see signs of aging — you can blame that on the lack of oil glands around the eye area. Oil glands keep our skin moist and hydrated, so we need to step up our eye game to avoid those pesky lines and crow’s feet. Nightly eye cream use is essential, but there’s even more we can do to treat this delicate area of the face. Weekly eye masks like these two from Stephanie Gerber’s latest book, “Essential Glow: Recipes & Tips for Using Essential Oils” (Weldon Owen, 2017), can help target different under-eye needs, from locking in moisture to de-puffing.
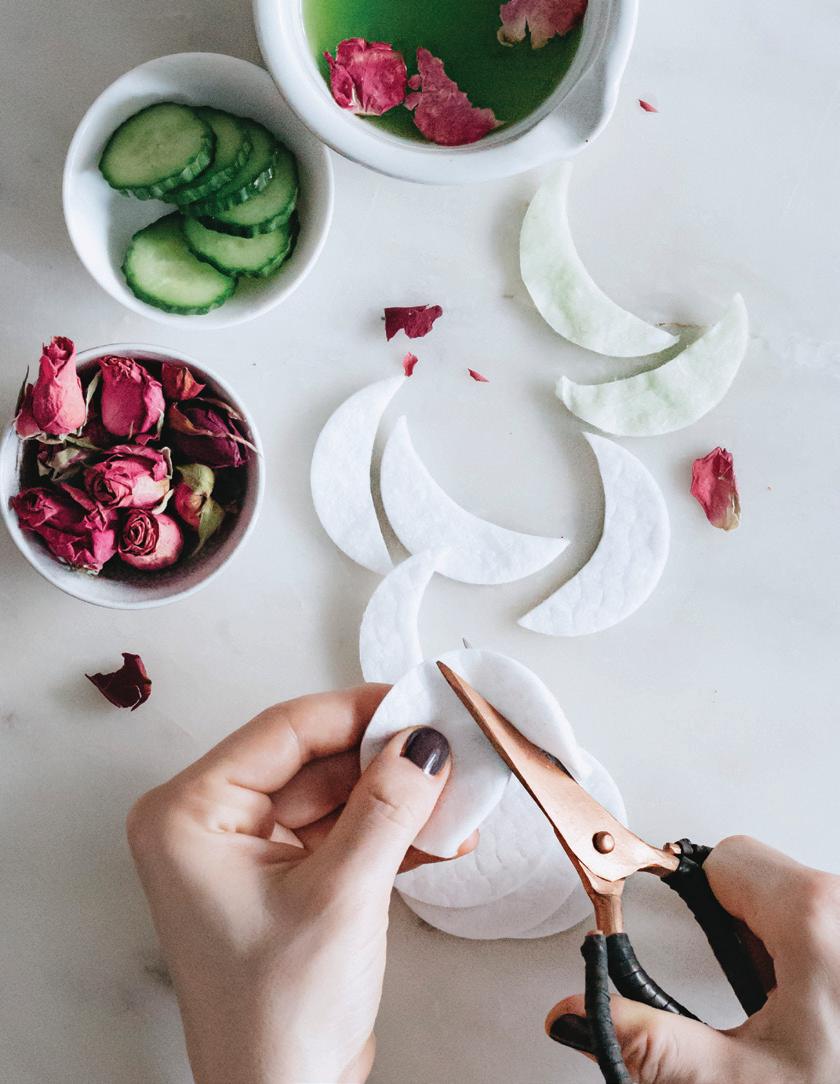
Rich in ascorbic acid and phytochemicals, cucumbers help tighten and soothe skin. Instead of placing cucumber slices over your closed eyelids, this blended mask will reach the inner and outer corners of the eyes.
Scissors
Cotton rounds
Blender
½ cucumber
1 oz. rose water
Bowl
Resealable plastic bag
Cut the cotton rounds into crescent-moon shapes. This mask should make quite a few pairs, so cut more than you think you’ll need.
In a blender, puree the cucumber and rose water until liquefied, and transfer to a bowl. Soak the cotton rounds in the mixture, squeeze out the excess, and then re-soak for optimal absorption. Store the extra soaked cotton rounds in a resealable plastic bag in the freezer for future use.
Thaw the eye pads for about 10 minutes before you use them. To apply, place the crescent-moon eye pads underneath your eyes, making sure to apply them close to the bottom lash line. Leave on for 10–15 minutes. T
31 willowandsage.com | WilloW and Sage i
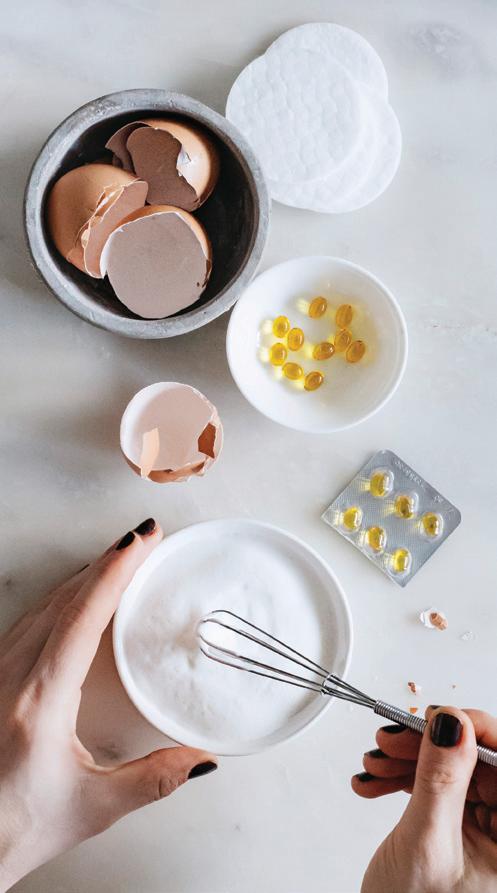
You’ll find egg whites in many anti-wrinkle masks for the face, and the eye area is no exception. Egg whites have been known to reduce the appearance of fine lines, while antioxidant-rich vitamin E fights free radicals.
Hand mixer
2 egg whites
1 capsule/5 drops vitamin E
Whisk
Makeup brush (optional)
Beat the egg whites until they’re frothy and then mix in the vitamin E with a whisk. Apply the mixture with your fingertips or a makeup brush to the under-eye area. Be careful not to ignore the outer edges of the eyes where expression and squint lines form. Leave on for 10 minutes and then rinse off.
Recipe by Deborah
and photos by Ana
reprinted with permission from “Essential Glow: Recipes & Tips for Using Essential Oils” (Weldon Owen, 2017). For more easy DIY beauty and wellness tips, visit helloglow.co
32 i WilloW and Sage | willowandsage.com
Harju
Stanciu of Hello Glow;

A Gift For You Free Gift Card Included *All gift subscriptions include a beautiful gift announcement card and envelope. To Order: stampington.com/gift-subscriptions or 1-877-782-6737 For Moms, Sisters, Best Friends, and You. Treat her to an entire year of creativity with an inspirational, magazine subscription. The best part? She’ll think of you every time a new issue arrives in the mail.
34 i WilloW and Sage | willowandsage.com
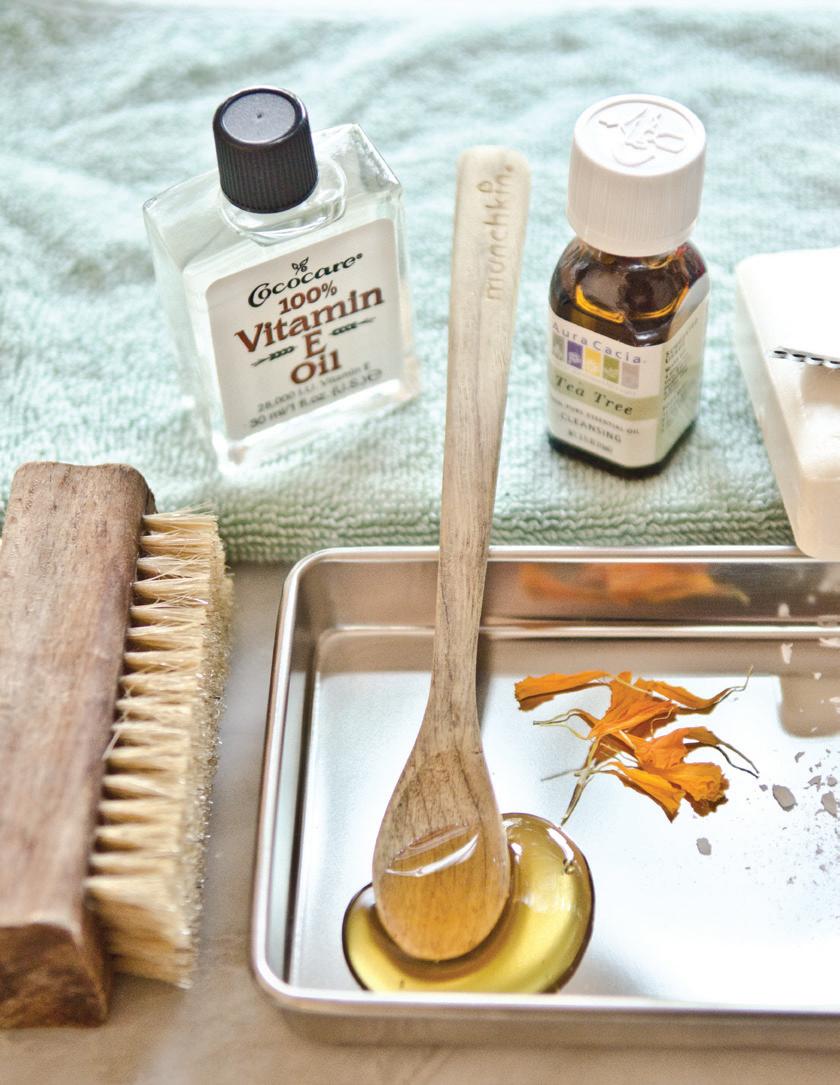
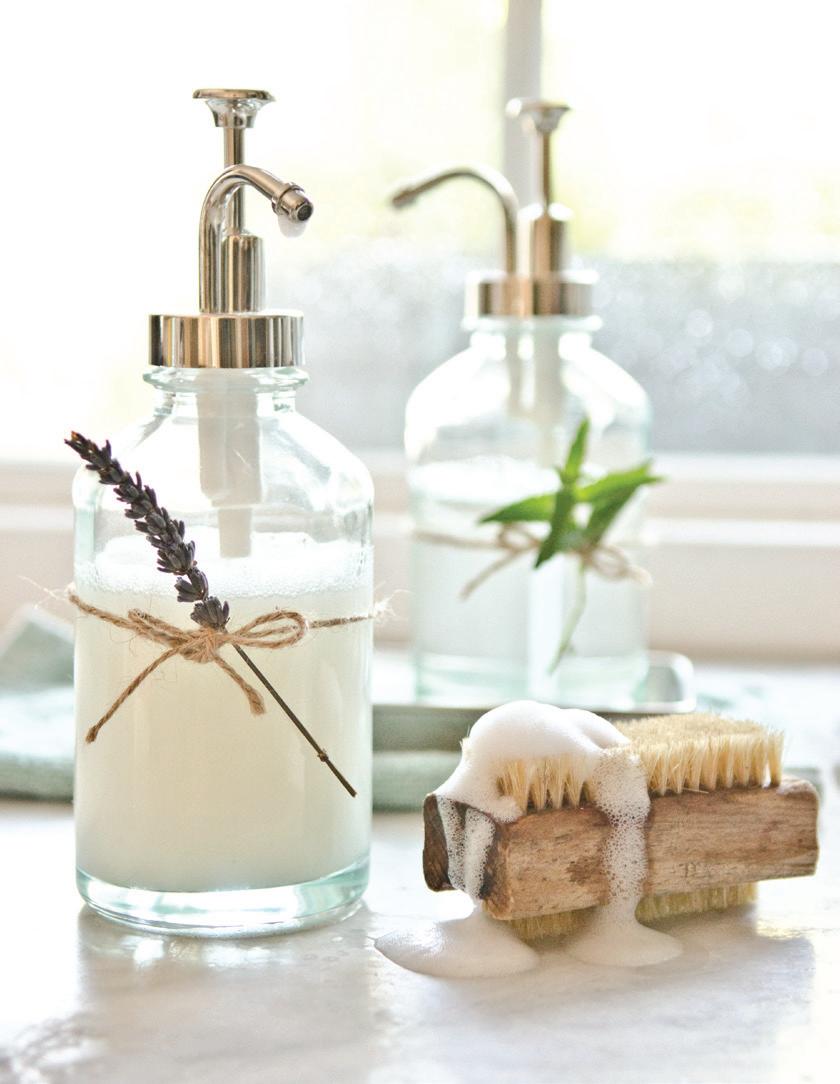
Goat’s milk soap is something of a miracle ingredient. Rich in vitamins, alpha hydroxy acid, and amino acids that are essential to good skincare, it’s no wonder that goat’s milk soap is frequently used in face and body products. This gentle two-ingredient cleanser is great to use by itself, but it can also be customized to fit your skincare concerns. Looking to fight the effects of UV rays and rejuvenate skin cells? Add several drops of carrot seed oil to the face wash. If you find yourself struggling with blemishes, tea tree oil is worth adding for its antibacterial qualities. Using gentle, minimal ingredients will strip down your face wash without stripping your face of natural moisture and nutrients.
Cheese grater
1 bar goat’s milk soap
1½ cups filtered water
Medium saucepan

Spoon/Immersion blender
Pump Bottle
Funnel/Measuring cup
Grate the bar of goat’s milk soap to produce approximately ¼ cup of soap shavings. Combine the soap shavings and filtered water in a medium saucepan. Heat water and soap on a stove over low heat until the soap has melted and combined with the water. Allow the mixture to cool to room temperature; this will most likely take about two hours. Stir the now gelatinous soap mixture with a spoon, or puree it with an immersion blender for a smoother texture. Once the soap mixture has completely cooled, pour it into a pump bottle using a funnel or a measuring cup.
y Tea tree essential oil for acne-prone skin
y Vitamin E oil to protect against and treat free radicals
y Calendula petals to minimize scarring
y Carrot seed essential oil to assist with skin cell regeneration
y Jojoba oil for extra moisture and to regulate sebum production
Recipe adapted from dontwastethecrumbs.com.
35 willowandsage.com | WilloW and Sage i
by JESSICA HEALE y
As a gal who loves living life from scratch, I have spent a lot of time switching over my personal care products from toxic to nontoxic and actually healthy DIY products. It is so much fun to create my own products from scratch, and I like being in control of what is going on my body. I have a passion for revamping toxic recipes into healthy ones.
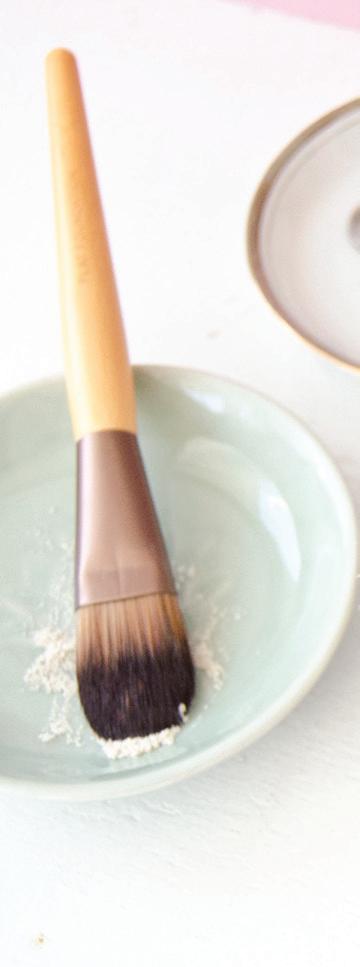
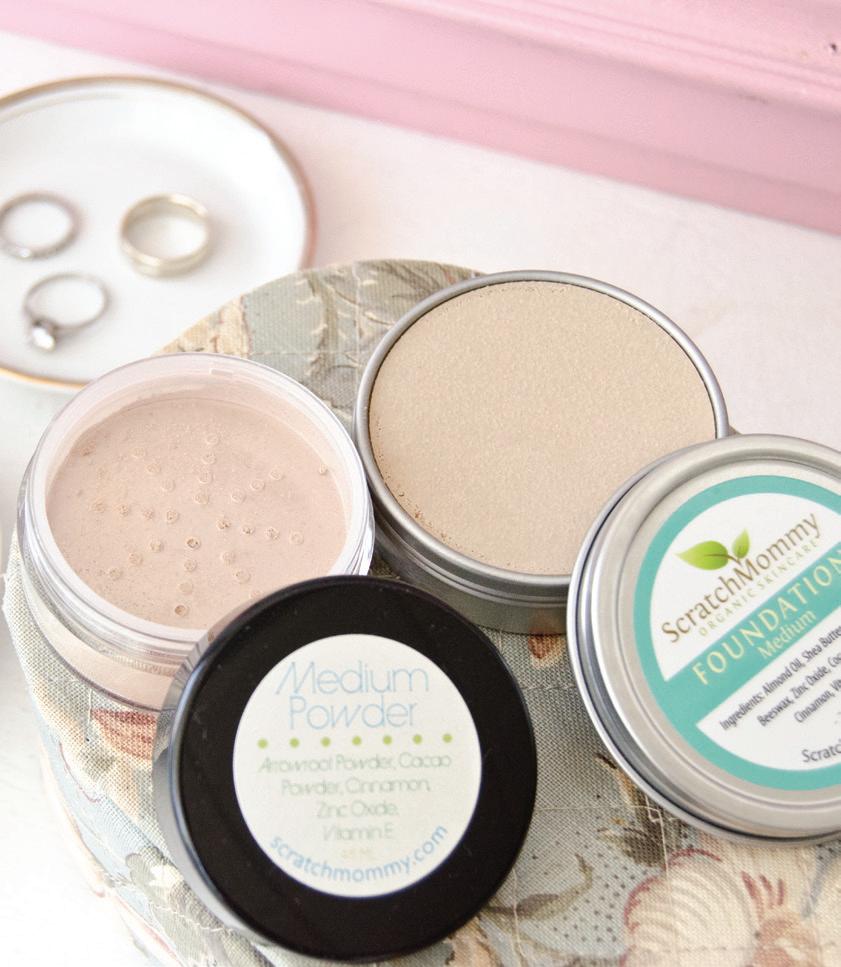
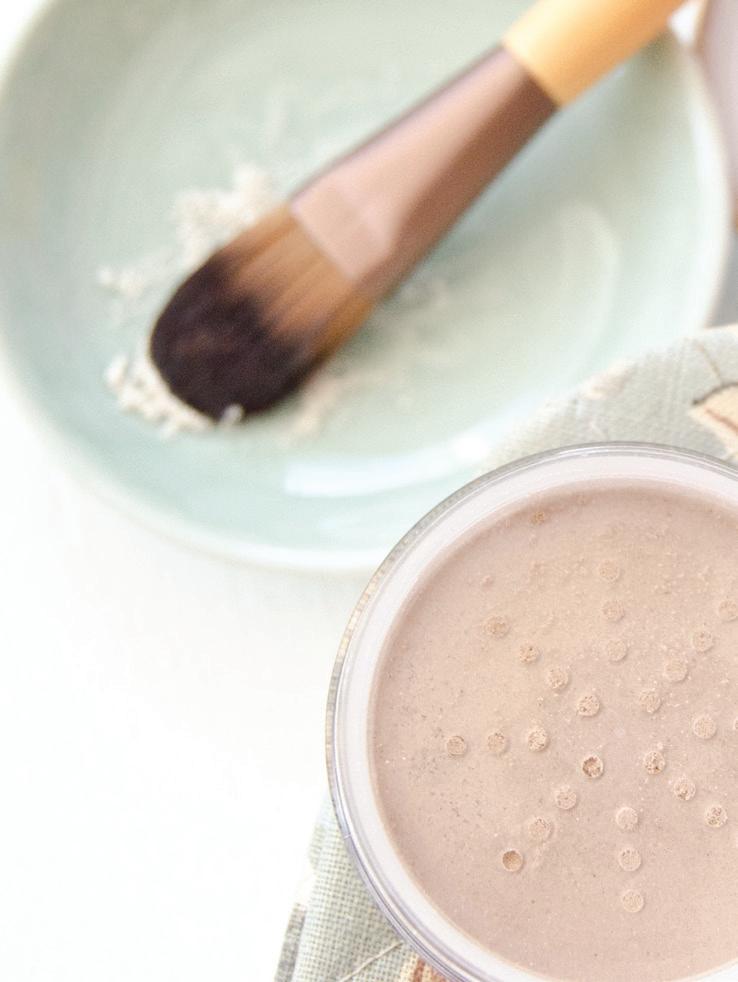
For this particular DIY product, I realized that makeup is one of the biggest offenders when it comes to toxic nastiness. I had been using a “natural” mineral foundation that I thought was good quality (Lord knows it sure is crazy expensive — $45 for just over 1 ounce). I was using it because it was mineral-based and did not contain colophony (an ingredient I am allergic to). After looking more closely at the ingredients, I went into my Scratch Mommy laboratory to create my own organic light-coverage foundation with sunscreen. I also decided to create my own nontoxic facial powder for days when I didn’t want to put on an entire face of makeup. This DIY facial powder is super easy to create, and it complements the foundation by setting and finishing it perfectly. You can even wear this without the foundation, as I do on many days. T
1.5 oz. almond oil
0.5 oz. cocoa butter
0.5 oz. beeswax
⅛ tsp. vitamin E Oil
Double-boiler
0.5 oz. zinc oxide
Cinnamon
Cocoa powder
Container
 Digital Scale
Whisk
36 i WilloW and Sage | willowandsage.com

37 willowandsage.com | WilloW and Sage i

Using the tare function on the scale, measure and combine almond oil, cocoa butter, beeswax, and vitamin E in the double boiler. Completely melt the ingredients, stirring occasionally with the whisk. Remove from heat and allow time to cool for several minutes.
Place the top of the double boiler back on the scale, hit tare, and add in spoonfuls of zinc oxide until the scale reads 0.5 ounce. This will give you approximately 20 SPF coverage. Whisk to combine.
Add ⅛ teaspoon of cinnamon; whisk to combine. Add cocoa powder a little at a time and whisk to get to the color you need for your complexion. To find your exact color match, start with ½ tablespoon of cocoa powder, whisk to combine, smooth a little on your wrist to check the color, and add more cocoa powder until you reach your perfect color: ½ tablespoon for a light foundation, ½ tablespoon plus 1 teaspoon for a medium foundation, and ½ tablespoon plus 2 teaspoons for a medium-dark foundation. Pour the mixture into the container and set aside to cool.
38 I WILLOW AND SAGE | willowandsage.com
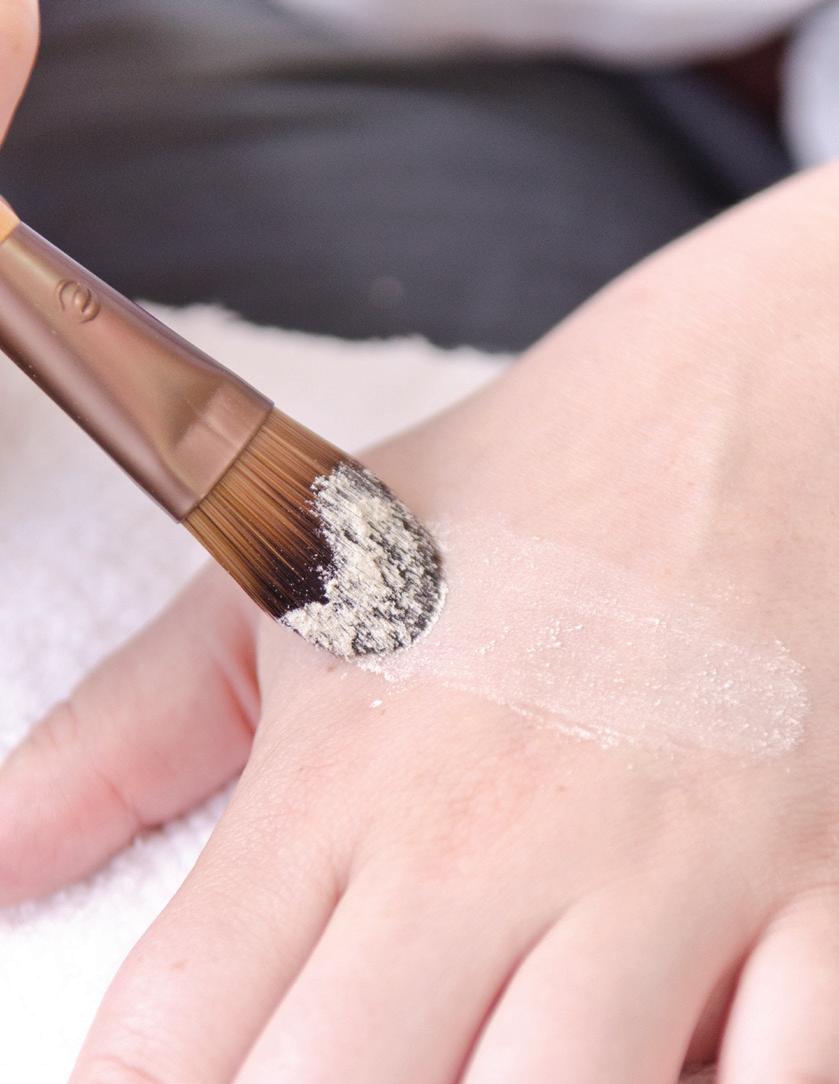
y You can use any unrefined, raw, and organic carrier oil of your choice instead of almond oil.
y Make sure the zinc oxide is uncoated, non-nano, and not micronized.
39 willowandsage.com | WILLOW AND SAGE I
Jessica Healey is the founder and creator of the Scratch Mommy website and organic skincare line. To learn more, visit scratchmommy.com

40 i WilloW and Sage | willowandsage.com

41 willowandsage.com | WilloW and Sage i

42 i WilloW and Sage | willowandsage.com
BY MELINDA BARNETT
My mother-in-law was raised in the south and has such a welcoming charm and grace that it seems she stepped out of another era. Brunches and dinners are always served on her best china, and her table settings are magazine-worthy. Unfortunately, she lives over an hour away from us, and it can sometimes take two hours to make the trip if the legendary Seattle traffic is bad that day. My husband and I have developed a shopping ritual that goes along with these trips.
Besides making bath products, I also love to cook. The grocery stores in our area are great for staples and fresh produce, but we don’t have any specialty food markets. The closer we get to my mother-in-law’s house, the more interesting the food choices become. Instead of general grocery stores, there are Italian markets with ciabatta bread and fresh mozzarella, Indian markets with whole spices and warm chapati, and Asian markets with fresh herbs and other wonders too numerous to fathom. Every time we make this trip, we stop at a different specialty market. On one such trip I discovered jasmine flower tea.
I’ll admit that I bought the tea just because the little blossoms were so lovely and I thought they would be pretty in bath products. At the time, I didn’t know the tea would be so enjoyable to drink, nor did I know that jasmine flowers are said to have therapeutic properties, such as stress-reduction and improved circulation, as well as having antioxidant and antibacterial properties. Apparently people have been drinking and using jasmine flowers for over 800 years.
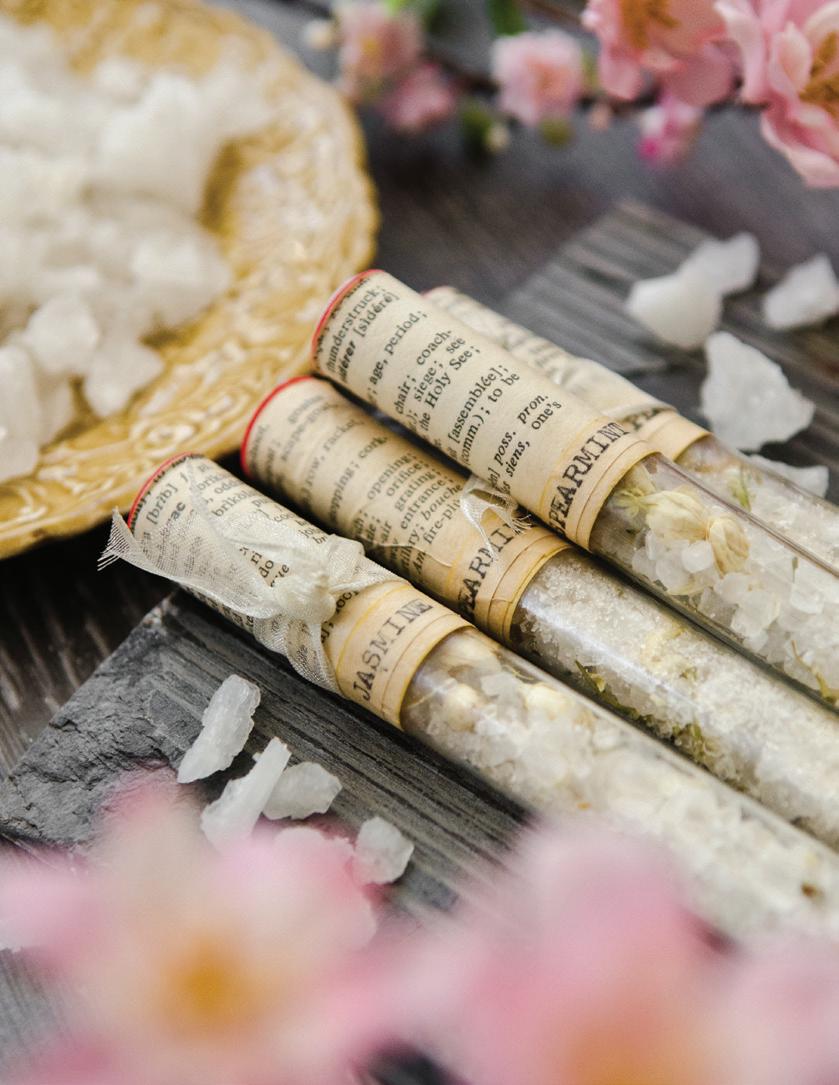
To make these bath salts, I paired jasmine blossoms with jasmine essential oil, which seemed to be the obvious choice. Spearmint is really the surprise here and is said to have similar stimulating properties. Its minty scent mellows the sweetness of the jasmine. These are my new favorite bath salts, both for their beauty and scent, and they make great gifts. In fact, I gave some of these vials to my lovely mother-in-law the last time we visited! T
1 cup Epsom salts
1 cup Dead Sea salt/salt of choice
1 cup jasmine flower tea
8 drops jasmine essential oil
10 drops spearmint essential oil
Jar w/ lid/Large plastic bag
Funnel
Glass vials
Typewriter Scissors
Vintage book Paintbrush
Decoupage medium: (Plaid - Mod Podge)
Stronghold glue
Button Ribbon
43 willowandsage.com | WILLOW AND SAGE I
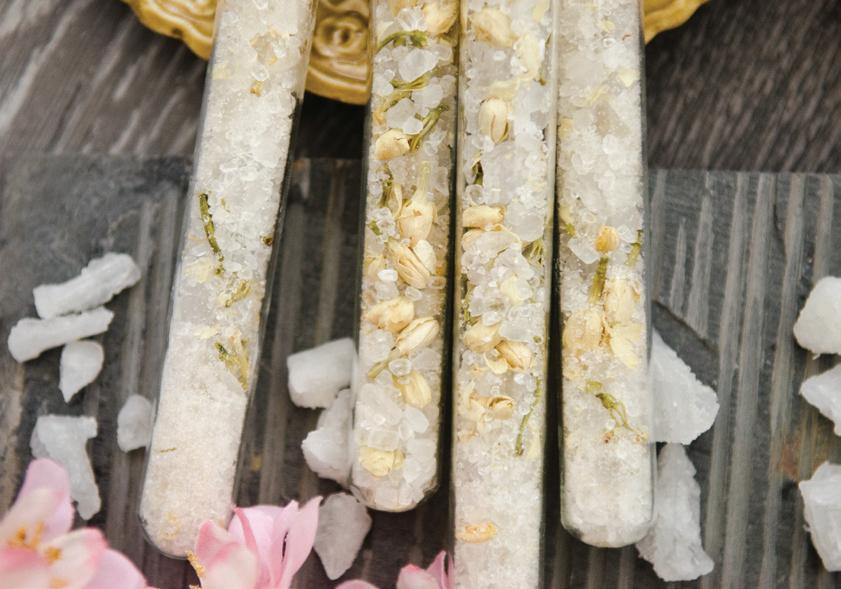
Put all the ingredients into a jar or plastic bag. Shake well, and funnel into glass vials.
Create the label with a typewriter and cut out. Cut out a strip from a vintage book and adhere it to the top of the vial using decoupage medium. Layer the typed label with the strip of text and adhere to the vial. Seal with several additional layers of decoupage medium, allowing it to dry between coats. Use stronghold glue to adhere a button to the top of the vial. Tie a ribbon. around the vial.
y I bought this particular tea at HMart in Bellevue, Washington, but it can easily be found online.
y If you order glass vials online, they will occasionally come with hollow plastic tops. These tops can easily be filled with candle wax before gluing on the buttons.
y This recipe is for a mild-to-medium scent. For a stronger scent, double the amount of essential oil.
Melinda Barnett lives in Stanwood, Washington, with her husband, horses, dogs, and guinea pigs. More of her work can be seen at beesonpie.blogspot.com . She welcomes email at melinda.erickson@hotmail.com
44 I WILLOW AND SAGE | willowandsage.com
45 willowandsage.com | WILLOW AND SAGE I
BY LAURA PUTNAM

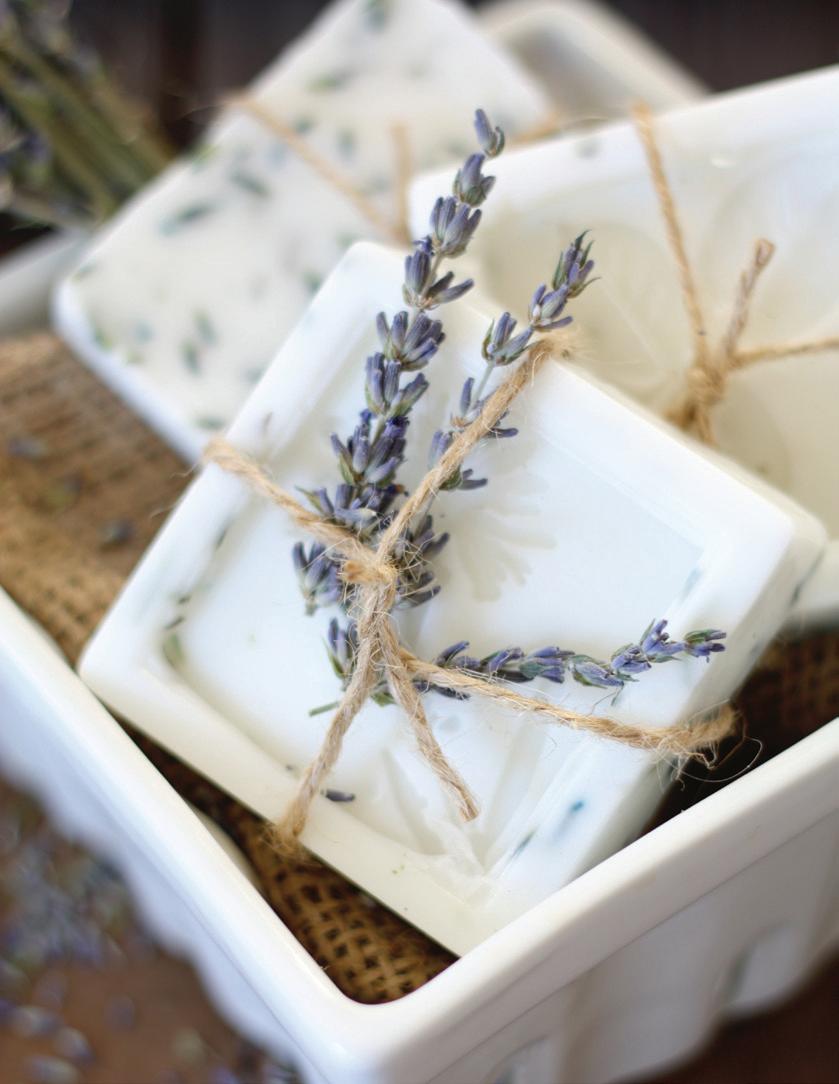
I have a confession to make: I am a scent snob. I try not to be, but it is true. I bring home all kinds of things that smell yummy in the store. But there are two scents I always love: lemon verbena and lavender. And it is even better if they are mixed together. So I decided I would try my hand at making my own soap in my favorite scents. And if the soap is going to smelly yummy, it may as well feel good too, so I made it with goat︐s milk soap ingredients. It could not have been any easier to make, and I found all of my ingredients and supplies at a major craft store. T
46 I WILLOW AND SAGE | willowandsage.com
47 willowandsage.com | WILLOW AND SAGE I
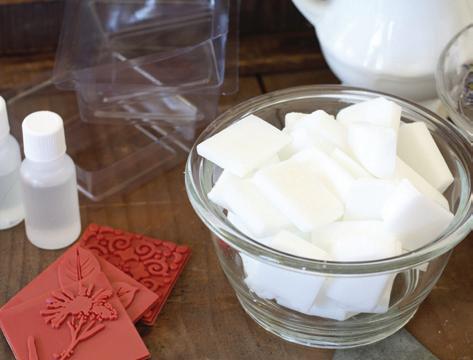
Goat's milk soap base
Container w/ spout
Spoon
Scented Oil
Lavender
Soap pattern stamp
Soap molds
Knife

Cut the soap base into smaller squares and place them into a microwavable container with a spout. Microwave the squares for about 40 seconds and continue to microwave them 10 seconds at a time until melted. Use a spoon to mix along the way. Be sure to test the timing on how your base melts, as it may differ from mine.
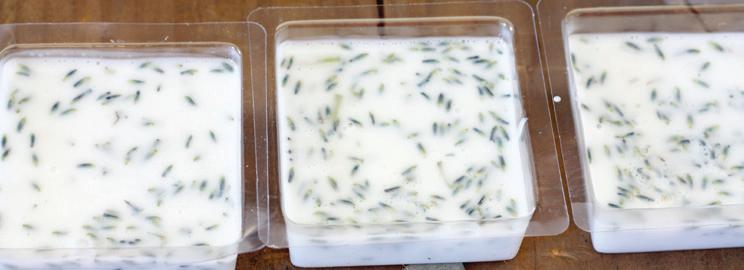
48 I WILLOW AND SAGE | willowandsage.com

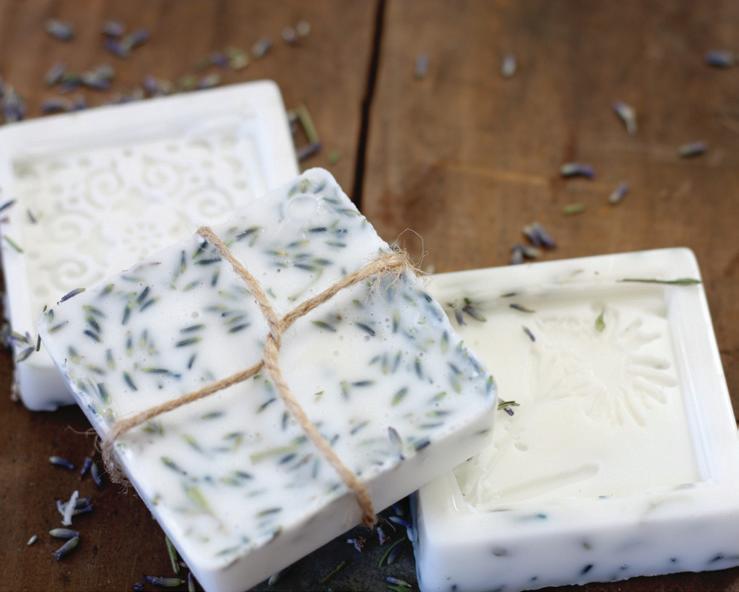
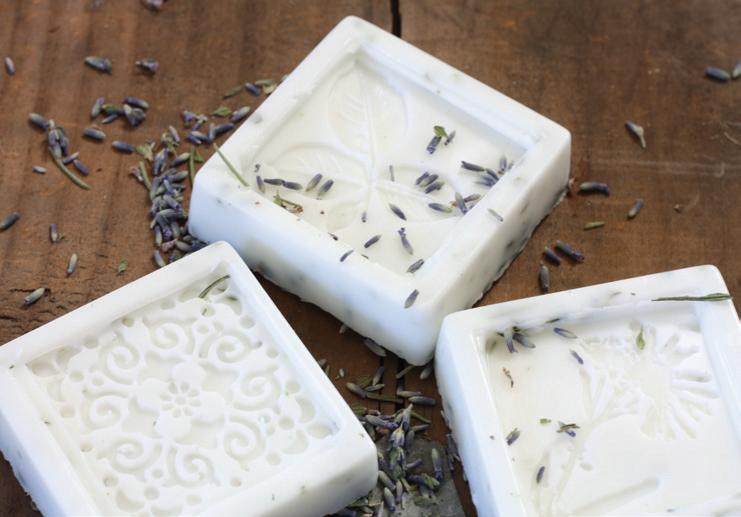
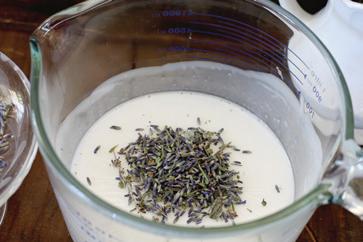
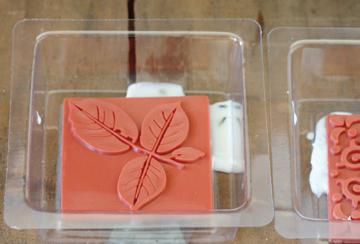
Add a few drops of scented oil and lavender. Keep adding and stirring until it reaches the level of scent desired. Use a soap stamp to make them pretty. Add a small amount of the mixture into the mold to adhere the stamp to the bottom with the pattern facing up. Fill the mold to the desired depth. Make sure you are working on a flat surface so that it will set up flat.
Wait for about 40 minutes for the soap to set. You can put it in the fridge once it is almost set to speed up the process. Slowly pull away the sides of the mold from the soap and begin to pry away the bottom. To remove the pattern stamp, use a knife to cut the edge from the soap and carefully pry it off.
As you can see, the added lavender floats to the top of the mold, which is also the bottom of the soap. And that is it! Now you have custom homemade goat︐s milk soap.
You can add twine and lavender sprigs to the soap, and place it in a pretty container for a perfect gift. And if you really want to make it a special gift, you could add another bath-related item. Wrap the soap in either paper or a pretty plastic bag to keep it from turning color.
49 willowandsage.com | WILLOW AND SAGE I
Laura Putnam lives in New York with her extremely supportive hubby, their two amazing daughters, and their Goldendoodle, Bailey Rose. Visit her online at findinghomeonline.com.
 BY LIA GRIFFITH
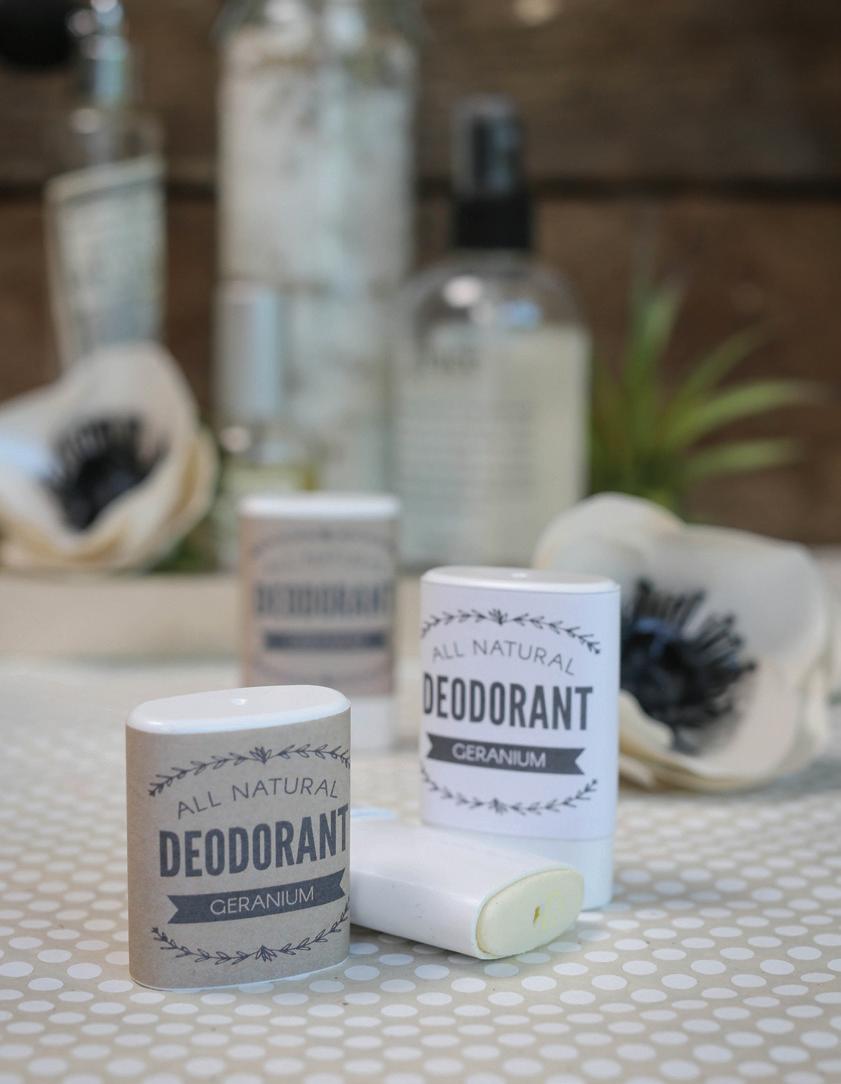
I always try to use natural products, to eat well, and to live a healthy life. I like to say that if I can’t eat it, I don’t want it on my skin, so my favorite beauty products are nearly always edible. Making my own natural beauty products has been something I have done for a while now, and today I’m sharing the newest recipe: an all-natural deodorant for those who want a chemical-free option. I had everyone in the office road-test this recipe and they all came back with raving reviews. For this batch I used geranium essential oil, which is both uplifting and calming, but you can use any of your favorite essential oils for your own batch.
The small deodorant containers that we used fit nicely into a handbag or travel bags, but we plan to make larger sizes in the future. It’s also worth noting that although you only need a small amount of the zinc oxide in this recipe, it’s worth it to buy a whole bag. Zinc oxide is the active ingredient in this deodorant, meaning you can add more if you want a more deodorizing product.
50 I WILLOW AND SAGE | willowandsage.com
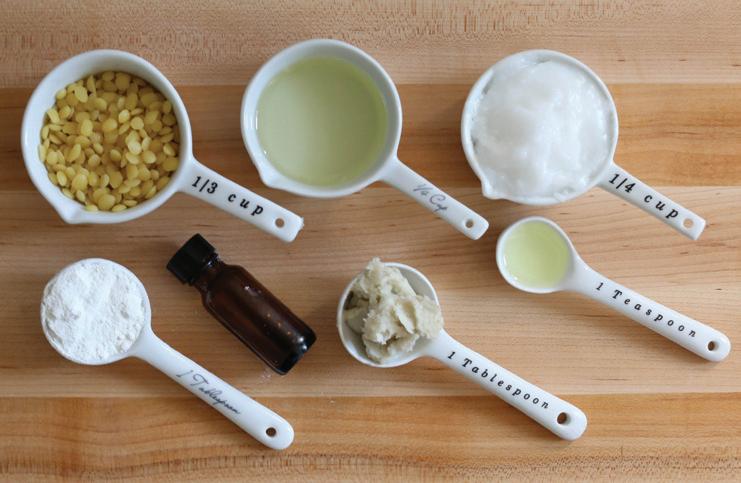
60 g. coconut oil
30 g. almond oil
15 g. shea butter
30 g. beeswax
3 g. vitamin E oil
Double Boiler
1 TB. zinc oxide
10–20 drops essential oil of choice
Funnel Deodorant containers
Melt the coconut oil, almond oil, shea butter, beeswax, and vitamin E oil in a double boiler. Allow the mixture to cool for
three minutes. Stir in the zinc oxide and essential oil. Using a funnel, pour the liquid into the deodorant containers. Allow to cool completely before putting on the lid. This recipe makes enough to fill 10, 15-milliliter deodorant containers.
y Visit liagriffith.com/homemade-all-naturaldeodorant-recipe/ for free printable labels. They can be printed onto full-sheet label paper and trimmed to size for your small containers.
and
Visit her
at liagriffith.com for daily DIY projects, tutorials, and videos. 51 willowandsage.com | WILLOW AND SAGE I
Lia Griffith is a designer, maker,
handcrafted lifestyle expert.
blog
52 I WILLOW AND SAGE | willowandsage.com
BY LIA GRIFFITH
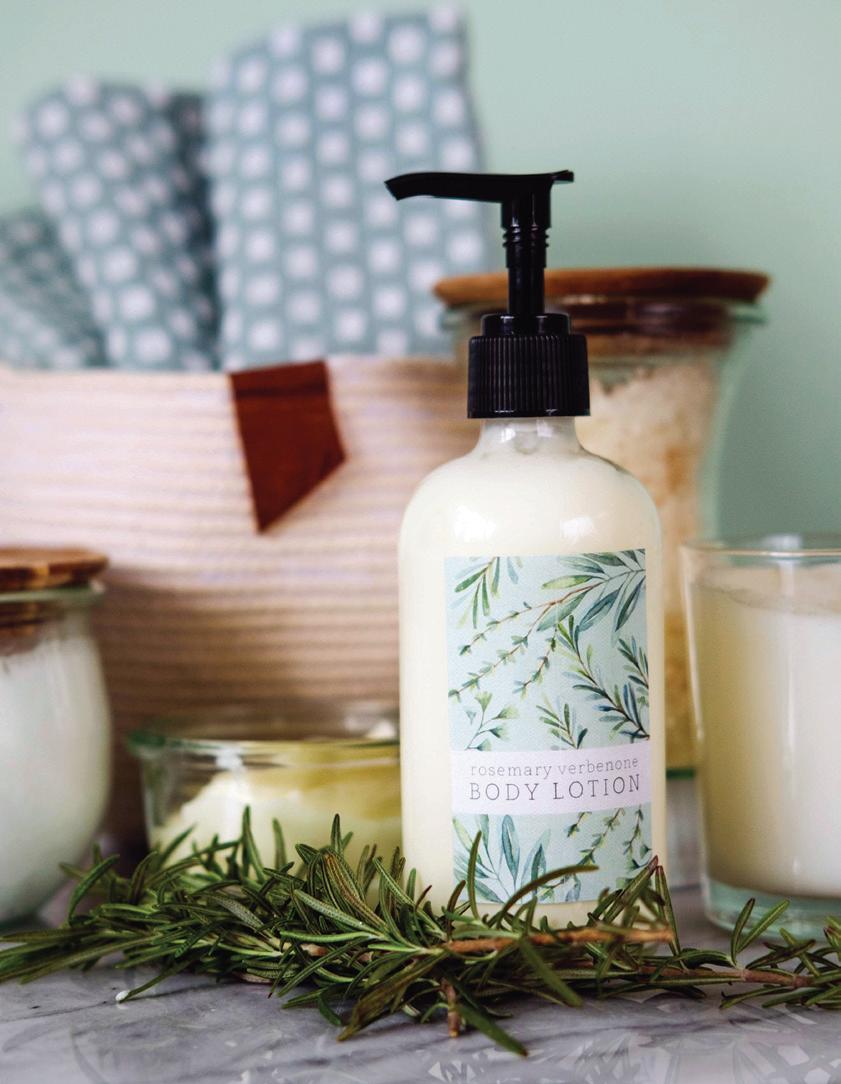
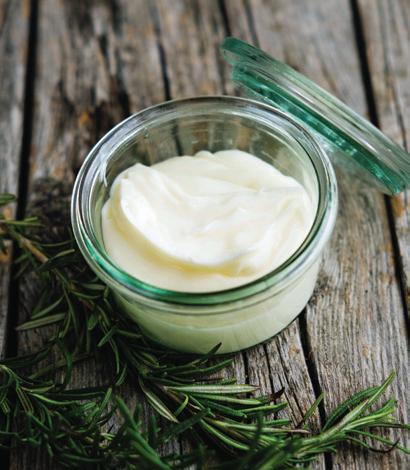
As the summer draws to a close and the air becomes cooler, it’s important to moisturize your skin and prepare it for the months ahead. This rich lotion marries cocoa butter, jojoba oil, and vitamin E oil for a perfectly nourishing body cream. Rosemary is naturally antibacterial, smells divine, and is great for promoting youthful-looking skin. The scent of cocoa butter can be overpowering, so the rosemary also provides a herbaceous balance to this product. Apply after bathing to moisturize and nourish your skin.
12 oz. distilled/boiled water
1 / 4 tsp. citric acid
2 oz. jojoba oil
1 oz. emulsifying wax
Mason jar w/ lid
Double boiler/Microwave
1 / 4 tsp. potassium sorbate
10 drops vitamin E oil
20 drops rosemary verbena essential oil
Sanitize your equipment by placing it in boiling water for 10 minutes. Boil 12 ounces of water, let cool to 170 degrees Fahrenheit, and mix in citric acid. Place the oils and wax into a mason jar, and melt in a double boiler or microwave in 15-second intervals. Cool oils to 170 degrees Fahrenheit and add to water at the same temperature. Put the lid onto the jar and shake continuously for 10 minutes until it has become thick and creamy. Add potassium sorbate, vitamin E oil, and rosemary verbena essential oil. Leave overnight to thicken.
• Use your homemade lotion within six months.
Lia Griffith is a handcrafted lifestyle designer and maker. Download the labels for this lotion, plus hundreds more DIY project downloads for a small fee at liagriffith.com

53 willowandsage.com | WILLOW AND SAGE I
 BY MEGHAN HORAN
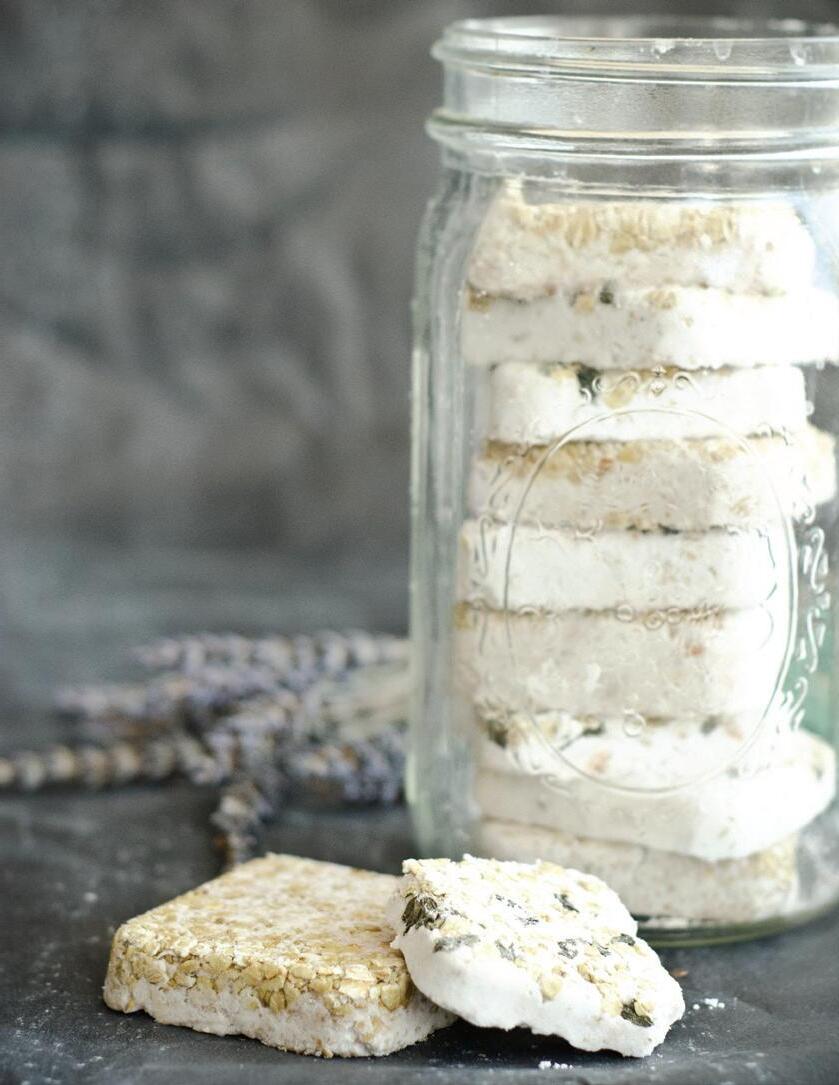
My passion in life is to create. I love creating art, and I try my hand at almost any medium. Before I became a graphic designer I loved to cook and experiment with different foods.
For this project, I wanted to make something in the kitchen that was beautiful and simple. When I create I try to use inexpensive ingredients I already have on hand. I am happy to say that I bought all of my ingredients used here for under $10. I scoured Pinterest for a recipe I could slightly alter to achieve the same effect.
54 WILLOW AND SAGE | willowandsage.com
Bowl: medium
Baking soda
Citric acid
Oatmeal
Cornstarch
Water
Lavender essential oil
Muffin baking tin: square
Dried lavender
Mason jar w/ lid: wide-mouth
Grubby tags (optional)
OATMEAL BATH BOMB MIXTURE
In a medium mixing bowl, combine ¼ cup baking soda, 2 tablespoons citric acid, ¼ cup oatmeal, and 2 tablespoons cornstarch. Add in 2 tablespoons of water. Mix all ingredients well, and add more water if needed to make the mixture tacky and pliable. Set the mixture aside.
LAVENDER BATH BOMB MIXTURE
In another bowl, combine ¼ cup baking soda, 2 tablespoons citric acid, and 2 tablespoons cornstarch. Add in 2 tablespoons of water and several drops of lavender essential oil. Mix all ingredients well, and add more water if needed to make the mixture tacky and pliable.
MAKING THE BATH BOMBS
Divide ¼ cup of oatmeal evenly between six spaces in a muffin baking tin; do the same with a mixture of 2 tablespoons dried lavender and 2 tablespoons oatmeal in the other six spaces.
Pack the oatmeal bath bomb mixture evenly into the spaces in the muffin tin lined with oatmeal. Pack the lavender bath bomb mixture evenly into the spaces in the muffin tin lined with lavender and oatmeal. Firmly press the mixture into the corners and pack it tightly to make sure the mixture holds together.
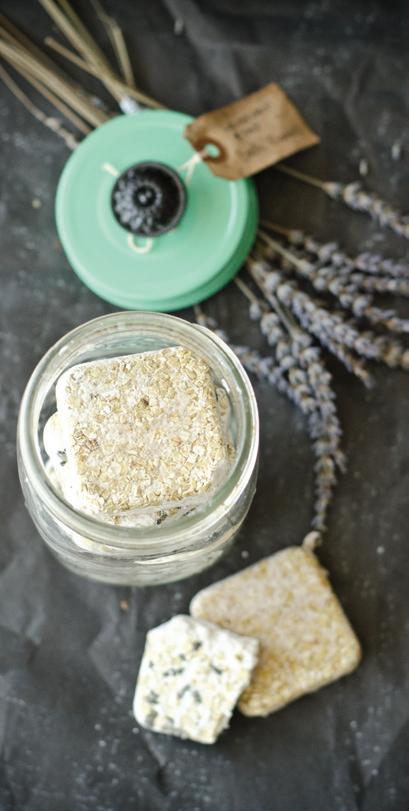
Leave out on a dry surface or place in the freezer to hold the shape longer. Let dry for about a day. When dry, gently remove the bath bombs from the muffin tin.
Package the bath bombs, in a clear glass mason jar so each and every element can be seen. A tall wide-mouth jar fit the bath bombs perfectly. The Shoppe at Somerset carries these adorable metal tops with decorative handles, and using this light green top elevated the overall presentation.

55 willowandsage.com | WILLOW AND SAGE I
 BY CHRISTEN HAMMONS
56 I WILLOW AND SAGE | willowandsage.com
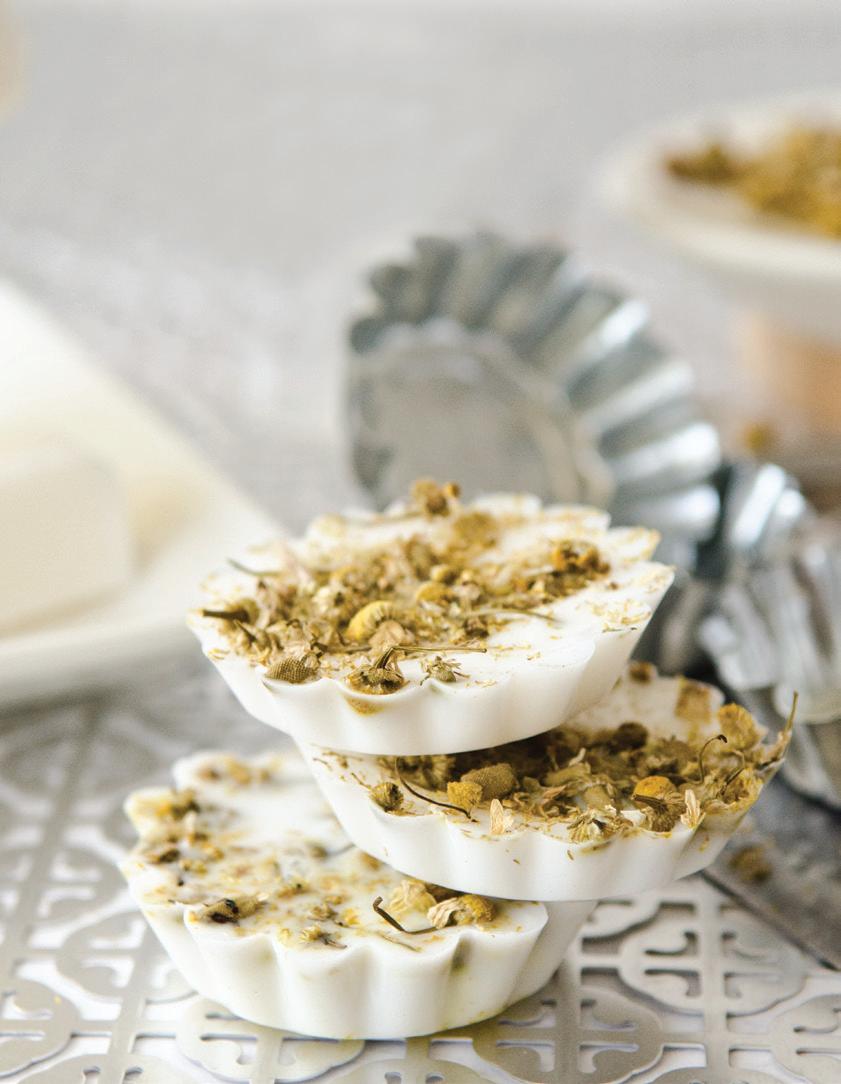
It’s no secret that I’ve been bitten by the melt-and-pour soap bug. I love quick and easy projects I can make for myself or give to a friend. While going through my craft supplies the other day, I noticed I had just a bit of white soap base left and wanted to put it to use. It wasn’t enough to fill my usual molds, so I had to find something smaller to pour the base into. I heard we recently got in a shipment of vintage tart tins for The Shoppe at Somerset and knew that they’d be perfect! I thought the soaps might be a little too plain, so I found some chamomile to add a touch of color, scent, and a bit of exfoliant.
Tin/Mold
Rubbing alcohol/Vodka
Soap cutter
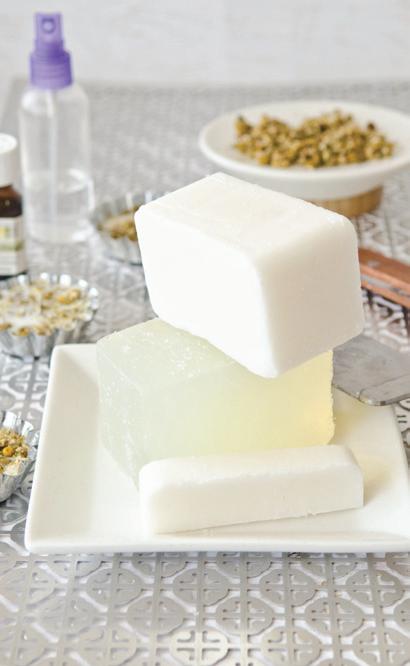
White soap base
Measuring cup: microwave-safe
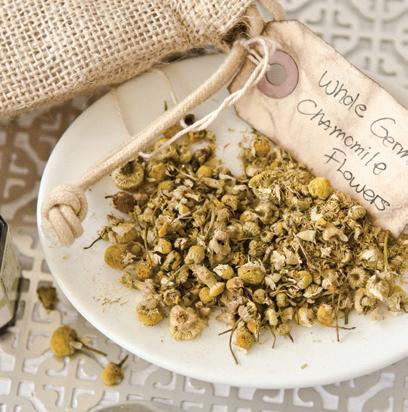
Dried chamomile buds
Spray your tins (or whatever mold you’ve chosen) with rubbing alcohol or vodka. This will help ensure your soap will slide out of the mold once it’s set. Cut the soap base into 1-inch cubes and place in a microwave-safe measuring cup. (I really recommend investing in a soap cutter. It is much safer than a knife, as it glides right through the base.) Microwave the soap base in 30-second increments until it is thoroughly melted. Pour soap into the tin and sprinkle chamomile on top. (I tried to place the chamomile in the tin first for one of the soaps, but it floated to the top once I poured in the soap base.) Place in the refrigerator to set overnight.
Once the soaps have set, they should pop out of the tins easily. You can then remove the soaps and wrap them as desired, or leave them in the tins for a unique gift presentation. Other than the setting time, this project took me less than five minutes to make, and that includes clean-up time. You really can’t get quicker or easier than that!
57 willowandsage.com | WILLOW AND SAGE I
Christen Hammons is the director of publishing for Stampington & Company. She lives in Orange, California, with her husband, two lazy cats, two funny chickens, and one scruffy pup.
58 I WILLOW AND SAGE | willowandsage.com
 BY KAETLYN KENNEDY
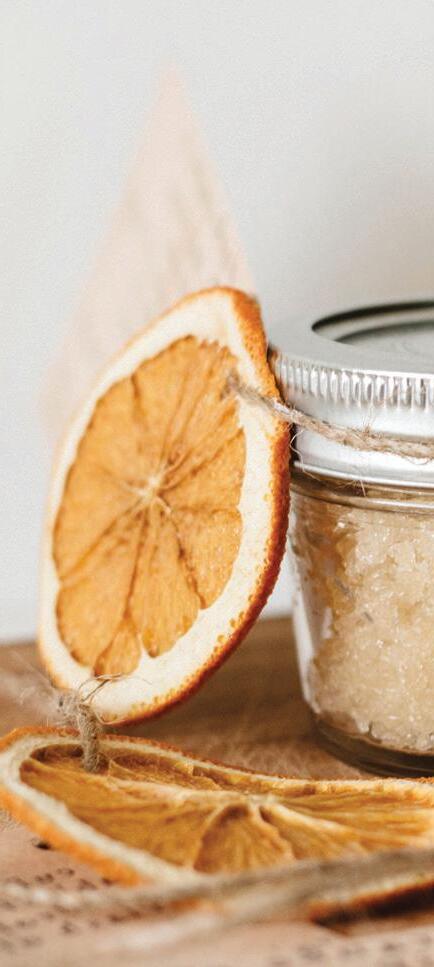
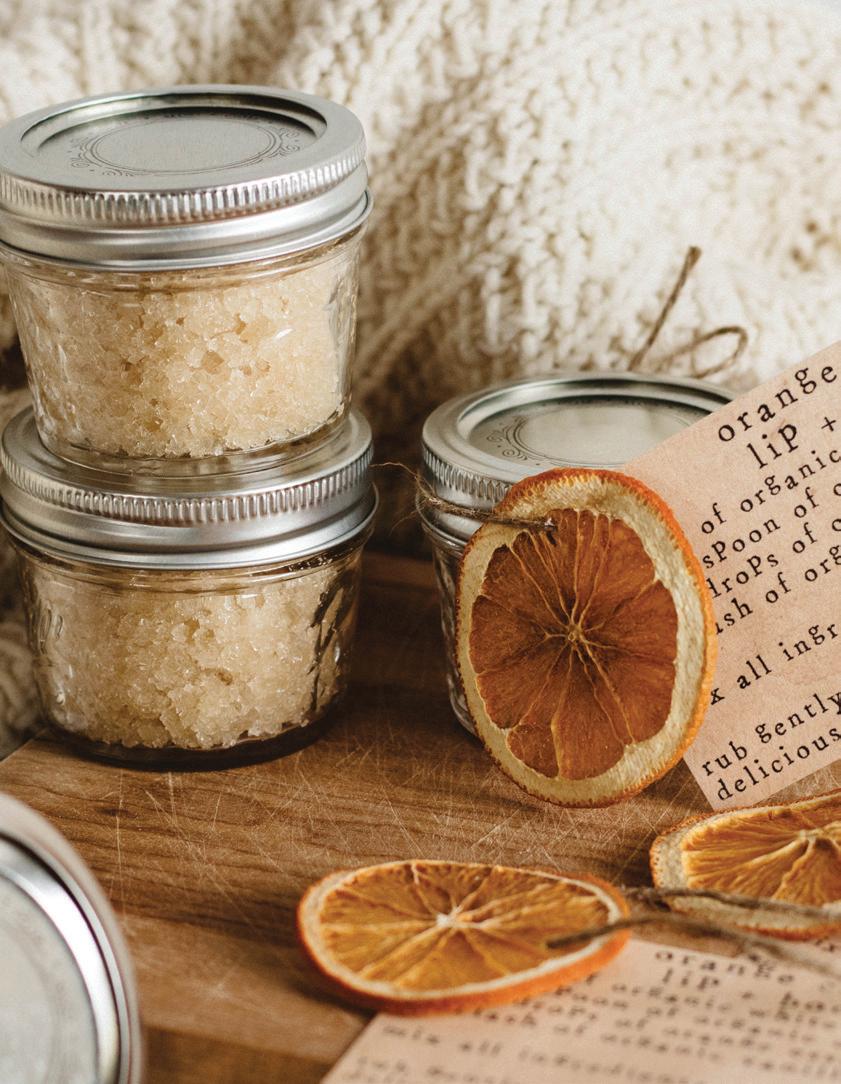
Do you guys remember the orange-and-cream flavored Creme Savers? Those orange-and-white swirly hard candies that tasted like heaven in your mouth? They were my favorite candies growing up, and I’m not even sure that they are produced any longer.
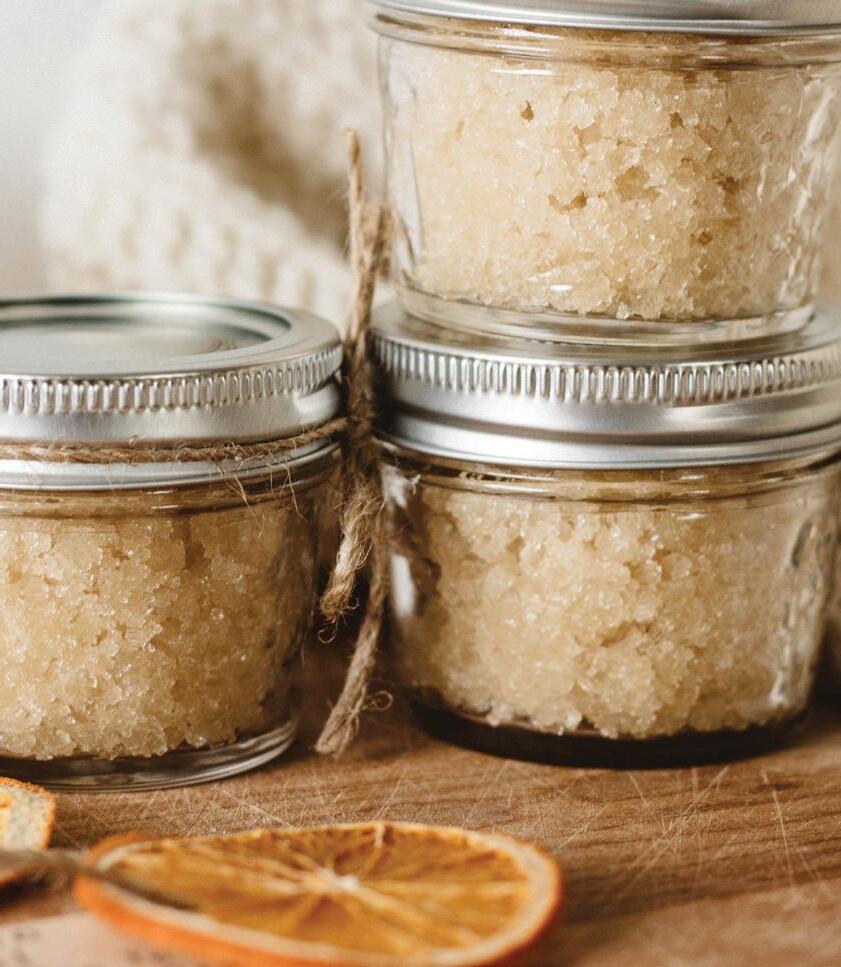
When I whipped up this body scrub, those candies immediately came to mind because it smells just like them — talk about nostalgia! It may or may not taste like them, too. I originally made this with the intention of it being a body scrub, but I now use it as a lip scrub as well, mainly because it’s less conspicuous when some of it ends up in my mouth.
The sugar in this scrub exfoliates, while the coconut oil moisturizes, making it great for the winter months when things become a little dry. The combination of sugary vanilla and winter citrus is the perfect scent for this time of year. Keep this scrub in the shower for some extra self-care or make it for a loved one as a holiday gift!

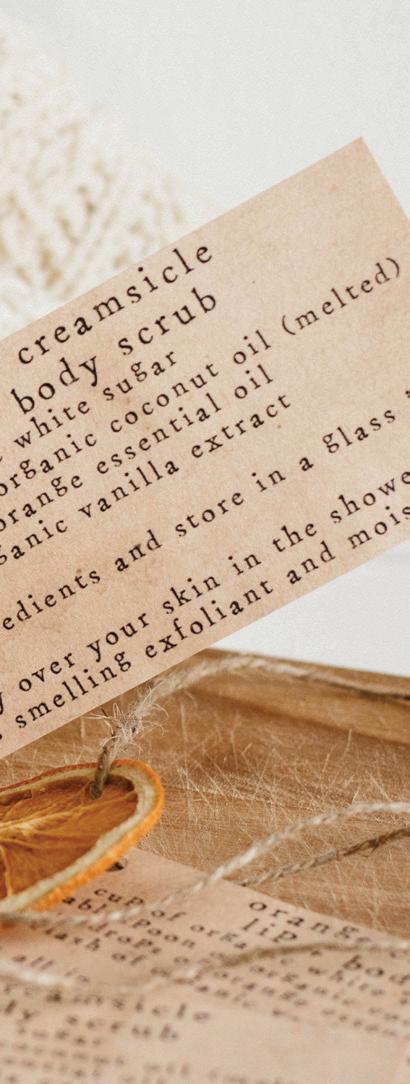
1 TB. organic coconut oil
⅓ cup organic white sugar
10–15 drops orange essential oil
Splash of organic vanilla extract
Bowl
Glass jar: 4-oz.
Melt the coconut oil on the stovetop until just melted; don’t melt it in the microwave because it will zap the nutrients from the oil. Mix the sugar, coconut oil, essential oil, and vanilla extract together in a bowl. Transfer to a 4-ounce jar with an airtight lid. To use, rub the scrub gently over your skin in the shower for a delicious-smelling exfoliant and moisturizer.
Kaetlyn Kennedy lives in Cleveland, Ohio. To learn more, visit kaetlynanne. com and calicoandtwine.com, and follow her on Instagram (@kaetlyn.anne). She welcomes email at kaetlynkennedy@gmail.com.
59 willowandsage.com | WILLOW AND SAGE I
BY DANA BUENO
Knowing what ingredients go into our bodies is very important to me — I look for the most pure, unprocessed ingredients when I cook for our family. I take the same approach to what we put on our bodies for skin care, which is what inspired me to come up with my recipe for this luxurious body butter!
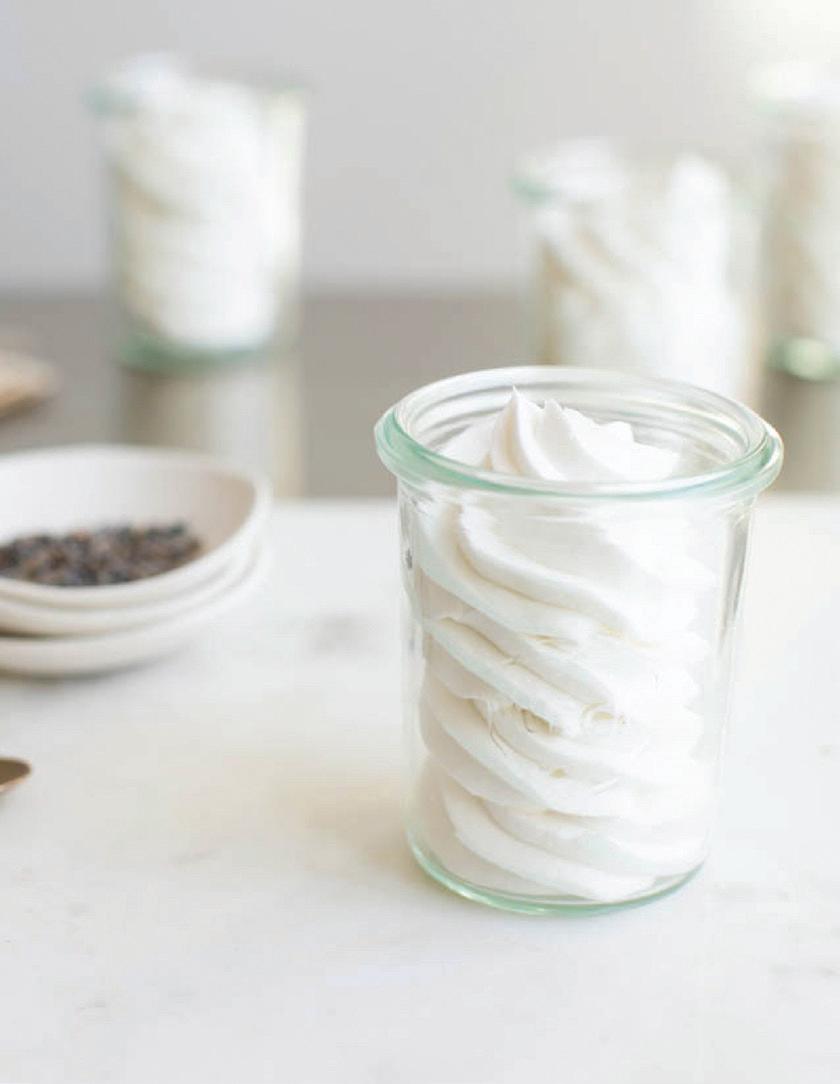
Yields approximately 6 Weck jars of Body Butter
2 cups coconut oil
½ cup Shea butter
3 TB. almond/jojoba oil
20 drops lavender essential oil e
In a glass bowl, microwave coconut oil in 15-second increments (whisking in between) until just melted all the way.
Add Shea butter, and heat again in 15-second increments (whisking in between) until Shea butter is melted and incorporated into the coconut oil.
Place bowl in the refrigerator and allow to cool until the mixture starts to become opaque around the edges.
Transfer the mixture into the bowl of your stand mixer. Whip the mixture until it starts becoming creamy. Drizzle the oil and essential oil into the coconut oil/Shea butter mixture. Continue to whip until the mixture is creamy and fluffy.
Store in glass or plastic airtight containers.
Lifestyle blogger Dana Bueno lives in Nashville, Tennessee. Her blog is a place where she shares things created from her heart and with her hands. To see what inspires Dana, visit her blog at danabueno.com


60 I WILLOW AND SAGE | willowandsage.com
61 willowandsage.com | WILLOW AND SAGE I
BY KATHLEEN LOVELAND
My love of flowers prompted the gift of a hibiscus plant from a loved one, but I received much more than just a beautiful bush. I collect the blooms at the end of each day before they fade and wither away. Whether it’s a single flower for a cup of herbal tea, several flowers for a batch of white grape-hibiscus jelly, or dehydrated petals to use in a salt scrub, I reap the benefits of the blooms both in beauty and in health.
I wait to collect the hibiscus flower petals until the end of the day to allow enough time for the bees to pollinate the plant. Then I gently close the flower and break it off of its green receptacle. I carefully tear each petal off of the flower just above the harder white tip of the petals. The white tips are very bitter and more difficult to dehydrate. I bring the petals in, rinse them with water, and lay them out on paper towels until I have enough to fill up my dehydrating machine. After they are dehydrated, I store them in a sterile airtight container or bag..
1 cup coarse kosher salt
2 oz. aloe vera gel
2 oz. vitamin E oil
1 oz. coconut oil
½ TB. hibiscus petals: dehydrated & crushed
Glass jar w/ lid
Combine salt, aloe vera gel, vitamin E oil, coconut oil, and hibiscus petals in a glass jar. Mix the ingredients well.
Stir the scrub, wet your hands, and rub the scrub onto your hands, feet, or body. Gently rinse off with warm water, pat dry with a towel, and massage the remaining oils into your skin.
y If you don’t grow and dehydrate your own hibiscus flowers, you can substitute hibiscus tea, or you can find them on my Etsy shop at kalphotoartdesign.etsy. com.
y Why coarse kosher salt? Kosher salt contains no additives. The coarse grind does not easily melt, therefore it maintains its ability to scrub. Another option would be semi-coarse sea salt, since it contains trace minerals that could be beneficial to your health.
62 I WILLOW AND SAGE | willowandsage.com

Kathleen Loveland is a teacher and artist. She lives on a farm in Ararat, Virginia. You can find her work on Pinterest (kloveart) and in her Etsy shop at kalphotoartdesign.etsy.com She welcomes email at kalphotoartdesign@gmail.com . 63 willowandsage.com | WILLOW AND SAGE I


64 I WILLOW AND SAGE | willowandsage.com
65 willowandsage.com | WILLOW AND SAGE I
66 I WILLOW AND SAGE | willowandsage.com
 BY CHLOE MACKINTOSH

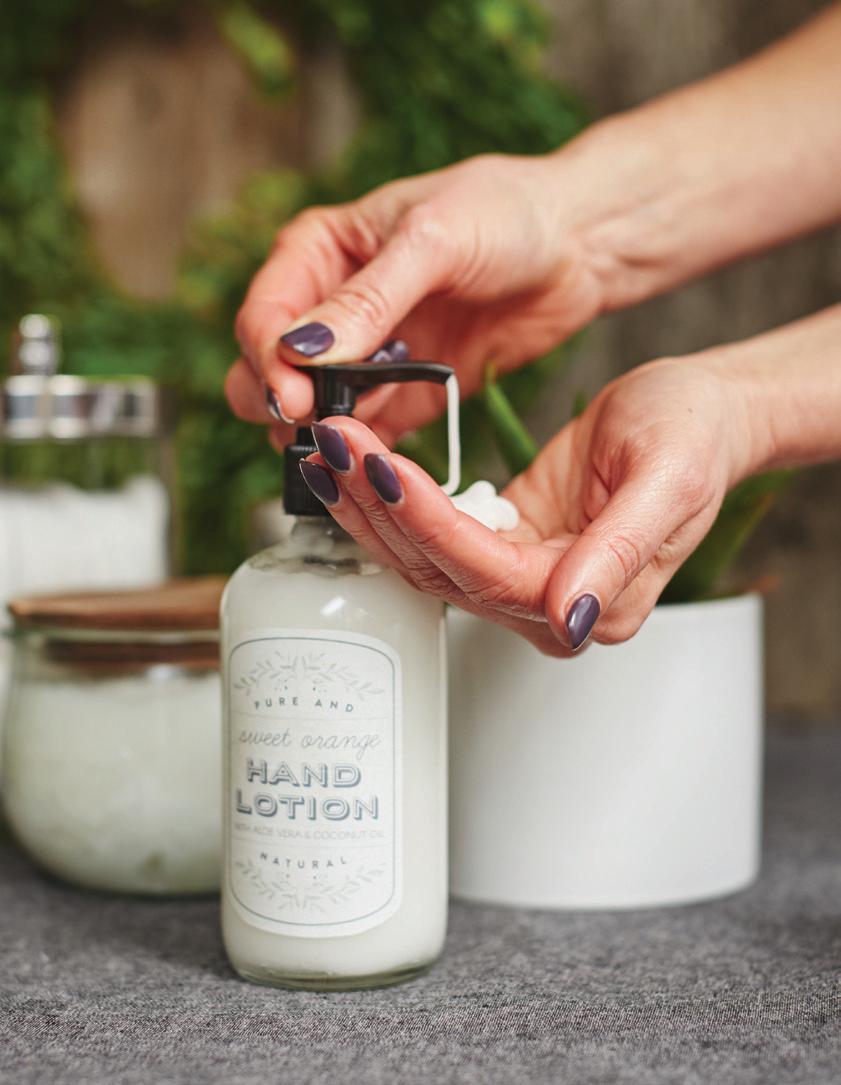
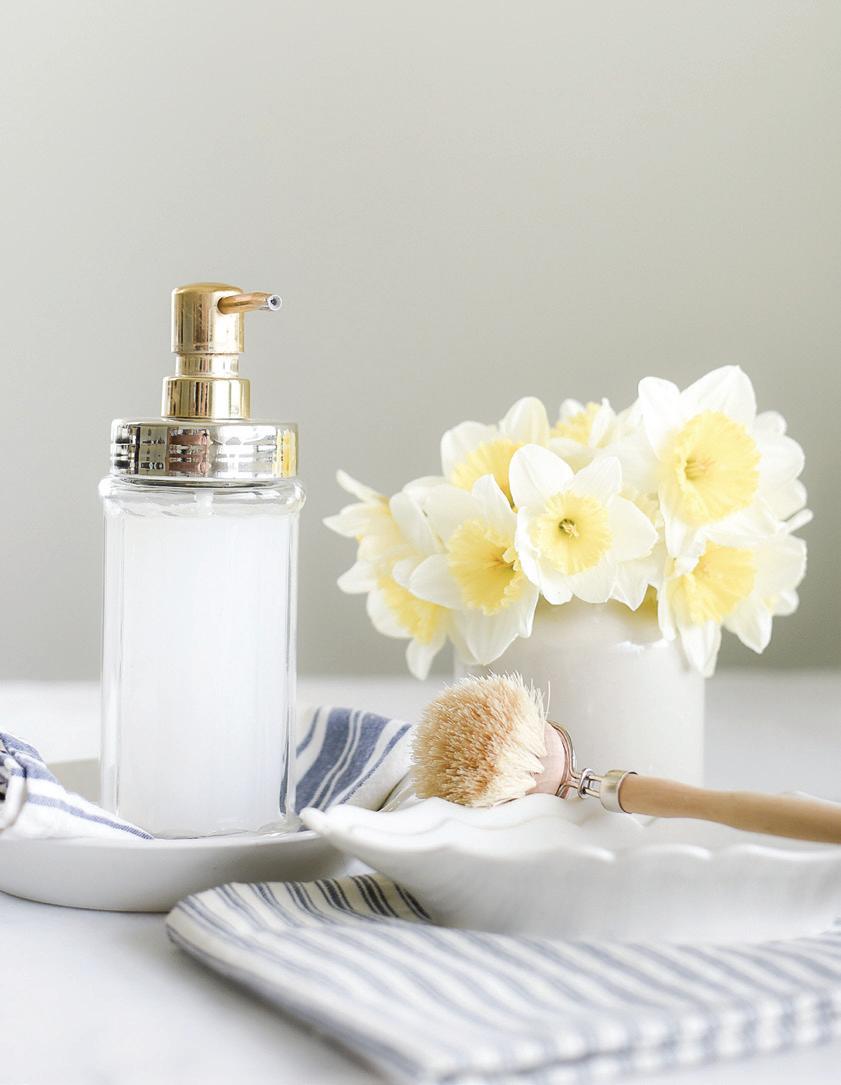
I was inspired to make my own liquid hand soap with castile soap because of all of the amazing benefits. Castile soap is what I use for nearly everything in my home, from countertop spray to laundry detergent, so utilizing it in our bathrooms was a natural extension for us. Not only does it help save money, but it is also safe and free of chemicals. I also love being able to customize the scent with essential oils! This is such a quick and easy project that lasts for months.
Glass soap dispenser
⅛ cup castile soap
2½ cups distilled water
10–15 drops essential oil of choice
Fill a glass soap dispenser with distilled water (to prevent bacterial growth), followed by the castile soap (added second to prevent air bubbles). Finish with essential oil such as lemon.
y Add a splash of vitamin E oil or liquid coconut oil for added moisture!
Chloe Mackintosh lives on a ranch in Northern California. To learn more, visit boxwoodavenue.com and follow her on social media (@boxwoodavenue).
67 willowandsage.com | WILLOW AND SAGE I
BY KAYLA HAUPT

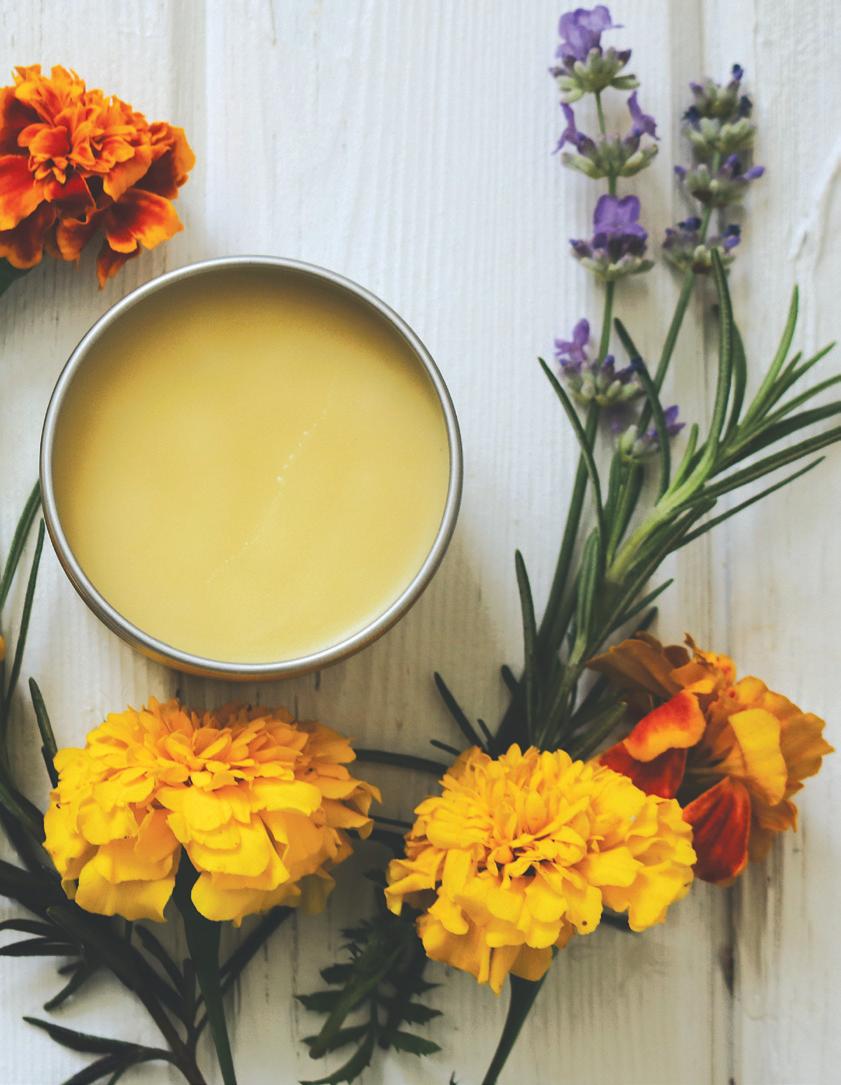
This salve is great for dry hands and feet. If you are like me, working your hands into the dirt most days and spending the rest of the time working with them on either crafting or typing, you know that dry and cracked hands can be a problem. I made calendula-and-peppermint-infused oil, two great skin savers, so I could prepare some of this balm for myself in the coming cold months.
Calendula is a trusted herb used for many skincare problems: eczema, psoriasis, dermatitis, and more. Applied topically, it is soothing and safe on sensitive skin. Calendula is often used on children as well. It has wonderful medicinal properties that aid in healing scar tissue, speeding the recovery of wounds, and can even disinfect the wound site. You can easily grow calendula in your backyard or in a pot. It is often confused with marigolds; calendula is actually pot marigold or English marigold and is safe to eat. If you are growing French marigolds, which are most often planted in home gardens, they can be potentially dangerous to consume. Be careful and know which types of seeds you are planting. Peppermint is used in this recipe to soothe the skin and add a cooling effect. You will find it works well for its antifungal and antimicrobial properties. You can even use it on your feet! T
68 I WILLOW AND SAGE | willowandsage.com
69 willowandsage.com | WILLOW AND SAGE I
YIELDS 3, 4-OZ. TINS
Double boiler
1 cup carrier oil: coconut/grapeseed/sweet almond/jojoba
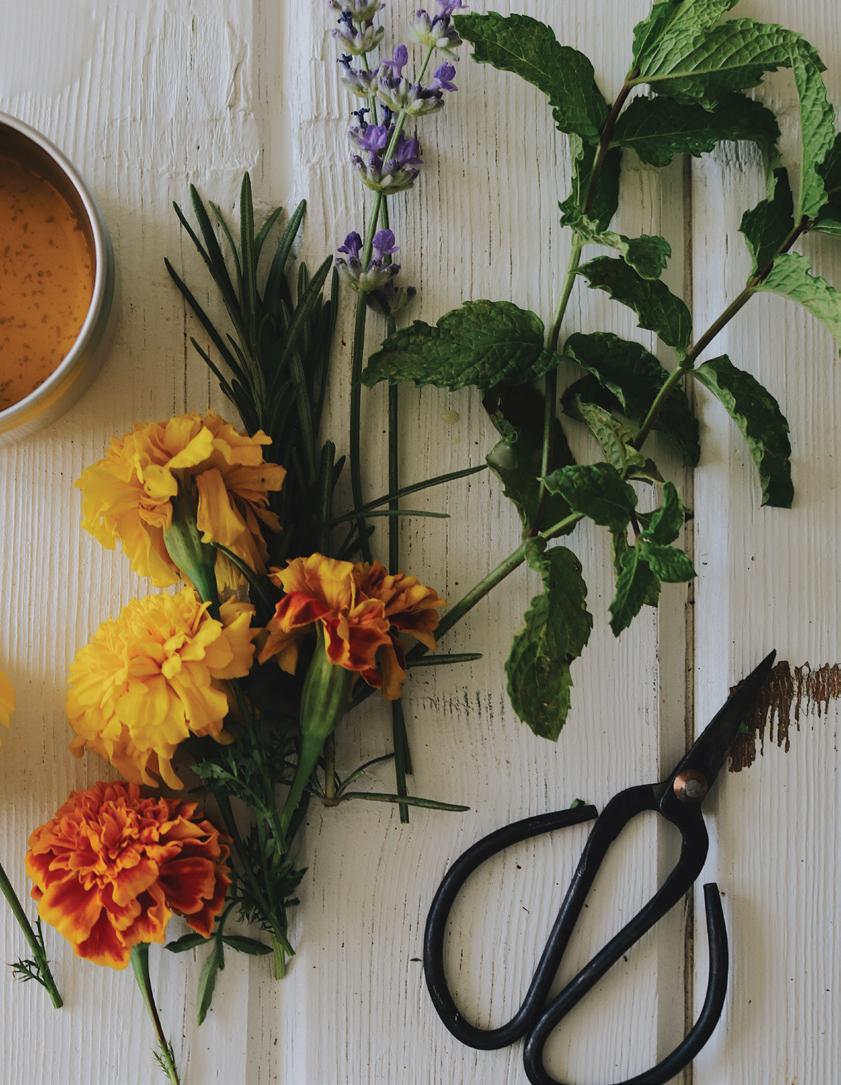
½ cup dried calendula & peppermint
Fine-mesh sieve/Cheesecloth
Double boiler
4 TB. beeswax
2 TB. Shea butter
1 cup infused oil
5–10 drops essential oil (optional) Tins
If you do not have infused oils on hand, you can make some in about four weeks. It’s more beneficial because it’s like creating an at-home essential oil that is less potent and is much safer to use on sensitive skin and young children. If you do not want to wait four weeks, you can make herb-infused oil over the stove in about 20 minutes.
Put a double boiler on the stove over medium-high heat. Pour in the carrier oil and dried herbs. Cook for about 20–30 minutes, stirring occasionally to prevent sticking and/or burning. After 30 minutes, strain the oils through a fine-mesh sieve or cheesecloth. Try to capture as much oil as possible by squeezing or pressing on the herbs. Discard the herbs.
In a double boiler over medium heat, melt the beeswax and Shea butter. Once melted, pour in the infused oil. Heat until everything is mixed together well, about five minutes. Remove the pan from the heat and, working quickly, drop in the essential oils if desired and stir in gently. With tins ready, carefully pour the salve into the tins. Let it sit overnight before using. The salve should be solid and break easily to apply. The top layer might be a bit harder than what’s underneath, so use a little pressure to break.
To apply, rub the salve gently over the hands and feet. It can also be used on chapped lips, elbows, and knees. Be sure to test a little bit on the inner part of your wrist to make sure it does not irritate your skin.
Kayla Haupt is a master gardener, blogger, embroidery artist, homesteader, first-generation farmer, and single mother to her young son, Tad. She lives in rural Iowa, on a small farm amongst one of the largest Amish settlements west of the Mississippi River. She spends her days tending to her garden, chasing chickens, reading “Outlander,” and sipping black coffee. Kayla hopes to instill the idea of sustainability, creativity, and seasonal living in her son and others. You can learn more about her and follow along with her daily life on her blog at underatinroof.com and follow her on Instagram (@underatinroof).


70 I WILLOW AND SAGE | willowandsage.com

71 willowandsage.com | WILLOW AND SAGE I
BY LIA GRIFFITH
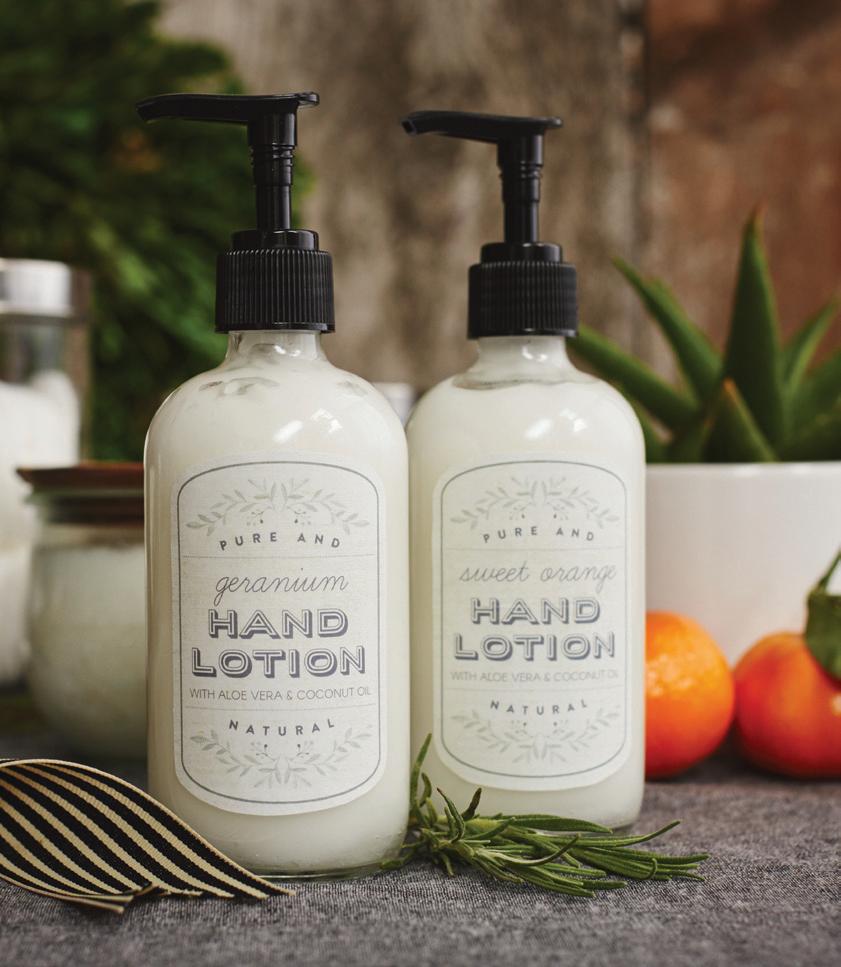
Because I have sensitive skin, I have always been conscious of trying to use natural products with as few ingredients as possible. The older I get, the more I realize that many people can relate to the experience of having all different kinds of skin sensitivities, and how difficult it can be to find the right product for you. My hands are always dry and cracked in the winter, so I needed something that would be mild on my skin but with some serious healing power. My sister recently shared her homemade lotion recipe with me, and it was so wonderful that I couldn’t wait to share it!
Lily of the Desert 99 percent Aloe Vera Gelly works particularly well because the extra 1 percent includes emulsifiers that will help to blend the homemade lotion. I also added vitamin C serum to add an anti-aging aspect to the mix! This ingredient is not necessary, but it’s a great option for adding a natural skin toner and spot corrector. Lastly, adding some essential oils of your favorite scents personalizes your homemade moisturizer!
Lotion bottles
6 oz. Lily of the Desert 99% Aloe Vera
1 1 / 2 oz. fractionated coconut oil
20 drops vitamin C serum
10 drops essential oils
To make this gorgeous lotion, mix all the ingredients together in a mixing bowl with a whisk, and then scoop the lotion mixture into a plastic sandwich bag. Cut the corner of the bag and squeeze the mixture into your bottles.
• When buying coconut oil for this recipe, make sure that you are purchasing fractionated coconut oil.
• I found some 8-ounce glass pump bottles on Amazon that are perfect for my bathroom. And I am definitely going to be getting some small squeeze bottles to keep this in my purse!
• If you love the printable bottle labels, you can download those from my site at liagriffith.com — enjoy!


72 I WILLOW AND SAGE | willowandsage.com
Lia Griffith is a designer, maker, and handcrafted lifestyle expert. Visit her blog at liagriffith.com for daily DIY projects, tutorials, and videos.

73 willowandsage.com | WILLOW AND SAGE I
BY KYRSTIE BARCAK

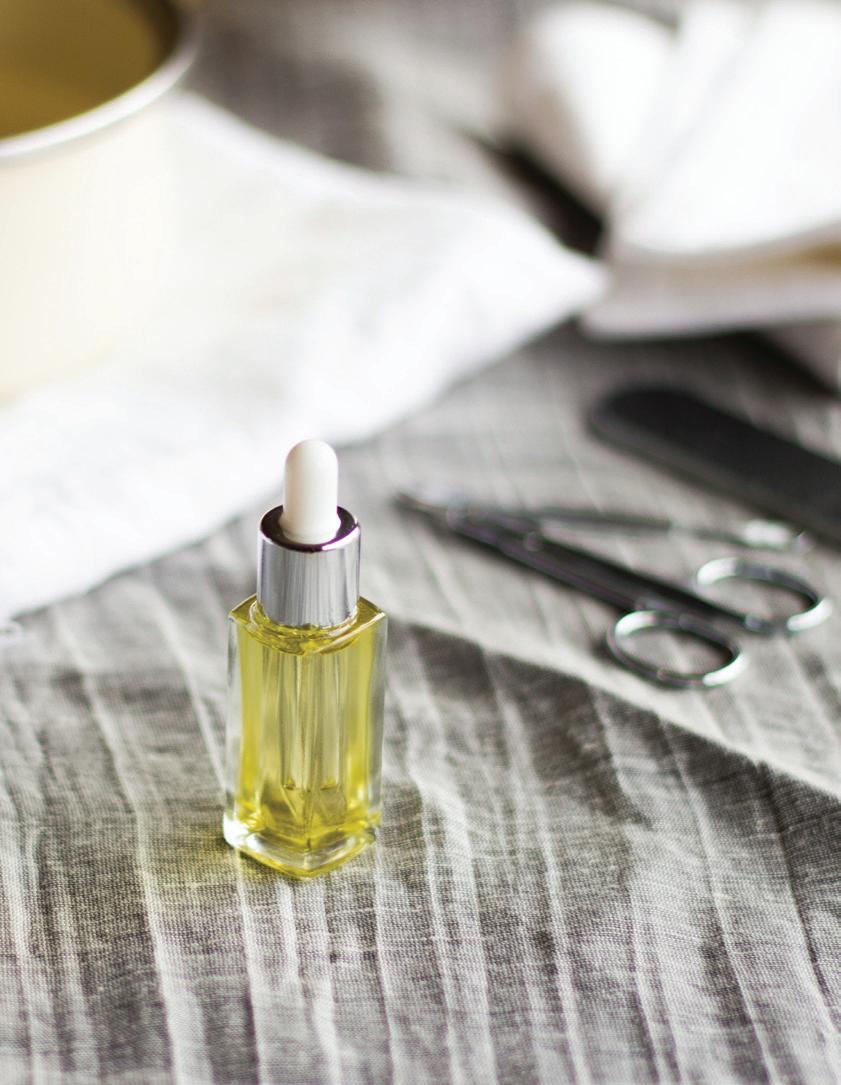
Fingernails, like hair, contain a protein called keratin. They can benefit from the use of aromatherapy oils to keep them healthy, elastic, and looking lovely with a low sheen. The appearance and condition of your fingernails are great health indicators. White moons and a pale pink coloring are signs of good circulation and metabolism. Ridges, flakiness, and spots may indicate a health issue such as a lack of calcium in the diet.
Fingernails provide one of the first impressions someone has of you. Broken, chipped, unfiled nails can be common for me at times, especially following a seasonal change in the vegetable garden, as this is usually when I am tidying up from the previous season and adding new plants. Gardening can be tough on the hands. A little while ago I created a gardener’s hand scrub to help give gardeners︐ hands a little TLC; this nail oil is also a great way to give your nails and cuticles a little bit of care.
The skin on my hands is looking more and more aged, as my hands work hard all the time in the garden, in the kitchen, and with the kids. Mine certainly deserve more love and attention on a regular basis, so I have been rubbing this lovely, rich oil into my hands once a day.
This nail oil treatment is very quick and simple to prepare, so grab a cup of tea, a nail file, scissors, and a cuticle wand, and let︐s get started.
1 drop cedarwood essential oil
1 drop geranium essential oil
1 drop lemon essential oil
6 ml almond oil
1 ml avocado oil
1 ml evening primrose oil
Glass jar
Add the almond oil, avocado oil, and evening primrose oil to the glass jar. Add the essential oil. Store the nail oil in a cool, dark location. Gently rub a few drops of oil onto the cuticles and nails of each hand every few days as needed.
Kyrstie Barcak lives in Melbourne, Australia. She shares her recipes on her blog A Fresh Legacy at afreshlegacy.net
74 I WILLOW AND SAGE | willowandsage.com

75 willowandsage.com | WILLOW AND SAGE I

76 I WILLOW AND SAGE | willowandsage.com
77 willowandsage.com | WILLOW AND SAGE I
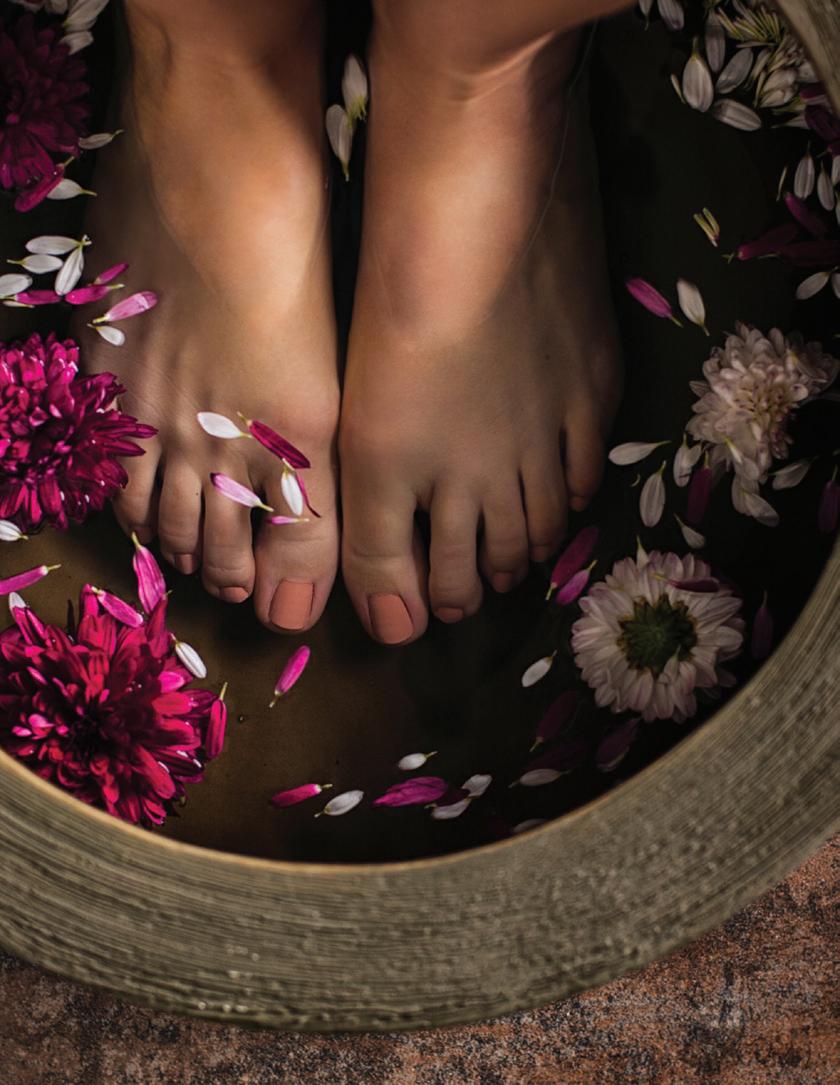
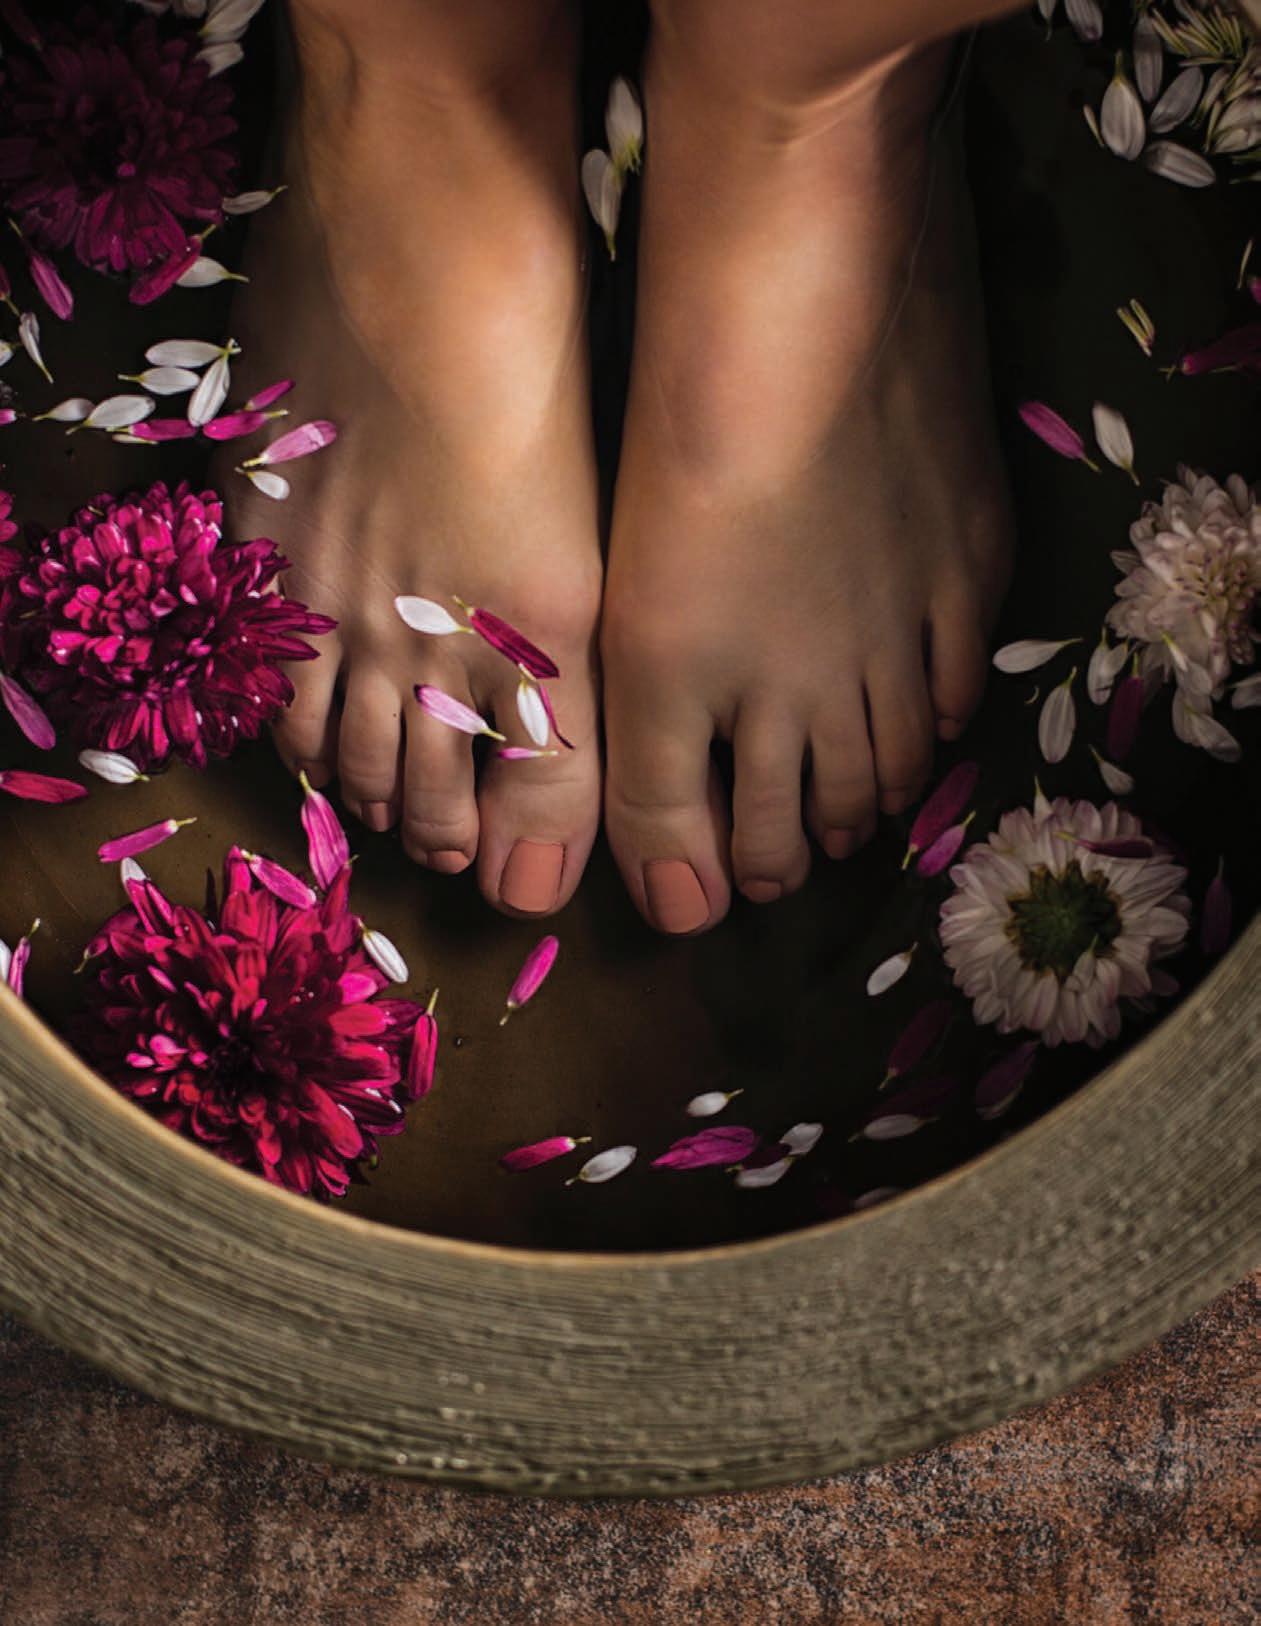
Does anything feel better after a long day than soaking your feet in a hot tub of water? The minute your feet hit the water, you can feel your stress float away. Just some soap and water can do the trick, but with the help of essential oils and salts, you can really make your foot soak a luxurious experience. Here are some easy ideas to get you started.
FOR COMFORT
1 cup sea salt
1 cup Epsom salt
2 cups baking soda
15 drops peppermint essential oil
FOR RELAXATION
1 / 4 cup Epsom salt
15 drops lavender essential oil
FOR STIMULATION
1 cup honey
2 cups Epsom salt
2 TB. almond oil (optional)
6 drops eucalyptus oil
4 drops camphor oil
4 drops arnica oil (optional)
FOR COMFORT OR RELAXATION
Add 8 cups of water to a pot, add additional ingredients, and bring to a boil. Let water cool, and transfer to a container large enough to soak feet in.
FOR STIMULATION
Blend all ingredients together. Add to a pot containing 8 cups of water and bring to a boil. Let water cool, and transfer to a container large enough to soak feet in.


78 I WILLOW AND SAGE | willowandsage.com
79 willowandsage.com | WILLOW AND SAGE I
80 WILLOW AND SAGE | willowandsage.com
BY STACIE VAUGHAN
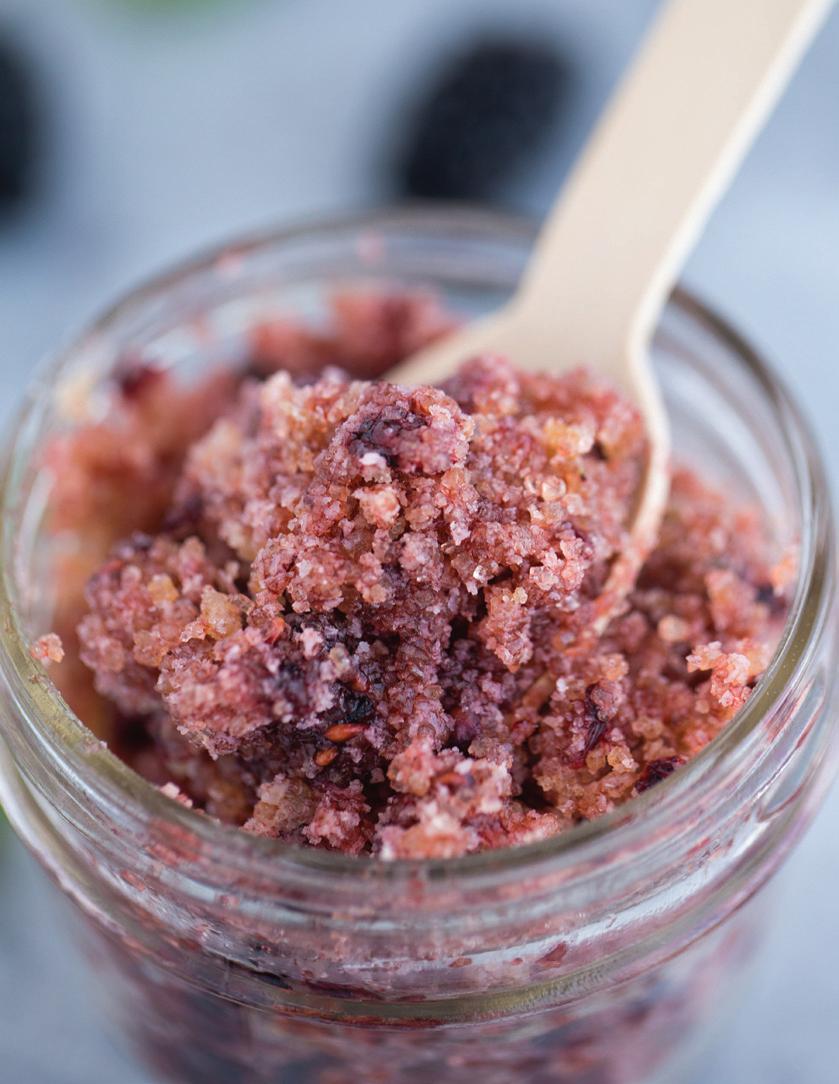
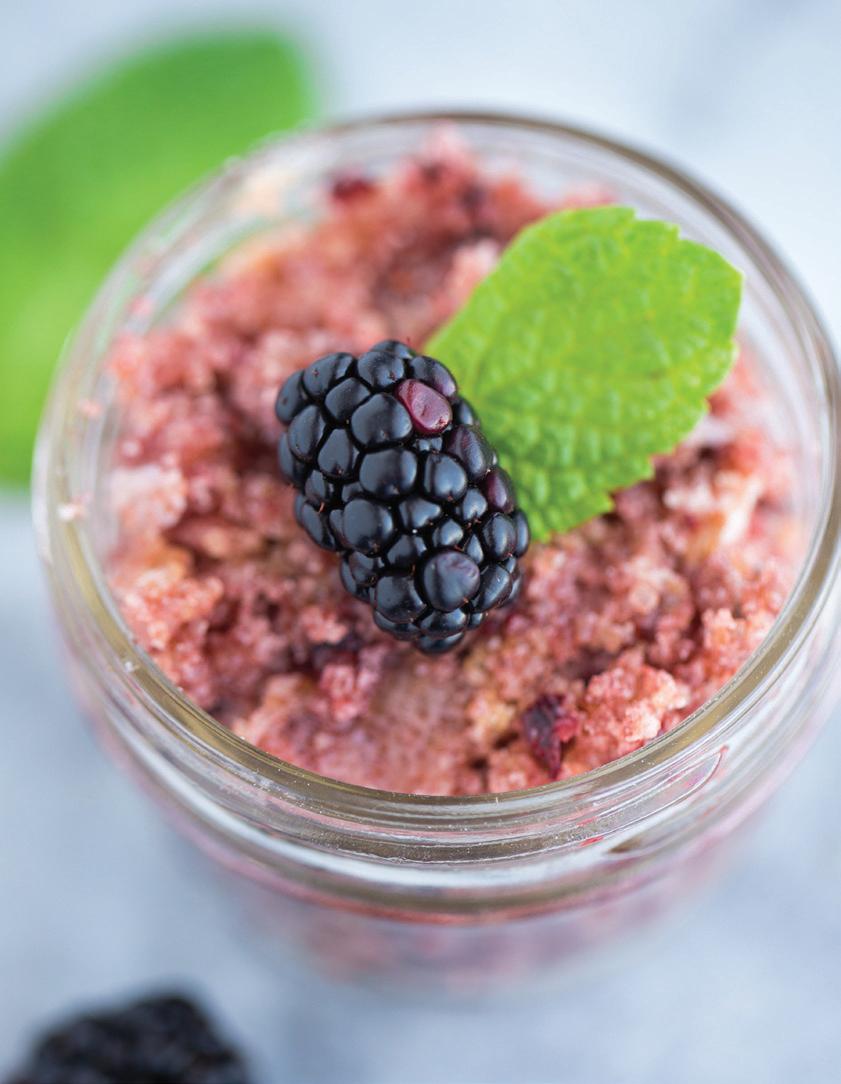
I was inspired to create this foot scrub after a long day of shopping at one of the huge malls in the city. My feet were sore, tired, and in need of some major TLC. I saw the blackberries sitting in my fridge and decided to whip up a quick sugar scrub with peppermint essential oil for my aching feet. The result was invigorating and refreshing!
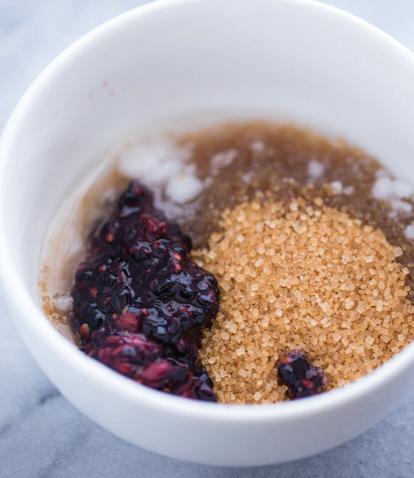
1—2 TB. coconut oil
4 blackberries
1 / 4 cup raw sugar
10 drops peppermint essential oil
Fork
Mason jar
Small bowl
Melt coconut oil and mash blackberries with a fork. Add all ingredients to a small bowl and stir to combine. Add in extra coconut oil and/or sugar to achieve desired consistency. Scoop into a small mason jar. Store in the fridge for up to one week. To use, massage into wet feet and rinse thoroughly. Pat feet to dry.
Stacie Vaughan is passionate about food, photography, crafting, and coffee. Visit her online at simplystacie.net

81 willowandsage.com | WILLOW AND SAGE I
82 WILLOW AND SAGE | willowandsage.com
BY HEATHER SMITH
The long, busy days of modern life wreak havoc on our bodies and souls, the stress slowly building and burnout surely following. When we regularly take a few minutes to nurture the part that makes us “us,” we ground ourselves, leaving no room for burnout. Taking the time to sustain our uniqueness never needs to come at a high cost or take an abundance of effort, it should be simple and effortless, which was the inspiration behind my clay foot soak — it takes little effort and has little impact on your pocketbook.
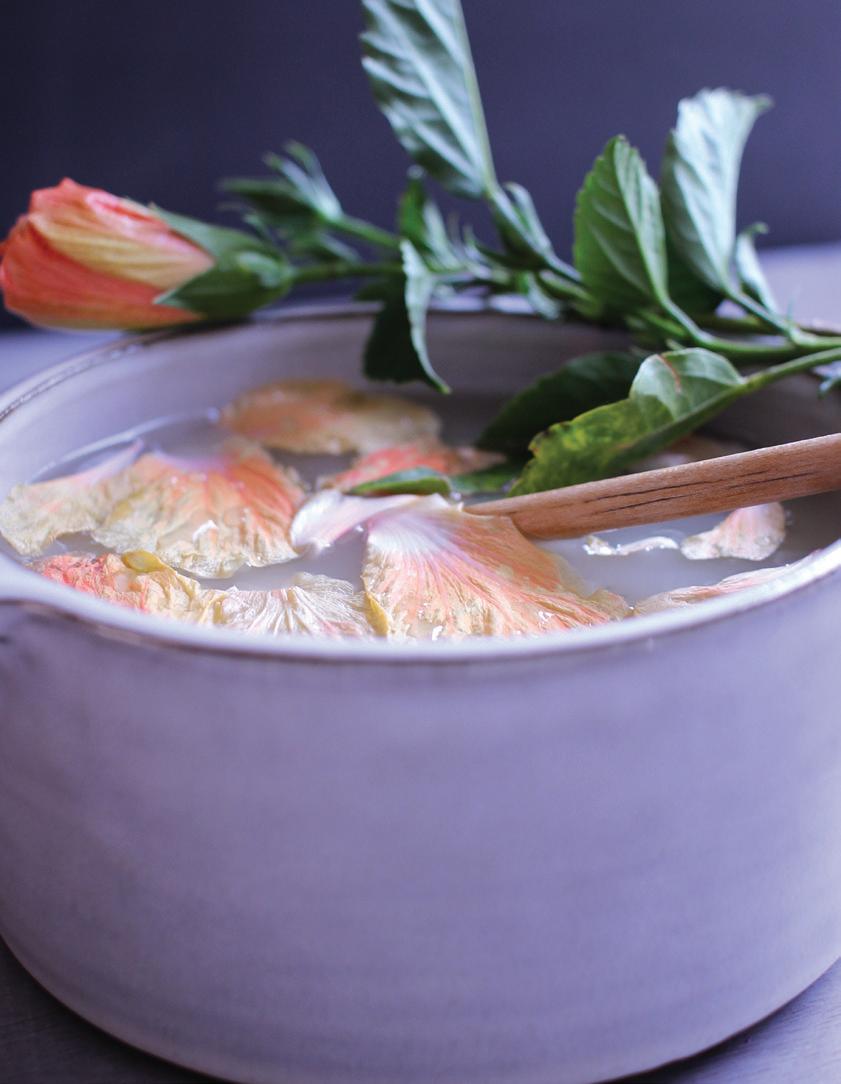
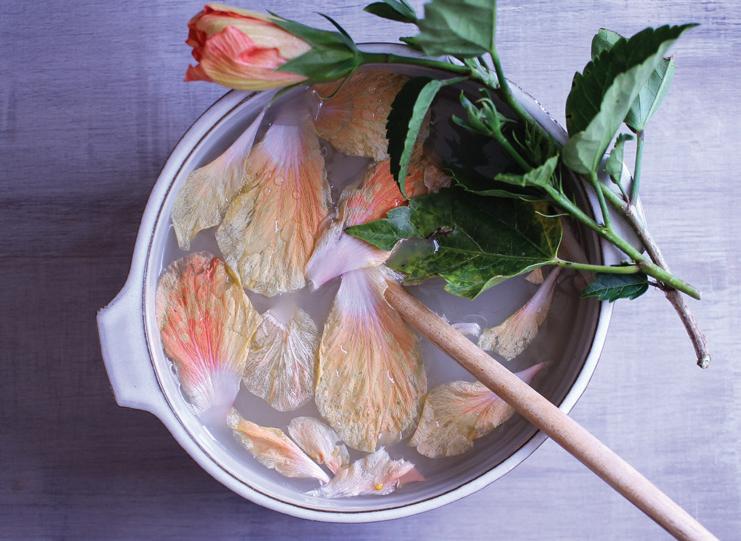
Bentonite clay has the ability to draw out toxins and bind itself to those toxins. Bentonite clay also has the added benefit of reducing inflammation, which makes it perfect for tired feet after a long day. Tea tree essential oil is an antiseptic and anti-fungal that helps rid your feet of the side effects of being enclosed in shoes. Fresh or dried flower petals add a mood-boosting elegance that cannot be rivaled — I personally keep hibiscus and roses in my garden, which I grow organically so I can add them to beauty recipes. As you move through life, take the time to nurture “you.”

2 cups bentonite clay 2 1 / 2 cups tea tree essential oil
Place the clay in a glass bowl, sprinkle a little of the tea tree oil onto the clay, and mix. Repeat this step until the tea tree oil is all mixed in and the clay is dry. You don’t want the clay to get wet or gloppy; you want it to be slightly crumbly when you’re finished mixing in the tea tree oil. Put the clay mixture in an airtight container to store. To use, add up to ¼ cup of it to a foot bath filled with warm water, and soak tired feet for 10–20 minutes. This mix keeps for a minimum of six months.
is
visit woodsofbelltrees.com
83 willowandsage.com | WILLOW AND SAGE I
Heather Smith
the voice behind the blog Woods of Bell Trees. To learn more,



 Danielle Williams Assistant Senior Managing Editor willowandsage@stampington.com


 By kA rI Pe T er S


 Digital Scale
Whisk


 BY LIA GRIFFITH


 BY MEGHAN HORAN


 BY CHRISTEN HAMMONS


 BY KAETLYN KENNEDY


 BY CHLOE MACKINTOSH


