107 minute read
Advertiser Index
Albina Pipe Bending Co., Inc................ 13 AZZ Galvanizing .................................. 33 Canadian Wood Council....................... 19 Clark Dietrich Building Systems ........... 37 Computers & Structures, Inc. ............... 60 CTS Cement Manufacturing Corp........ 23 Design Data.......................................... 15 Enercalc, Inc. .......................................... 3 Engineering International, Inc............... 25 Foundation Performance Association..... 39 Fyfe....................................................... 47 Gerdau.................................................. 45 GT STRUDL........................................ 10 Integrated Engineering Software, Inc..... 17 Independence Tube Corporation........... 28 ITW TrusSteel & BCG Hardware... 14, 29 JMC Steel Group .................................... 6 KPFF Consulting Engineers.................... 8 NCSEA................................................... 9 Powers Fasteners, Inc............................... 2 RISA Technologies ................................ 59 S-Frame Software, Inc. ............................ 5 Structural Engineers Assoc. of Illinois.... 50 Simpson Strong-Tie............................... 27 Structural Engineers, Inc....................... 40 StructurePoint....................................... 49 Struware, Inc......................................... 26 Wood Products Council........................ 41
Editorial Board
Chair
Jon A. Schmidt, P.E., SECB
Burns & McDonnell, Kansas City, MO chair@structuremag.org
Craig E. Barnes, P.E., SECB
CBI Consulting, Inc., Boston, MA Mark W. Holmberg, P.E.
Heath & Lineback Engineers, Inc., Marietta, GA Dilip Khatri, Ph.D., S.E.
Khatri International Inc., Pasadena, CA Roger A. LaBoube, Ph.D., P.E.
CCFSS, Rolla, MO Brian J. Leshko, P.E.
HDR Engineering, Inc., Pittsburgh, PA John A. Mercer, P.E.
Mercer Engineering, PC, Minot, ND Brian W. Miller
Davis, CA Evans Mountzouris, P.E.
The DiSalvo Ericson Group, Ridgefield, CT Greg Schindler, P.E., S.E.
KPFF Consulting Engineers, Seattle, WA Stephen P. Schneider, Ph.D., P.E., S.E.
BergerABAM, Vancouver, WA John “Buddy” Showalter, P.E.
American Wood Council, Leesburg, VA Amy Trygestad, P.E.
Chase Engineering, LLC, New Prague, MN
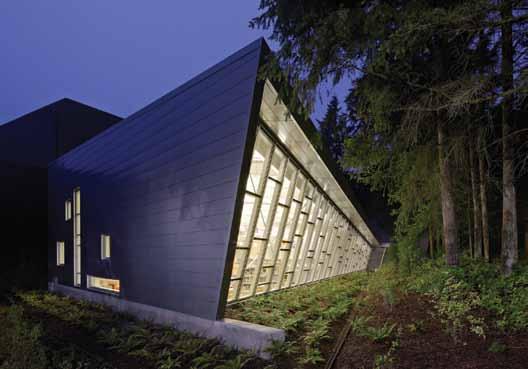
WINNER OF AN AIA Washington Civic Design People’s Choice Award
FEDERAL WAY REGIONAL LIBRARY EXPANSION, FEDERAL WAY, WA PHOTO BY DOUG J SCOTT
Seattle • Tacoma • Lacey • Portland • Eugene • Sacramento • San Francisco • Walnut Creek • Los Angeles • Long Beach • Pasadena • Irvine • San Diego • Boise • Phoenix • St. Louis • Chicago • New York
AdvErtising Account MAnAgEr
Interactive Sales Associates Chuck Minor Dick Railton
Eastern Sales Western Sales 847-854-1666 951-587-2982 sales@STRUCTUREmag.org
EditoriAL stAFF
Executive Editor Jeanne Vogelzang, JD, CAE
execdir@ncsea.com
Editor Christine M. Sloat, P.E.
publisher@STRUCTUREmag.org
Associate Editor Nikki Alger
publisher@STRUCTUREmag.org
Graphic Designer Rob Fullmer
graphics@STRUCTUREmag.org Web Developer William Radig
webmaster@STRUCTUREmag.org
STRUCTURE® (Volume 20, Number 11). ISSN 1536-4283. Publications Agreement No. 40675118. Owned by the National Council of Structural Engineers Associations and published in cooperation with CASE and SEI monthly by C3 Ink. The publication is distributed free of charge to members of NCSEA, CASE and SEI; the non-member subscription rate is $65/yr domestic; $35/yr student; $90/yr Canada; $125/yr foreign. For change of address or duplicate copies, contact your member organization(s). Any opinions expressed in STRUCTURE magazine are those of the author(s) and do not necessarily reflect the views of NCSEA, CASE, SEI, C3 Ink, or the STRUCTURE Editorial Board.
STRUCTURE® is a registered trademark of National Council of Structural Engineers Associations (NCSEA). Articles may not be reproduced in whole or in part without the written permission of the publisher.
Celebrating years 1993-2013
C3 Ink, Publishers
A Division of Copper Creek Companies, Inc. 148 Vine St., Reedsburg WI 53959 P-608-524-1397 F-608-524-4432 Visit STRUCTURE magazine on-line at publisher@STRUCTUREmag.org
Visit STRUCTURE magazine on-line at www.structuremag.orgwww.structuremag.org Visit STRUCTURE magazine online at www.structuremag.org
inFocus new trends, new techniques and current industry issues Risk and Responsibility By Jon A. Schmidt, PE, SECB
In his entry on “risk” for the Stanford Encyclopedia of Philosophy (plato.stanford.edu/entries/risk), Sven Ove Hansson noted that there are at least five relevant senses of the word in common usage today: • An unwanted event that may or may not occur. • The cause of an unwanted event that may or may not occur. • The probability of an unwanted event that may or may not occur. • The statistical expectation value of an unwanted event that may or may not occur. • The fact that a decision is made when the outcome probabilities are known. The first three definitions are often assigned to different terms – such as consequence, hazard, and threat (or vulnerability), respectively – and treated as contributors to the fourth, which is the standard technical meaning of “risk” among engineers and risk analysts. The fifth is only invoked in formal decision theory, where “decision under risk” is an alternative to “decision under certainty” (each option is associated with exactly one outcome) and “decision under uncertainty” (outcome probabilities are unknown). A 2012 paper by philosophers Ibo van de Poel and Jessica Nihlén Fahlquist with the same title as this column (Chapter 35 in Handbook of Risk Theory, Springer) points out that “risk” is more nuanced in fields such as psychology and social science. In particular, contextual elements come into play, which may include “by whom the risk is run, whether the risk is imposed or voluntary, whether it is a natural or man-made risk, and so on.” It is precisely these kinds of factors that give risk its moral dimension, and thus imply some degree of responsibility on the part of those who confront it on behalf of others – such as engineers. In a 2011 paper on “The Relation Between Forward-Looking and Backward-Looking Responsibility” (Chapter 3 in Moral Responsibility: Beyond Free Will and Determinism, Springer), van de Poel proposed nine distinct notions of responsibility: 1) Cause – The earthquake was responsible for killing 100 people. 2) Role – The driver is responsible for controlling the vehicle. 3) Authority – The superintendent is responsible for the construction project. 4) Capacity – The person has the ability to act in a responsible way. 5) Virtue – The person has the disposition to act in a responsible way. 6) Obligation – The person is responsible for the safety of the passengers. 7) Accountability – The person is responsible for explaining what he/she did. 8) Blameworthiness – The person is responsible for what happened. 9) Liability – The person is responsible for the cost of the damages. The first four are strictly descriptive, while the other five are normative; and of those, #5-6 are forward-looking (prospective), while #7-9 are backward-looking (retrospective). Philosophers throughout history have mostly addressed retrospective responsibility, especially #8; in particular, the necessary and sufficient conditions for someone to be properly held responsible for something that has already occurred. However, engineering ethics is (or should be) more concerned with the prospective responsibility of engineers who assess, manage, and communicate risk in an effort to avoid unwanted events; i.e., a combination of #3-6. Interestingly, van de Poel and Nihlén Fahlquist assign responsibility for risk assessment primarily to scientists, and suggest that responsibility for both risk management and risk communication falls mainly on government officials and corporate executives. The only responsibility that they attribute specifically to engineers is for risk reduction; i.e., safety understood as maintaining risk at or below an acceptable level. However, they acknowledge the obvious question that arises: Are engineers also responsible for setting this threshold, or is that determination made by others? As I see it, the answer is a resounding “yes”! The consensus process by which most engineering codes and standards are developed today provides opportunities for all stakeholders – engineers and non-engineers alike – to have a say in establishing how much risk is permissible. However, the current trend toward more complex and prescriptive design criteria carries its own risks, which may be easily overlooked. Engineering is not simply a matter of following rules set down by others; each individual engineer must still exercise appropriate knowledge, skill, and judgment on a case-by-case basis. Another complication is what philosophers call the “problem of many hands” (PMH) – the difficulty of allocating responsibility when multiple people are engaged in a particular activity. Van de Poel and Nihlén Fahlquist suggest a few possible solutions and conclude, “What is needed is probably a combination of these three approaches”: • Responsibility-as-virtue (#5 above). This “would entail a focus on how to develop and cultivate people’s character with the aim to establish a willingness to actively take responsibility.” • Procedural distribution of responsibility. This would essentially apply the familiar consensus process to the ethical realm, not just technical considerations. • Institutional design. This would involve creating environments that foster responsibility-as-virtue and “minimize unintended collective consequences of individual actions.” The idea, again, is to “prevent risks from materializing instead of distributing responsibility when it has already materialized.” Avoiding PMH would thus require those involved to be “virtuous-responsible people who use their judgment to form a balanced response to conflicting demands.” This should sound familiar if you have been reading this space over the last couple of years, or at least my most recent installment (“Virtuous Engineering,” September 2013). Having identified objectivity, care, and honesty as the moral virtues of engineering, and practical judgment as the intellectual virtue of engineering, I see the union of these traits as constitutive of the more general virtue of responsibility within the context of engineering practice. In other words, the virtuous engineer is a responsible engineer.▪ Jon A. Schmidt, P.E., SECB (chair@STRUCTUREmag.org), is an associate structural engineer at Burns & McDonnell in Kansas City, Missouri. He chairs the STRUCTURE magazine Editorial Board and the SEI Engineering Philosophy Committee, and shares occasional thoughts at twitter.com/JonAlanSchmidt.
Lessons Learned
problems and solutions encountered by practicing structural engineers
The term “sliver building,” according to the New York City (NYC) zoning code, is specifically reserved for a tall building or enlargement that is 45 feet wide or less. In many cases, such buildings are restricted to a height equal to the width of the abutting street or 100 feet, whichever is less. However, when considering the structural stability of a building, a “sliver building” is commonly a narrow building having a large aspect ratio (height to width). Even though a building may not specifically be designated as a sliver building according to the local zoning code and building department, engineers often encounter similar conditions which often present stability issues due to the narrow width when resisting lateral loads. The following example is mixed-use and located in the heart of New York City on East 61st Street. It features three floors of commercial space with a restaurant and salon, and three residential floors with a penthouse above. The six-story building with penthouse, basement and cellar has effectively seven Horizontal and Vertical levels above grade and one below grade. The width Enlargement of a of the building is only 19 “Sliver” Building feet, and the depth extends 90 feet – almost the entire length of the property. The height-to-width aspect By Dominick R. Pilla, P.E., C.E., S.E., R.A. and Xiaoli Tong, P.E. ratio, with respect to grade, is 3.45 (Figure 1). Major architectural modifications required the building to receive a new limestone and expansive glass wall façade, extending it horizontally 7 feet toward the street. Each floor of the building was therefore extended as well (Figure 2). The construction of the building is circa 1910. During its life it received various modernizing Dominick R. Pilla, P.E., C.E., alterations as well as alterations to accommodate S.E., R.A., owns and operates Dominick R. Pilla Associates, P.C. In addition, Mr. Pilla is an associate professor in the Bernard & Anne Spitzer School of Architecture at City College of New York. He can be reached at dominick@drpilla.com. Xiaoli Tong, P.E., is an engineer with Dominick R. Pilla Associates, P.C. Prior to joining the firm, Mr. Tong worked in a prominent national research institute on building technology in China. He can be reached at xiaolit@drpilla.com.
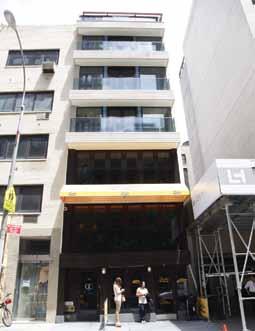
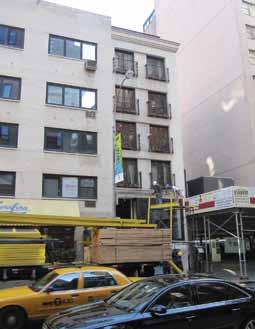
Figure 1: Building before renovation.
new tenant uses, prior to the enlargements discussed here. The original timber floors, which span between the west party-wall and the exterior east property line wall, have been reframed with cold-formed C-joists and concrete deck to accommodate a change in floor heights and architectural layouts requiring new penetrations for an altered stair location and the addition of an elevator. The wall construction of the building is brick masonry supported on rubble foundations. Portions of the rubble foundation and brick masonry walls have been extended, by underpinning methods, to enlarge the cellar level. The building was originally designed to utilize the perimeter masonry as shear walls to provide the lateral load resistance in both directions. The original engineering of the walls was an empirical design similar to that specified in the 1938 NYC building code. Wind loads are presented in the historical design code, but earthquake loads were not considered at that time. The building’s lateral load resisting system had to be altered due to the removal and replacement of the entire front facade. To alter the existing building’s structural system, several issues existed: (1) determining which of the permitted building codes, old (1968) or new (2008), should govern the proposed structural modifications; (2) choosing the appropriate structural design criteria; and (3) deciding how to engineer and construct the building’s new lateral load path. The 2008 NYC Building Code (2008 NYCBC), a modified version of the 2006 International Building Code (IBC), is the current governing design standard. The design wind load is 20 psf and the seismic response coefficient is 0.088 for this building, with site class B and a response modification factor of 1.0. The 2008 NYCBC called for a seismic upgrade of the entire building, including the unreinforced brick walls and
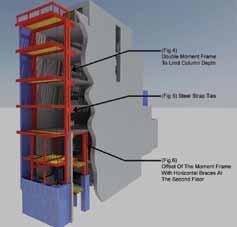
Figure 3: 3D rendering of the building renovation structural system.
diaphragm connection details. This would have required a huge amount of structural work and added considerable cost for this old building’s renovation. In order to balance the necessary scope of a seismic upgrade with a reasonable renovation cost, the 1968 NYCBC is permitted as an alternative design option. It presents almost the same design wind loads as the 2008 NYCBC, but an entirely different earthquake load which is in accordance with 1988 Unified Building Code (UBC) with certain exemptions and reductions. The renovation would add 1,660 square feet to the original 10,800-square-foot building. The combined 12,460-square-foot building has seismic forces (base shear and overturning moment) 15.4% greater than the forces in the original structure. As the increase in forces is less than 20%, the enlargement renovation is considered “small” per the 1968 NYCBC. Therefore, although the earthquake load analysis is still required for the new construction, the seismic upgrade of the existing building is not. The equivalent seismic response coefficient for the enlargement is 0.049, smaller than indicated by the 2008 NYCBC. Based on these studies, the final lateral system analysis of the new construction used a seismic response coefficient of 0.088 in accordance with the 2008 NYCBC (Figure 3). Rigidity of the floor diaphragm is an important factor in the lateral load analysis. If the average deformation of the floor diaphragm is less than or equal to two times the story drift, it can be considered rigid and the diaphragm shear forces will be distributed based on the rigidity and location of the lateral-loadresisting systems. According to ASCE 7-05, concrete filled metal deck diaphragms, with an aspect ratio (diaphragm span to width) of 3 or less, can be considered rigid. When the aspect ratio is larger, the diaphragm is
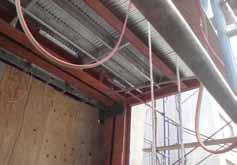
Figure 4: Double moment frames.
considered flexible and the diaphragm shear forces will be distributed based on the tributary area of each lateral-load-resisting system only. Another option is to treat the diaphragm as semi-rigid and conduct a load effect envelope analysis with both rigid and flexible assumptions. As the building in this case has a floor diaphragm aspect ratio of 4.5 at the lower two floors and 3.25 at other floors, assuming a flexible diaphragm simplified the lateral force analysis. As a result, a new lateral-force-resisting system had to be installed after the front wall was removed to maintain two such systems in each direction. A braced frame would be the most efficient, but not desirable from an architectural perspective. In order to leave the entire space open, a moment frame system
ADVERTISEMENT–For Advertiser Information, visit www.STRUCTUREmag.org
Toll-Free: (866) 252-4628 12080 SW Myslony St. Tualatin, OR 97062 info@albinapipebending.com www.albinapipebending.com YOUR BENDING EXPERTS
-Angle -Flat Bar -Square Bar -Wide Flange -Channel -Square Tubing -Tee -Rectangular Tubing -Round Tube & Pipe -Round Bar -Rail -Plate

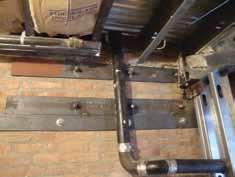
Figure 5: Steel strap ties on wall.
would be the only solution. The moment frame had to be designed using the same response reduction factor (i.e., 1.0) as the existing unreinforced brick wall in the earthquake load calculation per the 2008 NYCBC, representing the total elastic forces generated by the expected seismic event. It also needed to have considerable stiffness, not just adequate strength. The limitation on the building’s exterior wall deflection is 0.0083 (1/120) times the wall height in the 2008 NYCBC under wind load effects. The allowable seismic story drift is 0.01 times the story height for the cantilevered masonry building. This criterion is adequate if there are no adjacent buildings; otherwise, it is required to create a structural separation of 1 inch for every 50 feet in height, equivalent to 0.0017 times the building height. A 1.5-inch separation was established for this building at the top, per the code. The preliminary design indicated that the moment columns had to be 18 inches deep to meet the deflection requirements. The architect of record required reducing the column depth to create more space, resulting in a double moment frame system that increased the clear space by 16 inches within the frame plane (Figure 4, page 13). The moment frame is connected to the metal floor deck by puddle welds for diaphragm shear force transfer at each floor. Being long and narrow with a large aspect ratio in plan, the floor diaphragm might exhibit so-called bow actions, which would subject the wall to torsional deformation and stresses at the ends. To resist the possible bow actions, steel straps welded to the moment frame were bolted into the brick walls to create sufficient bond to the side walls (Figure 5 ). The moment frame was discontinued at the second floor level due to the moment beam interfering with the front stair opening. The columns extend to the basement, and a new double moment frame system was installed 10.5 feet behind the front ones, from the second floor down to the basement. To transfer the shear forces securely, horizontal braces were designed at the second
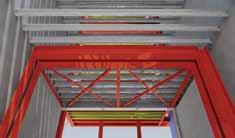
Figure 6: Offset of moment frames at second floor.
floor in between these two moment frames (Figure 6 ). The steel moment frame ended at the basement on a concrete shear wall, which safely dissipates the lateral forces into the ground. Renovation of this kind of “sliver building” for adaptive reuse is typical and popular in NYC. Whenever there is an increase of openings in a wall, or even total elimination of the wall, the first question facing an engineer is whether it is necessary, and how to design a new lateral-force-resisting system in accordance with the governing building code, especially in regard to the need for a seismic upgrade. It is not only a pure structural problem, but also an economic concern for the property owners. The 1968 NYCBC presents conditions for different extents of building renovation design, which could lead to a new model building code for existing buildings.▪
ADVERTISEMENT–For Advertiser Information, visit www.STRUCTUREmag.org

Just the FAQs
questions we made up about... Wood Design Codes
The American Lumber Standard Committee (ALSC) Board of Review approved changes to design values for all grades and all sizes of visuallygraded Southern Pine and Mixed Southern Pine lumber, with a recommended effective date of June 1, 2013 to allow for their orderly implementation. Accordingly, new design values for all sizes and grades of visually-graded Southern Pine dimension lumber were published in the Southern Pine Inspection Bureau’s (SPIB) Supplement No.13 to the 2002 Standard Grading Rules for Southern Pine Lumber. As a rules-writing agency, SPIB must follow a rigorous approval process to establish design values for Southern Pine lumber. SPIB and Timber Products Inspection worked cooperatively to complete a full In-Grade testing matrix as required by consensus standard ASTM D1990, Standard Practice for Establishing Allowable Properties for Visually-Graded Dimension Lumber from In-Grade Tests of Full-Size Specimens. Visually-Graded Southern Pine Dimension Lumber More than 7,400 full-size samples of commerciallyproduced Southern Pine were destructively tested in a two-step process, resulting in more than 300,000 data points.New Design Values The following frequently asked questions and answers were developed to assist designers with By Catherine Marx Kaake, P.E. implementation of new southern pine design values. and John “Buddy” Showalter, P.E. Q: Do new design values affect existing
structures?
A: No. New design values only apply to new construction, not existing construction. Like other building materials, wood products used in construction must meet building code requirements Catherine Marx Kaake, P.E., is Vice President of Technical Marketing at the Southern Forest Products Association. She may be enforced at the time. The integrity of existing structures designed and built using design values meeting applicable building codes at the time of permitting does not change. reached at ckaake@sfpa.org. Q: Why do design values change? John “Buddy” Showalter, P.E., is Vice President of Technology Transfer at the American Wood Council. He may be reached at bshowalter@awc.org. A: Design values have changed multiple times over the years based on available test data. The lumber industry conducts ongoing testing and invests millions of dollars to provide the most accurate and reliable design values for structural lumber. Comprehensive lumber testing is conducted as new technology becomes available or as warranted by changing resource data. The first significant lumber tests began in the 1920s, resulting in design values based on the strength of small clear-wood specimens. The last major change occurred in 1991 when design values for Southern Pine and other North American species were first published based on In-Grade testing of full-size samples of commercially produced lumber. SPIB
More information is available did not specifically study why a change occurred at www.southernpine.com. this time, but a change in the timber resource mix is one of many variables that can affect the strength of structural lumber.
Q: How are lumber design values derived?
A: Design values provide guidance for designers to calculate the performance of a structural system and are assigned to six basic lumber properties. Design values for stiffness, as well as the major strength properties of bending, tension, and compression parallel-to-grain, are based on data from destructive testing of samples of commercially-produced structural lumber. Design values for the minor strength properties of shear and compression perpendicular-to-grain are based on published clear-wood properties. Design values for structural lumber undergo a rigorous approval process. SPIB is responsible for developing and publishing design values for Southern Pine. All testing and data analysis must be completed in accordance with approved standards. Proposed design values are submitted to the Board of Review of the ALSC, and approved following a careful review and recommendation from the U.S. Forest Products Laboratory.
Q: Which lumber properties have new design values?
A: Four lumber properties: • Bending (Fb) • Tension parallel-to-grain (Ft) • Compression parallel-to-grain (Fc) • Modulus of Elasticity (E and Emin)
Q: Which lumber properties have the same design values?
A: Two lumber properties: • Shear parallel-to-grain (Fv) • Compression perpendicular-to-grain (Fc ⊥ )
Q: Did design values for other Southern Pine lumber products change?
A: No. Design values for other Southern Pine lumber products covered by SPIB’s Grading Rules – such as mechanically graded lumber, timbers, Radius Edge Decking and other specialty items – are derived differently.
Q: Are design properties for structural glued laminated timber (glulam) beams affected by a change in lumber design values?
A: No. Laminating lumber has more stringent grading rules that have not changed. Glulam beams use special grades of laminating lumber evaluated based on more restrictive characteristics, particularly in the critical outer lamination. For more information, refer to the October 12, 2011 white paper, Changes to Lumber Design Values and Their Effect on Structural Glued Laminated Timber (Glulam), published by the American Institute of Timber Construction and APA – The Engineered Wood Association.
Q: How are design values implemented into the building codes?
A: Building codes reference design values certifi ed by the ALSC Board of Review in accordance with American Softwood Lumber Standard DOC PS 20. Th e American Wood Council (AWC) publishes these design values in a supplement to the code-referenced National Design Specifi cation® (NDS®) for Wood Construction, titled Design Values for Wood Construction. AWC developed addenda and other updates to use with new construction designed in accordance with its standards and design tools.
Q: How do design value changes aff ect span tables and other prescriptive requirements in the building codes?
A: Prescriptive code requirements based on old design values need to be amended to refl ect new design values. Th is includes ceiling joist, rafter, and header span tables. AWC worked with the International Code Council to incorporate the new design values into span tables in the 2015 International Building Code (ICC) and 2015 International Residential Code (IBC). AWC also developed recommended revisions to previous code editions, and developed recommended amendments to span tables for new construction designed in accordance with ICC model building codes.
Q: When will the new design values be enforced?
A: Building codes are enforced by the state, regional, or local jurisdiction; exactly when enforcement begins can vary by jurisdiction. Users relying on prescriptive code requirements should use new span tables based on the new design values eff ective June 1, 2013.
Q: How can I get similar load-carrying capacities as before?
A: Southern Pine users continue to have many available product options. One option is to specify a larger size and/or higher grade
ADVERTISEMENT–For Advertiser Information, visit www.STRUCTUREmag.org of visually graded Southern Pine lumber. Another option is to specify an increasing supply of mechanically graded lumber, which includes Machine Stress Rated (MSR) lumber and Machine Evaluated Lumber (MEL). Refer to SFPA’s table, Southern Pine Mechanically Graded Lumber (MSR & MEL) Grades & Design Values, for a complete listing from Supplement No.12 to the SPIB Standard Grading Rules for Southern Pine Lumber. Also refer to SFPA’s table listing sample Southern Pine grade substitutions for comparable spans.
Q: What is the impact of design value changes on stud tables?
A: Th e answer varies for single-family, multifamily, or engineered commercial buildings, as well as for tall studs (>10 feet) and for walls
Model * Load * Analyze * Design * Report * Succeed!

www.iesweb.com
Free 30-Day Trial
IES, Inc. | 519 E Babcock St. Bozeman MT 59715 800-707-0816 | info@iesweb.com
subjected to high-wind loads as included in the AWC’s Wood Frame Construction Manual. For example: • There is no change for studs based on the International Residential Code. IRC
Section R602.2 Grade states, “Studs shall be a minimum No.3, standard or stud grade lumber”. This requirement is prescriptive and based on historical performance, not on a specific species or grade. • Likewise, there is no change for studs based on the International Building
Code, IBC Section 2308 Conventional
Light-Frame Construction. • There is a change for tall studs (>10 feet), however, based on IRC Table
R602.3.1. Footnote b to that table states an assumption which translates to the requirement for a bending value not less than 1140 psi (1310/1.15), and an E value not less than 1,600,000 psi. The interim design values for studs are insufficient to meet this requirement. This IRC table didn’t change as a result of design value changes, but the grade required to meet this assumption changed. • Species-specific stud tables for resisting wind loads (Tables 3.20A, 3.20B, etc. in Chapter 3 of AWC’s 2012
Wood Frame Construction Manual ) also changed. Visit www.awc.org to download the Addendum to the 2012
Wood Frame Construction Manual for
One- and Two-Family Dwellings.
Q: What is the impact of design value changes on wall plates?
A: Design value changes have a different impact on lumber used as wall plates, depending on whether it is used in conventional or engineered construction. The performance of wall plates in conventional construction is typically governed by compression perpendicular-tograin. Because design values for compression perpendicular-to-grain have not changed, the overall impact on plate stock used in conventional construction is negligible. If the performance of wall plates in engineered construction is governed by a property such as bending with a design value change, however, then wall plates could be impacted. Following are more specific answers:
Q: What about double top plates?
A: For conventional construction: double top plates are applicable to all species as prescriptively specified per the IRC and
Section 2308 of the IBC. For engineered construction: the capacity of double top plates should be determined using new design values.
Q: What about single top plates (e.g. advanced framing and 24-inch on-center stud spacing)?
A: For conventional construction: single top plates are applicable to all species and prescriptively specified with a limited offset of the joist or rafter from the stud per the
IRC and Section 2308 of the IBC.
For engineered construction: the capacity of a single top plate and spacing requirements should be determined using new design values.
Q: What about shear walls and diaphragms?
A: For conventional construction: detailing of braced wall panels is independent of species per the IRC or Section 2308 of the IBC.
For engineered construction: the capacity of studs at ends of shear walls, and the capacity of plates used as chords in diaphragms, should be determined using new design values.
Q: What is the impact on joists, rafters, headers, and beams?
A: The impact is smaller than originally projected due to smaller reductions for the wider widths commonly used for joists, rafters, and headers. Refer to SFPA’s table, Maximum Span Comparisons by Species, for sample comparisons. SFPA has updated its easy-to-use tables for specific sizes and grades of Southern Pine lumber. Refer to SFPA’s span tables for Maximum Spans for Southern Pine Joists & Rafters and Southern Pine Headers & Beams: Size Selection and Allowable Load Tables for Southern Pine Lumber and Glued Laminated Timber.
Q: What is the impact of the new design values on structures built in the future?
A: Building designers may configure the individual pieces of lumber differently in the structural system. Building materials used in construction have guidelines for proper use. Wood construction incorporating new design values will continue to include a series of safety factors, and checks and balances, to ensure that wood products – specifically Southern Pine lumber – are safe and effective when used properly in the construction of a residential or commercial building. Refer to the Southern Pine Design Value Forum Report that includes a review of the margin of safety for in-market lumber.
Q: What is Southern Pine and Mixed Southern Pine?
A: Southern Pine is a commercial grouping of individual tree species that includes the four main species of loblolly pine, longleaf pine, shortleaf pine, and slash pine. Mixed Southern Pine includes the minor species of Virginia pine and pond pine.
Q: Did the Southern Pine Grading Rules change?
A: No. Lumber grades and the rules that define each grade did not change. Only the design values associated with visually graded Southern Pine dimension lumber changed.
Q: Did grade stamps change?
A: No. The grading requirements are unchanged.
Q: How will I know when updated information on new design values is available?
A: To aid users in the transition to new design values, the wood products industry will continue to publish helpful design information as it becomes available. Visit industry association websites for: • Southern Pine design values, span tables & product use information from the
Southern Forest Products Association • Codes and Standards from the
American Wood Council • Southern Pine Grading Rules from the
Southern Pine Inspection Bureau
Conclusion
New design values for all sizes and grades of visually-graded Southern Pine dimension lumber became effective June 1, 2013. New design values apply only to new construction. The integrity of existing structures designed and built using design values meeting applicable building codes at the time of permitting does not change.▪
Codes and standards
updates and discussions related to codes and standards
This is Part 3 of a series of articles introducing illustrative examples of changes in design and construction codes, standards, regulations and practices that have followed catastrophic failures of construction cranes. Part 1, in the December 2010 issue of STRUCTURE®, focused on bridges, Part 2 in the April 2011 issue focused on buildings, and Part 3 is devoted to construction cranes. It is a credit to our structural and construction engineering professions that failures have been and continue to be used to improve design, construction and regulatory practices. We do not just pay up, rebuild and walk away – we delve, we learn, and we improve. A crane accident in the core of a large city can be a dramatic event that splashes across television screens and tabloid covers (Figure 1). Government officials are compelled by public outcry to react; their constituents must be made to feel safe while walking through streets stalked by the shadows of giant construction cranes. Under such Changes in Codes, Standards circumstances, major accidents and Practices Following in dense urban Crane Failures zones have spurred the creation of crane regulations, particularly in Part 3 – Cranes California, New York City and the UK. Officials in other localities have reacted similarly to singuBy Lawrence K. Shapiro, P.E. and Robert T. Ratay, Ph.D., P.E. lar dramatic accidents, sometimes creating laws that are closely crafted to the particularities of the accidents that spawned them. This jagged path to the making of crane rules is an aberration. The great bulk of crane standards and regulations in both the United States (US) and the world at large are, instead, the product of a steady progression of deliberations, built upon collective knowledge and wisdom acquired over decades. Much of the knowledge, unfortunately, comes from the experience of accidents.
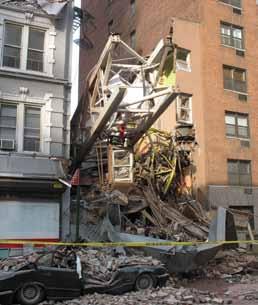
Figure 1: On the Upper East Side of Manhattan, a tower crane collapsed during a climbing operation, resulting in multiple deaths and massive property damage.
Most crane accidents do not occur in the center of major cities, nor do they make the front pages of tabloids. These lesser-publicized events add up to a much greater human and economic toll than the headline-grabbers. They do not, however, escape attention. Stakeholders, who suffer the losses and deal with the consequences, do not ordinarily forget them (Figure 2). For those apt to learn from experience, the cruel lessons of a serious mishap will be internalized, analyzed and applied. There are also many incidents that might be termed near-misses or minor mishaps. These frightening brushes with catastrophe can be moments of serendipity for those inclined to learn from them. For the small fraternity of participants in standards-writing committees, hard-learned lessons from failures in the field become opportunities to contribute to the advancement of industrial codes.
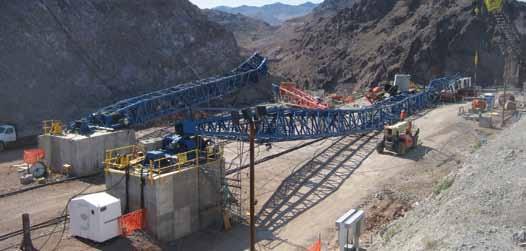
Cranes are broadly classified into the categories of Industrial, Construction and Marine. Some crane and rigging rules overlap in covering all three, while others are particular. For example, the American Society of Mechanical Engineers’ ASME B30.20: Below-the-Hook Lifting Devices covers lifting accessories for all cranes, while ASME B30.3: Construction Tower Cranes is targeted for its construction specificity. Industrial cranes usually operate in wellcontrolled settings, with operations that are repetitive and equipment that is often fixed in place or operating in circumscribed zones. Some common crane types in general industry are stackers, loaders, bridges and gantries. Accidents mostly occur from complacency, lack of training, inadequate supervision or deficient maintenance. (These causes could also serve to explain a great many industrial accidents outside of the crane and rigging sphere.) After all, cranes are subjected to abuse and prone to failure just like other mechanical contrivances used by general industry. The things that cause most accidents in general industry can cause construction crane accidents as well, but construction sites introduce additional hazards. Site conditions are short-lived and ever-changing; personnel rotate through, and the operations of the various trades overlap. Mobile cranes and tower cranes, the types most common on construction sites, each engender a distinctive set of hazards that are unique to their class. Their users require specialized knowledge and procedures that are additional to the general set of rules for cranes and rigging. An informative discussion of the types, installation, operation and safety issues of construction cranes is in Chapter 20, “Cranes,” by L. K. Shapiro, in Temporary Structures in Construction, 3rd edition, R. T. Ratay, Editor, McGraw-Hill, Inc., 2010. The special nature of crane hazards on construction sites demands that particular rules exist for that milieu. That is why, for example, the Occupational Safety and Health Administration (OSHA) maintains an extensive section about cranes under its construction standard (29 CFR 1926 Subpart CC: Cranes and Derricks in Construction) that is separate from its standards for general industry.
US Crane Standards
Out of professional considerations, as well as from long-term self-interest, stakeholders have often organized to produce codes for the safe design and operation of cranes. Such
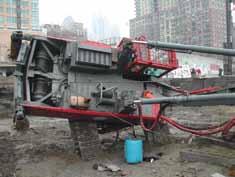
Figure 3: A crawler crane relies on firm level ground support to keep it from tipping.
voluntary efforts long predate government regulation. The collective wisdom of many experts gathering year-after-year has produced some well-known and widely-utilized series of rules, particularly the B30 series sponsored by the American Society of Mechanical Engineers (ASME). Important US standards are also produced under the tutelage of the American Petroleum Institute (API) and the Society of Automotive Engineers (SAE). These rules are considered consensus standards. Though lacking legal clout, their authority arises from the broad expertise of those who write them, and from the dedication of the sponsoring organizations to promote for the public interest. It is widely understood, but rarely stated, that sound standards are not just for the broad public good, but confer direct benefits to individual stakeholders. By promoting best practices they improve safety, and by promoting consistency of practices they remove a large measure of uncertainty from the industrial milieu. Though consensus codes and standards do not have the force of law, they oftentimes are incorporated into laws or are treated as de facto laws by regulatory and enforcement authorities. They are frequently cited in civil litigation and thus are well-entrenched in the common law. The list of stakeholders in the crane and rigging industry is long. A crane in service usually has a manufacturer, an owner, a user, an operator in the seat, a tradesman, often a construction manager or general contractor, and a project owner. There are also project planners, component manufacturers, engineers, safety professionals and regulators. Though some have a more dominant presence than others, all are represented at the table during codes and standards development.
Causes of Crane Accidents in Construction
In the US, most medium-sized and large construction sites are serviced by mobile cranes. Their variety, purposes and duration of use vary greatly. A truck-mounted mobile crane may show up at a site to make a handful of picks before departing, while a crawler crane could be set up for a year-long assignment. Mobility confers its own set of hazards, inferring likelihood that an operating site has not been adequately surveyed beforehand and perhaps not prepared for the presence of a crane. Moreover, the operator and crew may be encountering unfamiliar conditions with unexplored hazards. Mobility also confers the possibility of last-minute changes or improvisations, defeating the benefit of a plan. Among mobile cranes, the frequent types of serious accidents are: • Electrocution – the victims is usually a rigger handling the load when the boom or load line contacts an overhead power line. • Overturning – caused by overloading, ground support failure or improper operation of the crane (Figure 3). • Collision – a portion the crane or a suspended load strikes a building, person or object, or a suspended load is trapped. • Over-travel – the load block strikes the boom tip or boom runs up against the backstops. • Structural failure – from excessive side loading, overloading or an equipment deficiency. • Assembly/disassembly failure – the crew deviates from a qualified procedure. • Crushing – a worker is caught by a rotating or moving part such as a revolving deck or a spooling rope. The same types of accidents can occur with tower cranes, albeit less frequently because tower cranes tend to work under more controlled circumstances than mobile cranes. Tower cranes are used in the US primarily on major construction sites. By nature, they are fixed or semi-fixed in place and, therefore, less prone to problems caused by scanty planning, hasty preparation or last-minute improvisation. The greatest exposure of these machines to accidents occurs when they are being erected, dismantled or jumped.
Crane Failures, Codes and Standards
Though “code” and “standard” are words that are sometimes used interchangeably, the first implies a mandate while the latter is more often voluntary. The history of crane standards in the US is longer than that of codes, beginning with the first ASME issuance in 1916. Earlier standards, promulgated by the
industry policing itself, focused on crane design and work practices. The same subject matter has evolved over the decades and can be found in contemporary standards, but new topics have been added. Recent developments have focused on personal responsibilities and qualifications, as well as requirements for devices to enhance safety. These changes have often been in response to catastrophic failures. Early government regulation of the crane and rigging industries was light, mostly occurring at the state level. The most significant development in the regulatory landscape took place when the OSHA act of 1970 was signed into law. With that pen stroke, the federal government became the dominant regulator of crane and rigging practices. OSHA regulations lagged behind industry standards until 2010, when a broad update of OSHA construction crane regulations went into effect. Up until then, OSHA filled in the gaps by enforcing consensus standards as the de facto law. The 2010 regulations absorbed much from these consensus standards, but also moved beyond them. In developing the new regulations, OSHA consulted with a panel of industry experts and applied costbenefit analyses in addition to unalloyed safety considerations. Though portions of the regulations remain controversial in the industry, the agency clearly based its work on a broad view without reacting “knee-jerk” to particular events of failures. In spite of the new robust OSHA crane rules, localities that have their own regulations are unlikely to back away from them. The most entrenched of these rules – in New York City, Chicago and California – are justified by officials as being necessary to provide an extra layer of protection for the citizenry in densely populated urban spaces. Some of the background for these rules is instructive, as described in the following examples of crane failures that precipitated changes in codes, standards and practices.
Illustrative Cases
New York City 1985 East 63rd Street Mobile Crane Overturns Onto a Pedestrian Since 1968, New York City has had the most comprehensive crane laws in the country, requiring engineering certification and City approval of models, registration and inspection of individual machines, and professional engineering design for field installations. Notwithstanding these requirements, serious failures have occurred, some of them spurring revisions to the existing regulations.
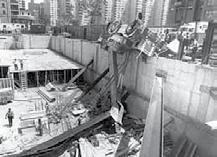
Figure 4: Telescopic crane toppled into a construction site, pinning a passerby.
In May 1985, during the early phase of construction of a residential high-rise building, a 35-ton telescopic crane turned over onto a passerby, pinning her precariously between the crane and the foundation wall (Figure 4 ). The ensuing dramatic rescue of the woman, who had been walking by the site on an open public sidewalk, brought national attention including a television movie and a presidential bedside call. Investigators determined that the crane had been operated by a laborer who had hastily jumped in the operator’s vacant seat to unload a truckload of rebar that had arrived during lunch break. In the haste to complete the task before the regular operator’s return, he had failed to extend the outriggers fully. When the boom swung over the side of the crane with the load on the hook, it toppled towards the site. The incident prompted city officials to strengthen administrative rules both for cranes and for general site safety, and a new site safety enforcement unit was created within the Department of Buildings. New administrative rules required on-site inspection of each crane by a professional engineer prior to its operation, assignment of a person to be responsible for safe crane operation and certification of site safety managers. In ensuing years, these measures have been greatly expanded. San Francisco 1989 Tower Crane Collapse In November 1989, a 350-foot tall tower crane constructing a downtown San Francisco high-rise office building collapsed while engaged in a climb. Five people were killed, including two passers-by. With a mangled wreckage and key witnesses among the dead, the cause was not easily discerned. However, investigators eventually determined that the upper part of the crane had been rotated during a critical stage of the climb. The act of rotation threw the crane out of balance and loaded the climbing apparatus above its ultimate capacity. As a result of this catastrophic failure, the California state legislature turned its attention to tower cranes, which had previously been given scant regulatory scrutiny at the state level. Labor Code Sections 7375-7384, that followed the 1989 incident, enabled a strict regimen of inspections, the most stringent in the country. Some of these inspections are now performed by statecertified private inspectors and others by Cal/OSHA. A qualified inspector is also required to be present during climbs and when dismantling a tower crane. Though tower crane inspection rules have toughened around the country, none approach the stringency of California except perhaps for New York City. Bellevue, WA 2006 Tower Crane Collapse On a November night, a 210-foot-tall freestanding tower crane constructing a high-rise building toppled onto several adjoining buildings, killing one occupant (Figure 5). The project had been redesigned and recently restarted after an
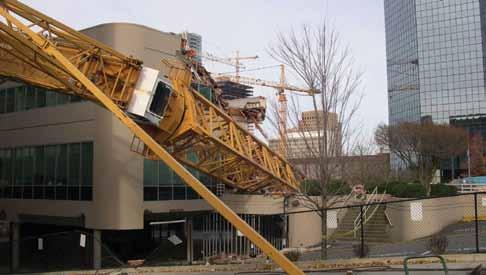
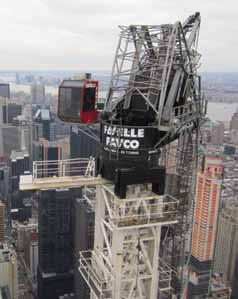

Figure 6: A tower crane boom fl ipped backwards during Hurricane Sandy, dangling above the streets of Manhattan.
earlier abandonment. With the old tower crane footing not in a suitable location, a new base support had been established on a fabricated steel frame attached to columns and shear walls in the underground garage. Due to a serious communication gap, the base designer was working with assumptions that diff ered drastically from the actual conditions on the site. Th e base designer used loads provided by the crane supplier and relayed by the general contractor, with the clear understanding that the crane would be erected with a tie connecting its mast to the building core, such that there would be no overturning moment on the base. However, the general contractor erected the crane initially as freestanding with no tie, thus imposing signifi cant overturning moments on the base that far exceeded its capacity. Triggered by this failure, two crane-safety bills were introduced in the Washington state legislature: Senate Bill 5990 and House Bill 2171, signed into law in 2007, making the state’s new crane safety regulations among the nation’s strictest. Eff ective January 1, 2010, the Crane Safety Act requires, among other things, cranes to be load-tested, inspected, and certifi ed at least annually, after any signifi cant modifi cation or repair of structural parts, and before and after each setup at a new site. It also requires crane owners to have an independent professional engineer review and approve plans for any non-standard tower crane base. New York City 2012 Crane Boom Failure during Superstorm Sandy In October 2012, a high-profi le failure occurred after the fi nal stages of erecting a 90-fl oor residential building in mid-town Manhattan. At the height of Superstorm Sandy, the boom fl ipped backwards and hung menacingly until it was secured several days later (Figure 6 ). Th e failure drew public attention for the spectacle high above the streets. Among engineers and regulators, it left questions concerning the adequacy of existing practices for leaving tower cranes to “weathervane” in high winds. Th e incident is still under review and is likely to spur new regulations.
Closure
In the not-too-distant past, a crane accident was treated primarily as an economic loss. Th e economic impact has not diminished from times past, but the social cost has increased. Society is much less tolerant of accidents and more inclined to assign blame. Th e calculus of risk management has shifted away from being a mere actuarial exercise; the stigma following a failure can seriously damage a company or a career, including the possibility of criminal prosecution. Beyond all these, injury or loss of life results in wrenching human suff ering. Crane accidents will always occur, as humans, materials and machines are imperfect, hazards are sometimes hidden, and nature is fi ckle. Th e burden of our profession and our industry is to learn from things that go wrong, develop corrective means and strategies and apply them. Laws and standards are merely one set of means to mitigate.▪
Lawrence K. Shapiro, P.E., is a principal of Howard I. Shapiro & Associates Consulting Engineers in New York, with a practice centered on cranes and other means of construction. He is coauthor of Cranes & Derricks, 4th Edition, and a member of several international and US codewriting committees. He can be reached at LKShapiro@hisassoc.com. Robert T. Ratay, Ph.D., P.E., is a structural engineer in private practice in New York, and an Adjunct Professor at Columbia University. He has been an expert consultant/witness on some 200 cases of structural failures, some of which resulted in changes to codes, regulations and practices. He is the Editor-in-Chief of three books: Handbook of Temporary Structures in Construction, 3rd Edition, Forensic Structural Engineering, 2nd Edition, and Structural Condition Assessment. He can be reached at
Structures@RobertRatay.com
Triple Protection Against Corrosion
Increase Corrosion Resistance
Use in areas susceptible to corrosion and chloride
Prevent unsightly appearance to concrete
Increase the life expectancy of metals, steel and rebar
Repel Water
Reduce Chloride Permeability
Add Corrosion Inhibitor to Cement All® , Mortar Mix, Concrete Mix and DOT Repair Mix for triple protection against corrosion
800-929-3030 ctscement.com
Structural ForenSicS
investigating structures and their components
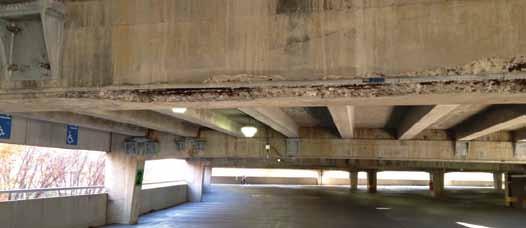
Figure 2 (from Part 1, Sept. 2013): Spalling due to deteriorated strands at precast girder.
Figure 3 (from Part 1, Sept. 2013): Corroded and failed prestressing strands at precast girder.
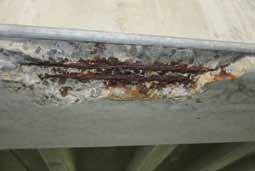
As a part of Pennoni’s on-call contract with an existing client, the Philadelphia structural division investigated and developed repair bid documents for an existing, three-level, 1,200-space precast concrete parking garage during the last quarter of 2012. Part Prescription for Repair 1 of this series (September 2013) described the existing structure and summarized observations The Triage, Life Support and material testing results. This article presents and Subsequent Euthanasia an analysis of those findings. of an Existing Precast Observations Parking Garage – Part 2 The surface spalling and subsurface delamination By D. Matthew Stuart, P.E., S.E., F. ASCE, F.SEI, SECB, MgtEng and Ross E. Stuart, P.E., S.E. observed at the girders occurred due to the corrosion of the internal reinforcing (Figures 2 and 3 from Part 1). Corrosion is an electrochemical process that requires an anode, a cathode and an electrolyte. For the existing structure, the moist concrete provided the electrolyte and the embedded reinforcement provided the anode and D. Matthew Stuart, P.E., S.E., F.ASCE, F.SEI, SECB, MgtEng (MStuart@Pennoni.com), is the Structural Division Manager at Pennoni Associates Inc. in Philadelphia, Pennsylvania. cathode. Water and oxygen must be present for any corrosion to take place and, in good-quality concrete, high alkalinity slows or stops the corrosion process. However, if the concrete alkalinity is lowered (e.g., due to carbonization) or if corrosive chemicals (e.g., chlorides) are present, the corrosion process will accelerate. Ross E. Stuart, P.E., S.E. (RStuart@Pennoni.com), is a project engineer at Pennoni Associates in Philadelphia, Pennsylvania. The electrical current that flows between the cathode and anode results in an increase in metallic volume at the anode as iron is oxidized and precipitates as rust. Rust, a byproduct of electrochemical reaction, has a volume three to four times greater than the iron anode from which it originates. As the layer of rust increases due to the ongoing corrosion process, the resulting expansion of the corrosion byproduct causes the surrounding concrete to crack, delaminate and ultimately spall. As the surface of the concrete degrades, the corrosion process accelerates as internal areas of the reinforcing that were previously protected by the concrete cover are exposed to additional moisture and deicing salts (chlorides). The decrease in frequency of deterioration at the second floor girders was likely because fewer deicing salts were used, since this floor was not directly exposed to snowfall. The post-tensioning cables, whether ducted and grouted or sheathed and unbonded, were somewhat protected from the high chloride content and as a result did not corrode as extensively as the unprotected prestressing cables at the precast girders. The mild reinforcing at the post-tensioned girders was not protected from direct contact with the surrounding concrete, and would therefore be expected to deteriorate over time. However, field observations (Figure 4 from Part 1) indicated a general lack of spalls and subsurface delaminations in the post-tensioned girders. It was also noted that the cast-in-place, post-tensioned girders were constructed at a slightly later date than the precast girders, so the embedded reinforcing may not have created enough corrosive byproduct at the time of the condition assessment to create spalls as frequently as was observed at the precast prestressed girders.
Material Testing
Water Soluble Chloride Content In order to prevent the corrosion of internal reinforcing steel and the subsequent deterioration
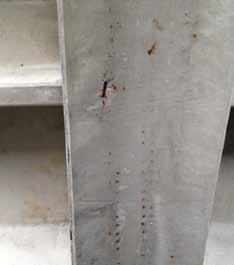
Figure 4 (from Part 1, Sept. 2013): Rust staining due to internal corrosion of posttensioned girder reinforcing.
of the surrounding concrete, the American Concrete Institute (ACI) recommends that the initial ratio of water soluble chlorides to weight of cement not exceed 0.06% for prestressed structures in a moist environment that are exposed to chlorides in either the form of admixtures or deicing salts. The chloride powder sample tests indicated that the actual chloride content was as high as 25 times greater than this recommended limit (Table, sample PAI-1). Some of the chloride content in the samples taken from the top surface of the concrete likely resulted from direct exposure to deicing salts (Table, samples PAI-4A and 5A). However, the magnitude of the chloride content at the beams suggested that there was a secondary source of chlorides in the concrete. The most likely explanation is that a set-accelerating admixture containing chlorides was used in the original concrete mix. This hypothesis was based on the following rationale: 1) Set-accelerating admixtures are typically only employed during winter concreting operations when there is a desire for the concrete to set more quickly than normal in order to avoid freezing of the mix water before complete hydration occurs. A review of the available construction phase documentation indicated that the cast-in-place post-tensioned girders might have been placed during cold weather. In precast operations, when there is a desire to accelerate fabrication and reduce turnaround time associated with the curing of the concrete, set accelerators are also employed.
Sample No. & Description PAI Chloride Content Comparison Table
Cl-
(Note 1)
Previous Report Sample No., Date Description & Location Cl-
(Notes 1, 2 & 3)
PAI-1: side of precast girder 1.515% 4t 2005 Level 3 CIP topping <0.006% PAI-2: side of precast girder 1.045% D-2 2002 0.03%
PAI-3: side of CIP girder 1.345% 5t 2005 Level 3 CIP 5p 2005 topping & precast TT flange D-3 2002 0.022%
<0.006%
0.006%
PAI-4: CIP topping 0.595% 2t, 1t 1t 2005 Level 3 CIP topping
D-1 2002 <0.006%
0.017%
0.006%
PAI-4B: precast TT flange 0.065% 2p 1p 2005 Level 3 precast TT flange
D-1 2002 0.011%
<0.006%
0.006%
PAI-5A: CIP topping 0.07% 3t 2005 Level 3 CIP topping 0.045% PAI-5B: precast TT flange 0.075% 3p 2005 Level 3 precast TT flange 0.011%
PAI-6: side of precast girder 0.97% 7t 7p 2005 Level 3 CIP topping & precast TT flange D-3 2002 <0.006%
0.006%
1) Cl- % refers to percent chloride ion content by weight of cement. 2) Previous reports of investigation reported acid-soluble chlorides as opposed to water-soluble chlorides.
There is no direct correlation between these, except for relative change over time. 3) Previous reports of investigation reported chloride content as a percentage of concrete, not cement.
PAI multiplied this value by five since cement is typically 20% of the weight of concrete.
2) A comparison of the latest powder samples from the third level precast girders with one taken from a second level precast girder indicated a greater concentration of chlorides at the third level. As indicated previously, it is reasonable to assume that the girders on the second level had not been exposed to large quantities of deicing salts, so the measured chloride content should have been about the same as the initial chloride content when all of the beams were cast. It is also reasonable to assume that the 2-inch cast-inplace topping slab did not contain chloride set accelerators, based on previous material testing, and likely had an initial chloride content of approximately 0%. 3) Assuming that the initial chloride content was 0.97%, a comparison of PAI-2 (third floor girder) to PAI-6 (second floor girder) indicates a 0.075% chloride growth over the past 20 years. If the topping slab did not initially contain chlorides at all,
233
Structural Design Spreadsheets
www.Engineering-International.com
• Seismic Analysis for Family Dwellings
Based on 2012 IBC/2013 CBC.
• Wind Design for Low-Profile Solar
Photovoltaic Arrays on Flat Roof,
Based on SEAOC PV2-2012.
• Falsework Design for Steel Girder
Bridge Based on NDS 2012 &
AASHTO.
then the chloride growth in sample PAI-5A (topping slab) of 0.07%, is approximately the same amount as would be expected over the same time. A similar separate comparison of PAI-1 (third floor girder) to PAI-6 (second floor girder) indicates a 0.545% chloride growth over the past 20 years. The chloride growth in sample PAI-4A (topping slab) is 0.595%, which is also approximately the same. 4) The previous chloride tests performed as a part of earlier reports of investigation also allow for the chloride growth rate to be compared and verified to the latest results (see Table, page 25). As previously indicated, the estimated chloride growth in the girder for sample PAI-2 is 0.07% over a 20-year time span. This equates to a 0.0035% growth rate per year. The previous 2002 sample D-2 indicates a similar chloride content growth of 0.003% per year over a ten-year span, while the 2005 sample 3t indicates an identical growth of 0.0035% per year over a 13-year span. By verifying the chloride growth rates as shown in the analysis presented above, it is reasonable to conclude that chloride-containing set accelerators were used in the original precast, prestressed and subsequent posttensioned girder construction. This appears to be the most rational explanation for the extremely high chloride content in the girders discovered by the material testing. It should be noted that none of the previous testing performed in 2002 or 2005 included chloride testing from the girders. As a result, Pennoni compared the old and new chloride content test results from the topping slabs to extrapolate and confirm the
StruWare, Inc
Structural Engineering Software
The easiest to use software for calculating wind, seismic, snow and other loadings for IBC, ASCE7, and all state codes based on these codes ($195.00). CMU or Tilt-up Concrete Walls with & without openings ($75.00). Floor Vibration for Steel Bms & Joists ($75.00). Concrete beams with torsion ($45.00).
Demos at: www.struware.com likely chloride ion growth in the level three girders. In addition, the testing performed at the girders allowed for the identification of the primary cause of the rapid deterioration of the same members, which was not included in the previous investigations. Petrographic With the exception of the deleterious conditions identified by the material testing described above, the results of the petrographic analysis of the six core samples indicated that the concrete appeared to be of good quality. However, either the concrete was not air entrained, or an insufficient amount of air entrainment admixture was used, resulting in diminished protection of the concrete against freeze-thaw damage. Concrete normally exhibits entrapped air of approximately 3%. Per Table 4.4.1 in ACI 31808, the concrete used to construct the exposed slabs and girders of the garage should have had an air entrainment of approximately 6%. Chemical admixtures are typically introduced into the wet concrete mix to increase the air entrainment to 6%, thus greatly increasing the protection against freeze-thaw damage. The additional air voids allow for moisture to expand as it freezes, thereby reducing the internal stress on the concrete. In addition, the large quantity of water voids in the six core samples indicates that additional water was added to the wet concrete mix after the initial batch was prepared. This construction practice normally occurs to increase the workability of the wet concrete (increase slump) for placement. The increased workability comes at the cost of strength and durability, since the water/cement ratio is increased. However, the compressive test results from the previous 2002 report of investigation indicated that the concrete achieved the desired compressive strength.
Carbonization
Concrete is highly alkaline (i.e. high pH) due to the presence of calcium hydroxide created during the cement hydration process. The high alkalinity of concrete protects internal reinforcing from corrosion by creating a layer of passivity around the embedded steel. When concrete is exposed to carbon dioxide from the combustion exhaust of vehicles and the surrounding polluted atmosphere, the gases are absorbed by the concrete and react with dissolved calcium hydroxide associated with the free moisture located in the pores of the concrete. As a result of this reaction, the alkalinity of the concrete is reduced from its normal pH level of approximately 12.5. Once the pH level reaches approximately 9, the layer of passivity is lost and the internal steel is no longer protected from corrosion. The results of the carbonization tests at all six cores indicated that only the exposed concrete surfaces, to a depth of no more than 0.6-inch (see Table, core sample PAI-2) had been carbonized. The typical clear cover established by field observations was ¾-inch, so the presence of the carbonated concrete is not currently contributing to the direct loss of corrosion resistance of the internal steel. Practical experience has demonstrated that the depth of carbonization normally increases 1 inch every 50 years, or 0.02 inches per year. This value is confirmed by noting that the 2002 material testing indicated a depth of carbonization of approximately 0.5-inch. Based on the 0.02-inch per year estimated growth rate and the 7-year elapsed time period between measurements, the depth of carbonization should be approximately equal to 0.64-inch.
Service Life Analysis
By extrapolating from the carbonization analysis, the depth of carbonization will reach the embedded reinforcing in approximately two to three years. Once the carbonization reaches the internal reinforcing and the passivity layer is lost, the reinforcing will begin to deteriorate at an accelerated rate, greatly reducing the expected future service life. In addition, Pennoni used ACI 365.1R00, Service Life Prediction – State of the Art Report, to evaluate the remaining service life of the garage due to the high chloride content of the precast girders exhibited by samples PAI-1 and PAI-6. The criterion provided in this document essentially evaluates the time required for the embedded reinforcing to create a delamination and spall based on the clear cover, chloride content and reinforcing size. At the time a spall is created per the calculation, the service life of the member is essentially over, because repairs will be required for both the spall and the corroded reinforcing. The results of the calculations indicated that the precast concrete girder at the third floor represented by sample PAI-1 had a remaining service life of approximately two years, while the girder at the second floor represented by sample PAI-6 had a remaining service life of approximately four years. Parts 3 and 4 of this article will appear in future issues and discuss conclusions and recommendations for the temporary repair, stabilization and ultimate replacement of the garage.▪
Courtesy of Evelyn Weingardt.
Richard George Weingardt
In Memoriam
“When looking at important man-made improvements on this planet, it is quickly apparent they would not be possible without the input of engineers. roughout history, this has been the case. e Seven Wonders of the Ancient World, for example, are all structural engineering feats. Indeed, the history of engineering is the history of civilization. As engineering skills and techniques advance, so does the progress of society.” (Richard George Weindgardt)
On September 24, 2013, the structural engineering community lost a strong advocate with the passing of Richard G. Weingardt, P.E., Dist.M.ASCE, F.ACEC. Mr. Weingardt authored numerous articles for STRUCTURE magazine’s Great Achievements column.
Born March 23, 1938 in Sterling, Colorado, Richard held both a Masters and Bachelors in civil-structural engineering from the University of Colorado and received an honorary doctorate in engineering from that same institution. roughout his career, Mr. Weignardt popularized the phrase “ e world is run by those who show up” while championing the importance of engineering to both the public and young people.
Richard was the founder of Richard Weingardt Consultants, Inc., a Denver, Colorado-based consulting engineering rm specializing in structural engineering. He was a registered professional engineer in 29 states and was the recipient of numerous community and professional awards and accolades.
Mr. Weingardt could easily be described as an activist, as he consistently was an outspoken advocate in challenging engineers to step up and be heard. While serving as the national president of the American Council of Engineering Companies (ACEC), he was involved in instigating an industry-wide analysis of engineers as social leaders. is e ort culminated in the ACEC I-Book, Seeing into the Future.
He was a proli c and sought-after speaker around the globe. He chaired engineering advisory boards for several universities, was a member of Colorado’s LongRange Planning Subcommittee, the state’s Historic Preservation Review Board and the Colorado State Electrical Board.
Mr. Weingardt was the author of seven books and more than 500 published papers on engineering, leadership and creativity. His books include: Circles in the Sky, e Life and Times of George Ferris; Forks in the Road: Impacting the World around Us, a book of re ections and practical advice on societal leadership; Cylindrical Shell Design, a design textbook using “Beam Method” analysis; Empire Man about Homer Balcom, structural engineer for the Empire State Building; and Engineering Legends: Great American Civil Engineers.
In addition to engineering, writing and lecturing, Mr. Weingardt’s talents included painting. His preferred medium was oil painting and his favorite subjects were Native Americans and the Western landscape. He also wrote a history book about Colorado’s last signi cant Plains Indian battle at Summit Springs, Sound the Charge. is area of Colorado was near where Richard was born and raised, and was also the backdrop of many of his paintings.
Mr. Weingardt leaves his loving wife of 54 years, Evelyn Scheberle Weingardt, and three children, Nancy Weingardt, Susan Whitworth, (George) and David Weingardt (Kathy). Please join STRUCTURE® magazine in sending our condolences to his family.
ADVERTISEMENT–For Advertiser Information, visit www.STRUCTUREmag.org
Ev E ryman Th E aT r E
Setting the Stage for Neighborhood Renewal
By Matthew J. Daw, P.E., LEED AP and Amanda Gibney Weko
Acommunity repertory theater organization developed the project to renovate historic Everyman Theatre in Baltimore, Maryland, revitalizing an abandoned property. Encompassing historic preservation, creative architectural design and structural engineering, construction craftsmanship, and good stewardship, the project created more than a modern performing arts venue. It contributed to positive neighborhood and economic renewal in Baltimore’s West Side arts district.

History
Built in 1911 at the height of vaudeville performance, the Empire Theater was designed by architects Otto Simonson and W.H. McElfatrick. Over its lifetime, the building hosted live theater and
The renovated theater reopened to the public with a ribbon-cutting ceremony in January 2013. Courtesy of Alan Gilbert Photography.
movies, including a 1947 showing of It’s a Wonderful Life attended by star Jimmy Stewart and director Frank Capra, before deteriorating into a series of uses ranging from bingo parlor to boxing venue to adult-movie theater. Its interior was later modified for conversion to a parking garage. By 1990, the building was abandoned and the neighborhood declined. In the same year, Everyman Theatre organized as an equity professional repertory company of artists from the greater Baltimore and Washington, D.C. region. In 2006, Everyman Theatre received the Empire Theater building as a donation from Bank of America and the Harold A. Dawson Trust.
After 20 years of abandonment, the theater needed structural stabilization, façade preservation, and complete interior architectural adaptive reuse in order to return it to a live-performance venue. The design team comprised of Cho Benn Holback + Associates, Inc., Keast & Hood Co. and James Posey Associates, Inc., developed plans for two new theater spaces, which included a 250-seat studio theater stacked beneath a 200-seat black box theater, plus new scene shops, costume and prop facilities, classroom spaces and a grand lobby. Lewis Contractors was engaged for construction. In addition to the complexities of archaic structural systems found within the historic building, the building team faced significant acoustical challenges with stacking two theaters. The difficulty of these challenges increased with the presence of an operating metro train tunnel located 50 feet below the building’s foundations.
Train Tunnel
The team demonstrated to the Maryland Transit Administration that building renovations would not impact the metro train tunnel through a strategic design that reduced the building’s dead load and prevented the need for tunnel reinforcements. The Structural Engineer of Record (SER) utilized lightweight concrete in the new long-span interior framing to minimize the overall building weight, and supported it with the existing building foundations rather than introducing new foundations. Areas of the building that were no longer needed for theater use were infilled as office space using light-gauge metal and wood framing to minimize the building loads further. The project reached completion without altering or interfacing with the existing train tunnel.
Acoustic Solutions
Significant effort went into acoustically isolating the two theaters from one another, and the building superstructure from the train tunnel to mitigate noise and vibration of passing trains. The design team carefully detailed attachments to the original building fabric and developed special beam pockets with neoprene insulation to avoid transmitting vibrations through the structure. The upper theater was built with two separate floor slabs consisting of a floating acoustical slab raised on acoustical isolation mats to mitigate concerns of structure-borne vibrations transmitting into the supporting floor structure below.
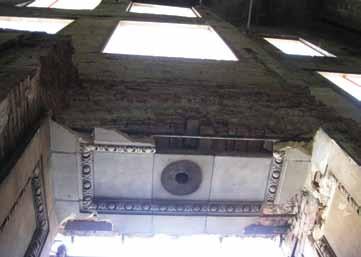

The once-elegant 1910 Empire Theater was a bingo parlor, boxing venue, adult theater – even a parking garage – before abandonment in 1990. Courtesy of Keast & Hood.
Façade Restoration
The theater’s historic terra cotta and granite façade required significant intervention to stabilize and restore it. The main header beam supporting the ornamental pilasters was seriously corroded; however, replacing the beam was cost-prohibitive. Instead, the SER devised a unique and cost-effective solution. A system of proprietary sock anchors permanently stabilized the sections of fragile hollow terra cotta façade, supported the pilasters, stitched together the deteriorated window heads, and re-established the continuity of the wall system. This system avoided the costly and invasive replacement of the heavily corroded steel lintels and armatures. The new sock anchors consisted of 30-inch long by 5/8-inch diameter stainless steel threaded rods within fabric socks. The sock assemblies were inserted into dry core-drilled holes in the hollow terra cotta and filled with a cementitious grout to bond into the fragile material. The fabric socks enabled the grouting of anchors without completely filling the terra cotta voids. The system enabled the contractor to remove interior floors and partitions while the building remained standing and structurally sound. The façade’s original windows, long since removed with the openings infilled, were reopened to return natural light into the lobby. The designers developed a new marquee and signage modeled after the original marquee, putting a modern spin on the original aesthetic. Fittingly, the ornamental terra cotta seal on the center of the parapet was restored to prominence. It features a large letter E – originally for Empire – now coincidentally representing Everyman Theatre.
Structural Intervention
One facet of complex structural design was the alteration of the main proscenium girder to make way for a new door opening into the upstairs office area. The original girder was approximately six feet deep and consisted of built-up and riveted steel plates. In order to cut the girder and avoid damaging the fragile historic fly-loft masonry, its loads first had to be transferred by hydraulic jacking onto the new steel structure that infilled the fly-loft footprint. This required careful monitoring and sequencing to ensure proper load transfer without damaging the historic masonry walls. continued on next page
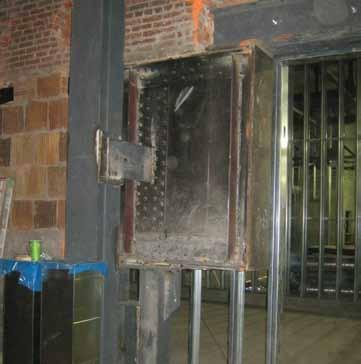
Careful sequencing ensured the proscenium alterations were done without damage to existing structure. Hydraulic jacks transferred loads until new steel structure was inserted. Courtesy of Keast & Hood. New beams fit into pockets of neoprene insulation to avoid transmitting vibration or sound through the building. Courtesy of Keast & Hood.
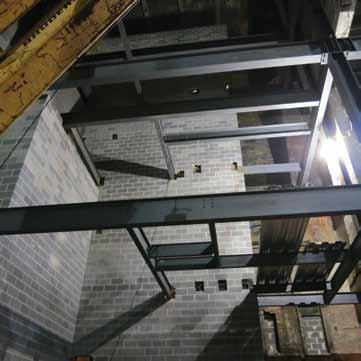
Natural Disasters
With the façade stabilization in place, the interior of the building gutted, and renovations not yet begun, the project faced a natural disaster. The August 2011 Mineral, Virginia, earthquake put the structural shoring to the test. The magnitude-5.8 earthquake struck less than 150 miles away, and shocks were felt up and down the East Coast. The shoring held, crack monitors did not detect any building movement, and minor damage to the deteriorated façade was corrected during the restoration process. In the fall of 2012, Hurricane Sandy, with an area of 850 square miles, made landfall in Atlantic City, N.J., 150 miles to the north of Baltimore. The project was further into construction with the exterior work nearly finished, and the building survived the event without any damage.
Reacting to Surprises
Unraveling history is a big part of any building renovation. The Empire Theater’s long and varied past made it particularly susceptible to unknown field conditions. Ongoing communication and rapid response by the building team, often the same day, kept the project on track. Unexpected finds included steel columns embedded in the masonry walls, which were evaluated, deemed acceptable, documented, and entombed back in the walls. Also discovered were 15-foot by 15-foot stepped masonry foundations added to support the parking structure. The design team was able to use them to provide additional support for the new framework and re-route the ductwork to avoid removing or modifying them.
Laser Accuracy
The building team realized during initial surveys that few of the building’s perimeter walls were straight. Although expected with an old building, the team resolved concerns with an innovative technique using lasers to survey the building interior after gutting it. The precise dimensions allowed the building team to verify structural steel measurements and member sizing to avoid change orders once the prefabricated steel arrived on site.
Historic Preservation
The building team coordinated closely with both the Maryland Historic Trust and the National Park Service to earn state and federal tax credits for historic restoration and preservation efforts. Both groups mandated the façade restoration and the restructuring of the proscenium wall, and the historic community paid particular attention to reopening the façade windows. In compliance with all historic organizations, the restoration work earned a 2013 Baltimore Heritage Adaptive Reuse Award.
Stewardship
Responsible and cost-effective choices in the Everyman Theatre project proved that budget- and environment-friendly buildings can be beautiful and successful. The careful craftsmanship and strong execution in finish work made the difference. Exposed masonry and building structure offer an elegant, industrial aesthetic and cost savings. In lieu of hardwood paneling, the wall covering consists of plywood stained and arranged in a pattern, while recycled polyboard theater flooring offered durability and economy in initial costs and life-cycle maintenance. White reflective thermoplastic polyolefin (TPO) membrane roofing and added insulation throughout the building contributed to its energy efficiency. Although the project did not pursue LEED certification due to its added expense, it qualified for LEED Silver equivalent.

Community Impact
The renovated theater is a catalyst for change in West Side Baltimore’s burgeoning arts and entertainment district. Courtesy of Alan Gilbert Photography.
The new building enabled Everyman Theatre to expand its vibrant education programs that reach 2,000 students annually, including its lauded high school matinée program, offered free of charge to schools and students. The two classrooms in the renovated building will accommodate additional programs and community engagement activities. For the first time all of its education programs will take place on-site. Everyman Theatre already impacted West Side Baltimore’s redevelopment of an arts and entertainment district. The neighborhood has been in transition over the past several years and this project was an iconic catalyst for the positive change. It is among the leaders in a burgeoning arts community, including the Bromo Seltzer Arts Tower, H&H Building, and The Hippodrome Theatre, plus the business and academic impact of the University of Maryland Medical School. According to the 2010 census, downtown’s West Side and City Center were the fastest-growing residential neighborhoods in Baltimore over the past 10 years, outpacing even the waterfront district. Everyman Theatre’s redevelopment has created jobs at the theater and at nearby restaurants. Baltimore Mayor Stephanie Rawlings-Blake attended the January 2013 ribbon-cutting ceremony signaling the public opening of the renovated theater. To engender additional community support, Everyman Theatre hosted a pay-what-you-can night of performance during its grand opening week.▪
Building Team
Structural Engineer (SER): Keast & Hood Co. Architect: Cho Benn Holback + Associates, Inc. Civil Engineer: Gower Thompson, Inc. MEP Engineer: James Posey Associates, Inc. General Contractor: Lewis Contractors Acoustics: Shen Milson Wilke, Inc. Theatre Design: Theatre Project Consultants A/V Design: Engineering Harmonics, Inc. Lighting Design: Bruce Dunlop Lighting Design
Matthew J. Daw, P.E., LEED AP, is a structural engineer and principal in charge of the Washington, D.C., office of Keast & Hood Co. He played an active role in the collaborative design process at Everyman Theatre as Structural Engineer of Record (SER). He can be reached at mdaw@keasthood.com. Amanda Gibney Weko is a design writer and communication consultant based in Philadelphia, PA. She can be reached at amanda.weko@agwdesigncommunications.com.
ADVERTISEMENT–For Advertiser Information, visit www.STRUCTUREmag.org
Structurally EfficiEnt
Trimble Rockies Campus Positioned to Deliver Impressive Efficiencies, Innovation
By Vicki Speed
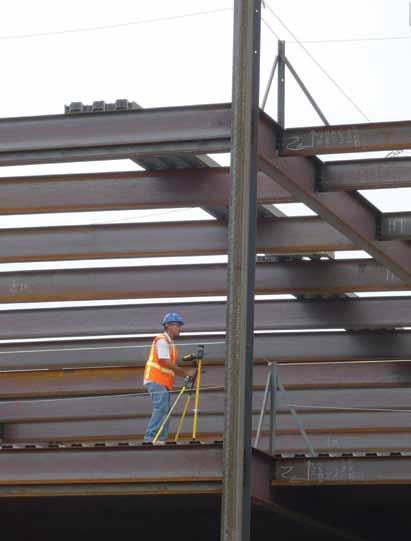
Trimble Navigation is best known as a leader in positioning technologies that help the world’s mobile workforce build, harvest, map, plan, and survey everything from the Beijing National Stadium to the mineral mines of South Africa. So when company executives decided to build – rather than lease – new office space to support the over 500 engineering, marketing, and sales staff based in Westminster, Colorado, they understandably believed their positioning technologies could help optimize people, processes, and materials in the built environment. The Rockies Campus project offered Trimble a particularly unique opportunity to demonstrate the potential of its positioning, information sharing and collaboration BIM solutions to deliver a new office space with greater speed and improved communication, along with all the coordination opportunities that a project team could envision.
Lean and Green
Designed by OZ Architecture in Denver, Colorado, the four-story, 125,000-square-foot Trimble Rockies Campus incorporates floorto-ceiling windows for abundant natural light and spectacular views of the Rocky Mountains and downtown Denver skyline. There is extensive bike parking with access to regional trails and large locker rooms to encourage exercise. With the goal of LEED Silver certification, the building envelope is optimized for energy performance using passive systems that do not use any man-made energy to function once installed; only natural free energy. The overall energy cost savings over an ASHRAE 90.1 2007 building is at least 30%. Water use was reduced by 40% as compared to a typical building of its size.
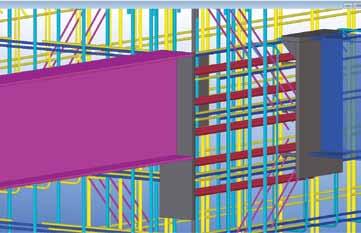
In-model review tools helped drive discussion during and resolve potential conflicts in advance of fabrication and steel erection. With BIM-to-field connections, the project team achieved 100% embed placement and had zero placement errors during steel frame layout.
For JE Dunn, the general contractor, the challenge was to complete the structure in 13-months or less using the latest collaboration and information sharing technologies to support design, sitework, fabrication, and construction. To meet the fast-track schedule and owner requirements for collaborative technologies, such as BIM, the project team implemented integrated project delivery (IPD) strategies to streamline all facets of the project. The BIM Execution Plan called for architectural, structural, mechanical, electrical, plumbing, fire safety, and accessibility designs to be completed using BIM design tools. The building model would be used to facilitate design coordination, conflict checking, constructability reviews, and store building component specification data. AIA Level of Development (LOD) requirements were assigned for structural, fire protection, and mechanical, electrical and plumbing (MEP) BIM. In order for all MEP trades to utilize the same model for coordination and fabrication, the team modeled the building systems to a LOD 400, which includes enhanced levels of detail that pertain to specific MEP systems, such as pipe hangers, fittings, and junction boxes. The availability of one digitally and dimensionally accurate model for design and construction coordination, detailing, fabrication, and field level management would create opportunities for workflow efficiencies throughout the design and construction of the structure. In addition, the general contractor applied “Lean” principles throughout to streamline workflows. Lean principles and BIM-to-field connections facilitated significant efficiencies during the construction of the structure’s two stair cores and elevator core.
The formwork lift drawings were coordinated in the 3D model with rebar, embeds, anchor studs, beam form pockets, and blockouts. During field installation, the formwork, rebar, and embeds were continuously checked for accuracy with the Trimble robotic total station, per the 3D model. Embeds were color coded based on positioning/orientation in the wall to allow efficient installation. After the concrete work was complete and the steel structure was erected, the general contractor found that embeds were installed with 100% accuracy.
Accuracy Drives Quality
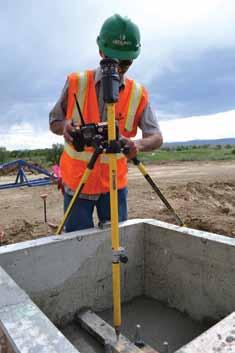
The project team determined that the repeatability of the building skin system created an opportunity for onsite prefabrication. Early paving of parking lots provided a level, clean surface that would accommodate prefabrication. In coordination with the exterior framing subcontractor, exterior wall frames, composed of metal studs and sheathing, were prefabricated utilizing a jig system and set into place by a lift. The prefabrication effort started on the southeast elevation and moved counterclockwise around the building. The first elevation took 1.5 weeks to complete, but the last two elevations were each completed in one day. Another critical connection of the new JE Dunn hired Zimmerman Metals, a steel Trimble Westminster office building was fabricator proficient with Tekla Structures, the marriage of the exterior skin to the to help create synergy in the steel design, in-place steel/concrete structural systems. fabrication, and delivery. The glazing subcontractor was brought on With the intent to reduce duplication of board early to coordinate final detailing effort, the general contractor, the structural engineer (Structural Consultants, Inc. or SCI), and the steel fabricator opted to use During field installation, the anchor bolt placements as well as formwork, rebar, and embeds were continuously checked using Trimble’s Robotic Layout and budgeting of the ribbon window and curtain wall design. Several coordination meetings were conducted between the one federated model developed in Tekla Solution – Trimble Field Link for Structures and design team and glazing subcontractor to Structures from design through construc- verified in the Tekla Structures model. detail the system. tion to expedite steel delivery. The idea was Per the design, Phase 2, the glazing contracthat the same model that is used to permit tor would fabricate 139 panels ranging in size approved contract documents is leveraged to detail and fabricate from 4- by 29-foot to 8- by 30-foot on site. shop drawings for rebar, structural steel, exterior metal studs, and The panels were designed to fit to the in-place structural systems with structural components. very tight tolerances. The panel clips that are attached to the building SCI detailed the rebar shop drawings and adapted its Tekla Structures had to match the stud layout of the prefabricated panels to within model to the rebar fabricator’s standards and installer’s constructabil- 1/8-inch to ¼-inch accuracy, otherwise the panel clip would need be ity comments. relocated during the erection process, thus wasting time and money. Two charettes were conducted with all parties to optimize embed SCI incorporated the panel dimensions and panel stud center locations and shift rebar as needed to accommodate anchor studs. This locations into its structural model and then generated Phase 2’s collaboration effort streamlined and expedited the review/approval shop drawings. continued on next page and material procurement processes. During erection planning, the fabricator set up a truck delivery schedule based on the Tekla Structures model. A trailer load of steel was scheduled every four days. Due to the accuracy of the steel from the BIM, the erector set the first load in 1.5 days. Since the next shipment of steel did not arrive for another 1.5 days, the erector proceeded to finish all bolting, decking and welding on the first load of steel. The set, bolt, and weld sequence continued for every subsequent load of steel. The “back welding”, typically completed after the frame is erected, happened concurrent with the erection schedule. Expedited steel erection enabled the concrete decks to be poured sooner. The steel was originally scheduled to be erected in 10 weeks, not including complete bolting and welding. Based on the described sequence and accuracy of steel placement, the entire steel structure was completed in 10 weeks. The use of BIM also allowed the steel erector to cut the anticipated splice plate correction work by 50% due to the accuracy of the steel members and concrete work. Overall, the steel structure resulted in 67% fewer RFIs and field fixes as compared to a similar office building project constructed by JE Dunn in Colorado Springs, Colorado the previous year. JE Dunn field personnel using the Trimble RTS 773 and Trimble Field Link for Structures layout solution for verifying edge of slab during the build-out of the elevator core.

Trimble Rockies Campus completed April 2013.
Ordinarily, Phase 2 would have outsourced the framing detailing to a structural engineer who would have had to get the structural information from SCI, model the exterior framing components and then generate shop drawings – a 4-6 week process by the time all documents are prepared, reviewed, and approved. With Tekla BIMSight and the Trimble Connected Community (TCC) portal, Phase 2 had a much tighter coordination process, which resulted in approved exterior framing shop drawings in half that time.
BIM-to-Field Synchronized Systems
• Trimble Connected Community – dedicated project website to track project progress, store critical BIM files and track site activity in real-time • Tekla BIMsight – project collaboration software to combine 3D models from IFC-compliant BIM tools, clash detection, markup and design review • Trimble Field Link construction layout solution– transition model data with field points to the field for location and stake-out • Trimble Point Creator – create 2D and 3D field points within Revit or CAD and then export to Trimble Field Link for easy stake-out in the field • Tekla Structures – create and manage detailed, highly constructable 3D structural models regardless of material or structural complexity • Trimble PipeDesigner 3D – 3D CAD software for piping and plumbing contractors • Trimble AutoBid Mechanical– generate and manage piping and plumbing bids • Trimble Accubid Enterprise – estimating software for piping and mechanical contractors • Prolog Project Management Solution – a flexible and robust project management solution for the management of construction costs, scope and schedules • Trimble SketchUp Pro – an easy and intuitive 3D modeling software for contractors that allow rapid creation of models for conceptual design and planning To further ensure smooth installation, the Trimble Westminster team mocked-up some of the critical details of the exterior skin in the virtual environment, including the unitized curtain wall system, using Trimble SketchUp Pro. The team then constructed a physical mock-up to visualize the exterior skin for aesthetics and functionality. The SketchUp Pro model, mock-up and document package helped the team visualize and understand critical exterior skin details, develop best practices, uncover possible scope gaps, and most importantly develop a sequencing methodology so that the wall systems met both the design and construction team’s expectations. In utilizing the SketchUp Pro software, JE Dunn was able to identify several different difficult details on the exterior skin of the building. They were able to build those details in SketchUp Pro, which allowed them to understand the details in three dimensions. The ability to properly sequence the subcontractors work in these areas, identify potential issues with the details, and find better ways to construct them were just a few of the benefits of preconstruction techniques. By identifying issues long before building in those areas, the general contractor was able to resolve the issues with little or no financial and schedule impact. The design team approved the shop drawings within two days. Due to the repeatability of the building skin system, the glazing subcontractor prefabricated the ribbon windows and curtain wall in its local shop, enhancing onsite efficiency and safety by minimizing material and worker exposure to site conditions and other trades. Installation of the prefabricated ribbon windows and curtain wall was smooth and fast.
Commissioning
To finalize the model handoff to Trimble facility operations, all architectural, structural and MEP details were incorporated, which transitioned the model into a LOD 500. Construction of the Trimble Rockies Campus began on April 24, 2012 and finished on April 25, 2013. On May 6, 2013, approximately 500 Trimble engineering, marketing and sales teams moved into the new headquarters – several weeks ahead of the 13-month planned schedule.▪
Vicki Speed is a freelance writer specializing in architecture, engineering and construction space. She can be reached at vickispeed1@comcast.net.
Trimble Rockies Campus Project Team Members
Structural Engineer: Structural Consultants Inc., Denver, CO Owner: Trimble Navigation, Westminster, CO Architect of Record: OZ Architecture, Denver, CO General Contractor: JE Dunn Construction, Denver, CO Steel Fabricator: Zimmerman Metals, Denver, CO Glazing Contractor: Phase 2, Fort Collins, CO Mechanical Contractor: MTech Mechanical, Westminster, CO Electrical Contractor: Encore Electric, Englewood, CO Plumbing Contractor: Total Plumbing, Denver, CO Software: See BIM sidebar
Structural Performance
performance issues relative to extreme events After fire exposure, design professionals are sometimes called upon to determine if the charred heavy timbers (Figure 1) are safe for future use without additional support or repairs. In this article, the authors present a sequence of reasoned steps that will help design professionals analyze charred timbers and gain the type of information needed to decide whether the charred timbers are adequate based on the applicable building code.
Case Study
In the example case, the initial available information is as follows: 1) Timber floor beams appear to be nominal 12x16 surfaced 4-sides southern pine. 2) The client believes the typical char depth is about ½-inch. 3) No evidence exists that the timbers were graded.
Post-Fire Analysis of SolidSawn Heavy Timber Beams
Often, in older buildings, timbers are not “grade marked” and there are no records of any grading of timbers at time of construction.
By Robert H. White, Ph.D. and Frank E. Woeste, P.E., Ph.D.
Robert H. White, Ph.D., is a Wood Scientist in fire research at USDA, Forest Service, Forest Products Laboratory, Madison, WI. Robert may be reached at rhwhite@fs.fed.us. Frank E. Woeste, P.E., Ph.D., is Professor Emeritus, Virginia Tech University, Blacksburg, VA. Frank can be reached at fwoeste@vt.edu.
Figure 1: The evaluation of a glued laminated timber or other structural composite lumber will require considerations of factors beyond those discussed in this article.
Recommended Steps for Analysis
What follows is a series of recommended steps for analysis of charred timbers. This approach should allow a registered design professional to determine the adequacy of post-fire timbers to carry structural loads. For example, Figure 2 shows a beam in a renovated textile mill that was constructed in 1850. The timbers are valuable and replacement would be extremely costly in the event of a fire event. Replacement of timbers may not be an economical option, thus an in-depth structural engineering analysis, post-fire timber evaluation, and code-conforming re-design could establish that the timbers could be saved for future use. Step 1. Feasibility “Paper” Study First, the registered design professional (RDP) can conduct a feasibility “paper” study to initially determine if the residual cross sections of the charred beams have a reasonable chance of being adequate under current code loads and other loads deemed to be appropriate by the RDP. • By assuming reference properties listed in the National Design Specification® (NDS®) for
Wood Construction for a new No. 2 Southern
Pine timber (nominal 5x5 and larger) since this is a common grade used; and, • By reducing the cross-section based on initial estimates of the char depth. The charred layer is assumed to have no residual strength and stiffness. Based on the outcome of the paper study, the RDP and client can make a decision to move forward as discussed in the next section, in lieu of replacing the timber outright.
Step 2. Preliminary Investigation of Timbers using a Limited Sample of Char Depths In this step, calculations are refined by more accurate measurements of the dimensions of the
Figure 3: Illustration of temperature gradient in fire-exposed wood member. Figure 4: Illustration of zero-strength layer model of fire-damaged wood beam.
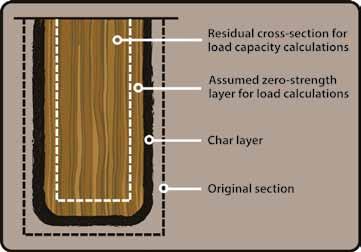
charred beam and consideration of thermal damage to the uncharred wood. In a typical fully developed fire, the base of the visible char layer will reflect a temperature of approximately 550°F. Depending on the intensity and duration of the fire exposure, a zone or layer of wood beneath the char layer experiences some irreversible loss in load capacity. While days of heating at 150°F can have a permanent effect on mechanical properties, the temperature effect on mechanical properties is reversible for heating periods of hours at temperatures below 212°F. From temperatures of 390°F to 570°F, the wood components of hemicelluloses and lignin begin to undergo significant degradation. Significant depolymerization of the cellulose component of wood occurs between 550°F and 660°F. Thus, the zone beneath the char layer between 212°F and 550°F has the potential of irreversible loss in mechanical properties due to thermal degradation. Effects of elevated temperatures are primarily on the strength properties. The effect on stiffness is considerably smaller. In addition to temperature, adverse effects depend on duration and type of exposure. In contrast to the impact on strength properties of wood at elevated temperatures, the loss in tensile strength after cooling to room temperature is greater than the loss in compressive strength. Since wood is an insulator, the temperature gradient in the cross-section is typically fairly steep during a fully developed fire (Figure 3). In heavy timbers subjected to fire exposure of the standard fire resistance test (ASTM E119), the 212°F temperature location (or front) will be approximately 0.5 inch inward from the base of the char layer after the first 15 or 20 minutes of fire exposure. In an actual fire, the temperature profile within the wood section will depend on the severity and duration of the fire exposure and post-fire exposure. One can account for additional thermal damage to uncharred wood in the load capacity calculations by including a zero-strength layer in the dimensions of the residual cross section (Figure 4). In Evaluation, Maintenance and Upgrading of Wood Structures, A Guide and Commentary published by the American Society of Civil Engineers (ASCE) in 1982, recommendations for evaluation of fire damage were for “removal” of a fixed amount of wood. Recommendations included removal of the char layer plus approximately ¼ inch or less of wood below the base of the char layer. For members controlled by compressive strength or stiffness, the recommendation was that no additional adjustment beyond removal of ¼ inch was necessary to apply the basic allowable design stresses to the residual cross-sectional area. For members controlled by bending strength or stiffness, the recommendation was either removal of an additional 0.625 inch or removal of an additional ¼ inch in combination with a 10% reduction in the allowable design value used to calculate the load capacity of the residual cross-sectional area. The code accepted methodology for calculating fire resistance ratings for heavy timber members addresses the anticipated thermal degrade effect on load capacity in the fire test by assuming an additional equivalent thickness having no strength and stiffness, and by using “room temperature” published properties for the residual cross sectional area. The analysis assumption is that “damaged” wood provides an “equivalent” thickness of load capacity. In the fire resistance calculation methodology in the NDS (Chapter 16), the equivalent thickness for the heated and thus potentially damaged section is 20% of the calculated char depth. Using the normal assumption of a char rate of 1.5 inches per hour, the 20% calculation for the zero-strength layer is equal to 0.3 inch for a one-hour fire resistance rating. This 1.2 factor adjusts the thickness to reflect the fire duration and its likely impact on thermal penetration into the wood interior. The methodology has been shown to be applicable to both dimension lumber members as well as heavy timber members. It is likely that a post-fire temperature profile will be flatter and of longer duration than the standard fire resistance test profile. Longer duration of elevated temperature in the interior portion of the member may increase the permanent loss in strength. The total duration includes both the fire and the post-fire period of elevated internal temperatures. The temperature at the char layer base should quickly be considerably less once the fire is extinguished, and thus reduce the thickness of wood subjected to the more severe elevated temperatures. In applying the methodology to the available strength data for permanent strength loss and the temperature profile reported for ASTM E119 fire exposure for various durations,
Foundation Performance Association (FPA)
Technical papers and monthly Presentations
The FPA hosts monthly events with interesting presentations with slides often posted on the website.
Members receive C.E.U.’s for each meeting attended.
Membership $96/yr
www.foundationperformance.org
the authors concluded that 0.1 inch to 0.3 inch is a reasonable recommendation for the zero-strength layer of a member loaded in compression in a post-fire load capacity analysis when used with the NDS adjusted design values. For members loaded in tension or bending, the recommendations are a thickness of 0.3 inch to 0.5 inch. These recommendations assume that the zero-strength layer is not physically removed from the member and the temperature at the center of the timber did not increase based on the likely temperature profile during the fire. One can further adjust the depth of the zero-strength layer downward by a fraction (e.g. 50%) of any uncharred depth removed for appearance reasons. Selection of values between 0.3 inch and 0.5 inch should be based on the duration of the fire as reflected in the observed char depth and location of members relative to direct exposure to flames. The observed thickness of the residual char layer will be less than the observed reduction in the dimensions of the charred member due to shrinkage of the char layer. In the context of these recommendations, 0.3 inch for compressive members and 0.5 inch for tension and bending members are the more conservative values for the thickness of the zero-strength layer in the calculation of load capacity. In continuation of the example, • The RDP obtains measurements of the char free cross section. In this example, measurements indicated the residual width B' of the beam was 10.6 inches and residual height D' was 14.6 inches. • Available information on the fire indicated the beam was directly exposed to flames and that the fire was extinguished shortly after flashover. The intense short-duration fire produced about ½ inch char, but thermal penetration into uncharred wood was likely limited. Thus, the conclusion
Software and ConSulting FLOOR VIBRATIONS
FLOORVIBE v2.10
• Software to Analyze Floors for Annoying Vibrations • New release • Demo version at www.FloorVibe.com • Calculations follow AISC Design Guide 11 Procedures • Analyze for Walking and Rhythmic Activities • Check floors supporting sensitive equipment • Graphic displays of output • Data bases included CONSULTING SERVICES
• Expert consulting available for new construction and problem floors. Structural Engineers, Inc.
in this example is that the additional reduction via a zero-strength layer of 0.3 inch is appropriate for calculation of residual load capacity. • To estimate the effective post-fire B and
D dimensions.
B* = effective post-fire width = B' – 2(0.3) = 10.6 – 2(0.3) = 10.0 inches
D*= effective post-fire depth = D' – (0.3) = 14.6 – 0.3 = 14.3 inches With Step 2 completed, the RDP has the basic information (B* and D* estimates) needed to conduct a preliminary structural analysis with respect to adequacy of the example fireexposed timber floor beams. This preliminary structural analysis is conducted using the NDS adjusted design values for the grade/ species as installed (if known) or new No. 2 Southern Pine timber. If the results are favorable with respect to demonstrating code compliance, a decision can be made by the RDP and client to further process the timbers to reduce them to their final dimensions and establish the grade and species of the beam whereby the structural design properties of the processed timbers will be available for use by the RDP.
Step 3. Documenting the Species, Grade, and Size of Each Timber In this step, add the potential impact that the reduced cross section had on the structural grade of the timbers. • This step is necessary because visual stress grading rules are based on member size and characteristics (such as knots) of the outer zones of a member that greatly impact stress grade results. With the timbers “clean” and reduced to their final dimensions, the RDP should contact a supervisory grading agency to evaluate all of the affected timbers in the structure. A list of grading agencies is available on the web site of the American
Lumber Standard Committee, Inc. The grading agency can make a qualified statement for each timber based on what grade characteristics are evident for each beam. For example, by viewing a beam in-situ, the grading agency can conclude that the highest possible grade for the specific beam is No. 2 because the beam exhibits characteristics that exclude it from the No. 1 grade. Knowing the most optimistic grade for each beam, the RDP would be required to make the necessary judgments on a reasonable “design” value to use in the engineering process. The maximum potential grade for each beam should be established and documented by the engaged supervisory grading agency. Also, the RDP should measure and record the residual size of each timber for use when checking all fire-exposed timbers in the structure. The final sizes may be different from the sizes calculated under Step 2. With Step 3 completed (the timber species or species group identified, visual stress rated grades confirmed, and section dimensions recorded for each timber), the RDP has an available set of visual stress rated design values for each timber to use with the effective post-fire section B* and D* dimensions. The RDP should also verify that the timbers are “sound” and have not been damaged by factors other than fire exposure.
Additional Considerations
• Since the timbers have been in-service, they may be decayed and thus timbers should be thoroughly inspected for presence of decay. • Decay in a structural timber trumps all other factors that impact strength and stiffness, and therefore, a decayed timber cannot be relied upon to support in-service loads. • The load history of the timbers may be important. The possibility of overloads in-service, or cumulative damage, should be investigated. • The authors limited the scope of this article to solid sawn timbers.
Laminations of different grades are often used in construction of a glued laminated timber. The inability to view the wide faces of the interior laminations will complicate the necessary re-grading of the residual beam. In addition, glued laminated timbers use very high quality outer tension laminations and the loss of these tension laminations due to a fire can severely impact the possibility of salvaging these timbers.
Conclusion
Structural evaluation of an existing wood structure, even without fire exposure, is an order of magnitude more difficult than the design of a new structure with new materials. In addition to collecting basic input information for structural analyses (species, timber sections, timber grades, timber condition, etc.), structural design experience is valuable as engineering judgment is likely to be needed in each specific case.▪



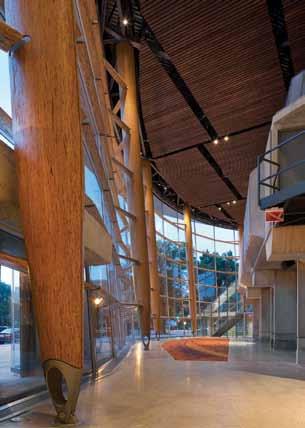
Structural DeSign
design issues for structural engineers
There is an important design consideration for wood floor framing that is not likely to be found in building codes or design standards – differential deflection. This issue is often overlooked, but can lead to significant performance problems. Differential deflection, as described here, is the change in elevation from one framing member to the adjacent member. Differential deflection may escape consideration. Building code requirements and design standards for deflection typically pertain only to the deflection along the span length of an individual member. Problems related to differential deflection can arise when one long span member deflects in flexure, within building code limits, while the adjacent member does not, often due to different support conditions or stiffness (Figure 1). Relatively longer spans and higher loads have the potential to make differential deflection problems in floors more pronounced. The 2012 International Building Code (IBC), Section 1604.3, requires Differential Deflection in Wood Floor Framing floor members supporting dead and live loads to not exceed an L/240 deflection limit. For example, for a 30-foot span (L), deflection of up to 1.5 inches in a single floor member By Zeno Martin, P.E., S.E. and would be permissible per the IBC. But if, in this Jim Anderson, P.E. example, the adjacent floor framing member were 16 inches away and supported to prevent deflection, then a pronounced differential deflection might result. Let’s consider the issue with a few actual cases the authors are familiar with, in which differential deflection caused performance problems identified shortly after the new construction was completed. Case 1–Residence A large custom single-family wood frame home had wood I-joists spanning 22 feet under a living room and spaced at 16 inches on center. Near mid-span, a partition wall for the level below was built tight to the bottom flange of one of the floor joists such that mid-span deflection was prevented. Floor dead loads were relatively high in this case due to hydronic heating with a 1.5- inch thick Gyp-Crete topping and a stone tile floor above. The resulting differential deflection was around 1 inch vertical over 16 inches horizontal (Figure 2). The resulting performance problems included objectionable floor sloping as well as excessive stone tile cracking, which occurred due to the resultant differential deflection. Case 2–Multi-Unit Condominium A condominium building was designed and constructed with an open grade-level floor for parking, with residential units above. The elevated floor above the open parking area was supported by wood floor trusses spanning 30 feet and spaced at 19.2 inches on center. The structural framing and column layout placed column supports near mid-span of some floor framing, while adjacent floor trusses 19.2 inches away were free to deflect over their 30-foot span. The floor trusses supported dead loads of about 20 pounds per square foot. The resulting long span deflections were as expected and within building code limits. The differential deflection between the non-deflecting floor framing and near mid-span of the 30-foot long spanning floor trusses created localized floor slopes in multiple condominium units. The resulting slope caused racking of interior partition walls, which led to gypsum wall board cracking and door operational issues.
Zeno Martin, P.E., S.E., is a Structural Engineer in the Seattle Washington office of Wiss, Janney, Elstner Associates, Inc. and can be reached at zmartin@wje.com. Jim Anderson, P.E., is an engineer for the Engineered Wood Products business of Weyerhaeuser in Federal Way, WA and can be reached at AndersJ@trusjoist.com.
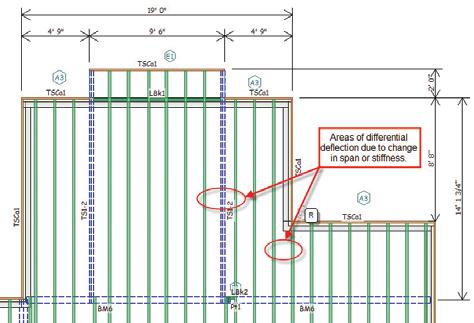
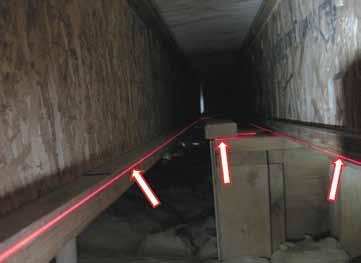
Figure 2: Wood I-joist on right bears on wall framing while the adjacent I-joist (left) spans 22 feet and is free to deflect under load. The laser level line (arrows) shows the I-joist on the left is roughly 1 inch lower than the adjacent one on the right. Figure 3: Kitchen floor ridge and floor sloping toward wall. Dash lines represent framing direction below floor.
Figure 4: In areas with non-load-bearing walls, consider gapping the wall to ensure all joists deflect equally.
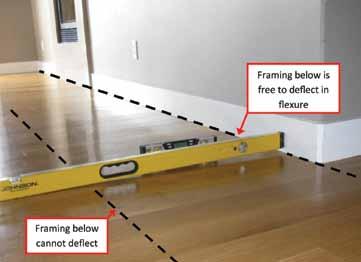
Case 3–Residence Soon after the owners moved into their new home, they noticed that the kitchen floor was sagging near an adjacent hallway (Figure 3), which caused concern. Investigation revealed that the cause was due to the fact that a partition wall below prevented some of the wood I-joist floor framing from deflecting while the adjacent wood I-joists were free to deflect over their 17-foot span, creating the differential deflection and objectionable slope. In Cases 1, 2 and 3, the floor framing was either designed to just meet code limits and/ or construction errors had occurred in which loads were higher than anticipated in the original floor framing design. We observed that, in each of these example cases, the flexural design of the relatively long-span floor framing just met code limits.
Suggestions for Designers
Designers should be aware that differential deflection can lead to significant performance problems and even litigation. Therefore, identify where these issues may occur and consider the suggestions provided here to minimize the potential for differential deflection related problems. Great rooms and kitchen areas may have long spans, higher loads due to floor finishes, and are often a focal area which has a higher owner expectation on floor performance. A great room may be a large open space, but it is likely that the support structure below does not match the same spans. There may be bearing walls (or non bearing walls) below, making the span of the joist variable from area to area. When designing these focal areas, be aware of what load-bearing and non-load-bearing members may be above and below. The best design minimizes changes in spans, framing direction, or different member stiffness within the focal area. Non bearing partition walls below can produce differential deflection if they are framed tight to the underside of the joist (a common practice for residential structures) compared to adjacent joists that have no walls (Figure 4). When walls are framed tight to the bottom of joists near mid-span, they act as a bearing support and prevent deflection. If non load bearing walls are in the focus area, details to properly gap the wall at the top should be included to prevent transferring of load and inadvertent “high” spots or “ridges” in the floor surface above. Changes in framing direction, introduction of large stiff beams or additional loading such as center islands and counter tops may also contribute to unfavorable differential deflection. If these are unavoidable in the area of concern, adding members or changing spacing or stiffness of framing members may be prudent ways to avoid potential differential deflection problems. In some cases, the floor finish installation guidelines, for example those from the Dimension Stone Design Manual (DSDM), may require floors with increased stiffness. Increasing the stiffness of the floor framing in general helps minimize the potential for differential deflection. Additionally, guidelines in the DSDM or Tile Council of North America Handbook provide criteria on levelness of the subfloor. The levelness of the floor can extend parallel or perpendicular to the framing member, and differential deflection could create a levelness problem for certain floor finishes like stone or ceramic tile.
Conclusion
Because there are no defined guidelines, design checks for potential differential deflection is discretionary but often overlooked. Ultimately, differential deflection can be a nuance issue, and requires engineering judgment to minimize potential problems. Increasing the overall stiffness of the long span floor framing to reduce their deflection is an easy rule of thumb to minimize the potential for differential deflection-related problems.▪
Limit Design for Masonry
Insight into the new Limit Design method for special reinforced masonry shear walls – what it offers, how it was developed, and a glimpse at possible future developments.
By Diane Throop, P.E.
“Limit Design is a bold step for masonry engineering and it marks it as an even more significant structural material.” That may be my favorite comment from my tenure as the MSJC Chair. It came upon the successful balloting and adoption of the new Appendix C – Limit Design of Masonry.
So What is ‘Limit Design’?
If masonry walls have no openings, analyzing them is simple. Add a door or a window opening and it still isn’t difficult. However, multistory shear walls with irregular openings can pose analytical challenges, especially when coupled with the requirements of higher seismic zones. The Masonry Standards Joint Committee Code – TMS 402/ACI 530/ ASCE5 (MSJC), provides several options for the design of special reinforced masonry shear walls both through allowable stress design (ASD) and strength design (SD) methods. These forced-based methods usually work well, but can be difficult to apply to irregular wall configurations, especially those controlled by shear…enter “Limit Design.” Limit Design is a performance-based option for such structures, based on a more global look at the wall rather than just the segments comprising that wall. Limit Design, while still using the design base shear now required by ASCE7, permits the designer to distribute that shear internally according to the plastic capacities of the segments comprising a wall, rather than according to their elastic stiffnesses. The Limit Design appendix takes an approach that is very similar to that taken with existing seismic design. Basic steps include (Lepage, et al. Eleventh North American Masonry Conference): • Performing a conventional seismic analysis, • Determining the controlling yield mechanism, • Checking the lateral strength of yield mechanism, • Checking the deformation capacity of yield mechanism. The method offers an alternative to the special boundary element and maximum reinforcement provisions in the code since the method confirms masonry ductility for the structure being analyzed. It focuses the design on the areas of the structure that are likely to experience high deformation demand during seismic events. According to Thomas Gangel, a long-time member of the MSJC and former chair of the Seismic Subcommittee, “The code in Appendix C gives us a rational method to design cantilever shear walls with openings. That is something that we have never really had in the MSJC before now. The MSJC appendix limit state method requires the designer to anticipate the behavior of the wall during a seismic event, and provides design and detailing guidance to help him achieve a wall design that will perform in accordance with the anticipated behavior. It provides a glimpse of where masonry engineering is heading in the future.”
Research was part of the process used to develop Limit Design. This full scale, 2-story masonry specimen with irregular openings was tested on the shake table at UC San Diego as part of a NEES/NIST funded project. Courtesy of Richard Klingner.
Task Group”. Task groups were created to permit participation in the MSJC process from people who had an interest in working on a specific, focused topic or task. Task group members are given a single task and asked to dig into it in depth, then bring recommendations back into the traditional MSJC structure for additional vetting and balloting. The task group provides a depth to the topic that isn’t always possible in subcommittees or main committees which, by necessity, must deal with multiple items. The Ductility Demand task group was chaired by Steven Dill, who assembled a broad-base group of seismic and masonry experts as members. Richard Klingner was the chair of the Seismic Subcommittee where the recommendations of the task group eventually came to roost for additional development and balloting. During the 2011 cycle, the Ductility Demand task group further focused to Limit Design and submitted their proposed provisions to the Seismic Subcommittee. Those provisions were the genesis of Limit Design. This ambitious work on special reinforced masonry shear walls carried into the 2013 MSJC cycle where it was successfully adopted into Appendix C – Limit Design of Masonry.
So What is Next for Limit Design?
Richard Bennett, has been appointed as the new Chair of the 2016 MSJC Committee. Dick has every intention of continuing the development of Appendix C by encouraging input from users and from the research community which will be used to refine MSJC Limit Design. The ultimate goal is to continue to work with other structural groups to evolve the appendix into a displacement-based design option for masonry structures not just for special reinforced masonry shear walls. The 2013 MSJC edition of Limit Design is a good first step toward this goal.▪ Diane Throop, P.E., is Director of Engineering, International Masonry Institute, Annapolis, MD and was Chair of The Masonry Standards Joint Committee for the development of the 2011 and 2013 editions of the Building Code Requirements for Masonry Structures (TMS 402/ACI530/ASCE5) and Specification for Masonry Structures (TMS602/ACI530.1/ASCE6).
How We Achieved ‘Limits’
In the 2011 MSJC cycle, a new concept for the Committee was instituted – task groups – one of which was called the “Ductility Demand
The online version of this article contains detailed references and short bios of mentioned participants (Gangle, Dill, Klinger). Please visit www.STRUCTUREmag.org.
What Exactly is the Building Code?
By Gail S. Kelly, P.E., Esq.
To many A/Es, the words “building code” have a distinctly negative connotation. This is not entirely surprising – the words often come up in the context of an obscure requirement that no one can explain. Or even worse, two obscure requirements that appear to contradict each other. Nevertheless, being able to design to the applicable building code is a non-negotiable element of an A/E’s work. An often-heard phrase is “the building code sets only minimum standards.” Or more colloquially, “the code sets a floor not a ceiling.” While this is true – if the code requires 2 x 6 construction, an A/E can specify 2 x 8s – it doesn’t really explain what the code is. Essentially, a building code is a collection of legal requirements governing building design. In the US, building codes fall within each state’s general “police power” to protect the health, safety and welfare of its communities. This means that each state can determine the design requirements for structures built within that state.
Model Codes
Rather than developing an entire building code, states generally base their codes on a model code developed by a standards organization. For most of the 20th century, there were three commonly-used model codes in the U.S. – the Uniform Building Code (UBC), the BOCA National Building Code (BOCA/NBC), and the Standard Building Code (SBC). The UBC was primarily used in the Midwest and western states, the BOCA/NBC was used in the northeast, and the SBC was used in the south. The organizations that published these codes merged in 1994 to form the International Code Council (ICC) and in 2000 discontinued publication of all three codes. In their place, the ICC publishes the International Building Code (IBC) which, with only a few exceptions, has now replaced the prior model codes as the basis for all state and local building codes.
Adoption of a Model Code
A model code does not become the law in any jurisdiction until it is adopted by a vote of the designated adopting authority. When a jurisdiction adopts a model building code, it adopts a specific edition of the model code,
for example, the 2009 International Building Code. When adopting the model code, the jurisdiction can add, delete, or modify sections to address concerns specific to the jurisdiction. The IBC is updated on a three-year schedule; the most recent release is the 2012 edition. Although a jurisdiction can choose to continue using an older version of a model code, most jurisdictions update their codes regularly to avoid having to deal with A/Es seeking variances based on what is allowed by the newer edition of the model code. Nevertheless, there is always a lag between the release of a new edition of a model code and when a jurisdiction adopts it. The adopting authority must review the changes in the new edition, evaluate the effect on any amendments it has enacted, and ensure that its code inspectors are aware of the changes.
State Versus Local Codes
About two thirds of the states adopt their building codes at the state level. These states typically have an agency that is charged with administering the building codes. The agency will promulgate a set of regulations to carry out this responsibility; generally, the first regulation will be that the agency is adopting a specific edition of a model code. The other regulations will be changes to various sections or subsections of that code. These regulations are collected, along with regulations promulgated by other state agencies, in an administrative code for the state. The other one-third of the states adopt their building codes at the local (city or county) level. Generally, codes are adopted through a vote of the city council or county commissioners, after a staff review. In the early 1900s, before model codes were widely available, it was common for cities to develop their own codes; many of these codes were written by insurance companies who were motivated by reducing the risk of fire to buildings they had insured. Over time, most cities have migrated to model codes and Chicago is the only major city that still uses its own code.
The ICC Website
Although references to the “building code” usually refer to the IBC, the ICC now publishes 15 “I-Codes.” All of the I-Codes published between 2000 and 2012, including the recently-released International Green Building Code can be viewed on-line for free. To see all of the codes, search for “ICC free resources” and select the International Codes option. To see a particular code, search for that code, for example “ICC IBC 2009” and select the link for publicecodes. For the 2009 IBC, this would be: http://publicecodes.cyberregs.com/ icod/IC-P-2009-000019.htm. While the codes can be viewed for free, a paid subscription is required to either print or save any code or section of a code. The ICC website also contains information about which codes have been adopted by which states. There is a webpage for each state that shows the codes adopted by that state; the webpage also contains contact information and links for relevant state agencies. For example www.iccsafe.org/gr/Pages/MA.aspx is the web page for Massachusetts. The webpage at: www.iccsafe.org/gr/
Documents/AdoptionToolkit/
HowStatesAdopt_I-Codes.pdf explains the code adoption process in each state. The webpage at: www.iccsafe.org/gr/Documents/ stateadoptions.pdf lists which codes have been adopted in each state. The webpage at: www.iccsafe.org/gr/Documents/ jurisdictionadoptions.pdf shows which codes have been adopted by local (city or county) governments. The ICC website is somewhat disorganized and is not always up to date, but it does provide a starting point for researching applicable codes.
Code References
Confusion sometimes arises because A/Es refer to a number of documents as “codes.” For example, ACI 318, Building Code Requirements for Structural Concrete, is referred to as “the concrete code” or just “the code” by engineers who specialize in
concrete construction. However, while ACI 318 can be used to set minimum concrete construction requirements in jurisdictions where there is no legally adopted building code, it is not written as a document that can be directly adopted as a building code. Instead, it is written to be incorporated into a building code. ACI 318 § 1.1.1 states:
This Code provides minimum requirements for design and construction of structural concrete members of any structure erected under requirements of the legally adopted general building code of which this Code forms a part. When a jurisdiction adopts a model building code, it implicitly adopts all of the standards referenced by that model code. Generally, the standards referenced will be the most current editions as of the model code’s publication date. However, given the time lag in adopting a model code, the applicable standard in any particular jurisdiction may not be the most current edition of that standard. This can present a problem if the current edition of a standard prohibits construction allowed by earlier editions, or increases safety factors or loading requirements. In such cases, the A/E must consider what a “reasonable A/E under the same circumstances” would do. If most A/Es working in that city or county would know of the changes to the standard and would agree that the changes should be followed, the “professional standard of care” requires the A/E to follow the new, stricter requirements. building are rejected because they were done in accordance with the IRC may face a charge of professional negligence. Likewise, a number of states have adopted an Existing Building Code based on the ICC’s model International Existing Building Code. The Existing Building Code provides alternatives to some of the IBC requirements for structures being renovated. A/Es who represent themselves as experienced in renovation would be expected to know of these alternatives. Failure to implement alternatives that would be beneficial to
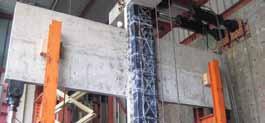
Conclusion
Designing to at least the minimum requirements set by the building code does not require a standard of care analysis; it is a non-negotiable element of an A/E’s work. An A/E whose plans are rejected because they don’t incorporate the requirements of a newly adopted code could be liable for any costs associated with the delay in getting the plans approved. Designing to the wrong code may carry similar liability. For example, most states have a residential building code, based on the ICC’s model International Residential Code (IRC), that applies to one- and two-family dwellings. There are substantial differences between the IBC and the IRC, particularly with respect to egress requirements. An A/E whose plans for the renovation of a three-family their clients could be considered professional negligence.▪ Gail S. Kelley, P.E., Esq., is a LEED Accredited Professional as well as a licensed attorney in Maryland and the District of Columbia. She is the author of Construction Law: An Introduction for Engineers, Architect, and Contractors, published in 2012 by John Wiley & Sons. Ms. Kelley can be reached at Gail.Kelley.Esq@gmail.com.


