15 minute read
divine design: renovating
Structural rehabilitation
renovation and restoration of existing structures
This series of articles discusses a number of commonly encountered structural issues on renovation and restoration projects that focus on historic houses of worship, and provides guidance on ways to address them. Parts one, two, and three of this series dealt with foundations, wall systems, and roof framing in historic houses of worship. This article addresses interior architectural components and finishes. Architectural components and finishes are often the most visible and identifiable elements inside historic houses of worship. They define the ambiance and “feel” of the space, reflect the cultural and religious sense, and are often a testament to history and development of communities in which these structures were built. Given their effect and significance, a lot of thought should be placed on their appearance, performance, and serviceability. However, if designed or installed improperly, if exposed to severe or unplanned conditions, or if not regularly maintained and repaired, Divine Design: Renovating they may undergo accelerated deterioration and and Preserving Historic decay, or can be subject Houses of Worship to distress that can cut their expected service life short. Therefore, when planning repair, renovaPart 4: Architectural tion, or rehabilitation projects, understanding the Components and Finishes basic material properties of common architectural components and finishes, addressing their potenBy Nathaniel B. Smith, P.E. and Milan Vatovec, P.E., Ph.D. tial vulnerabilities and exposure limitations, and considering structural support, compatibility, and constraint issues, is paramount.
Nathaniel B. Smith, P.E., is a Senior Project Manager at Simpson Gumpertz & Heger’s office in New York City. He can be reached at nbsmith@sgh.com. Dr. Milan Vatovec is a Senior Principal at Simpson Gumpertz & Heger Inc. He can be reached at mvatovec@sgh.com.
Wood Components and Finishes
Wood is a natural building material known for its workability, high strength-to-weight ratio, and durability. Wood’s natural beauty is unequaled. Wood is also the only truly organic building product that is renewable and sustainable. As such, wood has successfully been used for centuries in a structural role and, perhaps more prominently, as a go-to material for architectural components and decorative finishes in houses of worship. Its ability to be milled and carved, and its ability to receive stains and paints, has made it a great option for finish work and flooring, and exposed structural and architectural members. Wood, however, can also be challenging to work with. It comes in many varieties (species), with each variety having its own unique characteristics. Sawn lumber can have natural-growth defects (e.g. knots, splits, excessive slope of grain). Wood properties can vary significantly even between pieces of lumber taken from the same tree. The makeup of the cell structure of the tree trunk causes sawn wood to be orthotropic; it behaves differently in three principal orientations (directions), defined basically with respect to the configuration of a tree trunk. The orthotropic behavior comes into play in terms of strength and stiffness differences, resulting in a number of design and detailing consequences (e.g. never load wood in tension perpendicular to grain). It is also a large factor when it comes to physical properties, most notably orientation-dependent differences in shrinkage and swelling (dimensional-change reaction to moisture intake and release in response to environmental changes), durability, and, last but not least, appearance. Finally, wood is susceptible to attack by microorganisms, which requires special care and consideration both in design and in-service. Because of all this, optimal use of wood often depends on special knowledge that requires integration of material science, engineering, and familiarity with construction practices and detailing. When it comes to structural design, engineers tend to place high importance on the mechanical properties of wood components, which typically includes variability in properties, natural-growth characteristics, and orthotropic-behavior considerations. By and large, this is accounted for through established design processes (e.g. stress grades and associated design values, etc.). Vulnerability to biological attack and propensity to dimensional change in service are generally addressed through standard detailing. Often, however, issues that affect non-structural wood components in service, and particularly in historic structures, involve non-standard use or detailing, or are not within the domain of a structural engineer. In these situations, architects, builders, and other practitioners that design, fabricate, and install wood components and finishes are required to pay special attention to a number of additional parameters, often related to all phases in the “life” of the wood component: harvesting, milling, drying, conditioning, installation, environmental exposure, geometric and boundary constraints, type and duration of loads, etc. The most common problems with wood in service are related to deterioration from unanticipated exposure or to distress resulting from dimensional changes. Both of these problems are driven predominantly by exposure to and effects of moisture (either as humidity in air or as liquid water). In general, moisture is considered to be the number one contributor to problems with wood and its performance in service. While wood deterioration due to decay (a.k.a. rot) from moisture exposure is likely the greatest contributor to loss of wood material in service in the world, the implications of water exposure, the resulting change in properties, and ultimately the damage caused by fungal action will not be discussed in detail here; the focus of this article will be placed on dimensional stability and associated issues.
Wood elements and components meant for interior use will typically be in what is considered a “dry” condition immediately before, during, and after installation; they would have undergone either an air or kiln-drying process before delivery. However, the actual moisture content of interior wood, while in general considered dry, will fluctuate, sometimes significantly, in wood’s attempt to be in equilibrium with its environment. As the temperature and relative humidity (RH) of air surrounding wood components fluctuate (seasonally or otherwise), the wood’s moisture content (MC) will fluctuate as well, albeit with some inherent lag. As the MC goes up or down, wood elements will swell or shrink, respectively. Even for interior use, the expected yearly MC swing of wood components could be on the order of 5% (especially in spaces where RH is not controlled), which, depending on wood species, can translate into approximately 1 to 2% of cross-grain shrinkage or swelling (Wood Handboook, Forest Product Laboratory, 2010, Tables 4-2 and 4-3). To further complicate things, cross grain movement is not uniform; expected movement in the tangential direction is approximately two times larger than in the radial direction (relative to orientation of tree rings). Therefore, the extent and uniformity of movement will depend on the orientation of the wood grain within the piece, which is dictated by where the piece was milled from the tree. Given all of the above, it is not surprising that dimensional compatibility and restraint problems are often encountered with wood in service. If not designed or installed properly, shrinkage will cause joints between adjacent pieces of wood to open, whereas expansion will make the joints tight, and, in extreme situations, buckling or other distress will ensue. The buckling problem is often most pronounced in wood floors that are exposed to high levels of moisture (e.g. leakage), floors that were installed too wet (or on the high end of the expected equilibrium spectrum), or are not detailed to allow for sufficient expansion without causing distress. Other types of architectural components or finishes may also be subject to restraint-related distress, if not detailed to allow movement. It is not uncommon to see infill boards or trim panels crack or otherwise become distressed because they were too “tightly” connected to their frames. Veneers and other thin elements may crack or be subject to localized buckling (waviness) when “married” to a substrate that does not undergo similar moisture-driven dimensional changes. Depending on the orientation of the grain, individual members not restrained against movement can also be subjected to distress.
Buckled wood flooring.
Cupping and twisting may occur even when wood undergoes small MC changes in service because of the difference in cumulative dimensional movement between the tangential and radial directions. Simply put, wood will move with moisture fluctuations, and it does not like to be constrained against that movement. If it is, problems that may be difficult or very expensive to address will likely occur. Ironically, engineers, who are typically not involved with design, detailing, or specifying nonstructural components and finishes, are often best equipped to deal with existing issues, or to predict (and therefore avoid) problems in-service related to wood material behavior. Tools and knowledge exist. Having foresight, and respecting wood behavior and its response to the design environment, is key. Similarly, proper detailing, especially if developing new, non-vetted systems, is paramount. Finally, acclimatization, selection, treatment (if any), and proper installation of wood components should all be carefully considered and incorporated into the specifications for renovation and remedial projects.
Plaster Finishes
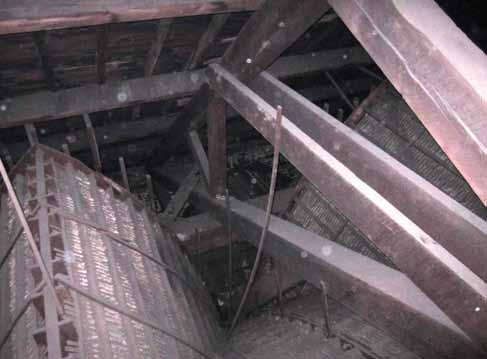
Plaster is one of the most common interior finishes found in historic houses of worship, with typical applications for wall and ceiling surfaces. Ornate, molded plaster finishes (trim, finials, florets, etc.) are often incorporated into the overall finish work. While plaster is a tried and true finish that has been used for centuries, it is not without its limitations. Plaster in its simplest form is a combination of hydraulic lime, sand, and water. Water reacts with the hydraulic lime, causing it to chemically bond to the sand particles creating a solid substance. The plaster stays in a “fluid” state for a limited time, allowing it to be applied by trowel to walls and ceilings, or it can be placed into molds to take specific shapes prior to solidifying. Plaster for walls and ceilings is typically applied in two layers. The base layer, often called a “brown coat,” contains relatively coarse sand particles and helps give the plaster its strength. The top coat, or “finish coat,” typically contains fine sands, which gives the top coat its smooth finish. Plaster can be applied directly to masonry or terra cotta, as the hydrated lime will bond with stone and clay particles within these materials. However, plaster for walls and ceilings is often supported by lathe, which is typically wood or metal mesh. Older construction typically features a wood-lathe substrate, which is a series of parallel wood strips about ¼ inch thick, 1 inch wide, spaced about ¼ inch to ½ inch apart. When the plaster is applied to the lathe, it is pushed through the spaces between the wood strips and tends to ooze over the backside, creating a plaster “key”. This “key” helps hold the plaster in place. A similar process occurs with metal lathe as the plaster oozes through the wire mesh. Plaster keys are a critical component of overhead plaster applications. Sufficient keying needs to be created to hold the ceiling in place. Lack of adequate keys can cause portions of the ceiling to become loose, to debond, and potentially fall. Plaster keys in ceilings can also break over the life of a building through the course of regular maintenance and alterations. Installation of new lighting or mechanical equipment from within attic spaces can often break keys, resulting in the potential for ceiling failures. Detecting failures or distress in plaster keys is often difficult and may require specialized access and equipment (e.g. minimally-destructive testing instruments such as boroscopes).
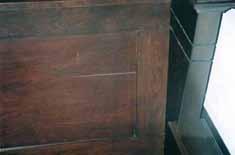
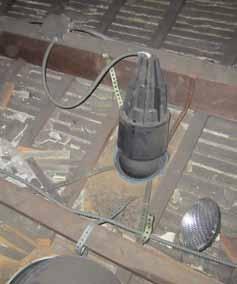
Typical wood lathe plaster ceiling with broken keys and lathe from light fixture installation.
There are numerous available options to address broken keys. Several of the more common options include: • Remove and Replace: One option to address broken keys is to remove the affected portion of the plaster and replace it. This will certainly address the issue but can be cost prohibitive due to access and coordination constraints (scaffolding likely required).
It can also be a time consuming process as the plaster needs to be removed, new plaster installed and allowed to dry, then sanded and painted to match the surrounding areas. Special blending of paint is needed to match the surrounding areas as well. Also, plaster on metal lathe will likely require new lathe to be installed, as salvaging the existing lathe may be difficult. • Additional Mechanical Support: The affected portions of the plaster can be reattached to wood lathe through mechanical means, such as screws.
Screws with large plastic washers are typically installed through the plaster into the lathe or ceiling framing. This option also requires access from the underside of the ceiling to allow for placement of a skim coat of plaster over the fasteners to conceal them, followed by a fresh coat of paint. • Cover-board: In some circumstances, placing a new ceiling below the original and fastening it through the existing ceiling is a preferred option. Gypsum drywall, often used in this application, is placed on the underside of the existing plaster. With this option, care should be taken to ensure that the
new drywall sheets are supported by the ceiling framing and not the wood lathe. Wood lathe in historic structures is often fastened to the ceiling framing with cut nails (tapered nails cut from flat stock), which may withdraw under the additional load of the drywall. • Consolidation: Another option that seems to be gaining popularity, due to its minimally invasive nature, is a consolidation process. The process includes applying an acrylic resin to the backside of the plaster, typically from within attic spaces or through small holes drilled in the plaster. The resin permeates into the plaster and then cures to create a solid mass that is stronger than plain plaster. This process can reestablish keys, fill in small cracks, and strengthen the plaster. This process also has the benefit of having a minimal impact on the finished face of the plaster. Choosing the correct plaster remediation option depends on numerous factors, including the condition of the existing ceiling, ceiling framing, and architectural features of the ceiling. If the ceiling is of architectural significance, options that leave the existing ceiling in place should be explored first. While leaving a ceiling in place may be the ultimate goal, understanding the limitations of the plaster and support system is a critical step in order to make an informed decision. Structural engineers are often called upon to evaluate the plaster-ceiling support system to determine if it has adequate capacity to support additional ceiling loads (cover-board) or other architectural features (lighting, insulation, etc.), or in some cases partial removal to accommodate access. In other cases, these framing systems require evaluation to determine if their condition renders them inadequate to continue carrying the ceiling loads. Understanding the ceiling-framing layout is a key step in this process. The support framing for flat-ceiling systems is typically straightforward, with a series of parallel joists supporting the lathe and plaster; these systems are easy to assess and analyze for additional loads. However, many houses of worship are not flat and feature very intricate ceiling geometries, often with gothic arches. Despite the large level of redundancy, the framing for such ceilings is often independent from the main roof structure and can be much more difficult to analyze due to complex geometry, a multitude of components (with various stages of effectiveness or deterioration that may be difficult to quantify), unclear load paths, and lack of accessibility.
Non-Standard Components and Furnishings
Many renovation projects in historic houses of worship call for installation of new furnishings, or components that need to be incorporated with and supported by the existing structure. These new components may be related to accessibility (new ADA ramps or elevators), improvement of mechanical systems (e.g. new chiller units), or could simply be related to aesthetic or other improvements (new organs, chandeliers, heavy furniture, statues, etc.). While structural engineers will often consider
the load associated with furnishings as part of the uniform live load, some of the proposed components can be quite heavy and may require special attention. For example, many religious furnishings and statues are made of solid stone, are quite heavy, and require proper support analysis and design. Often, the hardest part of determining how to support the new loads is actually determining what the load is. Some of the furnishings are old and do not come with established weights, so an estimate needs to be made. Sometimes, fairly detailed historical or material research is needed to gain a comfortable level of understanding of the component materials and geometry, and to be able to develop reasonable loads for use in design of the support components. Similar to other situations where structural modifications to the original structure are proposed, addition of heavy loads requires that the load path and all elements that may be affected along it be well understood. Given the likely absence of any structural drawings, this frequently requires a probing program where finishes are removed to expose the underlying structure. This process is not always straightforward and may require several iterations before full or sufficient understanding of the load path and the involved structural components is gained. In addition, material characteristics of
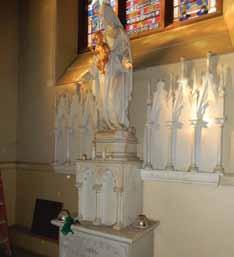
Non-standard furnishings require proper support.
all the involved structural components need to be understood. Historic buildings often feature a variety of structural framing materials including wood, timber, cast iron, and steel, and it is not unusual to see any combination of these within the load path. The material properties for each can be difficult to ascertain, and, if conservative estimates cannot yield effective design, sampling and subsequent laboratory testing may be required. If a deficiency in the load path is found, there are numerous options for strengthening or alternate load paths that can be evaluated, including sistering, shortening the span, adding supplemental supports or cross section to the existing members, etc. If the loads are excessive, it may be easier to provide an alternate load path through installation of new members or systems, in lieu of reinforcing. The best option will depend on the specifics of the furnishings, the existing framing, and the ultimate needs of the owner. Economics and ease of installation, along with the needs of the surrounding programming space all need to be considered when making recommendations.
Conclusion
While not always considered to be in the wheelhouse (or even within the scope of services) of structural engineers, consideration of mechanical and other material properties of non-structural components in the design phases of historic renovation projects is critical. Regardless of whether the project revolves around design and installation of new systems or evaluation and retrofit of existing systems, special care aimed at understanding and anticipating the in-service behavior of architectural components and finishes is required of everyone involved.▪
ADVERTISEMENT–For Advertiser Information, visit www.STRUCTUREmag.org
